
Coffee Table To Ottoman Magic
Psssst… this post *might* contain affiliate links: see my disclosure here.
Today’s post is a blog bucket list post. One of those projects I’ve had in my brain for years but finally had the space and the motivation to finish!! Until Louisa’s a little bit older, Martha has one giant room to herself and I thought this repurposed ottoman might be fun for her in there. (To refresh your memory, here’s the “before” version of our new home’s tour.)
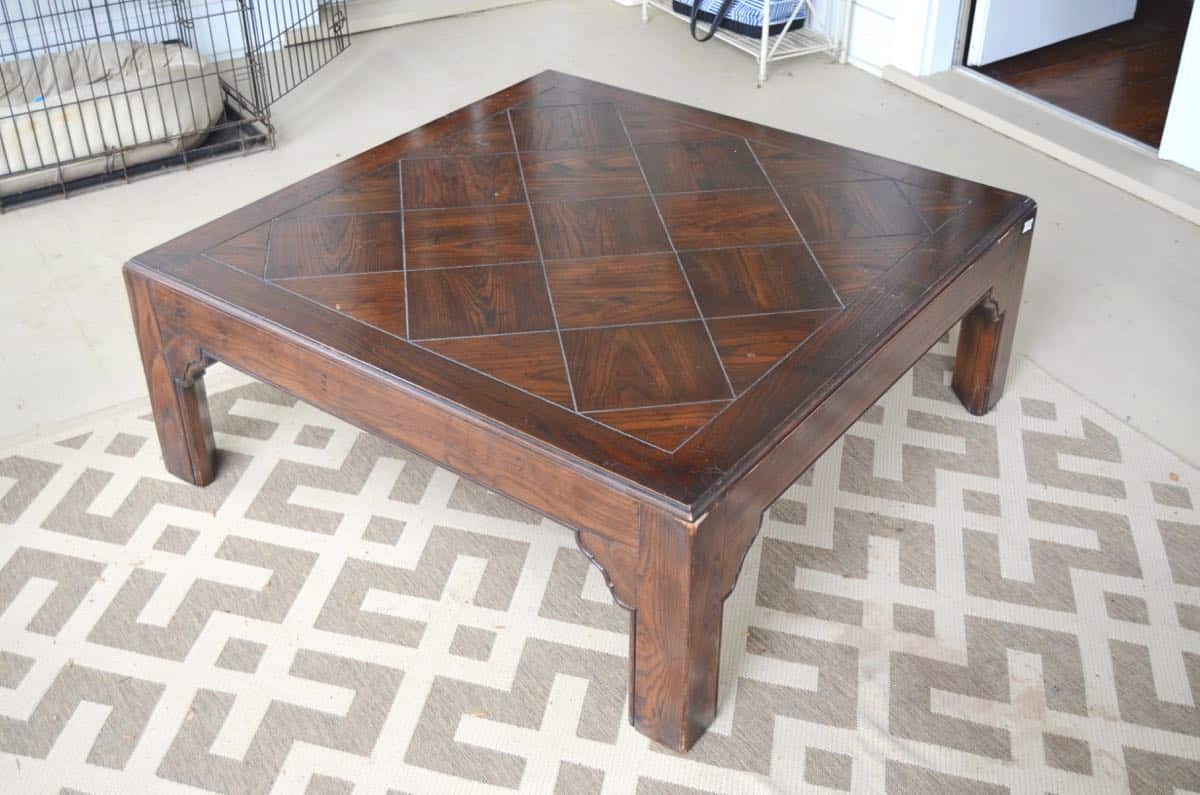
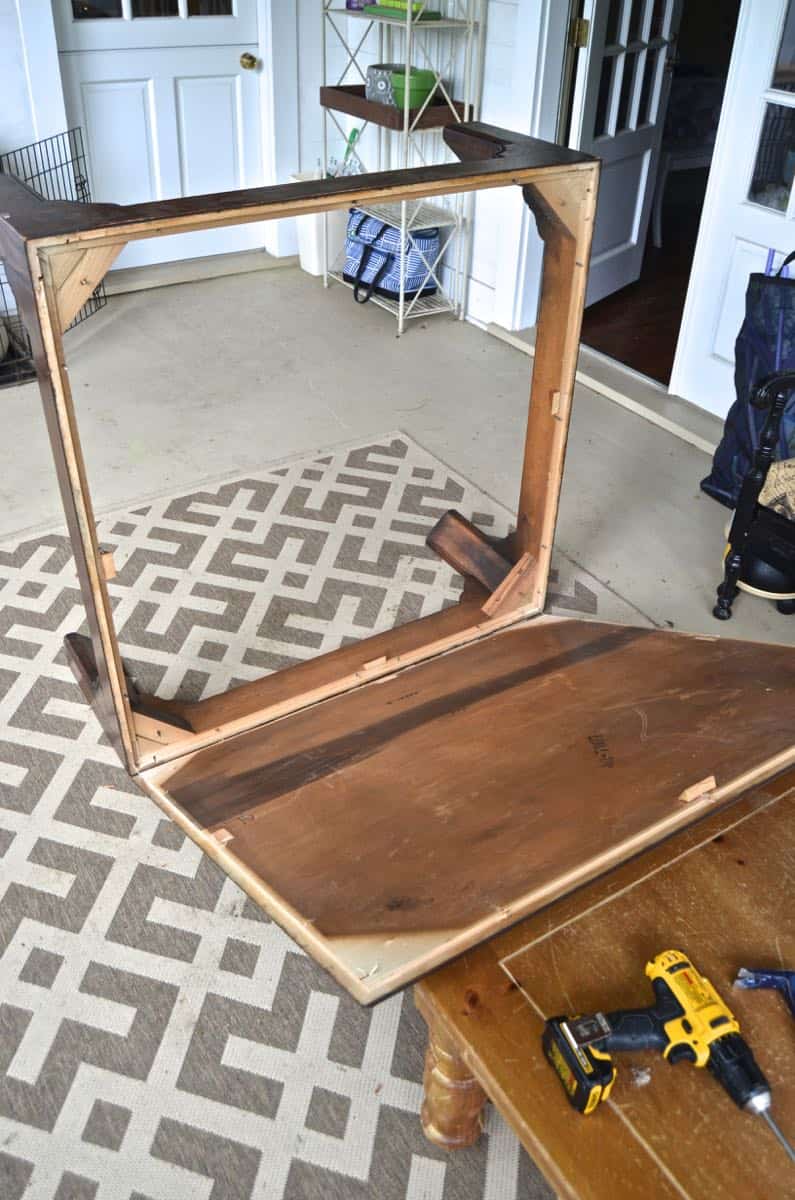
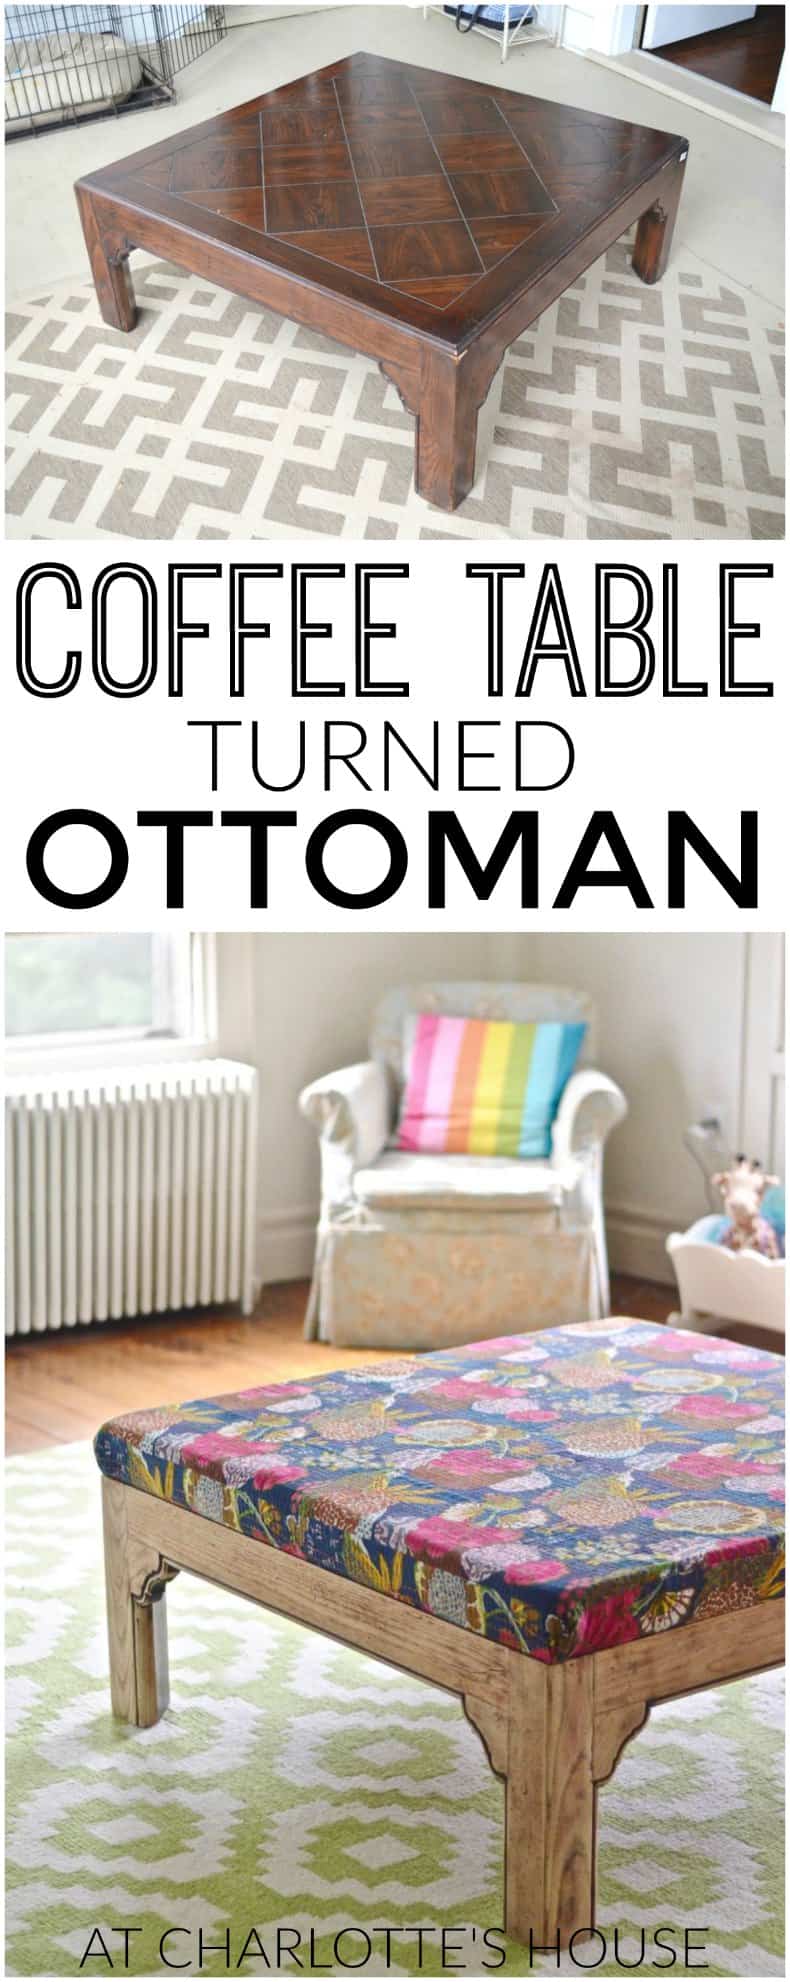
I found this table on Craigslist a while back. (One piece at a time… clearing out the garage!) I was all set just to staple the fabric along the edge and cover with piping or decorative nailheads or something, until I realized that I could unscrew the top of this bad boy. Even better!
Shop my favorites!
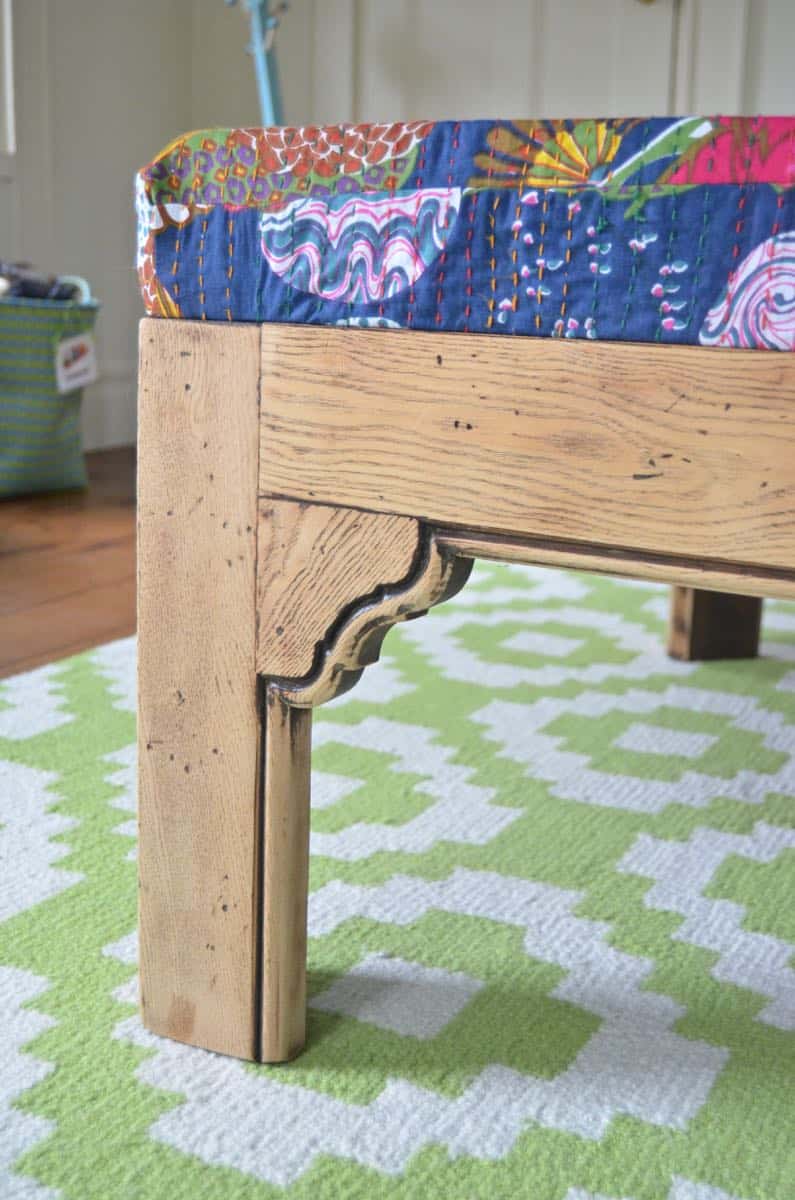
The stain wasn’t my favorite color, but… liked the idea of a wood finish (versus painting it). Enter my palm sander, stage right. Wanna know how your hand feels after sanding down a coffee table base? Buzzy. When it comes to refinishing, I’m lazy… so I simply sanded off the current stain and left it alone. No top coat, no wax, no oil… just the pretty bare wood. (Don’t tell anyone, but I LOVE it!)
I must have had the etsy Gods looking down on me when I plotted for this project because there was PLENTY of kantha cloth online a few months ago. Now? NONE. It’s so mysterious. I even struggled to find a picture online just to show you what the heck kantha cloth is… Here’s a close up of mine… it’s a vibrant and beautiful cloth from India and I’ve always loved it.

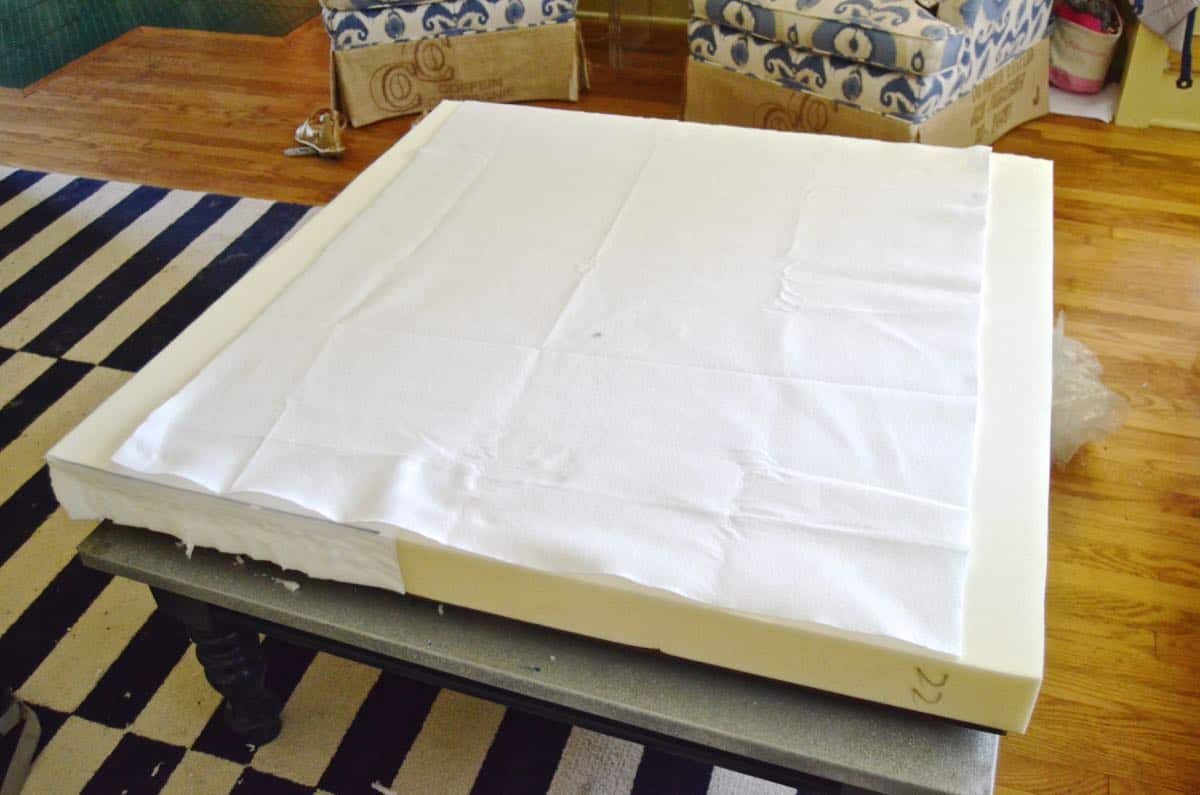
For the ottoman itself, I used 3″ foam (picked up from some secret awesome place for cheap from my girl Cija of Flea Market Flip fame and fortune). I simply cut it to fit, held it in place with some spray adhesive and then placed a piece of felt over the seam where the two pieces of foam met. If I had a clue where my stash of batting ended up after the move, I probably would have used that instead…

It’s hard to tell from the pictures (and I was too eager to finish to take pictures), but I actually sewed the kantha into a modified slipcover to fit over the foam topper. My friend Dena shared this tip with me for sewing nice and tidy corners! With the foam in place, I simple pulled the cover over the foam and stapled it along the bottom side of the coffee table topper… careful as always to pull it tight and even.
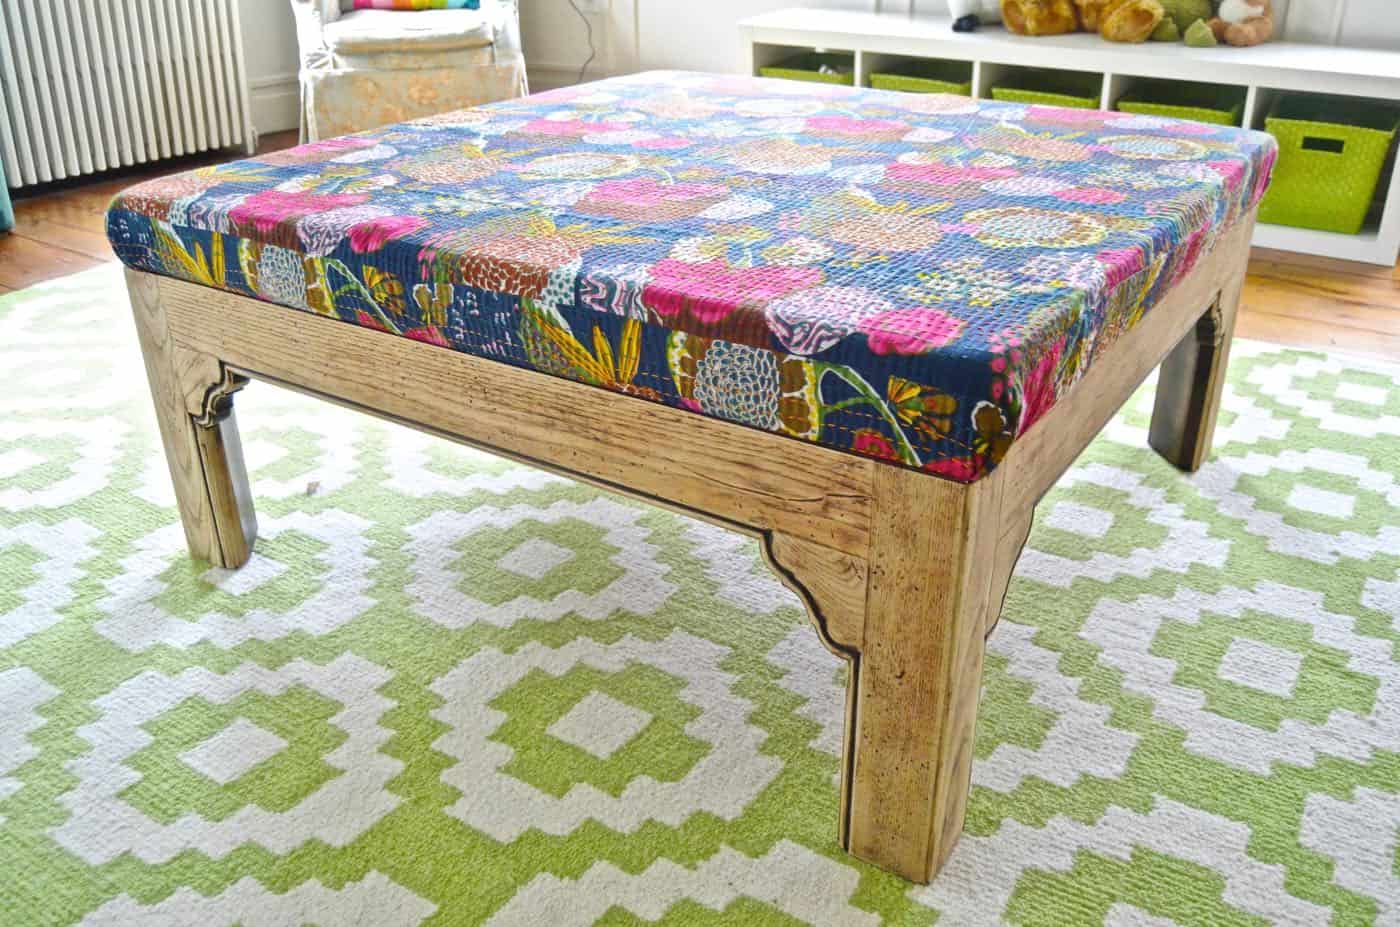
The topper screwed right back onto the base and we hauled this beauty up to its new home. I love the eclectic colors of it and the texture of the kantha with the wood.
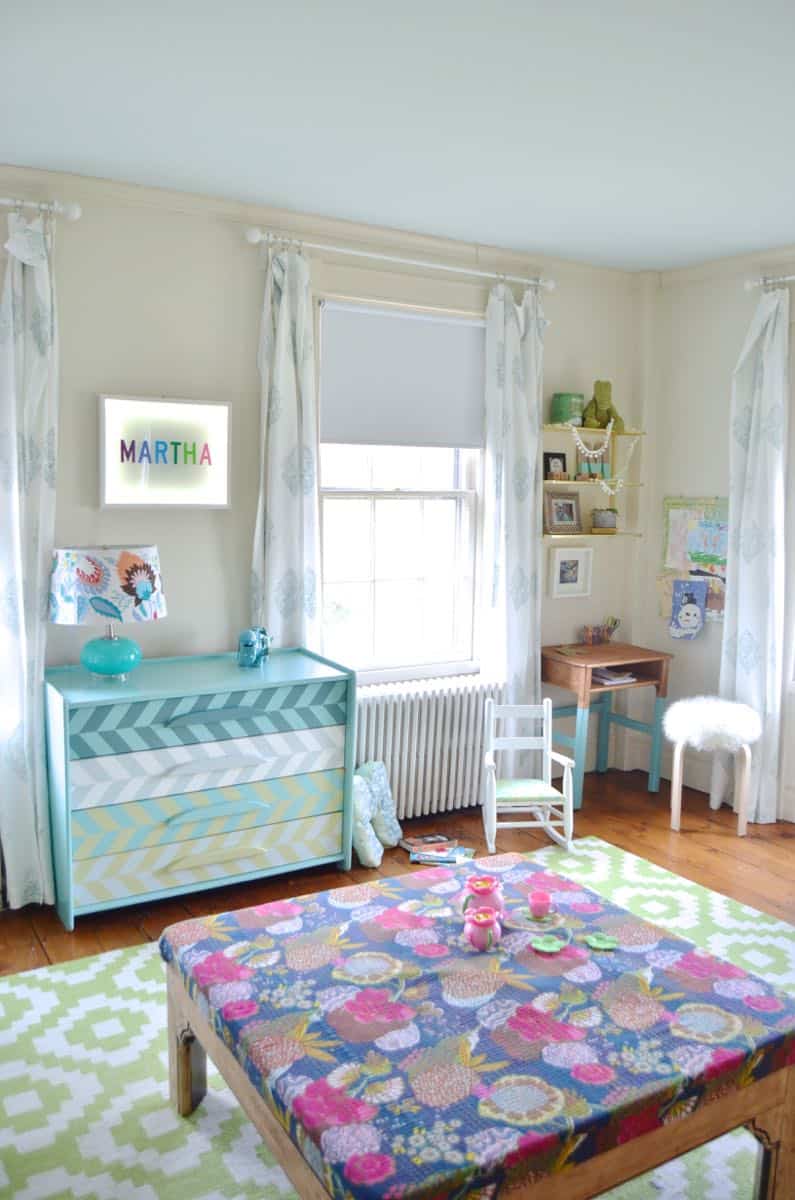
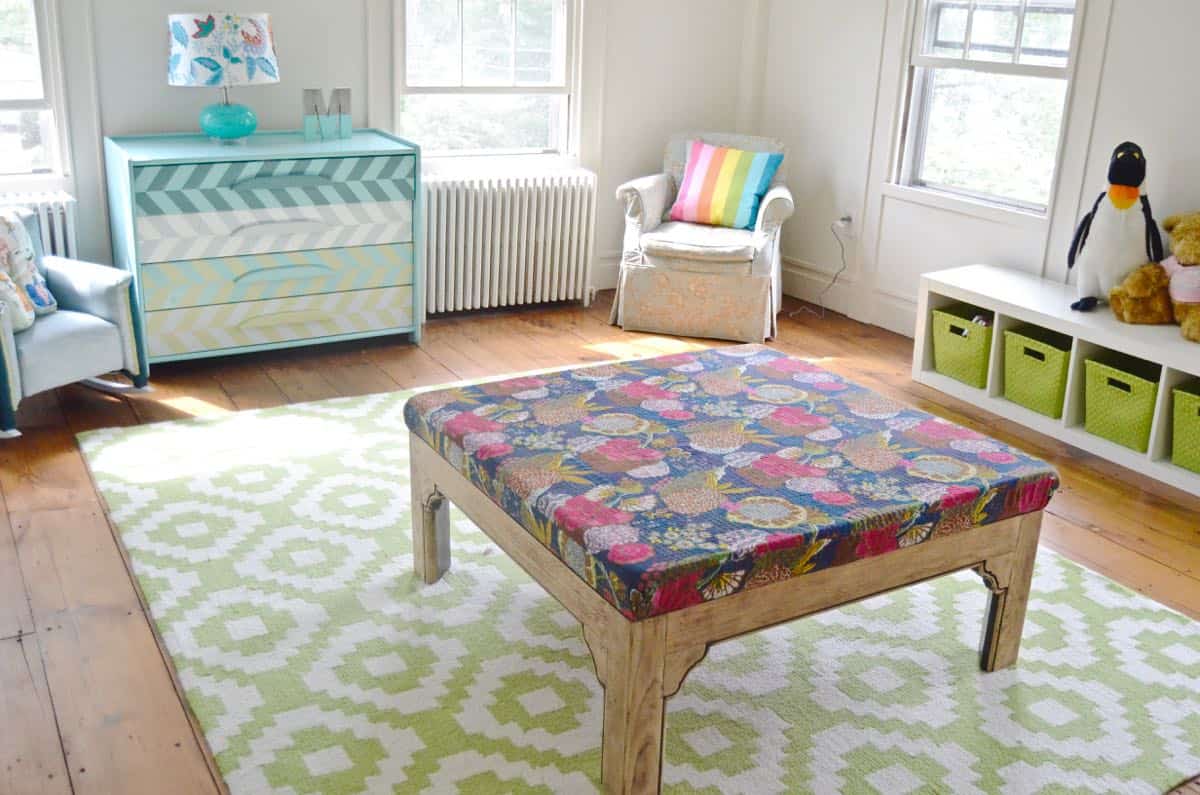
Martha’s delighted to have something I made just for her and will randomly skitter upstairs to take a peek. Can’t say that I blame her as I love catching a glimpse of this makeover whenever I go past her room. Now I kinda want to upholster everything…


that fabric is incredible! what a fun project 🙂
Thanks, Gretchen!!! I could use kantha cloth on EVERYthing!!! Looooove the colors!
Such a beautiful piece! Loving the fabric, lovely choice!
Thanks, Corinna!! Looooooove the fabric too! 🙂 xx
Woooooow!!! beautiful!!
By the way, can you tell me the wall color?
Thank you so much
Keep up the good work!!
Manon 🙂
Hi Manon, You know… I can’t! We just moved into this house 2 months ago so all the paint colors are whatever the previous owner did. I actually think these walls are pretty close to white and the ceiling is a pale blue. But that’s not how they look on the pictures at ALL. Sorry not to be any help! I’m a little nervous for how I’m going to fill nail holes since I don’t have the paint to patch over with. :/