
Make Your Own Disco Ball
Psssst… this post *might* contain affiliate links: see my disclosure here.
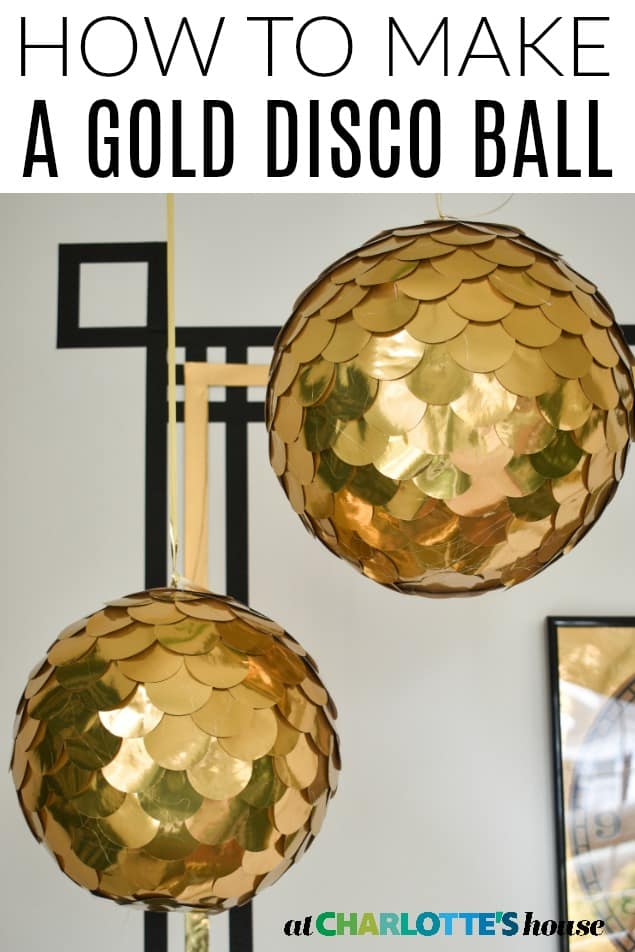
Gold Disco Ball for New Years
Disclosure: I am partnering with JOANN for this post and so happy to share some fun New Years Eve DIYs with you!
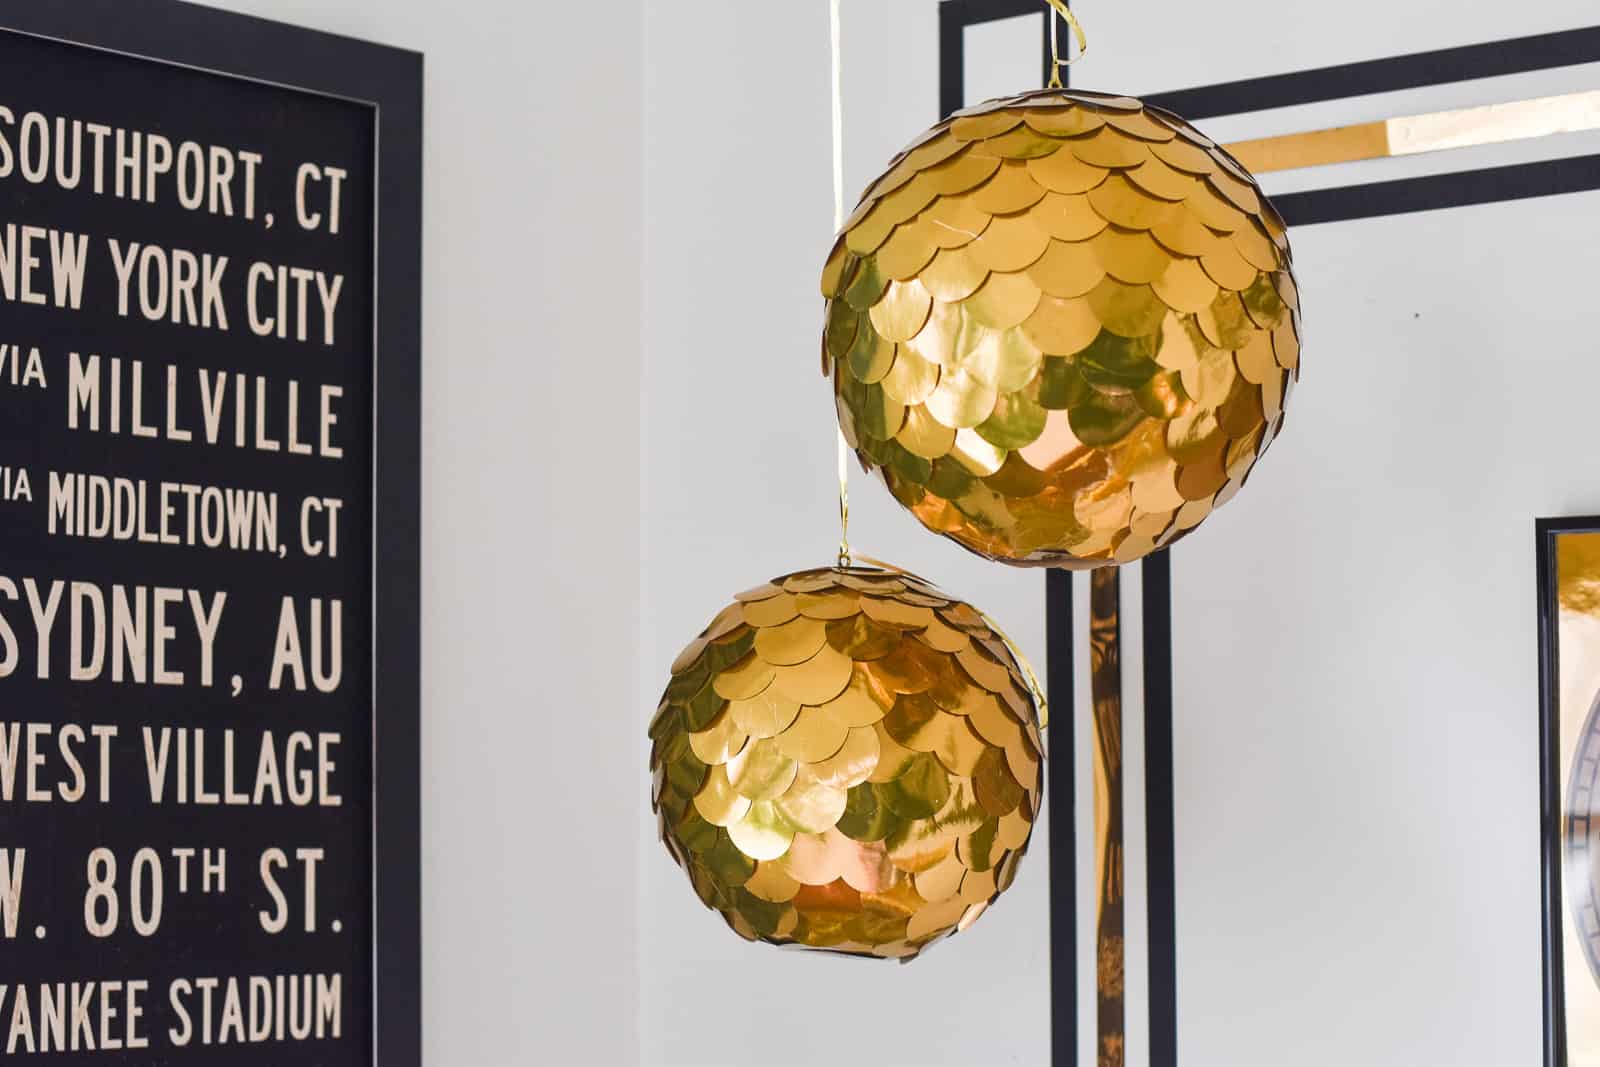
If there’s something I will sneak into any decor space, it’s a disco ball. I love the sparkle. The glitter. The way the light reflects off of it… well this DIY isn’t exactly the same as the classic mirrored disco ball, but it was the perfect decorative feature for my New Years Eve decor so I thought I’d give you a sneak peek. This project can be replicated in a couple of different ways, both of which are super easy. Full materials list at the end of the post!
Shop my favorites!
VERSION 1-
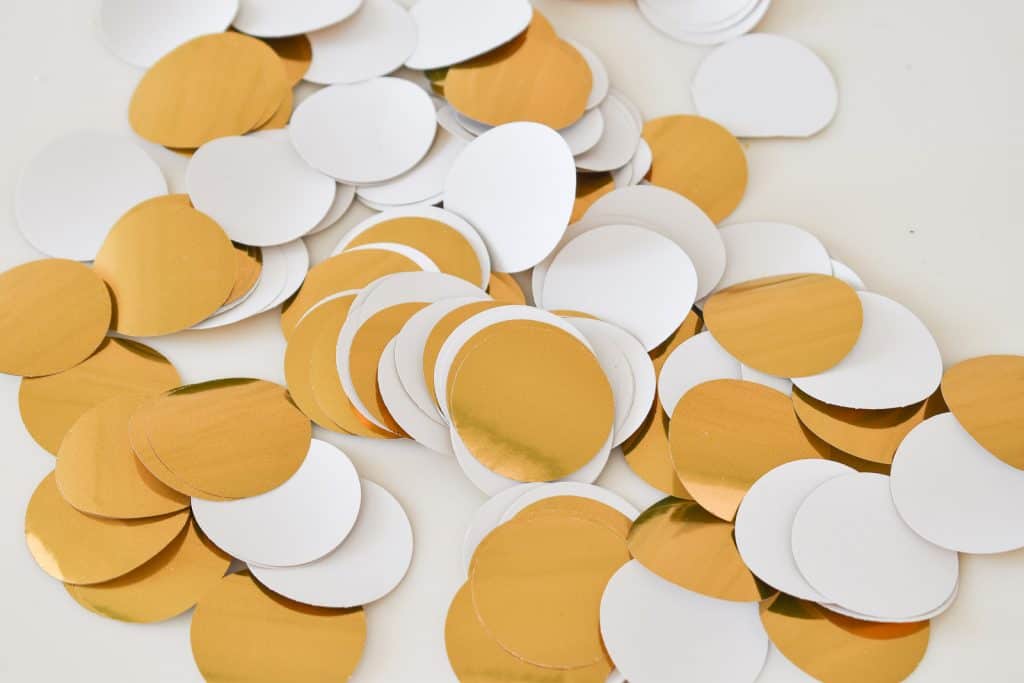
Step 1. Find your paper
I found a roll of gold wrapping paper and it provided MORE than enough for this project. Be aware though, that all wrapping paper is not created equal. I’ve tried to use my circle punches with other thin metallic papers and it didn’t work… this gold paper was perfect.
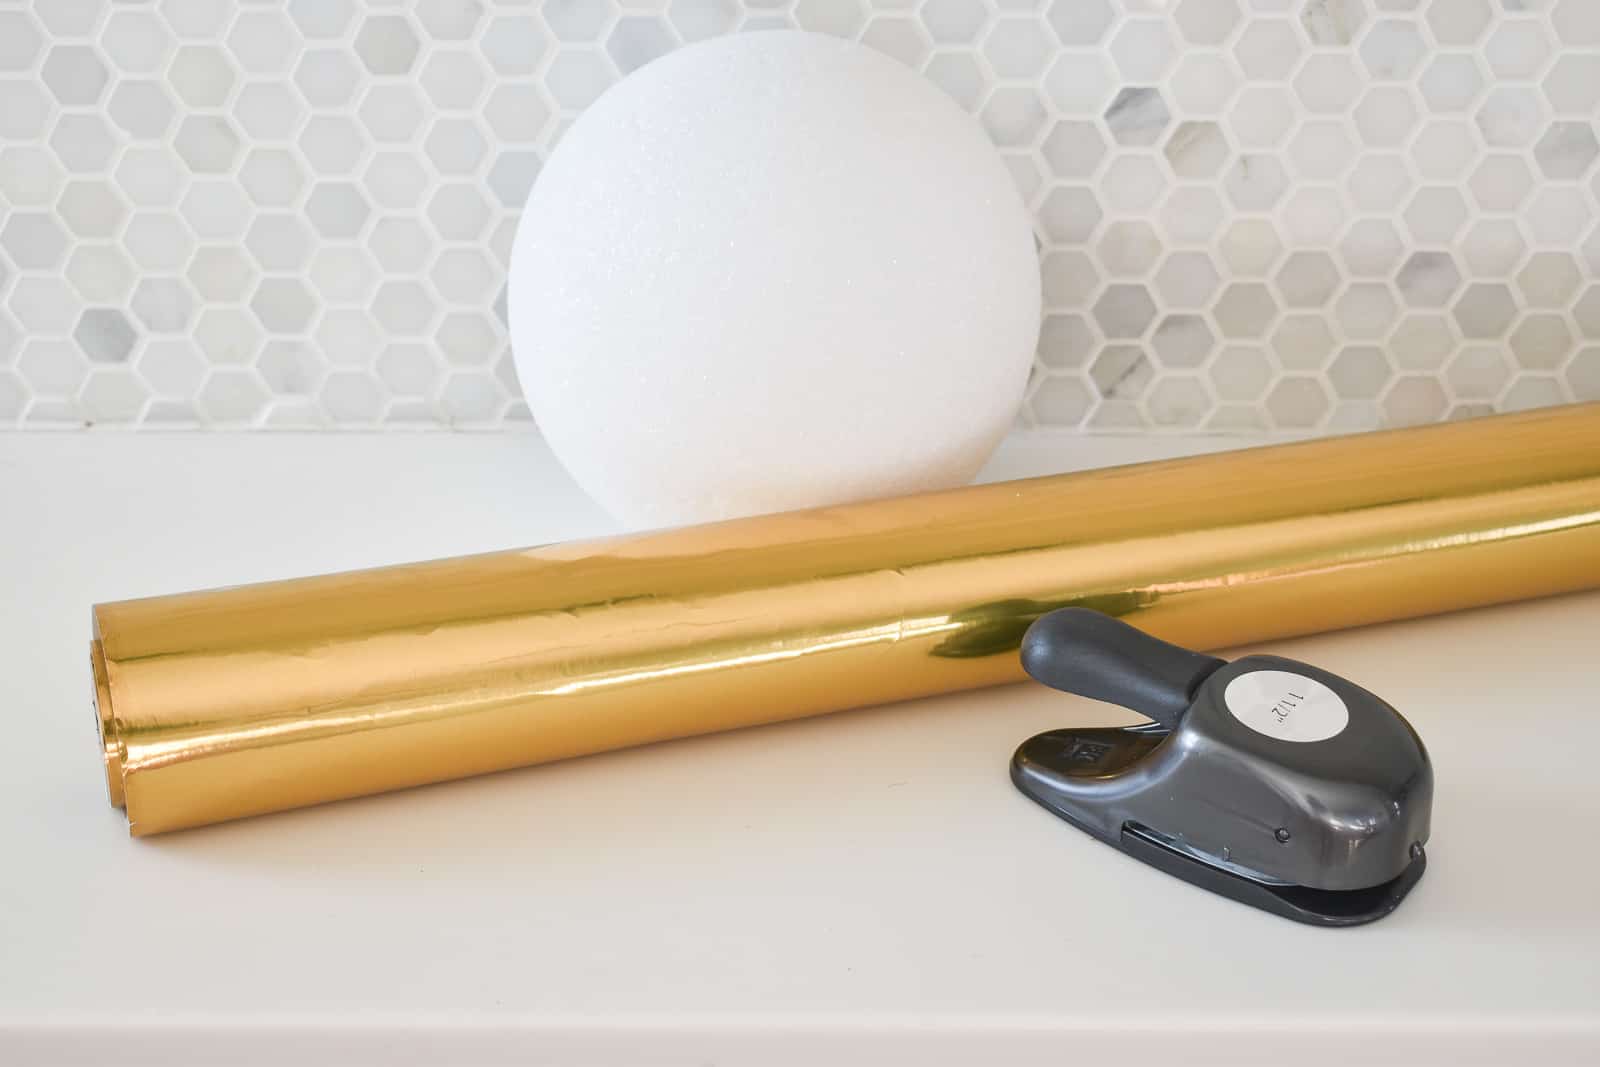
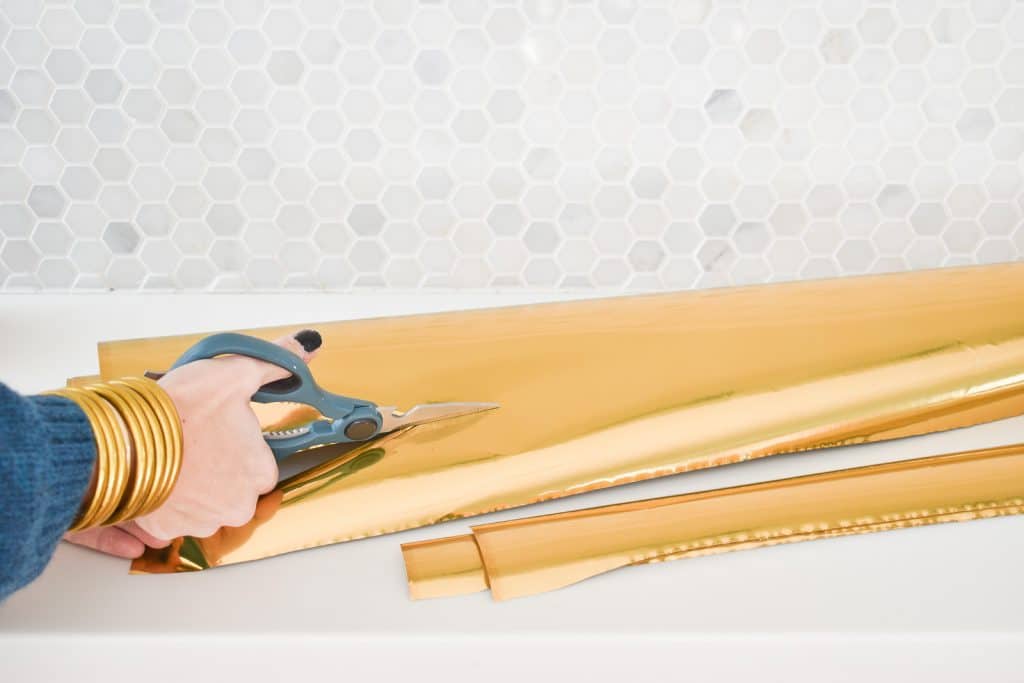
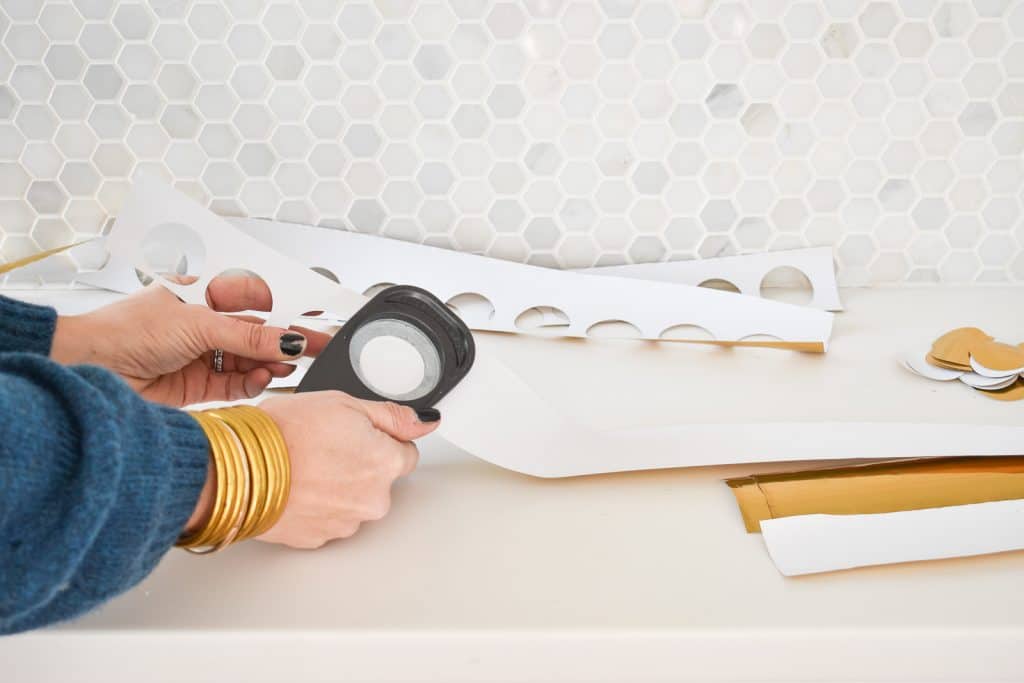
Step 2. Punch Circles
Using a circle punch (mine was 1.5″), punch out circles. It helped to cut the paper into strips first just to make it easier for the circle punch to work its magic.
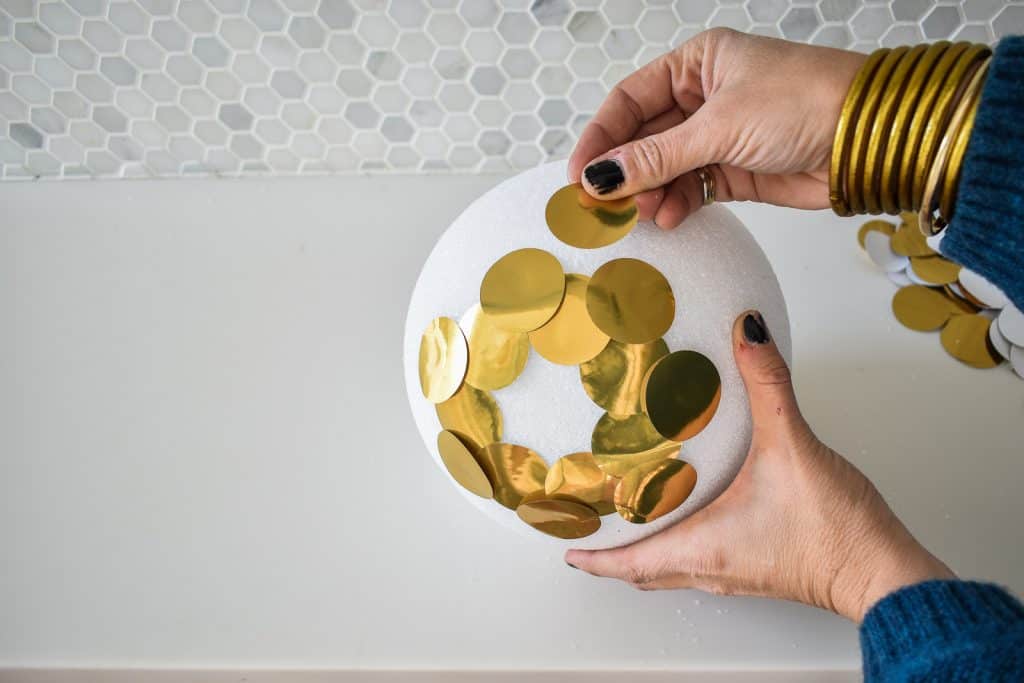
Step 3. Glue Circles
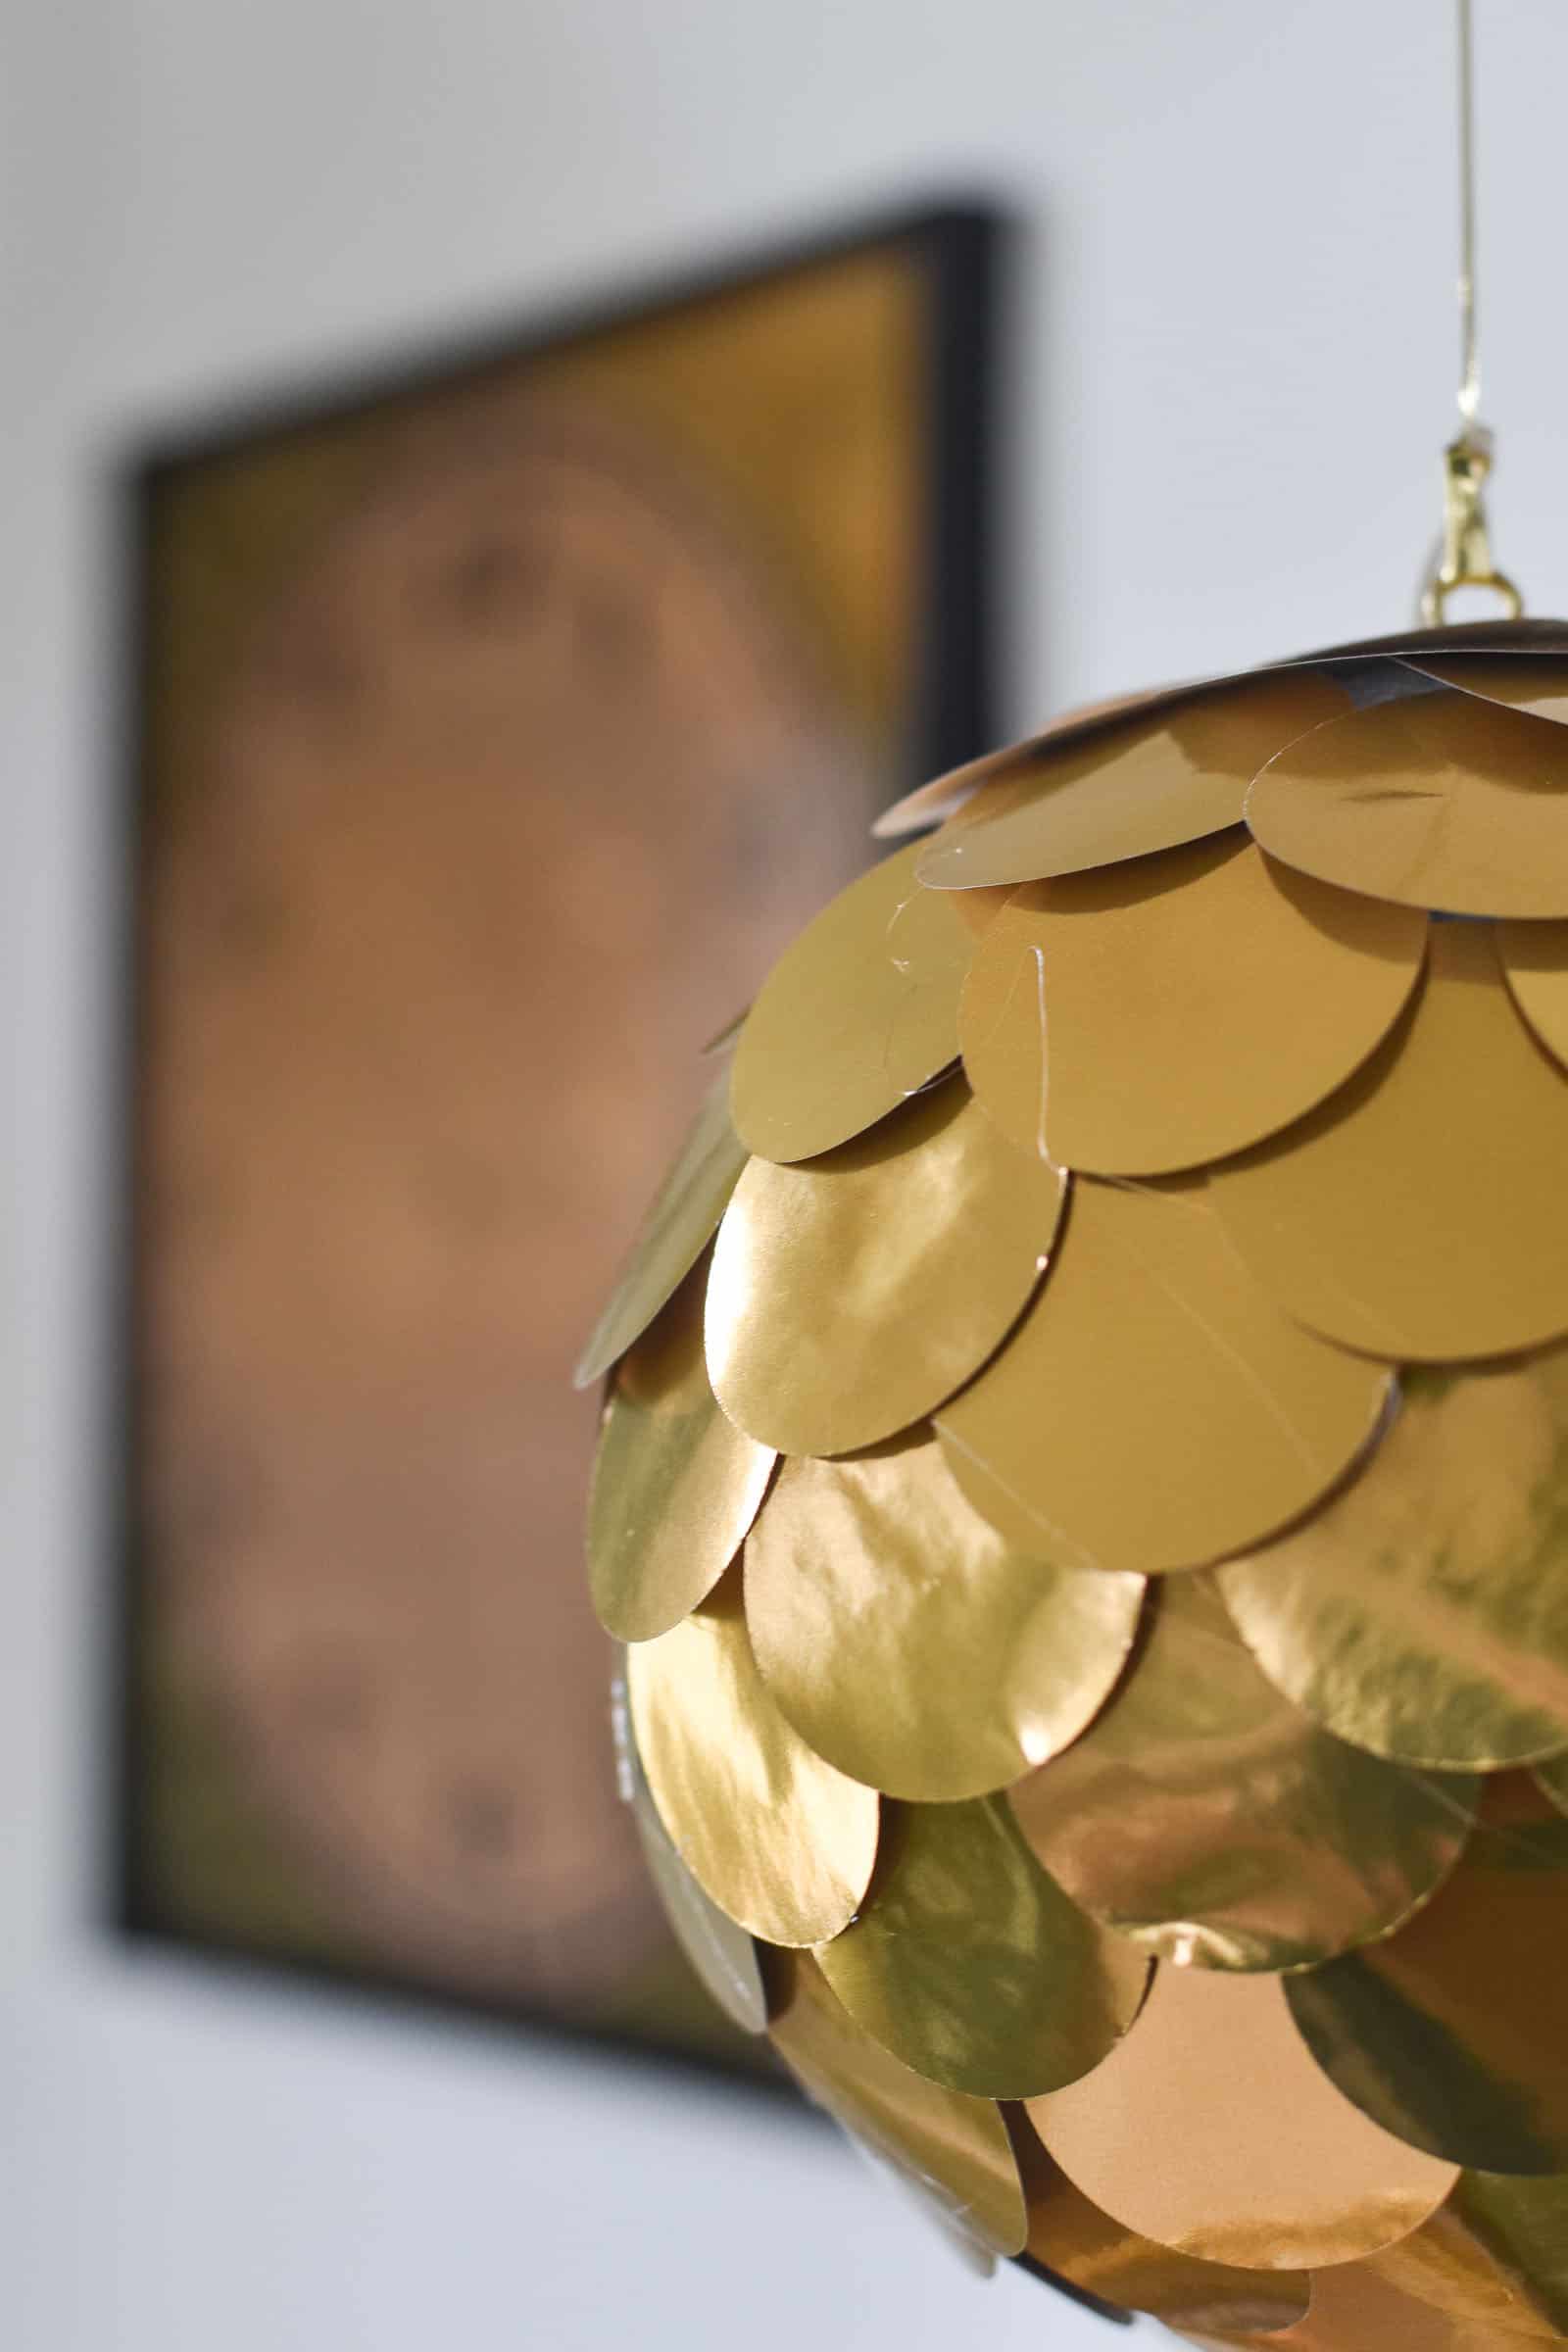
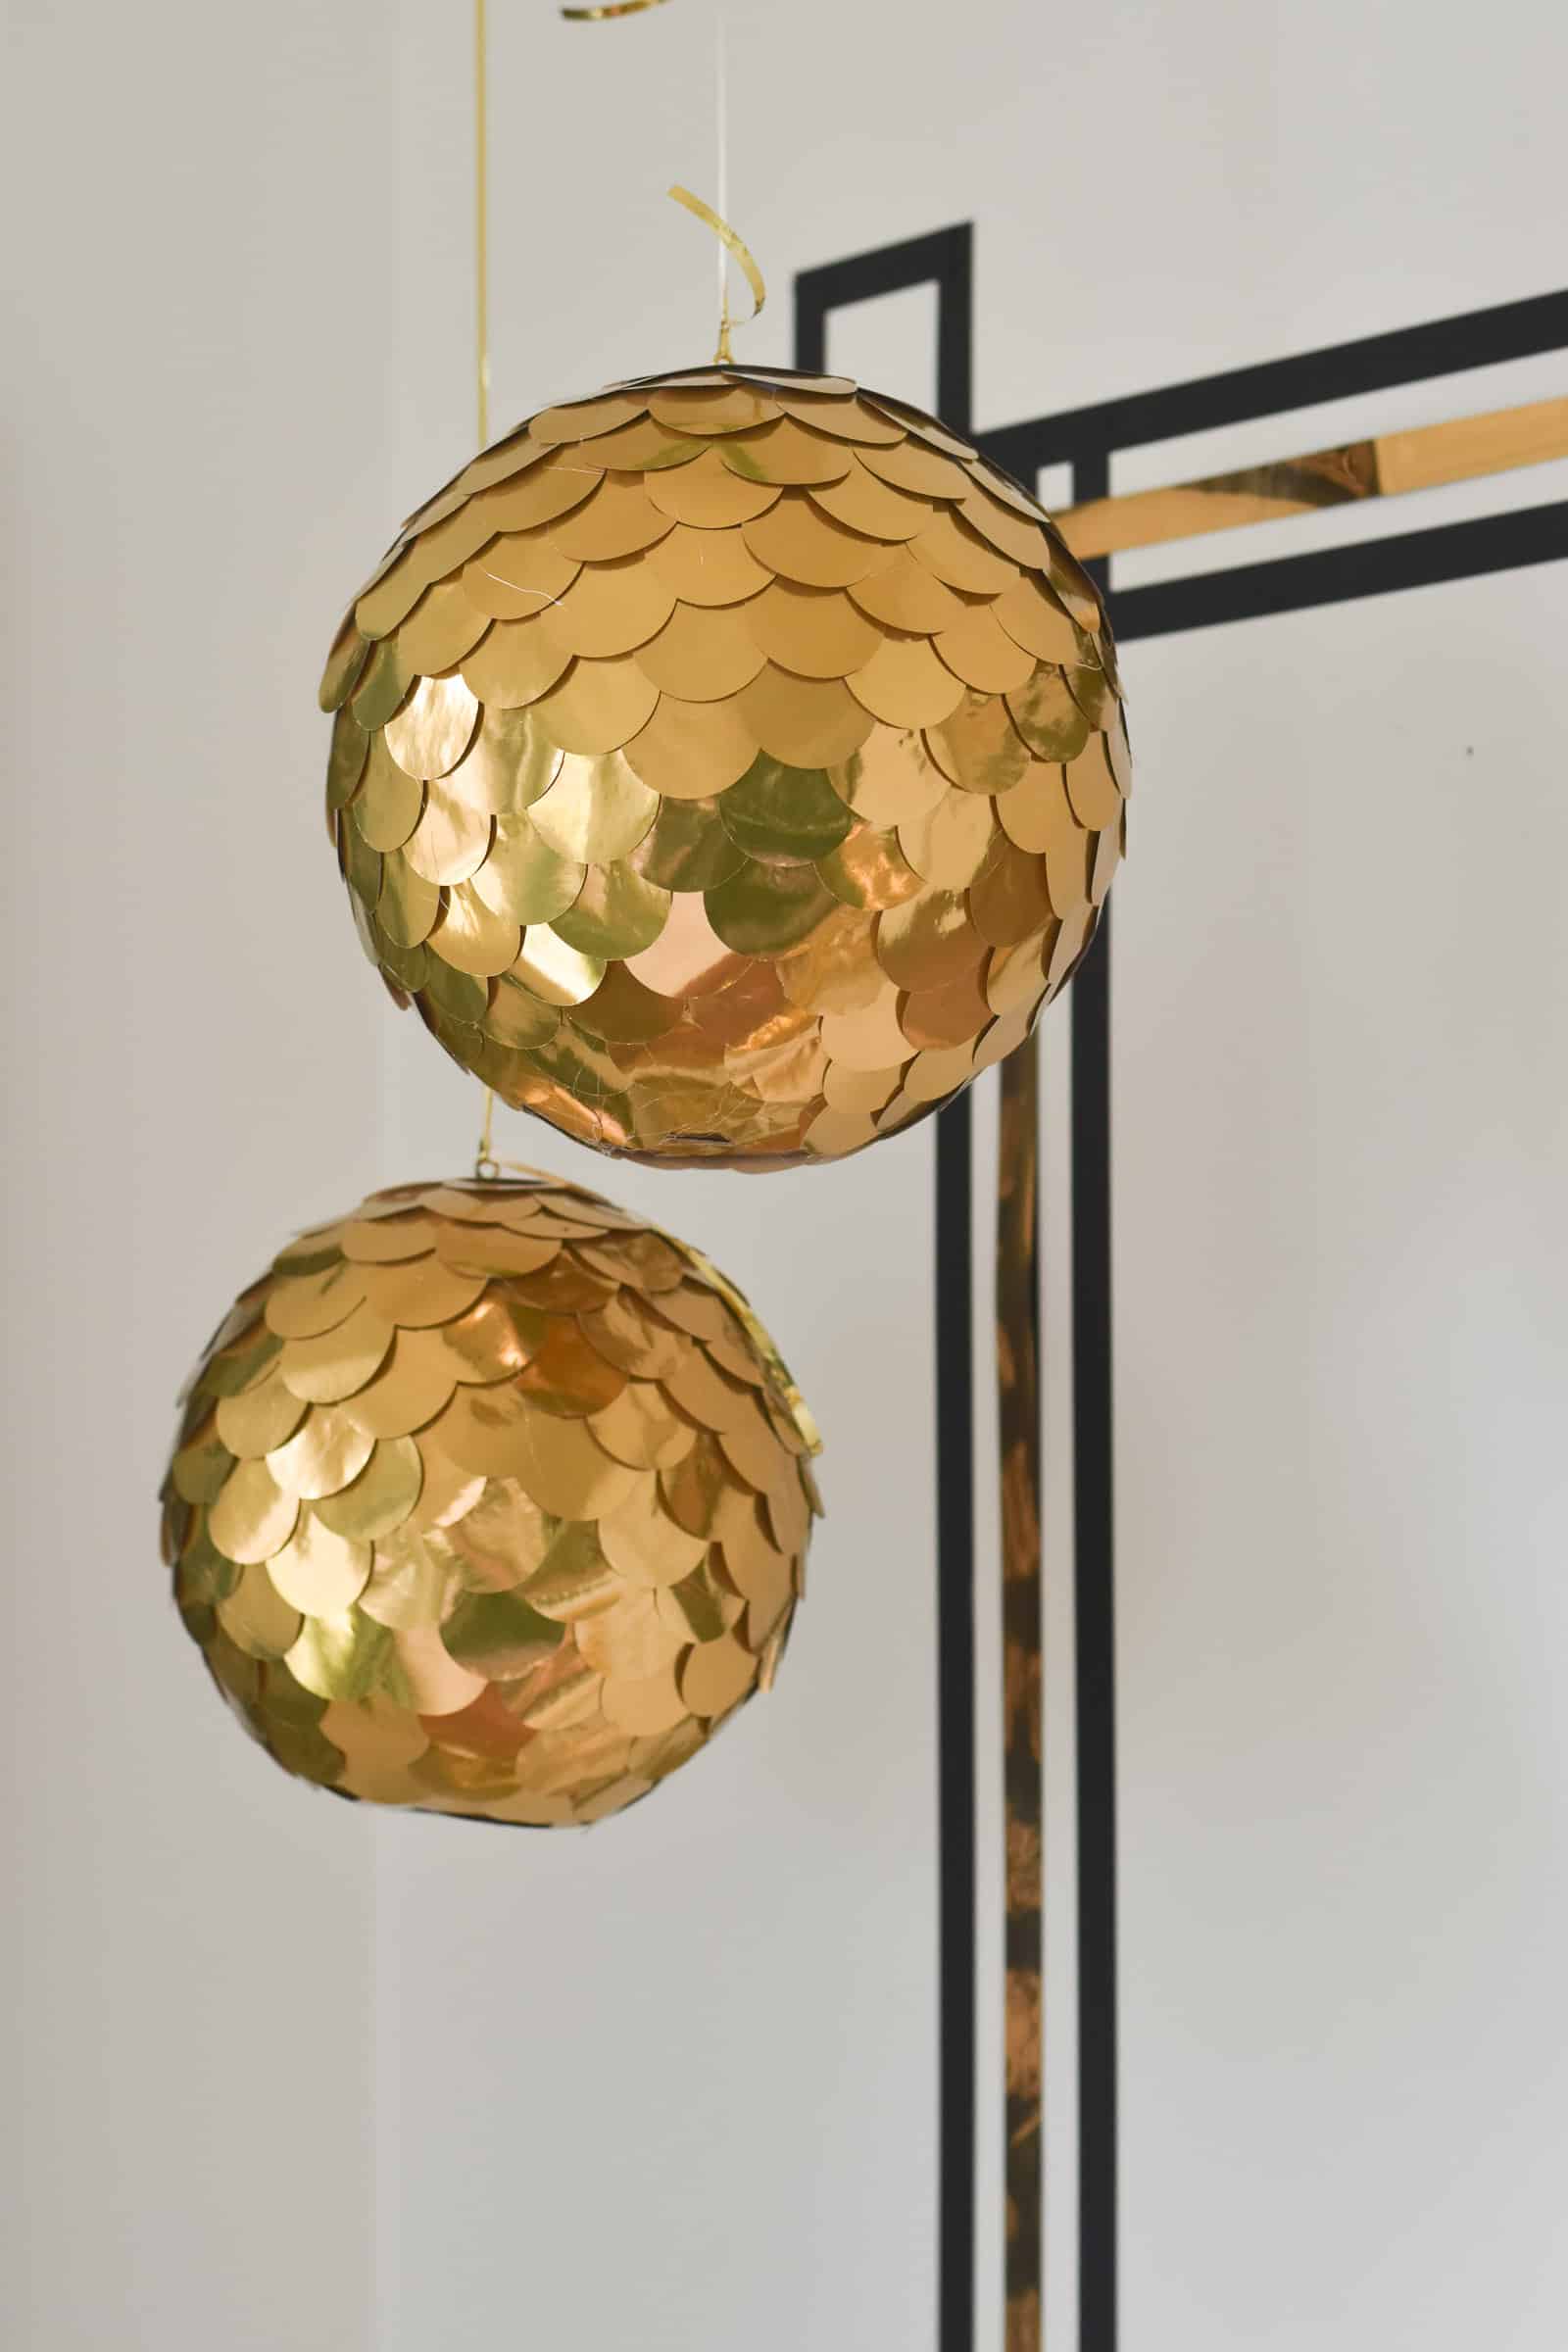
I used three of these large styrofoam balls for this project. Starting along the bottom edge, I applied a small bead of hot glue and stuck my gold circles in place making sure they were all lined up in a circle. (My styrofoam balls have a slight flat edge on the bottom, so I used this as my guide line…)
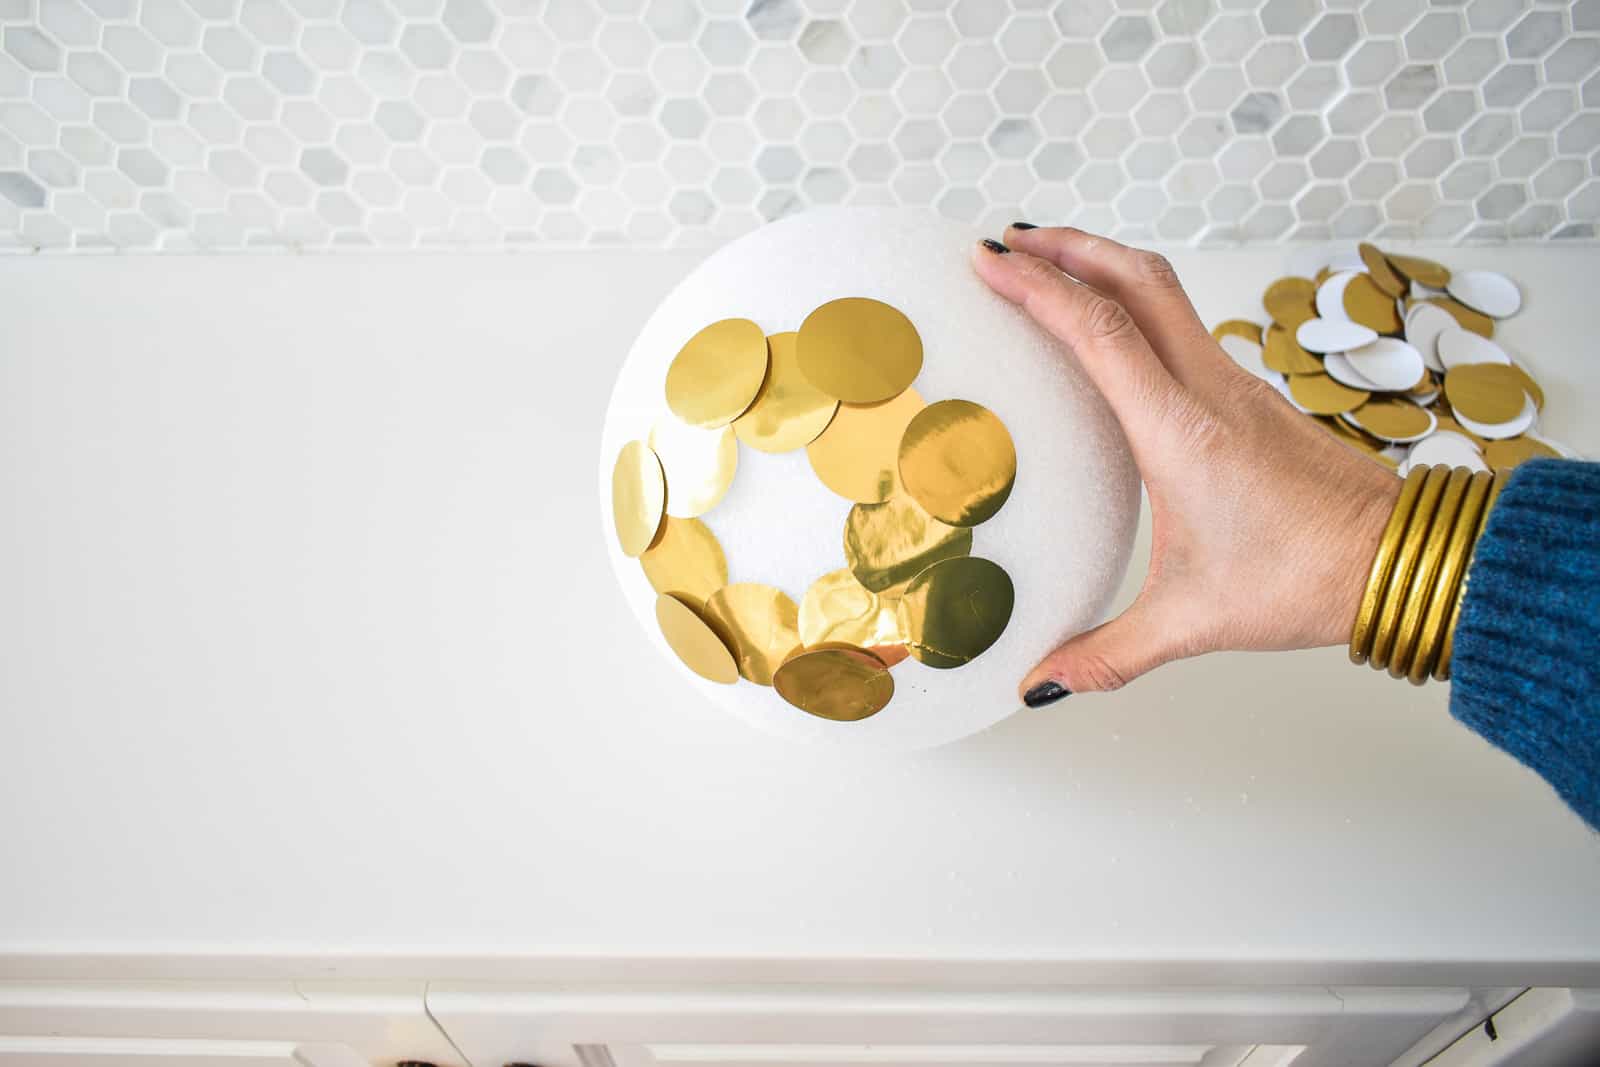
Step 4. Establish a pattern. Kind of.
Because the sphere is a different diameter throughout, I had a hard time finding a regular pattern, but essentially I tried to alternate circles along each row. In other words I would glue one row of circles around the styrofoam ball. And then the next row, I would glue the circles so that they alternated between the circles of the row below. Work your way up the ball until the entire surface is covered with gold overlapping circles.
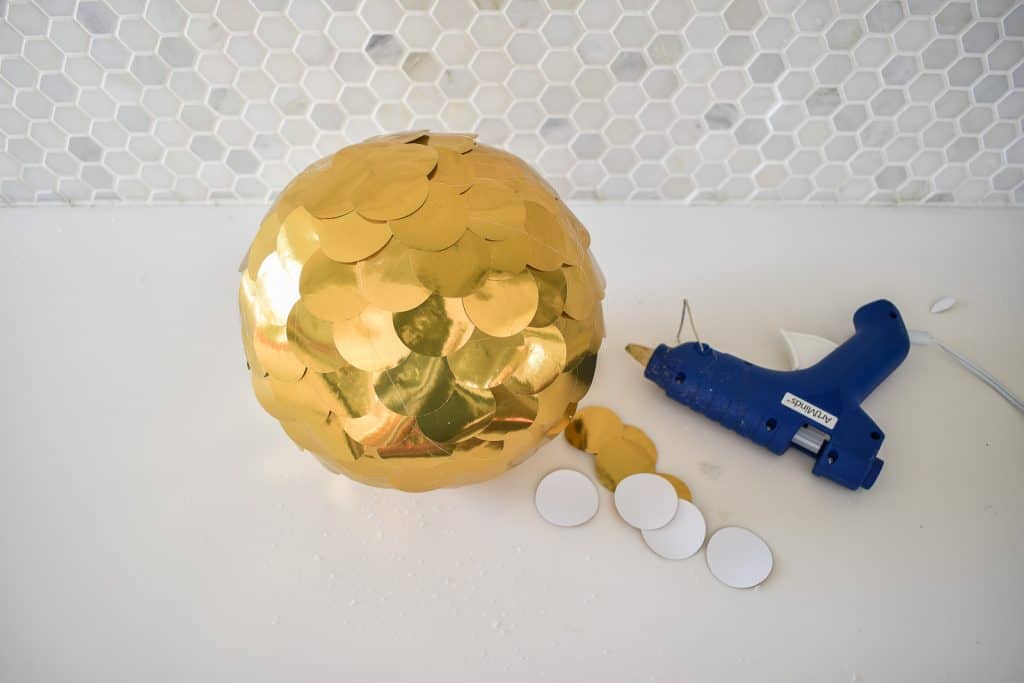
Step 5. Attach screw ring (optional)
If you want to hang your ‘disco’ ball, you need a way to attach string or ribbon. I used a small screw ring to hold up the disco ball. I screwed them in place and then secured with a dab of hot glue. These don’t weigh very much so the screw ring was plenty strong enough.
I have these hanging over my New Years Eve table and am ready to celebrate the New Year! I love how they look hanging from the ceiling!
VERSION 2-
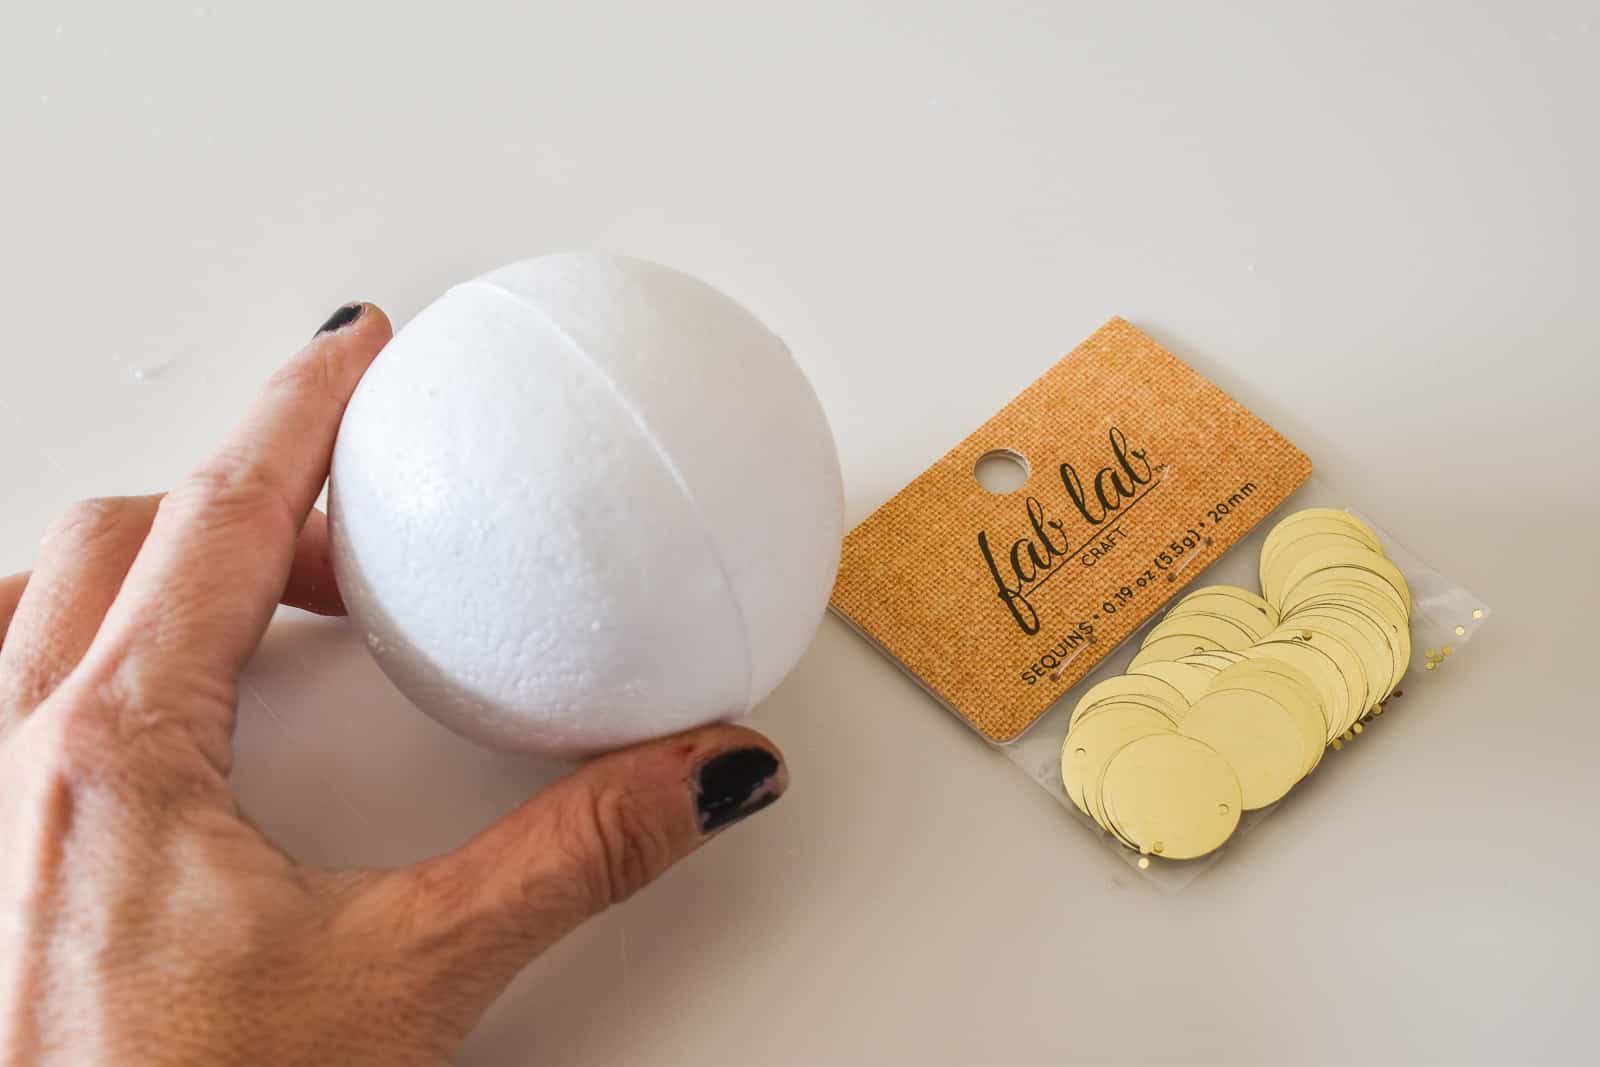
I also picked up some smaller foam balls (3″). Our JOANN had larger gold sequins… I couldn’t find the ones I bought online, but linked below to a mixed batch that have the larger ones like I used for you to sort out.
I followed the exact same process as I did above, but wanted you to see how it looked on a smaller scale.
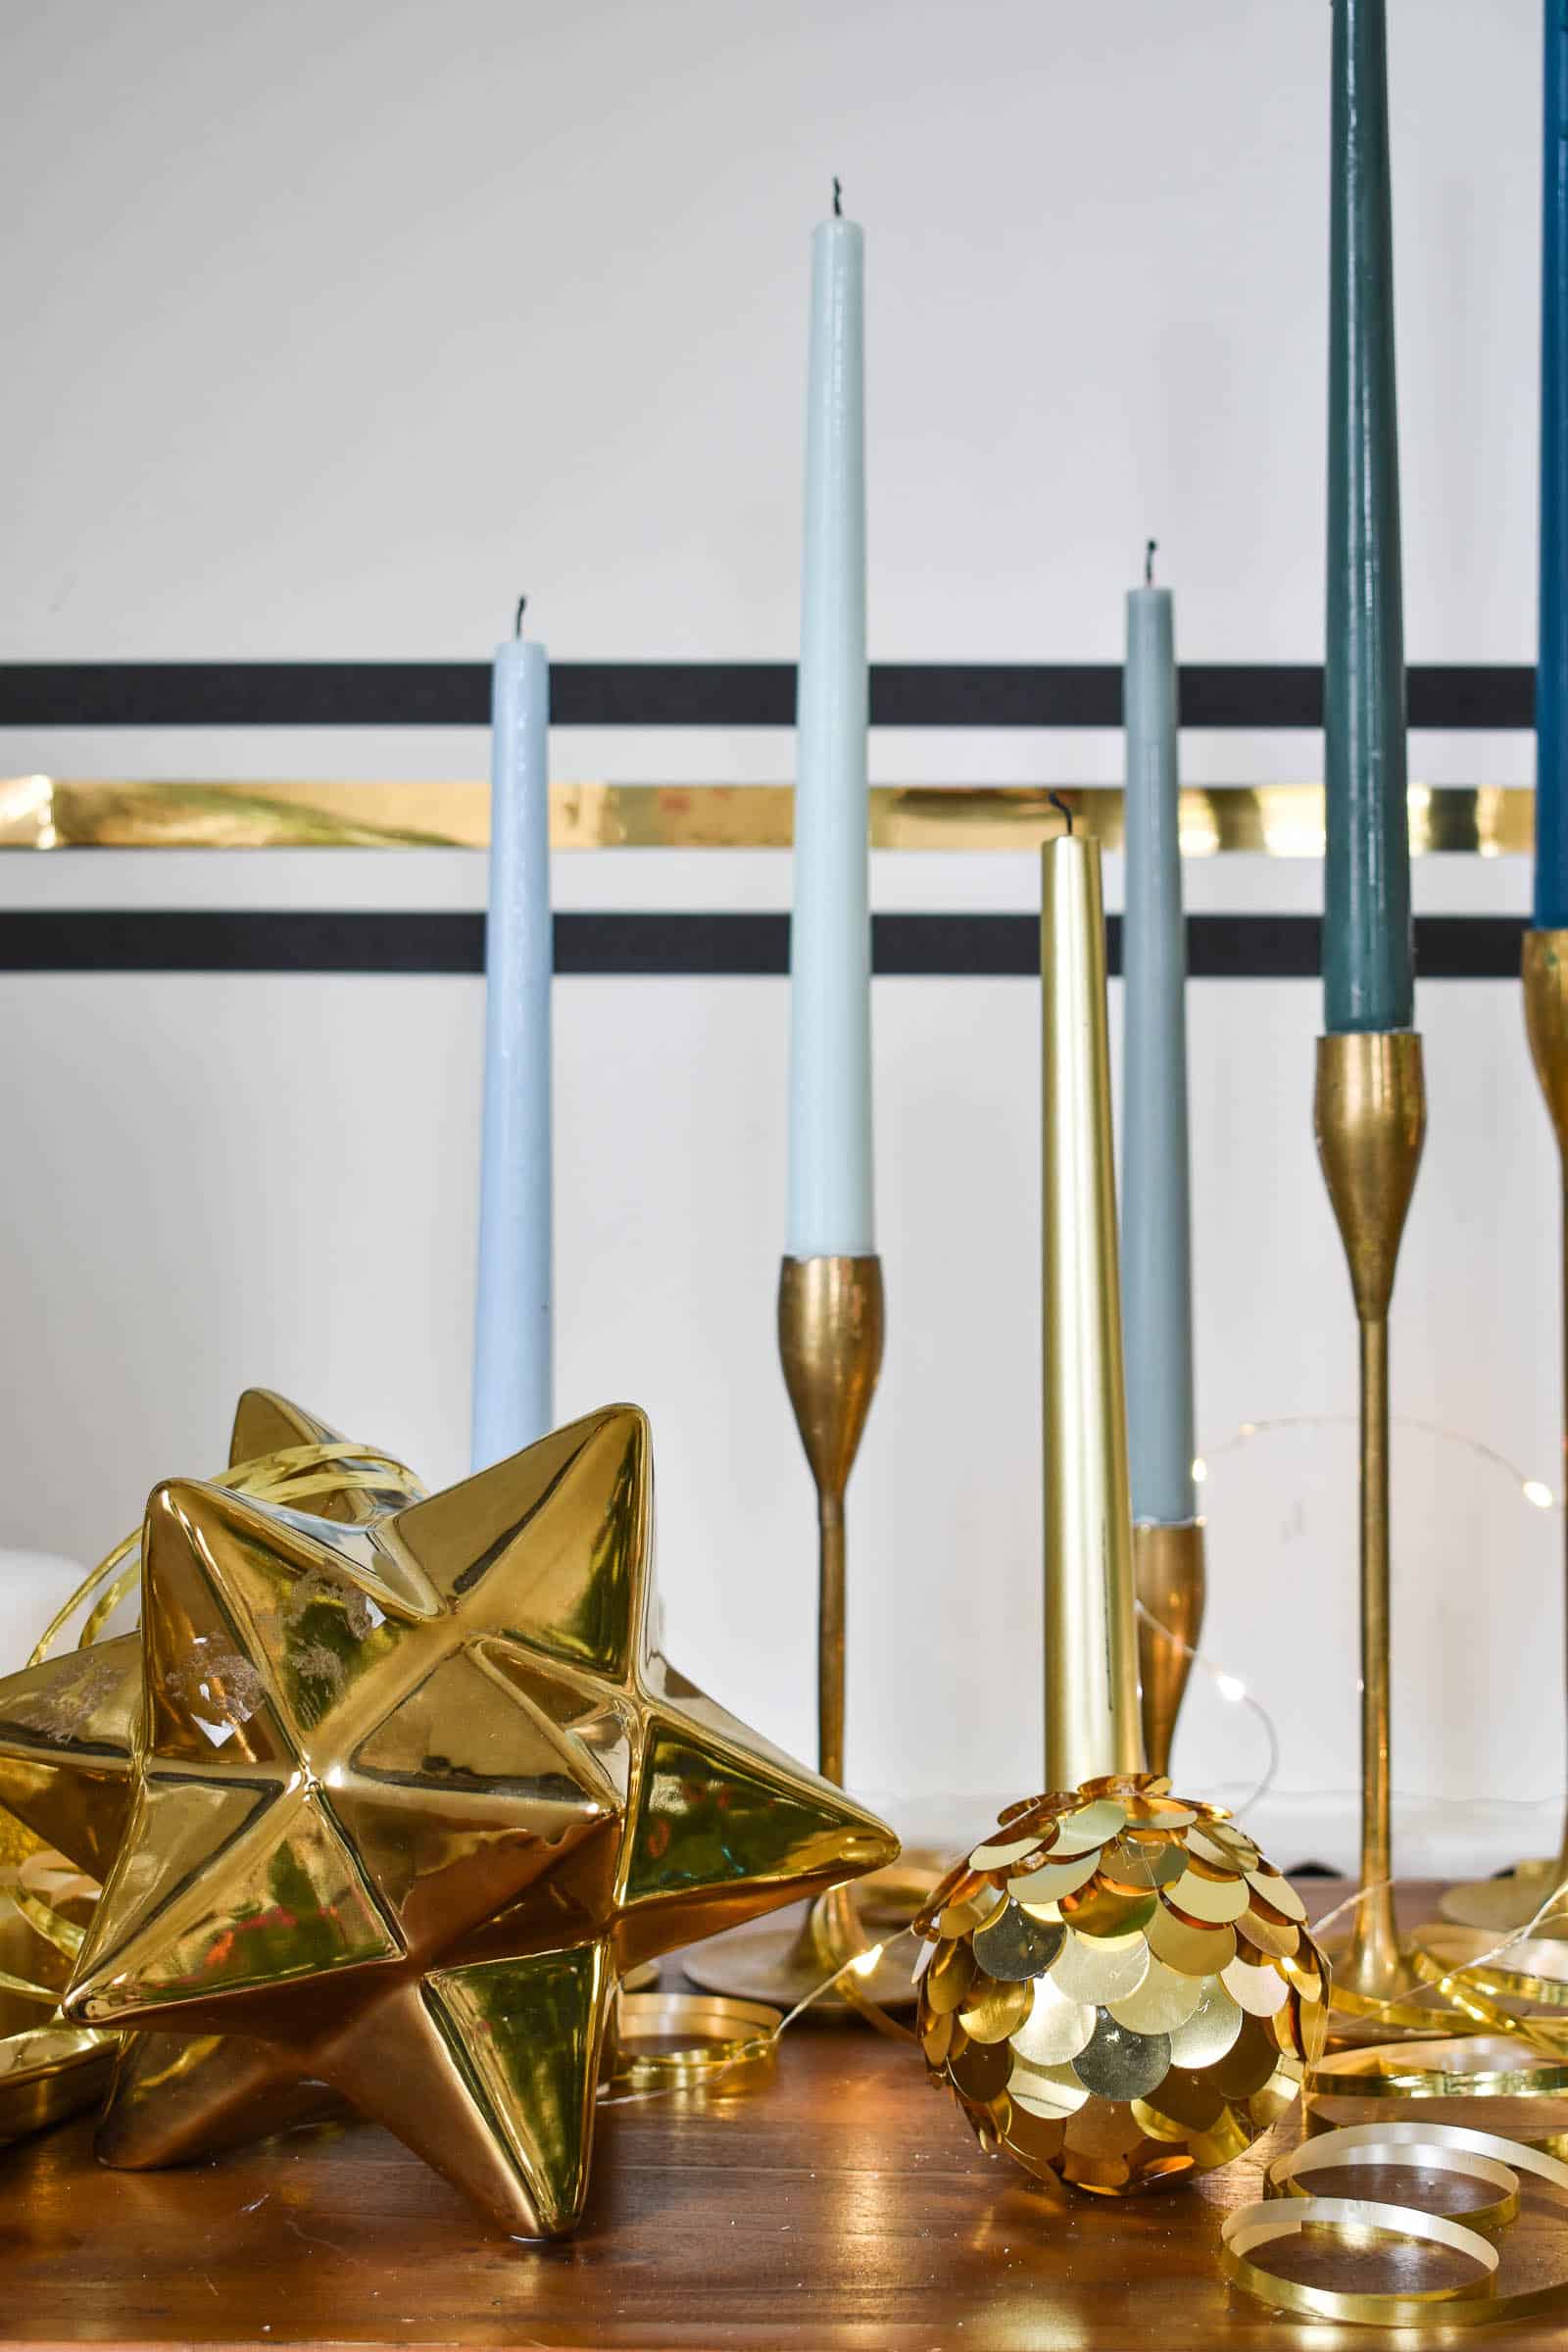
My kids are still young enough that they don’t stay up until midnight, but we try to play a few New Years games, enjoy some treats, and celebrate before bedtime just a liiitttle bit. Tune in after Christmas to see the full space!
Disco Ball Materials:
- Large Foam Sphere (9″)
- Large Foam Sphere (7″)
- Gold paper
- Paper Punch
- Hot Glue gun
- 3″ foam balls
- Gold Sequins (not found online… large ones from this assorted pack would work.)
- Screw rings


How Fun! I think i might try and make a version to hang in my daughter’s room year round.
Let me know how it turns out! That would be adorable!