
How to Use iMovie
Using iMovie to edit video content for your website or YouTube channel
Welcome, everyone! This is a recap of the iMovie presentation I gave at the Haven Conference in 2019. Please leave me a comment if you have any questions that I haven’t addressed here! Disclaimer: I am by NO means an expert videographers and I am by NO means an expert YouTuber. BUT… I firmly believe that a FREE program like iMovie can help you create polished effective video content for your blog or website. I’m sharing a little bit about each feature of the program and, at the end, I share a video outlining my editing process and more of a step-by-step editing tutorial. Enjoy!
Note: I’m using iMovie version 10.1.6… if yours looks a little different this could be why.
1. Setup and Tools
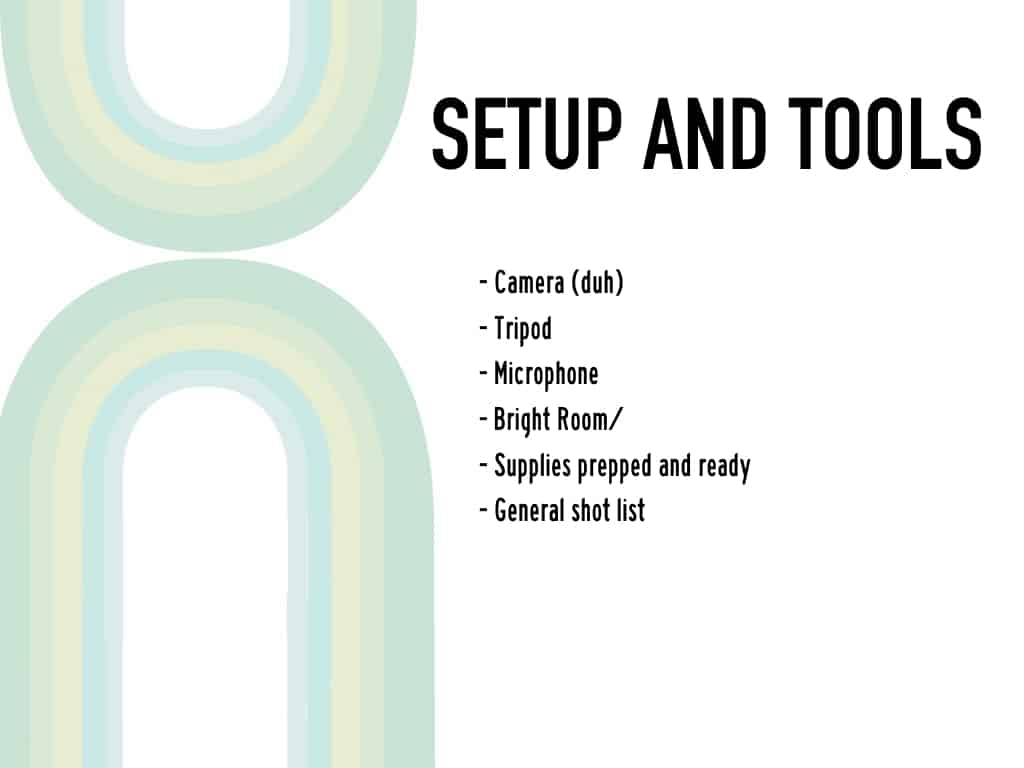
A tripod and a microphone are key for creating video in my opinion. I use a lav mic so a small microphone clips onto my collar and the receiver plugs right into my DSLR via headphone jack in the camera. Another sound options are a telescoping microphone which sits on the camera but ‘reaches out’ to your voice. I’ve also heard of people who record the audio separately and then sync it onto their video in editing. Obviously, you can add a voiceover after the fact also, but I’m a firm believer that YOU need to be in your videos at least at the beginning and the end if possible.
2. Gear
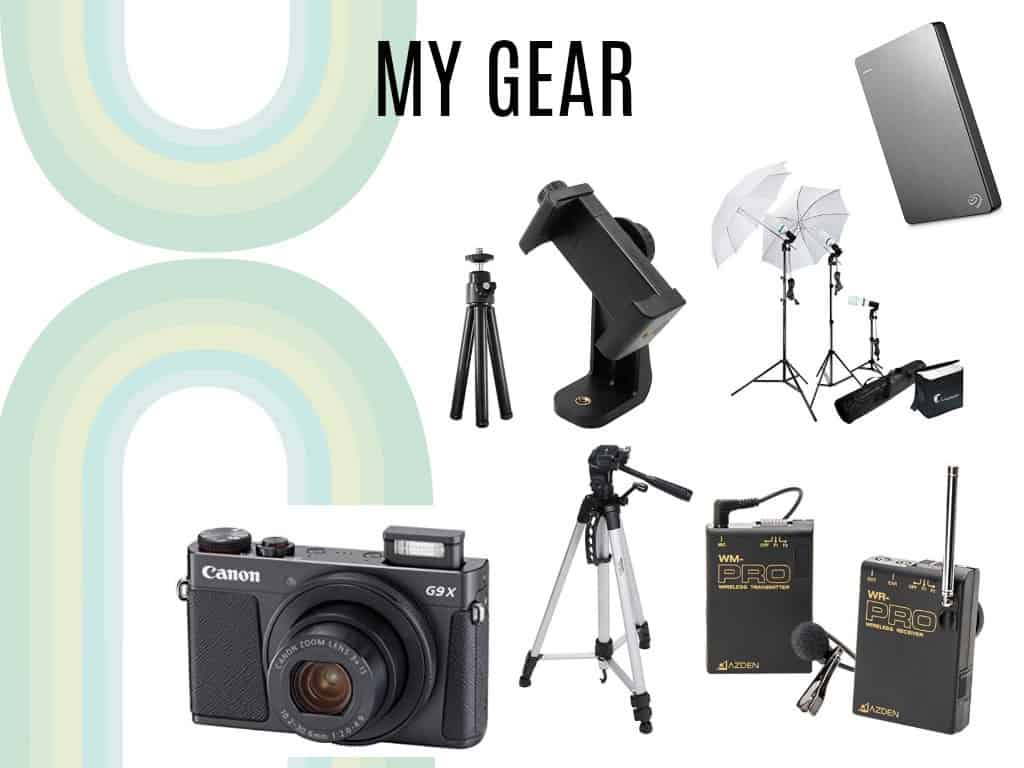
Here are affiliate links to my video gear:
- Tripod
- Microphone (this is a MUST… sound quality is the biggest way to ruin a video)
- Light kit
- External hard drive
- iPhone tripod
- Camera for Video: Canon (note that this camera does not accept an external mic so the only way to add sound would be to record separate audio and then sync it over your video footage when editing)
3. Before Filming
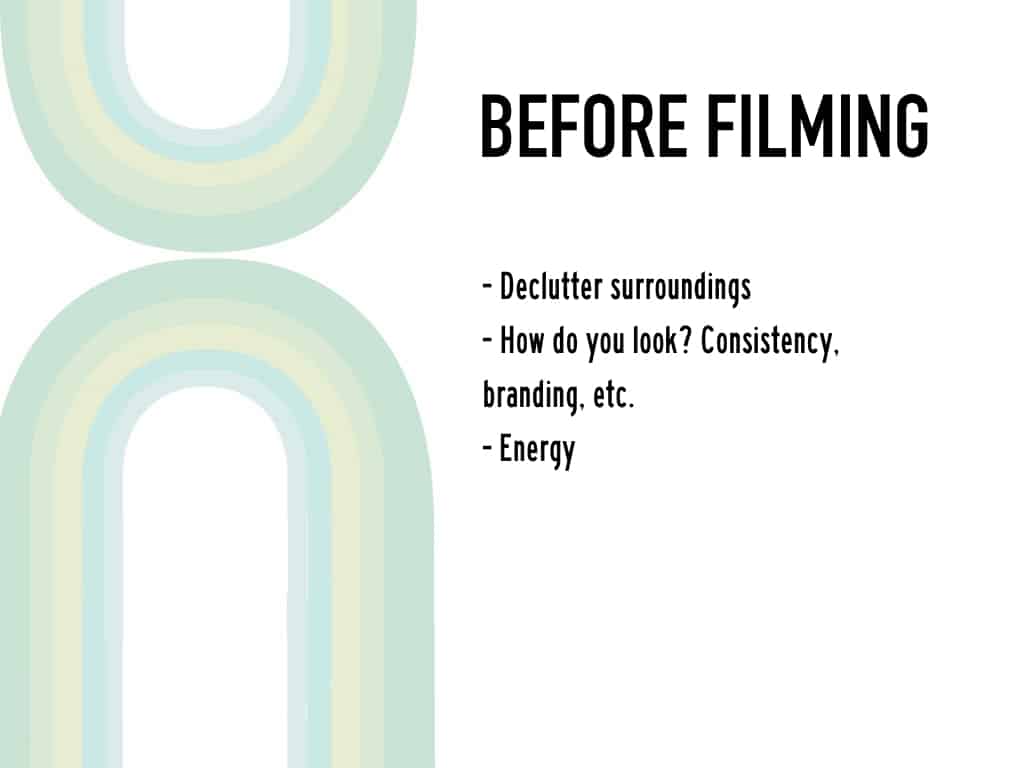
I don’t think your surroundings always need to be neutral or plain, but they should look intentional and not messy. Consider recording videos in the same space in your house so that begins to act as your ‘set’. I don’t wear anything specific, but lots of woodworkers or other YouTubers will wear a branded t-shirt or the same color in their videos for consistency and increased branding. When you’re on camera, you want to be 150% more energetic than normal. You should feel every so slightly over the top… on camera, that will be the right amount of energy!
4. Now what?
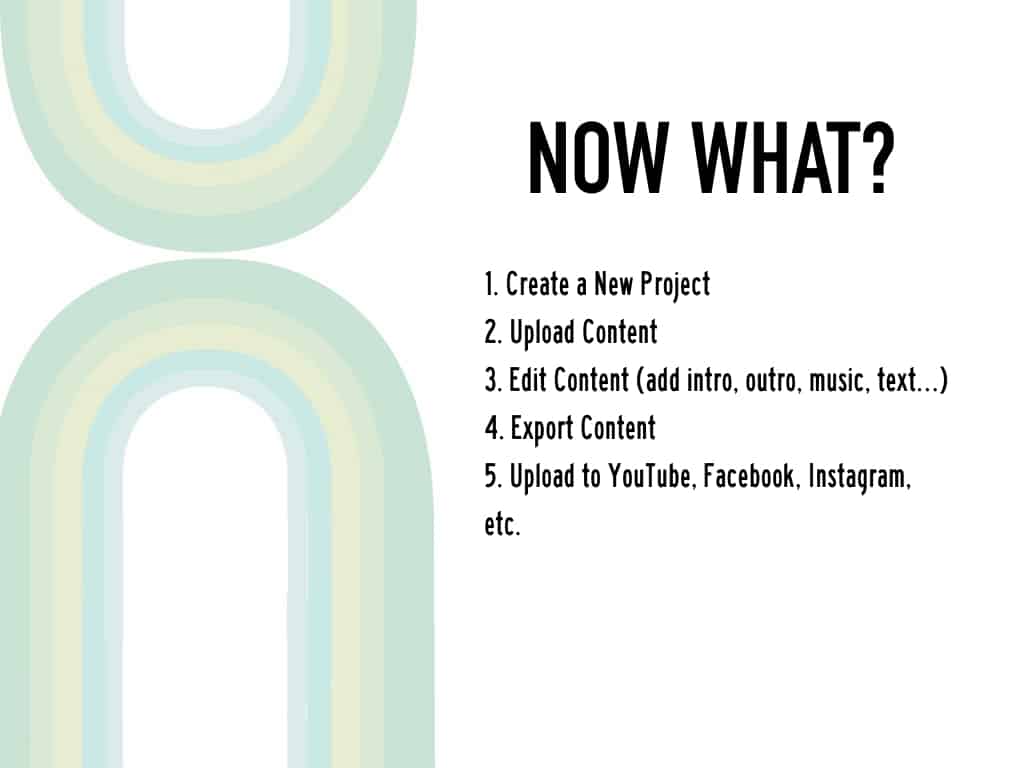
I’m going to quickly walk you through the basic steps, but watch the video at the end to see my demonstrate the entire editing process. The general work flow will be:
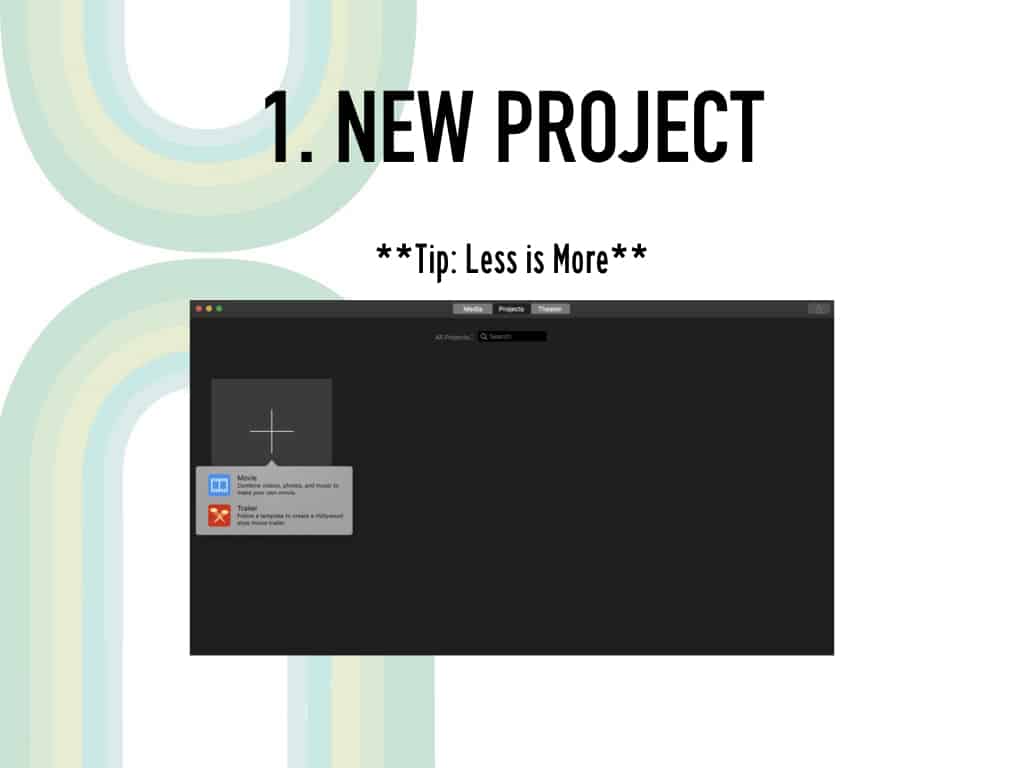
- Create a new project (Movie not Trailer).
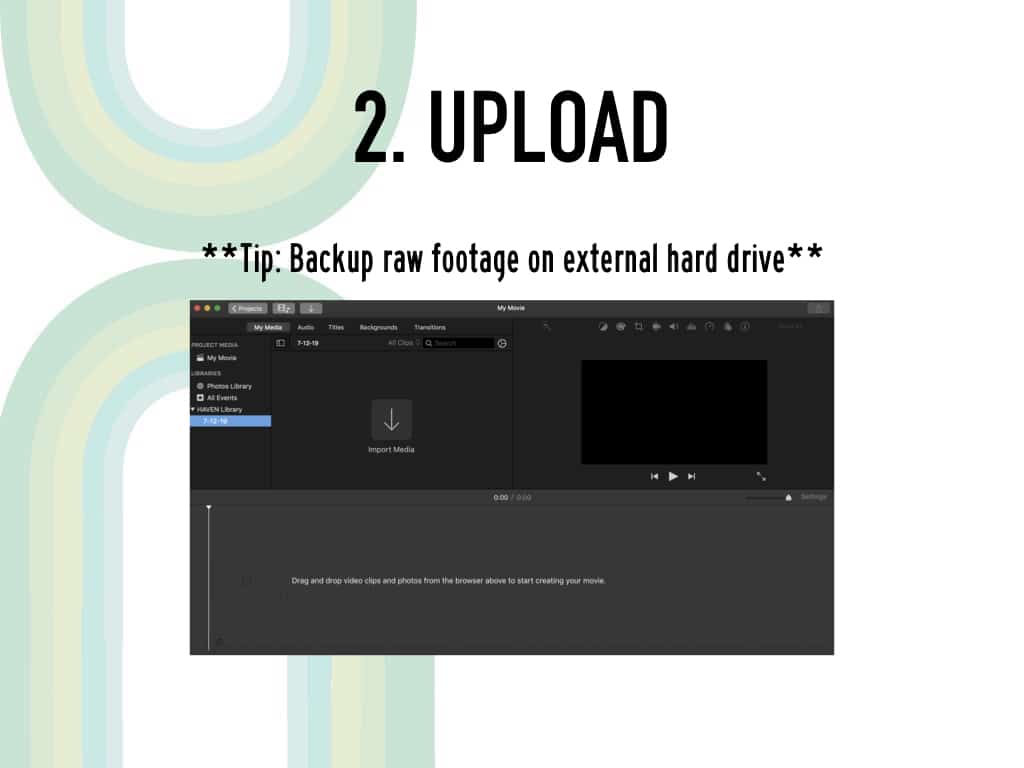
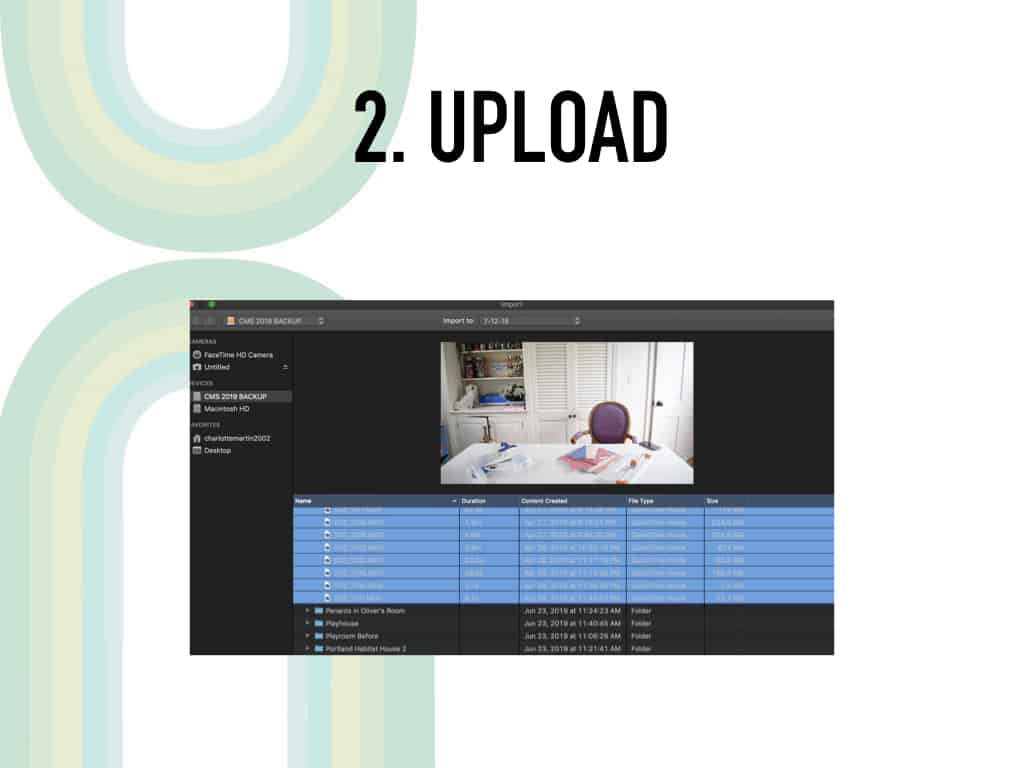
- Upload clips and photographs.
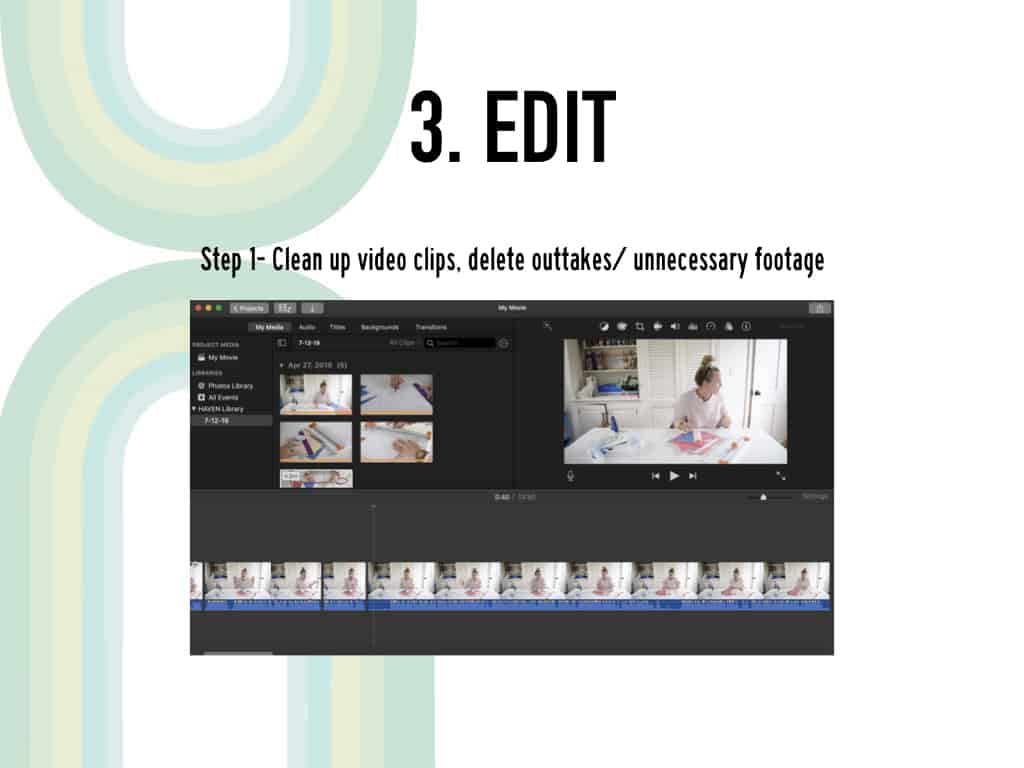
- Edit clips for content: remove unusable footage, select the best clips
- Adjust speed to control pace and flow of video
- Add title card (I use my YouTube thumbnail) and outro (I have a standard outro I made in iMovie)
- Add transitions if desired,
- Add music if desired.
- Export as a file keeping in mind SEO keywords for title.
New Project
Upload
Edit footage
Adjusting lighting, speed and sound
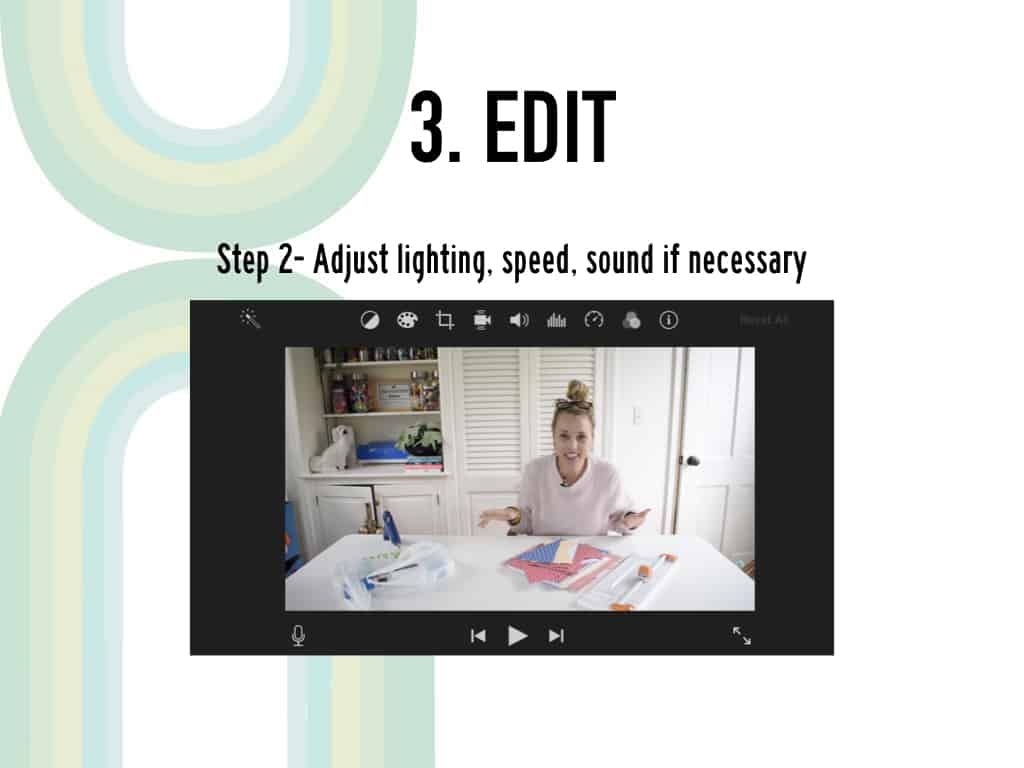 I mention this in the tutorial, but notice those icons above the preview screen. If you hover over them, a pop up will tell you what each one is. Working from left to right:
Color Balance: I don’t use this one.
Color Correction: The palette is where you can adjust lighting and color. It’s not all that precise, but can help you brighten up a slightly underexposed clip.
Cropping: This is where you can not only change the size of the video, but also access the Ken Burns effect. One thing you CANNOT do in iMovie is change the dimensions of the video. You’ll need another app if you want to change your video to a square or a vertical for social media. (I use an app called InShot.) Alternatively, you can simply film an iMovie video and make sure the subject is always center frame… that way when you upload to social media, the tutorial will still make sense.
Stabilization: Occasionally I’ll go in here if I feel like my footage is a little shaky, but 9 times out of 10, I’m using a tripod so this is unnecessary.
Volume: This is where I mute clips (if you click the megaphone within the volume settings, a red line will show up indicating the clip is muted.)
Noise Reduction and Equalizer: I don’t use this one.
Speed: I come here a lot. This is where you can reverse a clip (change the playback direction). I do this quite a bit when I want to display an intricate set up; I get everything where I want it and then slowly pick it all up… when playback is reversed, it looks like I’m arranging everything perfectly. This is also where you go to speed up or slow down a clip. I will OFTEN speed up clips so that you can still see what I’m doing, but it doesn’t slow down the video. Nobody wants to see 5 minutes of me gluing colorful tiles in place, but they would like to see an accelerated version of this for 5 seconds.
Clip filter and audio effects: I don’t use this one.
Clip information: Sometimes I will clip this if I want to be more deliberate about the duration of a particular image or clip
Title Cards
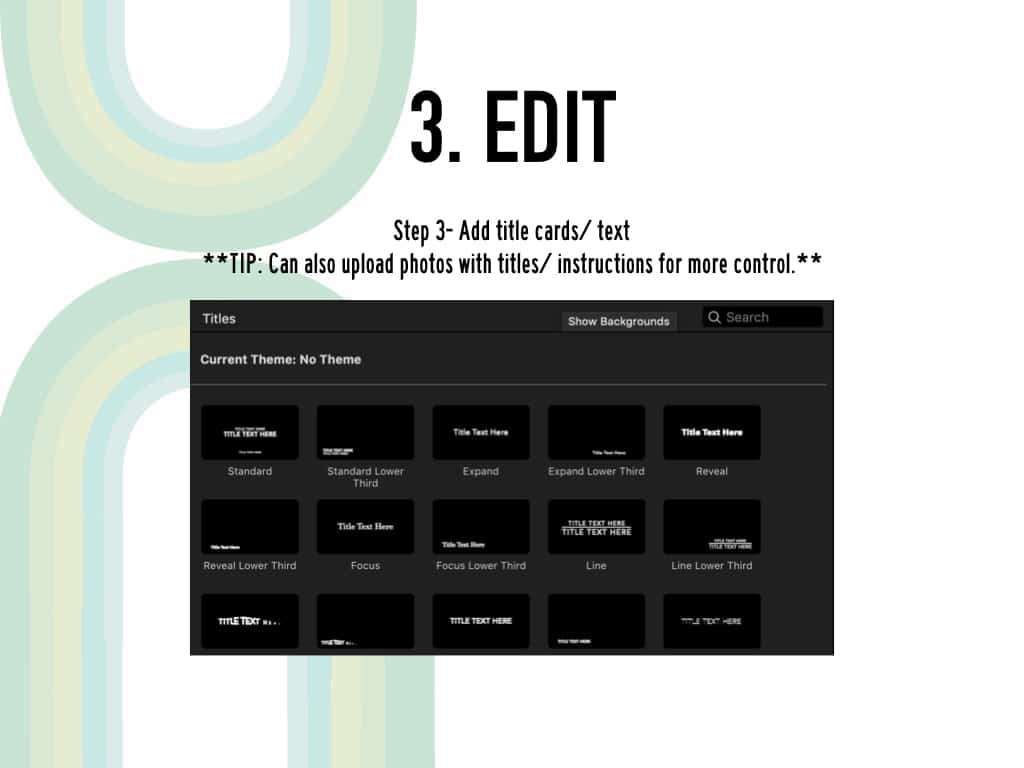
Above the imported footage thumbnails is Audio, Titles, Backgrounds and Transitions. iMovie provides some options for title graphics. If you drag your mouse over each one, it will show you what the title looks like. I use these sparingly as there aren’t many options within each one. For some, you can edit the font size, style and color, but you can’t change where the title will be on the clip.
I share a couple workaround in the tutorial but the biggest tip I have is to create a graphic with a transparent background and then you can drag this image on top of any video clip to create a more custom title.
Transitions
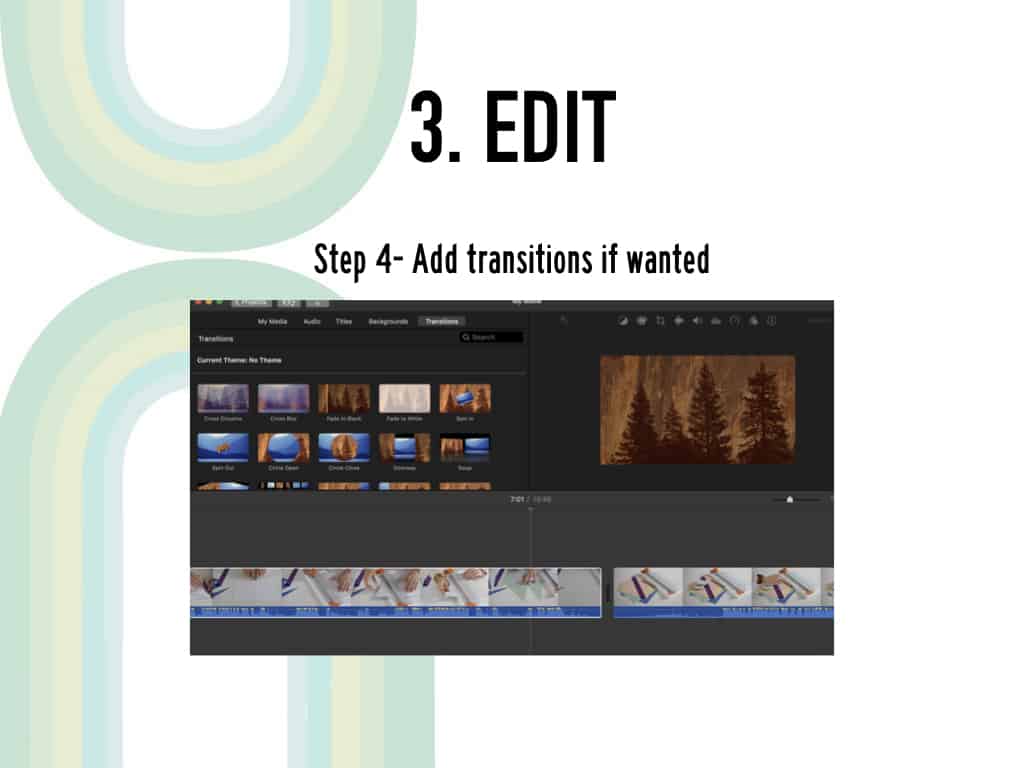
If I’m adding transitions, I will often select all (command A) and then use a keystroke shortcut Command-T which will add transitions between every clip. You can also go to the transitions menu and drag a specific transition between two clips. Finally, if you’ve selected a clip and then type Command-T, you will get transitions on either side of that one clip.
Audio

iMovie will pull music from iTunes which is nice. Make sure you are working with music that is Royalty Free or that you own the license to use. Even with citation, you cannot use music unless you have licensing rights to it.
Finishing Touches
– I start every movie the same way (my “intro”).
– Because I’m putting my videos on YouTube, I also create a custom thumbnail that uses my brand colors and shows the finished product as best I can. Some people feel strongly that a face does better on a YouTube thumbnail… I need to experiment with this a bit.
– I have a 5 second outro that I add to the end of every video. It’s a separate clip that ends up in my iMovie library so I can use it in every movie.
– When exporting your video, consider SEO and keywords to give it the best title possible
Export
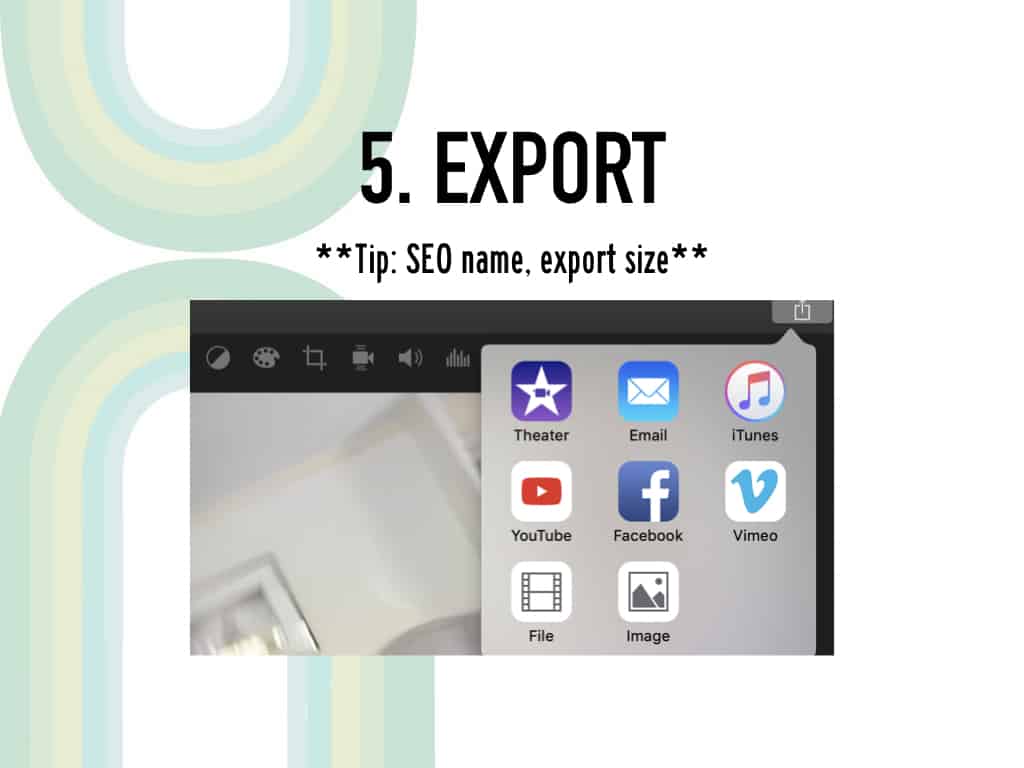
There are lots of options for exporting within iMovie. I always export as a File and save it to my external hard drive.
iMovie Keystroke Shortcuts
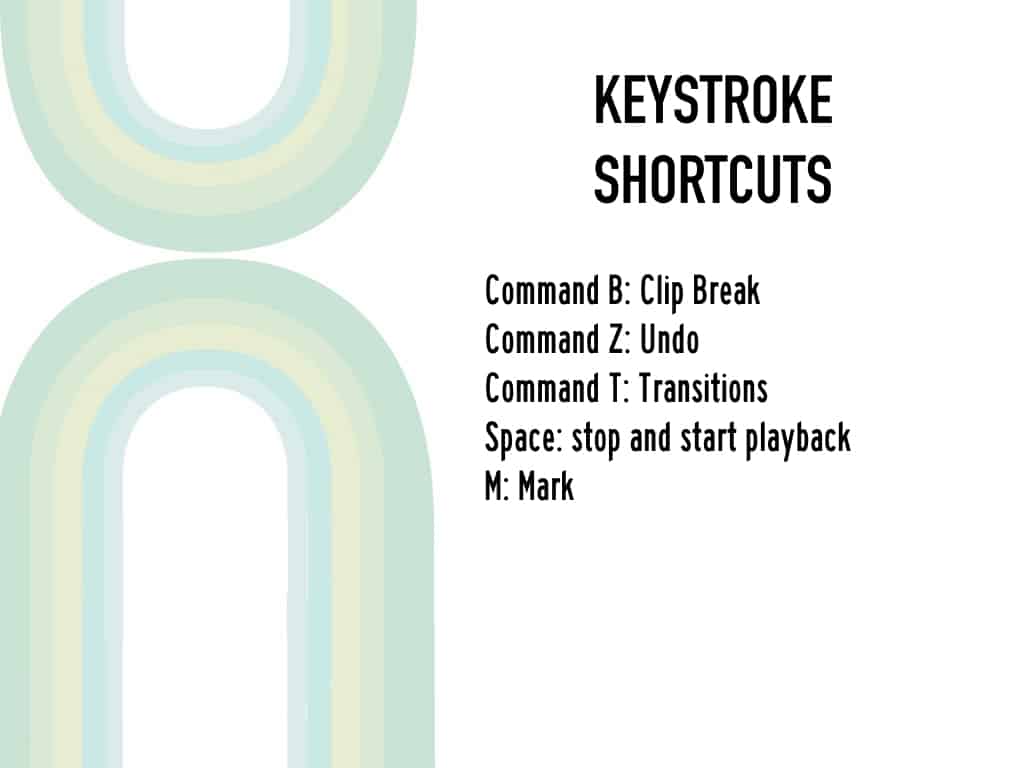
If you type the M key, you’ll see a small purple triangle show up above the clip. I will sometimes use this “mark” feature to indicate which version of a certain clip I like the most.
Watch the video below for a full step by step tutorial on how I edit and make my videos using iMovie!
