
How to Make a Wooden Jacob’s Ladder Toy
Psssst… this post *might* contain affiliate links: see my disclosure here.
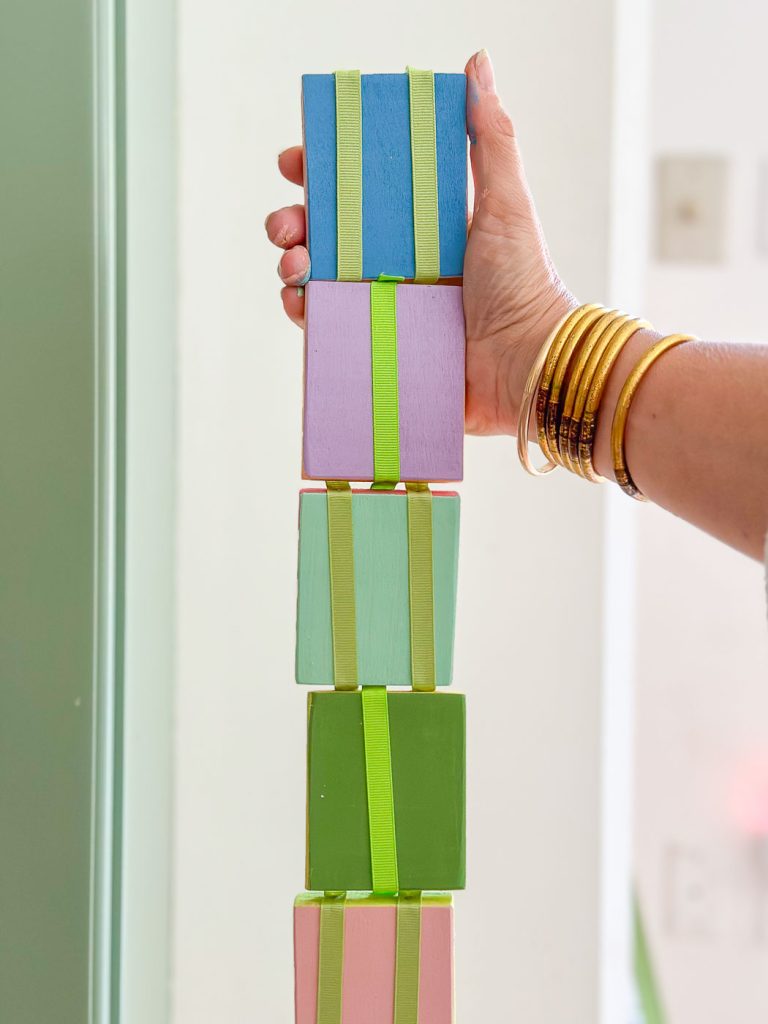
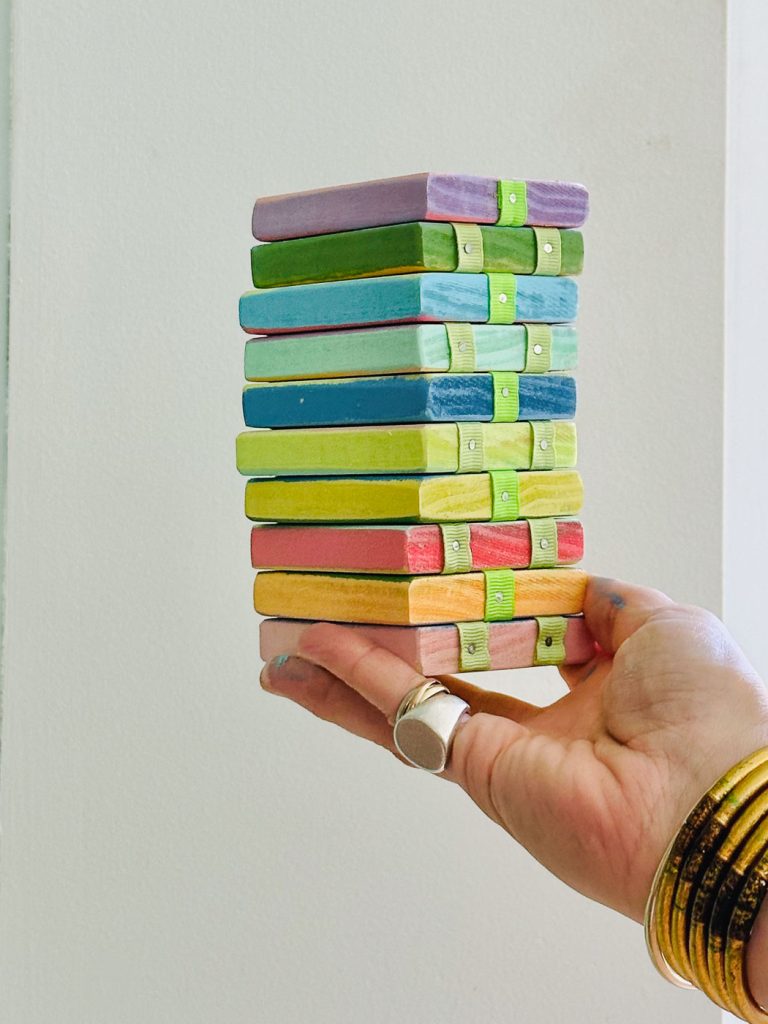
Do you remember these magical wooden toys that would fold down on themselves and seemingly defied the laws of physics? May I present the Jacob’s Ladder:
Story Time: When I was little, there was a place within biking distance of my house called John Davy Toys. Picture one of those toy stores with bins of toys at all prices, ethereal winged creations hanging from the ceiling and the sound of barking stuffed dogs popping up around the space. I actually googled it and found this short write up by the New York Times: “At John Davy Toys children may look at everything from plastic shark’s tooth necklaces (5 cents) to bisque porcelain dolls with real hair ($175).” Needless to say, they had Jacob’s Ladders and I was just as fascinated then as I am now! Thankfully google showed me the secret to this mystical toy so here’s how you make one for yourself!
Step 1. Materials
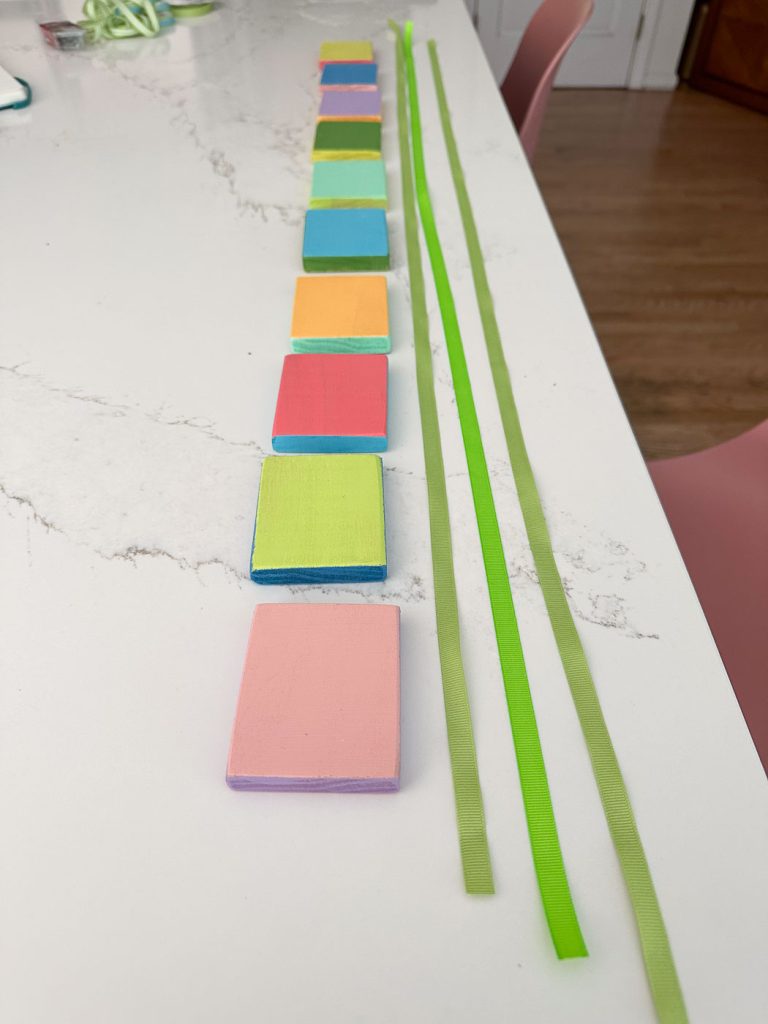
I’m going to make this real simple… just get a 2 1/2″ wide hobby board at your local hardware store… they’re the perfect width for a Jacob’s Ladder. Mine is poplar but they come in other materials. I also happened to have some 3/8″ grosgrain ribbon on hand which was the perfect size. Lastly, grab the smallest little brad nails you can find; you want ones with a head however so they will hold the ribbons in place.
Shop my favorites!
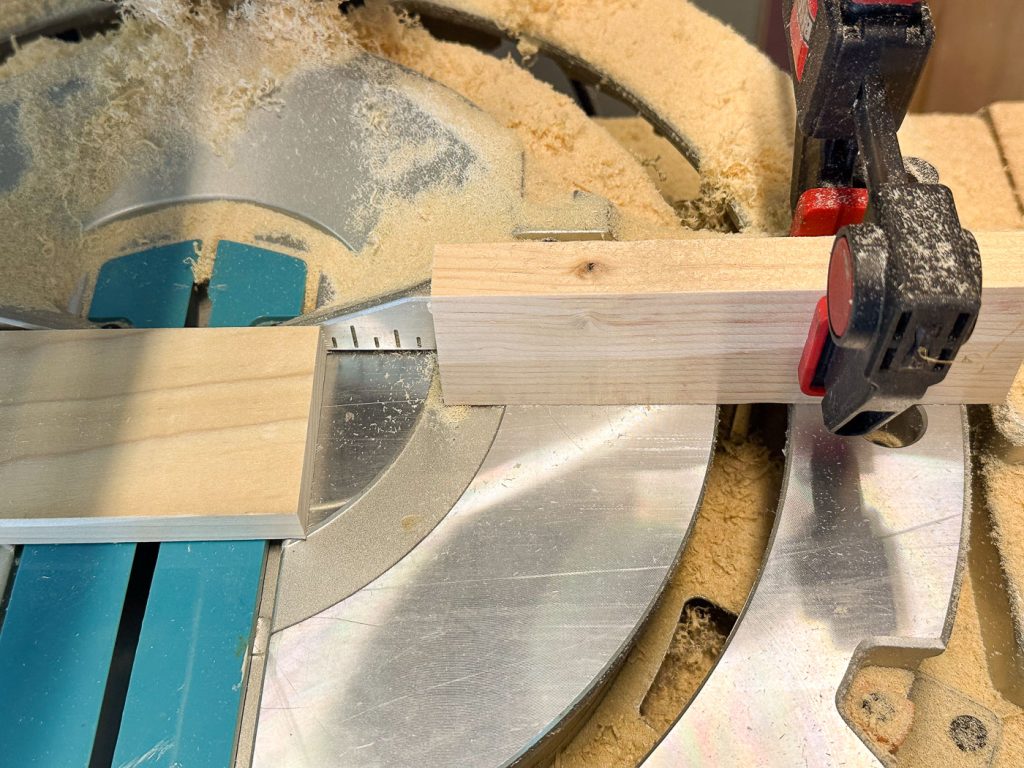
Step 2. Cut the Hobby Board into Blocks
I clamped a fence onto my miter saw so that every cut would be exactly 3″.

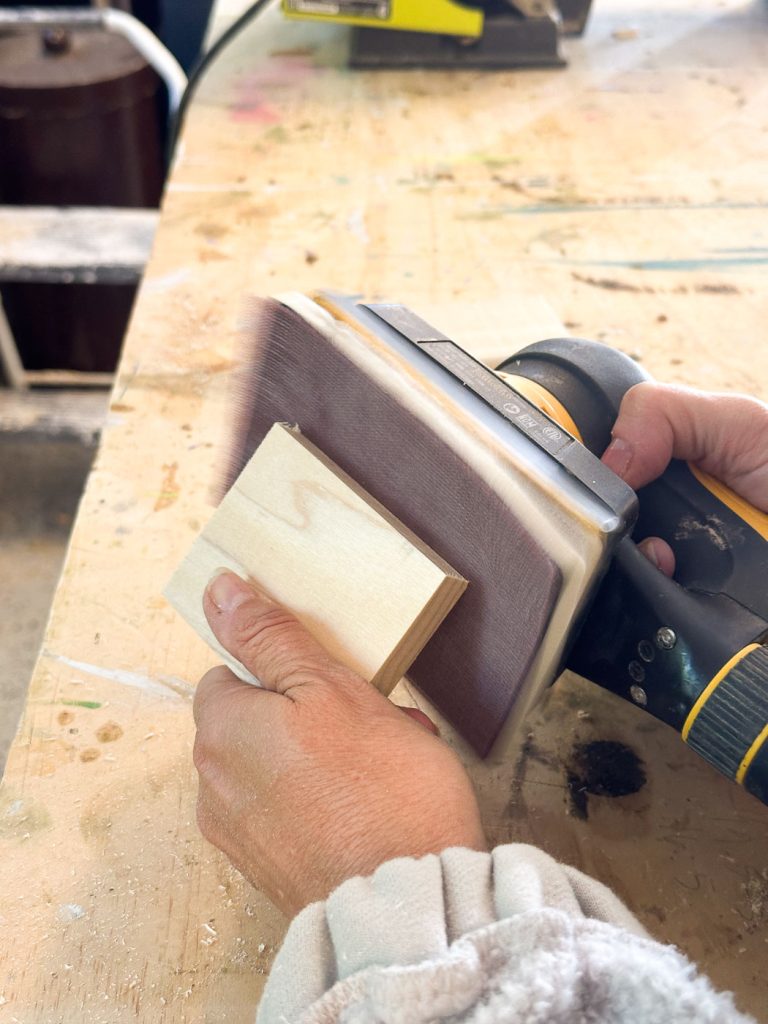
Step 3: Sand and Paint the Wooden Blocks
I saw some folks use their router to give the edges of their blocks a chamfered edge, but I just used my sander with a foam pad to help me sand the corners round on each block.
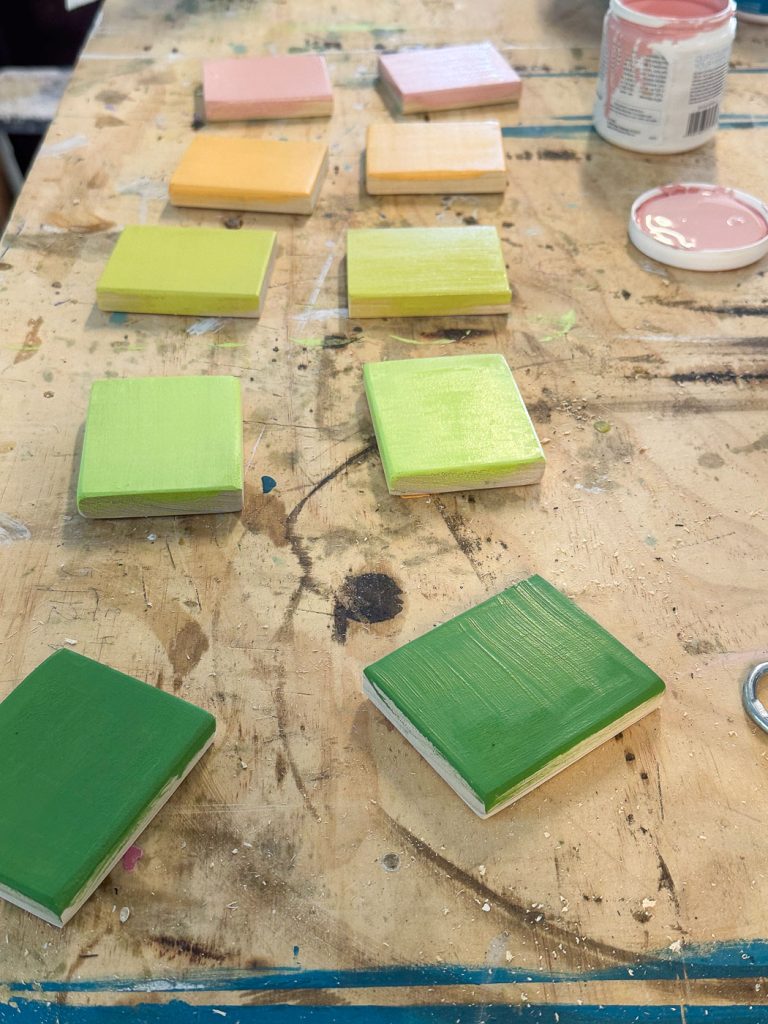
I’m using the same paint that I used for both the Little Free Library AND the old timey wooden bird knocker. They’re just various latex paint samples so use whatever you’ve got! I painted each side something different and then a third color on the edge of each block. Hot tip: grab a hair dryer or a heat gun to help dry your paint between coats. I was able to finished this project in a few hours!
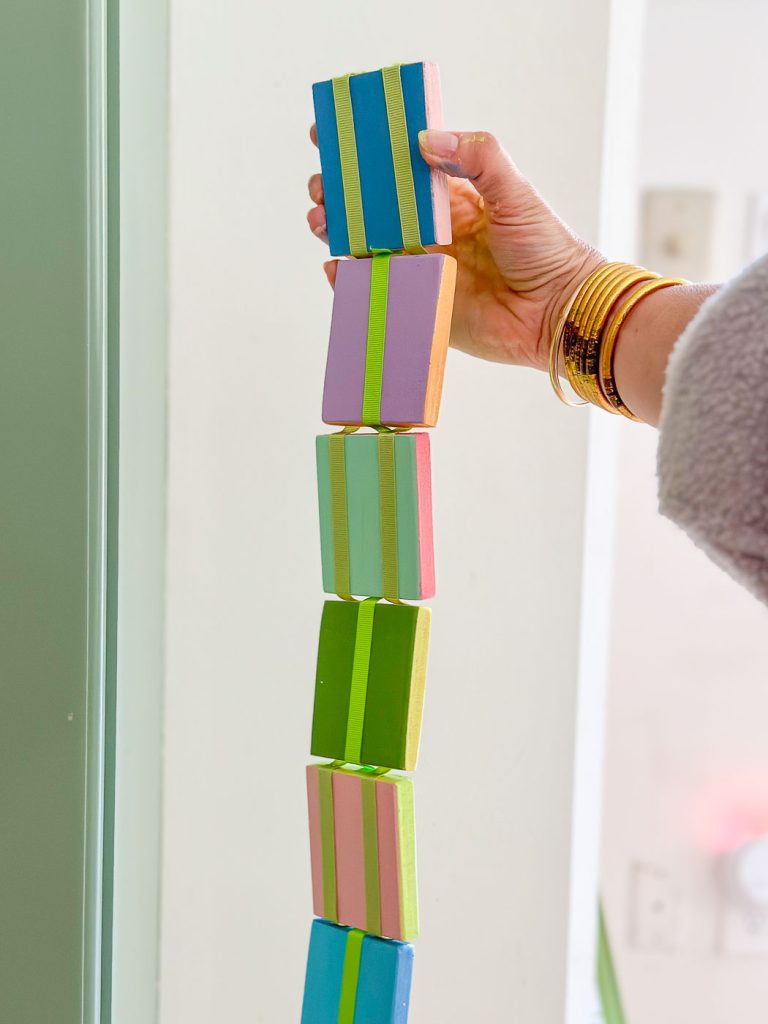
Step 4. Assemble the Jacob’s Ladder
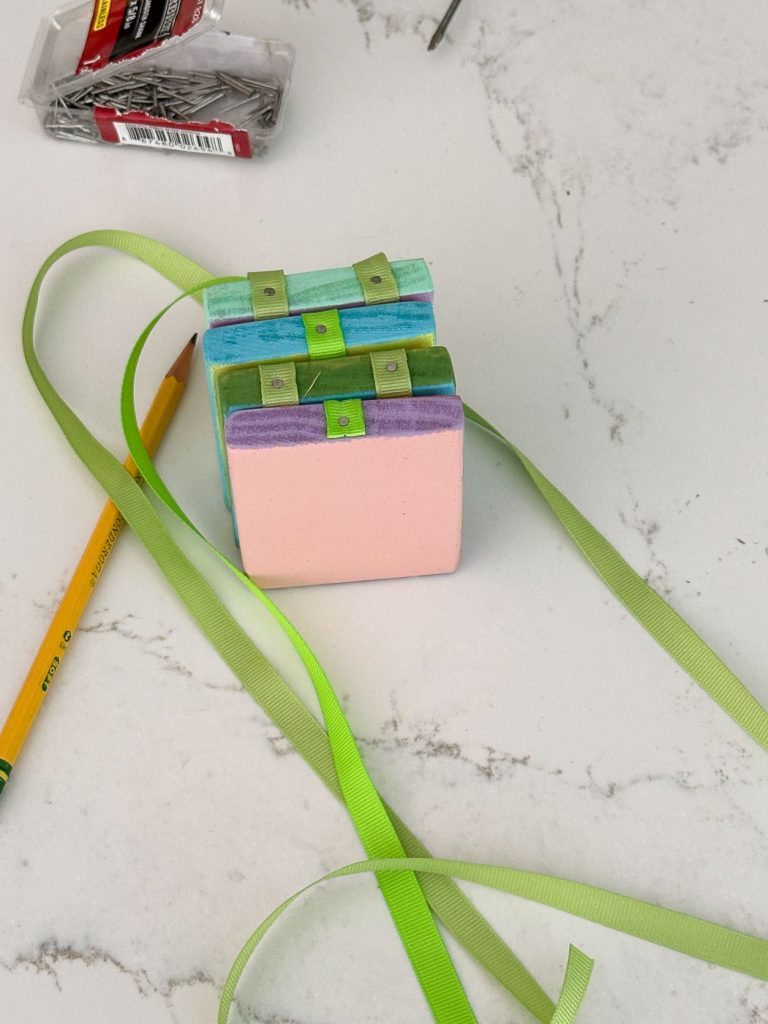
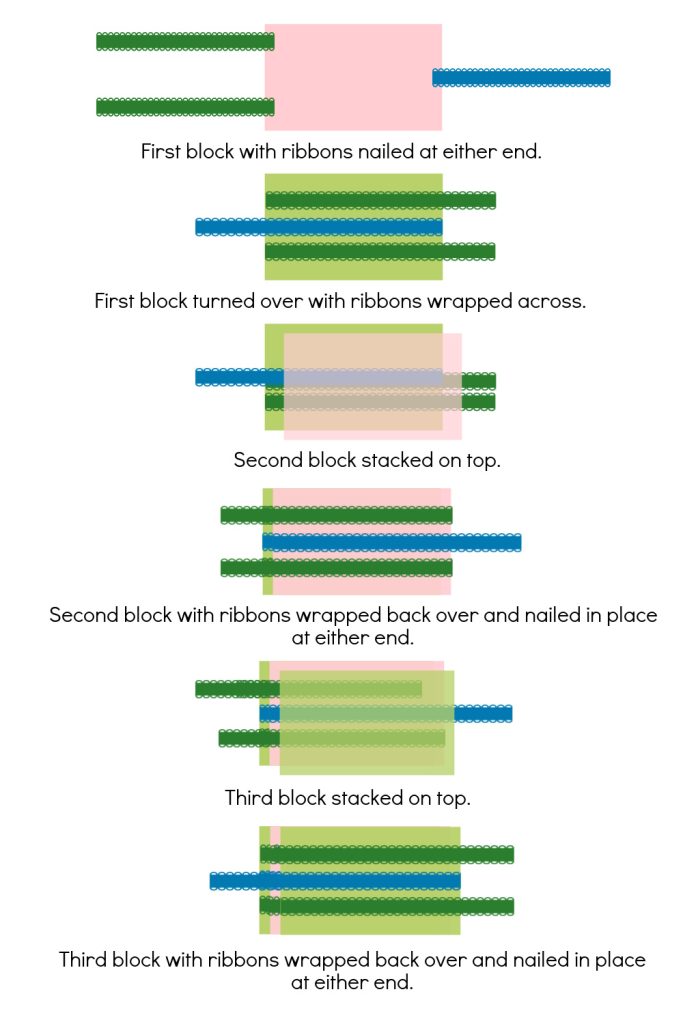
In all the tutorials I saw, how the ribbons were wrapped around each block was a bit of a mystery. Obviously I figured it out and I *tried* to make a graphic that might explain it better. First step is to layout three lengths of ribbon like you see below- basically a little bit longer than all your blocks lined up end to end.
With your first block, nail the end of one ribbon along the end of the block facing one direction. Nail the ends of the other two ribbons on the opposite ends of the block facing the other direction. This photo was take a few blocks in, but you can see how they are nailed in place.
Here’s the graphic showing how I wrapped them. Basically you stack the blocks and nail the ribbons on the end of the top block, wrap the ribbons over, stack another block and nail in place. Clear as mud?
Illustrating how this thing works is tricky via still photos but… you can see it do it’s thing on my Instagram post HERE.
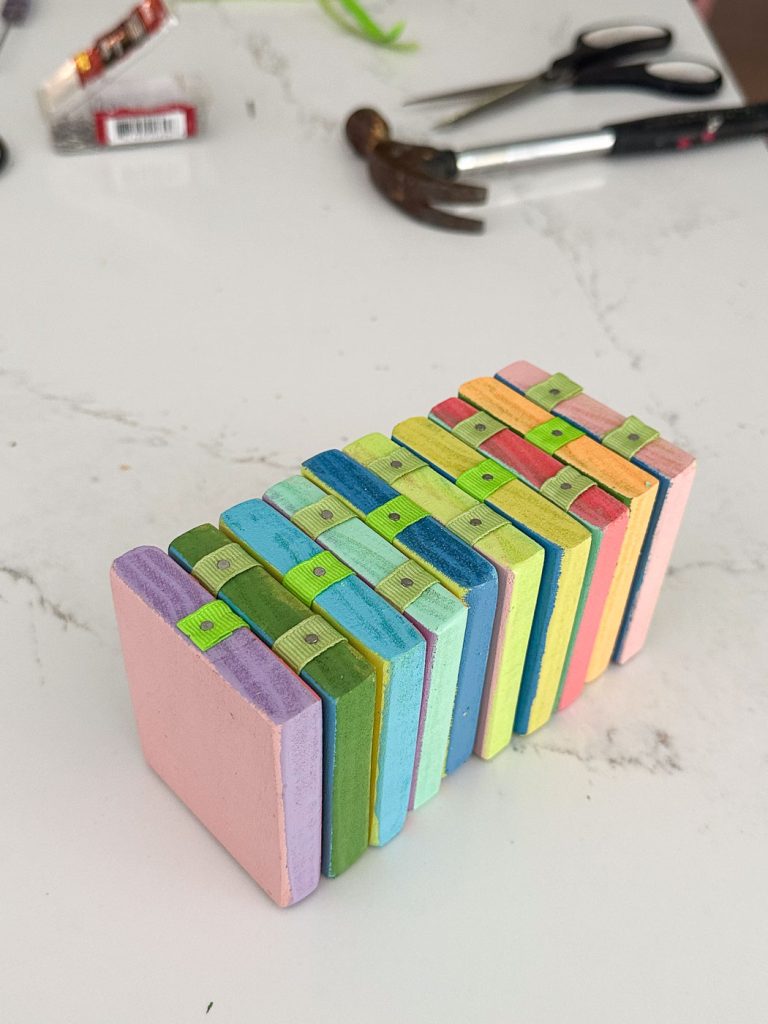
My kids were intrigued and I was delighted to remember this old timey toy from my childhood. Do I understand how it works? Still no. But I know how to make one!!

Don’t Miss Out
Become An Insider!
Signup for exclusive tips, and tricks from Charlotte’s House!
Let’s chat!
I love comments from you, so feel free to leave your thoughts and ideas below! And don’t forget to follow me on Instagram for even more!