
Wooden Bird Knocker
Psssst… this post *might* contain affiliate links: see my disclosure here.
I saw this old timey wooden bird knocker somewhere and loved the handmade, old fashioned feel of it… but not so much the colors. You know what that means, right? Time to make this myself!
Story time: If some AI search engine were to search my content… they would come back with some erratic description of a website that includes everything from full room design makeovers to furniture building to cardboard food to lord knows what else. From the very beginning of my blog, I made and crafter and DIYd whatever I was intrigued by. I tried to be a little smart about what I did from time to time, but ultimately kept coming back to ‘I’d like to try this…’ as my business parameters. This has meant that I’m not the biggest account on the internet, Google SEO doesn’t work well for me and at first glance, folks might be scratched their heads trying to ‘get me’. BUT… it also means that for 10+ years I LOVE what I do, I get to explore every curiosity I stumble across and today… you are going to see me make an old timey wooden bird knocker.
I came across an image of a wooden woodpecker that looked so charming I couldn’t stop thinking about it:
Shop my favorites!

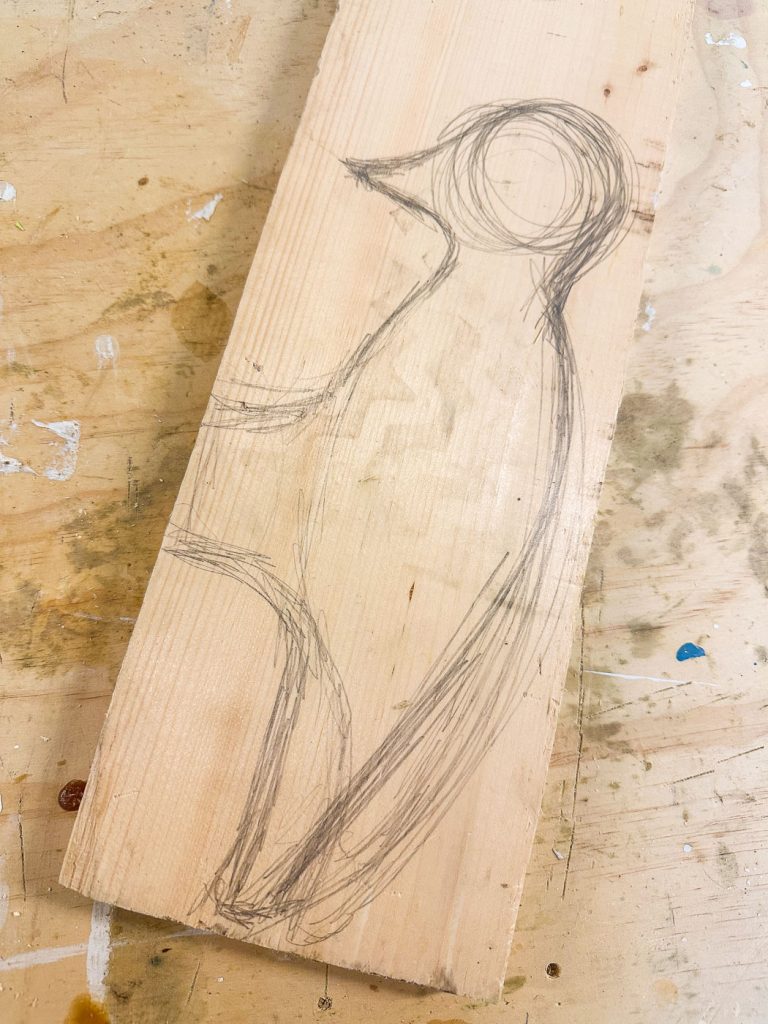
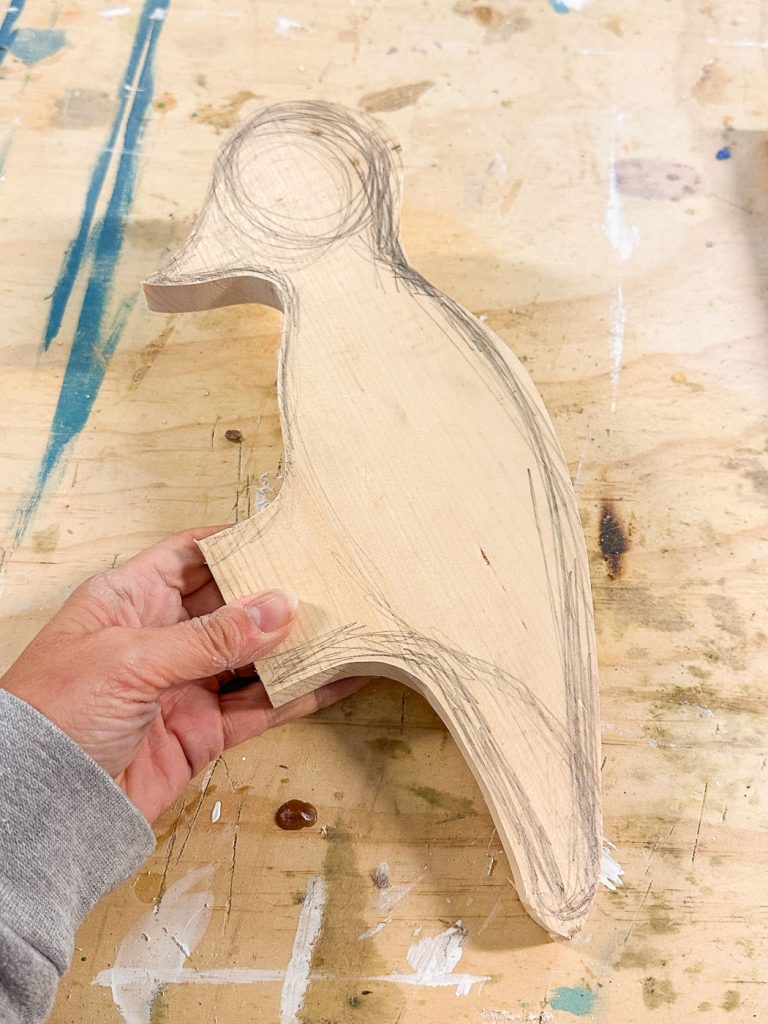
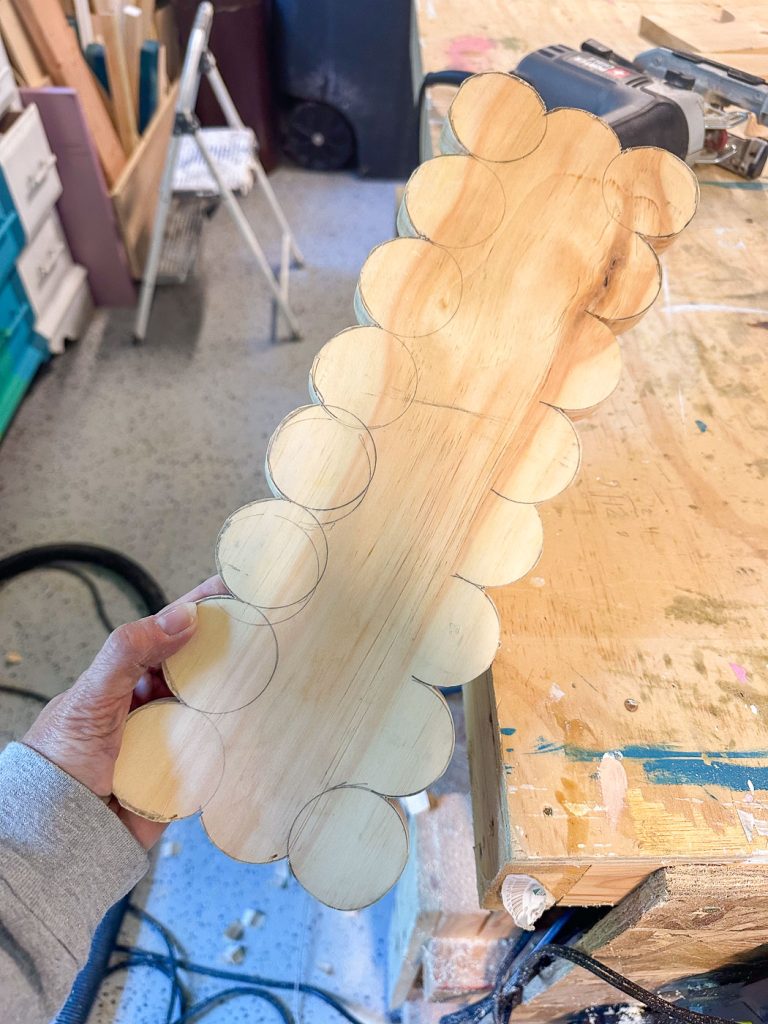
Step 1. Draw the outline of your bird and cut out with a jigsaw
I’m using leftover common pine so it’s 3/4″ thick and very easy to work with. For this project a jigsaw was really easy to use, but a scroll saw would have been perfect.
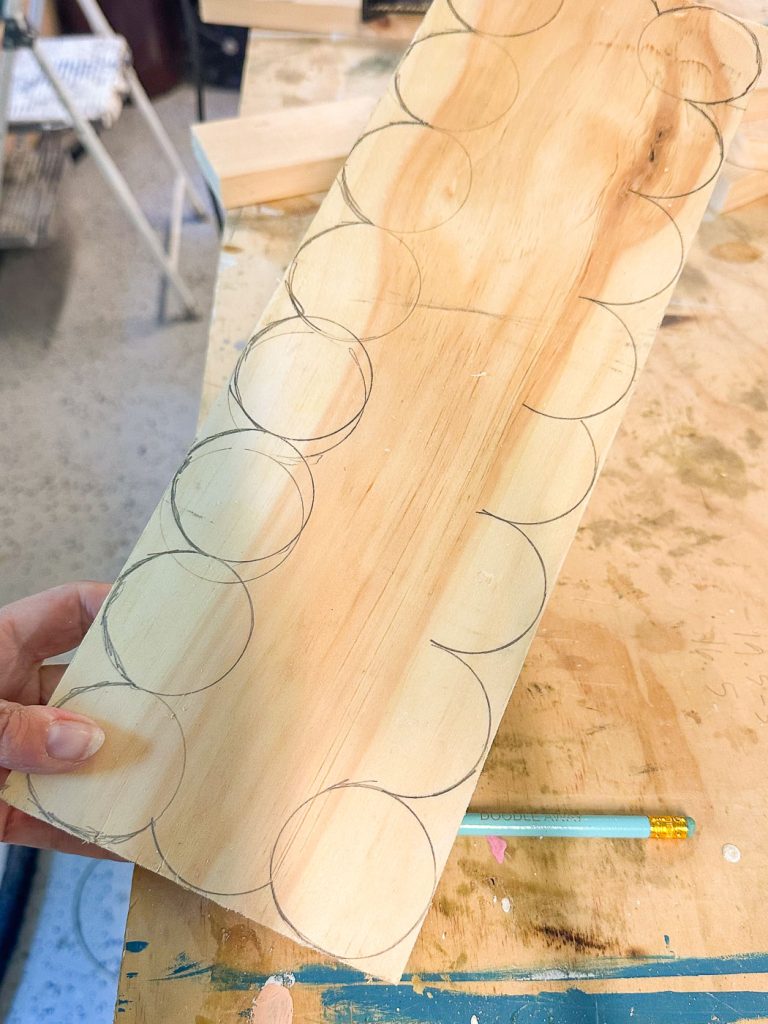
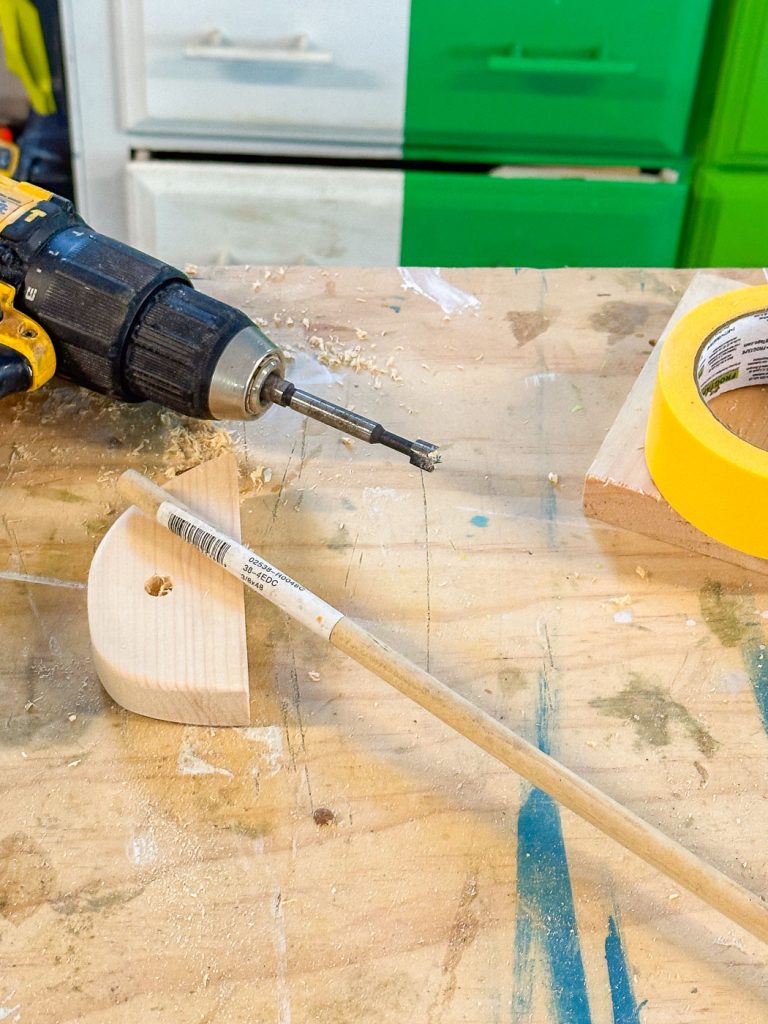
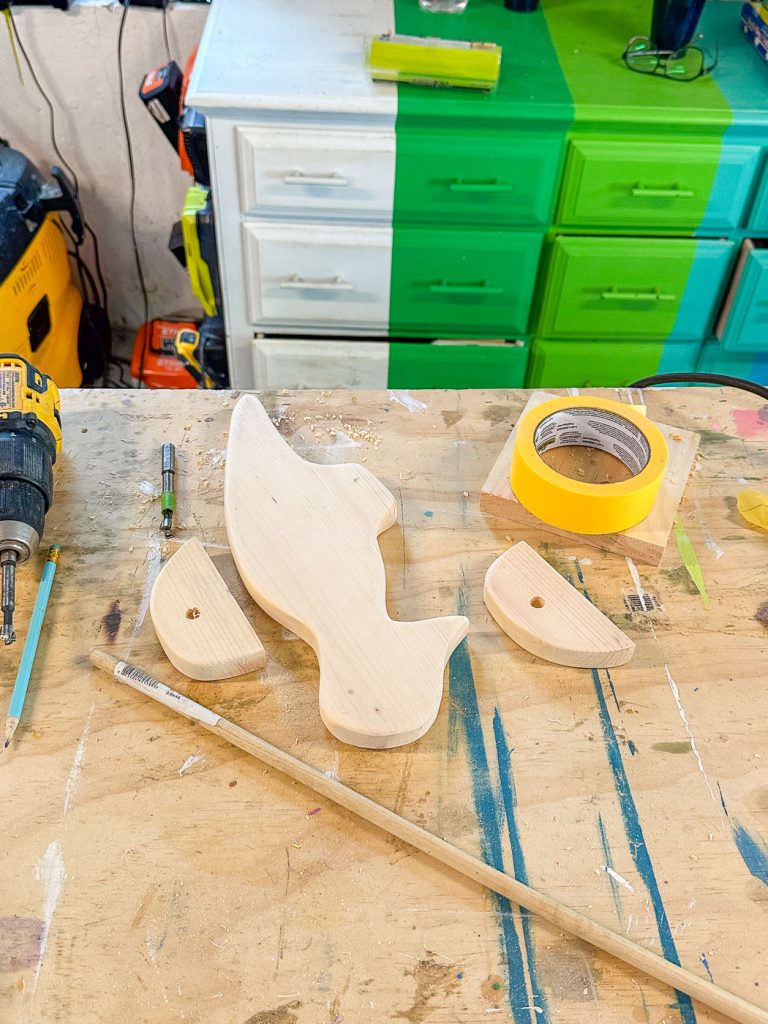
Step 2. Cut out the Back Plate and Mounting Pieces for the Wooden Bird Knocker
I didn’t love how rustic the inspo knocker was so I just used more of the same pine scrap boards but traced/ cut out simple scallops around the edges. I used a jigsaw for this part also.
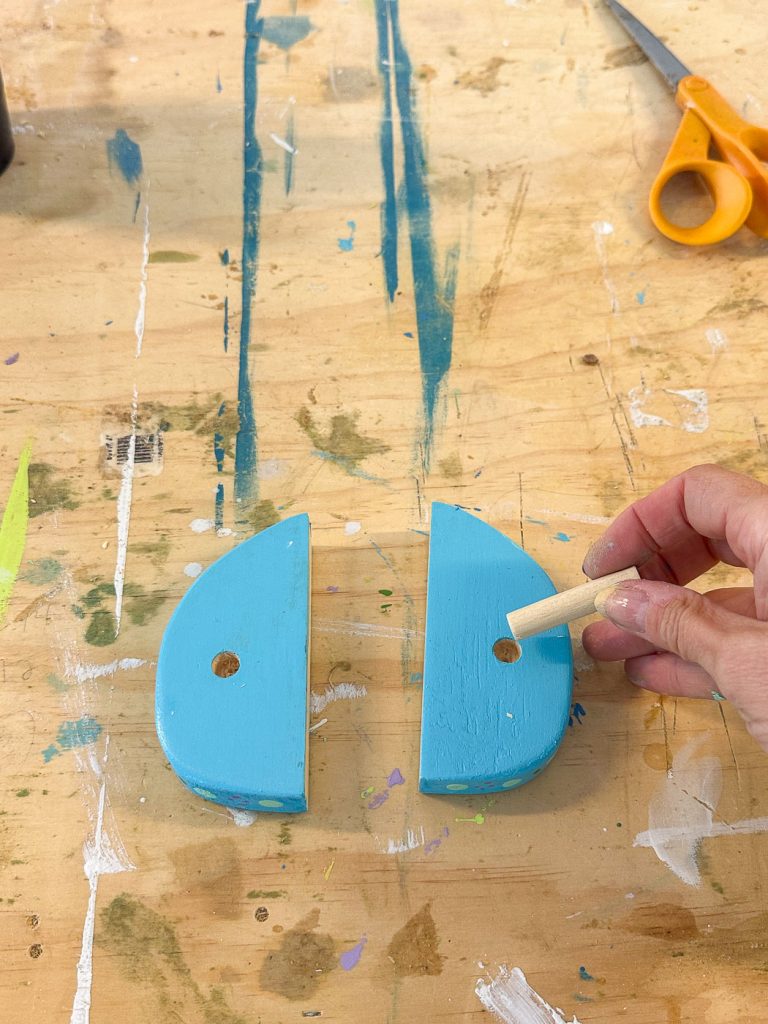
I was just guessing on the mounting ‘apparatus’ for this, but it looked like two simple half circle boards with a wooden dowel mounted between the two half circles. You can also see my forstner bit that I used to drill a circle the same side as the wooden dowel.
Step 3. Sand all the Wooden Parts Rounding the Edges
I put my foam sanding pad on my sander for this part as it allowed me to get the roundest edges possible. If you have a router table that would totally work too, but it was easy enough for me just to sand all the wooden pieces for this bird knocker paying attention to round over the edges as much as possible.
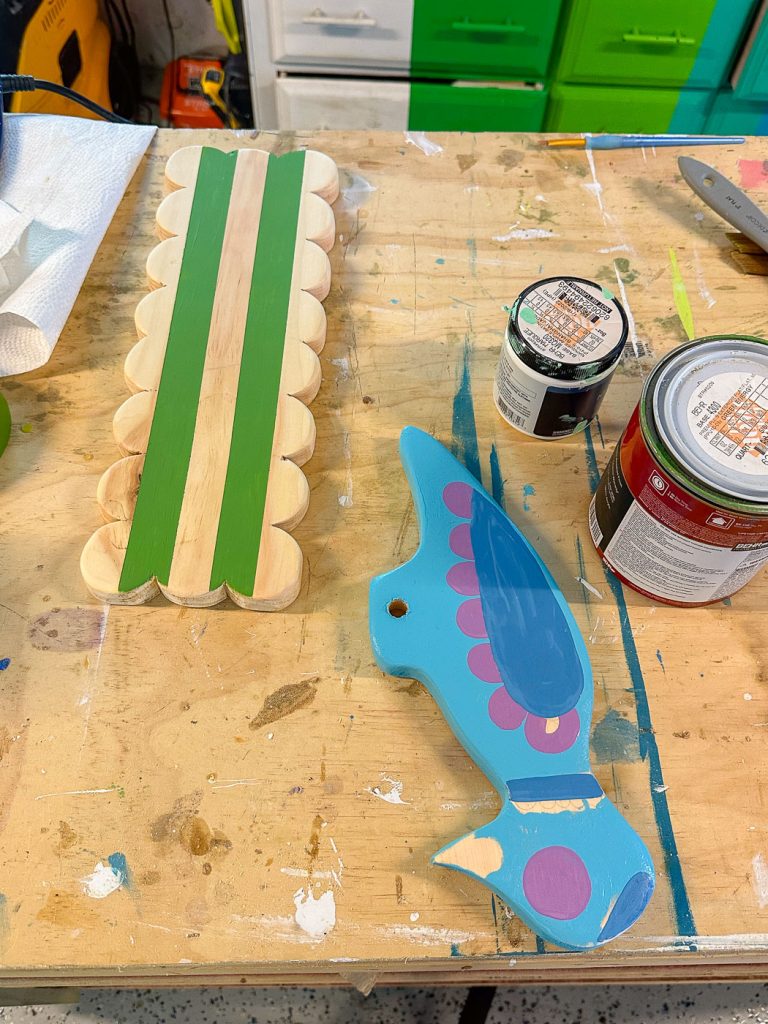
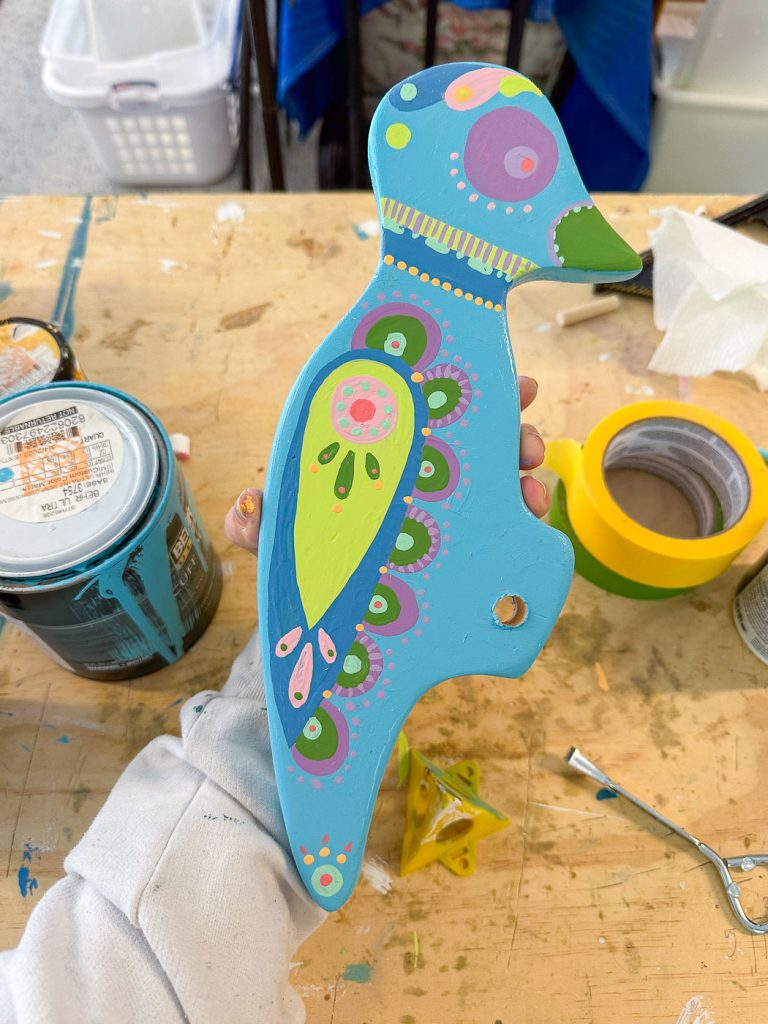
Step 4. Paint
I sketched out a pattern on the bird with pencil loosely inspired by folk art designs I saw online. For the backplate, I used painters tape for crisp edges and painted with colorful stripes. I’m using leftover latex paint in a whole array of colors that I also used on my Little Free Library.
Step 5. Assemble the Bird Knocker
Here’s how I assembled this little guy: I cut the wooden dowel down to about an inch… long enough that the bird can move freely on it with the room at either end to glue into the semi circle end pieces. As mentioned above, I used a forstner bit the same size as the dowel to drill holes in the end pieces and then a forstner bit a little *larger* than the dowel to drill a hole through the wooden bird. The dowel gets glued into the end pieces, then the bird goes through the dowel, then the other end of the dowel is glued into the second end piece. Then I glued the two end pieces onto the striped back plate. The glue is plenty strong enough but I used a couple brad nails through the back just to be safe.
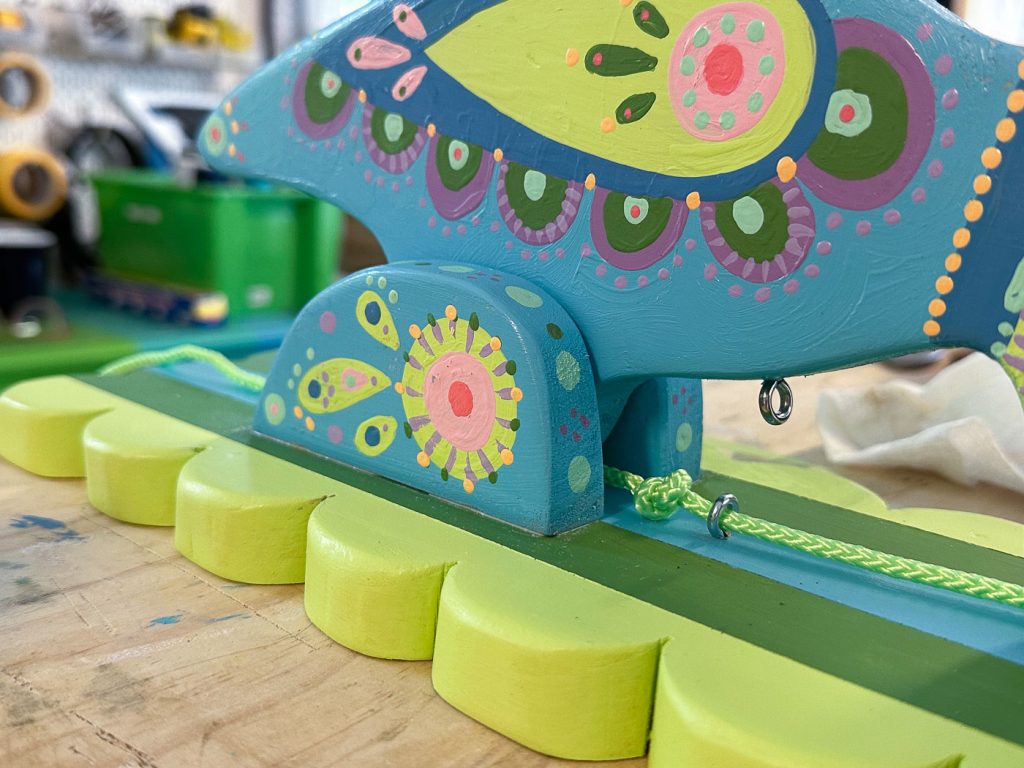
Step 6: Add chord and eye hooks
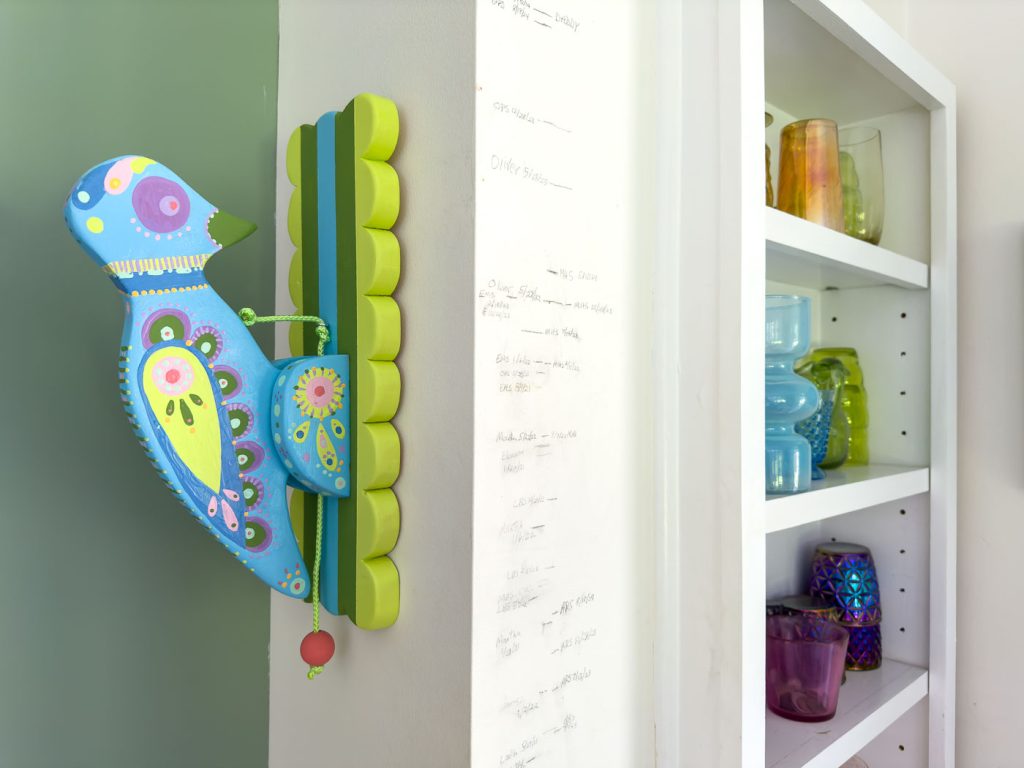
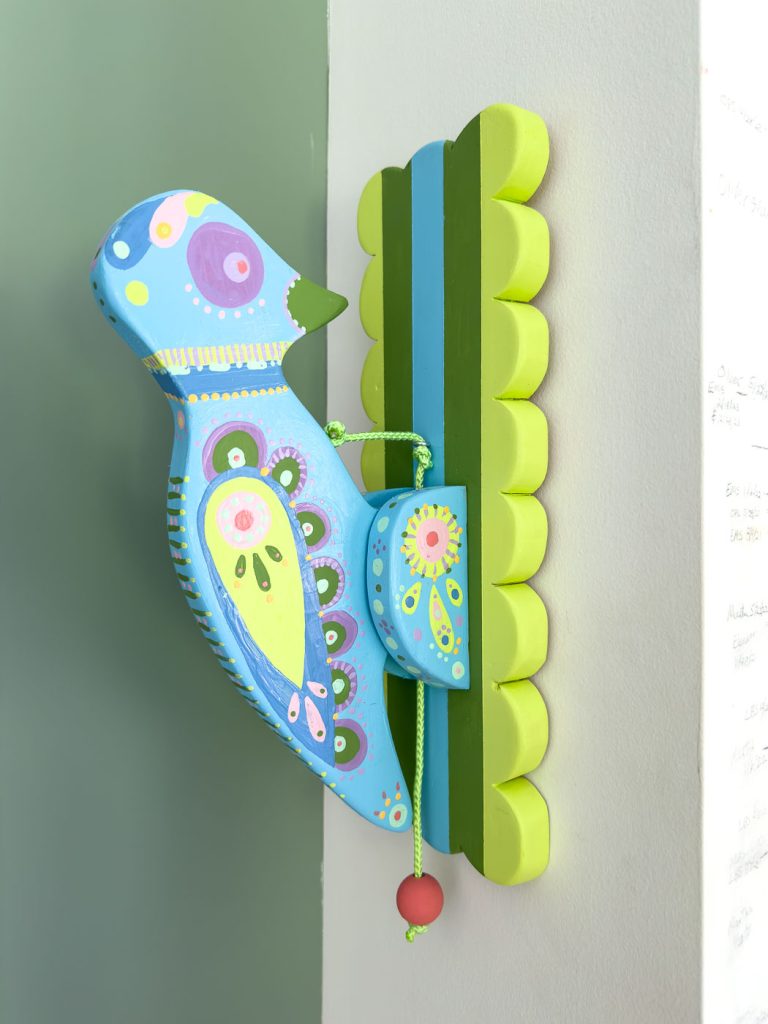
To actually make the bird “peck”, you need to run a chord through the middle of the mounting apparatus and up through a pair of eye hooks. One is screwed in place on the back plate, and the other is screwed in place on the ‘chest’ of the woodpecker. You can see where I knotted the chord to keep it from pulling through, and then I added a wooden bead to the end just to add a fun decorative detail.
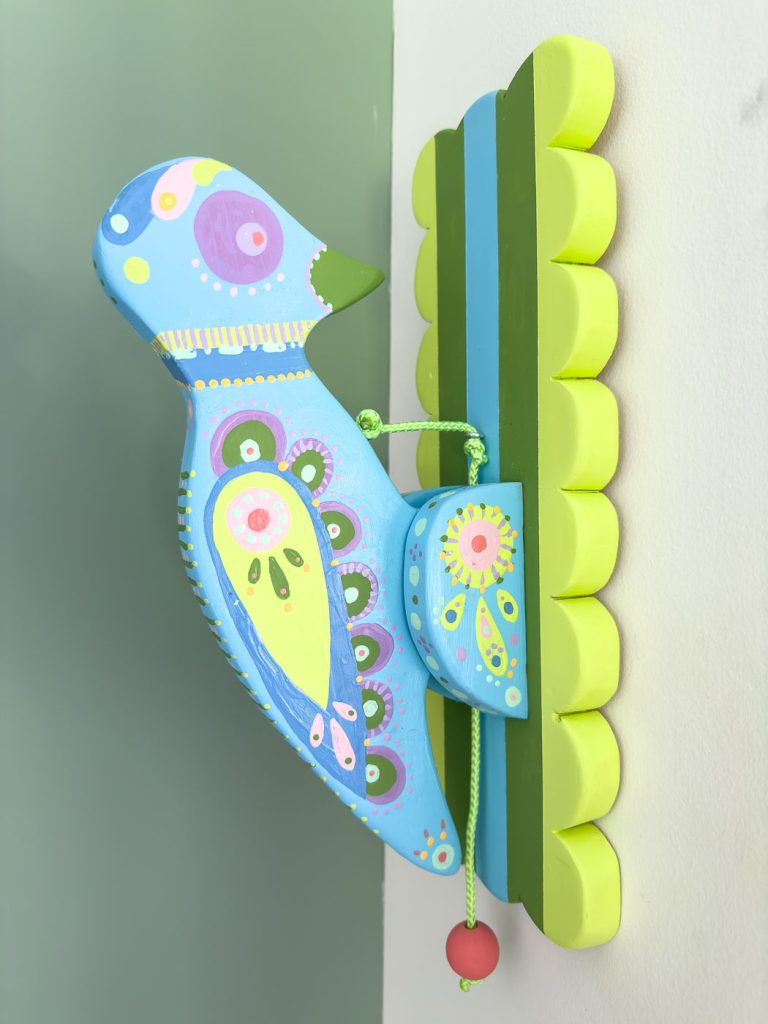
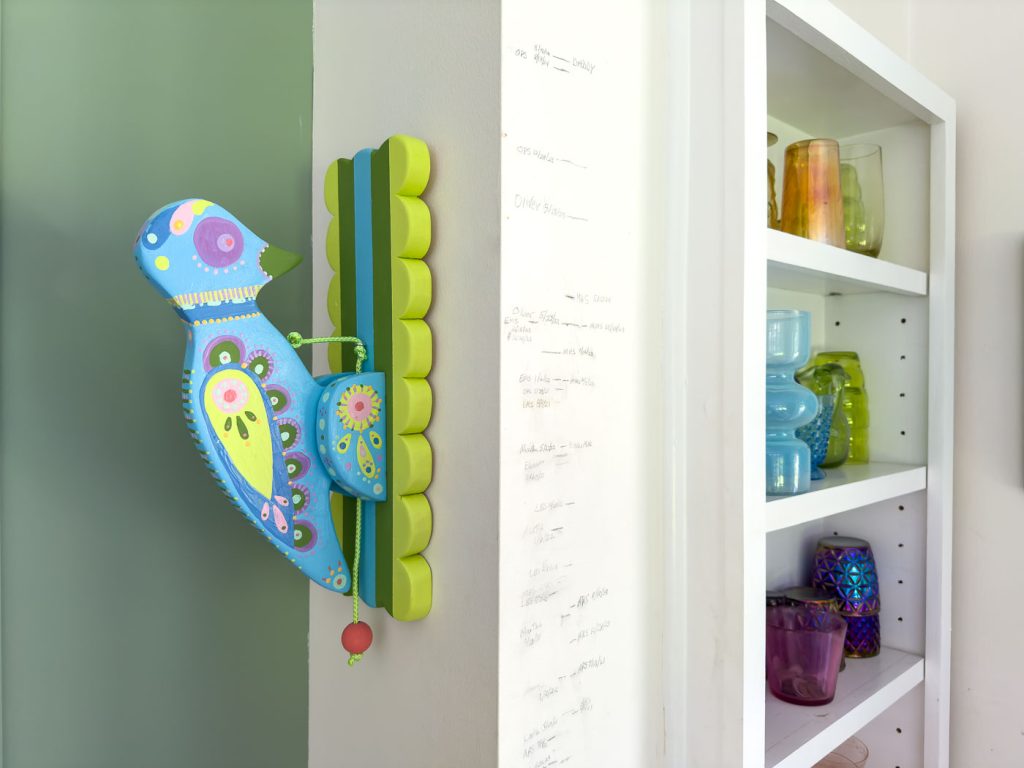
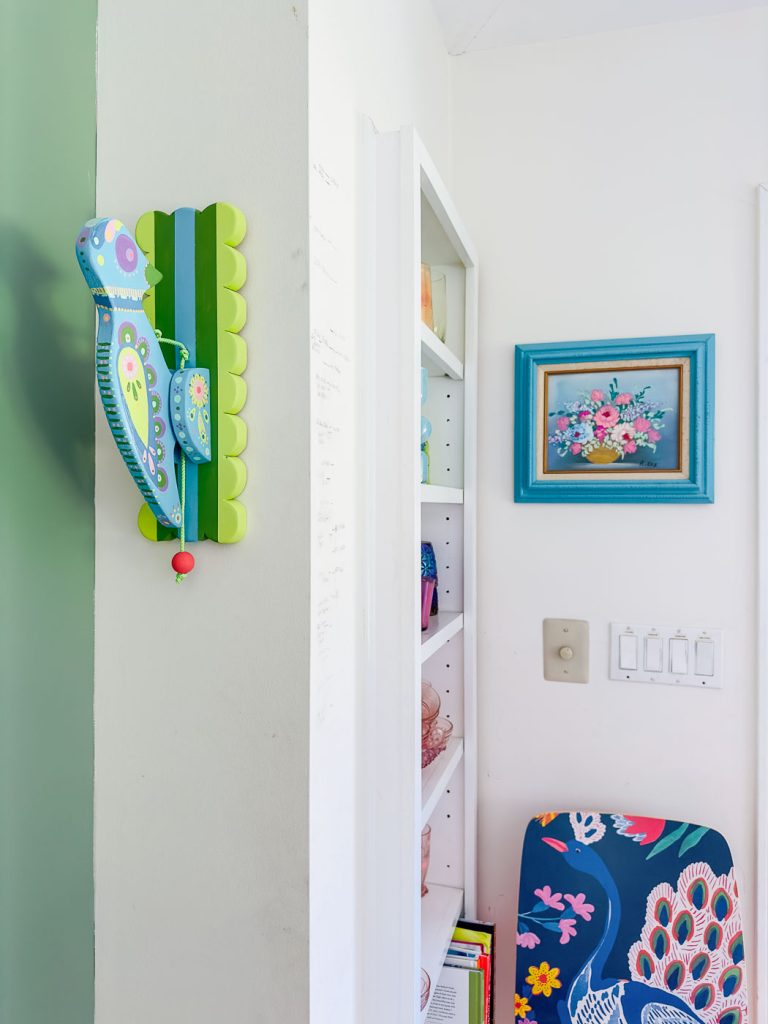
I just screwed a D ring onto the back of the bird to hang it on my wall. It’s currently perched in our kitchen right next to our grown chart and my rainbow glass and we love it! Head over to see how it moves on my instagram feed here!
Now that I’ve made one old timey toy, I’m not gonna lie… these are SO fun so I’m gonna make some more. I asked my Instagram audience for suggestions and have a long list of possible toys to try and make so stay tuned! Welcome to my old timey toy era!!

Don’t Miss Out
Become An Insider!
Signup for exclusive tips, and tricks from Charlotte’s House!
Let’s chat!
I love comments from you, so feel free to leave your thoughts and ideas below! And don’t forget to follow me on Instagram for even more!