
Going Globe-bowl
Psssst… this post *might* contain affiliate links: see my disclosure here.
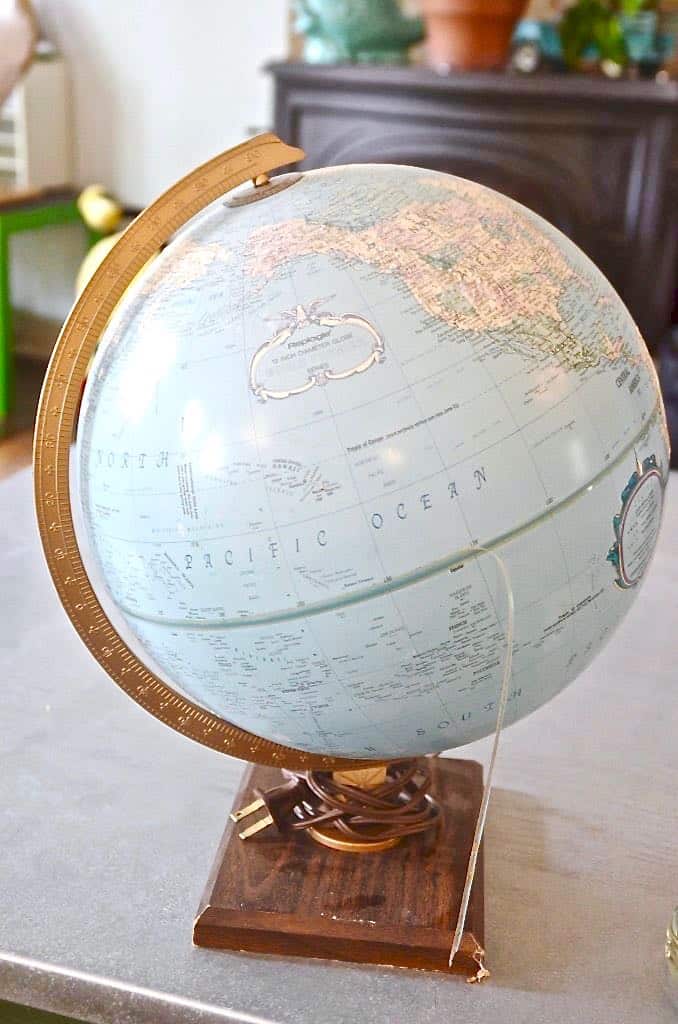
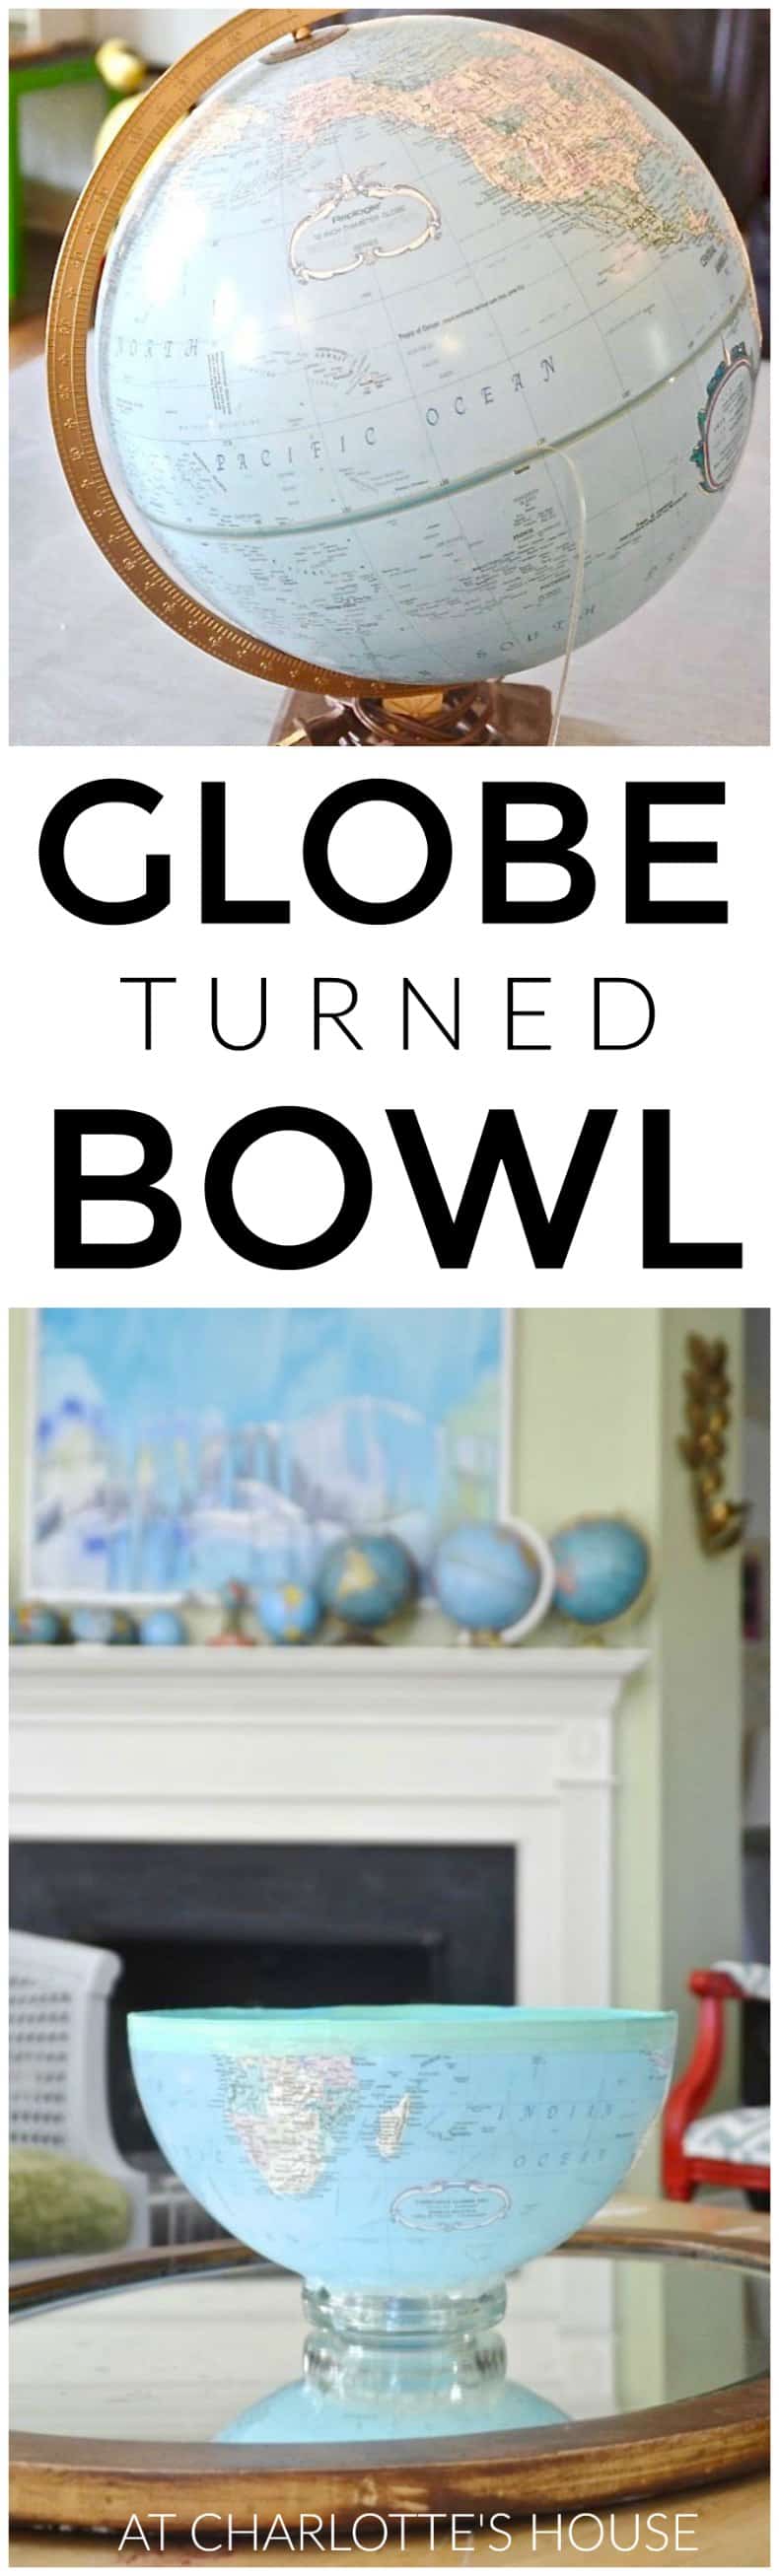
I’ve got a thing for globes. Not for geography persay, but for lovely old out-of-date globes. I had some larger globes in the garage and I decided to tackle one of my repurposing ideas this weekend.
How to Make a Globe Bowl
Step 1: Find a sturdy globe
This globe was meant to light up so it was made of a sturdy plastic to withstand the heat. Sturdy meant good for my project but bad for my execution. At first I tried a razor blade, but that didn’t even scratch the surface. So I needed to don some goggles (safety, first!) and reach for the power tools. (Full material list at the end of the post!)
Shop my favorites!
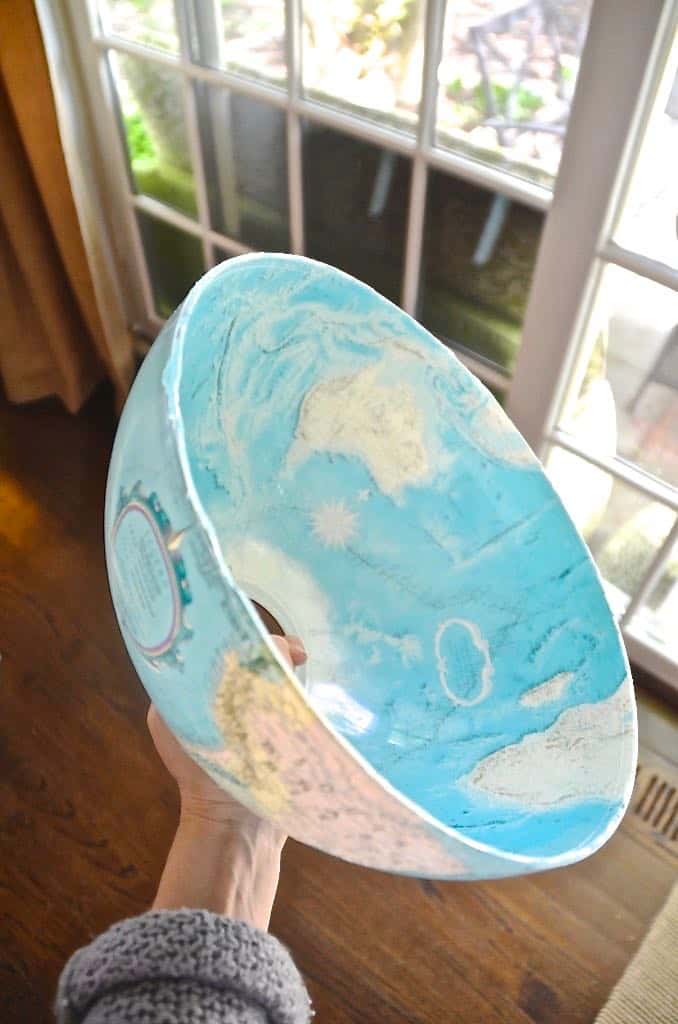
Step 2: Cut the globe in half
I drilled a hole in the side of the globe to allow an entry point for… the beloved jigsaw. Cutting through heavy plastic ain’t pretty and won’t give a smooth edge (at least I didn’t get one), but I was able to cut around the circumference of the globe to cut it in half. Then I used a pair of pliers to pull apart the edge along the equator where the two halves of the globe were adhered.

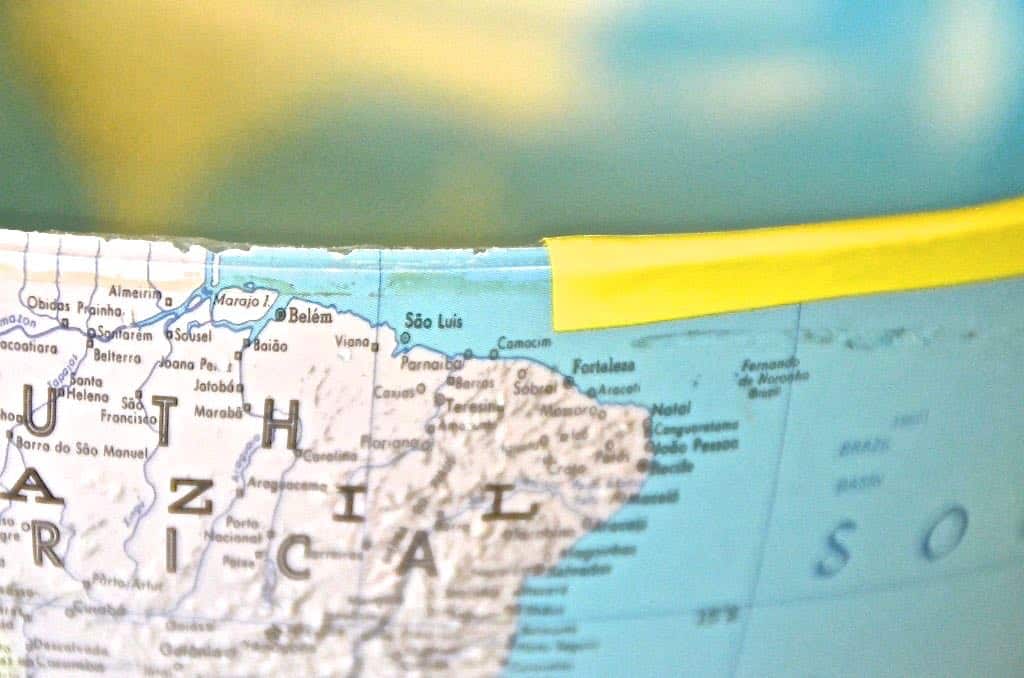
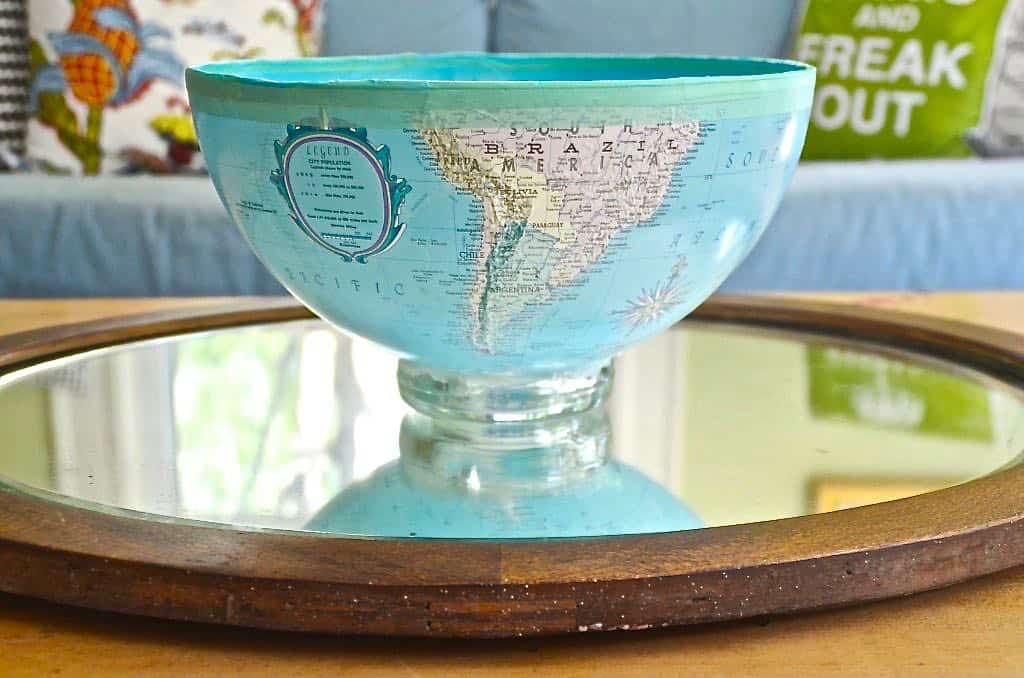
Step 3: Cover the cut edge
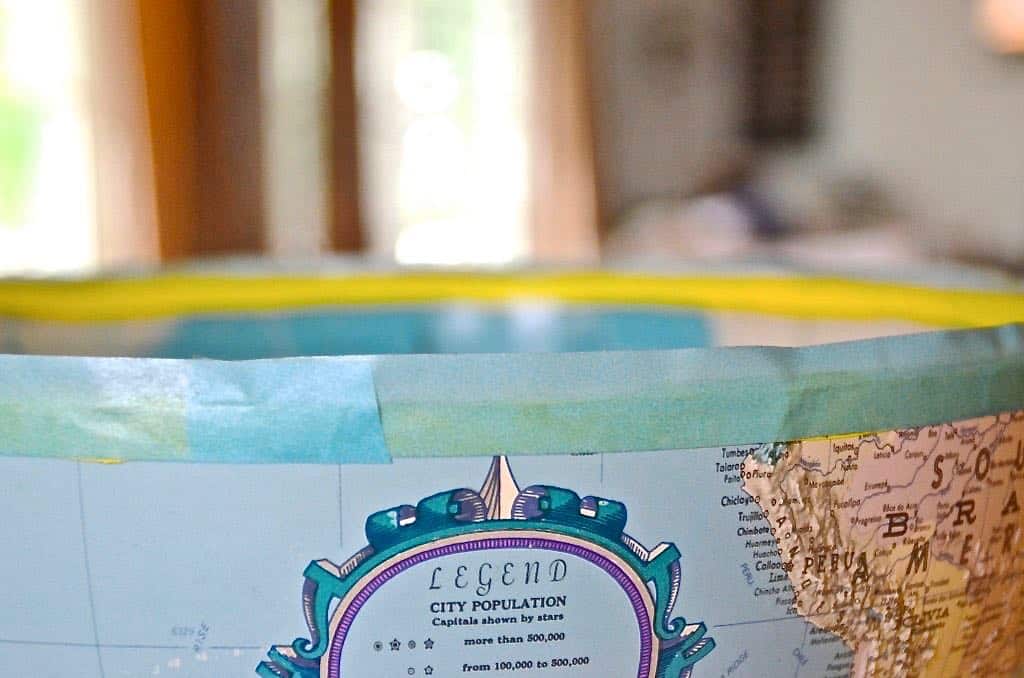
What I was left with wasn’t perfect, but it wasn’t nearly as rough as it had been after I took the jigsaw to it. To smooth out this edge and finish the piece a bit, I started with electric tape. It’s stretchy so wraps along the edge like a breeze; it’s also durable enough not to tear or rip when in contact with the occasional rough plastic edge. Not sure why I used yellow…. you can buy electric tape in less-bright colors. Doy.
To cover the electric tape and add some decoration, I reached for washi tape to finish off the edge.
Step 4: Add a base
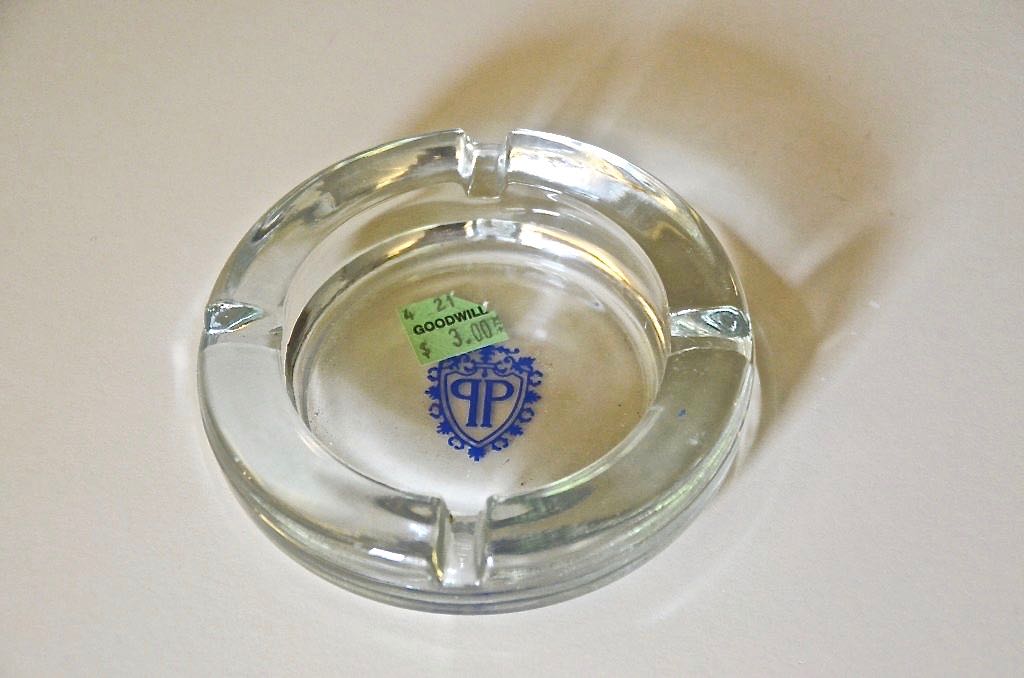
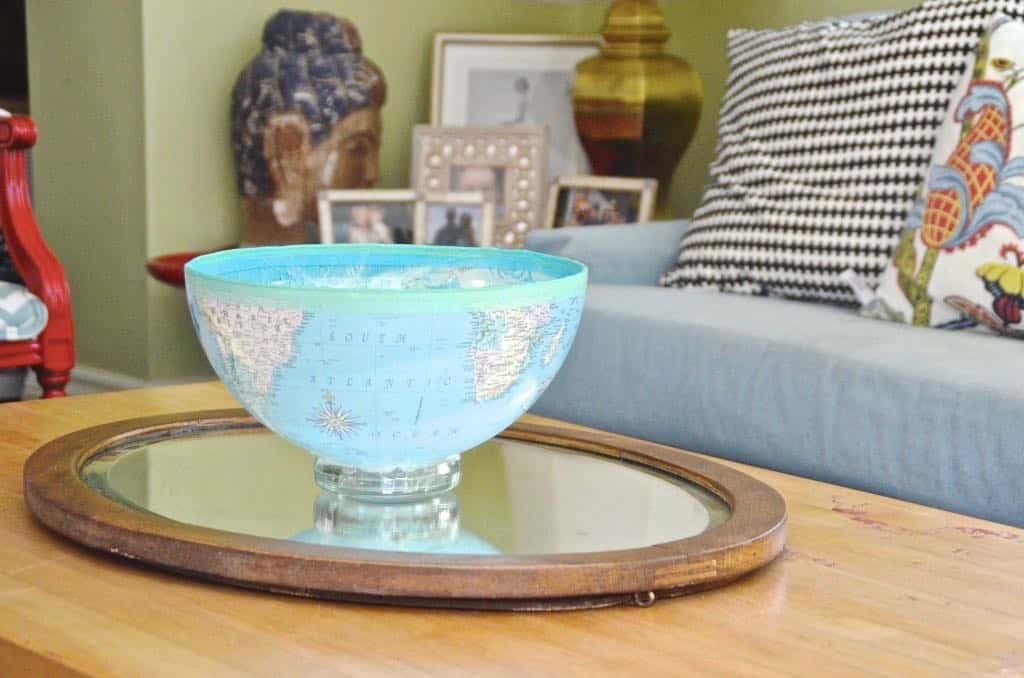
Last step was to attach the southern hemisphere to a base so it wouldn’t roll all around. After looking around Goodwill for an option (candle pedestals, small vases, bowls…) I finally found this old ash tray that worked PERFECT- wait for it- LY. The ashtray was heavy enough to support the piece, it was the right dimension for the size of the globe and it was thick enough that adhering it to the semicircle was a cinch.
I used some leftover epoxy I had kicking around to secure the globe to the new ashtray base. To smooth out the seams, I went around with some clear caulk after the epoxy had dried.
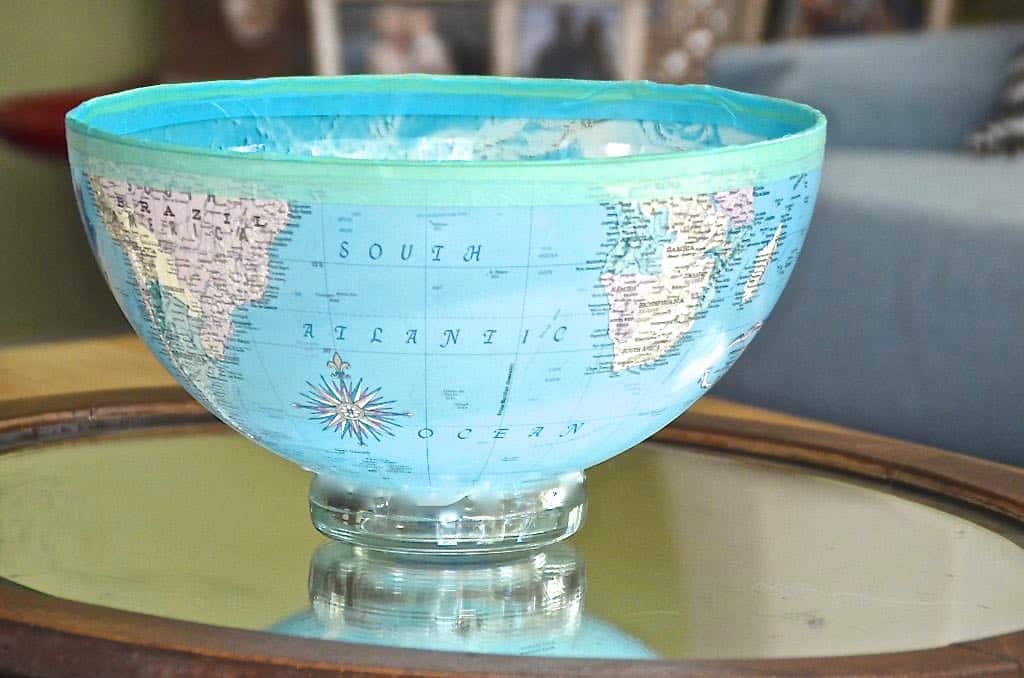
Obviously I won’t use this to serve food or anything, but I love-a-dub-dub how it turned out. It all came together and feels well proportioned and cool and interesting. And oh-so-worldly.
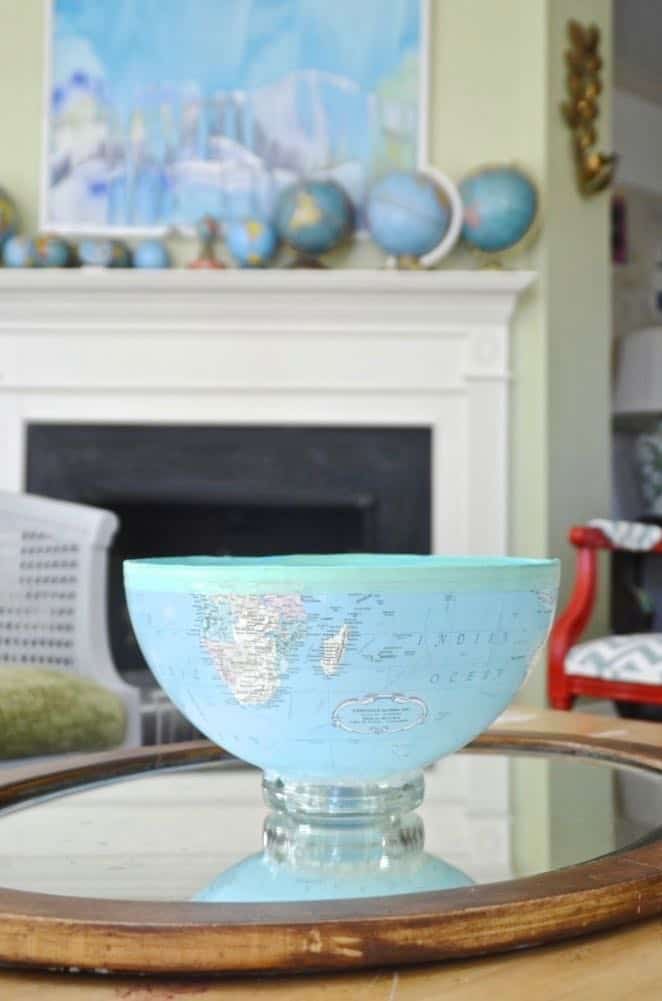
Now don’t blame me if your kids think the USSR is just to the right of Europe…
Materials Needed to Turn a Globe into a Bowl
(Affiliate links included for your shopping convenience.)
- Globe similar to this one
- Jigsaw or Dremel Multimax
- Electric Tape
- Washi Tape
- Sturdy base (I used a glass ashtray similar to this)
- Epoxy
- Clear Caulk


Nice re-purposing of not only the globe, but an ashtray!
(…that old ash tray is from the original Plaza hotel!)
Furiously Google-ing the original Plaza hotel….
Ha! Where the classic children’s story about Eloise took place. Right off Central Park… a few years ago they converted most of it into condos. Boo….but it’s a NYC icon. Put it on your itinerary when you take your weekend trip! 😉
I know! SO cool right. Can you imagine ash trays in any sort of public space nowadays?!
Ya, it is so weird to think…
A different time – when mothers smoked during pregnancy and flights!
I thought nothing could top the red/chevron chairs but you have done it! Love this! BTW — passed Ciburanity onto a DIY neighbor this weekend….!
Cheers,
Rosy
Thanks!!! I’m pretty fond of this one too… 🙂
This so fabulous! I’ll be on the lookout for old globes now!
Thanks, Christina! 🙂
/I saw an ad in a local magazine for one of your globes with countries painted different colours. Cannot find on your website to buy. Are they for sale?
Thanx. Edith Green
Hi there! Sadly these aren’t for sale, but hopefully you can follow this tutorial and make your own! Best, Charlotte