
How to Build A Little Free Library
Psssst… this post *might* contain affiliate links: see my disclosure here.
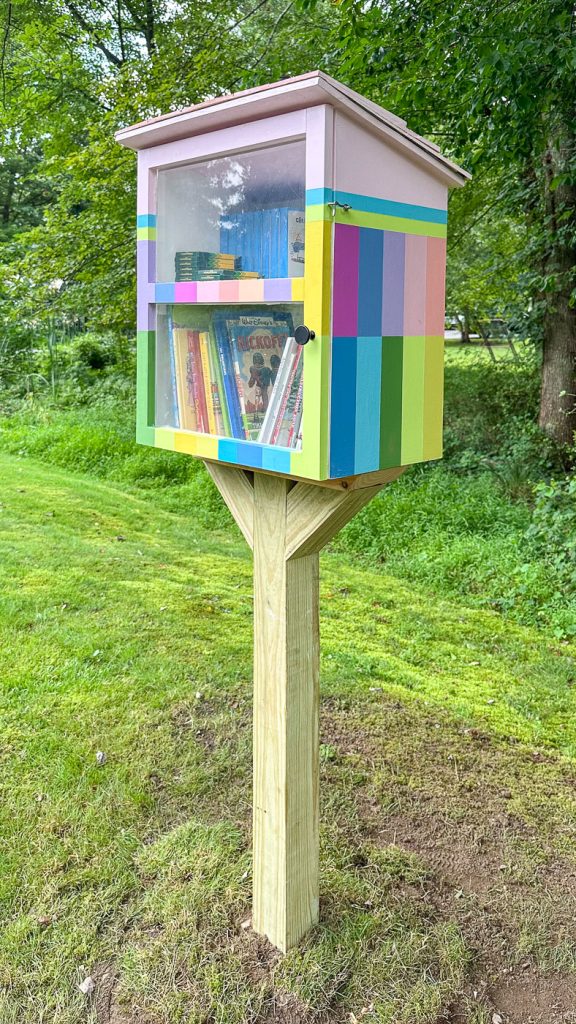
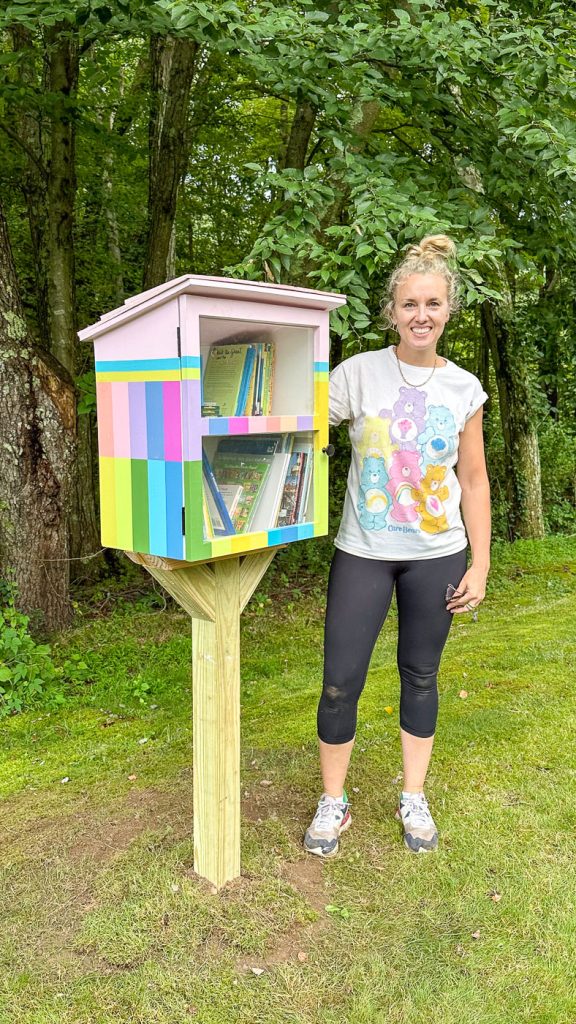
Do you guys know about free little libraries? They’re the cutest little boxes that people set up around their neighborhood to fill with recycled books where you can leave a book and take a book! I’ve seen folks make these to look like their own homes or using old cabinets or more, so I decided it would be a fun scrap wood project to make this summer!
Step 1: Plan the Shape of Your Library
My challenge for this library was to use materials I already had on hand so that pretty much dictated the shape of my house. I went with a single slant roof because it was easier to assemble and then planned the height and width around the boards I had leftover (and, obviously… books).
I am *NOT* using lumber that is ideal for exterior settings… but my workaround is to prime/ paint things well and to build a roof that will hopefully protect the house below. Worst case? It doesn’t last more than a few years… I’m okay with that.
Shop my favorites!
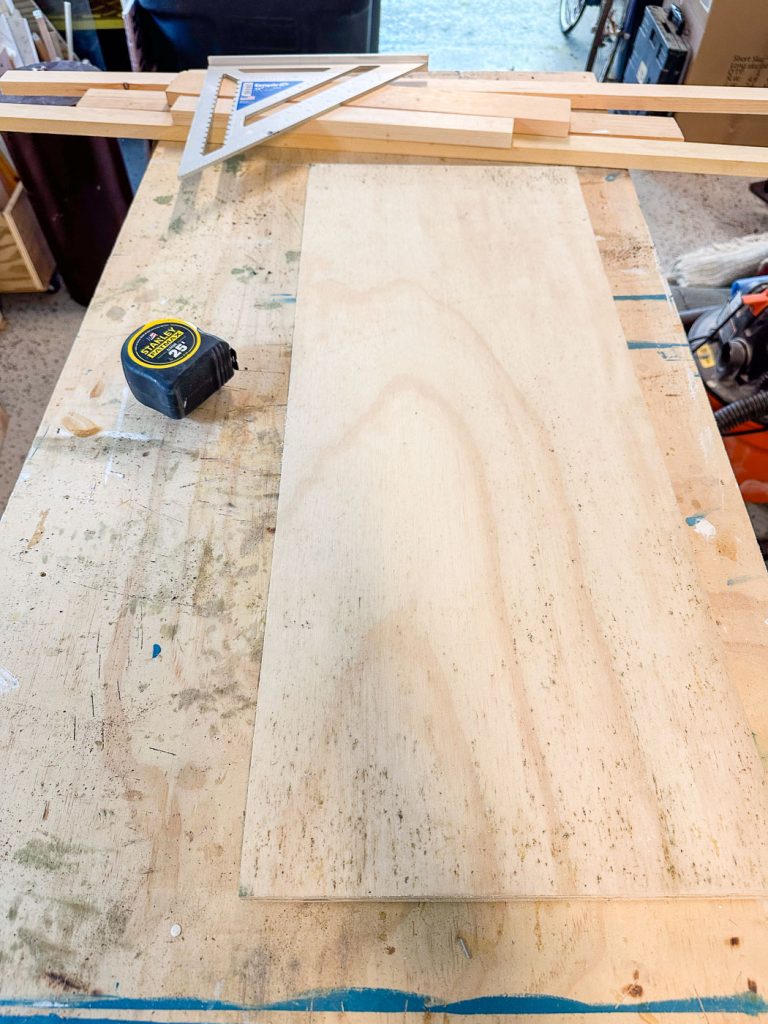
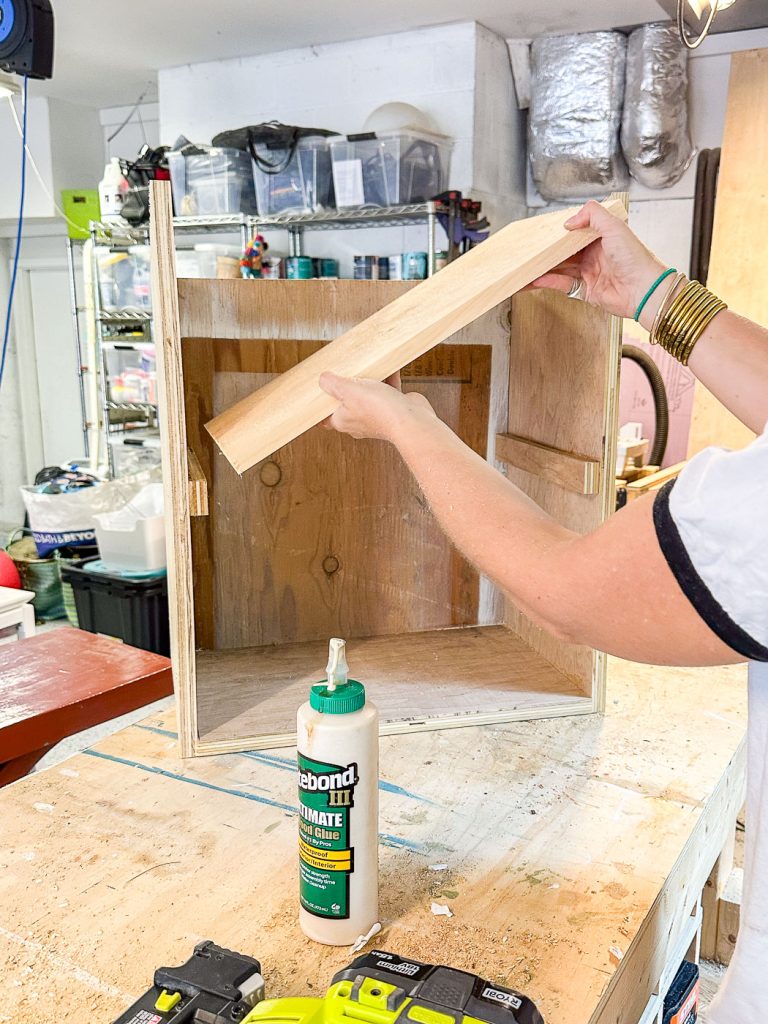
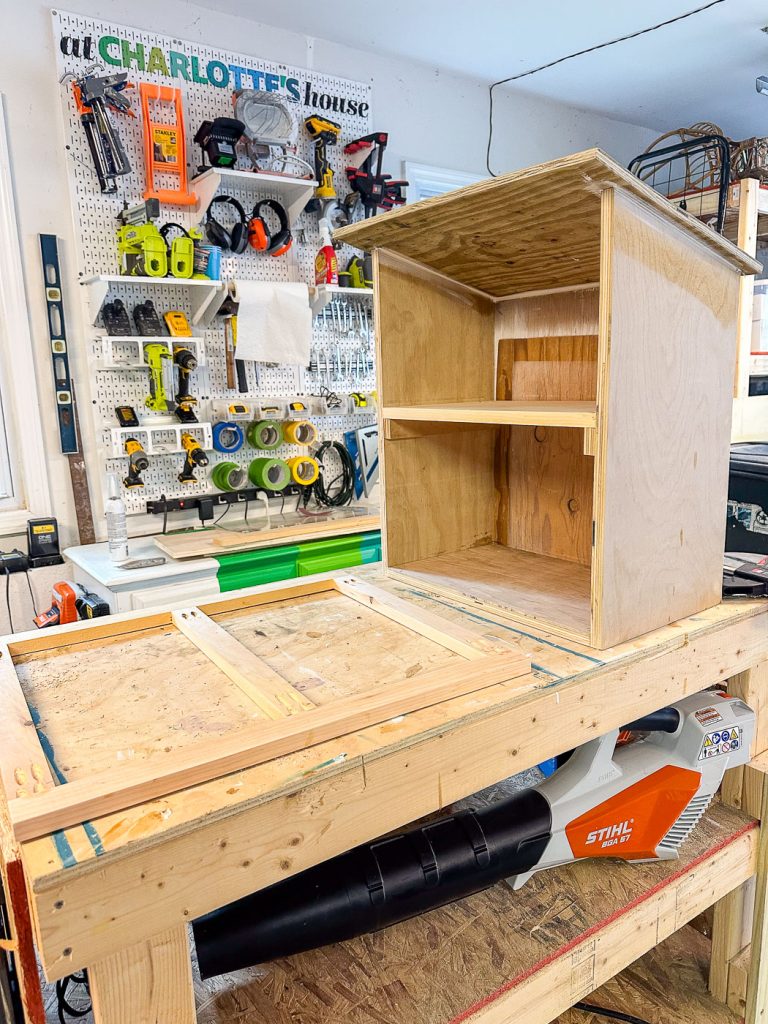
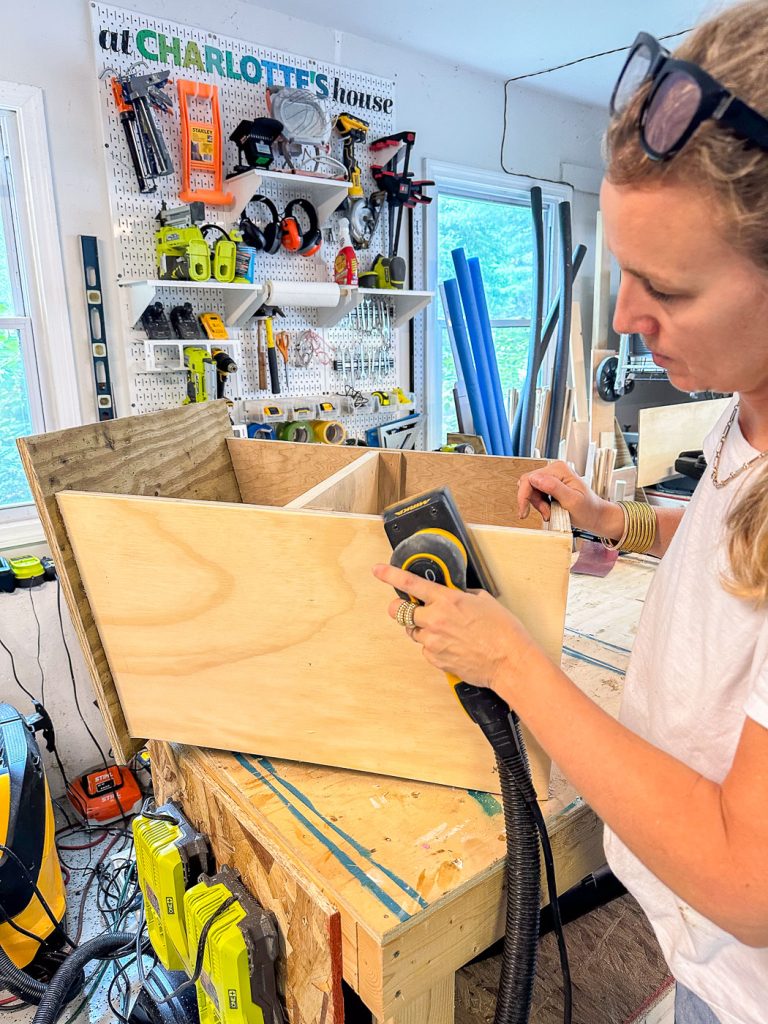
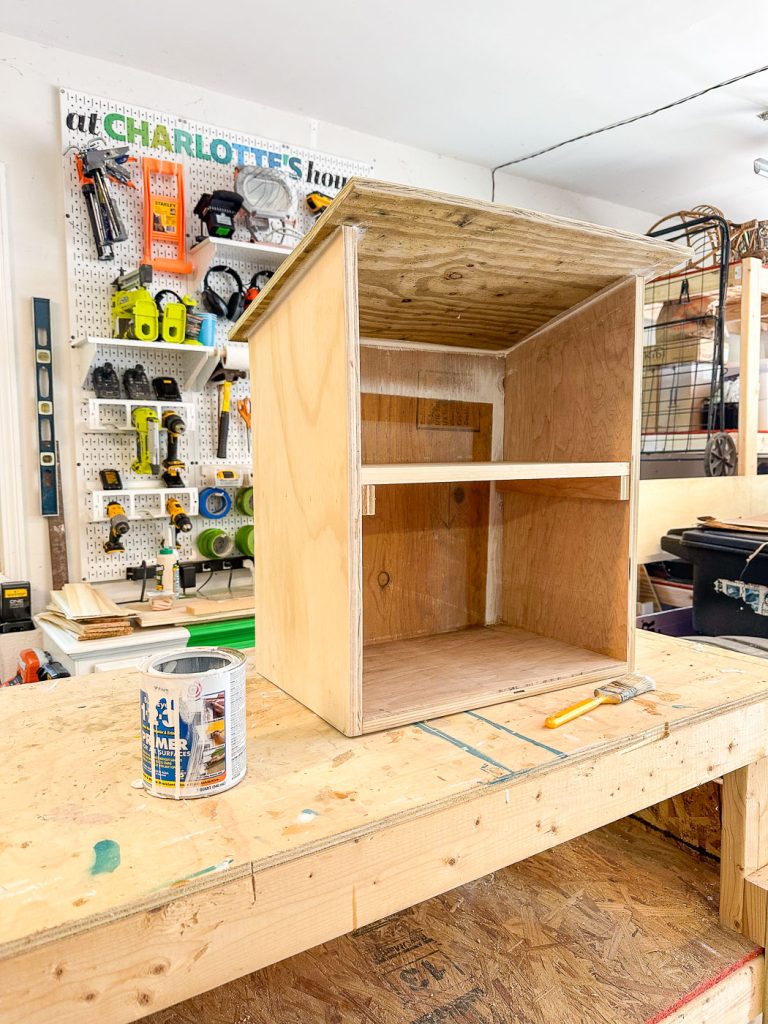
Step 2: Build the Base Shape of Your Free Little Library
I made an open faced box and then added a single shelf across the middle for the base of the library. The sides/ shelves are 3/4 birch (I think) and the back was a rougher piece of plywood that I think used to be the shelves in my old office. I used pocked holes and wood glue to hold the sides together.
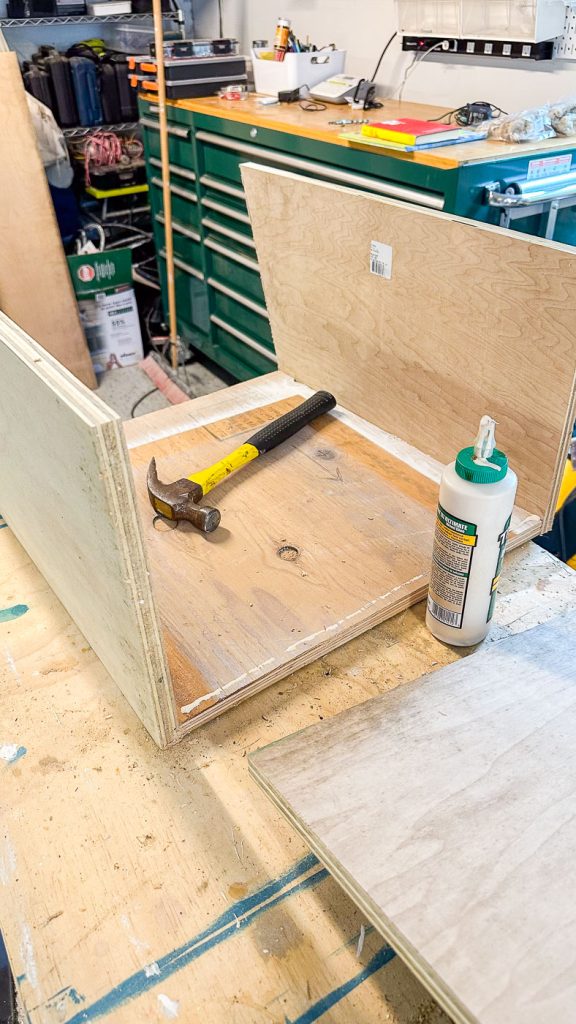
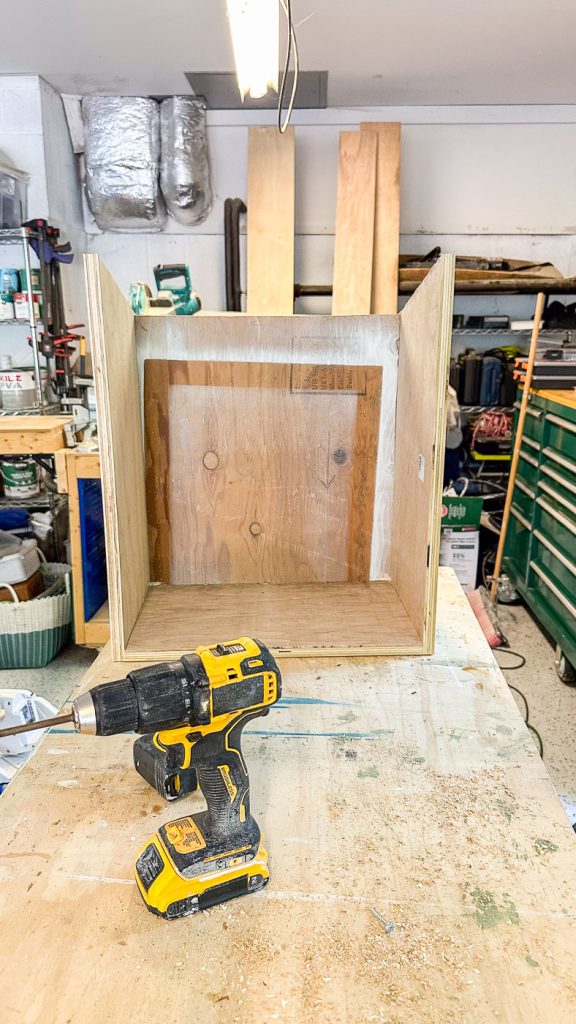
When adding the shelf, I made sure the bottom was high enough to accommodate *many* picture books and the top was a little shorter for those smaller paperbacks we all have kicking around.
Step 3: Build the Door
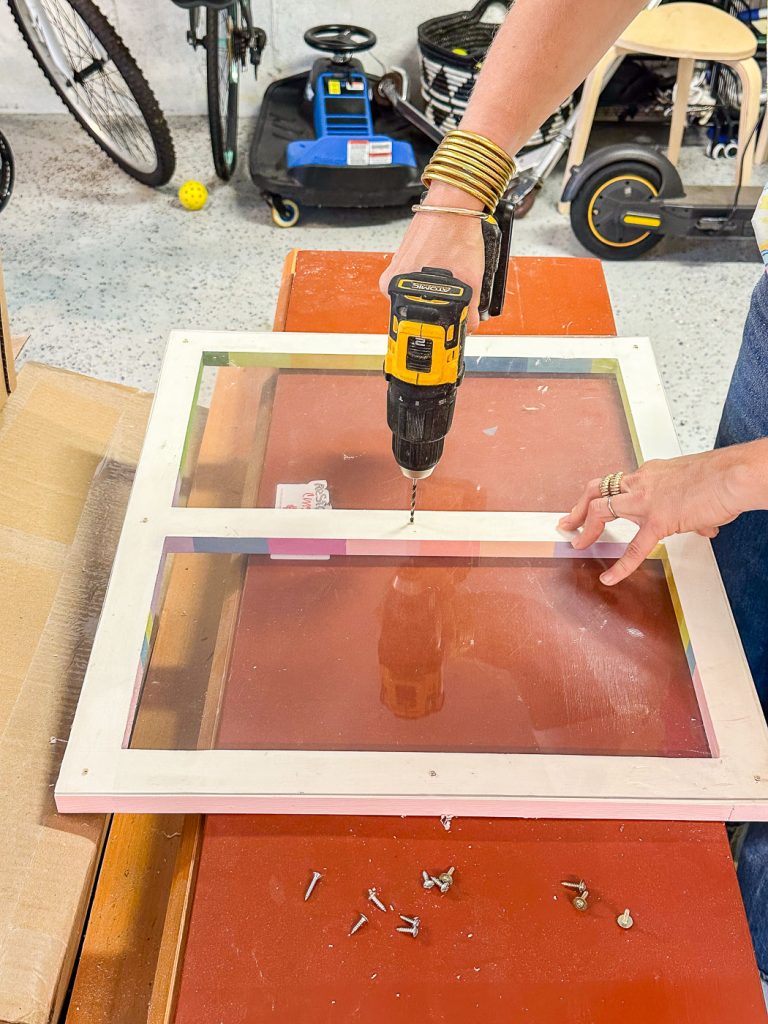
I’ve seen people use recycled of thrifted old windows for their free little library doors so keep that in mind, BUT… that’s not what I did. I had some leftover 1x3s that I screwed together with pocket holes and wood glue.
I happened to have a sheet of plexiglass leftover from my flip house so I used that for the door. (Honestly… I think I’d recommend plexiglass or acrylic regardless just given how many little people will be opening and possibly slamming the door.) I screwed my plexiglass in place and then sealed the edges with silicone caulk to help keep water out. Time will tell. I also used some wooden dowels to fill in my pocket holes so that is sealed up a bit too.
Step 4: Build and Add the Roof
The *only* thing I bought for this little library were some remnant cedar shingles from Home Depot and the tar I went ahead and put underneath them to protect the roof. I stained the shingles with some leftover pink Minwax stain to add a little color and then stapled them in place with a layer of that tar stuff underneath. I used my favorite saw to trim the edges.

Step 5: Seal and Paint
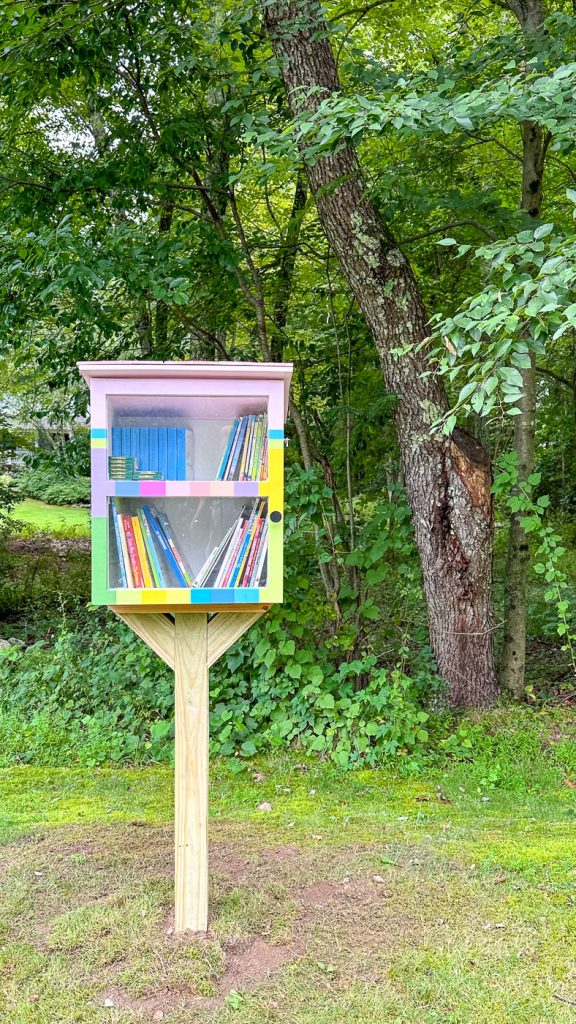
Paint is where I wanted to not only weather proof this little library but also bring the whole thing to life with some color! I had a handful of inspo pictures but ultimately decided to go with colorful graphic since I knew it would sit in front of the leafy green of our yard and I wanted it to pop. Obviously I started by filling in any nail holes, adding caulk to any seams and sanding the whole thing smooth-ish.
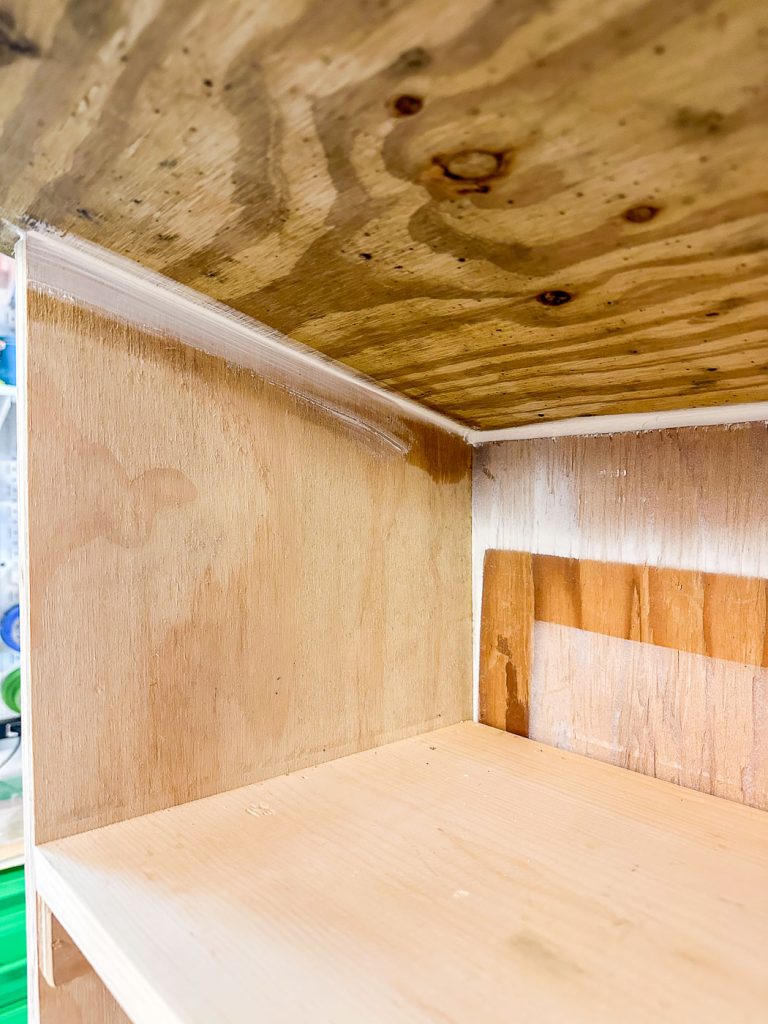
I used a heavy duty primer to not only help to block out any bleed-through from my knotty lumber but also to protect from the elements.
I didn’t take any great pictures but… you all know the drill. I taped off my pattern and then slowly but surely painted the color blocks. I forget how arduous this type of painting is only because you have to tape, paint… wait for the paint to dry, tape another shape and so on and so forth. It’s not a secret weapon, but I always use this tape when going over anything I’ve freshly painted.
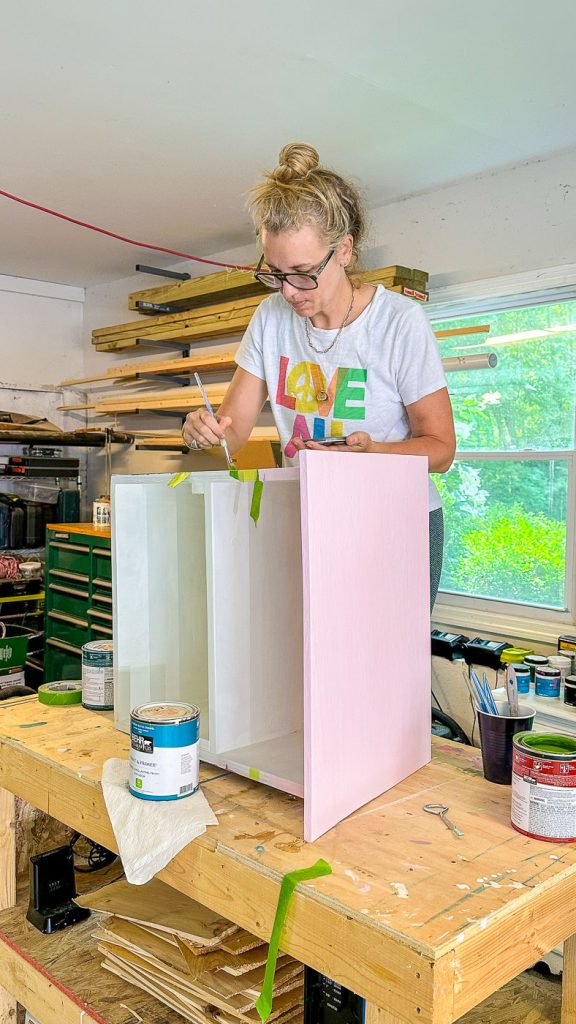
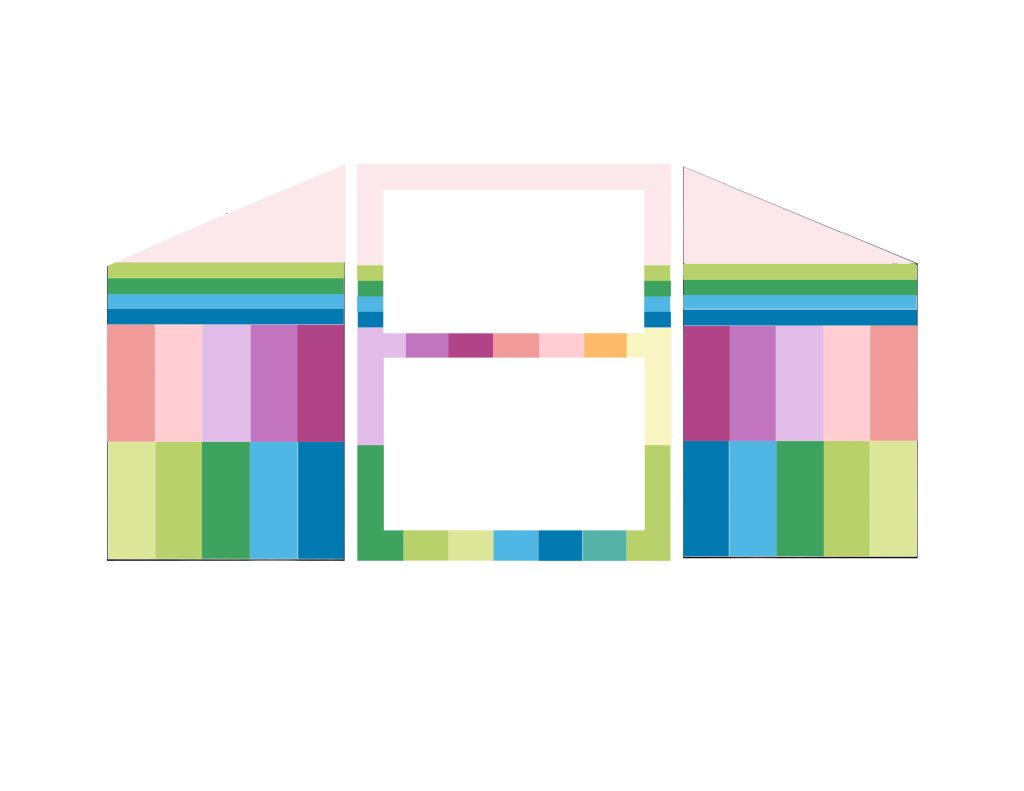
I went ahead and mapped out my color blocks in advance just to help me organize all my colors. This was what I had on my phone to refer to:
Step 6: Build the Stand for the Free Little Library
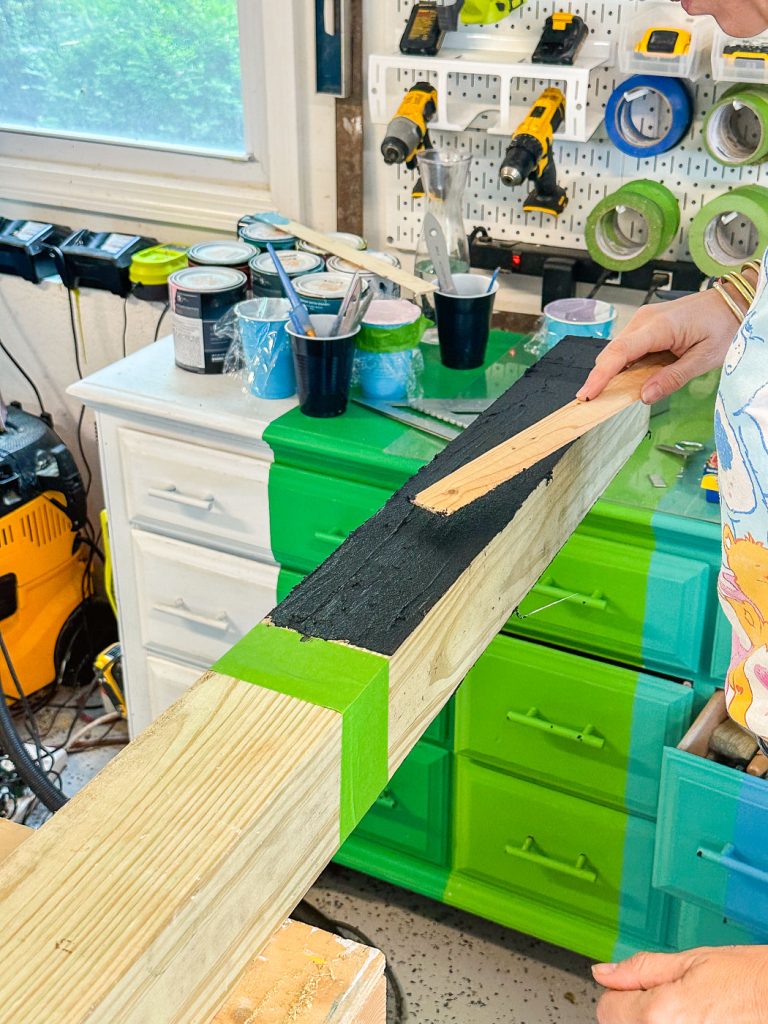
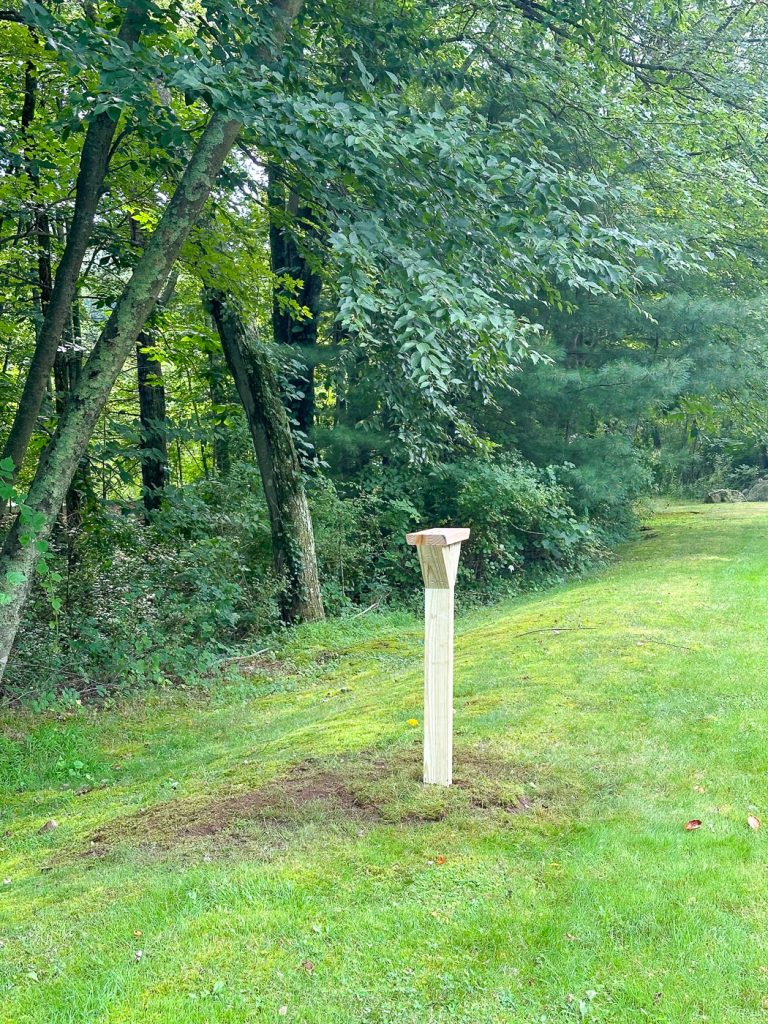
At some point, make sure you check out the Free Little Library website which… only just now I’m realizing is technically “Little Free Library”… oh well. I’ll go change my title to make the SEO happy. They have lots of tutorials and videos to help you create your own little library but also… suggestions for how to build a stand. My dimensions are a little different but I used some leftover 4×4 posts from my garden to make one to fit my own library. I had some leftover tar so I went ahead and painted this on the lower 24″ of my post to further protect it from the elements.
I dug a 24″ hole and plopped my post into the hole making sure it was level in all directions. You can see the basic shape of my stand too. The little free library site said there was no need to anchor the post in concrete or anything so this post is just secured with the dirt filled in around it in the hole.
Step 7: Assemble the Little Free Library
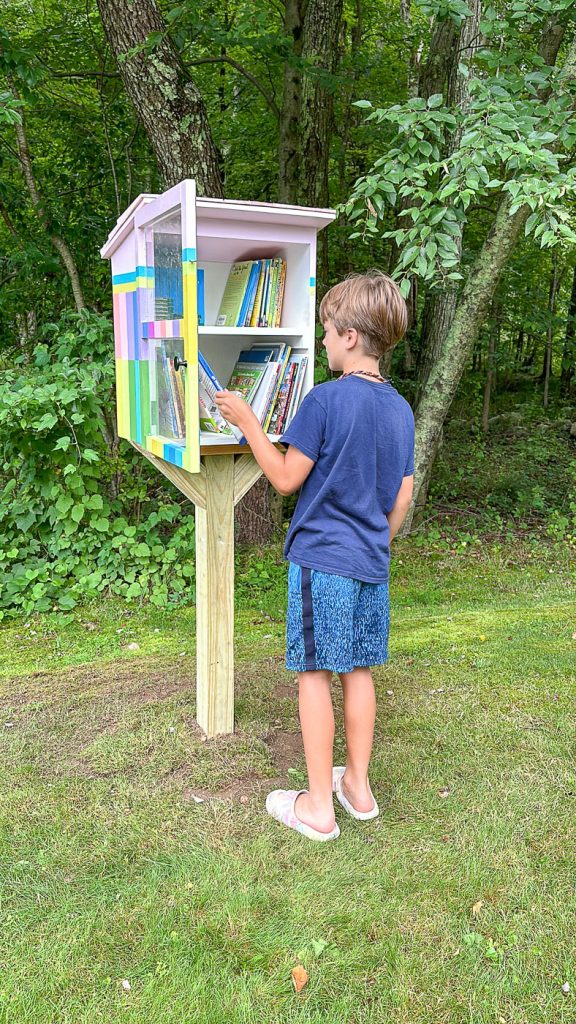
With the stand in place, all that was left to do was to attach the actual little library! I screwed the library down onto the base with long exterior screws and kept the door off until the base was attached. Once the base was in place, I screwed the door hinges onto the library and added a hook and eye as a latch. You can also see a singular cabinet knob as the doorknob.
We had plenty of books to donate, but the girls also came with me to Michael’s to grab some crayons and art supplies for the neighborhood kids also.
I didn’t register this one with the nationwide little free library site just so my address isn’t super public, but we have a neighborhood text chain that I used to let folks know the little free library was open for business.
Check out a list of supplies I used (not including the random lumber or acrylic!) and leave me a comment with any questions you might have!

Do you have rough measurements for this project? It looks like the perfect set up to build the Hot Wheels free car exchange that we’d like to install in our front yard for the neighborhood!
Hi! I was using scrap wood so just working with what I had, but… the Little Free Library website is an amazing resource and I believe they have plans and everything!
How has the post held up without additional stabilization? We are about to install the screw in post in our neighborhood and there is a concern that it will not be secure enough without adding concrete. Your input is appreciated!
No problems whatsoever, but… I buried it about 30 inches down and our soil is pretty dense!