
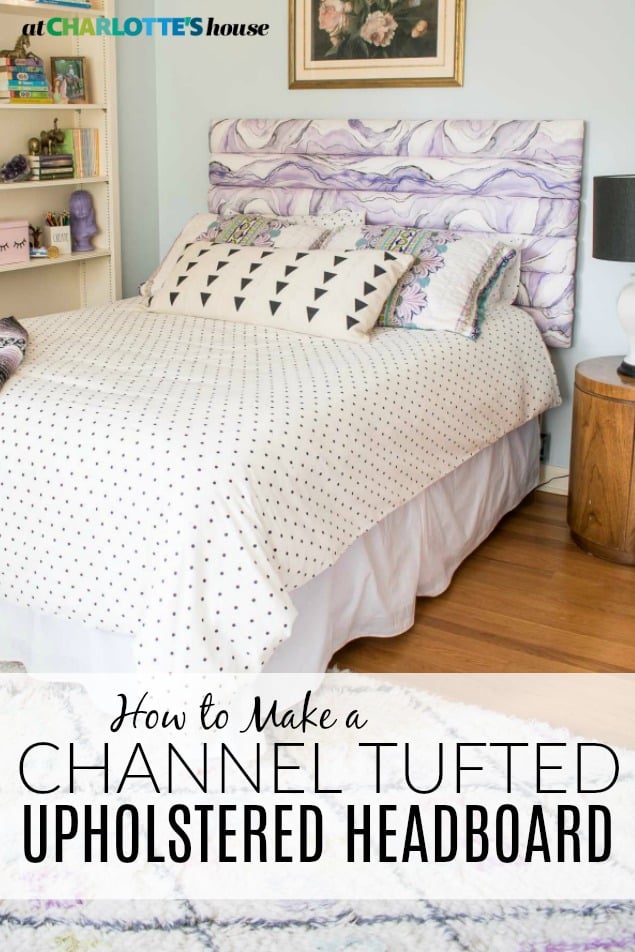
How to Upholster a Channel Tufted Headboard
Psssst… this post *might* contain affiliate links: see my disclosure here.
DIY Channel Tufted Headboard Tutorial
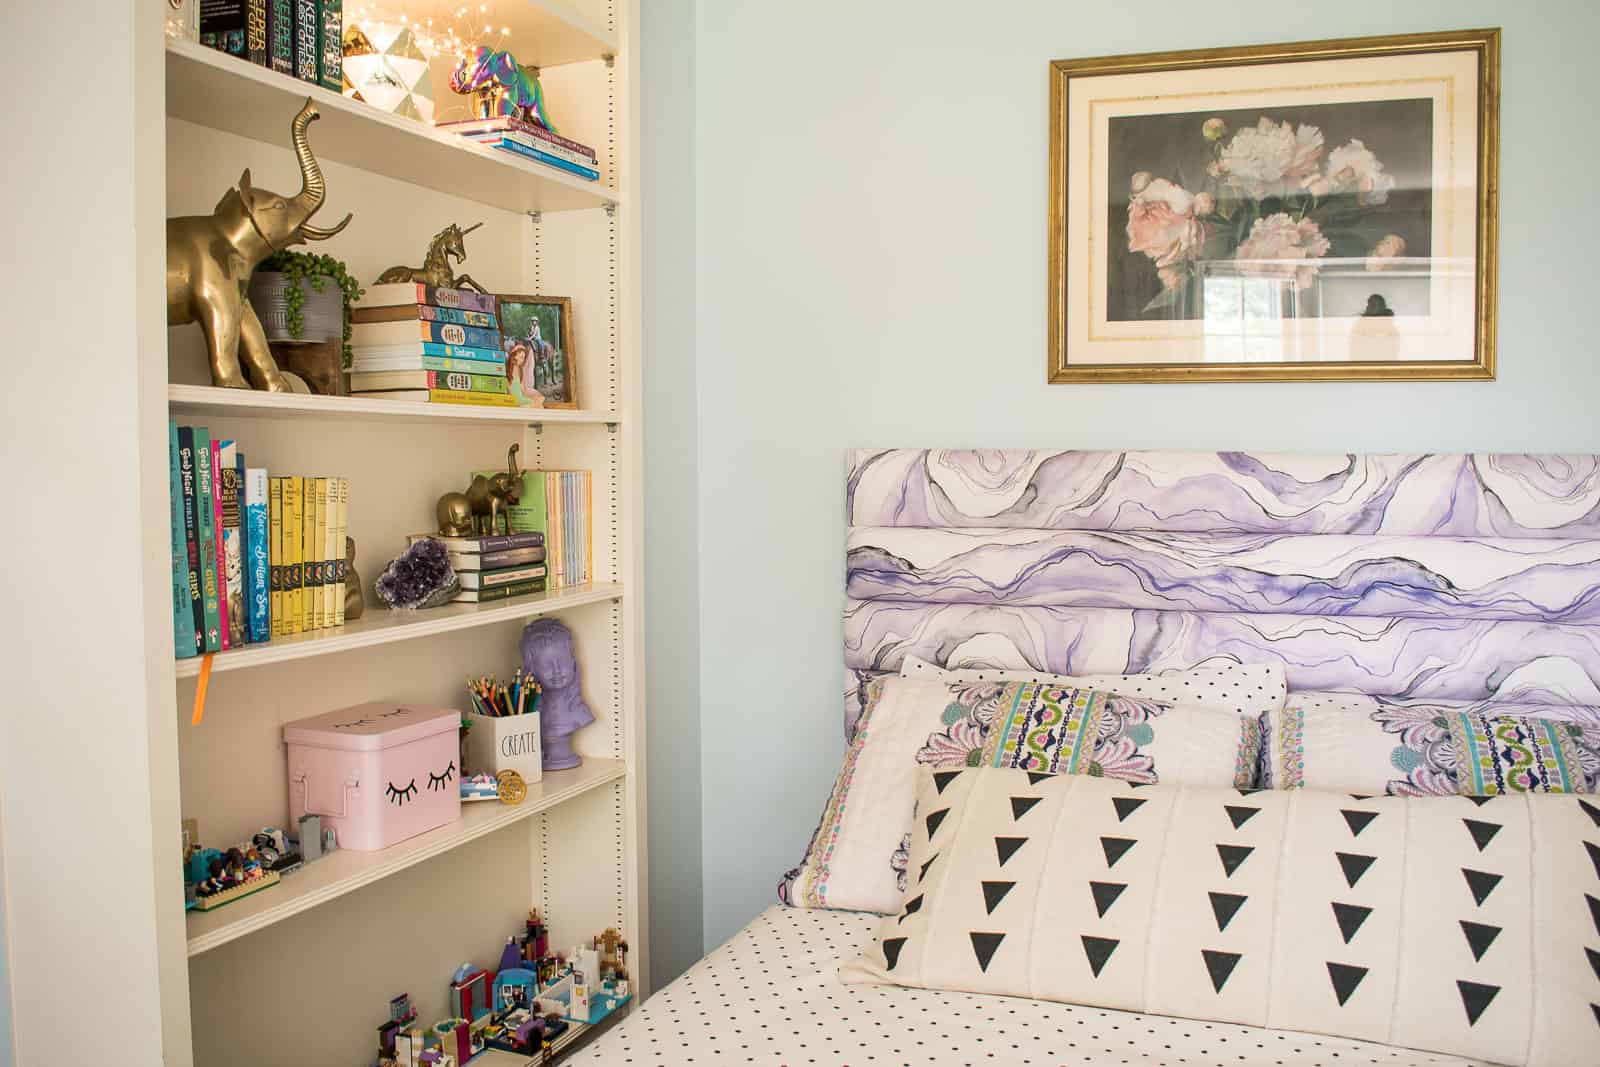
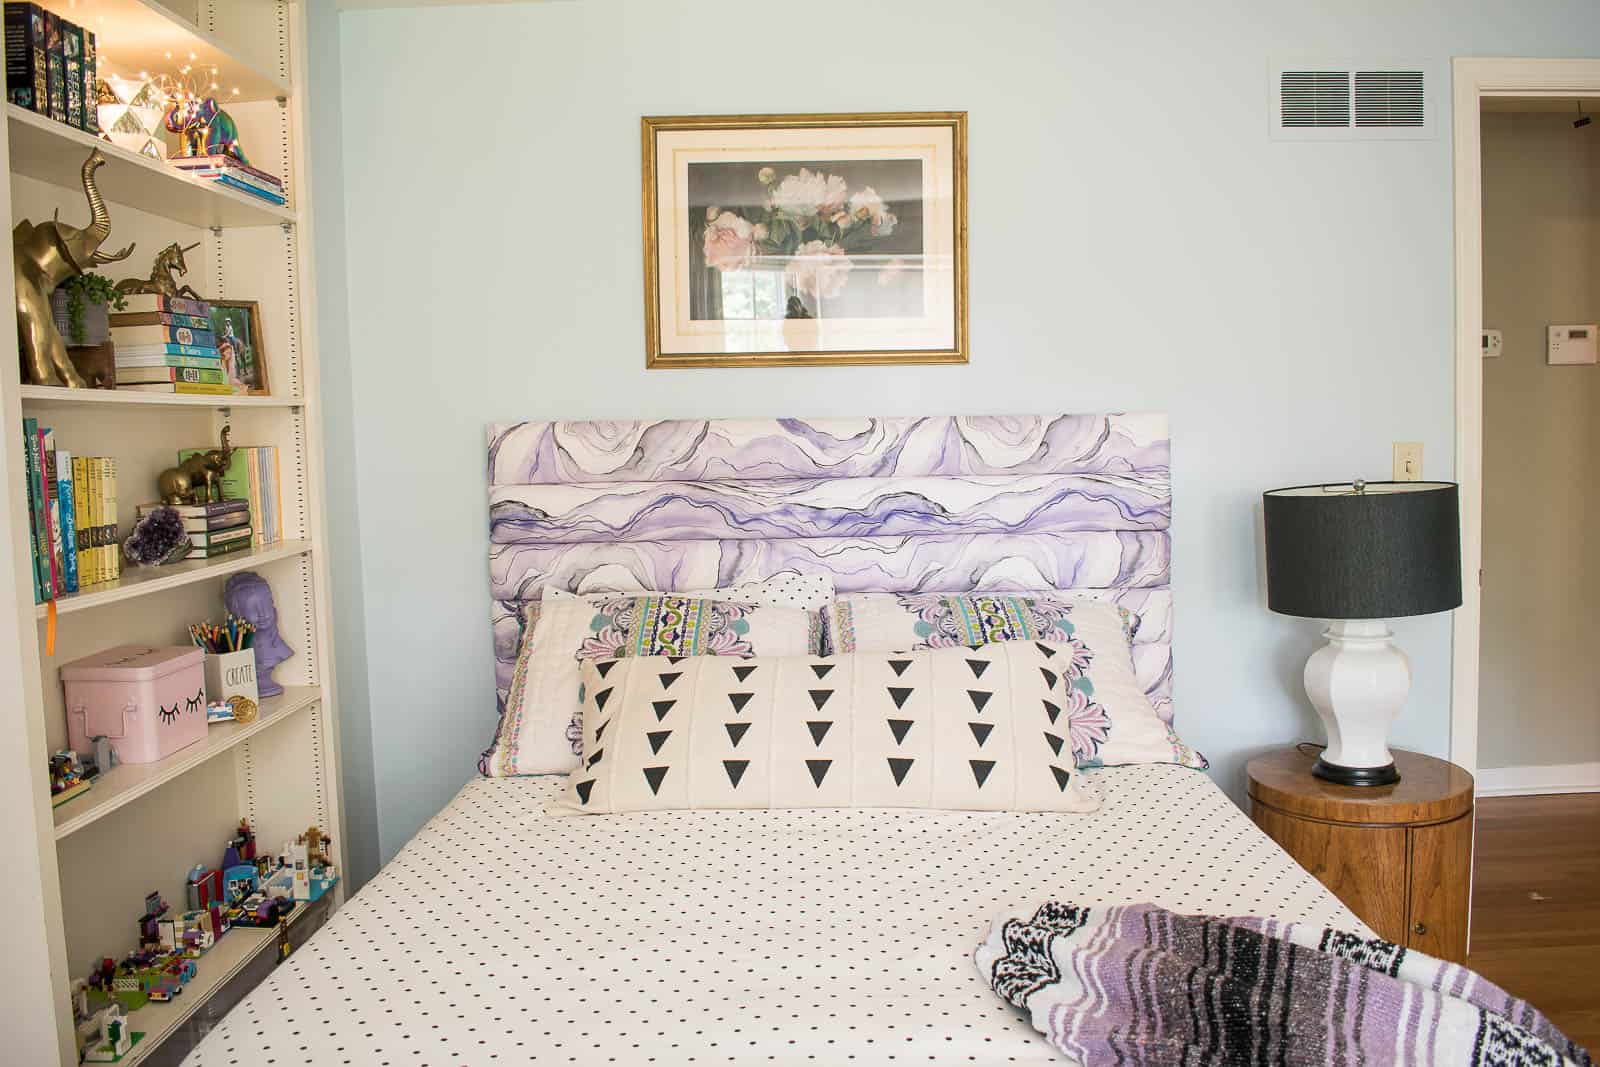
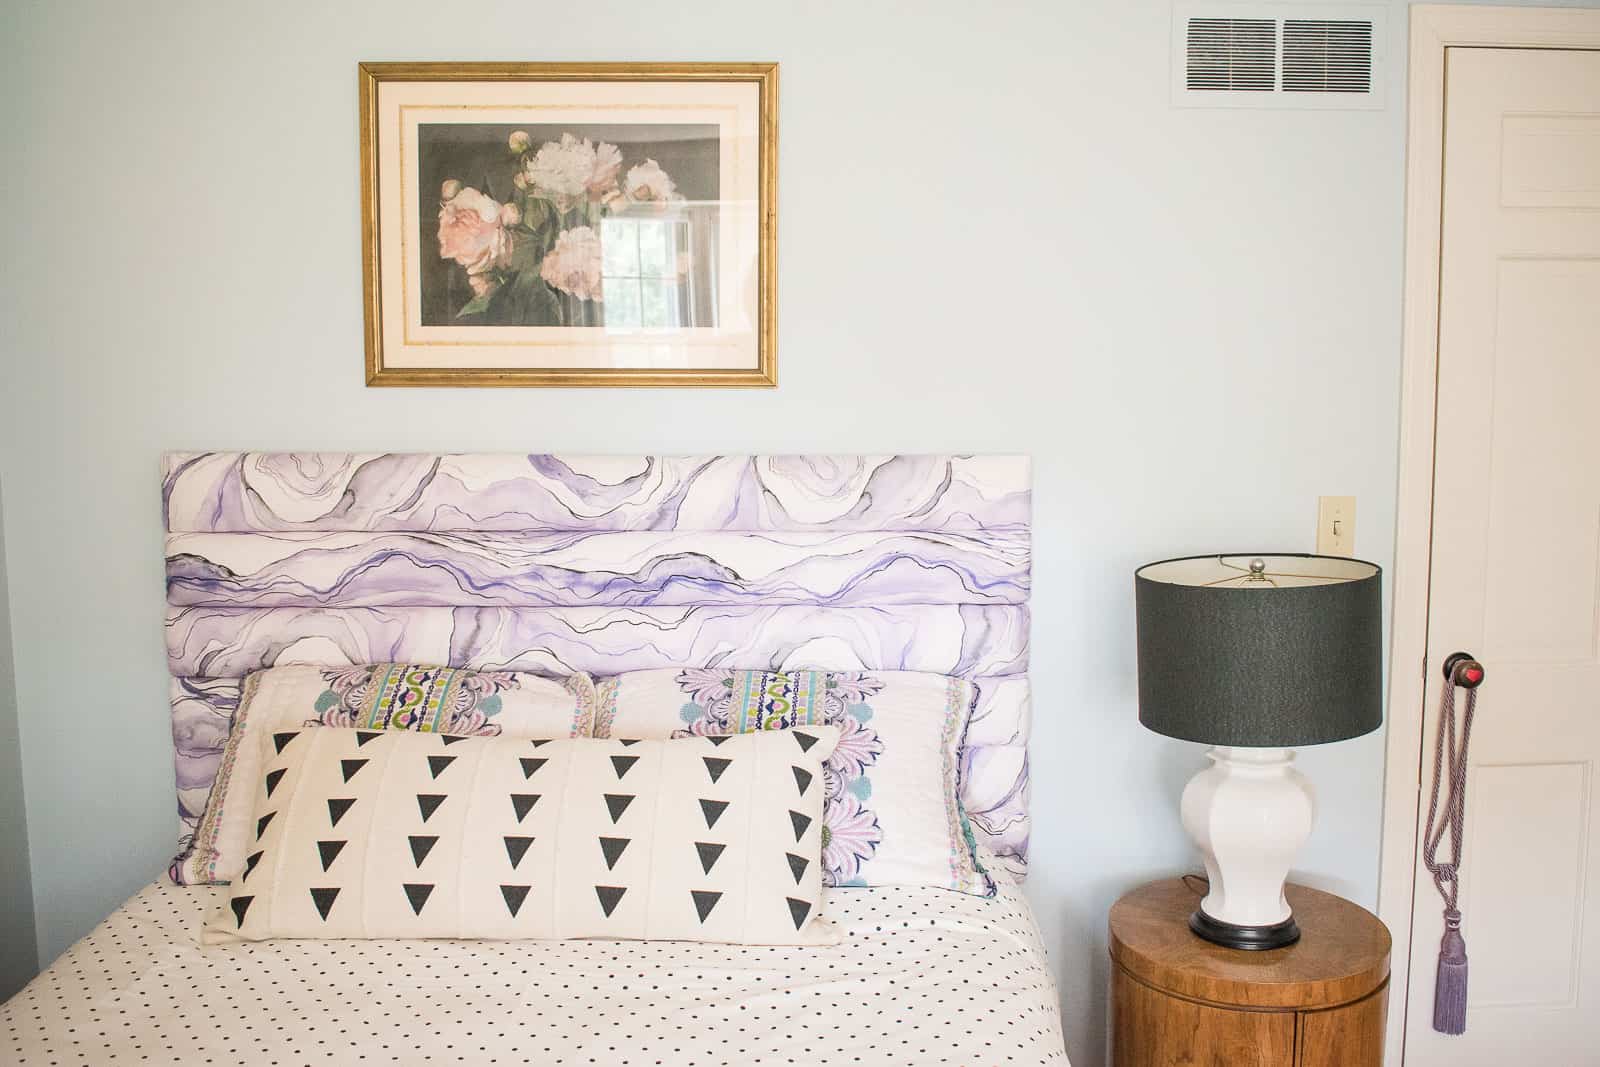
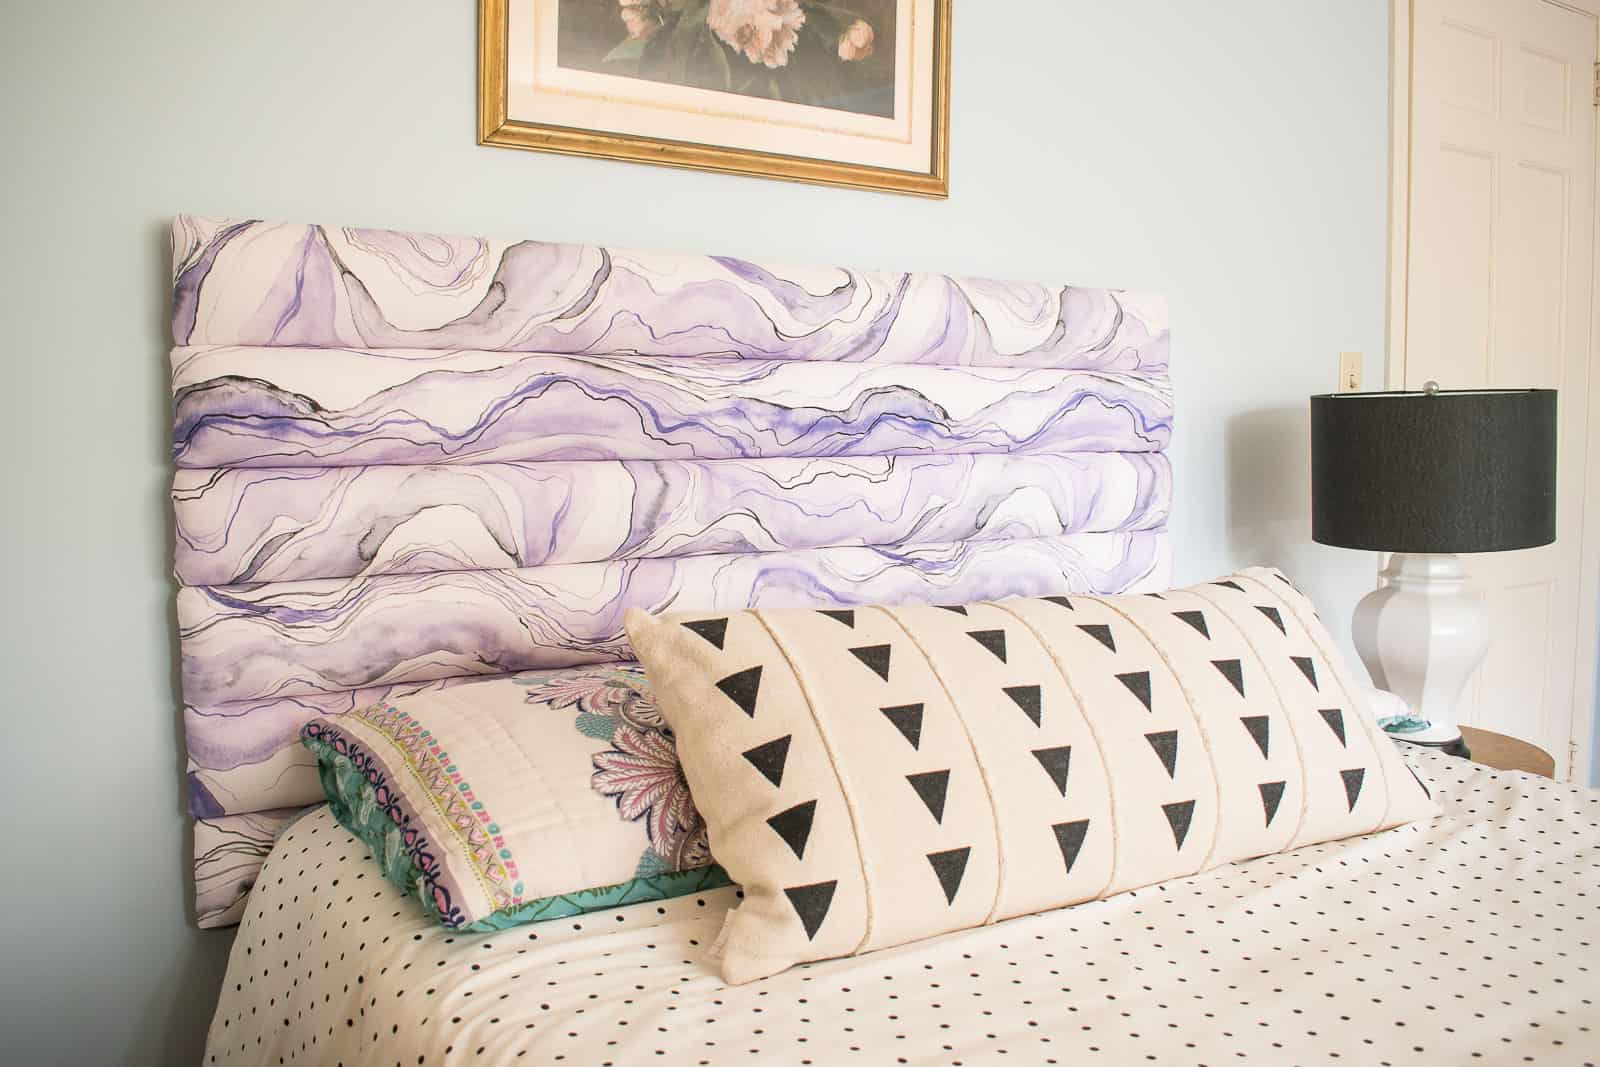
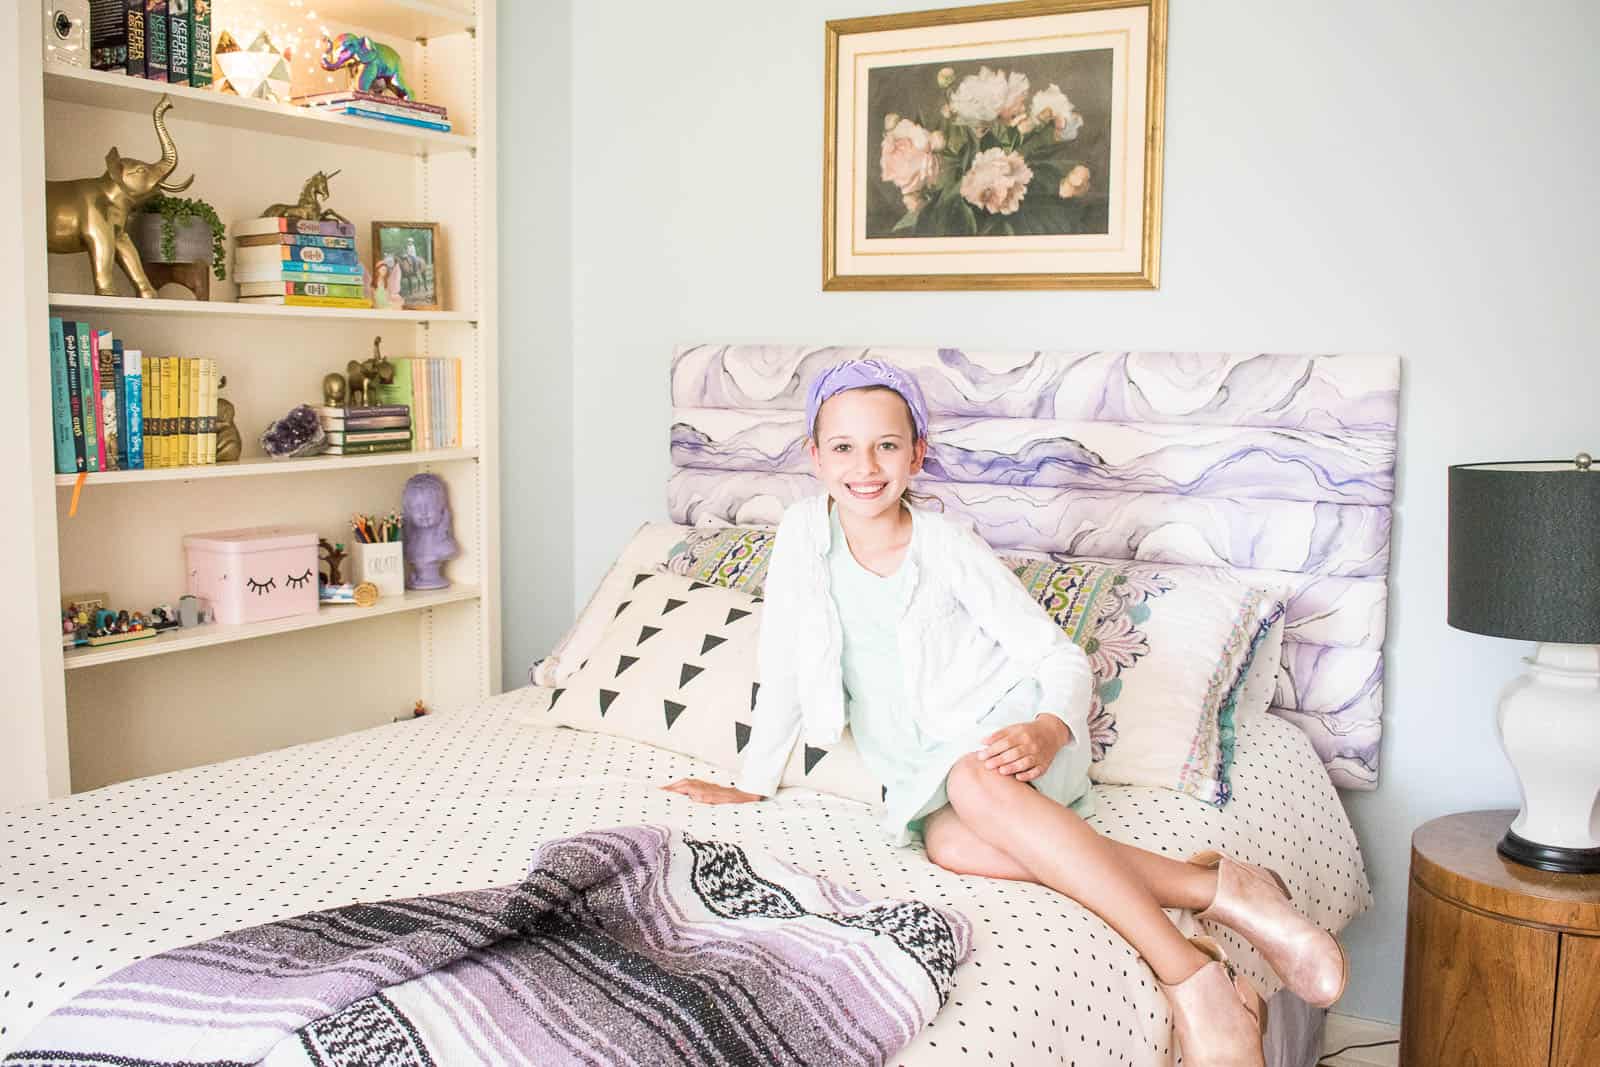
This channel tufted headboard was super easy to make but has such a custom chic look… I’m crazy about it!
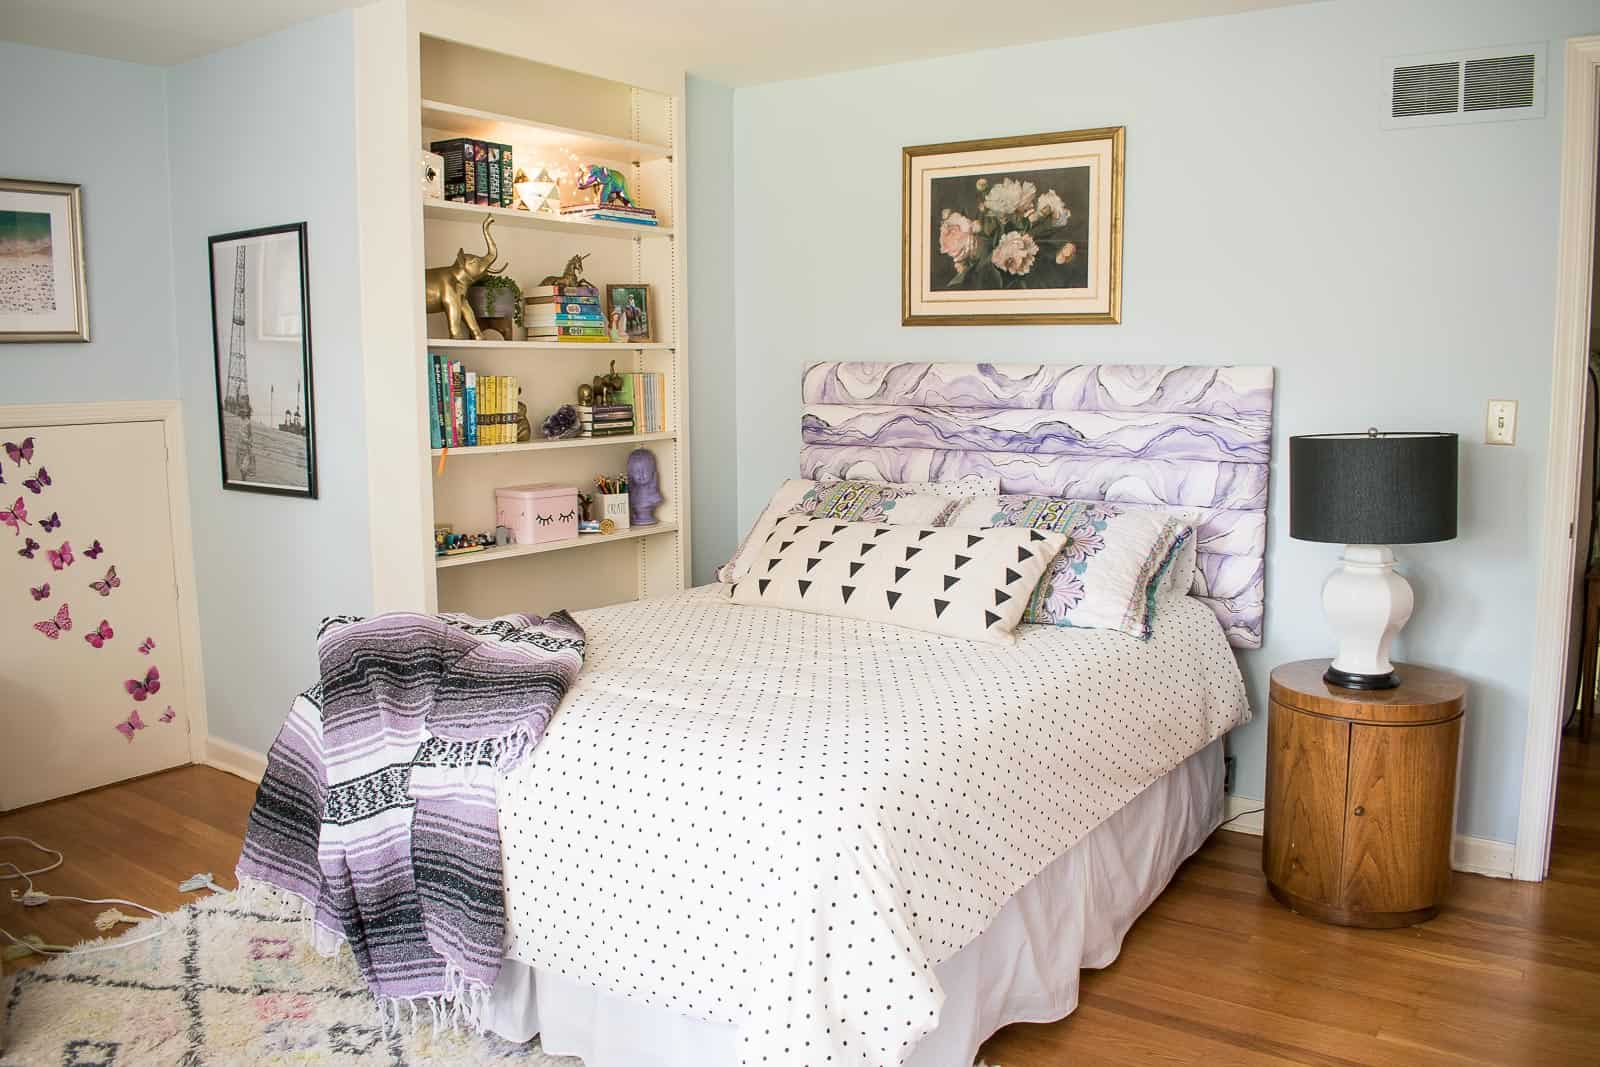
The best part about this headboard is that I would consider it a beginner upholstery project but it TOTALLY looks fancy and complicated! I’ll link to all the supplies at the end of the post, but I didn’t need anything tricky! I am THRILLED that Spoonflower sent me this gorgeous fabric by Rebecca Reck to use… Eleanor picked it out all by herself and it looks AMAZING in her new purple butterfly room! I should note that Spoonflower was able to ask the artist to print this fabric along the length of the headboard so I didn’t have to sew two widths of fabric together. (Otherwise I would have ‘railroaded’ the fabric and run it side to side.)
Shop my favorites!
Step 1. Determine dimensions of the headboard
Decide how tall and how wide you want your headboard to be. You’re going to need 2x this dimension from plywood so consider whether you can get both from a single 4×8 sheet! I used 1/2″ plywood which is pretty flimsy, but it seems to be working fine! I had the guys at The Home Depot cut one sheet of plywood into two equal pieces and brought them home to my garage.
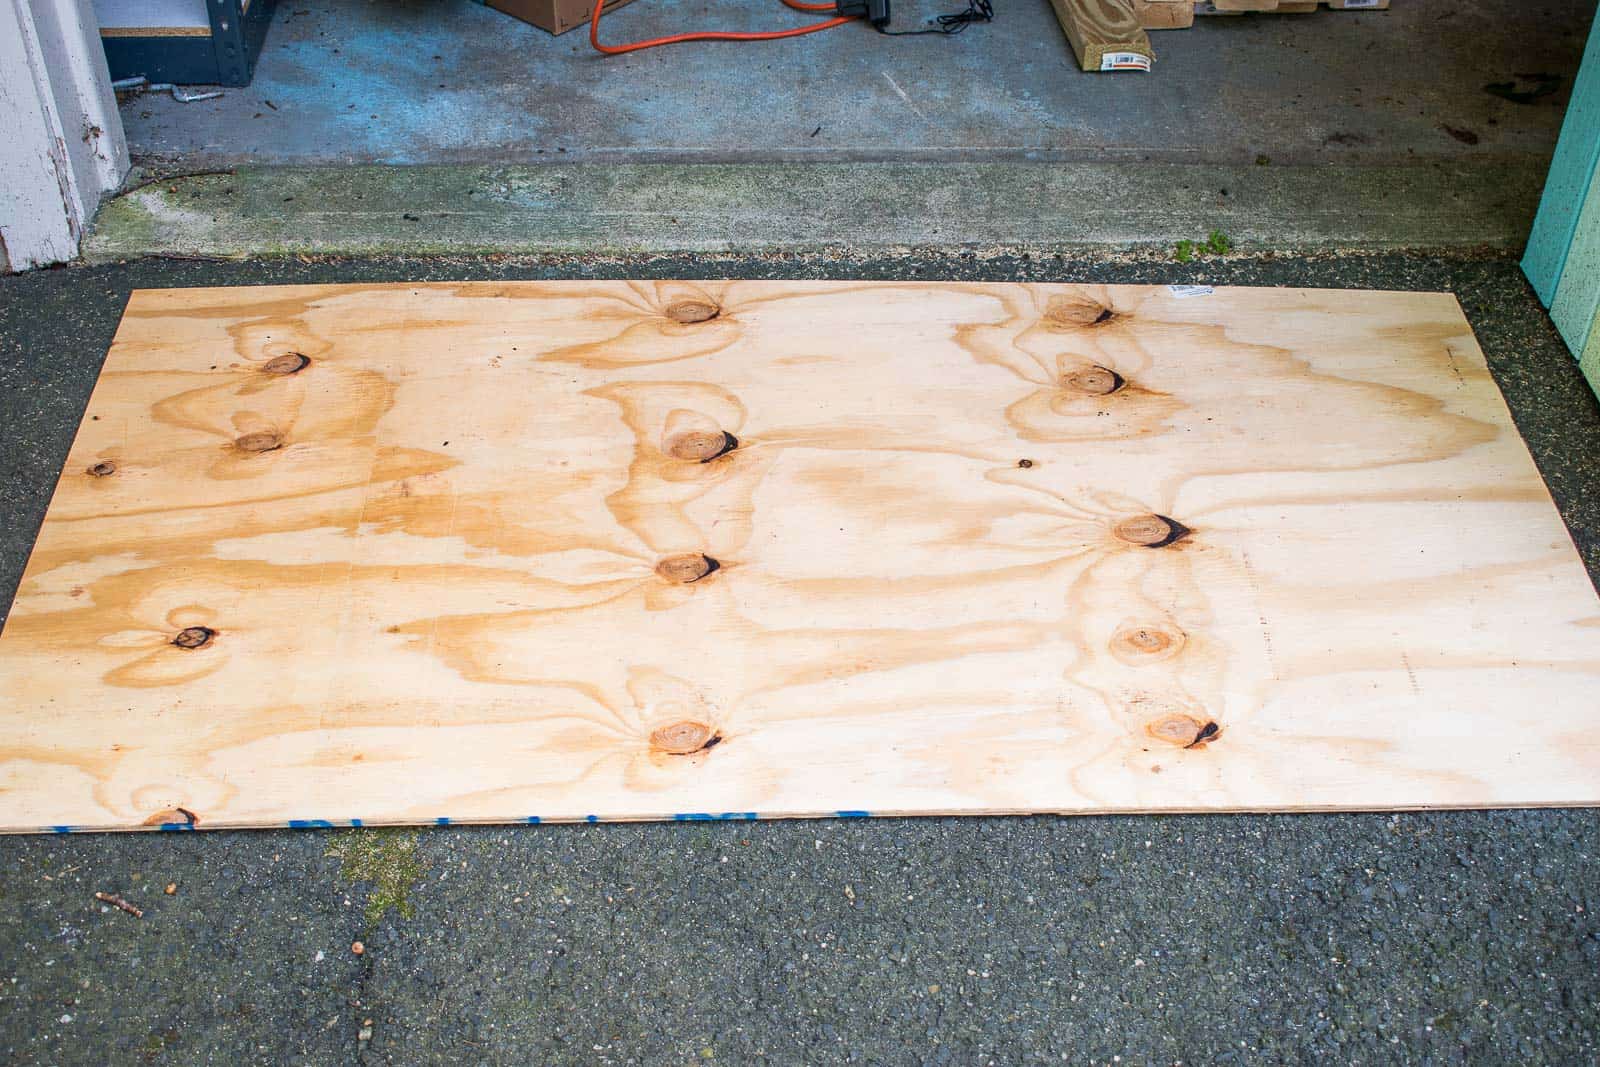
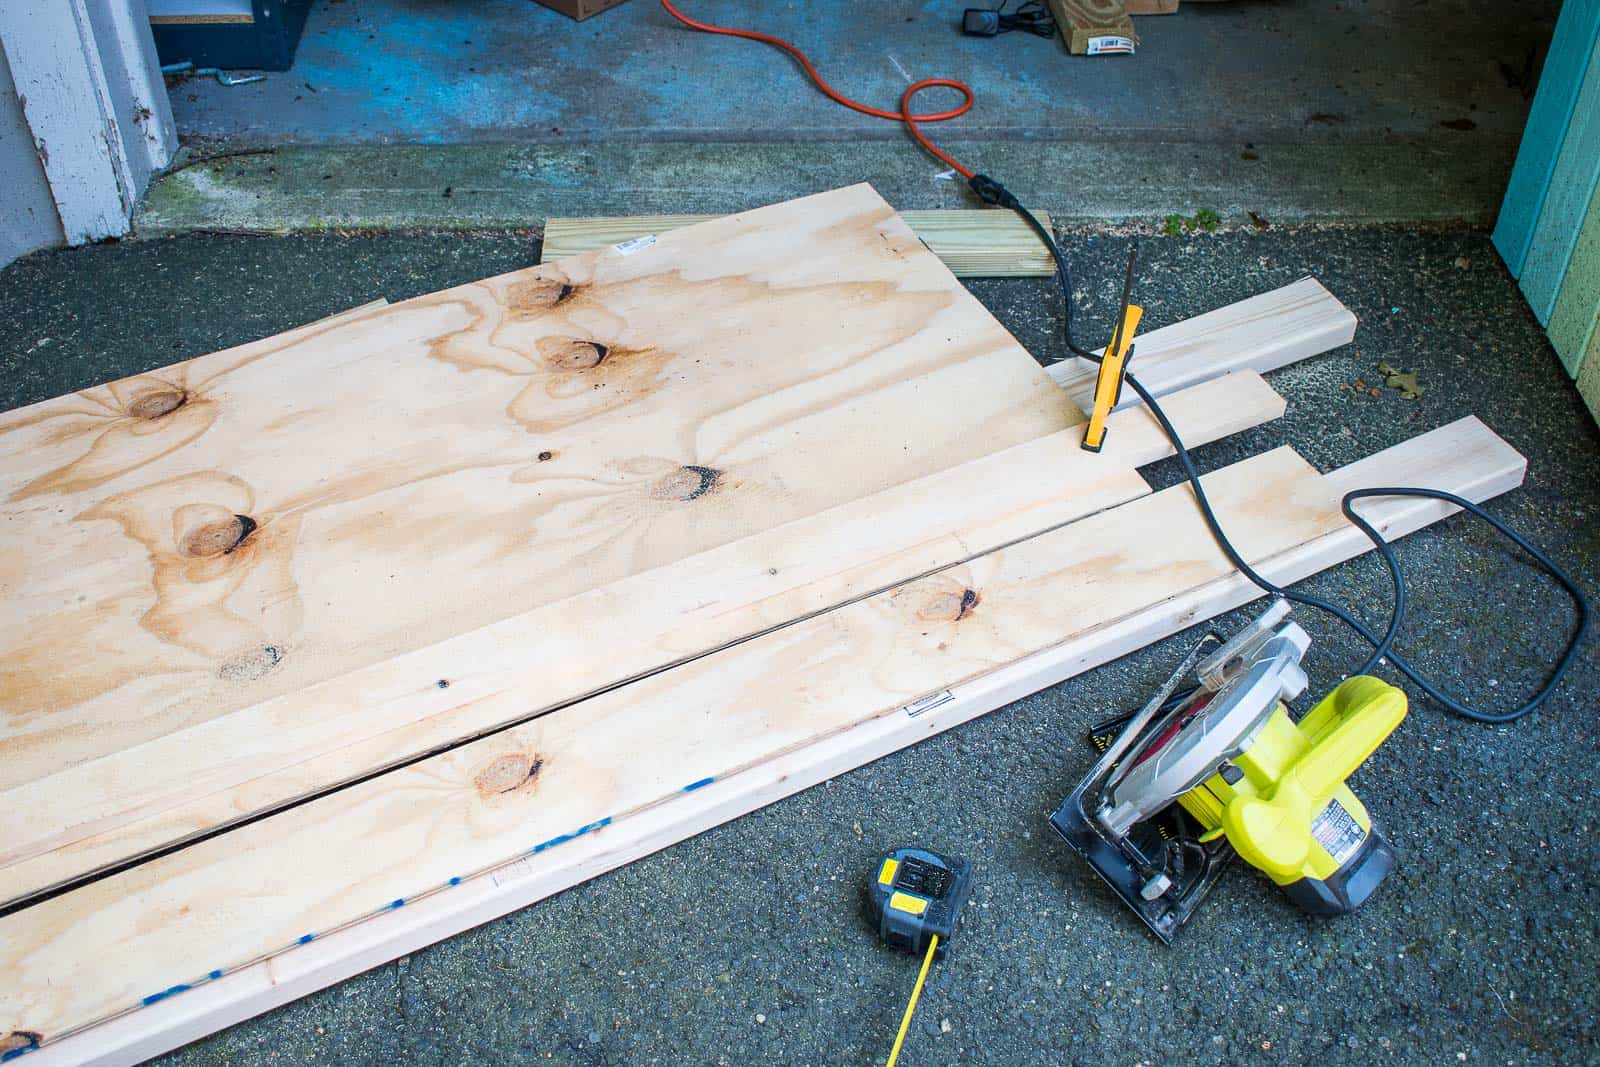
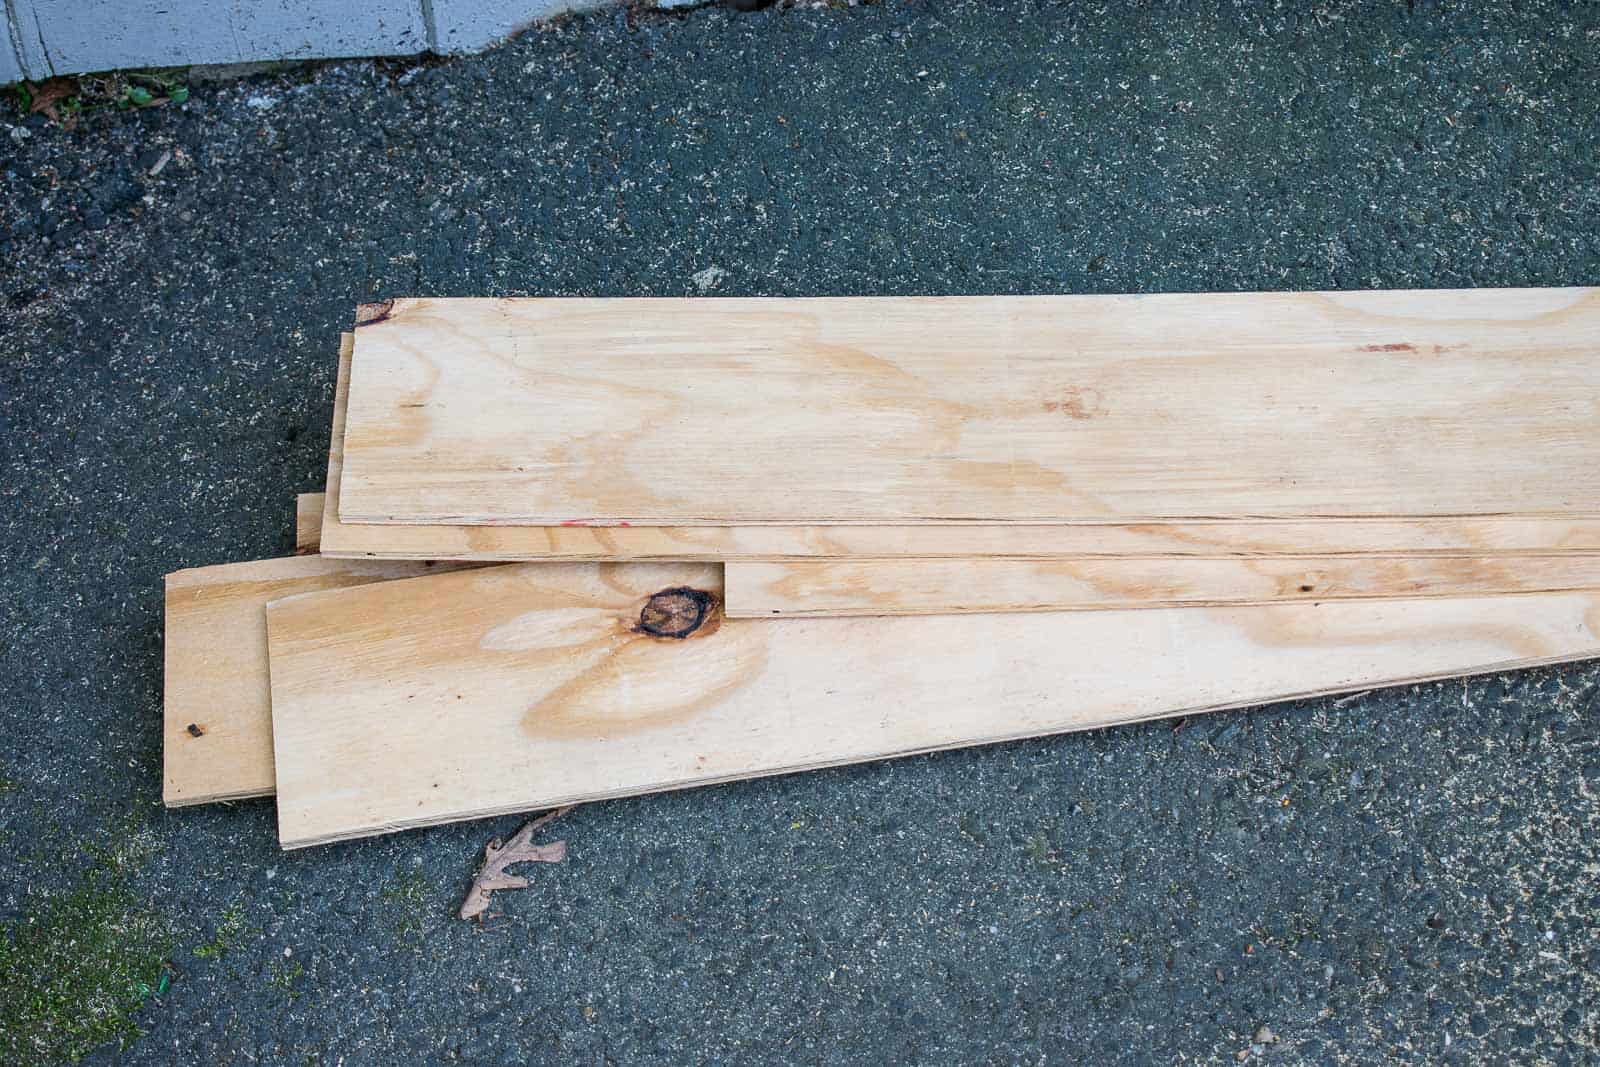
Step 2. Cut strips out of plywood
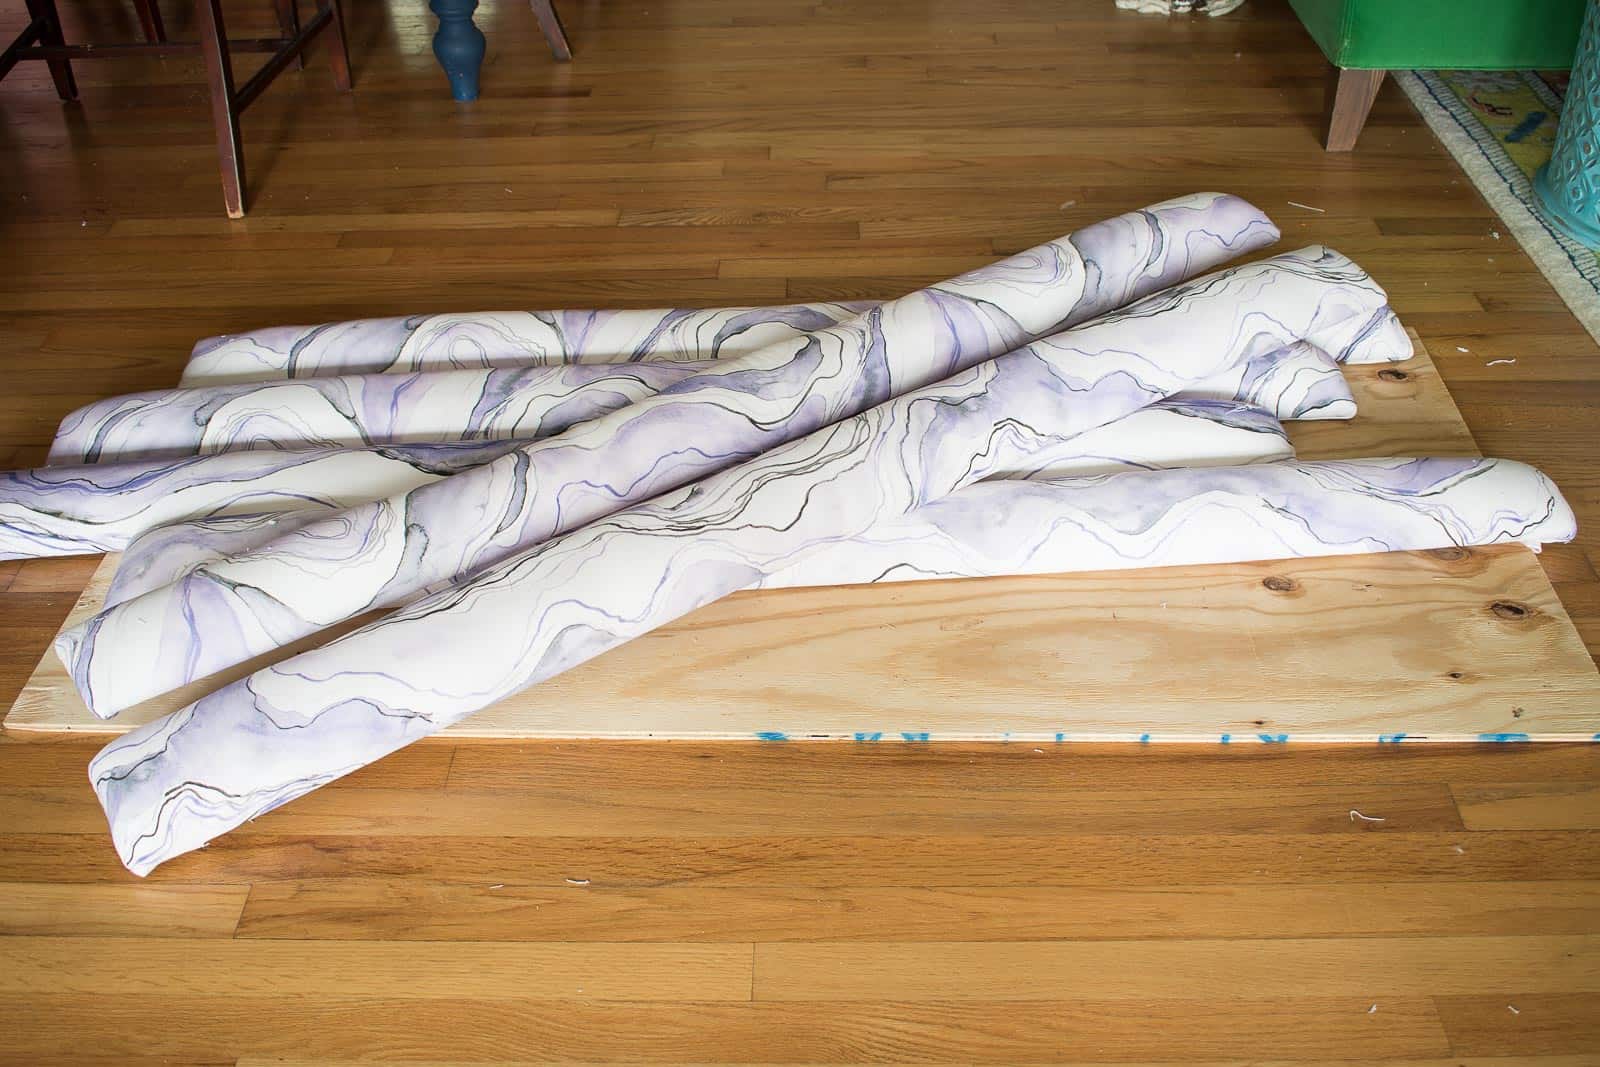
Using a straight edge as a cutting guide, I cut one of my pieces of plywood into 5″ strips. (I’ve seen other people do this same project using 1×6 common pine which would eliminate the need to cut the plywood into strips.) Put the uncut sheet of plywood aside until later.
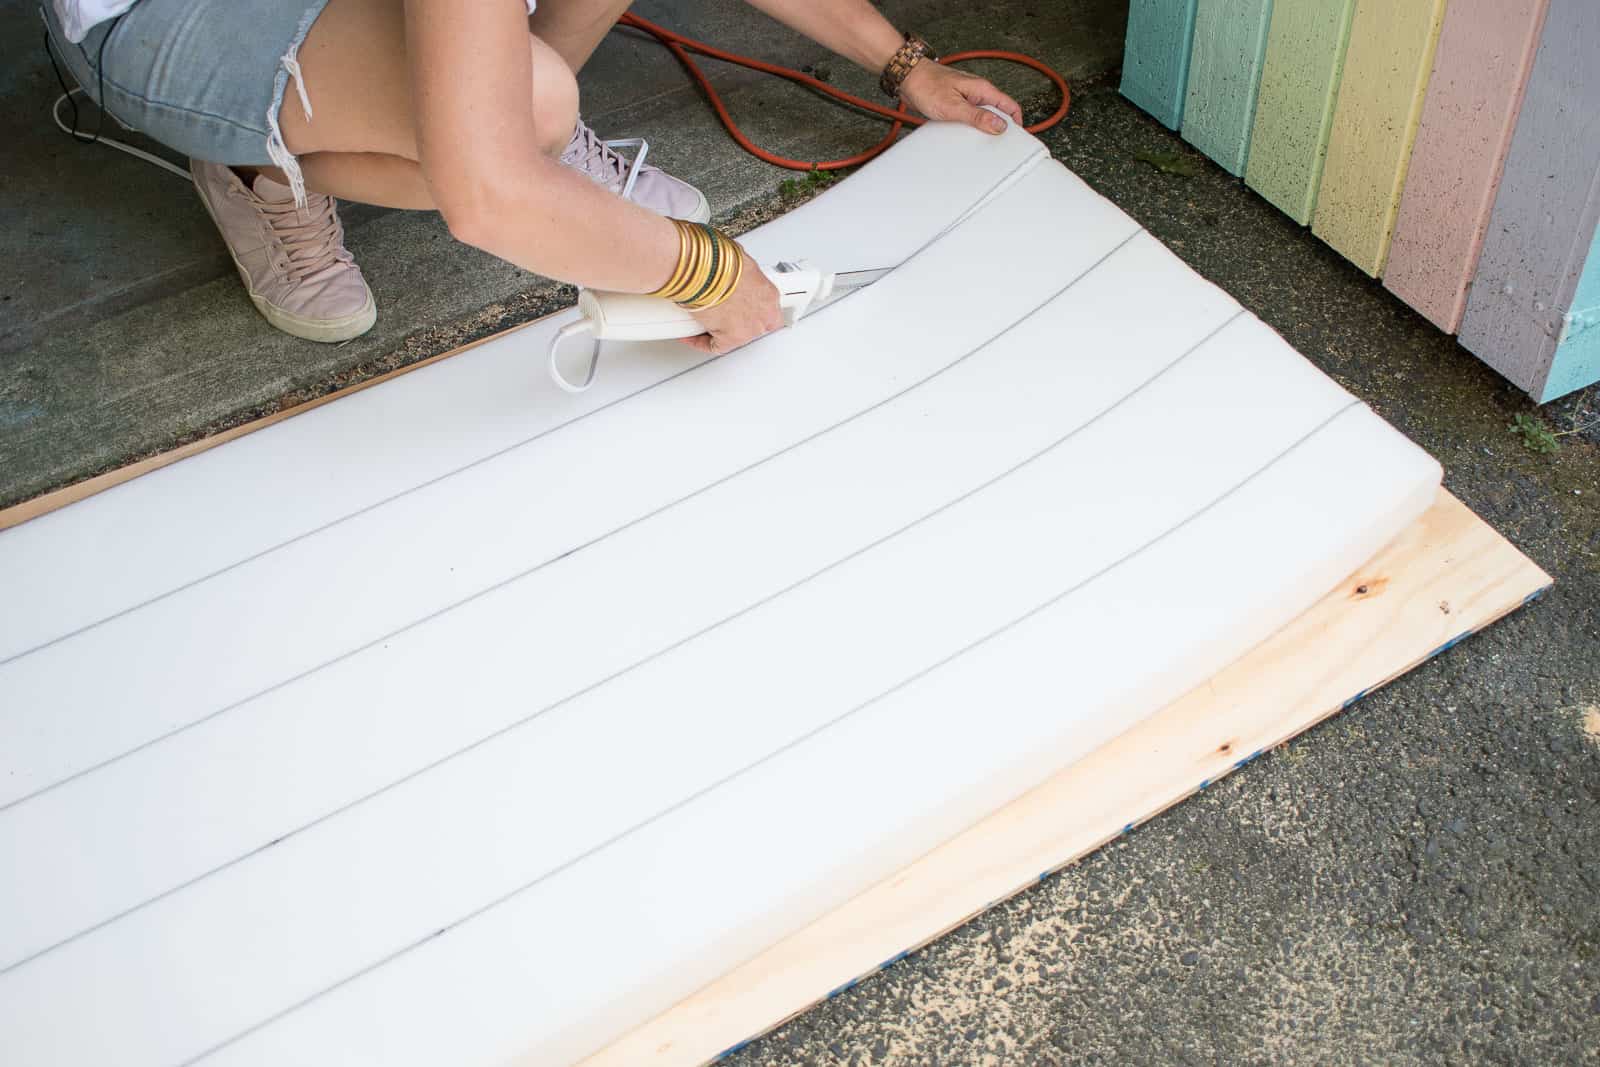
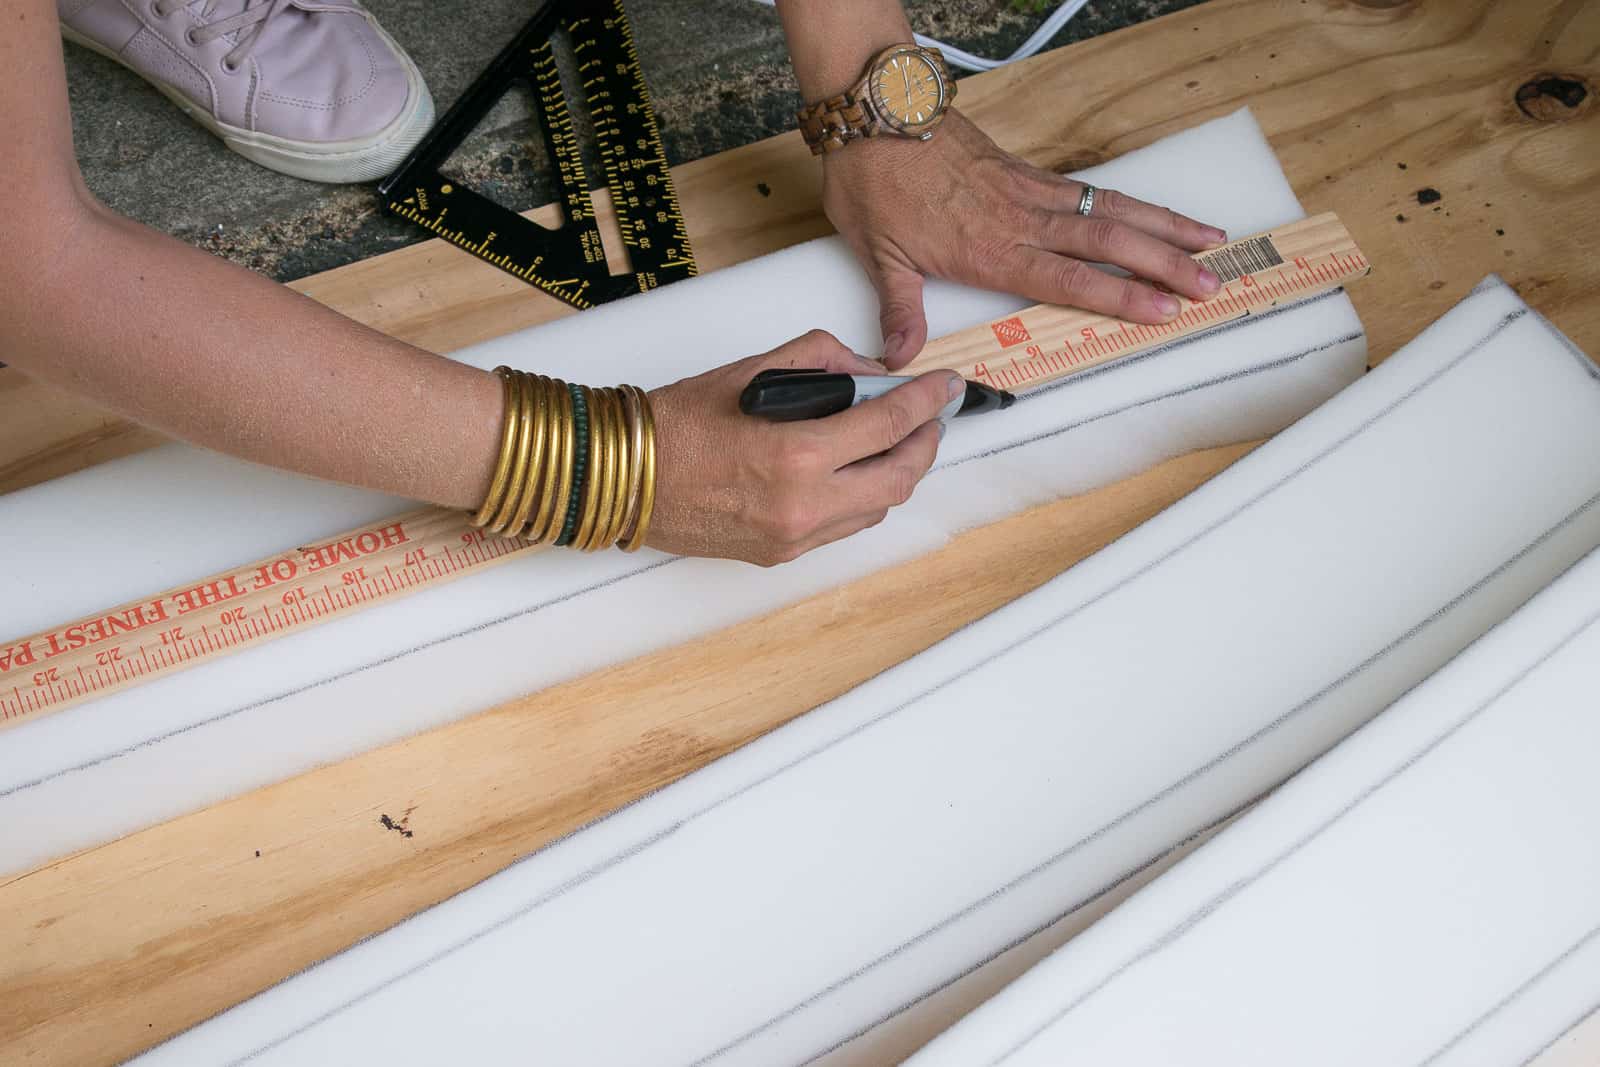
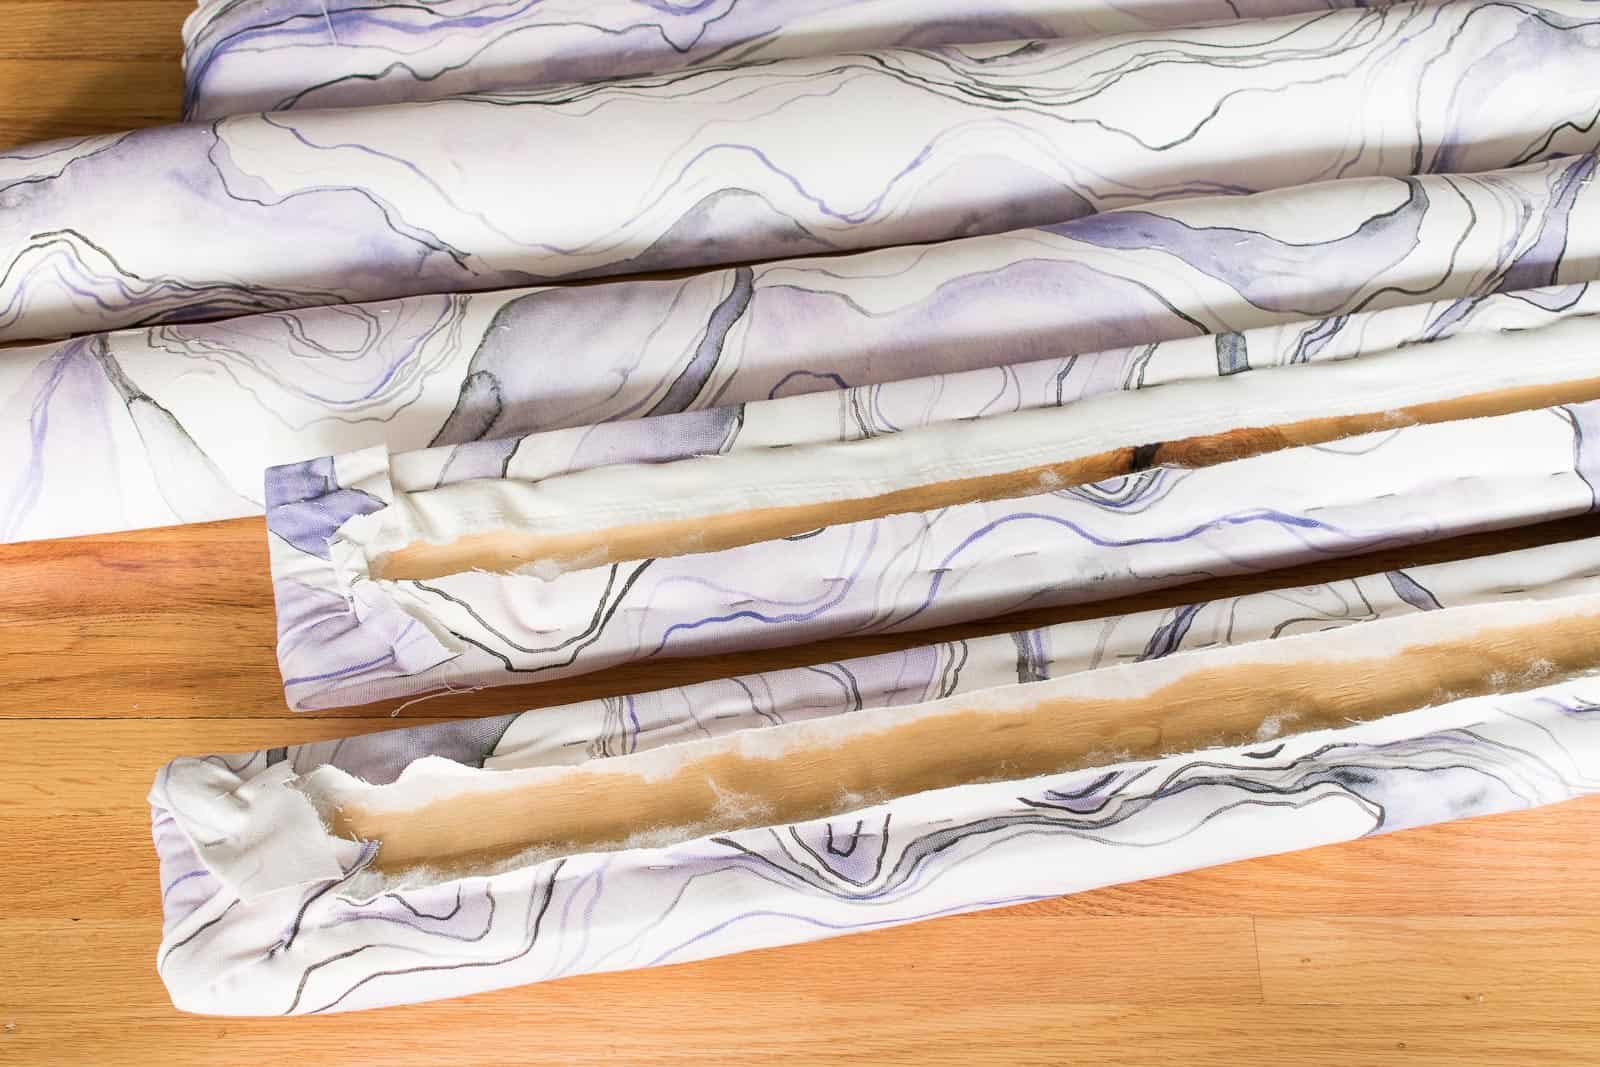
Step 3. Cut Upholstery foam
I used 2″ foam and cut it into 5″ strips with my electric bread knife. I’ve been coveting channel tufting ever since I saw THIS tutorial by Mandy Makes and she suggested shaping the foam a bit. I made guidelines with a Sharpie and then used the electric carving knife to trim off each corner.
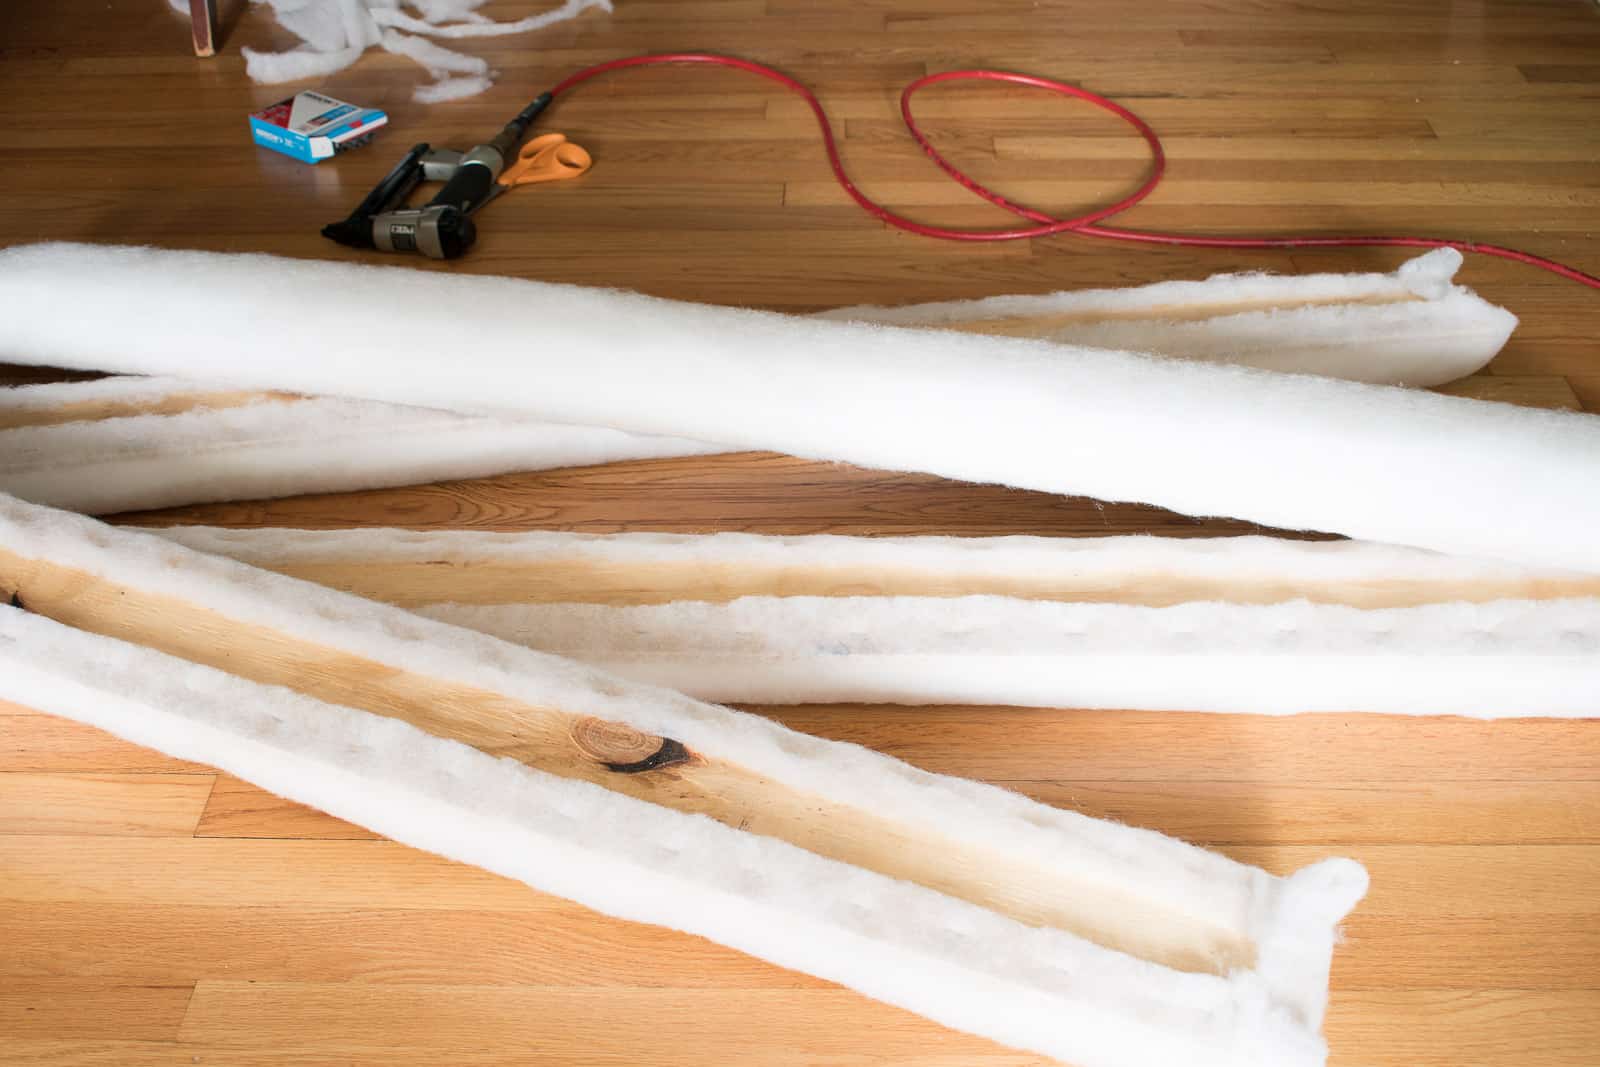
Step 4. Upholster each strip
This part of the headboard project is Upholstery 101. First is to wrap some batting around each foam covered board and staple along the back of the plywood strip. Then repeat this step with the fabric being careful to pull the fabric tight, line up the pattern, and keep the corners as neat and clean as possible. Repeat this with all of the plywood strips.
Step 5. Attach upholstered strips to plywood
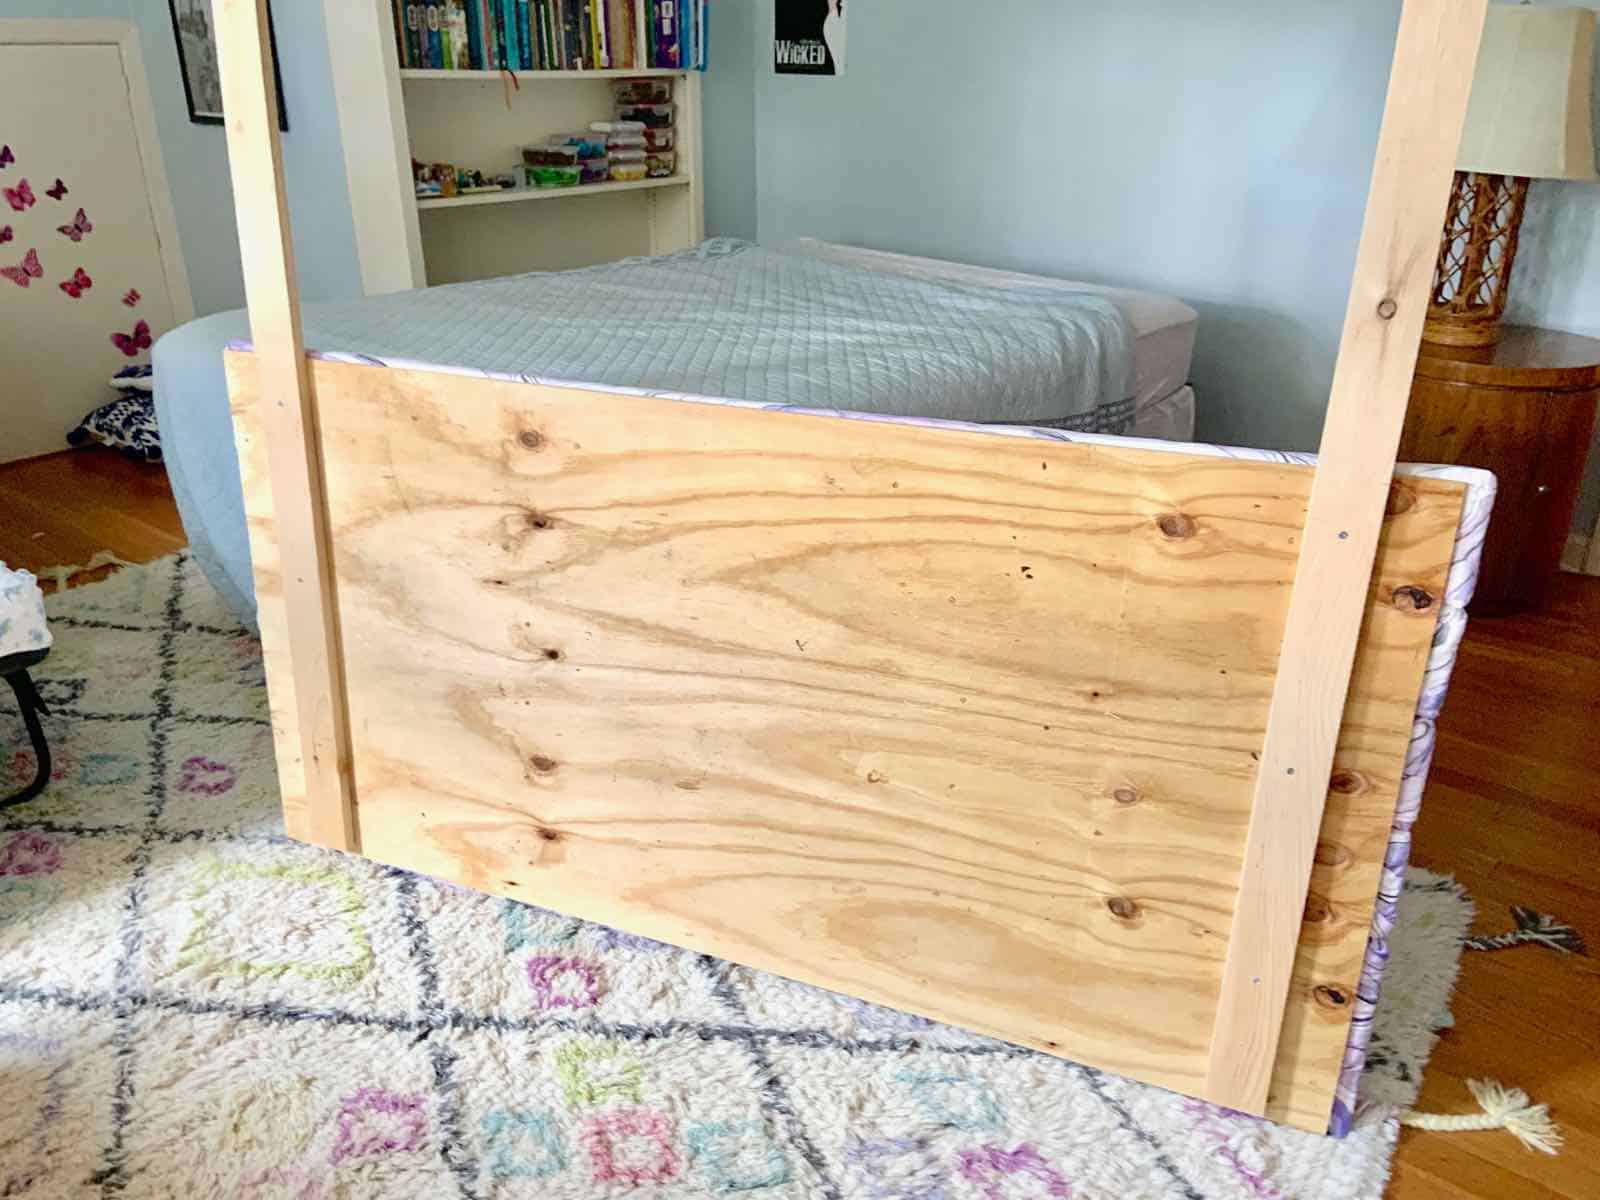
Apply a little bit of liquid nails to each strip and place it onto the uncut piece of plywood. (Alternatively, you can place this larger sheet of plywood on a table or work surface and screw the strips of upholstered plywood in place from below.) Once the Liquid nails has dried, flip the plywood over so that the upholstered strips are face down. Making sure you use the appropriate screw length for your plywood, screw the strips of upholstered plywood onto the larger sheet of plywood.

Step 6. Add legs
Because we are renting, I didn’t want to attach the headboard directly to the wall. I used 1×4 common pine and simply screwed in two legs to the back of the headboard. Because the headboard comes below the top of the bed by a few inches, the box spring holds it in place sufficiently! (Just so it’s clear… headboard is upside down in this photo!)
Did I mention I ADORE this headboard? Eleanor loves it almost as much. I love that this is a different spin on the basic upholstered headboard I’ve done on the past. Also? Did you notice NO SEWING REQUIRED! No cording, no seams, no hems. That fabulous polka dot duvet is linked here. (Affiliate.)
Supplies for Channel Tufted Headboard
- Plywood. I used 1/2″ because it was cheaper, but any type will work.
- Circular saw to cut plywood
- 2″ foam
- Staple gun (I use this one which also requires a compressor)
- 5/16 staples
- Electric carving knife
- Fabric
- Boards to use for legs
Check out another headboard project I made that I loved *almost* as much.
You might also like our current master headboard wall. No DIY required!


doing the headboard in strips is such a good idea. and the marbled look ties in with the classic esthetic of the room. thanks for sharing!
Thanks, Ashley! The strips made the whole thing SO easy! xx
Gorgeous, simply gorgeous. I would love to try this one!!❤️ thanks for sharing
Thanks you so much!! xx
So Pretty!
Thanks Jodi!
By doing each tuft individually the possibilities are endless!!!
Yes! So many fun shapes and arrangements!!