
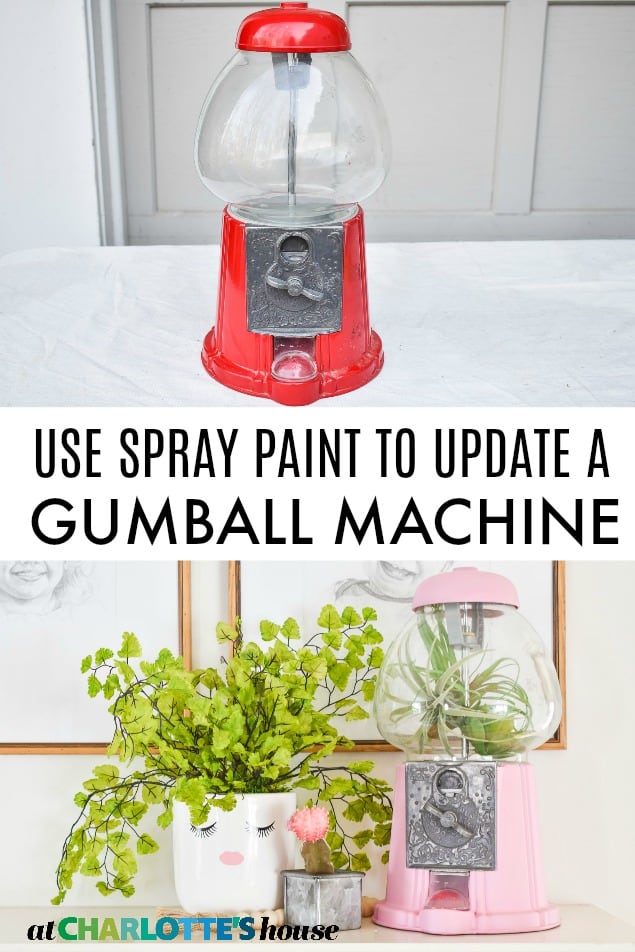
How to Spray Paint a Gumball Machine
Psssst… this post *might* contain affiliate links: see my disclosure here.
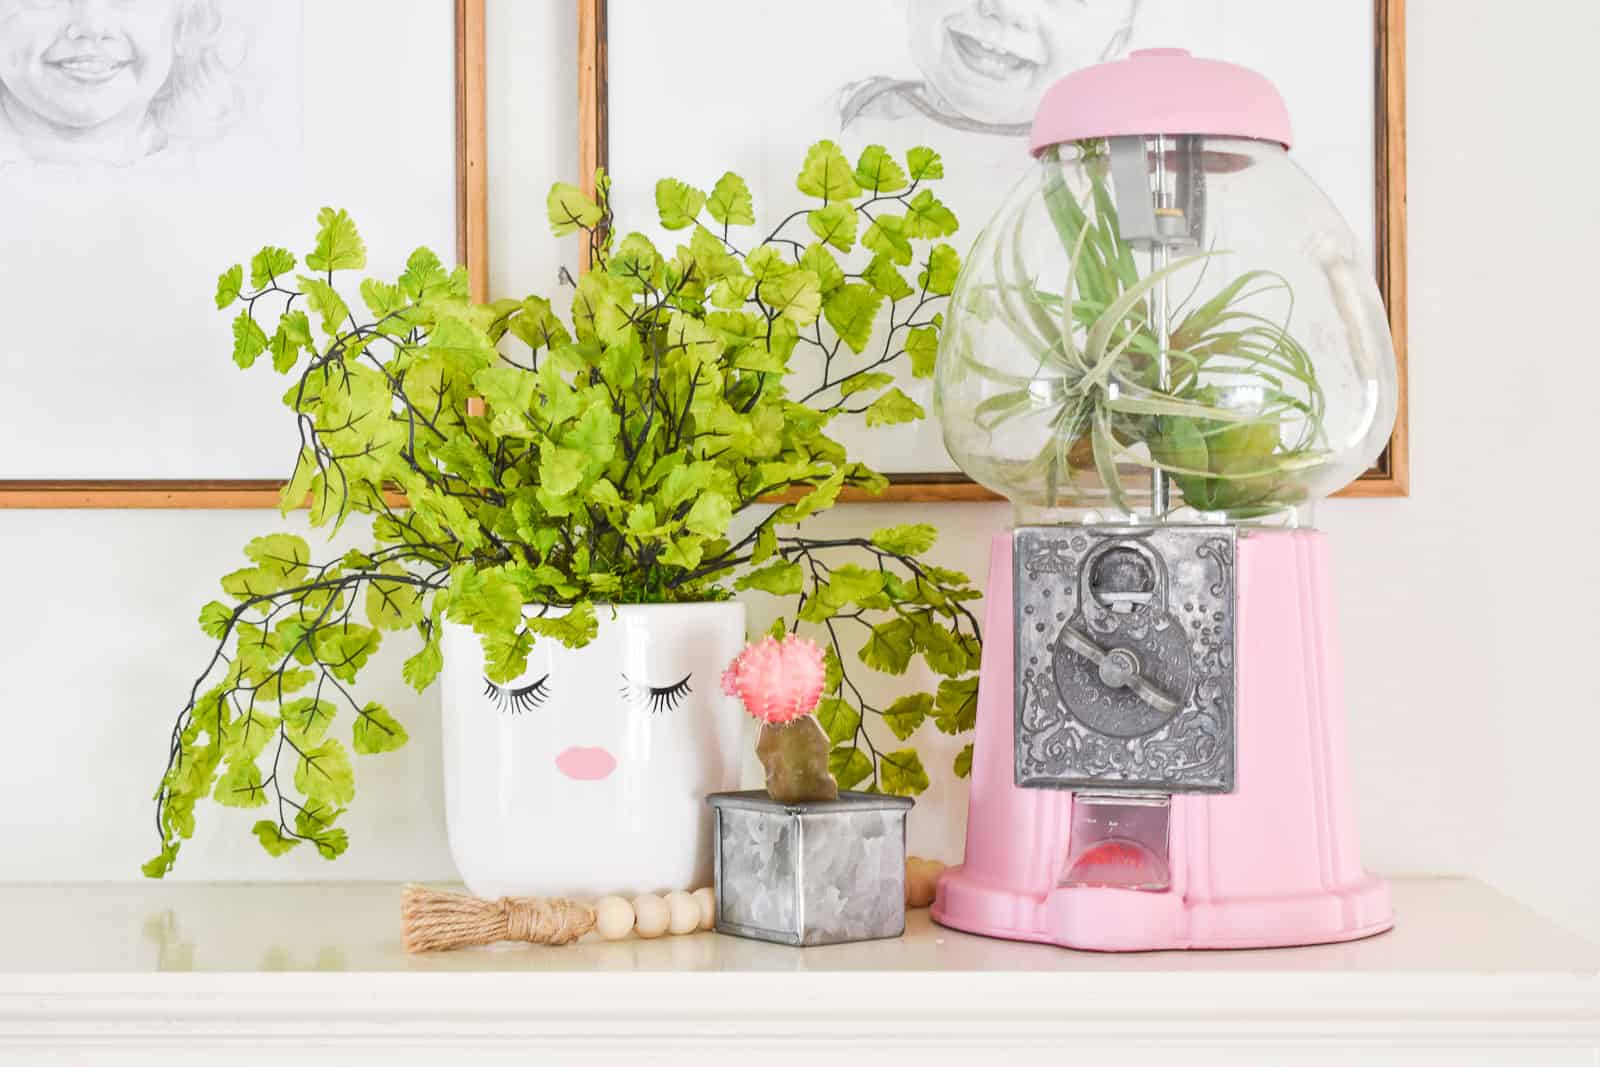
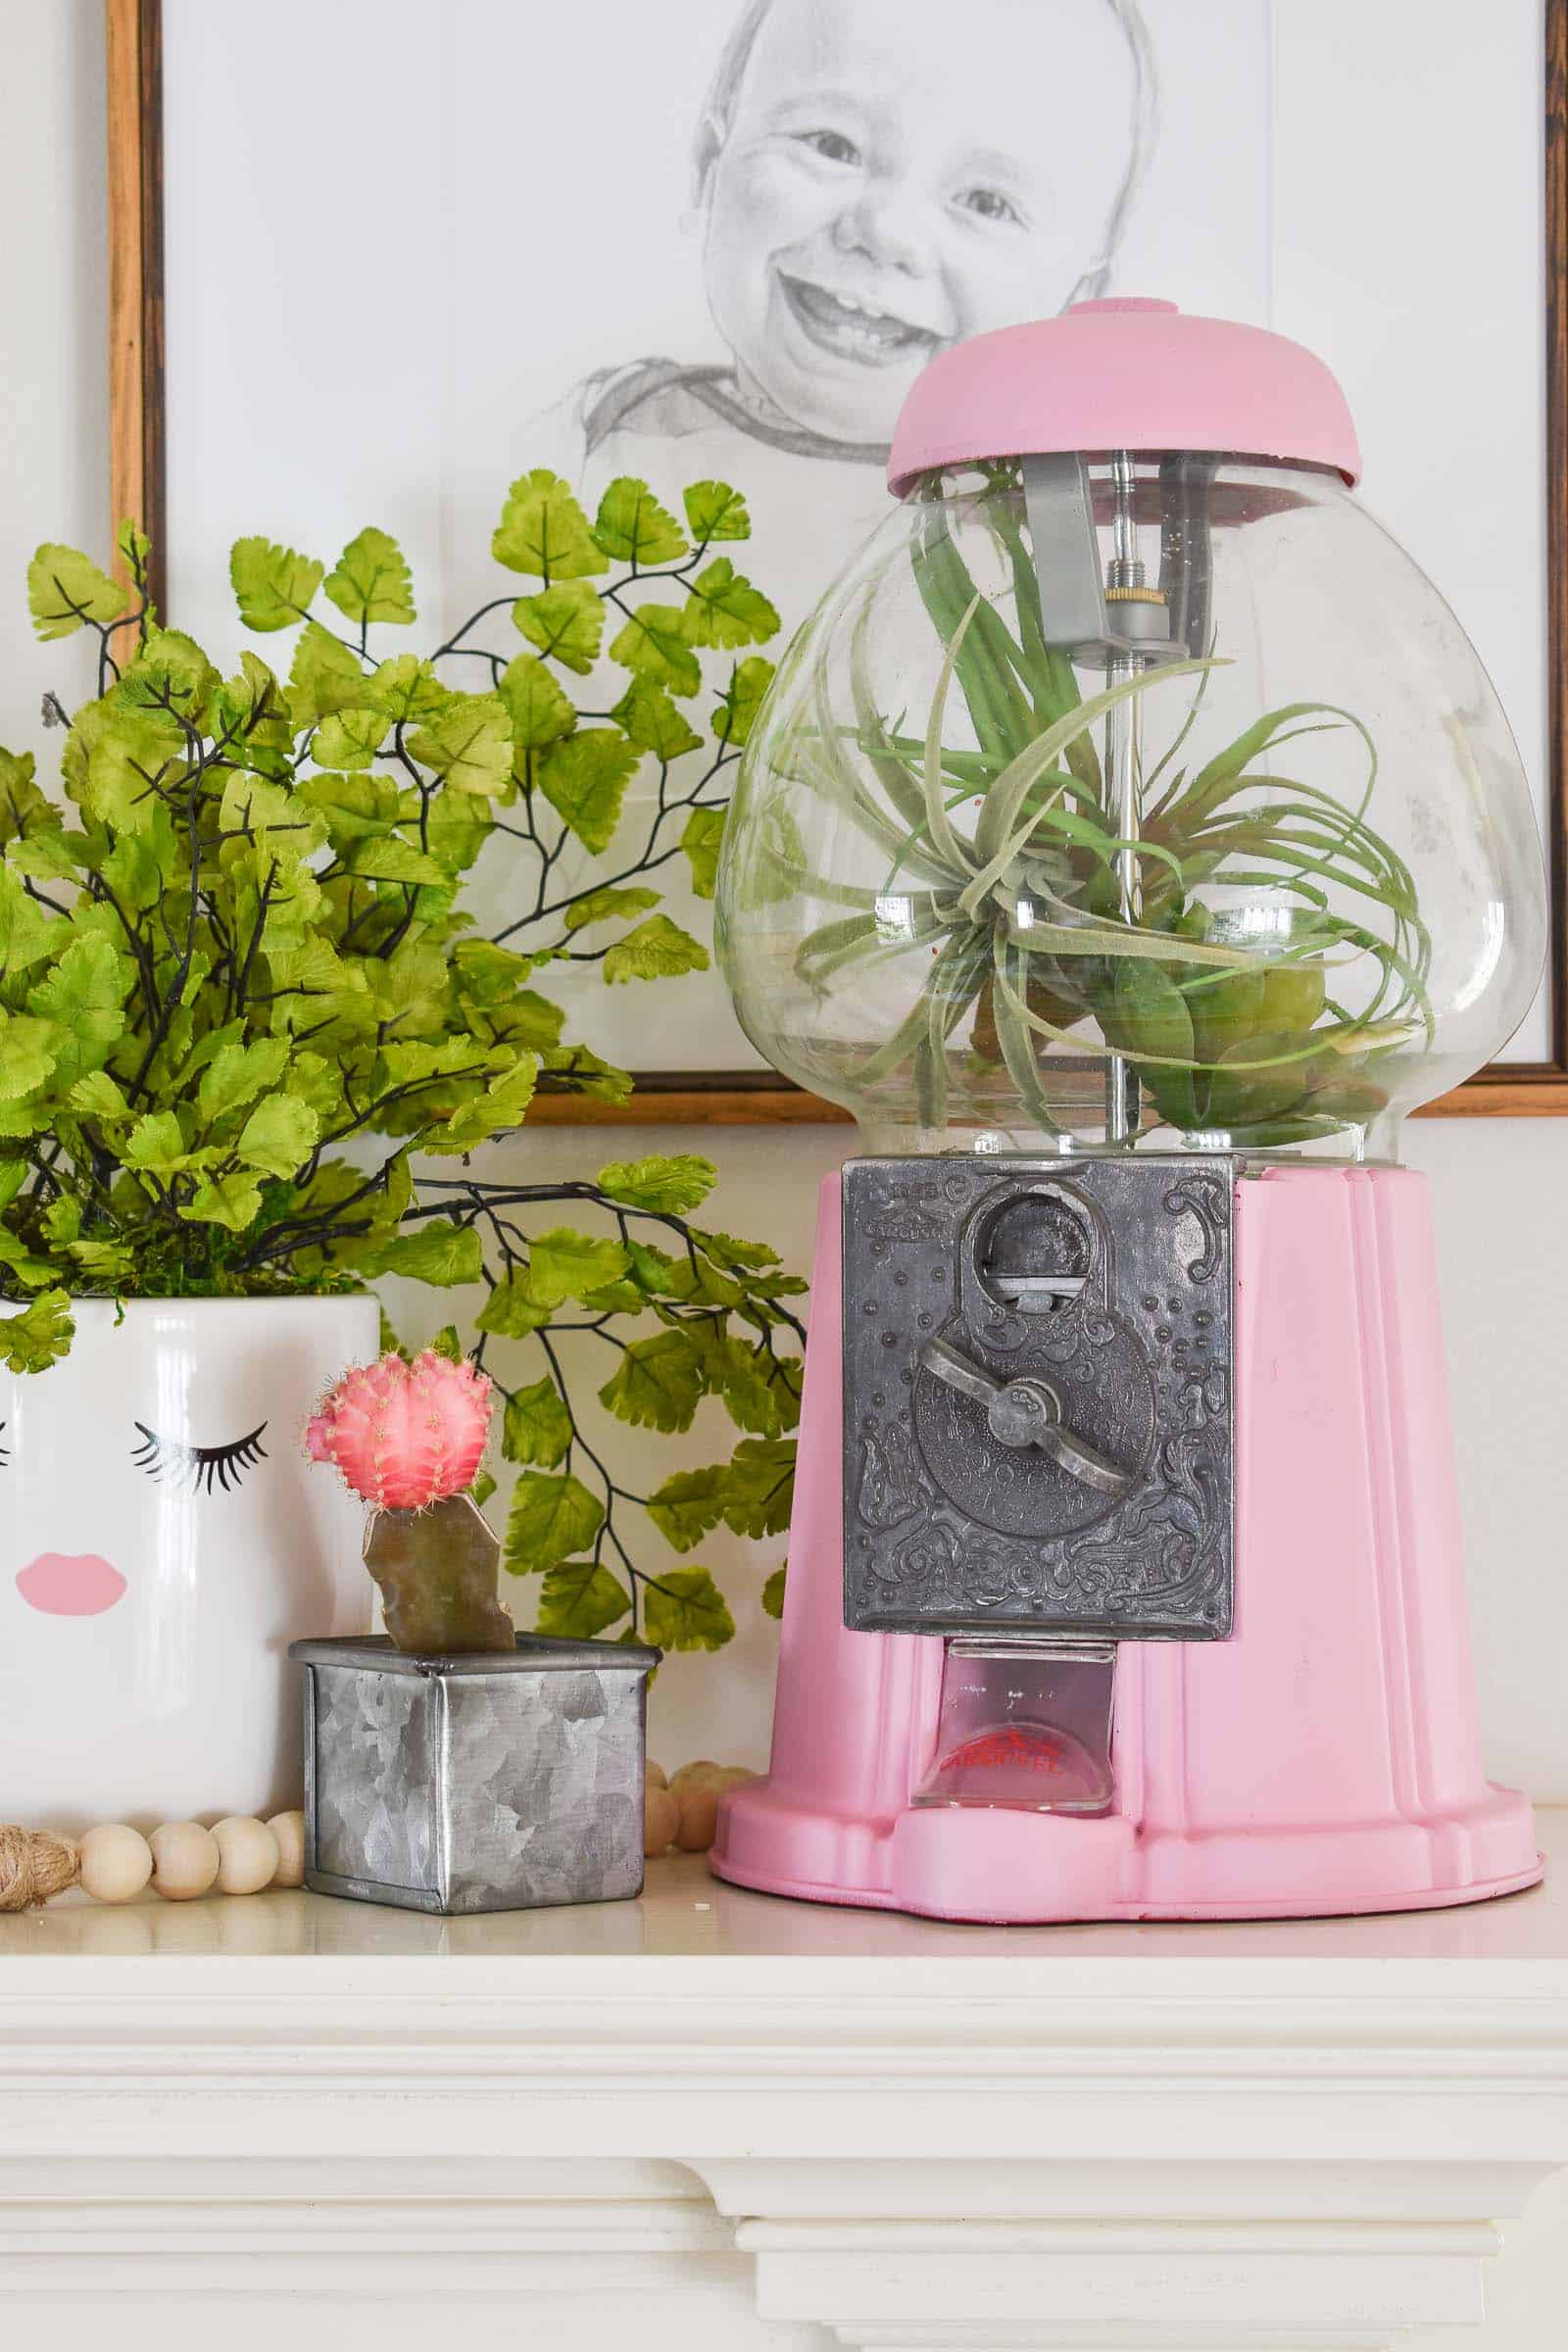
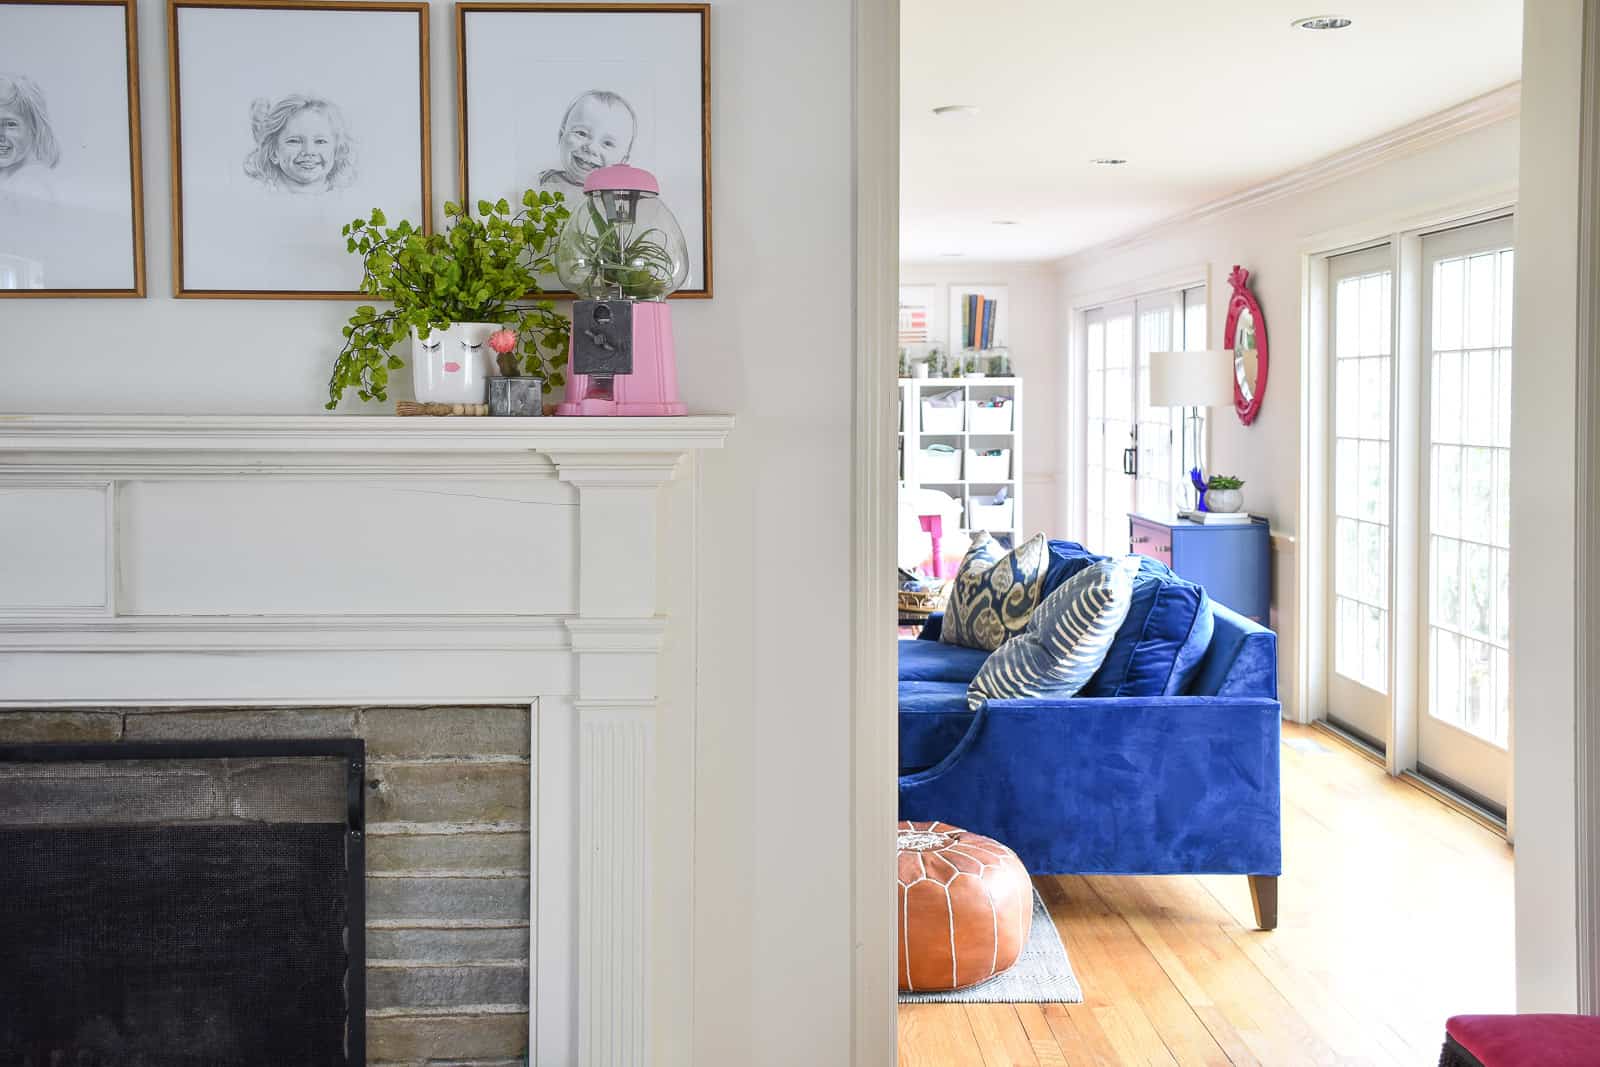
How to Spray Paint a Thrifted Gumball Machine
I wanted to give this retro gumball machine a bit of a spray paint makeover so that it would fit my decor a little better!
Disclosure: I am an ambassador for Plutonium spray paint. I was given spray paint for free.
Shop my favorites!
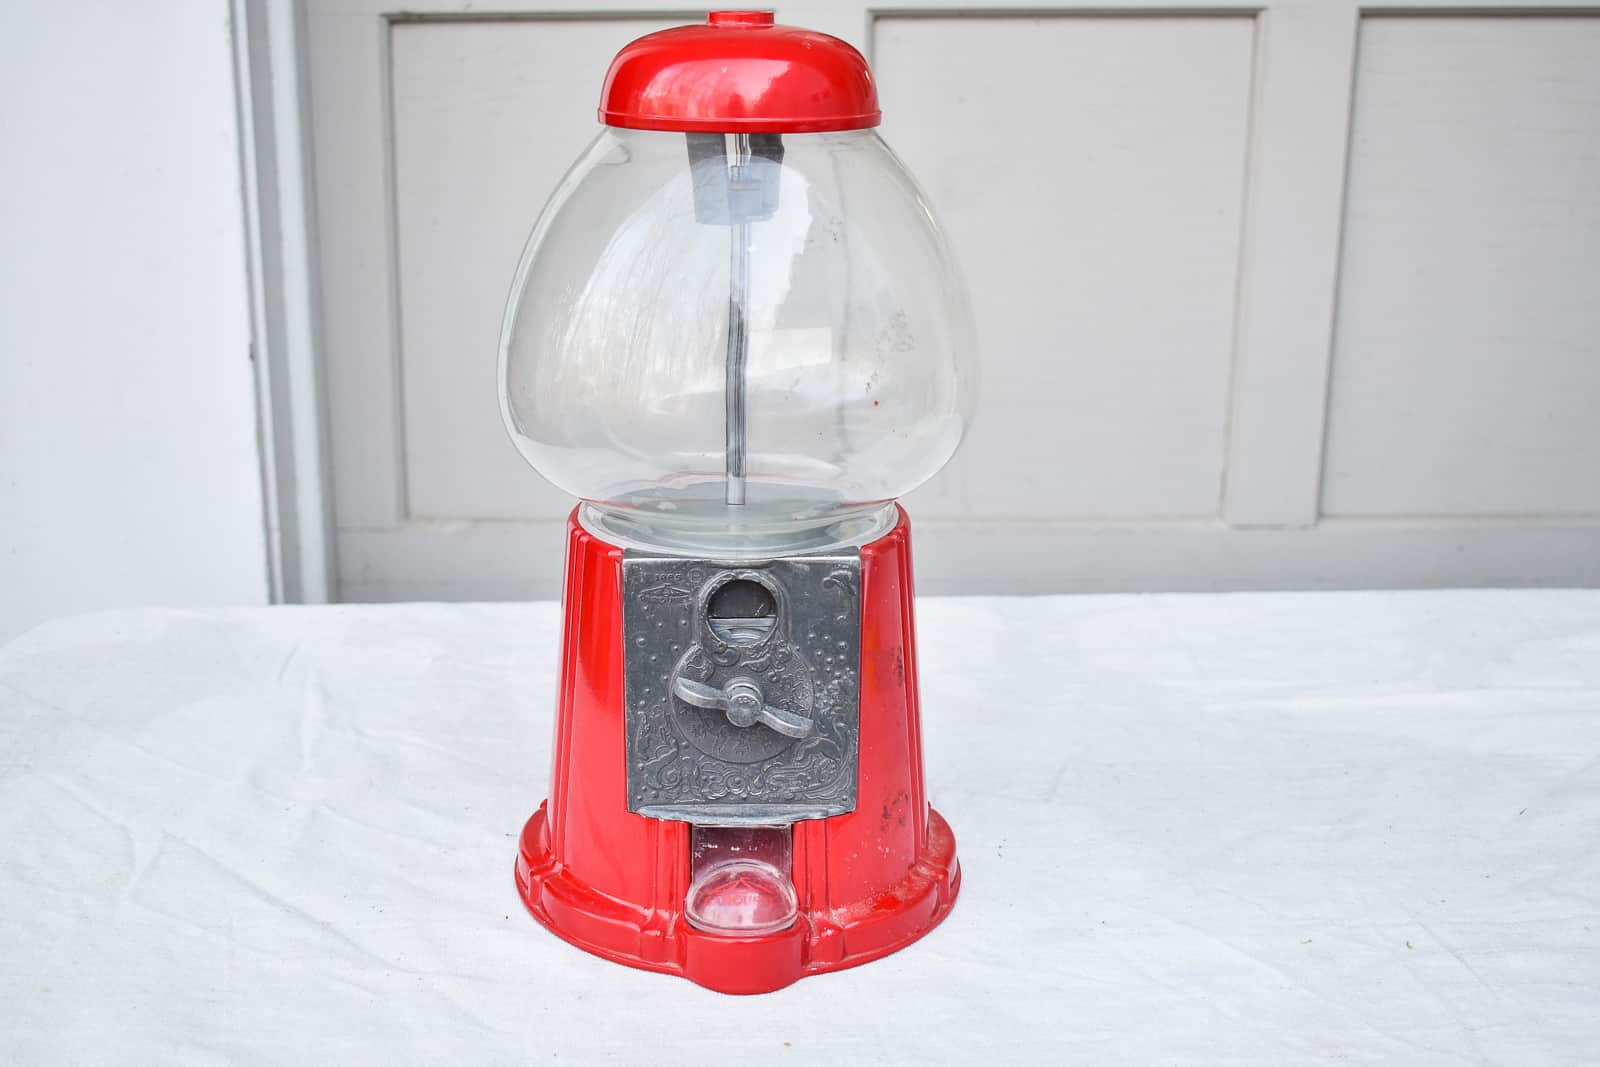
I picked up this gumball machine a few years ago at the thrift store and I’ve always loved it. But I only display it at Christmas because it’s a *bright*red and… that doesn’t match anything in my house. Thankfully… giving this guy a makeover couldn’t have been easier using Plutonium Spray Paint.
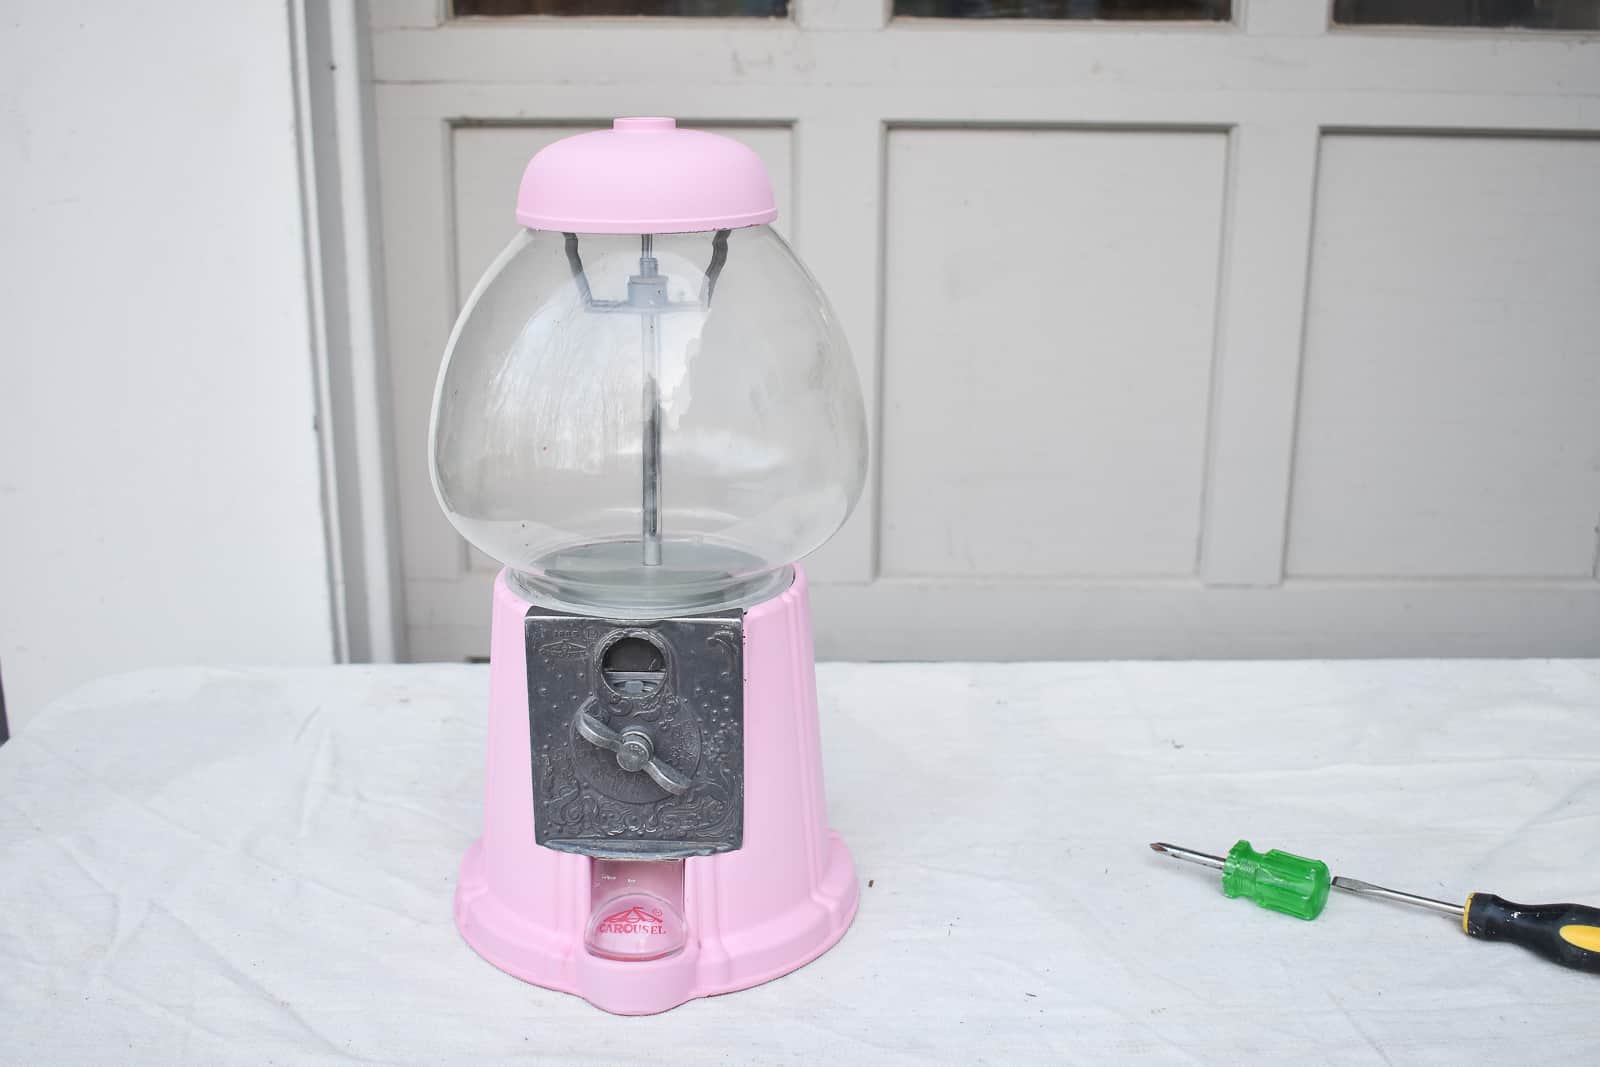
Step 1. Clean the surface
Before *any* paint project, you need to make sure the surface is clean. I thoroughly dusted my gumball machine being careful to get into all the nooks and crannies. A gently soap and water cleaning wouldn’t have killed me either… but I was impatient and didn’t have time to let it dry off completely.

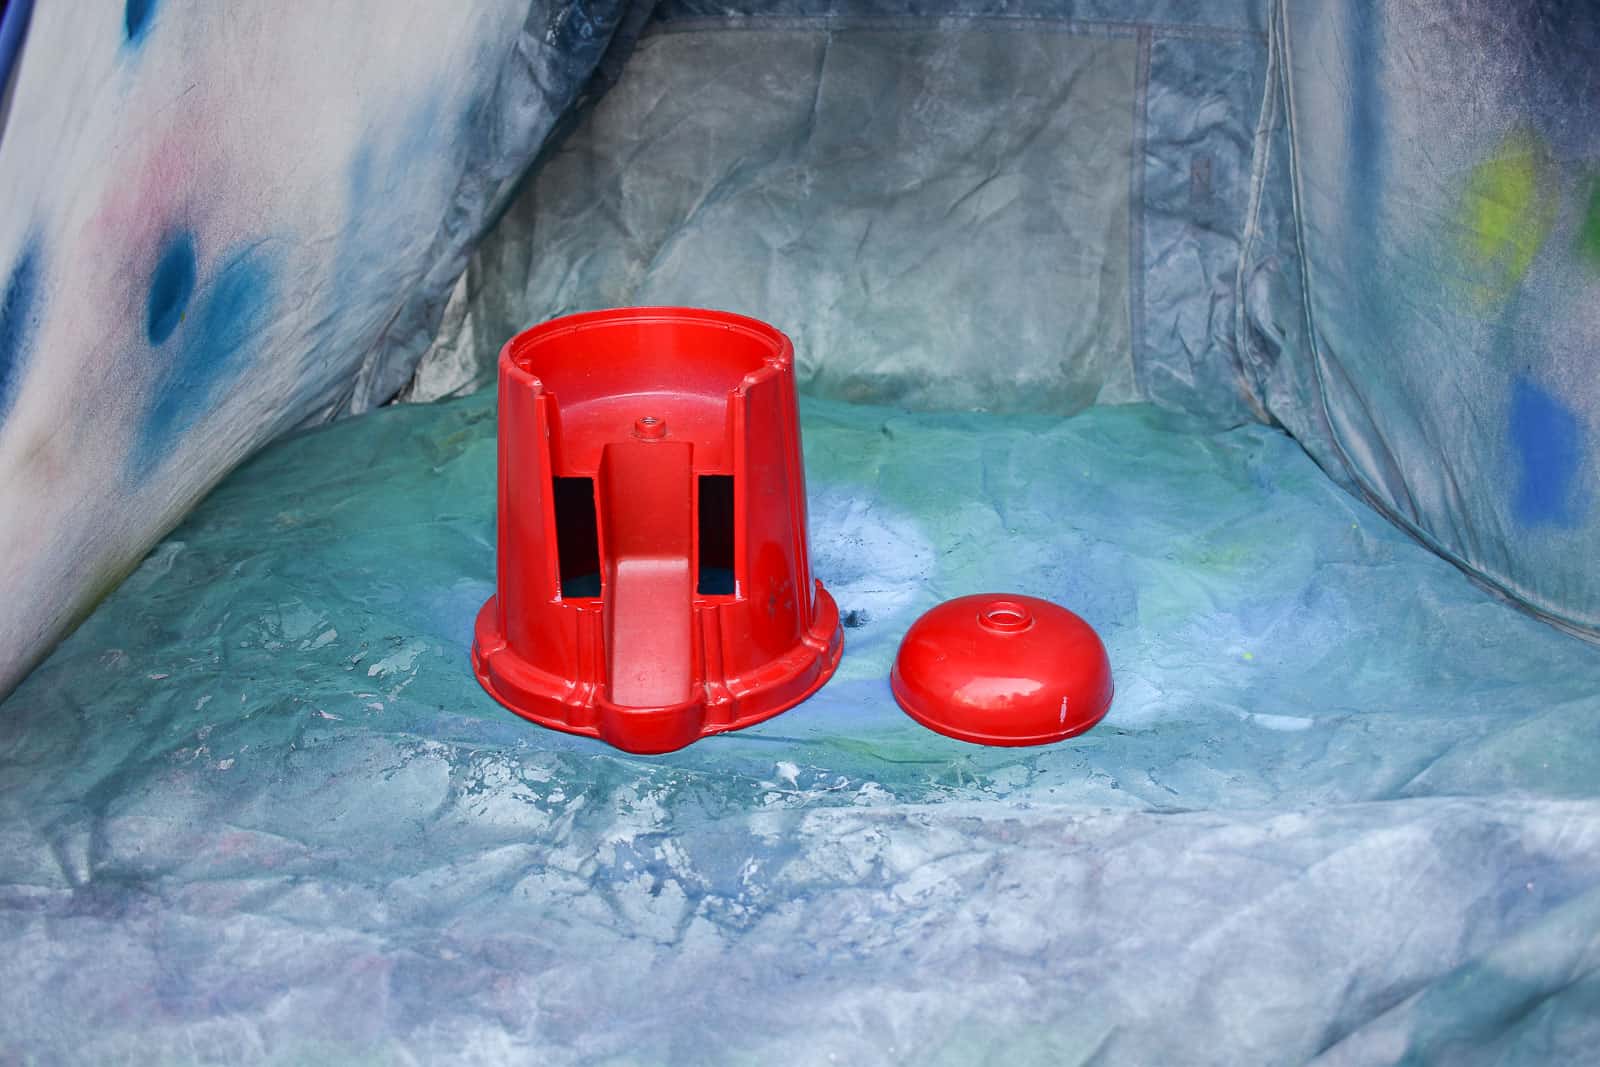
Step 2. Deconstruct the gumball machine
Truth be told… I had a roll of FrogTape® at the ready to tape off my gumball machine. It wouldn’t have been that hard, but… I began sniffing around and it turned out I could unscrew the top glass saving me SO much time. I also notice that if I flipped the gumball machine over, I could unscrew the metal plate from the front meaning there was NO need for taping!

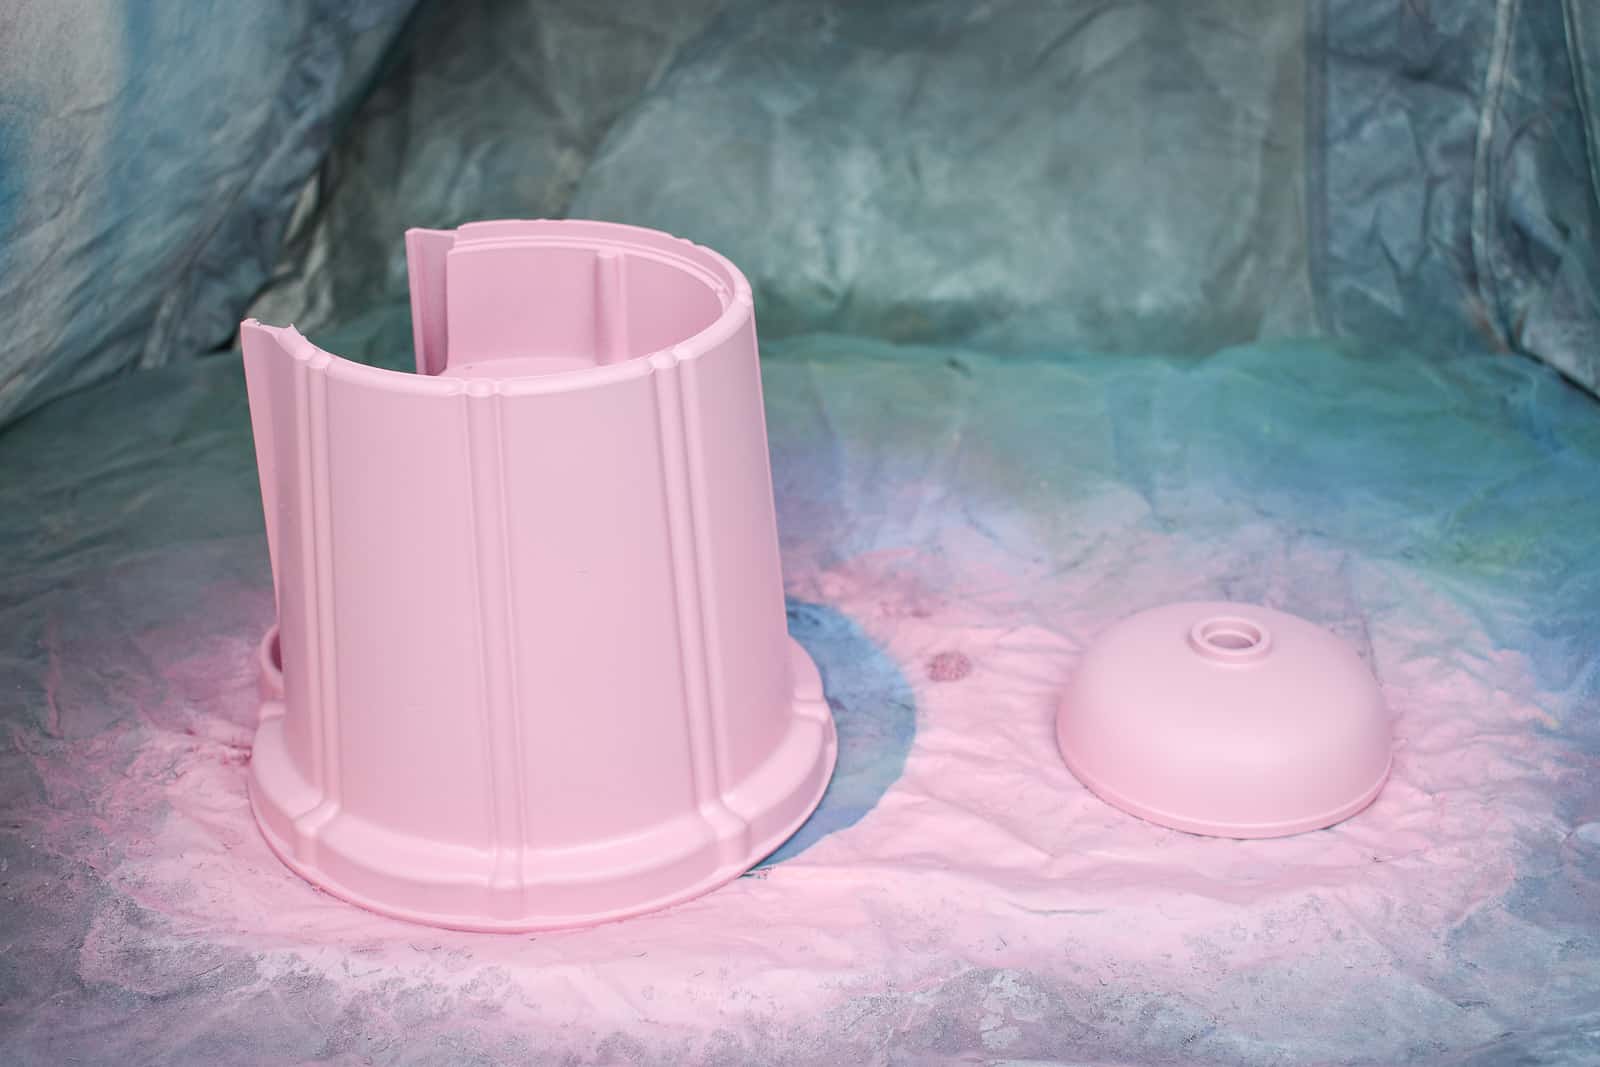
Step 3. Spray Paint
I’m using Plutonium paint in Manko pink. Because Plutonium sprays in SUCH a fine mist there’s virtually no overspray, the paint dries within seconds, and… no drips. It adhered easily to the metal and covered the red easy peasy. (I LOVE my Homeright mini spray tent for these small spray paint projects… it opens in a heartbeat and keeps wind from interfering with my project.)
Step 4. Put back together
Putting the gumball machine back together is a *bit* more complicated, so consider taking pictures of each step… I didn’t do this so I’m 90% sure I got it back together the right way. Because my gumball machine is only decorative… no biggie.
In case you’re too impatient to find a thrifted gumball machine, this is a link to the one I used brand new. It’s $30 so not a crazy amount to spend! I love sharing these simple makeovers since I really think color (and easy to use spray paint) can make SUCH an impact… thrift store treasures can fit into any decor… without breaking the budget!


Where did you buy the pink paint for the gumball machinE?
Hi Cindy! I used Plutonium Spray Paint for this! It’s sold online or at Ace Hardware stores!
Hi! Did you use a primer first, and do you have a favorite white that woiuld work? Thanks!
Hi Maria!
For this one, I didn’t use a primer because the Plutonium paint is so good. Otherwise, I usually reach for the RustOleum primer and spray paint.
Do you know if that brand of paint is food safe? Like if i wanted to put gumballs or peanuts inside after its Been spray painted?
I doubt it is, but nothing on the inside is painted so not sure if the gumballs/ peanuts would ever come in contact with the painted surface.