
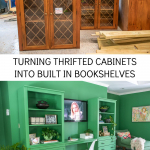
DIY Built In Bookshelves from Thrifted Cabinets
Psssst… this post *might* contain affiliate links: see my disclosure here.
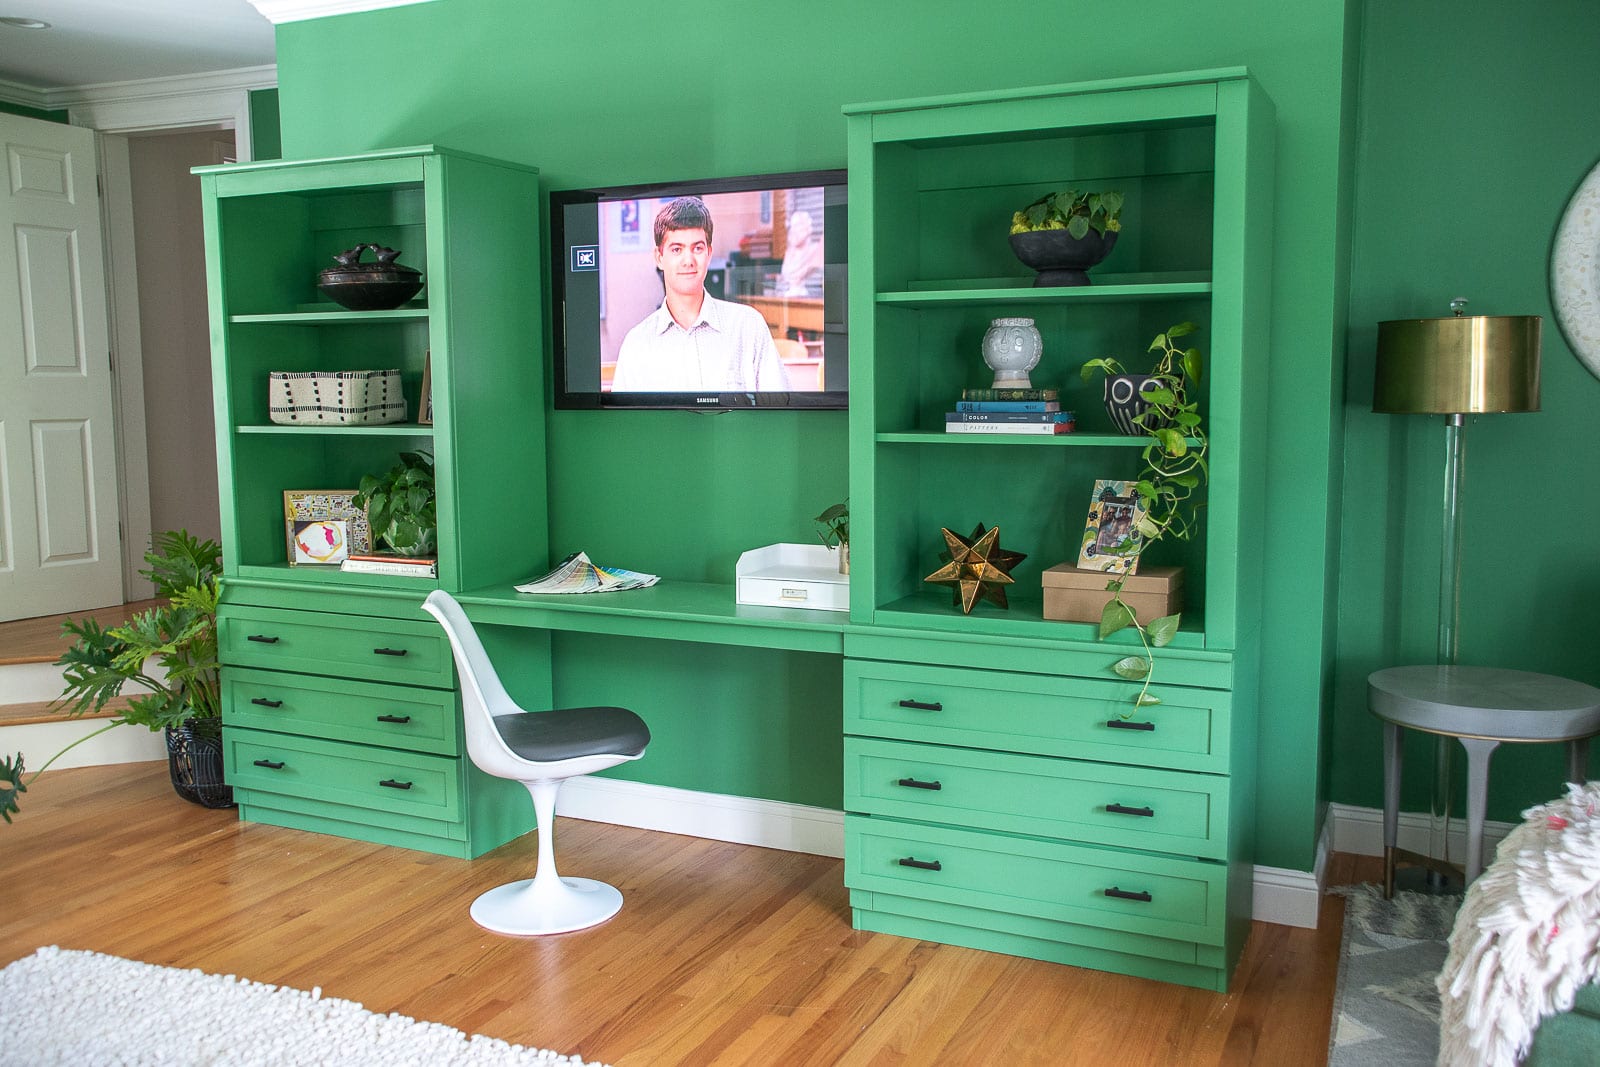
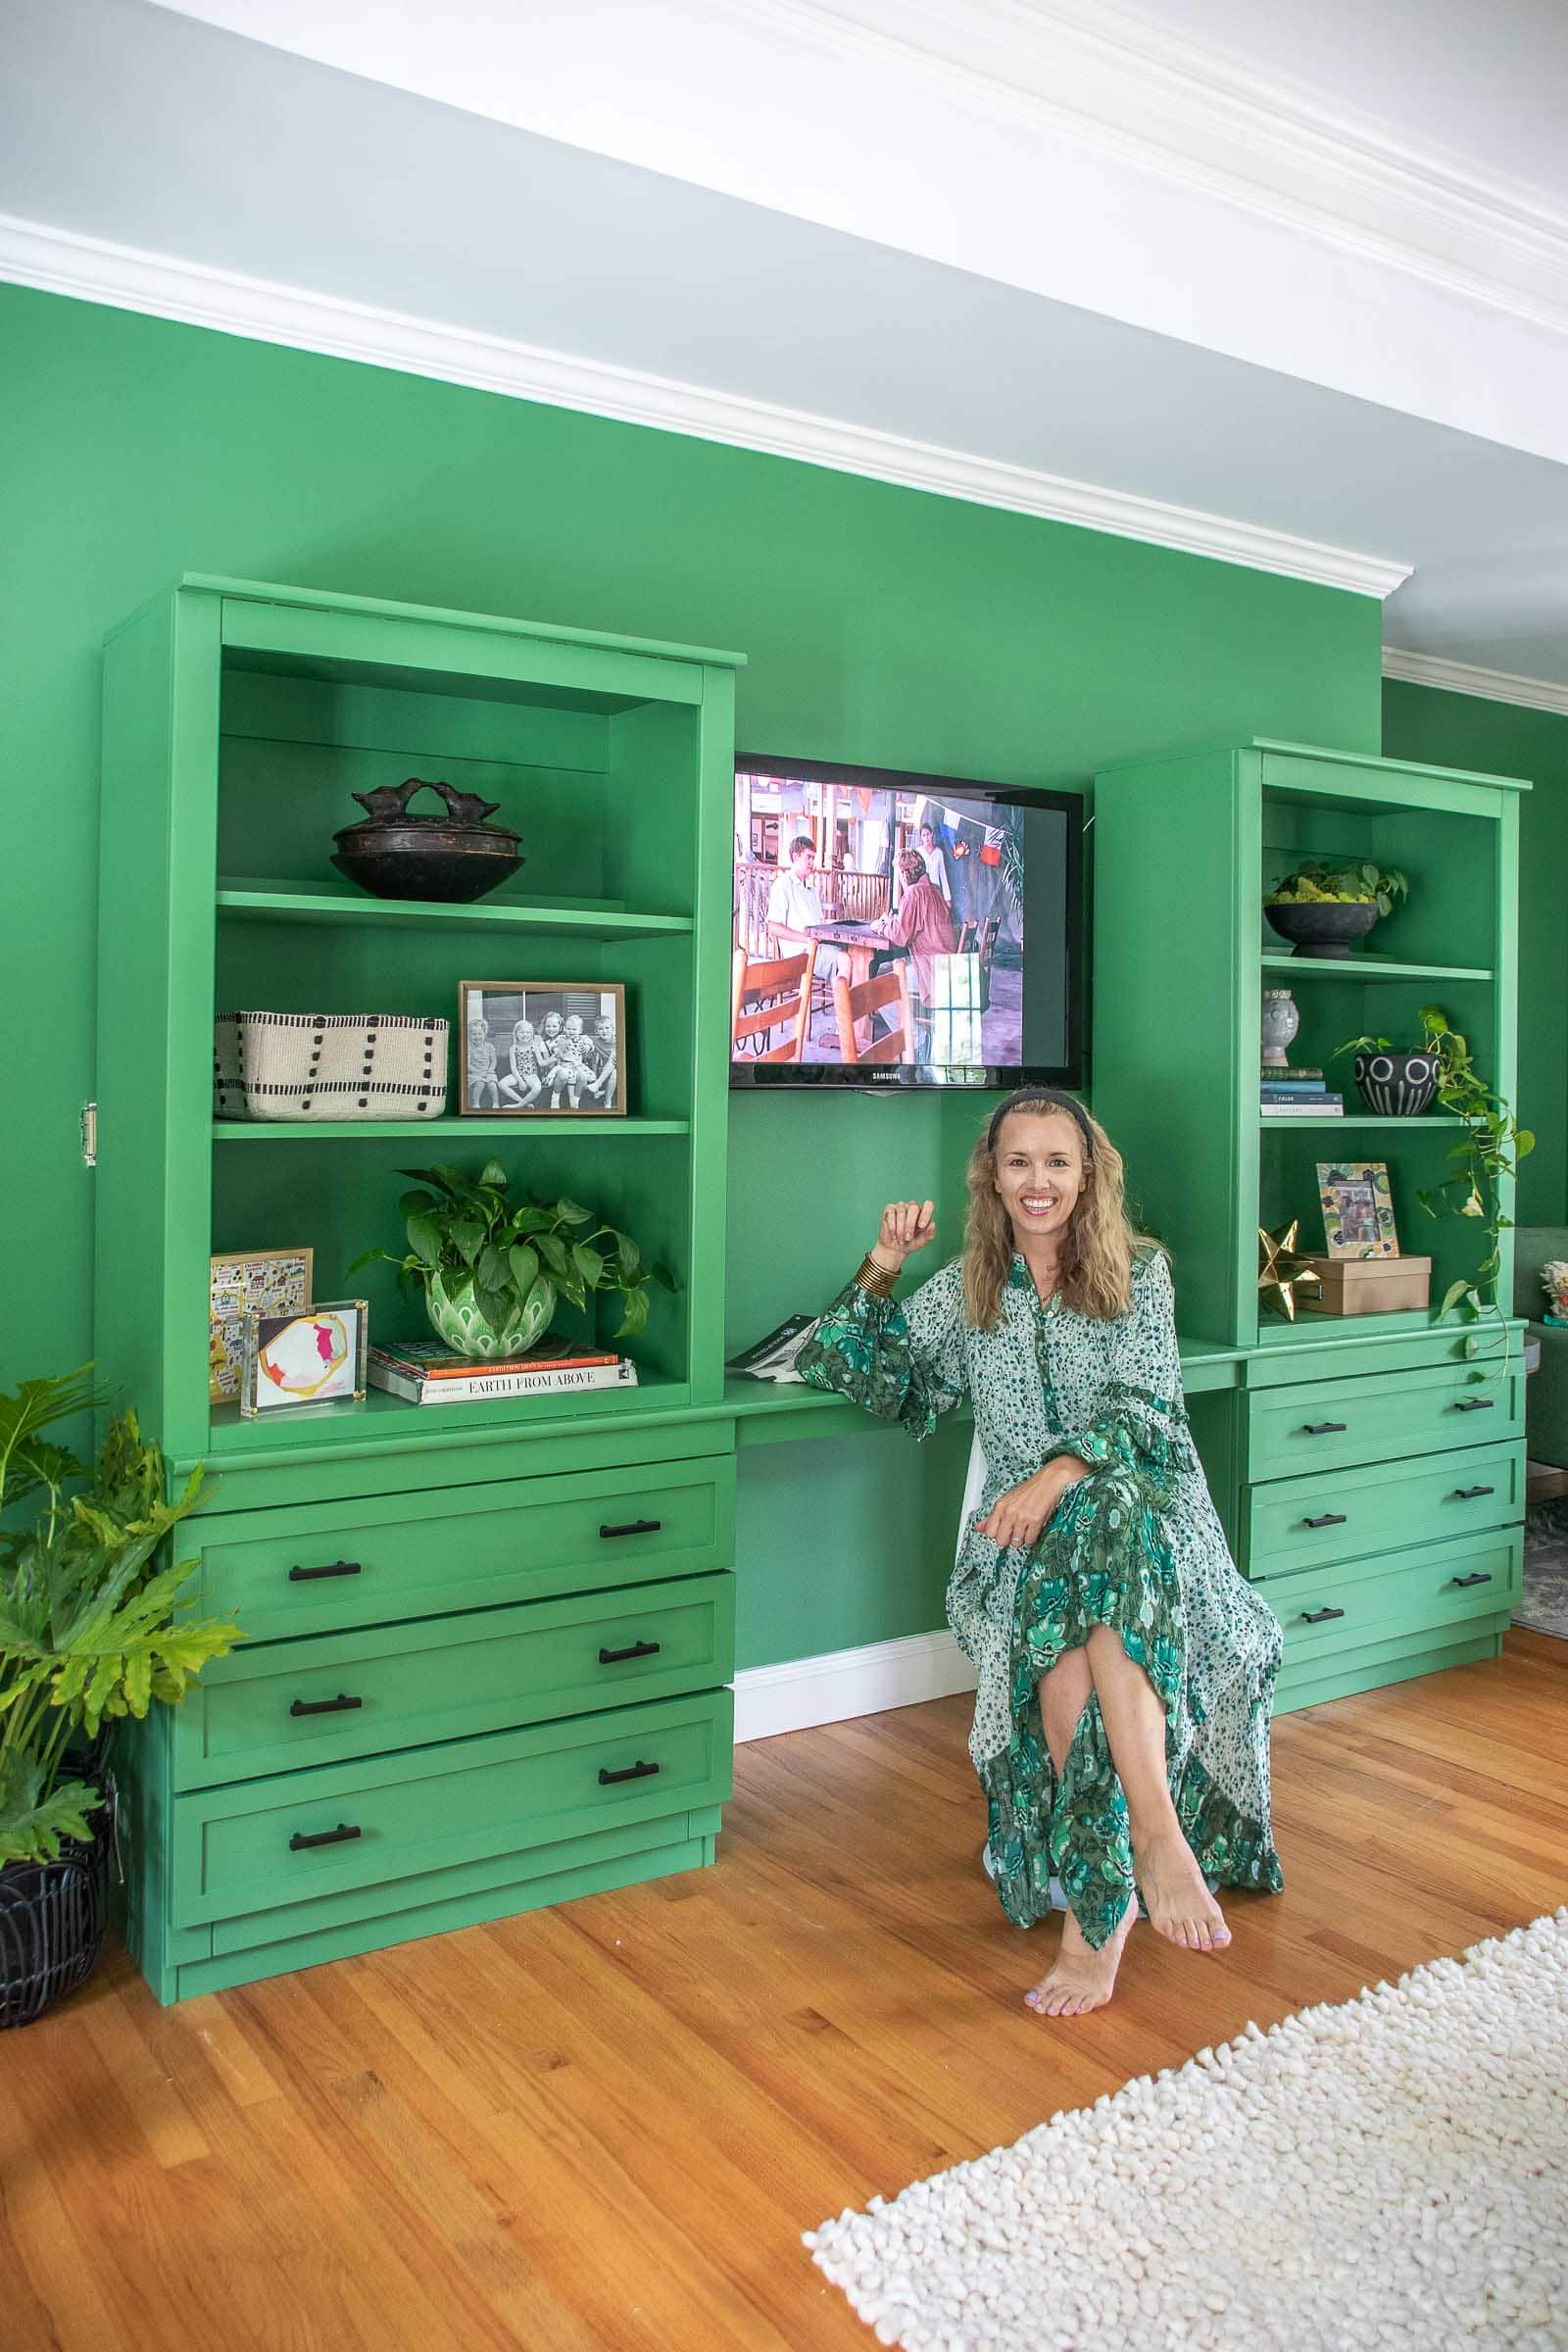
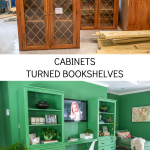
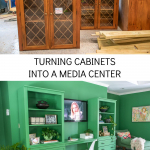
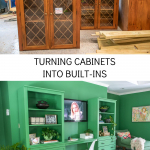
Turning Old Cabinets into a Media Center
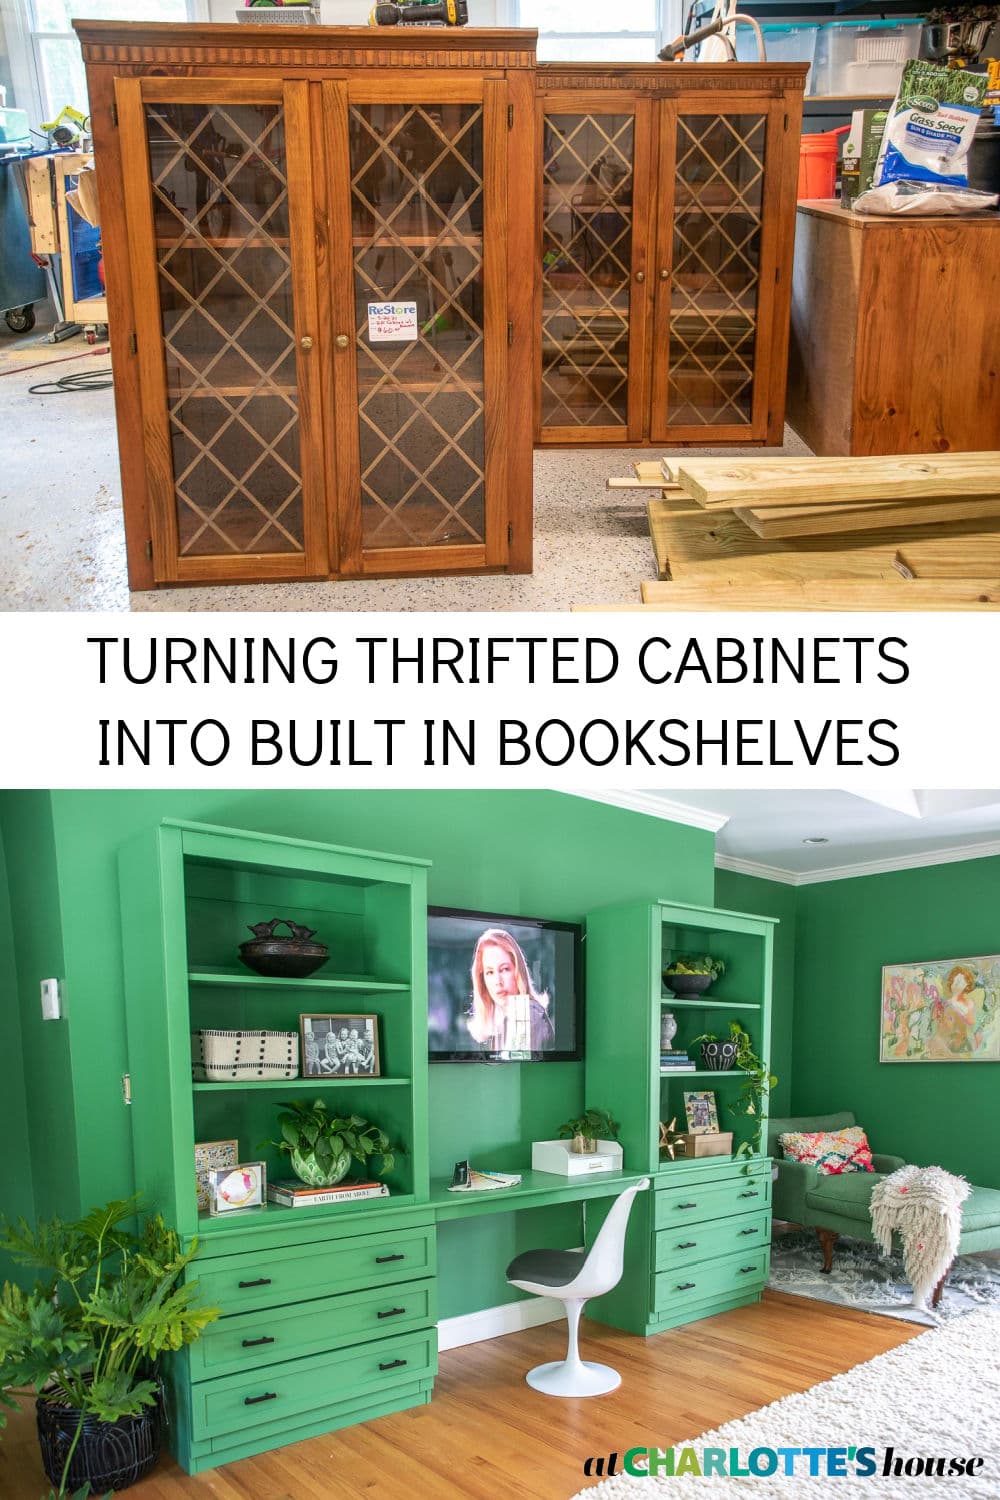
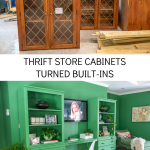
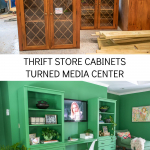
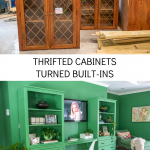
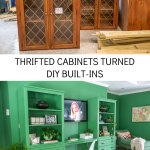
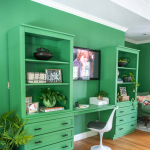
I took these thrifted hutches and turned them into faux built ins for our bedroom.
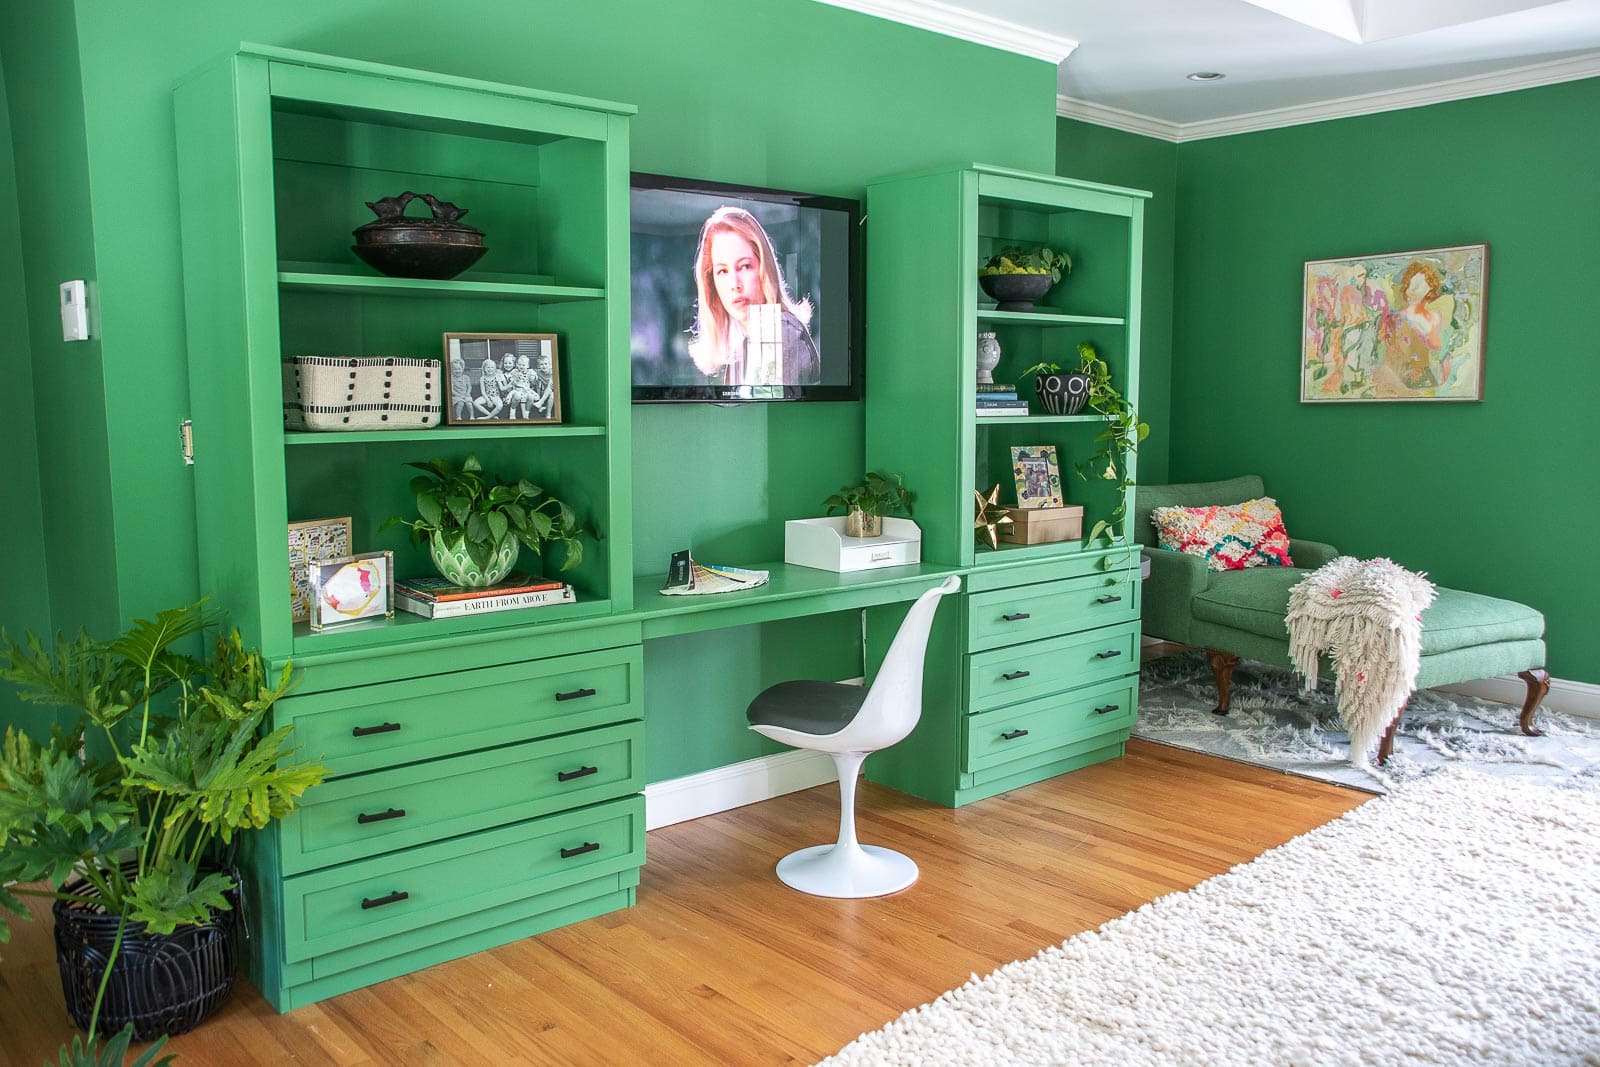
I think I’ve mentioned before but our primary bedroom in this house is big. Real big. I was an addition from the 90s and it’s much more space than we need, but it also means that I had to get creative with how to decorate/ fill the space with furniture. I picked up an amazing tweed chaise from Facebook marketplace and moved the room around a bit to accommodate and it became clear that the wall opposite our bed needed something pretty substantial to balance the space. Lots of you suggested a fireplace which I thought about for a minute. But honestly… we have a real fireplace downstairs so a decorative fireplace upstairs wasn’t super appealing from a functional point of view. What felt like it would be useful was some sort of desk/ storage situation. Perhaps built ins across that back wall? With lumber crazy high, I decided to look into repurposing existing furniture… perhaps cheaper and possibly easier because I would ba adapting something already built.
Shop my favorites!

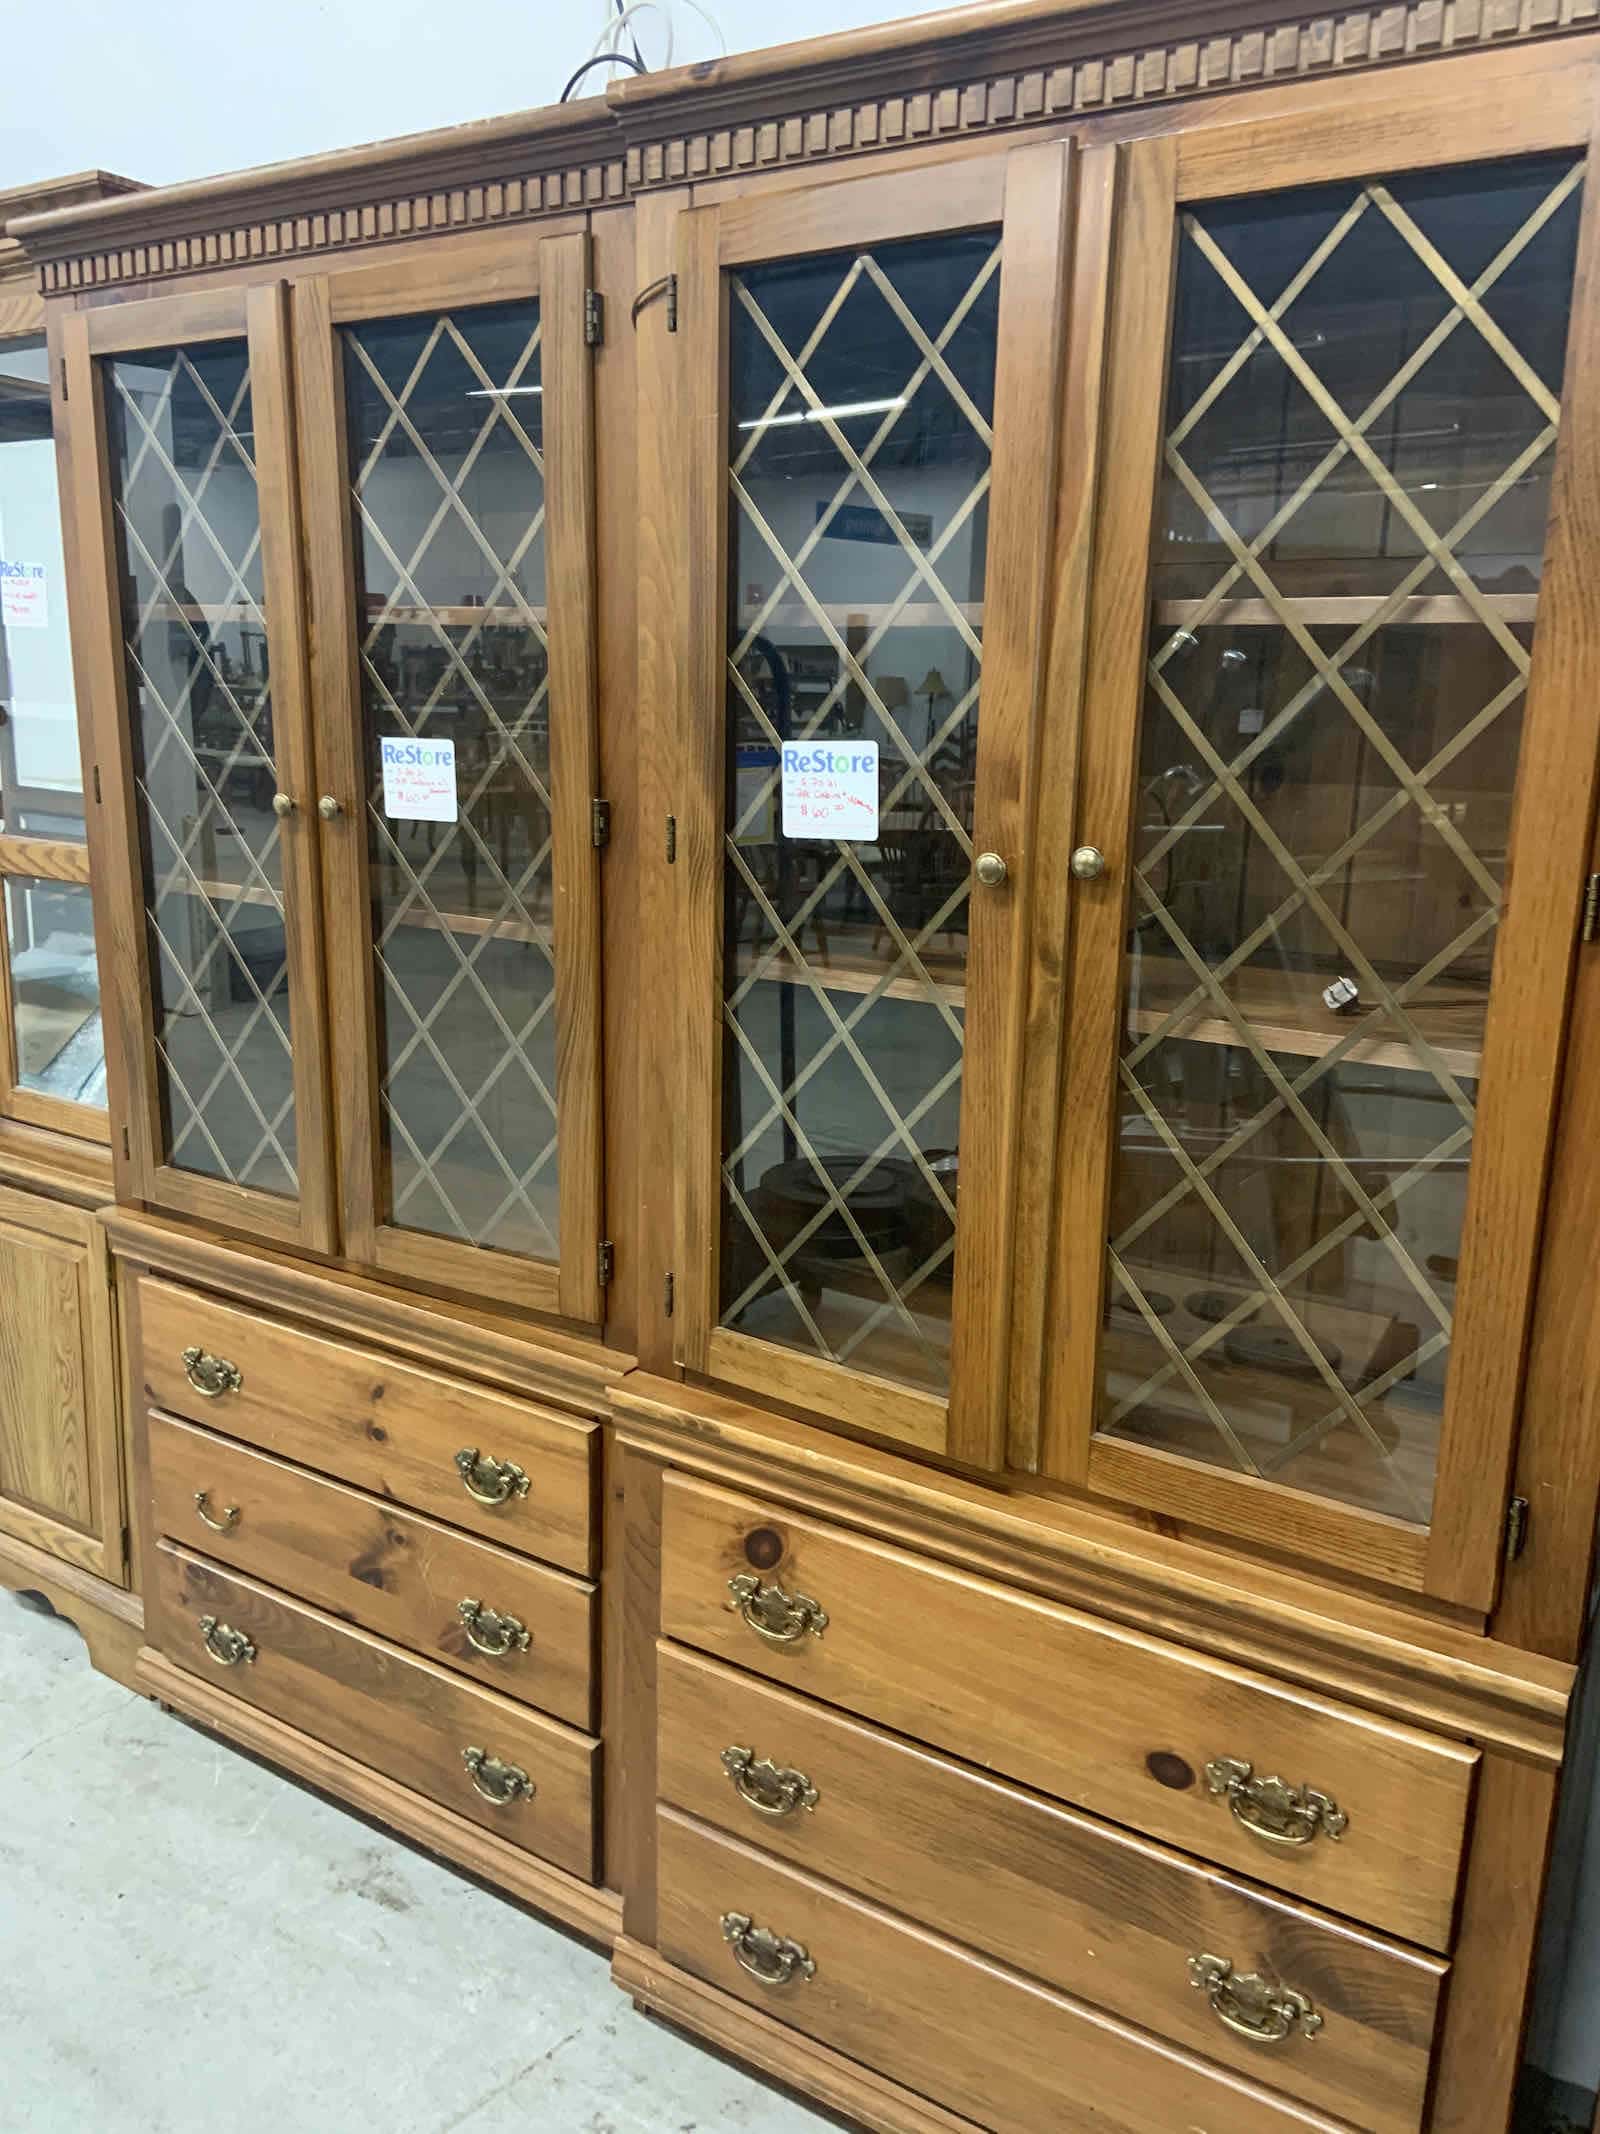
May I present this pair of wooden cabinets I saw at the Restore. Originally priced at $60 each, they were on sale so… I got them BOTH for $75. These are *not*antiques or fine pieces of furniture, but they ARE wood which is important because I knew I wanted to paint them. Let’s see what we can do with them…
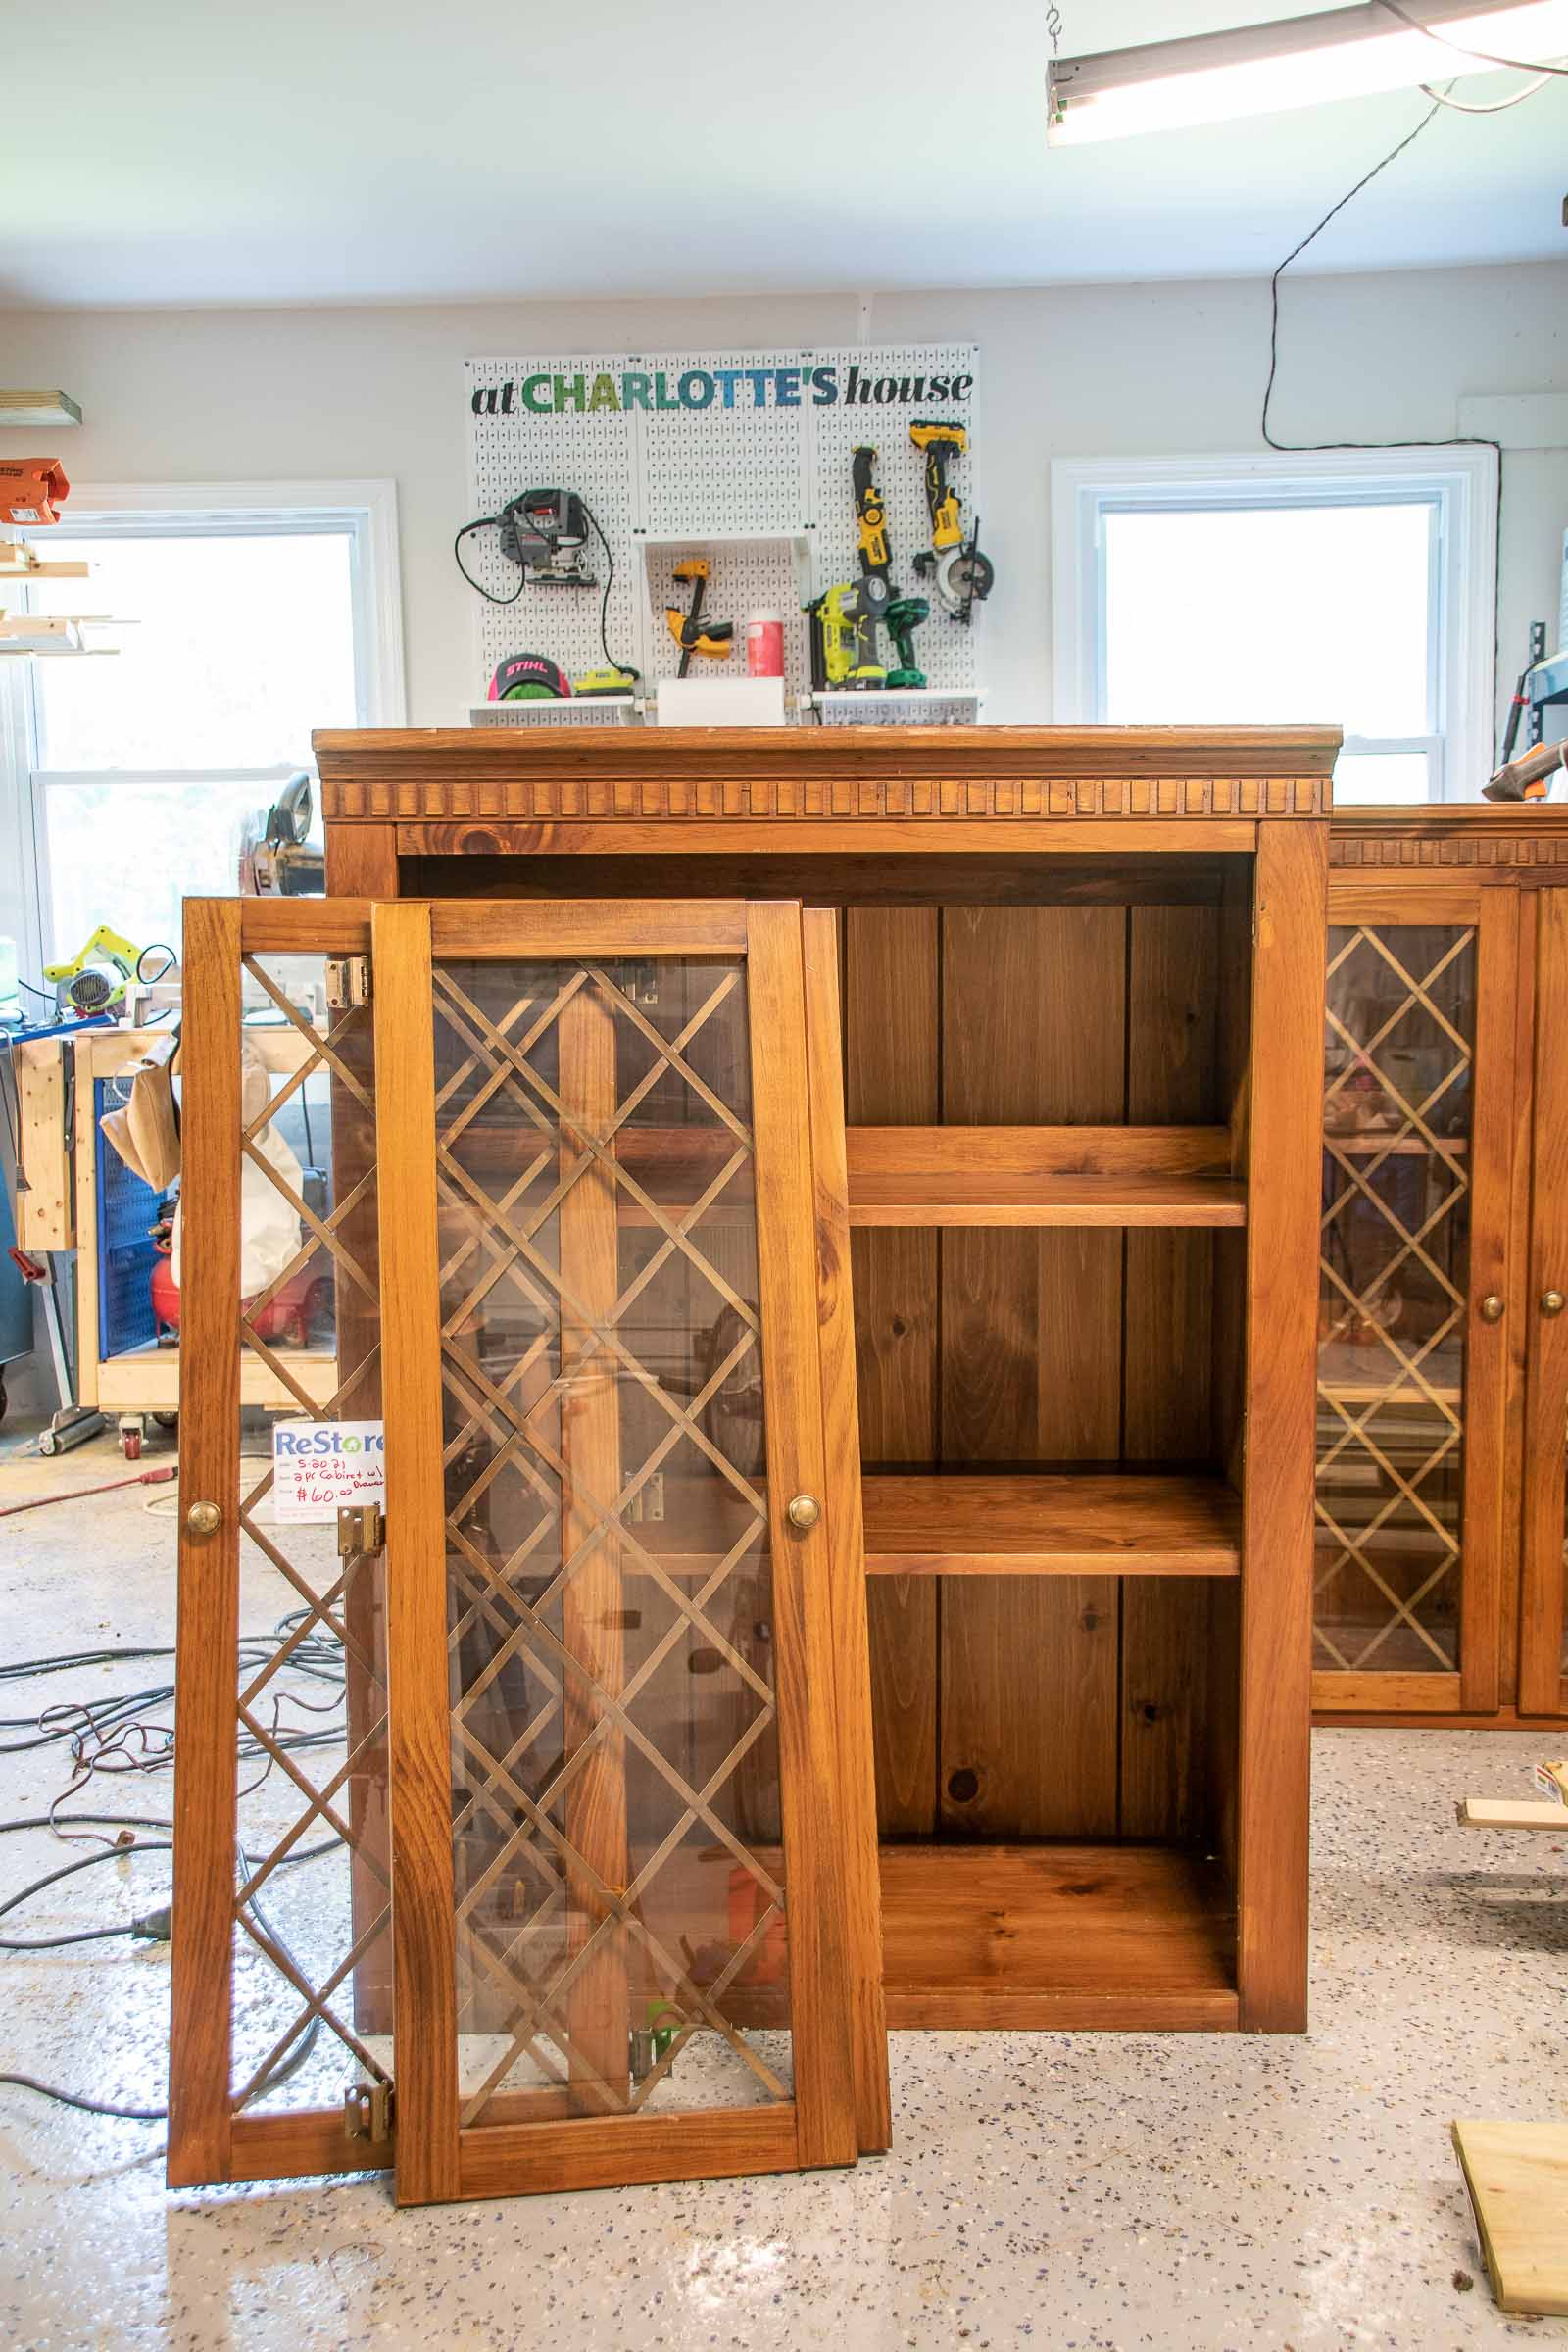
Step 1. Remove the Doors
The doors on these guys were lovely, but not the look I was going for. I was also thinking initially that I’d need to add a shelf to the top which would have made the doors impossible too. Two things that were lucky about these doors: 1. the hinges unscrewed from the base easily and 2. the hinges were NOT grooved into the base so once removed, all I needed to do was fill the screw hole.
Step 2. Change the Drawer Fronts
The drawers of the original cabinet felt a little dated. The built ins I liked the look of had straight front drawers with a shaker profile (a simple clean lined frame). I started by trimming off the curved routed edges on the ends with my 4-inch circular saw.
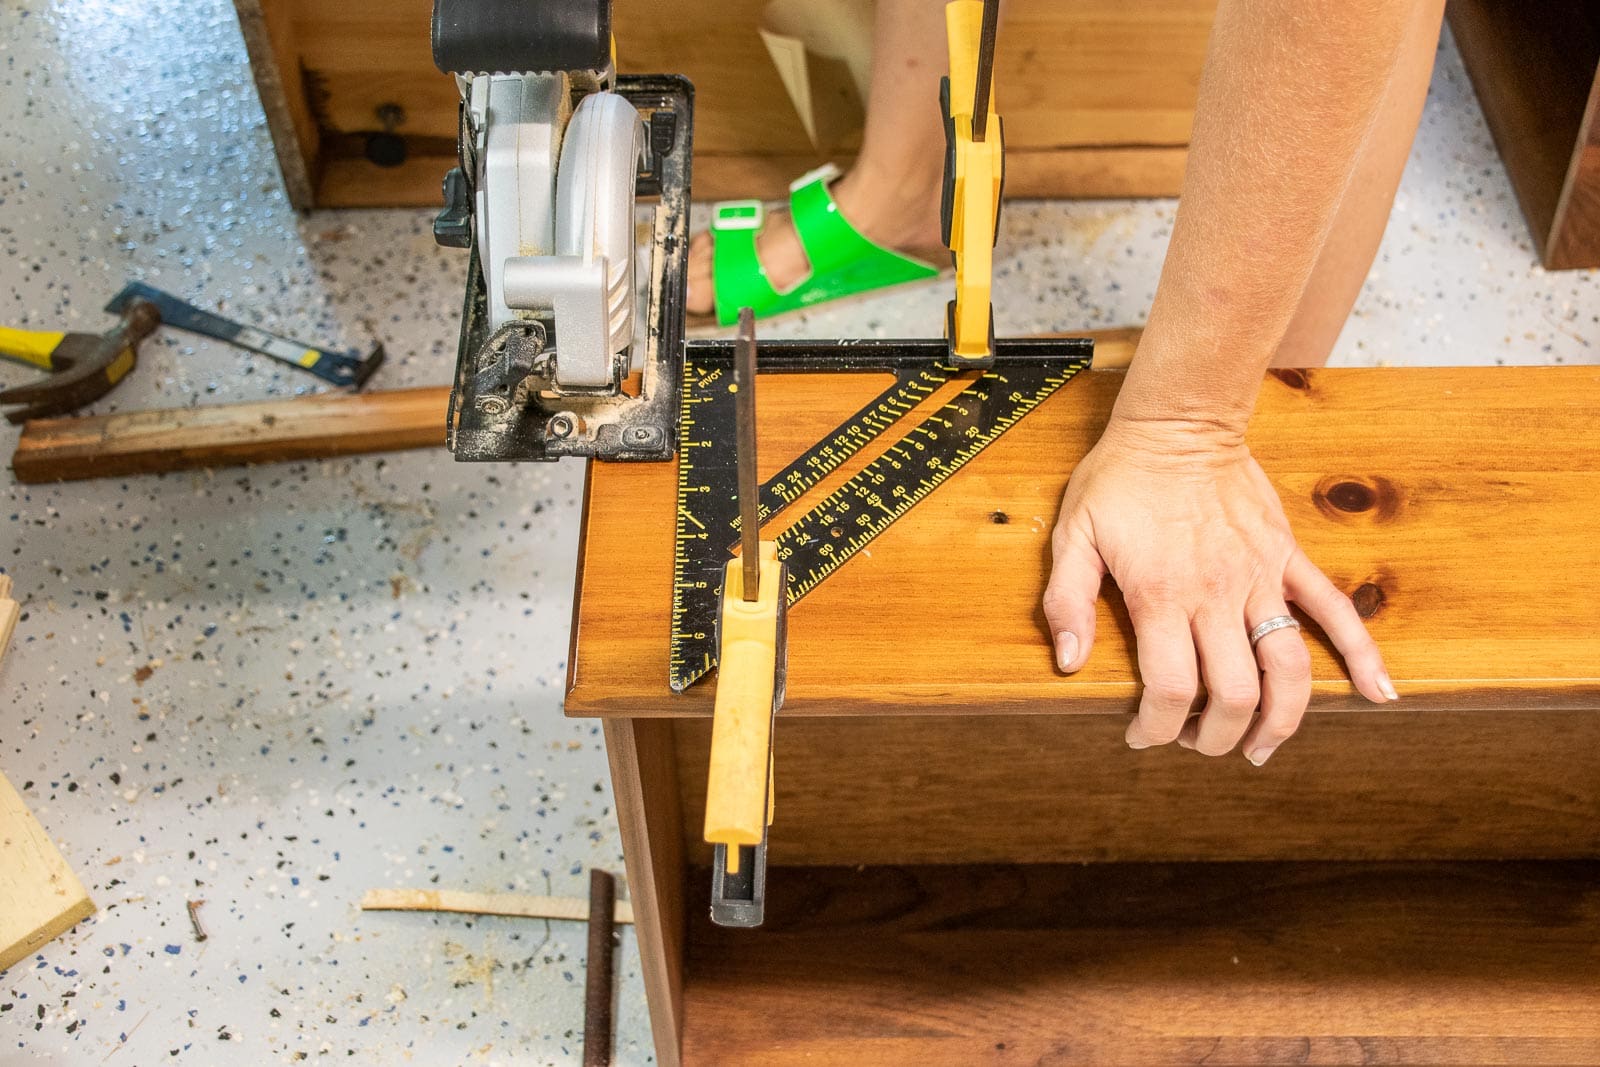
Then I cut some 1x3s down and used pocket holes to screw these into either side of the drawer so that the drawer fronts would extend all the way.

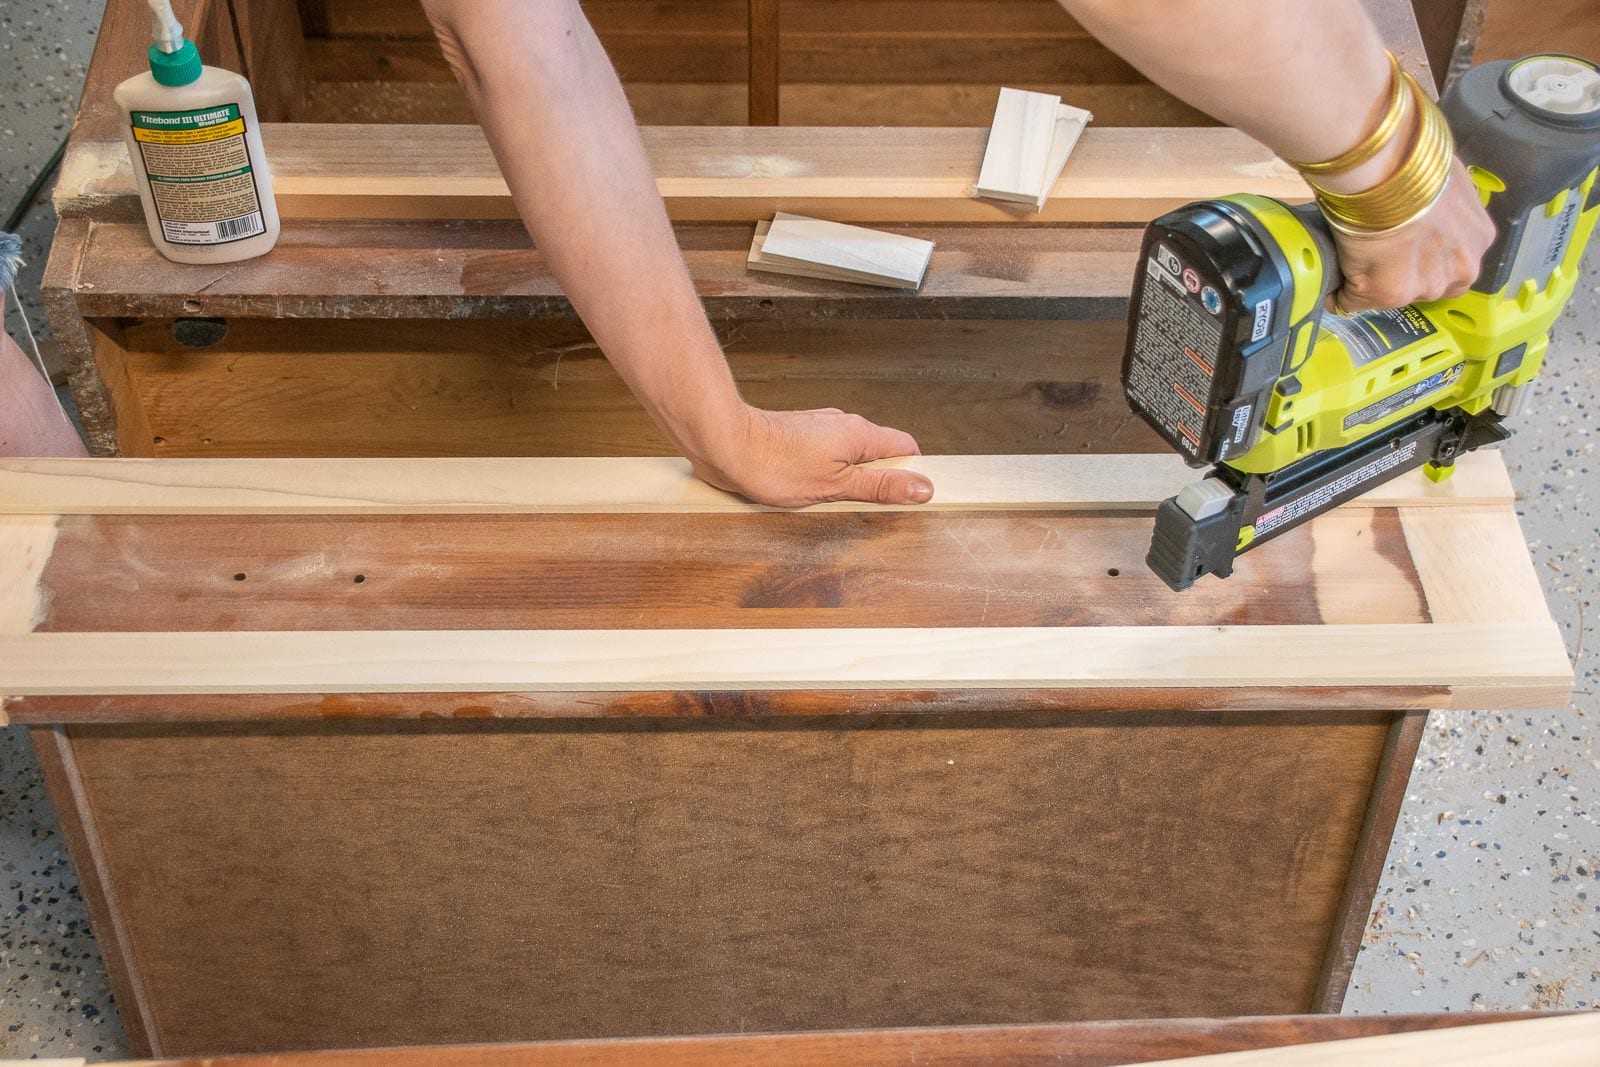
Finally, I used some poplar hobby boards to make the shaker frame for each drawer front. I attached these with wood glue and my brad nailer.
Step 3. Remove Trim
These cabinets had some trim and molding across the top as well as beadboard along the back. I used a small crowbar to remove these as well. I wanted these shelves to be as simple as possible and these pieces of trim/ molding made it feel a bit less contemporary in my opinion.

Step 4. Fill Nail Holes, Sand, Prime
I used paintable wood filler to fill in all of the nail holes from where I’d remove the doors and added the trim pieces. Once that dried, I was able to sand it down smooth, and primed it.
Step 4. Add a desk
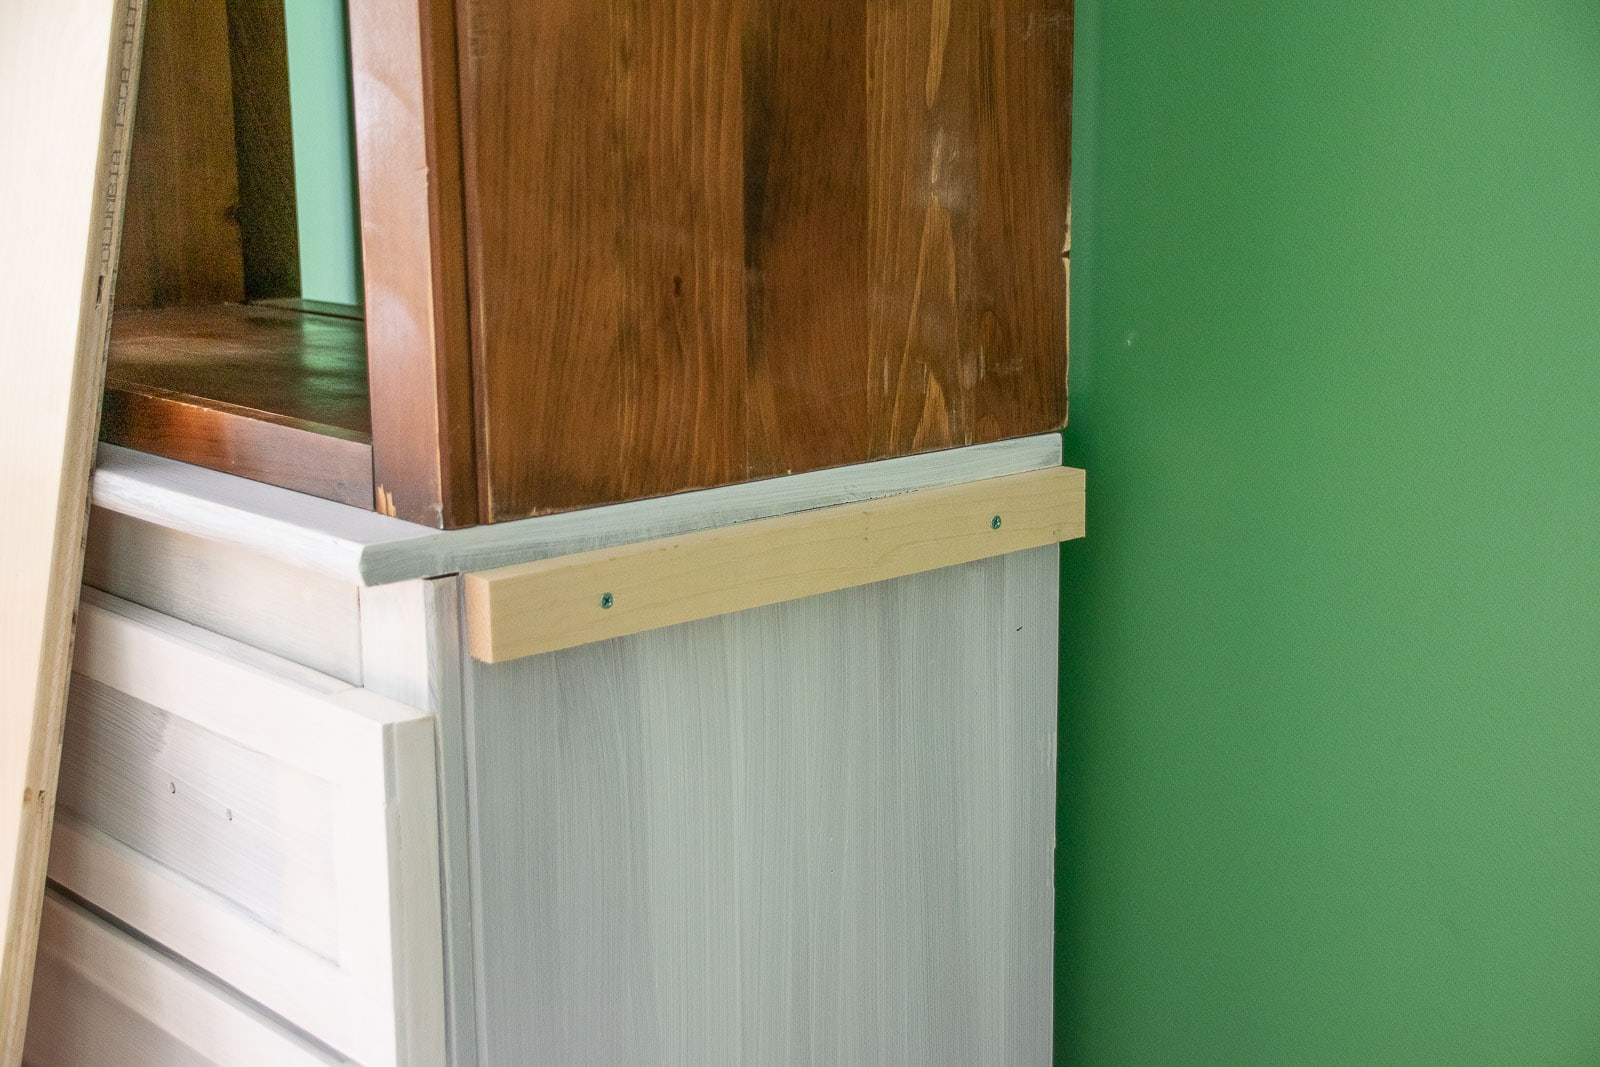
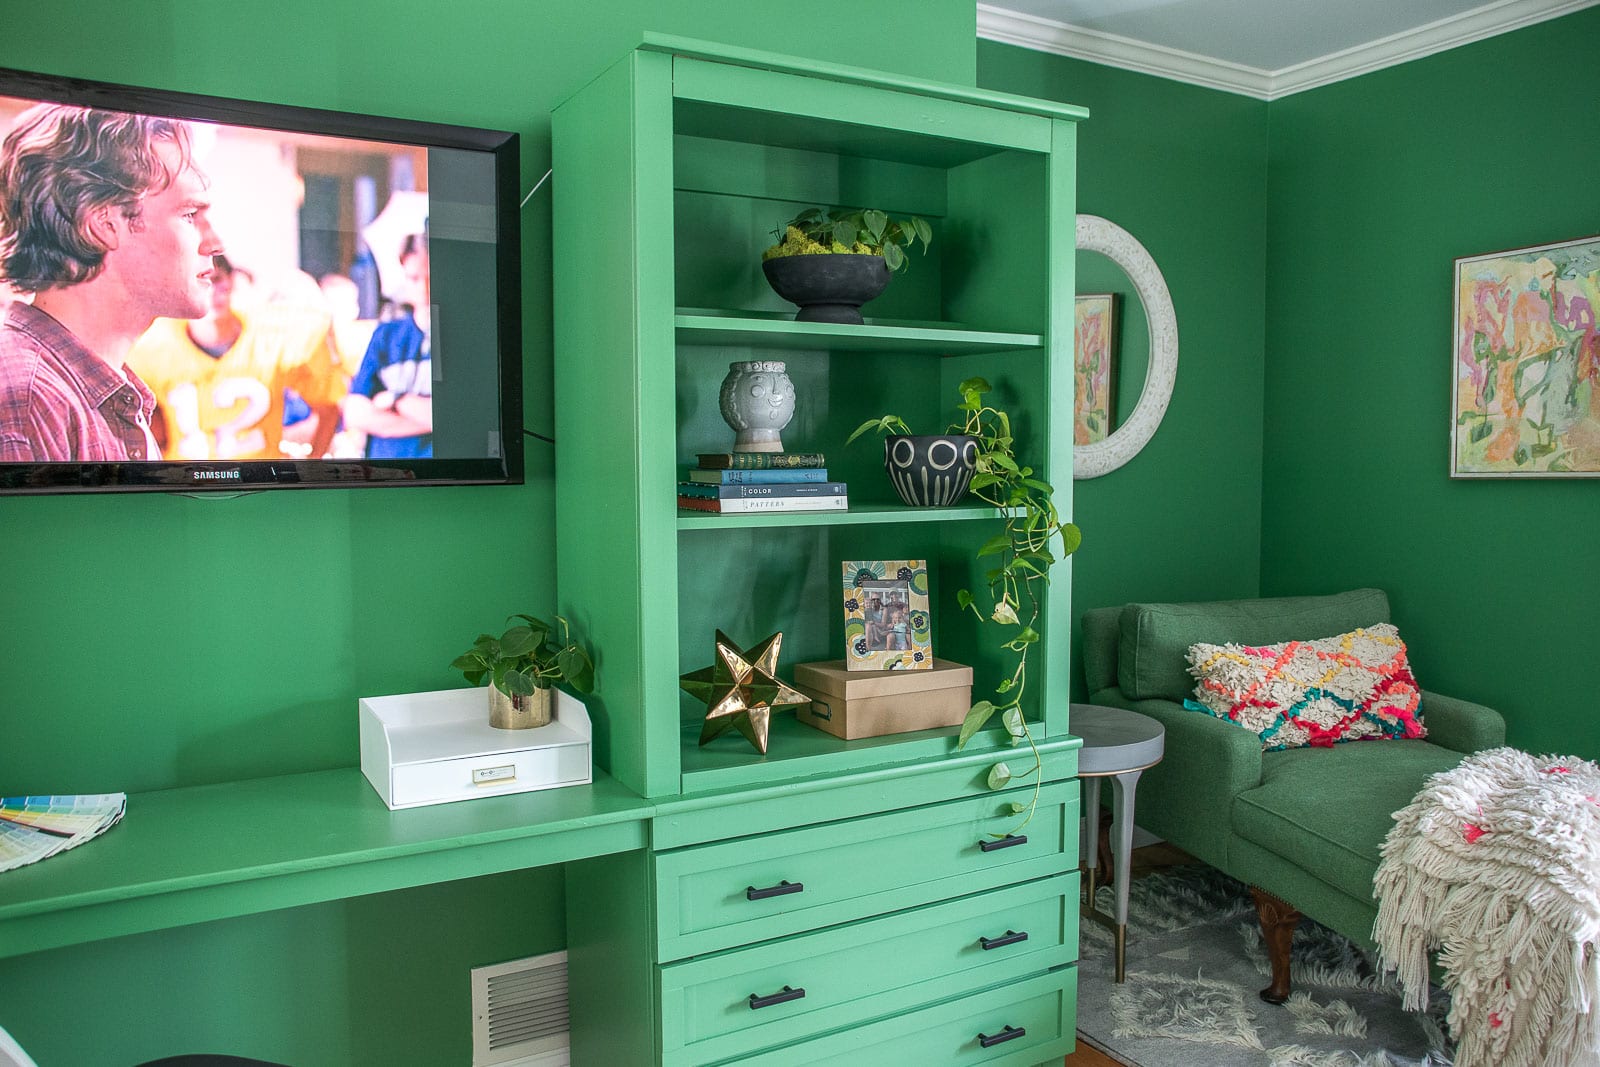
In order to make these two pieces look like one combined piece, I needed to somehow bridge the gap between them. Originally, as I mentioned, I was planning to build a shelf across the top and a desk across the middle. Once i brought the two sides into the space, I was worried that an additional shelf across the top would be too bulky/ high for the room. I wanted these to look like one solid media cabinet/ bookshelf but I wasn’t planning on adding crown molding or anything to connect it to the ceiling soffit.
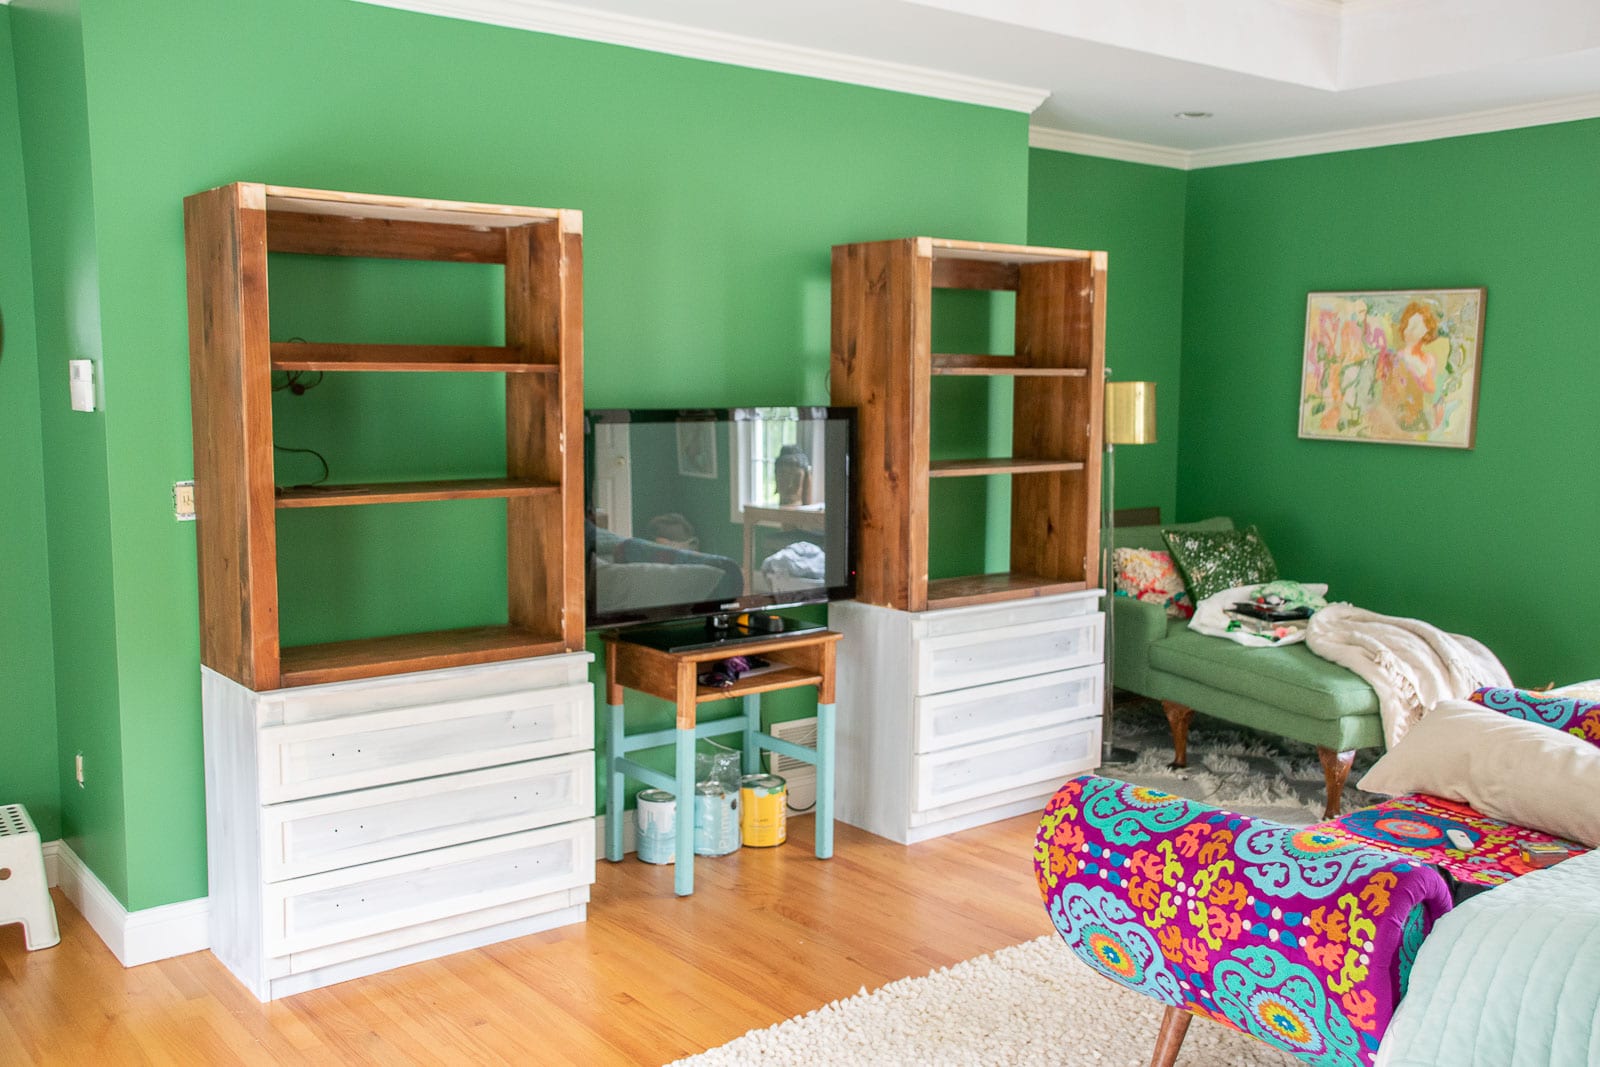
I figured the lower height felt more balanced. I did add two support pieces on the cabinets and then cross braces to support a piece of plywood I cut down to be a desk. I routed the front edge so that it matched the profile of the original cabinets. Once I saw it installed, I also went back and added a narrow front plate so that it matched the two lower sets of drawers a little better and felt more substantial.
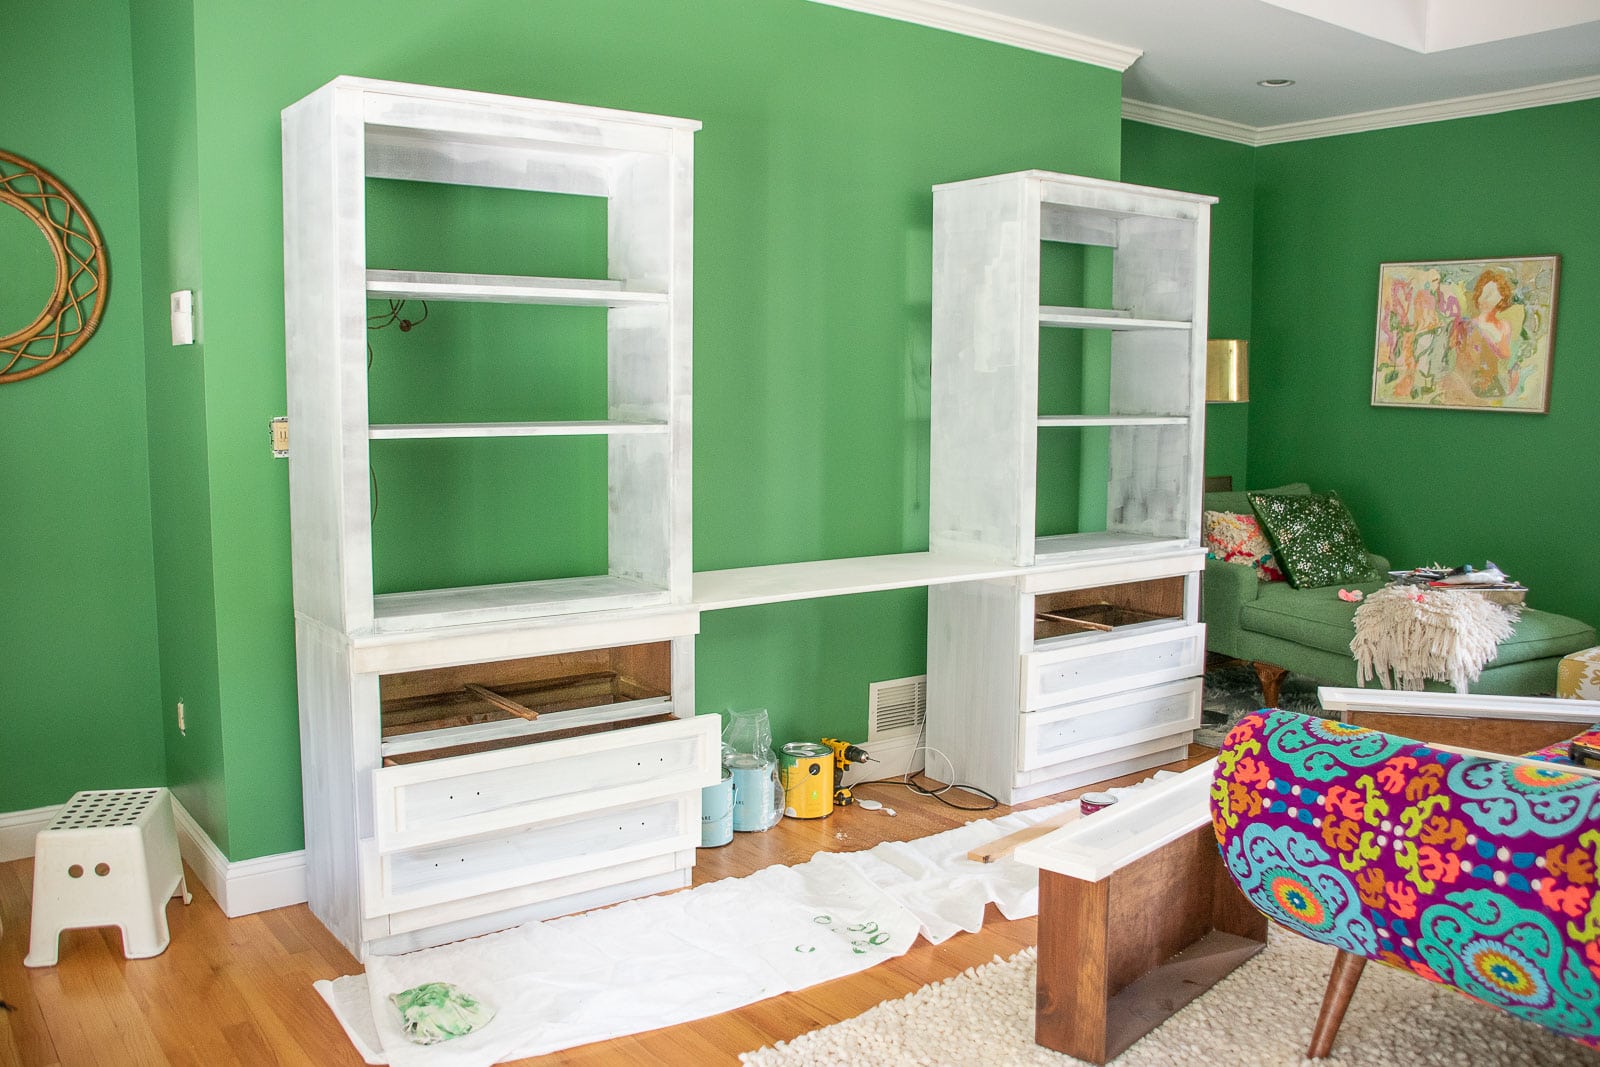
Step 5. Paint
I chose to paint the shelves the same color as the wall to give it more of a ‘built in’ look. (The green is Matcha Latte by Clare Paint.) TikTok disagrees but I love the way they came out! Haha.

Step 6. Cabinet hardware
The final step was to add new cabinet hardware. I opted for matte black to complement the hardware and fixtures in the rest of the room and love the simple lines with the new improved bookshelves.

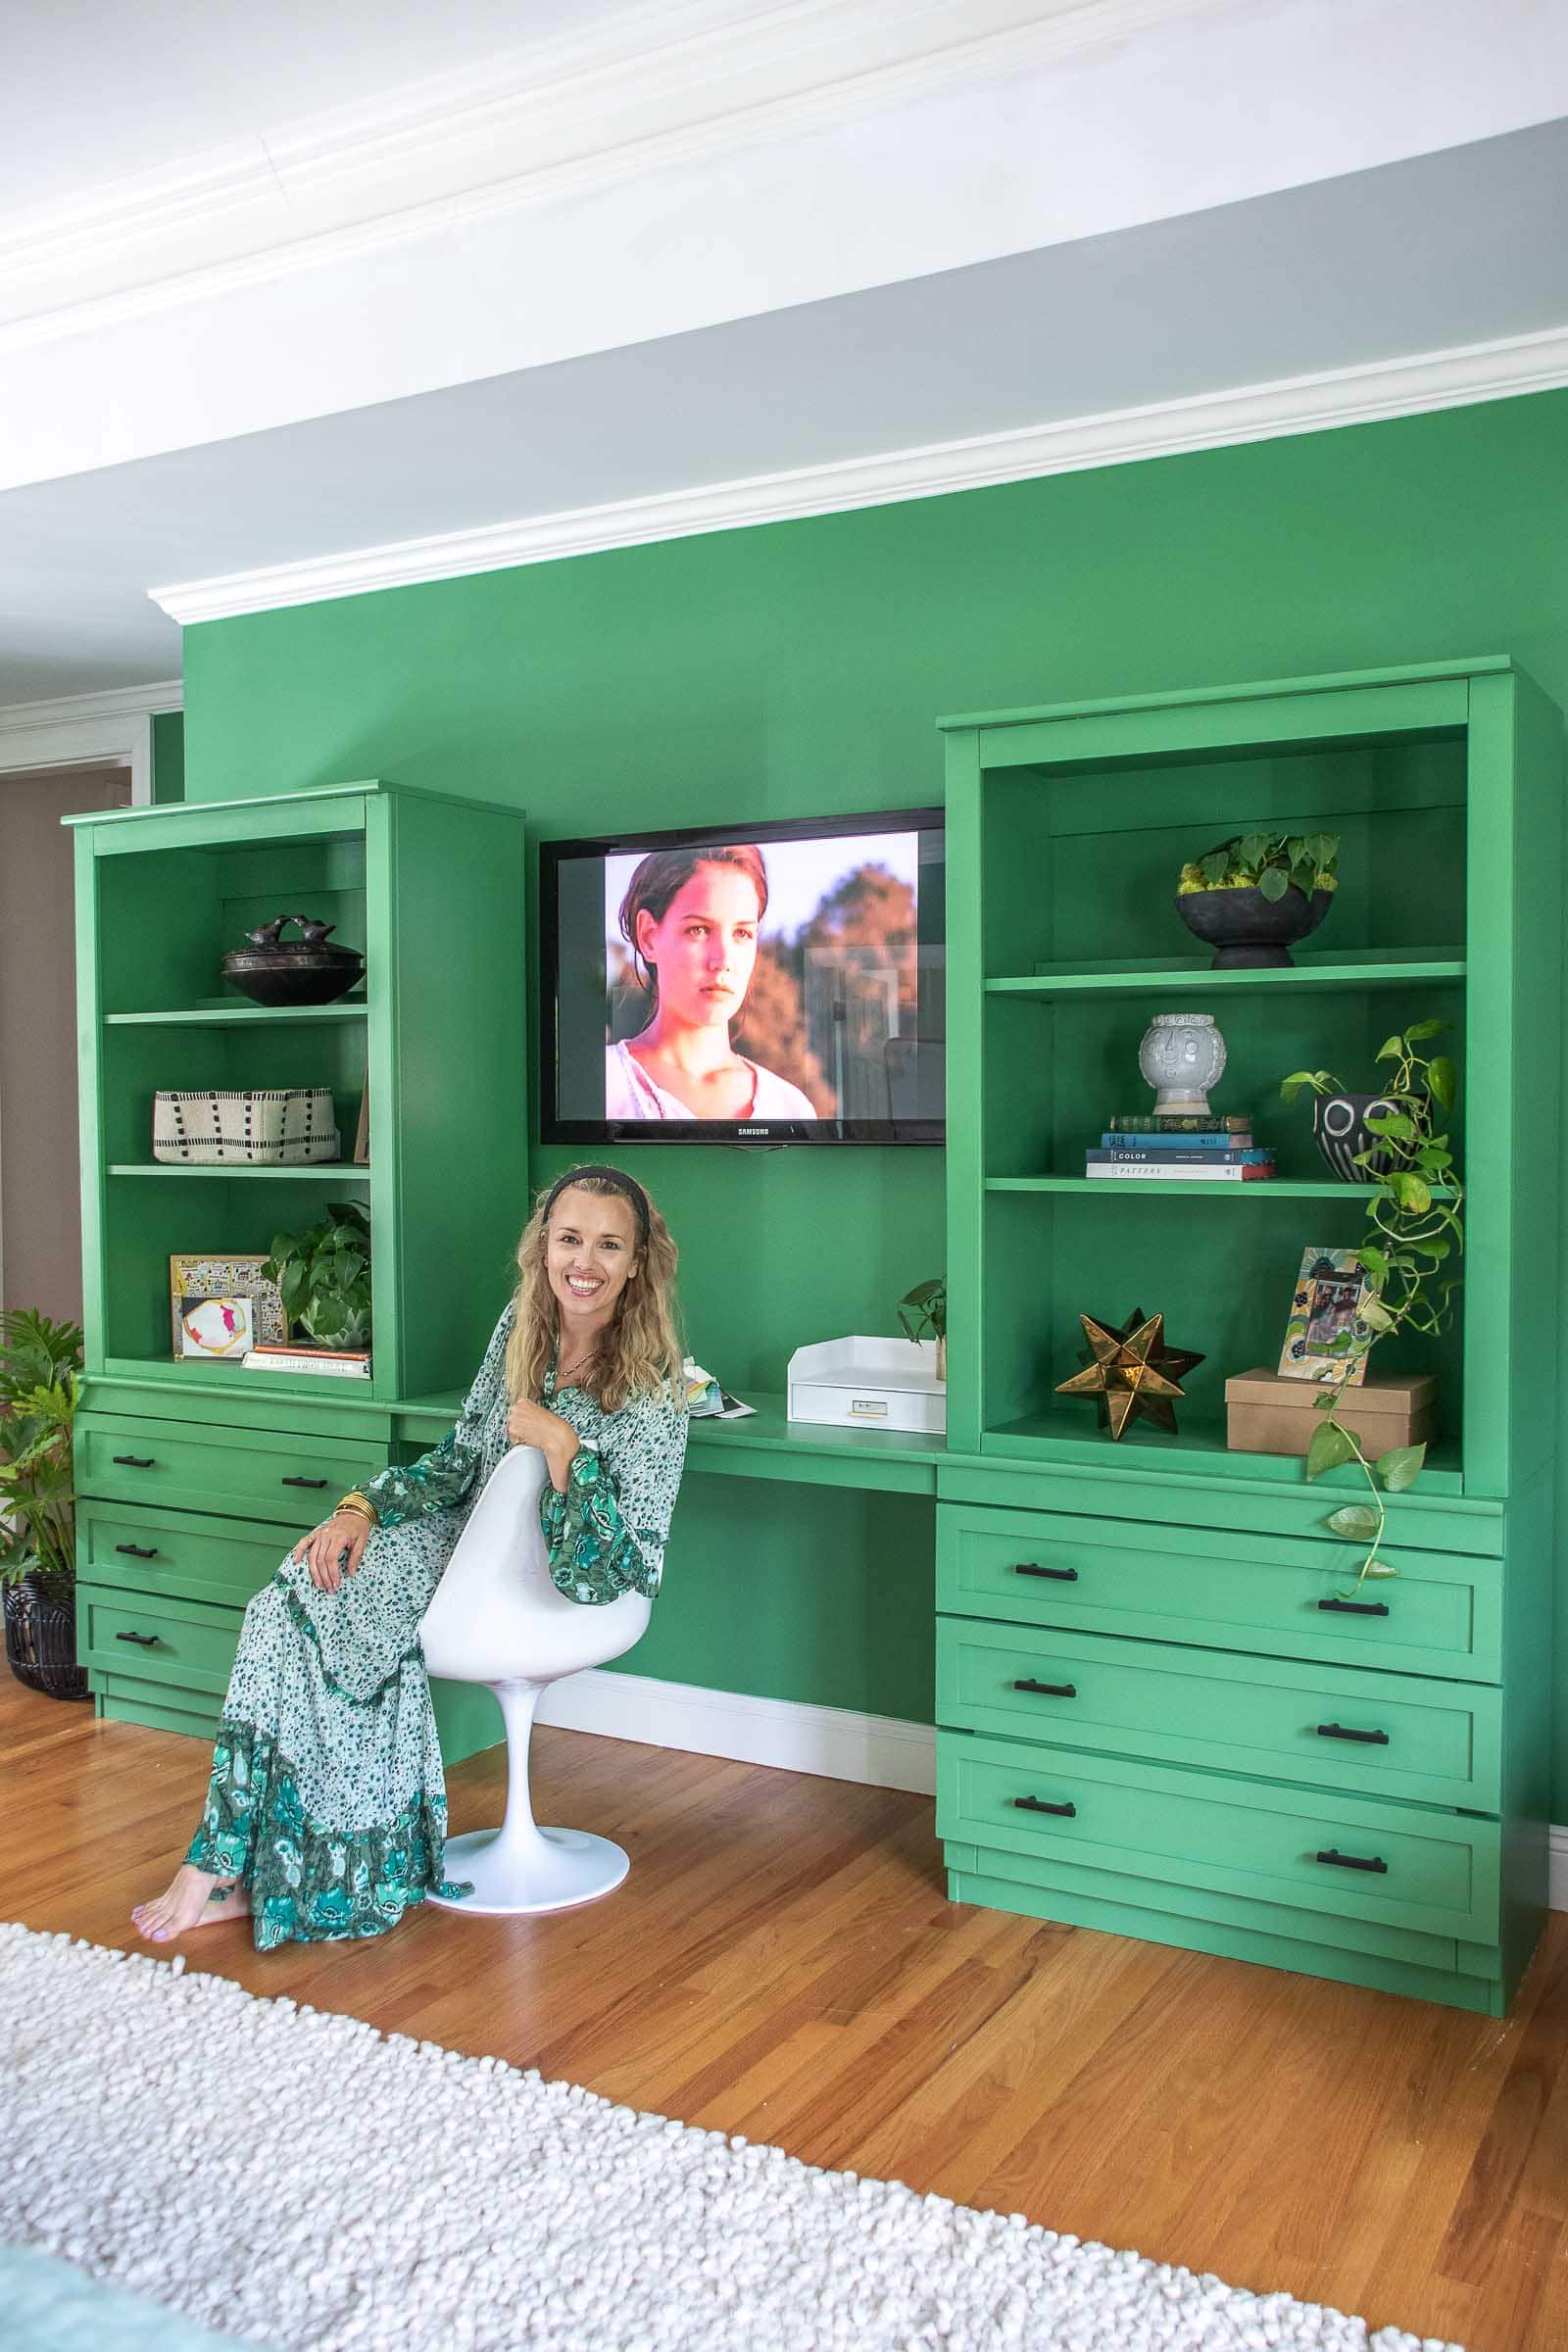
The bookshelf/ desk is now my work space and the shelves/ drawers have so much great storage. I love the way the bookshelf blends into the room itself so that even though it’s a large piece of furniture, it doesn’t stand out or look out of place. To me, it feels much more custom *because* it blends in with the walls. It took me a few days to alter and adjust, and maybe $100 in lumber so the grand total for this project was under $200.


LOVE IT!!!
Thank you!!! I do too!! xx
Not good at all. It’s definitely not built in or resembles built-in. It appears to be blocking a vent and switch. It’s just a super bulky cabinet painted to match the walls.
Let me get this straight… you took time out of your day to leave me a rude comment on a project I’ve created and shared for free?! A project that clearly I’m proud of and really like? Get a life!
This made me smile! (your comment) I feel sorry for people like that, imagine what her life is like. i, by the way, love this. the thriftiness, the ease of the build, and he color!!! I’m glad I found you on the home Depot site building dream homes for families from cardboard. happy 2023!
Haha! That was one of my favorite projects!!! Started my love for cardboard DIYs! Thank you!! xx