
How I Sewed a Hand Pillow
Psssst… this post *might* contain affiliate links: see my disclosure here.
Yes. You read that right. A hand pillow.

Storytime: I have a lot of weird things kicking around my house. They’re my favorite thing to DIY. If I’m scrolling social media or looking through a design magazine and see some sort of curiosity in the photo, that’s usually the thing I’m going to try and make. Years ago I went to a show house and they had a chair tucked in the corner of one room that was shaped like a scooped hand similar to this one here. That cooky hand chair has been on my brain ever since, but long story short… unexpected decor items make me happy. See: Giant Cheetos as evidence.
Step 1. Make Your Hand Shape
This was my first screw up. Yeah… the literal first step of this project. Don’t do what I did. I started by tracing my hand. Sounds simple enough but here’s where I screwed up: I kept my fingers too close together. I didn’t realize the screw up until I sewed the first pillow and didn’t have enough fabric left for a seam allowance. The pictures might be of the first version, but just keep that in mind… SPREAD OUT YOUR FINGERS. (Also… tracing my hand unlocked some part of my brain that remembers doing this as a child and just REVELING in the act of drawing long luscious fingernails and ornate jewelry onto my traced hands.)
Shop my favorites!

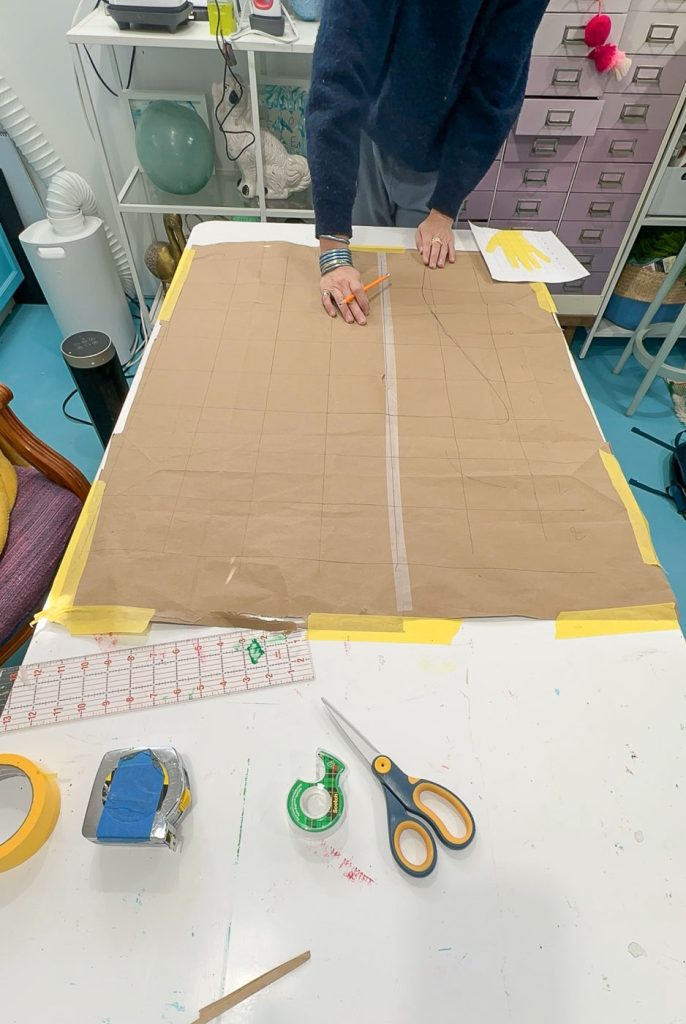
Step 2. Enlarge Your Hand Shape
I go into more detail on how I do this here, but remember that Ranger Rick magazine from your childhood where they would have a picture with a grid over it and then a larger grid on the opposite page? That’s how I enlarge things every single time. For my hand, the squares on the traced hand were 1″ and then the squares on the paper bag were 4.5″… I just transpose the outlined from the small grid onto the large grid and voila- a giant version of my hand. Cut this out to use as a template for your pillow.
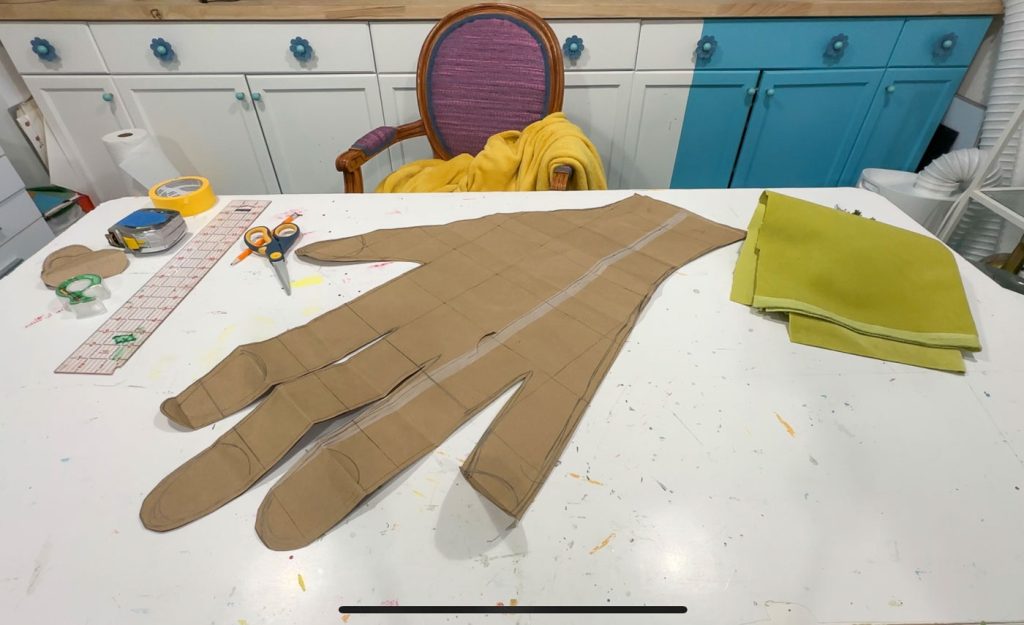
Step 3. Cut out Hand Shapes From Fabric
Cut out two hand shapes from your fabric making sure to flip the hand so that the right side of the fabric will be facing out for each shape. I almost made that mistake which is why I’m stating the obvious here.
Step 4. Trace and Cut Out Fingernails
I sketched out fingernail shapes onto my hand cut-out and then copied these onto a second paper bag to use as templates. I had some of this fun chartreuse velvet lying around so used that for each fingernail. I made sure to label them on the back because each fingernail shape felt slightly different to me.

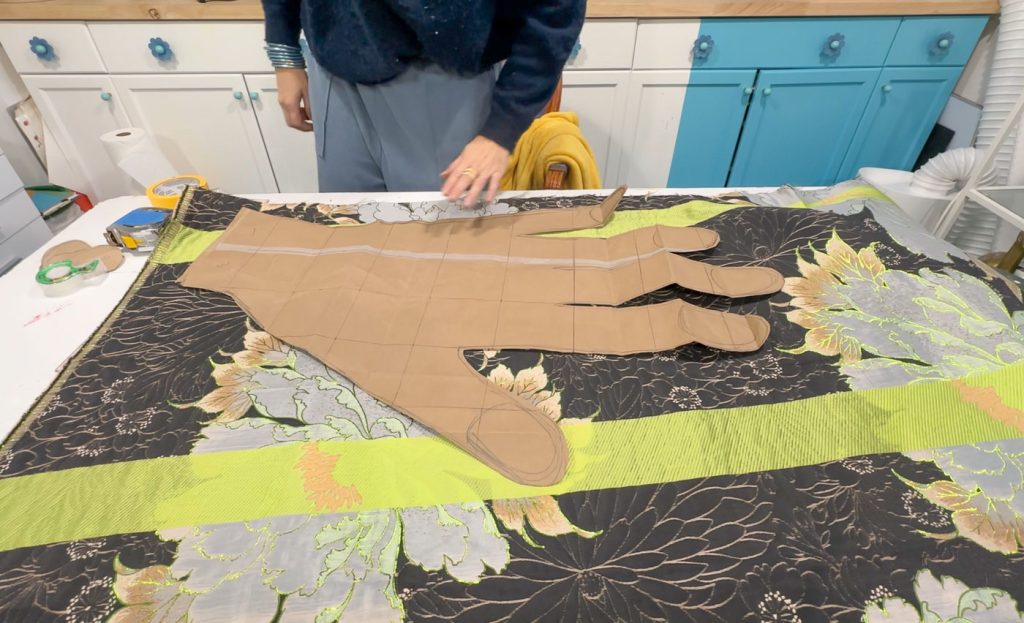
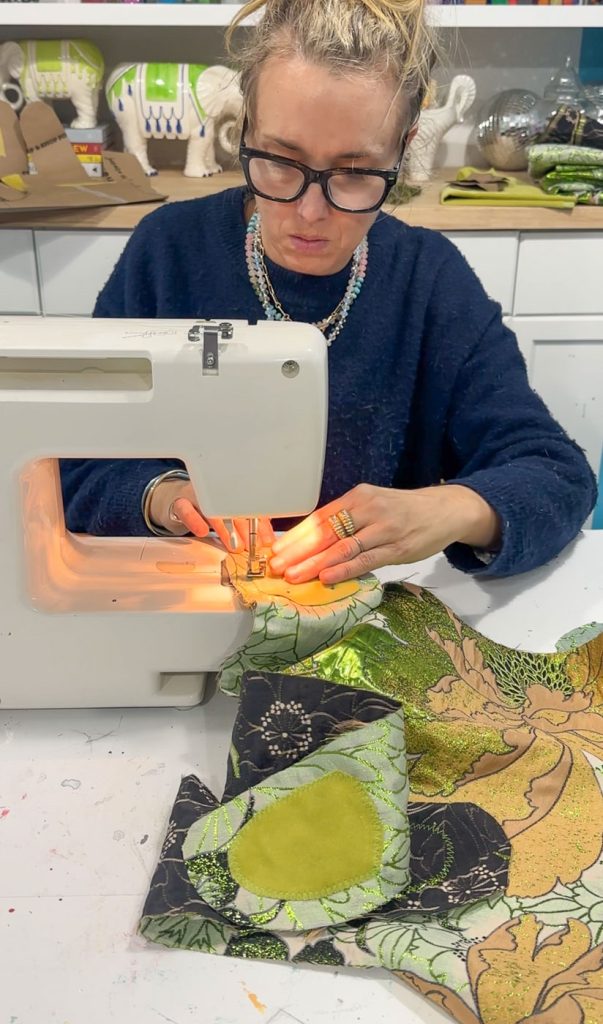
Step 5. Sew Fingernails Onto Fabric Hand
I just used a zigzag stitch to sew each fingernail onto the fingertip of the fabric hand. My velvet didn’t fray, but I also suspect the zigzag stitch would keep your fabric from fraying anyways. I used a matching thread, but this could be a fun detail if you chose to use a contrasting thread or even heavier embroidery thread in a bold color.
Step 6. Sew the Two Sides of the Hand Together
Place the right sides of each hand together and sew along the outside edge. I gave myself about 1/2″ seam allowance. Leave the ‘wrist’ open to allow for stuffing and turn the hand pillow right-side out. No question, the small corners where the fingers come together were not perfect. A more professional seamstress probably has some ideas for this crack… ultimately it was good enough for me.

Step 7. Stuff Your Hand Pillow
I used polyfil to stuff my hand making sure I worked the stuffing into the tips of each finger. It can be a little clumpy so make sure to fluff it up before stuffing and then massage the pillow a bit to work out any lumps and bumps.
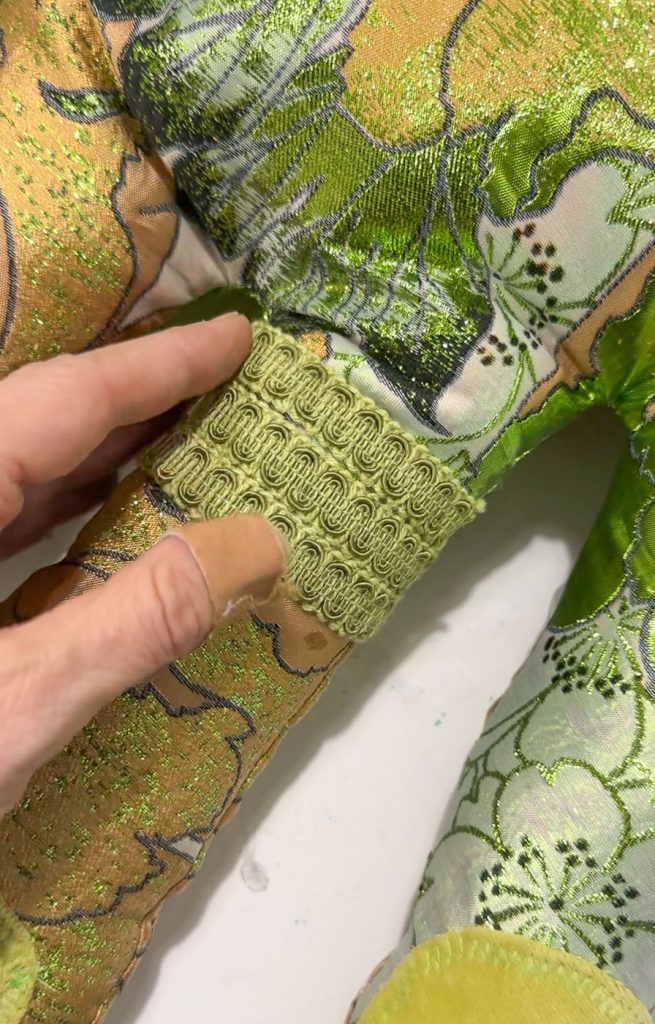
Step 8. Sew Pillow Closed and Add Embellishments
I sewed the pillow closed at the wrist and then added some fun ball fringe I happened to have on hand. I used flexible fabric glue to attach a differenet type of trim like a ring to one of the fingers.

In looking online, the various hand pillows all have different shapes. Some are much rounder and more folksy…. obviously mine was derived from the actual shape of my hand. I’m tempted to make another with a shape somewhere in the middle. Let me know what you think about the finished results… should I make one that’s a little ’rounder’ to echo a more typical pillow shape or is this realistic shape fine?


Don’t Miss Out
Become An Insider!
Signup for exclusive tips, and tricks from Charlotte’s House!
Let’s chat!
I love comments from you, so feel free to leave your thoughts and ideas below! And don’t forget to follow me on Instagram for even more!