
How to Build Your Own Firewood Shed
Psssst… this post *might* contain affiliate links: see my disclosure here.
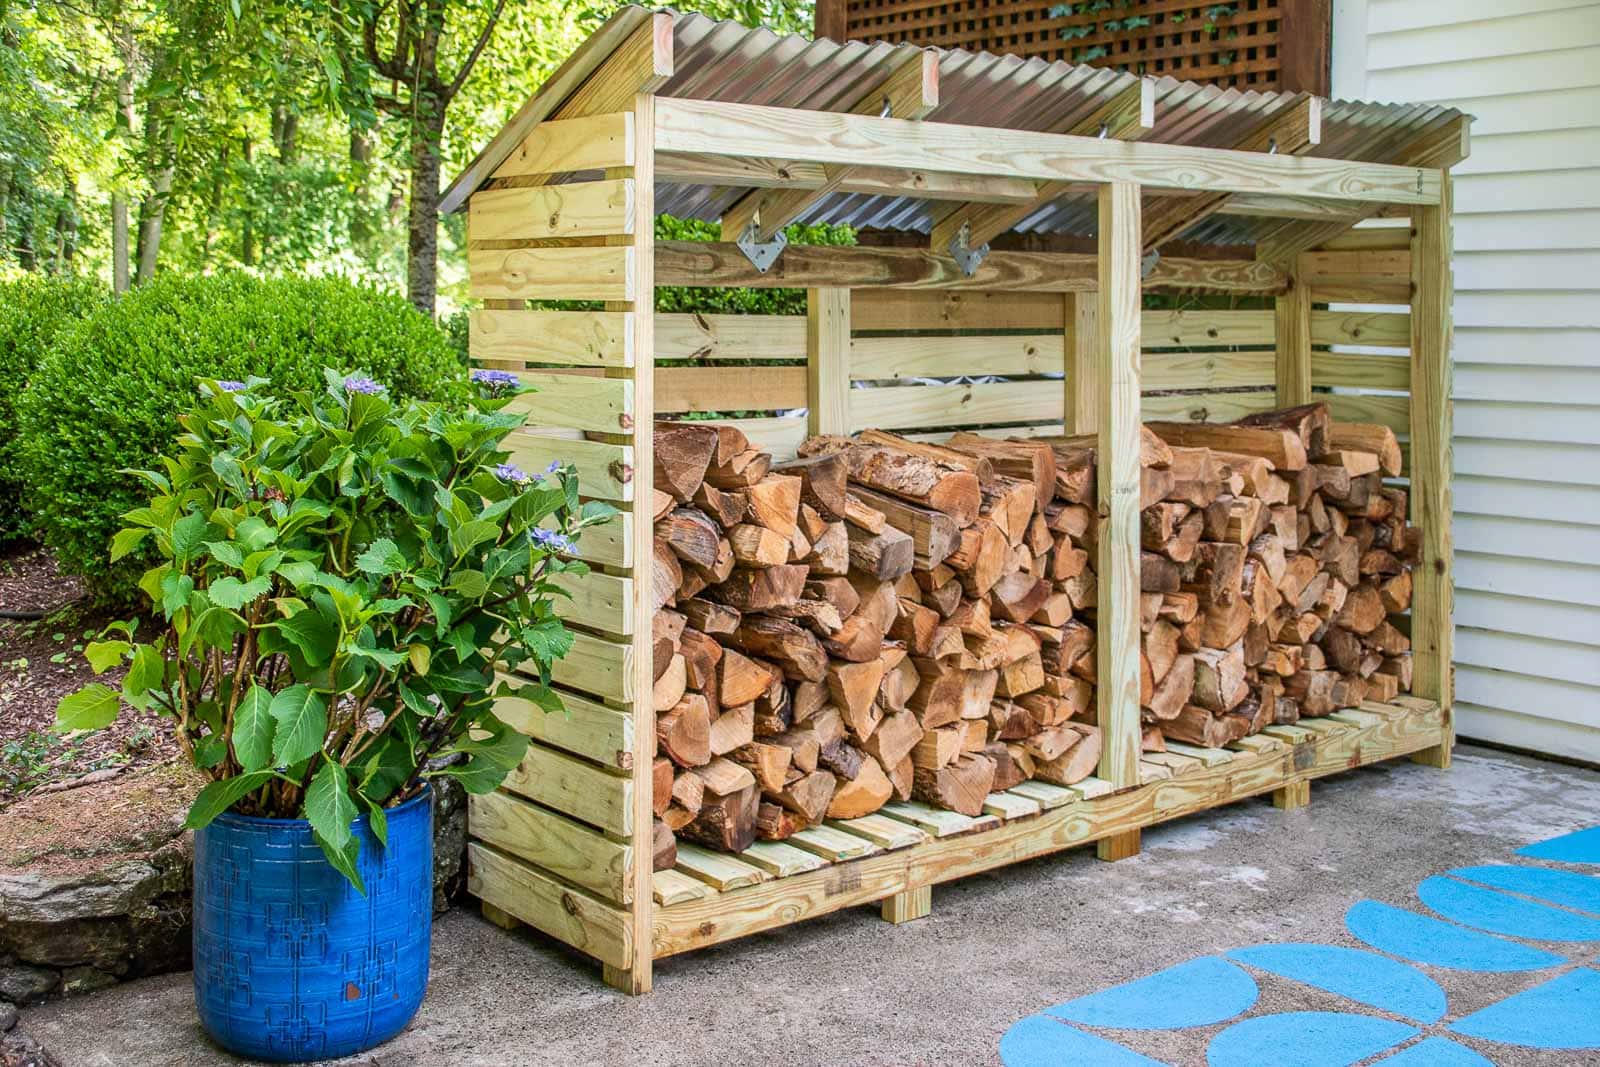
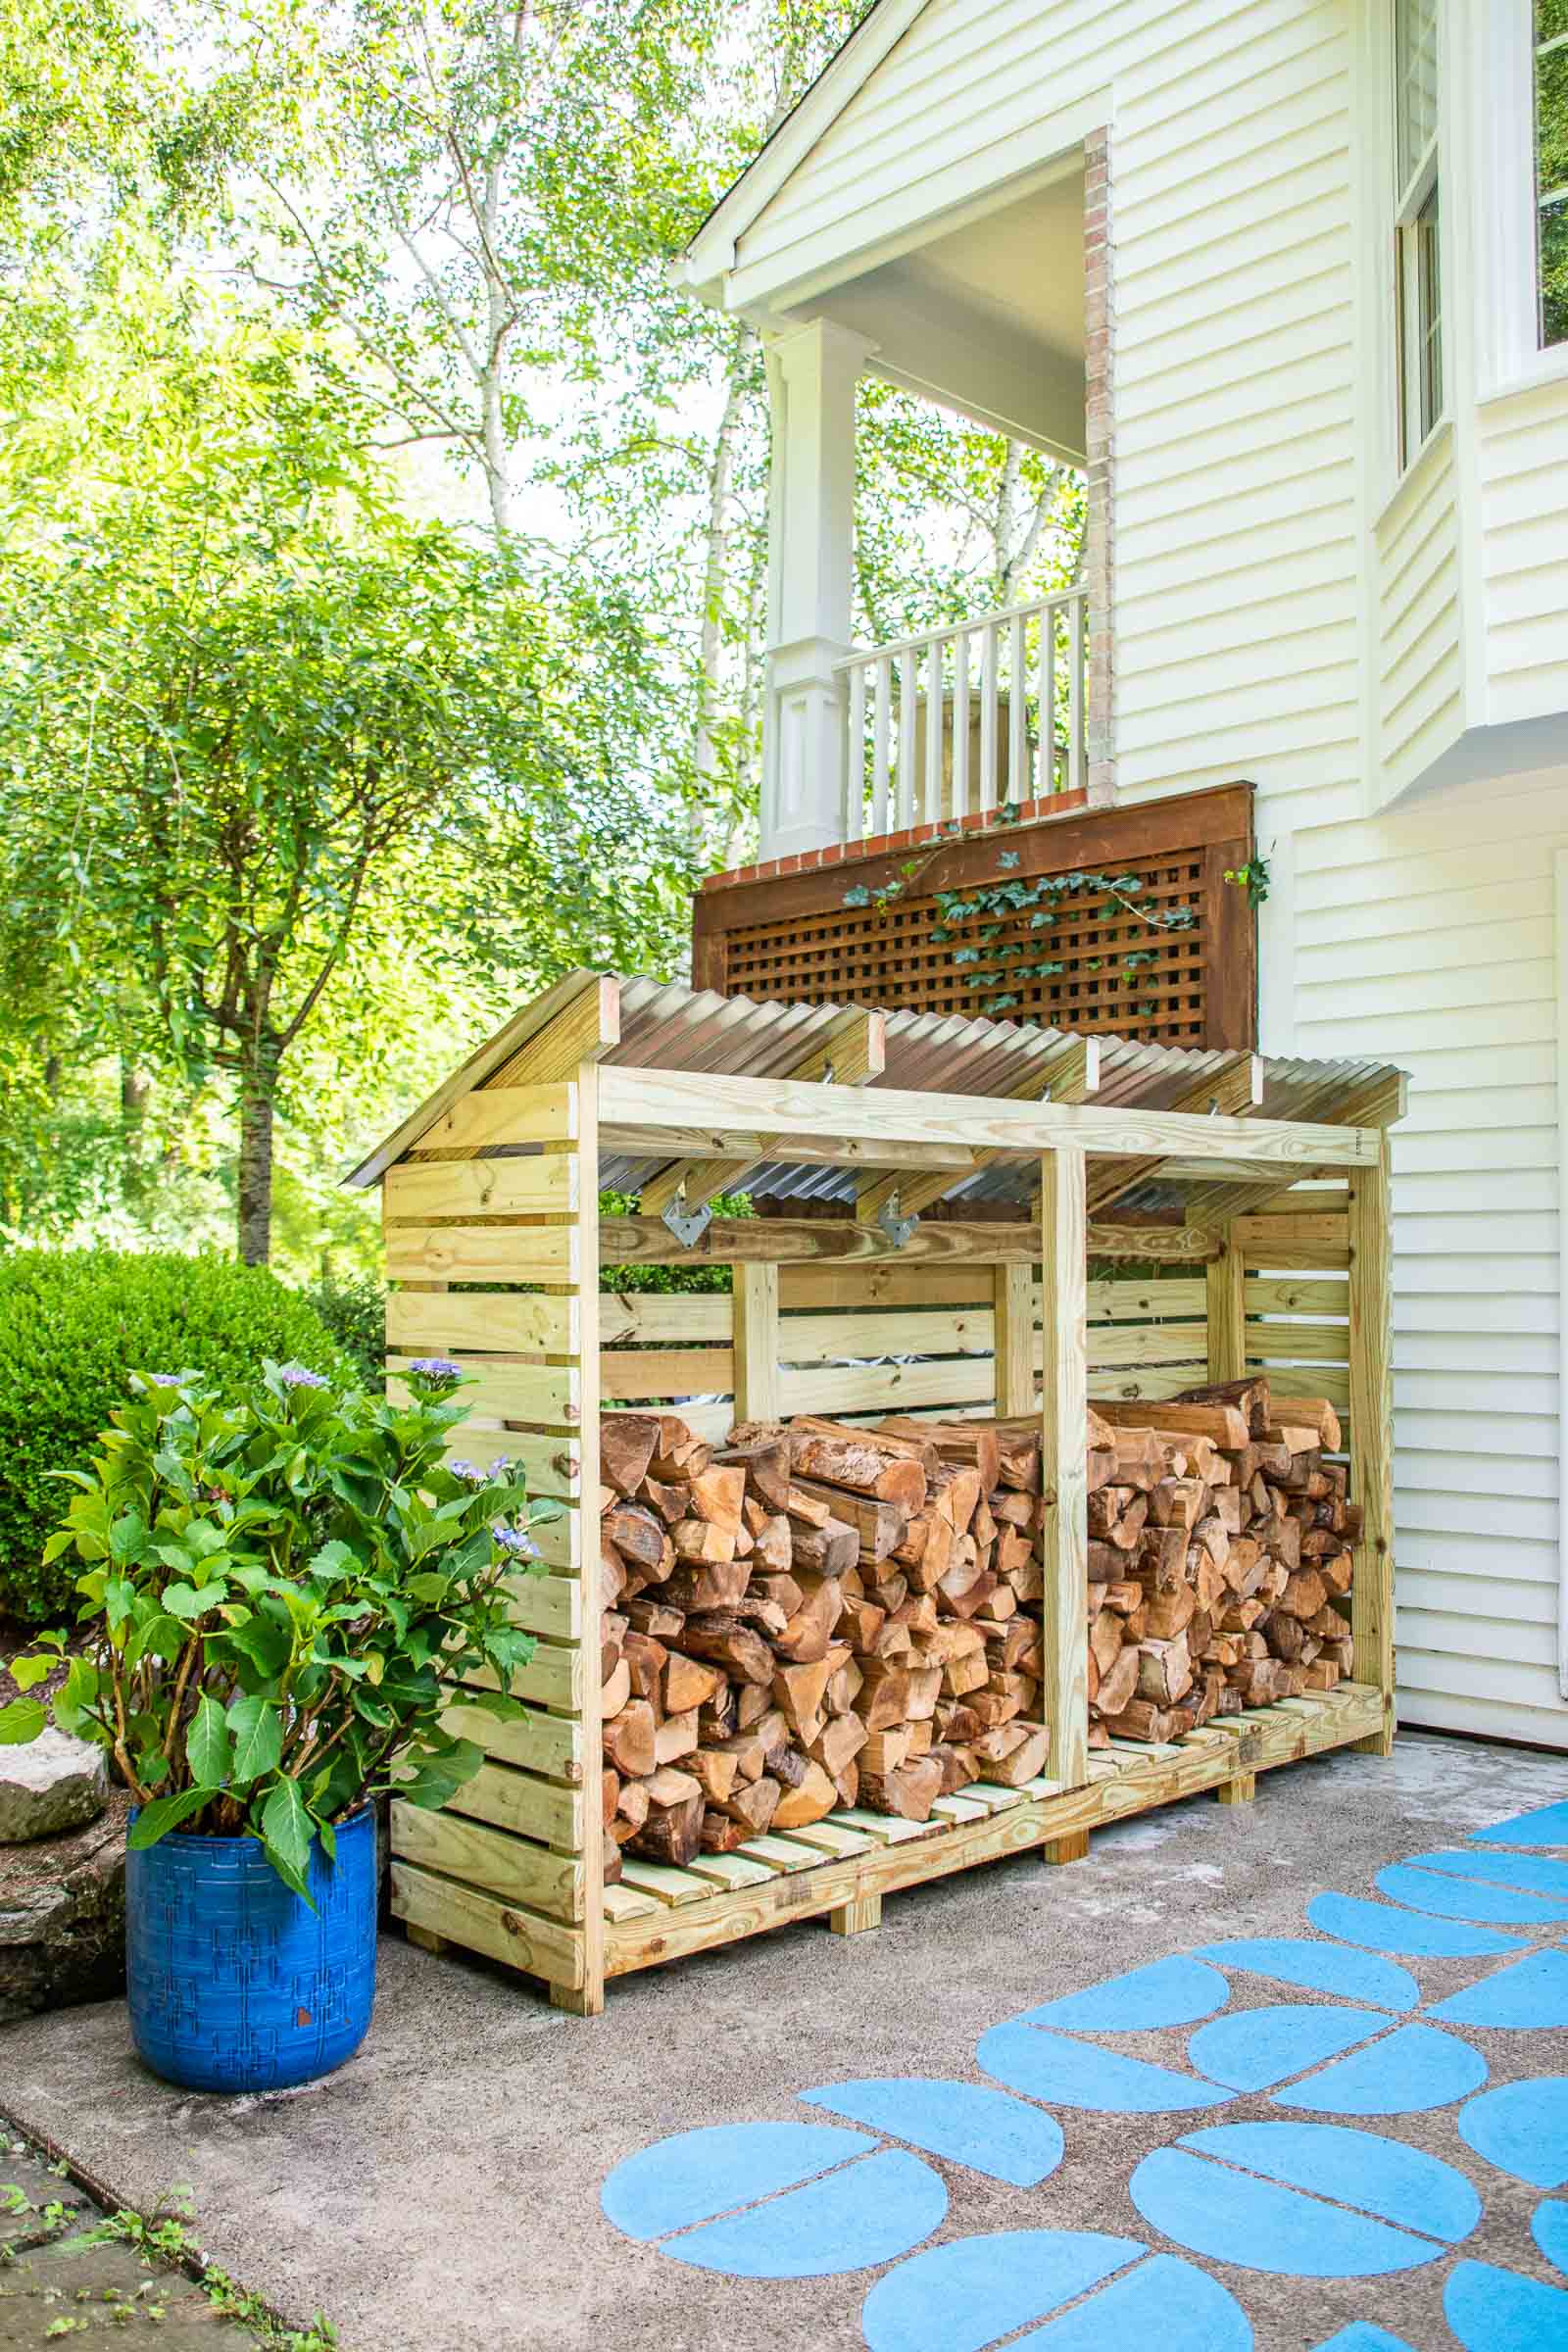
How to Build a Firewood Shed
How to build your own DIY firewood shed.
Disclosure: I’m partnering with The Home Depot and their DIY On-Trend Workshops, inspired by Pinterest, to share this post with you.
Shop my favorites!
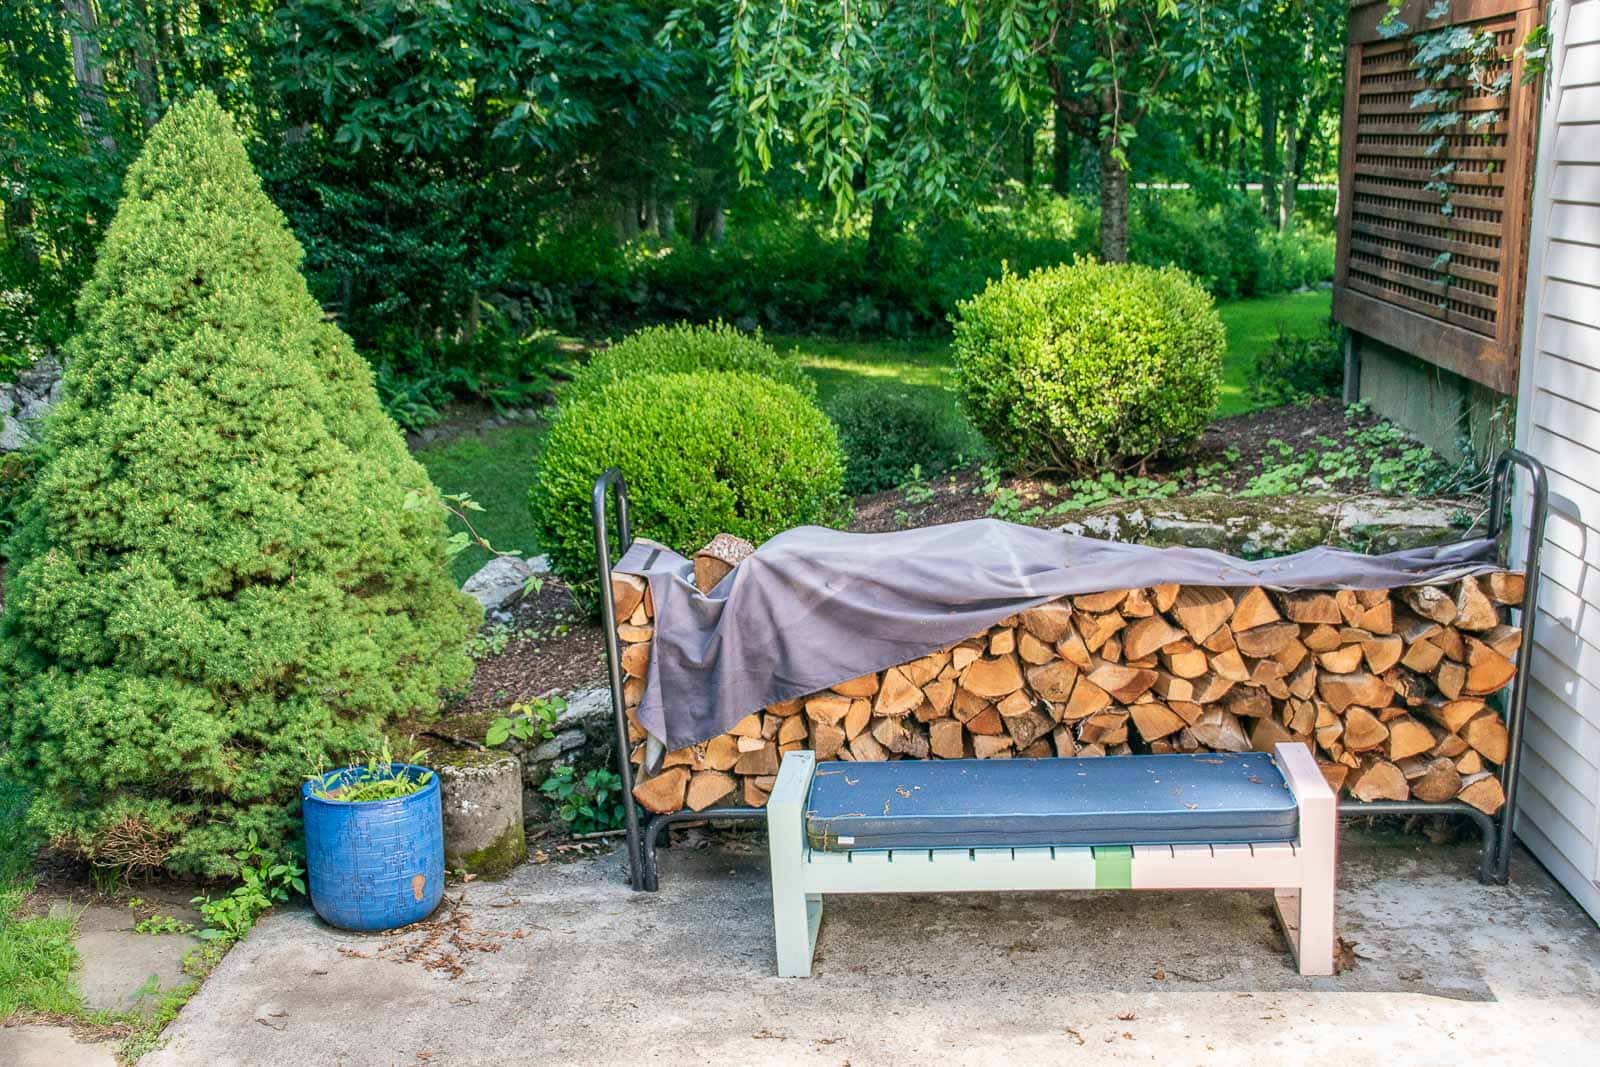
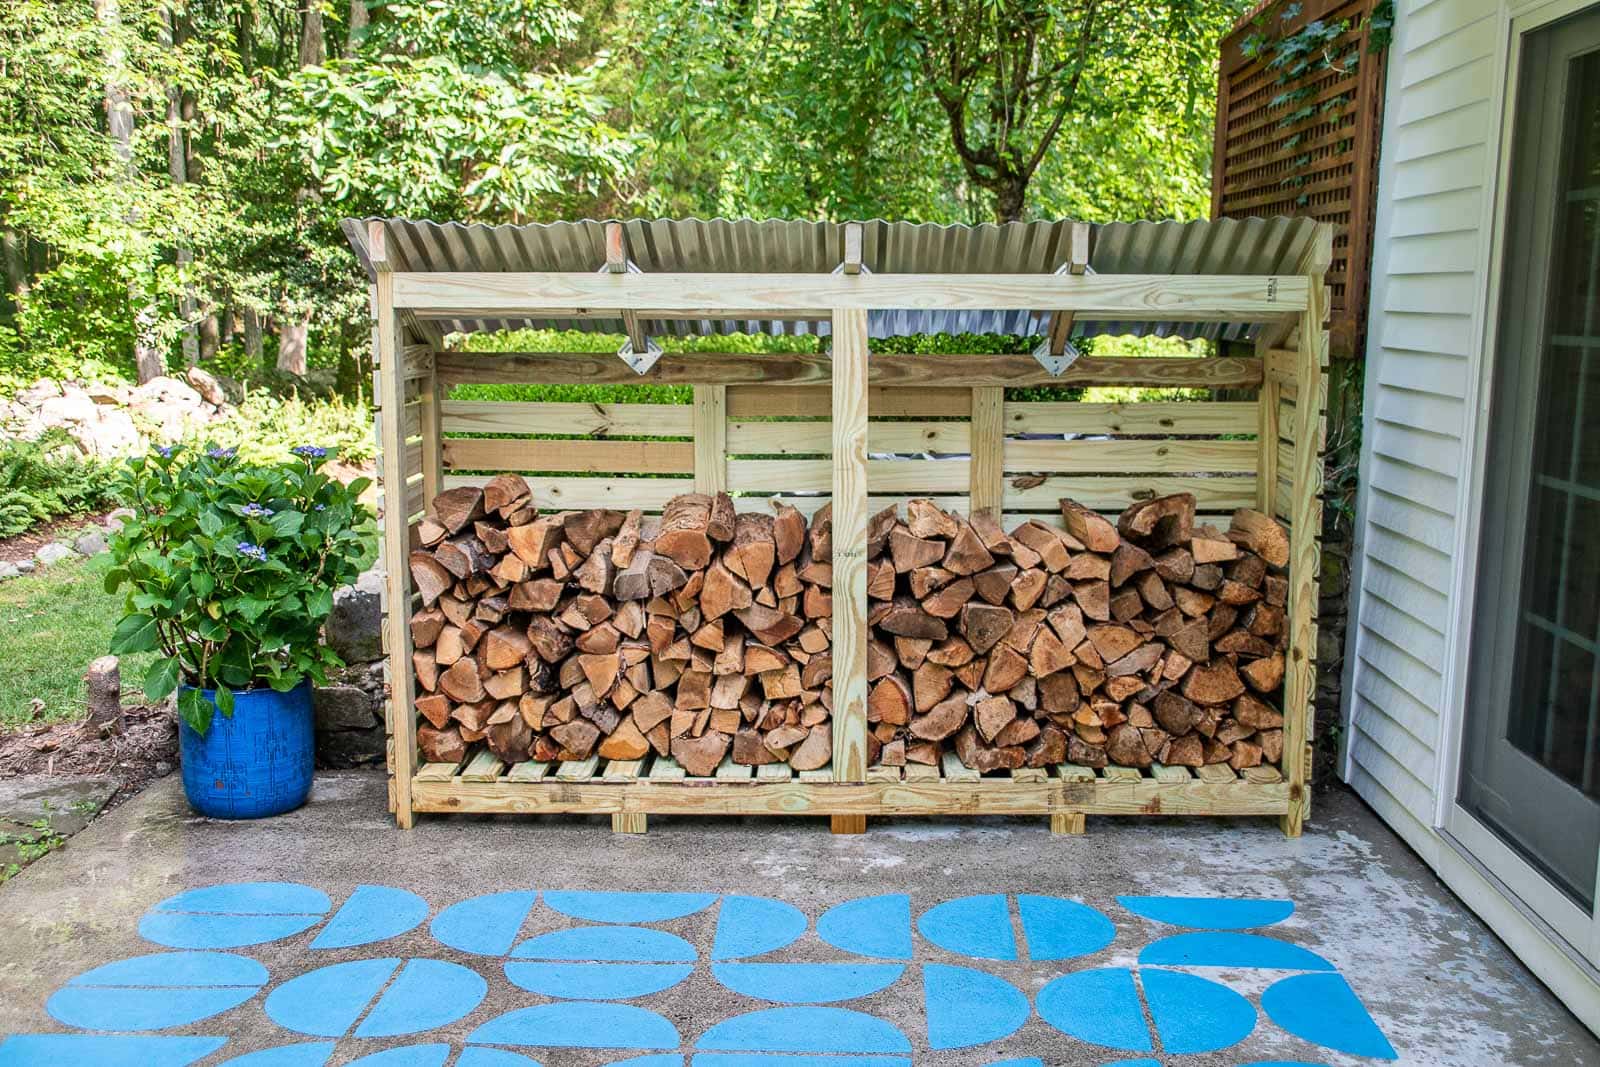
I was nervous about building this mostly because there were so many steps where I could go wrong! BUT… it turns out, this is actually quite basic and came together really easily! It’s not perfect and there are still places where measurements aren’t symmetrical, but it’s only a firewood shed, so this is the perfect way to practice building techniques. As always full materials list is at the end of the post, but note that I’m working with pressure treated lumber and, all in, this cost me about $380! The overall dimensions of the shed are approximately 8 feet wide, 20-inches deep and 5 feet high. This was what we were dealing with before:
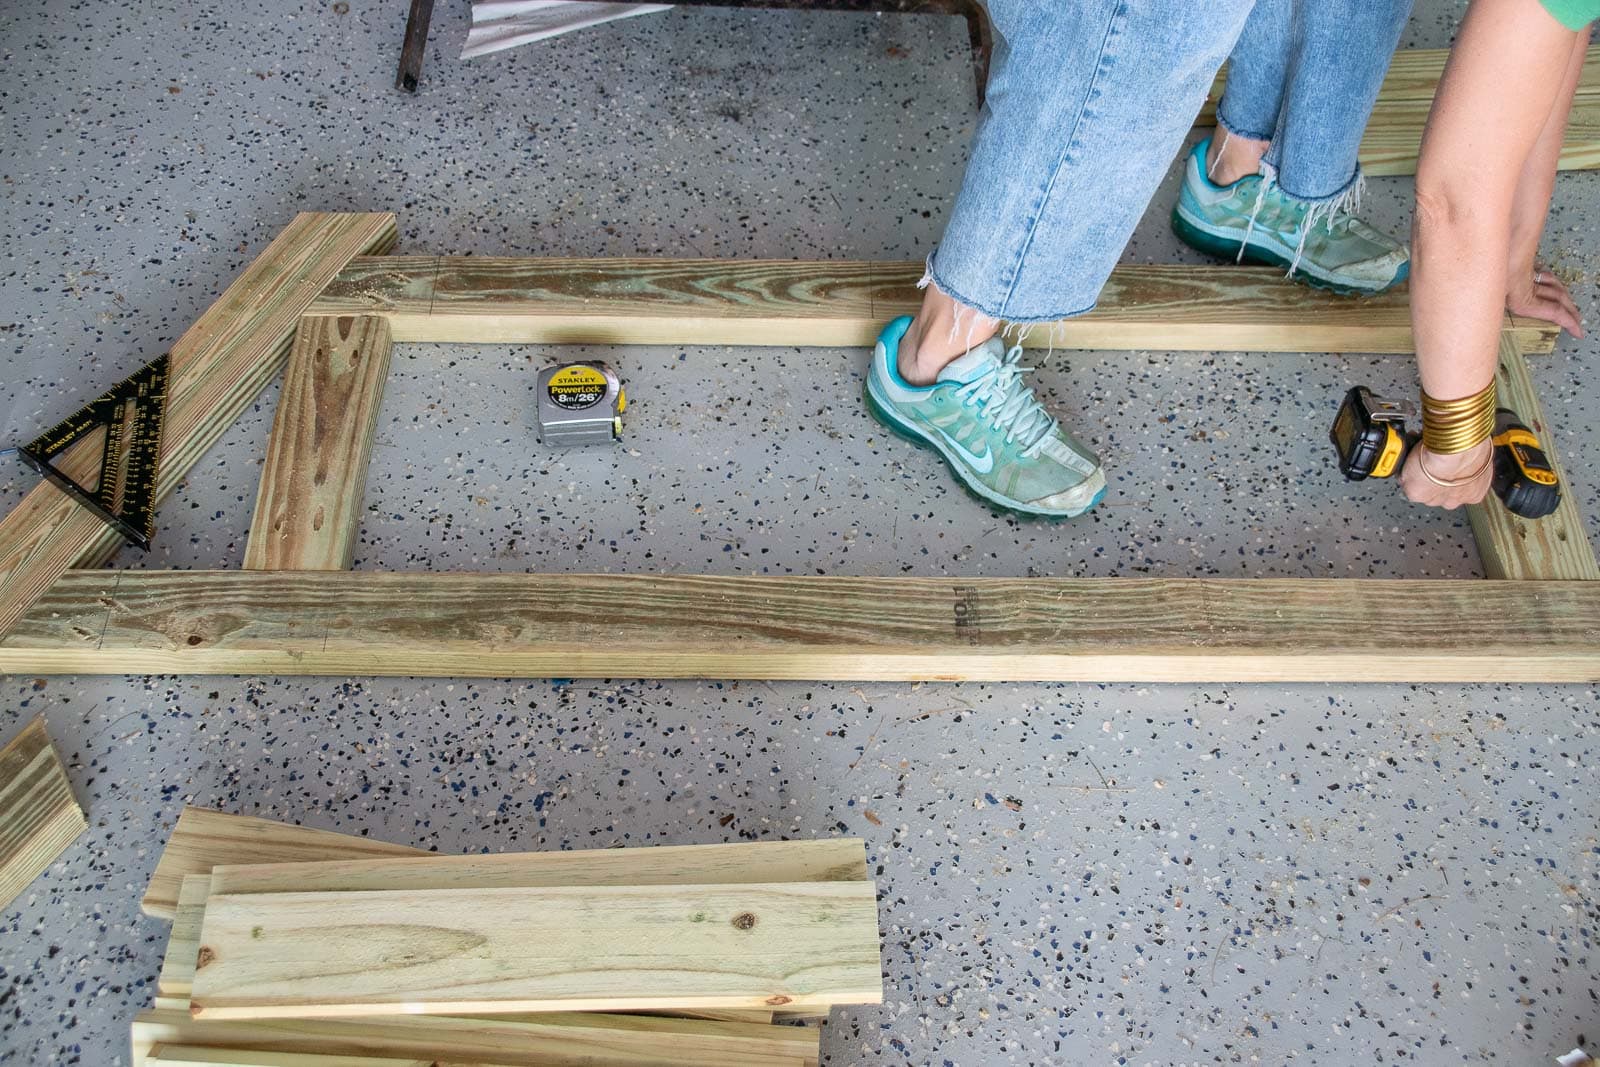
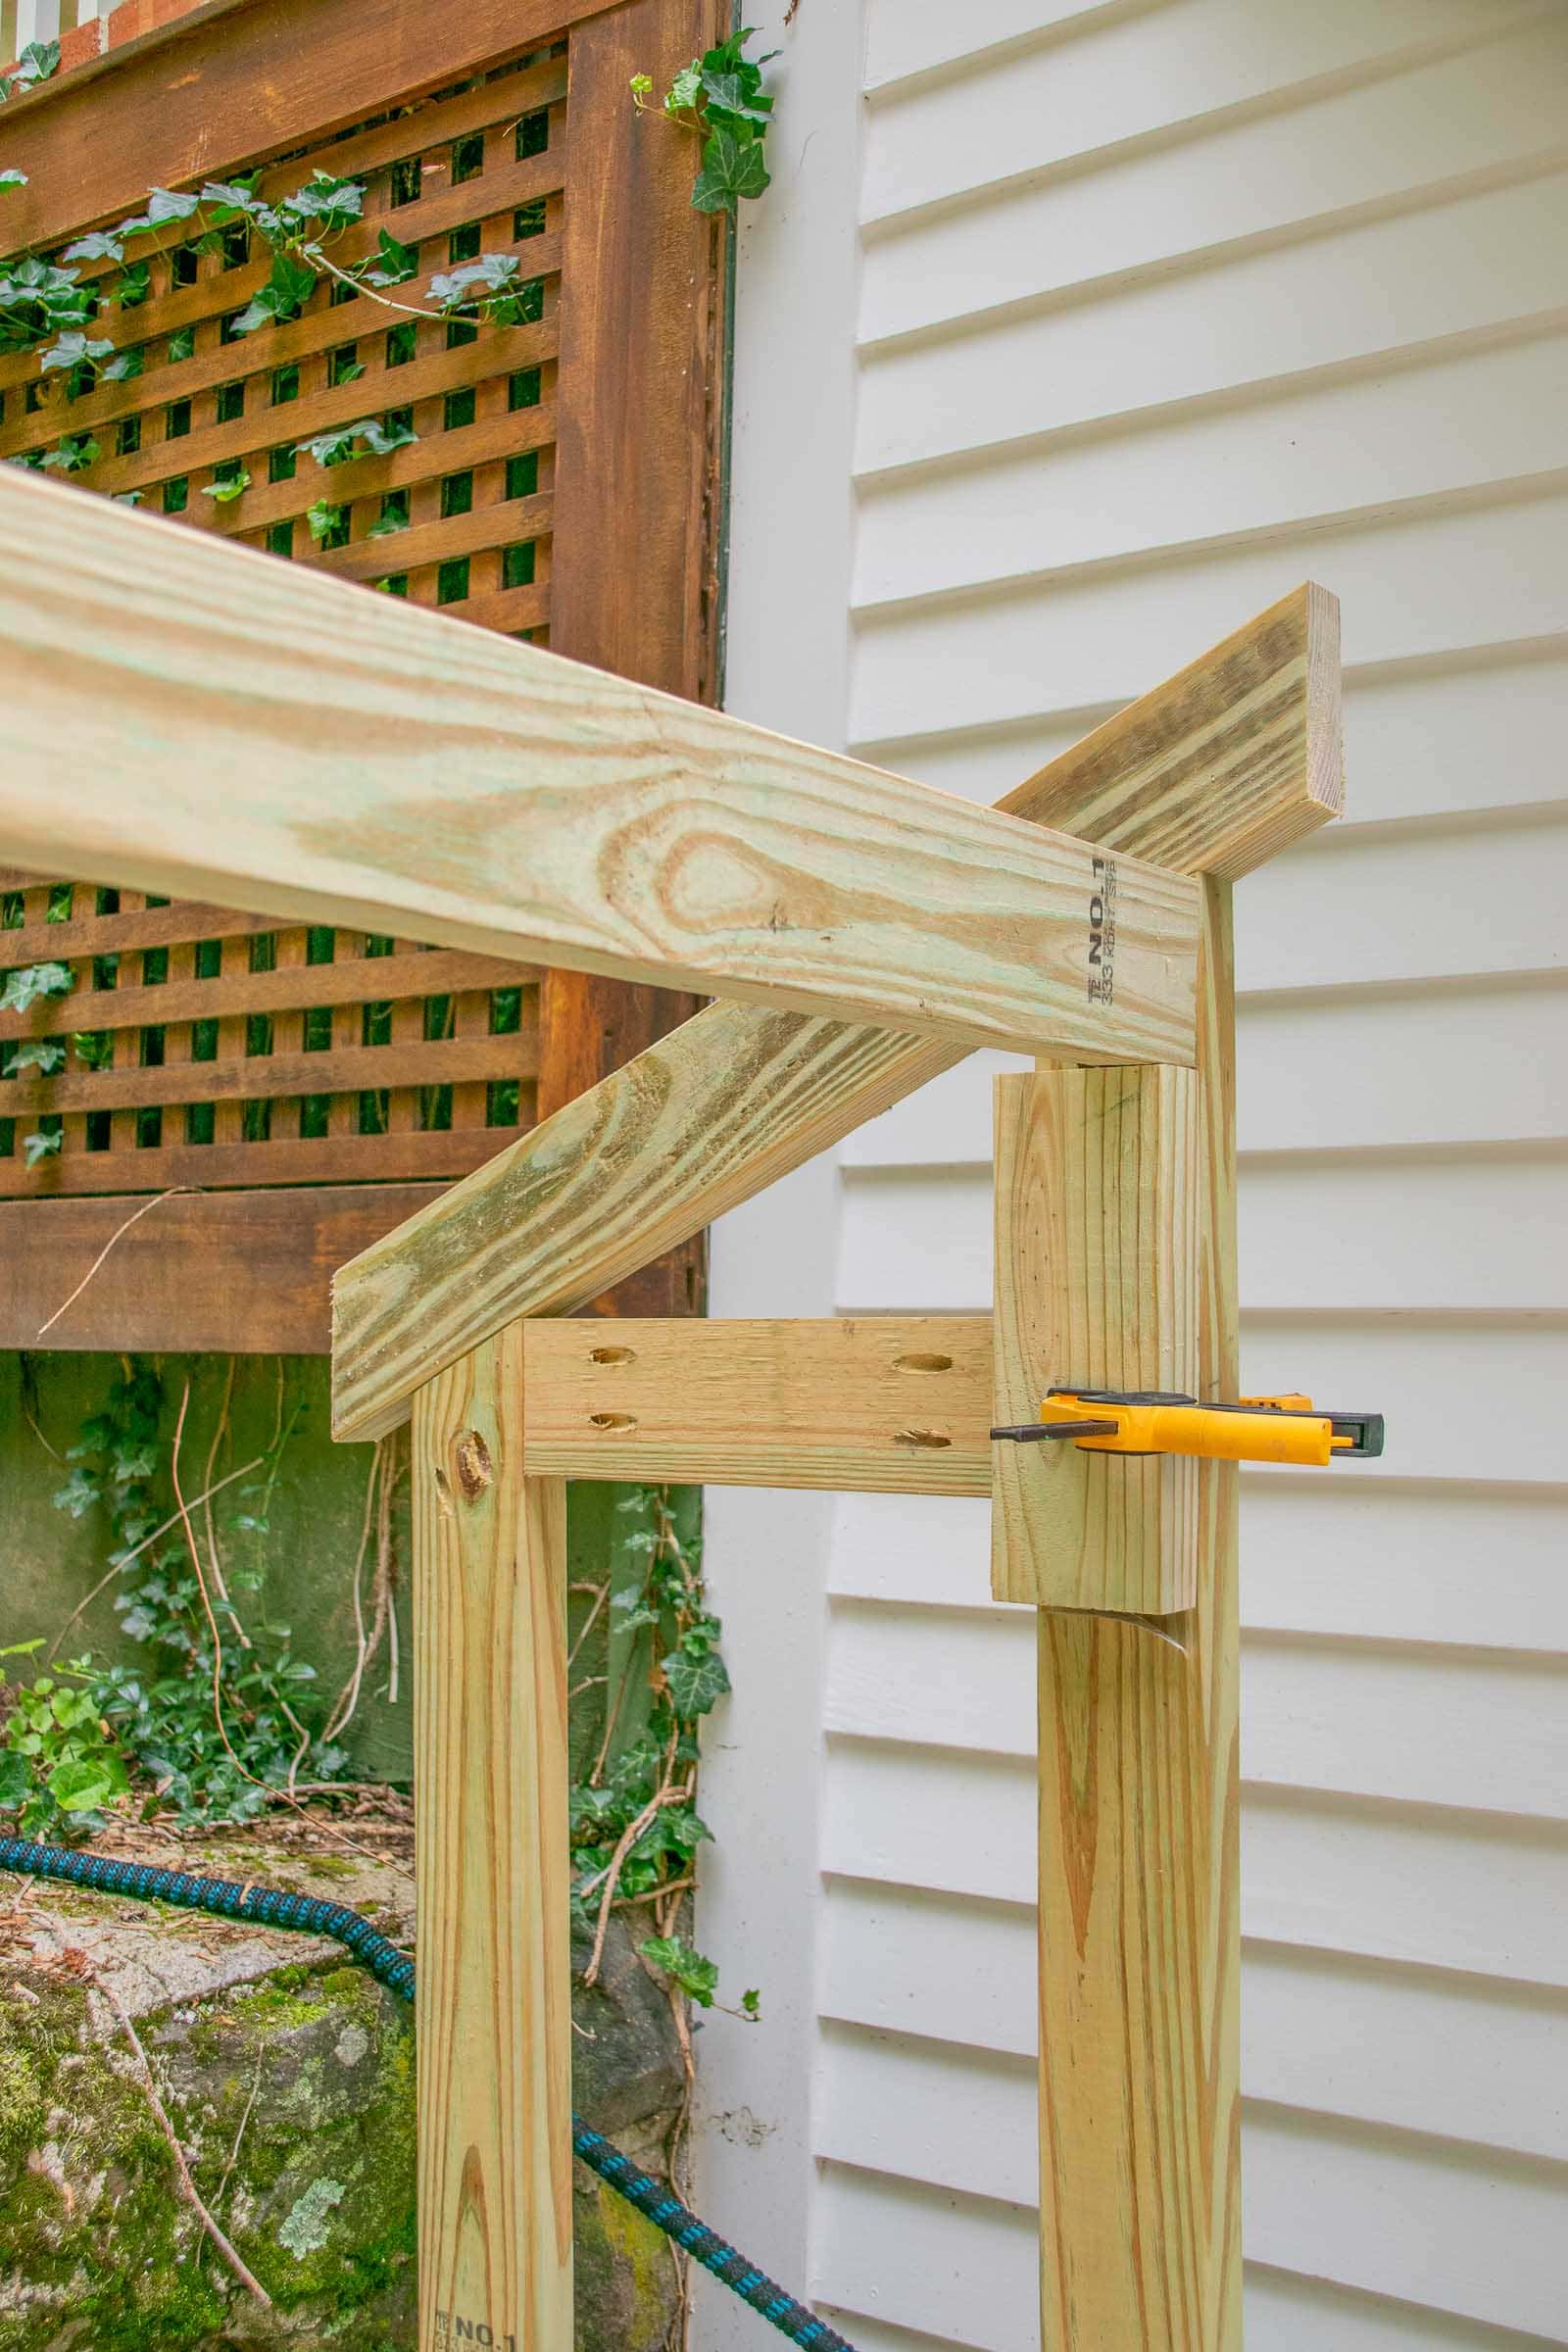
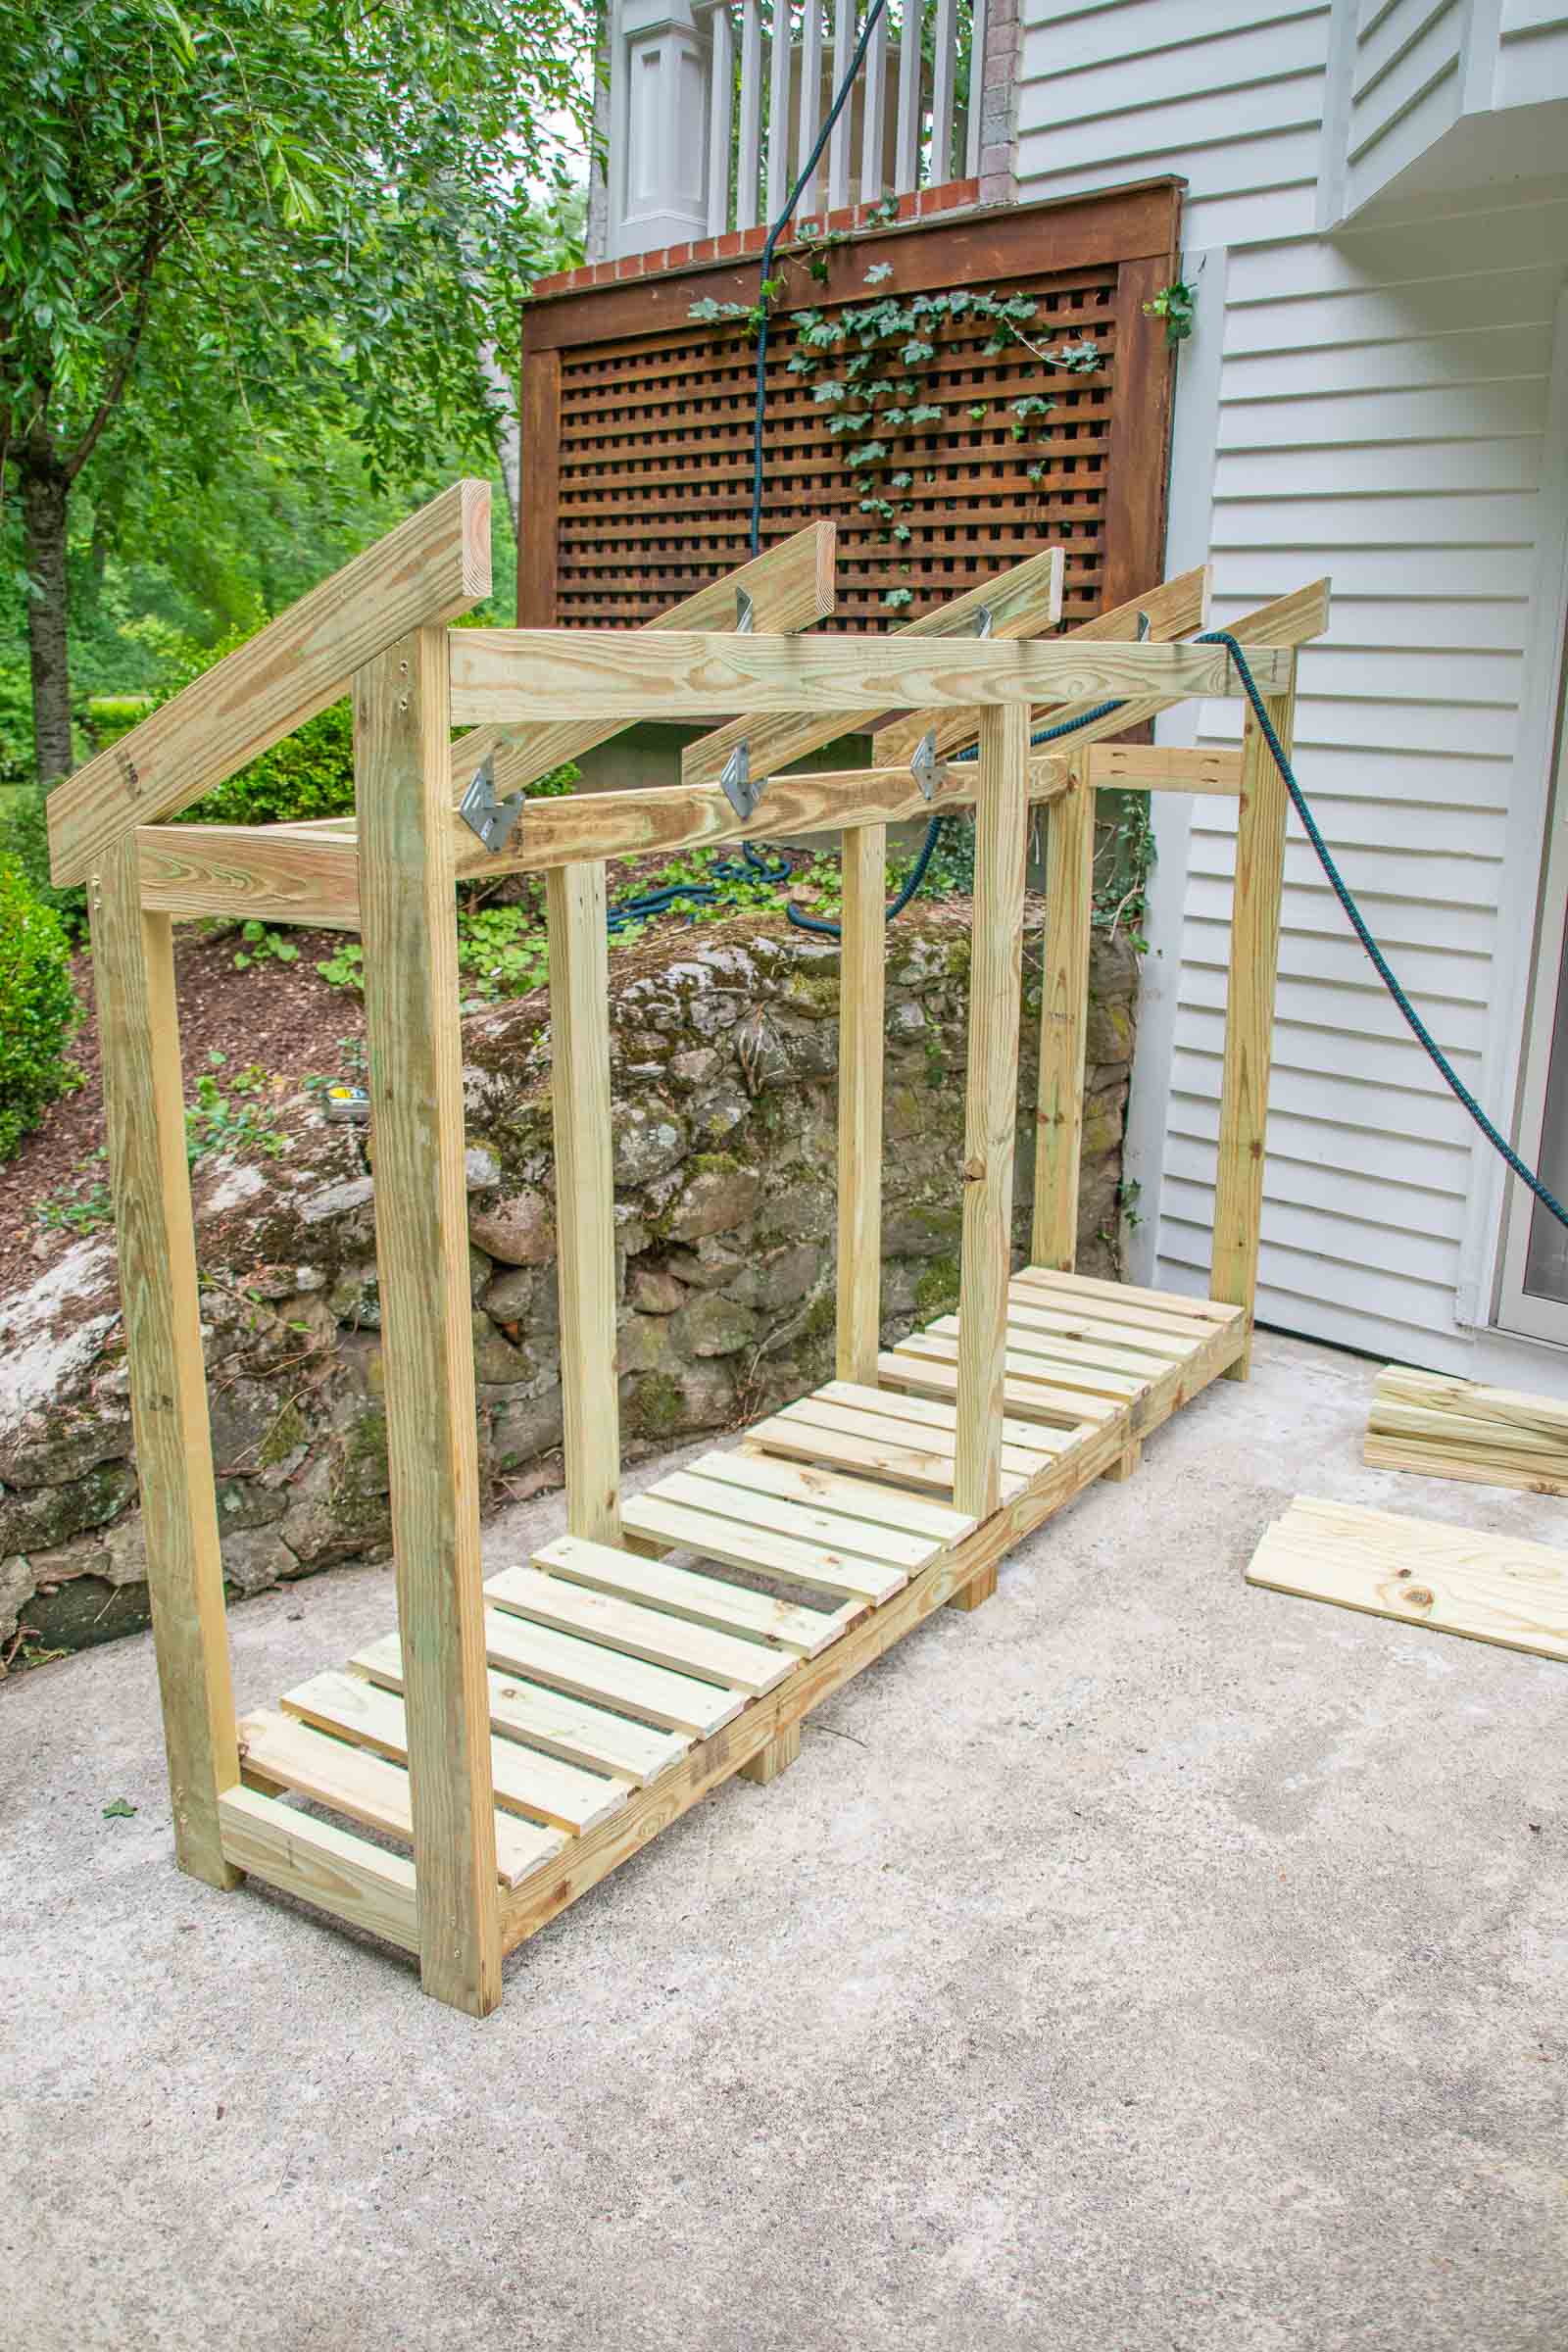
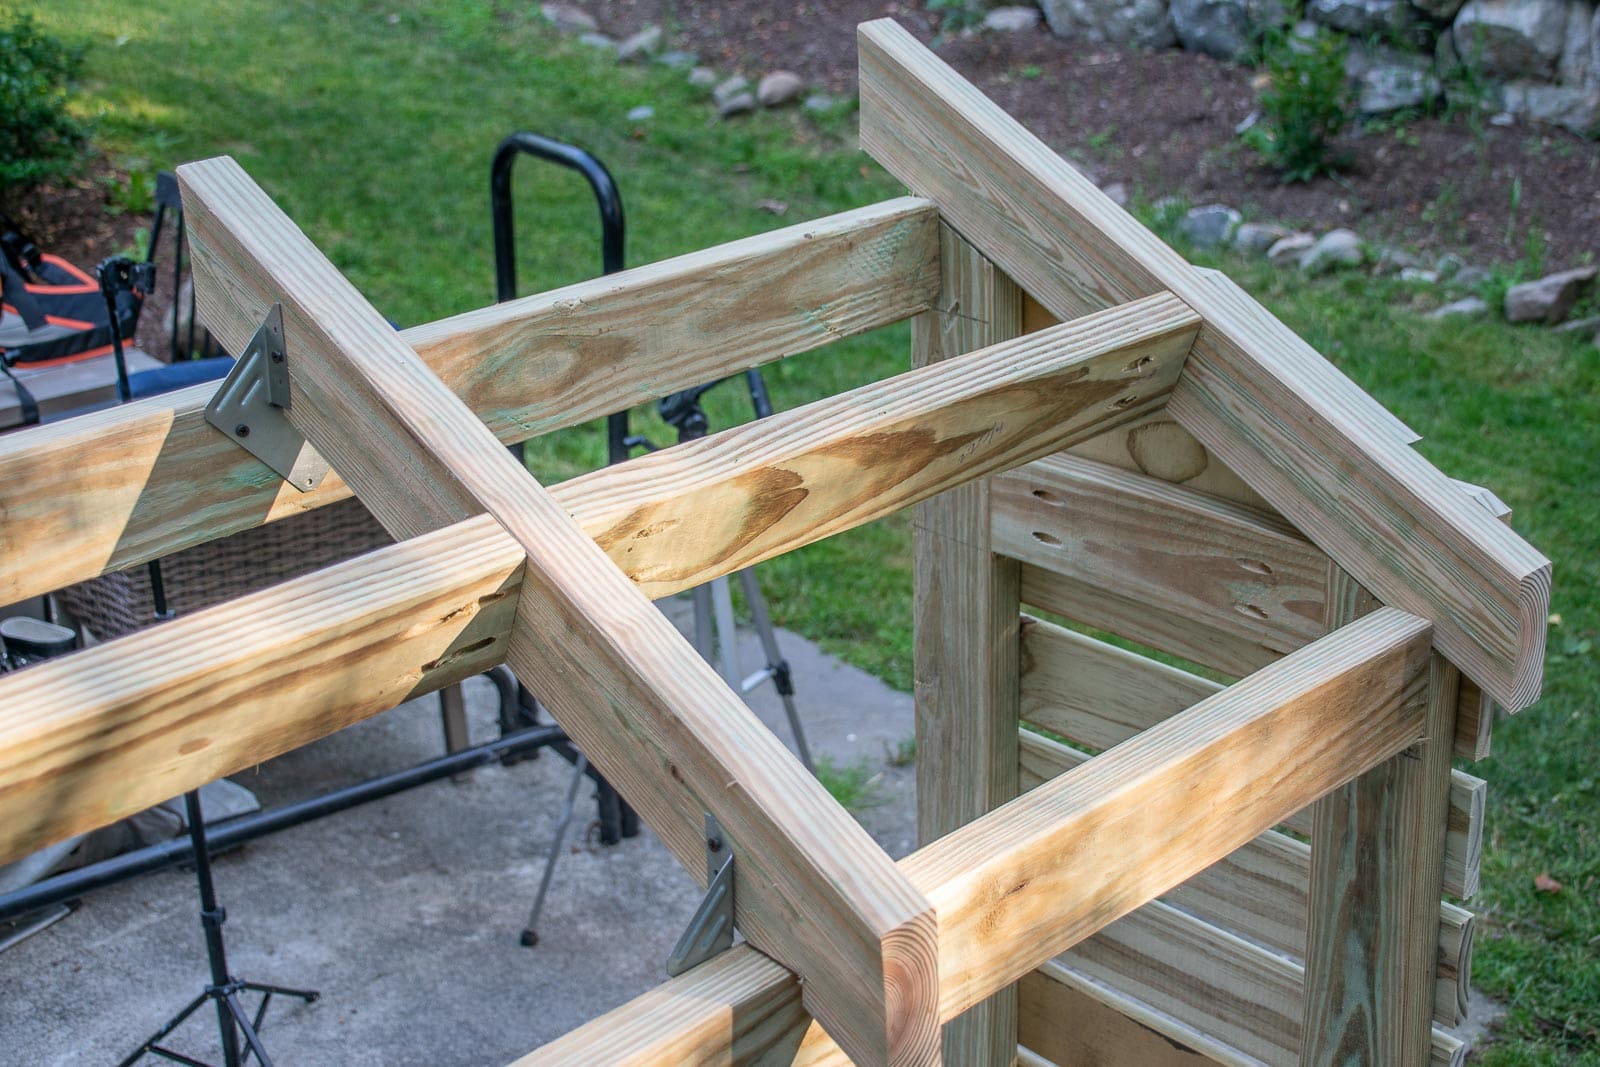
Step 1. Build the Ends of the Shed
I decided to make the roof of this shed a standard 6:12 slope (so each angle is 27-degrees), but… I could have done a 4:12 slope for slightly less of an incline. With the two top joists cut and the vertical pieces angled to fit, I used my Kreg jig to add two horizontal pieces to the bottom and then at a right angle along the top right under the angled joist. I also used the Kreg jig to connect the vertical angled pieces to the roof.
Step 2. Add Feet to the horizontal cross pieces
To provide some additional support, I cut 2-inch feet from scrap lumber and attached them to my cross braces with pocket holes. This means the weight of the firewood won’t just be on the screws holding the support beams into the ends, but rather will be on these feet.
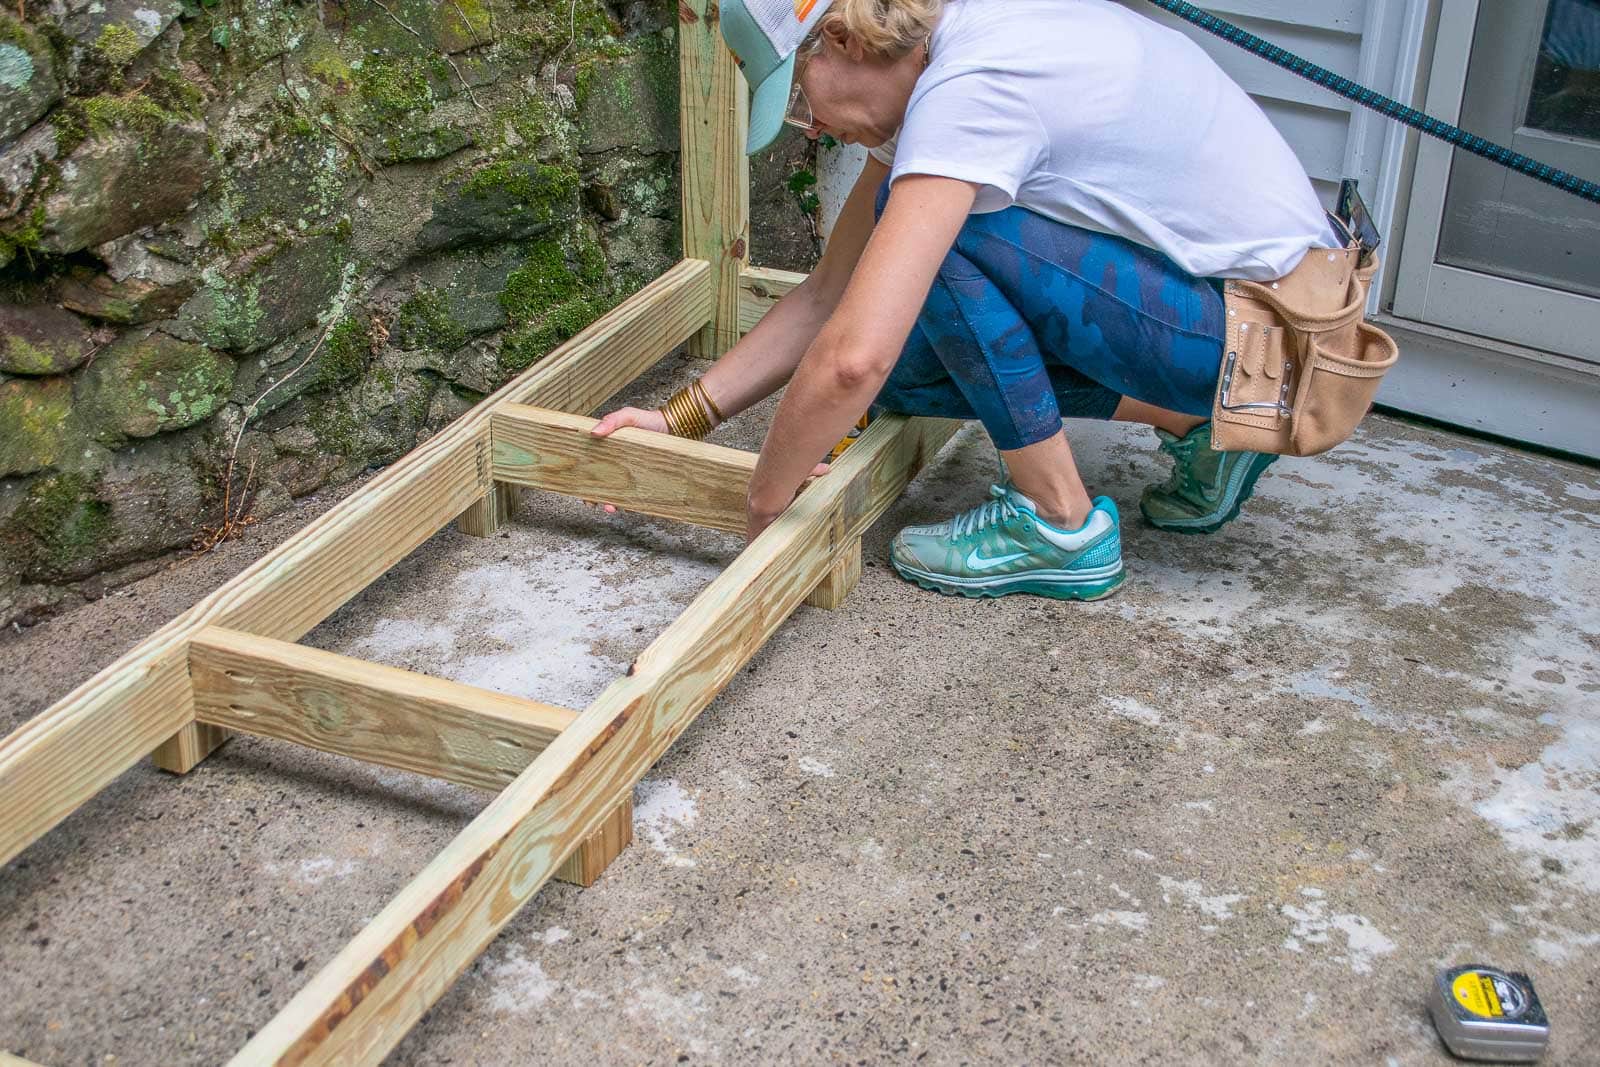
Step 3. Connect Cross beams to Shed Ends
I used these screws to connect the cross beams to the end and screwed them in place through my end pieces. To help support the top cross beams, I clamped a piece of scrap wood to the vertical lumber to support the weight of each board!

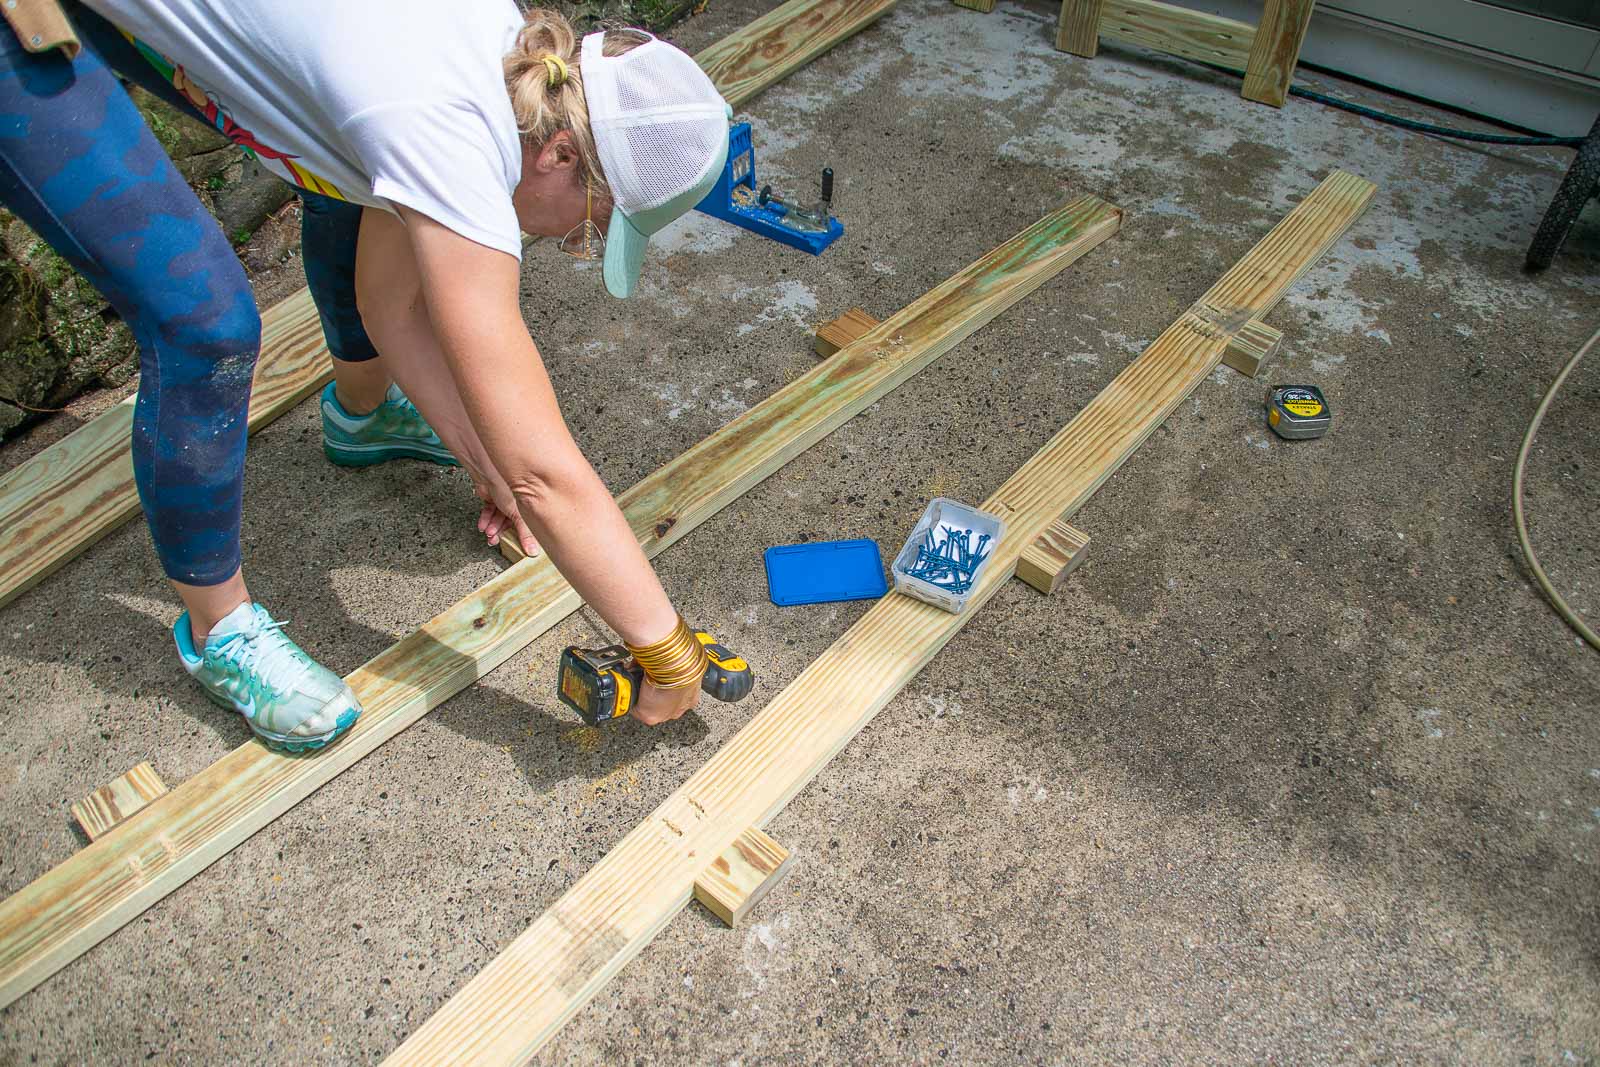
Step 4. Add Support braces to the shed floor and front/ back walls
To provide a bit more stability to the shed since I knew it would be holding *a lot* of weight, I used pocket holes to add some cross beams along the floor. I also added two vertical supports in the middle of the front and back of the shed that you can see in pictures below.
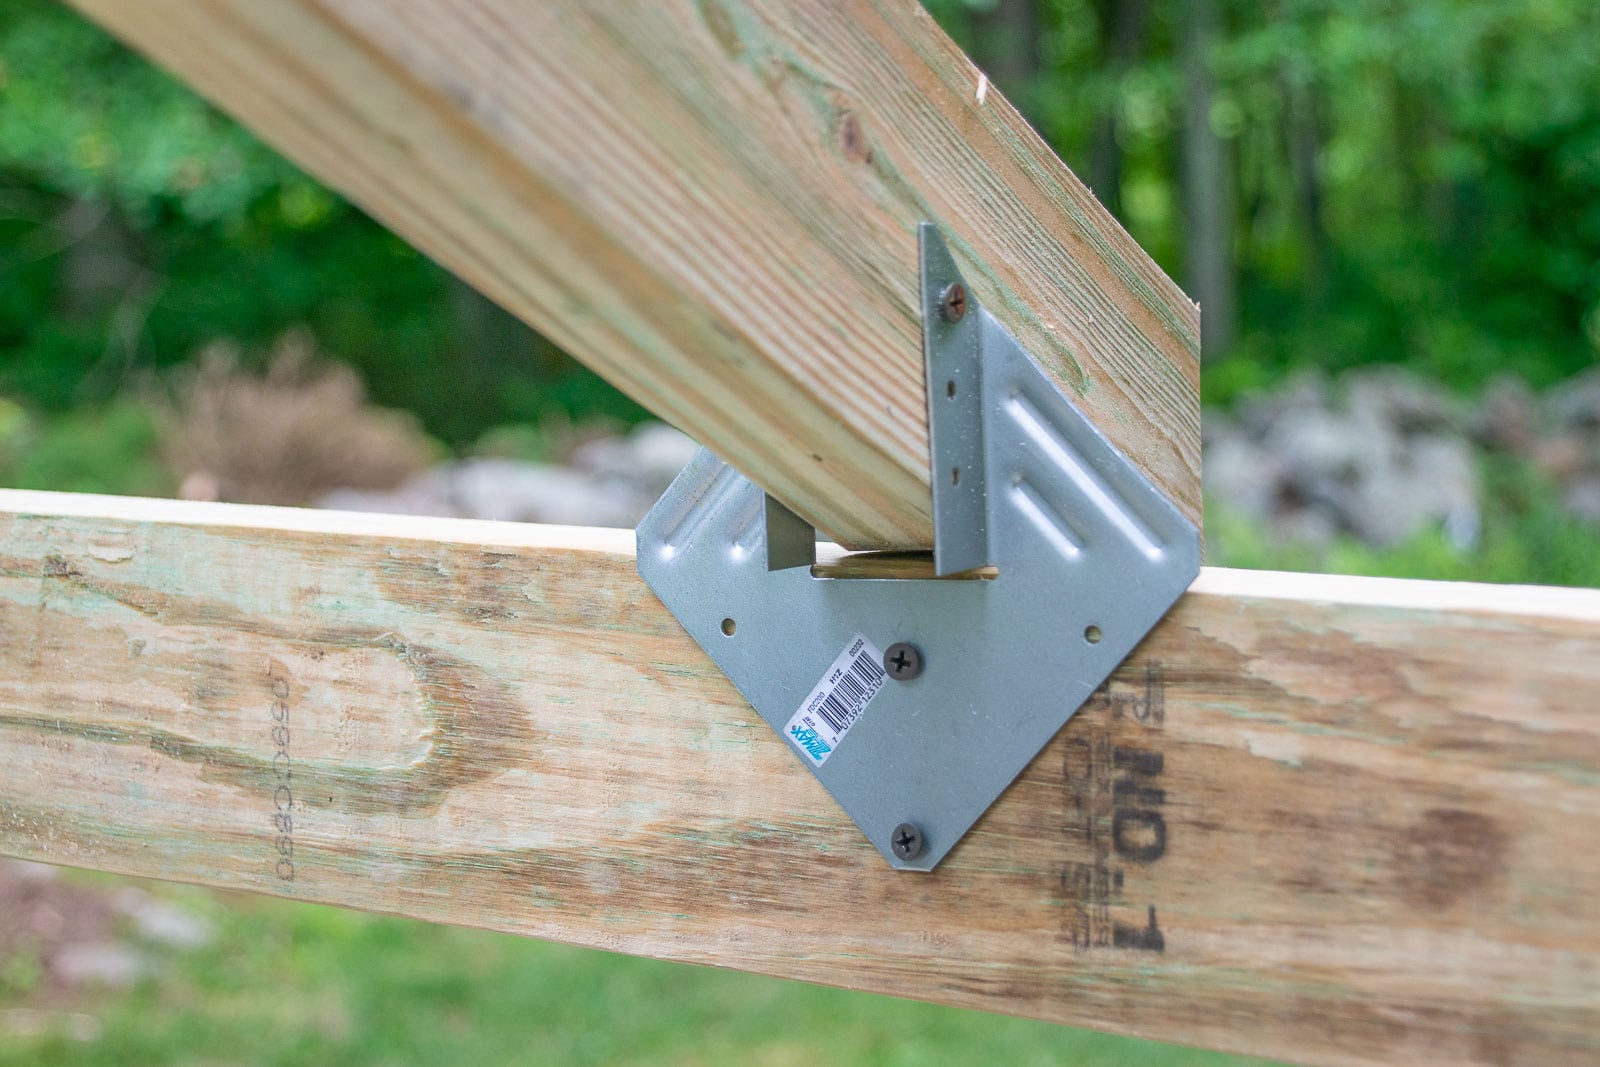
Step 5. Adding Ceiling Joists
I’ve never done this before, but because the roof is angled, I needed to notch out the ceiling joists so they would rest on the support beams. I used my speed square to figure out the right angles for these notches and, honestly, I just kind of guessed by looking at the angles of the end pieces. There are lots of videos on YouTube for how to determine the angles for these joists, but again… because this is a firewood shed, I was comfortable kind of figuring out with trial and error! I used my jig saw to cut out the notches and then attached them with these Simpson Strong Tie hurricane braces.
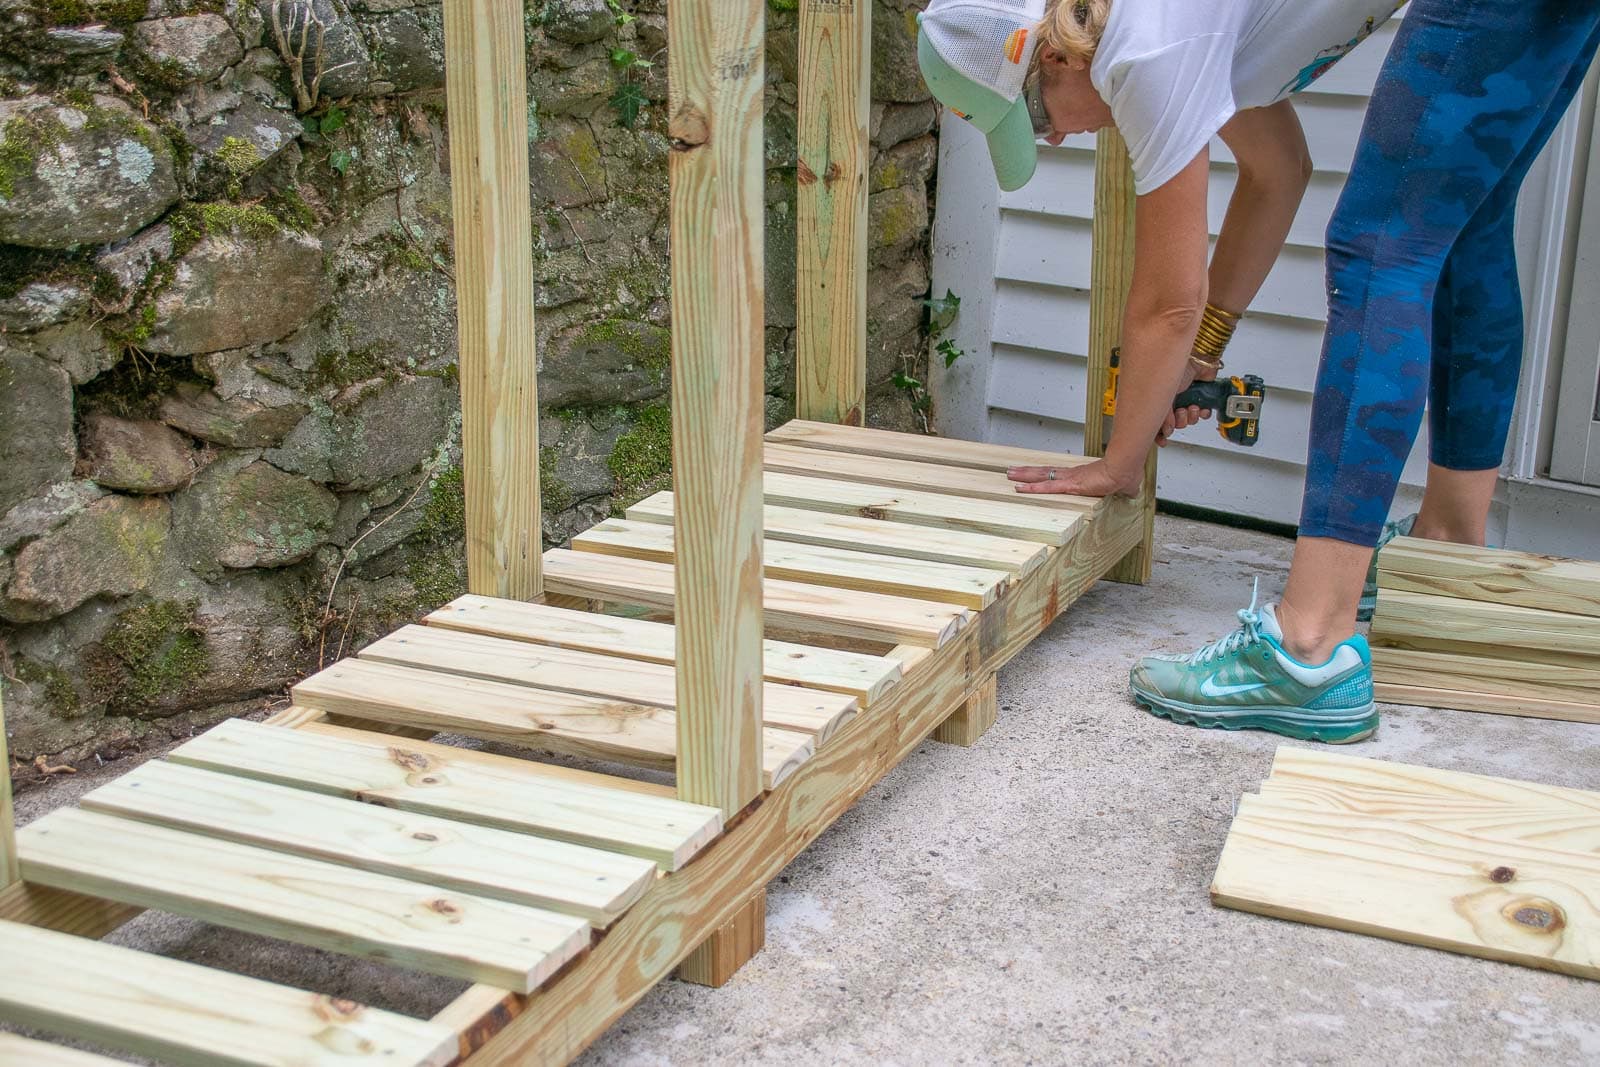
Step 6. Add floor boards
Working around the vertical braces, I screwed my floor boards in place. Note that you need to allow for ventilation when building a firewood shed which is why I spaced out all the boards on the floor and sides of the shed.
Step 7. Adding Siding
I’m using this lumber for the siding so it will hold up to the elements. I decided to have the sides overlap the back siding so I cut the sides about 3/4″ longer so that when assembled, they would cover up the siding along the back. I used scrap pieces of siding as a spacer between each slat and then screwed each one in place with one exterior screw. (I chose to only use one screw just to save on materials, but I’ll update this post if that means the boards warp or age in a weird way.)
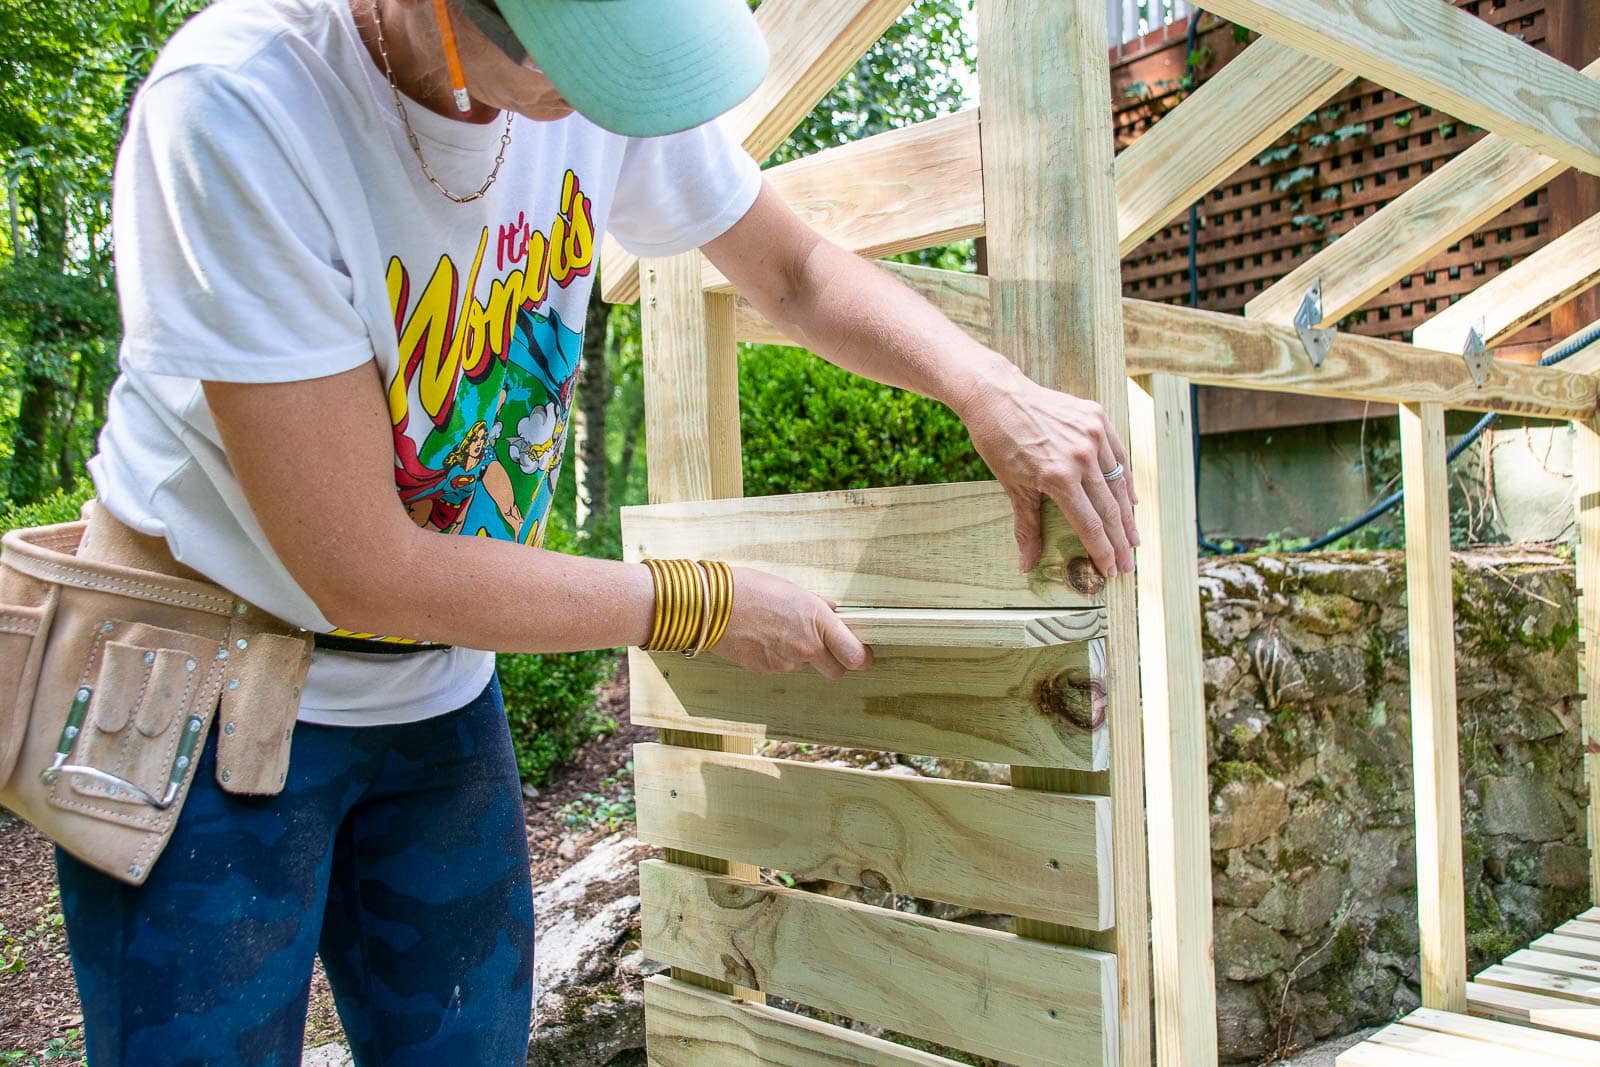
One oversight I realized when I got to this step, was that 8-foot siding I was using wasn’t quite long enough to reach the full length of the shed itself because I’d added the two end pieces to either end of 8-foot cross beams making the actual length of my shed about 8 feet 3 inches. My solution was to cut the siding for the back to 33-inches and 32-inches and then install it onto each vertical beam on the back. To make it look a bit more intentional, I staggered the end joints.
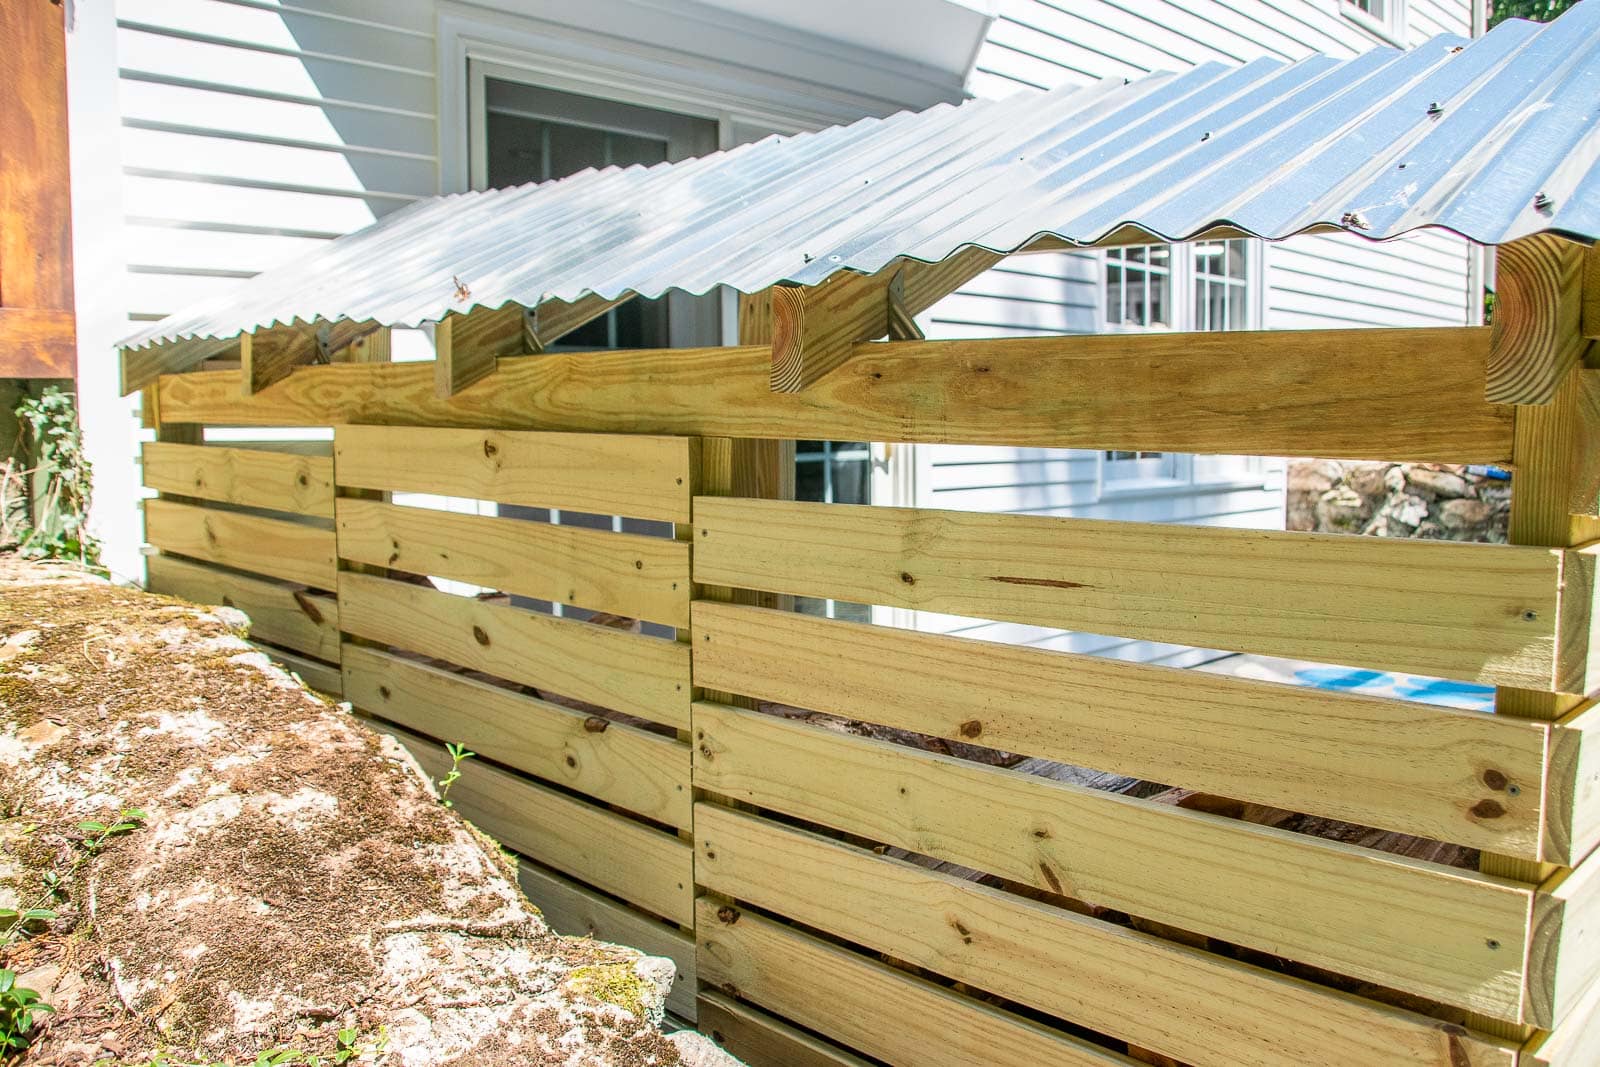
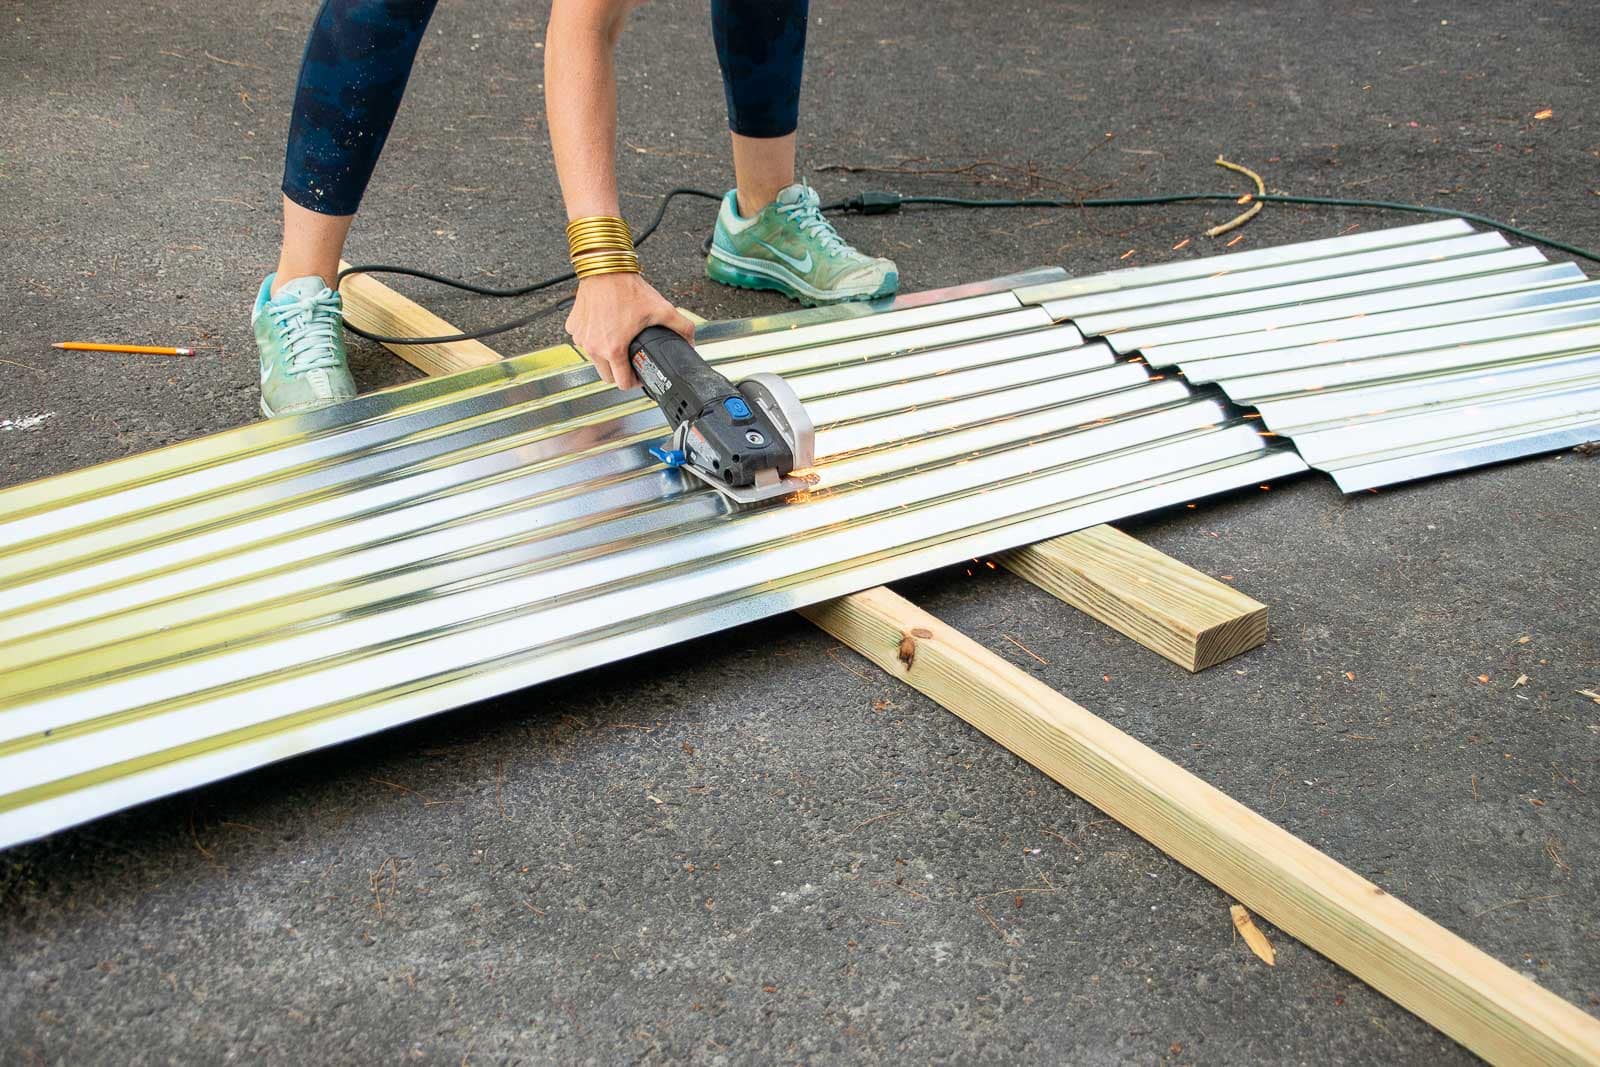
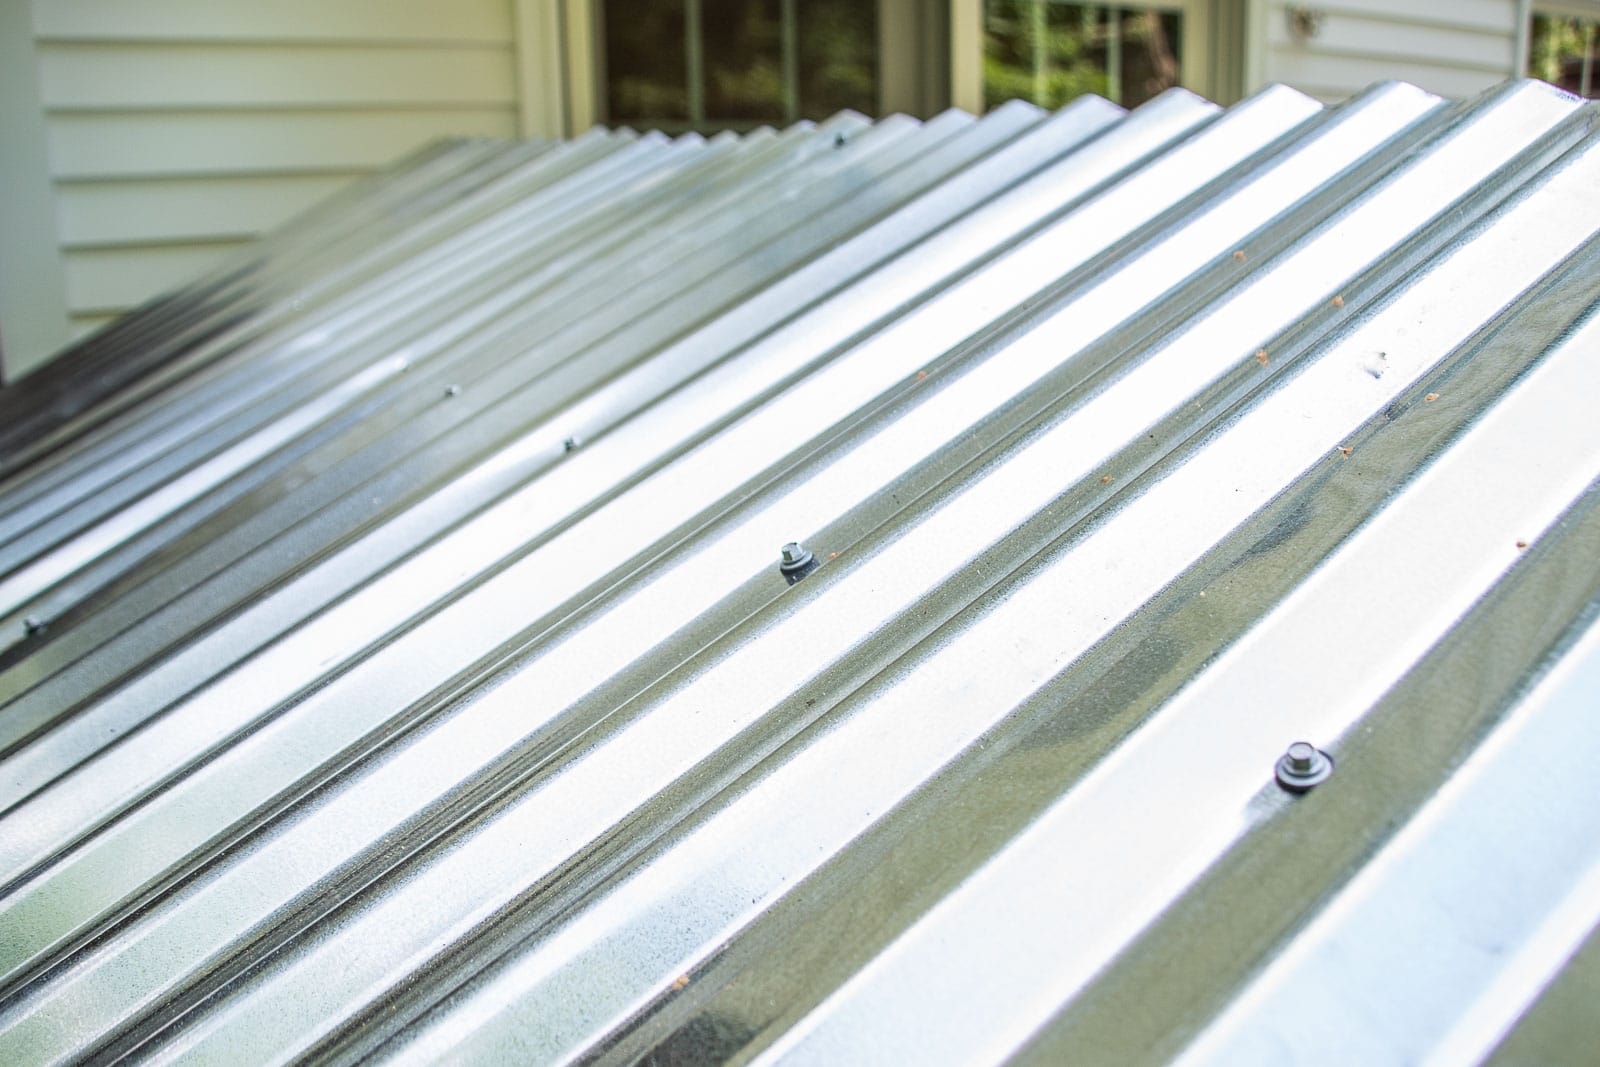
Step 8. Add the Roof
Note… This roof works great, but I may do it slightly differently if I made this again. I’m using corrugated metal sheets and they’re flimsier than I imagined. I suspect I could have spend more money on a more rigid version of corrugated metal OR used some sort of all-weather plywood underneath to help support it. As it was, I used my Dremel with a metal blade to cut the corrugated metal down to size and ended up adding some cross braces between the ceiling joints to help support the metal roof. You’ll want to use the screws intended for roofing since they have a built in rubber washer to help waterproof around the screws.
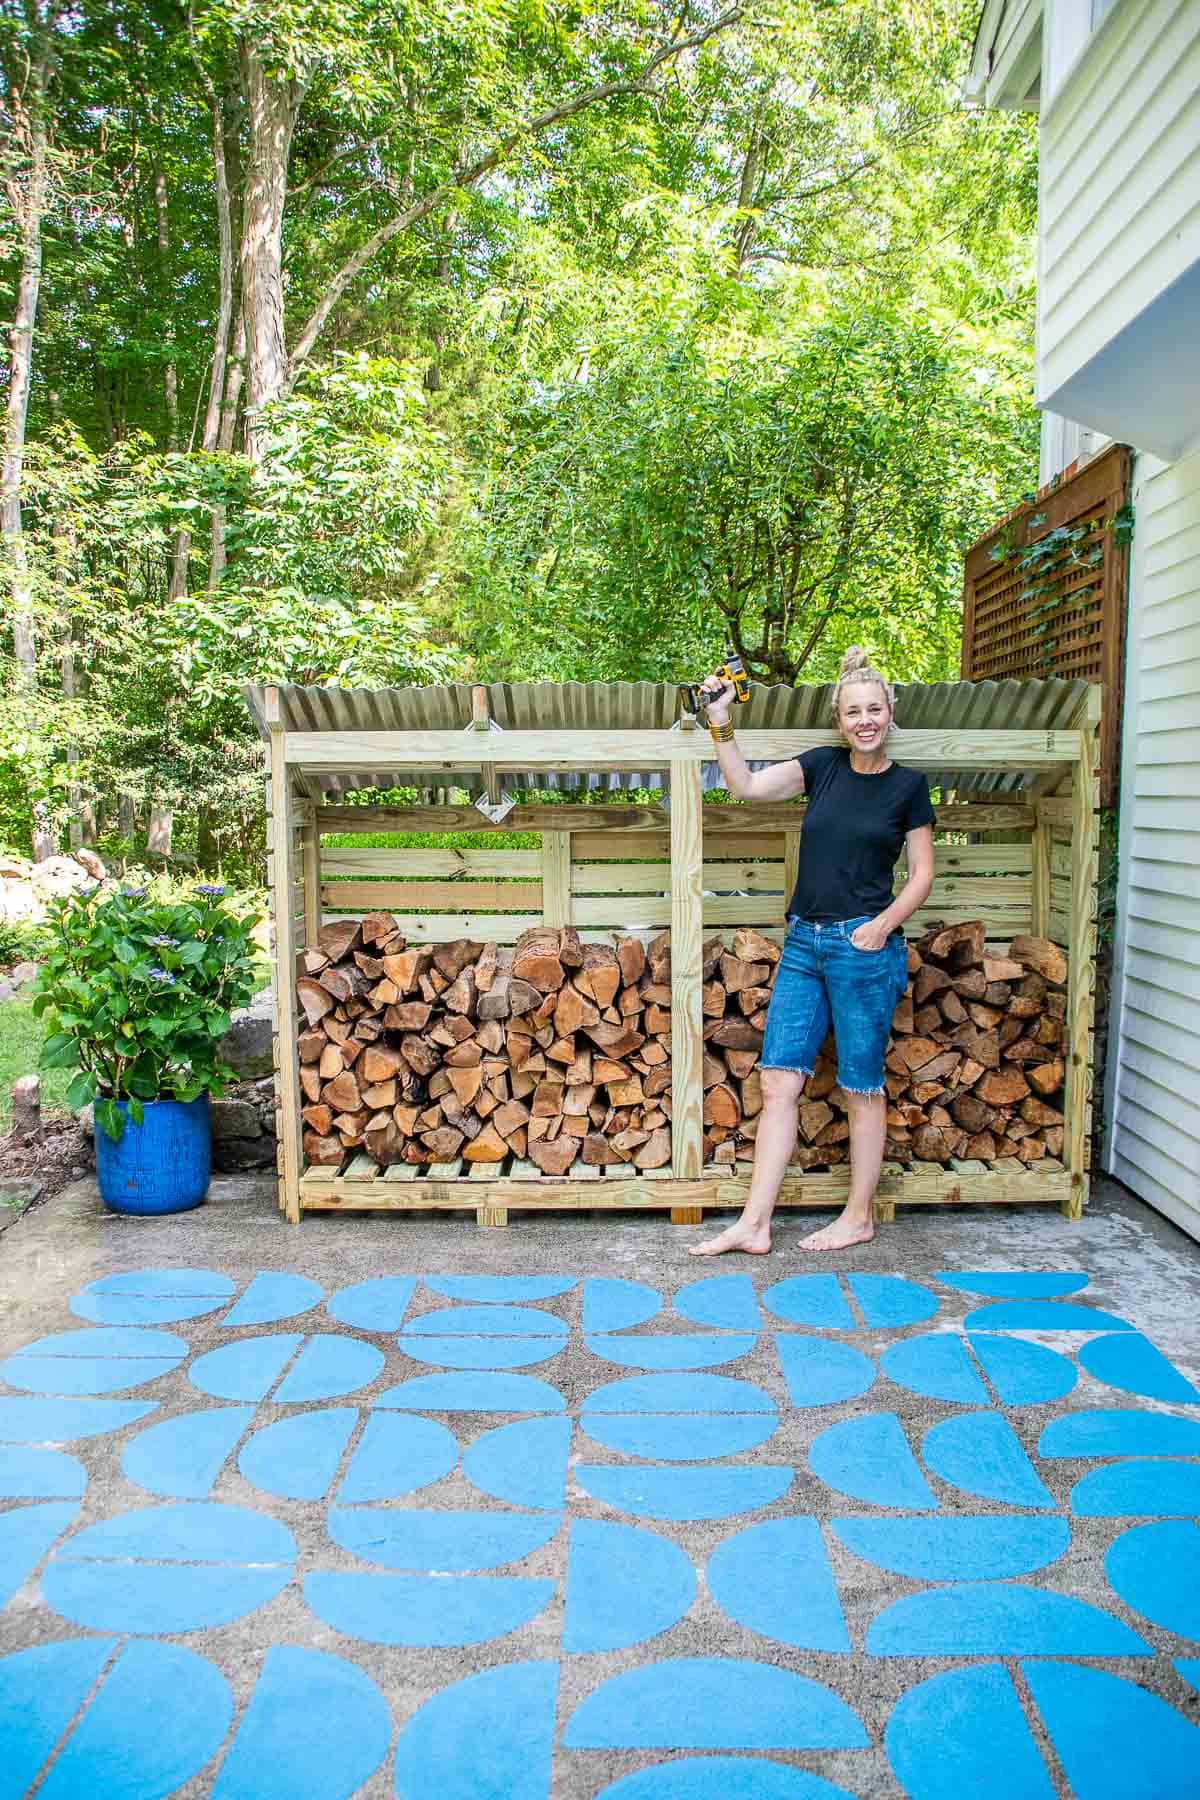
This firewood shed is part of a bigger patio makeover so you’ll have to check back in to see the full reveal, but here’s a sneak peek of the painted concrete patio I added to jazz up this space. I also removed that overgrown evergreen which helps brighten up the area as well! Not that I’m wishing for colder temperature, but… I’m also thrilled that we now have this sturdy and permanent solution for firewood. It looks great out on our new and improved side patio!
Materials
- 2×4 ground contact Pressure Treated
- 1×4 Weathershield boards
- Miter Saw
- Kreg Jig
- Speed Square
- Exterior Screws (3 inch and 2 inch)
- Dremel Ultra Saw
- Hurricane ties
- Jigsaw
- Corrugated roofing
- Roofing screws

Thank you for this tutorial! AS we get into the fall/winter—i’m already dreading the treKS out tO the log piLe (and, flipping over the tarp, getting wet/snowy, and then replacing The tarp all 0ver again). Great DIRECTIONS! Ill give it a Try! Thank you.
Good luck! I love knowing there’s something a bit more substantial back there for all our firewood!
Hi. This build looks great and is exactly what my wife and i were looking for!
Do you publish your full inventory or cutsheet by chance? I didn’t see it or just missed the link.
Thanks!
Hi! Unfortunately I didn’t… I’m always kind of making it up as I go. Apologies!
The roof is held up by a few screws! That horizontal beam should rest on the vertical side pieces. You could add strength by sistering in another vertical stud to carry the roof weight.
Roof weight? It’s a piece of corrugated aluminum!
This is so great!! thanks for the tutorial!
How much wood can you fit in it?
Oh man… I’m honestly not sure how much we order each season, but… we only get one delivery and this fits most of it! So… enough wood to last us all winter and then some!
You mentioned the roof being flimsy, but it just needs to be supported in a particular way. If you put some roof framing (called perlins) in the long direction of your shed it would be super strong.
That’s what I’ve done. I was just mentioning that the corrugated material itself should not bear any major weight.
It seems to be easily working after your instructions.