
How to Monogram a Leather Bag
Psssst… this post *might* contain affiliate links: see my disclosure here.
Heat-Transfer Monogram on Leather
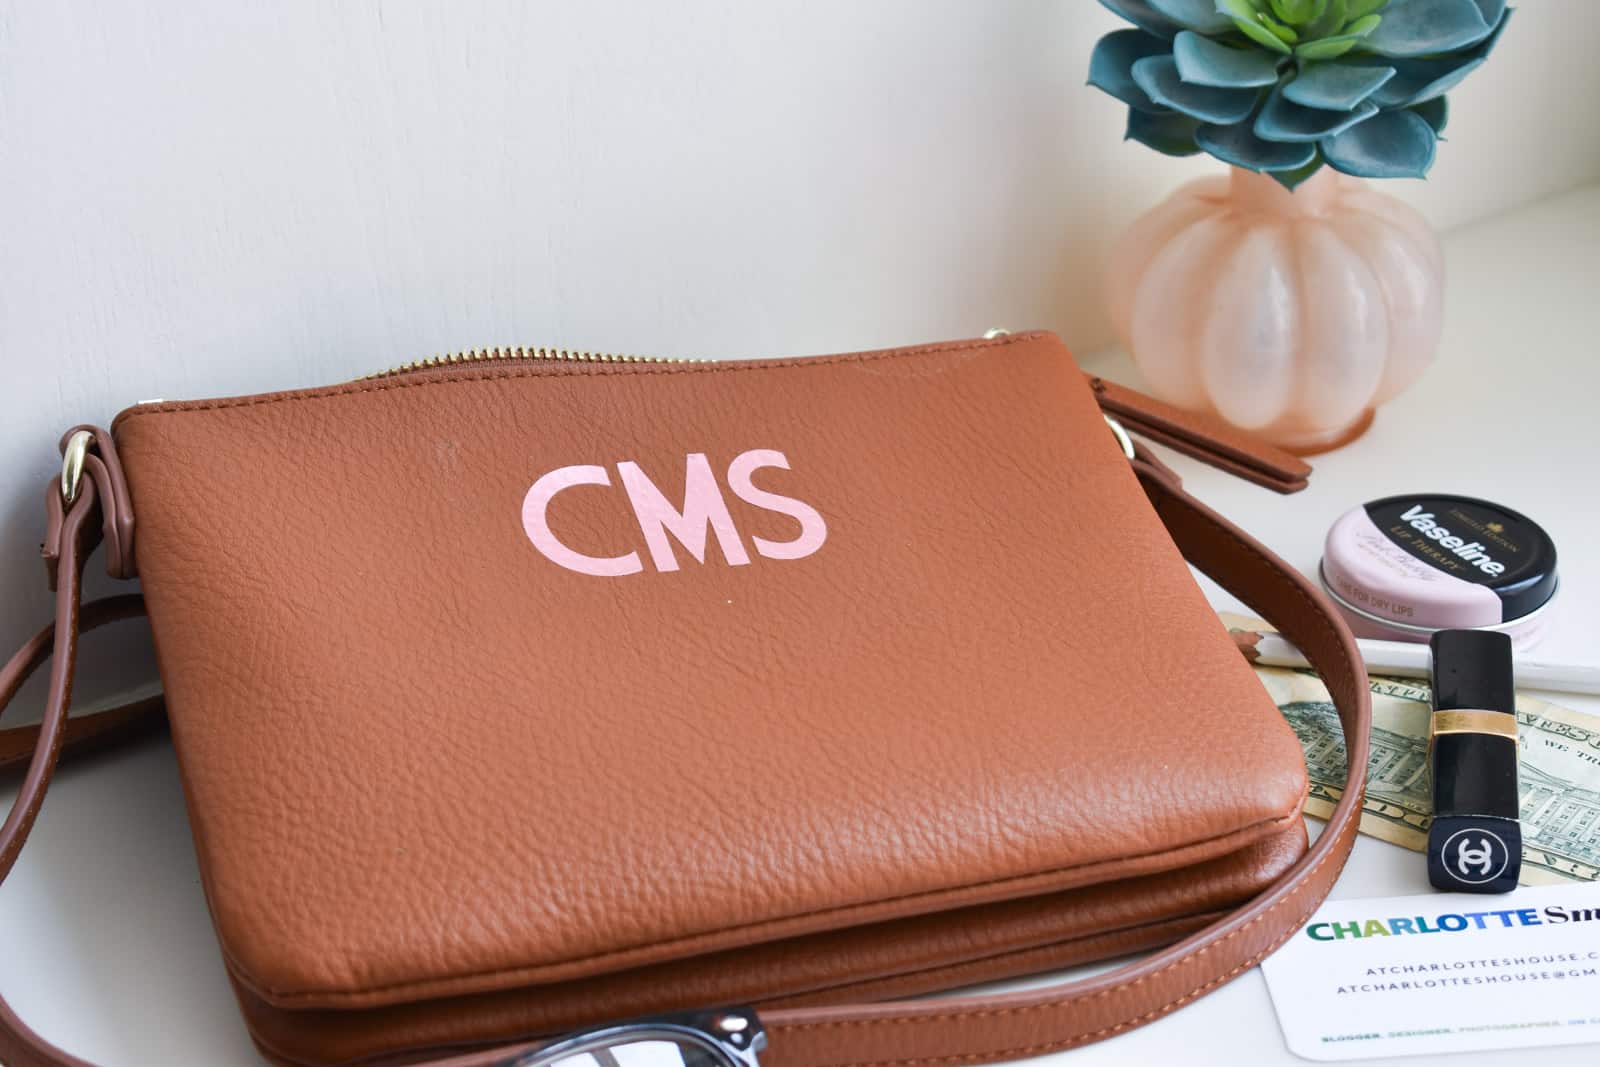
I’m loving all the cross-body bags that are on the market these days. A sassy clutch is great… until you’re stuck with it under your armpit while you try to juggle a cocktail and a dinner plate in the buffet line. Cross-body bag to the rescue! I picked up this one months ago at Old Navy (affiliate) thinking I could add a little flair to it, and I’m so glad I did!

Shop my favorites!
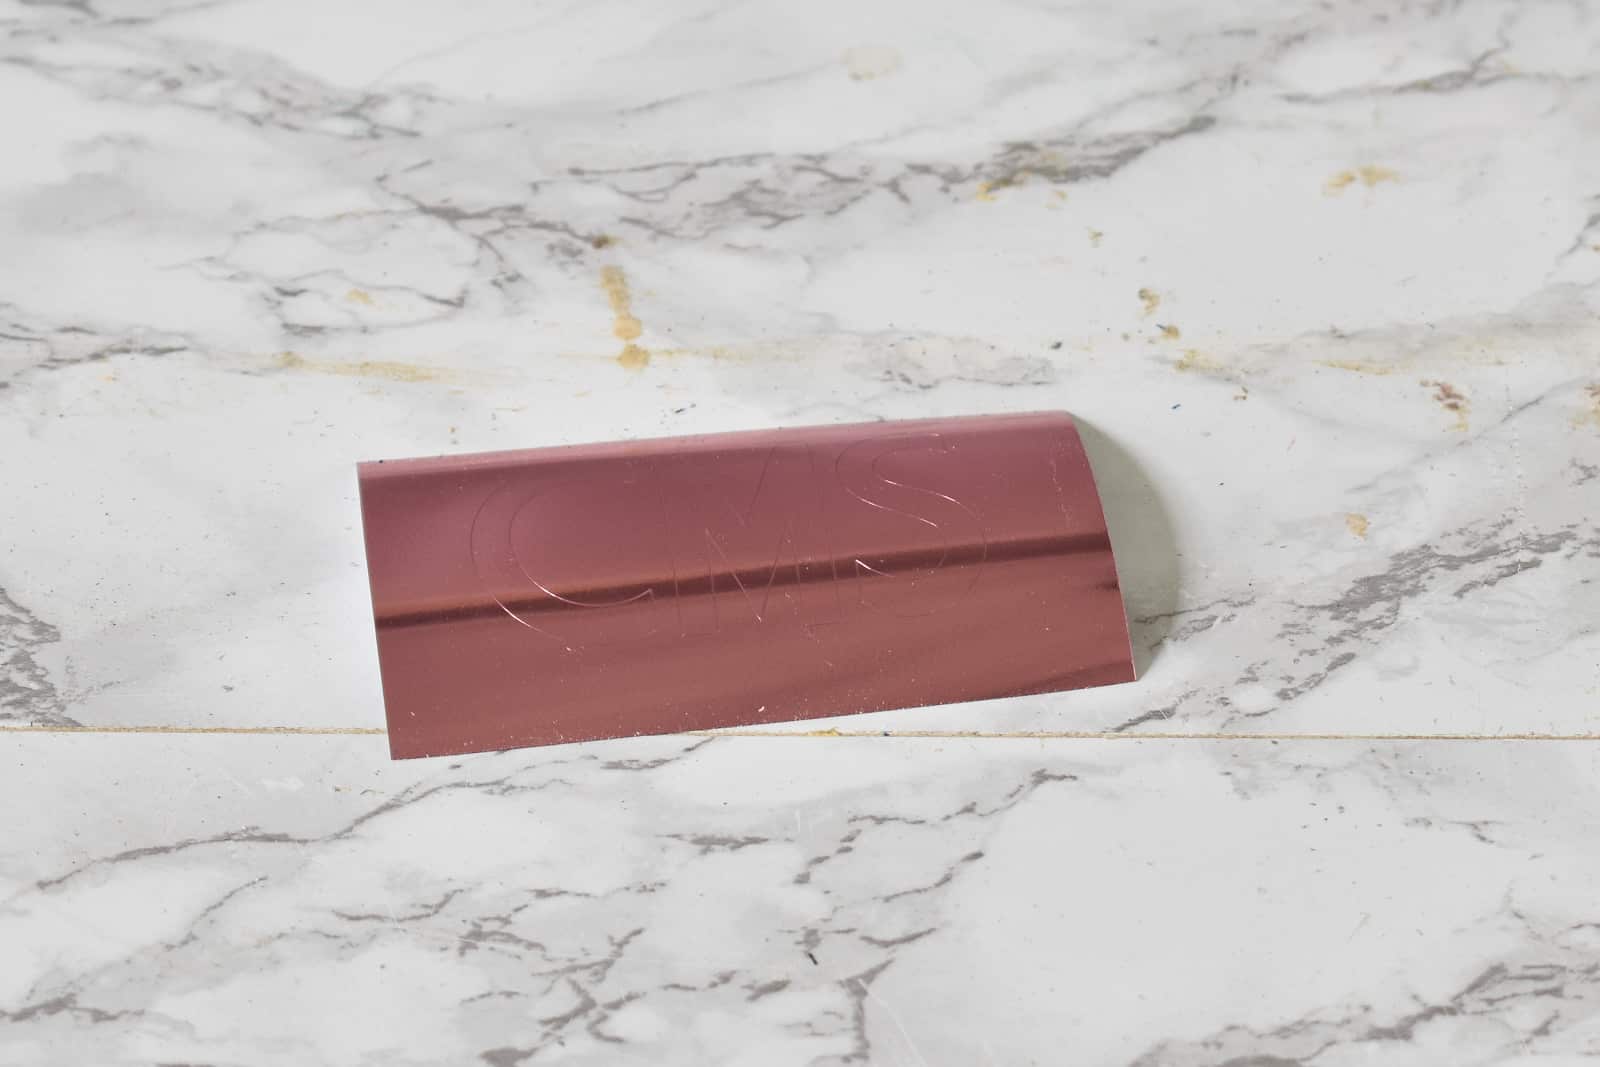
Cricut makes lots of iron-on options, but obviously this shiny metallic pink leapt into my cart. This is a heat transfer film but I had faith that I could figure it out with the ‘leather’ of my purse. (Thanks to this article by Persia Lou… I had even more confidence.)
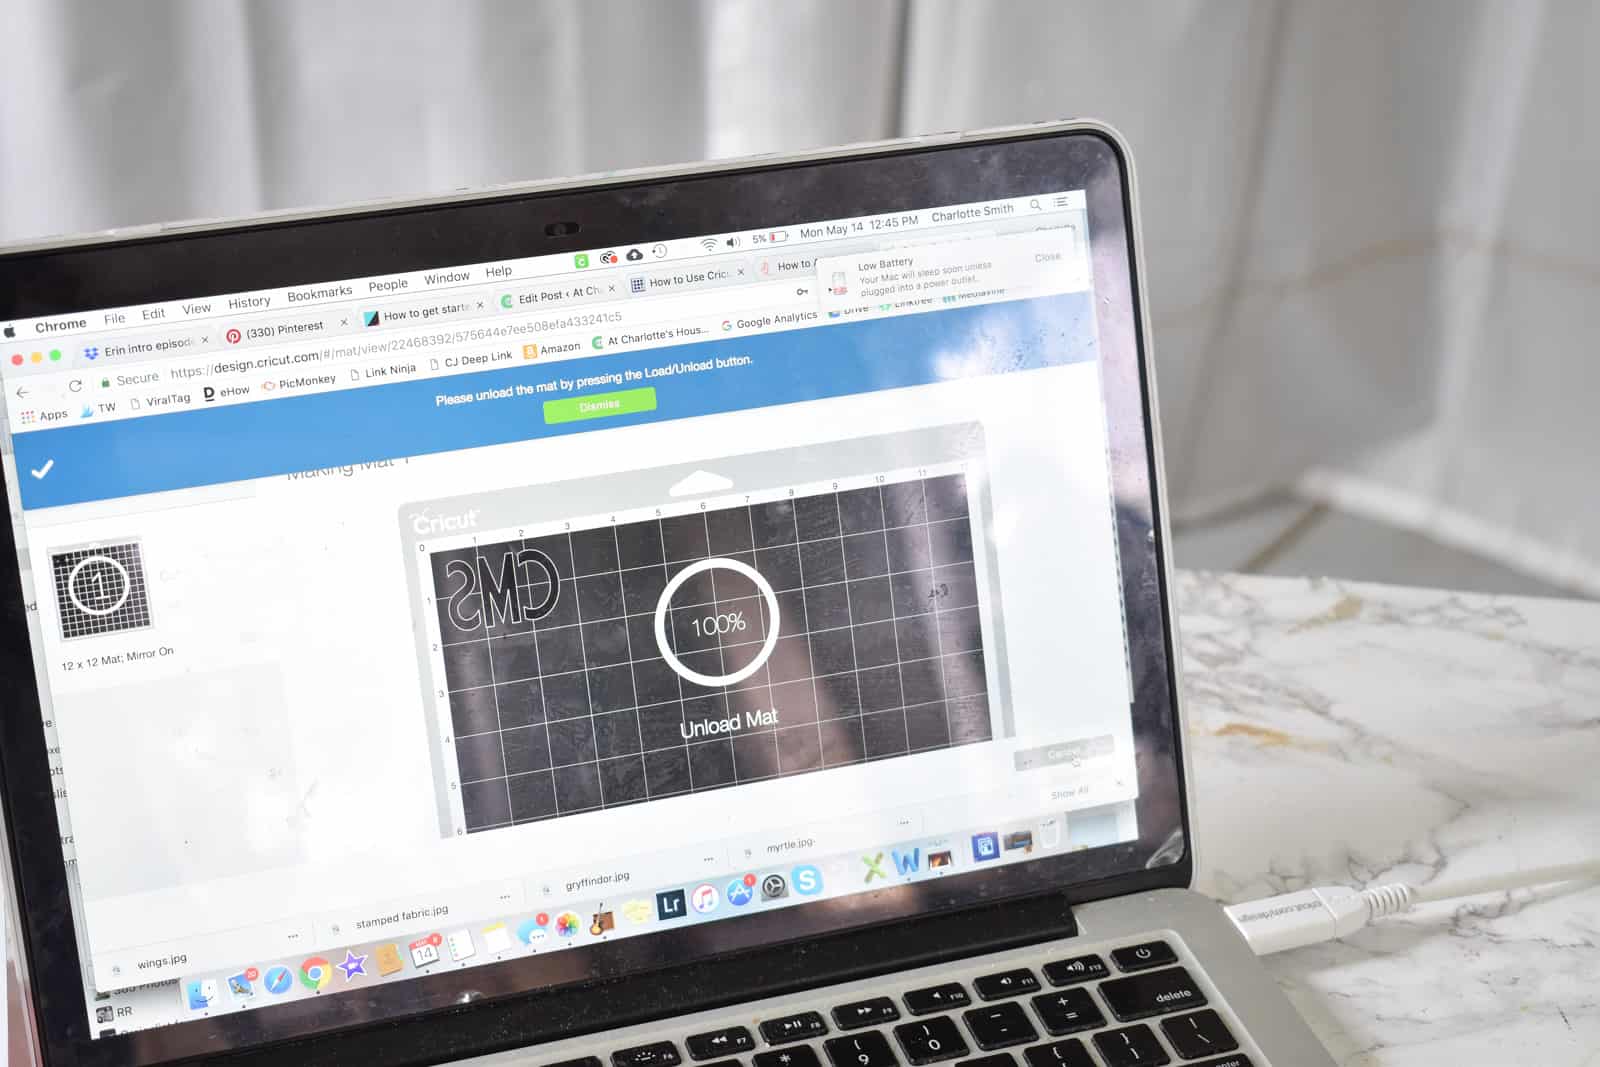
Step 1. Make Your Monogram
As you can see, I’m still no expert when it comes to the intricacies of the Cricut design studio, so I usually resort to clean, simple letters for my monograms. There are, however, lots of templates and pre-made designs you can search through and purchase for a couple of dollars if need be.
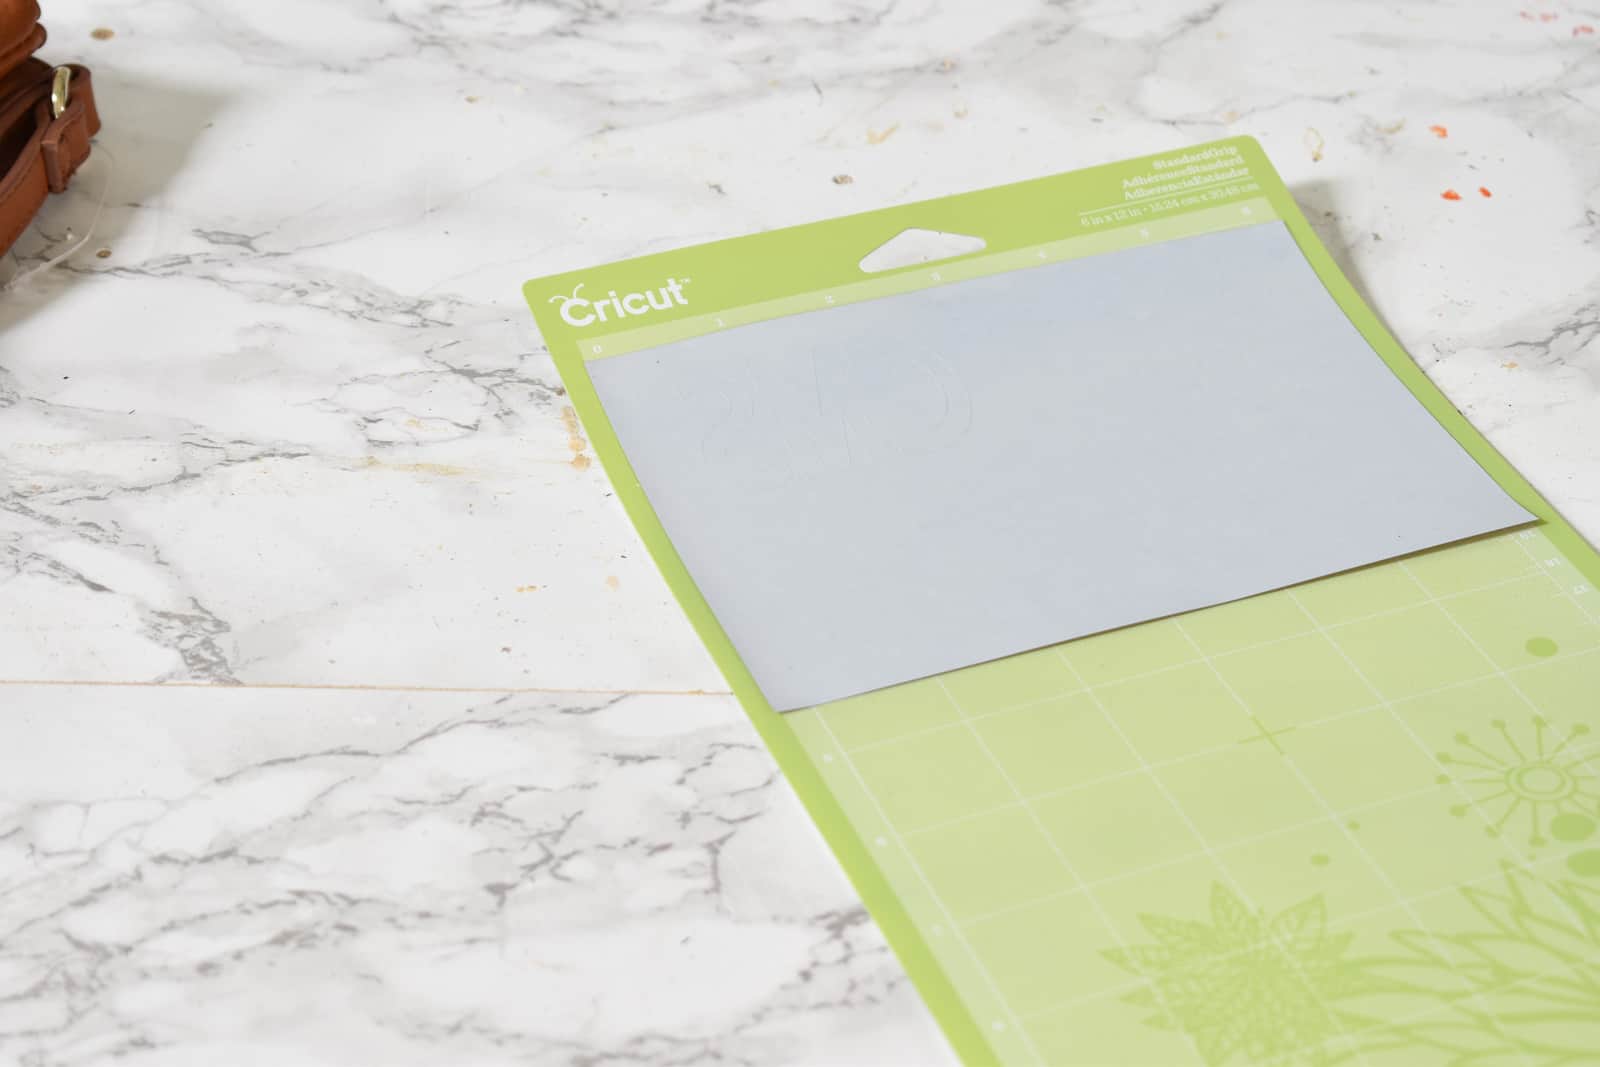
Step 2. Load Heat Transfer film
Because you’re dealing with the REVERSE image with any iron on, you want to place the foil onto the cutting mat with the color side down.
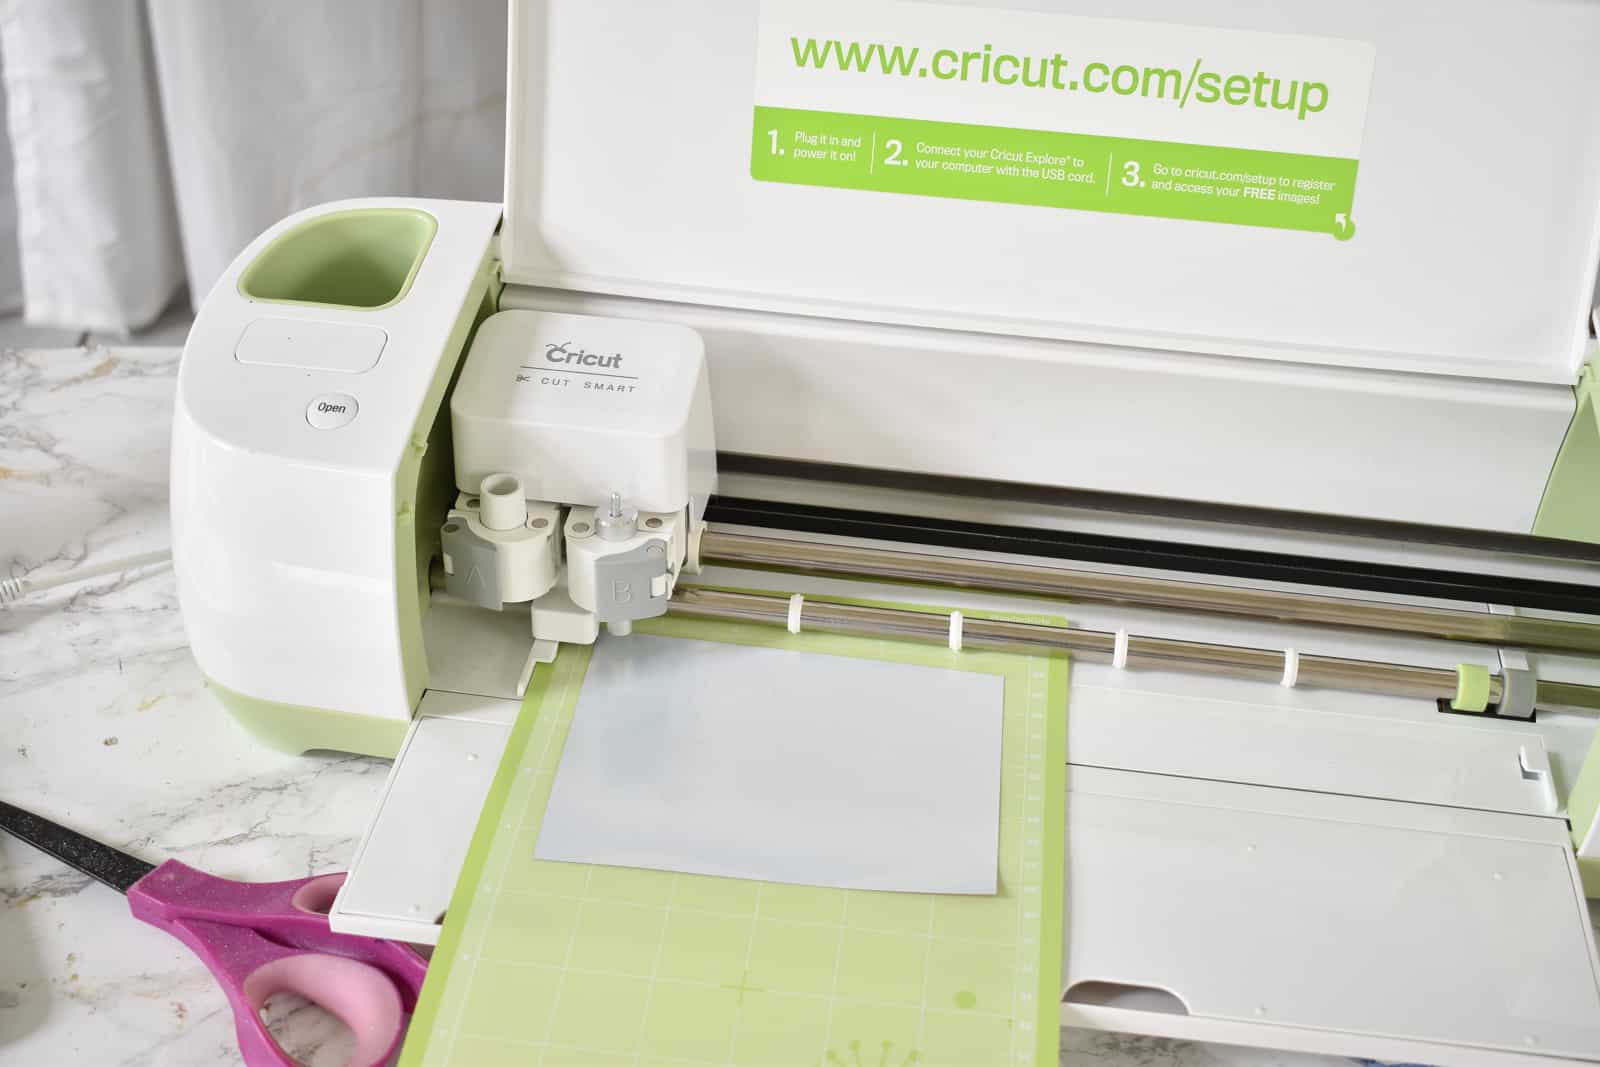
Step 3. Set Your Cricut
The only things you need to remember is that you should select “mirror image” and make sure the cut setting is for ‘heat-transfer’. Mirror image. Heat-transfer. (I have a the earlier version of this model.)
Step 4. Trim excess transfer paper
I’m cheap so I wanted to save any iron on paper so I trimmed around the monogram.
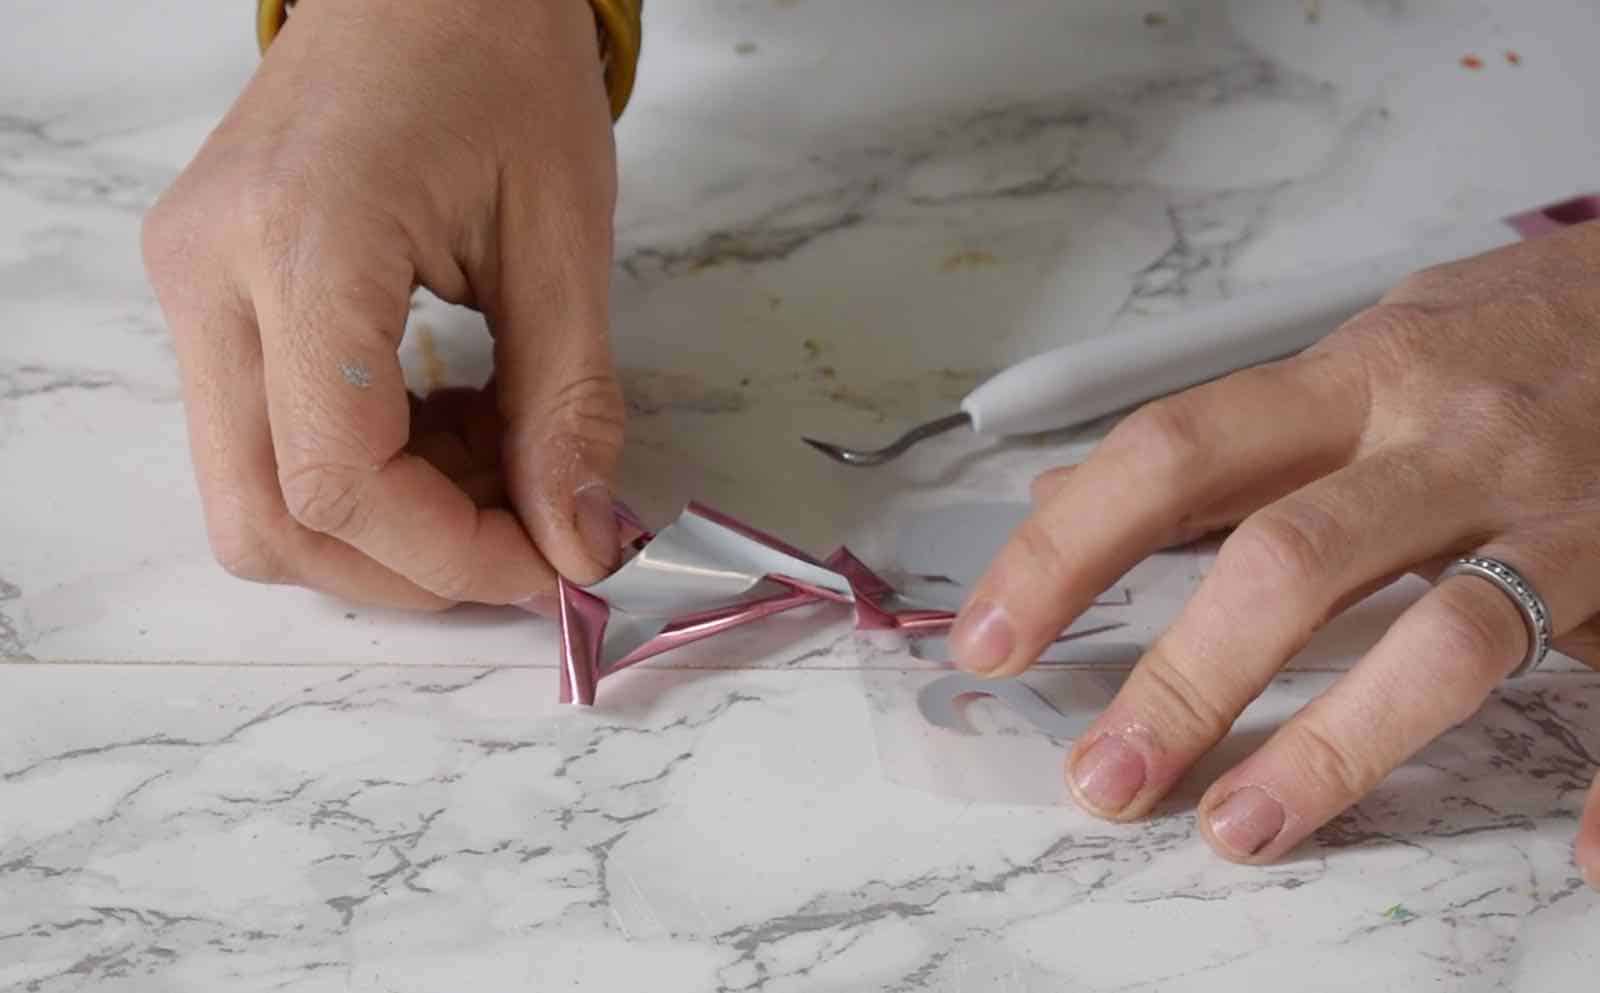
Step 5. Weed around Monogram
Weeding is the term for removing the excess heat transfer paper from around the monogram.
Step 6. Measure and Place Monogram
Make sure you like the placement of your monogram… measure, center, square it up… do what you have to do!

Step 7. Iron On the Monogram
Typically you preheat the fabric when using heat-transfer paper, but I skipped this step because of the ‘leather’. I placed a thin muslin cloth over the bag to protect the leather and followed the directions on the package: heat an iron to the “wool” setting and place on the heat-transfer for 20-30 seconds. Remove the muslin and take a peek. You should see the texture of the leather through the iron-on a bit… if you don’t, you may need to apply the heat for a bit longer.
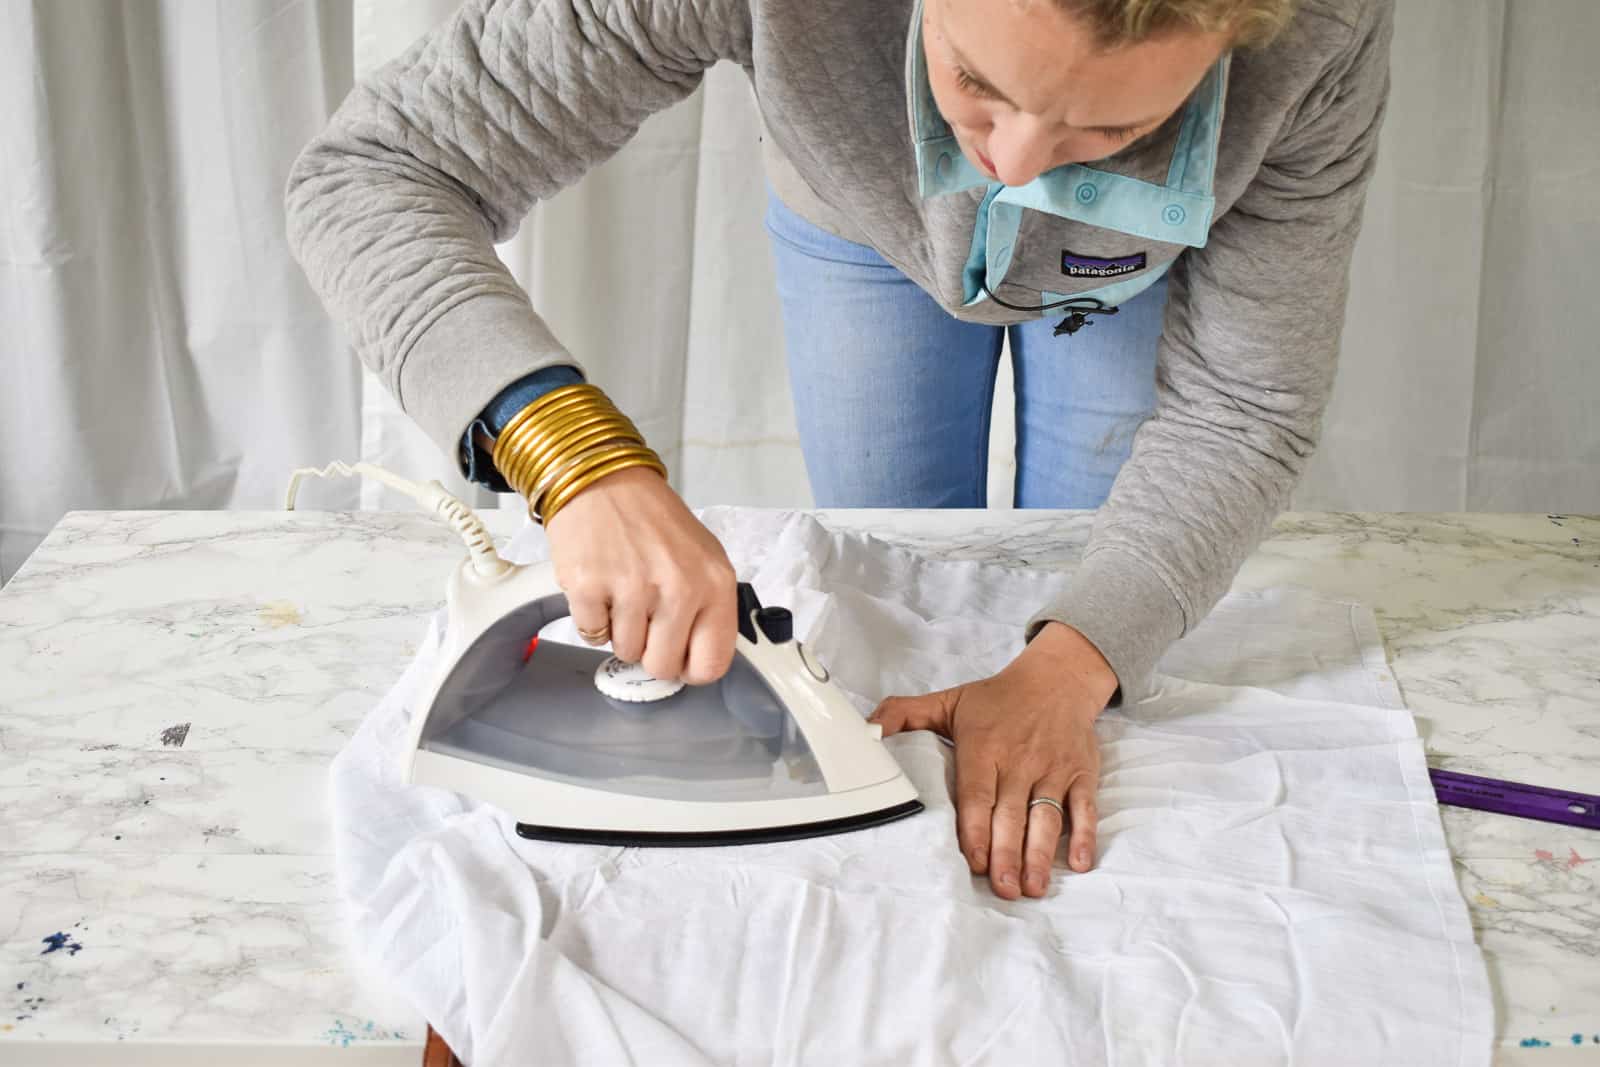
The clear plastic film on the transfer paper is heat proof, so I actually removed the muslin for a bit and used the tip of the iron to apply heat to the edges of the monogram, being careful not to come in contact with the exposed leather.
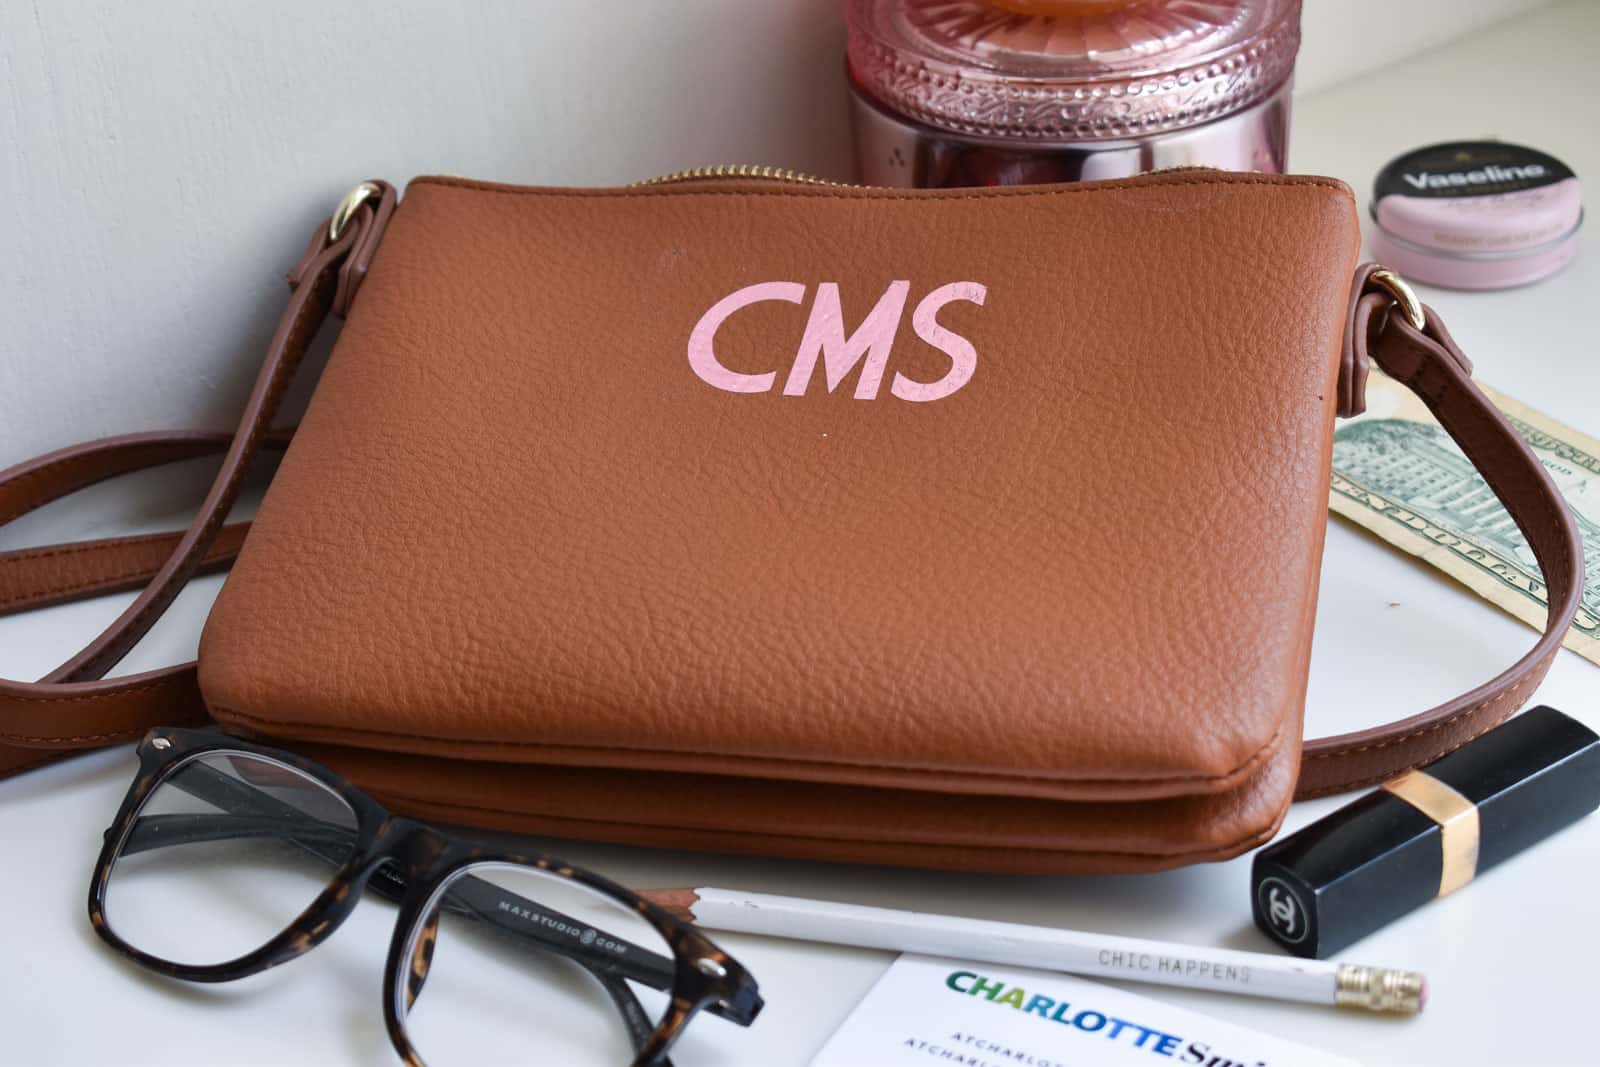
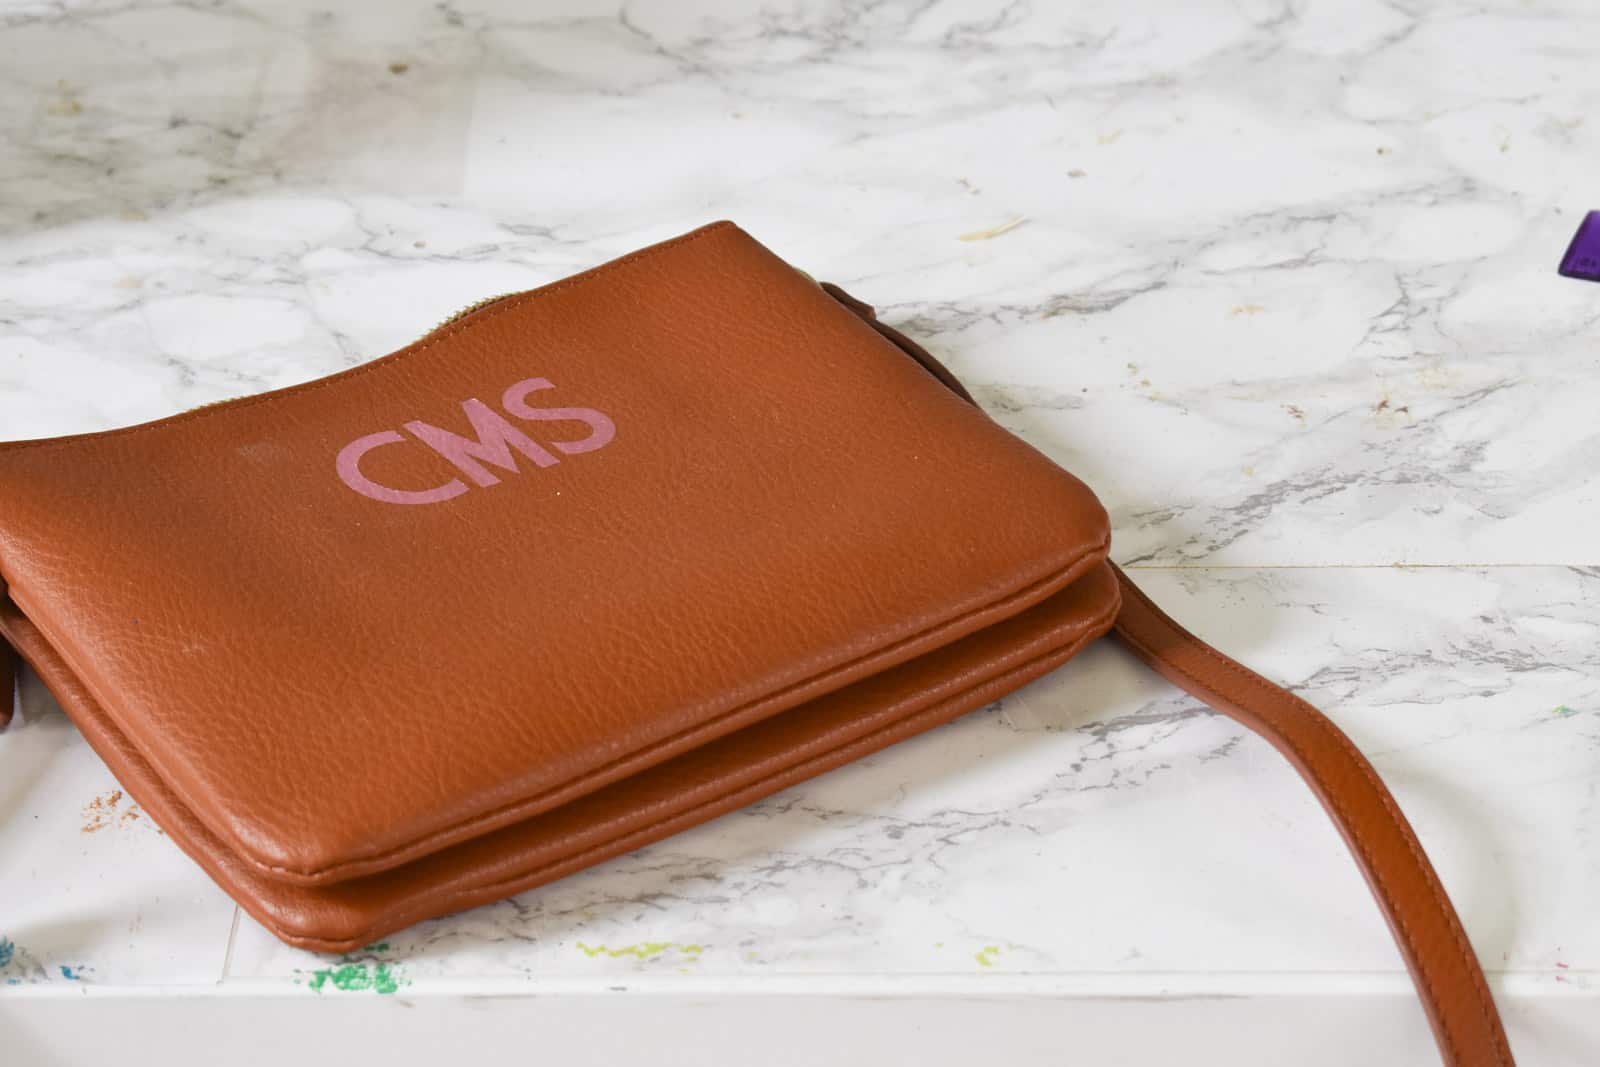
I’ll update this post to show you how the monogram is holding up, but for now… I love it and have already used my fancy new cross body clutch a couple of times since making this! See my full video below if this doesn’t make sense! And then subscribe to my channel!


Did the monogram hold up on the leather? Thanks!
This bag doesn’t used on a daily basis so it’s still in perfect shape!