
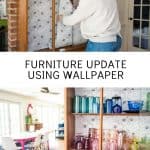
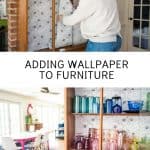
How to Put Wallpaper on Furniture
Psssst… this post *might* contain affiliate links: see my disclosure here.
Adding Wallpaper to Update Furniture
How to put wallpaper on furniture to give it an updated look.
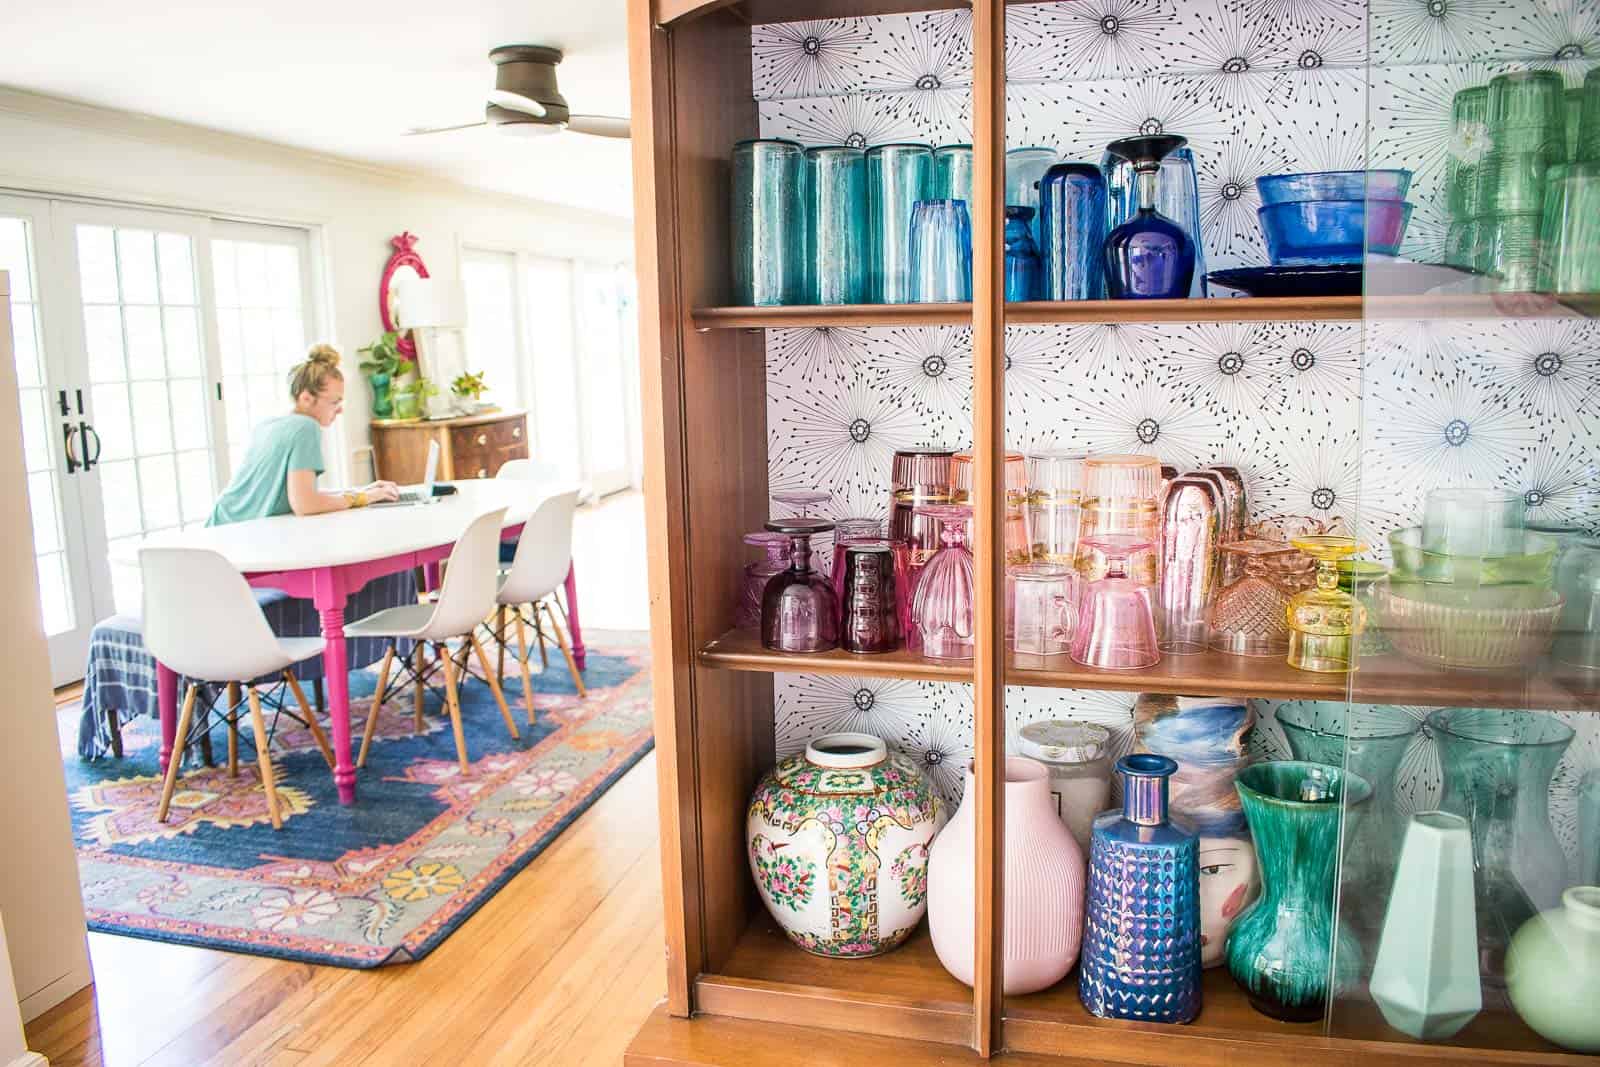
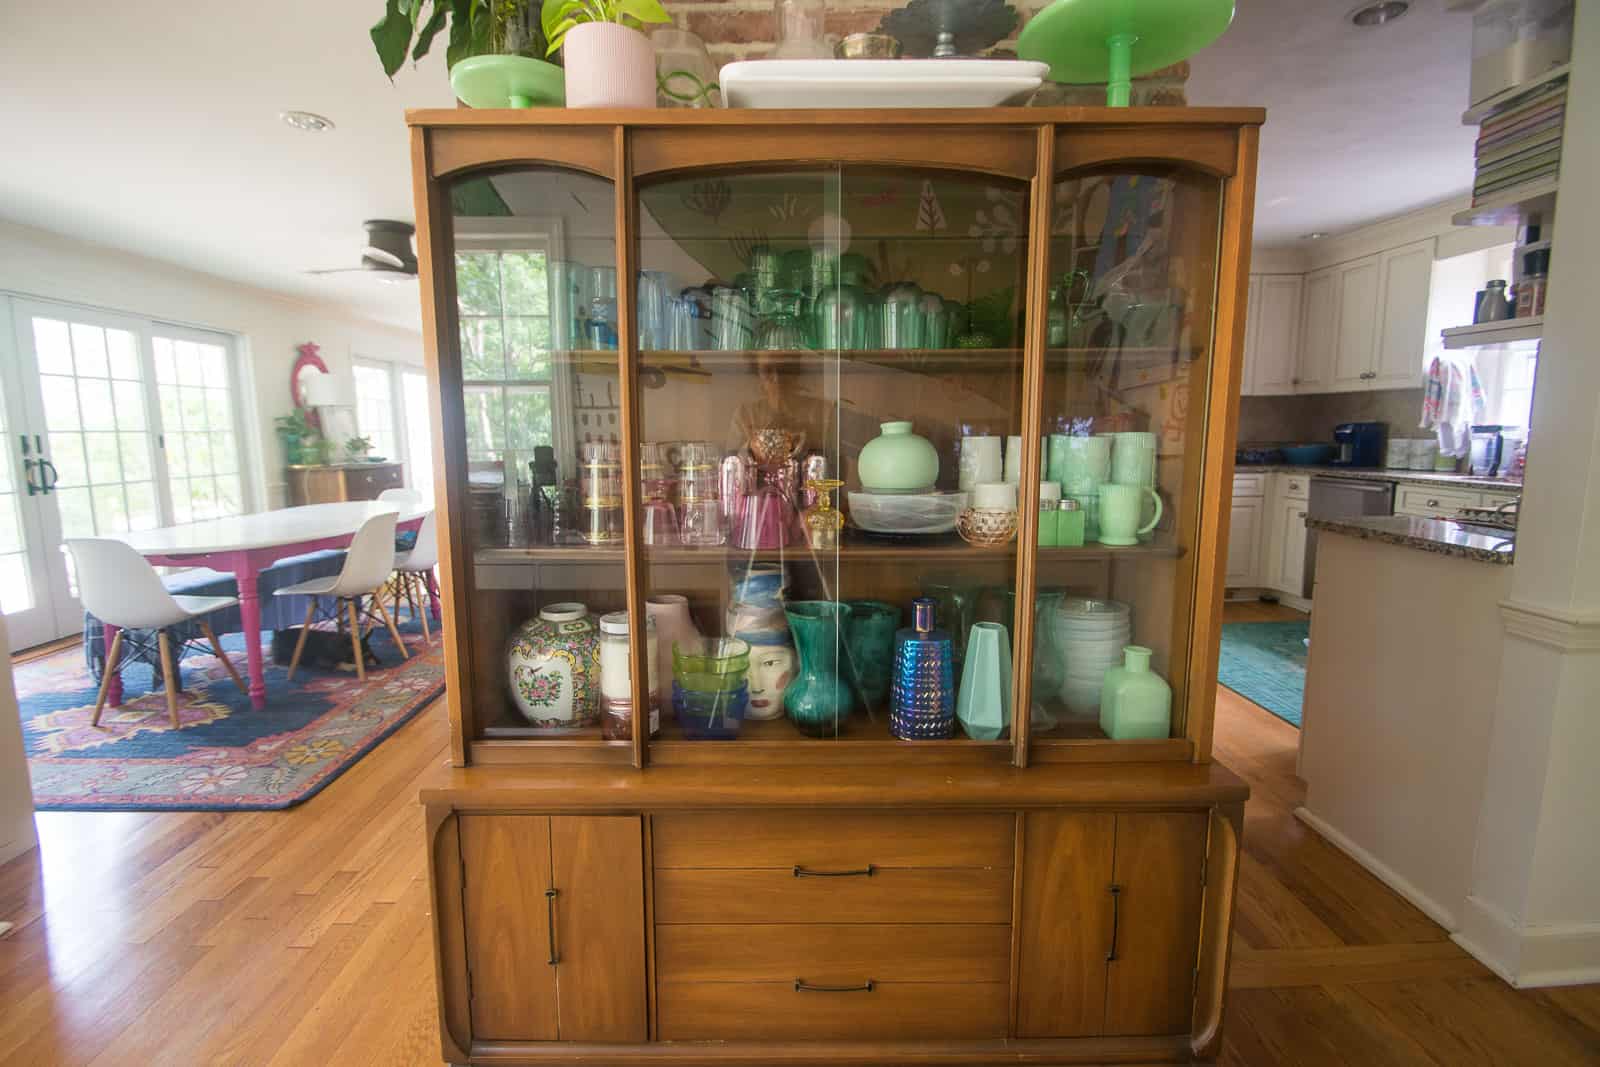
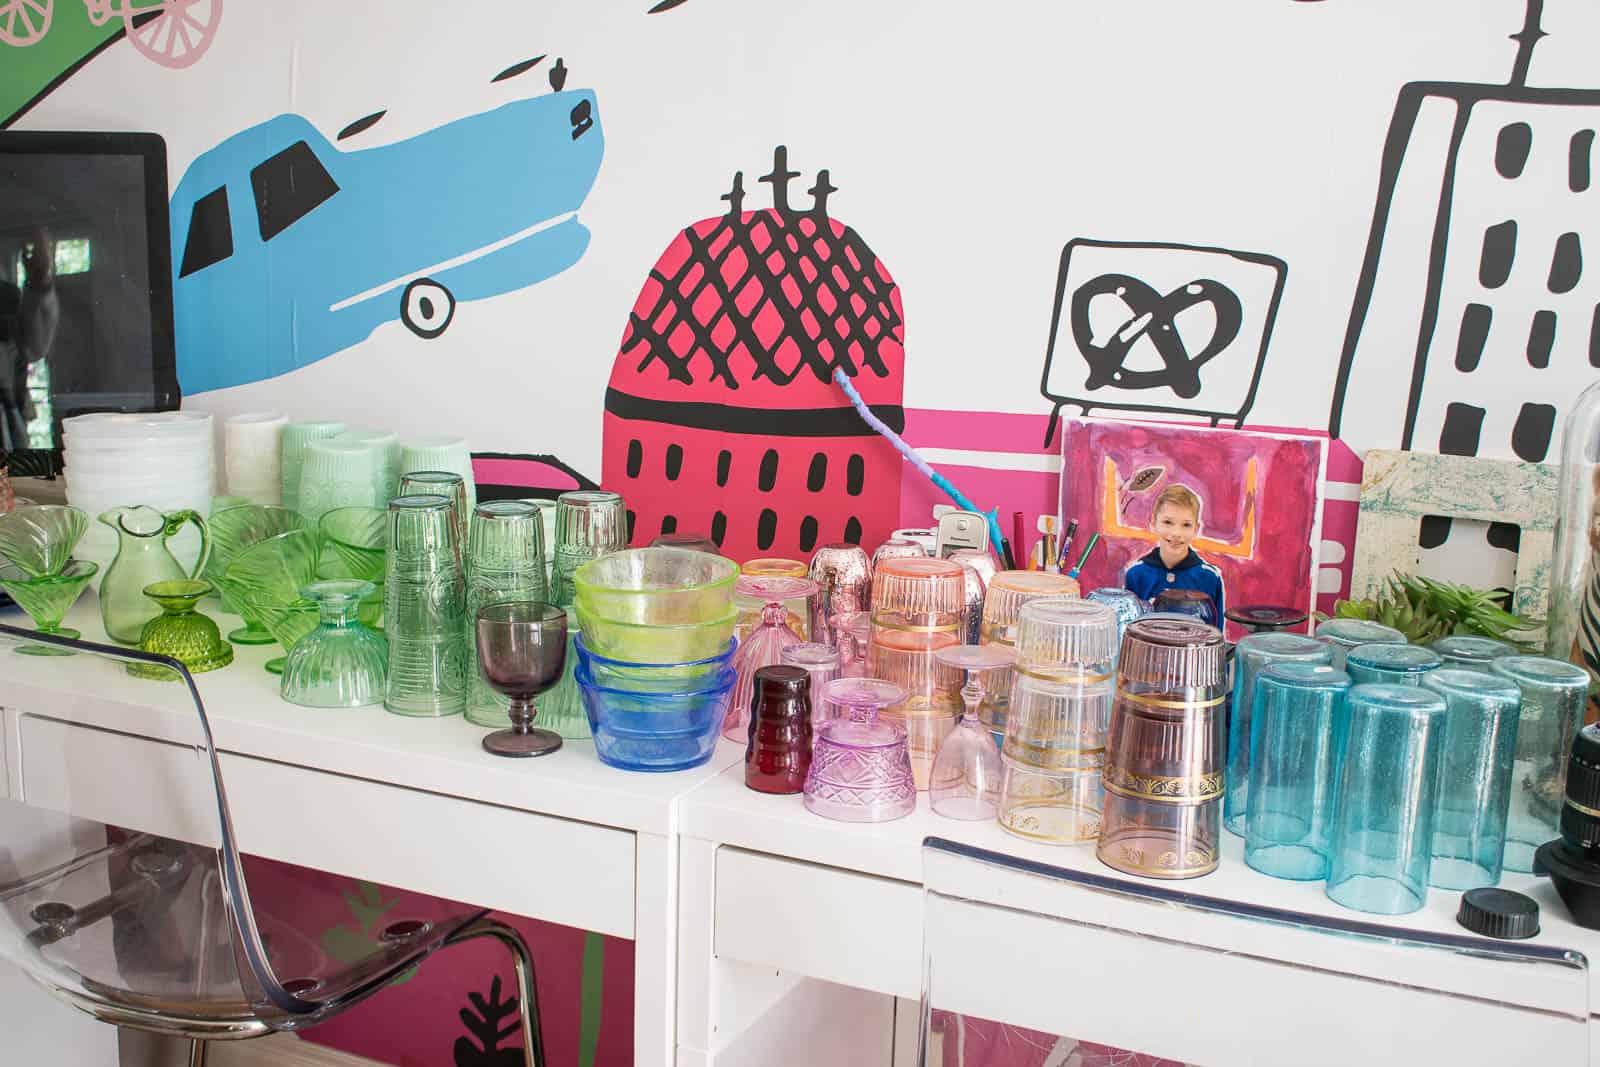
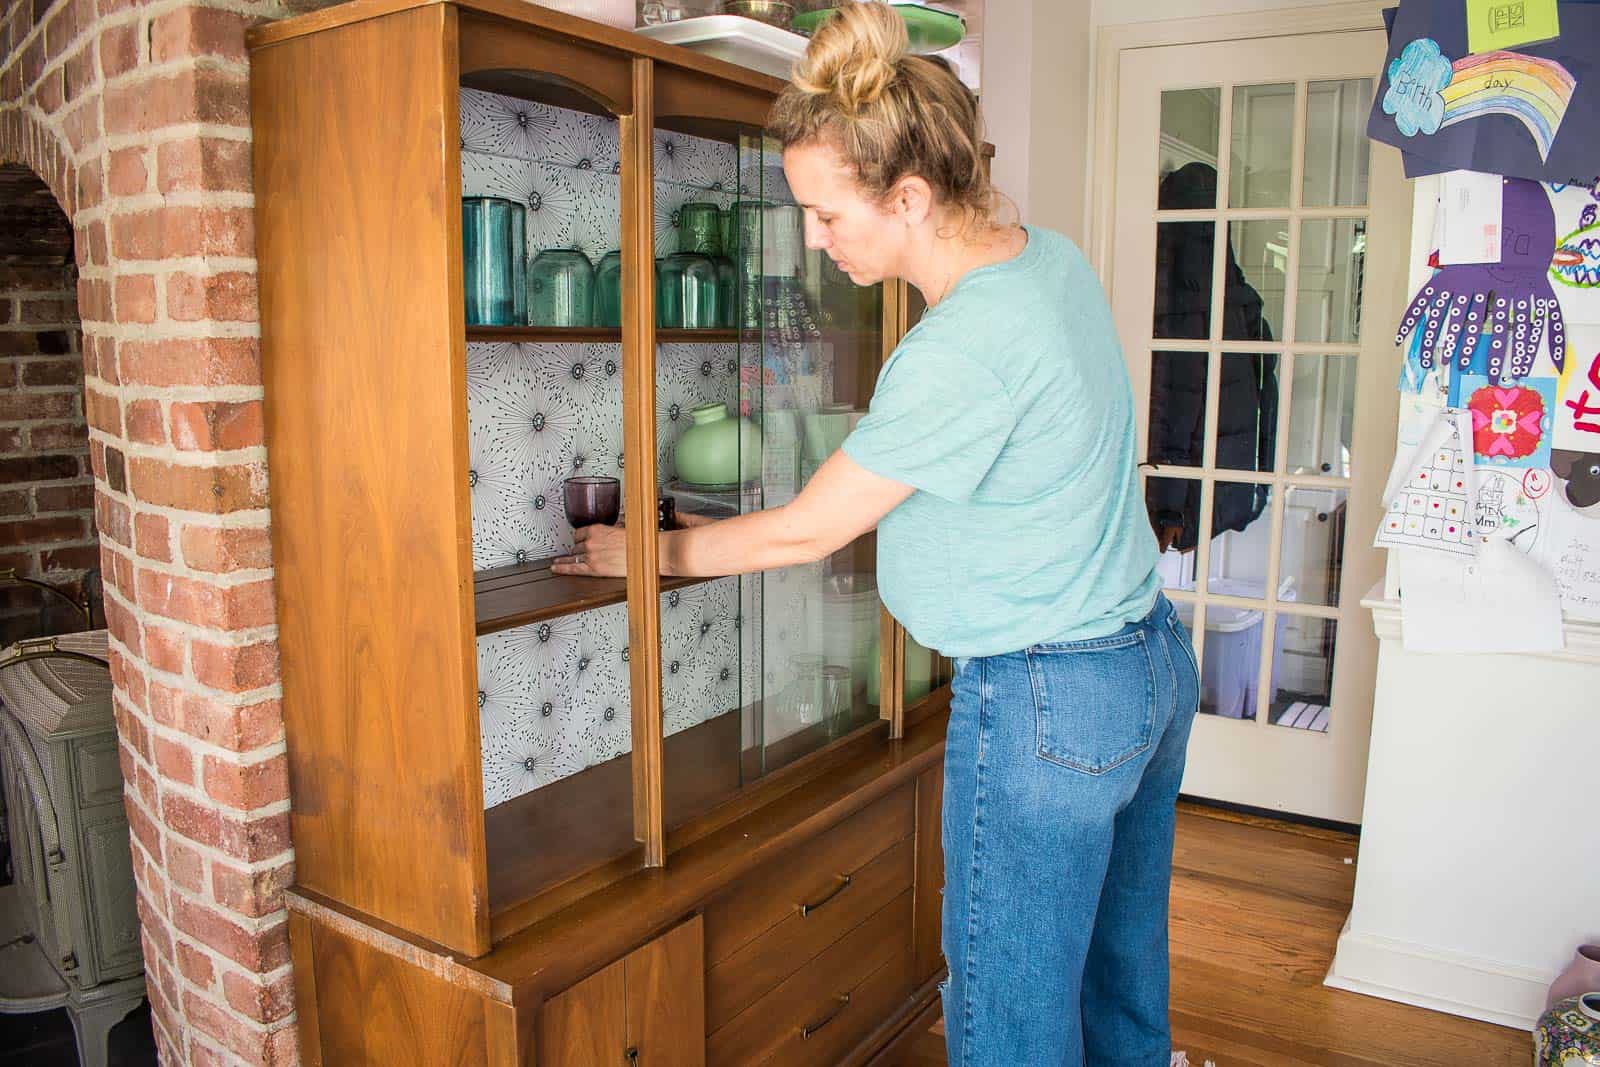
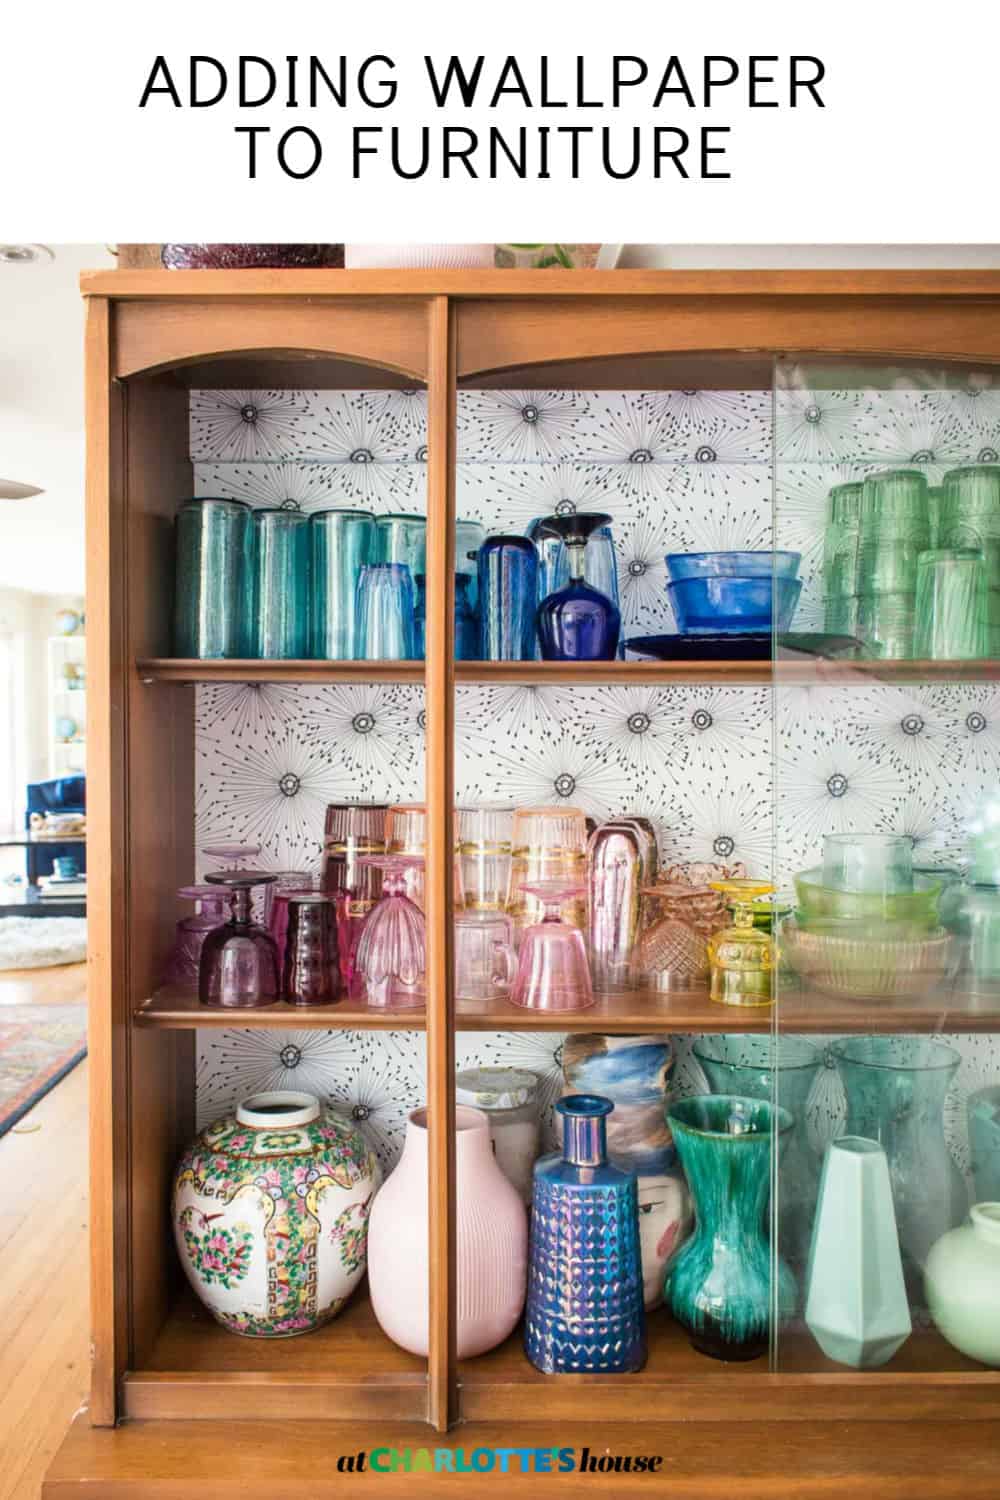
Back at the end of January I brought home a mid century hutch from the Restore. I was the PERFECT fit for a wall in our homework desk area and I was excited to display my rainbow glass somewhere in the rental. Once I loaded the glassware in, I realized that all those vibrant colors kind of got lost in the wooden hutch so I decided to add some wallpaper to the pack to help those colors shine through! There are lots of colors in the space already, and then obviously the glass, so I decided to look for a black and white removable wallpaper. I always start my search on Spoonflower because they have EVERYTHING. Many of their designers will also alter the pattern or colors a bit if asked so sky is truly the limit.
Shop my favorites!
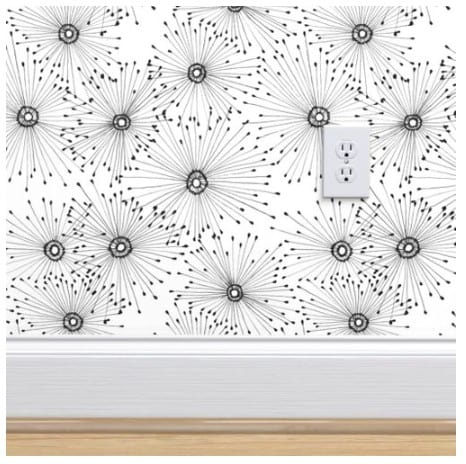
I wanted a pattern that was more white than black since the goal was to help that rainbow glass pop. I also wanted a pattern that was fairly random so it didn’t get lost behind the glassware. Finally, I wanted something that suited the style of the hutch, ideally. This Dandelion print by Curious + Fanciful was the PERFECT combination of all of these things.
How to Add Wallpaper to Furniture
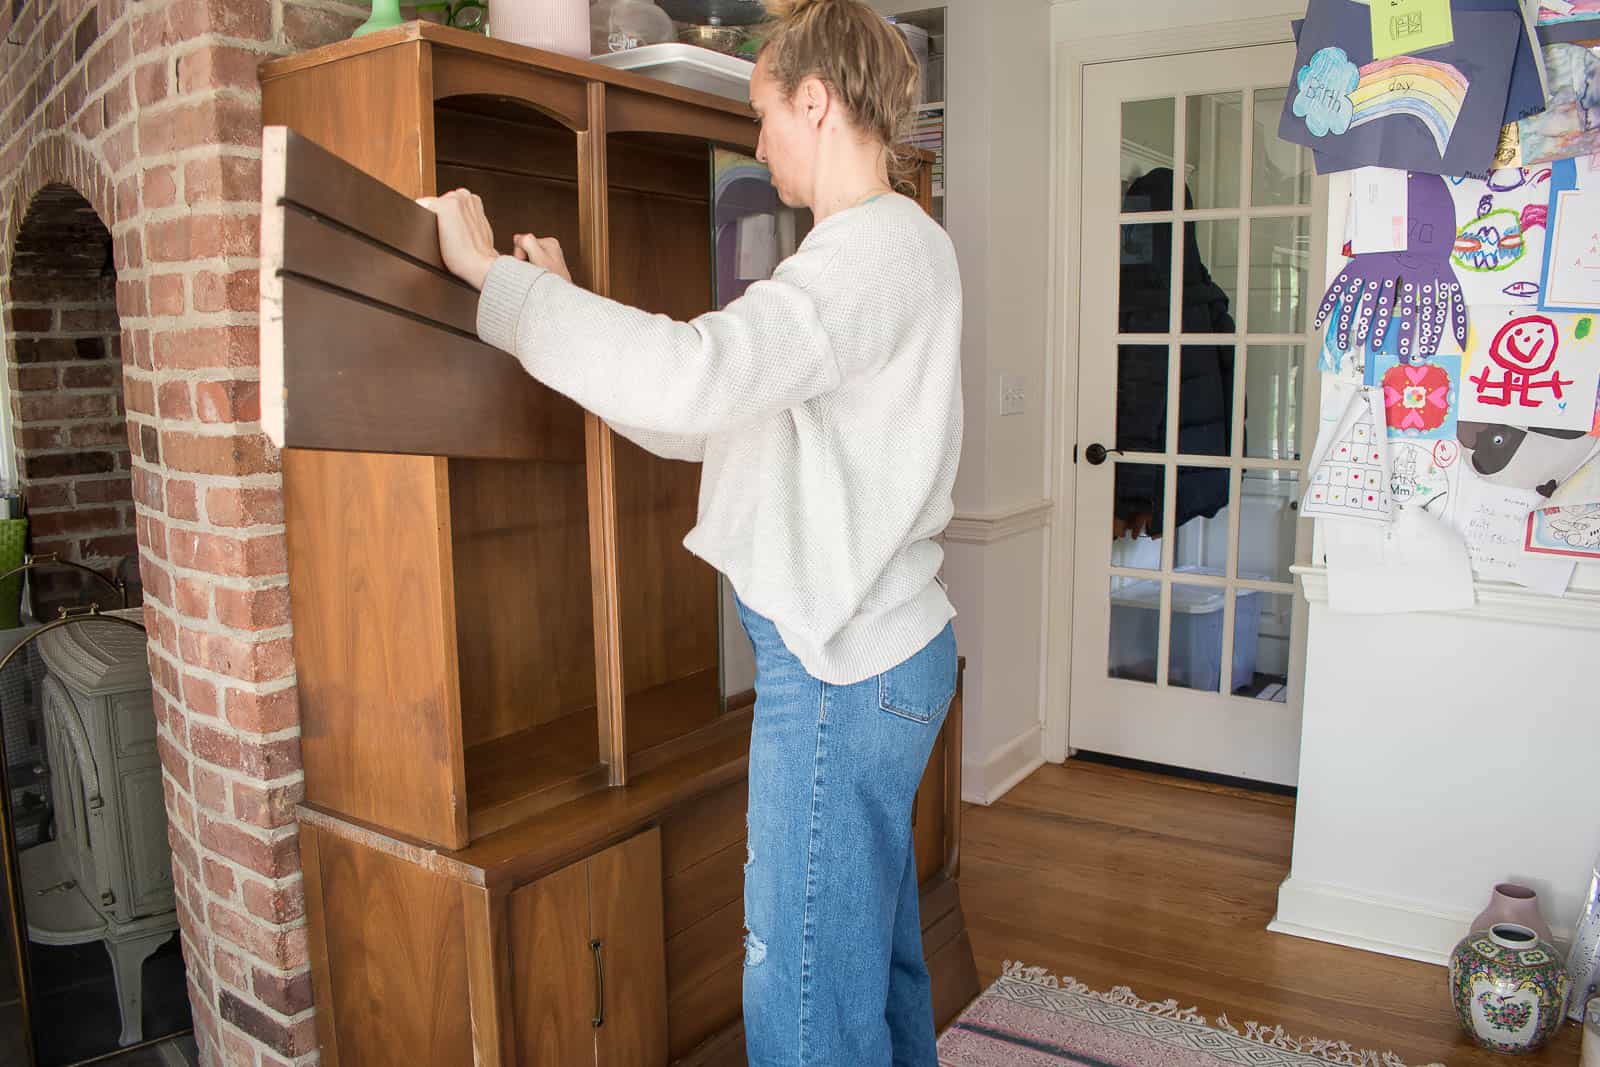
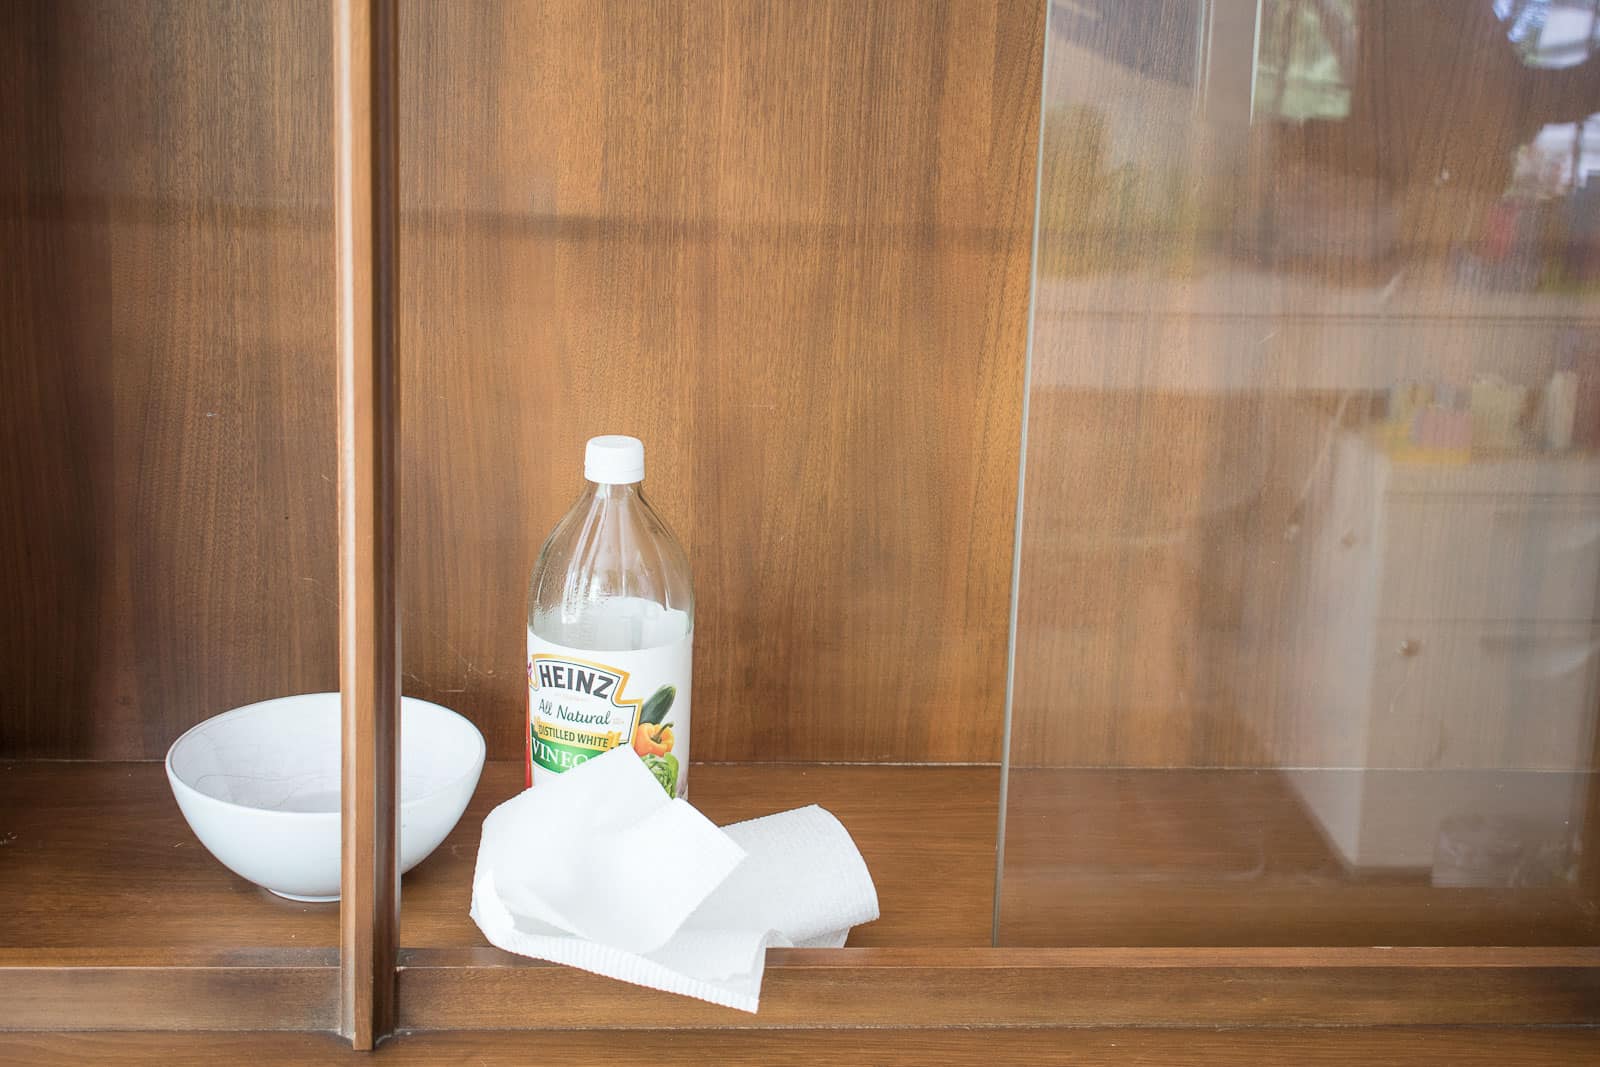
Step 1. Clear out and Clean
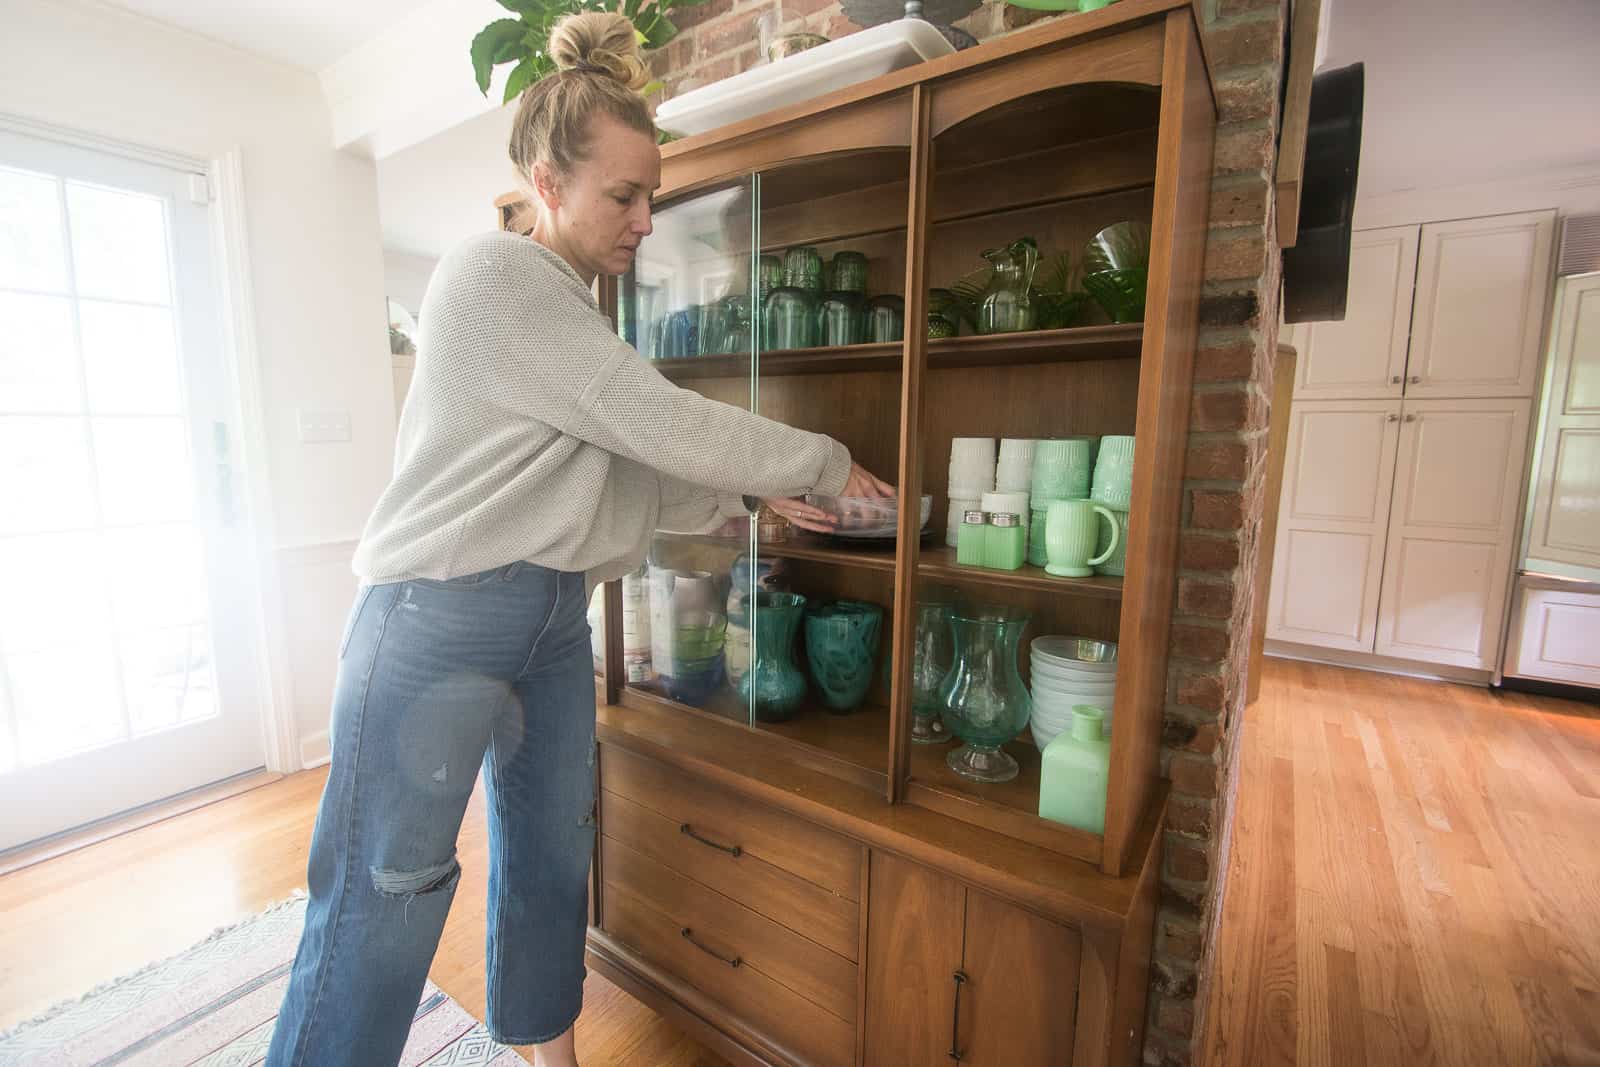
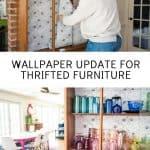
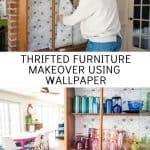
I had to unload all the glassware (obviously) and then I was able to remove the shelves which made this hutch SO easy to wallpaper. If you have furniture with shelves that aren’t removable, you’ll just have to do your best to match the pattern and wallpaper each section between the shelves.
With removable wallpaper, it’s important to clean the surface so that the adhesive can stick. I used white vinegar so that it wouldn’t leave any residue.
Step 2. Apply Wallpaper
With scissors, cut your wallpaper a few inches longer than the area that you are planning to cover. Peel back and rip off the backing on the top left hand corner (I’m right handed so it may feel more comfortable to start on the upper right if you’re left handed.) I’ve applied removable wallpaper before and I always mention that it’s not hard, but… it also takes some getting used to. My biggest tip is to rip off a small bit of the backing paper like I mentioned to make it easier to make sure the paper is lined up and square. Then you can go ahead and rip off larger sections of the backing paper to reveal the adhesive in order to apply the rest of the strip of wallpaper.
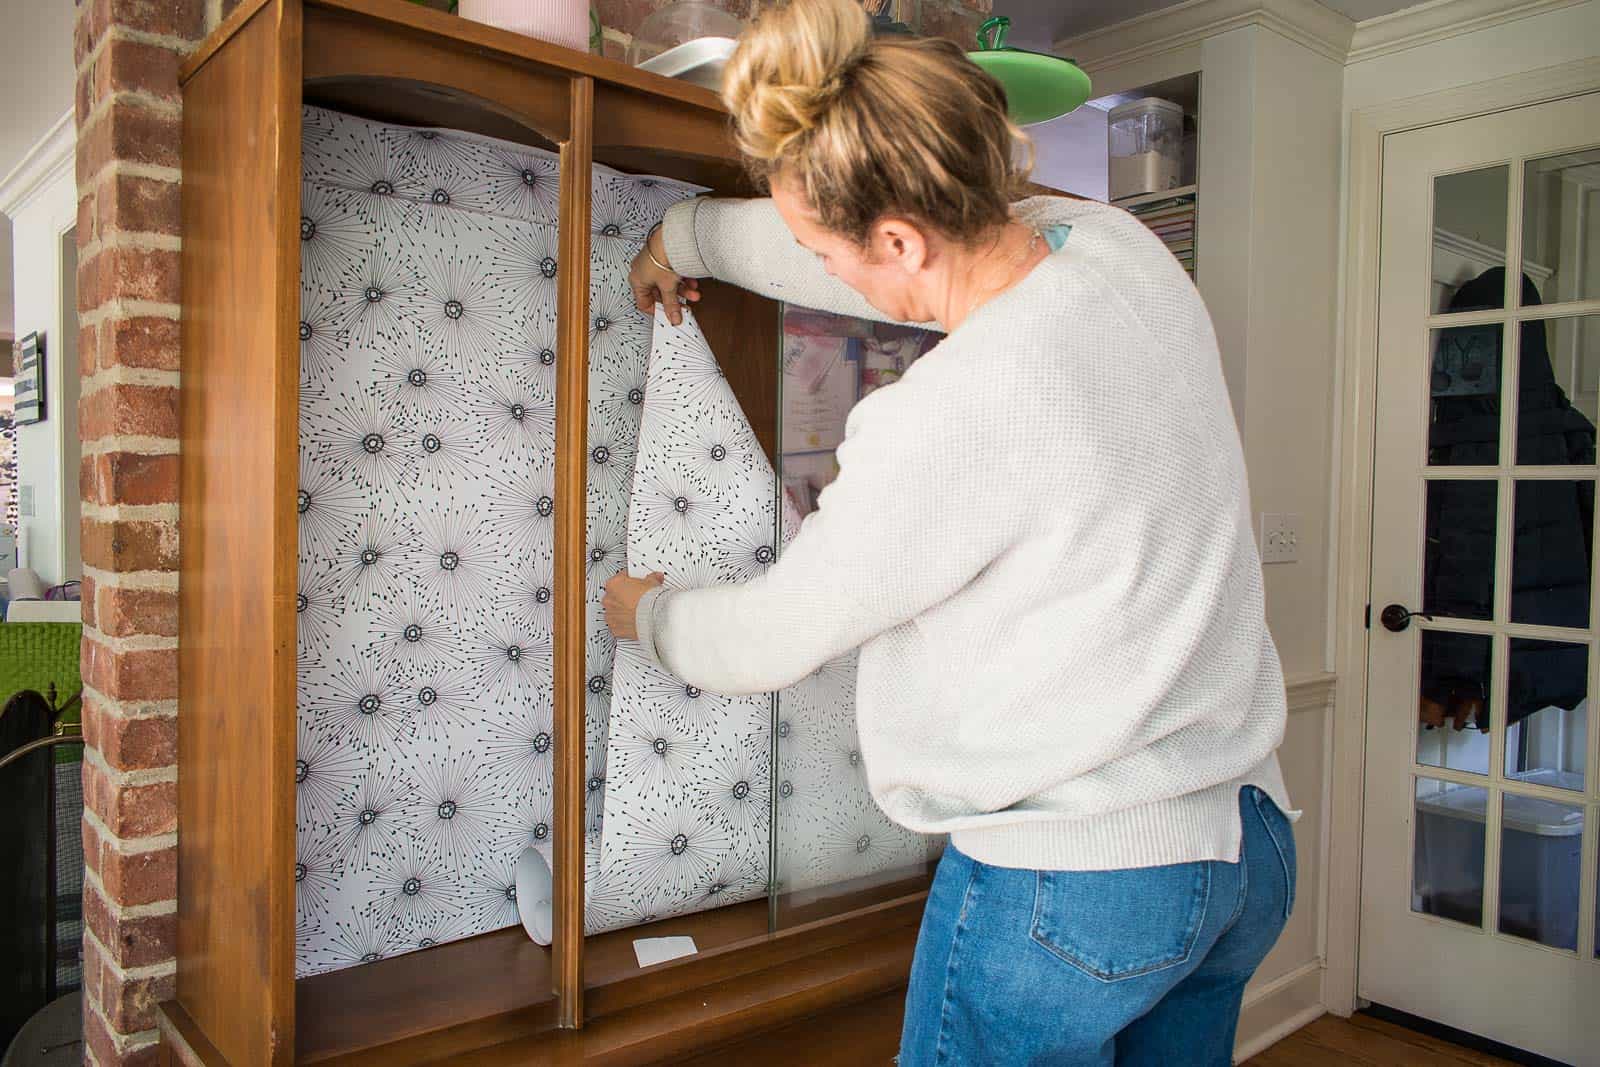
Step 3. Smooth out Paper and trim
Spoonflower provides a smoothing tool, but you can also just use an old credit card. If there are any large bubbles, just peel the paper back and reapply. For smaller trapped air bubbles, use an exacto knife and make a small incision to release the trapped air. To trim the excess paper on the top and the bottom, I used a small straight edge and ran a sharp blade along that edge to slowly cut the wallpaper.

With wallpaper installed, all I had to do was load my colorful glass back into the hutch and sit back and revel.
You know when you finish a project and walk back and forth throughout the day so you can get a peek of it? This is one of those times!!! I love how that fun paper showcases the colorful class and adds a little bit of pattern to the piece. For the cost of a single roll of wallpaper, this is one of the projects that can make a HUGE difference with a piece of furniture and it will probably take you about an hour!
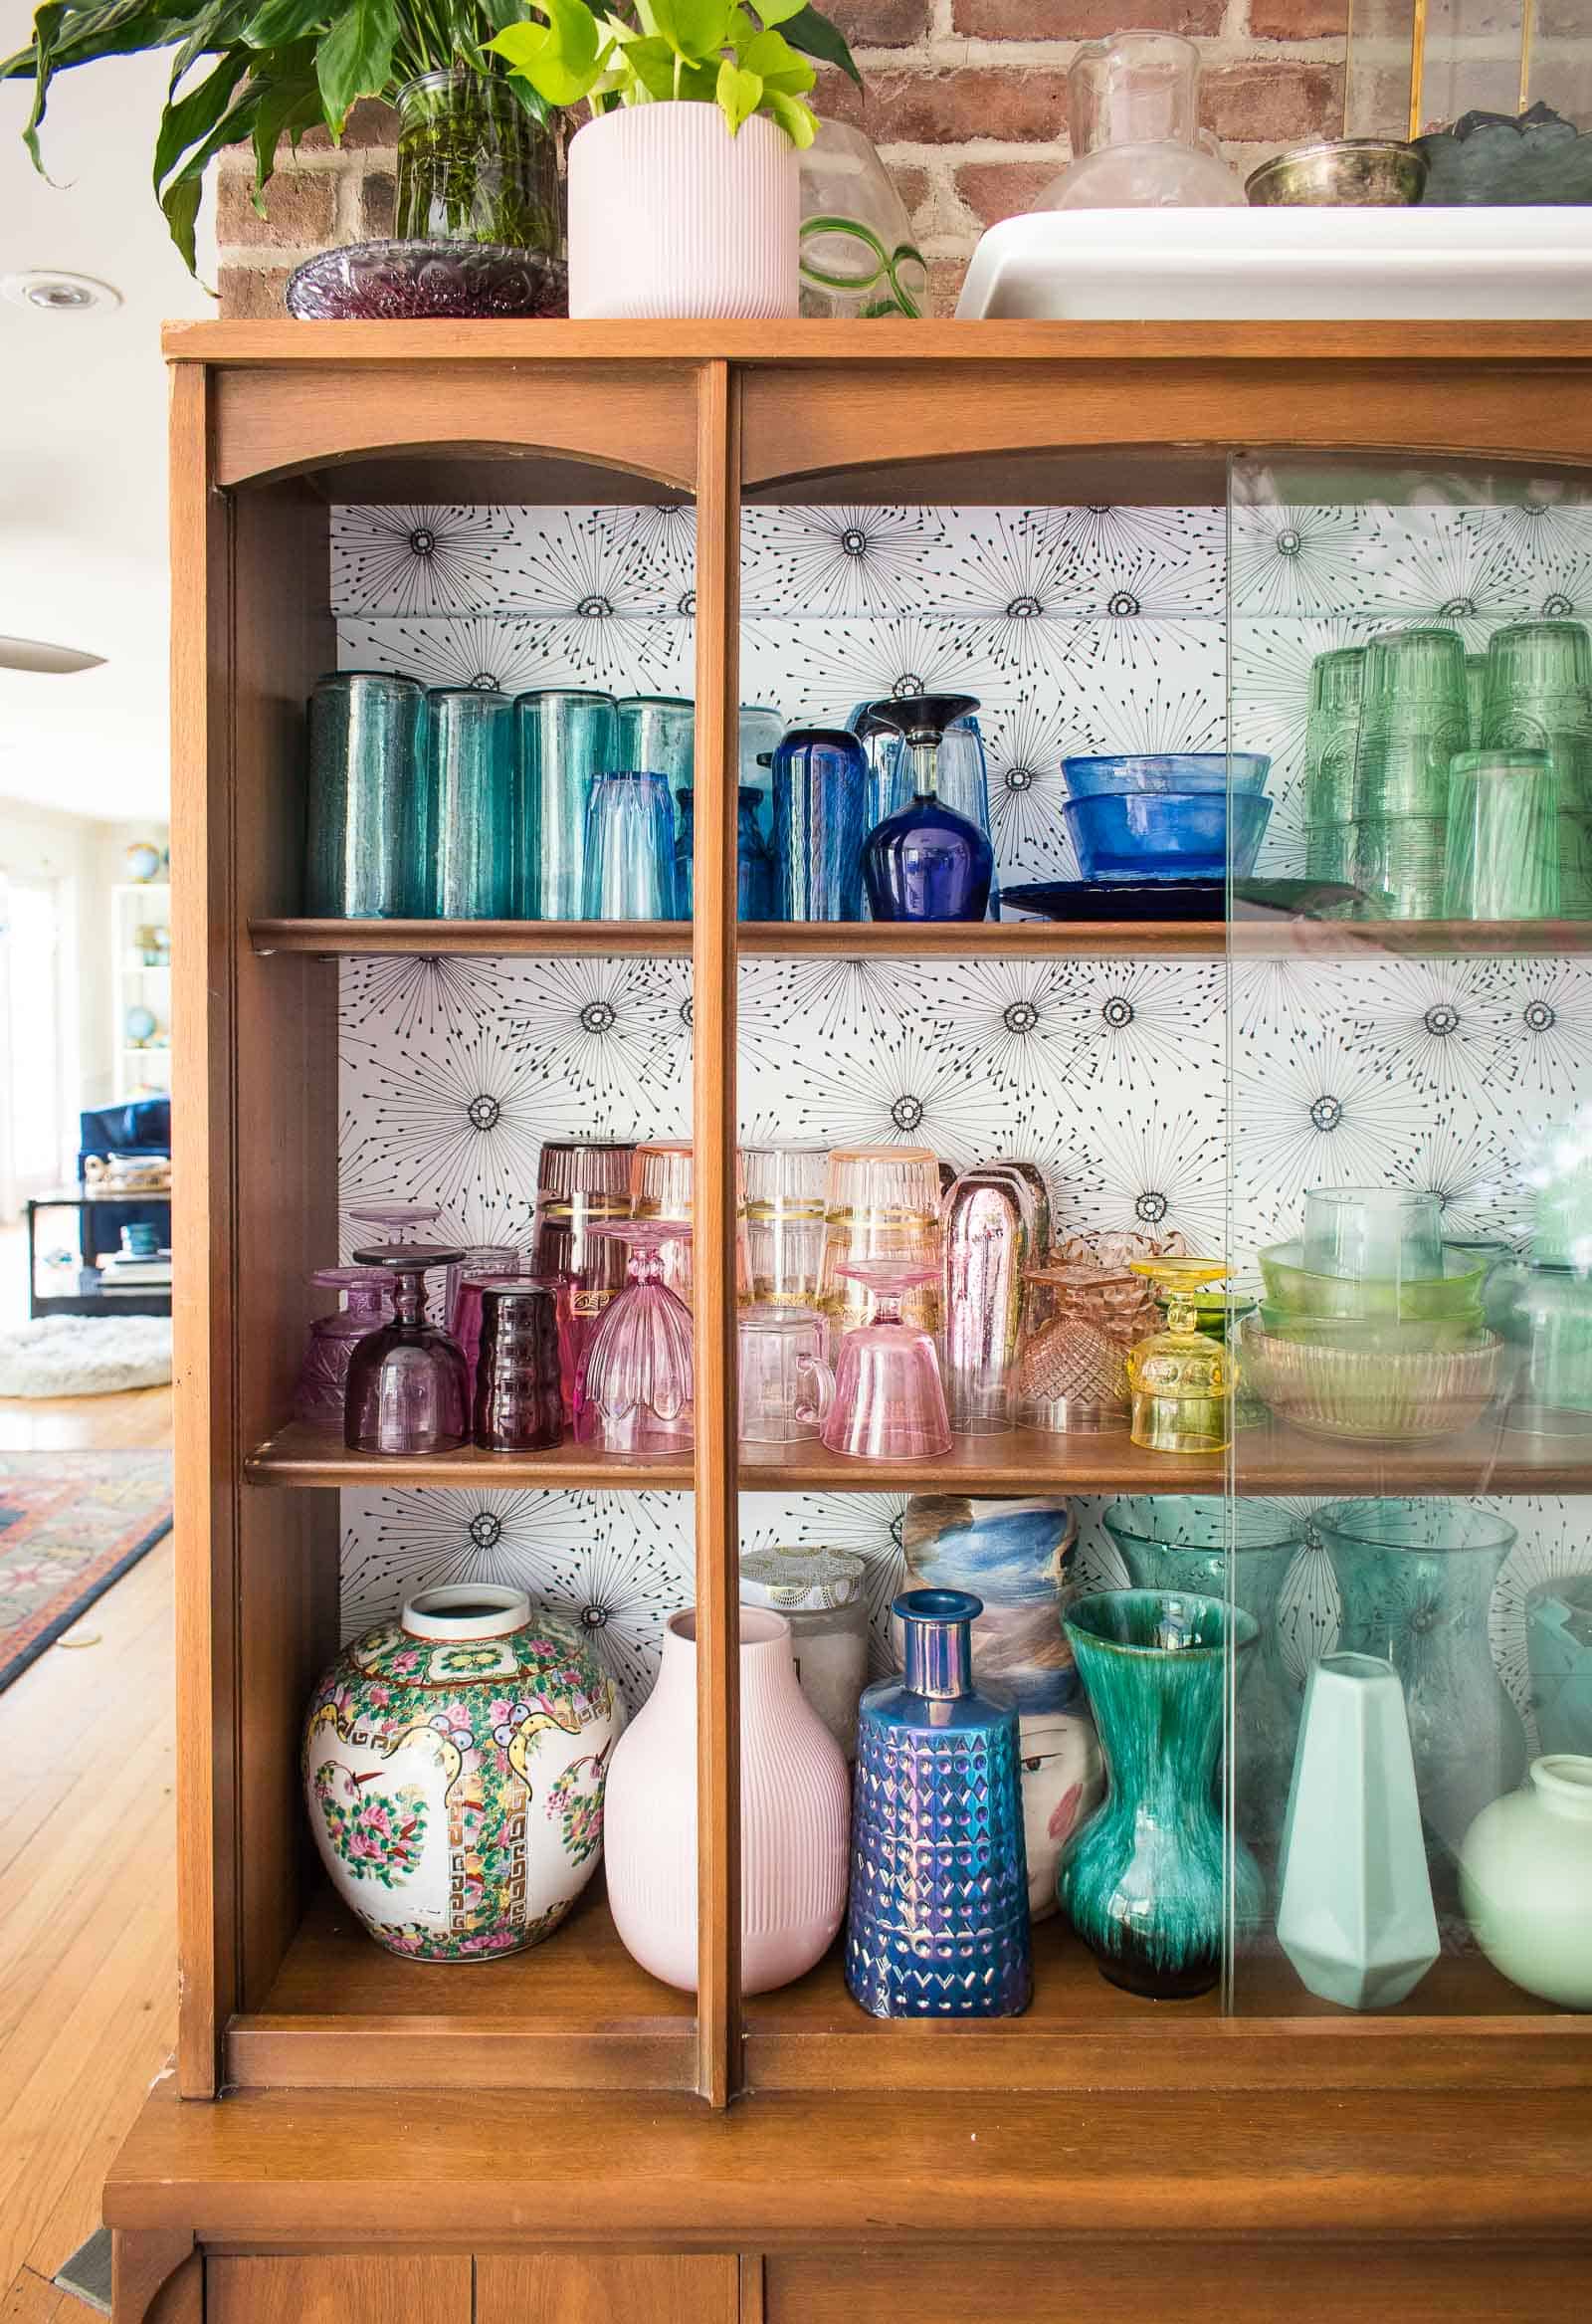
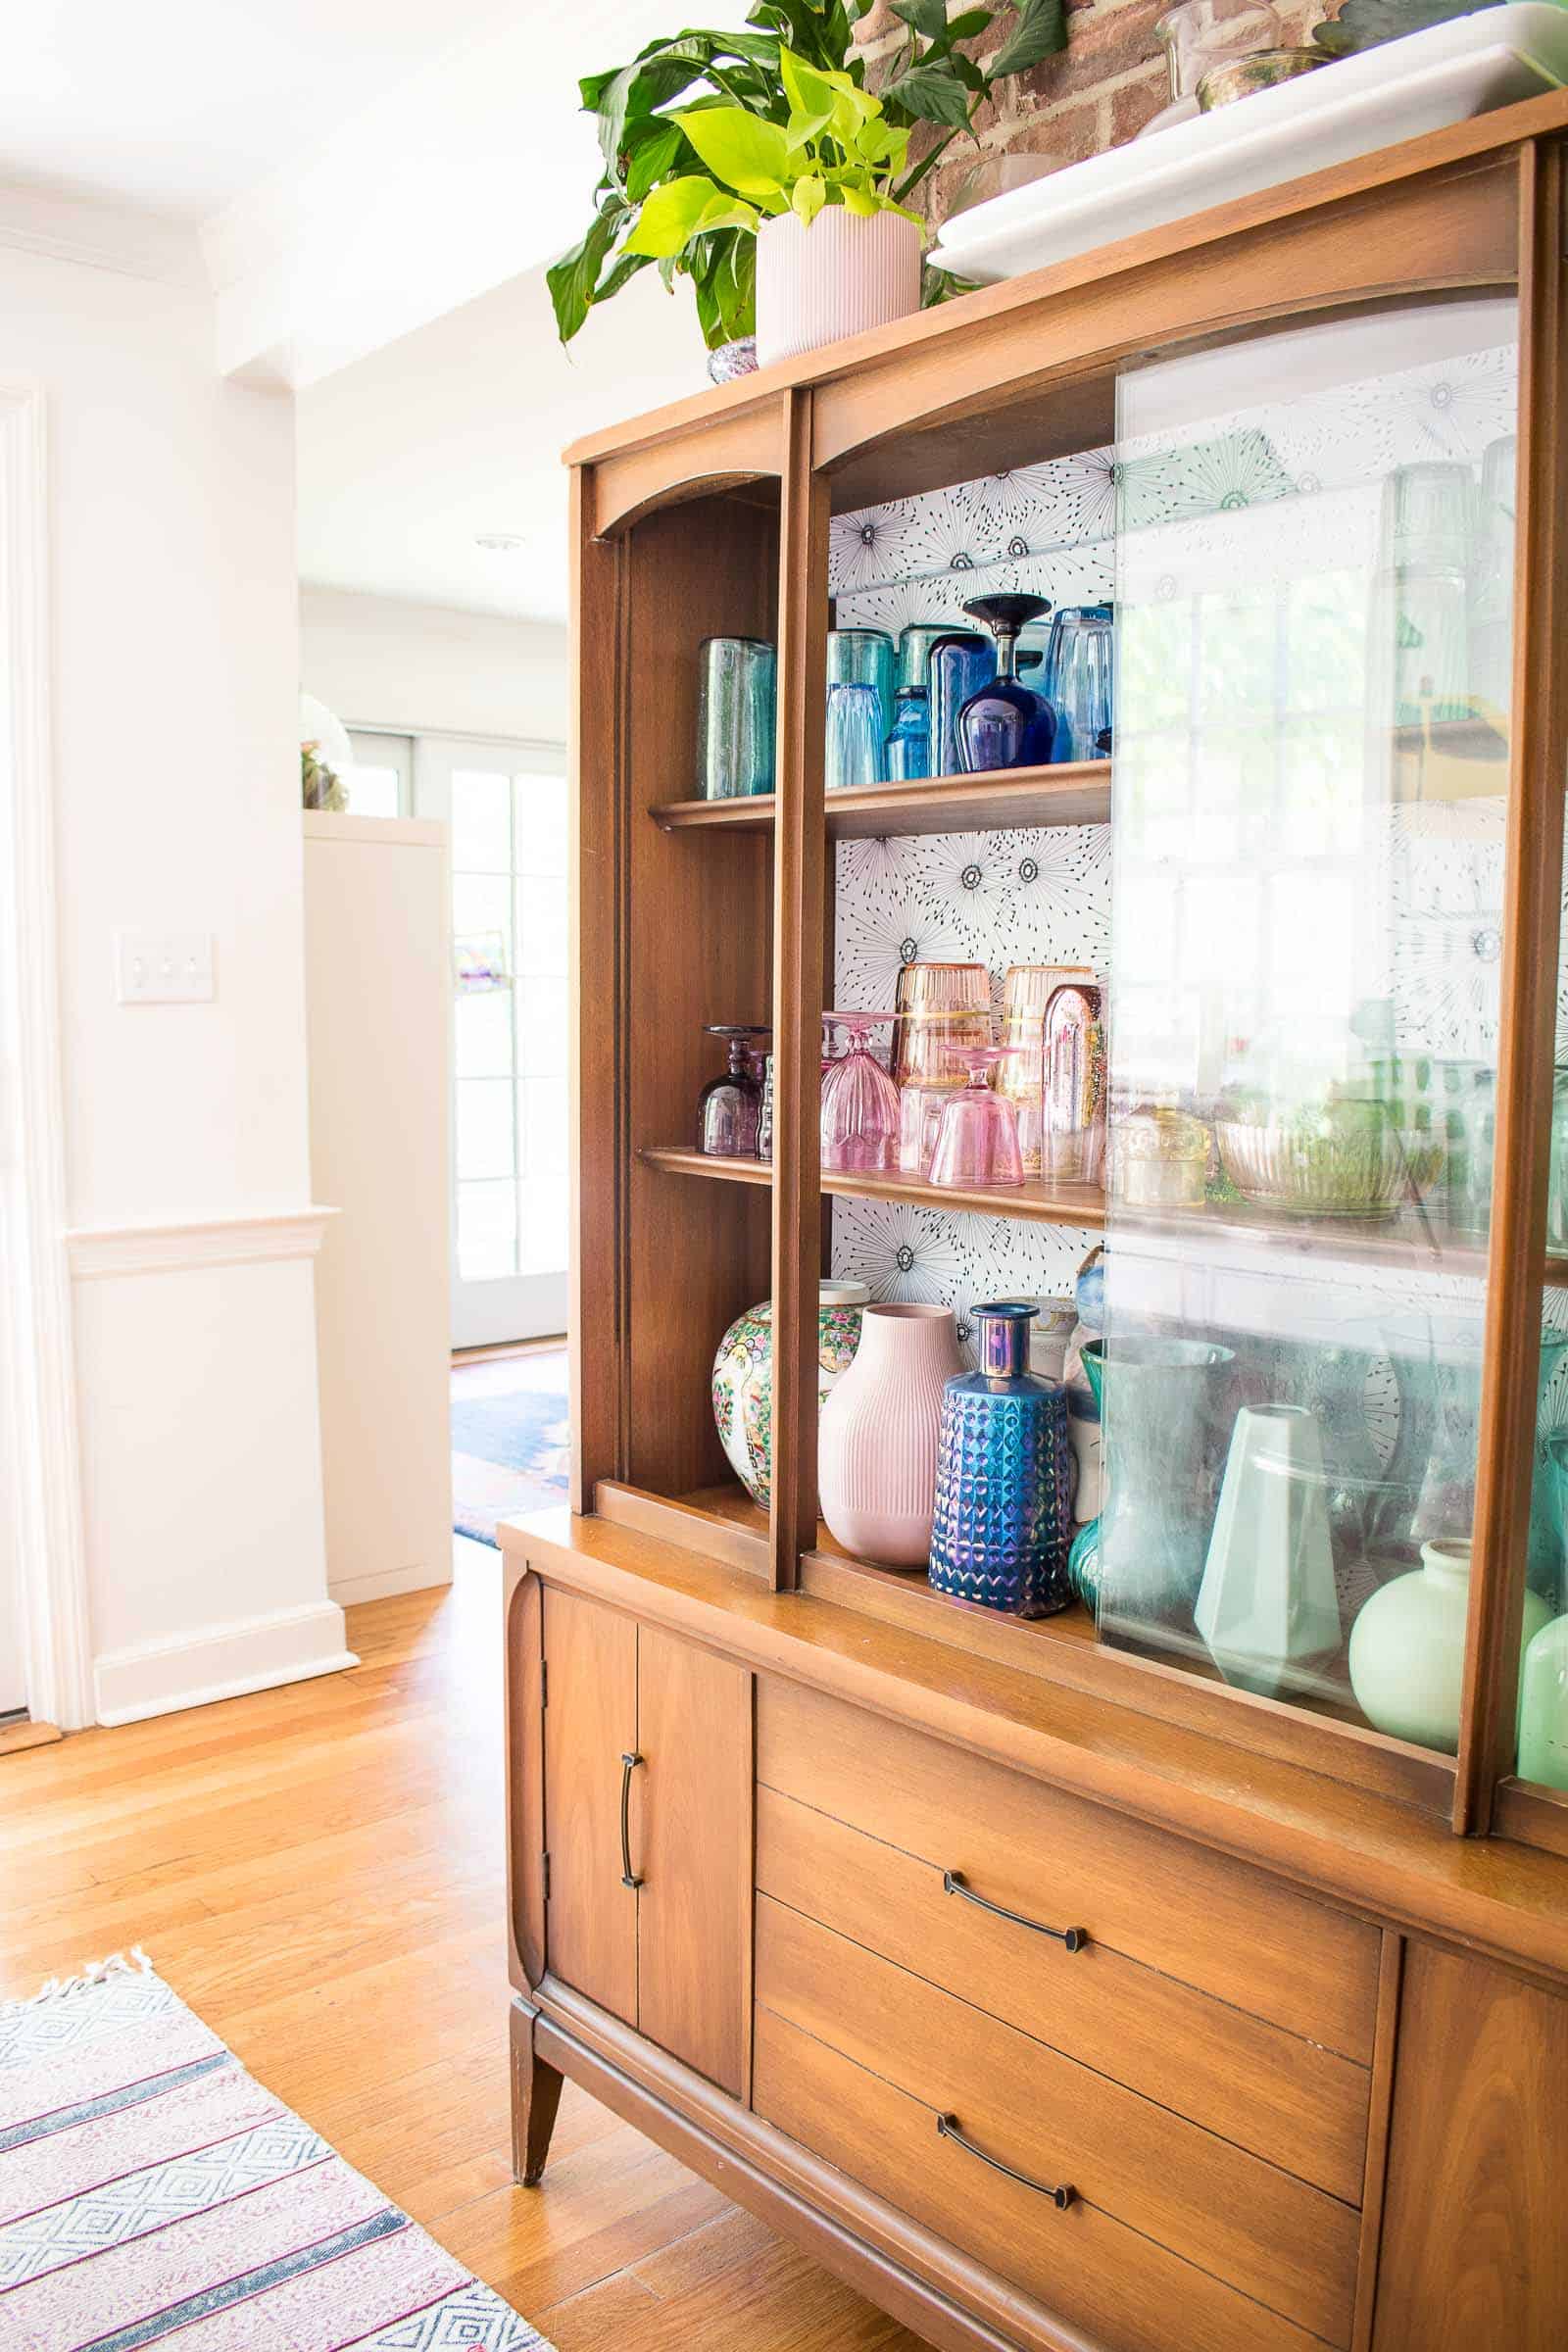
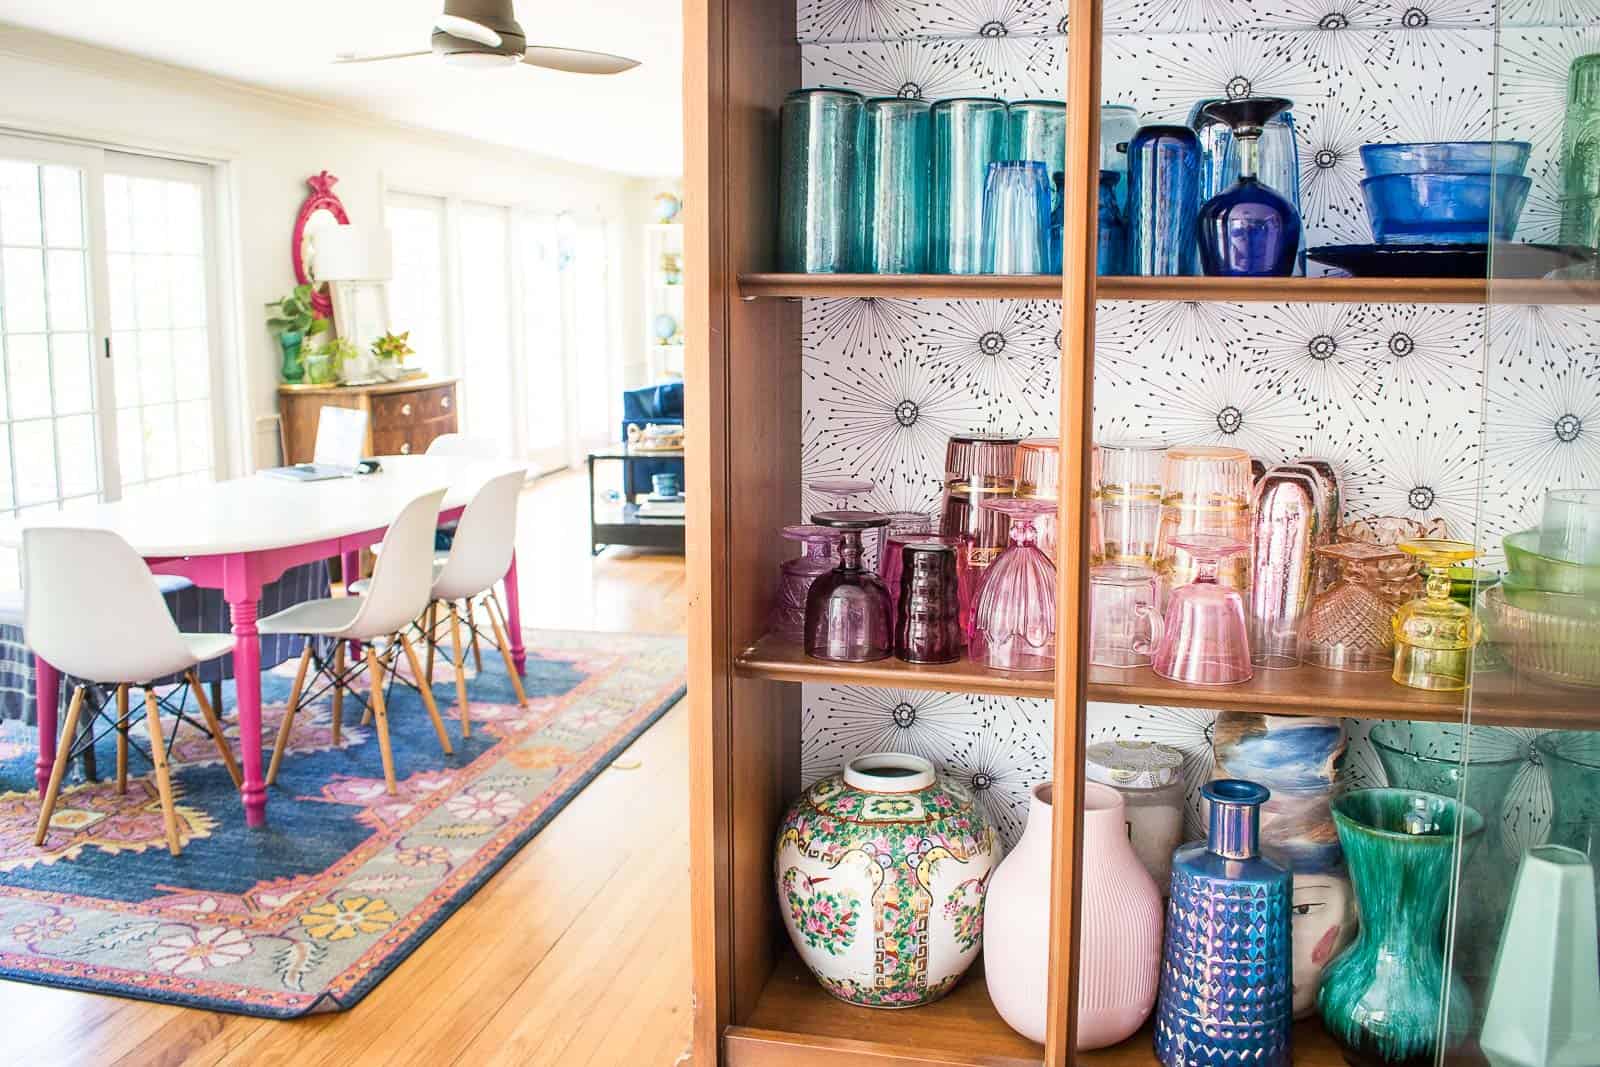


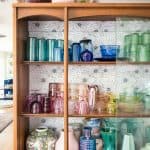


The white really showcases all those gorgeous colors. Love it!
I might try this – I bought a mid-century cabinet with a mirrored back because I thought it would make the coloured glass stand out. instead, it seems to “vanish”. a patterned background might help it stand out more.
yes, perhaps!! Good luck!
Im DEFINITELY doing this Now tk seArch for wallpaPer
FYI check out. Coppercorners she makes wallpaper
Fantastic ideA! I have a lot of DIFFERENT colored GLASSWARE, Much of which were wedding gifts given to my parents in 1958. As long as I’ve had THis GLASSWARE, I’ve kept it IN a midcentury HUTCH, particularly because it’s of the same time period. But now that you’ve pointed it out, i see The colors of the glass really do disappear against the wood background. I never considered how much better it all would look if the back was a lighter color. Thank you for THis inspiration. It’s getting put at the top of my (impossibly long) do LIST!
Good luck with it! Lucky to have such a collections!
I did it, too. I like the way it looks. i am not sure i would use peel and stick wallpaper on a wall since it wasn’t easy to slide around , but for this it was perfect. thank you for the idea.
Awesome! I’ve also found the quality of peel and stick can really vary! Some seem to peel right off… and I’ve worked with others that stick hard! 🙂