
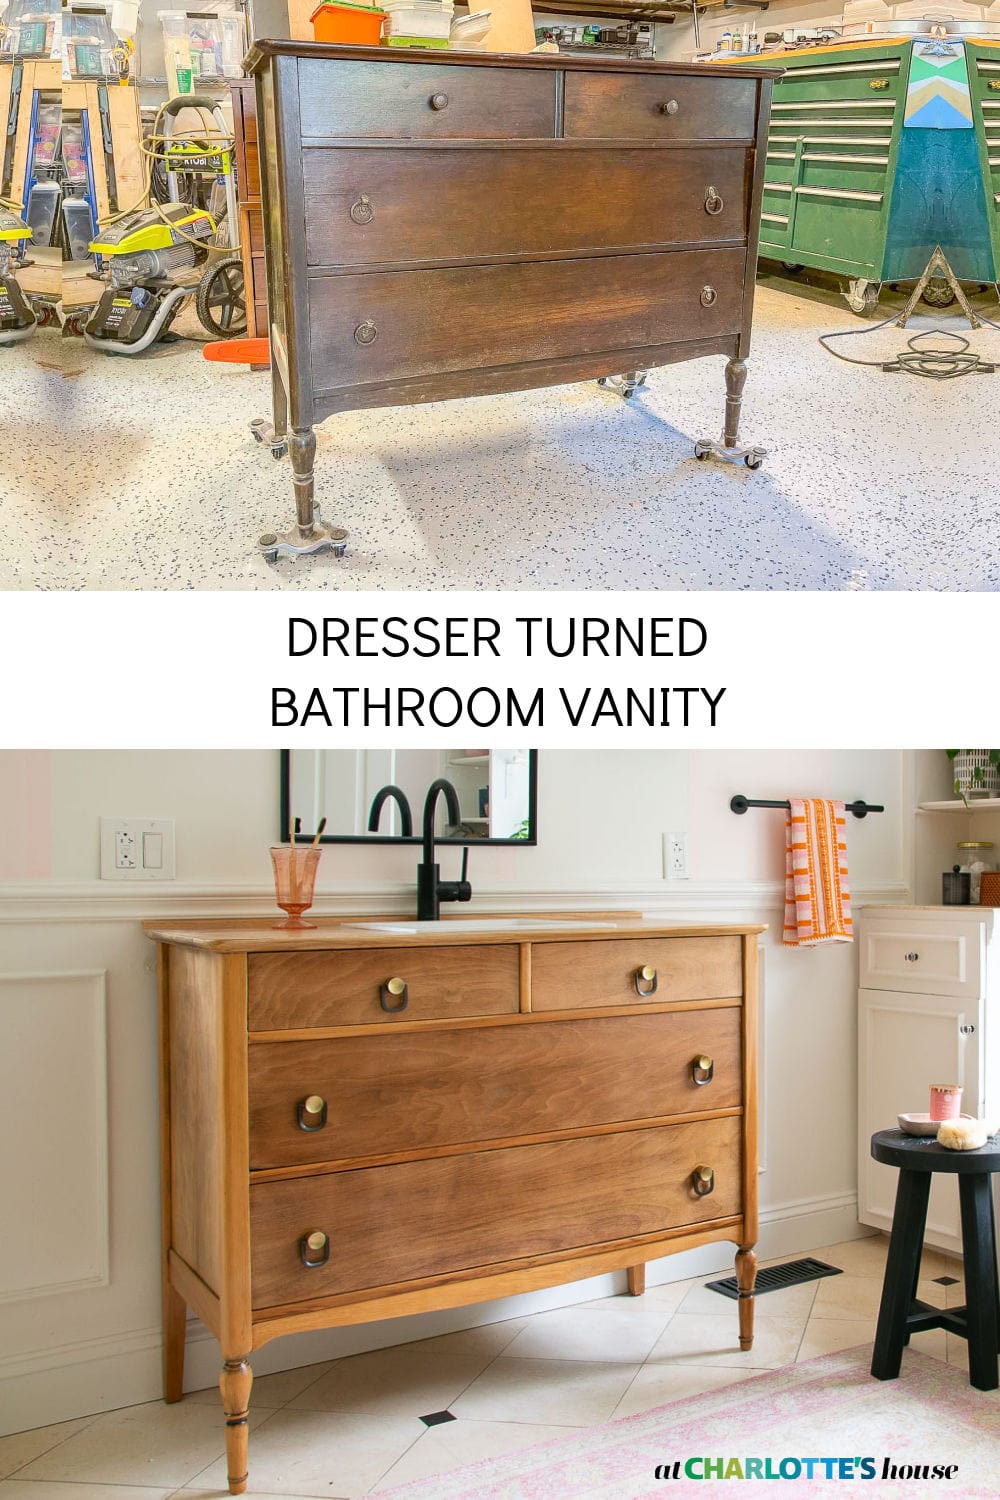
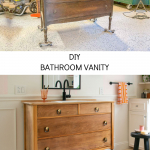
How to Turn a Vintage Dresser into a Bathroom Vanity
Psssst… this post *might* contain affiliate links: see my disclosure here.
Turning an Old Dresser into a Vanity
I took a thrifted dresser and turned it into a DIY vanity for our bathroom.
Disclosure: This post is sponsored by Elkay but all opinions and glowing reviews are my own!
Shop my favorites!
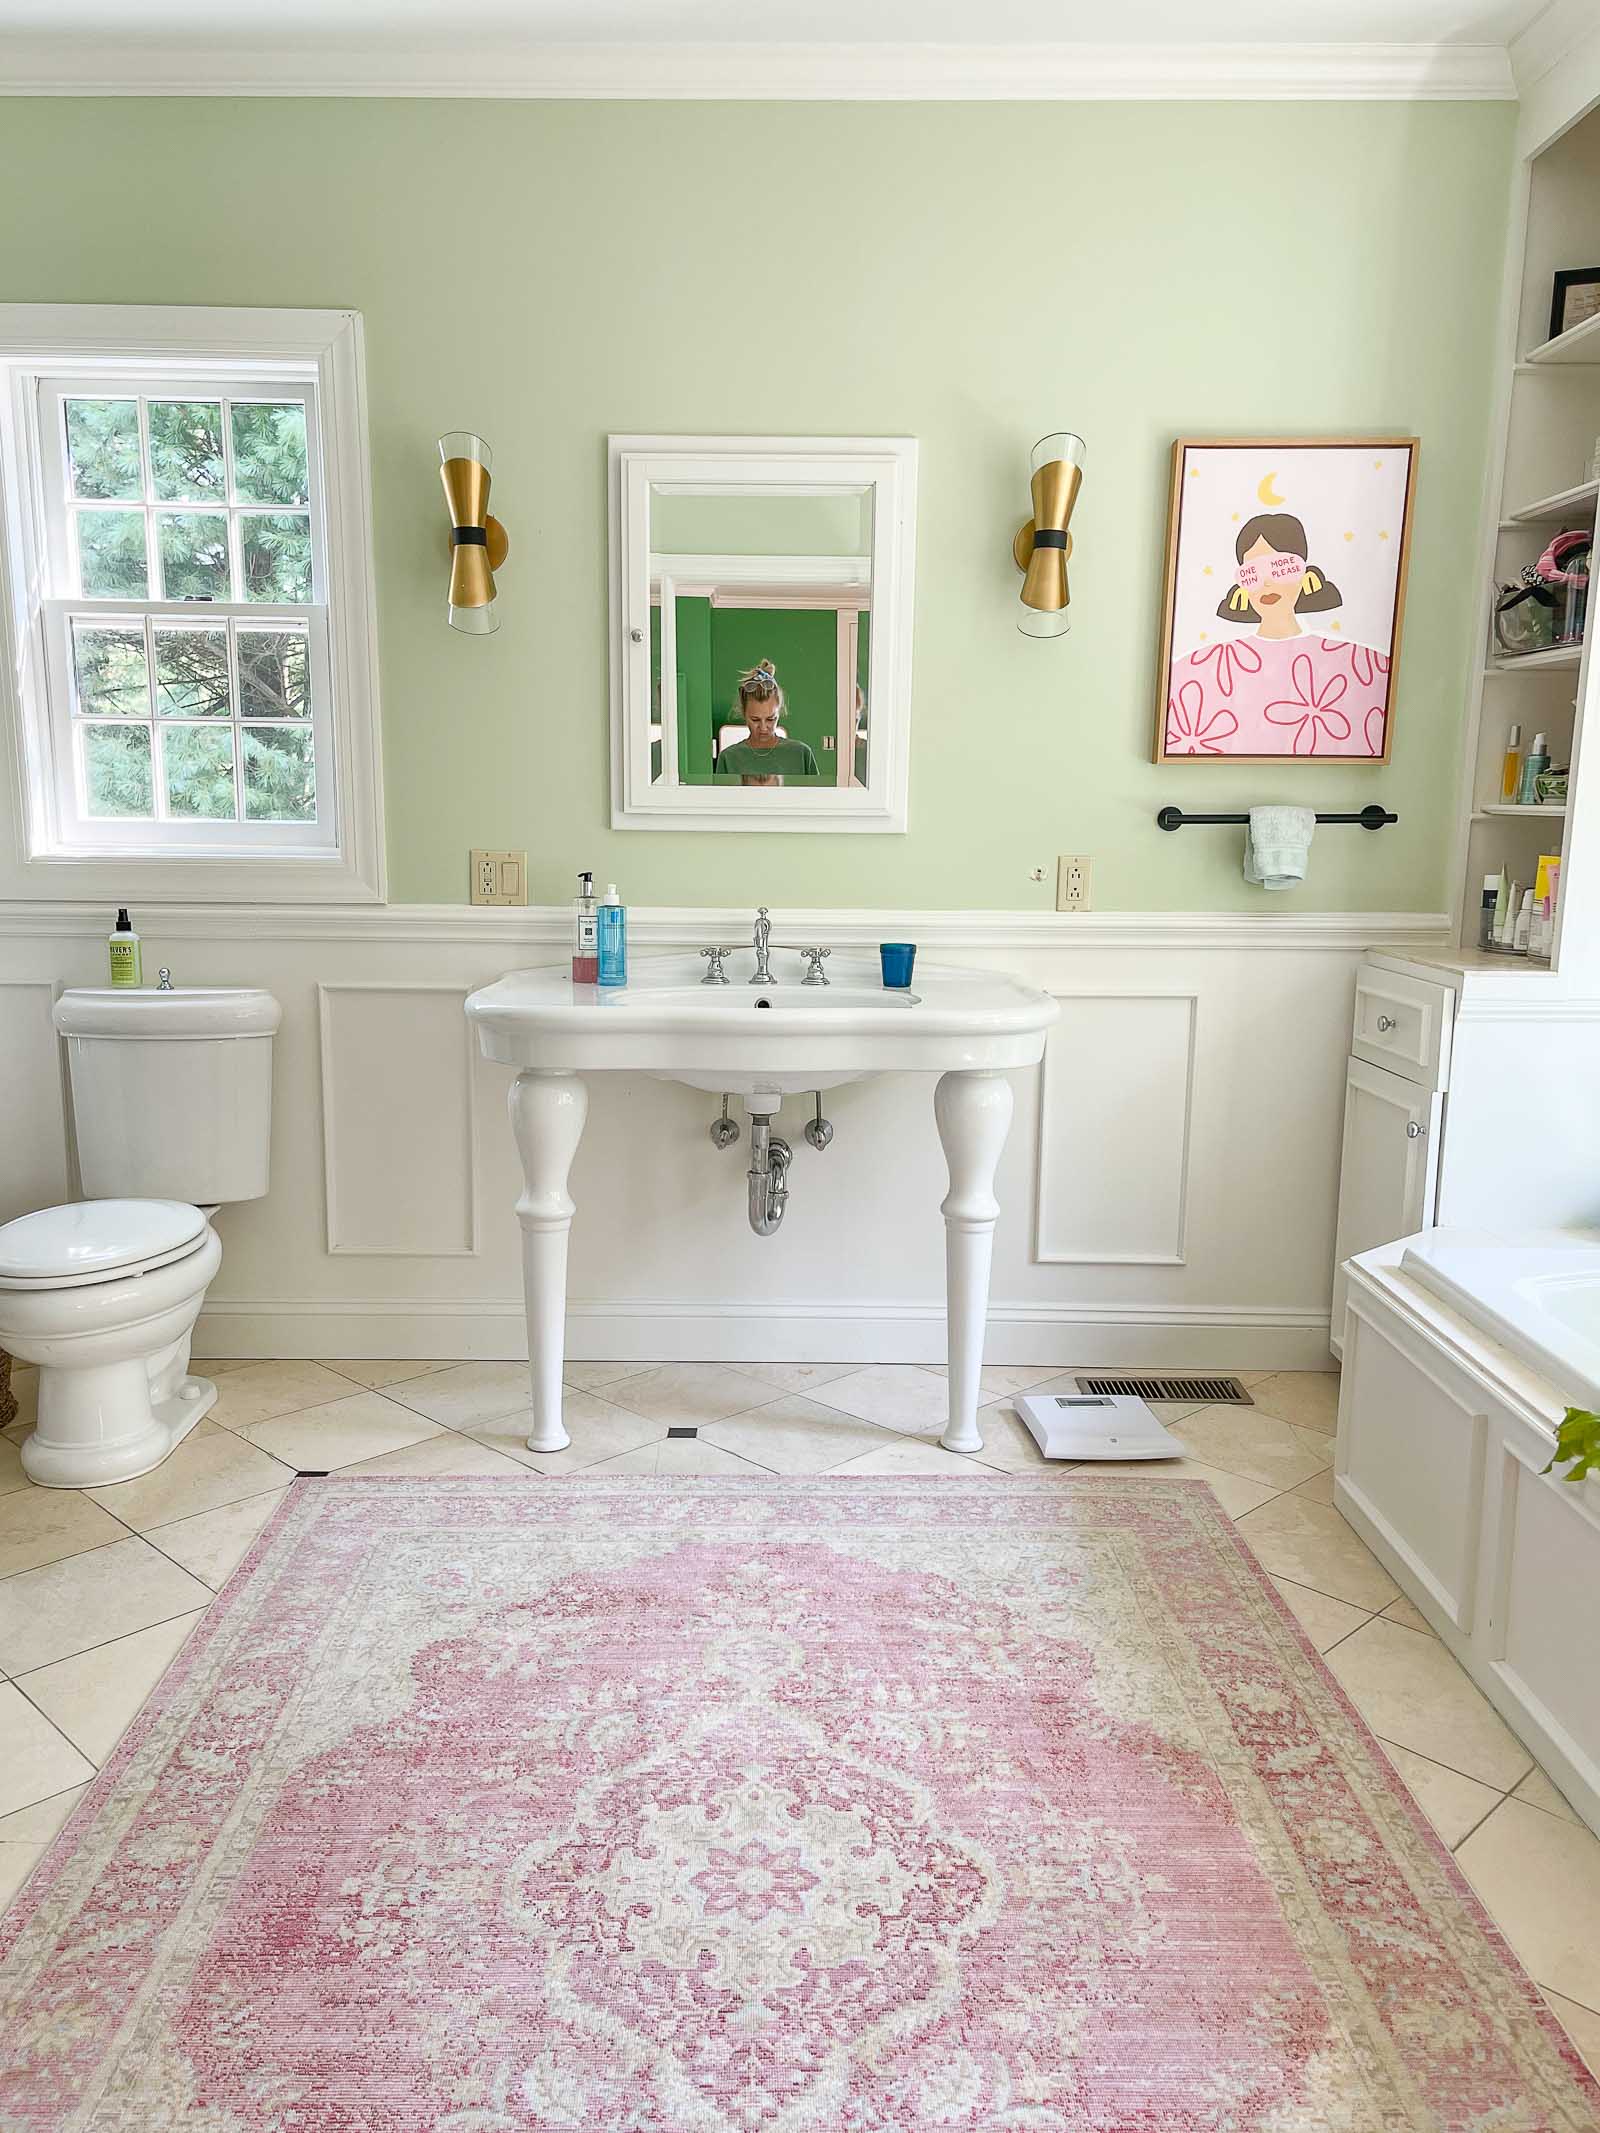
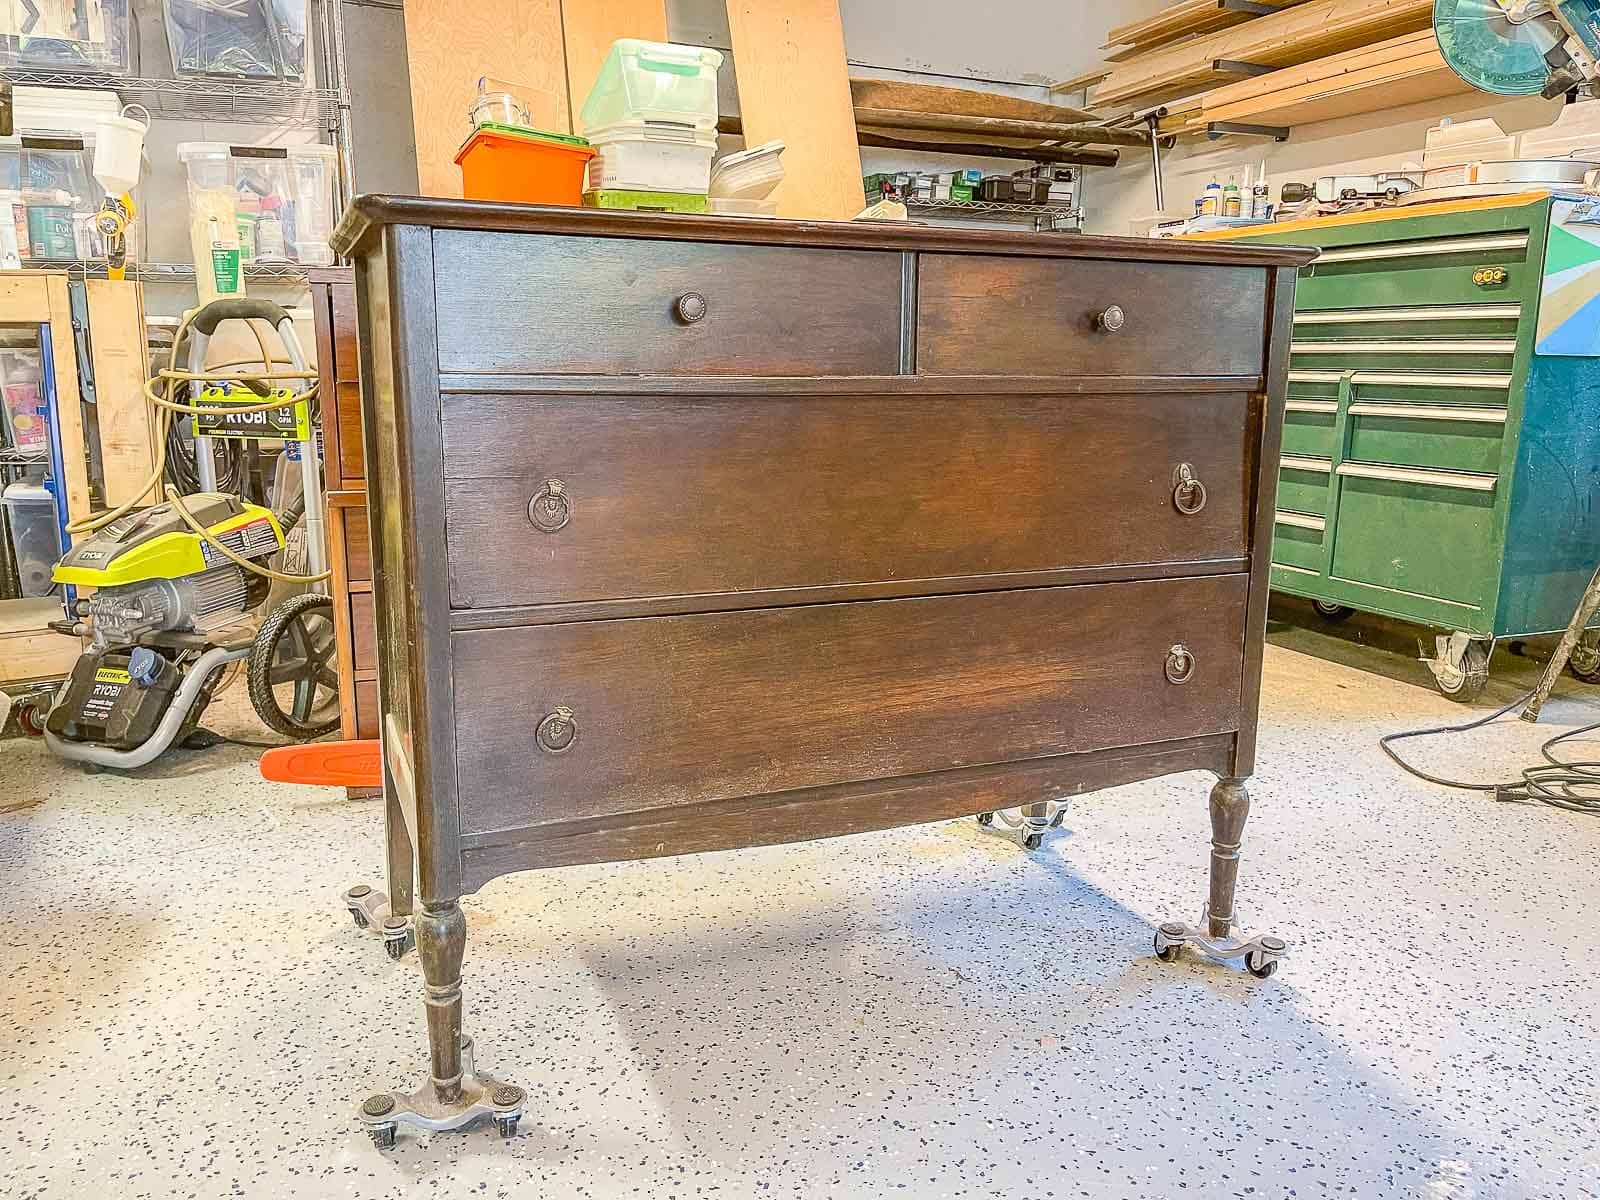
Today’s projects is one of the ones I’ve been eager to try for AGES. And then we moved into our current house and I had the perfect opportunity. When I shared on Instagram that I was planning to remove the existing vanity in our primary bathroom, I heard from LOTS of you that you loved the white vanity in there, but hear me out… I don’t love this space for a couple of reasons- the tiles… and the tiles. They’re a dated beige travertine-looking material that carries into the shower with a pizza parlor checkerboard border. Because I don’t have the budget to remove the floor AND the shower tiles, I was immediately put in a position to find a way to work *with* the tiles. To de-emphasize them. The shiny white vanity and the green walls really drew attention to the beige-ness of the tiles. Which is why I was FINALLY going to DIY A VANITY!!! Here’s where we started:
Step 1. Pick the right size Dresser
In my opinion, this is a KEY step to the vanity DIY. The dresser needs to be the right height. The right depth is important too but you can always find a sink to fit and the plumbing can adjust accordingly. Width is personal preference… my dresser happened to be about the exact same size as the white vanity I was removing which made things easy.
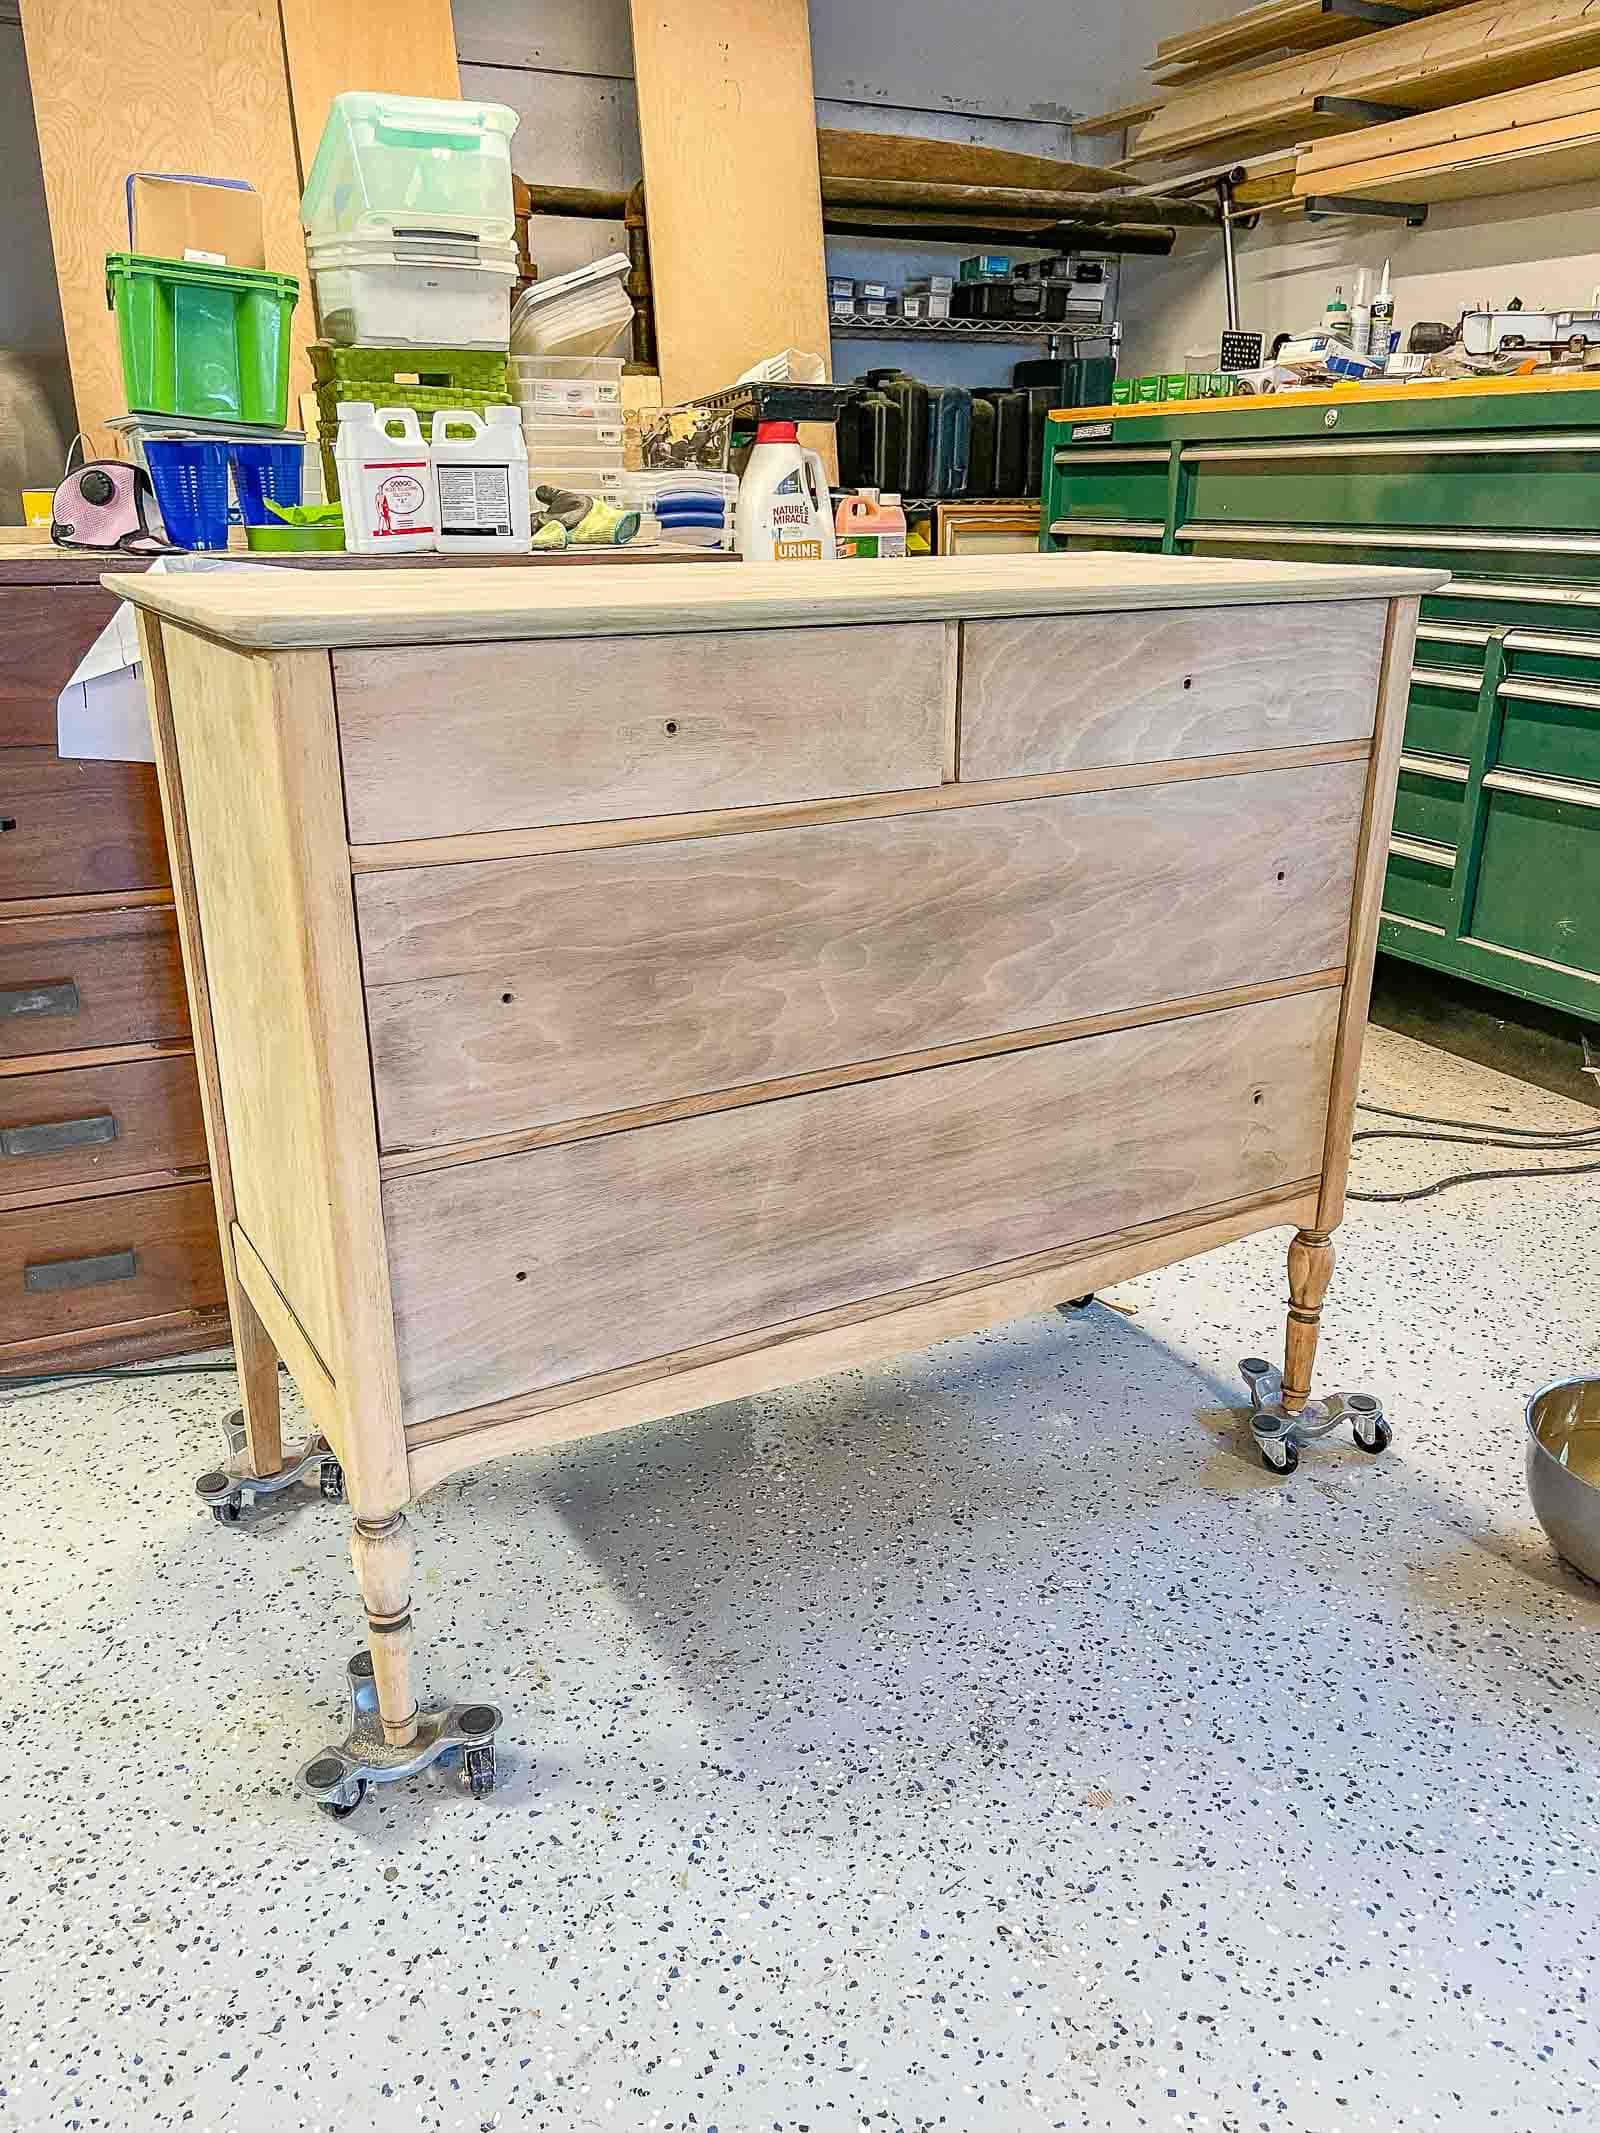
Step 2. Sand/ Paint/ Finish the Dresser accordingly
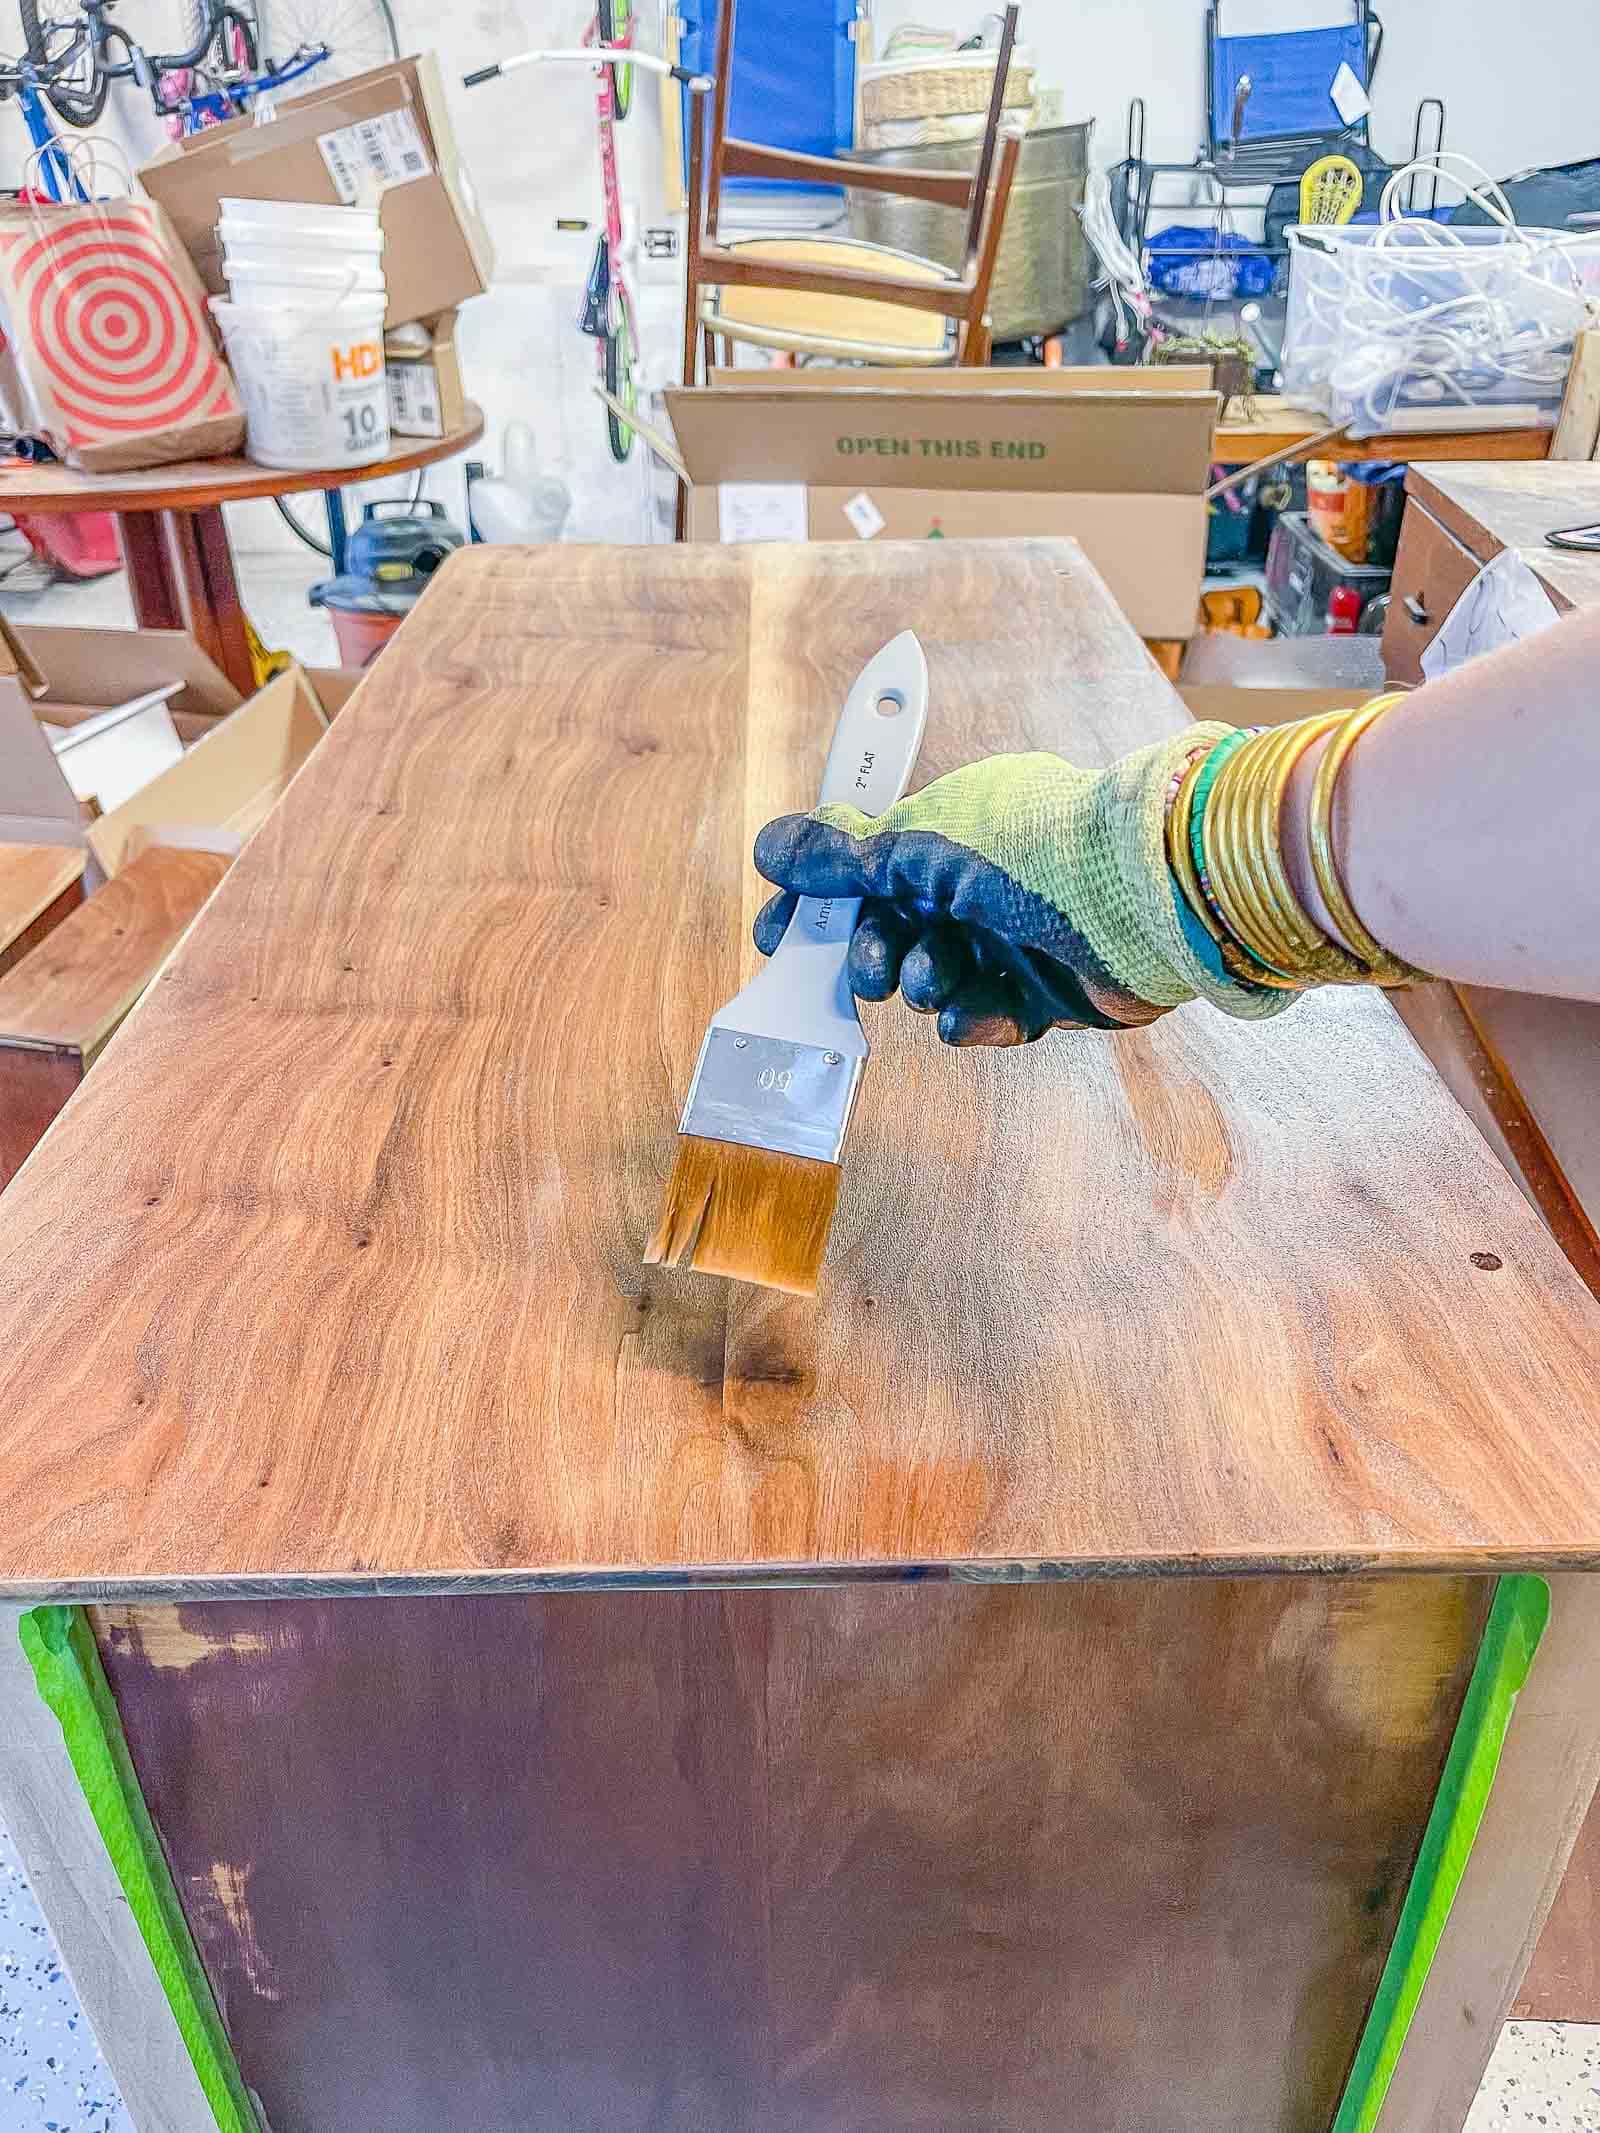
For my dresser, I wanted it to be *considerably* lighter. I started by sanding off the dark finish. I revealed the perfect shade wood on the body of the dresser but a type of wood veneer on the top, sides and drawer fronts that still felt a bit dark. (Note: Veneer is a very thin sheet of wood that is often adhered to the outside of furniture. It’s cheaper to build the furniture with one wood and then use the higher quality veneer where desired.)
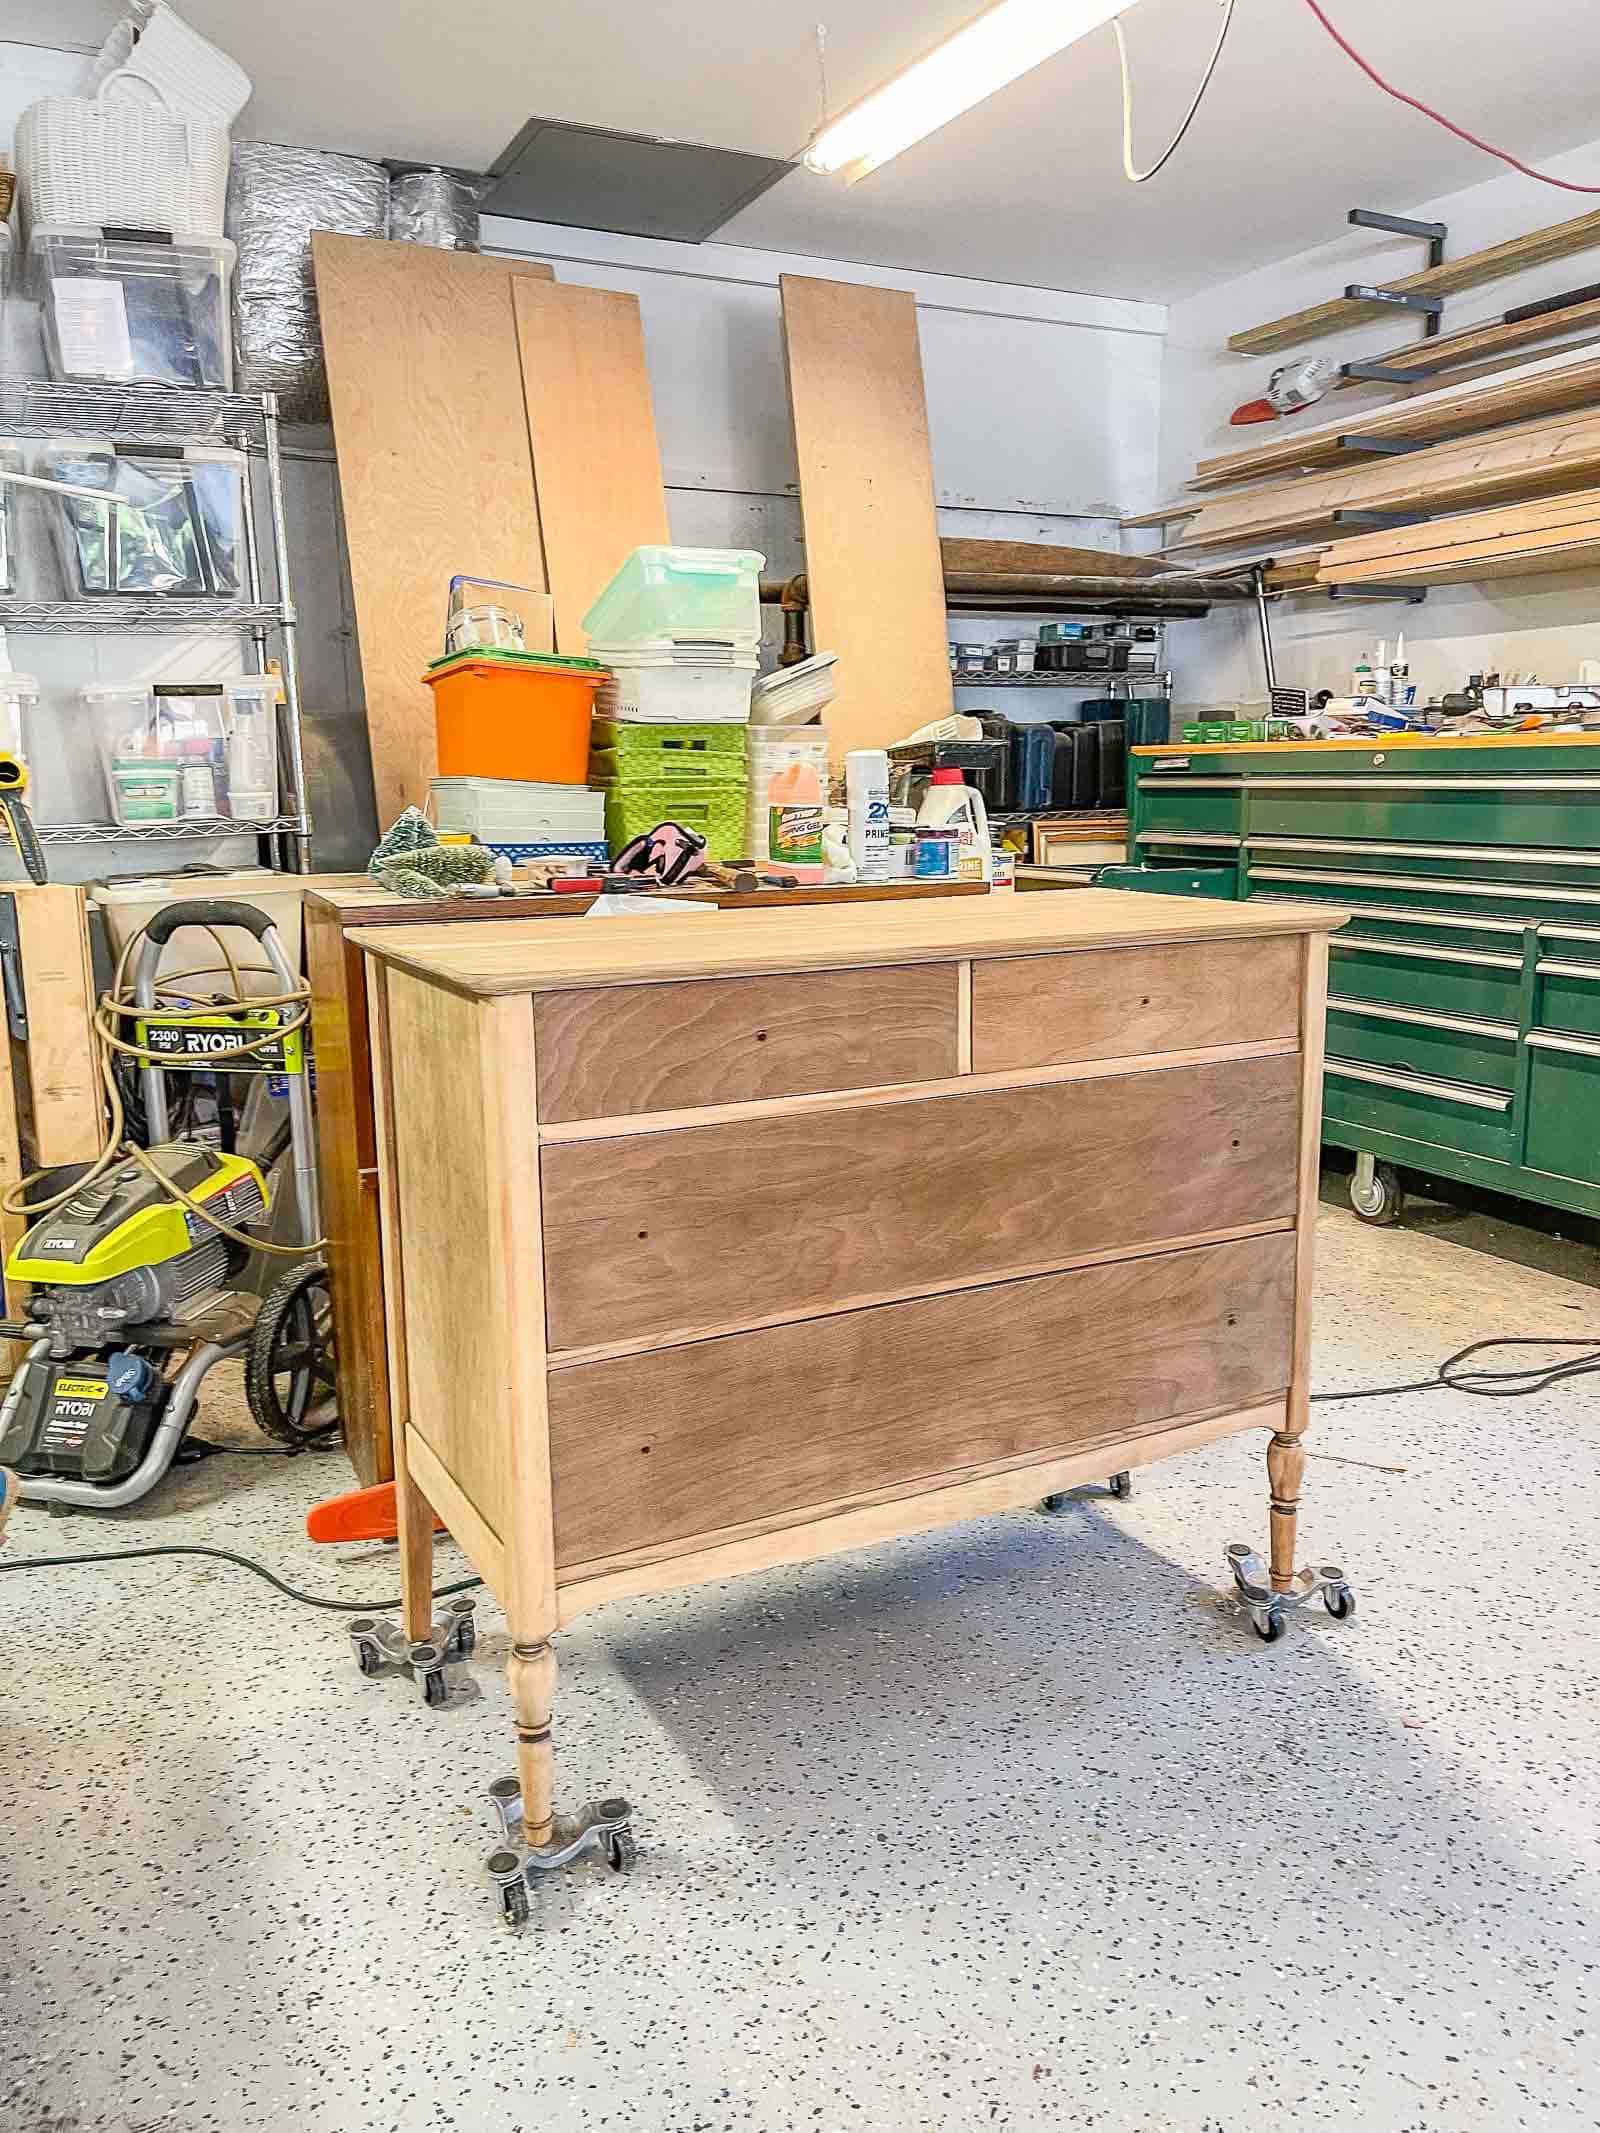
For the darker veneer on this piece, I tried out wood bleach for the first time. It’s an A/B mixture that you paint onto the wood and it effectively bleaches the actual wood grain (vs. bleaching the dye in the wood like a regular bleach would). It took two coats of wood bleach to lighten the dresser top, sides and drawer fronts. Bleaching lifts the fibers in the wood so I had to sand it lightly with a fine grit sand paper.
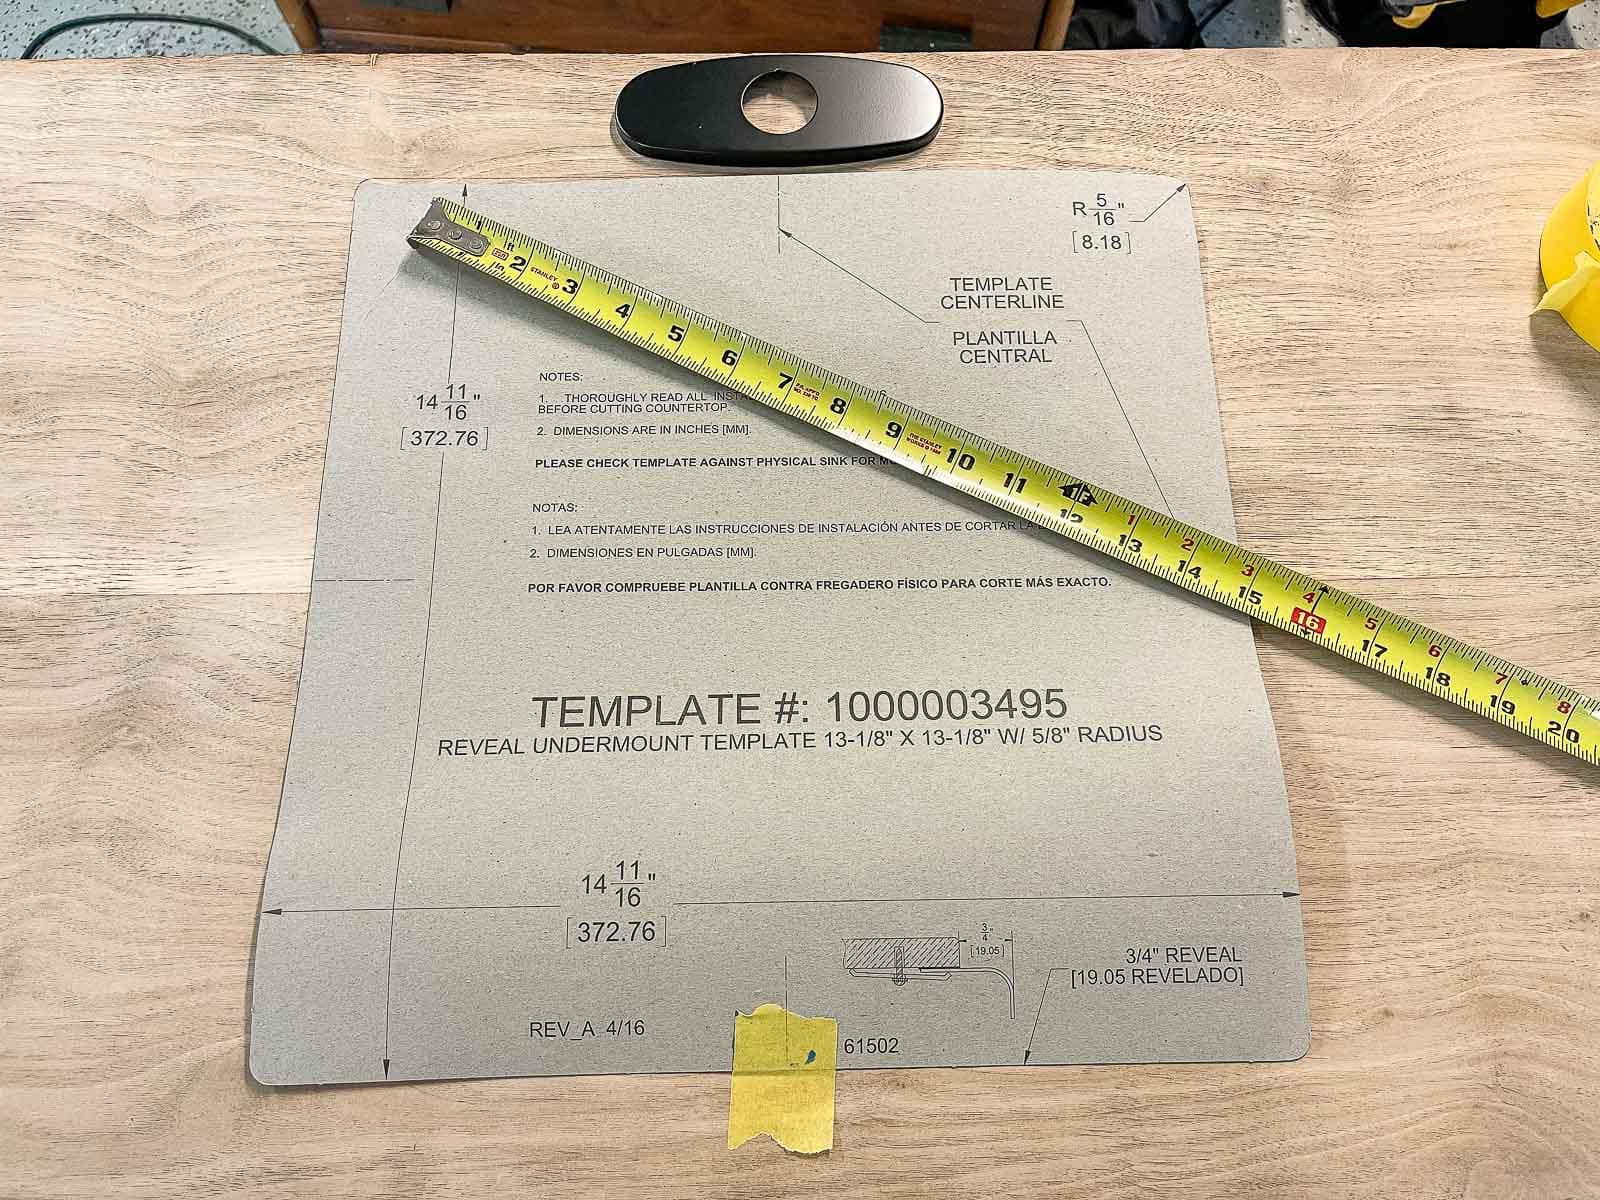
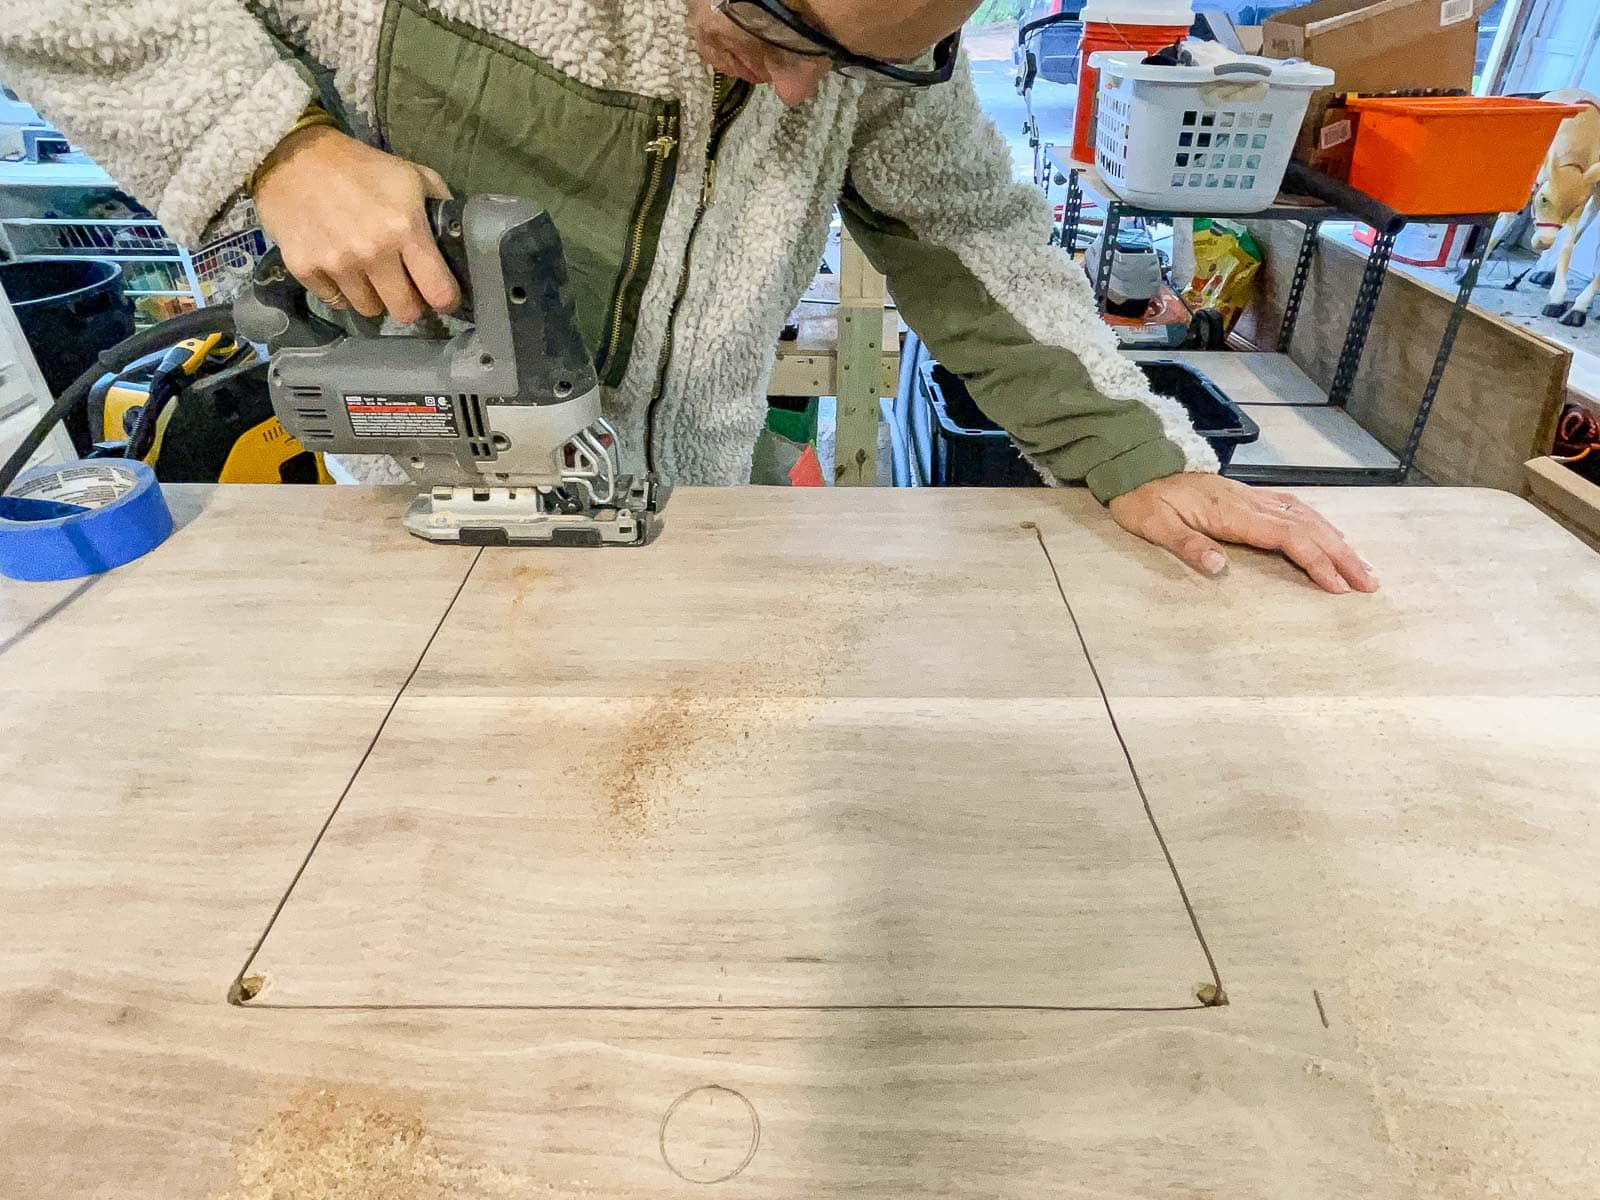
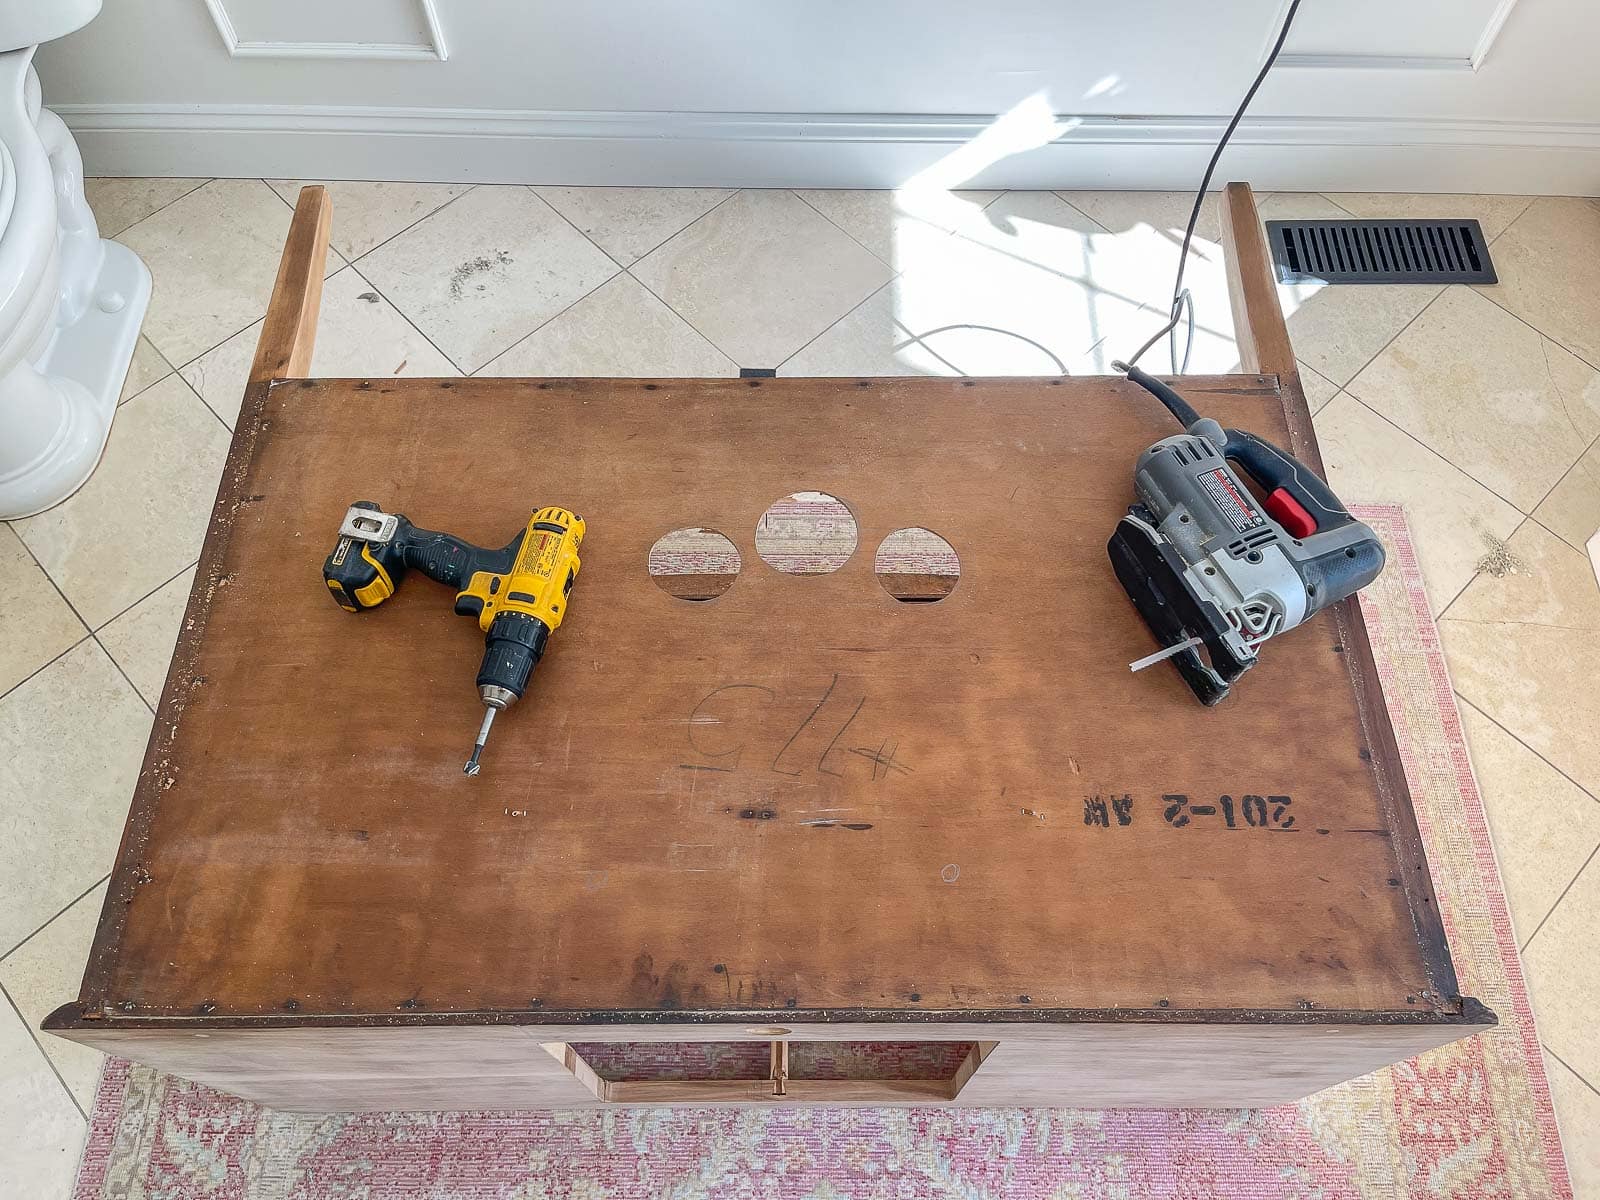
Step 3. Cut out for the sink and faucet
My sink is from Elkay and it came with a template. I measured (twice), making sure there was room for the Elkay faucet behind it, and traced it onto the top of the dresser.
To make space for my jigsaw, I drilled a hole in all four corner large enough for the jigsaw blade. Then I caaarrreeeefffuuullllyyy cut out the sink hole.
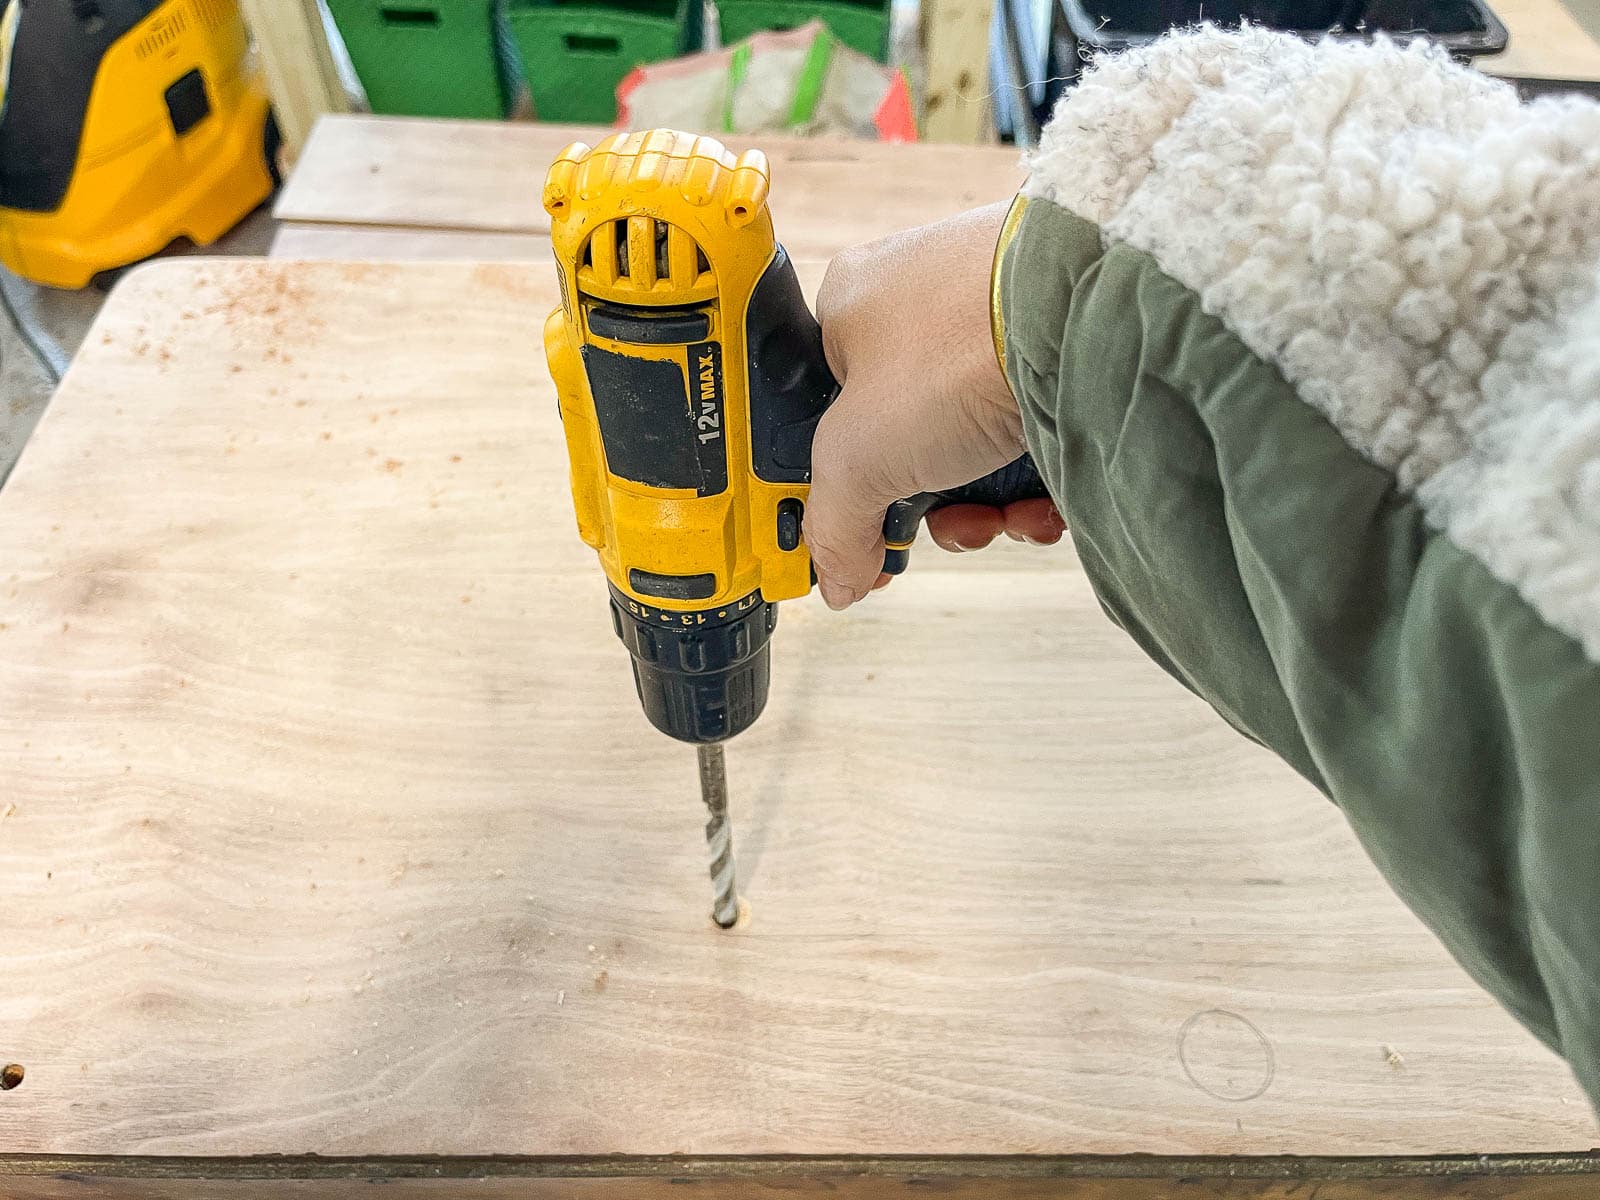
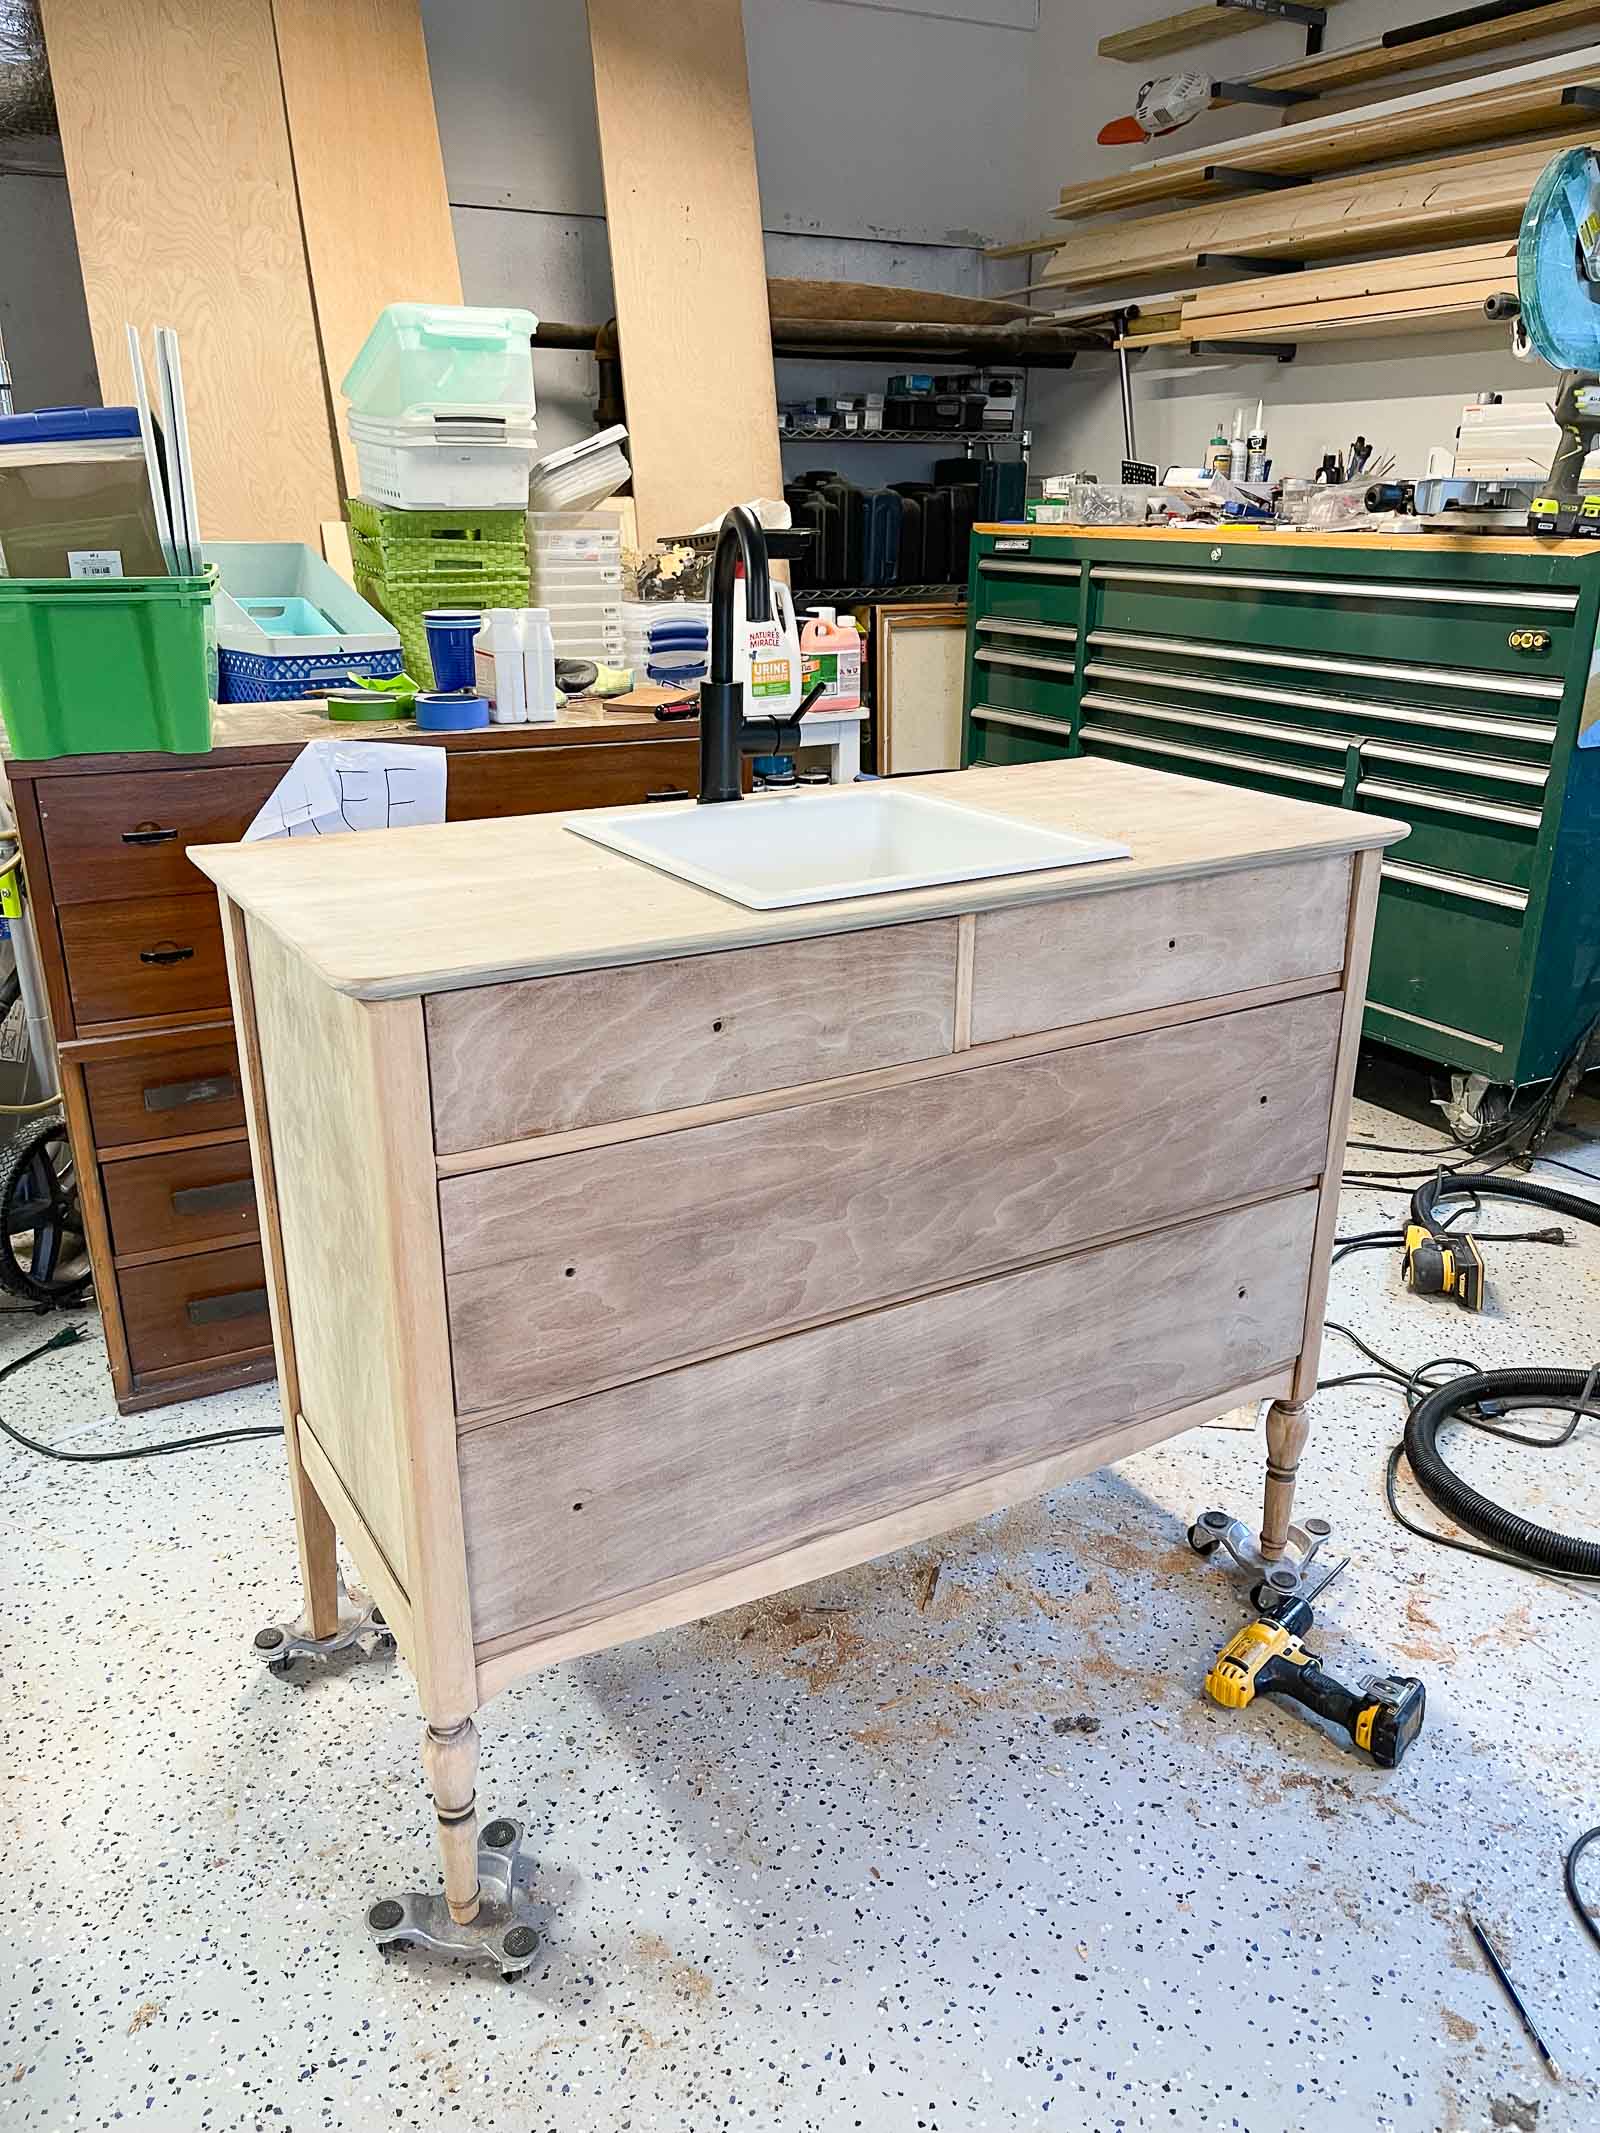
I used forstner bit large enough for the faucet and drilled a hole in the top of the vanity for the faucet as well.
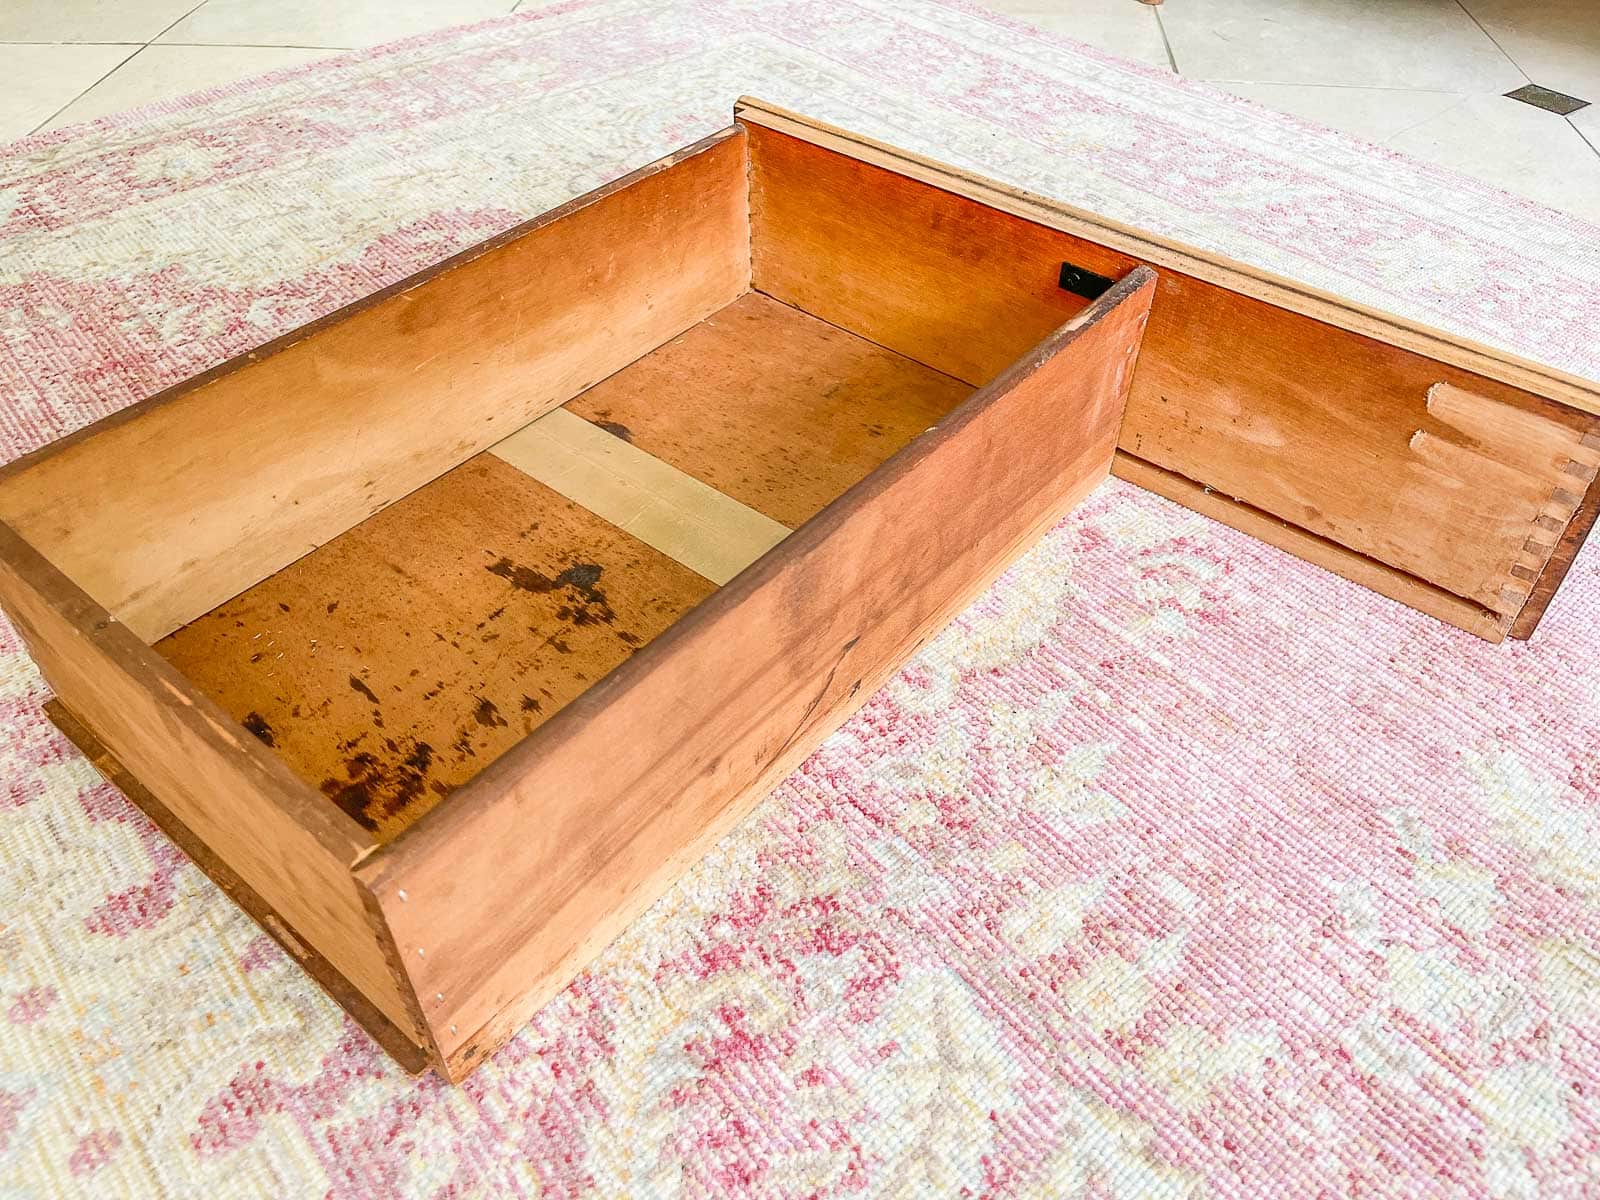
Step 4. Retrofit the drawers
I wanted to be able to use my drawers so I had to figure out a way to make them work around the sink and plumbing that was now running down the middle of the dresser. I suspect each piece will be unique, but for my dresser, I was able to remove the bottom of each drawer. Then I took a jigsaw and removed the side of each drawer that was in the way of the sink/ plumbing. After measuring the sink/ plumbing pipes, I trimmed the back of each drawer accordingly leaving one side still attached to make reassembly easier. Because the sides of my drawers were so skinny, I reattached the side to the front with L brackets attached it to the back with staples and wood glue. I cut down the bottom of the drawer, slid it back in its grooves and stapled it in place.

I also had to add new drawer rails/ slides to support the inside corner of each drawer. I made these from 1x2s and scrap pieces of square dowel. I attached them to the back of the dresser with staples (because the back materials was so thin) and the front with pocket holes (because there was enough width for the screws). You can see it below right next to the sink.

Step 5. Seal the Dresser
The number one concern I got from folks when I shared this project was how I was going to protect the wood. Once the dresser was upstairs in the bathroom, I gave it three (or more) coats of a heavy duty sealant. My paint store recommended a product called Masters Armor that also has a hardener to mix in. This product is intended for floors and countertops so it’s definitely strong enough to stand up to the splashes from a sink. (Waterlox or an oil based polyurethane are other good options.)
Step 6. Set the Sink and faucet in place
Run a line of clear silicon around the opening for the sink and then drop the sink in place. My Elkay sink came with sink clips that I could screw up underneath the top of the dresser/ vanity to hold the sink tight in place.
My faucet is also from Elkay and couldn’t have been easier to install. A large nut underneath screws in place to the faucet base and it tightens it onto the top of the vanity.
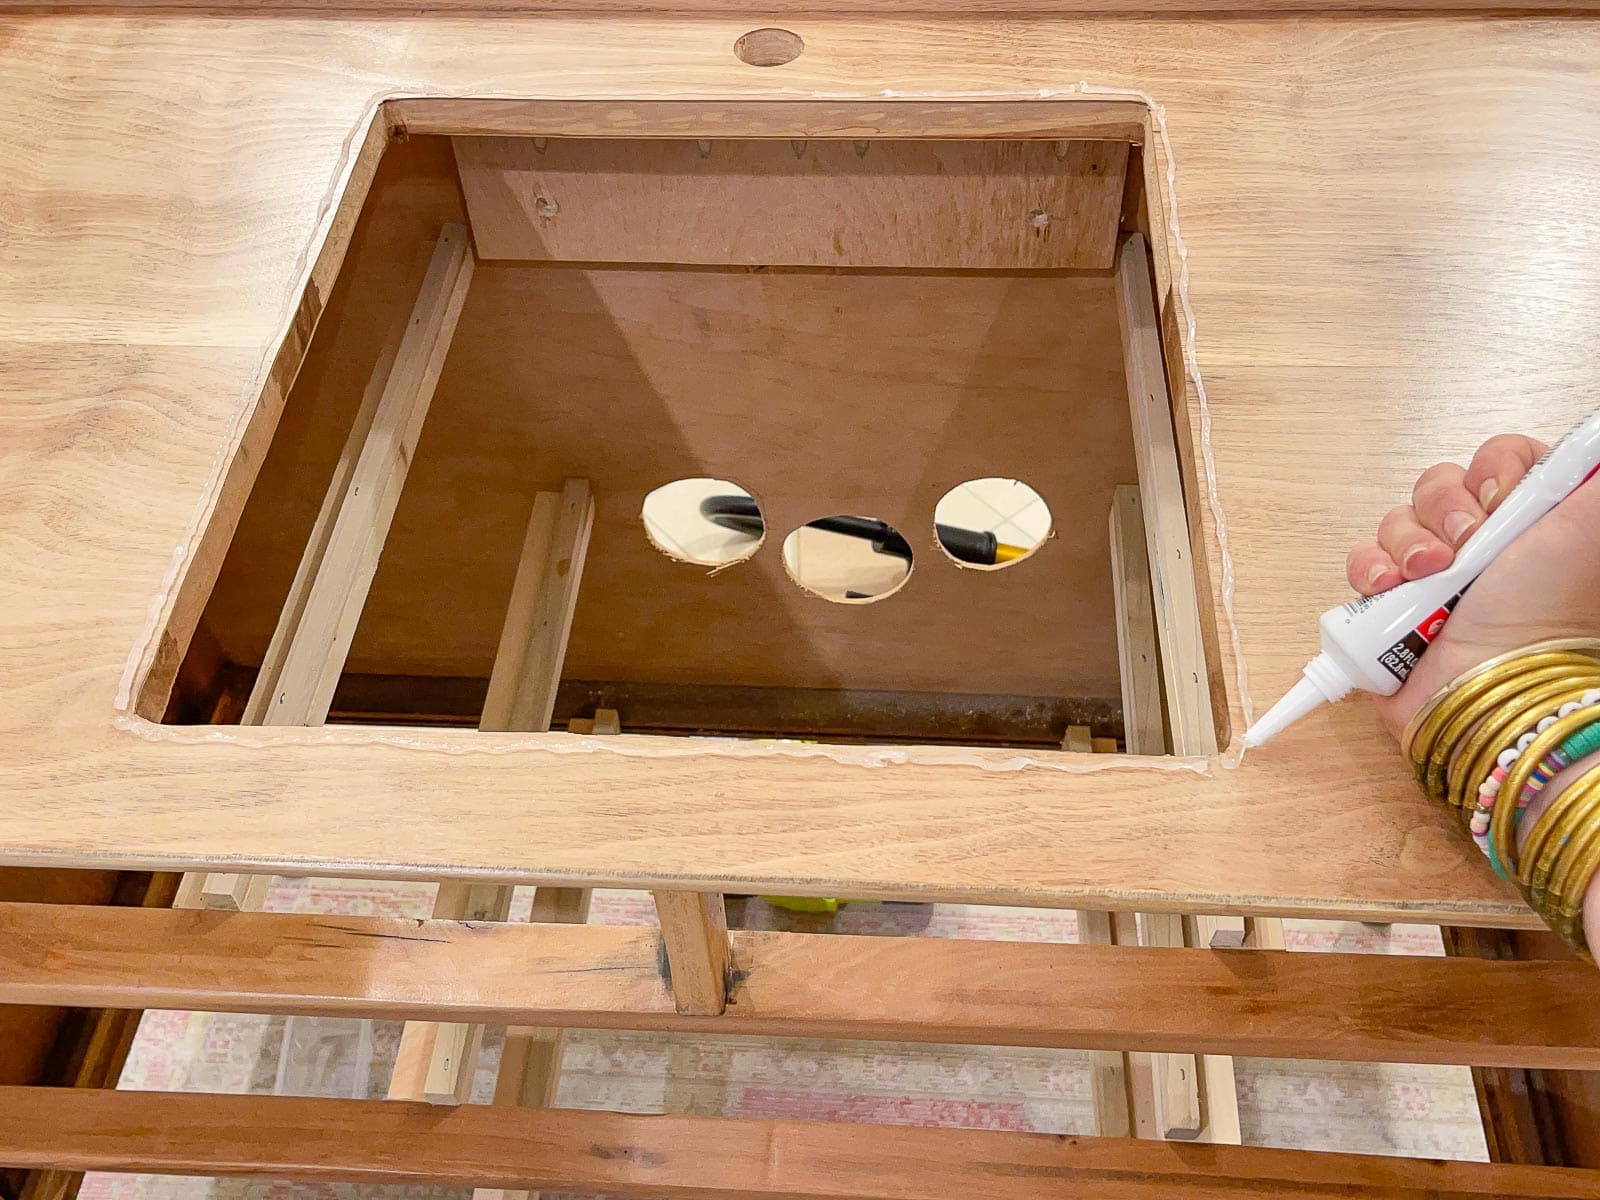
Step 7. Cut out in back of vanity for water lines and plumbing
I slid my vanity in place against the water lines and the plumbing pipe and marked the back of the vanity. I tipped it on it’s front, made a starter hole with my drill and then used my jig saw to cut out circles for the water lines and plumbing pipe.
Step 8. Secure the Dresser Vanity to the wall
My old vanity had two bolts in place to secure it to the wall so I was able to add a support brace inside my dresser in order to reuse the old bolts. If you don’t have something like this in place, I’d add a piece of scrap wood to the inside of the dresser and drill through this into wall studs.
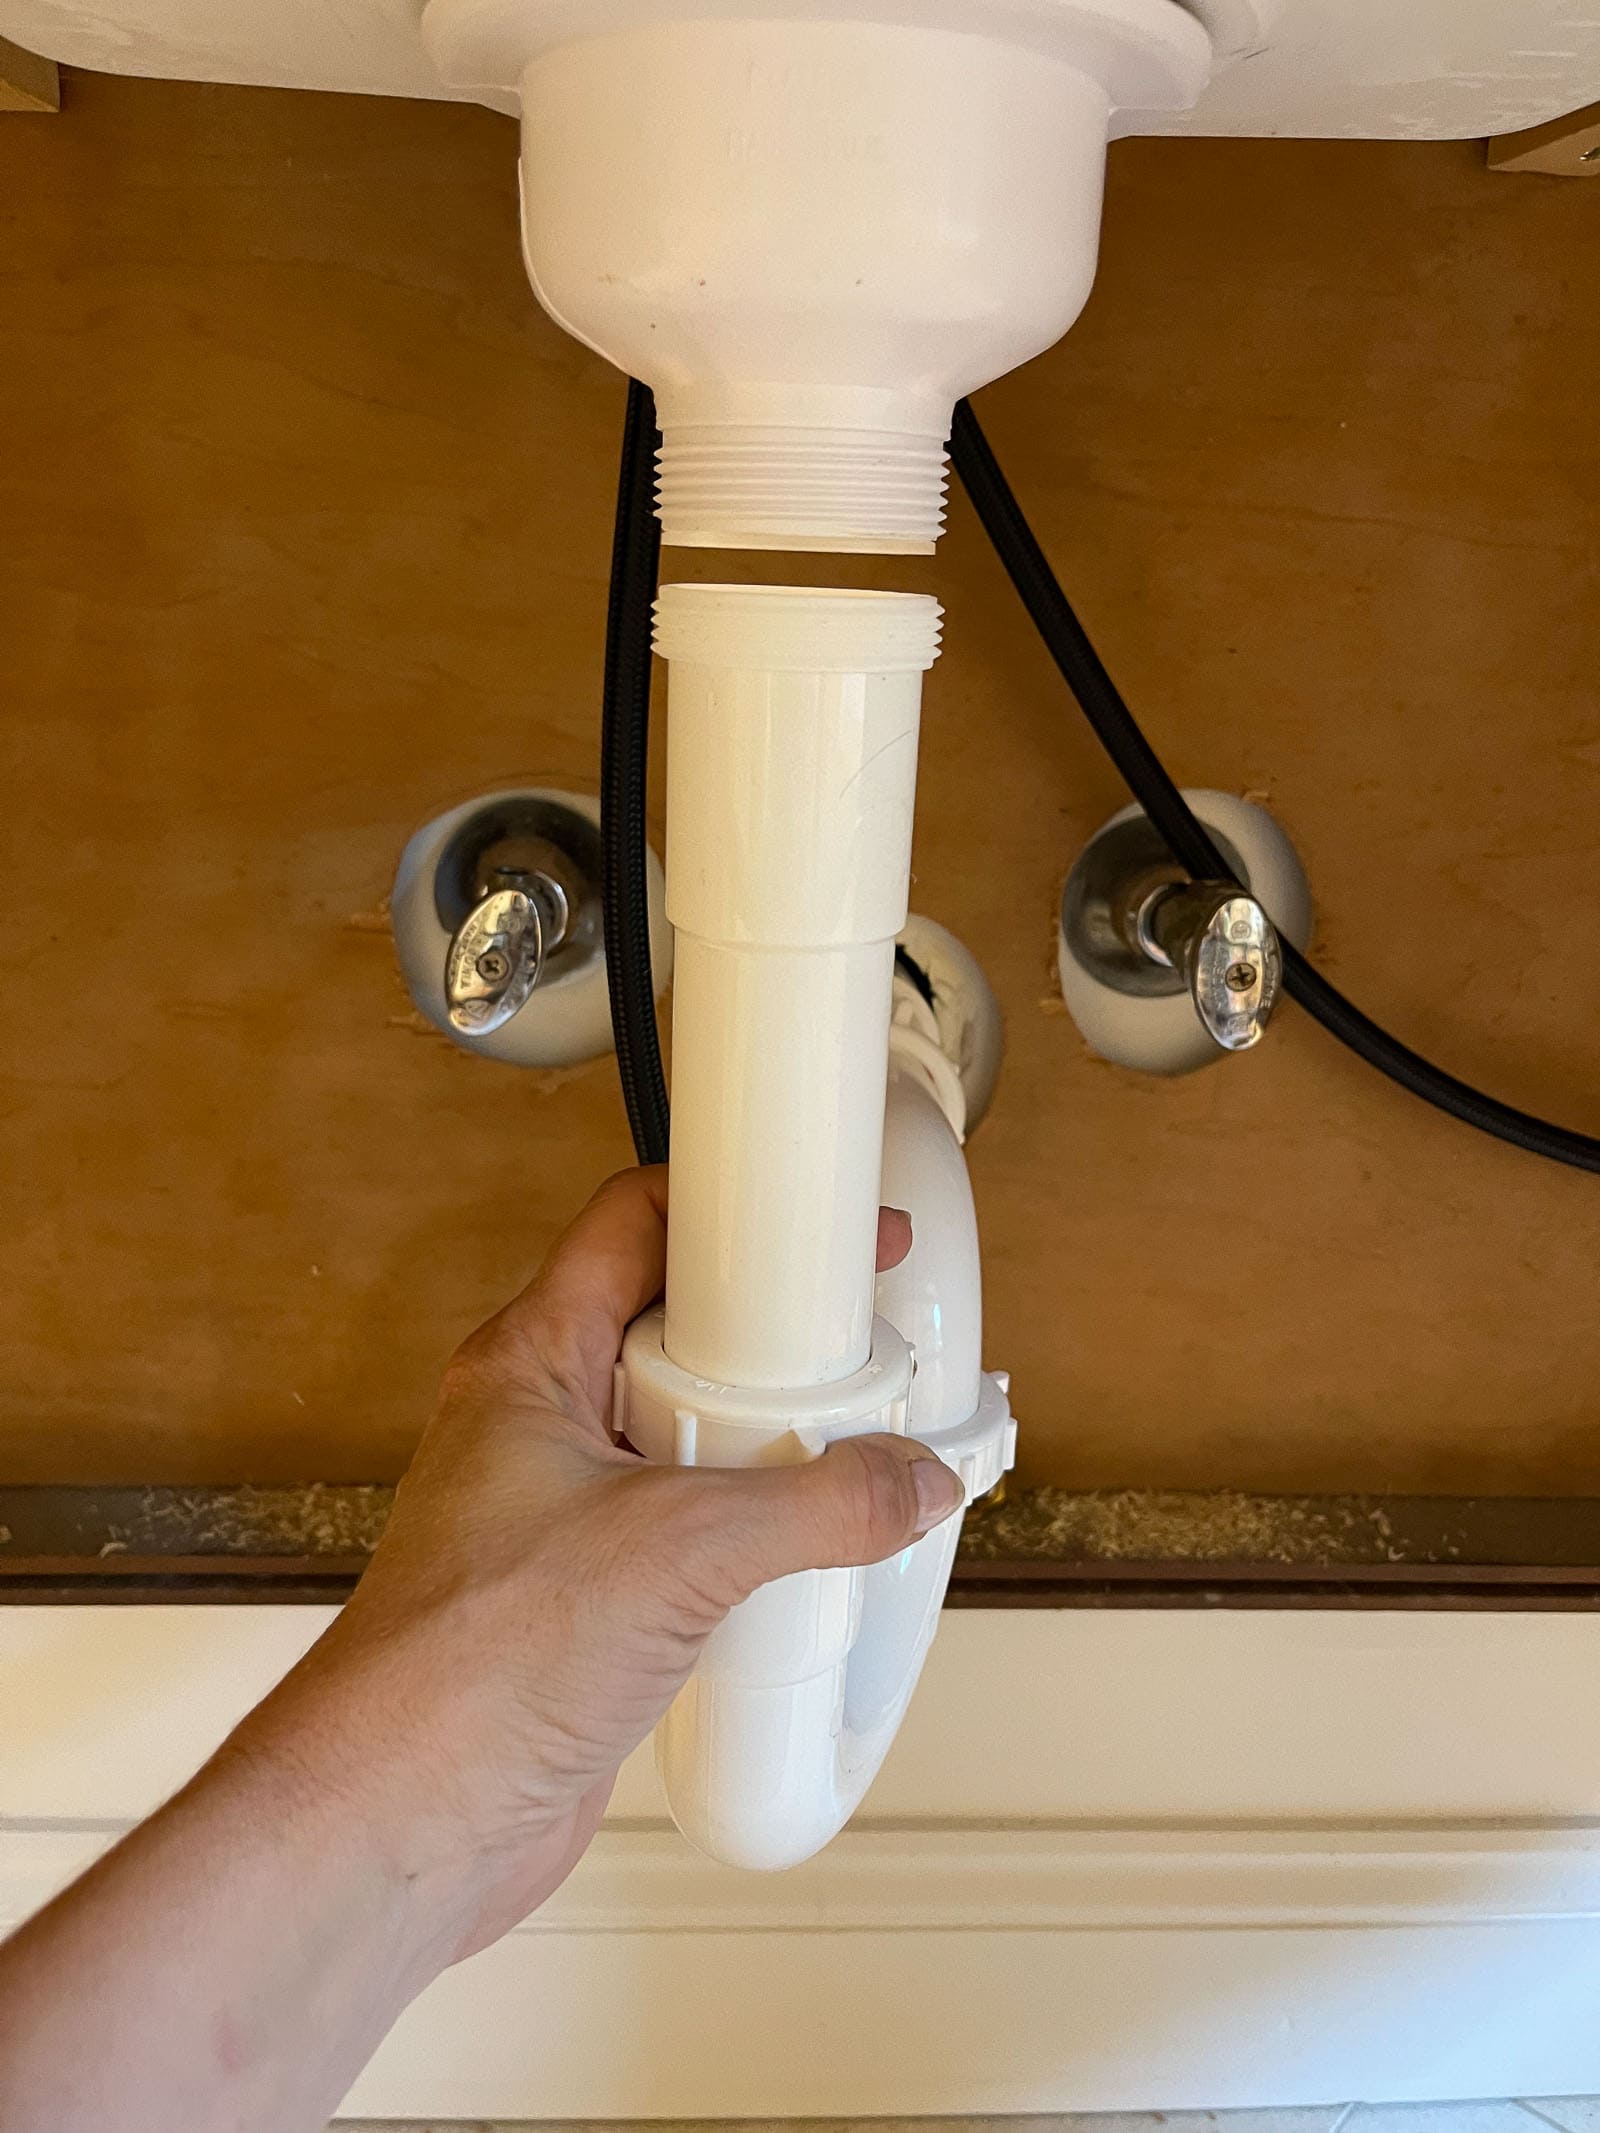
Step 9. Reattach the plumbing
The faucet has two water lines that screw right back into the existing water lines. I had to purchase a new P-trap (the U pipe underneath sinks) and a slightly longer length of pipe so that it would line up with the bottom of my sink and the pipe in the wall. I brought the pipe pieces to the Home Depot and they made sure I had the right set up. It was totally easy to install and put in place.
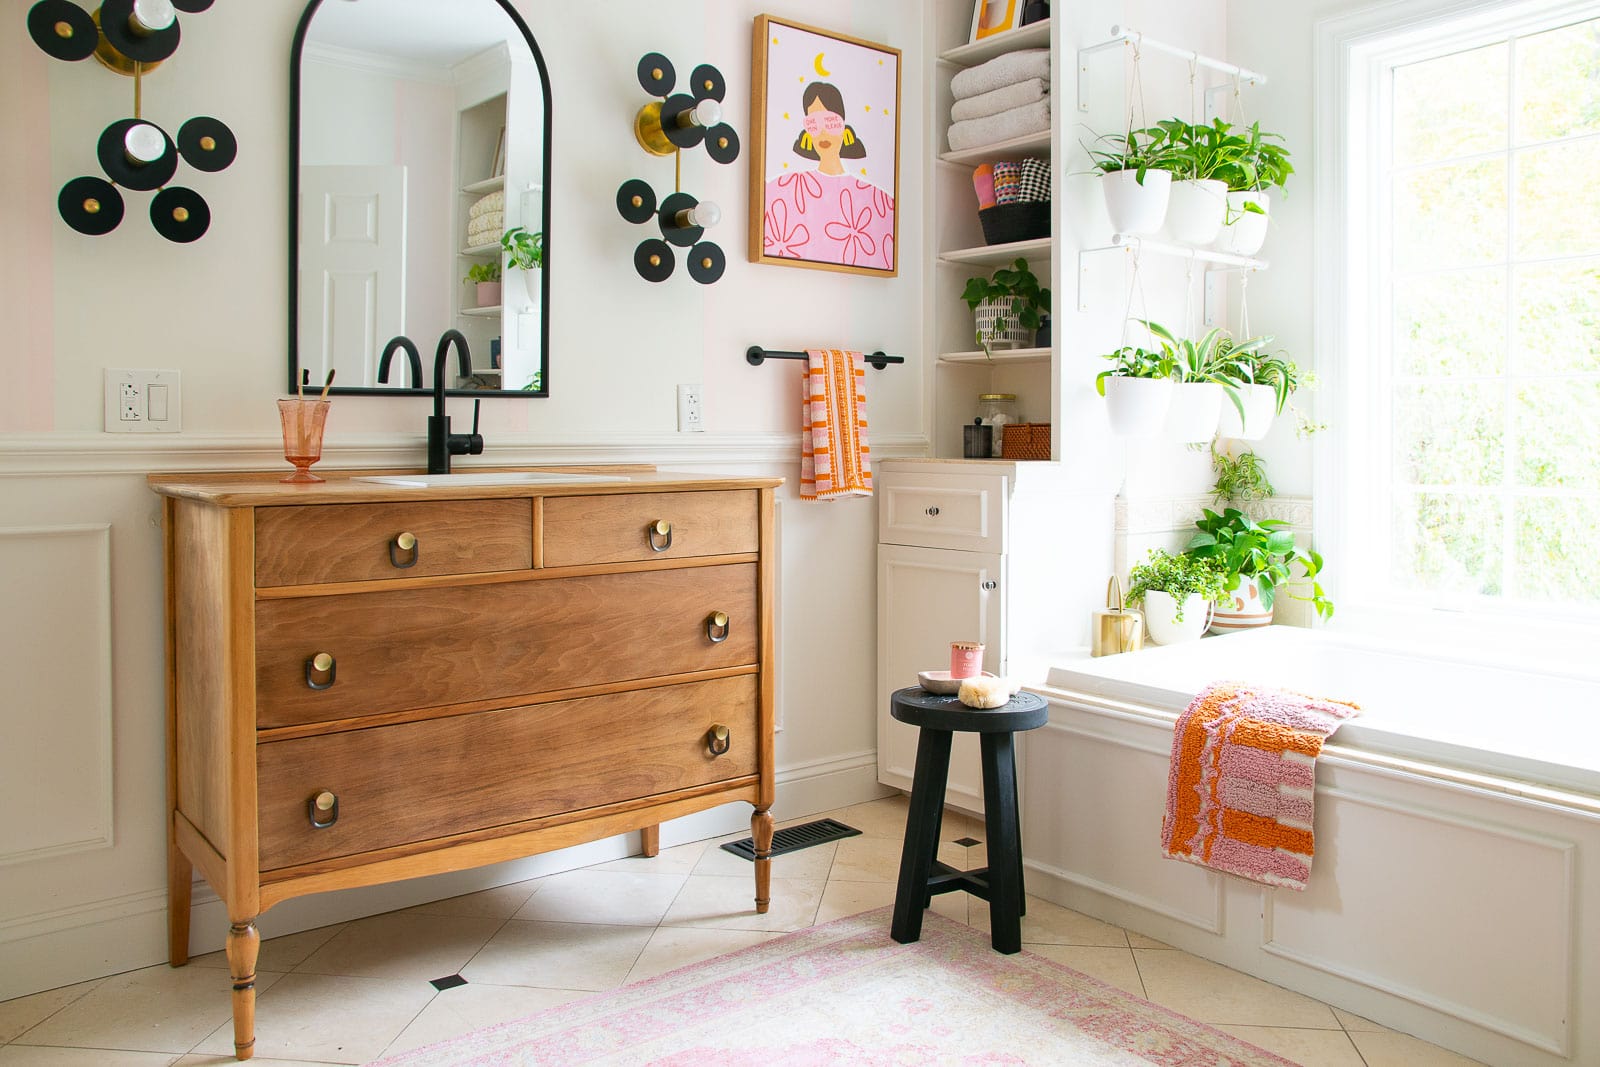
Step 10. Accessories!
I replaced the old hardware with these beauties from Anthropologie and they make SUCH. A. DIFFERENCE!! (I’ll do another post about the whole space makeover and share links to the rest of the room.)
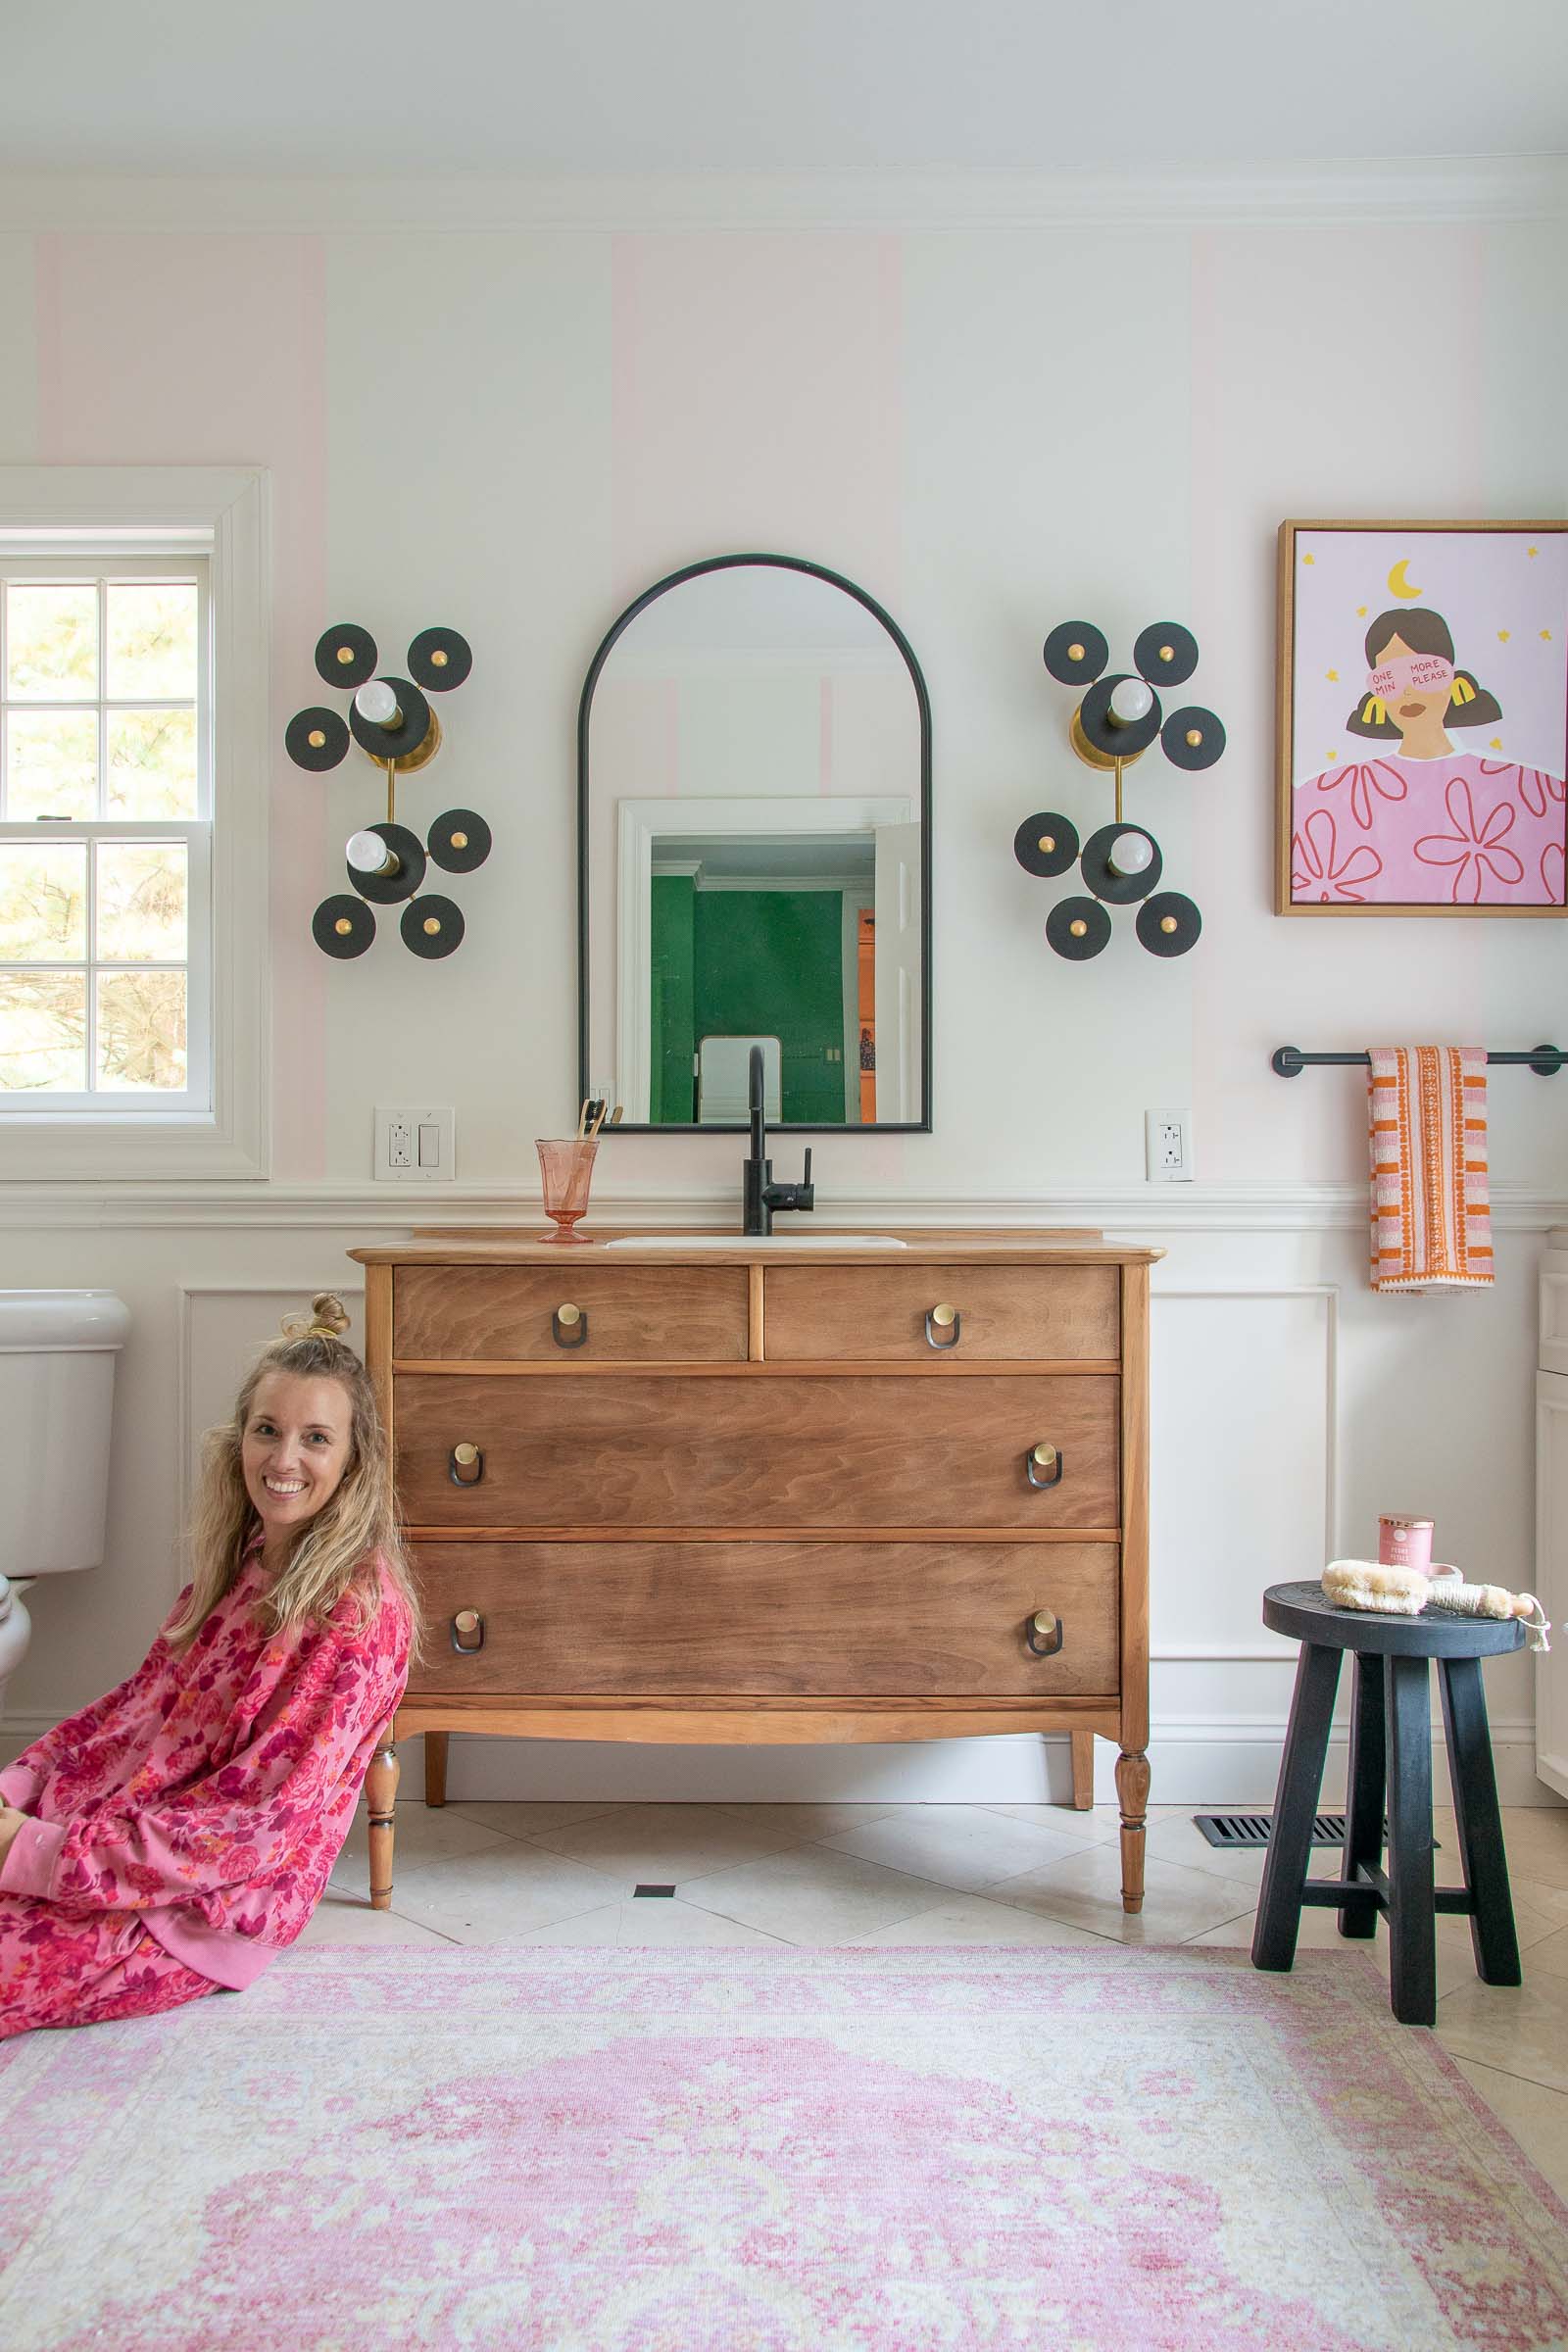
I still can’t believe what a difference this new vanity makes to the space AND that I actually made this with my own two hands! I’d say this is a totally do-able DIY and the biggest challenge for me was getting the finish on the dresser just right… the actual turning a dresser into vanity thing was pretty easy! If you have any questions, please don’t hesitate to ask!
SHOP MY FAVORITE BATHROOM ITEMS


I love this. Thanks charlotte! Been searching for the just right dresser to do this in our powder bath. So happy I’ll have this blog post to help me out once I finally find the righT piece!
Great! Let me know if you have questions!! Good luck!
Oh my gosh! How clever! I was wondering what I could do! Thank you!!!
Good luck!
Hi CHarlottE!
Thanks for sharing! I see dresSers from time to time and think they would be good for this but i All ways Thought it would be to harD. Im IMPRESSED!!
I thought the same thing! I think having the right dimensions to start made it helpful!
Love how this turned out! Are you still happy with the waterproofing on the top now that you’ve been using it a while? I’d love to try this myself but I’m most worried about water stains on the wood countertop.
Yes! NO stains whatsoever. I do plan to reseal it in a few places where I was a little lazy… this specific dresser has a thin (and old) veneer top and I should have painted more than one or two coats but that’s a feature of my specific dresser and not the clear coat in my opinion.
I remember seeing in your stories that You had a small gap behind thE dresser that was too biG For caulk. Did you end up just adding a piece of wood and then caulking? Do you feel like That looks okay? (We currently havE this issue). Thanks!
These folks/capitalizaTion went wacky — sorry! Ha!
Hi! Yes exactly! I added a thin piece of trim that is *maybe* a centimeter wide but it was enough to fill that gap. It looks fine!
love thIs idea so much! Did you stain the dresser after you bleacheD it? Or just used the protective coating?
Just the waterproof sealer!
Do you mInd sharing the dimensions of your dresser?
Hi! This was the same dimensions as our existing vanity. I believe it was about 42 inches wide and then standard vanity height! Maybe 24 inches deep?
What does the vanity look like on the inside? Do you have room for storage?
Yep! It has a full drawer on the bottom and then I made sure the other drawers are functional around the sink as well!
found a perfect dresser…attempting the same. Can you tell me where your drawer pulls are from?
Hi there! I linked to them in the blog post. Anthropologie.
This is absolutely gorgeous! Question – which of the drawers are still functional? I’m plotting to do this to a FB marketplace find…
Hi! All of them are functional, but the top two have been divided into smaller compartments to allow for the sink/ plumbing.
I actually just picked up this *same* vanity and was looking for vintage makeovers and found you!!
A couple of questions – what sealer did you use? Is it the “old masters” listed in your favorites section?
Also – my top didn’t have veneer, and the veneer on the sides is peeling. I’m trying to figure out if I want to replace it or leave the pine(?) blank – what veneer do you think yours has?
Sorry for all the questions! Just excited.
Hi! Yes! The Old Masters additive I linked to in this post is what my paint store recommended! Veneer is tough… if it’s already peeling, might just be worth removing and seeing what’s underneath it? It’s such a thin material that you don’t have much play with sanding etc. I sanded through mine in a couple places on the top. 🙂 Good luck!
Always trying to lean new craft ideas on re-using old furniture etc. Impressed what I’ve seen so far
Thank you!
What’s your opinion on a double sink vanity with the bowls on top?
I’ve never had one so can’t speak from experience, but my one concern would be that’s 2x the nooks and crannies to clean and take care of with two vessel sinks? If it’s a DIY, then you’d probably lose all the storage beneath because of the additional plumbing too!
Hi!
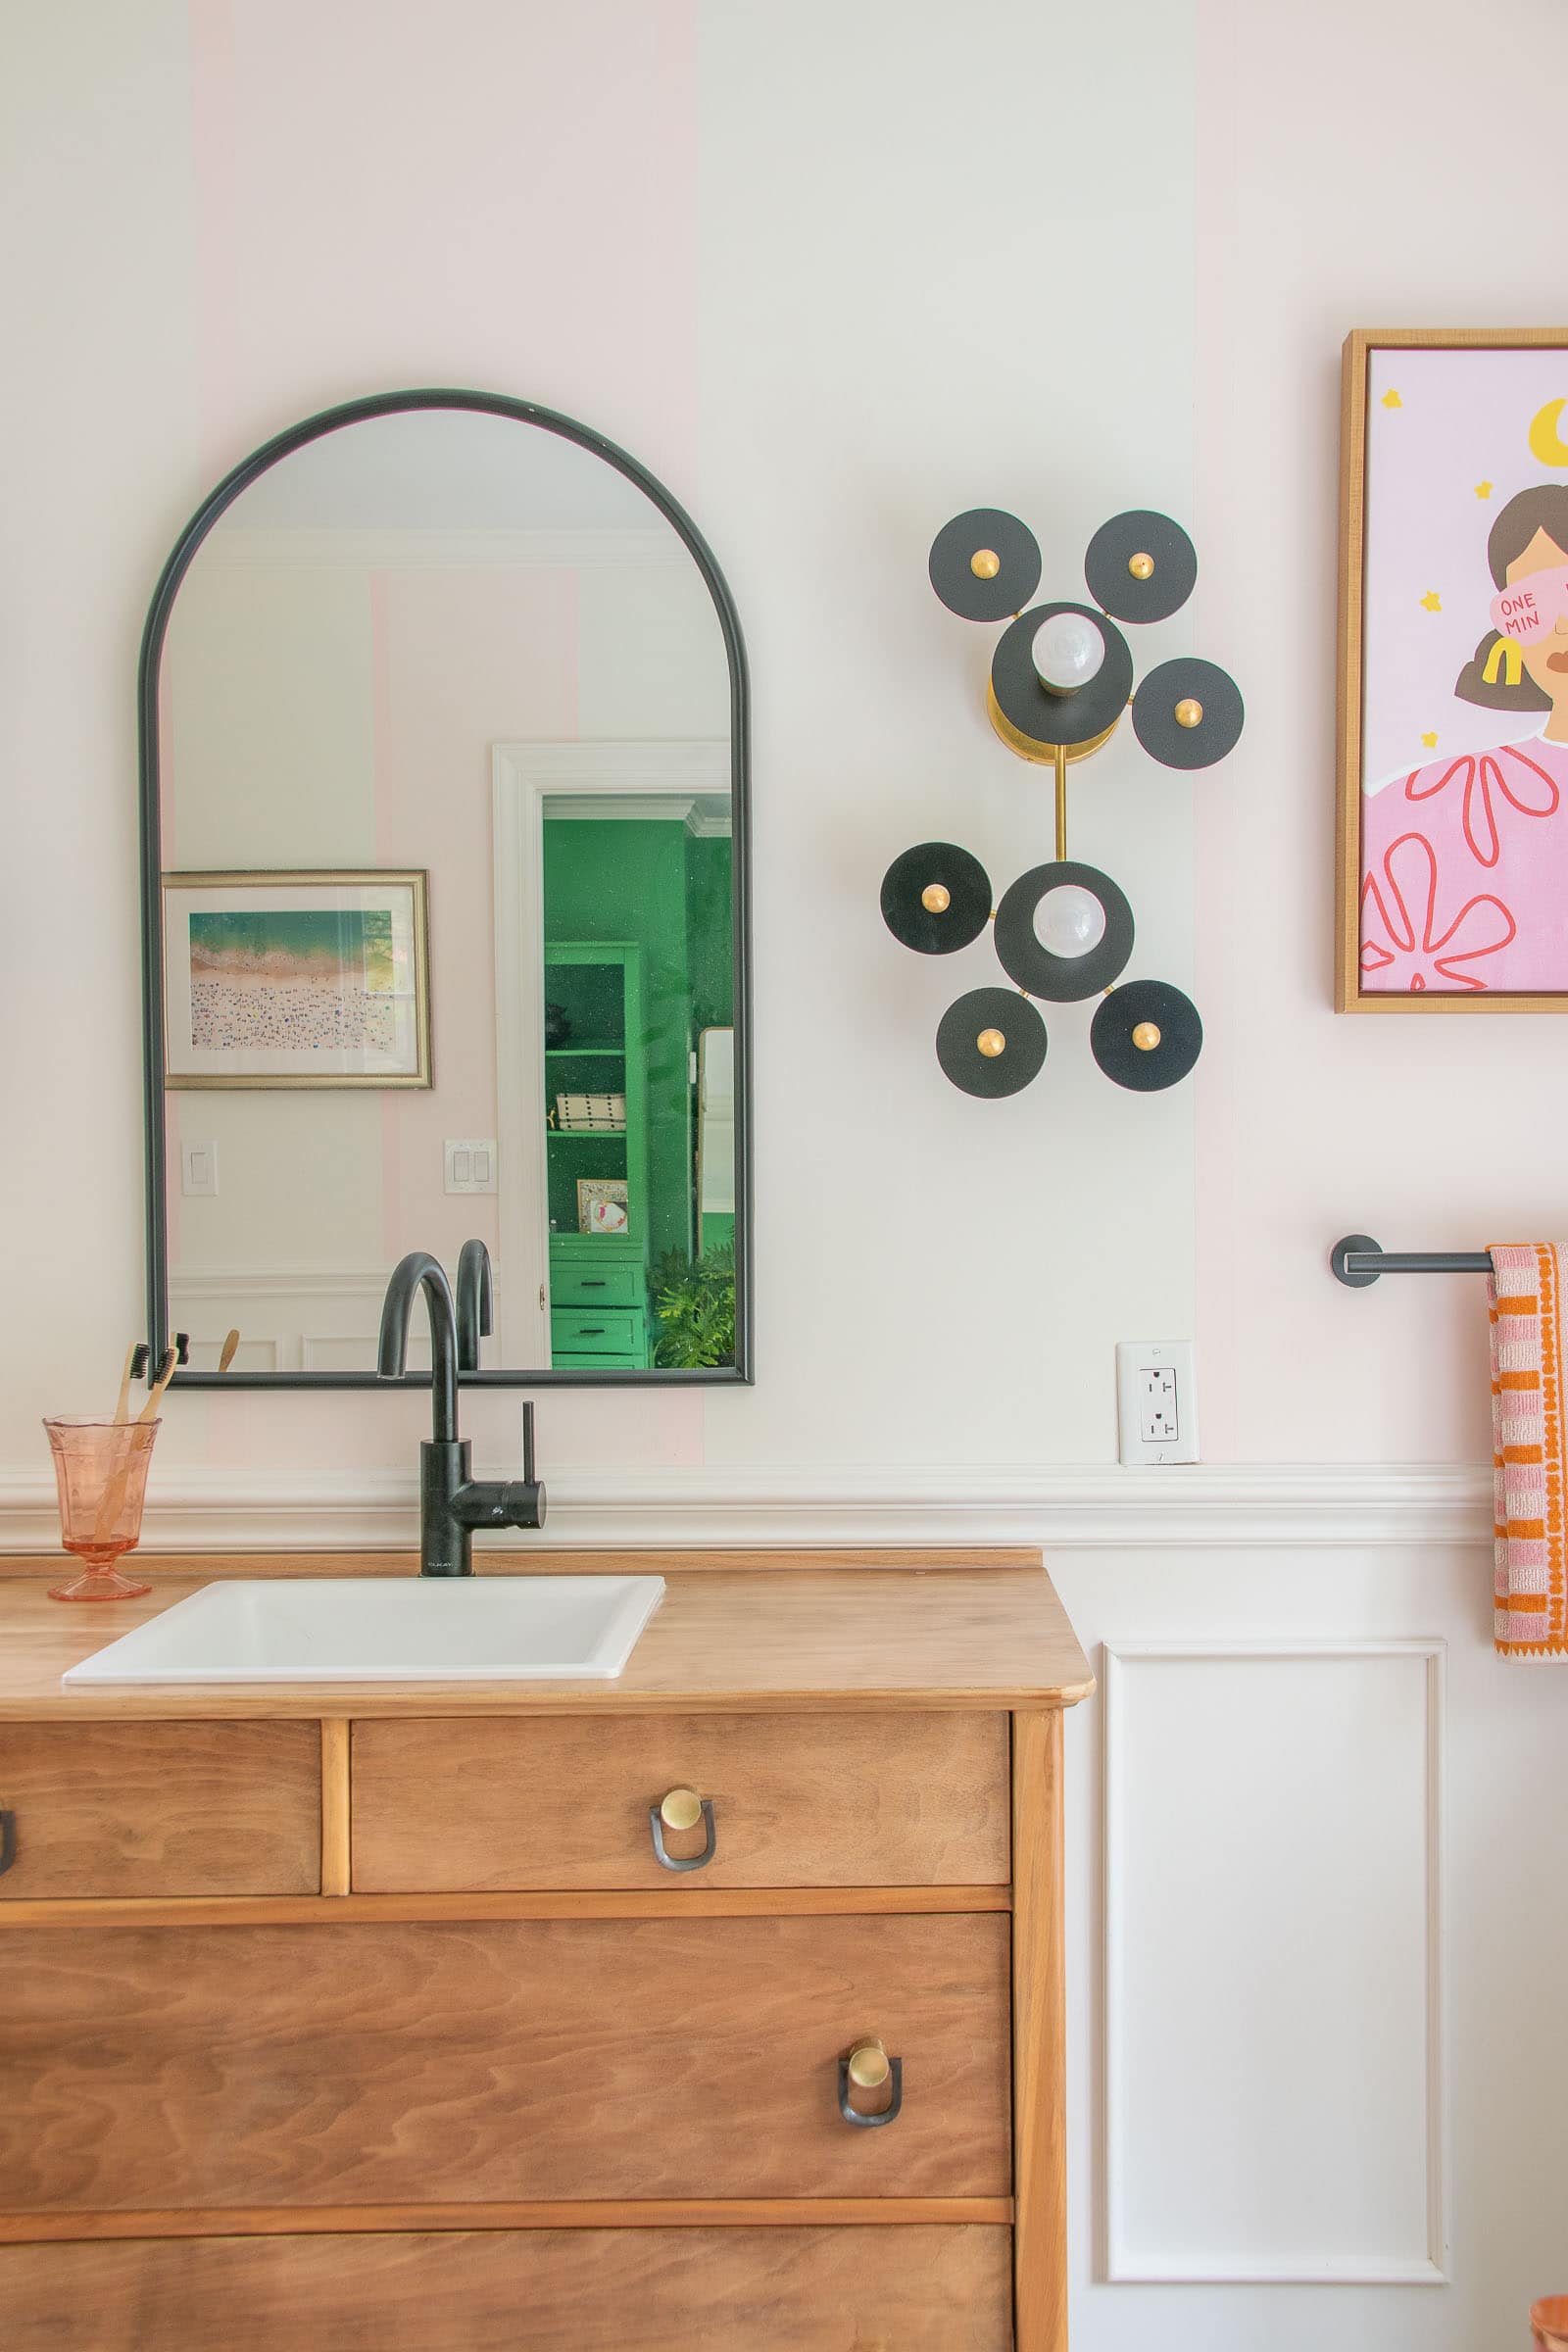
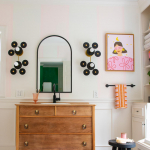
I love the sconces on either side of the vanity, where are they from!?
Thanks!
These are from Sazerac Stitches.
Love this so much! Thank you for the inspiration and great information.
You’re most welcome!
Could you share how this has held up to water and humidity? I’m considering doing this with an antique piece and that is my biggest concern. Looks beautiful!
So far so good! The top of this one is veneer so there are a few small places that I didn’t prep perfectly so they’ve needed to be sanded and re-top coated, but that’s my fault!
It’s beautiful! Where did you get the handles/hardware?
They should be linked right in the blog post… Anthropologie.
How long did it take for the sealer to harden before it could be used? Wondering about cure time.
Love your piece!
If I recall… 24 hours? I followed the directions on the can!