
Metal Backyard Shed Makeover
Psssst… this post *might* contain affiliate links: see my disclosure here.
Revamp Your Backyard Shed on a Budget
I used my pressure washer and two cans of paint to breathe new life into our backyard shed.
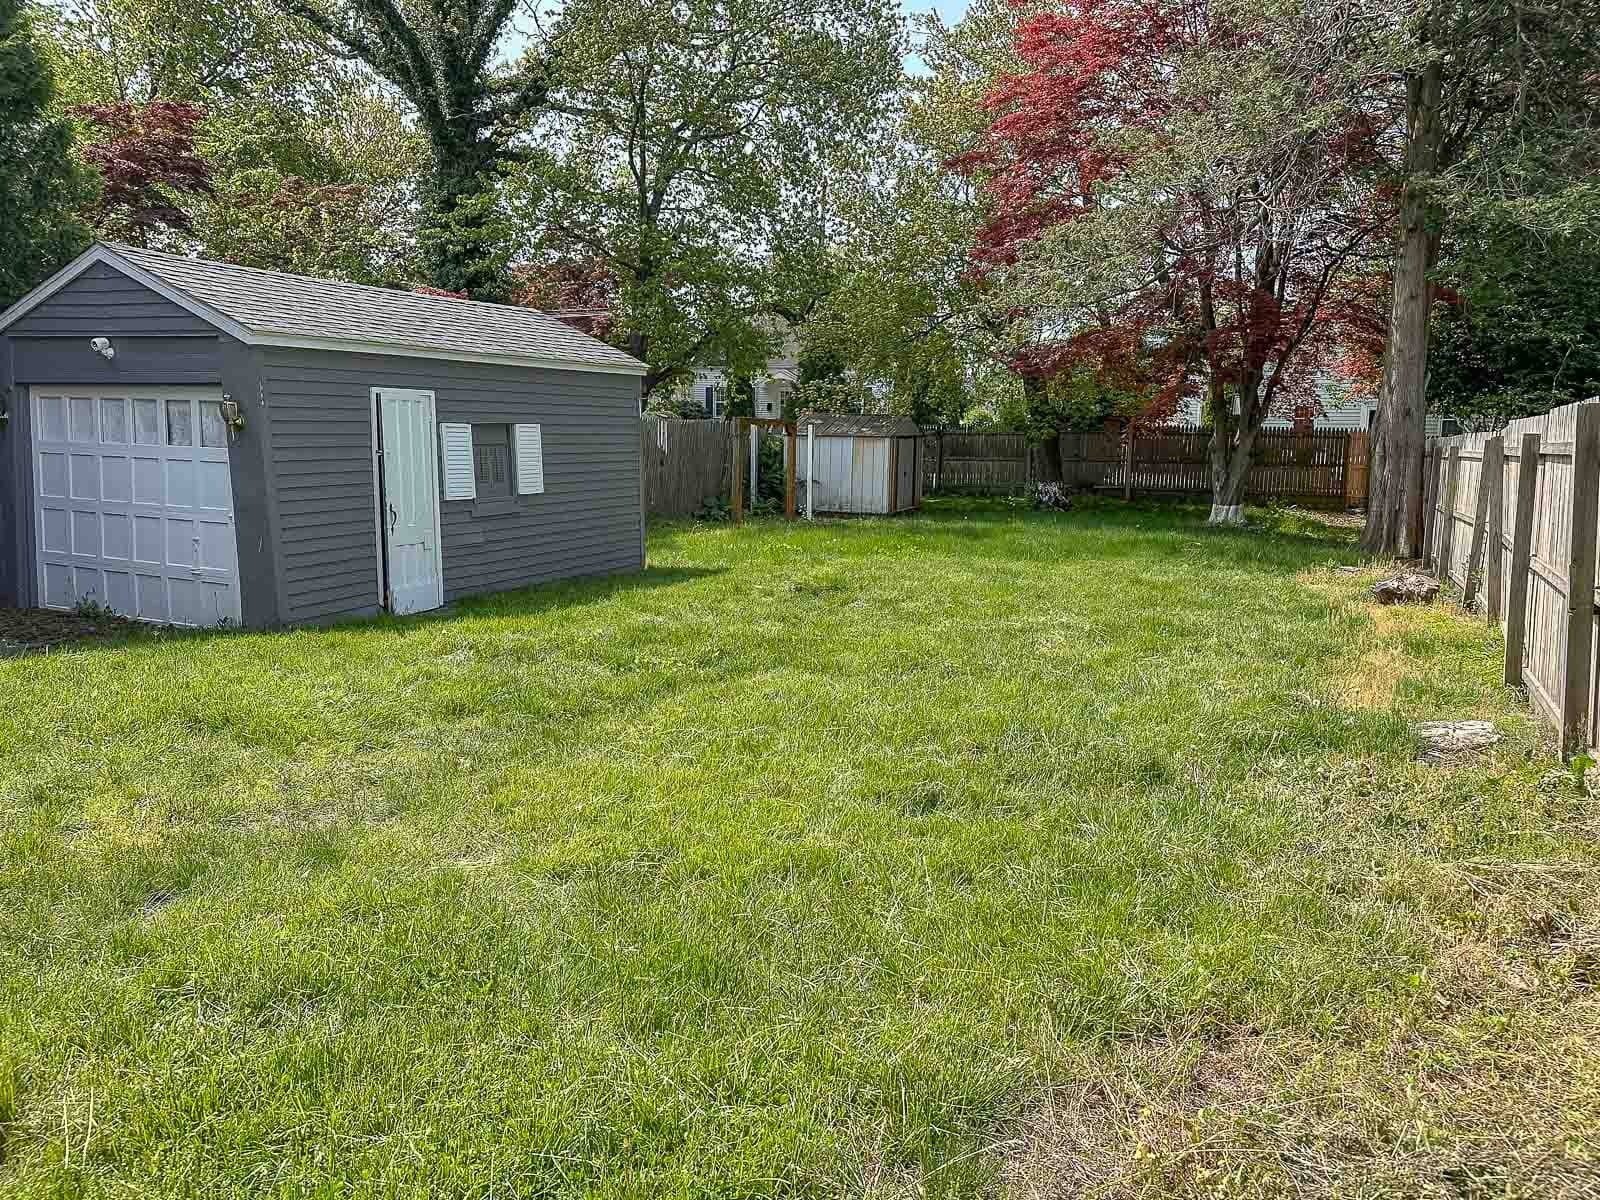
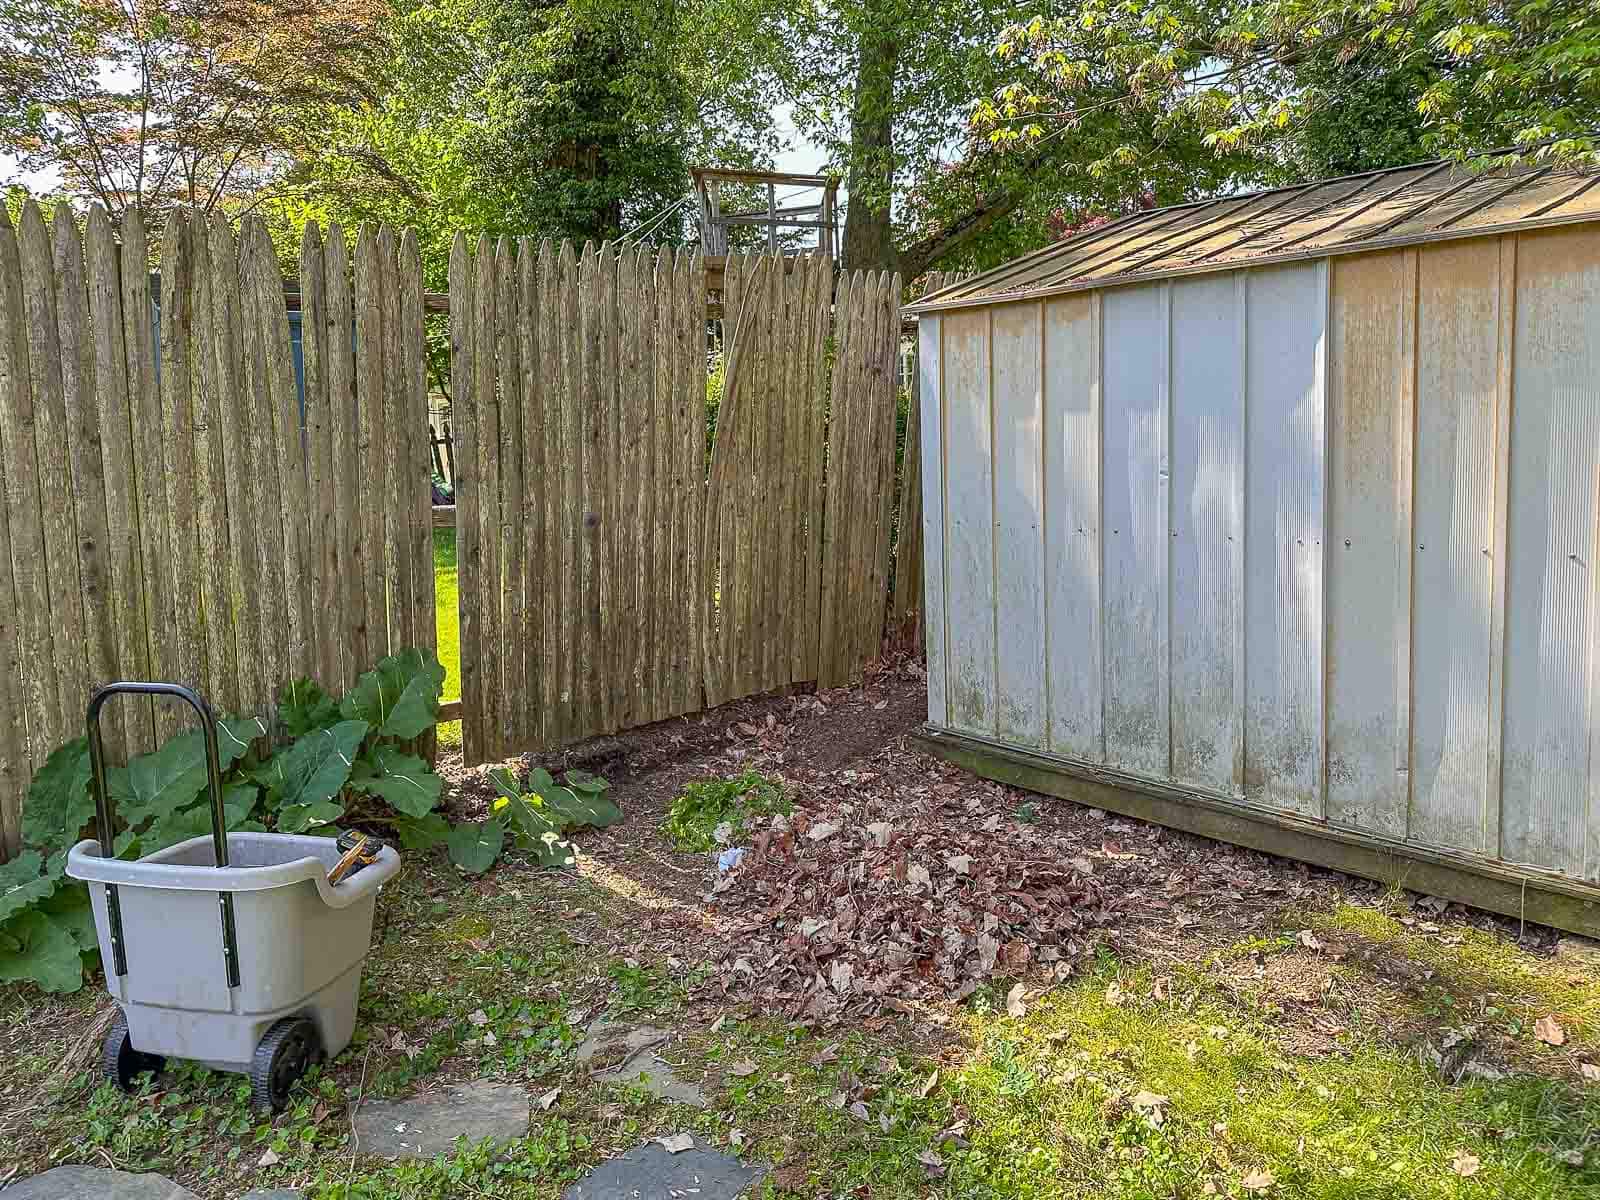
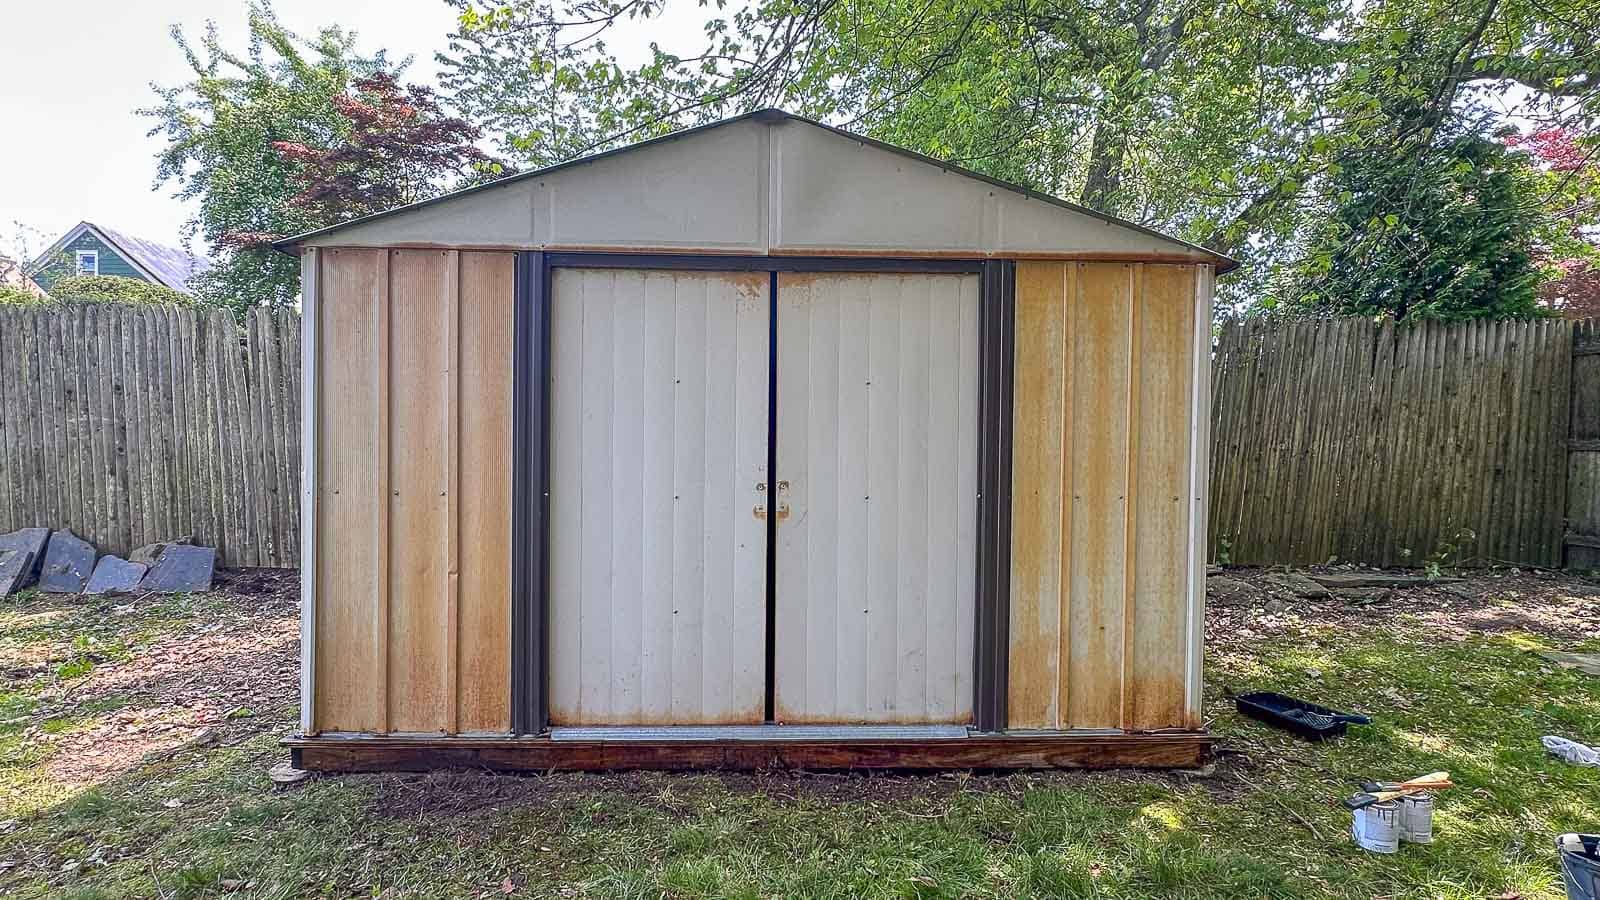
In the back corner of the flip house yard was a shed. Covered by weeds and dirt and rust, I had written off this shed and inwardly groaning about finding a scrap metal company that might come and haul it away. One afternoon I was working around the shed removing an old swing and a weird piece of lattice that I guess was meant to be a screen and I gave the shed a closer look. What I learned was that the metal had a little rust and staining but it was not *rusted*. And the platform/ floor was in great shape so… why get rid of this if I could find way to bring her back to life?!
Shop my favorites!
With a little elbow grease, power washing, and a fresh coat of black metal paint, you can give your shed a remarkable makeover without breaking the bank. In this blog post, I’ll guide you through the steps to revamp your backyard shed, making it a standout focal point in your garden.
Step 1. Clear out Debris/ Weeds
My shed was somewhat overgrown with vegetation getting in the way of things and adding to the dirt and grim. There was a layer of leaves built up behind it and an array of discarded scrap wood etc. I tossed what I could into the dumpster and then used my leaf blower to clear out the old sticks and leaves.
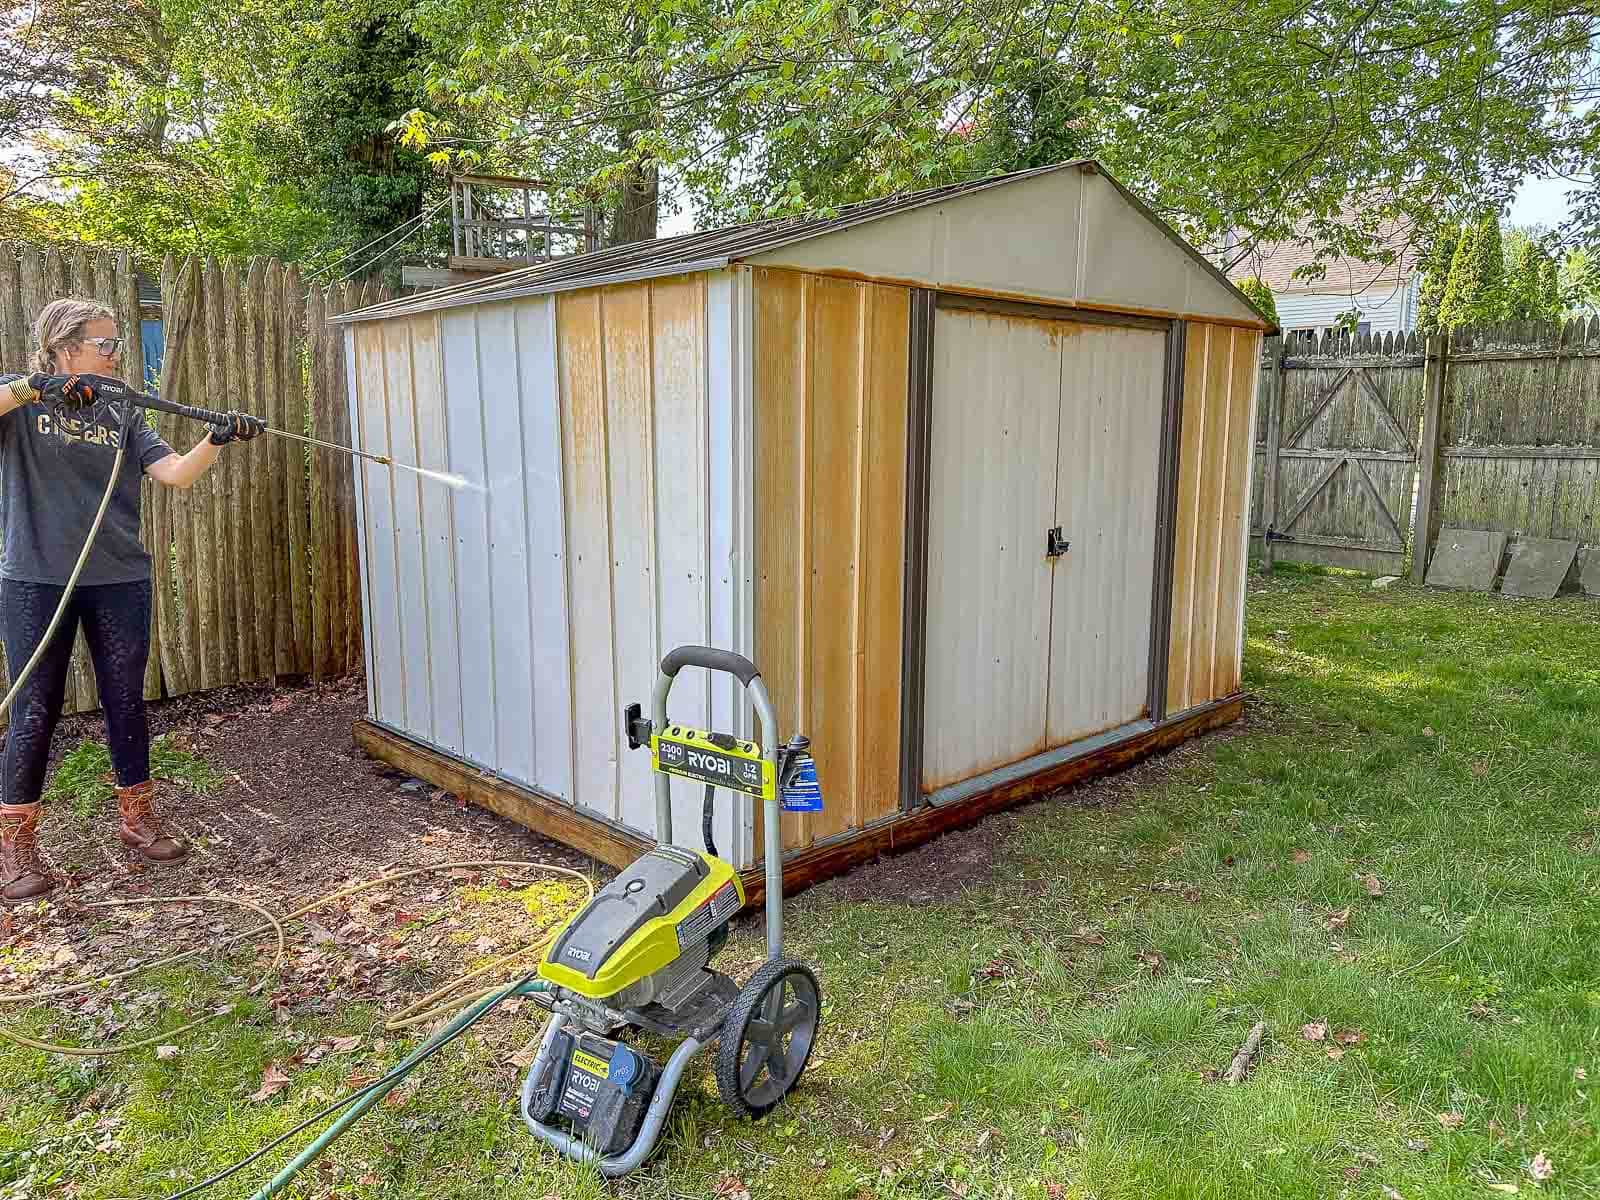
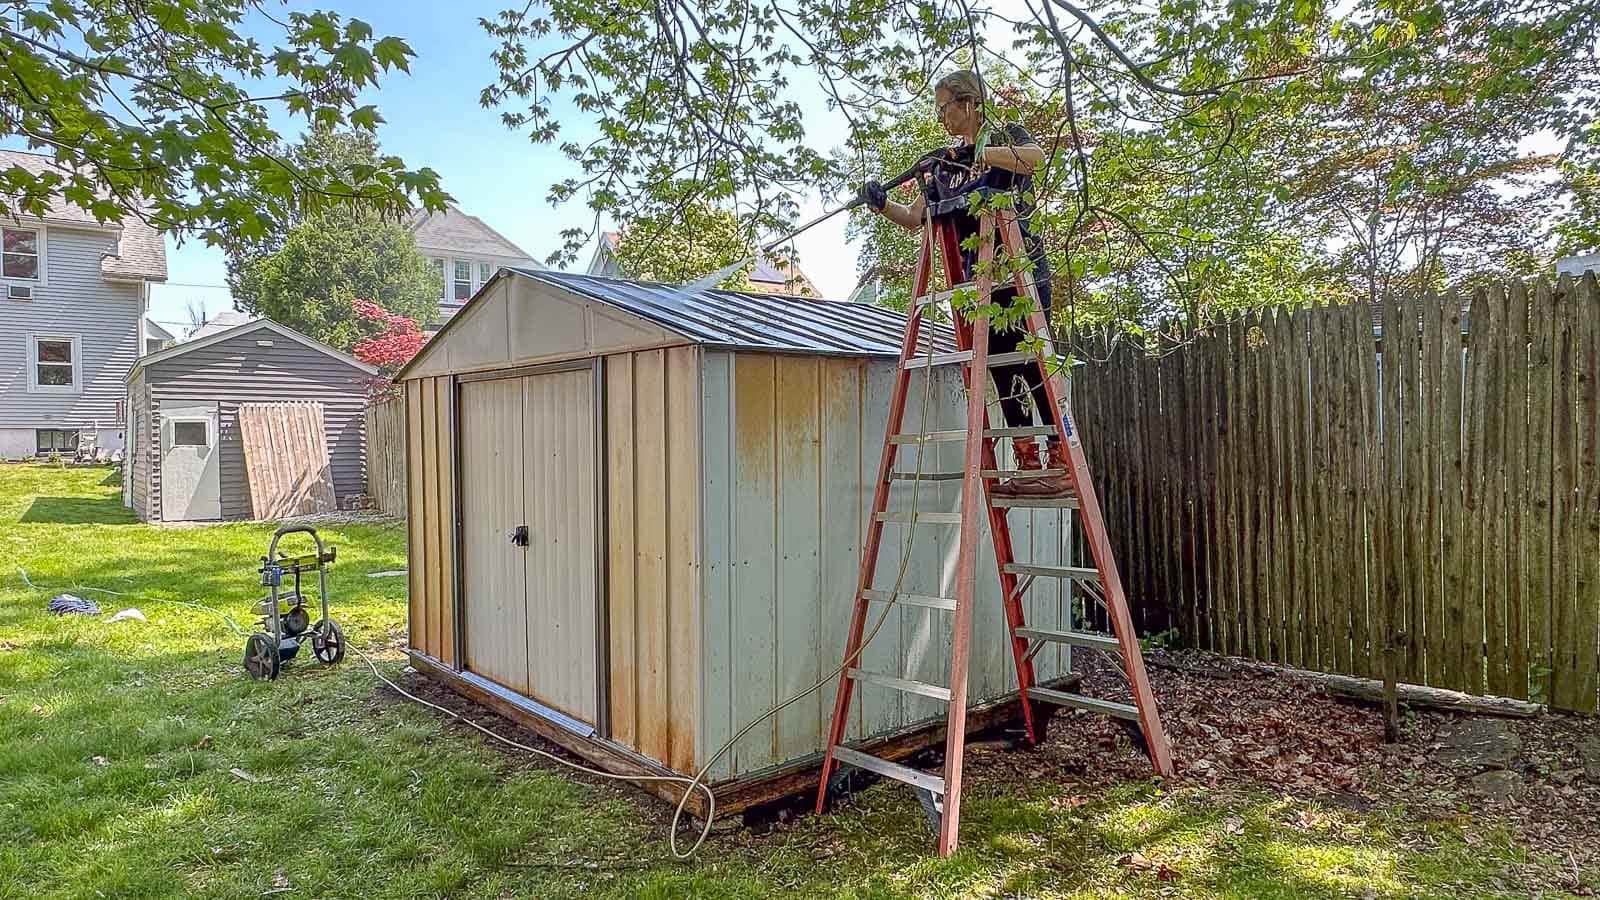
Step 2: Power Washing
Before painting, it’s essential to prepare the surface properly. Power washing is an excellent way to remove dirt, debris, and loose paint from your shed and it’s also about the most satisfying task you can name. If your shed has electricity, start by disconnecting the power supply and covering any electrical outlets or openings to protect them from water damage. Use a pressure washer with a low-pressure nozzle to avoid damaging the metal surface. Begin at the top and work your way down, ensuring all sides are thoroughly cleaned. This step not only removes grime but also creates a smooth canvas for the paint. I’m often asked what I add to my pressure washer and the answer is nada… just connected to the hose.
After power washing, give your shed a few hours in the sun to totally dry. Inspect your shed for any flakes or chipping paint and use a wire brush or sandpaper to remove loose rust and smooth out any imperfections. Apply a rust converter or primer designed for metal surfaces to prevent further corrosion where needed.
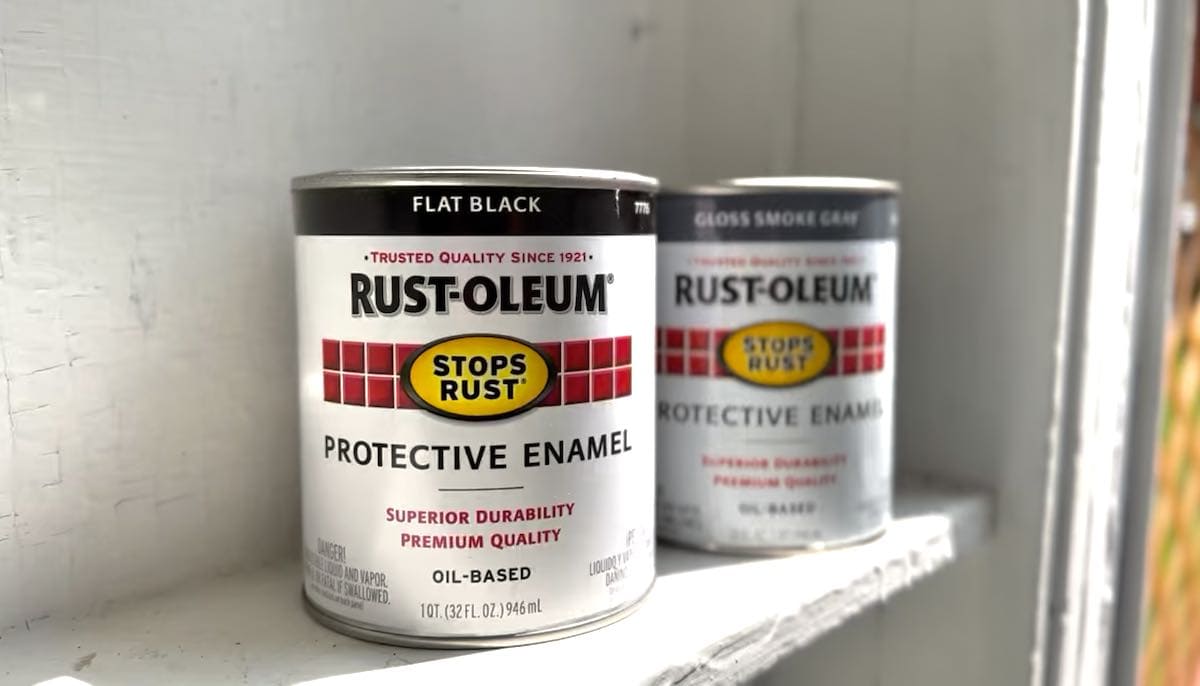
Step 3: Choose the Perfect Black Metal Paint
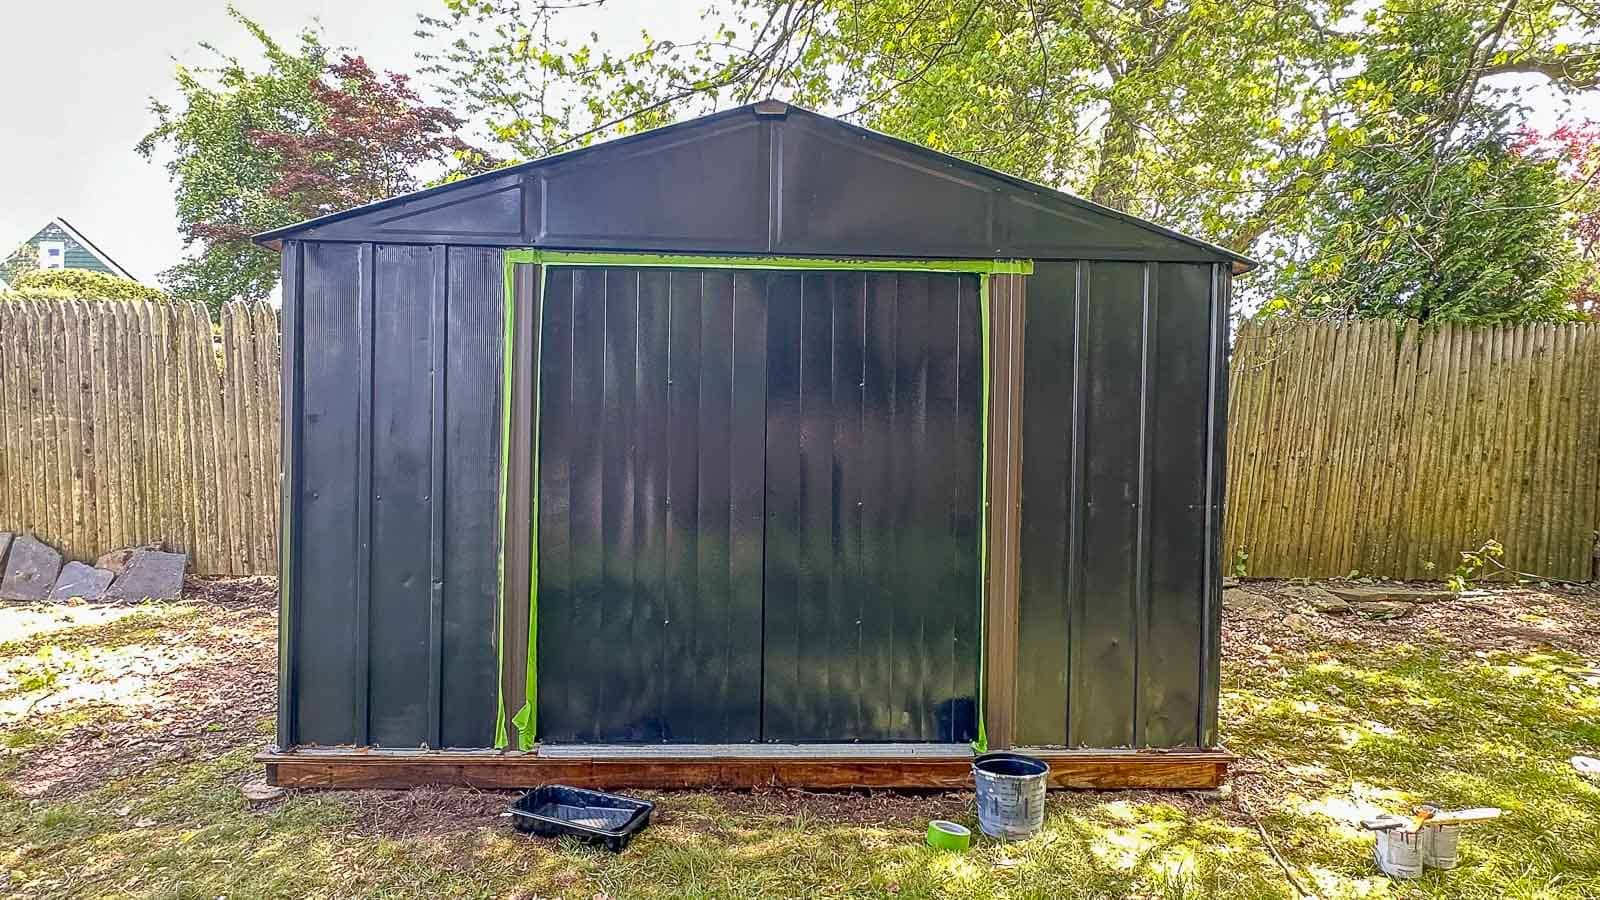
After doing a bit of research, I landed on RustOleum’s Protective Enamel paint for metal surfaces. It’s an oil paint which means you may want to wear a mask when you work, and should have a plan for cleaning your brush. (I just threw mine out after use, but having mineral spirits on hand isn’t a bad idea for any spills or splatters.) I wanted a charcoal gray shade for the shed so that I could cover the stains in one coat. I ended up combining 1 can of RustOleum’s Flat Black paint and 1 can of Gloss Smoke Gray. It’s not advisable to mix finishes like this, but I was eager to start/ finish this project and it ended up working out!
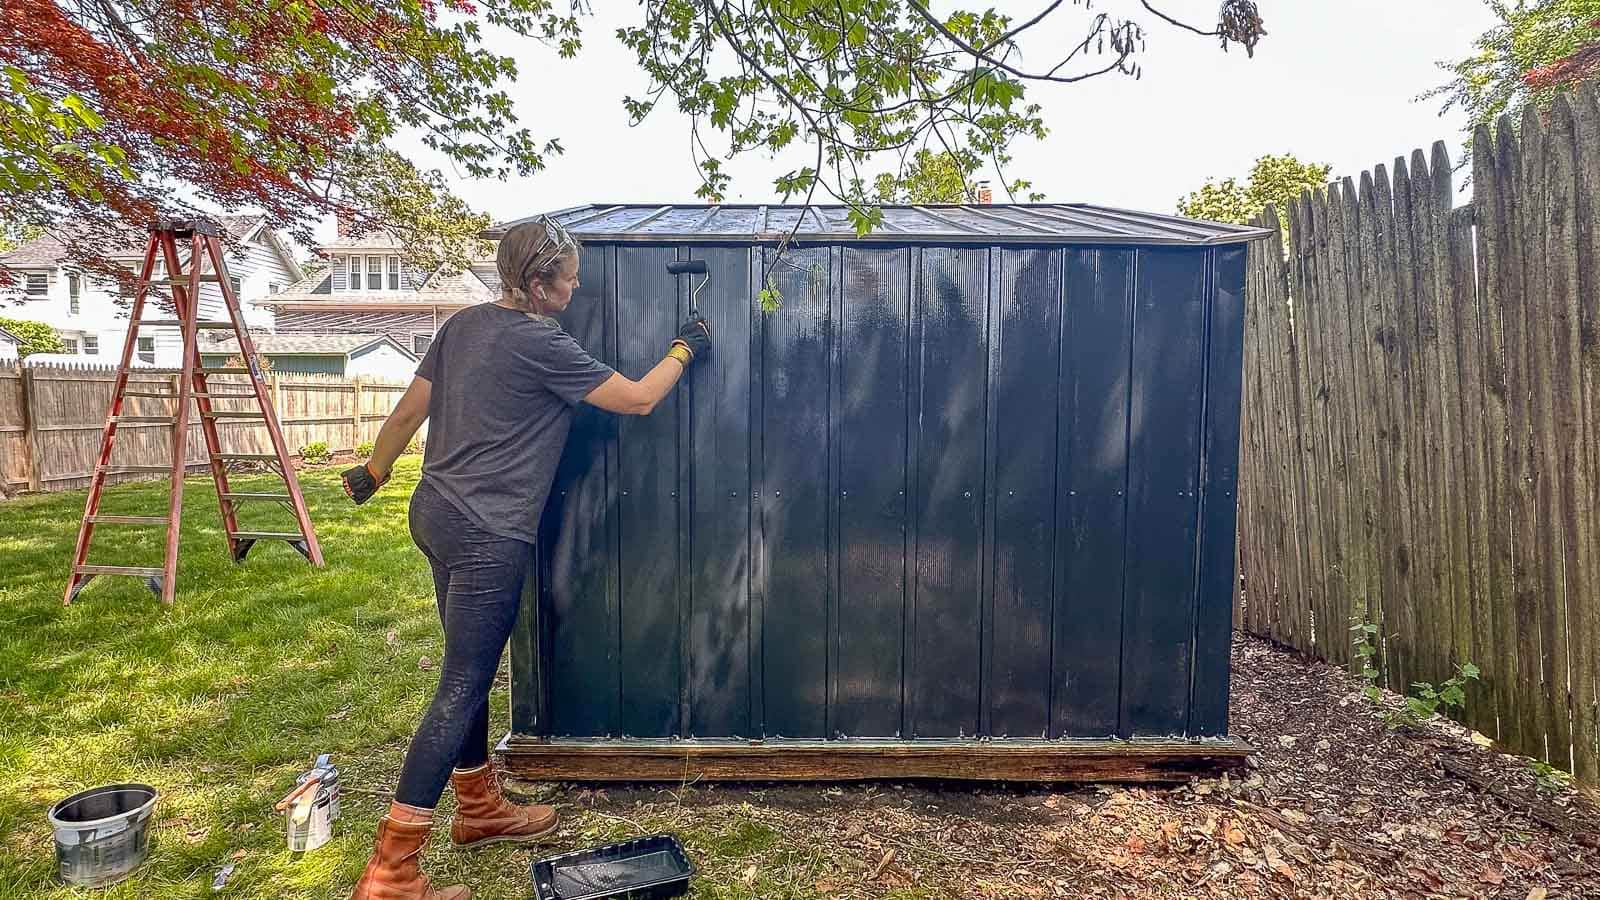
Step 4: Painting Your Shed
Start by carefully stirring the paint to achieve an even consistency. Use a high-quality brush or a paint sprayer for larger surfaces, depending on your preference. Given the oil paint, I opted for a small foam roller and a brush for the edges so I wouldn’t have to clean out the paint sprayer and worry about overspray. Begin by applying thin, even coats, working from top to bottom. Allow each coat to dry completely before applying the next. This process ensures an even application and prevents drips or runs. Don’t forget to paint all sides, including the doors and any windows.
Step 5: Finishing Touches
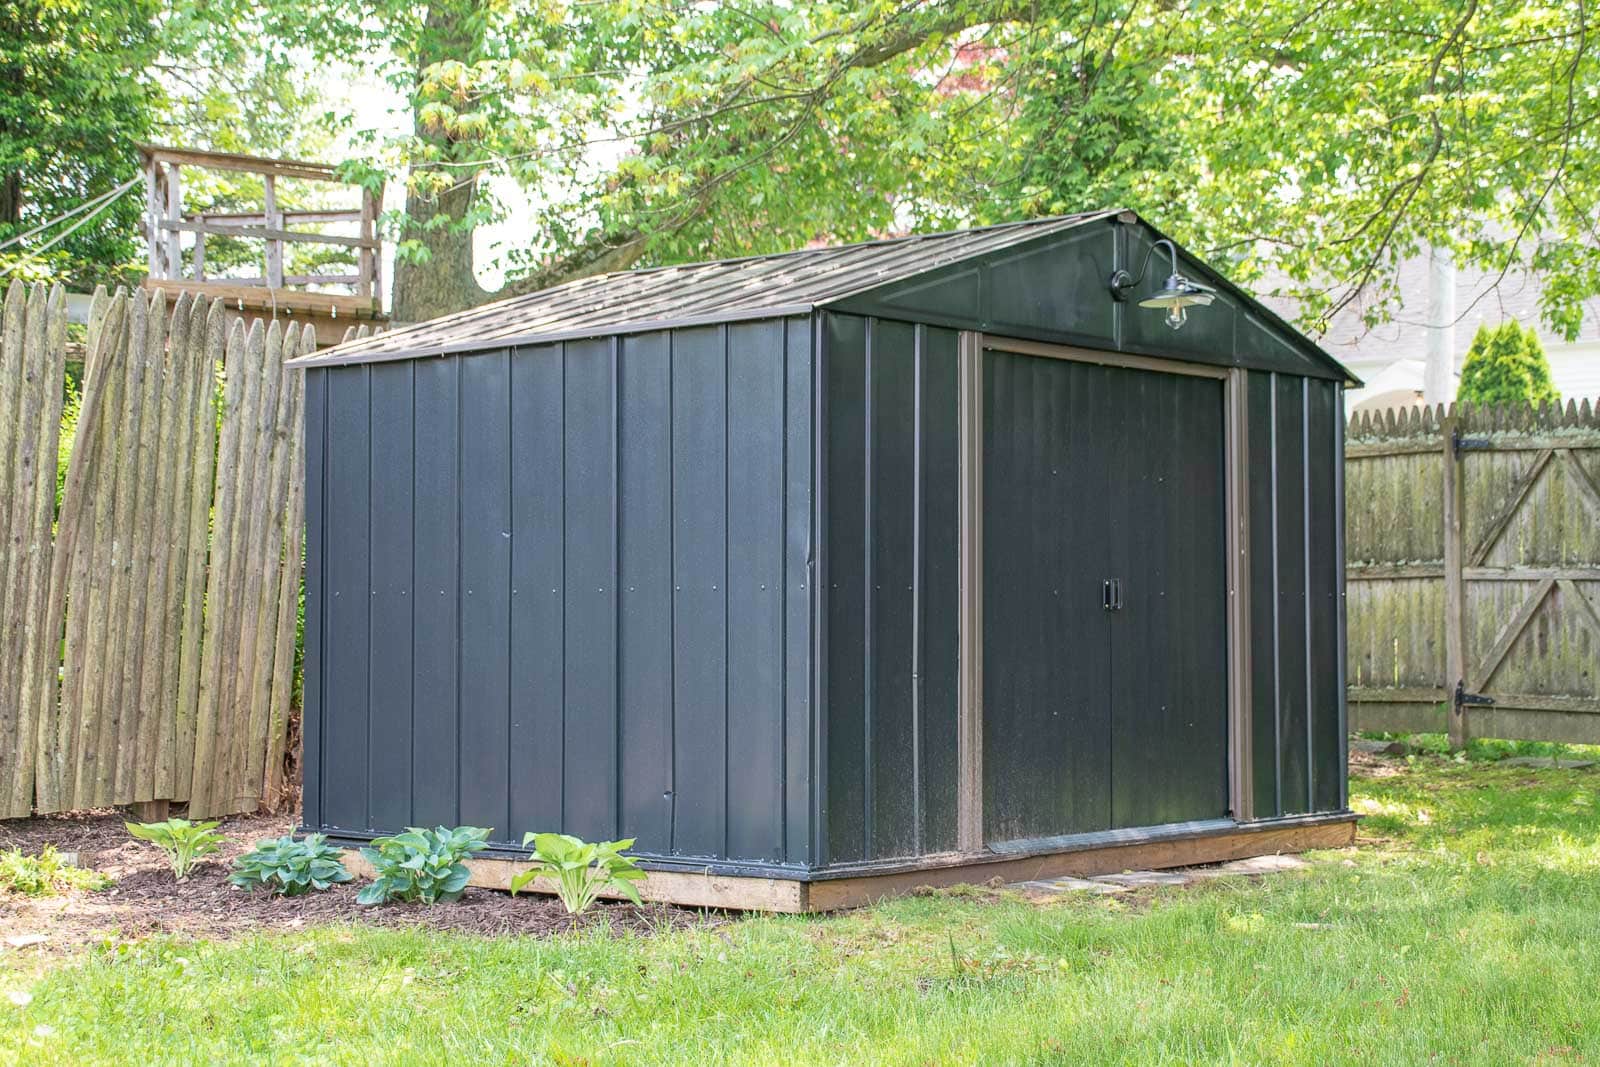
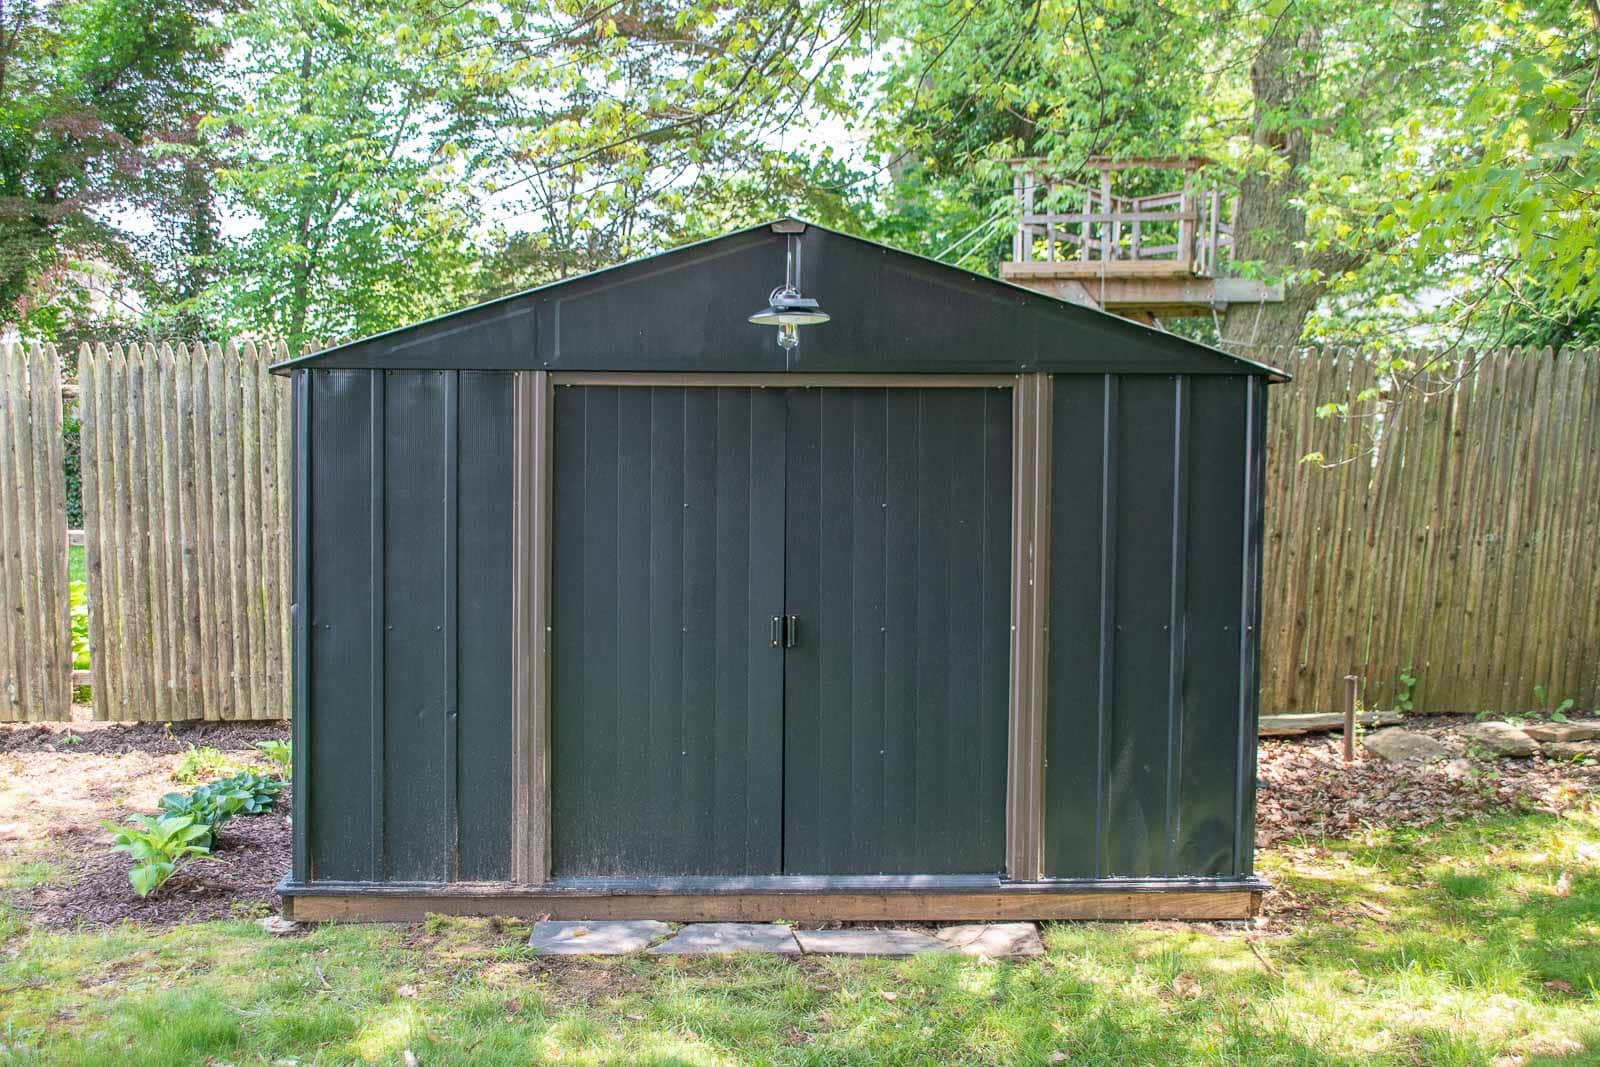
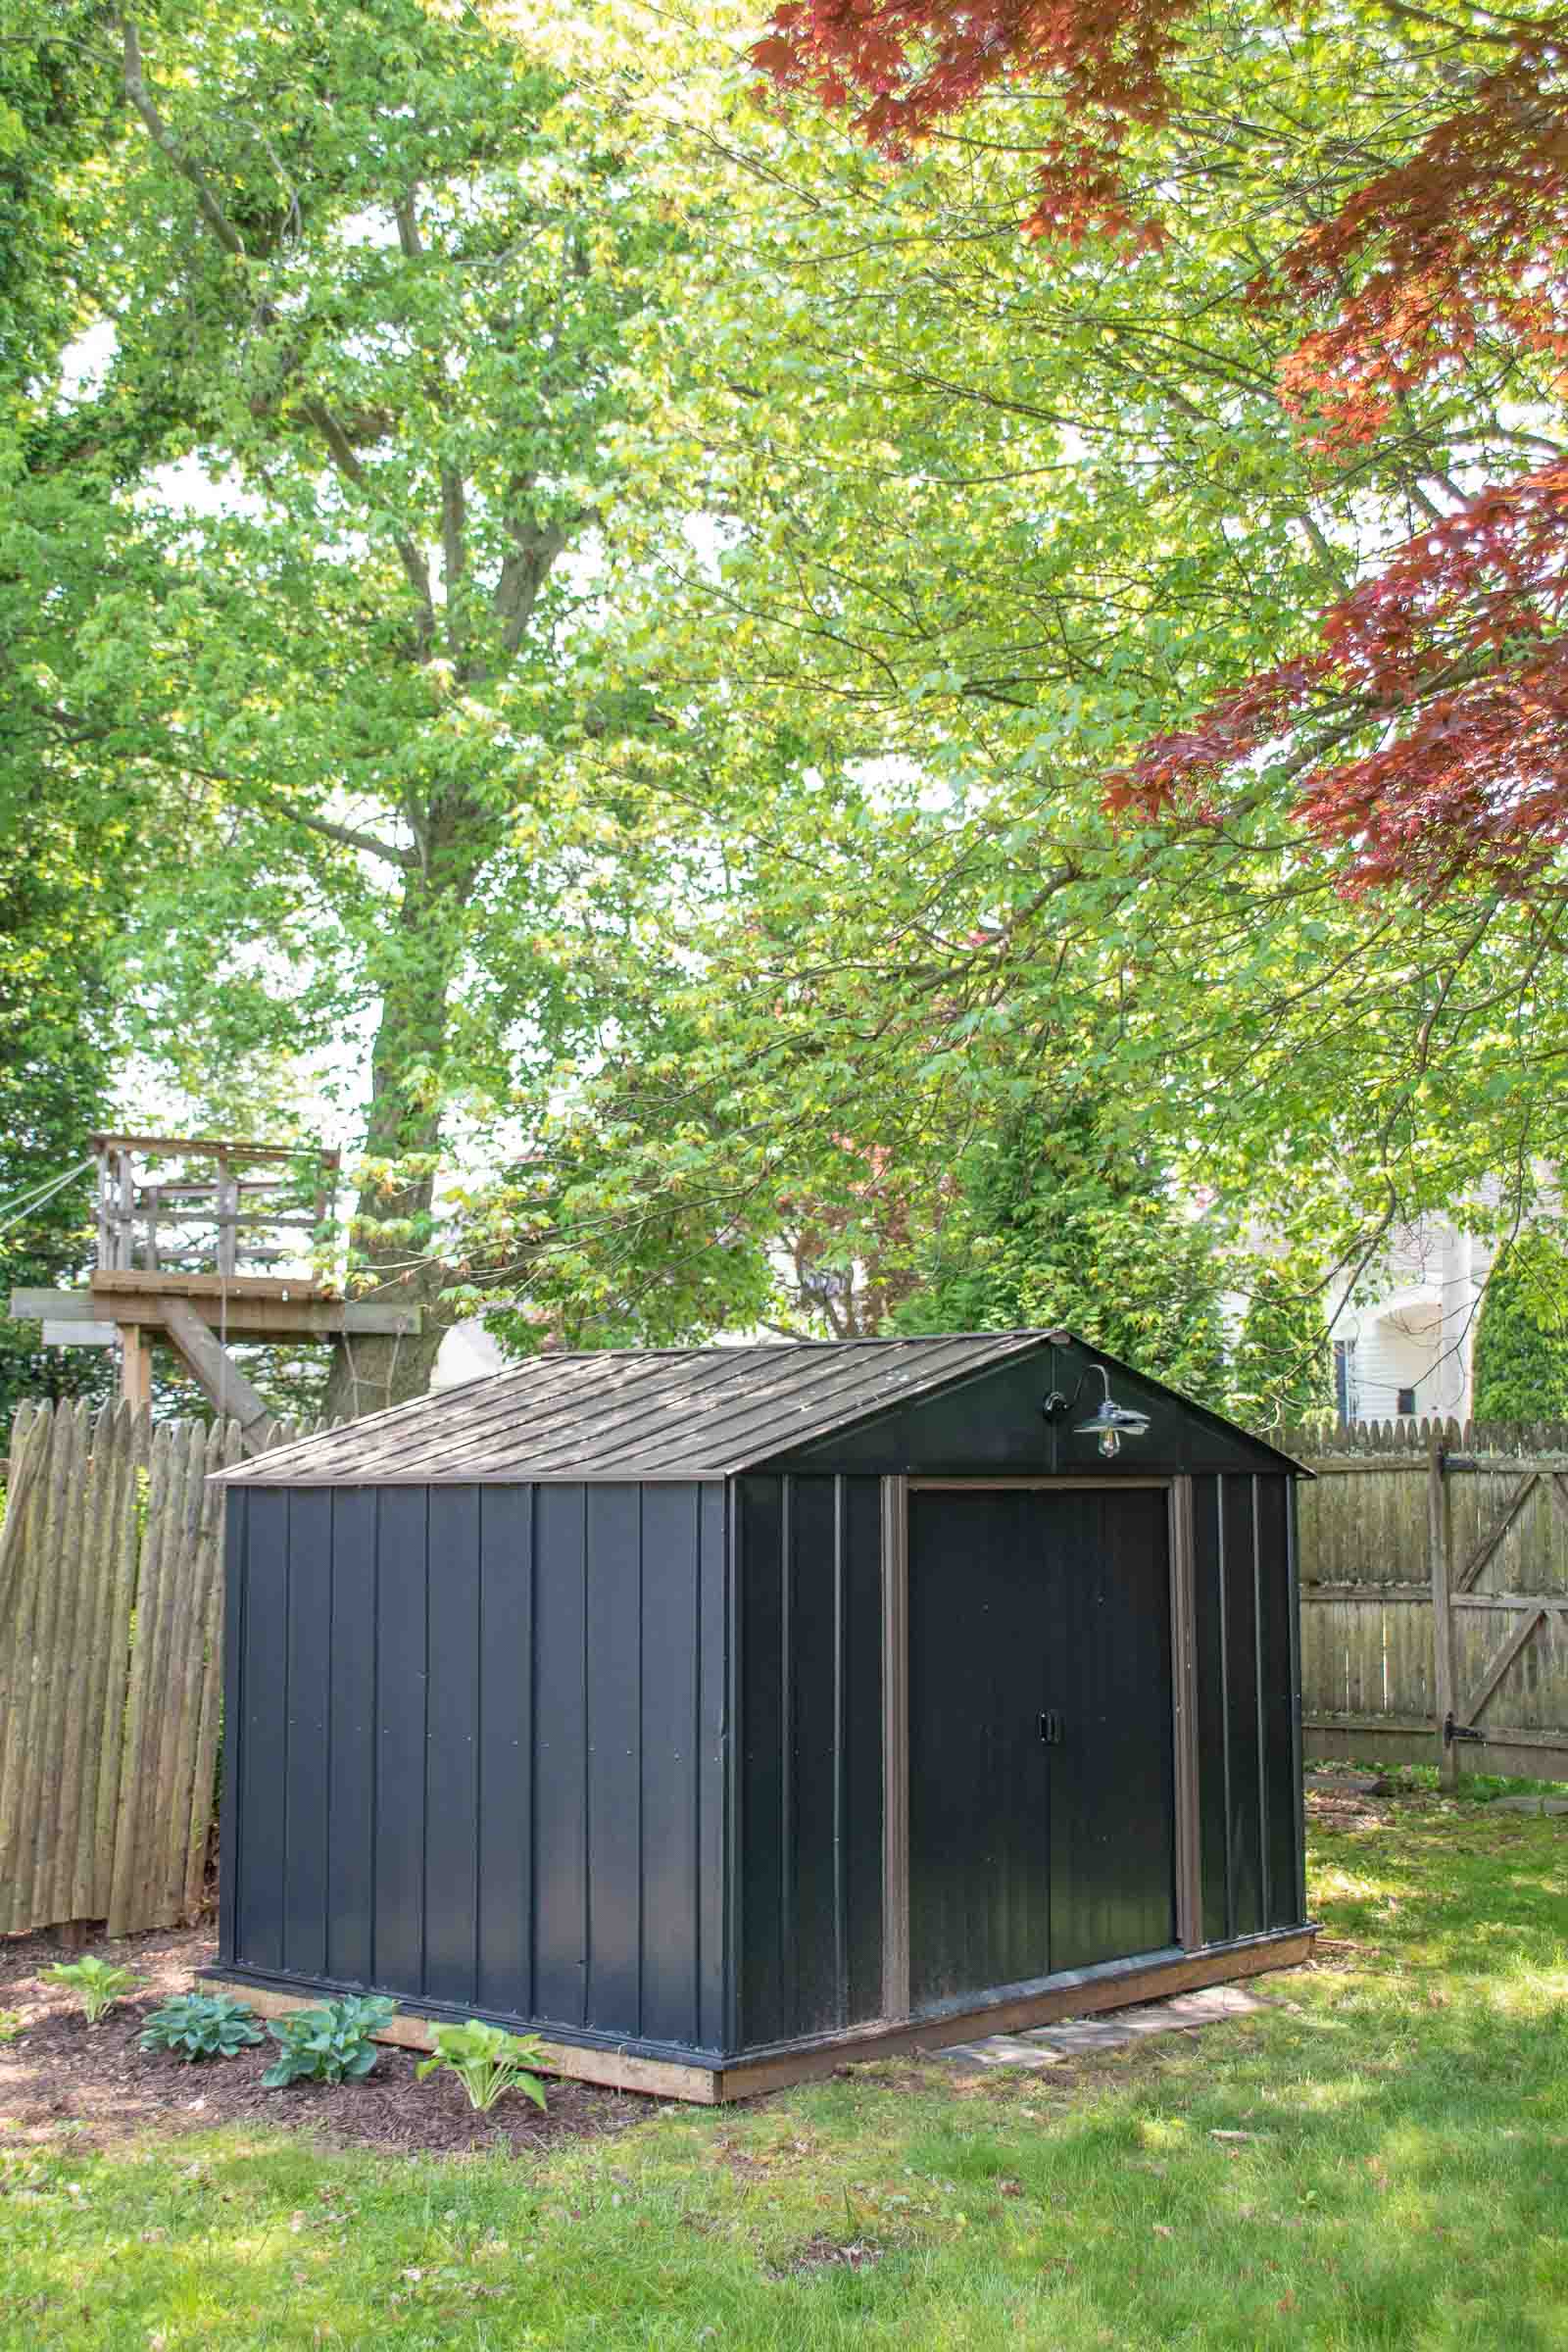
Once the final coat is dry, step back and admire your newly transformed shed. I replaced the sliding door hardware, added a cute solar farmhouse light above the door and planted a few shade loving hostas along the side. These will fill in over time and be a wonderful decorative feature.
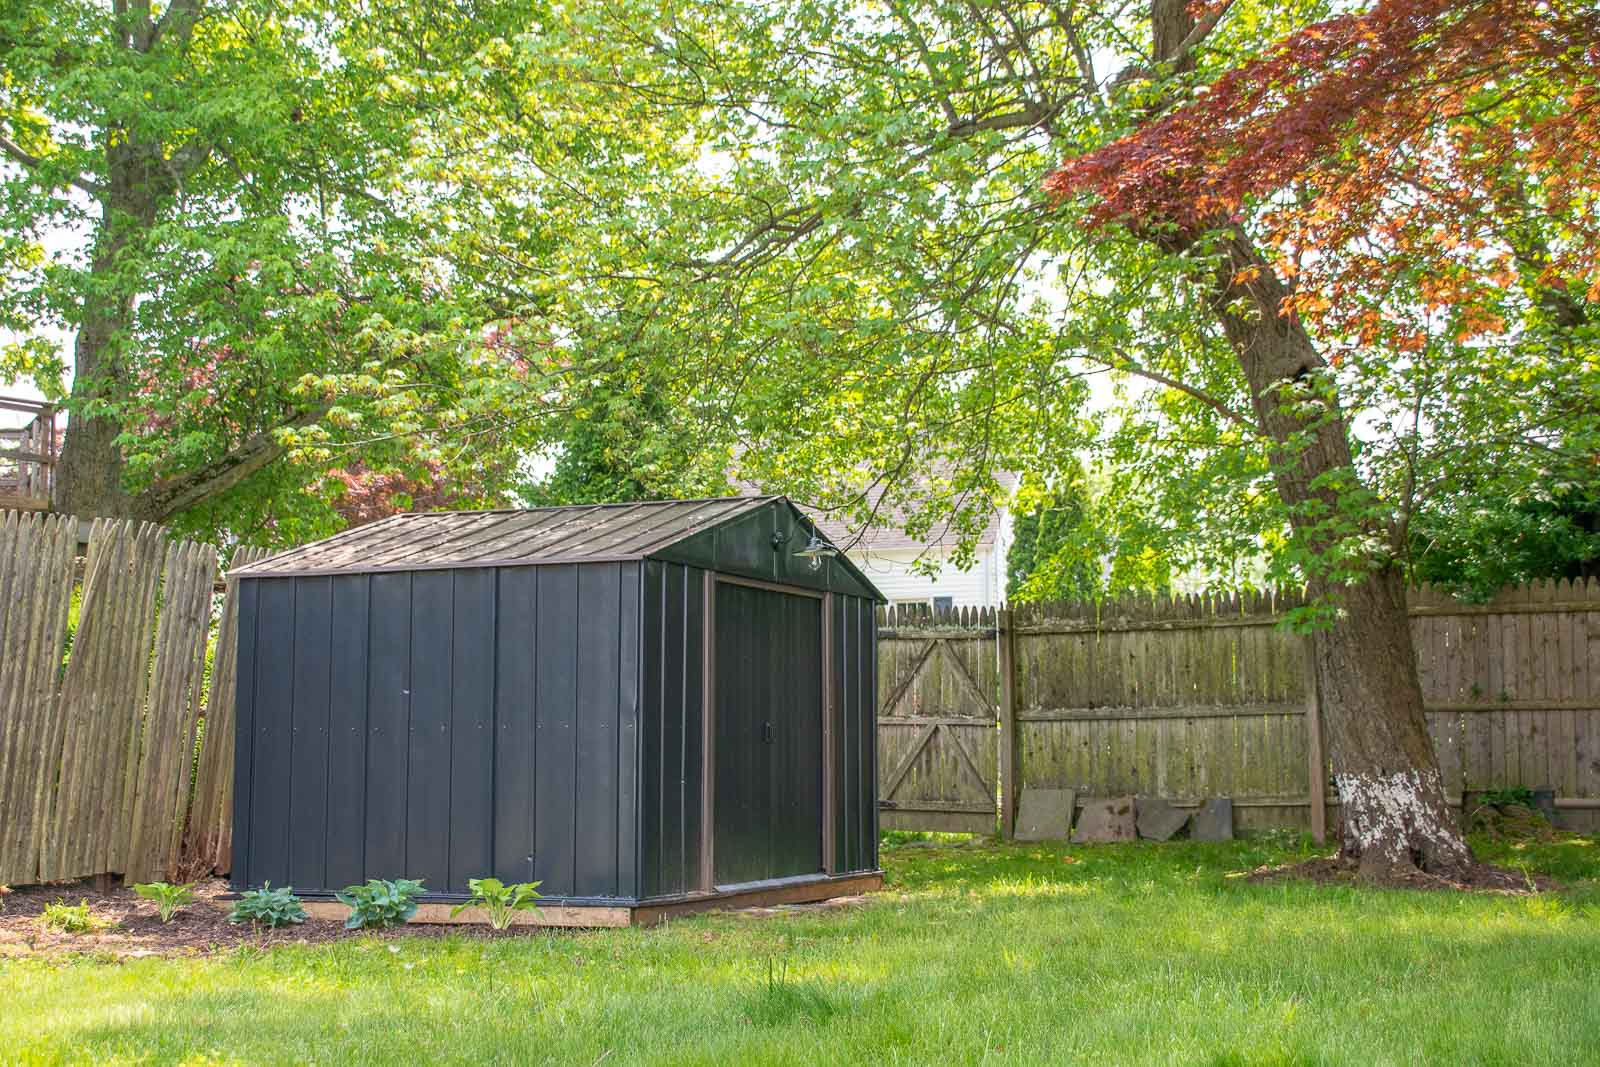
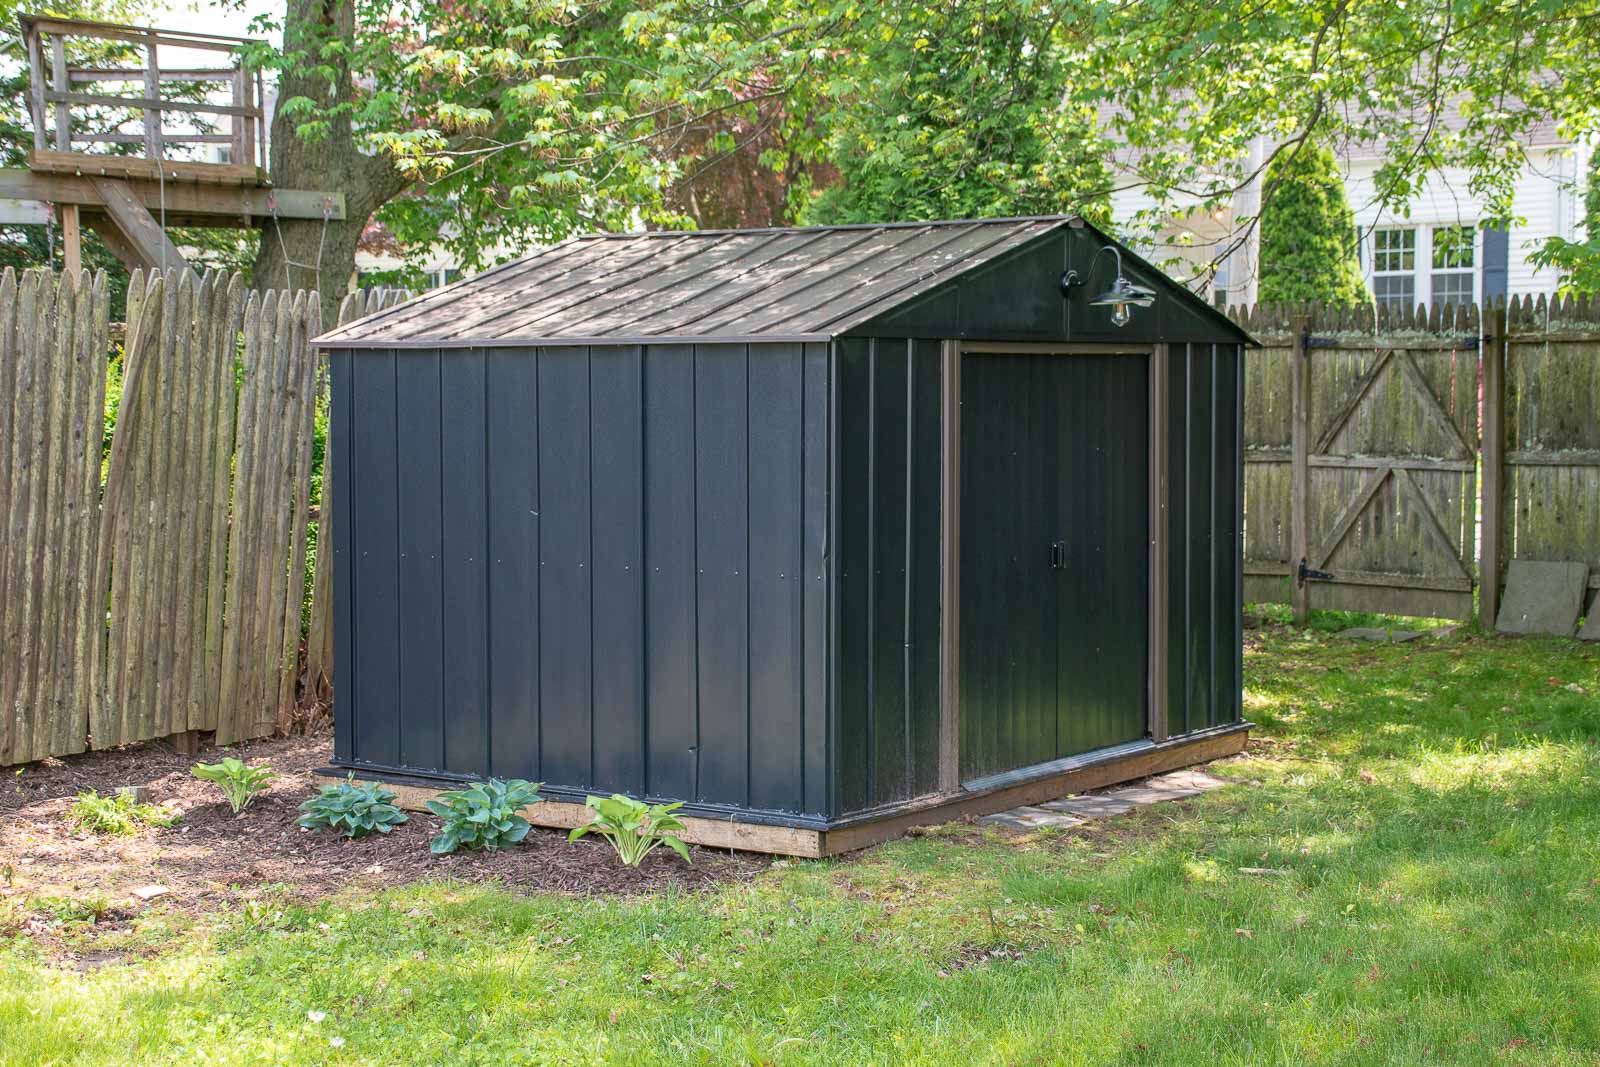
This budget-friendly backyard shed makeover set me back about $75 and it’s like I have a brand new shed back there. Power washing eliminated years of grime and a fresh coat of black metal paint provide a stylish and enduring finish. With a little time and effort, this shed is good as new and a great storage feature for the next home owners!
Here are my favorite tools for painting:

It looks so good! Great Job
I love the color
Thanks so much! It’s amazing how it looks good as new!
Hi Charlotte!
I want to do what you did with a shed that is very similar to the one you did, but about twice the size. Did you do anything with the roof? I’m afraid power washing would knock off more than accumulated grime and dirt
The roof on this one was a a PVC/ plastic situation so I wasn’t worried about pressure washing it…. I would have loved to paint it, but in my experience plastic doesn’t hold up to paint very well so I left it alone!
Have you experienced any paint chipping since you’ve completed this?
Thank you!
Hi! Not so far, but I’ve since sold the property. Sorry!