
Day 12: Twelve Days of Ornaments- Resin Pour Christmas Tree Ornament
Psssst… this post *might* contain affiliate links: see my disclosure here.
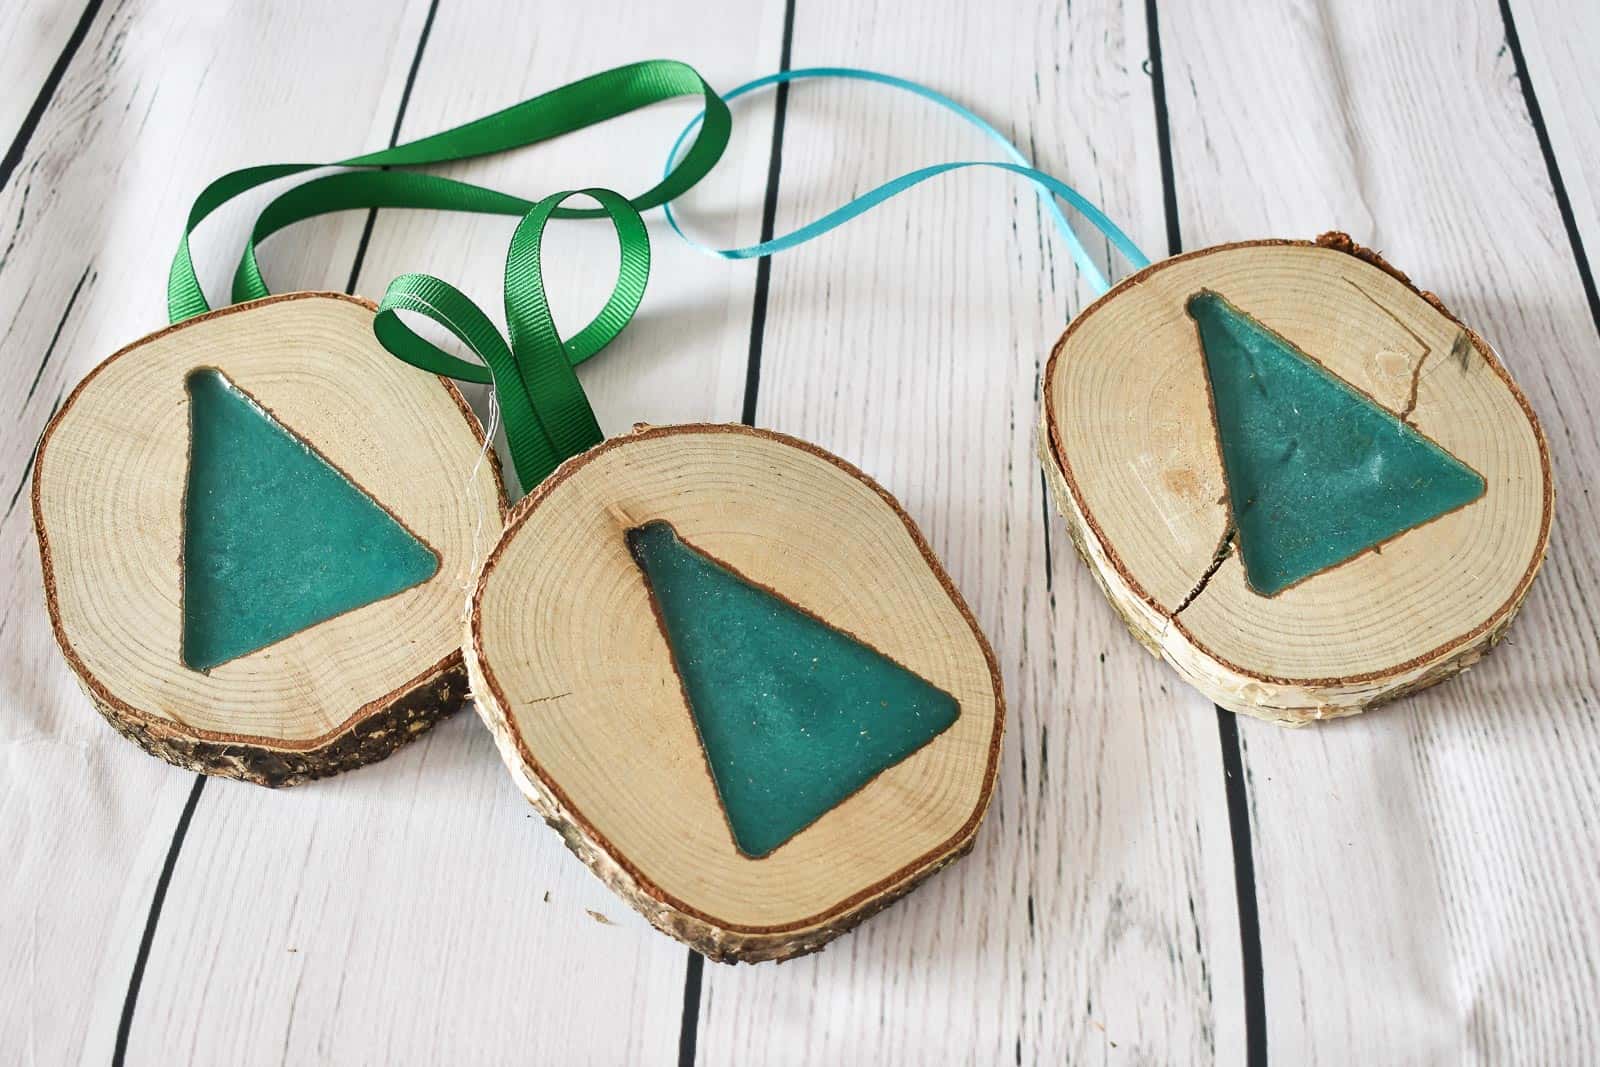
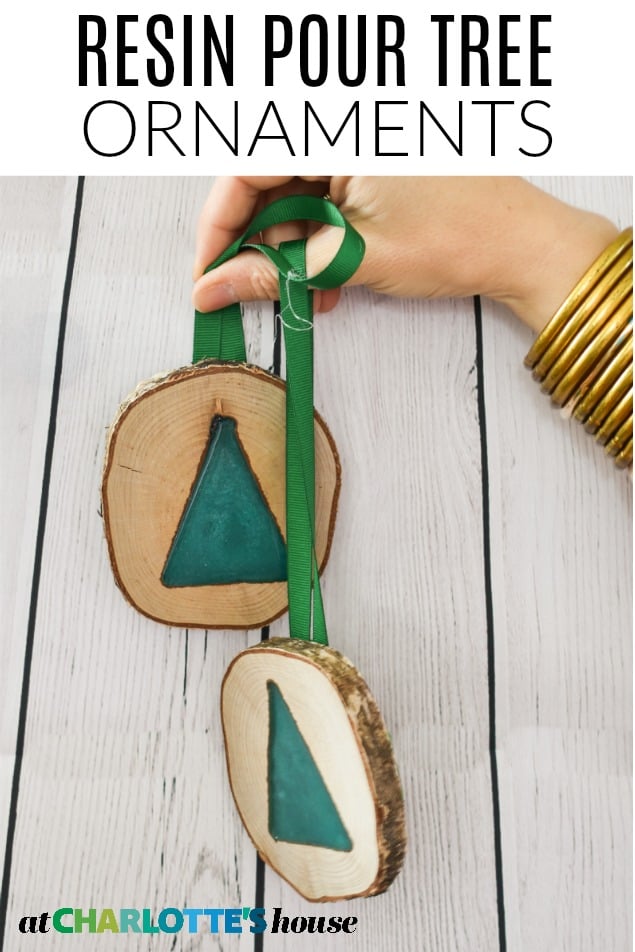
Routed Resin Christmas Tree in Wood Slices
Welcome to Day 12 of 12 Days of Ornaments on the blog and my YouTube channel! You can follow along HERE in case you’ve missed anything!
TWELVE DAYS, guys! I got this crazy idea this summer to share 12 days of ornaments with you and I did it! The list of ornaments changed about 5 times and there are some I thought up on a whim, and others I planned to do for months! I’m so thankful to all of you who followed along and left comments and shared my tutorials… I LOVE hearing from all of you and seeing these ideas passed along!

Shop my favorites!
Today’s ornament isn’t something that you can do at your kitchen table after school, but I wanted to try it and loved how they turned out: I routed a Christmas tree and then filled it with green resin and it’s SO fun!
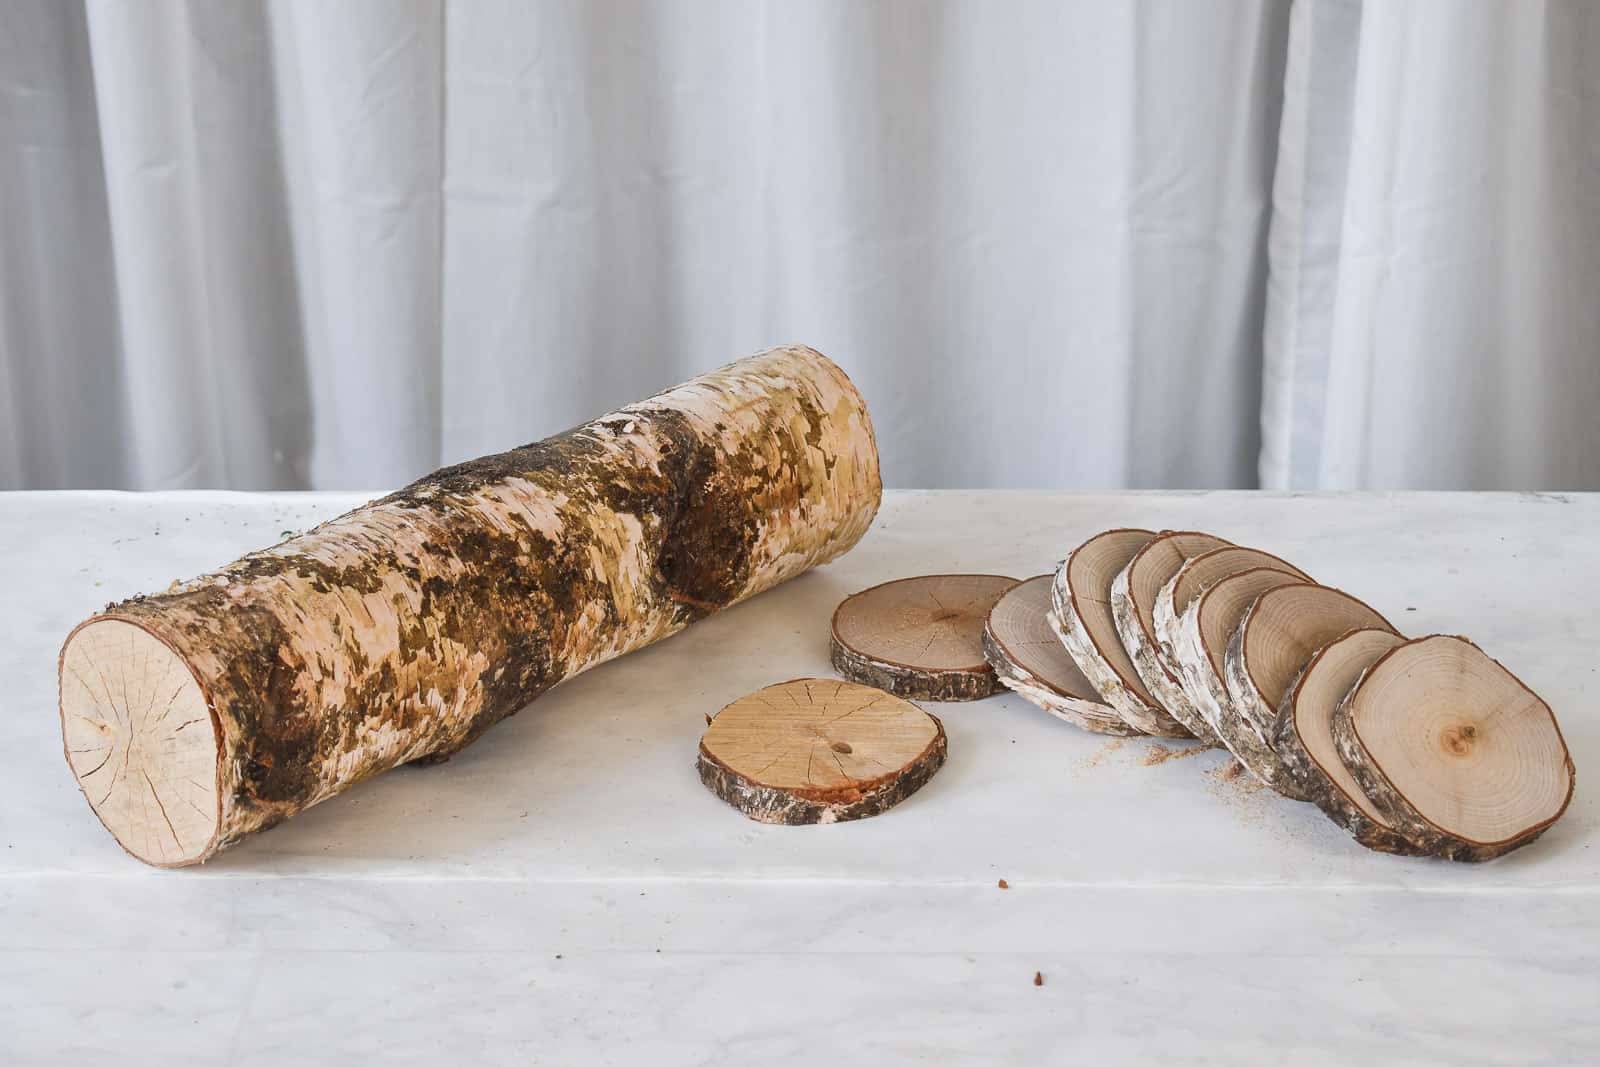
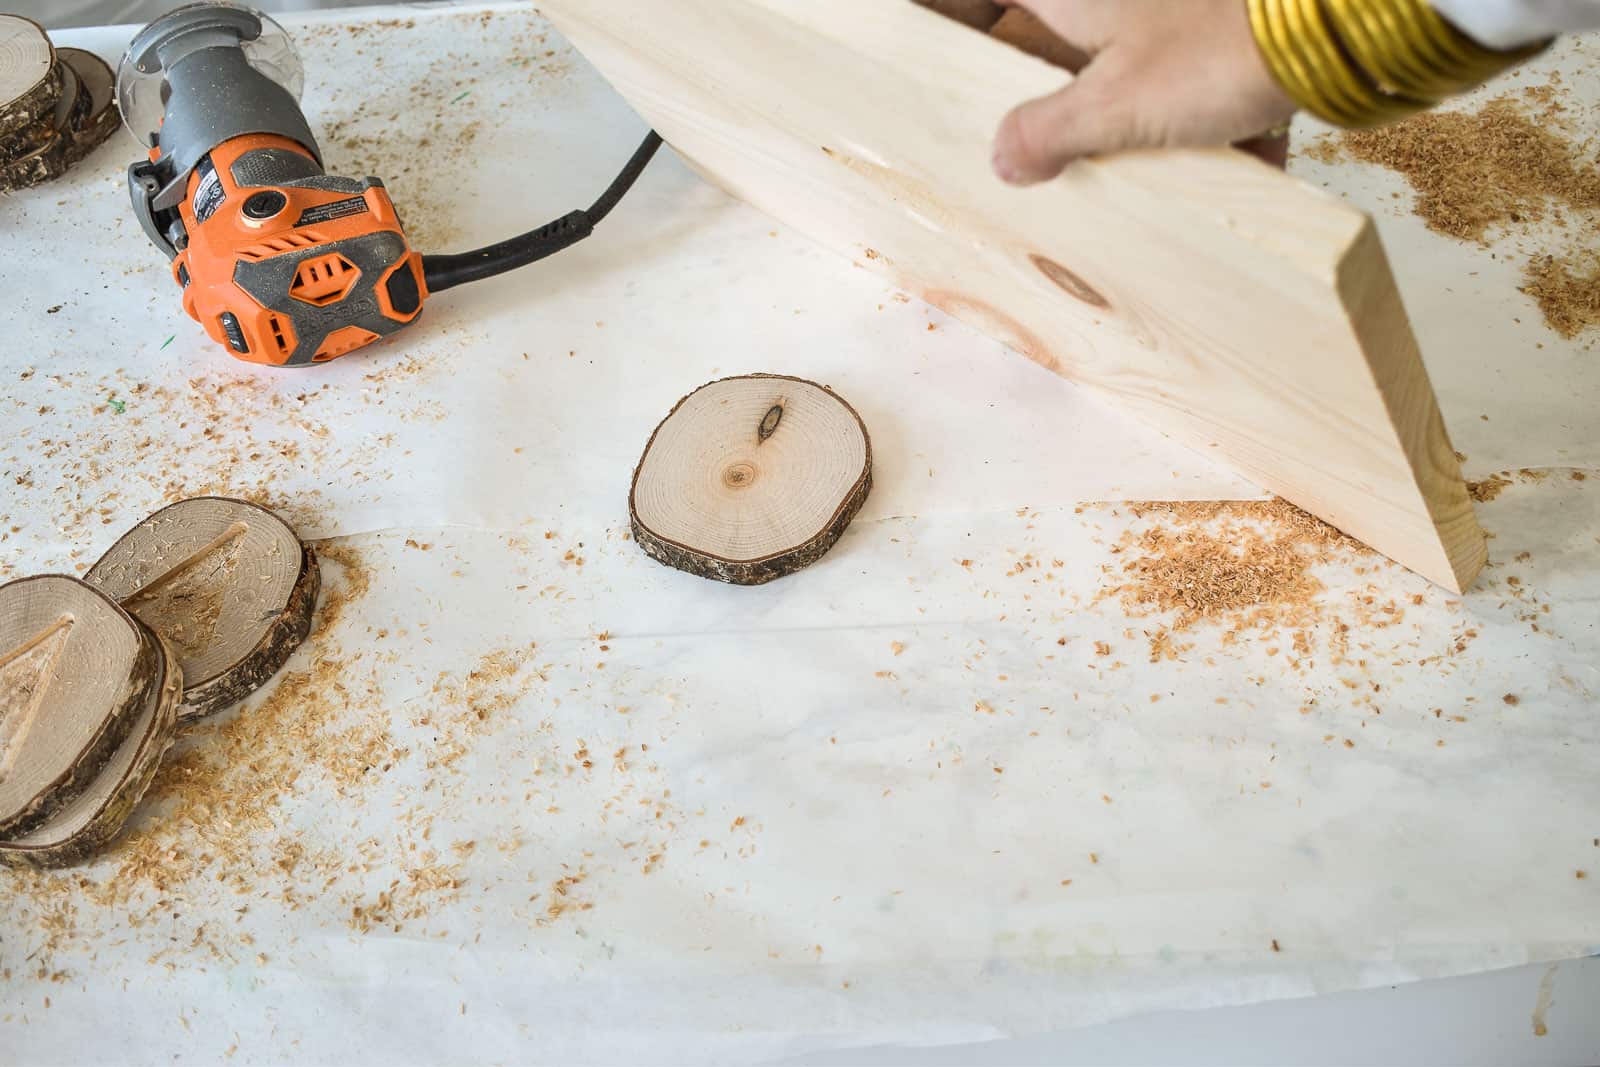
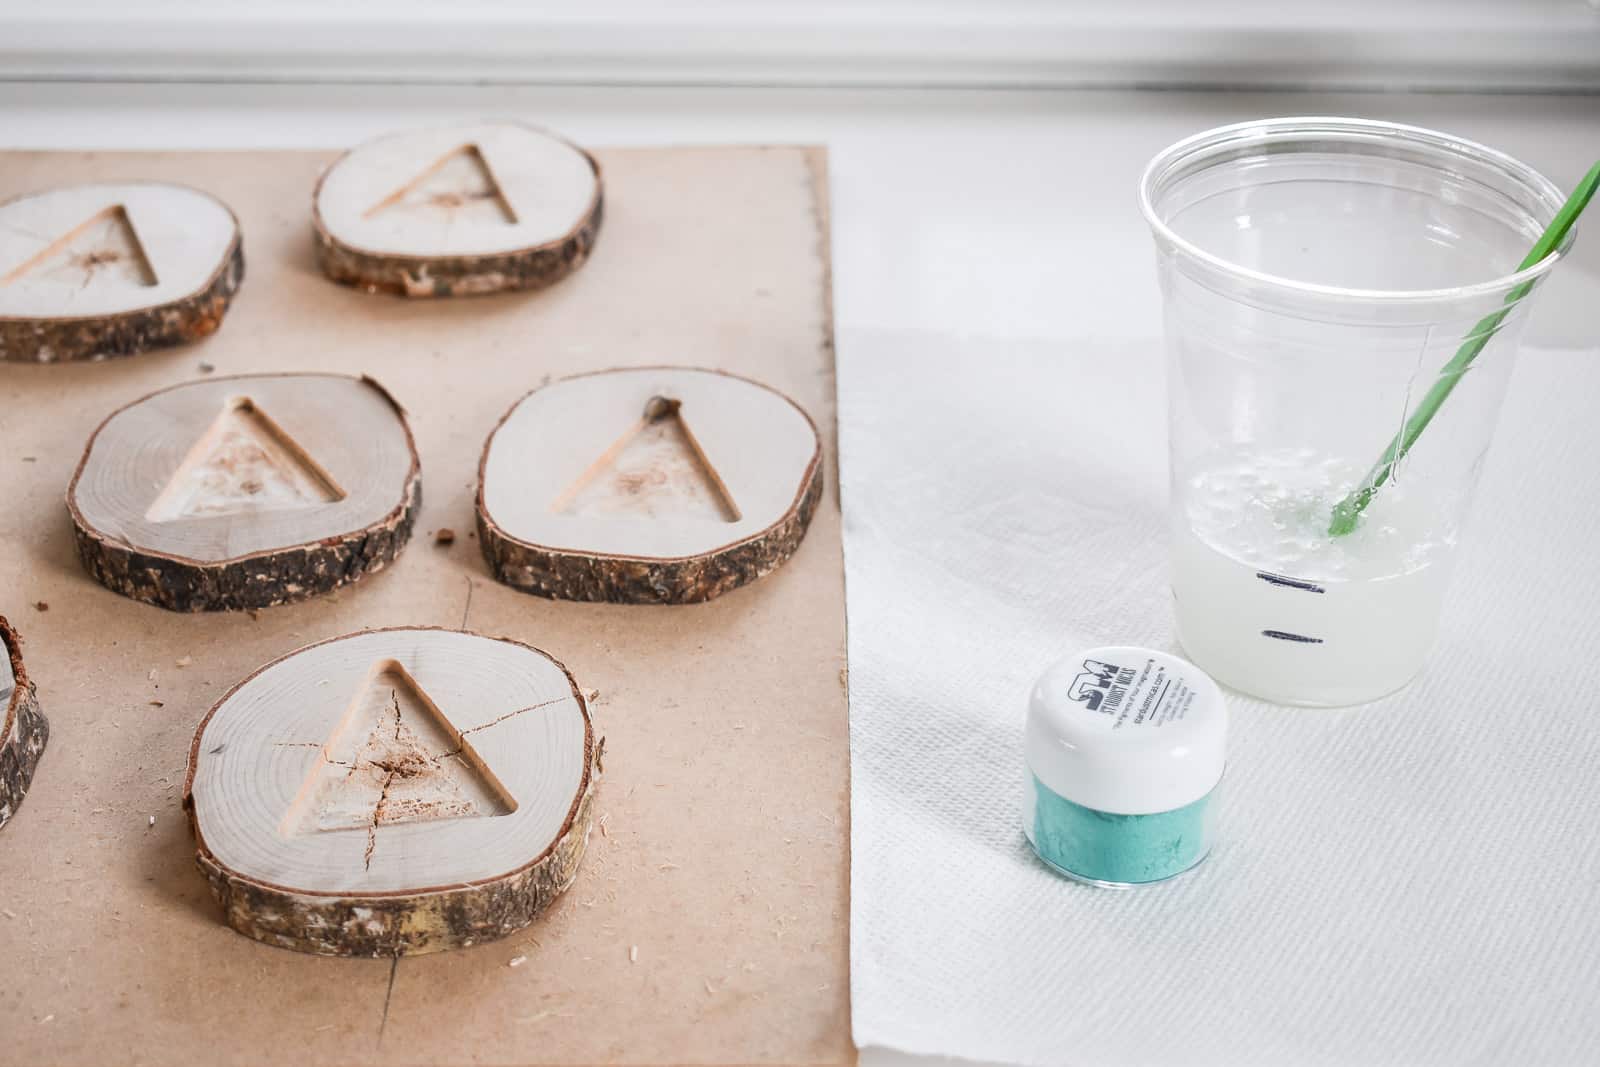
Step 1. Get Your Wood Slices
You can either buy precut wood slices online or at the craft store. I’m always surprised by how expensive they are so I used my miter saw to cut slices from birch logs I purchased at The Home Depot.
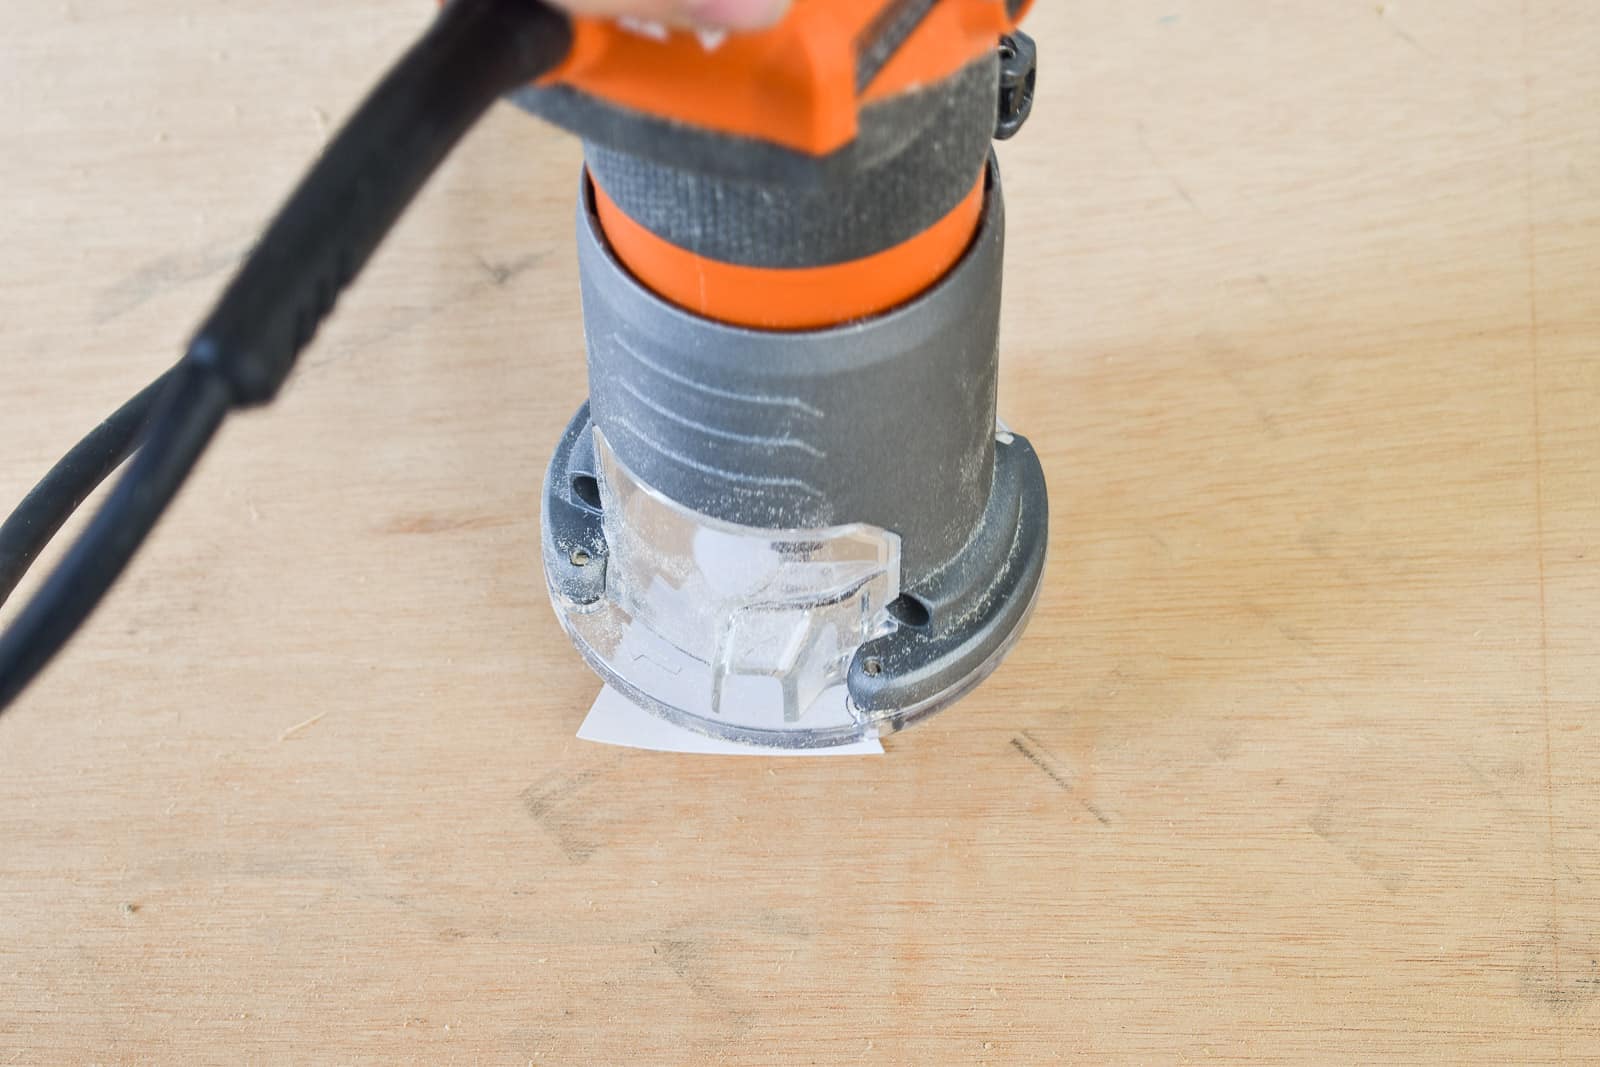
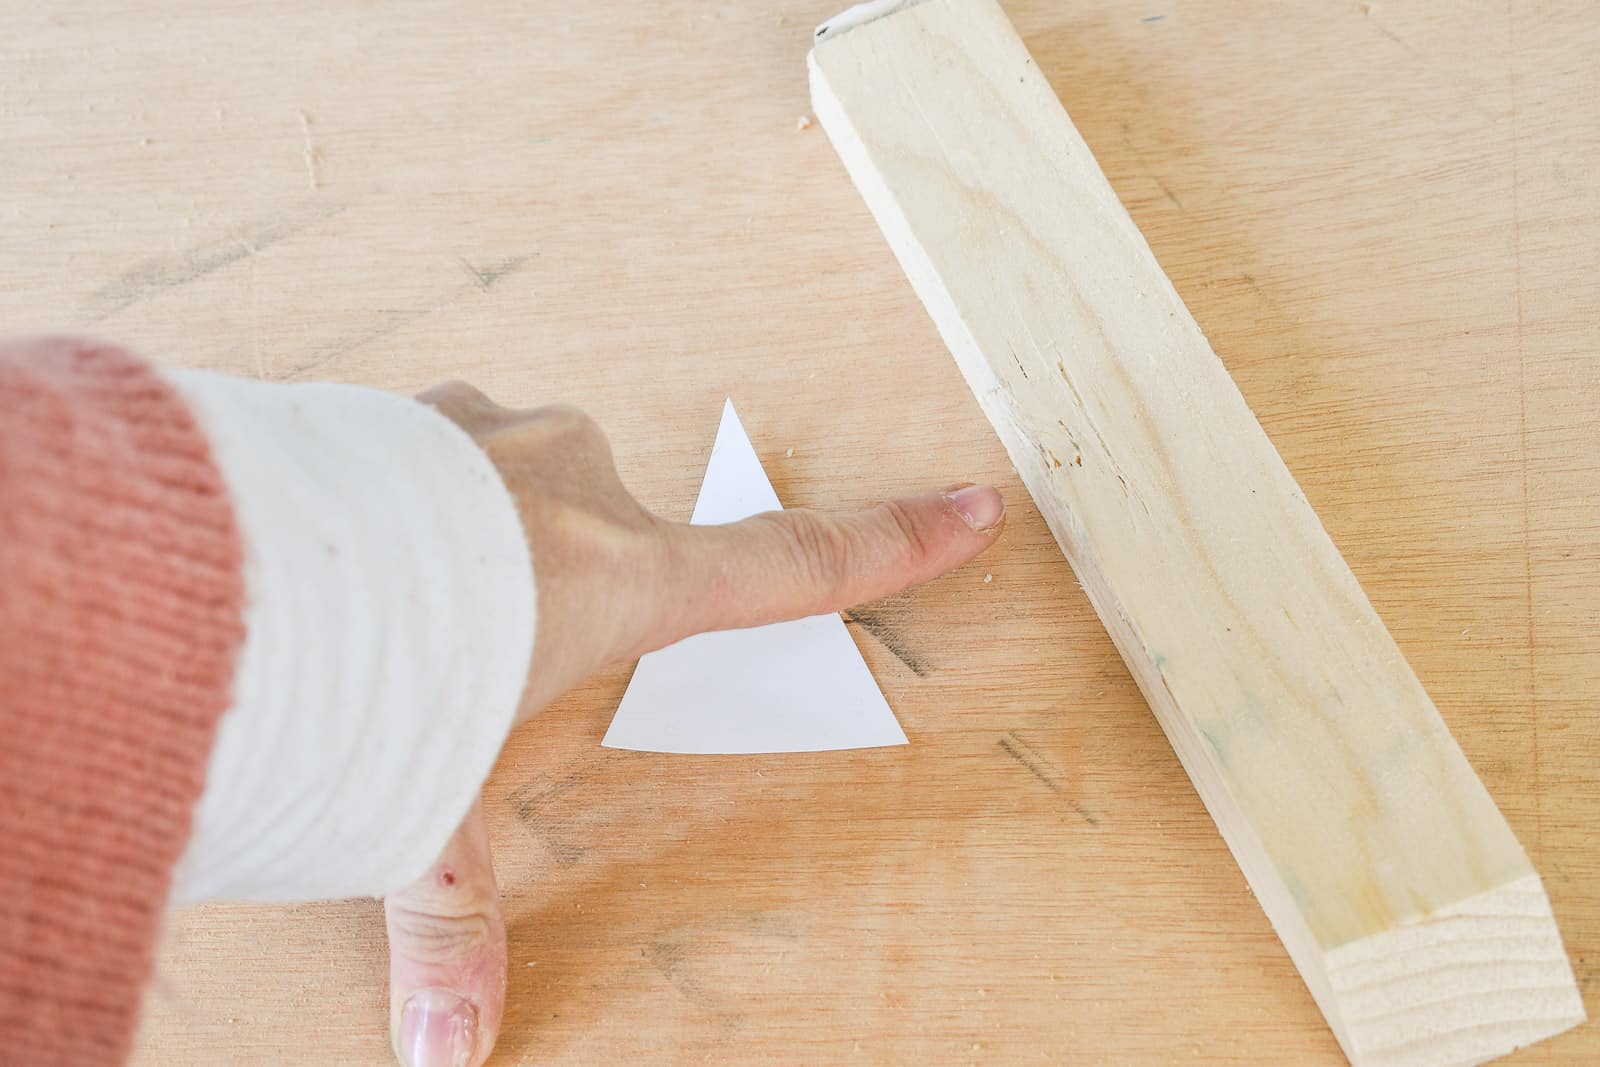
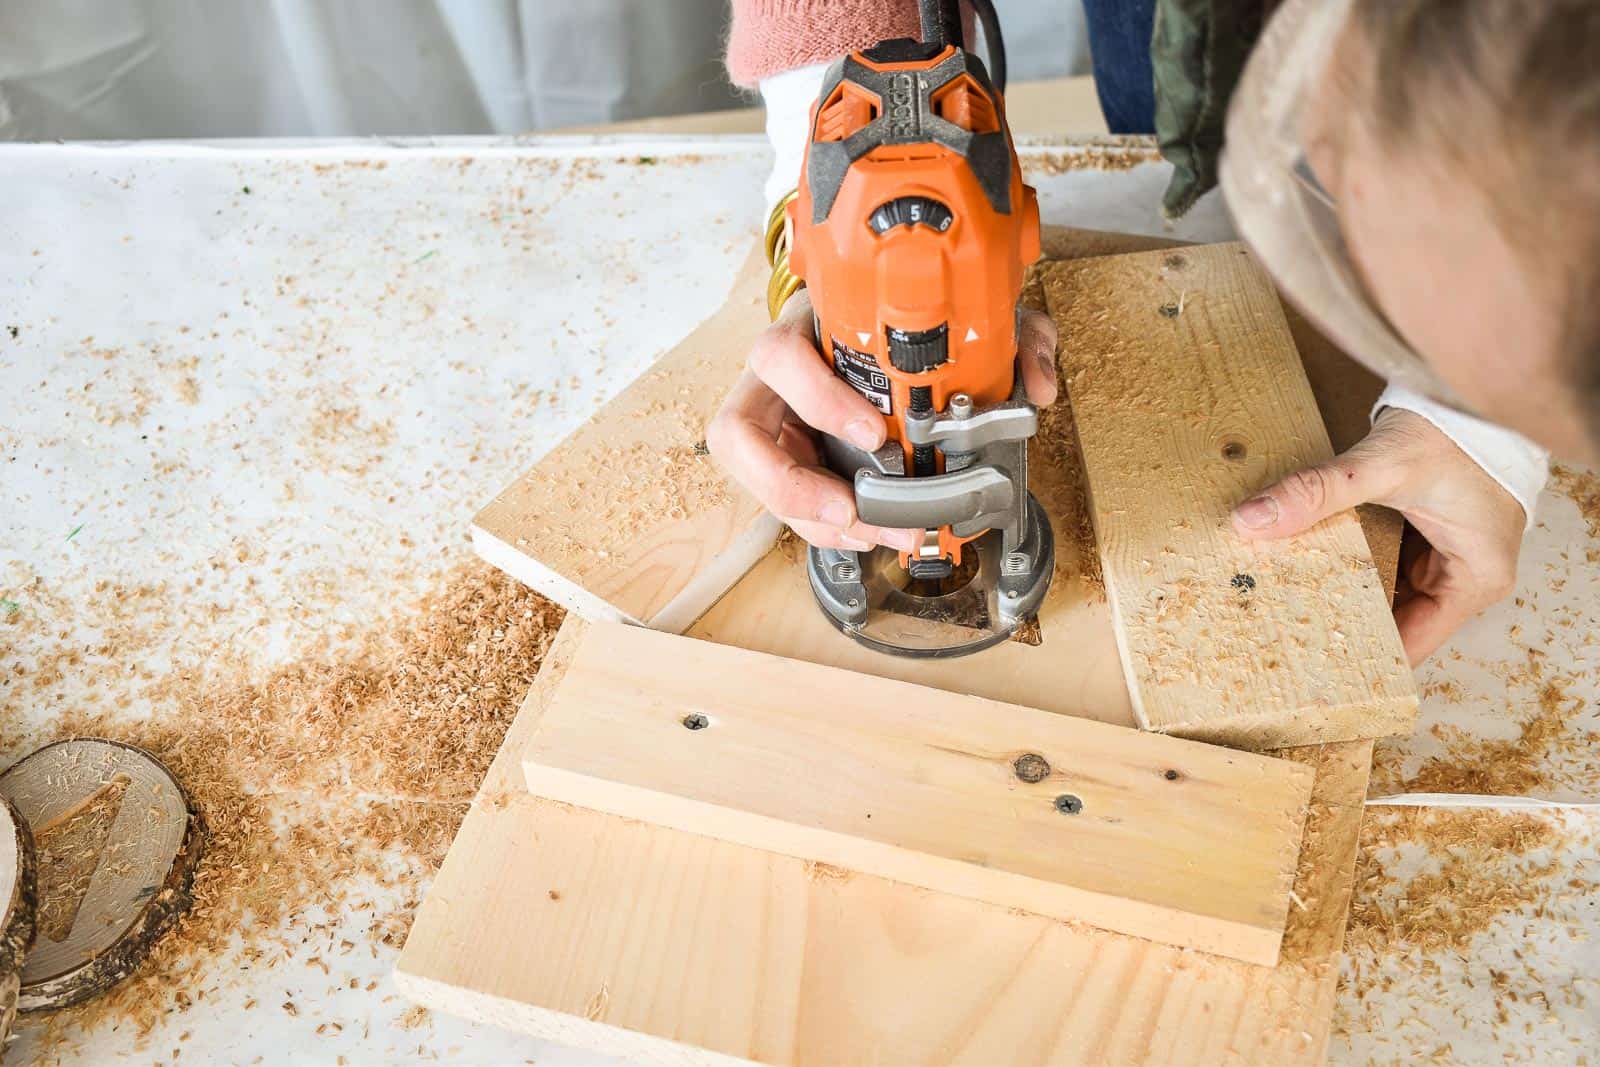
Step 2. Build a Jig
Truthfully, this is the most important part of this ornament. I phoned a friend and asked my friend Caleb from You Can Make This Too for his advice and he talked me through the process. The first step was to figure out how big a triangle I wanted to route. Once I had that template, I traced it onto a larger piece of scrap wood and determined how far away from this triangle the edge of my router would land.

I’m using this palm router so the edge was only about 1.5 inches from the template. I screwed in place 3 pieces of scrap would to act as the guide for my router. I practiced once, made a small adjustment and then routed out the triangle I’d traced. Whenever you’re using a router, you need to make sure you lower the blade incrementally so it took me a number of passes before I ultimately cut through the piece of scrap wood.
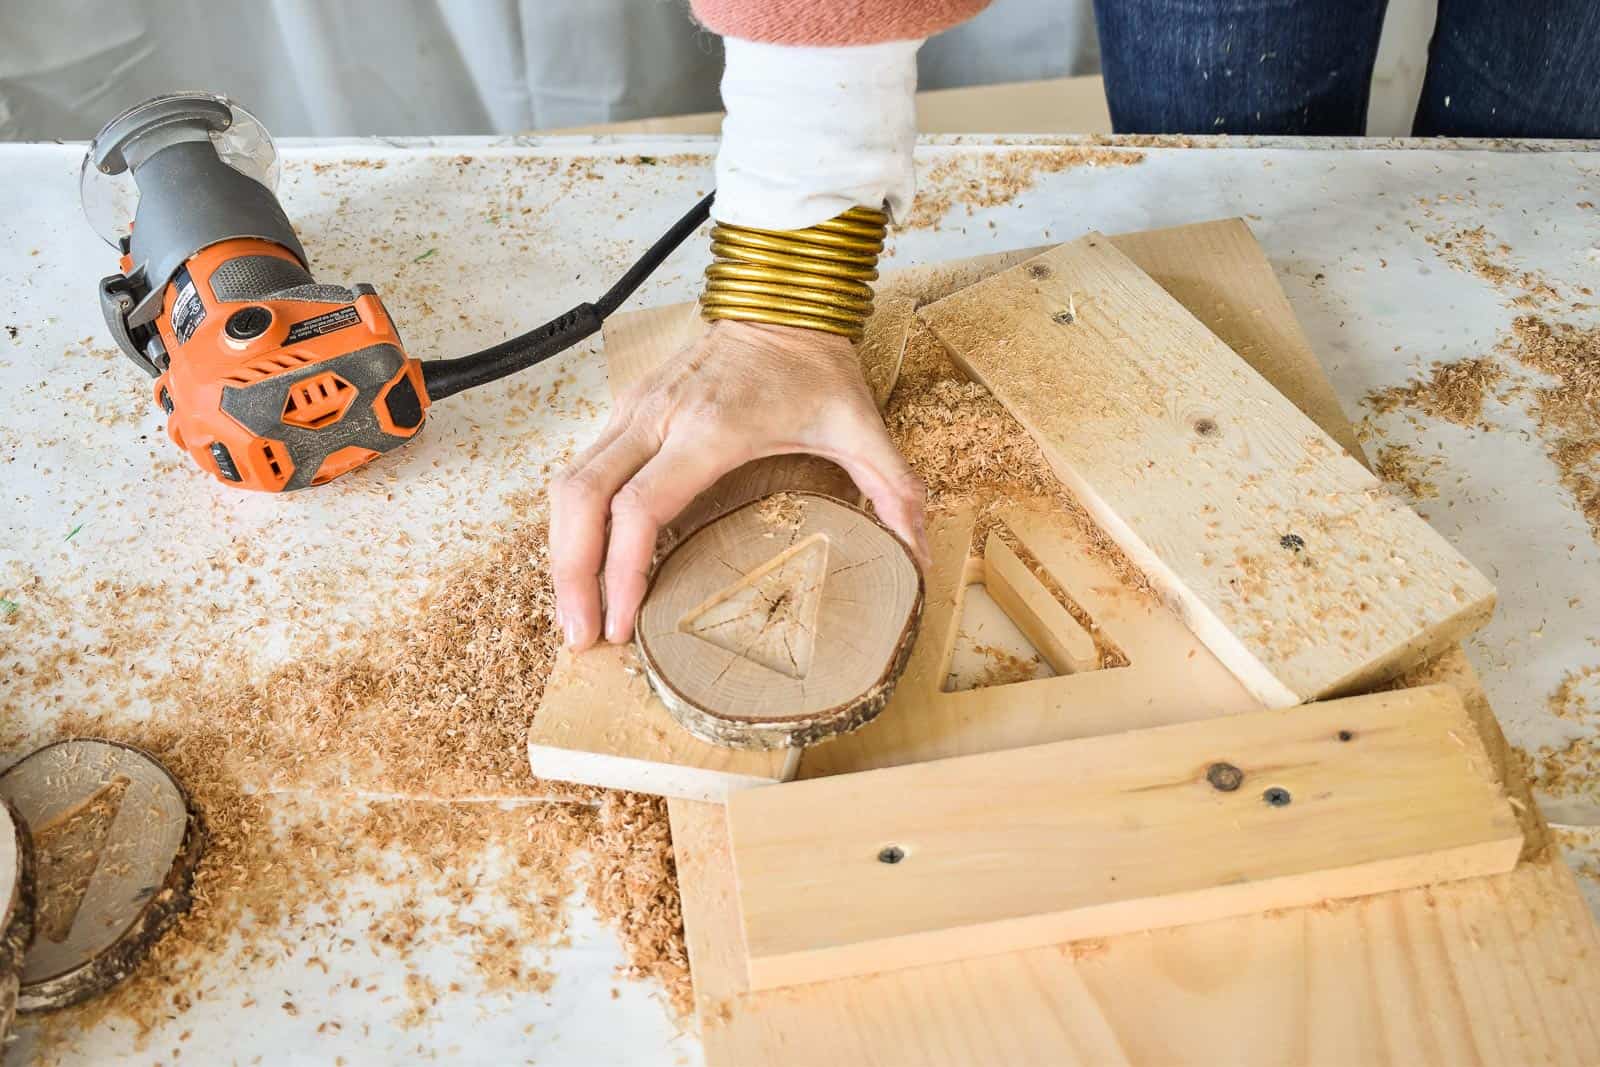
Next, I secured my wood slices with a tab of hot glue to the bottom of the jig. (The first time I tried this, the glue pulled apart the pine on the bottom of my jig, so I needed switched to a low temp glue gun/ glue dots.)
With the wood slice secured, I was able to go around with the router and carve out the triangle. I made sure my router was set to about 1/8″ from the bottom of the jig.
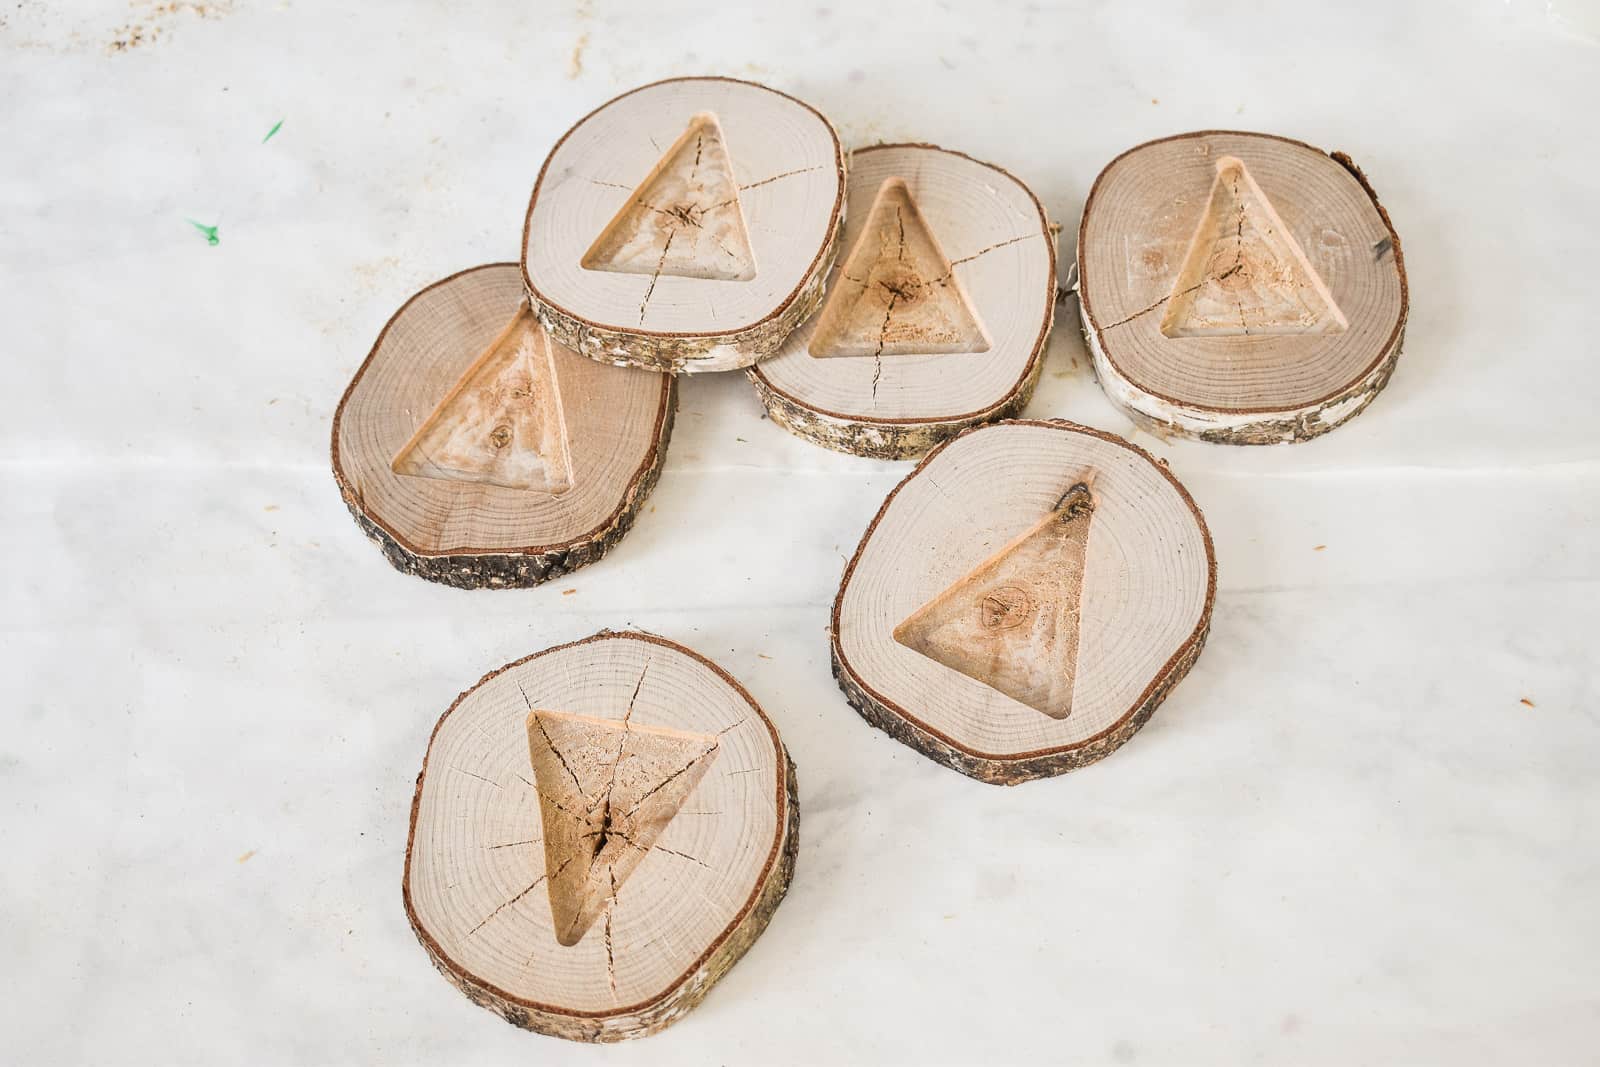
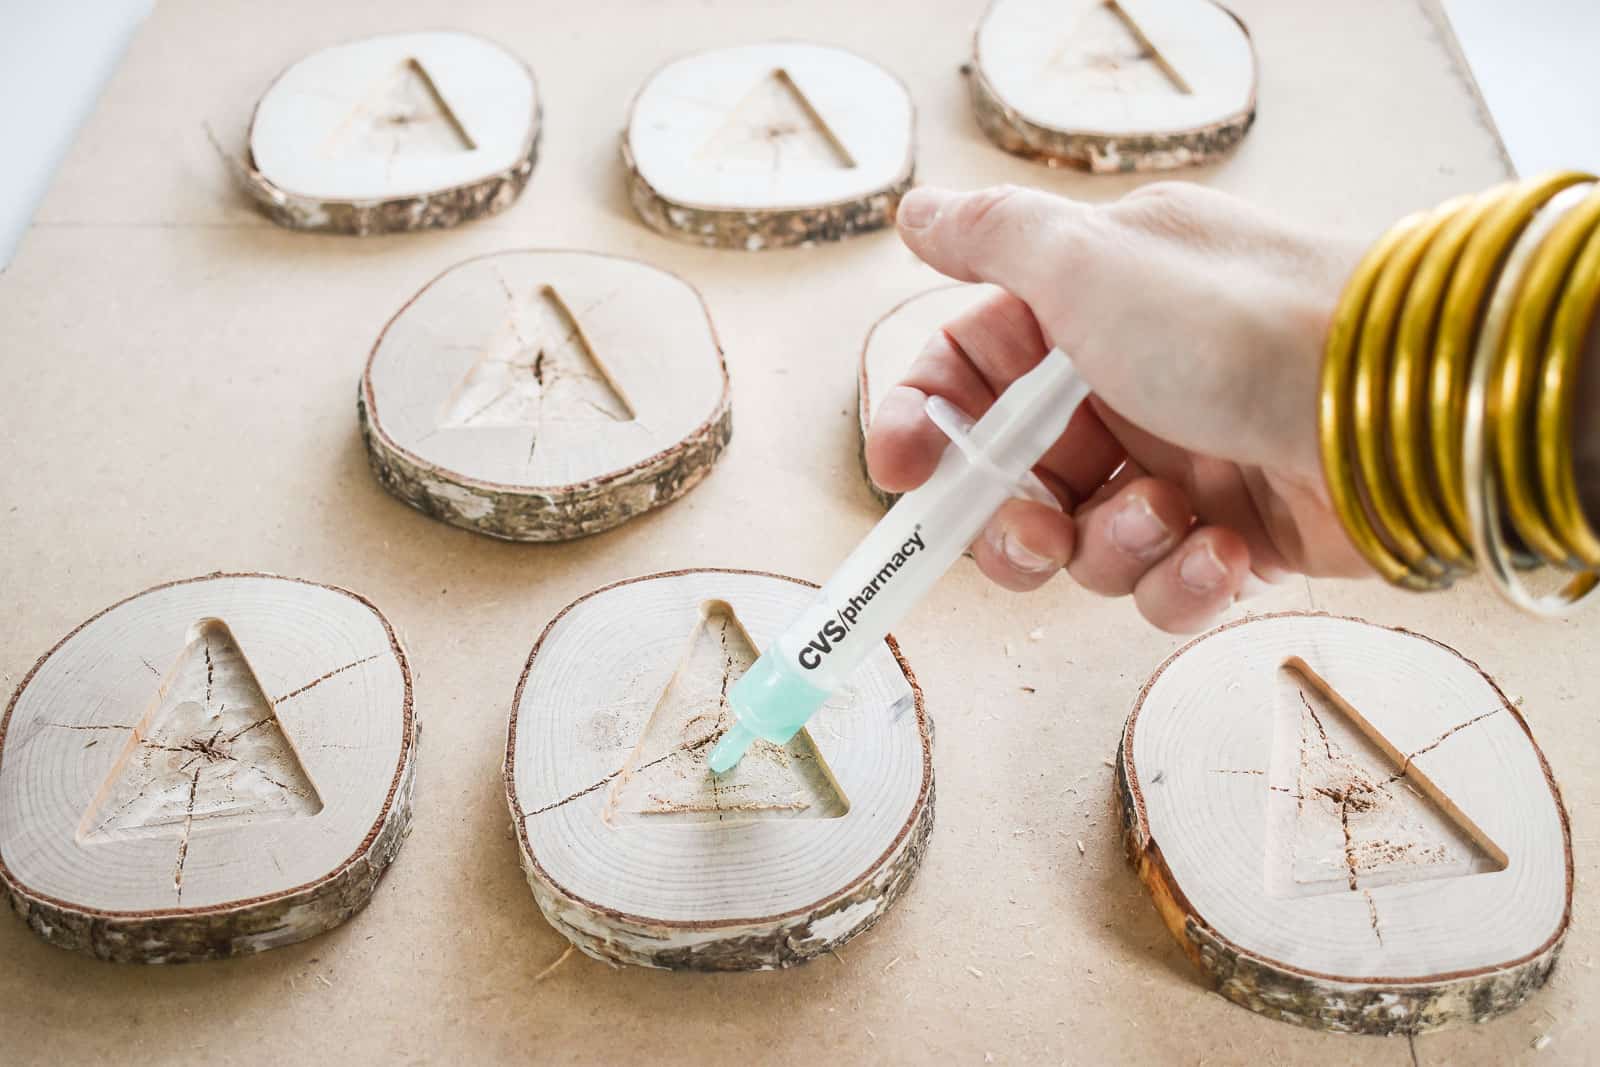
Step 3. Mix and Pour the Resin
I had to move the whole operation inside because it was too cool in my shed to work with the resin. With resin, it’s important to follow the directions EXACTLY! Make sure you’re mixing 1:1 for hardener and epoxy and mix, mix, mix some more. I used this epoxy resin and added this green pigment.
I used a syringe to control my resin pour. One thing I didn’t anticipate was my wood cracking from the change in temperature which meant the resin seeped through the cracks and made a mess of the work surface and the underside of my wood slices. In hindsight, I would have taped off the underside of my wood slices and tried to seal my wood first to prevent so much leakage.
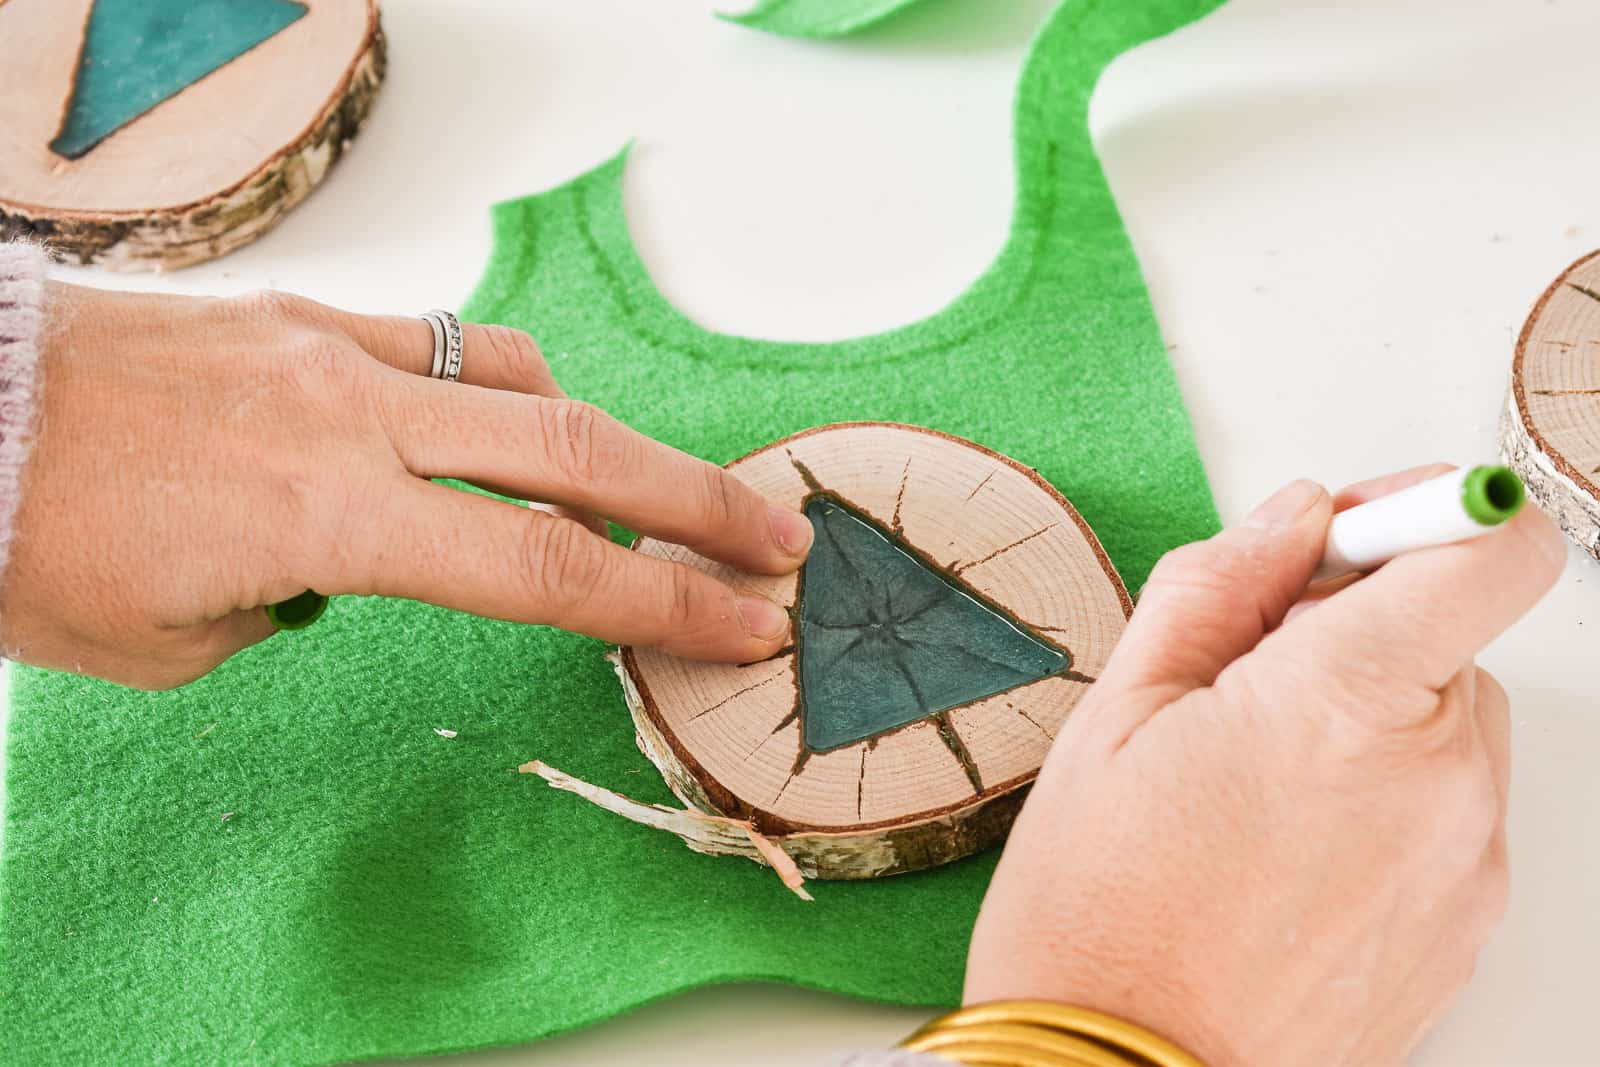
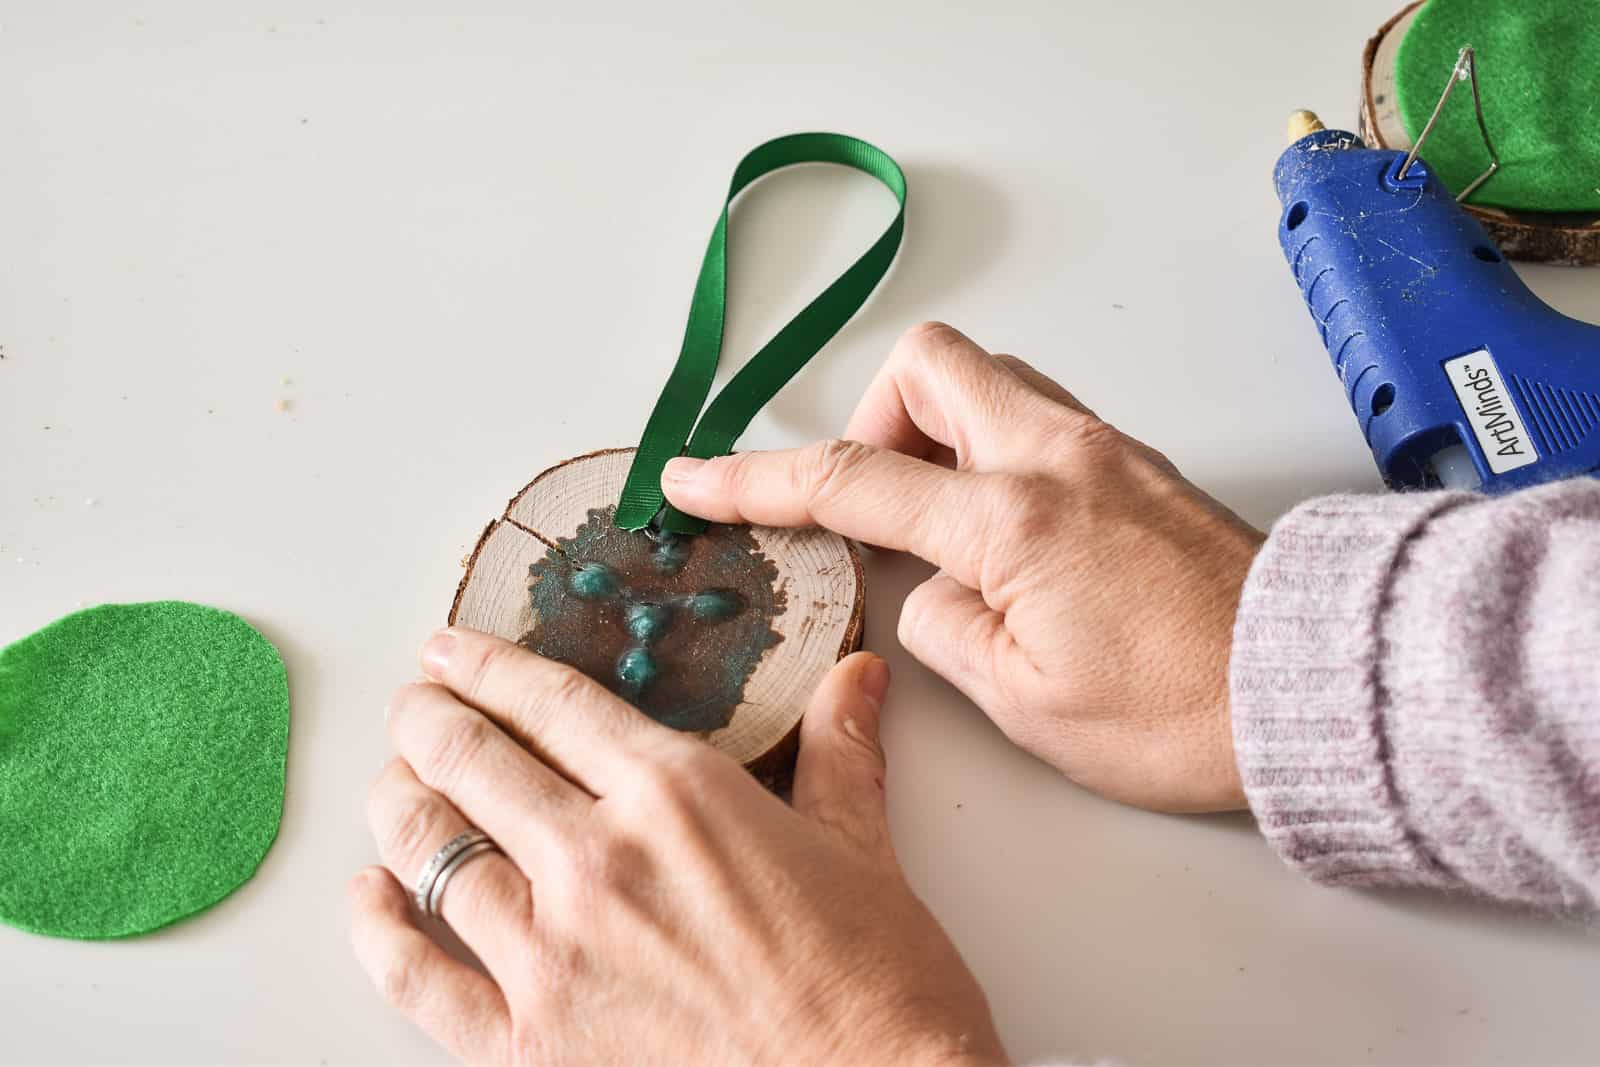
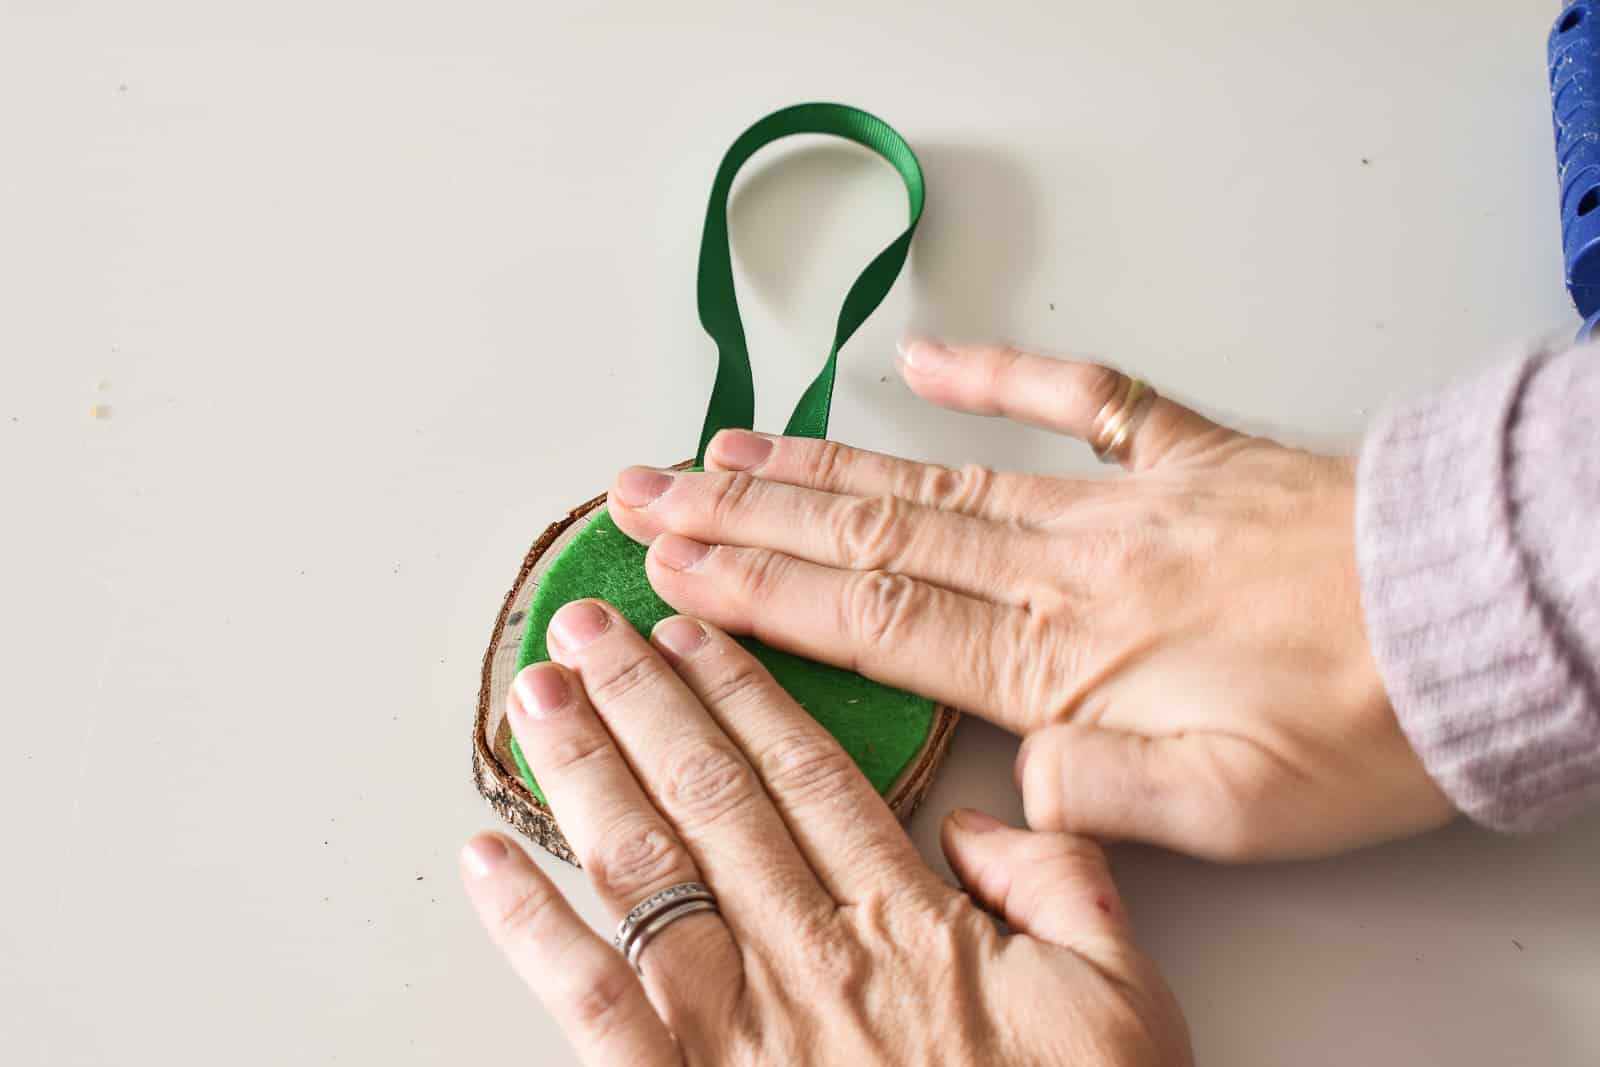
After a day or two, the resin was cured so I traced and cut felt to glue on the back of each slice with a ribbon in the middle for hanging.
These ornaments were the perfect way for me to test my jig making skills and every time I do something along these lines, I learn from my mistakes so… progress!!

Again, thank you SO much for following along with this series! I have a few more holiday projects lined up to share with you over the next two weeks, so make sure you check back in to my blog to see!
Be sure to check back to see what other ornaments I’ll be sharing in my 12 Days of Ornaments series!


Wow, what an amazing Idea! I am going to have to get my husband to help me make these.
Let me know if you do! I’m such a novice that someone with more experience could do a great job with these!
I love resin and have been looking for Projects! What about A linzer cookie-type CONSTRUCTION. Maybe Using die cut wood pieces glued to a solid suBstrate. Veneer tape to form an edge as needed. (Just thinking out loud, here.) I lead a 4-H arts and crafts group, so i am always on the prowl for a good craft project Where kids can do most of the work.
Love that idea! Maybe I’ll use it for next year’s ornament! For the 4H group, you could simply cut PVC pipe and adhere it to a sheet of melamine. They could play around with epoxy mixing and other effects with die.