
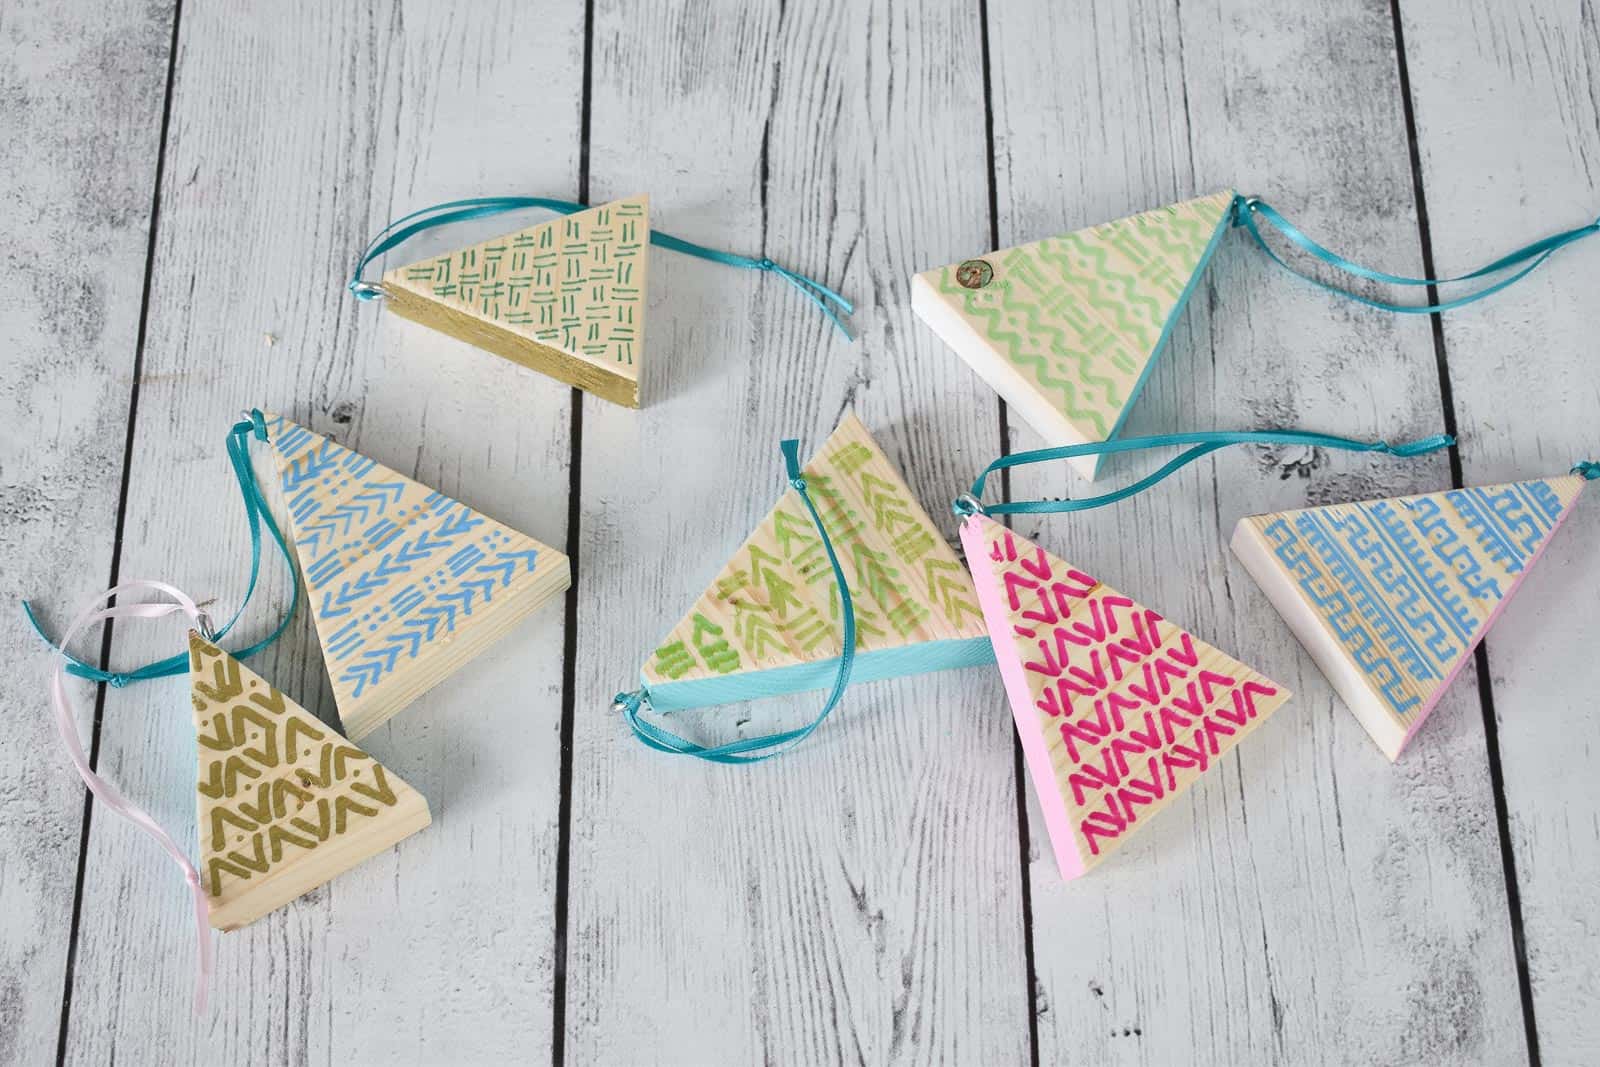
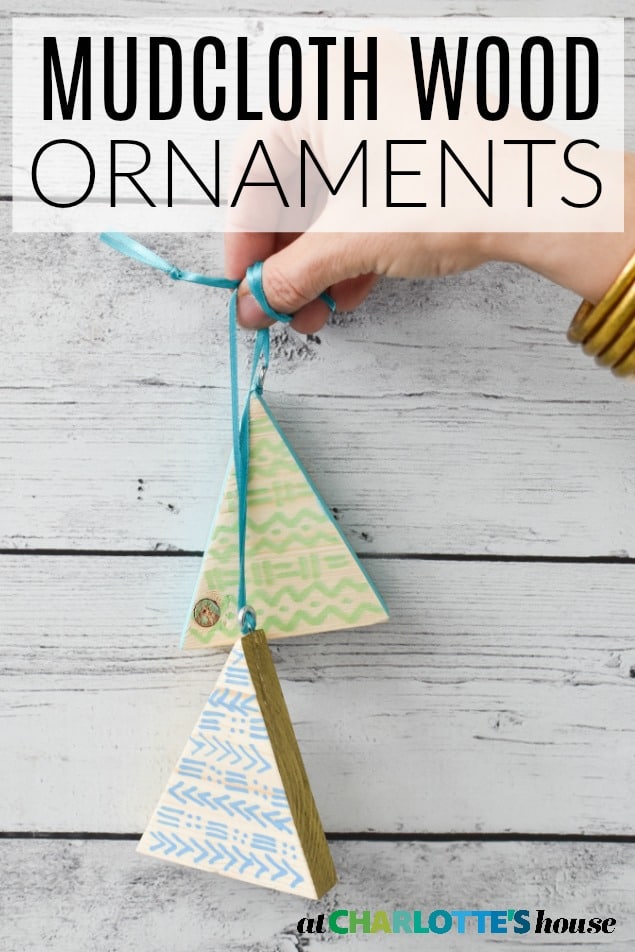
Day 6: Twelve Days of Ornaments- Mudcloth Scrap Wood Ornament
Psssst… this post *might* contain affiliate links: see my disclosure here.
Scrap Wood Patterned Ornaments
Welcome to Day 6 of 12 Days of Ornaments on the blog and my YouTube channel! You can follow along HERE in case you’ve missed anything!
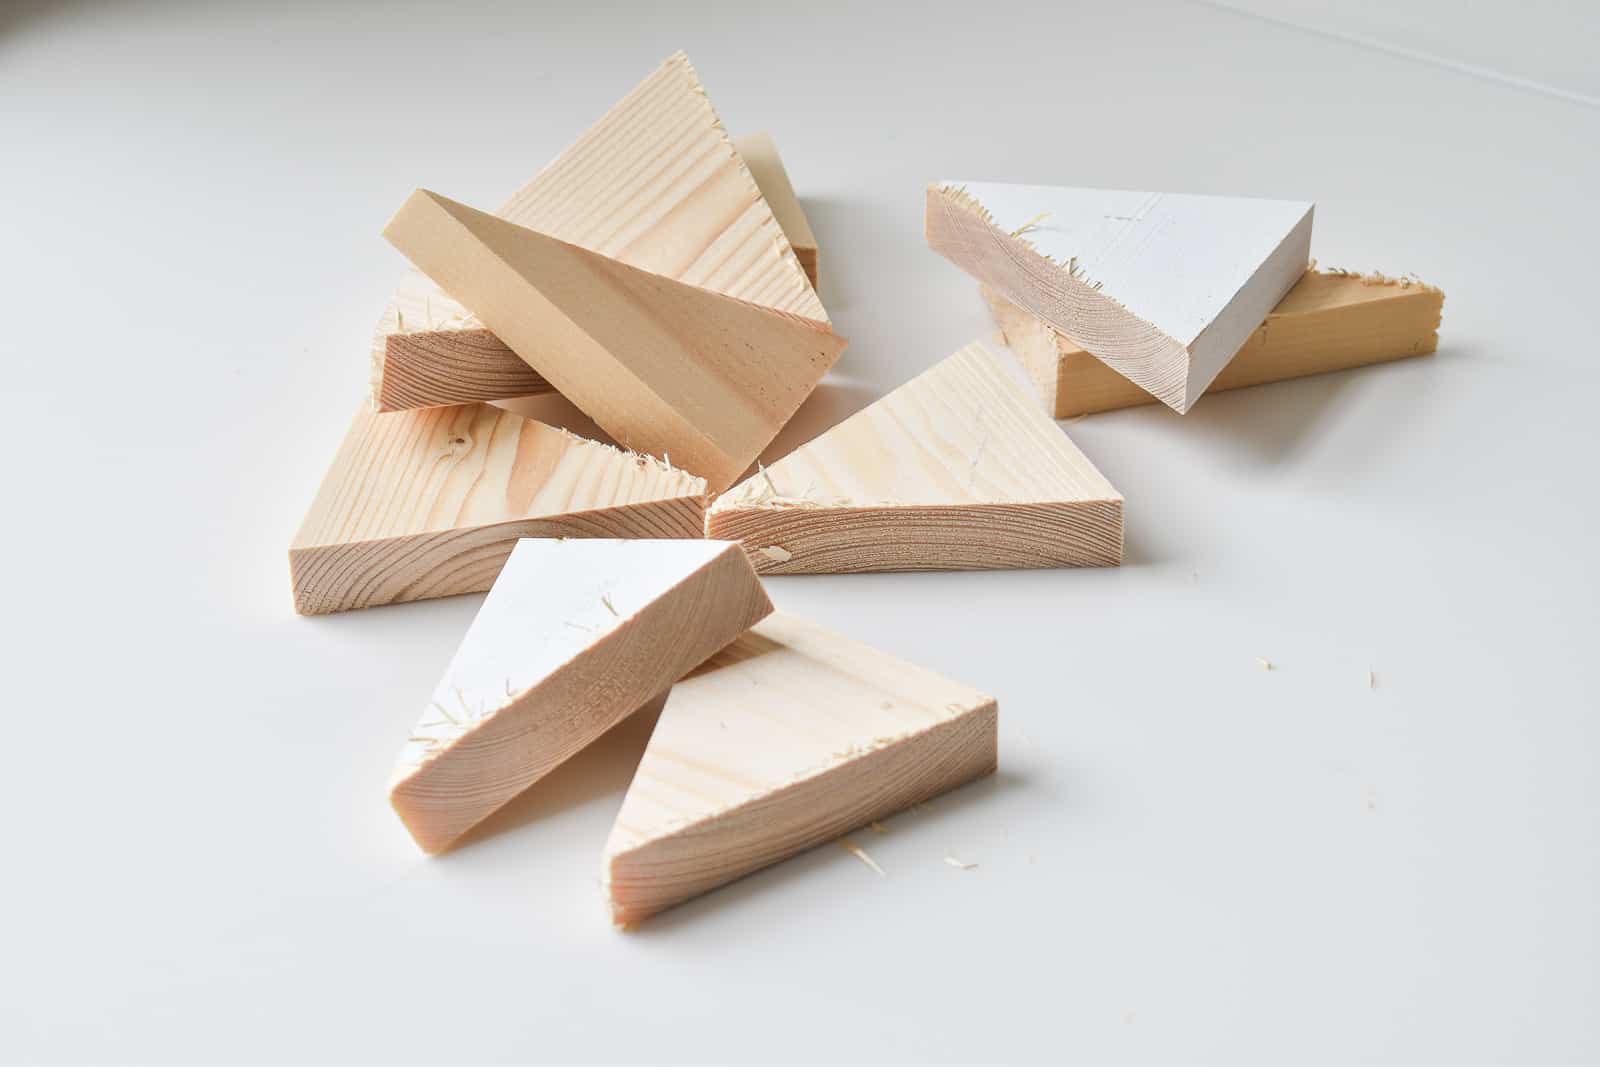
Anyone with a workshop no doubt has a cute little pile of scrap lumber. And by little I mean it takes up 1/4 of your work space. These ornaments were really fun to make and meant I could use up a few of the smaller pieces of lumber from my pile!
Step 1. Cut Up Your Scrap Wood
I set my miter saw at roughly 25 degrees and then just alternated back and forth to cut a 1×6 into triangles. Sand the edges.
Shop my favorites!

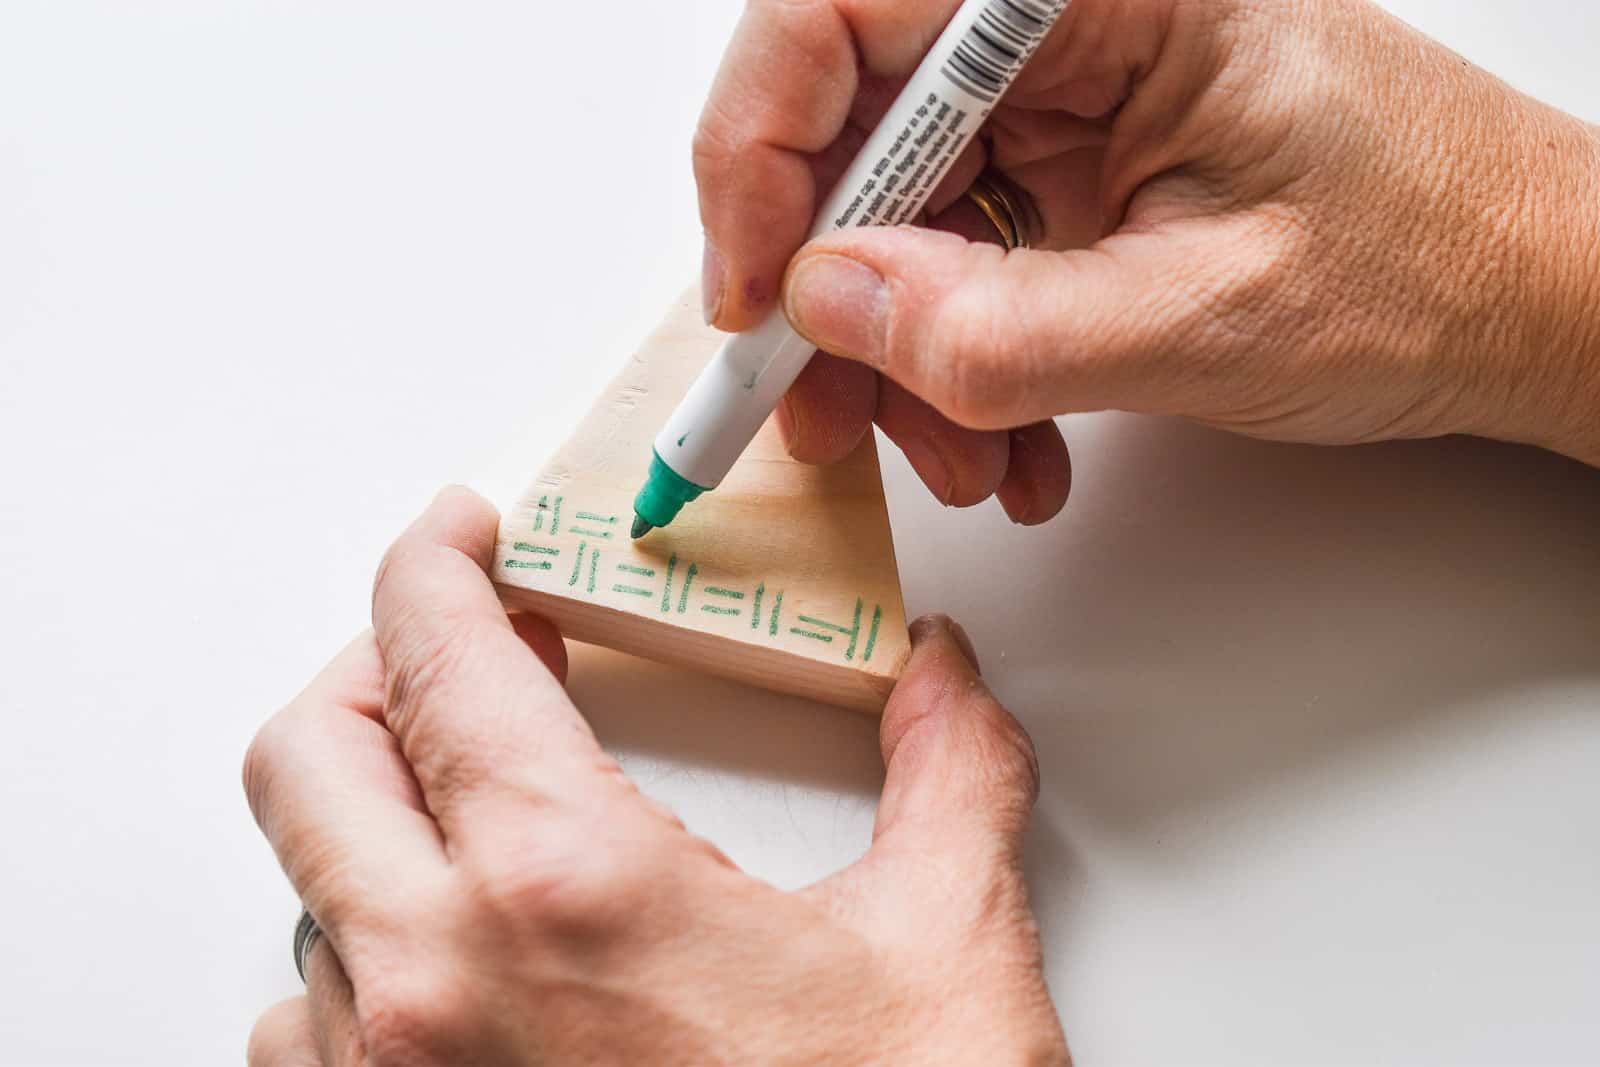
Step 2. Paint your Pattern
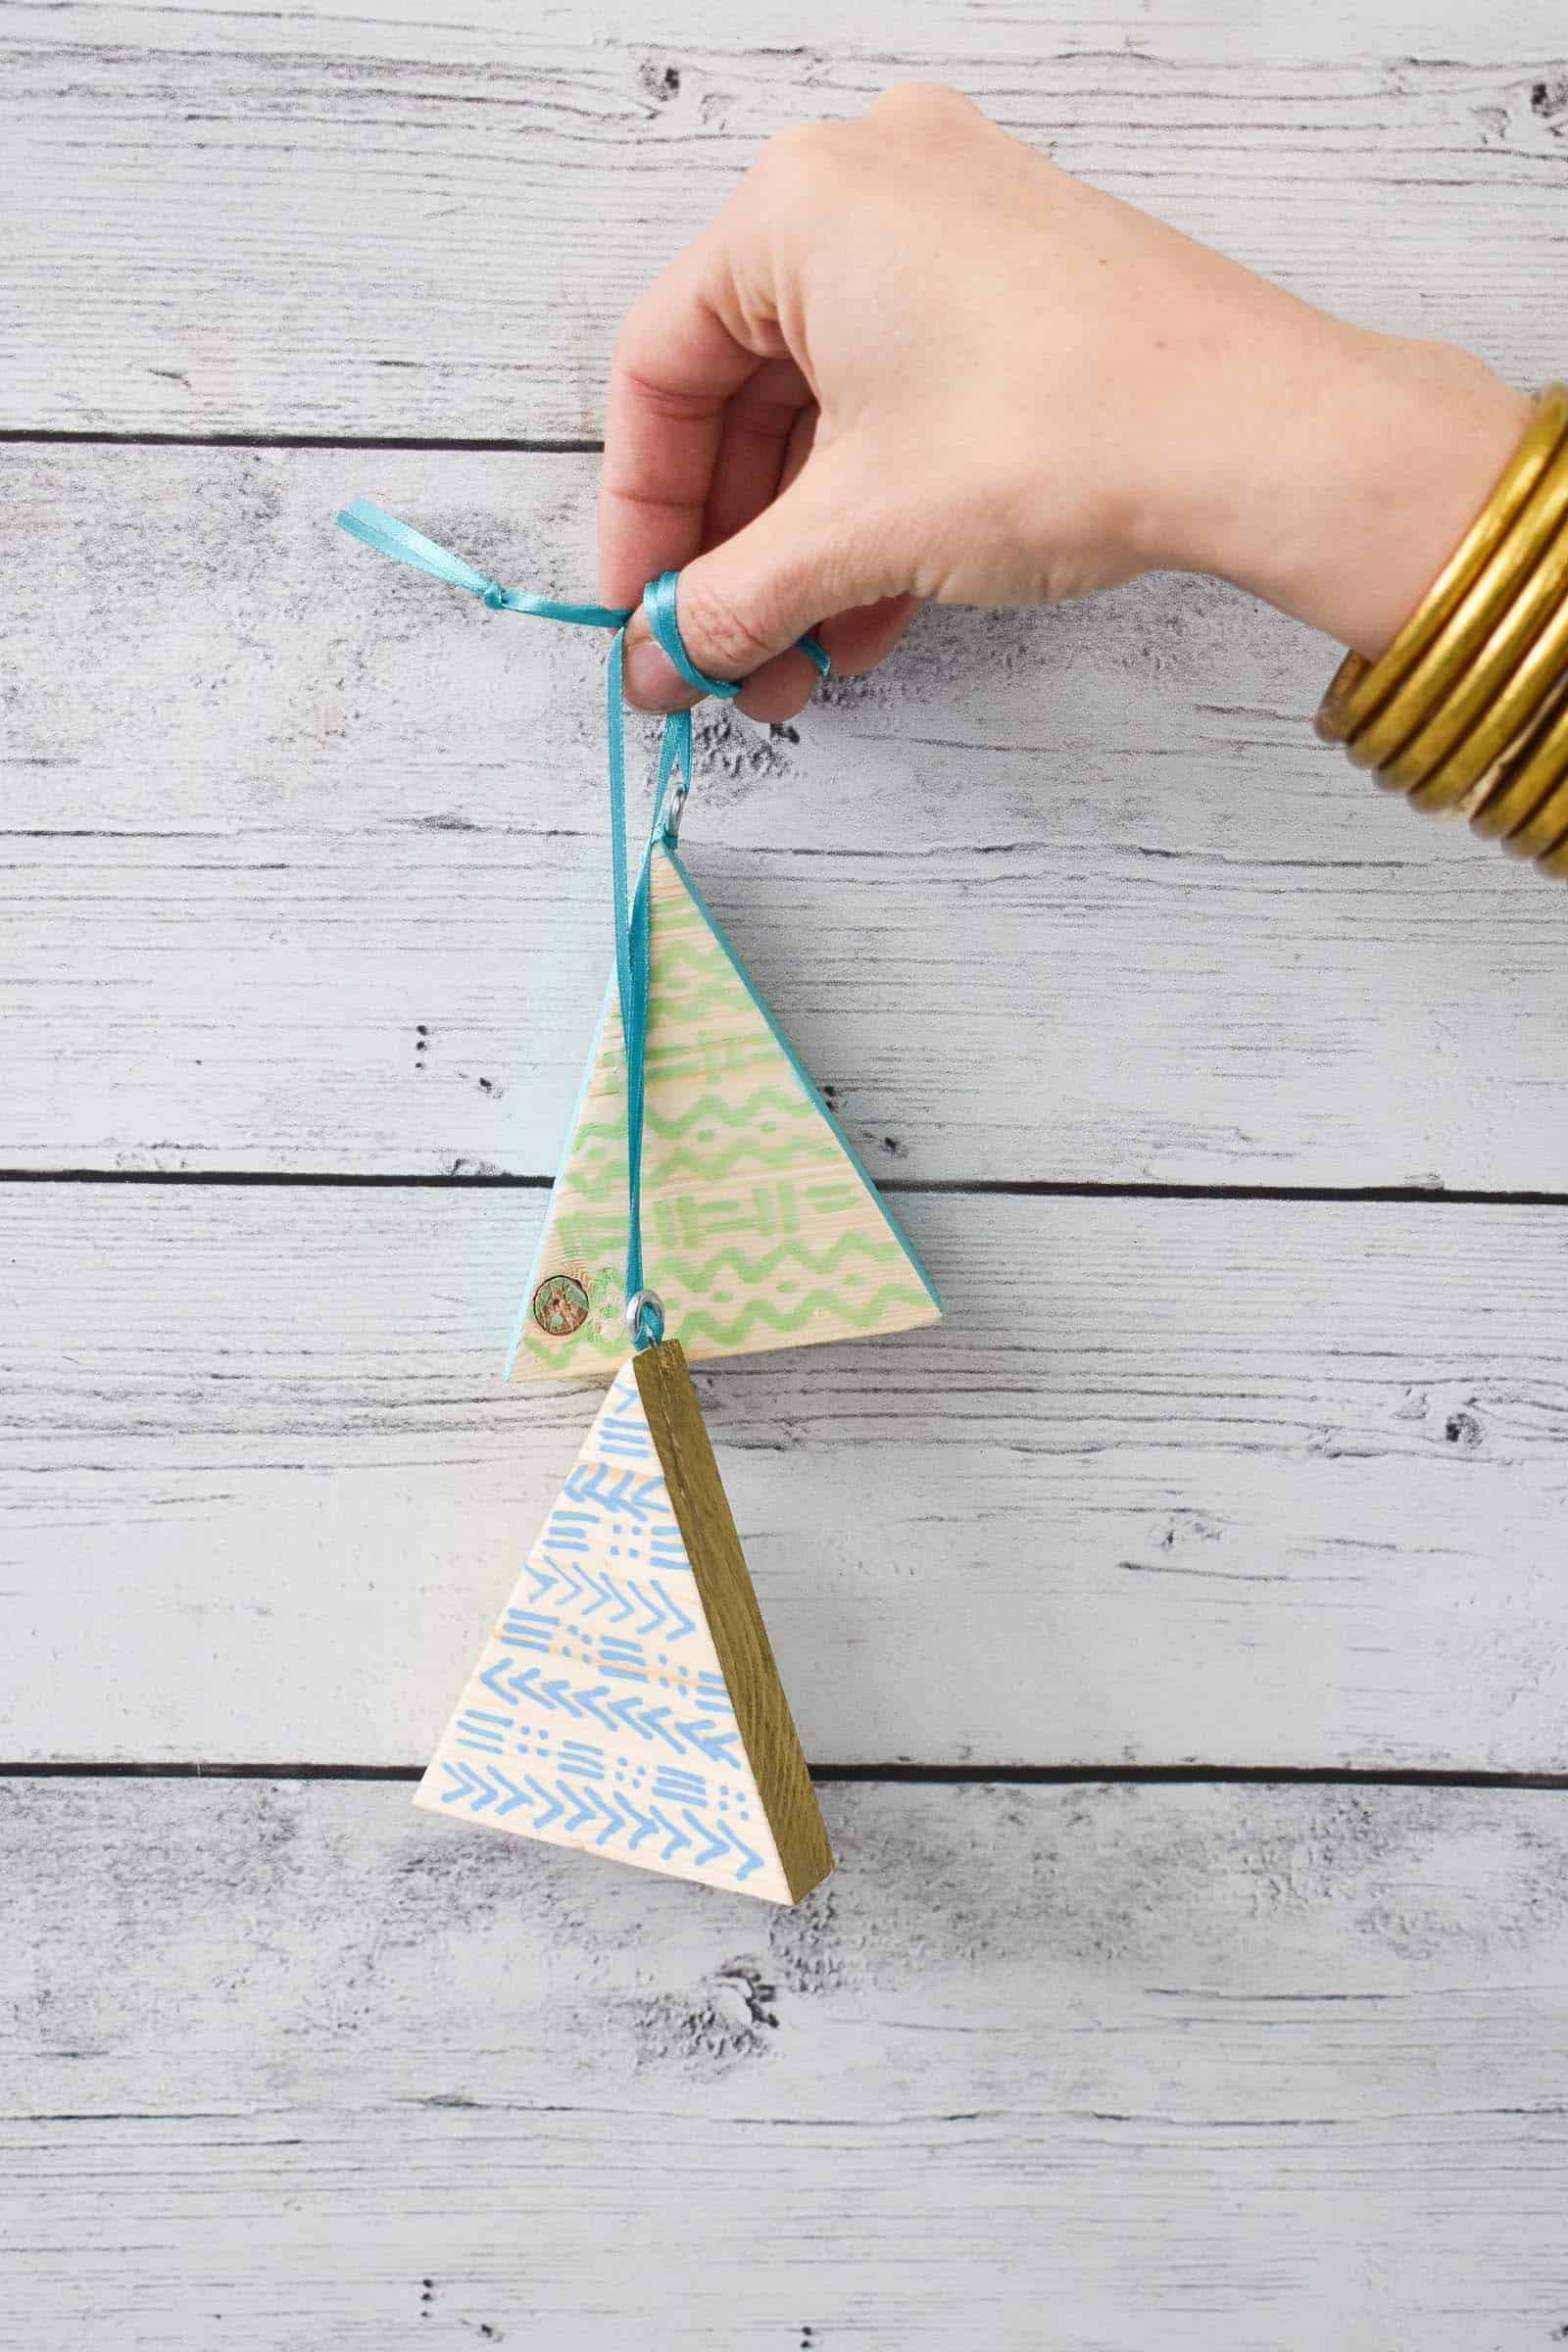
I used paint pens for this, but a detail paint brush and craft paint would totally work. I painted the edges with contrasting solid colors. Obviously, I love the pattern of mudcloth, but these would look just as vibrant and colorful if you fingerpainted or just added a random pattern.
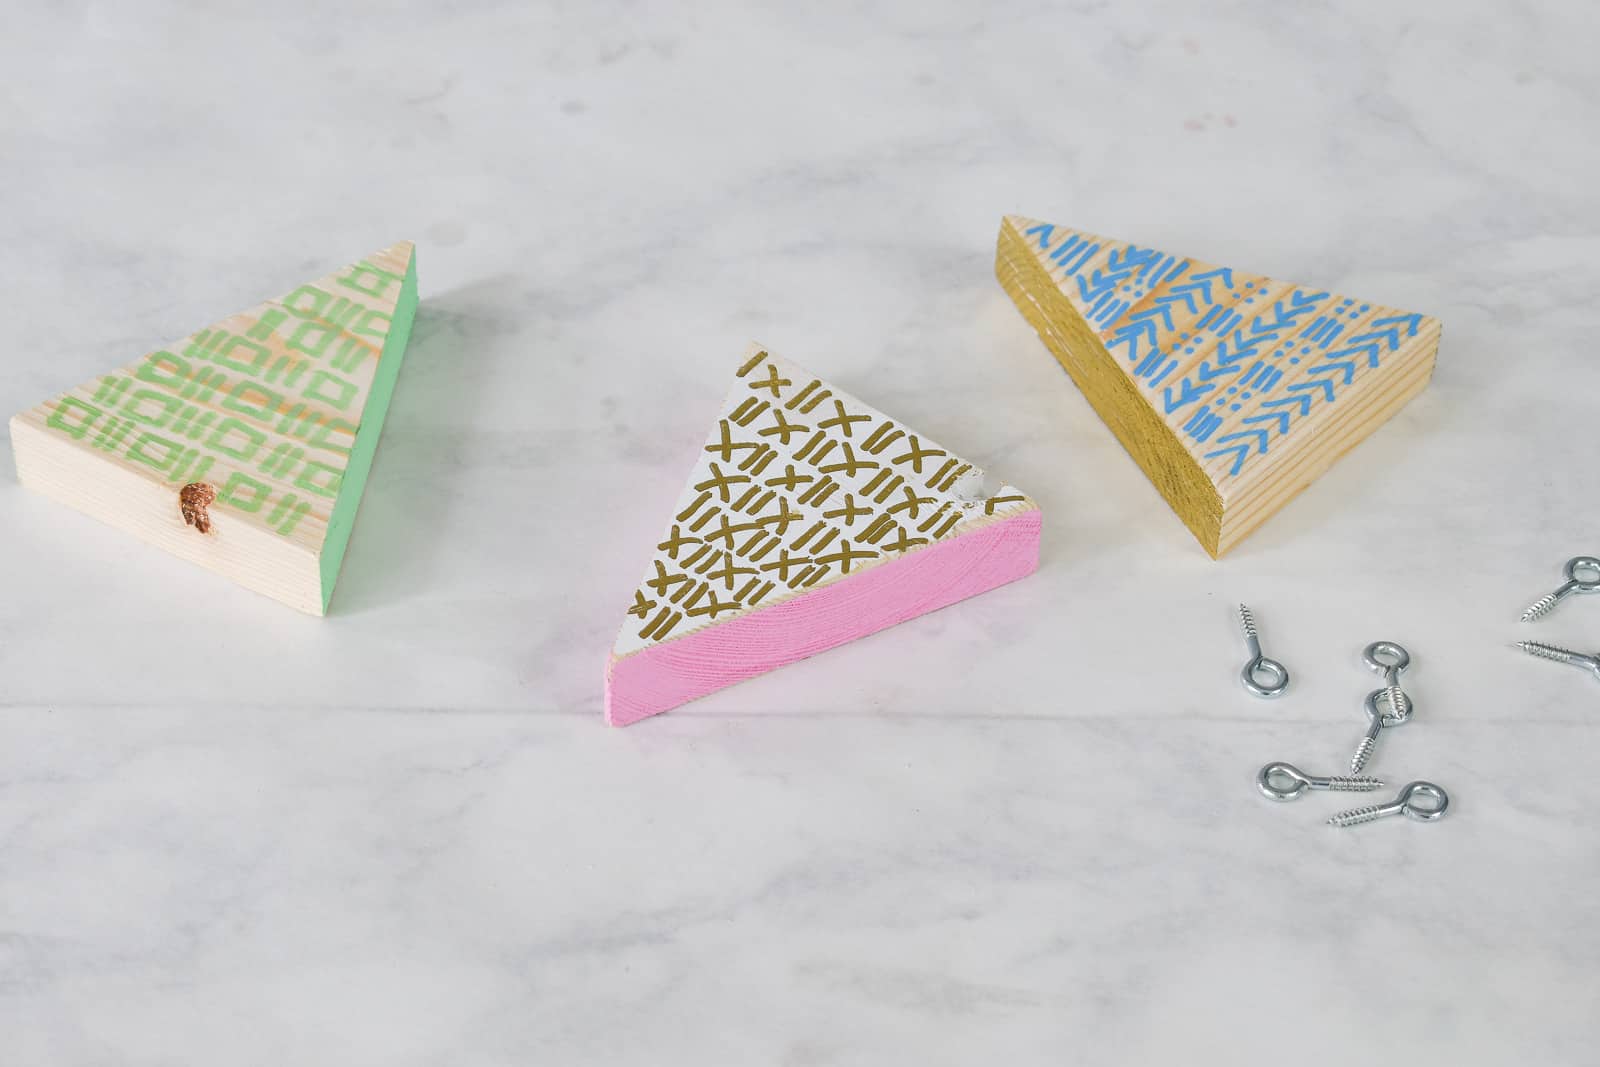
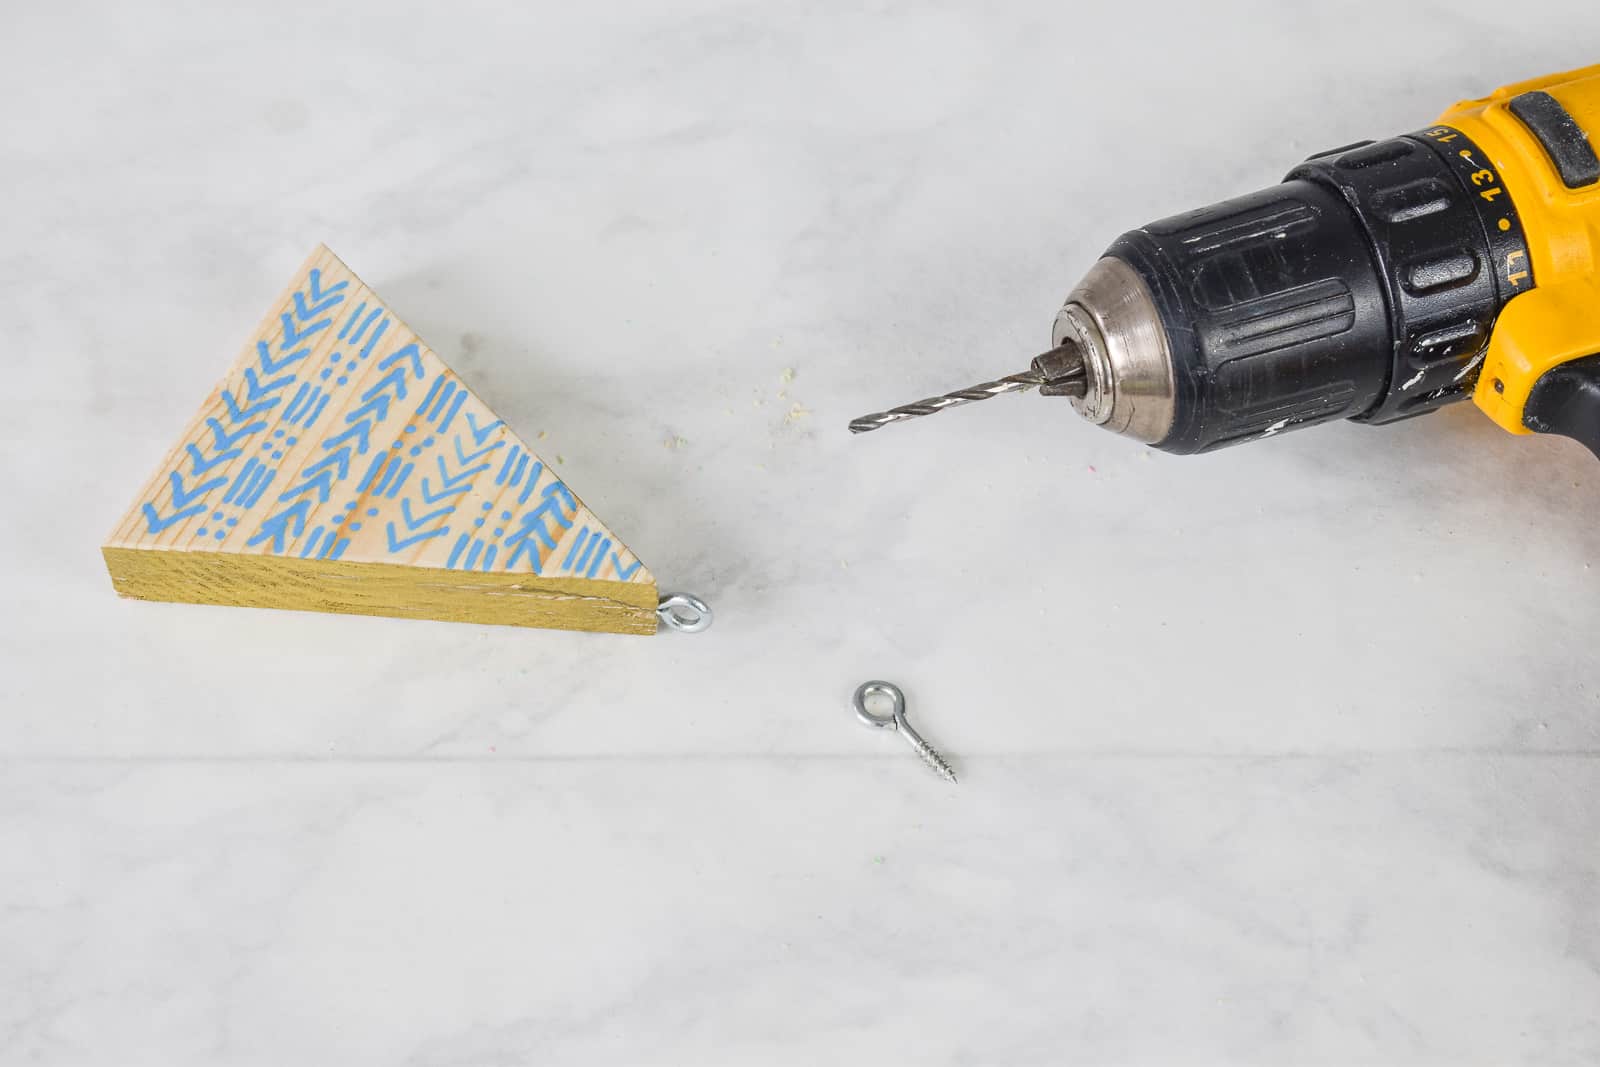
Step 3. Add a ring
I probably over complicated this part to impress you folks because glue and a ribbon would totally work. But I predrilled and then added a screw eye for the ribbon.
Step 4. Go decorate your tree because you did it.
Sometimes I come up with cute projects that are legitimately so simple that I write out the tutorial and I’m like yep… that’s it. This is one of those projects. Which is one of the reasons why I love it so much!
Be sure to check back to see what other ornaments I’ll be sharing in my 12 Days of Ornaments series!


Don’t Miss Out
Become An Insider!
Signup for exclusive tips, and tricks from Charlotte’s House!
Let’s chat!
I love comments from you, so feel free to leave your thoughts and ideas below! And don’t forget to follow me on Instagram for even more!