
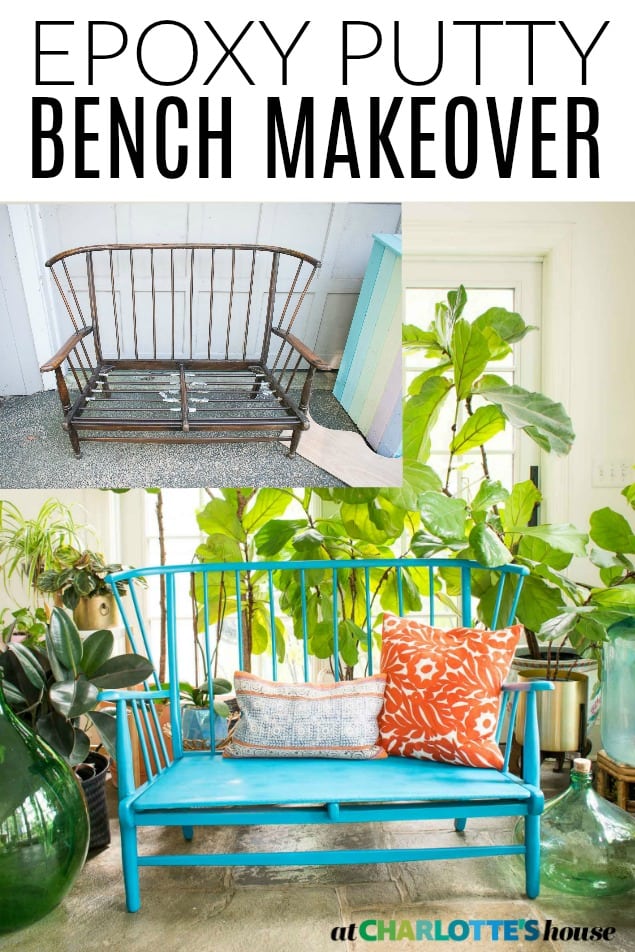
Using Epoxy Putty to Makeover an Old Bench
Psssst… this post *might* contain affiliate links: see my disclosure here.
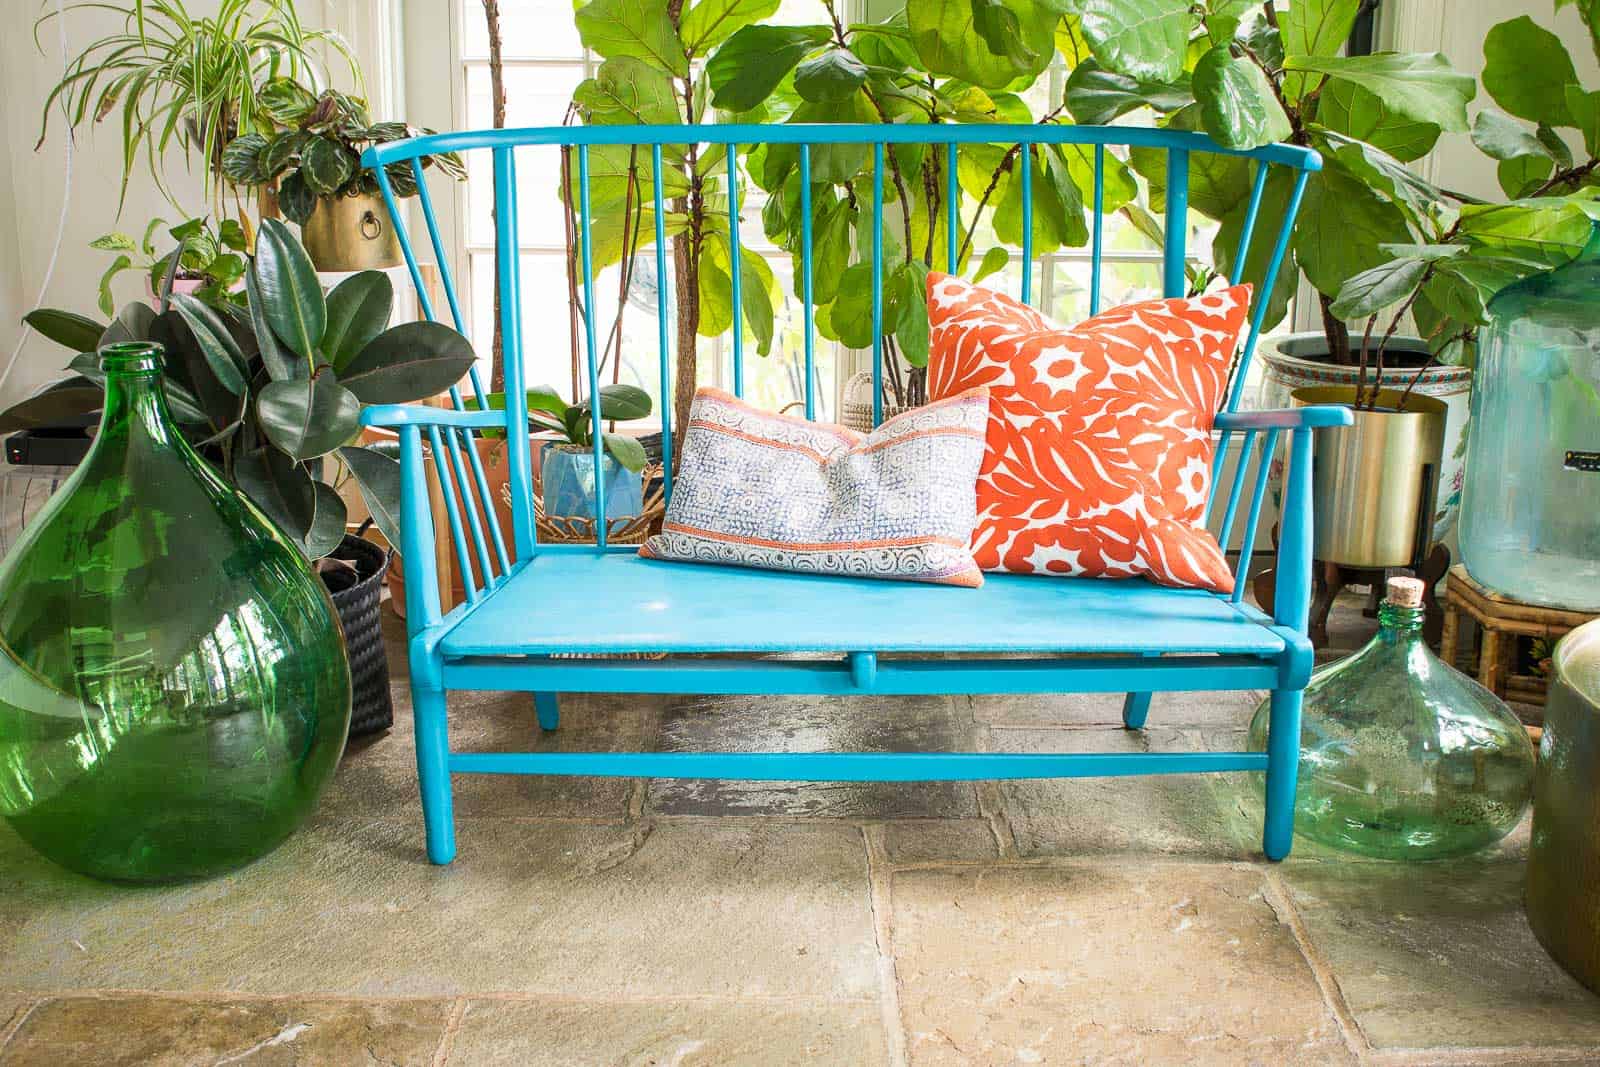
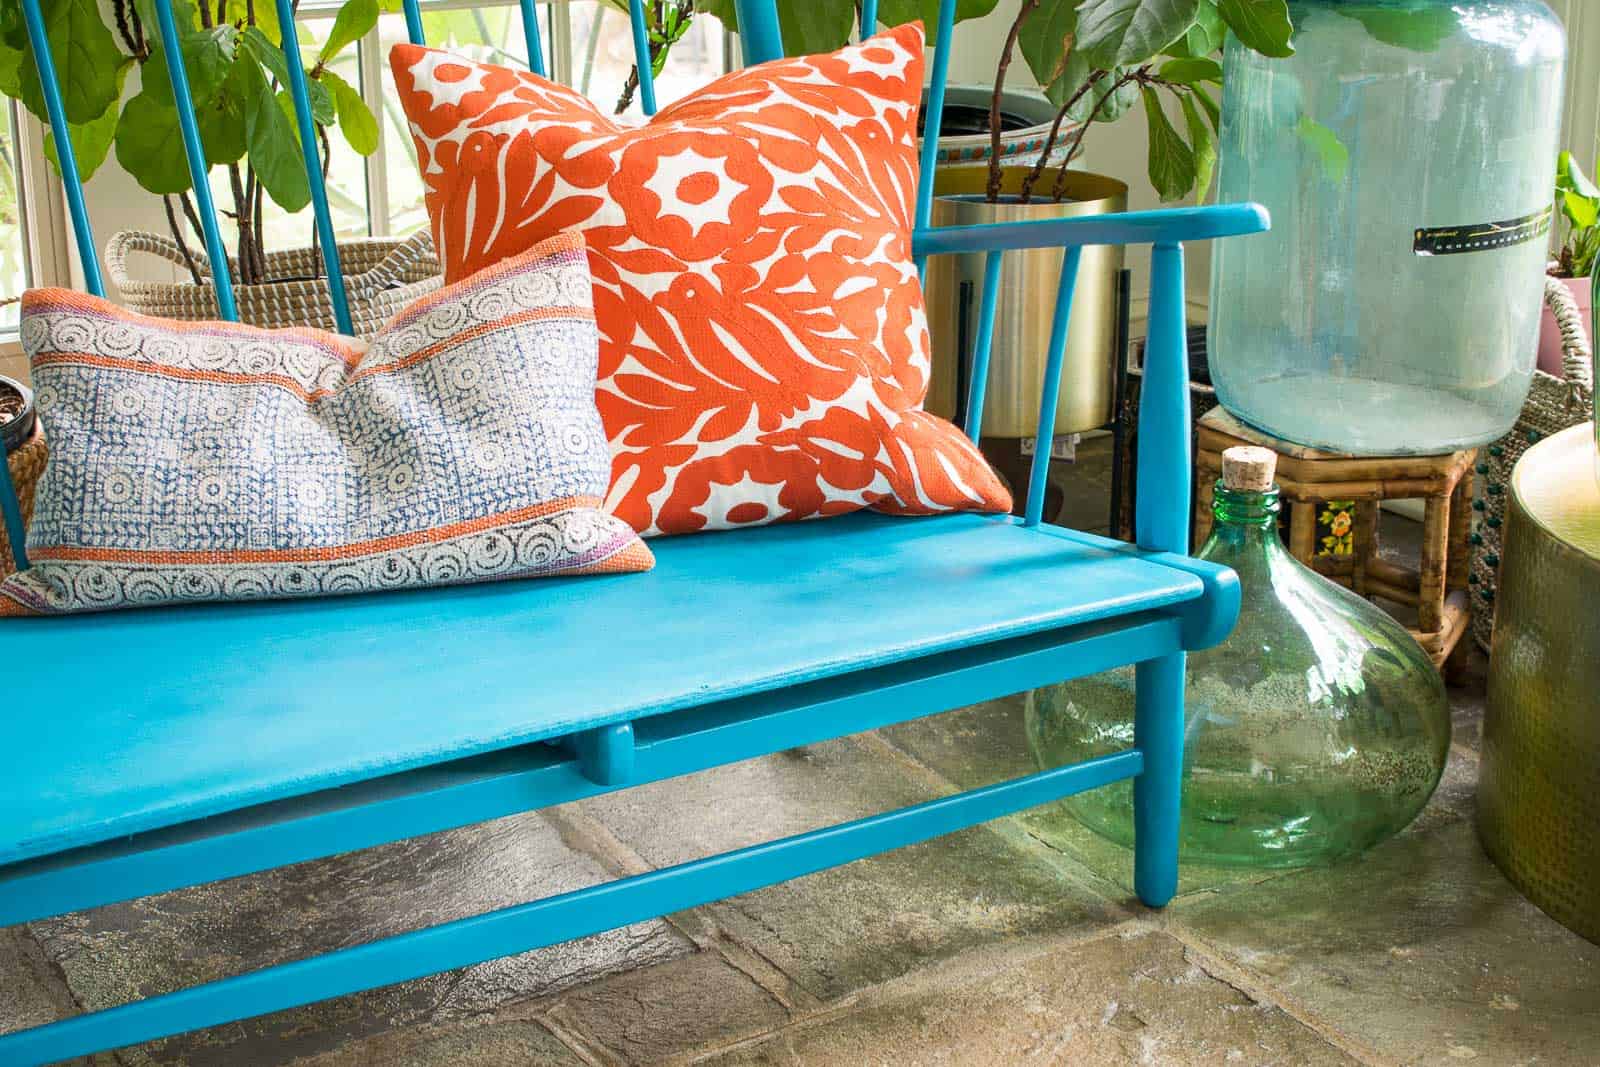
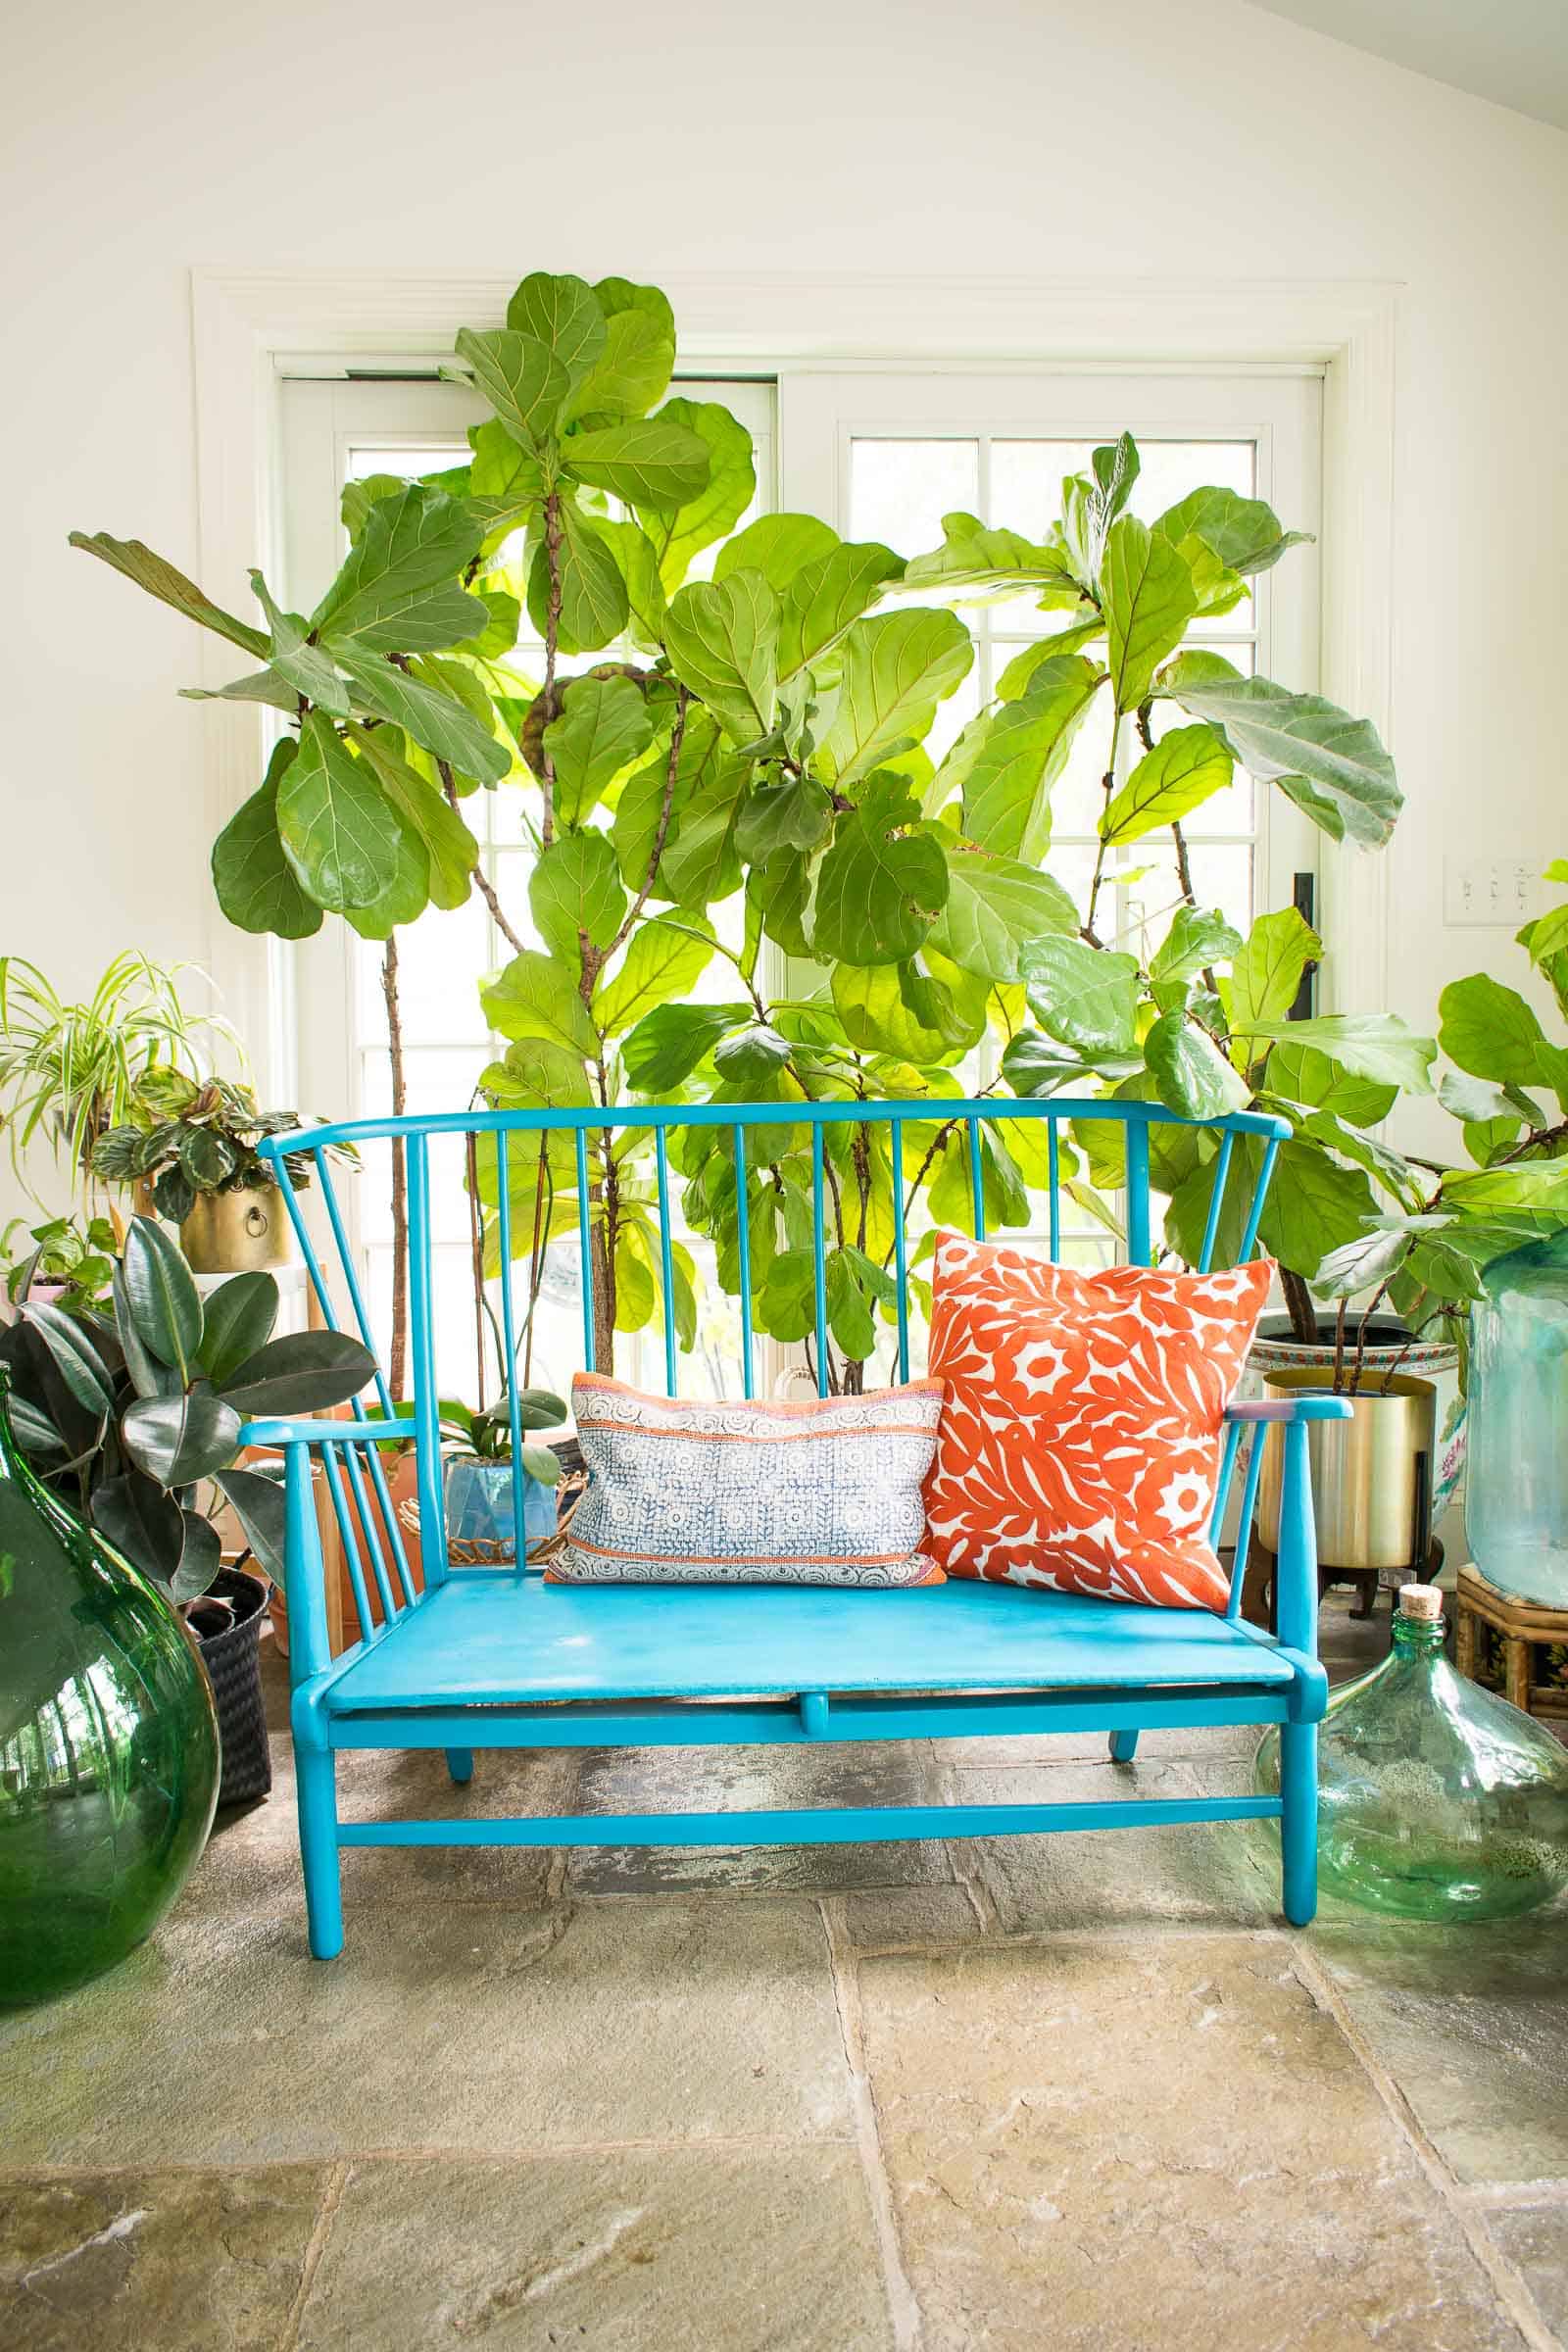
Bench Makeover Using Epoxy Putty
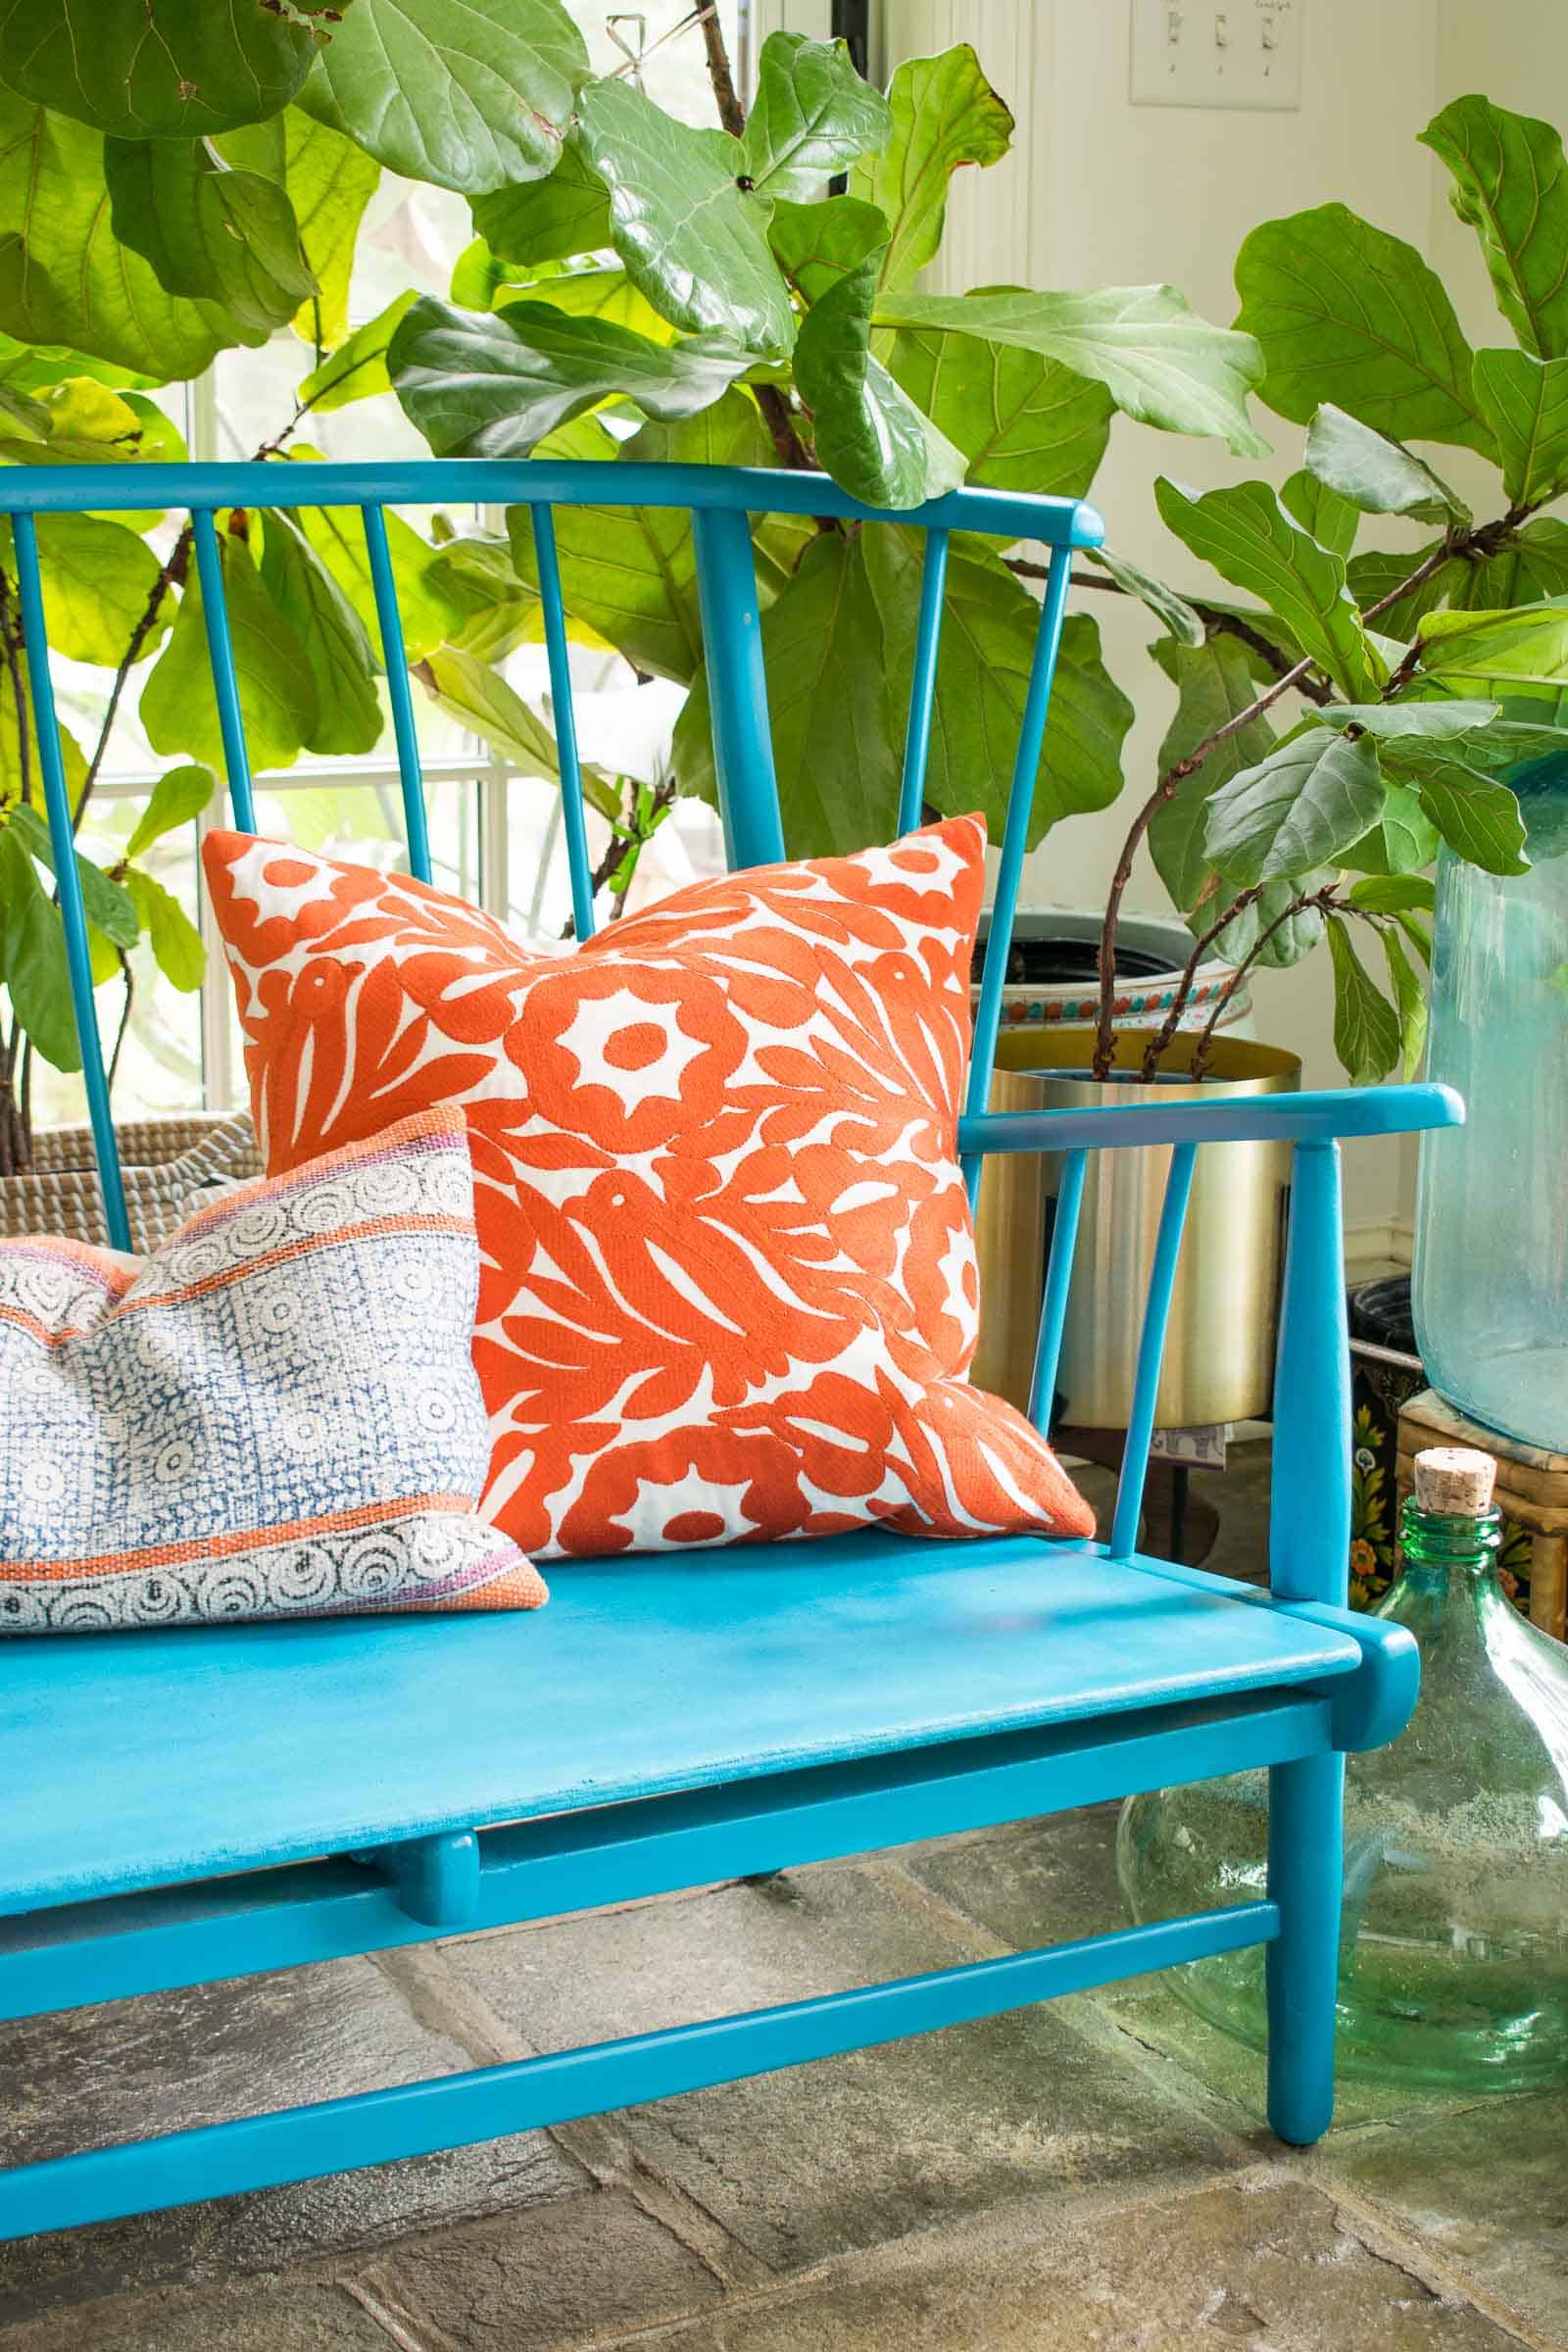
This bench had wonderful lines on the back but needed a new seat and an update to the front legs using epoxy putty.
Disclosure: I partnered with Mohawk to makeover this bench (and reshape some legs!)
Shop my favorites!
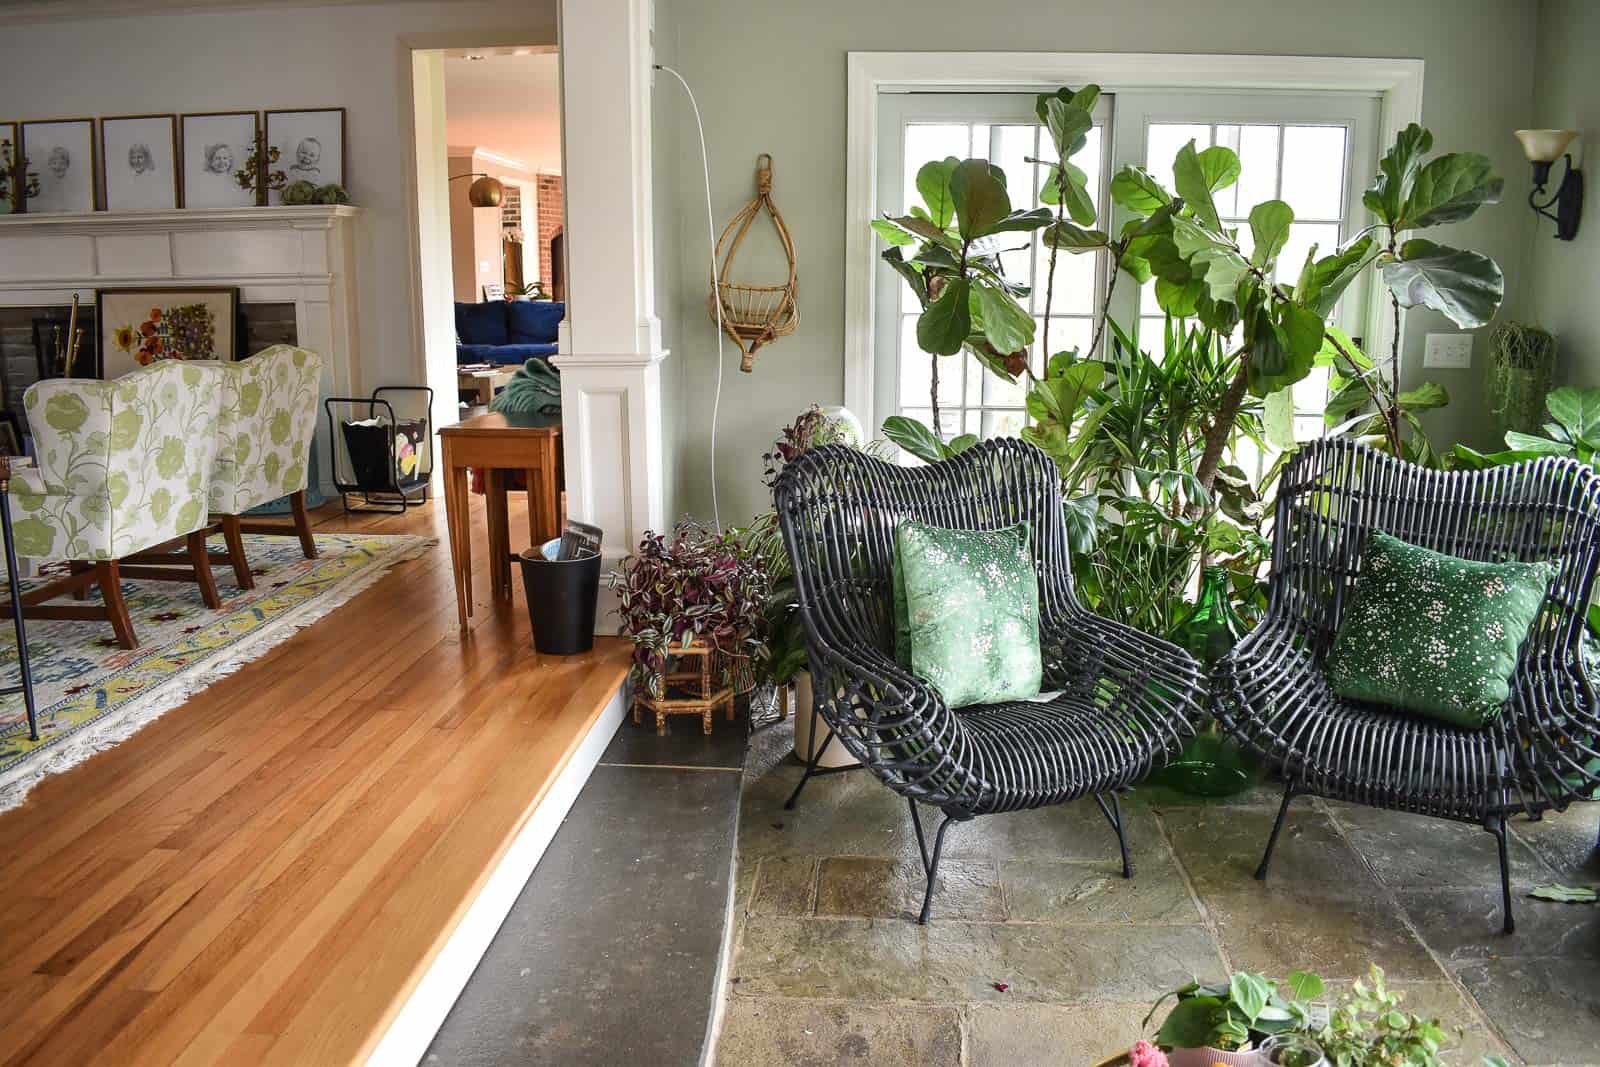
The end of our playroom is a tough space to decorate. A door opening up to the patio means we don’t have enough space for a full seating area, but there’s always been a seat or two over there. It’s also a great spot for all my houseplants… lots of great light. I decided that a colorful bench might be the right solution: small in stature, big enough to fill the space but not so big to block all the lovely plants.
After searching online for weeks and weeks only to see benches for hundreds of dollars, I saw this guy on sale for $40. It wasn’t perfect, but it was close and I figured I had nothing to lose!
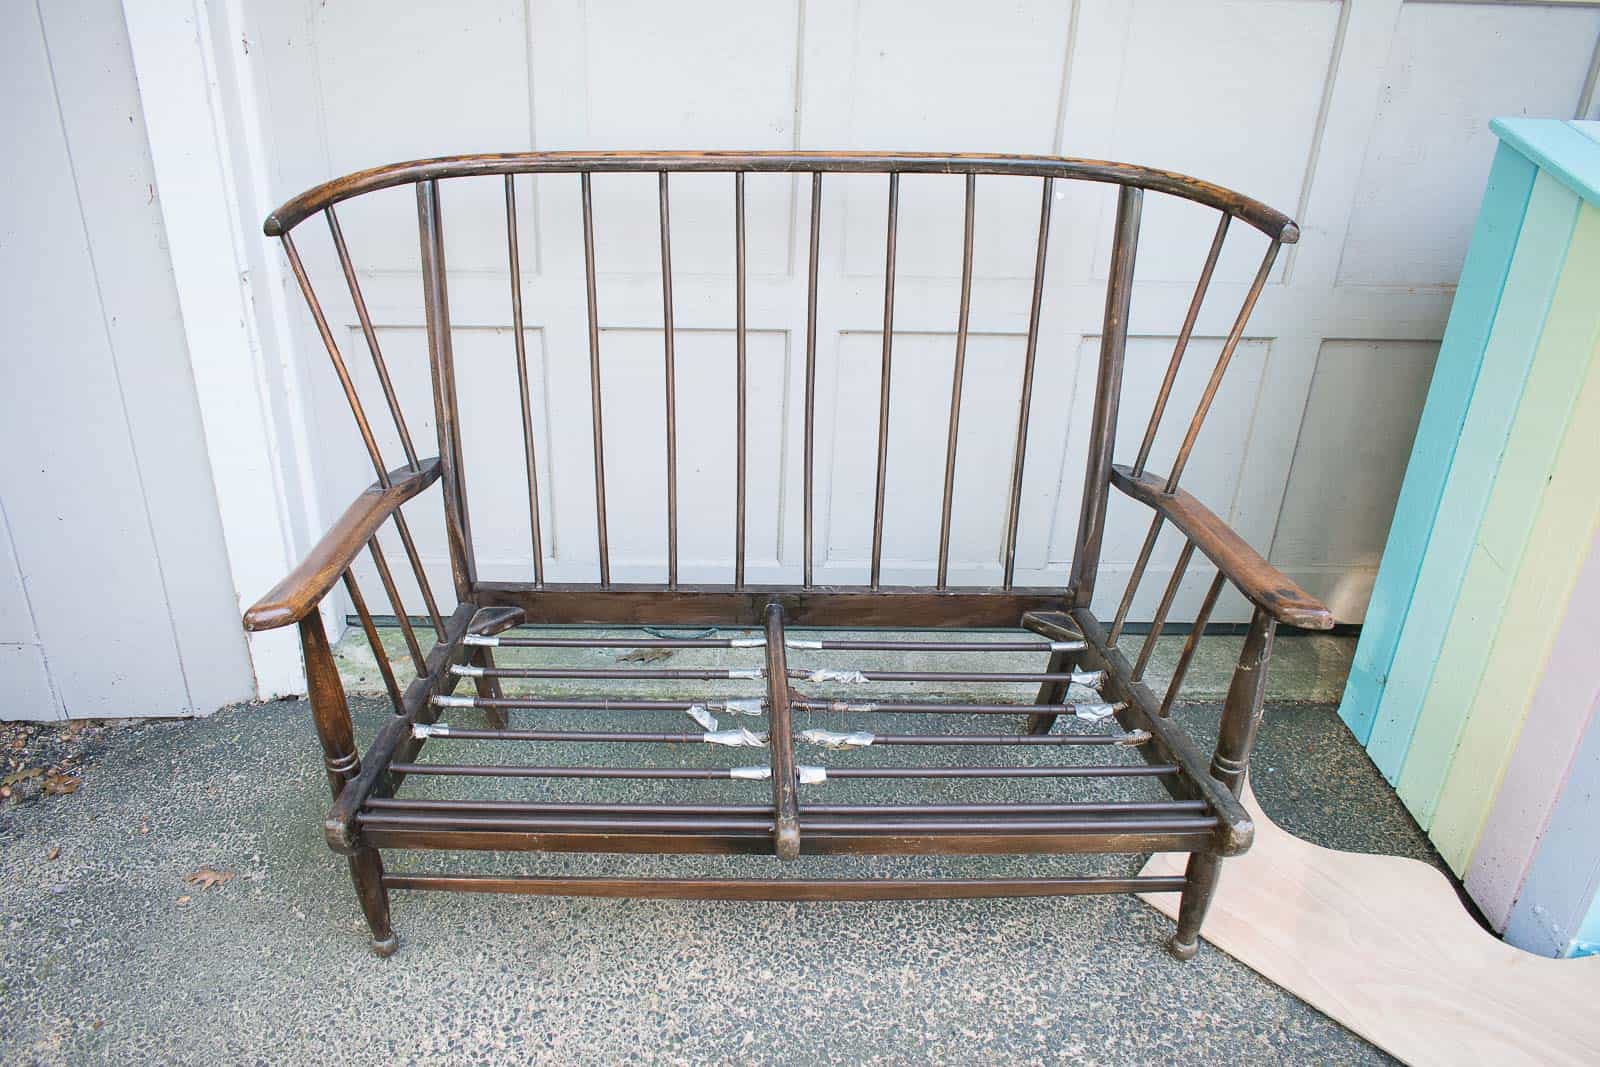
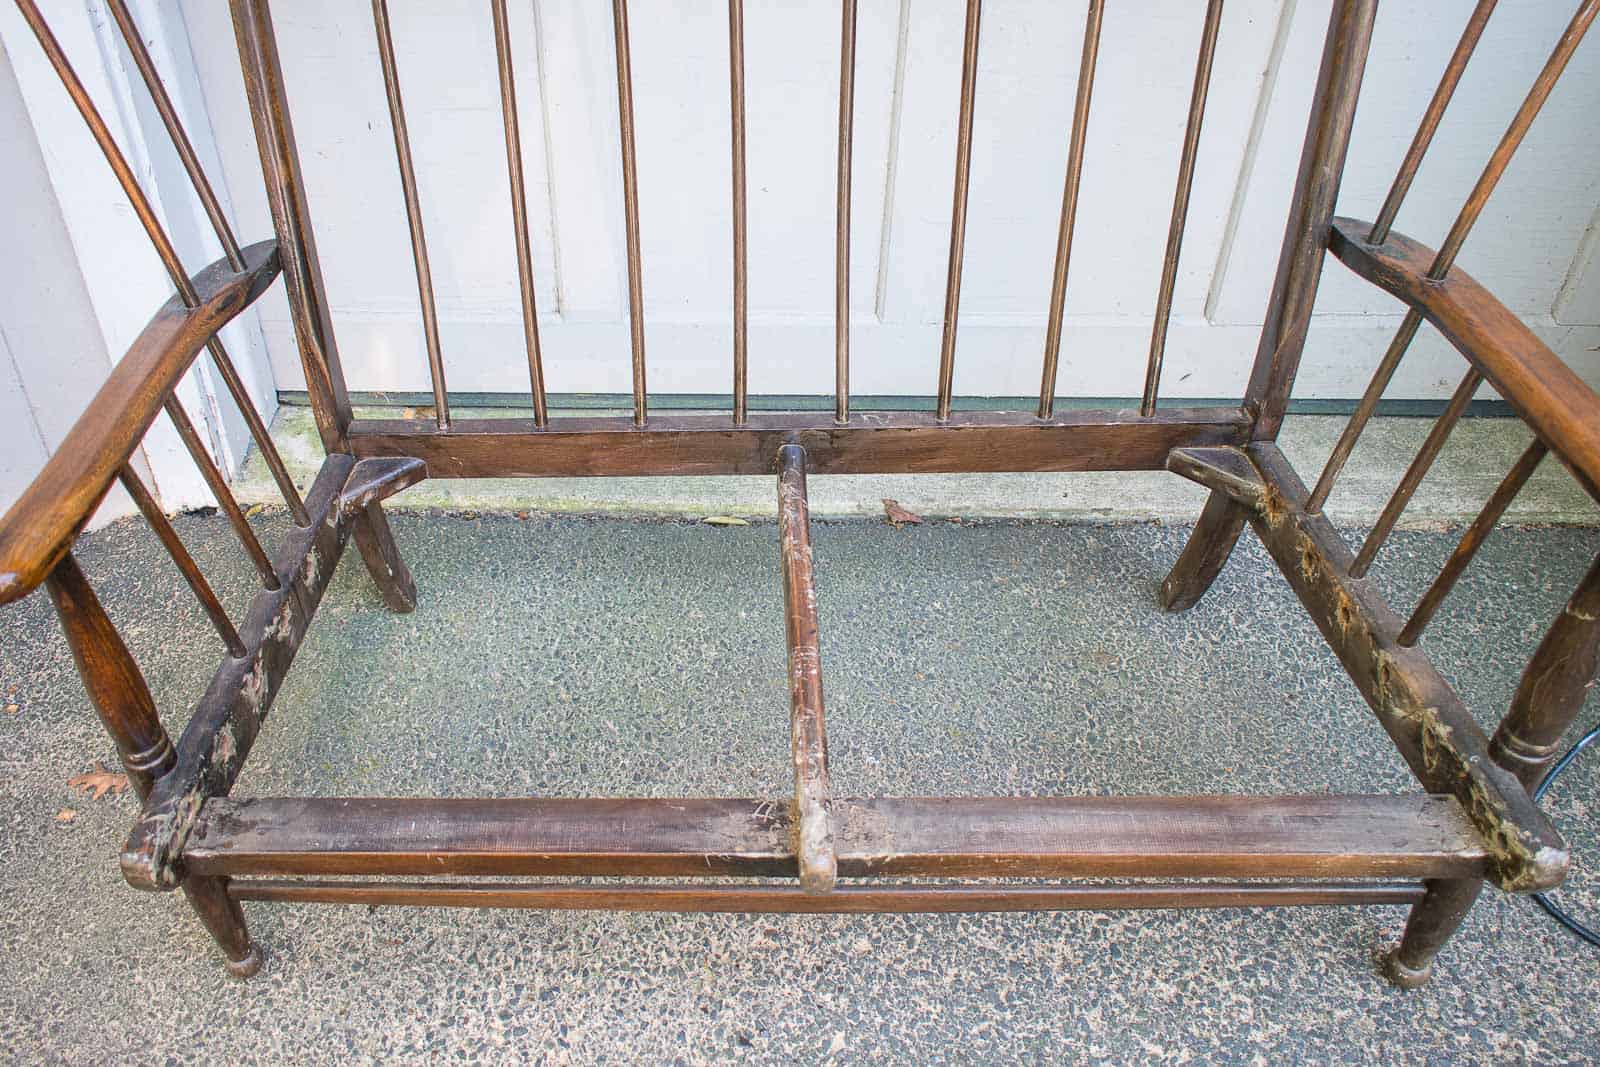
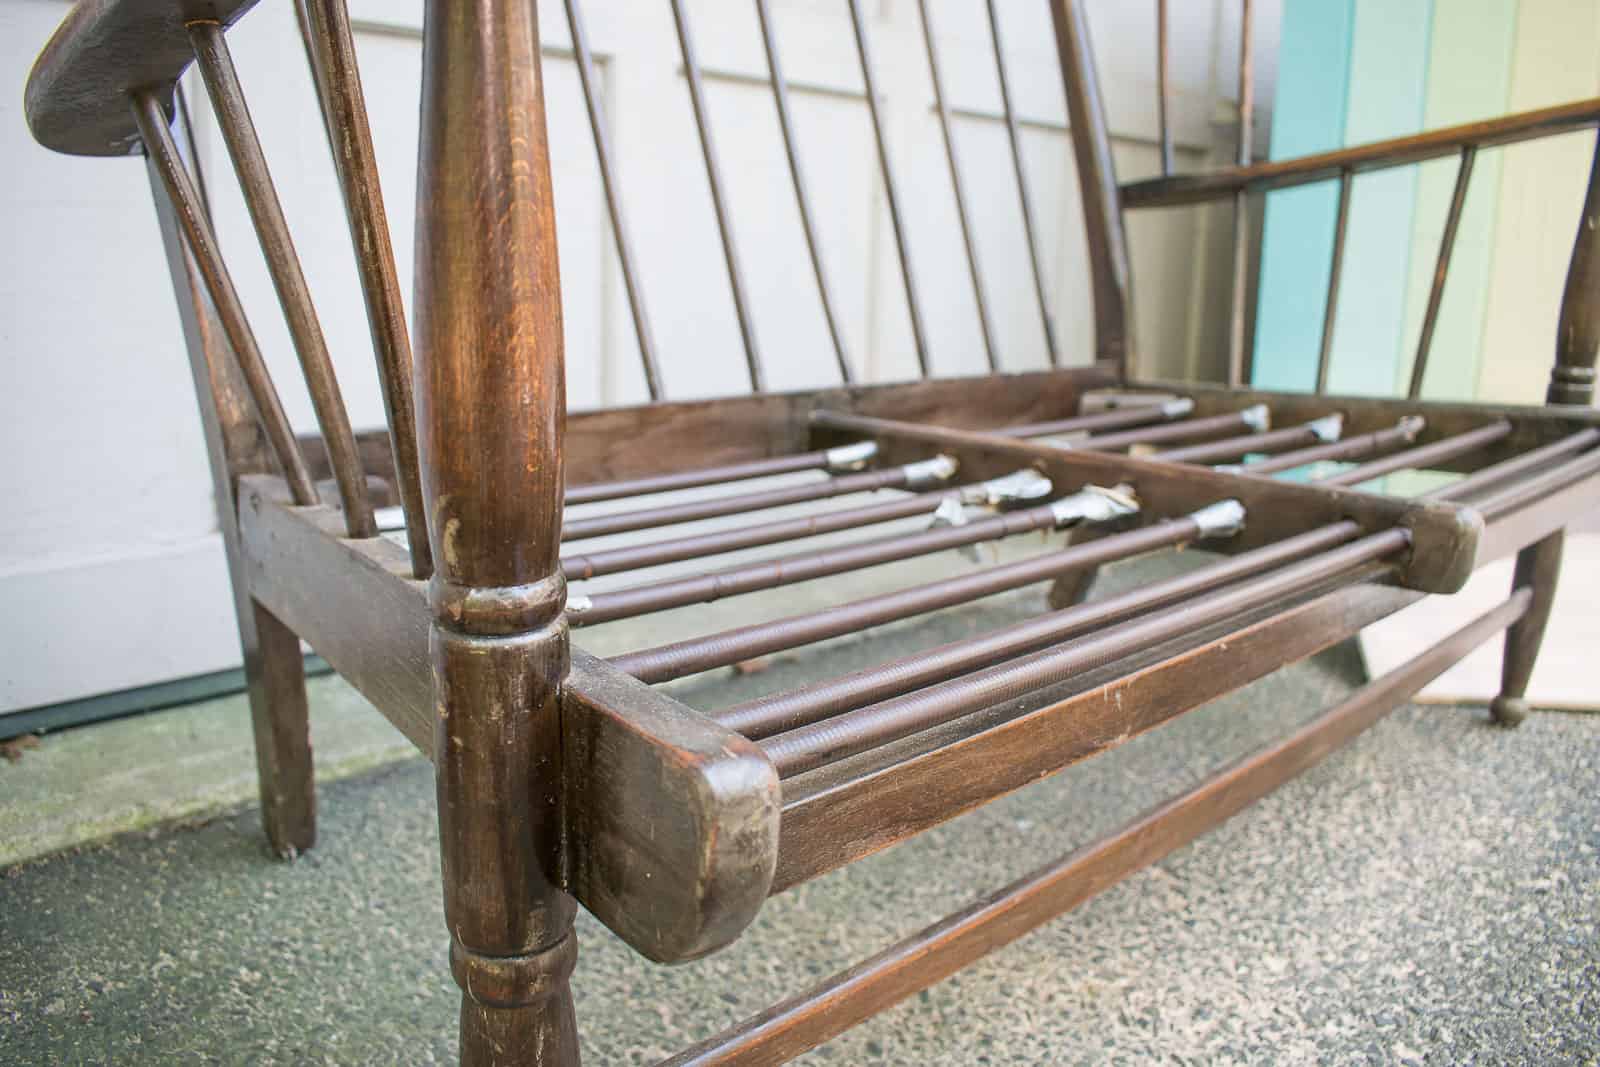
Step 1. Remove the seat
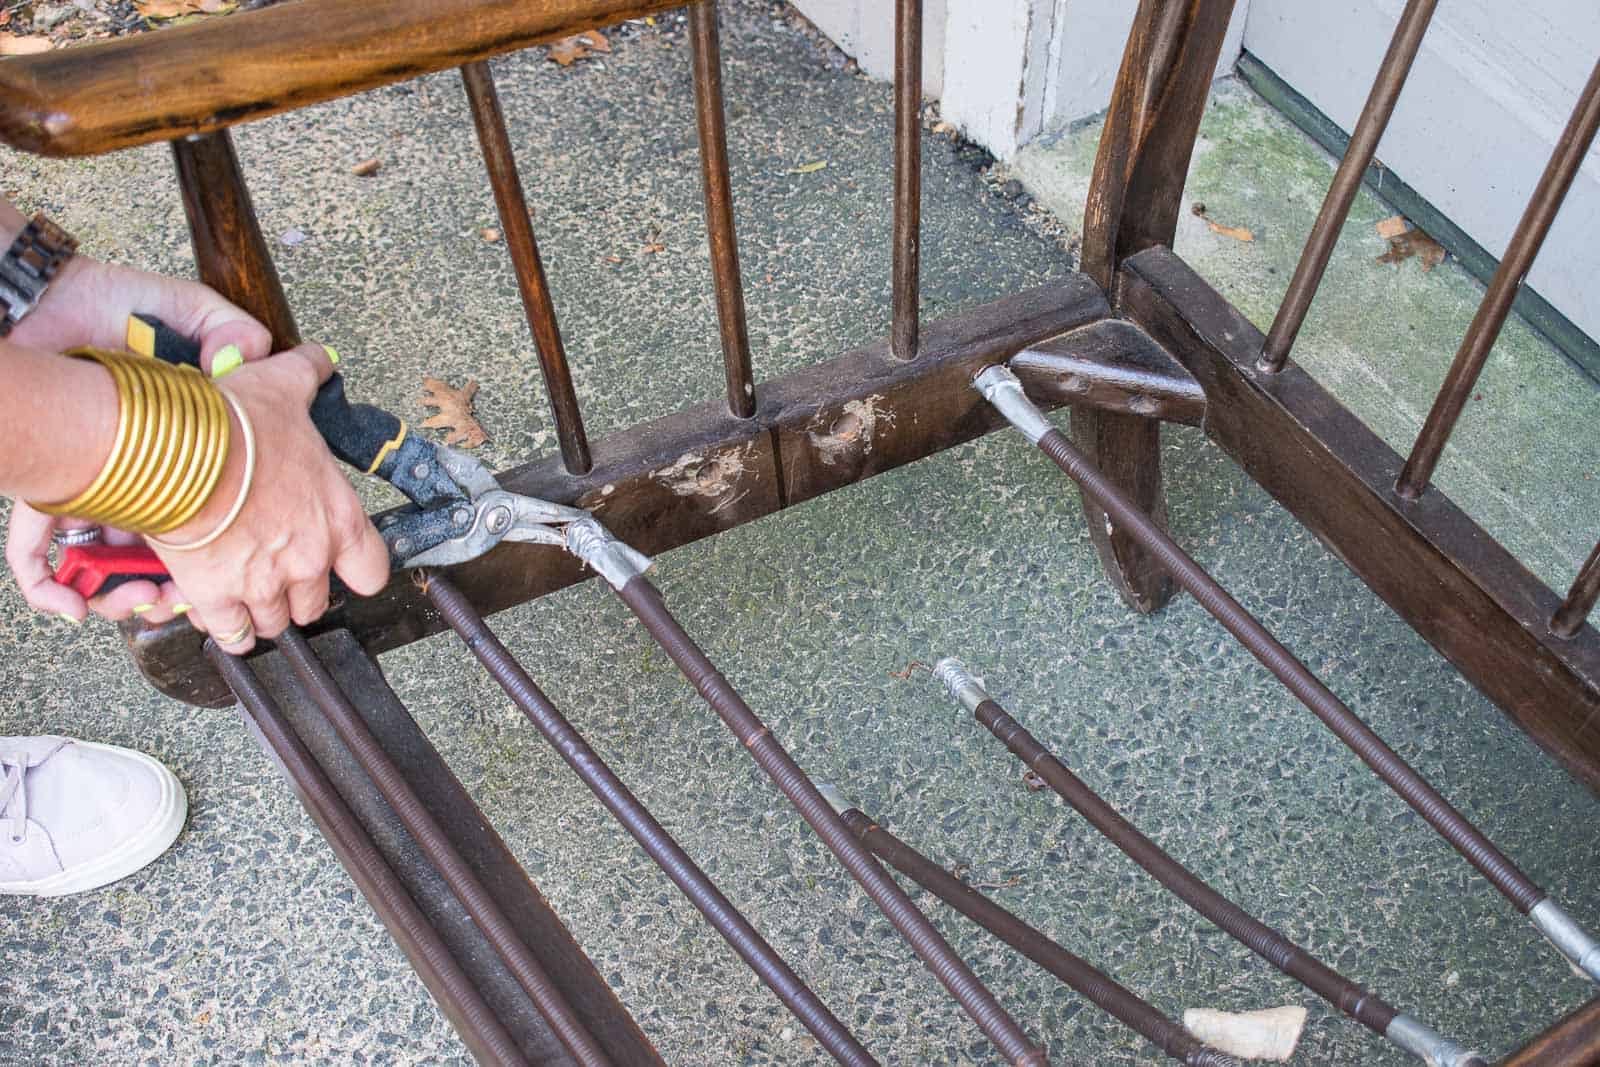
The biggest head scratcher about this seemingly classic bench was the addition of the springs on the seat. I couldn’t see ANY evidence that the springs were added later so I’m guessing this was how it came. Even though the springs were in great shape, I didn’t want to sew cushions and I didn’t really want that look anyways. I was hoping just to snip the springs, but they were STURDY! Ultimately, I used tin snips to twist and bend the springs until they eventually snapped off.
Step 2. Epoxy Putty
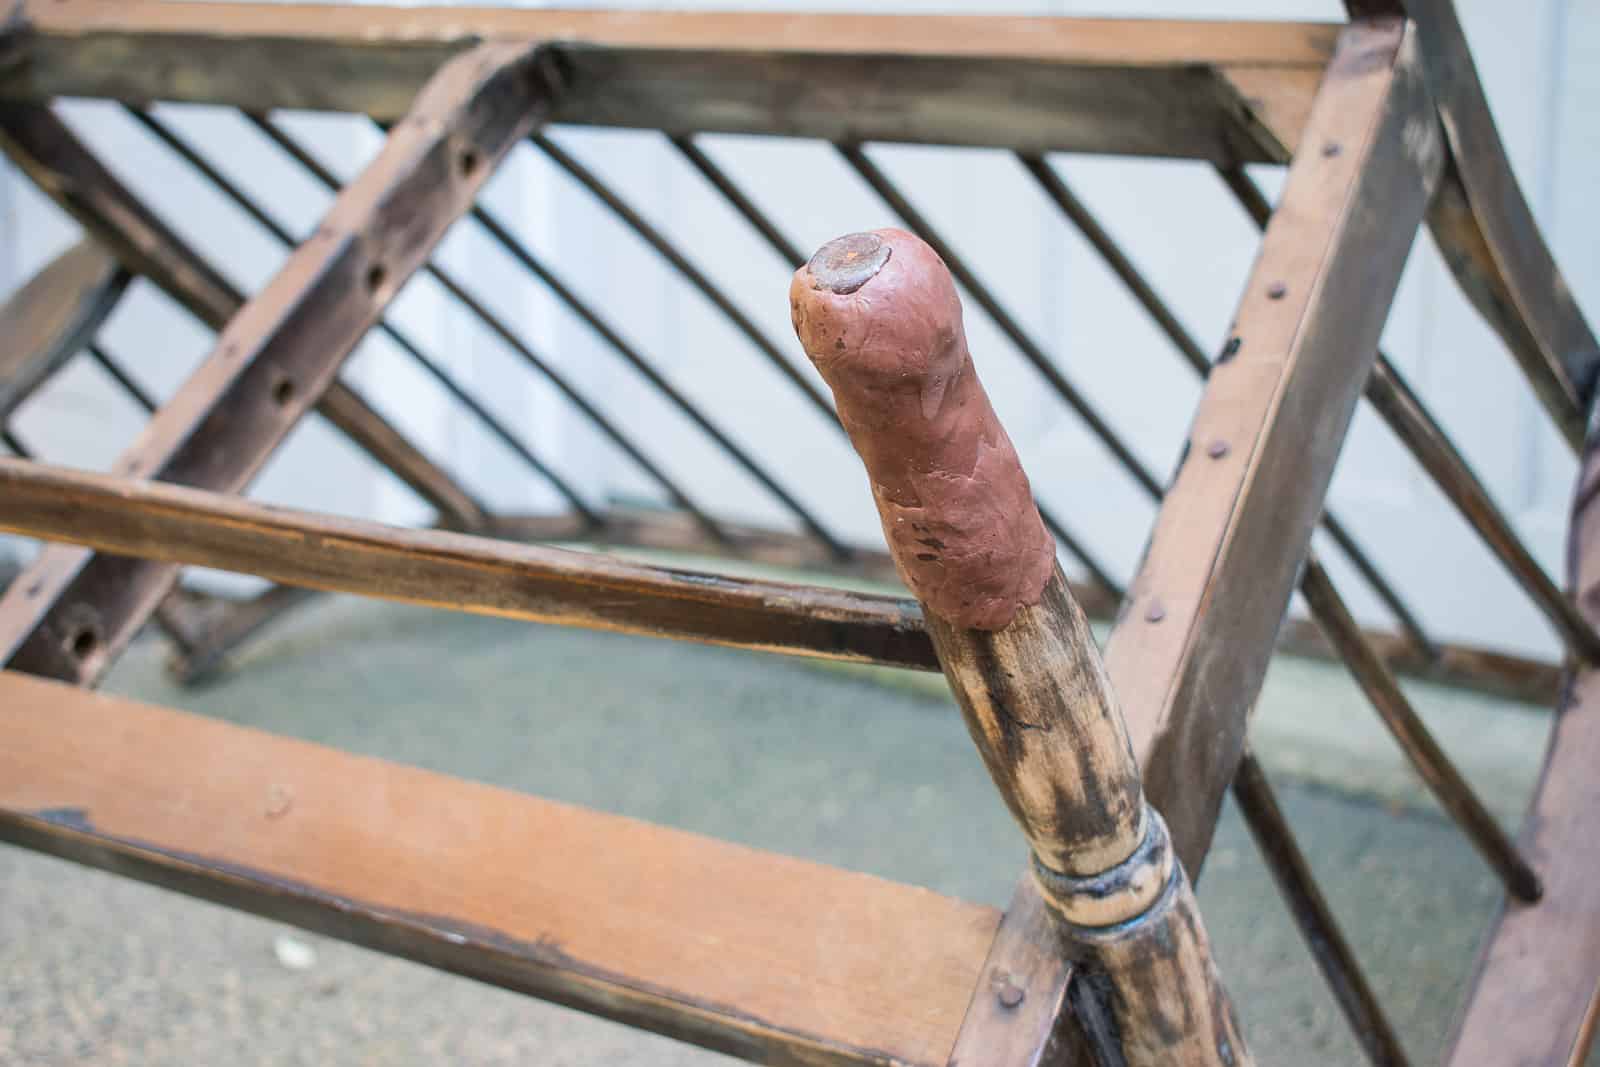
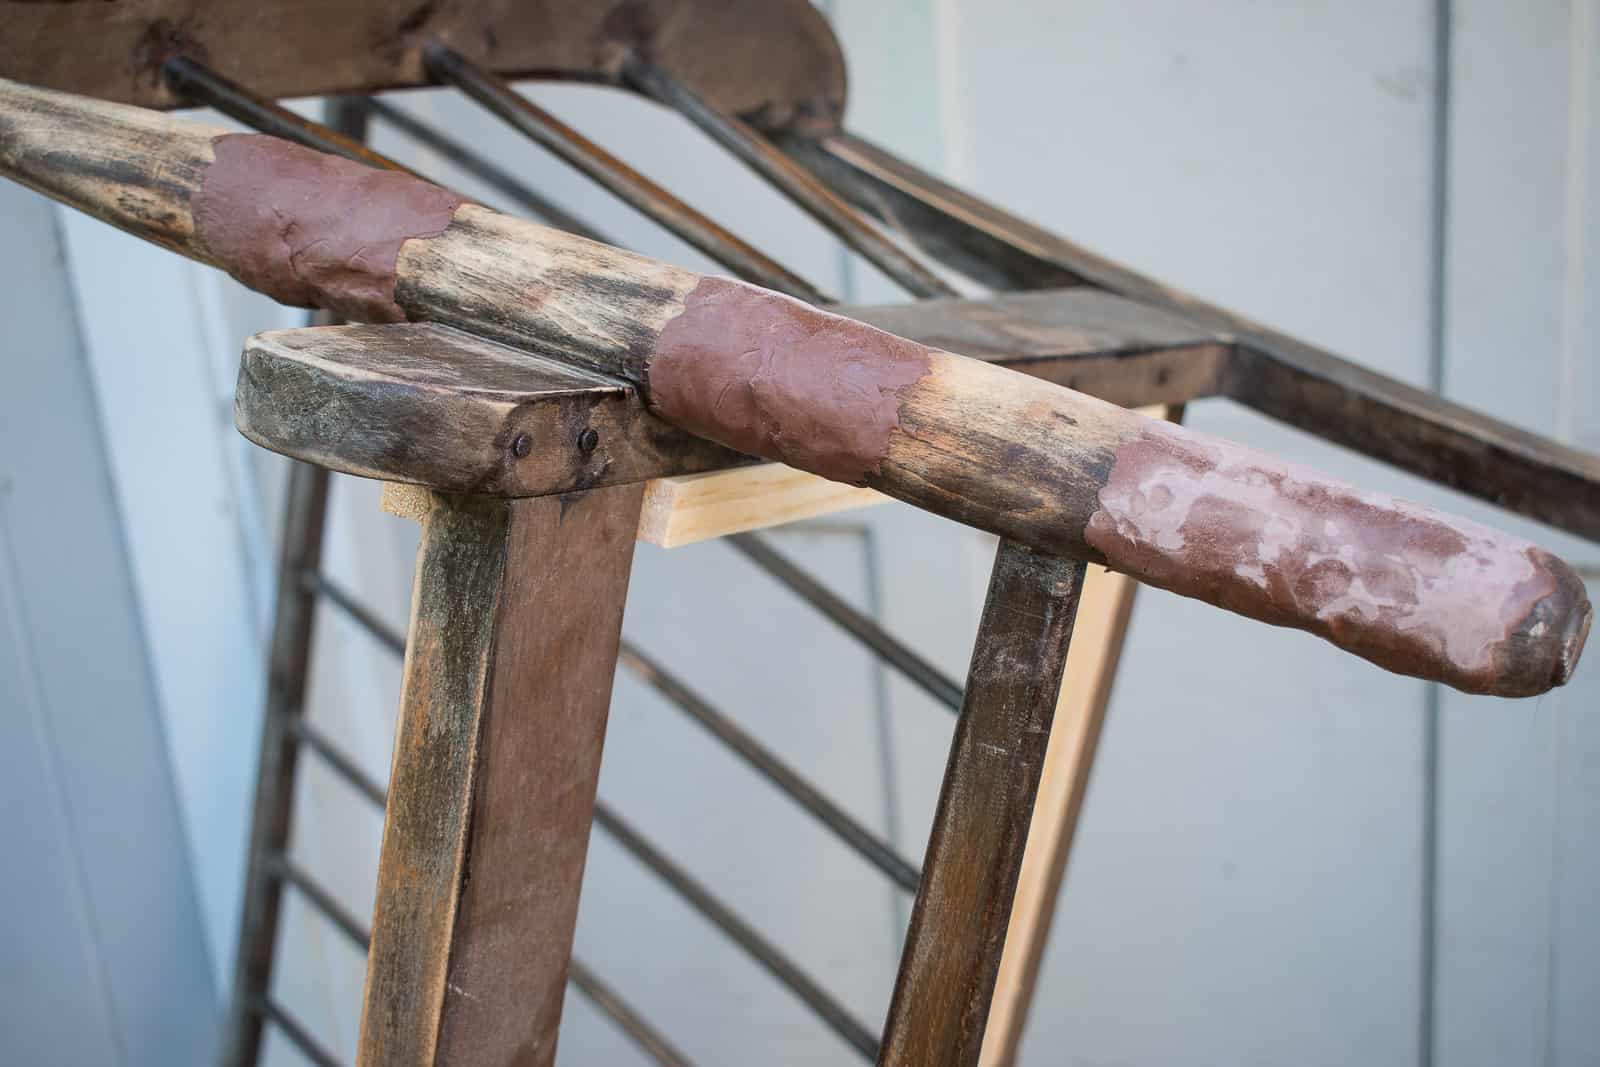
When I bought the bench, I didn’t pay much attention to the legs, but when I got it home they started to bother me more and more. They were not the simple sleek legs of the bench I had dreamed of. They had grooves and somehow felt… dated. Which is where this magical epoxy putty from Mohawk comes in!
It looks like a giant tootsie roll (the outside comes in a handful of different shades). When you mix the outside with the inside, it becomes an epoxy putty that you can shape and manipulate but it will harden within minutes. Once it hardens, it can be sanded, painted, and will keep its shape permanently inside or outside.
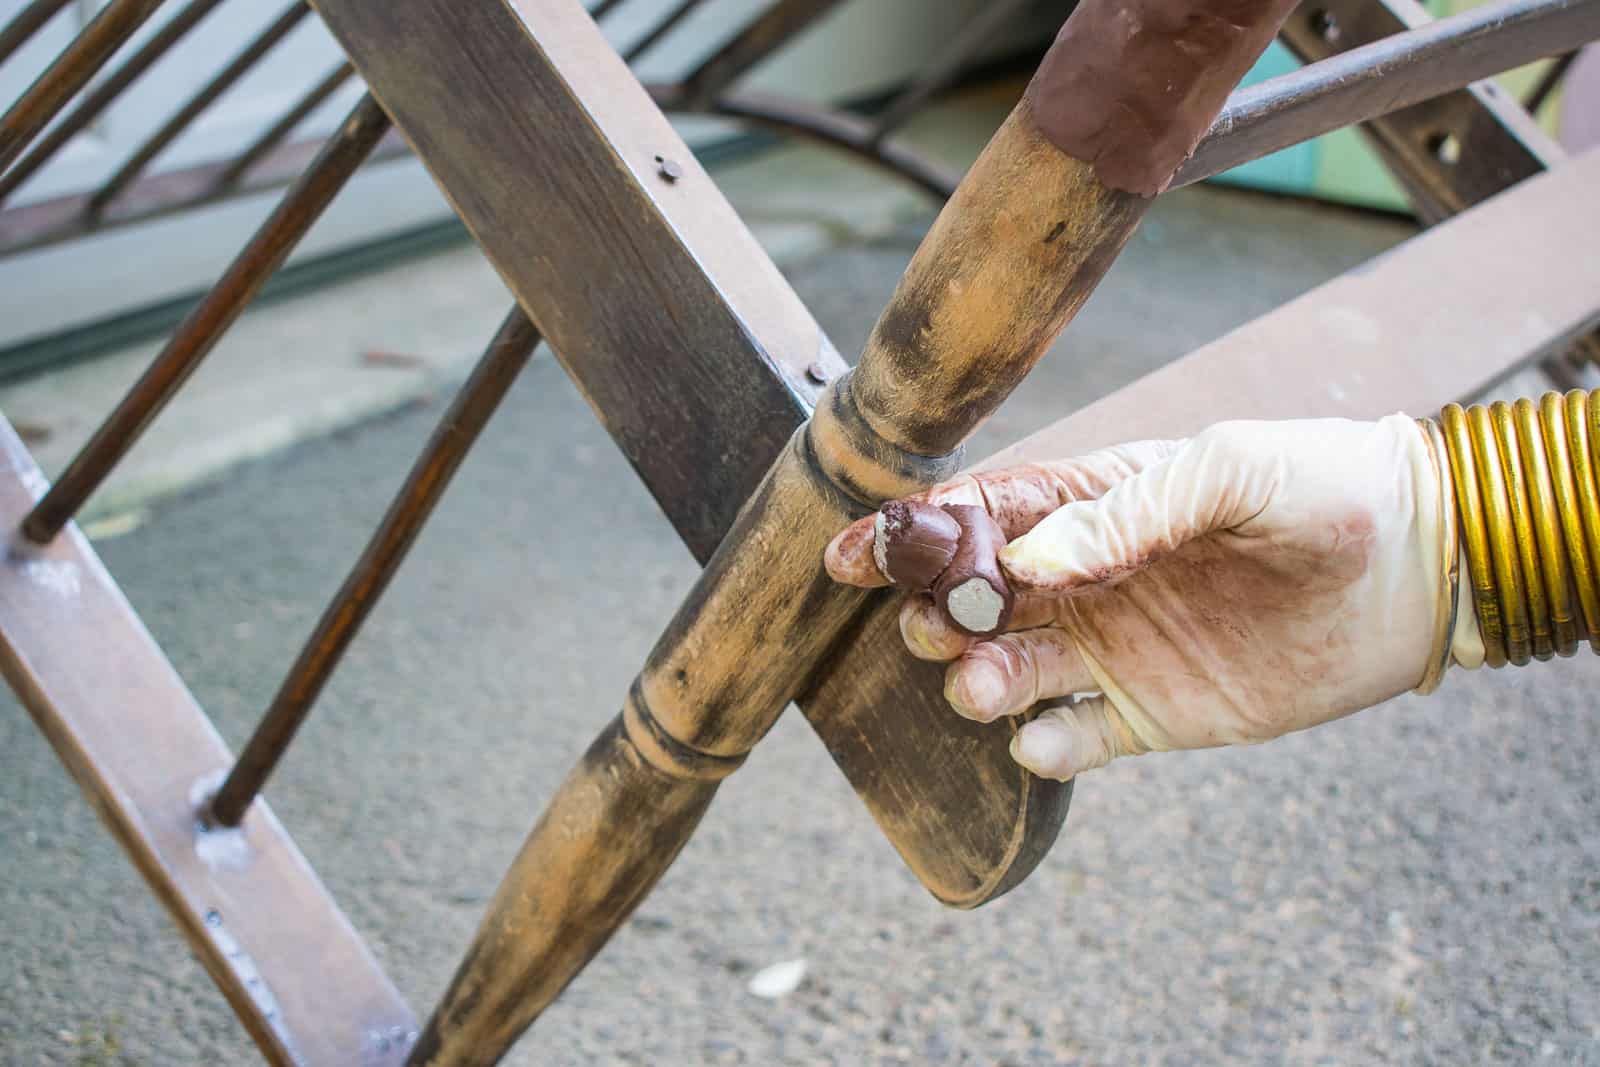
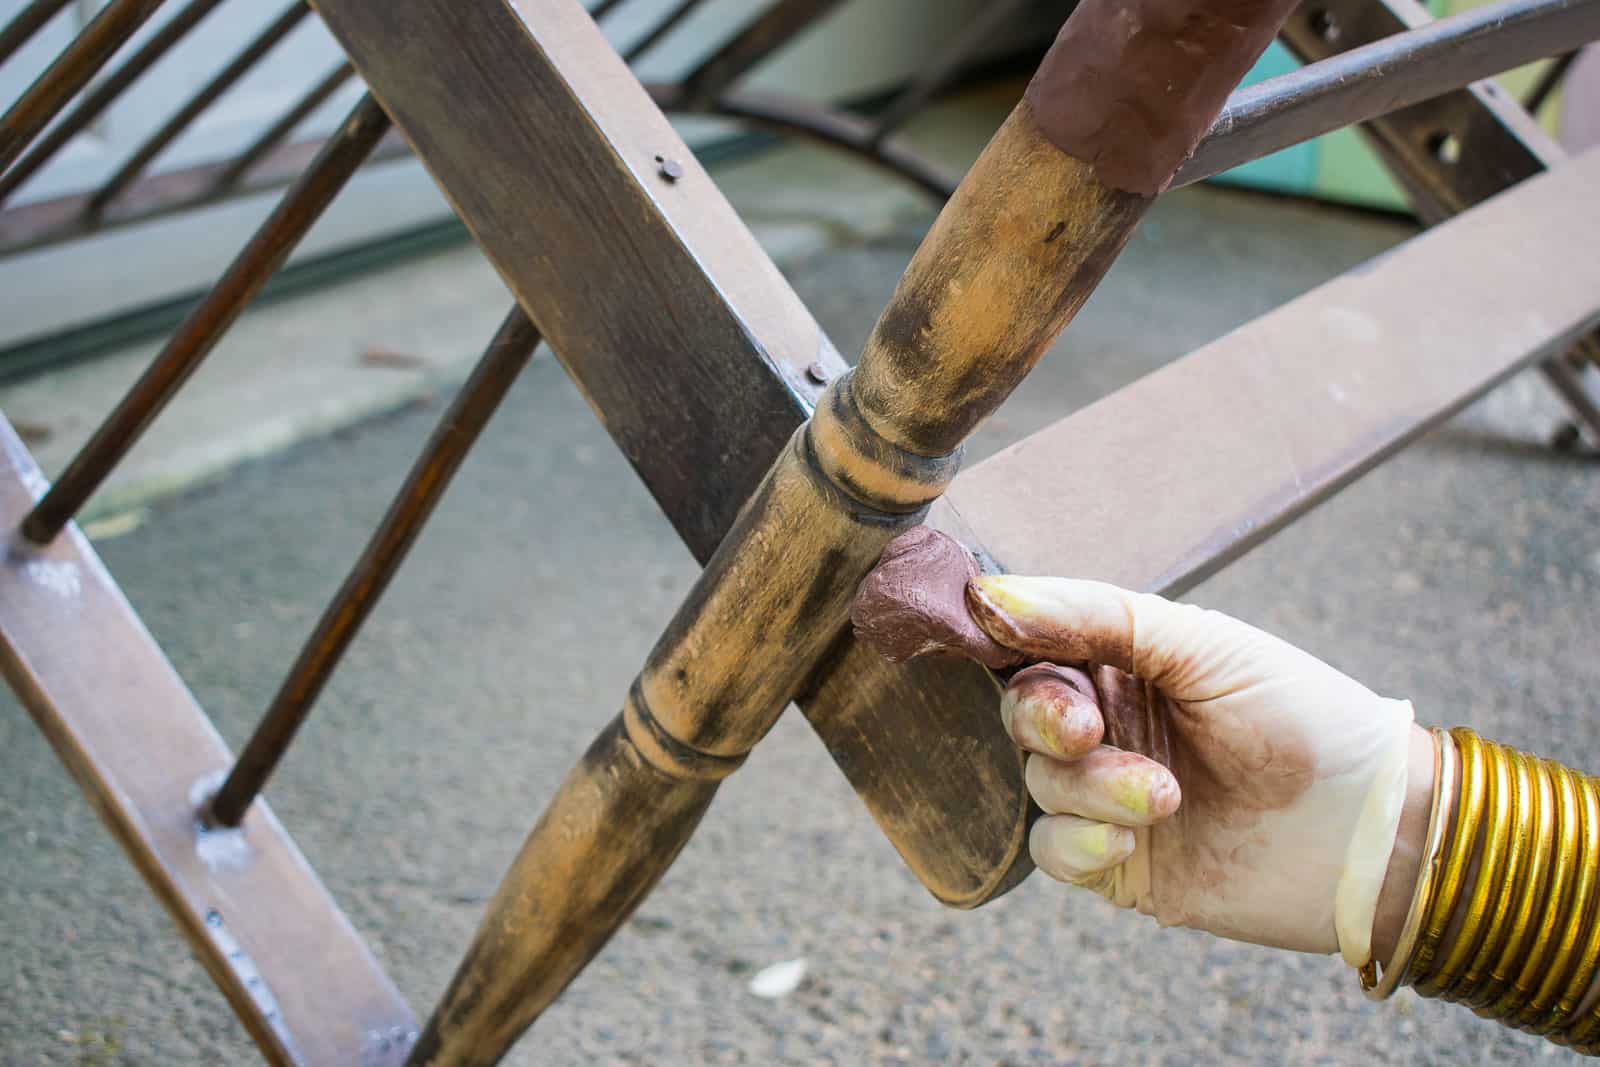
Working one small piece at a time, I pressed the putty into the grooves on the legs of my bench. Because the putty can be sanded when cured, I opted to build up the furniture legs and then sand it back down to smooth.
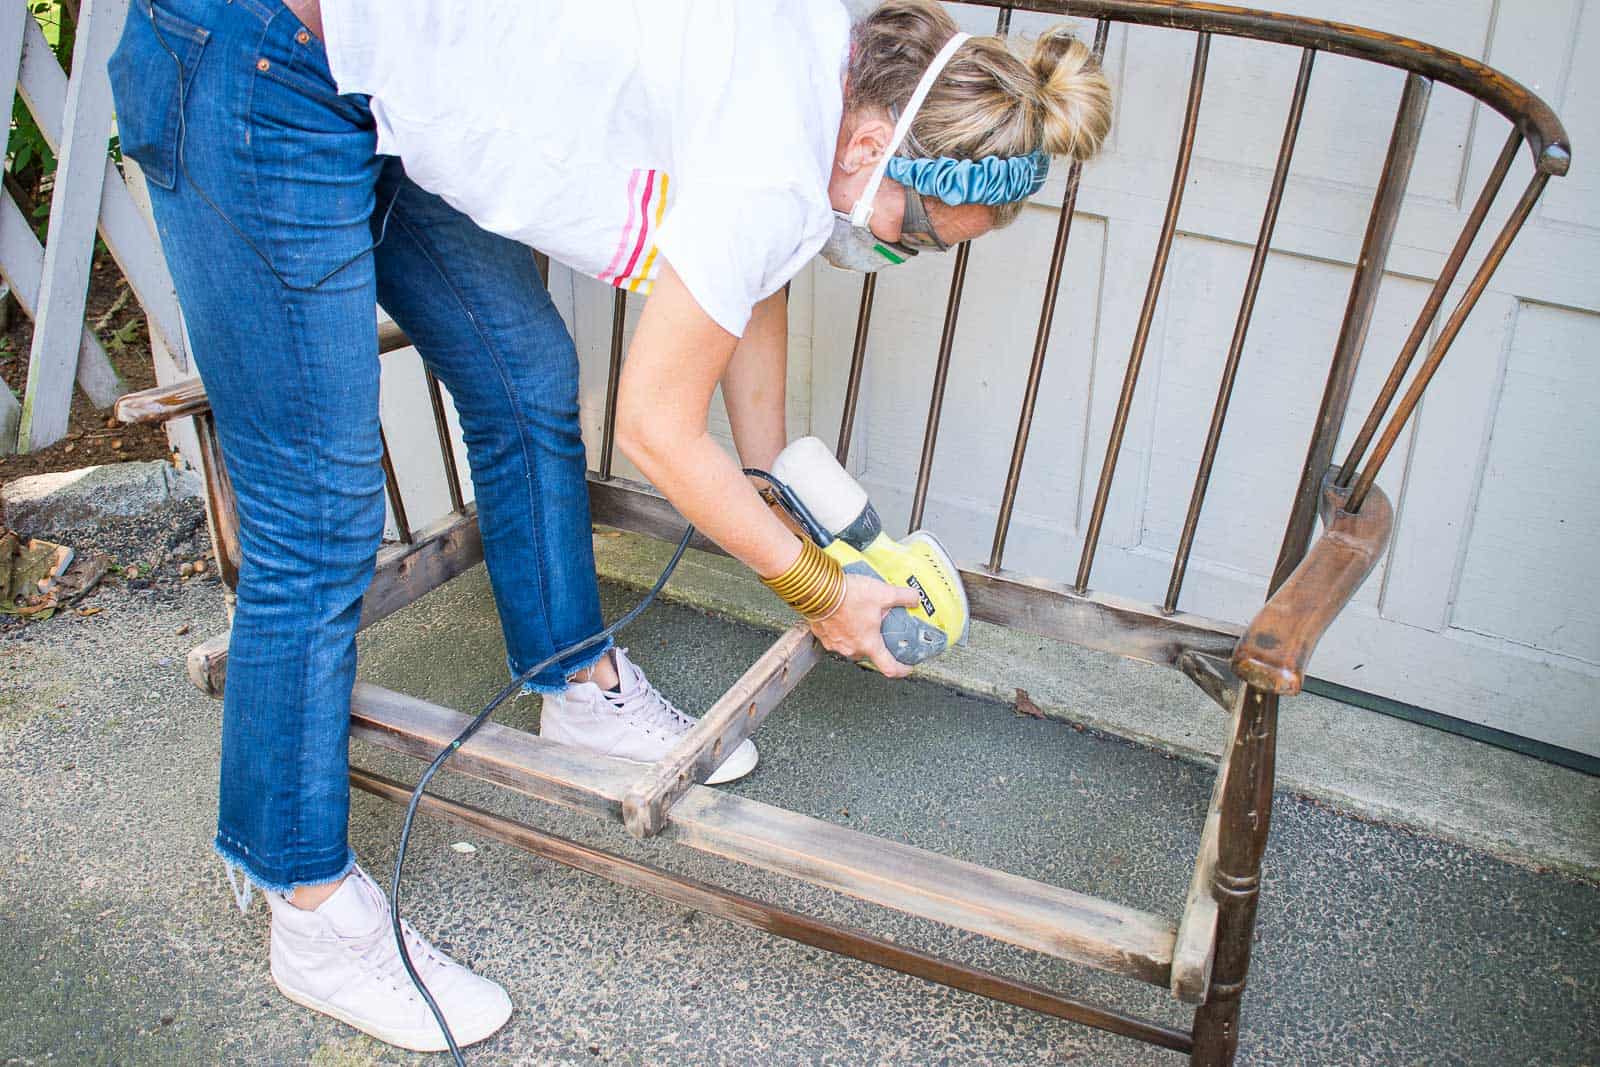
Step 3. Sand and Sand Some More
I sanded down one leg of the bench before applying the epoxy putty to the other leg and learned that more is more. It was actually easier to find the right shape when I had more epoxy to remove (within reason). An electric sander (affiliate) was really helpful for this step and I was able to shape the leg down to a straight smooth profile!
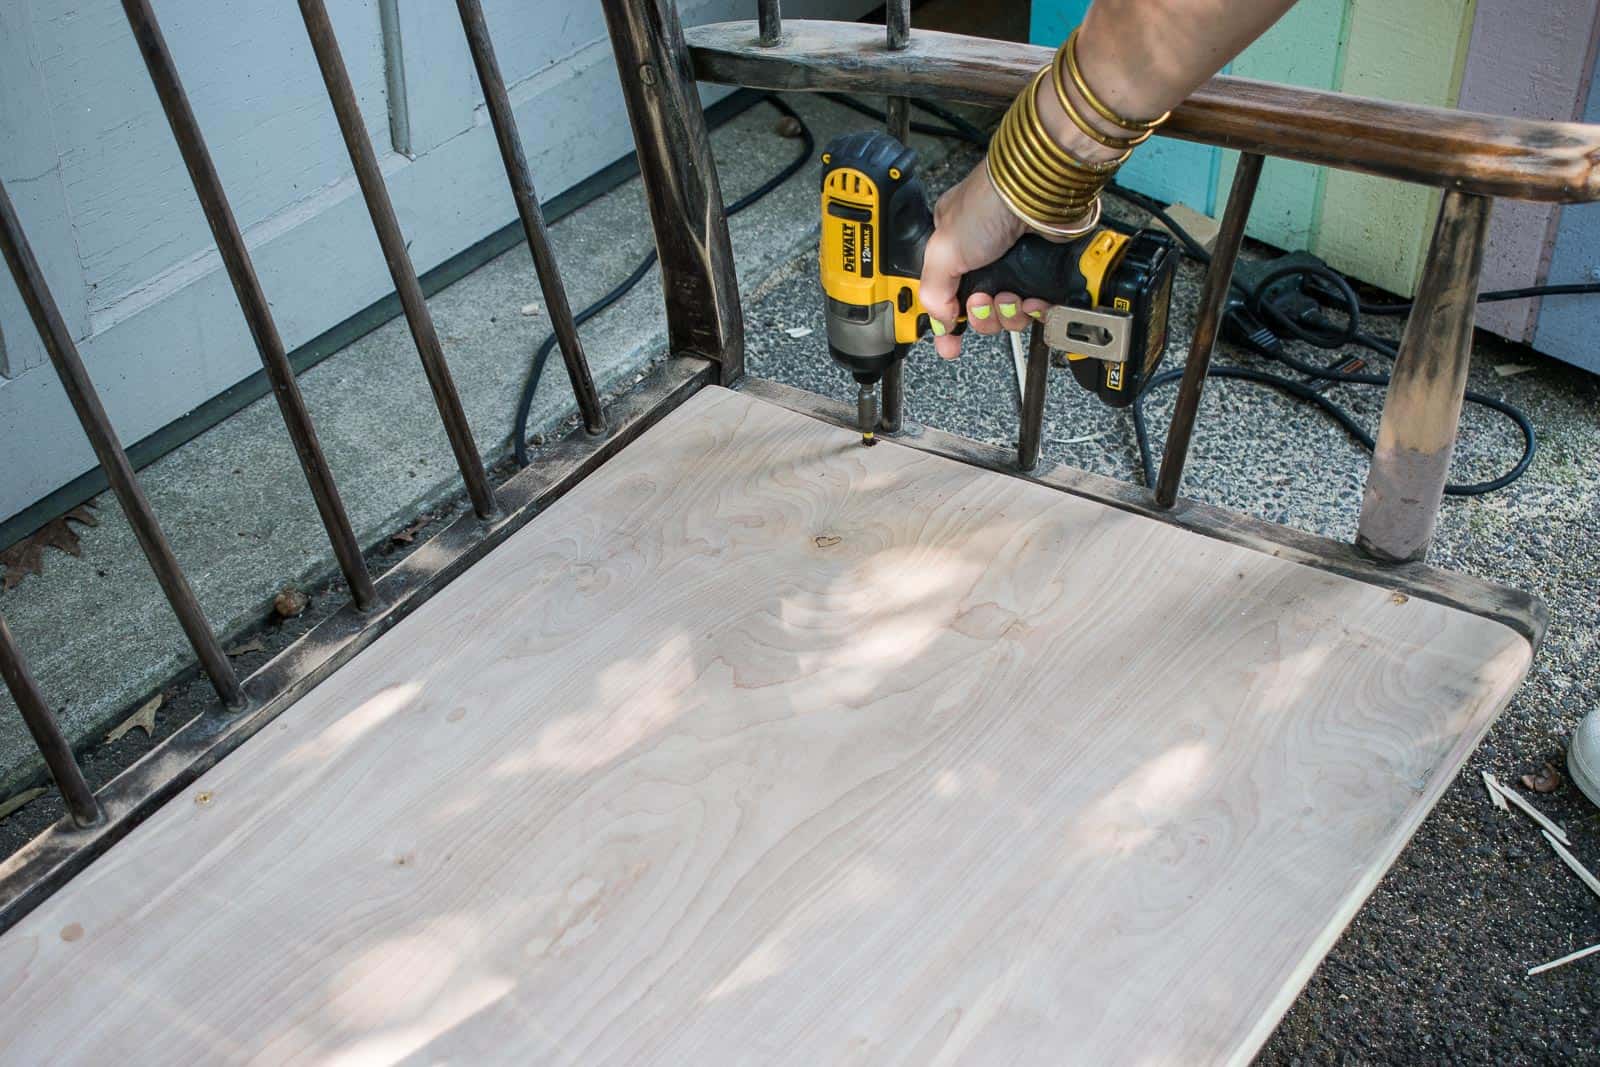
Step 4. Fix the seat
I definitely didn’t want the springs, but the bench didn’t have much depth for a seat. I didn’t want the seat to come up and over the back edge of the chair so I was limited to 3/4″ material. I used some leftover plywood from my Maker Space tree and cut it to fit. I forgot to take pictures, but I routed the edges to round them off a bit and screwed support braces along the inside edge of the bench. I attached the seat to the bench with countersunk screws along the perimeter.
Step 5. Prime and paint
This bench had a DARK stain. I sanded as best I could, but still wanted to protect myself from any bleed through after painting. To prevent this, I grabbed a shellac-based primer and gave the entire bench a couple of light coats.
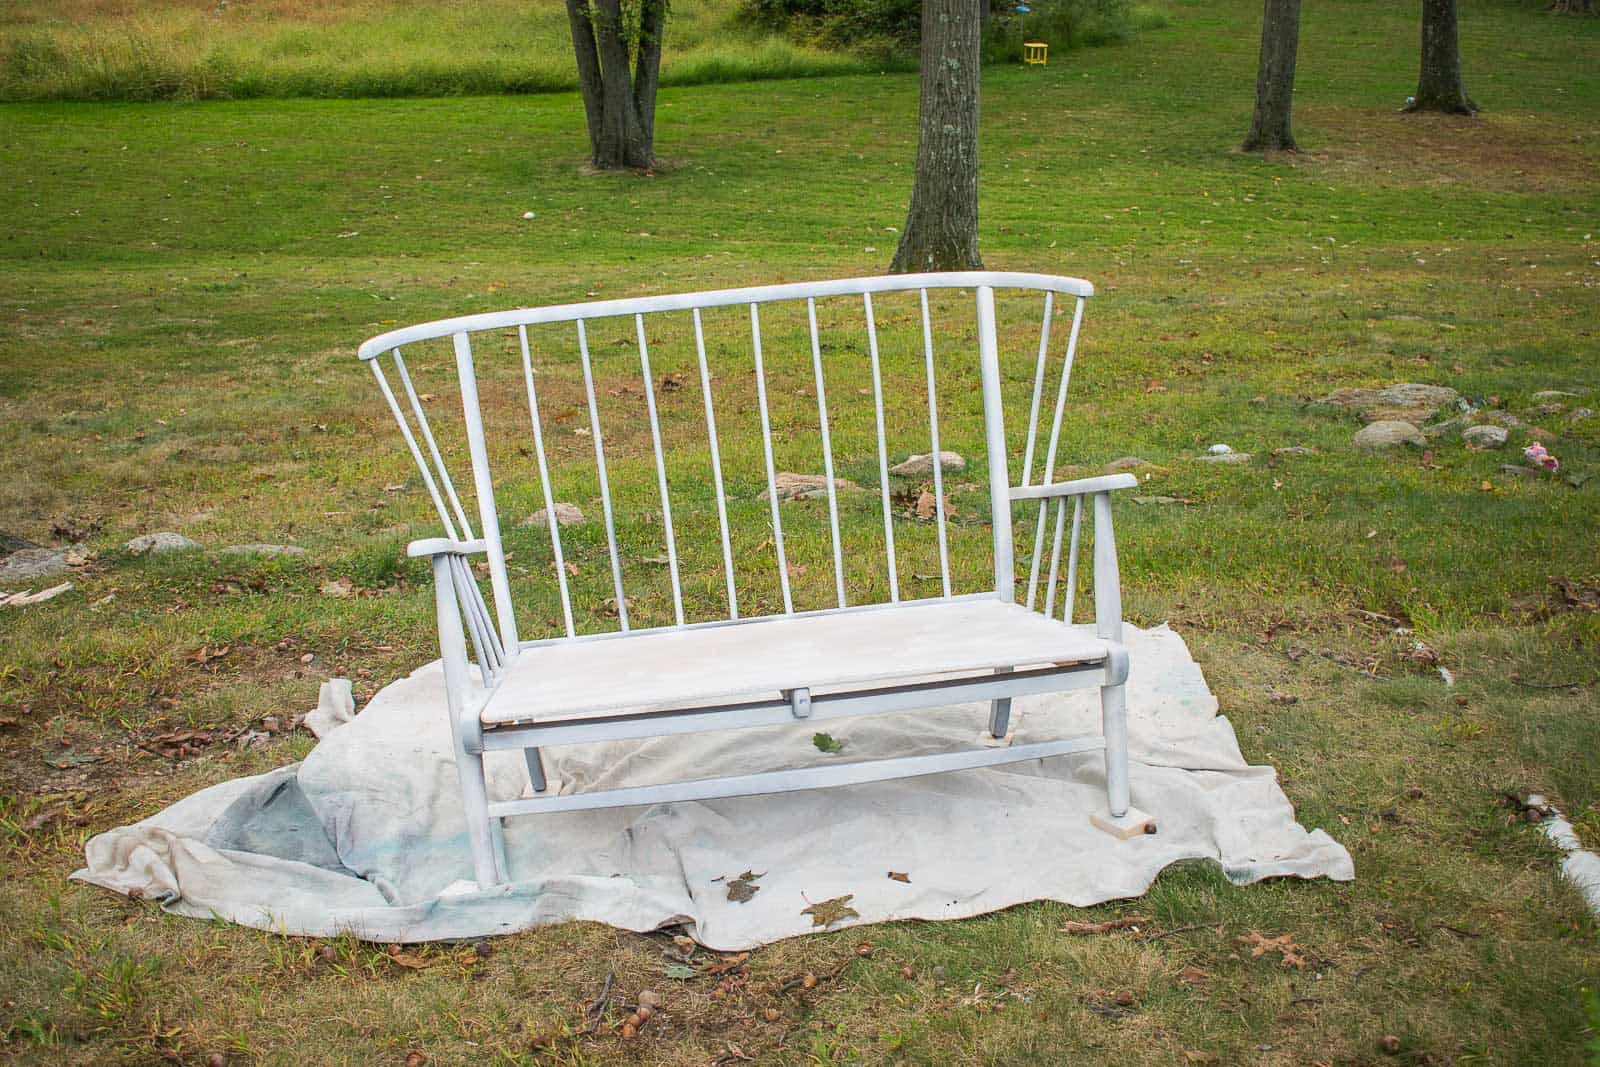
After 30 minutes, I was able to go over with my chosen color… teal. I was tempted by lime green but ultimately worried that a lighter color might exacerbate any grooves or dents as a result of my epoxy and basic carpentry skills.
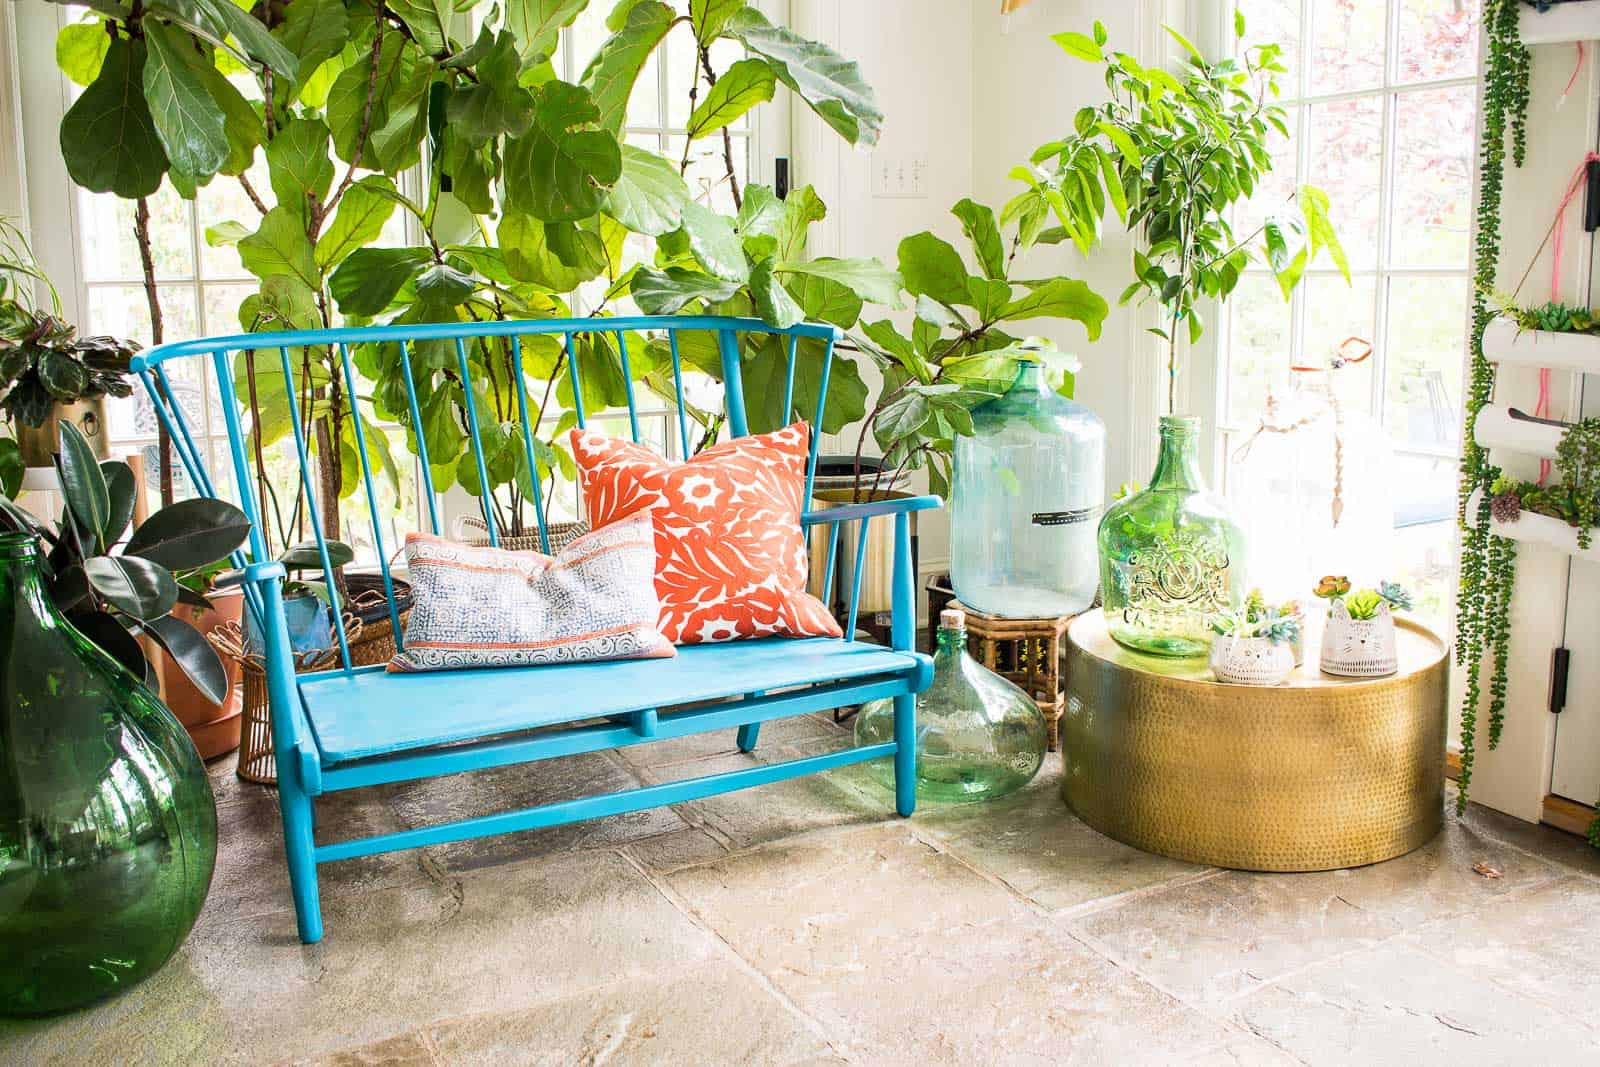
This bench is FAR from perfect: I think the seat looks a bit too thin for the bench, you can see places were the epoxy was too heavy but my sander wouldn’t reach, and I had to cut 3 seats before I got the right size! But boy howdy do I love this version better! I love the bright blue and the clean lines, and this is such an improvement to that dated curved leg beauty! I’m still in awe of how well the epoxy worked to mask the dated lines of the legs and I cant wait to use it again!


Wonderful transformation Charlotte. Love how to told those legs who’s boss!
Haha! Thanks, Mary! No legs are safe from me!
Love the bench….the color teal is perfect for you spot….question are those ruBber tree plants? .everything looks so bright and cheery!!!!
Hi Karen! Sorry for the delay! The larger trees are fiddle leaf figs, but there is one rubber plant on the left!