
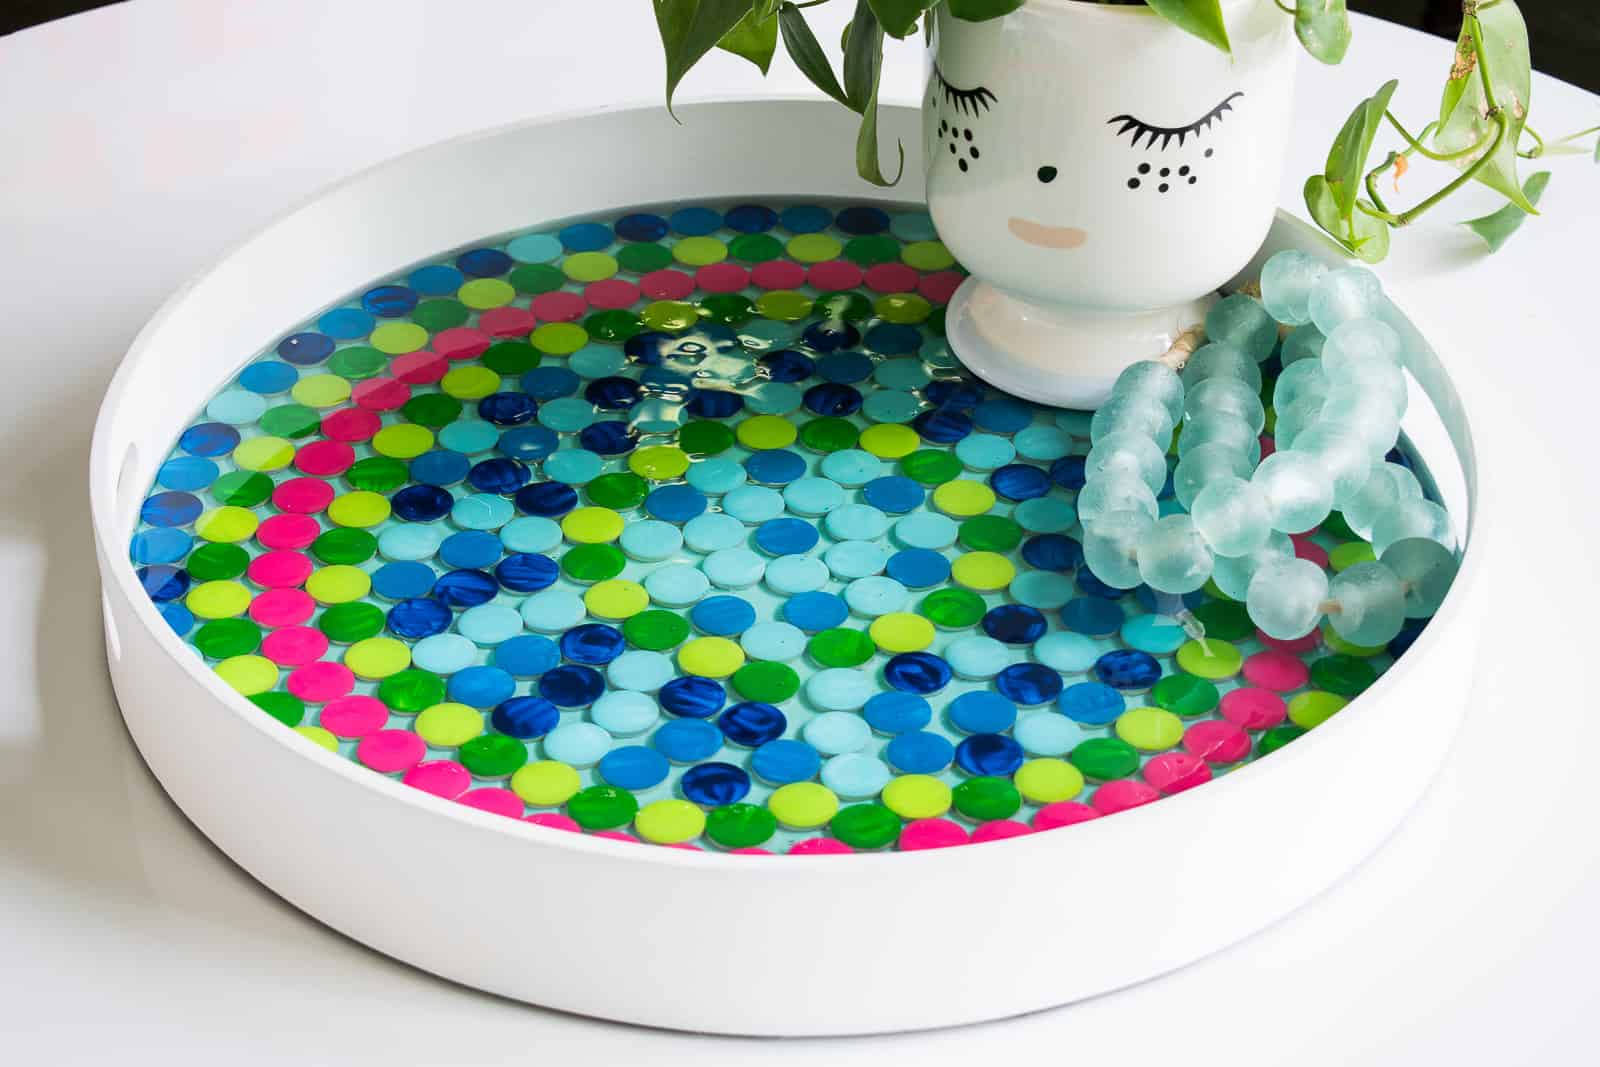
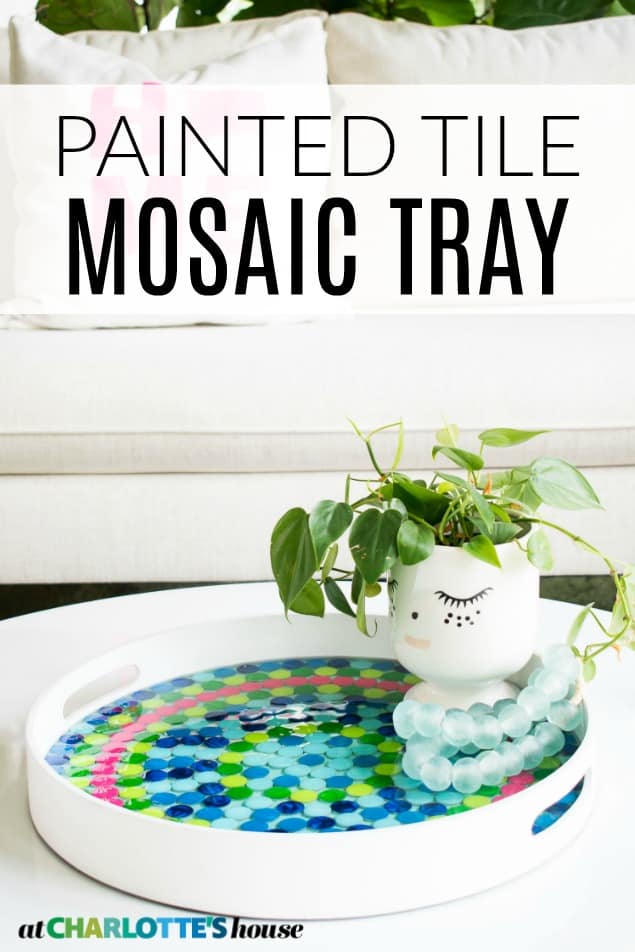
Enamel Paint Mosaic Tray
Psssst… this post *might* contain affiliate links: see my disclosure here.
Painted Penny Tile Mosaic Tray
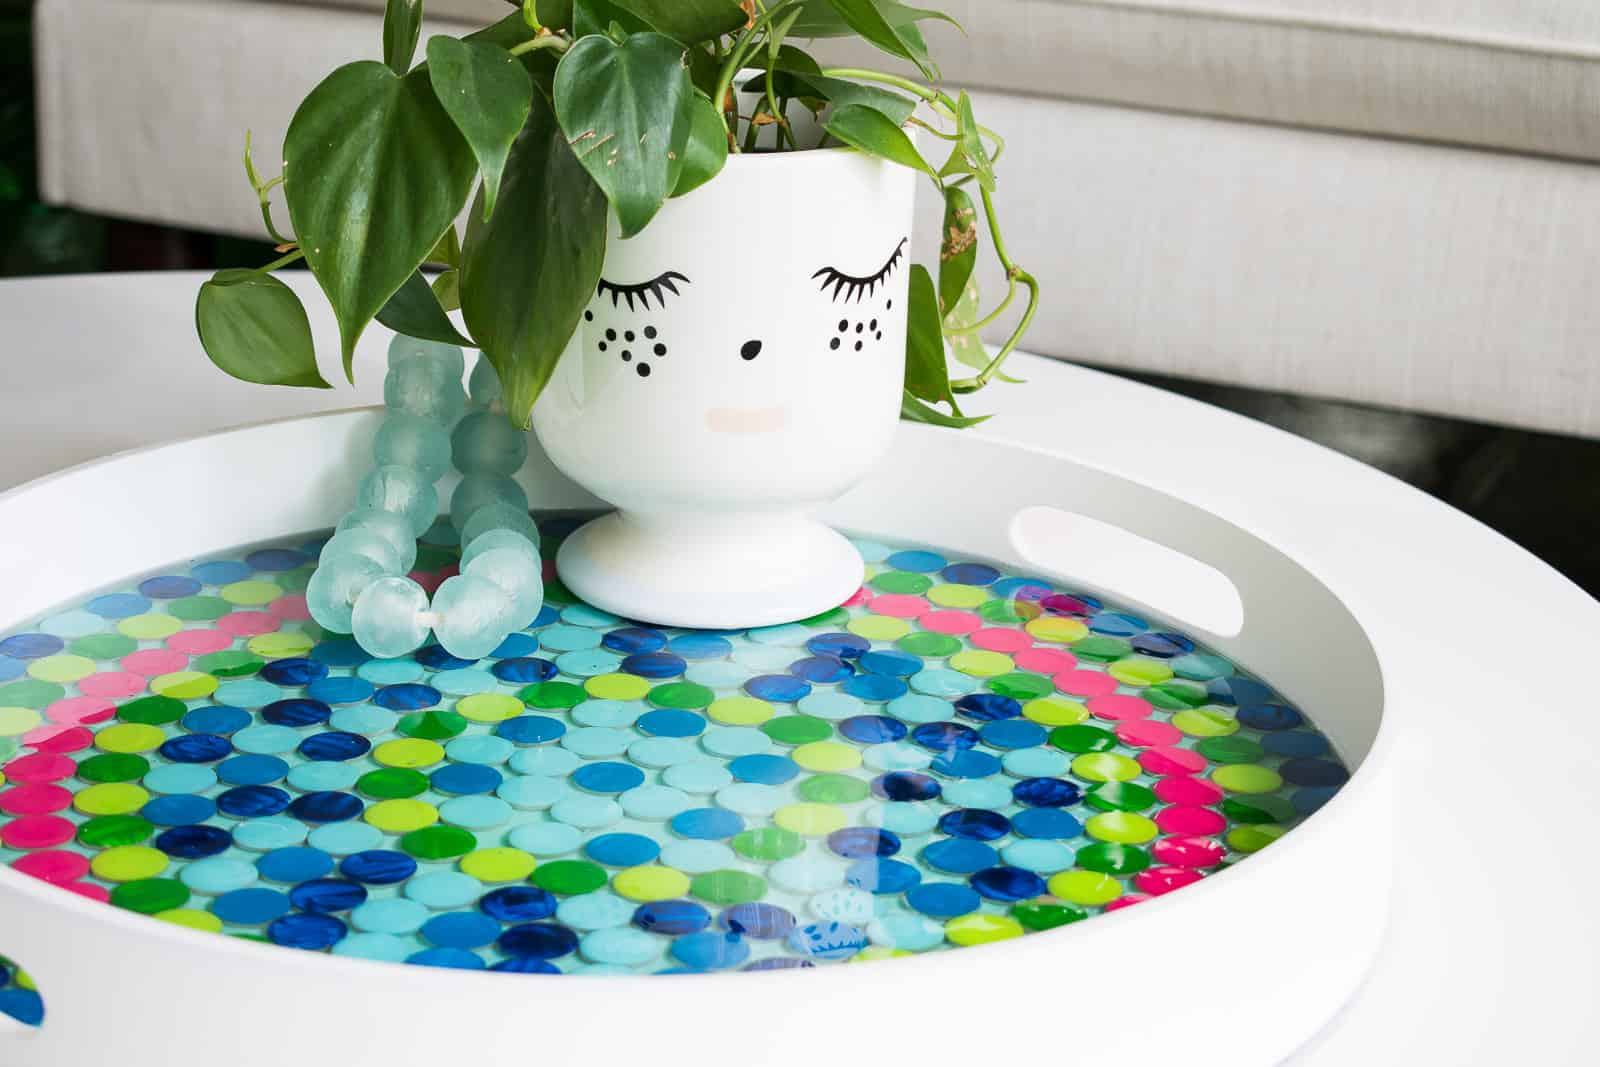
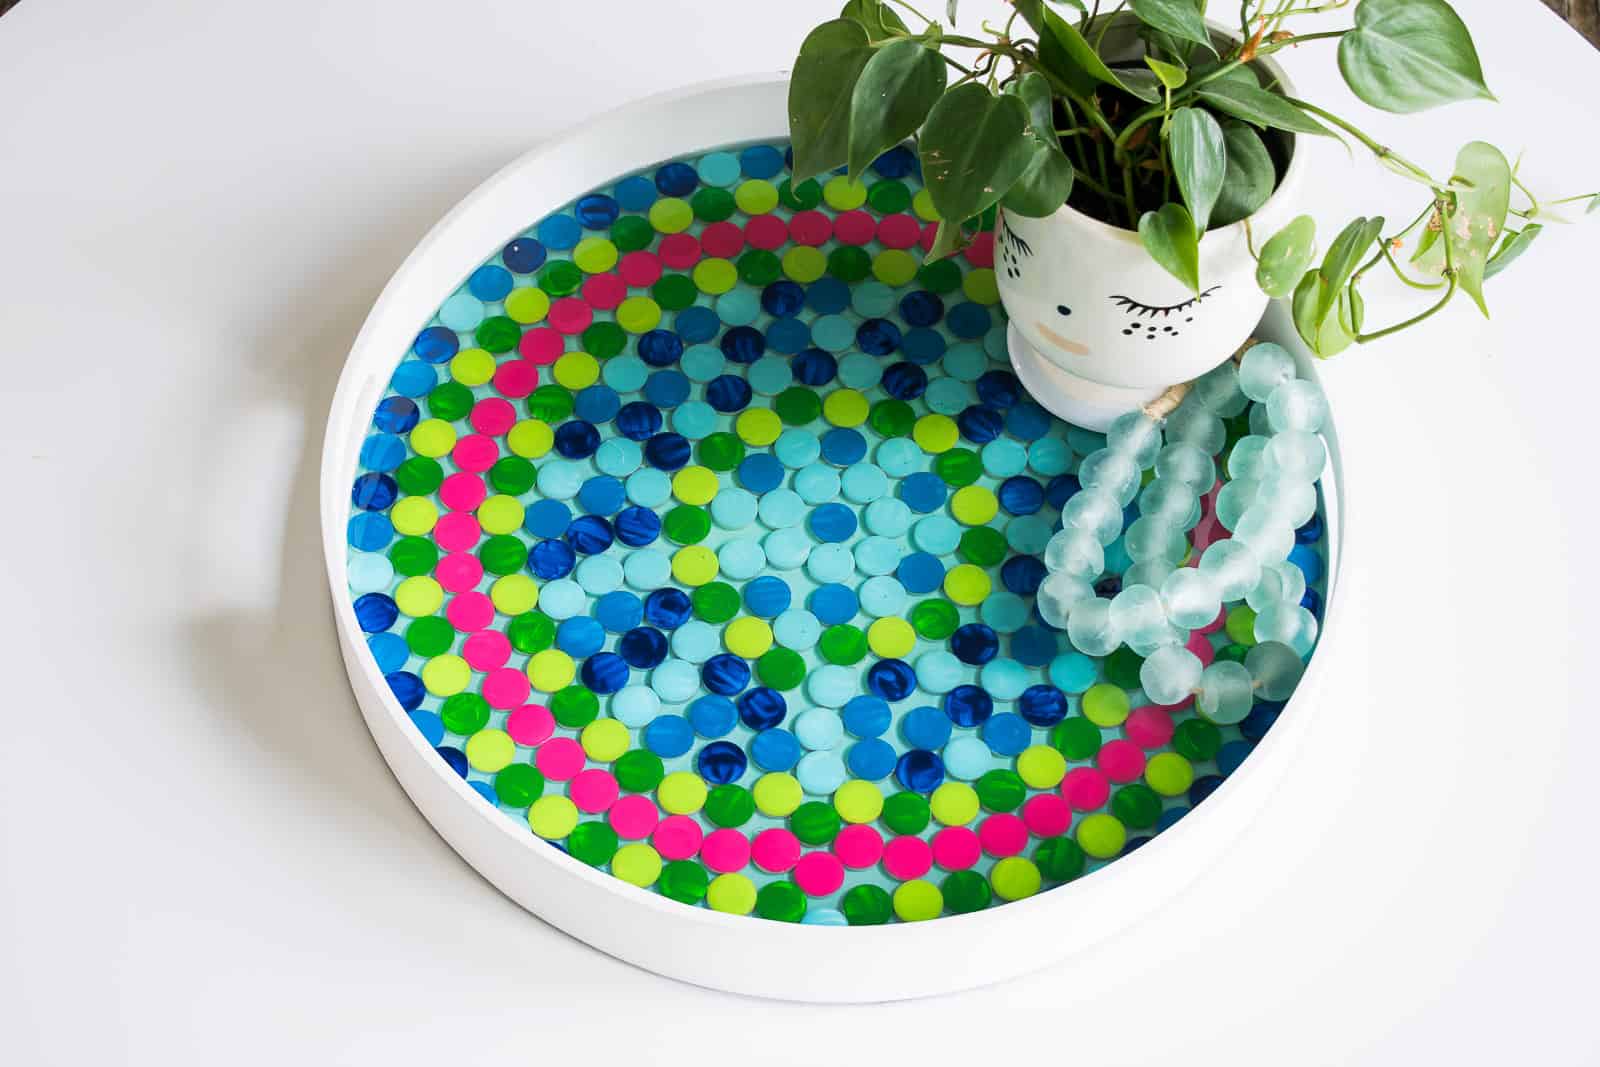
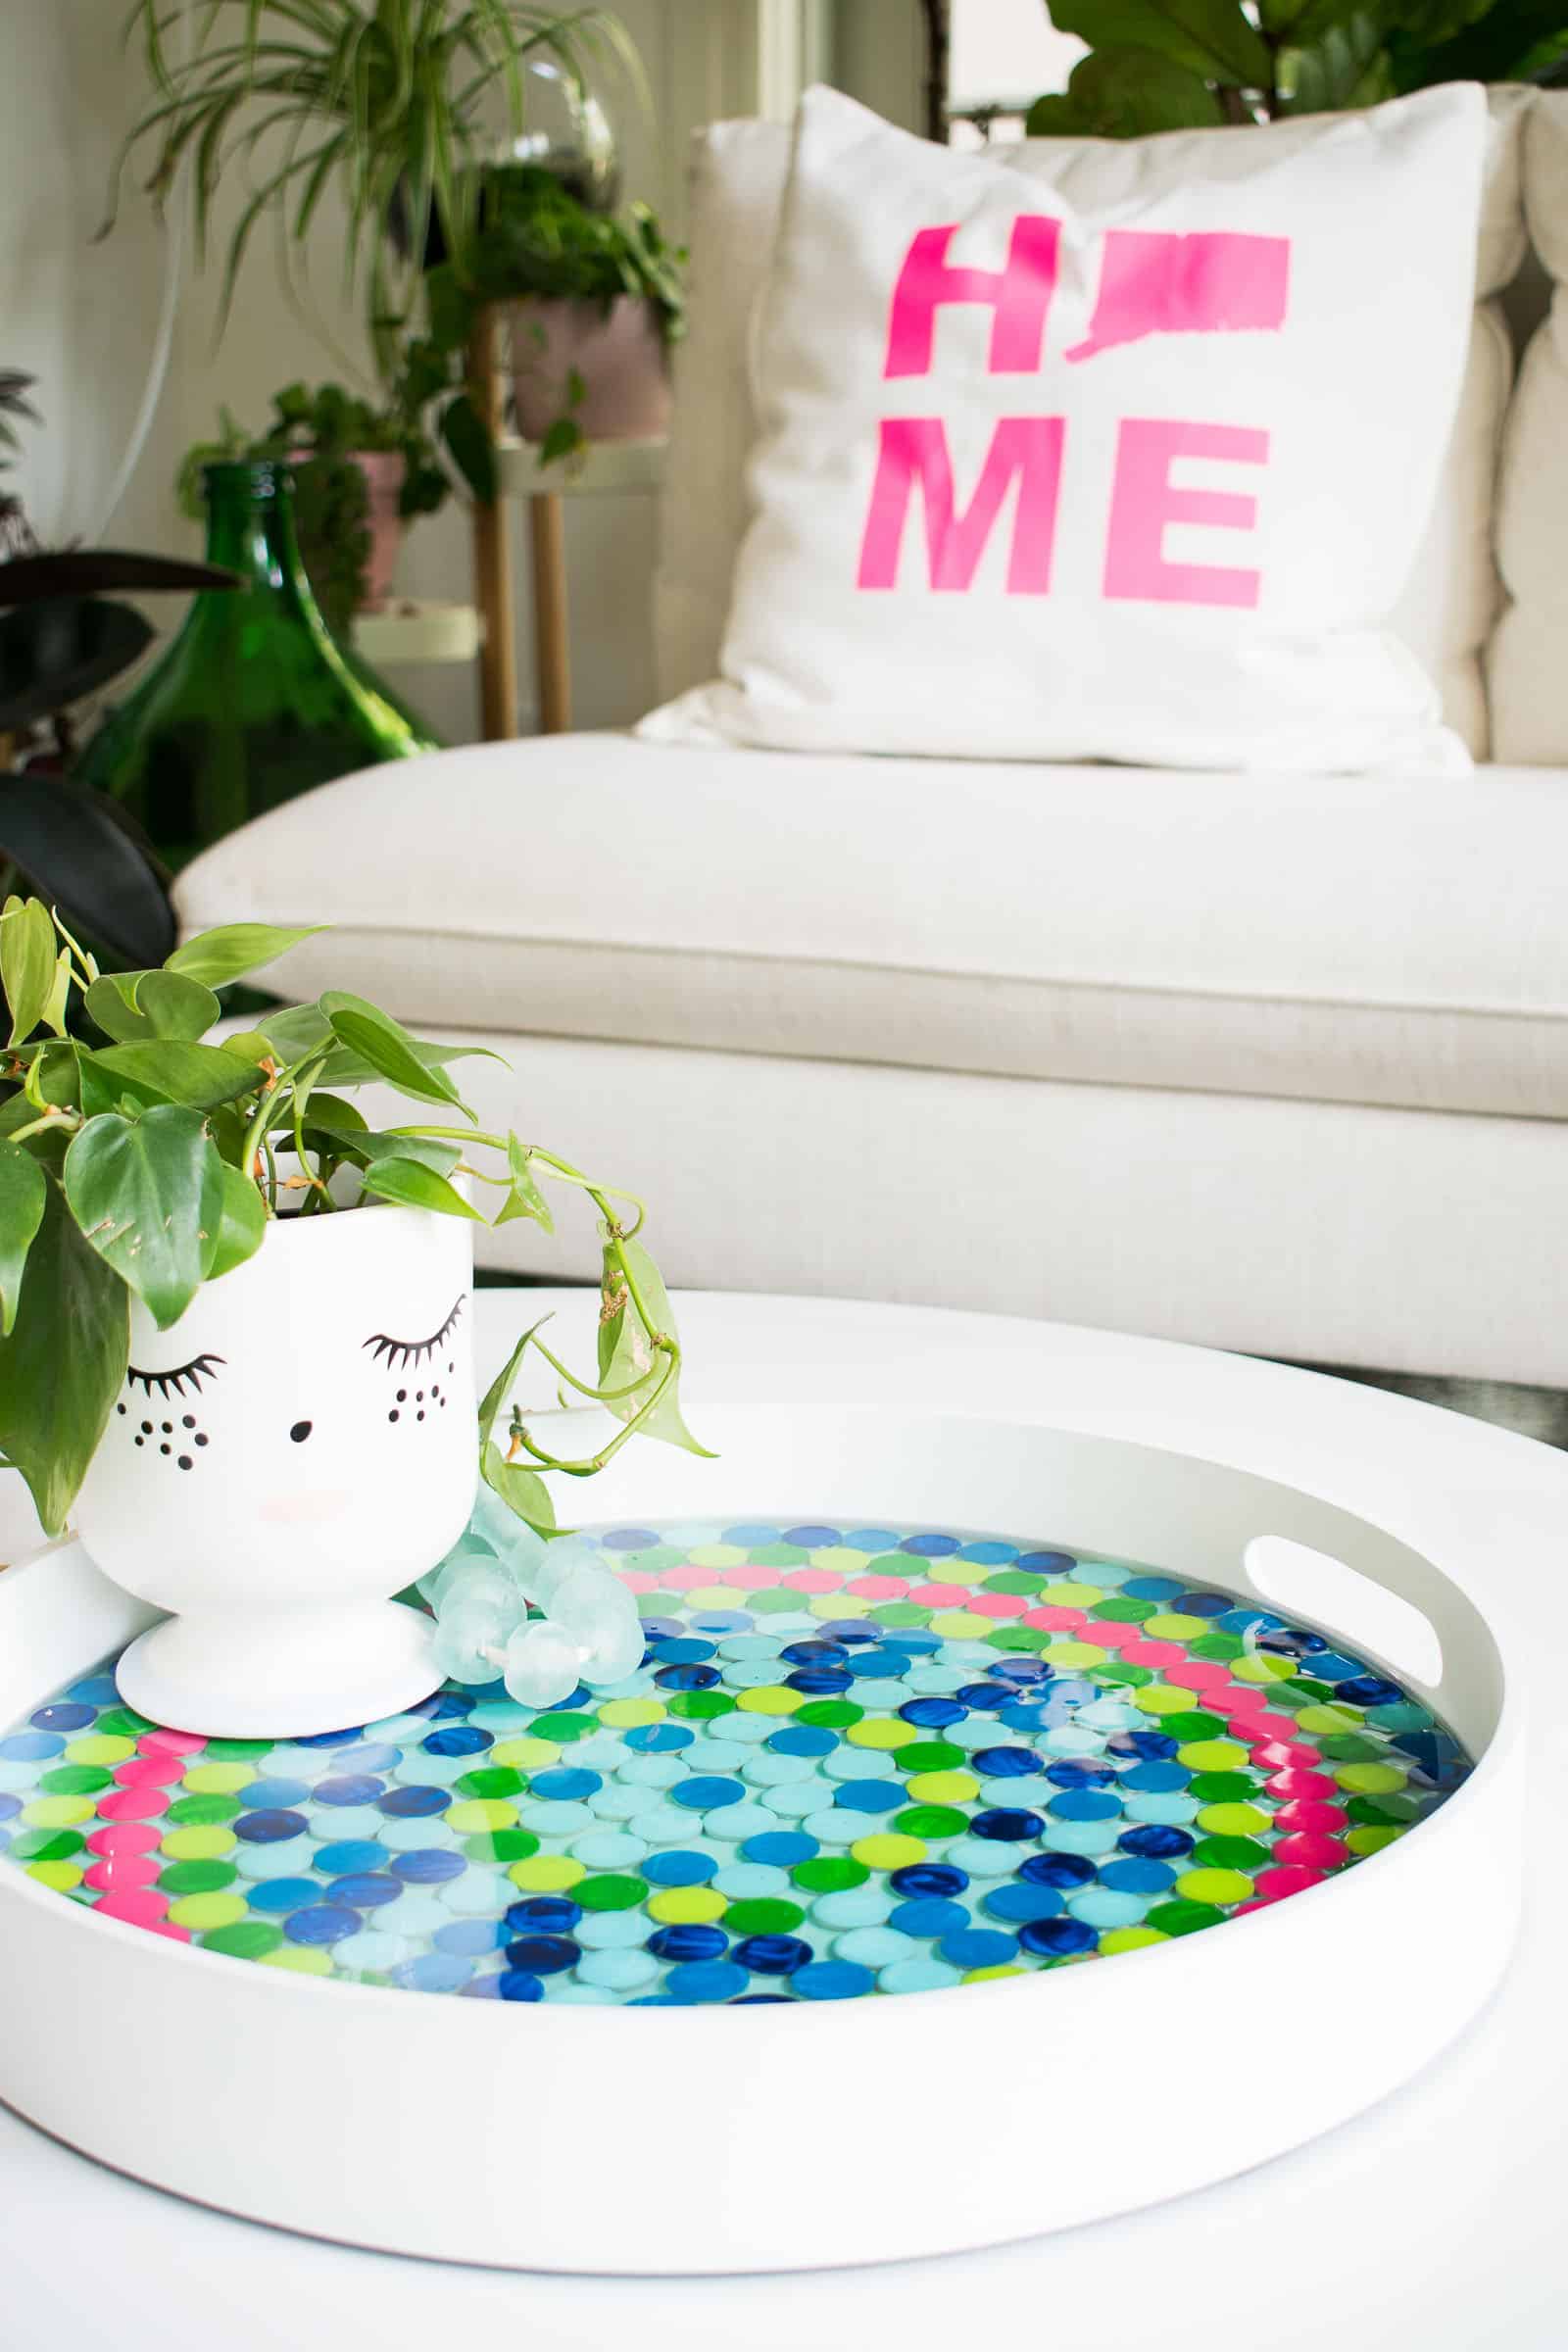
I painted penny tiles with Testors enamel paint and am SO happy with this colorful tray I made!
Disclosure: I partnered with Testors on this post and am SO happy I had the chance to try their amazing enamel paint finally!
Shop my favorites!
For years I’ve walked by all those sweet little containers of enamel paint at the craft store and I’ve never used them. Until today. And let me tell you… I’m a fan! There’s no question enamel paint is more ‘heavy duty’ than regular ol’ craft paint, but that’s the very reason I LOVED using it. I decided to paint something that would *never* hold up to basic craft paint: tile. I decided to use some inexpensive penny tile and a clearance tray to make my own colorful mosaic masterpiece! (Full materials list at end of the post.)
Step 1. Remove Penny Tile from Backing
Penny tile comes glued to a netting, but for this project you need to pull the tiles off the backing so they’re loose. They should come off easy peasy.
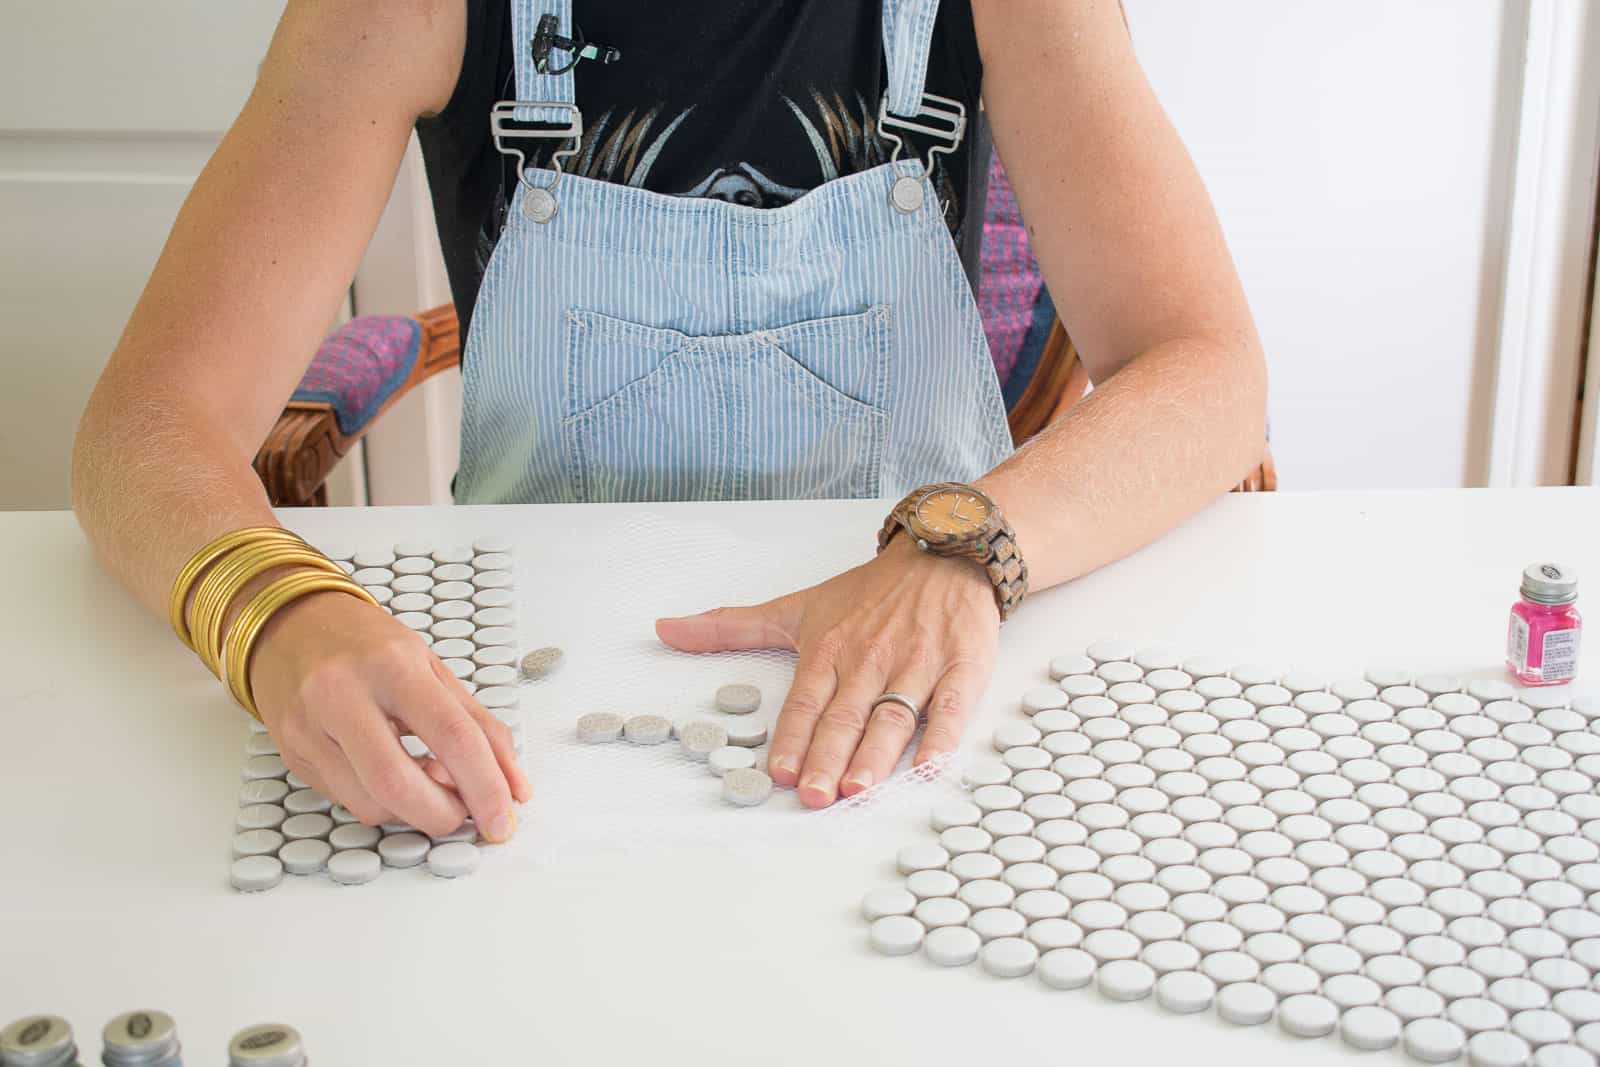
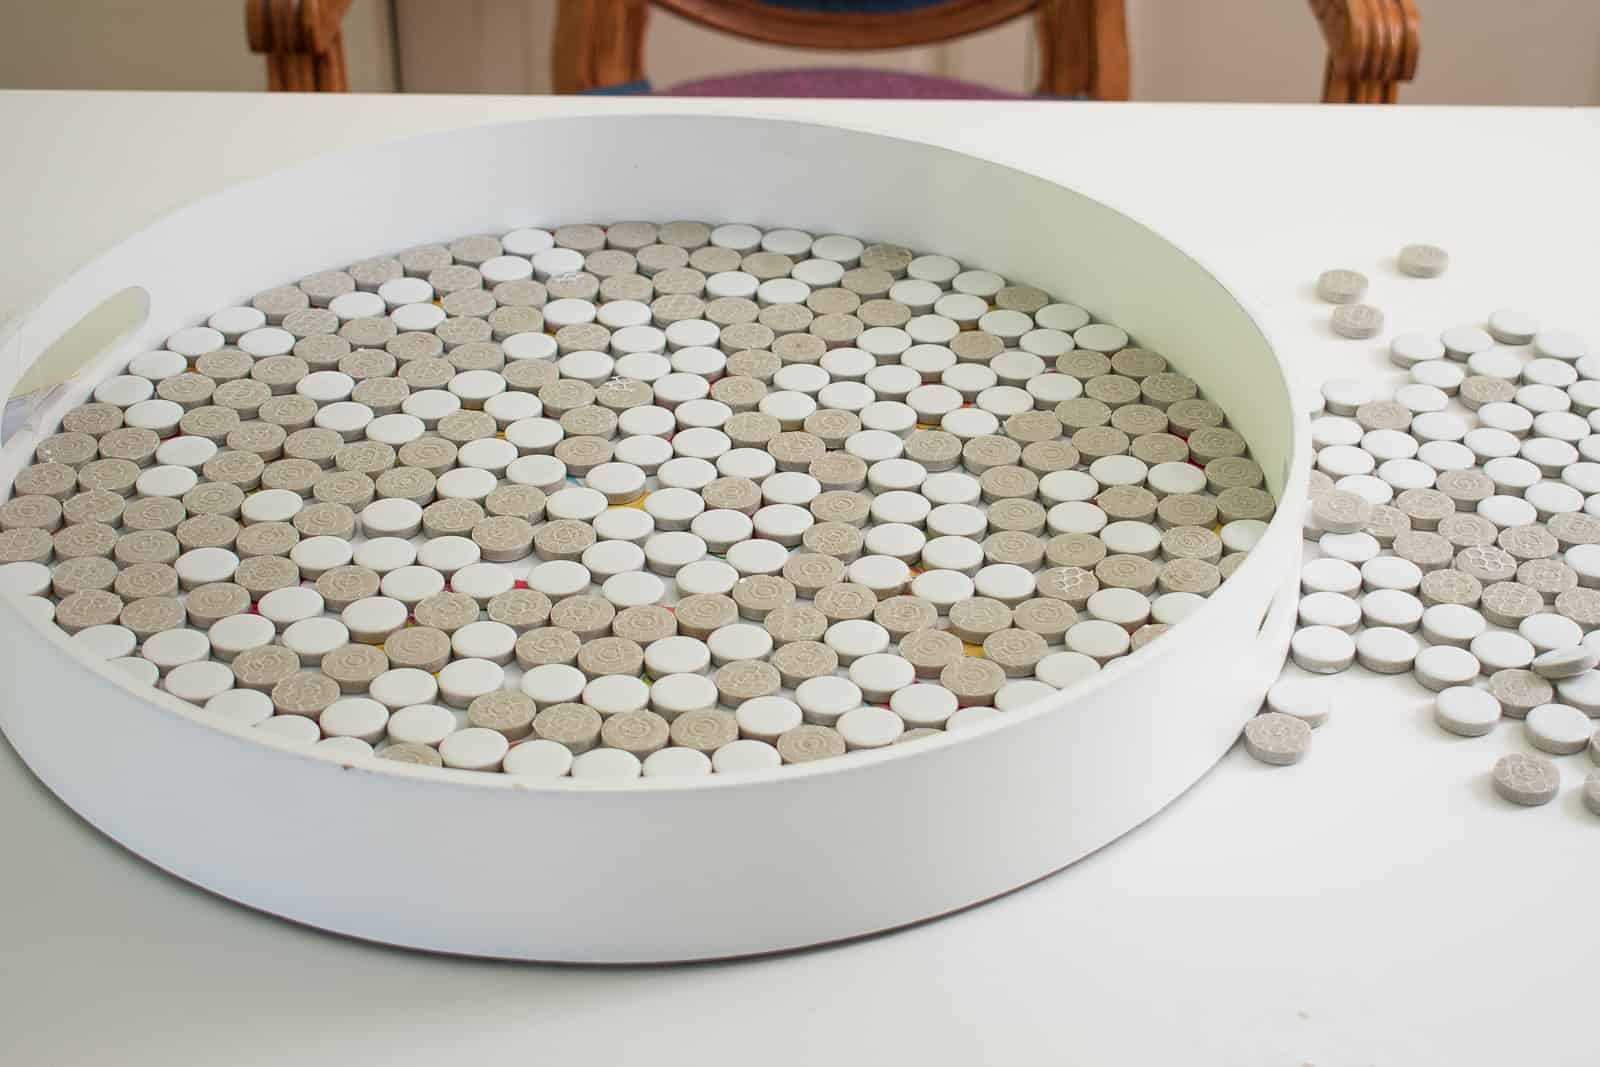
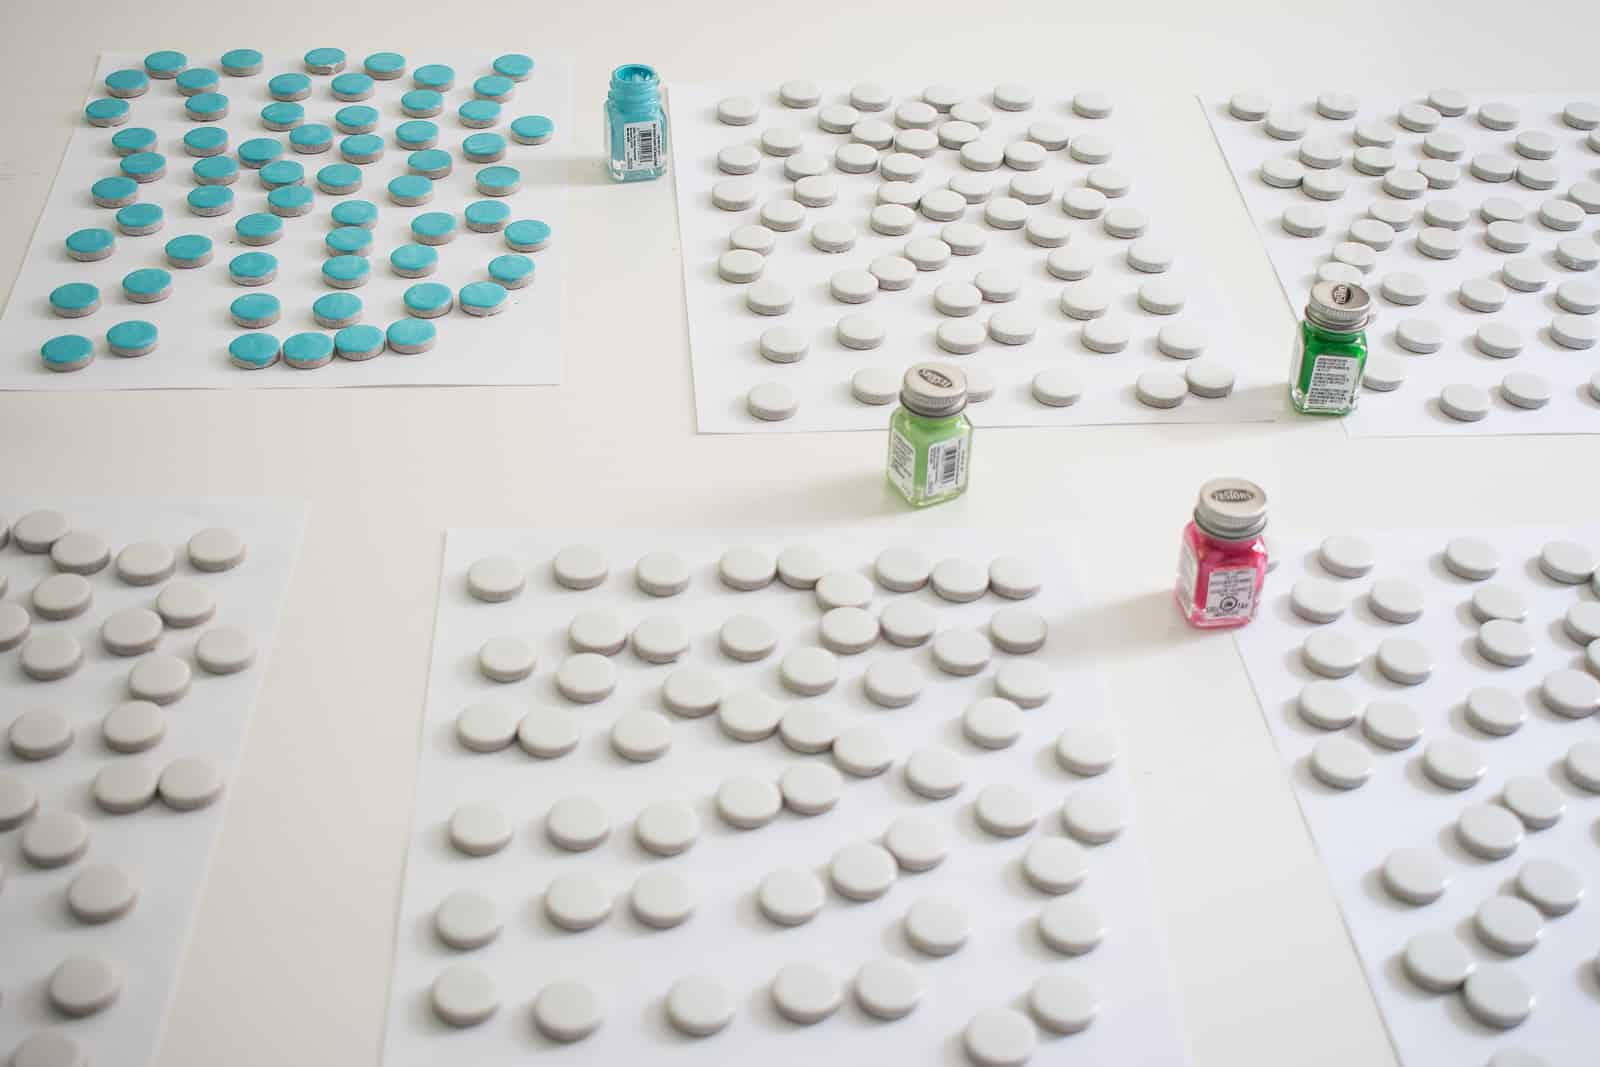
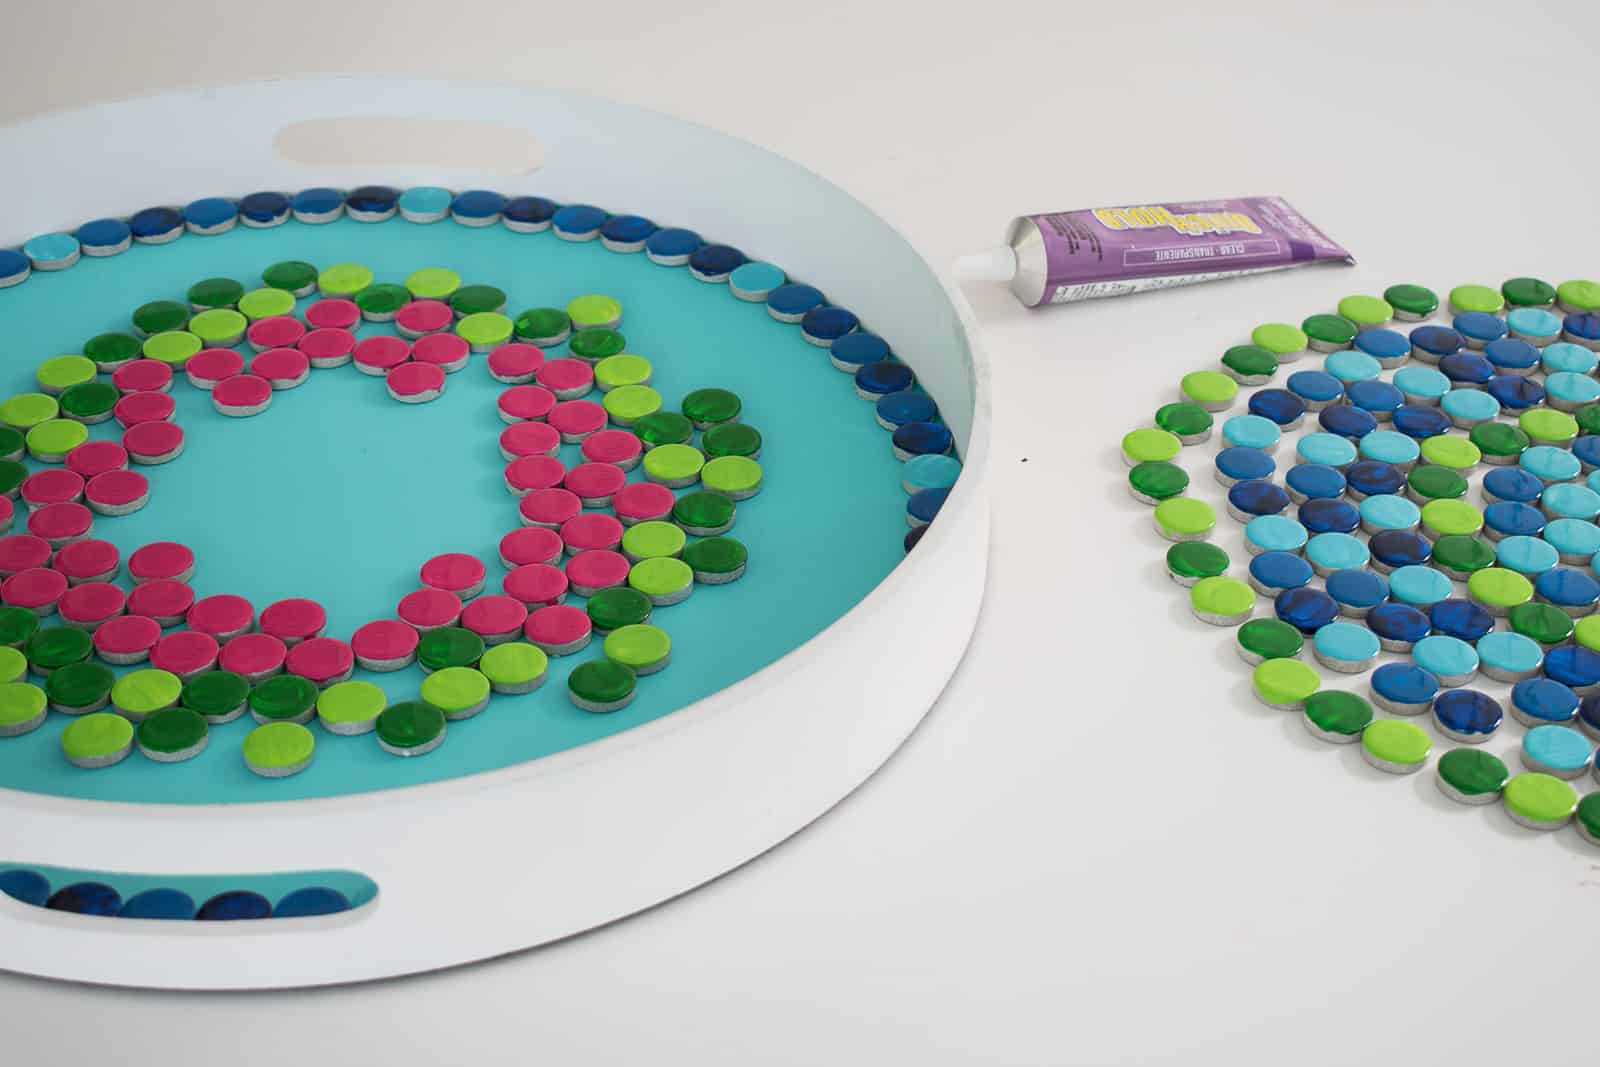
Step 2. Dry fit and sort tiles
To make sure I painted enough tiles, I started by filling my tray with the tiles. I used about 1.5 sheets of tiles so a little less than 1.5 square feet of tile. Once I was certain I’d fit as many tiles in the tray as I could, I divided them into even groups to correspond with each color enamel I was going to use.
Step 3. Paint!
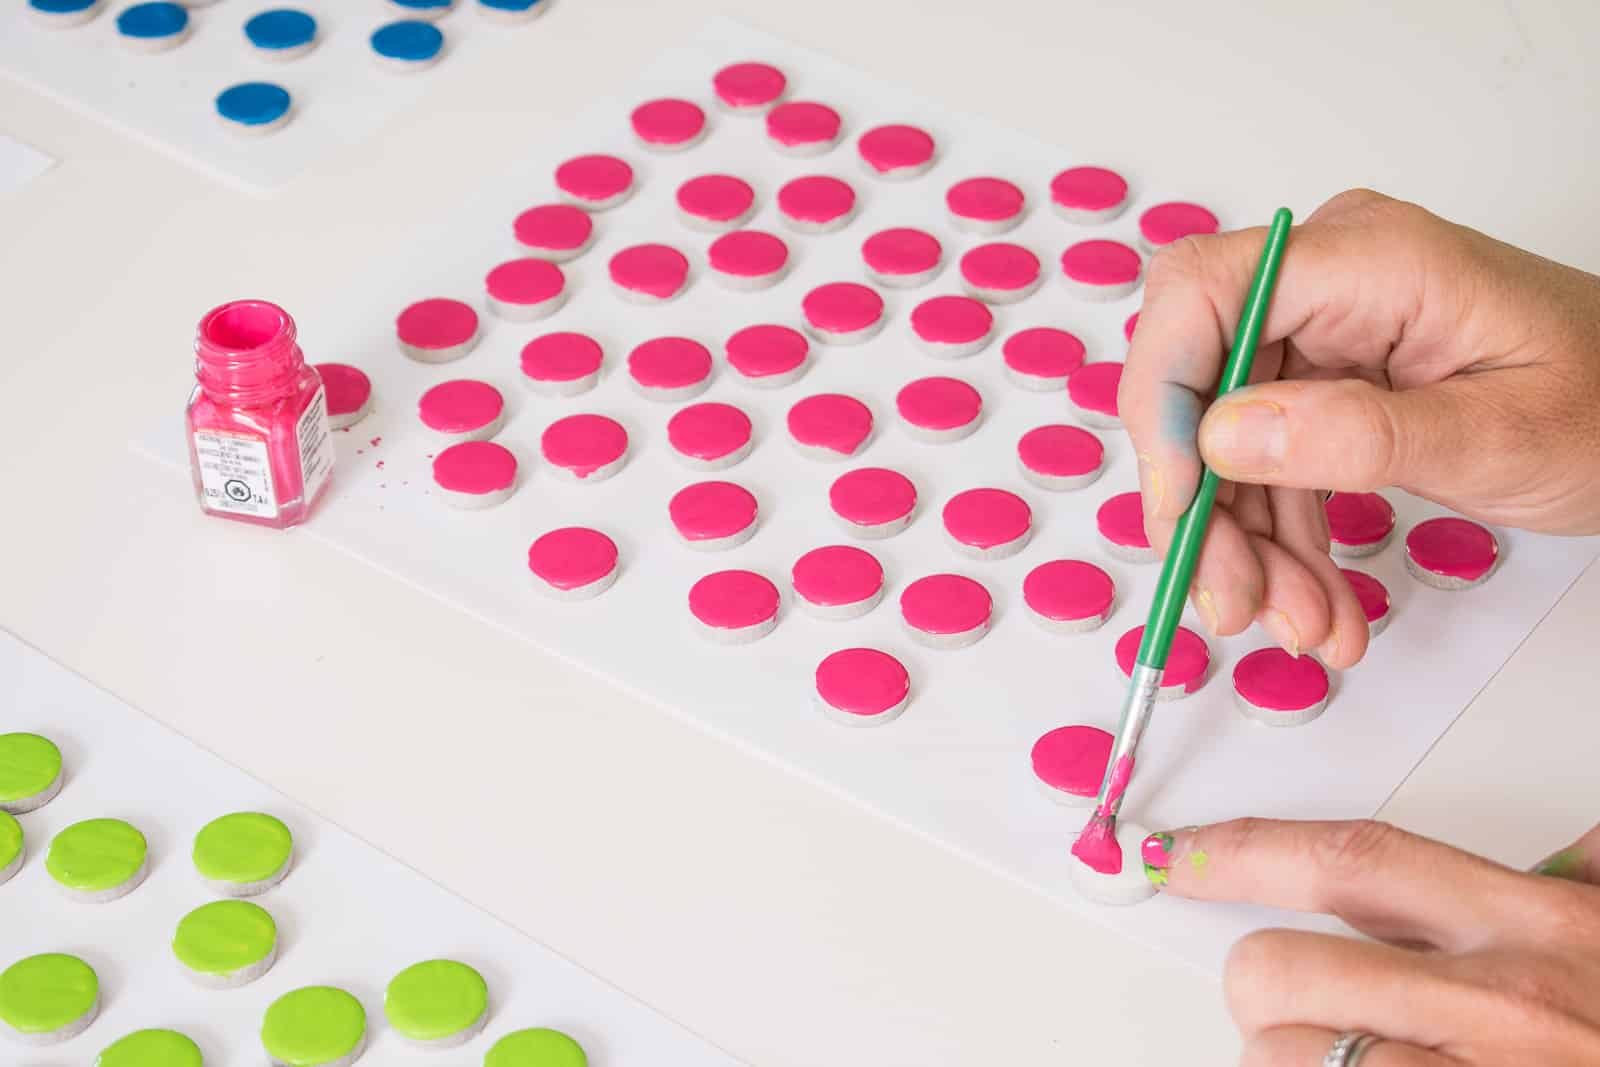
Enamel paint is REALLY easy to use. Work in a ventilated space as there is an odor to it, and it was helpful for me to have paint thinner (or nail polish remover) on hand to clean my brushes/ keep them from getting gunky. I laid out each color tile on a sheet of paper and painted a fairly thick single coat on each tile. Follow the directions on your package, but let the paint dry 24 hours just to be safe.
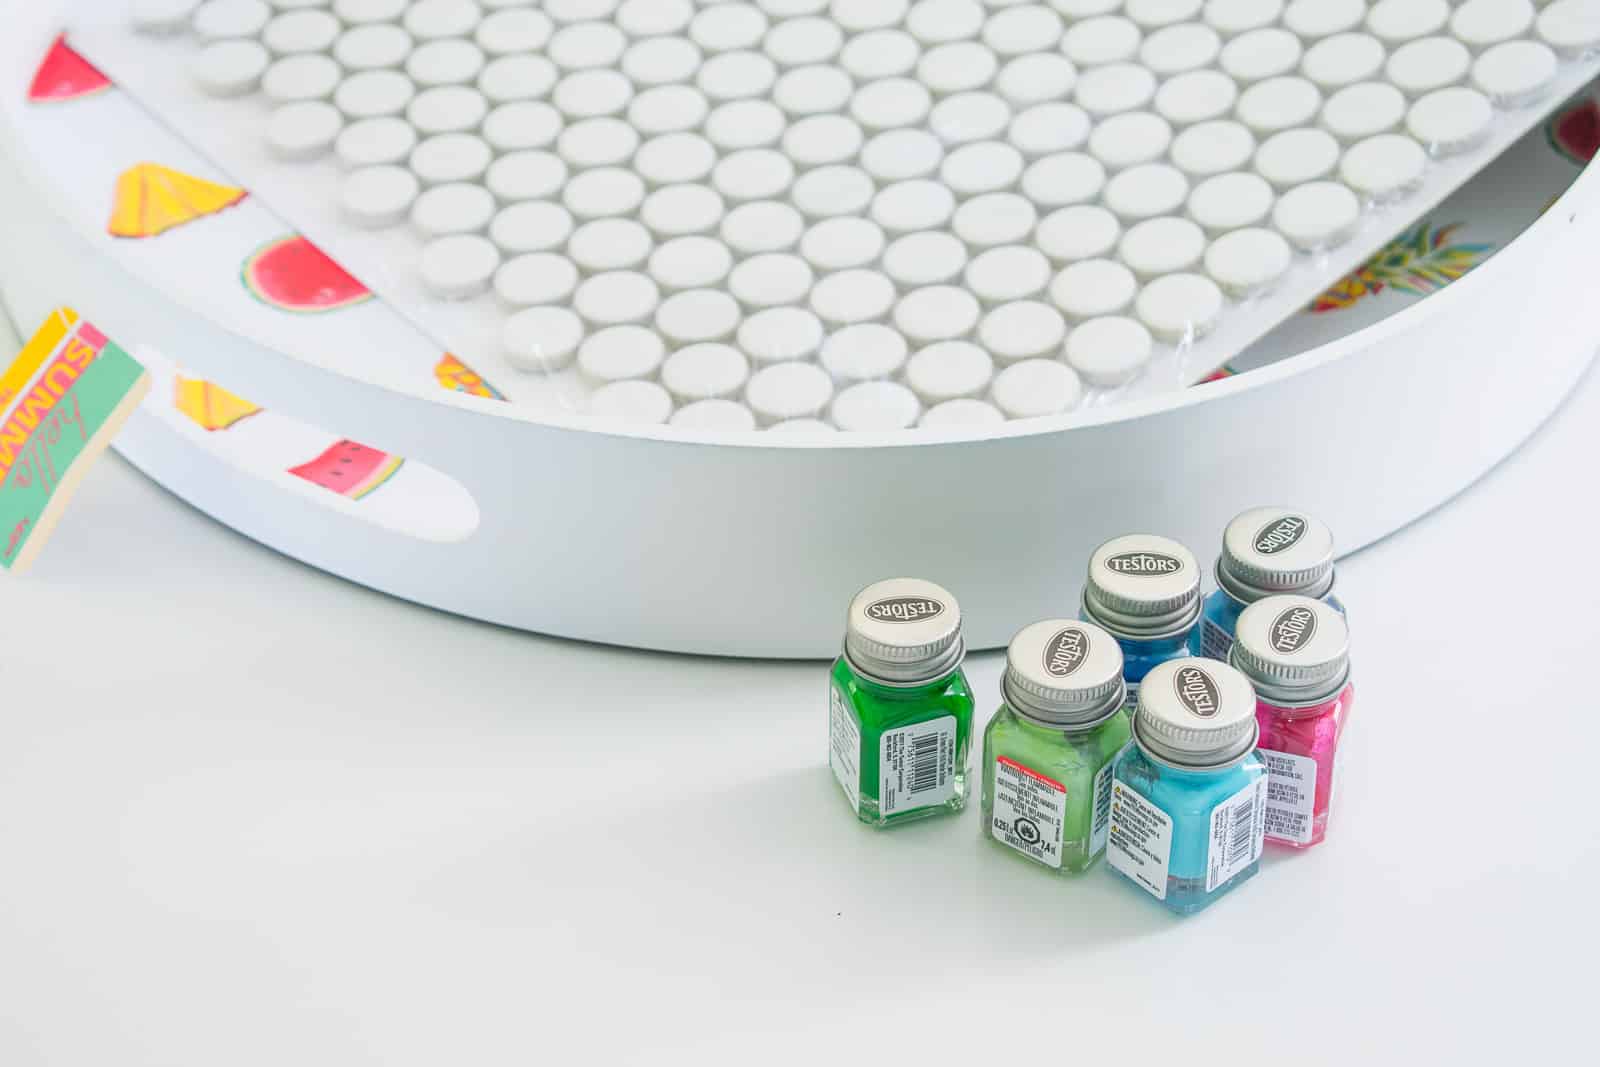
Step 4. Prepare the tray
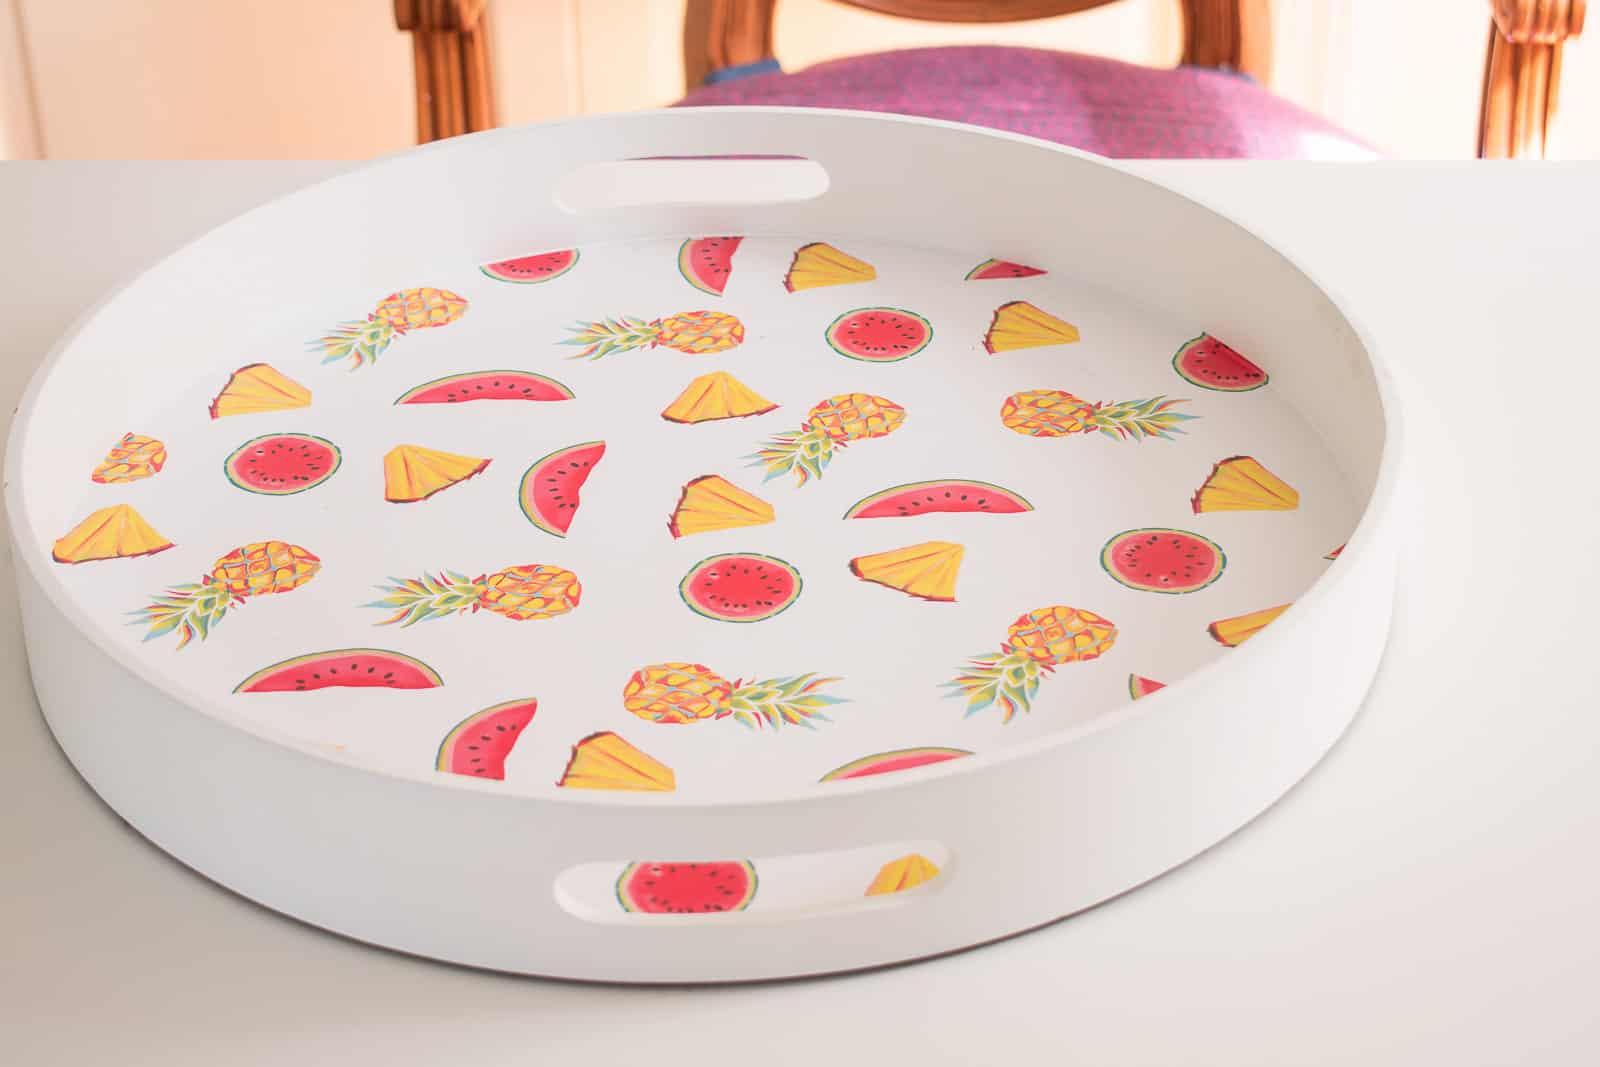
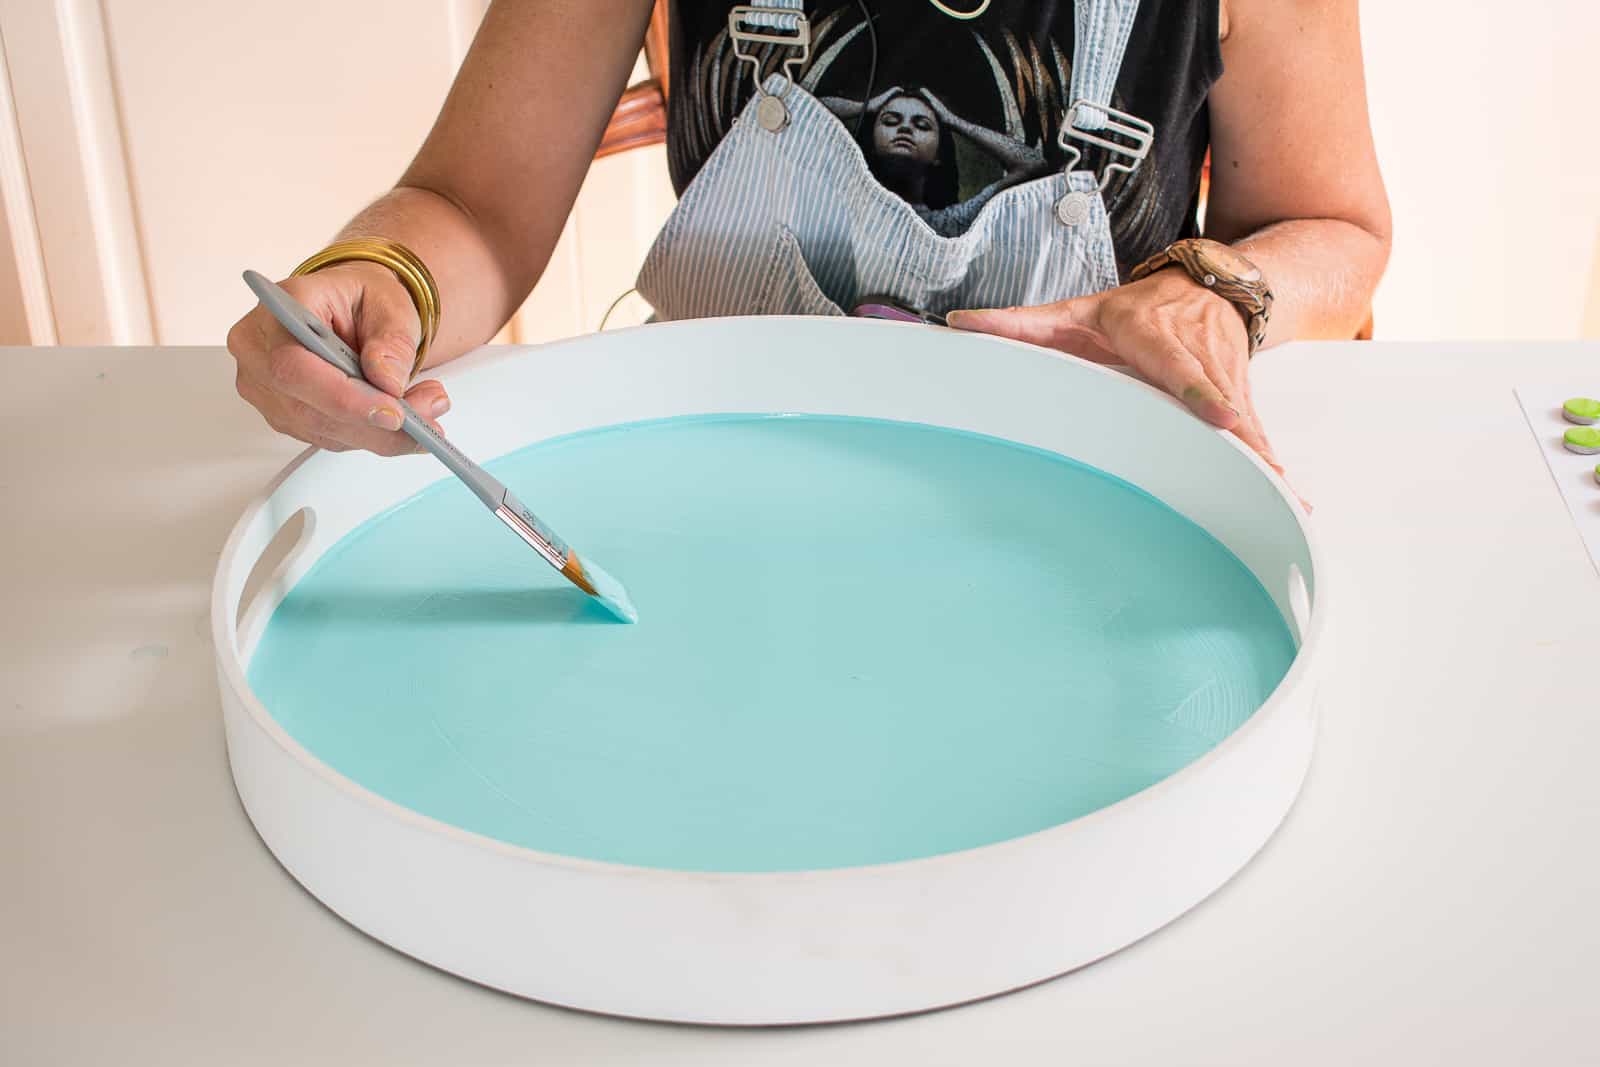
One thing to consider for this project is that the tray you’re using HAS to have a rim higher than the penny tiles. I suspect there’s a work-around, but consider this when buying your tray. Mine was on summer clearance so it also had a pattern on the bottom that I didn’t care for. So I prepped the tray by painting over the pattern with Testors craft acrylic paint that matched the colors on my enamel painted tiles.
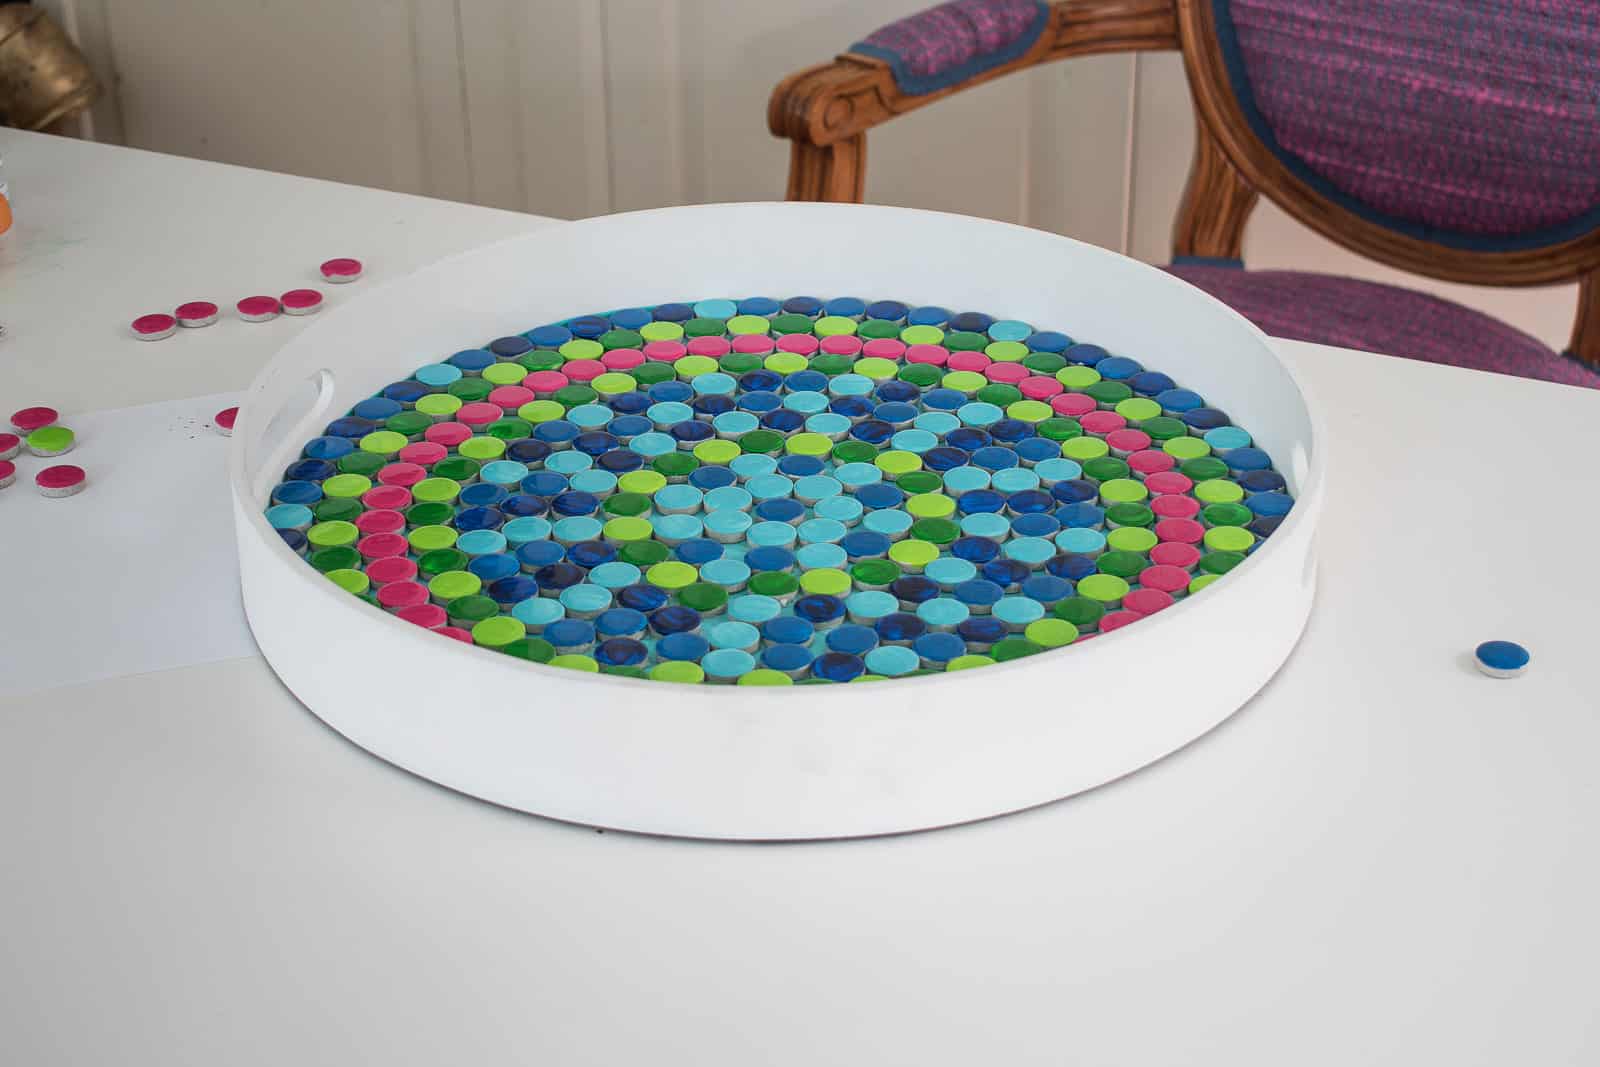
Step 5. Arrange the tiles
Finding the right pattern took a couple of tries. In hindsight I wish I’d done more of the blues, but I was able to find a layout that I liked with the colors I painted eventually! I wasn’t sure whether a hot glue gun would affect the craft paint, so I opted for another clear glue I had in my stash. It worked great.
Step 6. Mix and pour clear coat resin
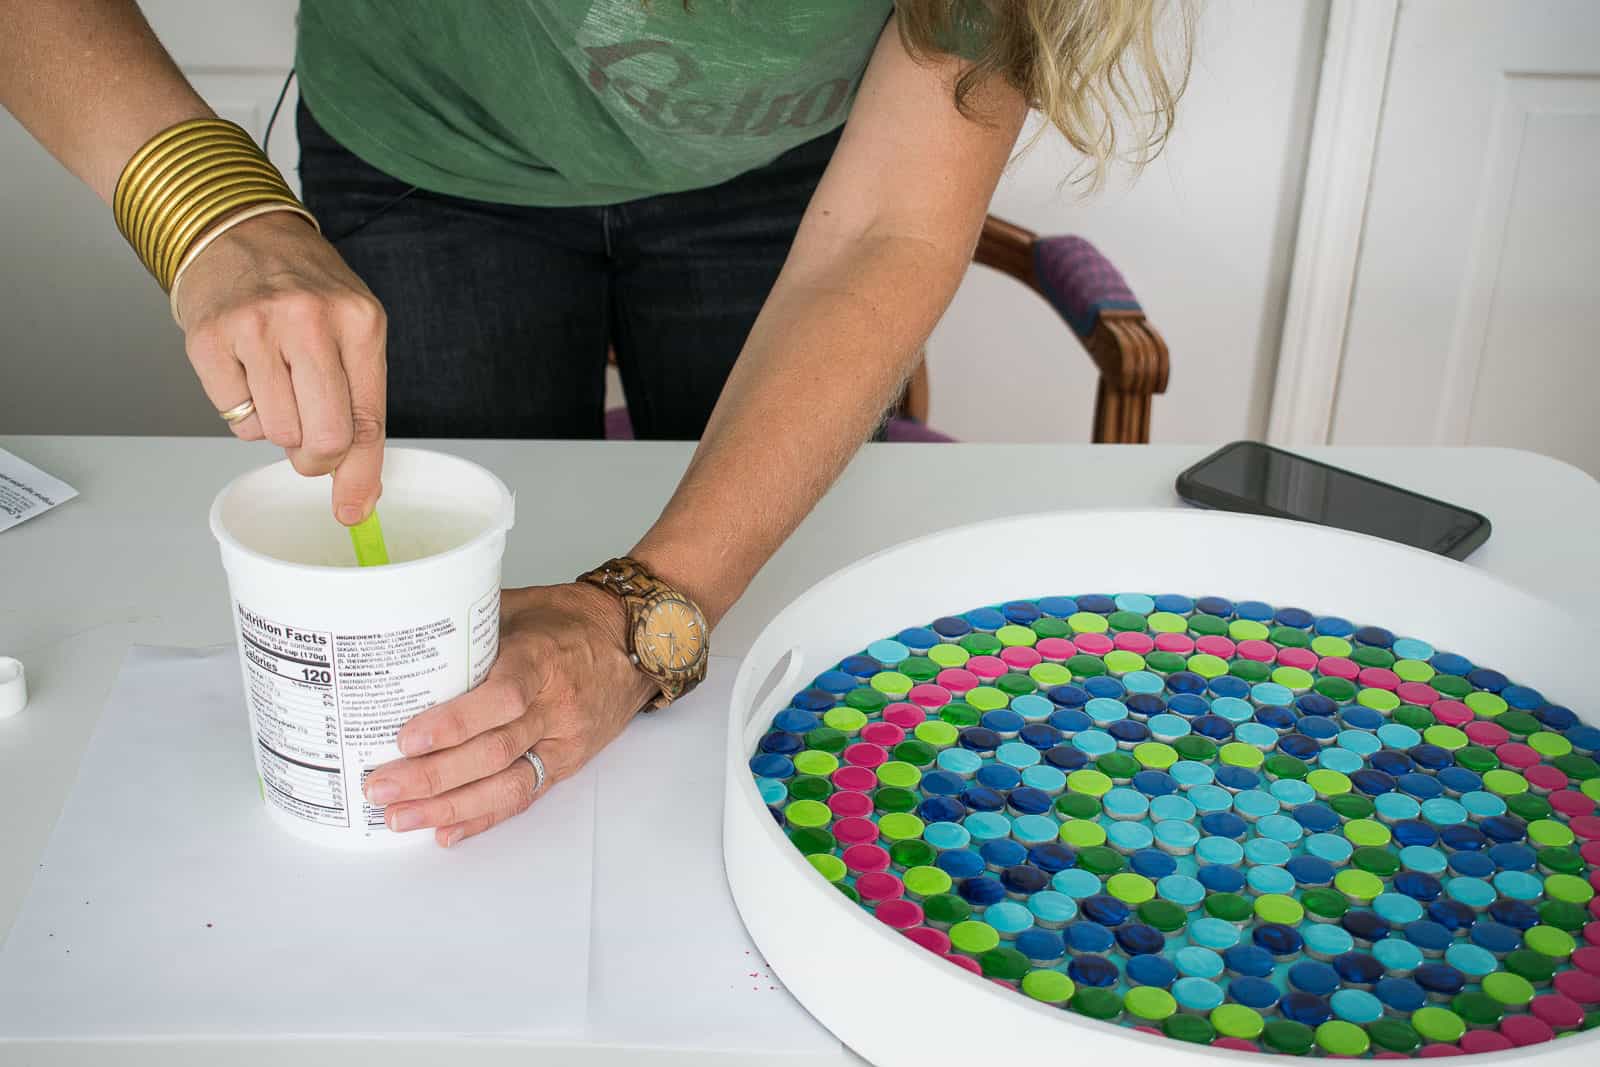
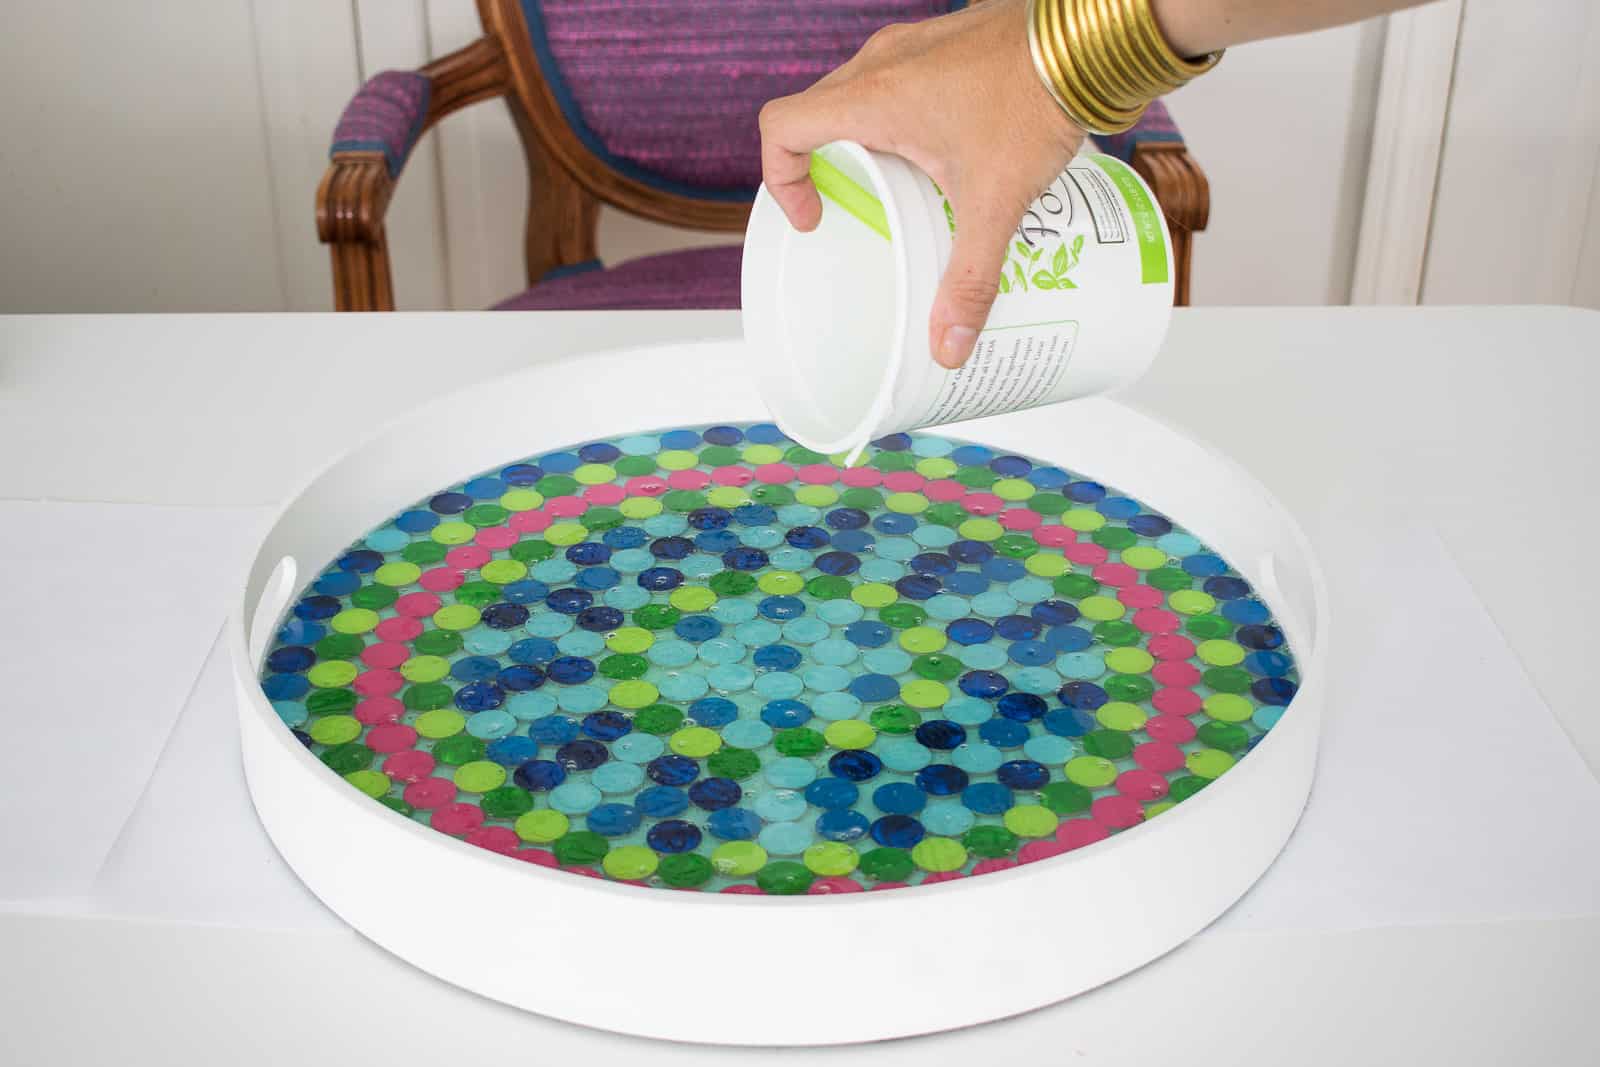
I used a clear coat epoxy over my tiles. I considered regular ol’ grout, but I wasn’t sure how the enamel paint would hold up to so much scraping and cleaning. I also wasn’t sure how heavy that would make the final tray. Clear coat epoxy is fairly easy to work with provided you consider a few things: 1. You HAVE to mix an exact ratio of 1:1 of the resin and the hardener. 2. You HAVE to mix for the full suggested time (2 minutes for my epoxy). 3. You HAVE to let it cure at the right temperature; for me that was room temperature which is perfect but extreme heat or extreme cold will affect how it cures so be aware.
When you pour epoxy, after a few minutes, you’ll notice bubbles. If you don’t mind that look then… ignore this next bit. I wanted my epoxy to be as clear as possible so I went over the surface lightly with a heat gun to ‘pull’ all the bubbles to the surface. Since you may not have a heat gun, my product instructions said you could exhale lightly on the surface of the resin to accomplish the same thing!
Step 7. Let the tray sit for a few days
Yeah. You read that correctly. Up to 72 hours was what my resin said. Before then the surface may be sticky or tacky so you may leave marks.
That’s it! I LOVE how bright and vibrant the enamel paint is. Super easy to work with a dries to a wonderful hard finish… I am definitely thinking about how else I can use with this paint. I also would be remiss not to mention… they have SO many colors to choose from.
Materials
- Testors Enamel Paint (I used Gloss Turquoise, Gloss Blue, Gloss Dark Blue, Sublime Green, Gloss Green, and Gloss Magenta)
- White Penny Tiles (check your local hardware store too…)
- Glue
- Tray similar to this one
- Craft paint for bottom of the tray if needed
- Pour on Resin


THis is such a cute project! This is a nice way to make a tray for a coffee or accent table if you find one you don’t like the pattern for.
SO fun! I love how the tray turned oUt!
WhIch other surfaceS are the enamel paints best suited for?
Hi! I think they’re pretty good for just about anything! I heard from someone who repainted her towel bar! I’d say they’re best on surfaces that might not be ideal for other paints too.
I used teStorS metallic gold to paint a towel ring in our bathroom and it has held up insanely well! This stuff is so tough!
Oh that’s a great idea!!! love it!
I think this is a nice way to make a tray for coffee. I would like that. This is such a cute project.