
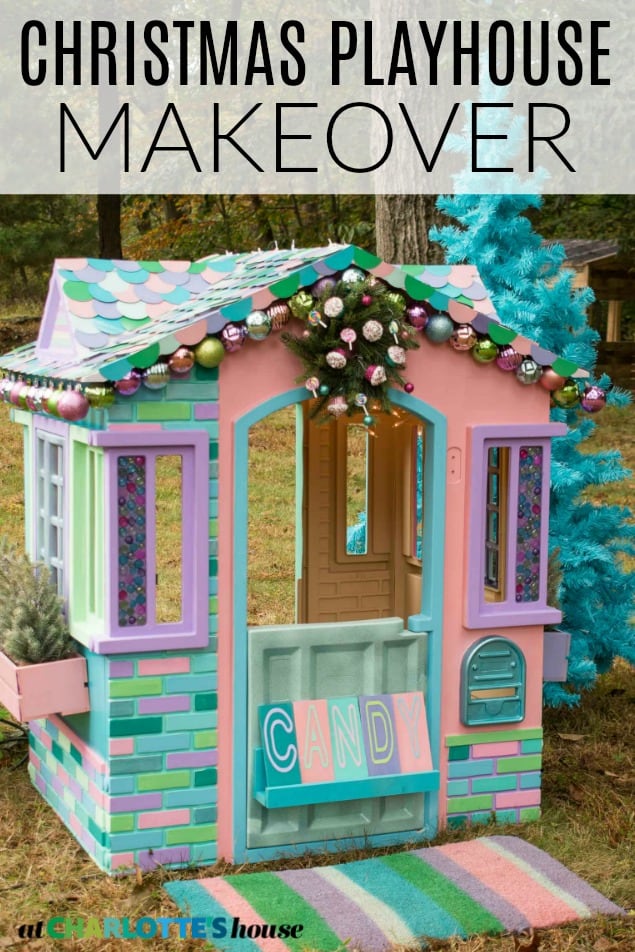
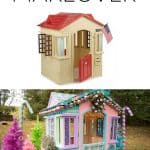
Children’s Christmas Playhouse Makeover
Psssst… this post *might* contain affiliate links: see my disclosure here.
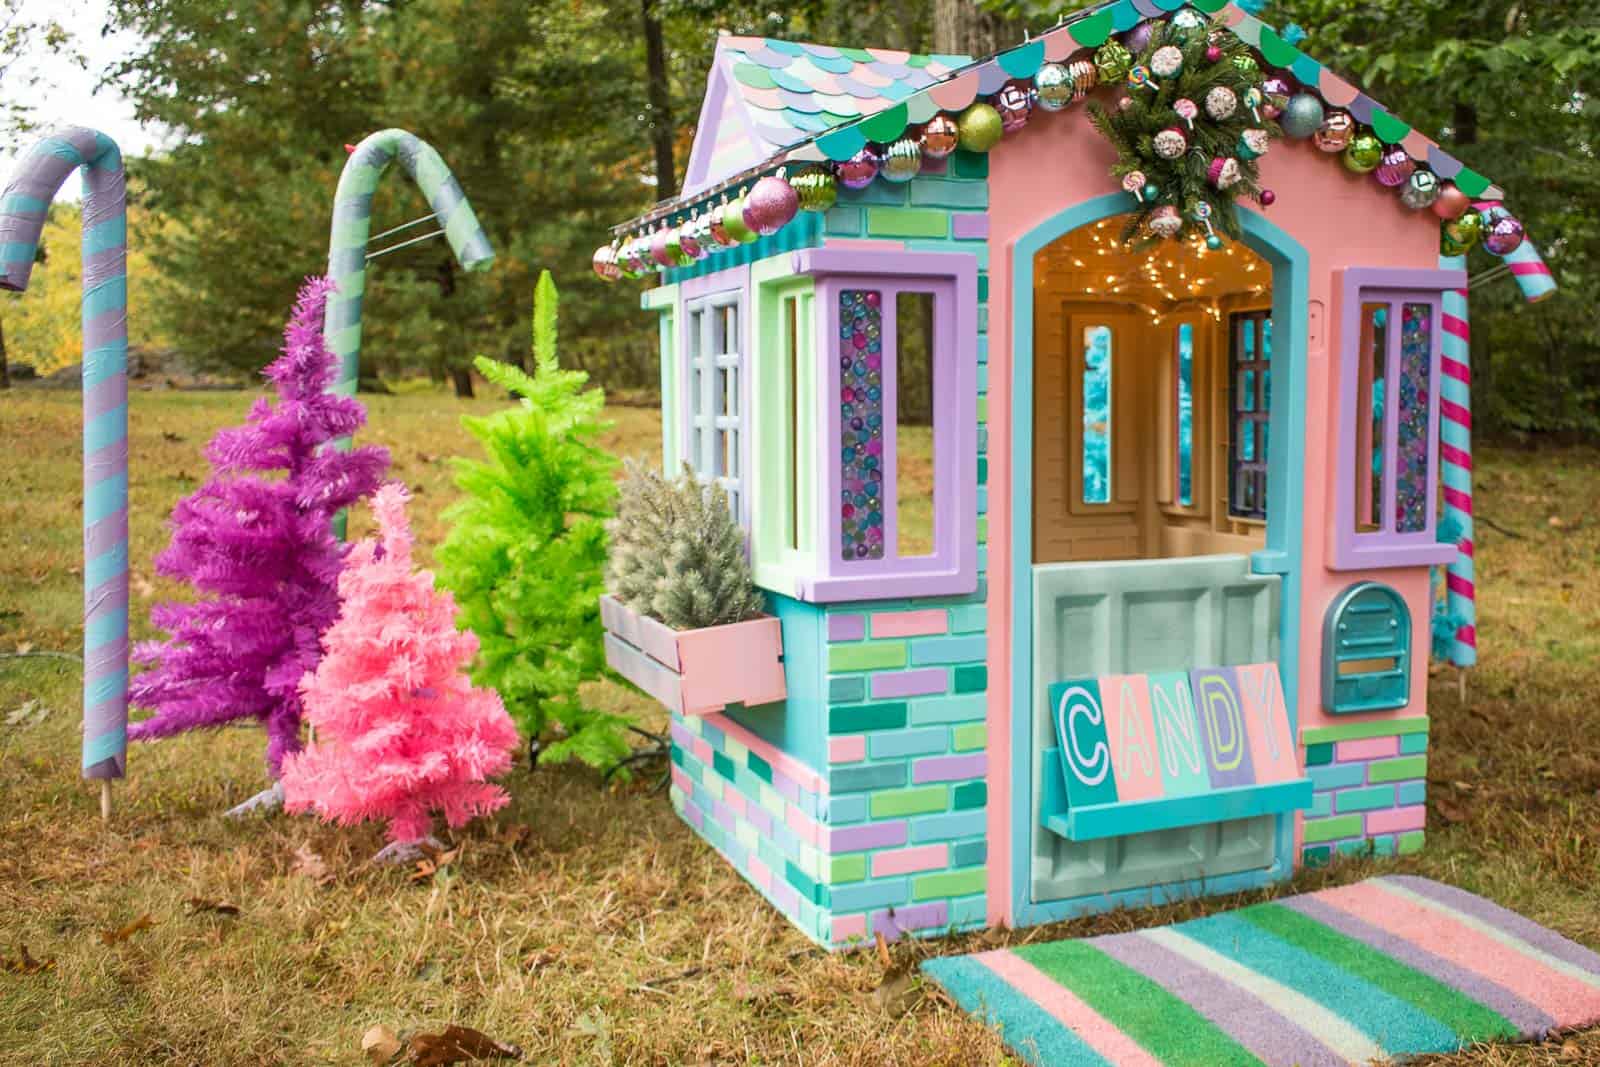
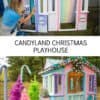
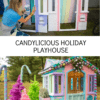
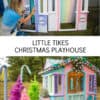
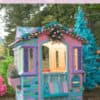
Decorating a Little Tikes Playhouse for Christmas
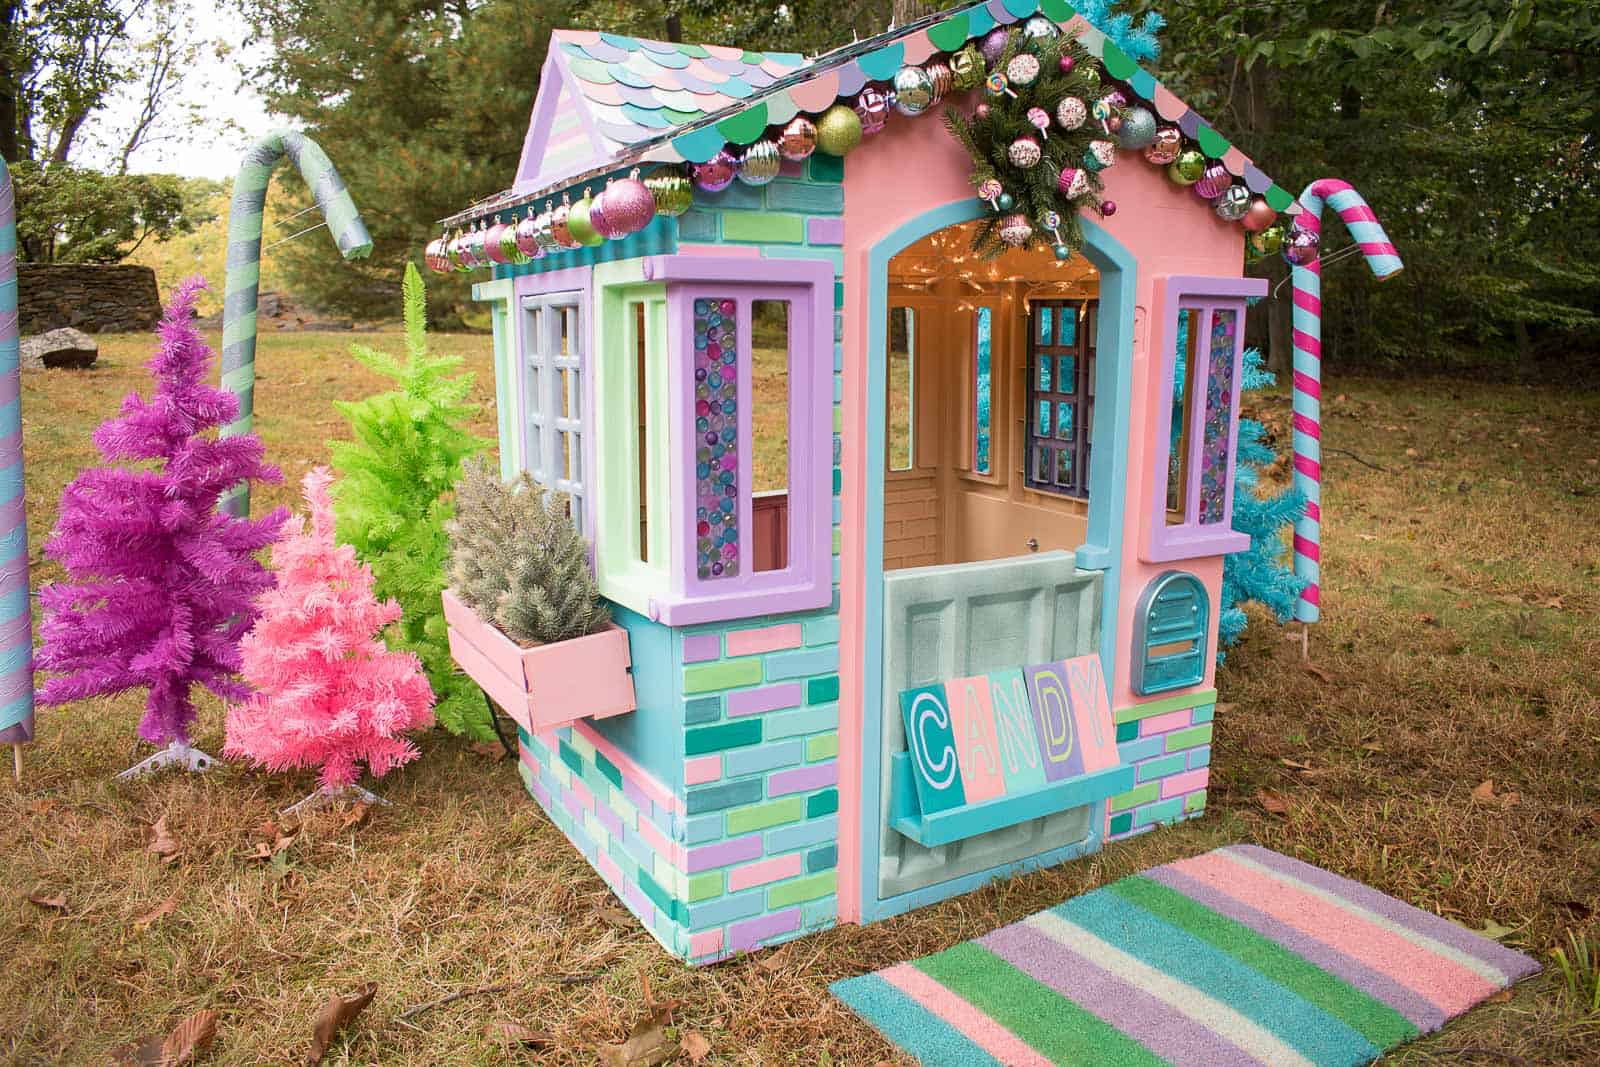
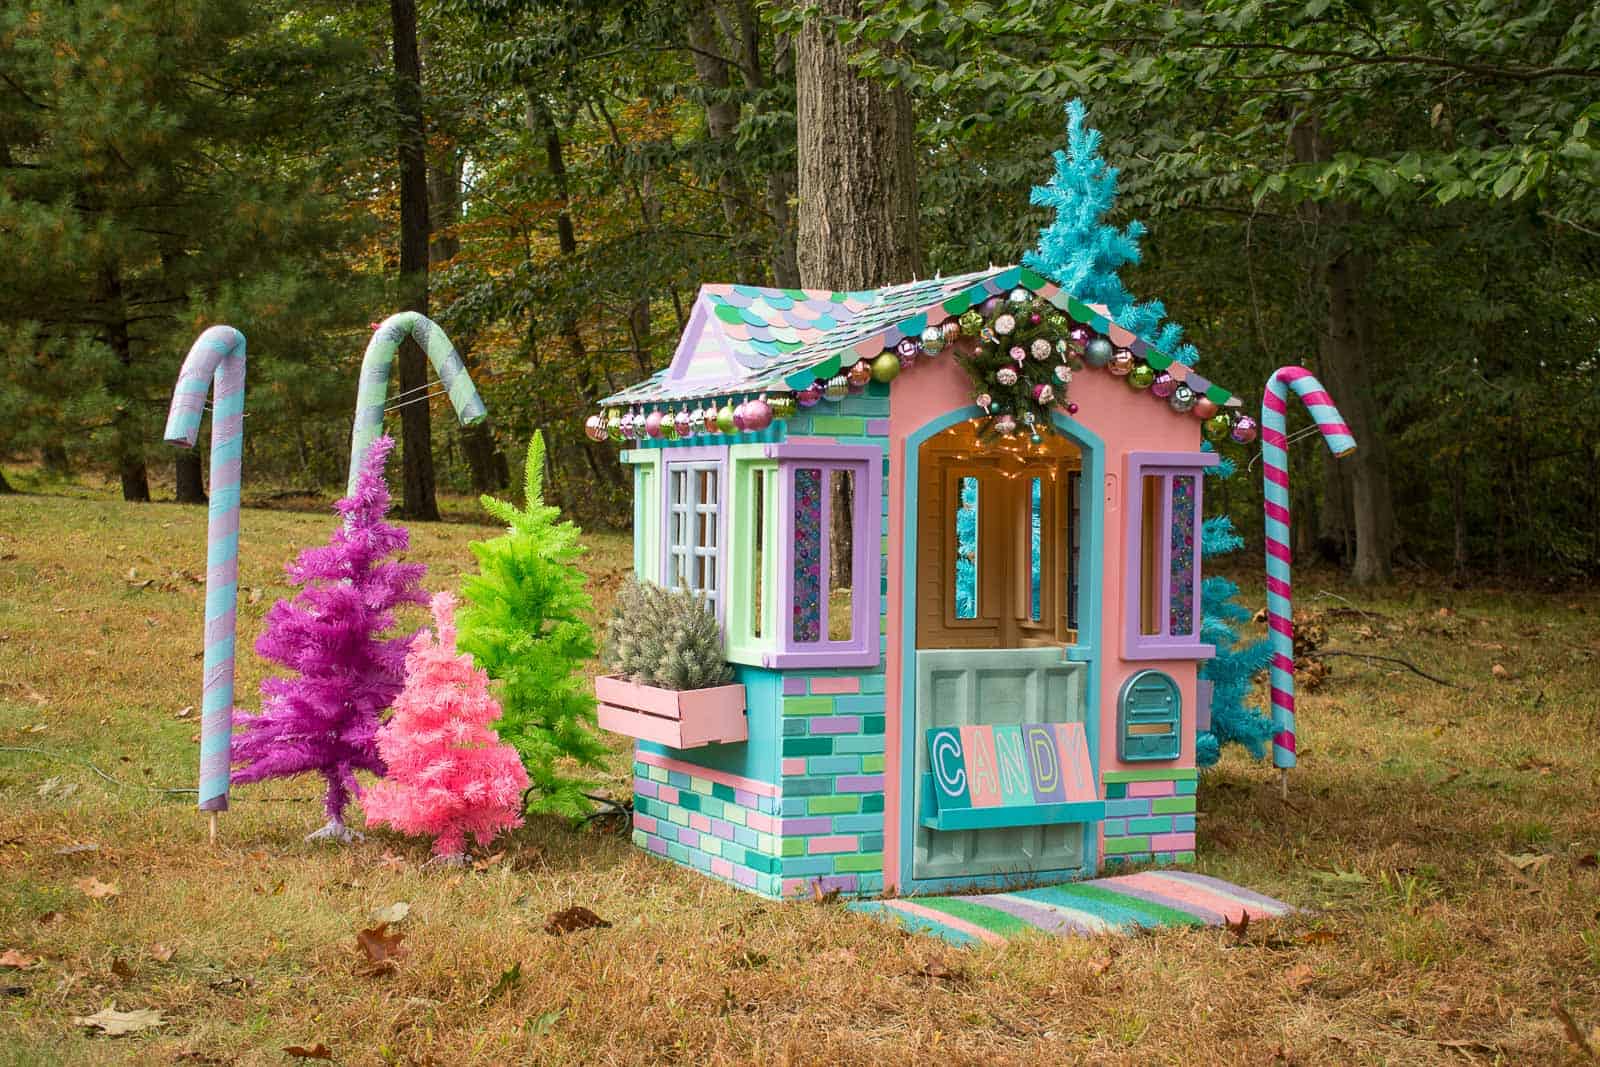
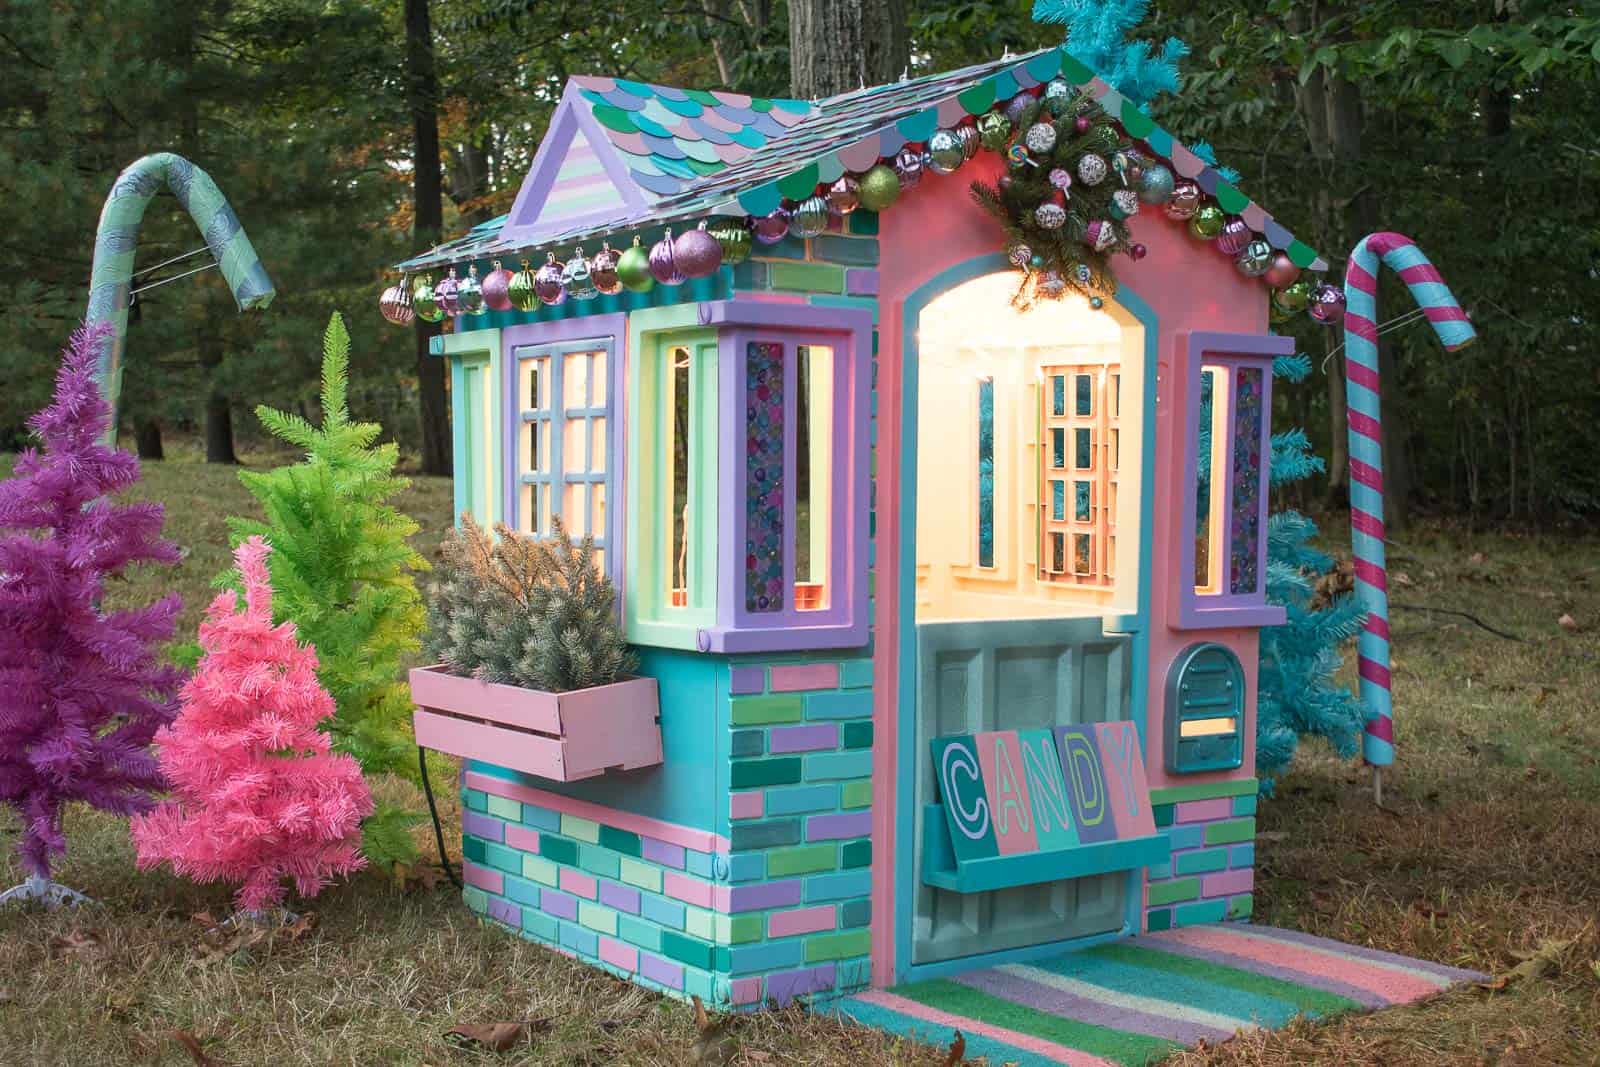
Transforming a children’s plastic house into a colorful candyland Christmas fantasy!
Disclosure: I partnered with JOANN on this post and got SO much inspiration from wandering the aisles and looking for colorful candy-inspired craft materials!
Shop my favorites!
Remember the fun Little Tikes playhouse makeover I did for Homes.com?! Well today I get to share ALLLLLL the details and give you a full play by play and materials list for everything! I am SO grateful to Joann for being an awesome partner since they provided just about ALL of the supplies for this project! (Full materials list at the end of this post!)
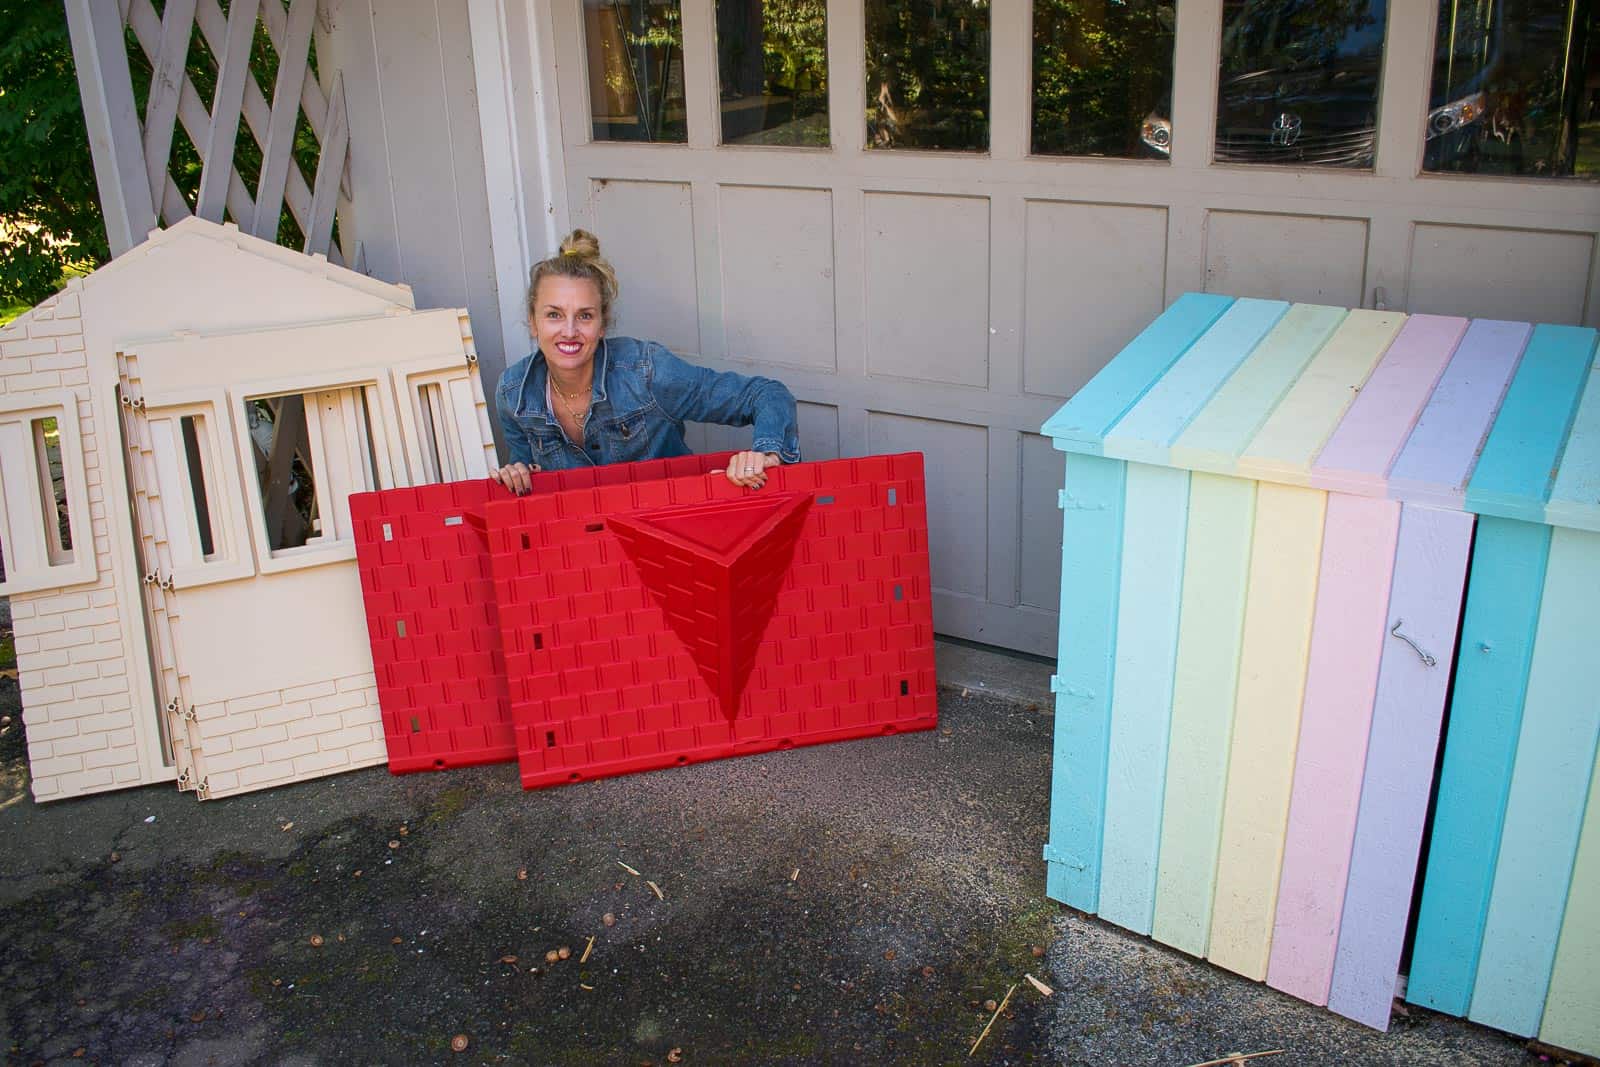
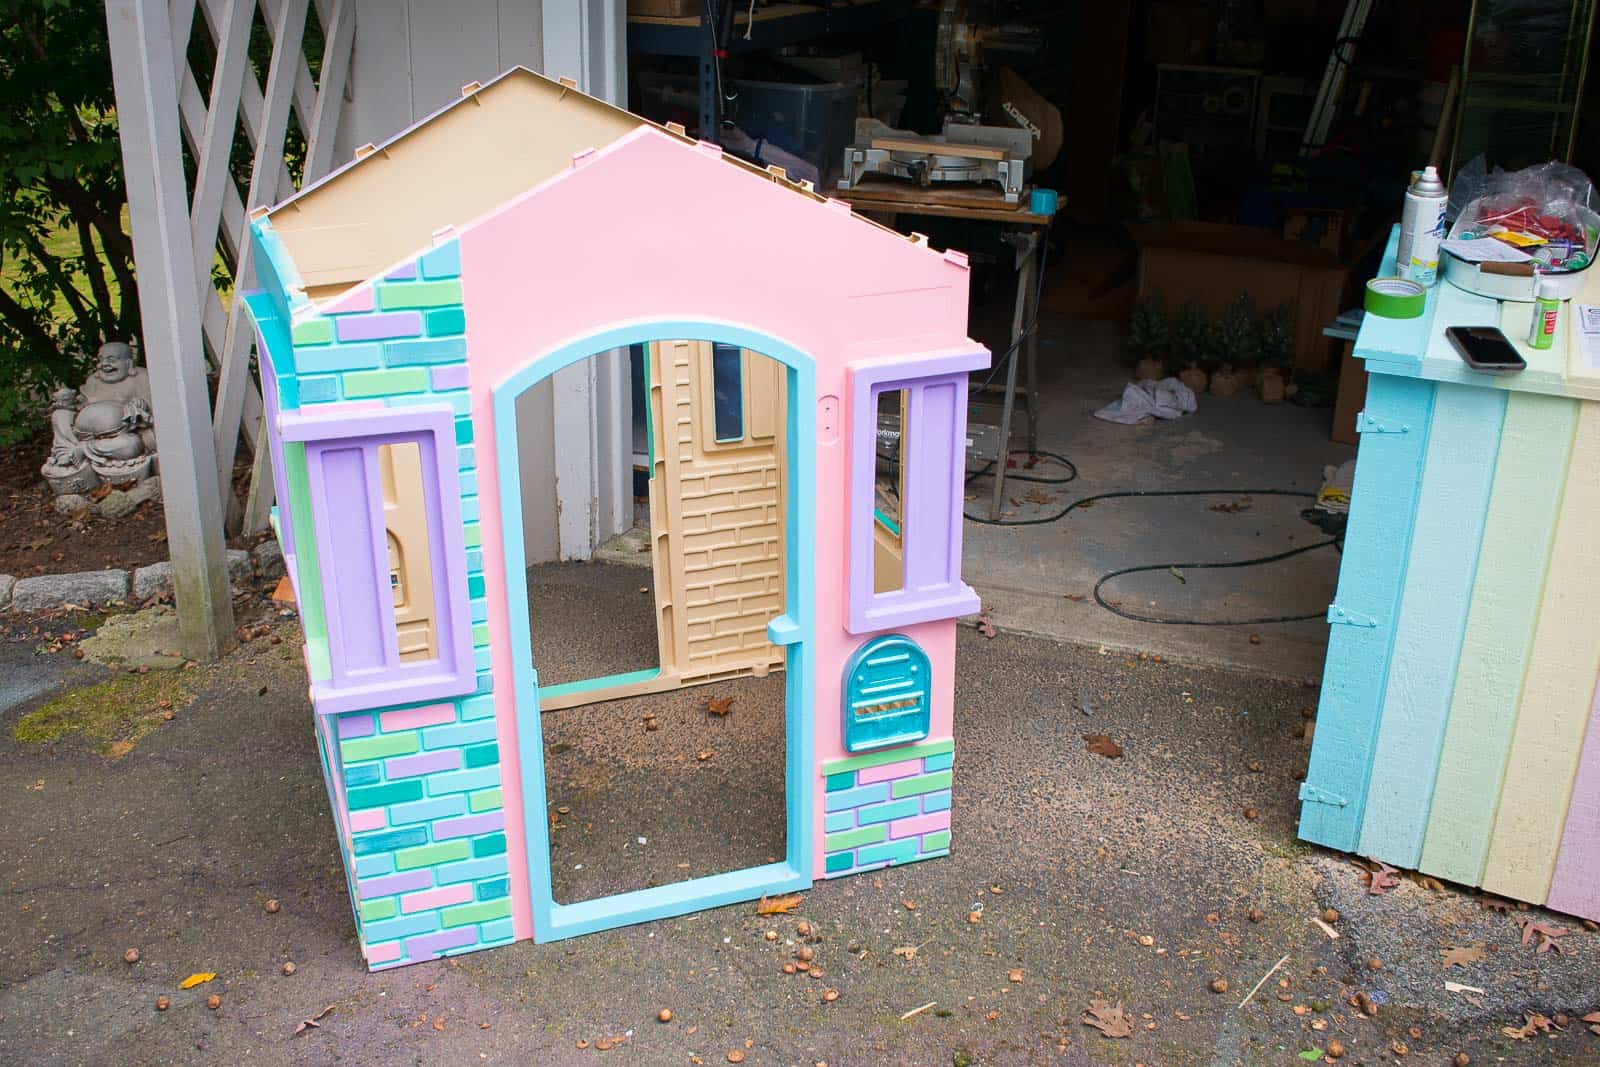
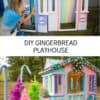
Let’s go back to the initial premise. I was challenged to take a basic plastic playhouse and transform it for Christmas. My brain immediately went to a candyland gingerbread house color situation. I started by perusing Pinterest and looking for candy house inspo and came up with a plan!
Step 1. Prep and prime
One disclaimer I will give before going into too much explanation is that I was lazy and didn’t do the first most basic, obvious step: prep. What I *should* have done was clean every surface of the house and then give it a light sanding. I did not. I just jumped right in with the primer and there were a few places (the shiny doors and window frames) that scratched on me.
So assume you’ve prepped the surface, lay out drop cloths and give the ENTIRE playhouse a coat of spray primer. Note that I didn’t assemble the house first… that’s key. In some places, I needed to go back with a latex primer and a brush… like below where I had some overspray from the spray paint.
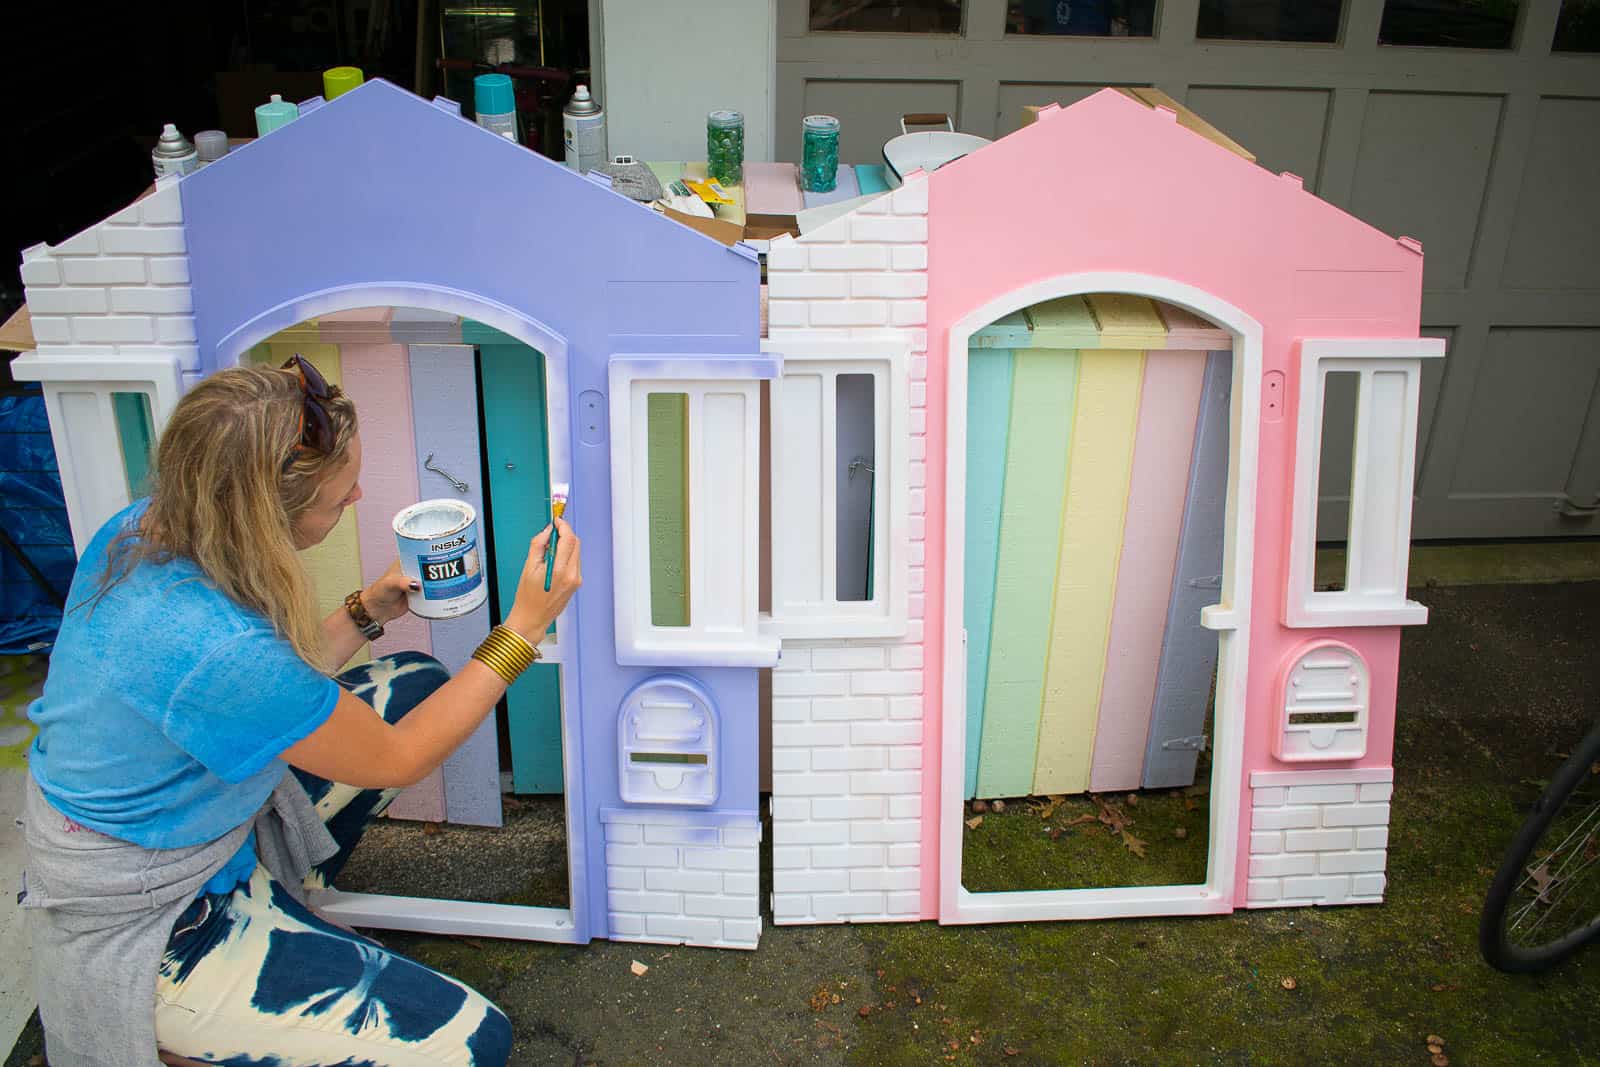
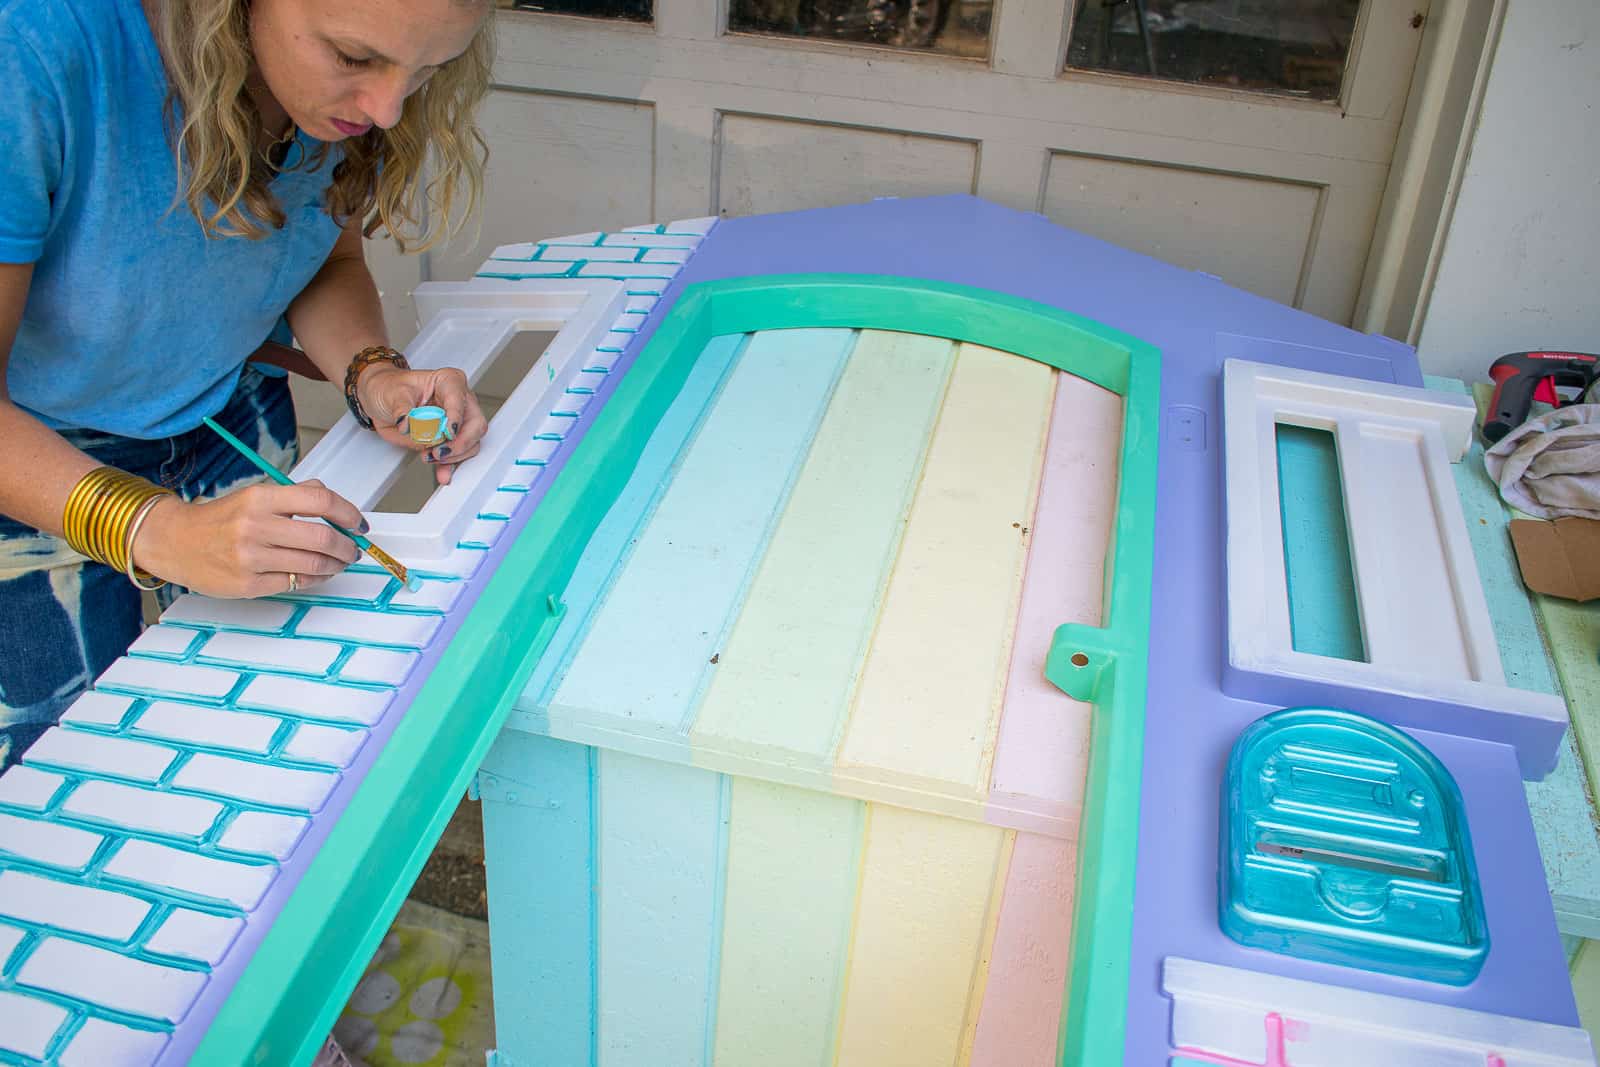
Step 2. Paint
For the larger areas of the playhouse, I taped off the edges and used colorful spray paint. For the ‘bricks’ of the playhouse, I used a small brush and some craft paint to hand paint the entire thing. I also hand painted the window frames and mailbox.
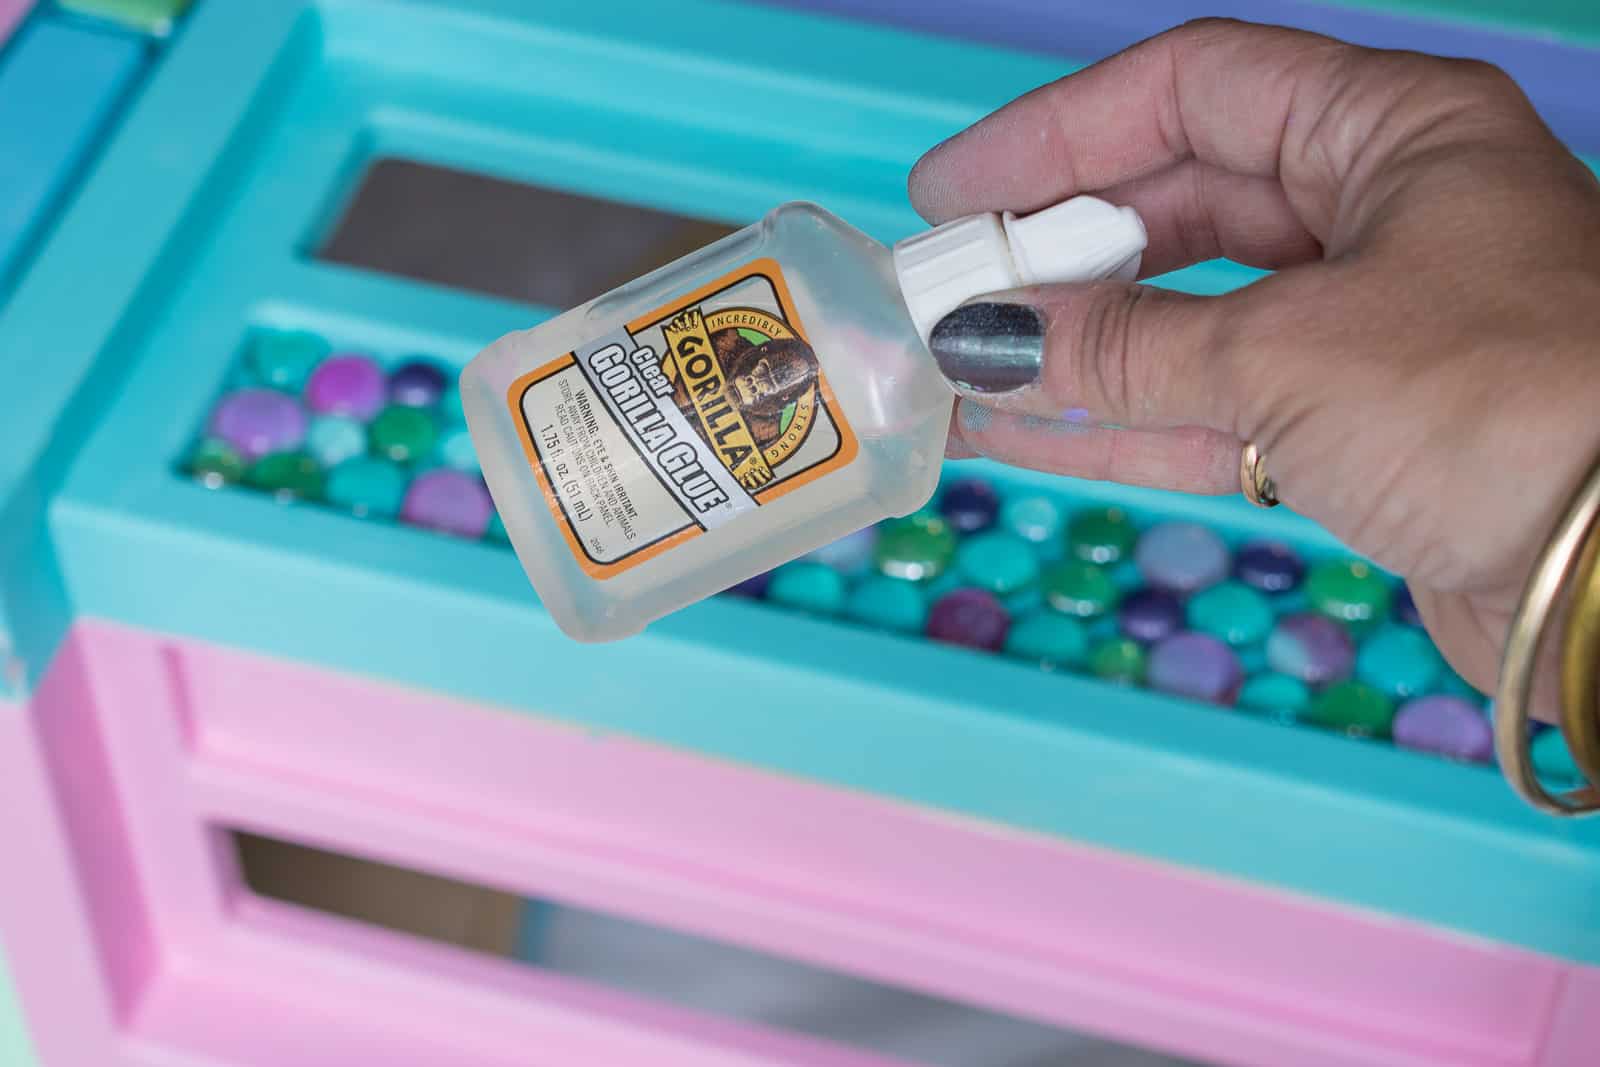
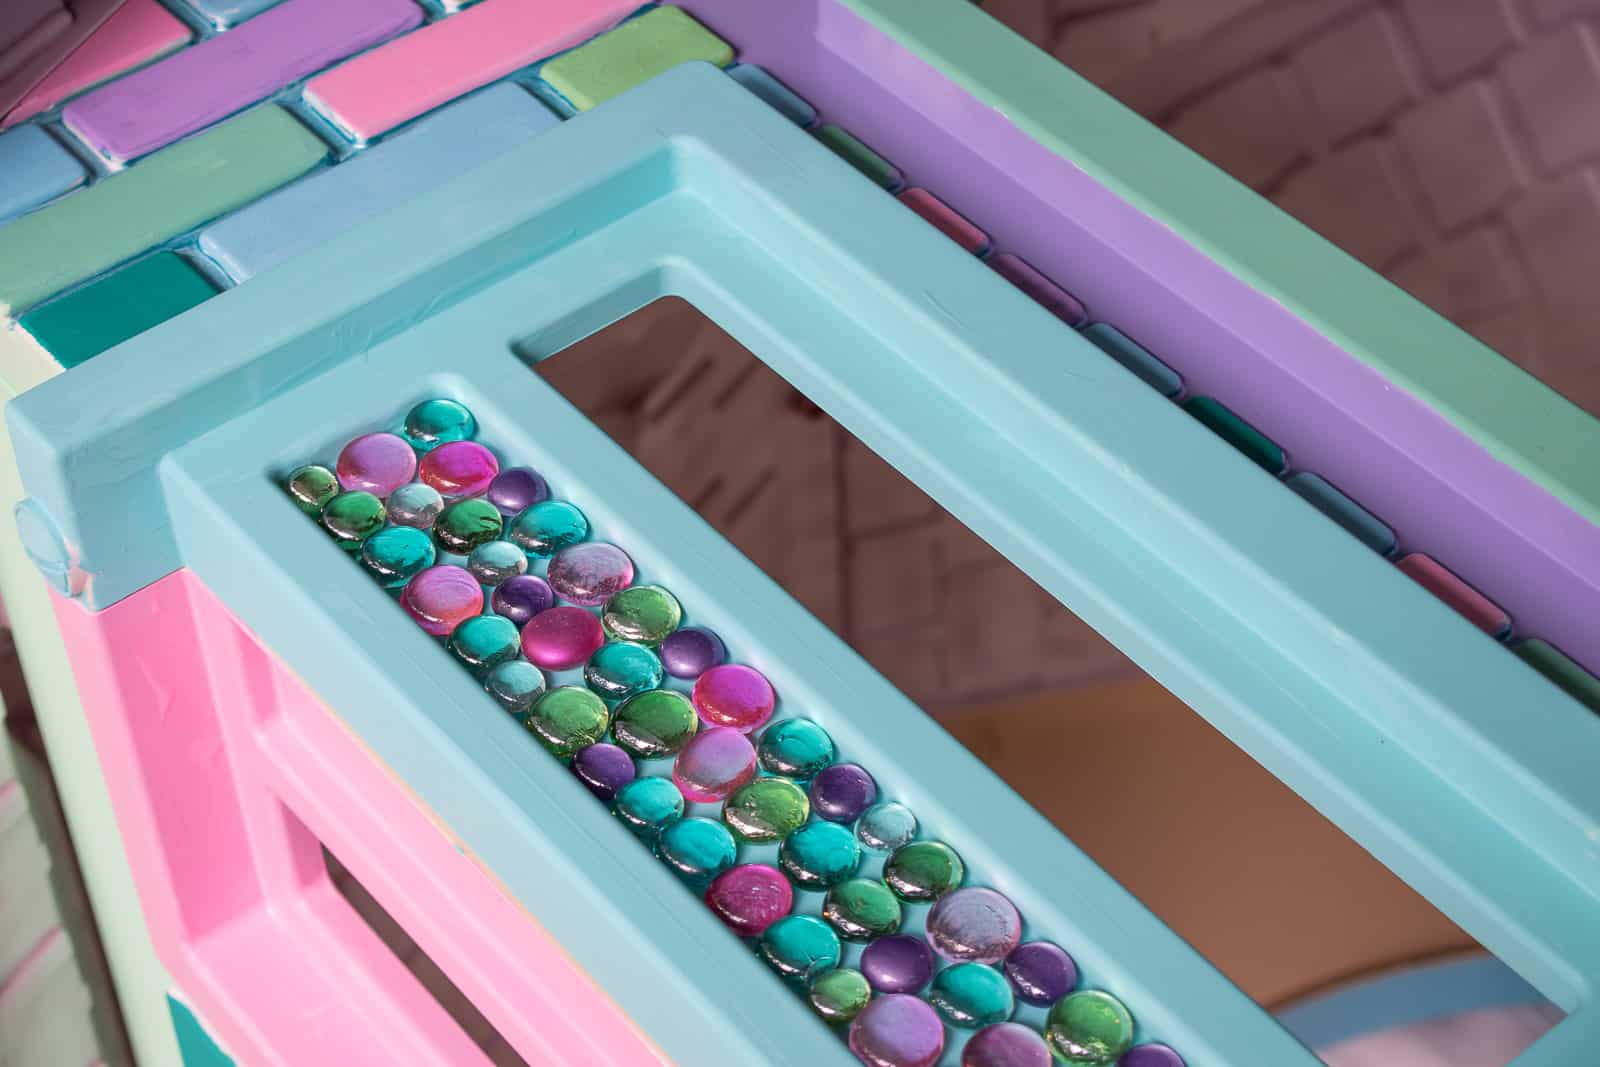
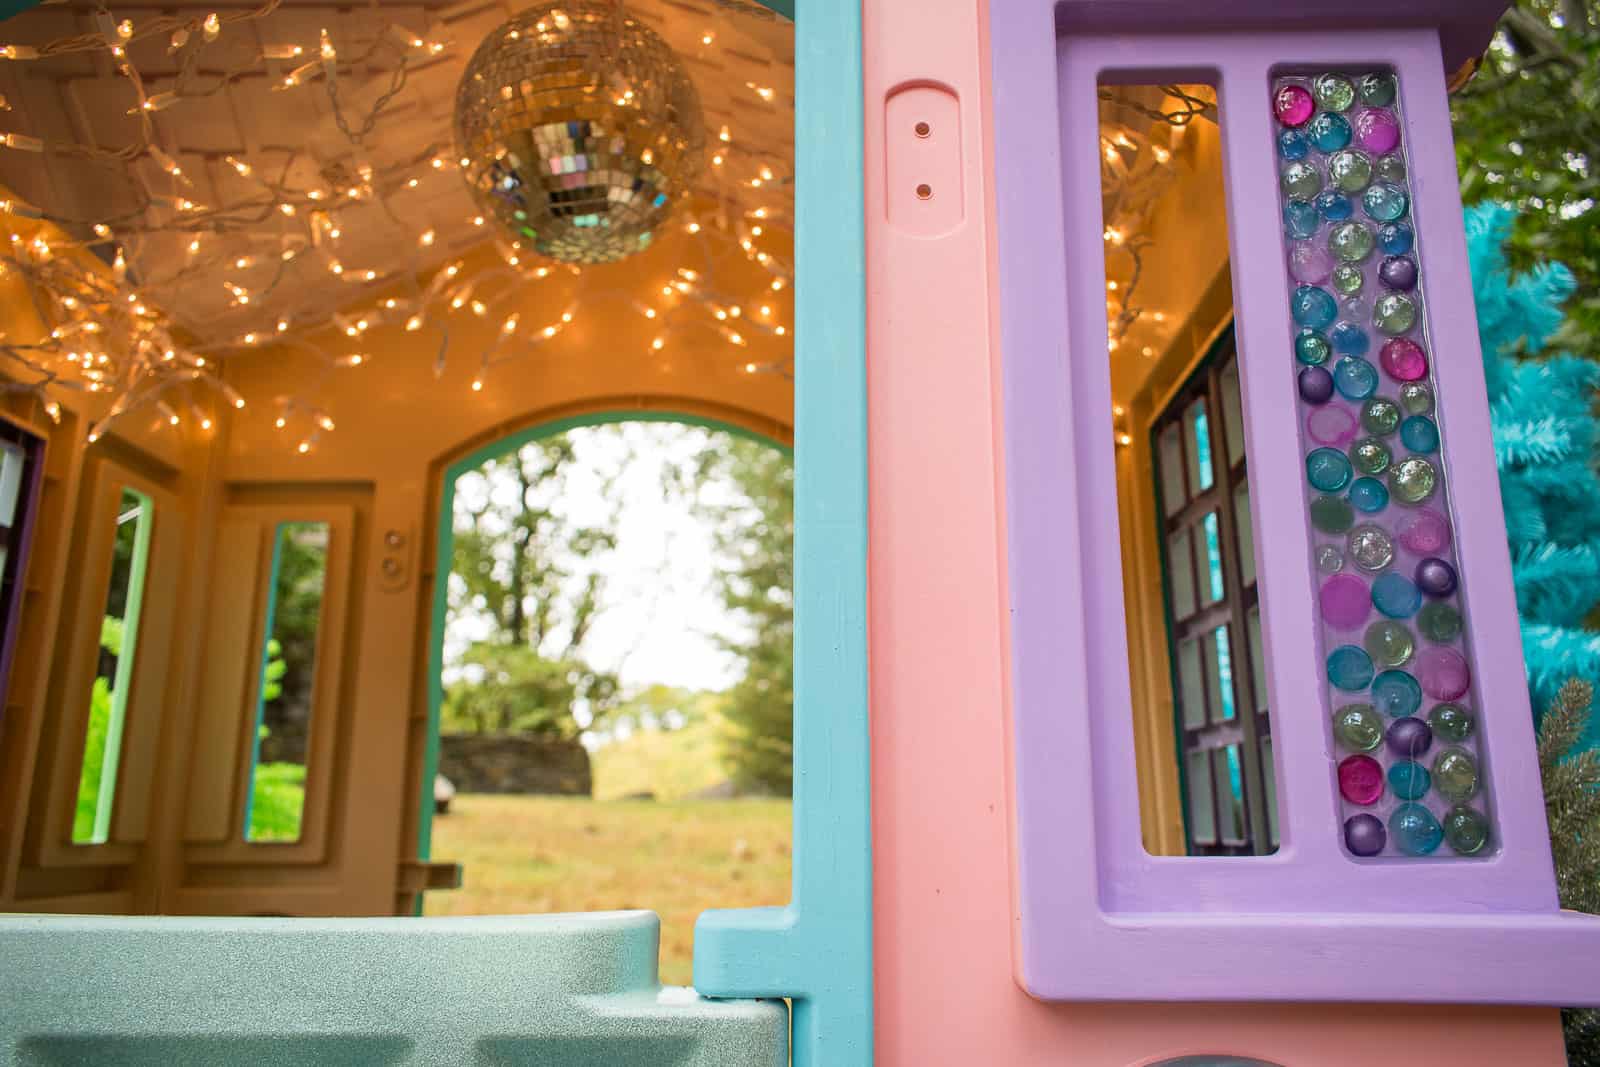
Step 3. Stained glass panels
Another note. I assembled the house first, but should have done this step before… you’re getting the benefit of my mistakes. I picked up some assorted glass marbles and used Gorilla Glue to adhere them to the recesses on either side of the front door. I let them cure overnight and then carefully mixed this epoxy resin (follow the directions precisely… mix equal parts resin to hardener, mix for 2 minutes, pour at the right temperature…). Tip: if you exhale on the surface of the resin 5-10 minutes after you’ve poured it, all the little air bubbles will come to the surface and disappear.
Step 4. Assemble the house
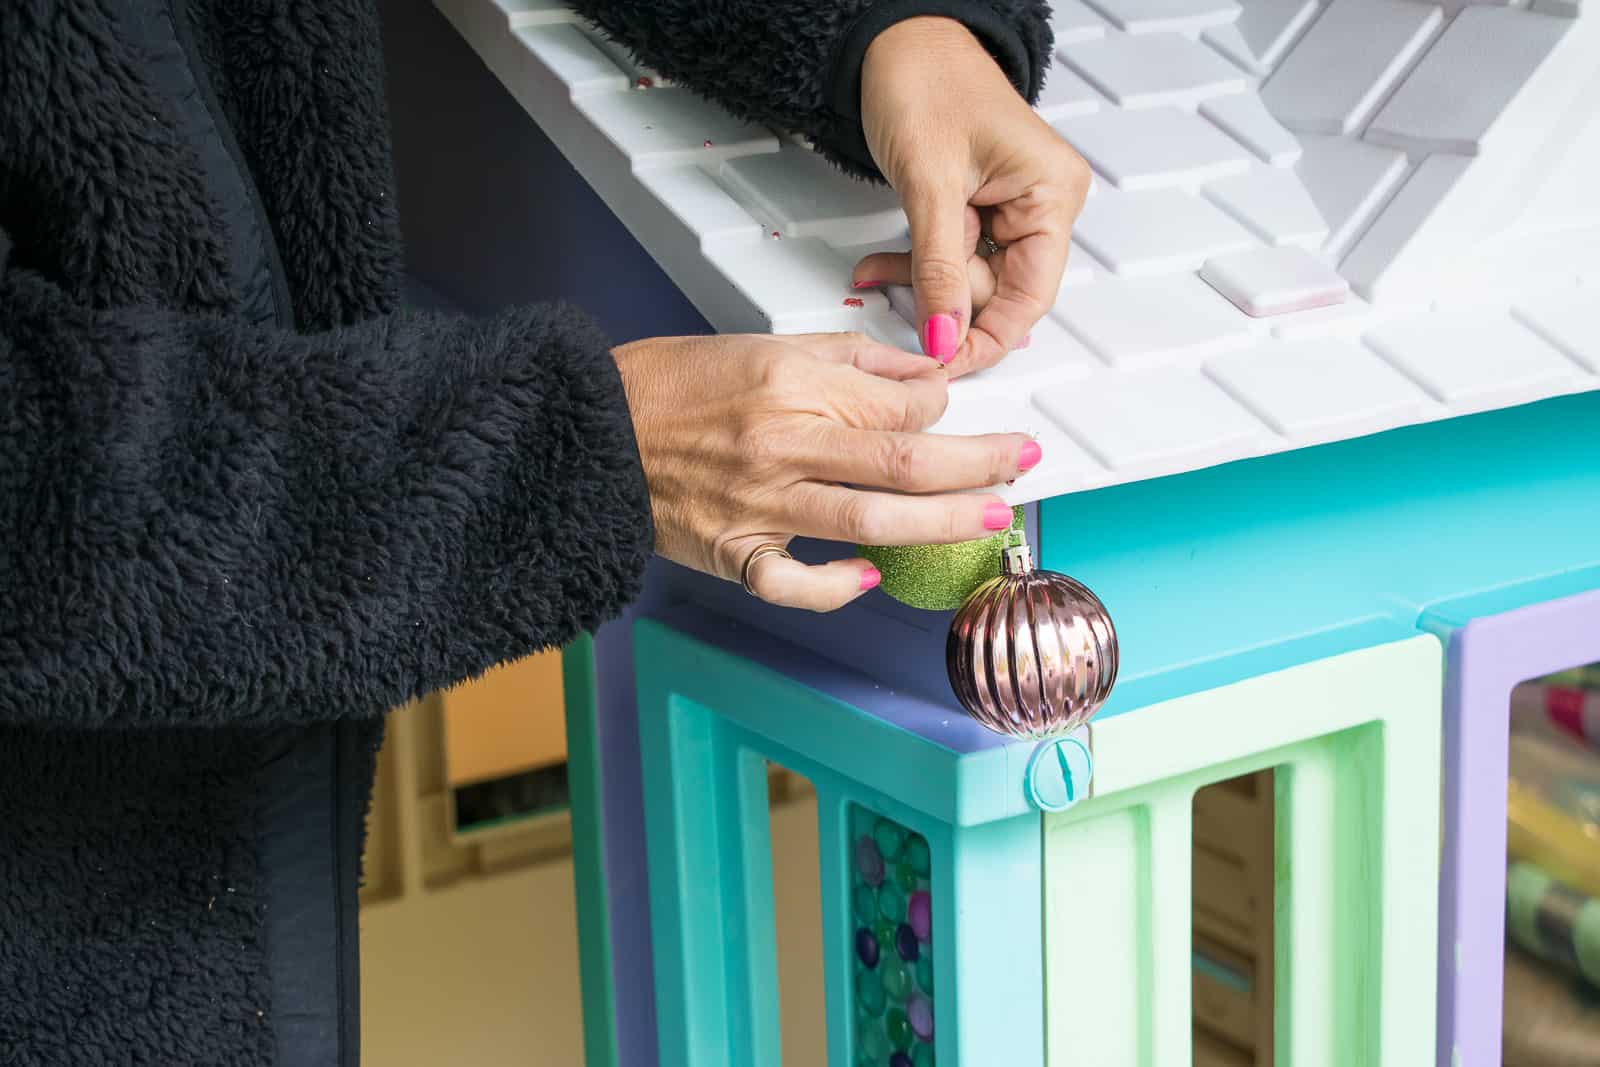
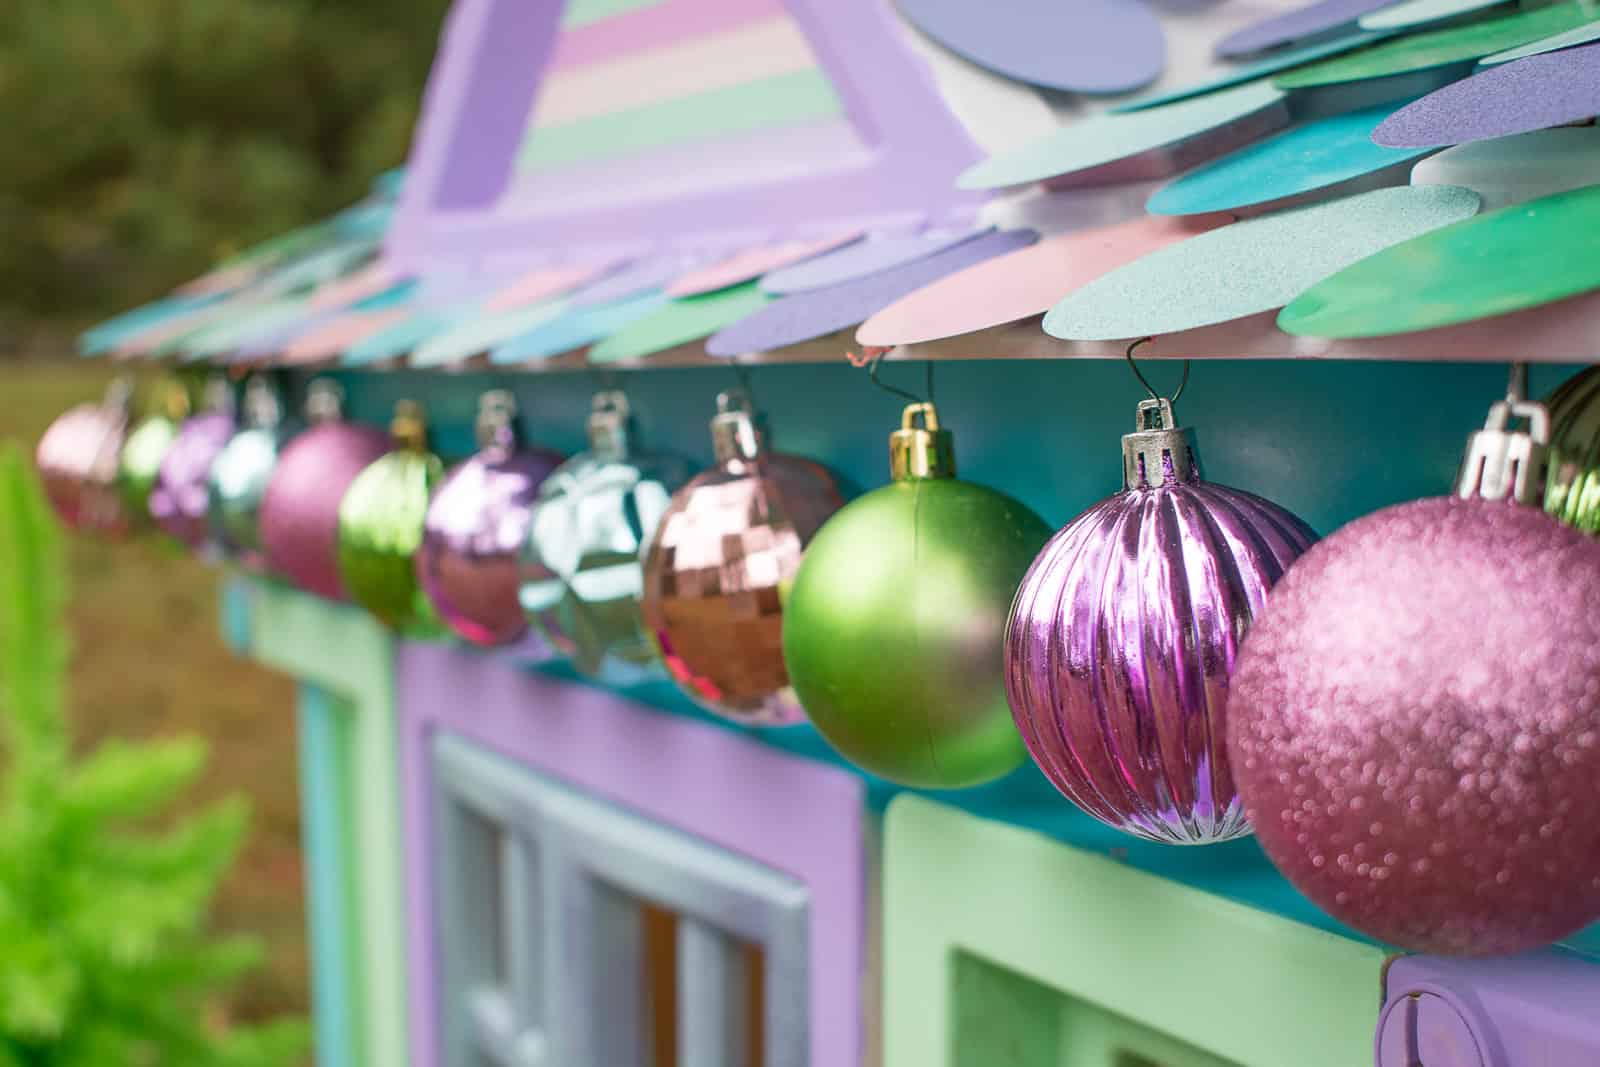
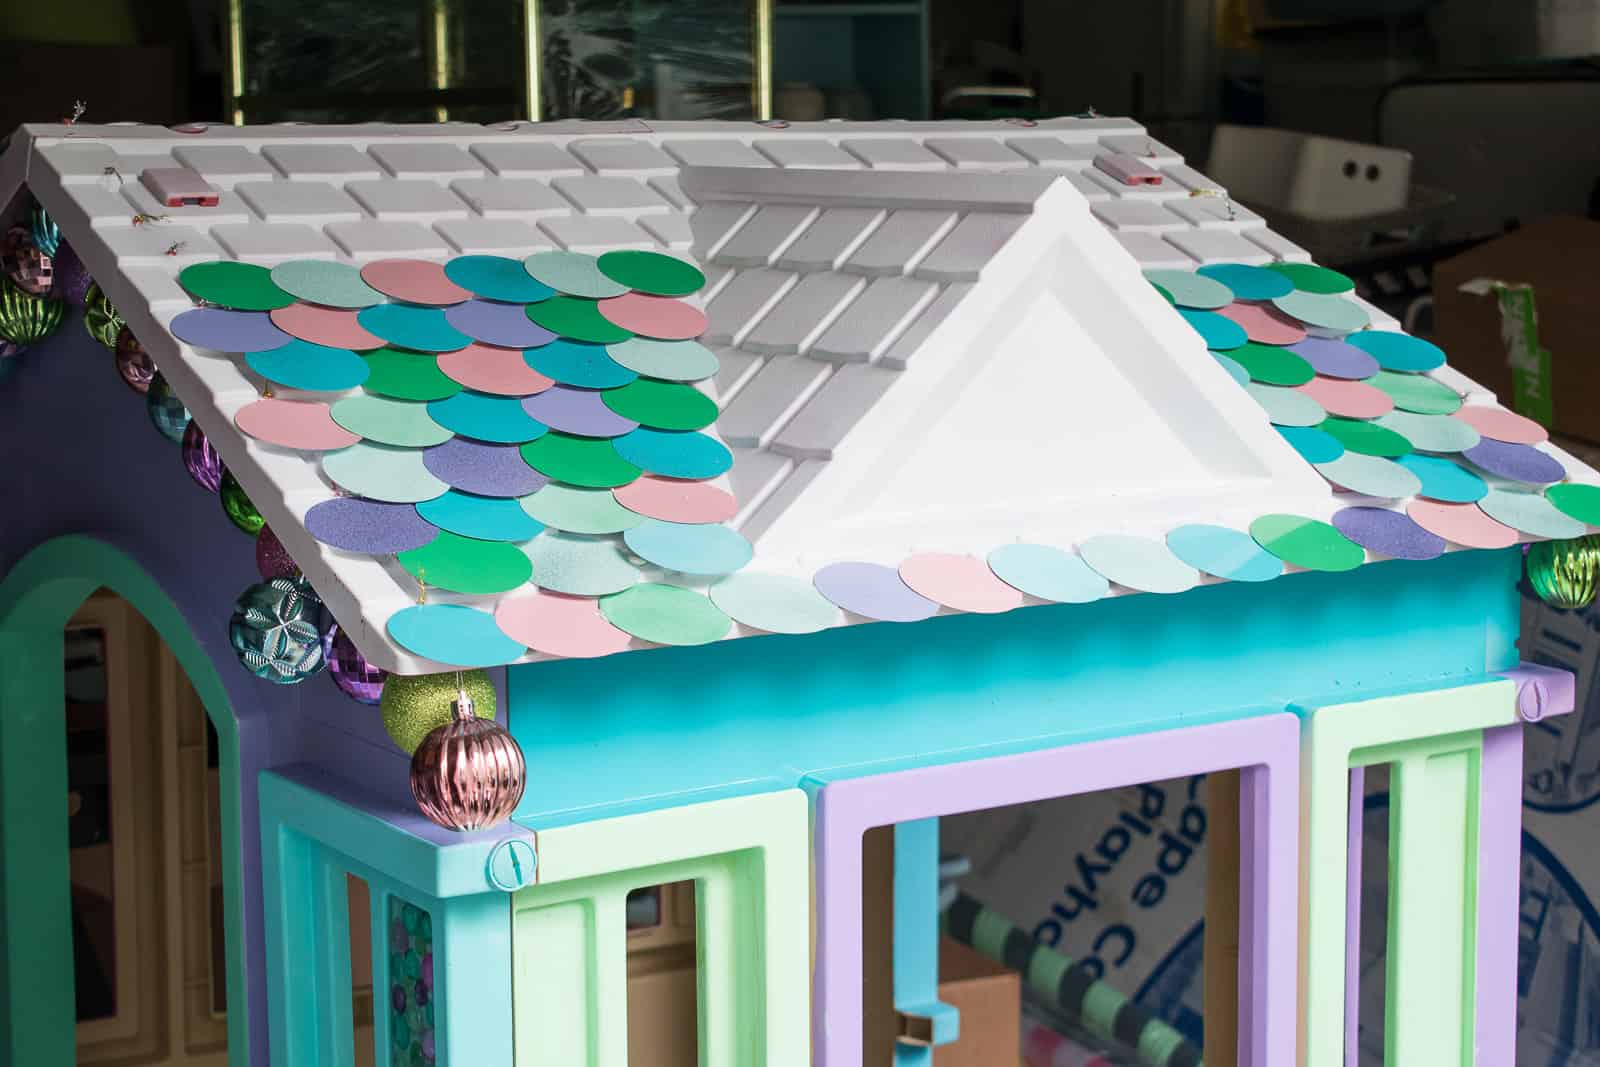
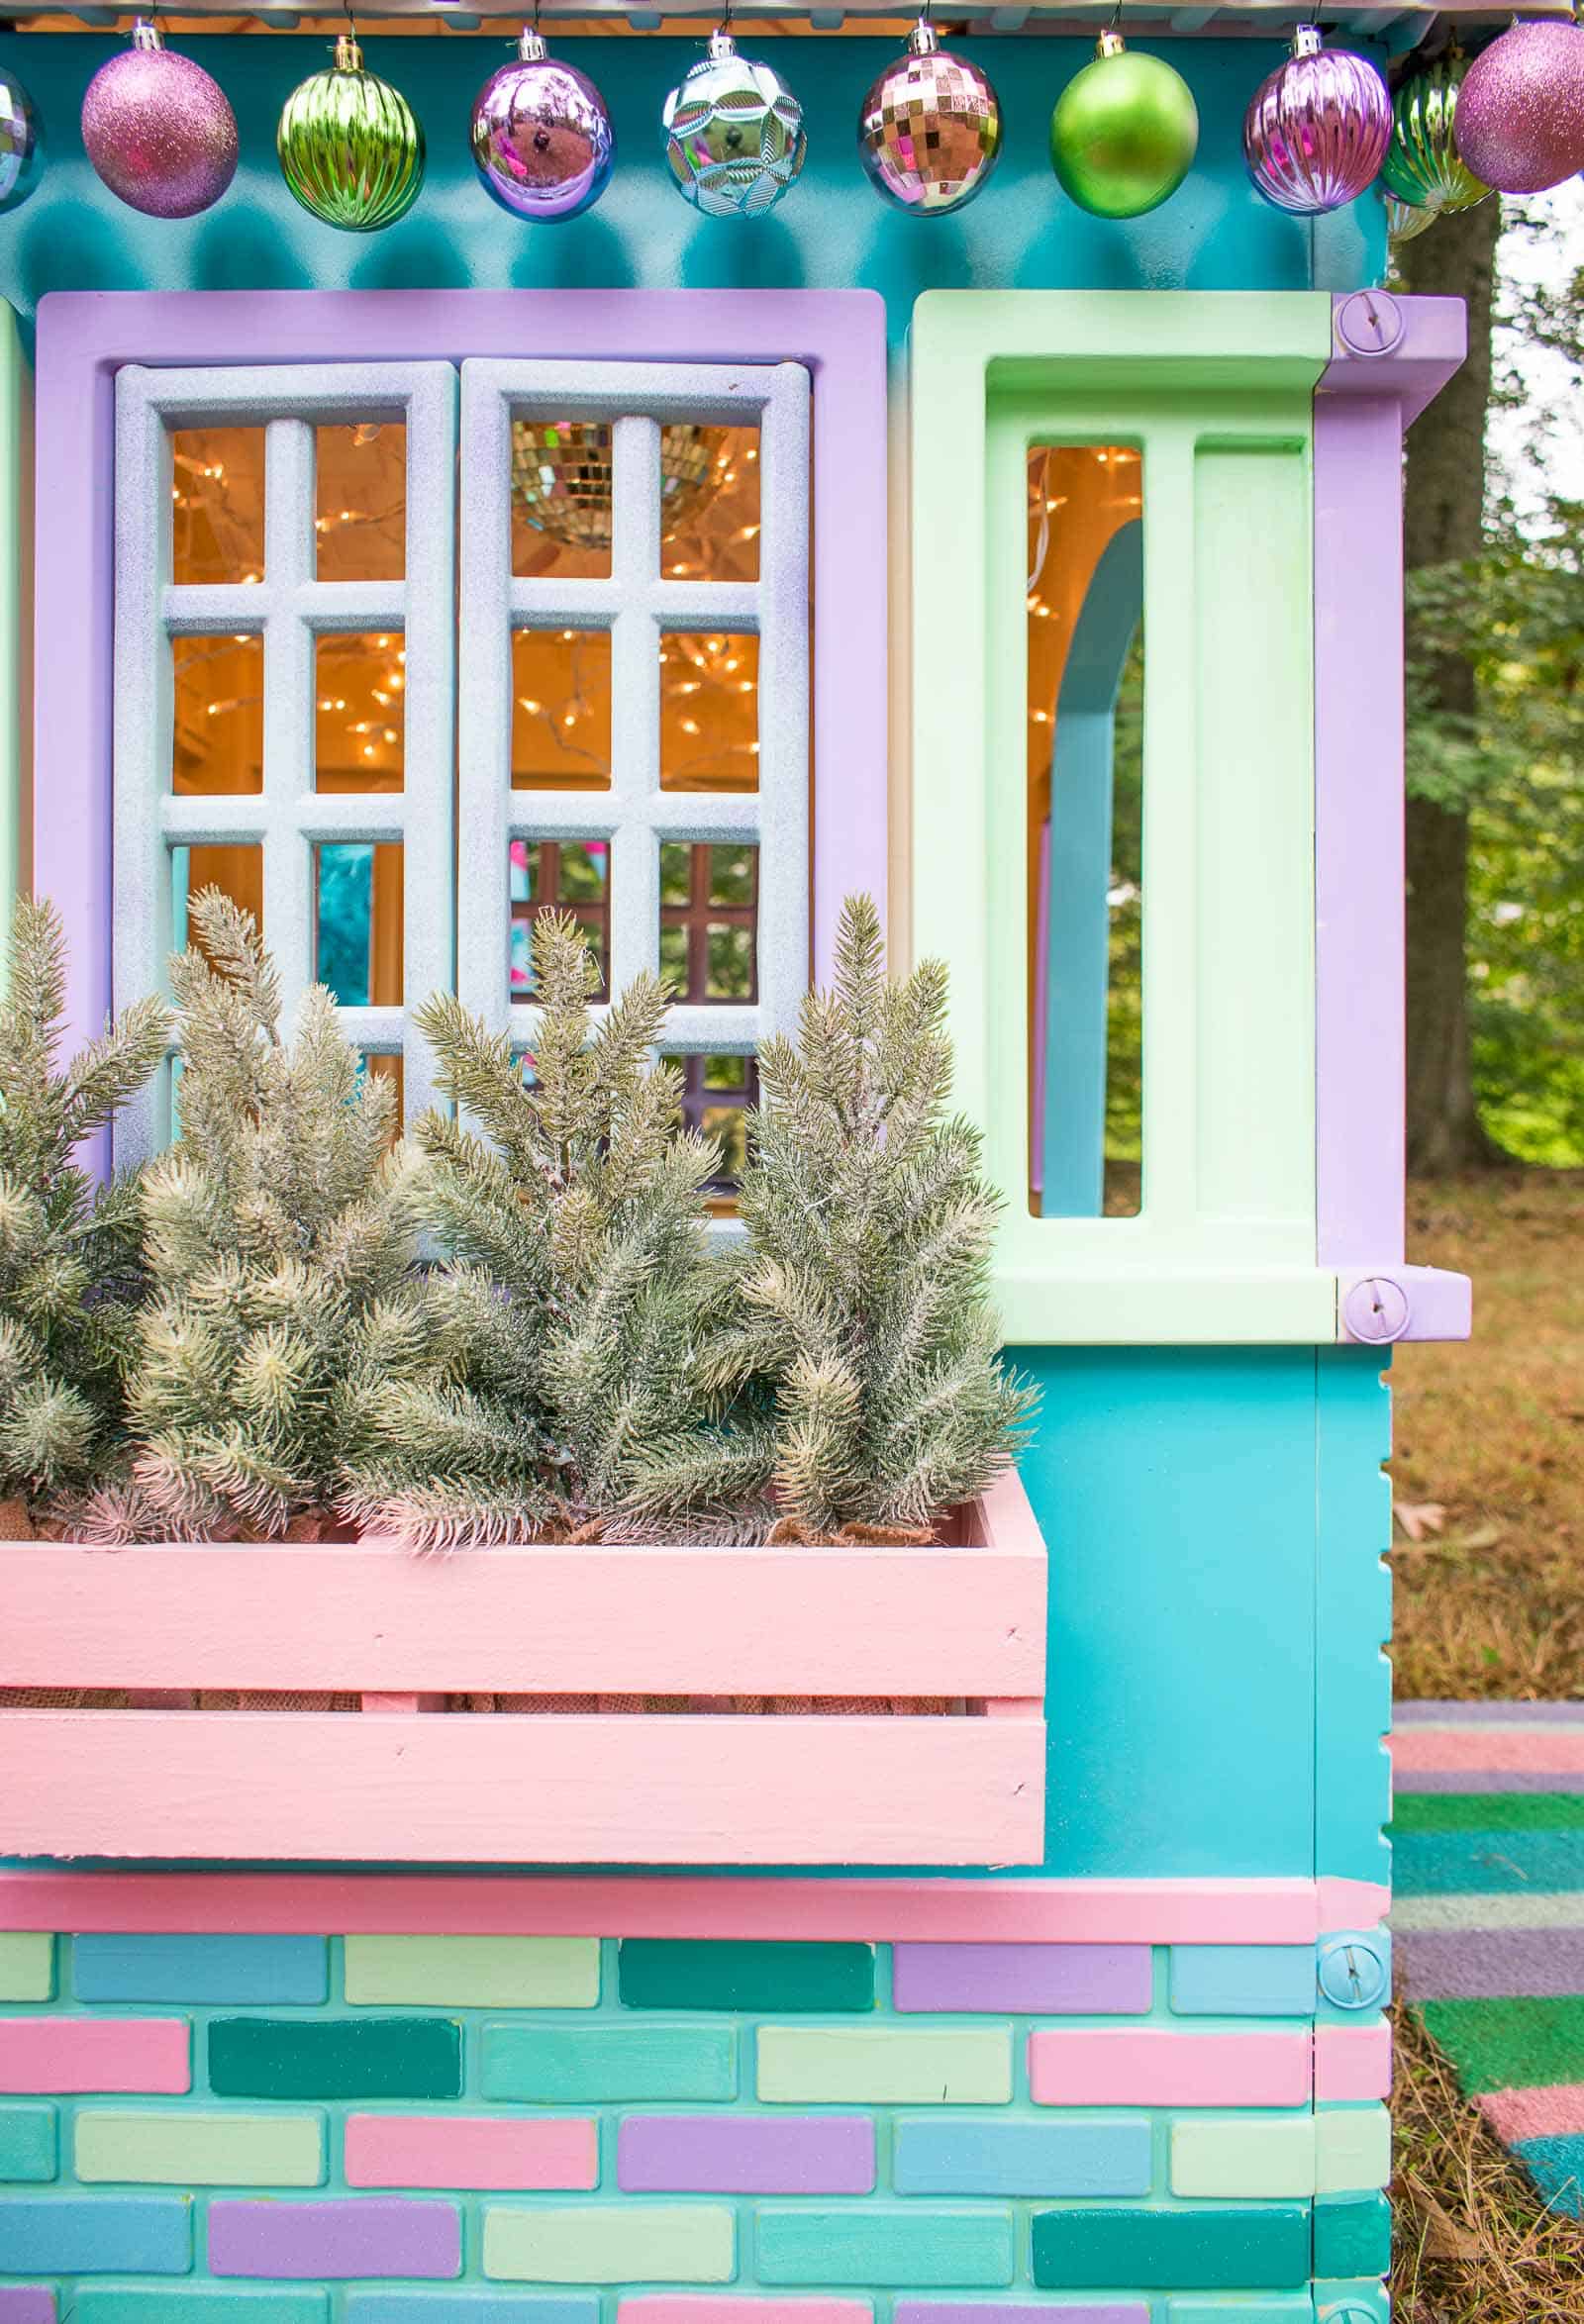
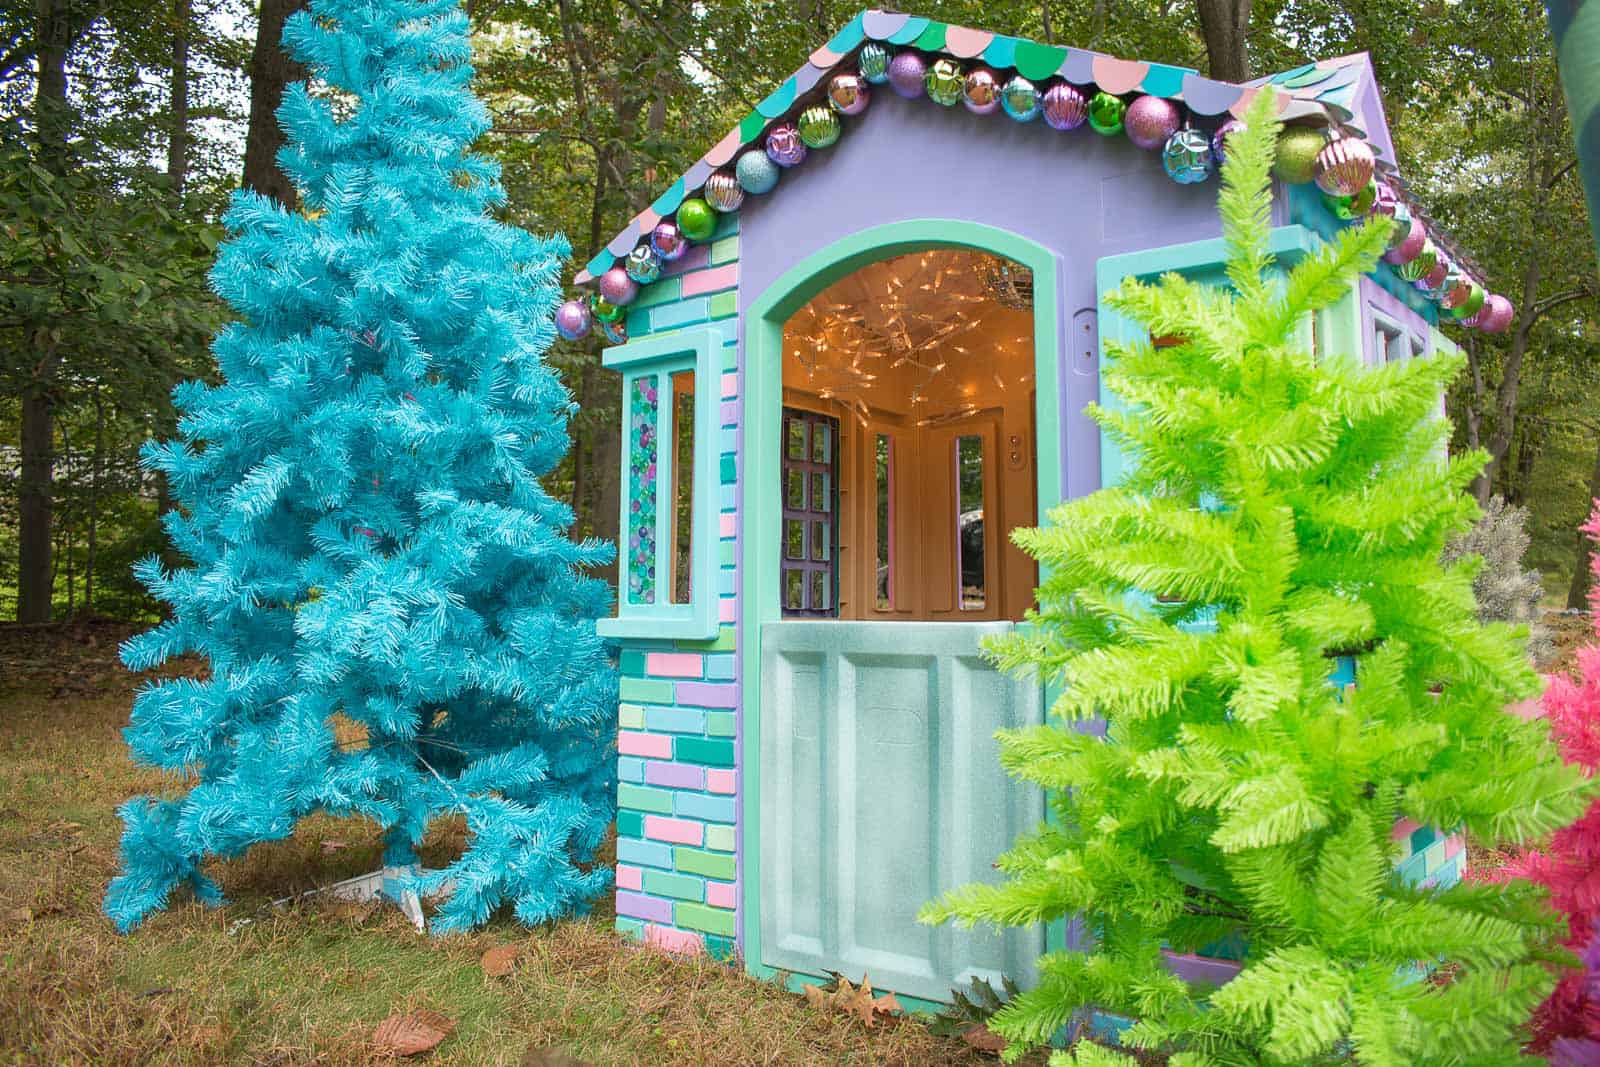
Step 5. Attach the ornaments to the eaves
I drilled small holes through the roof of the playhouse and then wired the non breakable ornaments in place.
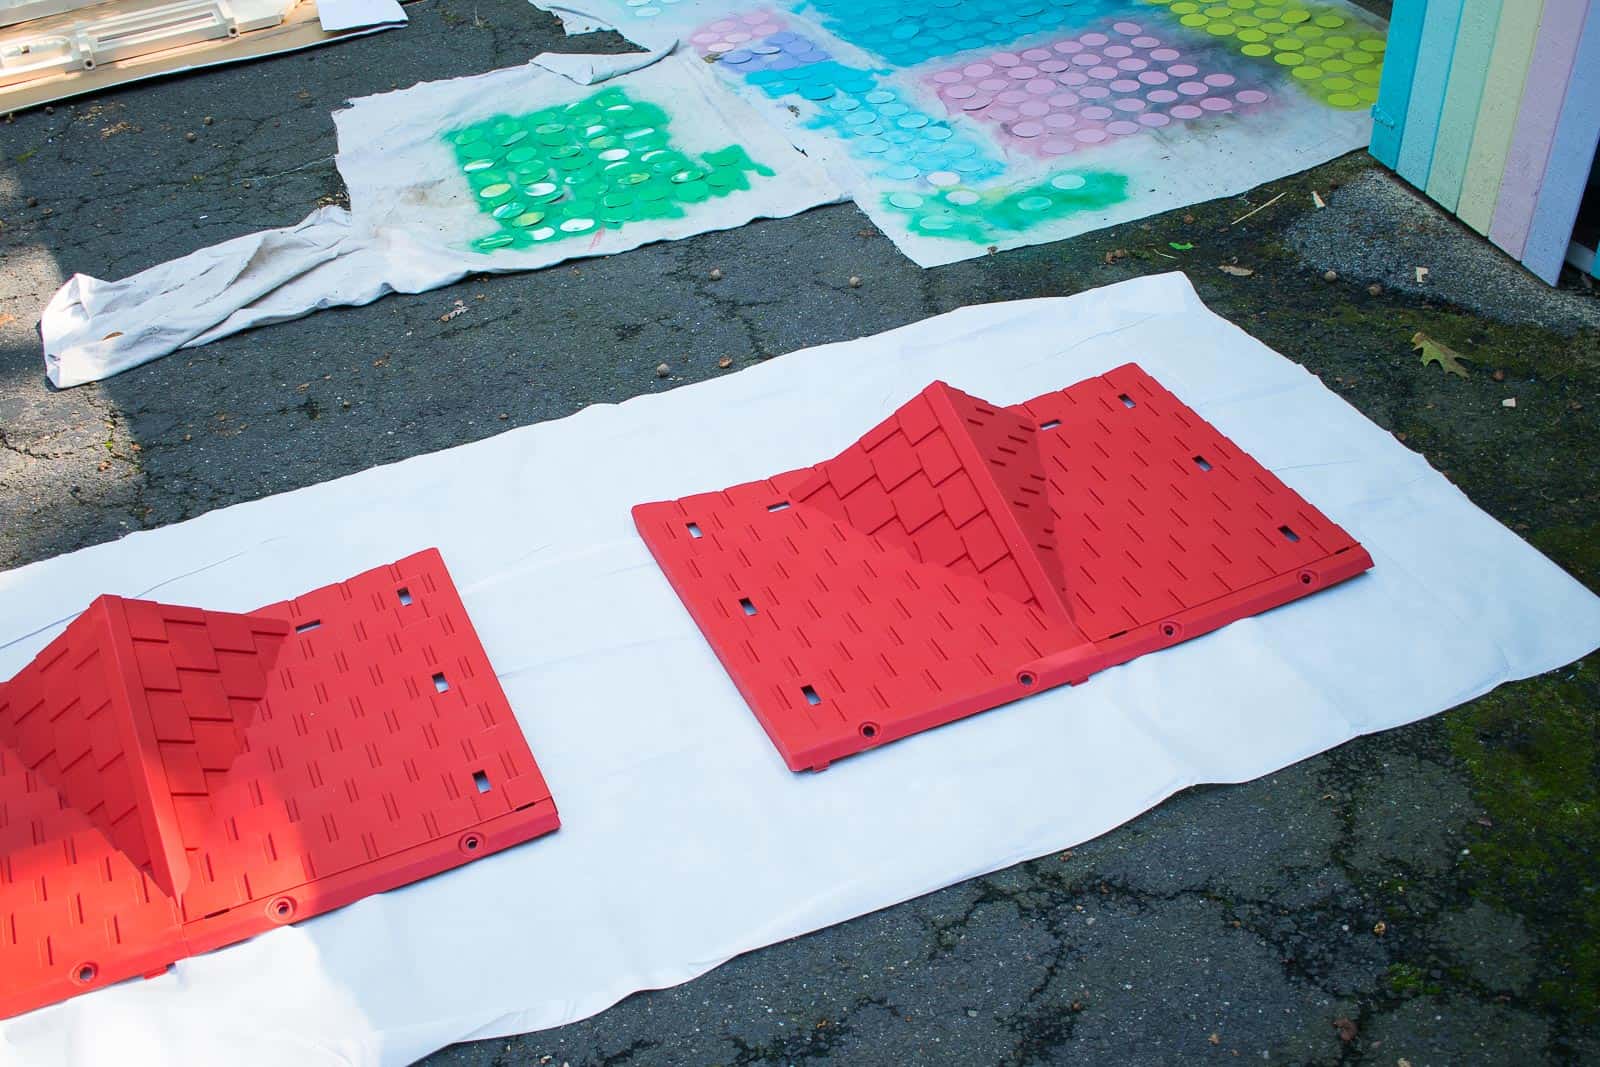
Step 6. Prep and attach the “necco wafer” roof shingles
I used these tin discs I buy at the hardware store. It took me about 6 boxes to cover the whole roof so $20 give or take. I spread them out on a drop cloth and spray painted all of them. To attach to the roof, I used a quick dry glue (I used this one) and worked my way up from the bottom staggering them along each row as I went.
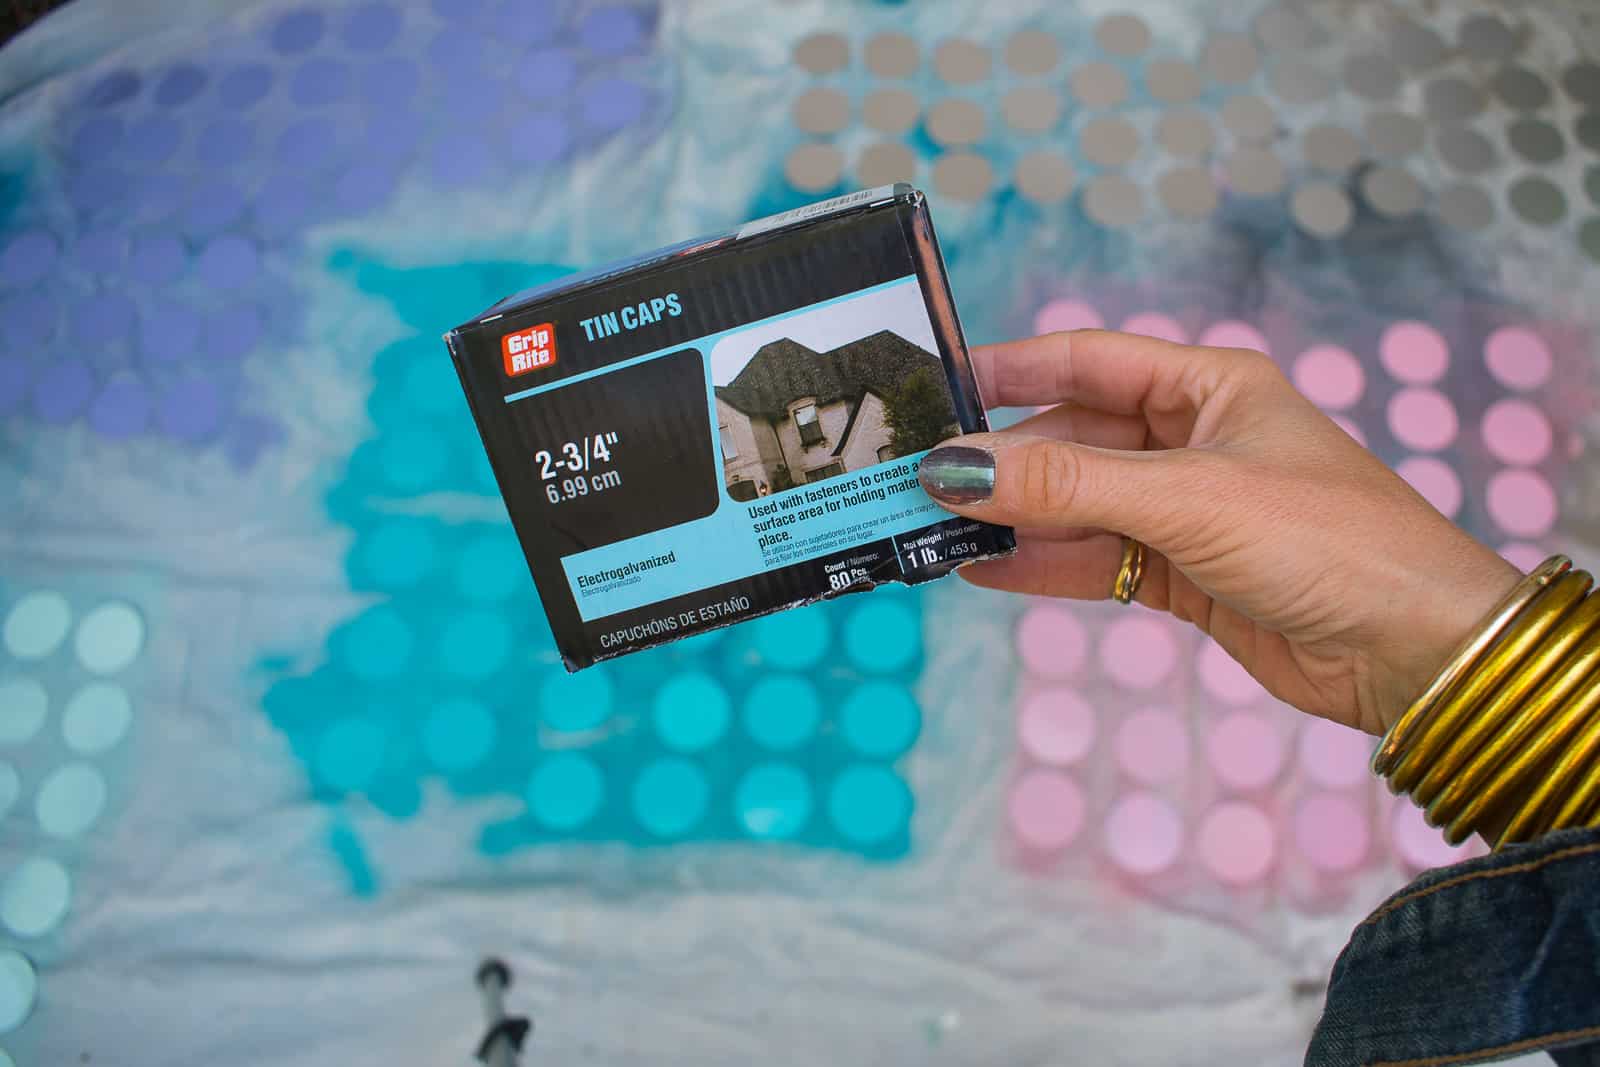
For the edges and the roof eave, I folded some of the discs in half and then trimmed some of them with tin snips. Note: IF you’re planning to use this house for children, then I would NOT cut these circles. Cutting made the corners a little sharper than I think I’d feel comfortable with if my kids were playing in this house.

Step 7: Accessorize!!
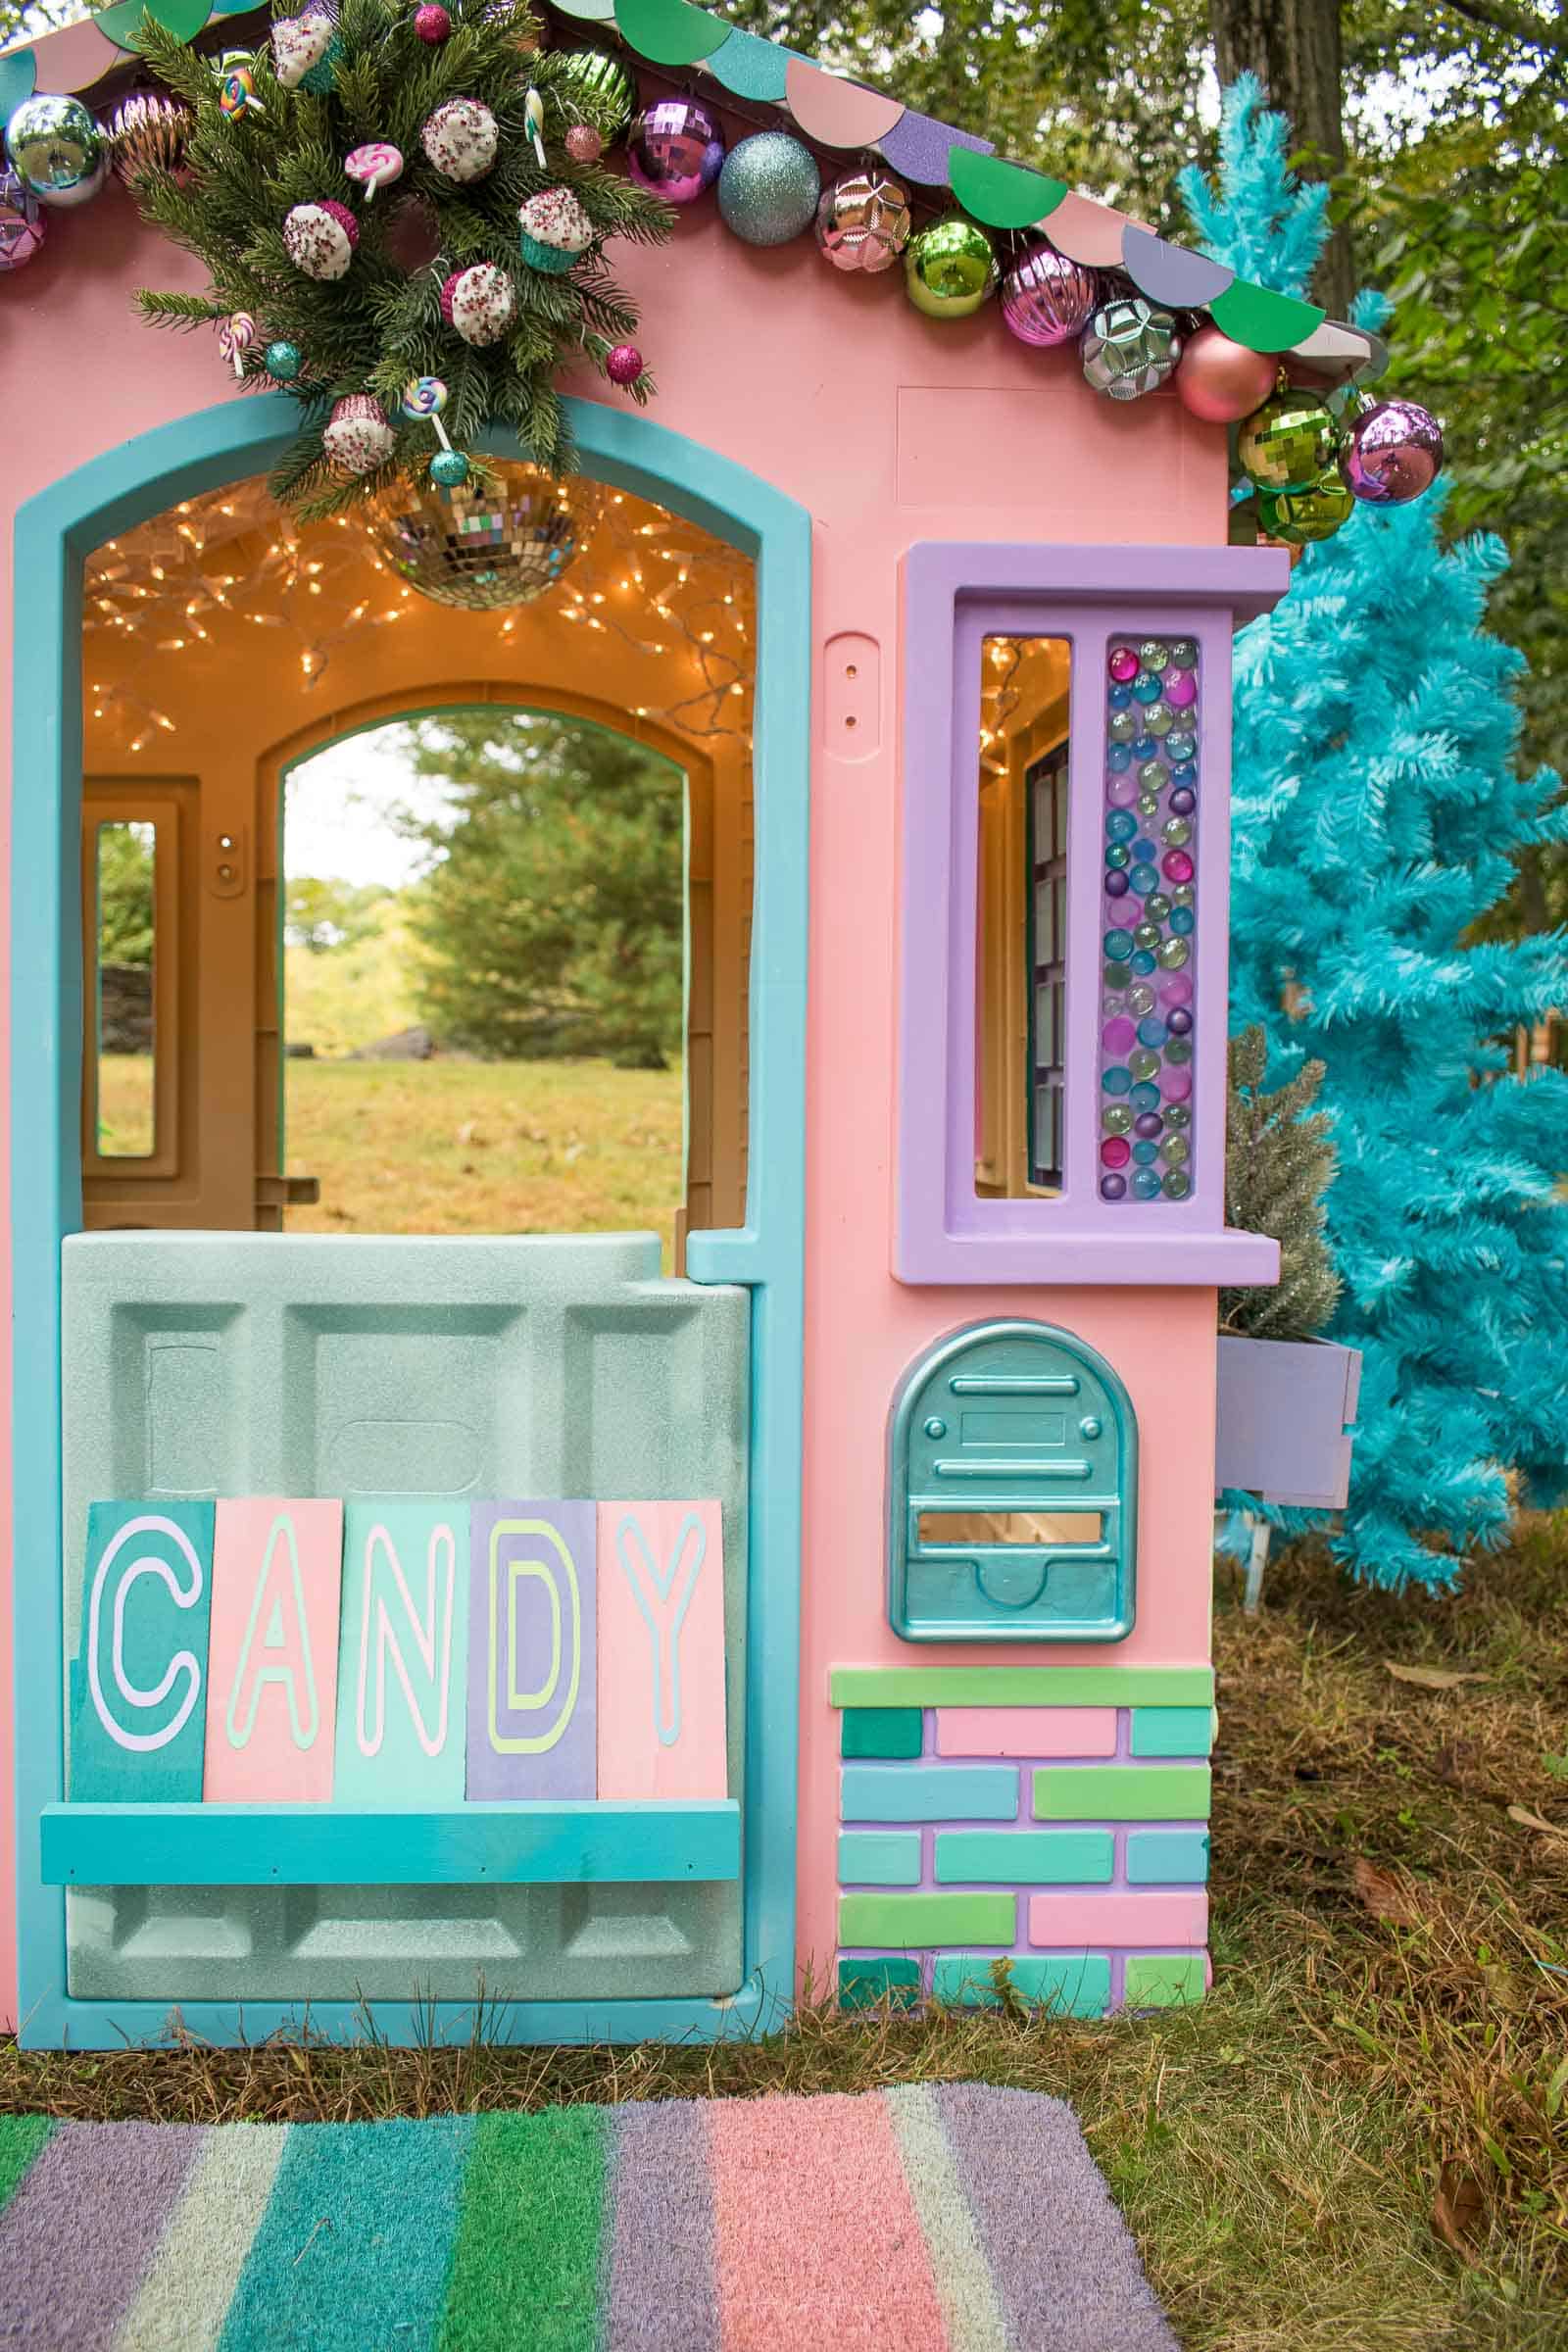
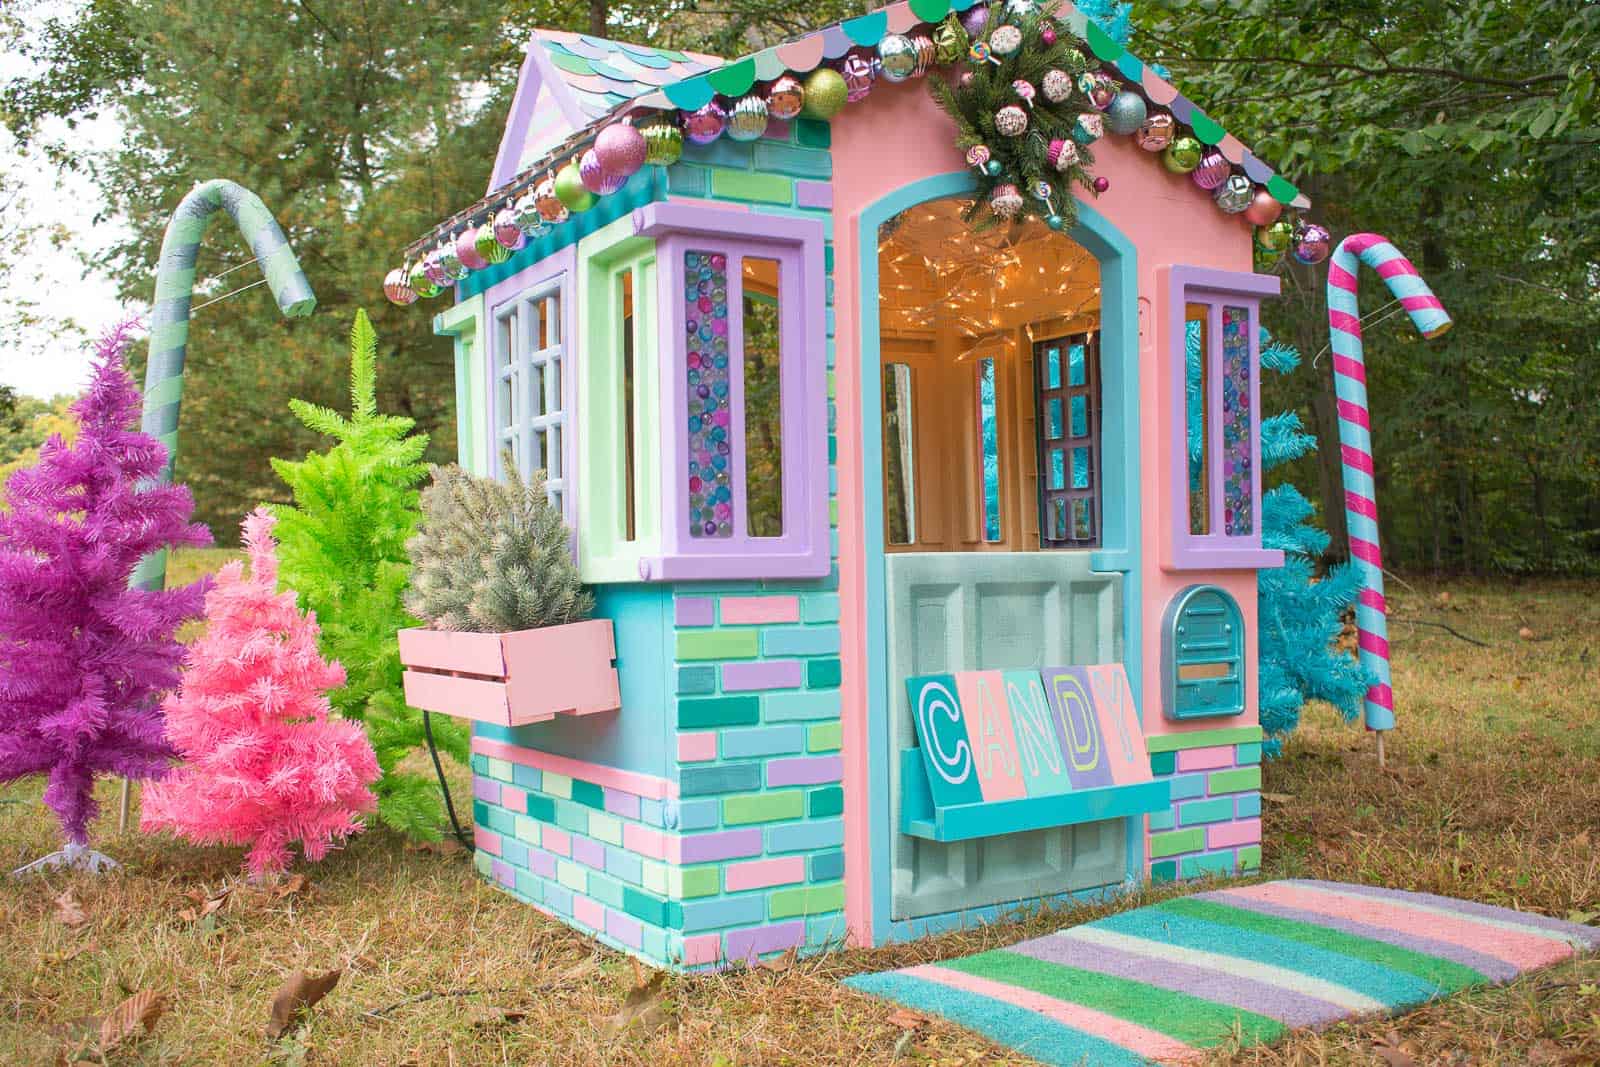
I added a bunch of flare to this house: Letter board on the front door, window boxes, candy canes in the yard, fairy lights and disco ball inside… obviously you can skip ALL of these, but… we’re making a mini Christmas house so I say go big or go home!
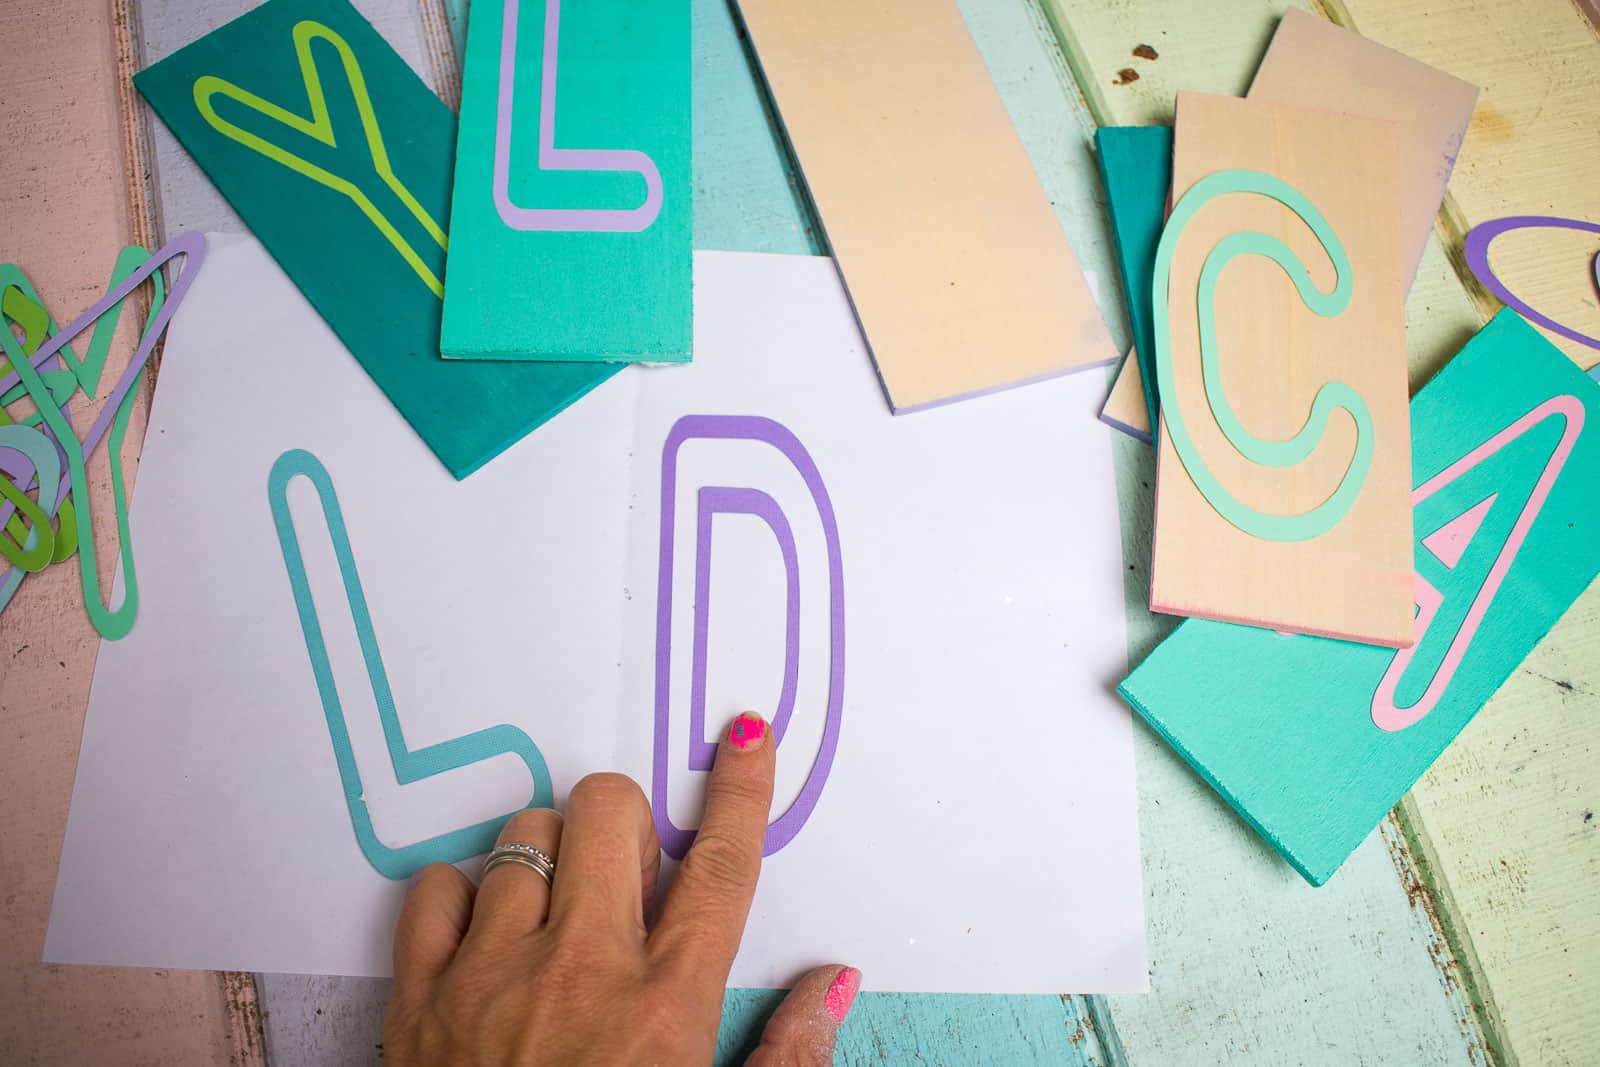
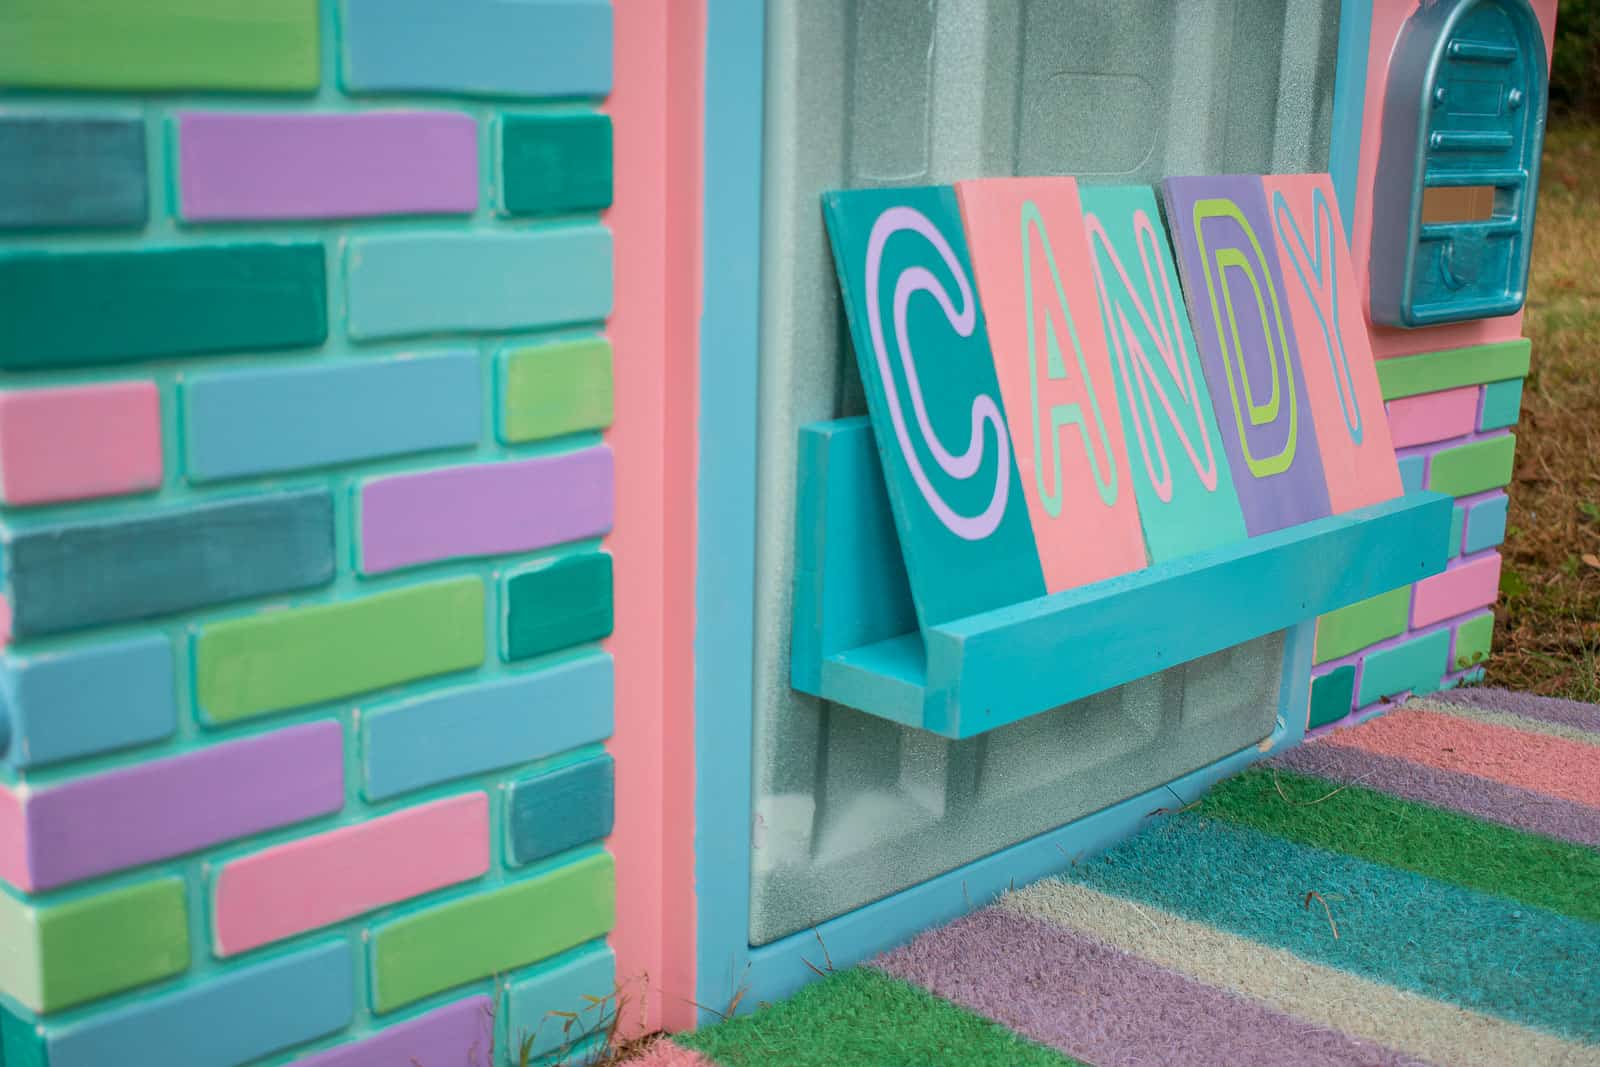
Custom letter board
JOANN sells the unpainted wood picture ledge so I simply spray painted that and then I grabbed some of these wooden craft boards. I painted them with craft paint, and then used my Cricut to cut out letters from card stock that I mod-podged onto the board. I spelled “CANDY” and “JOLLY”. To attach to the house, I drilled a hole through both the wooden board and the playhouse door and attached with screws and nuts.
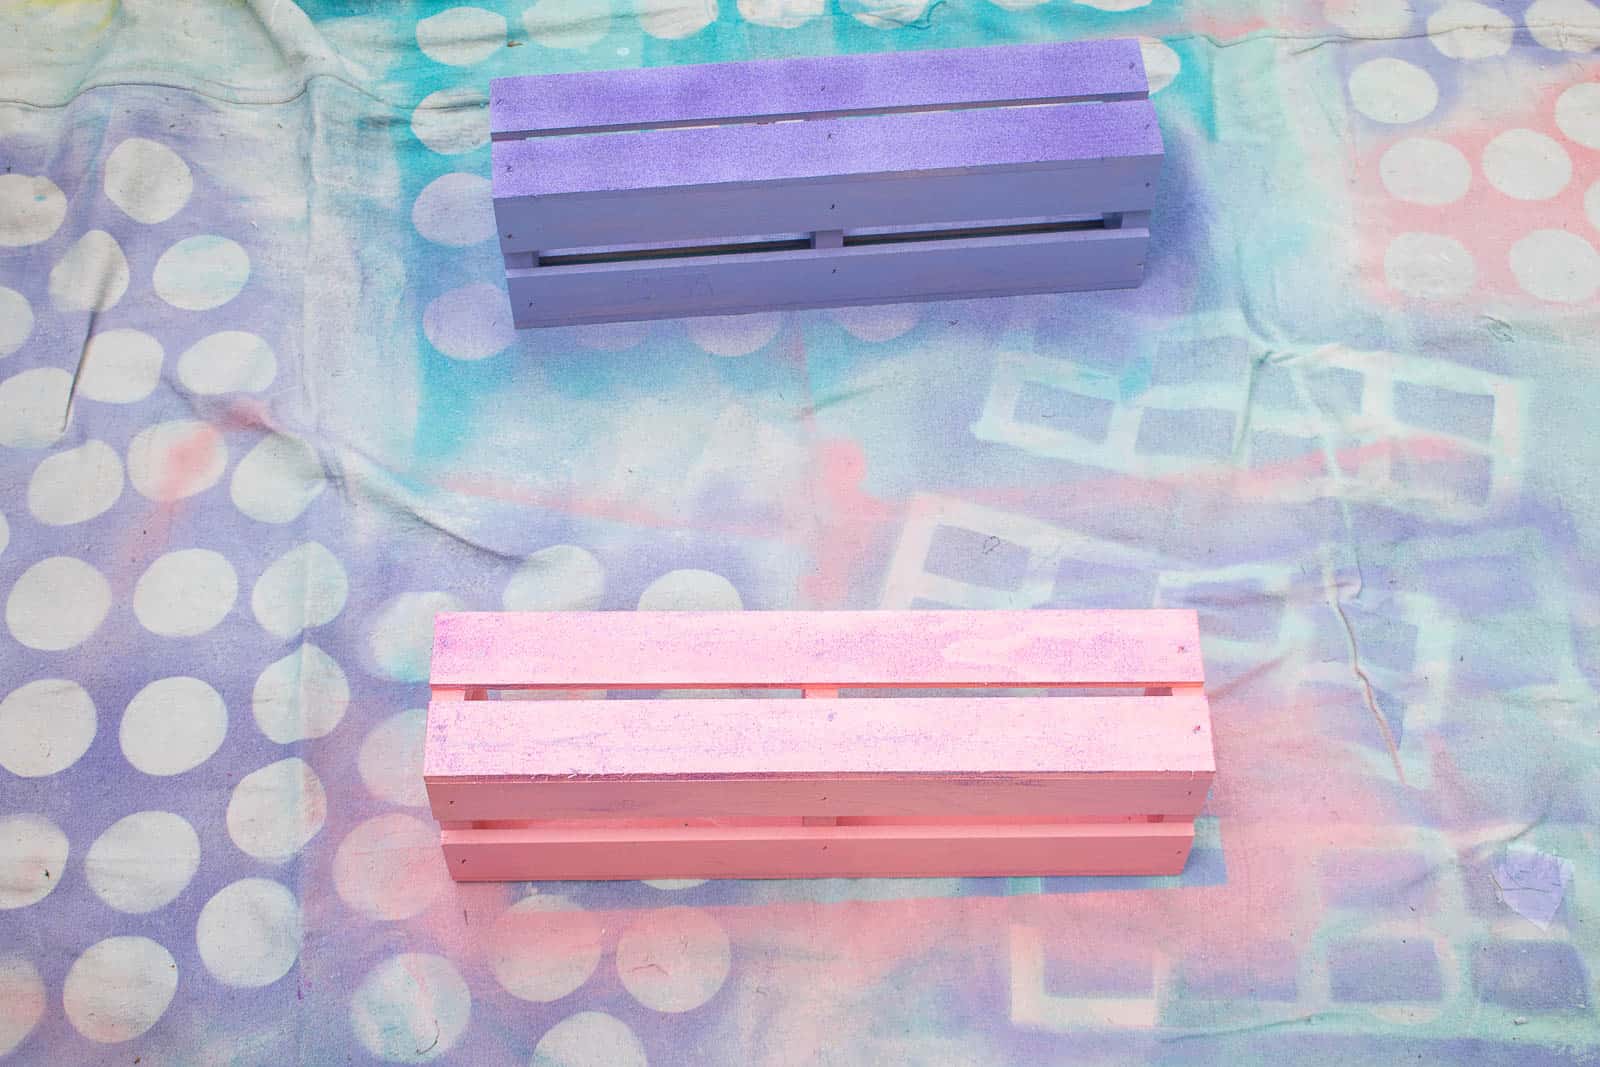
Window Boxes
These small wooden crates were the PERFECT size for those miniature glitter trees! All I had to do was spray paint with window boxes and then I screwed them in place under each window the same way I attached the letter board: Screws and nuts. I used washers for the window boxes just to make them a little sturdier, but it was easy to attach them.
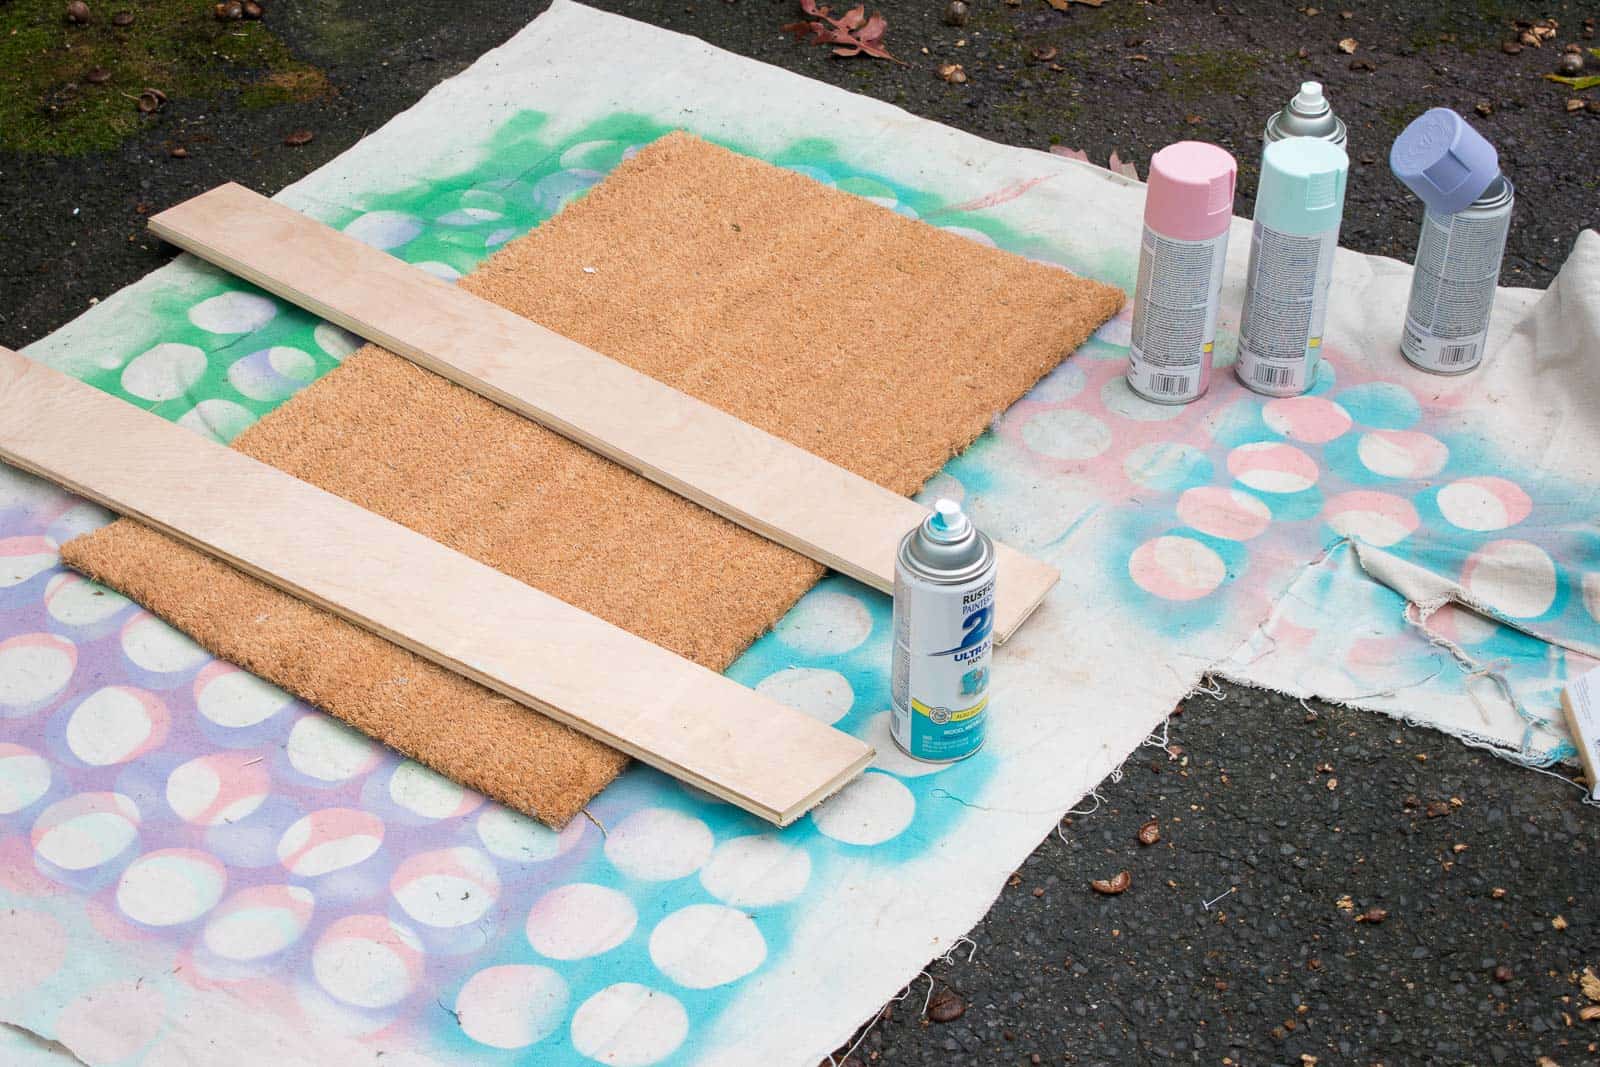
Welcome Mat
I grabbed an unpainted doormat at JOANN and then used some scrap boards as a ‘stencil’ for some colorful stripes with the same spray paint I’d used for the house exterior.
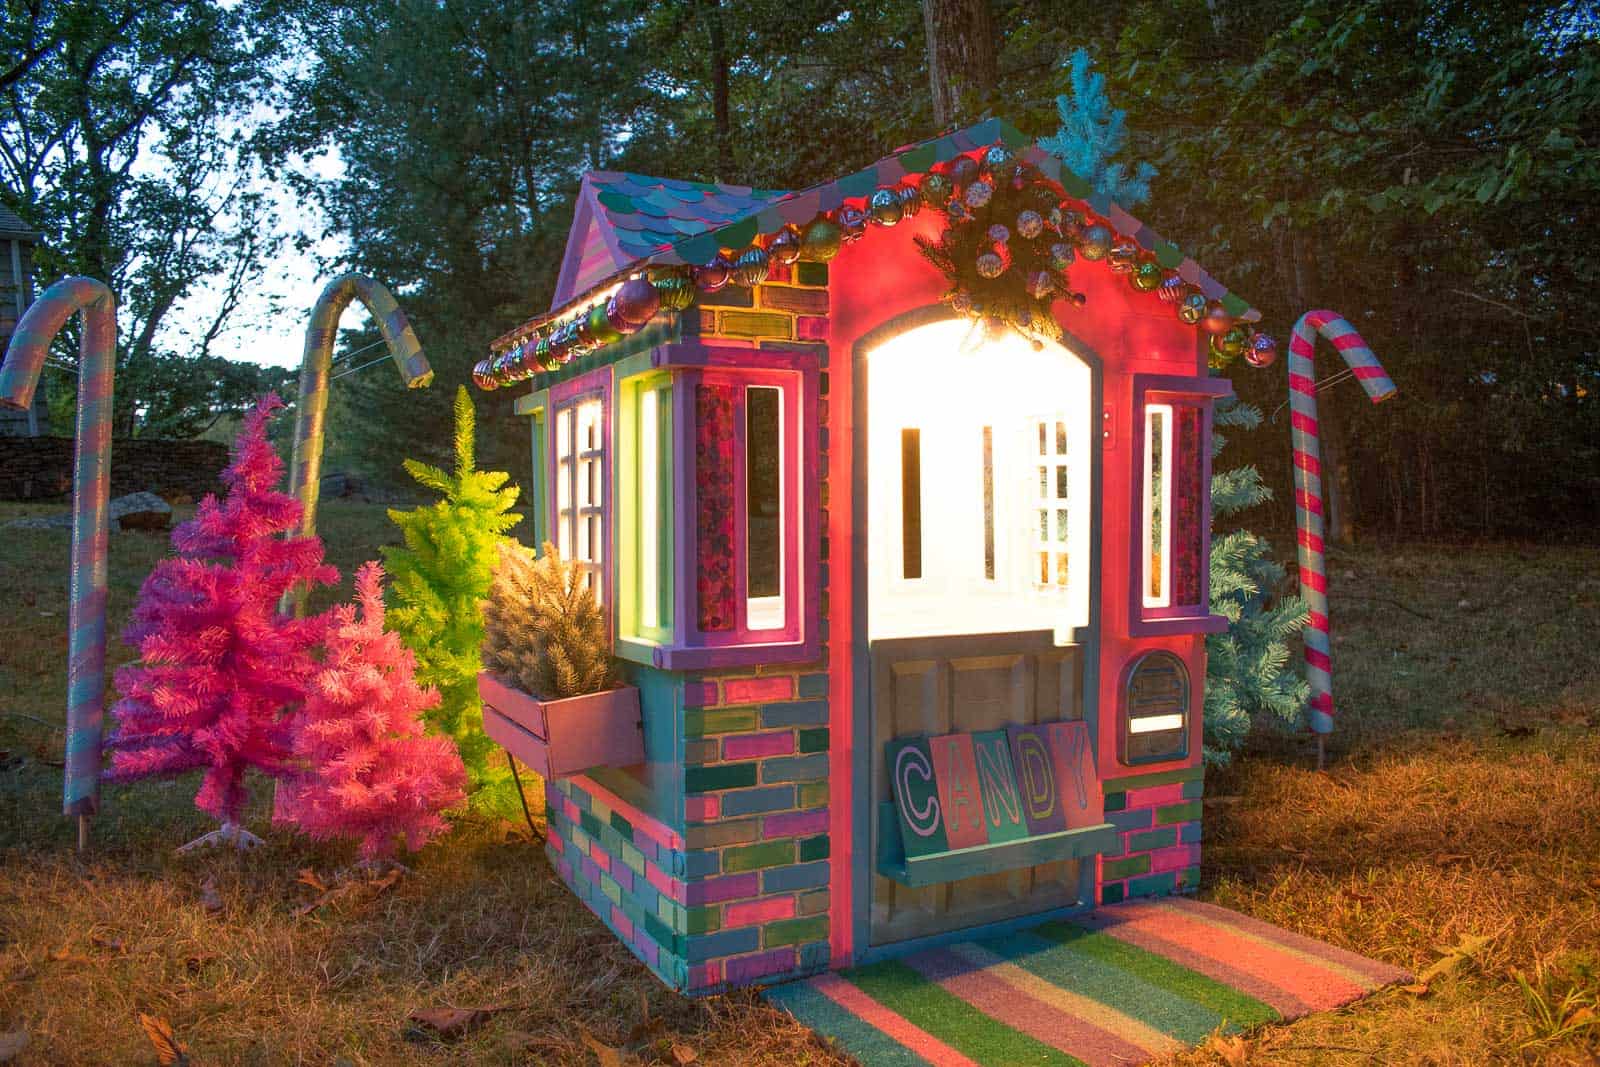
Fairy lights and disco ball
I drilled holes and used zip ties to attach icicle lights back and forth inside the house. For the icing on the cake, I hung a small disco ball inside. Can you imagine sitting in there at night looking up at the ceiling?! 6 year-old Charlotte would have been in HEAVEN!
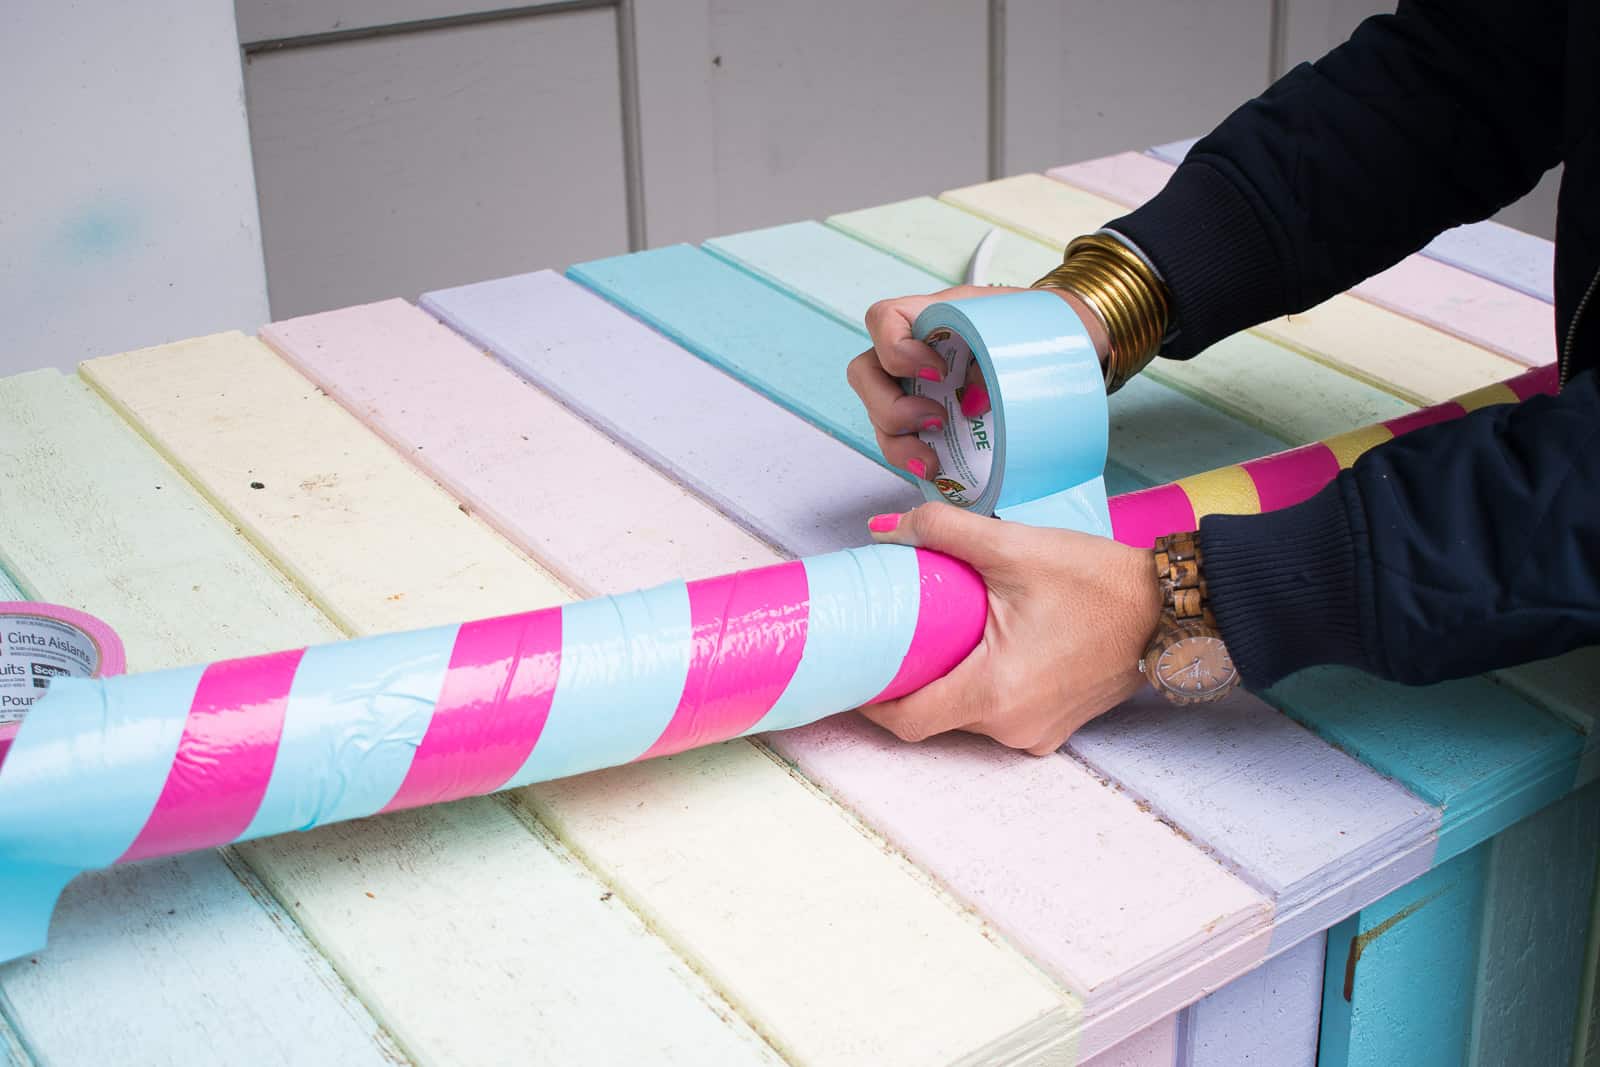
Candy Canes
These were a cute idea, but don’t look so great without snow on the ground… and since I had to photograph this house in October… sadly no snow. I used pool noodles wrapped alternately with different color duct tape. To make the candy cane ‘hook’ I bent the pool noodle over and wrapped some heavy duty monofilament around the curve. Another lesson learned here… I should have made the pool noodle into the arched candy cane BEFORE wrapping with duct tape. The duct tape didn’t bend as well as the pool noodle so some of them look better than others. To install, I just hammered some dowels into the ground and slid the pool noodles over them.
Mini Wreath
I grabbed that mini wreath and wired some mini ornaments in place to hang over the playhouse door. Now I want a whole mini Christmas setup… so cute.
Yes… I had all those Christmas trees in my holiday stash, but they’re the perfect backdrop to this colorful playhouse. I am just a little bit obsessed with it and trying to think of a way I can justify leaving it up all year round!
Materials for Christmas Playhouse
- Spray Paint
- Craft paint
- Glass gems
- Gorilla Glue
- Epoxy Resin
- Non breakable ornaments
- Quick Hold Glue
- Wooden picture rail
- Wooden craft boards
- Wooden crates/ window boxes
- Mini glitter trees
- Door mat
- Duct tape


This is just so much fun! I would have Loved having a playhouse like this as a kid!!
That’s what I kept thinking as I was working on it! 🙂 Thank you!
What are the colors you used? This is awesoMe! Thanks
Hi! Thank you! I sort of worked with what I have. Just about all of the paint is Rustoleum 2X… they have a light pink (candy pink), a lavender (dreamy lavender) and a lovely light blue (Ocean mist)… I know they have other pastels that would work too! The others were craft paints I had in my stash!