
DIY Light Box Place Cards
Psssst… this post *might* contain affiliate links: see my disclosure here.
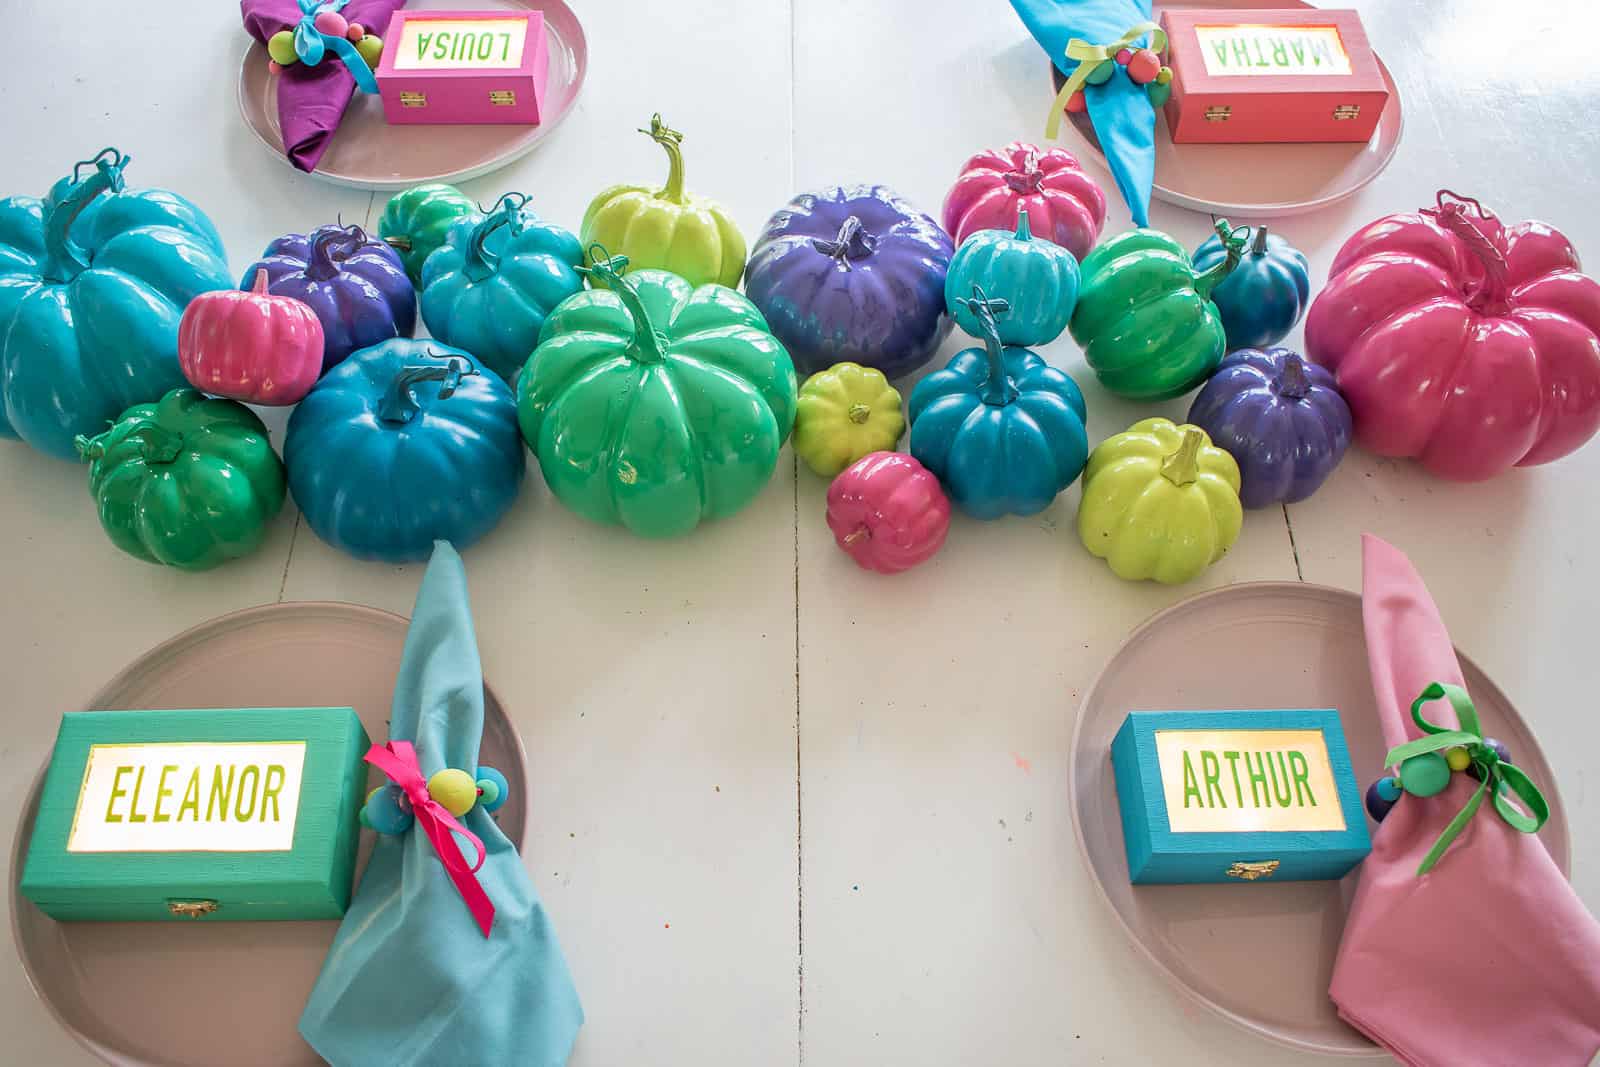
Colorful DIY Table Decor
Today I’m sharing some easy colorful DIY projects for your holiday table.
Disclosure: Thanks to JOANN for partnering with me on this colorful table… as always… they get me. They really get me.
Shop my favorites!
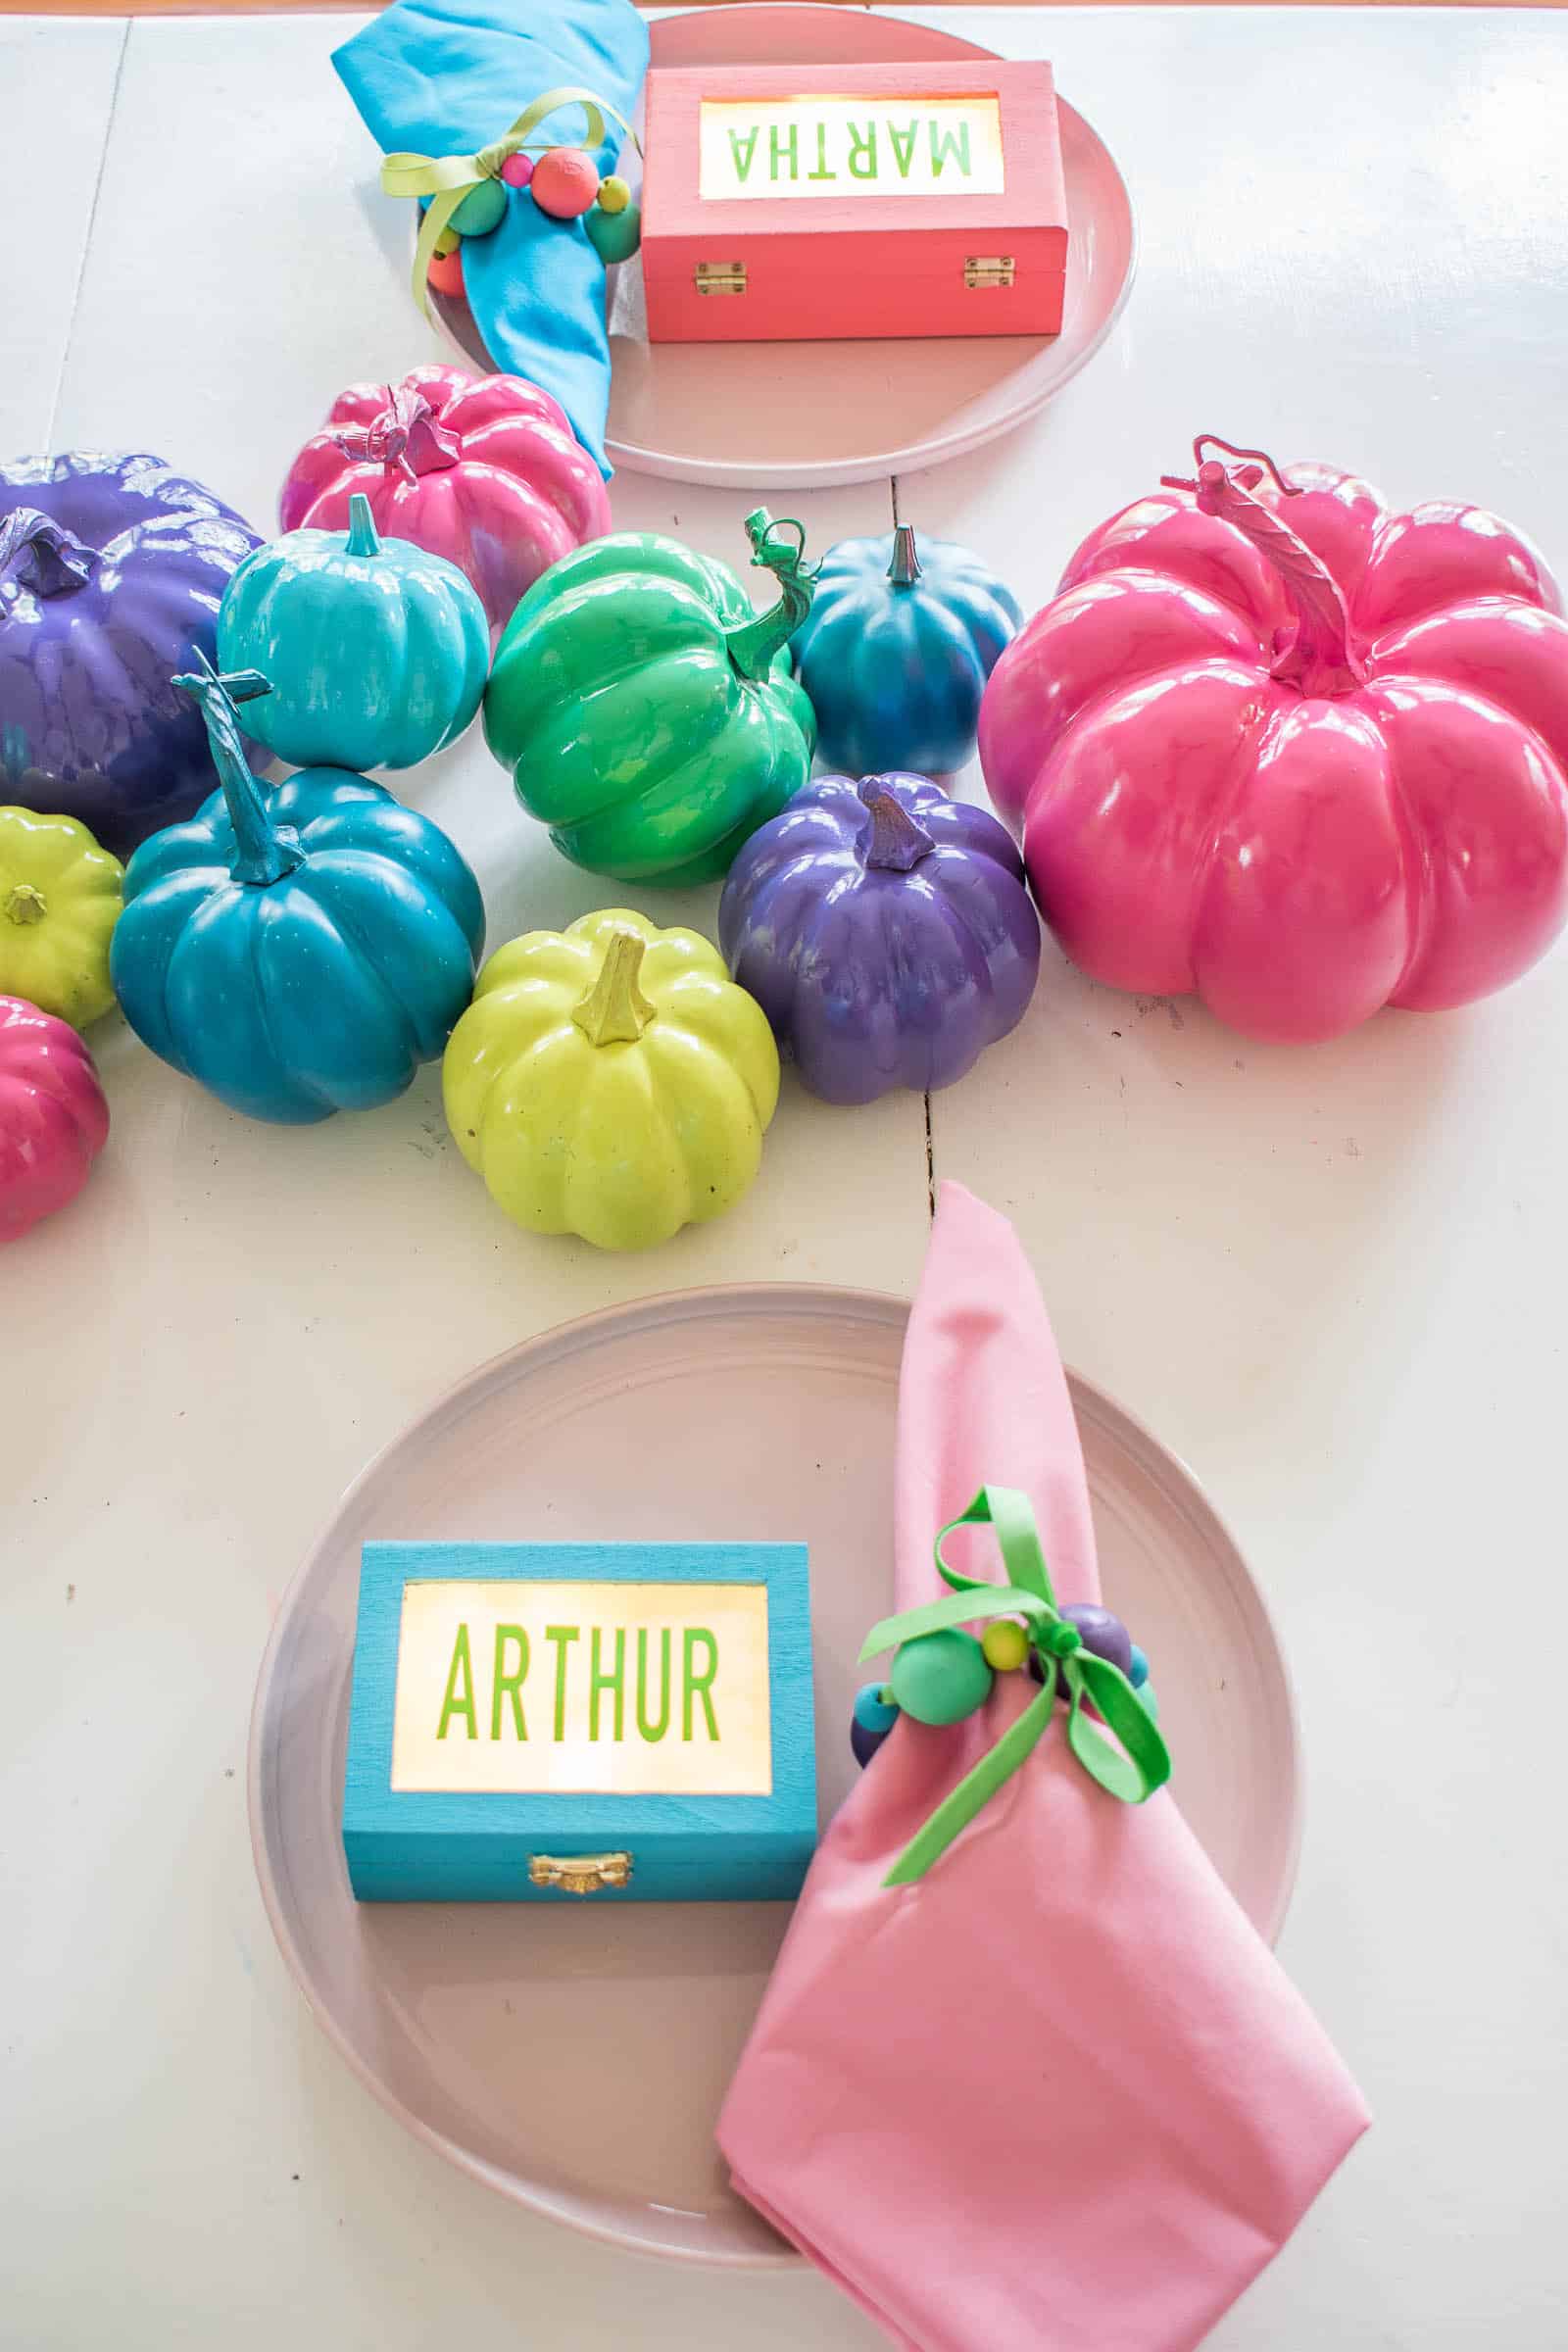
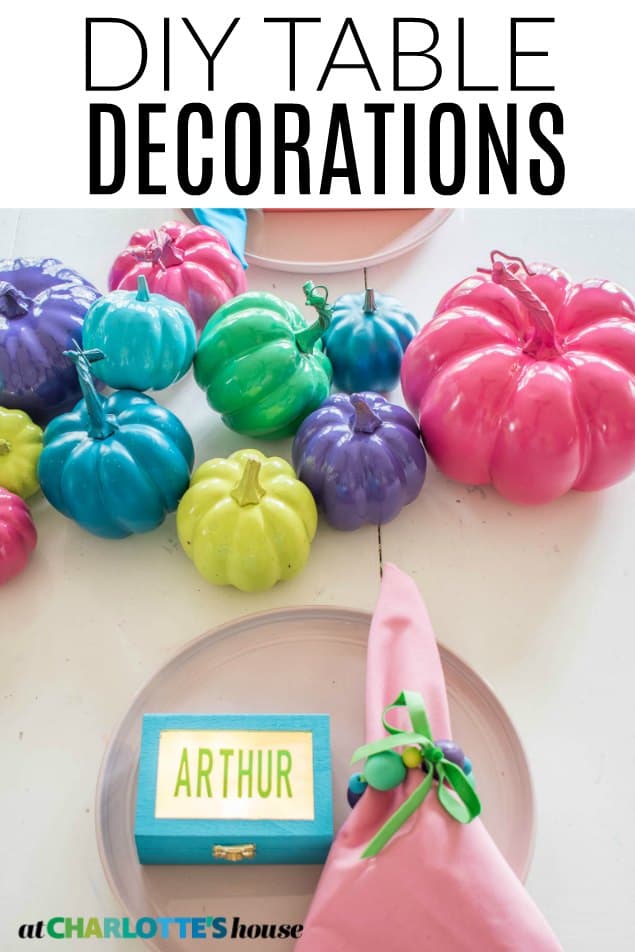
Right now, our current plan for Thanksgiving is a family affair! Which means the pressure’s off a bit as far as the fanfare and logistics. Buuuut…. I still want to decorate a pretty table for the kids to enjoy so I’m sharing a couple of the DIY table decoration ideas I made for the occasion and, guys… I love them. The light-up place card might be a top ten craft to date. I say this a lot before I share a project, but if you want to be more neutral with this… then by all means, adapt and adjust. All of these projects would be amazing in a crisp white or in shades of neutral. But color’s rad too. (Full material list at the end of this post!)
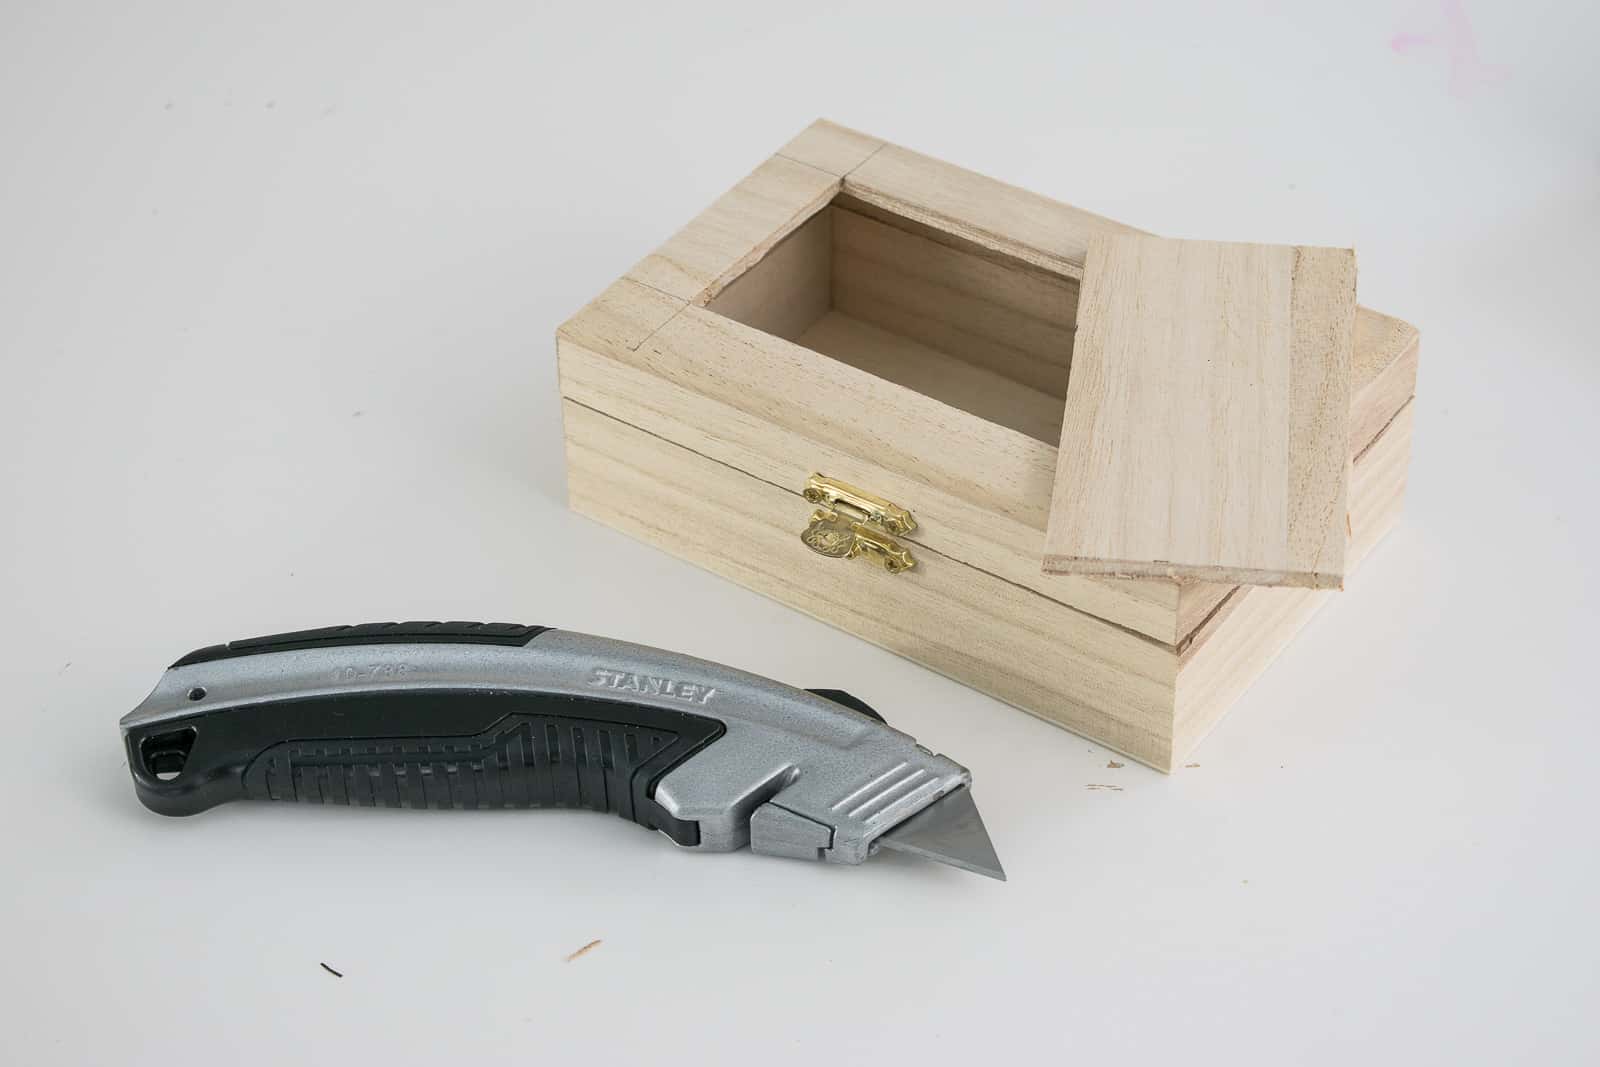
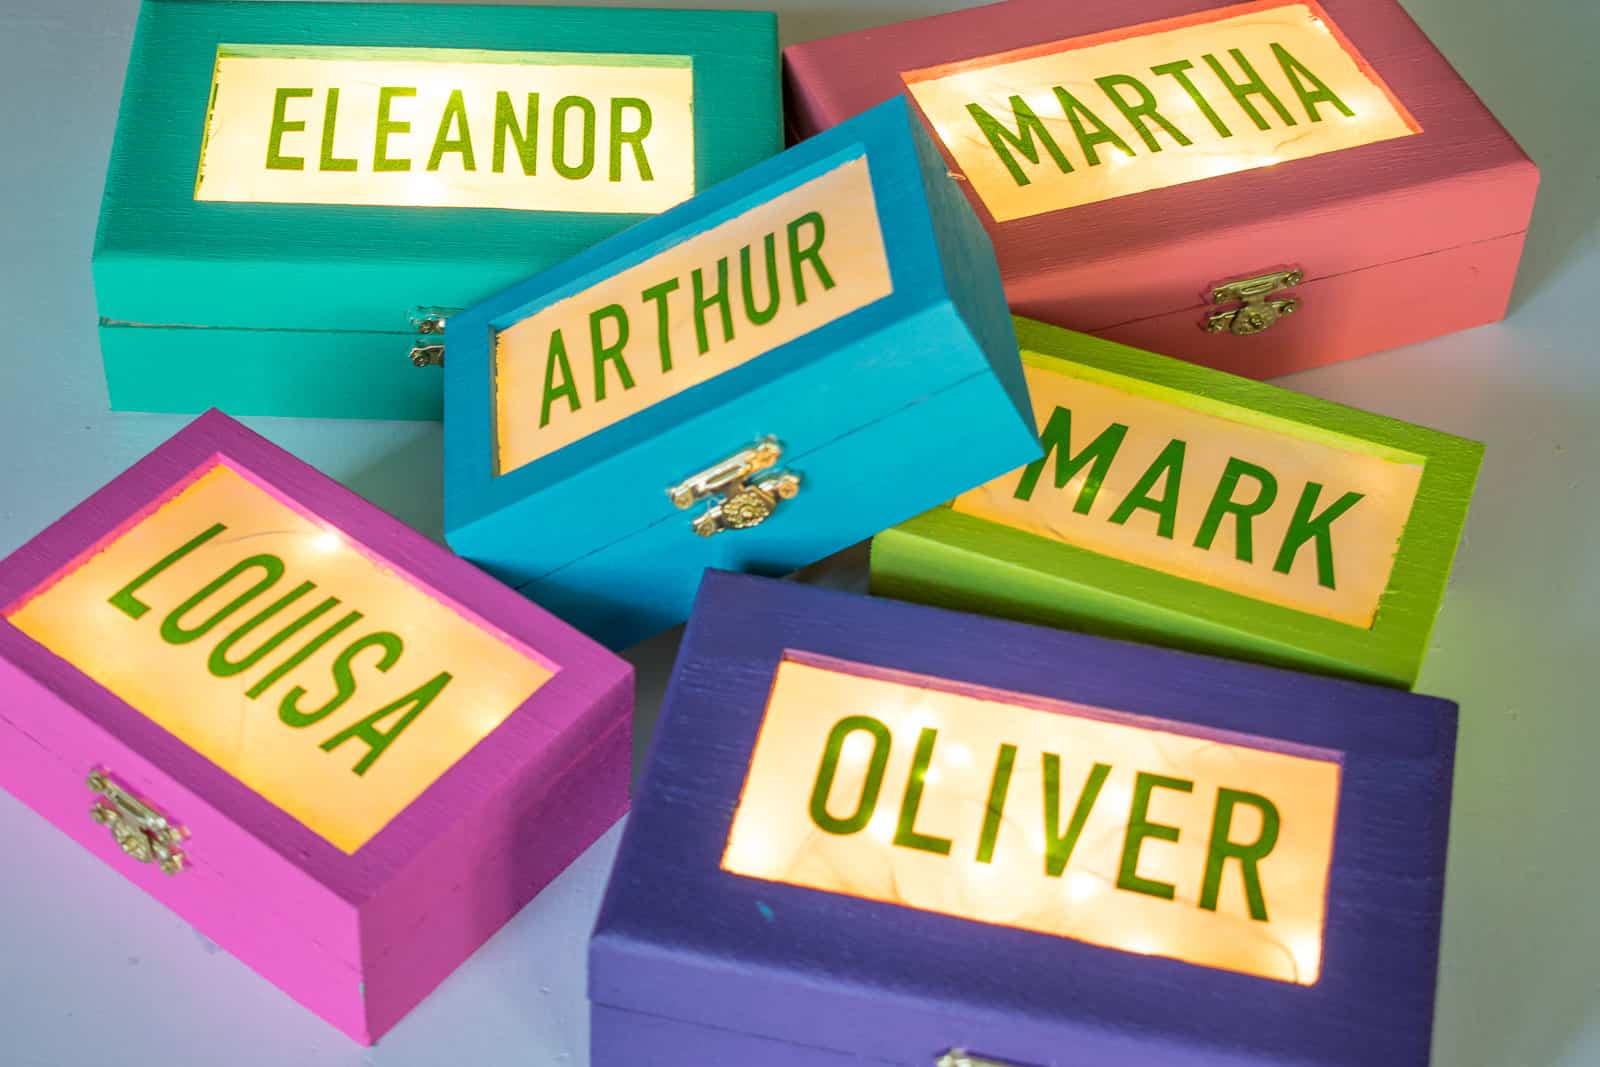
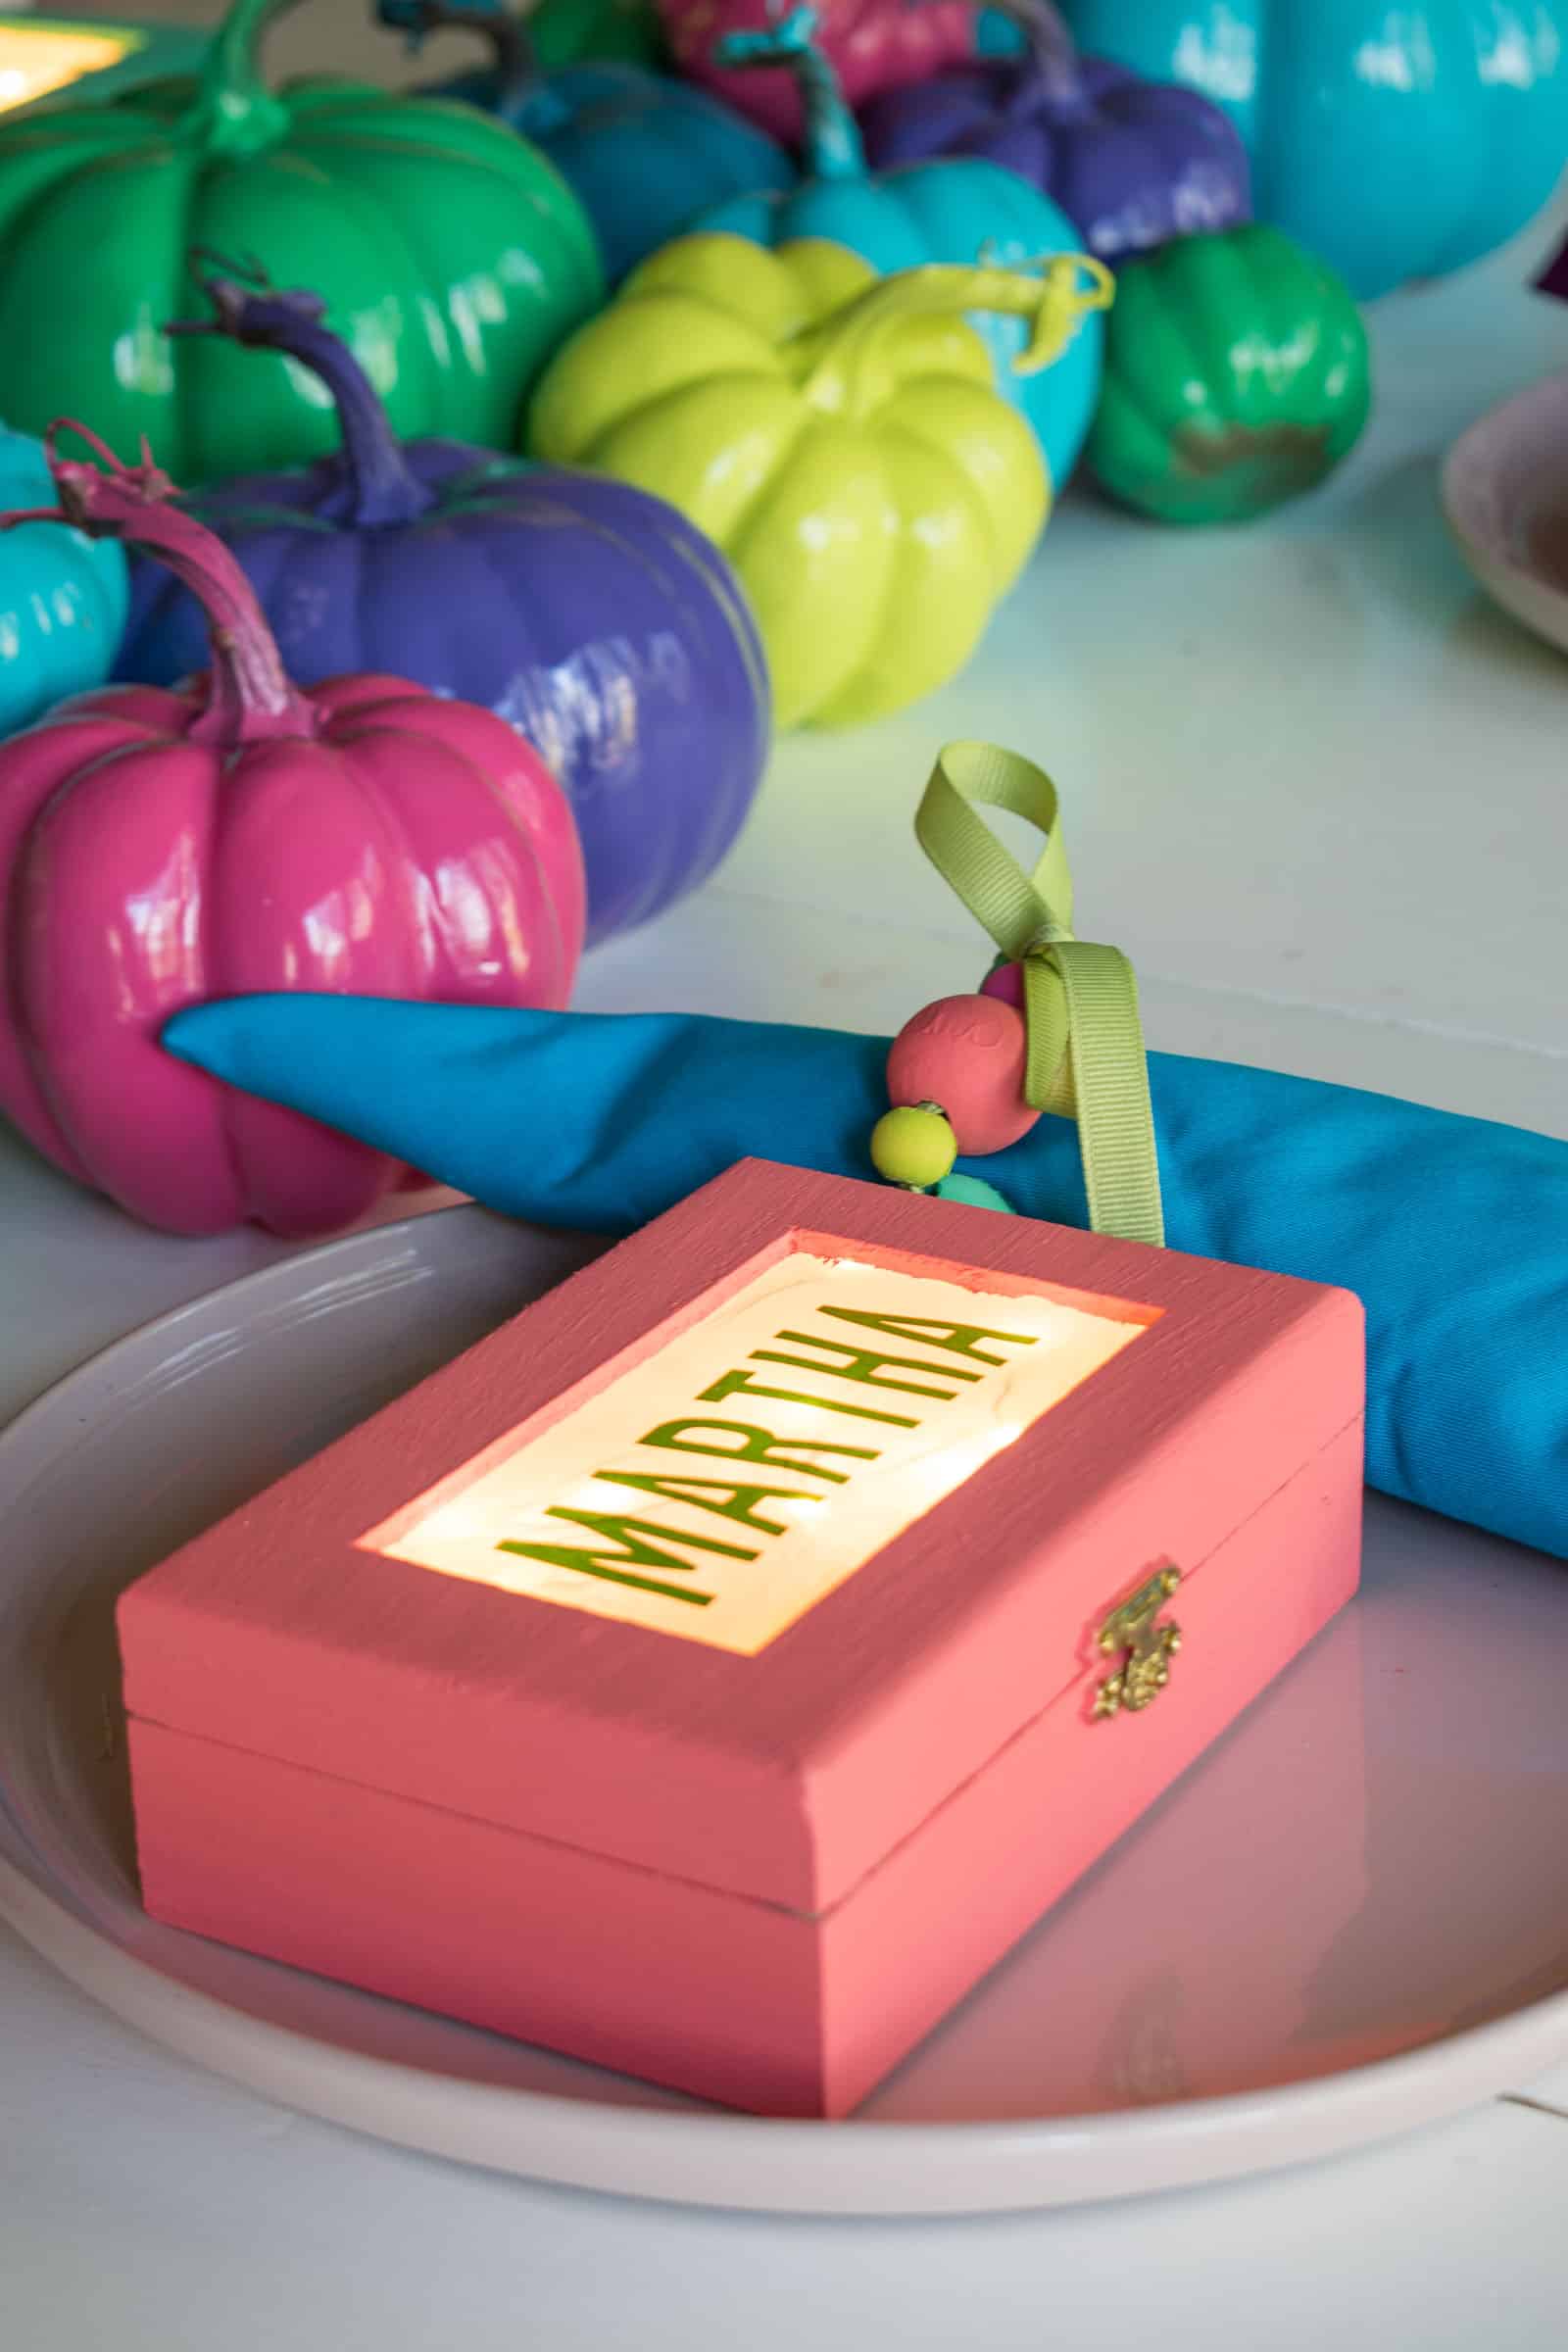
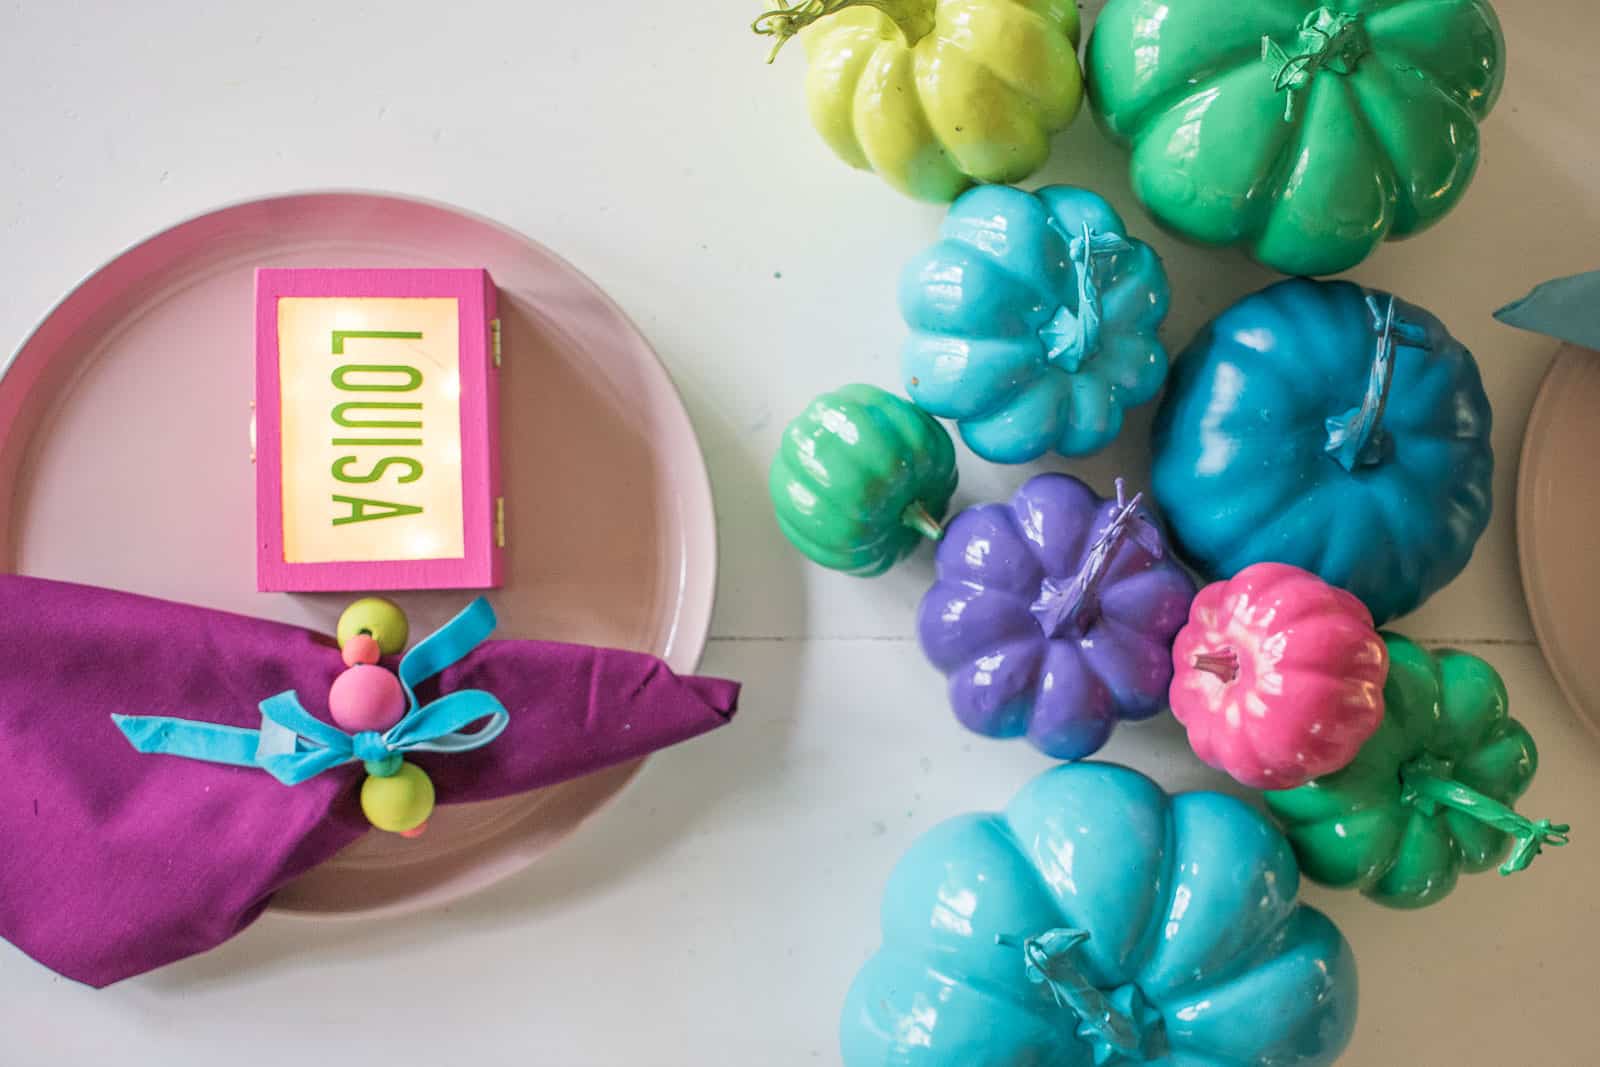
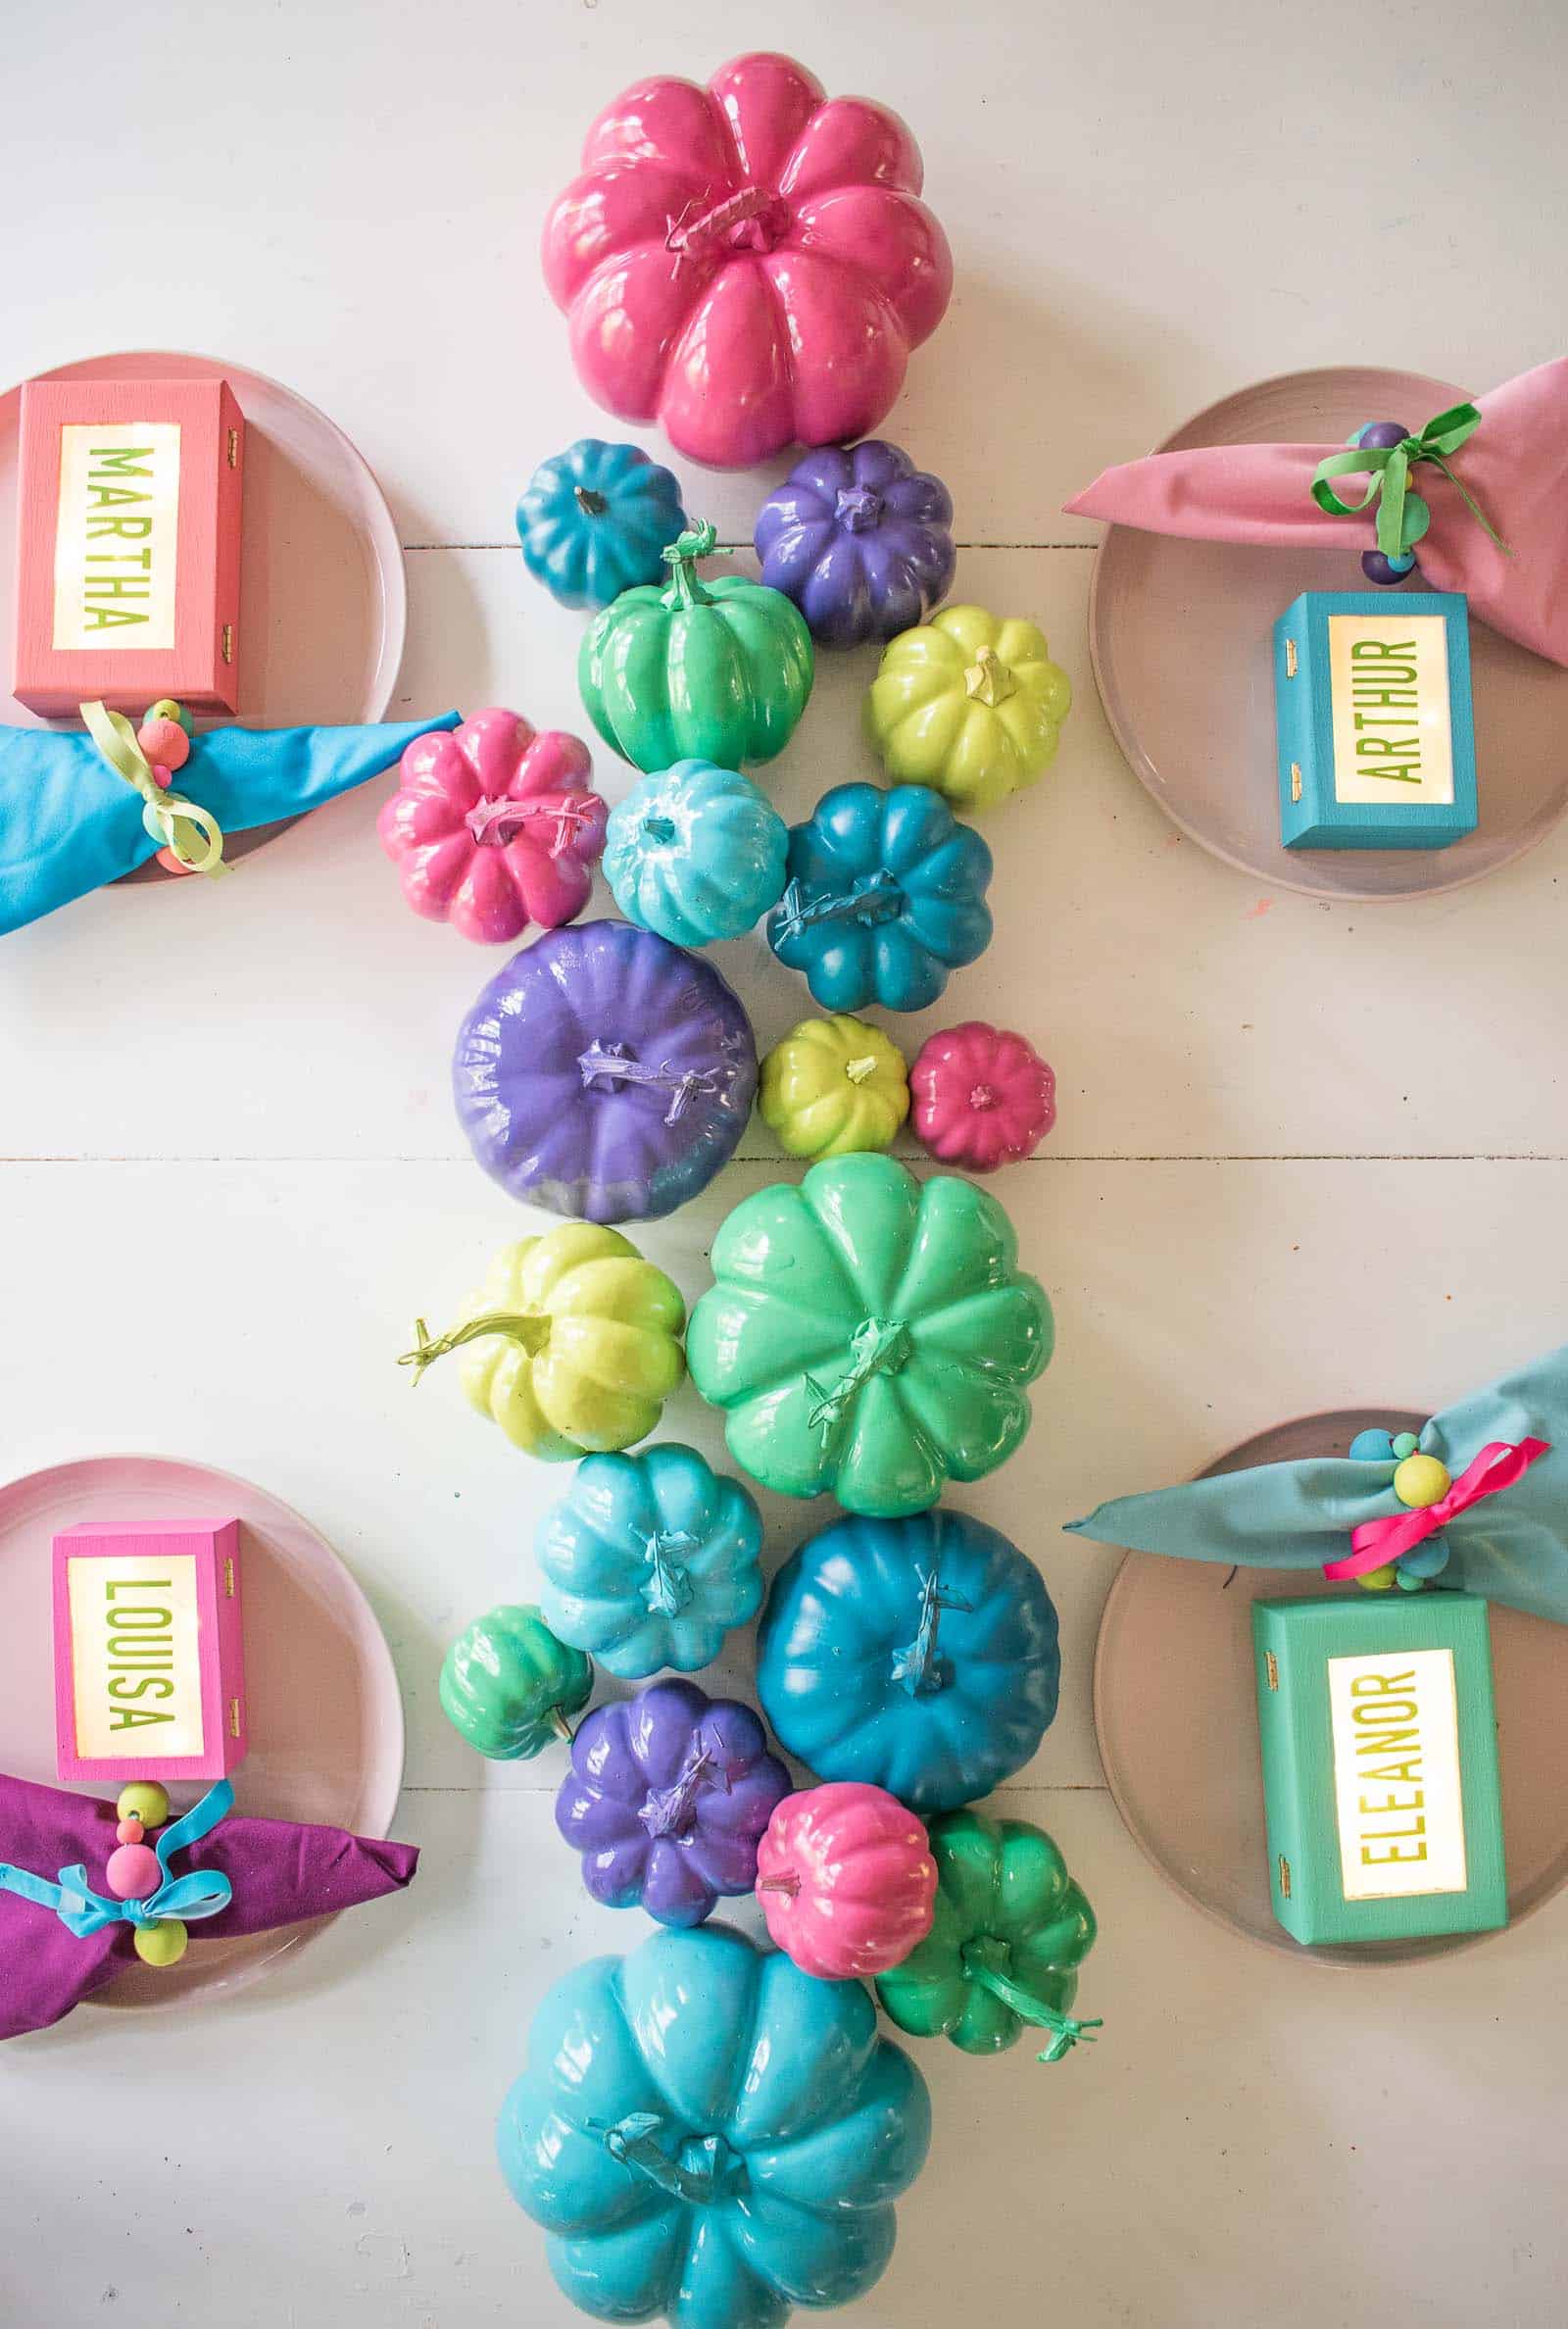
Light Box Place Card
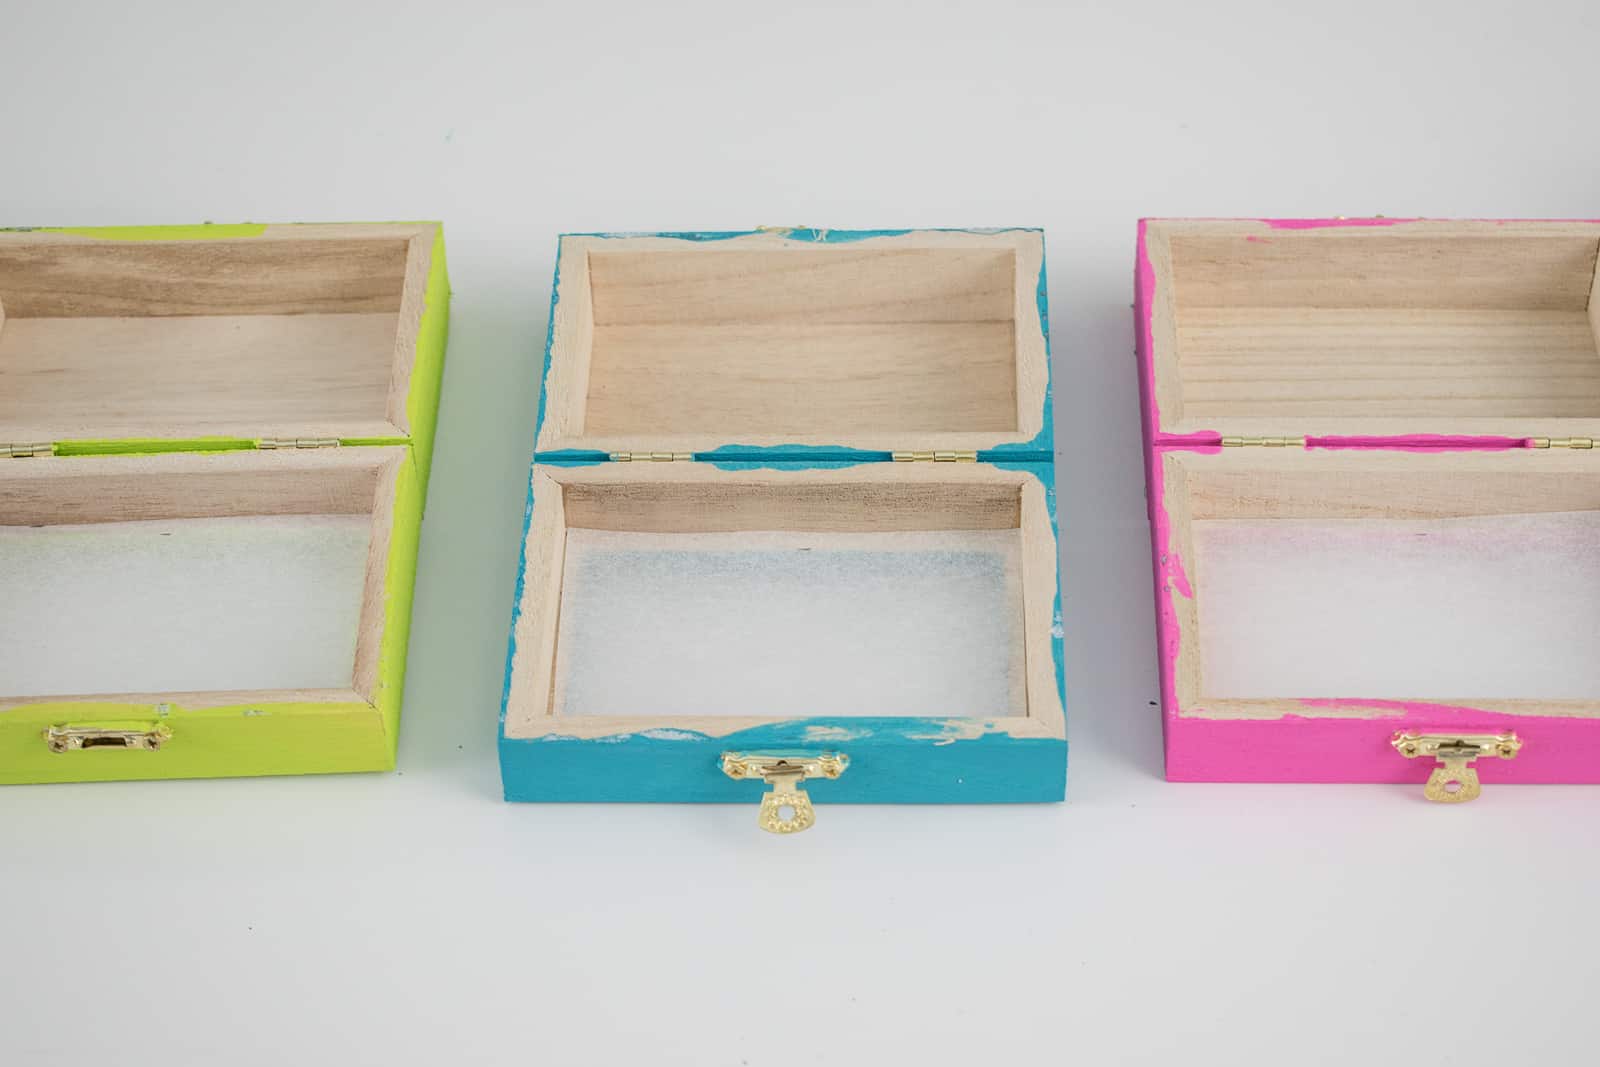
Step 1. Cut a rectangle from the lid of the box
I was using wooden boxes so I used a sharp utility knife and scored the lines over and over until I had cut through the box lid. Paper maché boxes would be even EASIER but my JOANN didn’t have enough in stock and I was impatient! I made sure to leave 1-2 CMs of the lid as a frame.
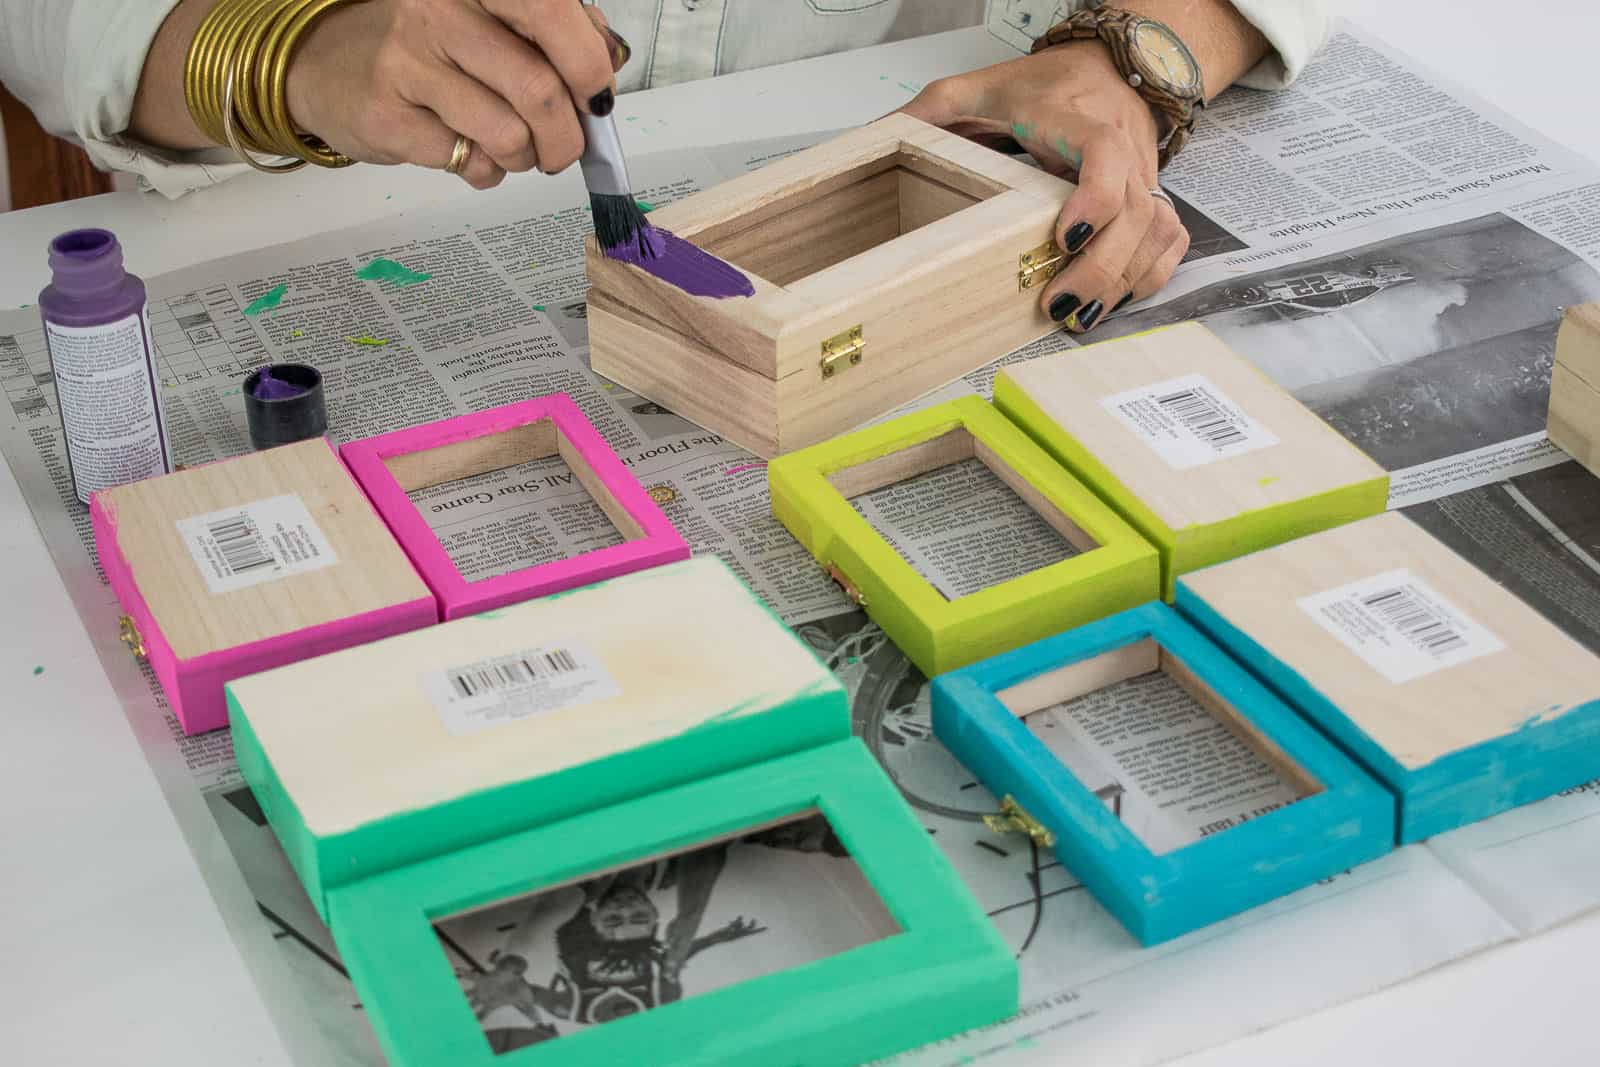
Step 2. Paint your boxes.
I used craft paint in assorted colors, but spray paint would work fine too! It all depends on the colors you want to work with!
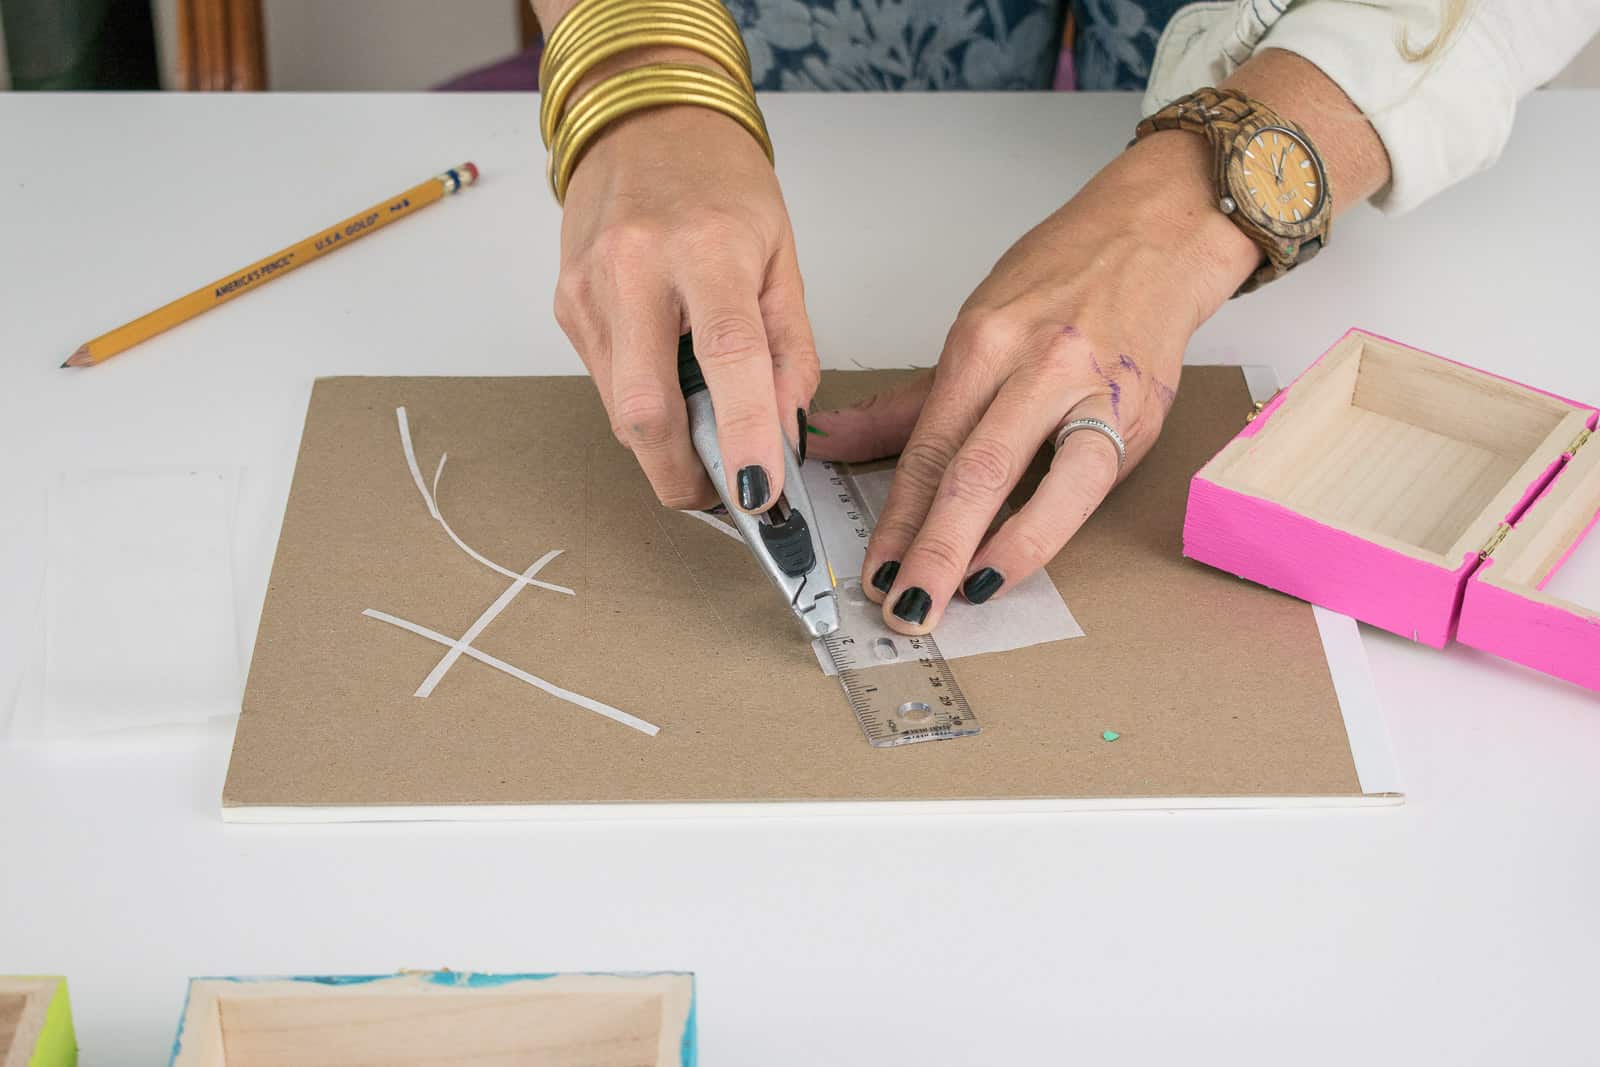
Step 3. Cut tracing paper to fit inside the box lid
For this step, vellum would also work and would be a little sturdier. Tracing paper is cheaper, but you only need a couple of sheets. Using scissors or a sharp blade, cut the tracing paper to fit inside the lid of your box.
Step 4. Add the names to your tracing paper
I pulled out my Cricut for this and used pretty shiny green vinyl. If you have non-serial-killer handwriting, a sharpie and your best penmanship would totally work and save you a step! That said… I love the way the vinyl looks because it’s not translucent at all.
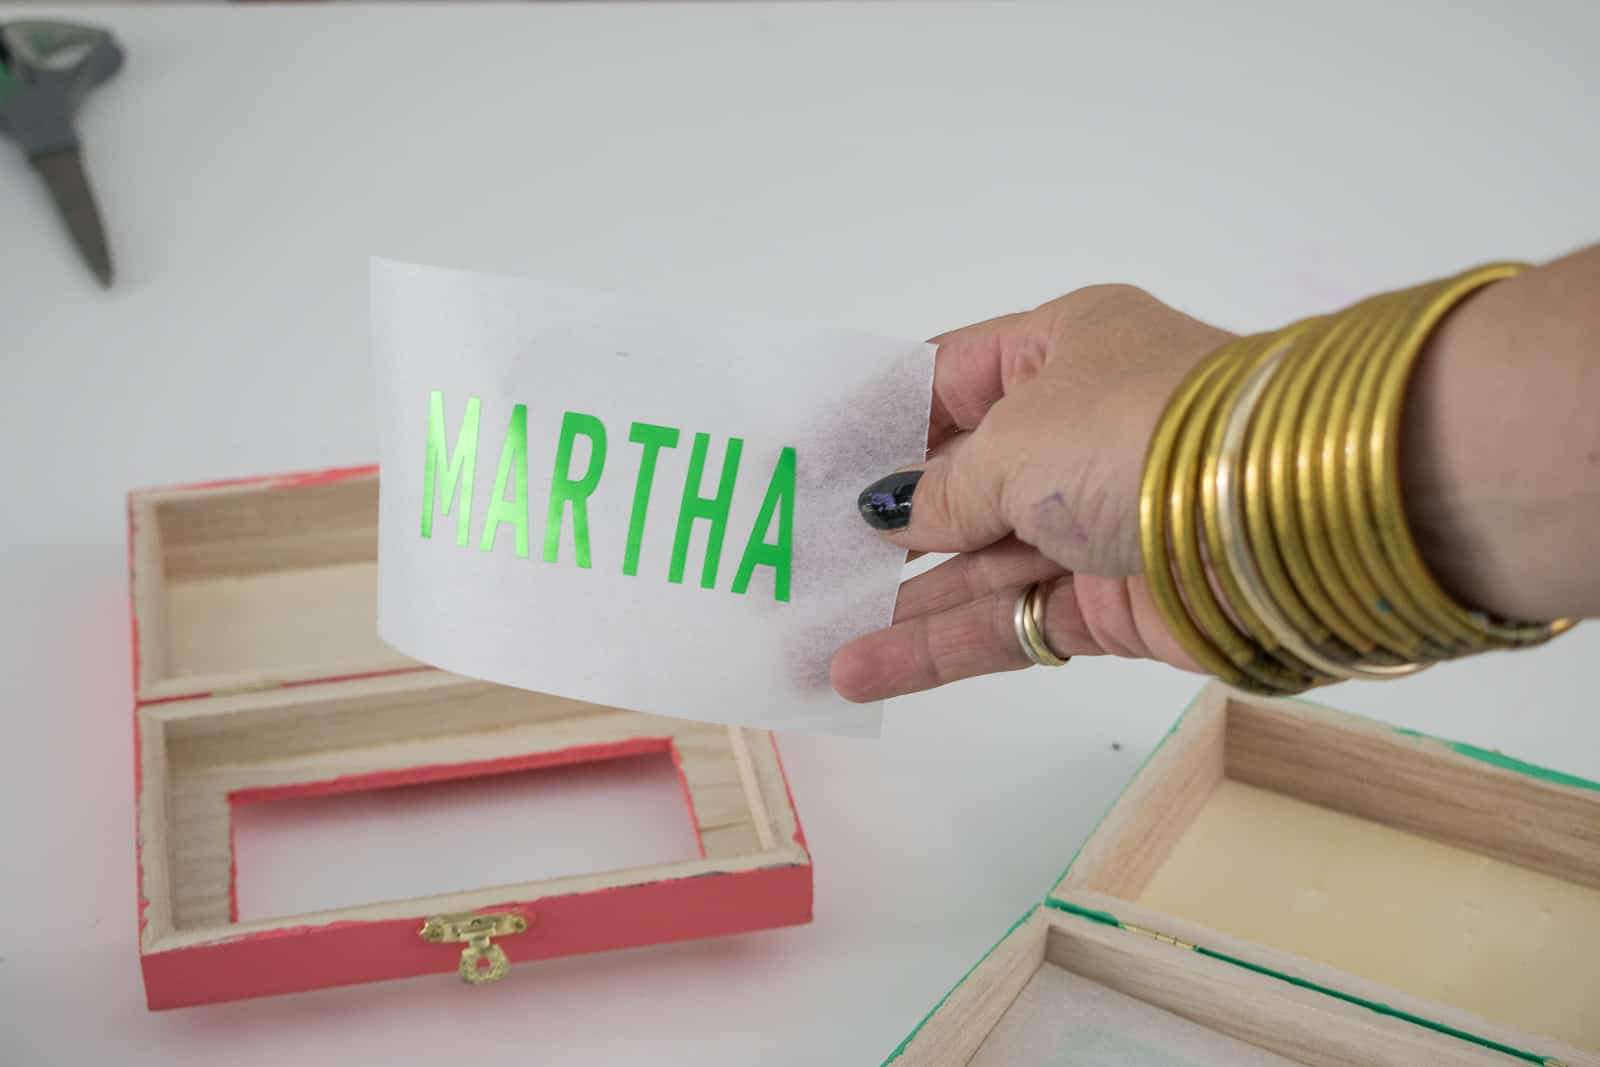
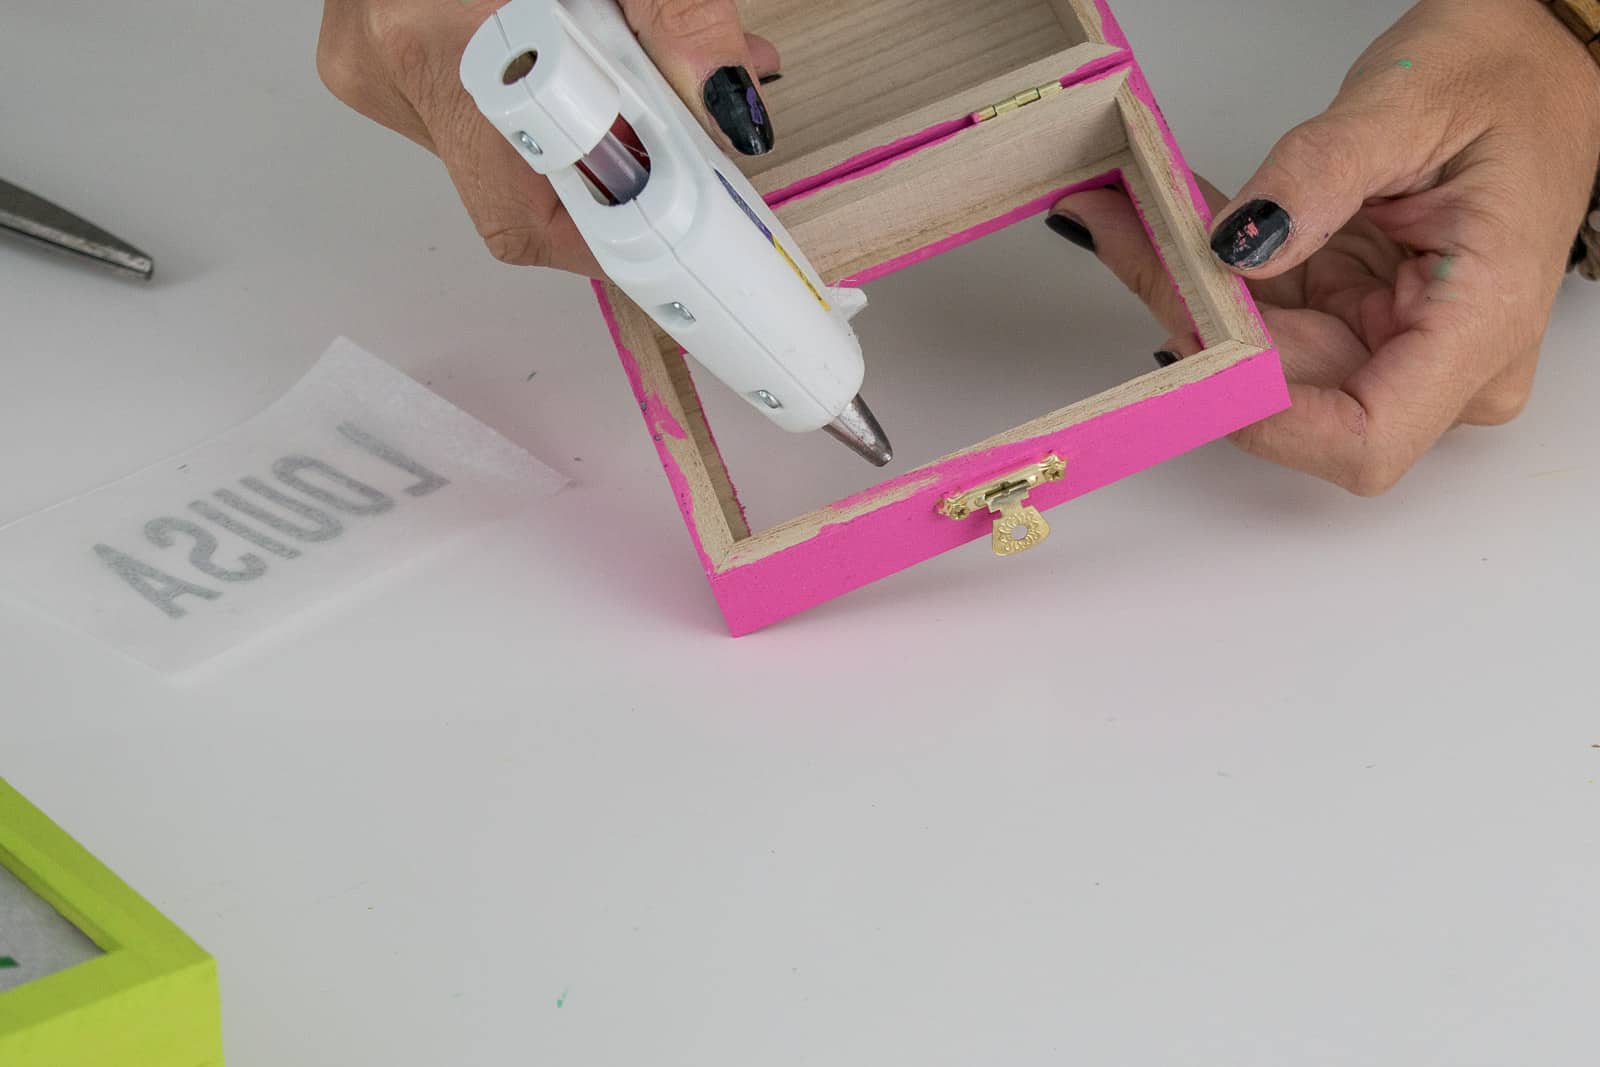
Step 5. Glue the tracing paper inside the lid of the box
Using a hot glue gun, glue the tracing paper with the names to the underside of the box lid.
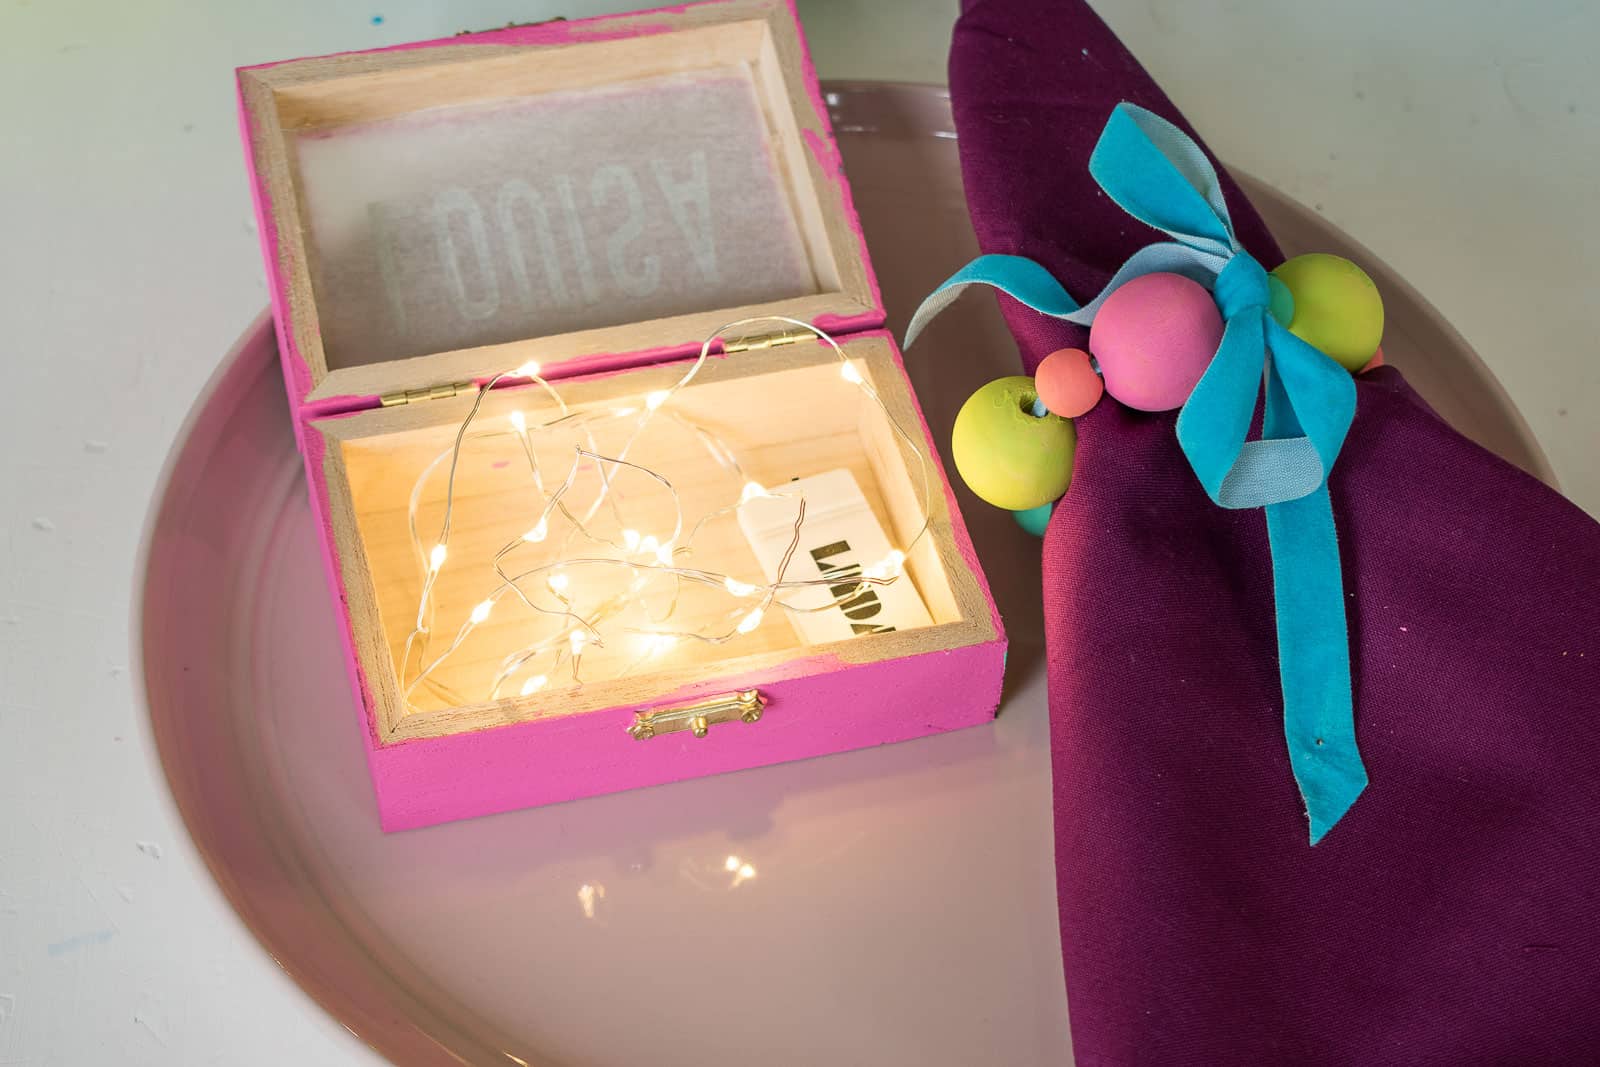
Step 6. Add LED mini lights
Tell me that’s not the sweetest little place card EVER. I LOVE how bright and colorful it is, but it’s also a fun favor for your guests to take home when you’re done!
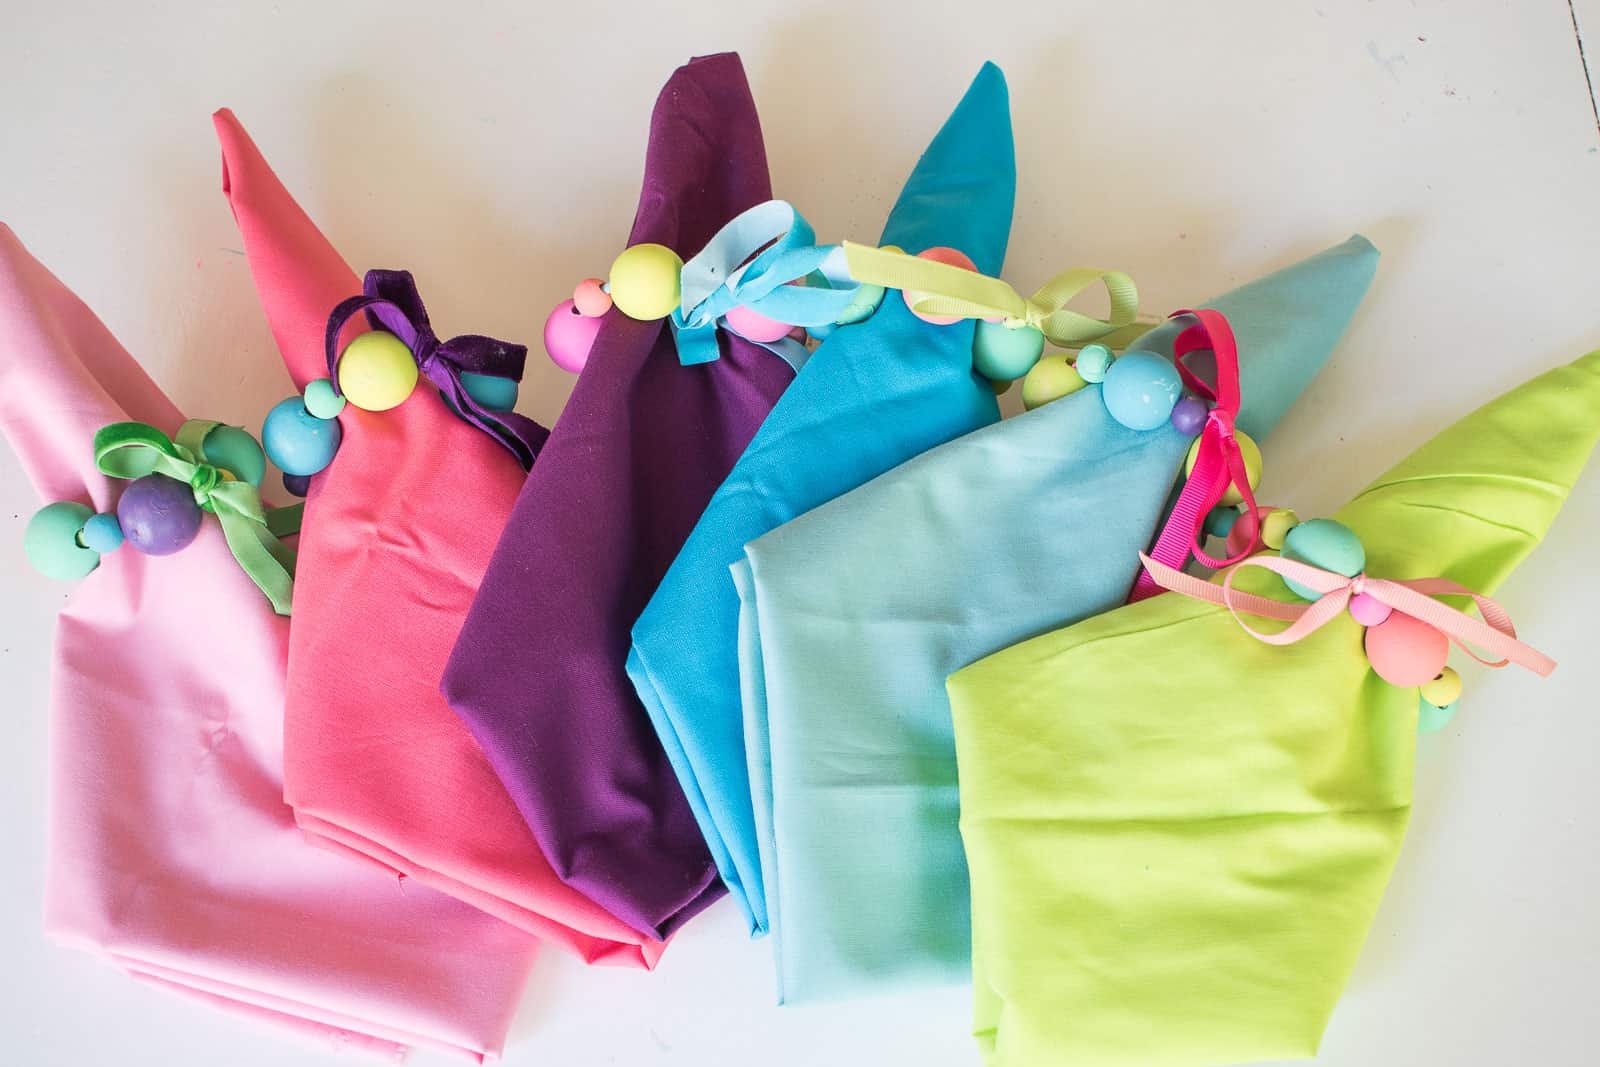
Colorful Beaded Napkin Rings
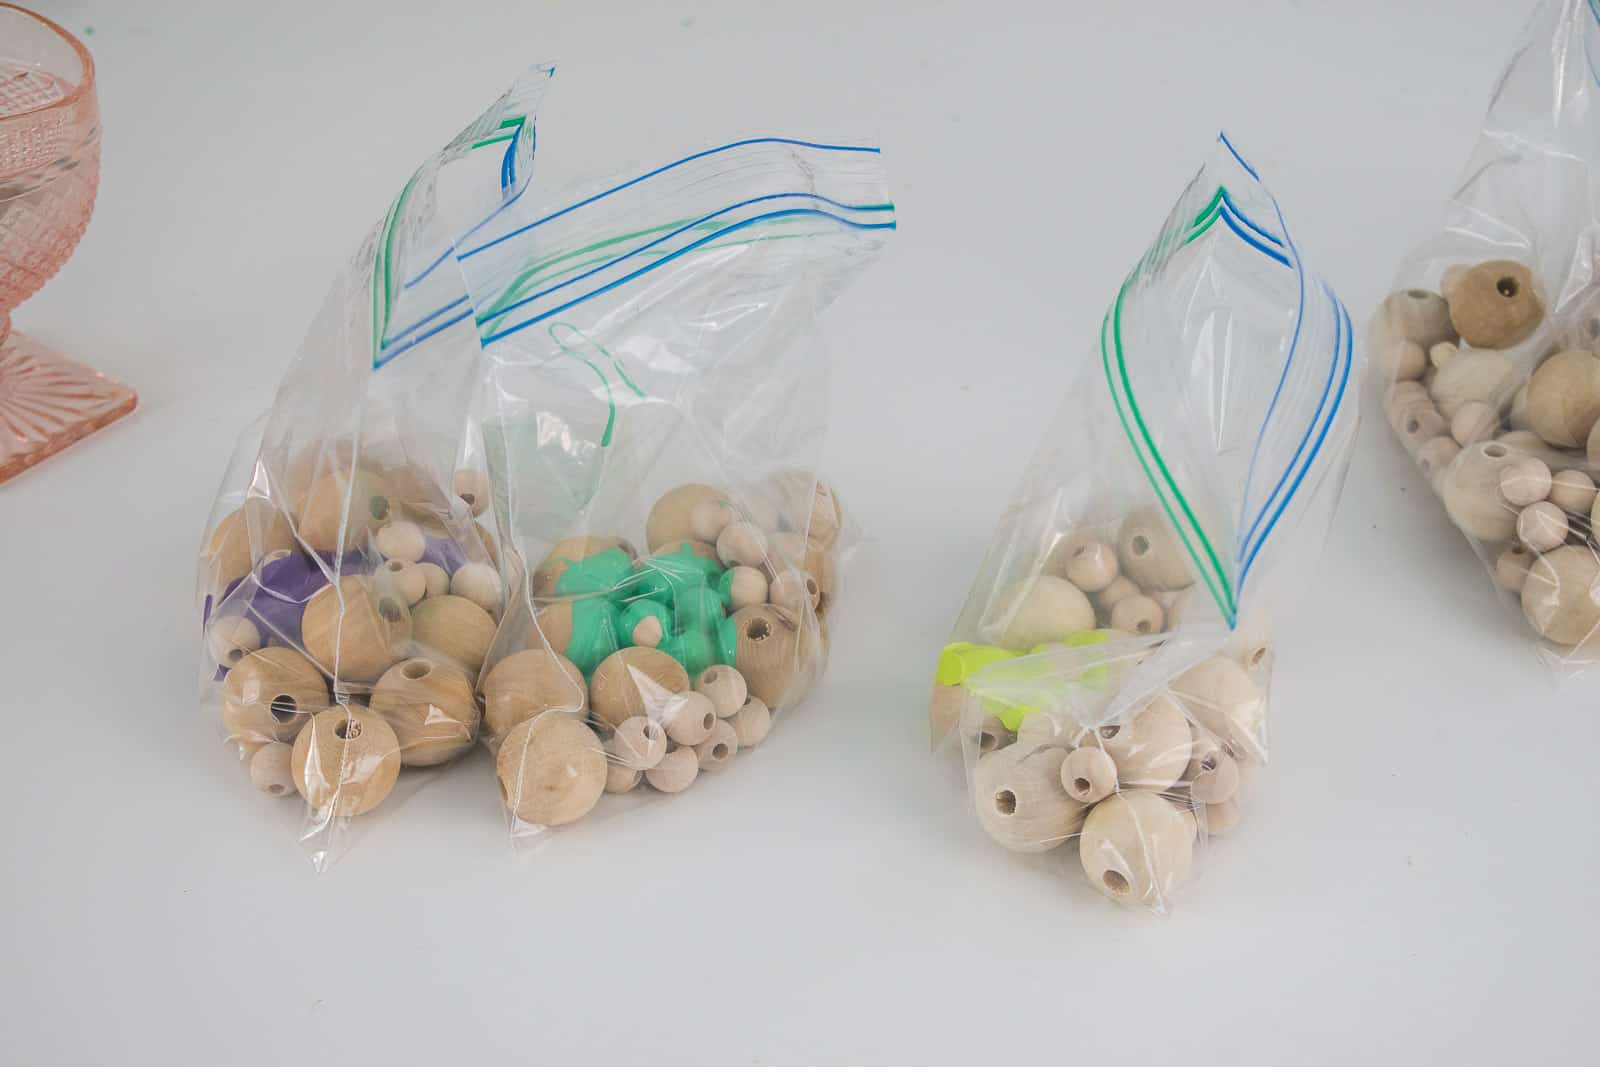
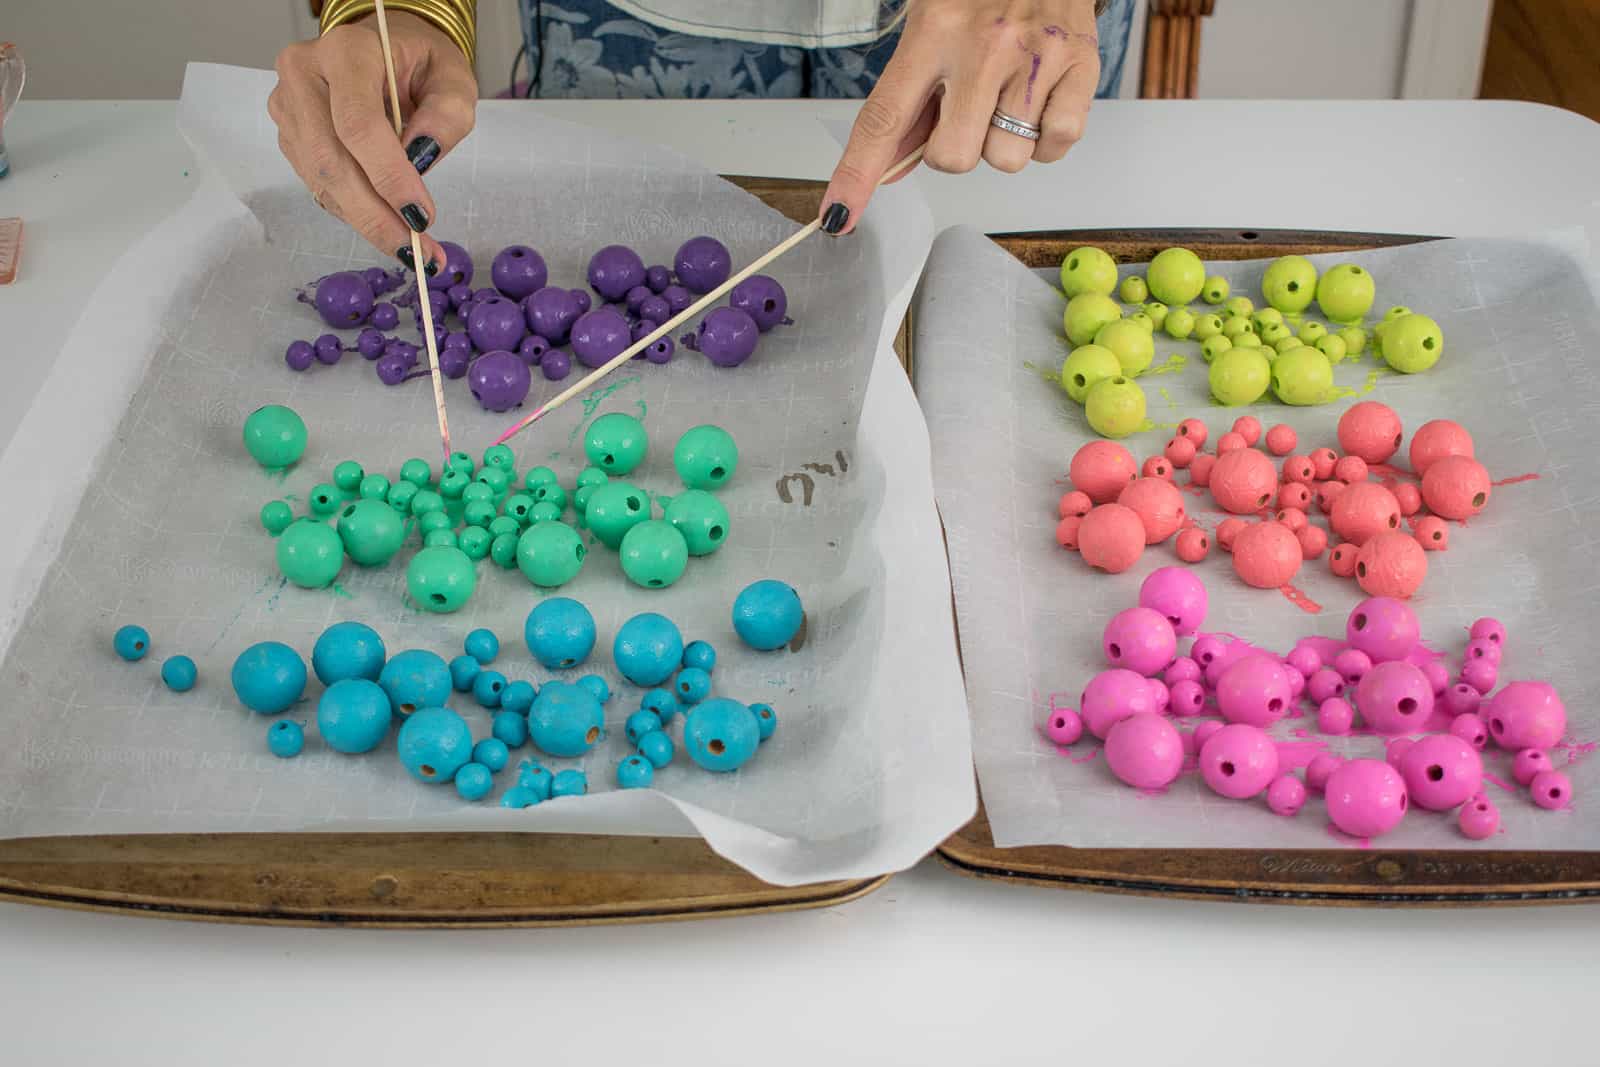
Step 1. Paint your beads
I’m working with assorted wooden beads so I first divided them up into six groups- one for each color box. My quick and easy hack for painting beads is to place them in a ziplock bag and squirt the craft paint in. I added a tiny bit of water to a couple of the bags where the paint felt thicker. Simply move the beads around in the bag until they’re covered and then pour them out onto parchment paper to dry.
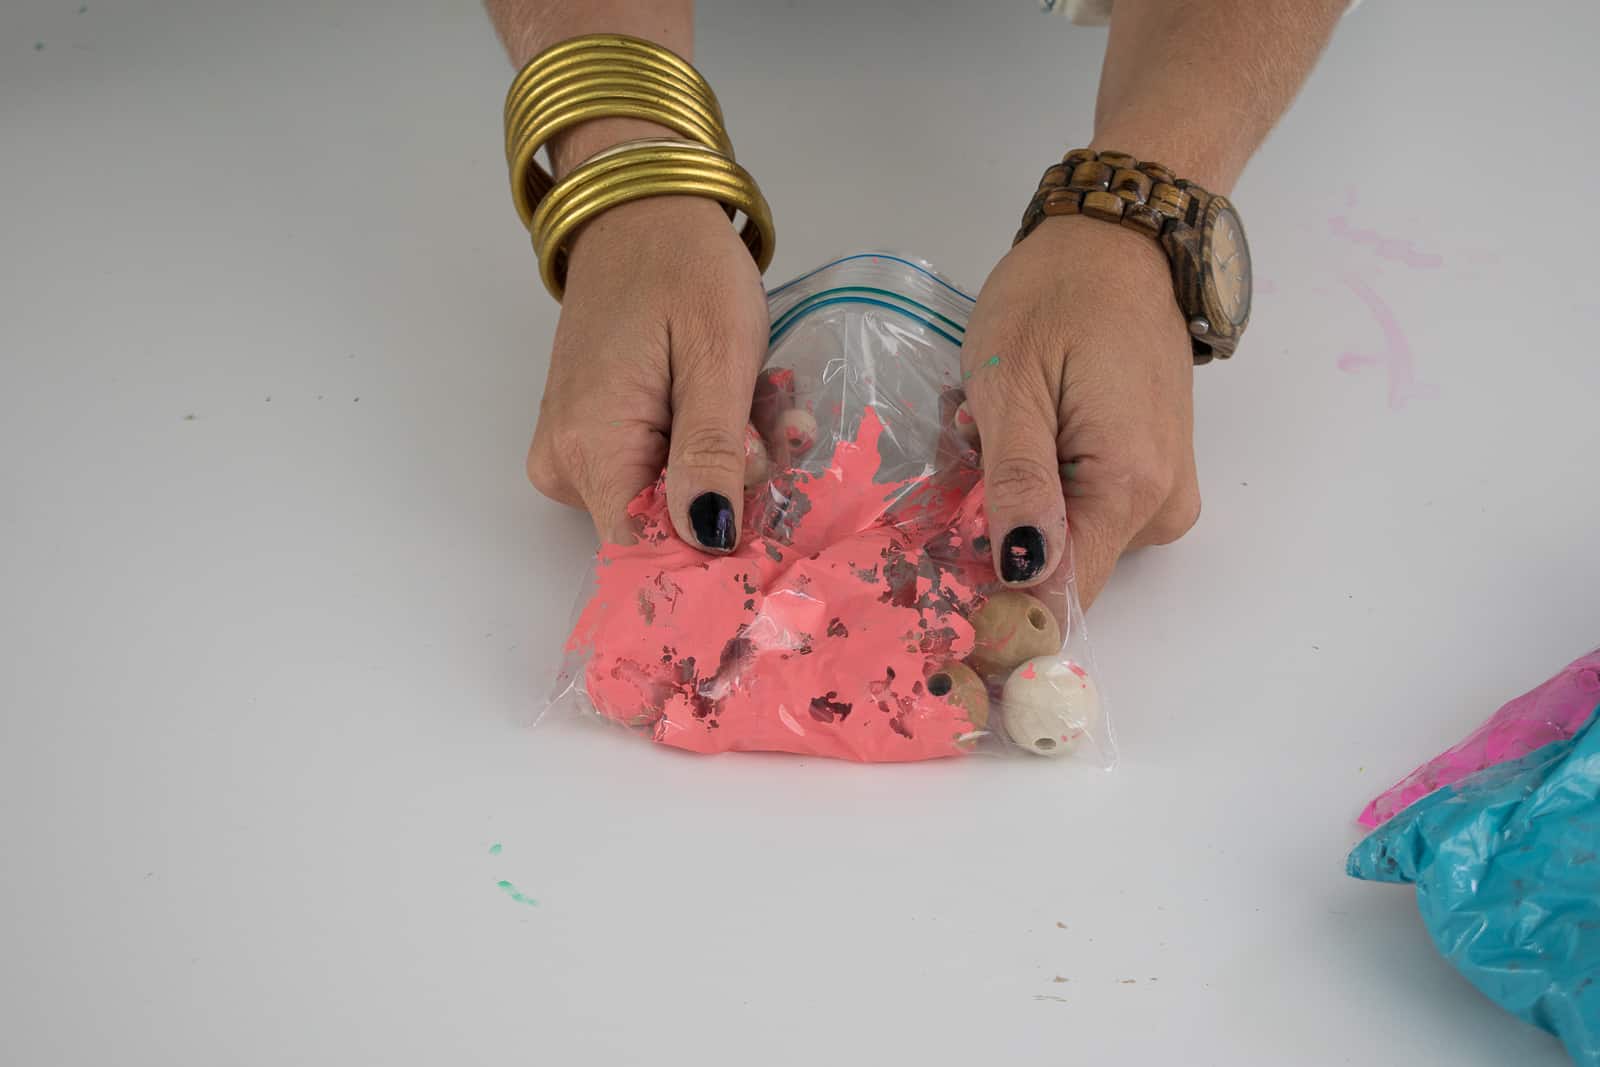
The paint job’s not pristine because they were resting on the parchment paper, but for napkin rings I wasn’t too concerned. (If you want a perfect finish, thread the beads onto a small skewer with either end resting on a bowl or small cardboard box to elevate them.)
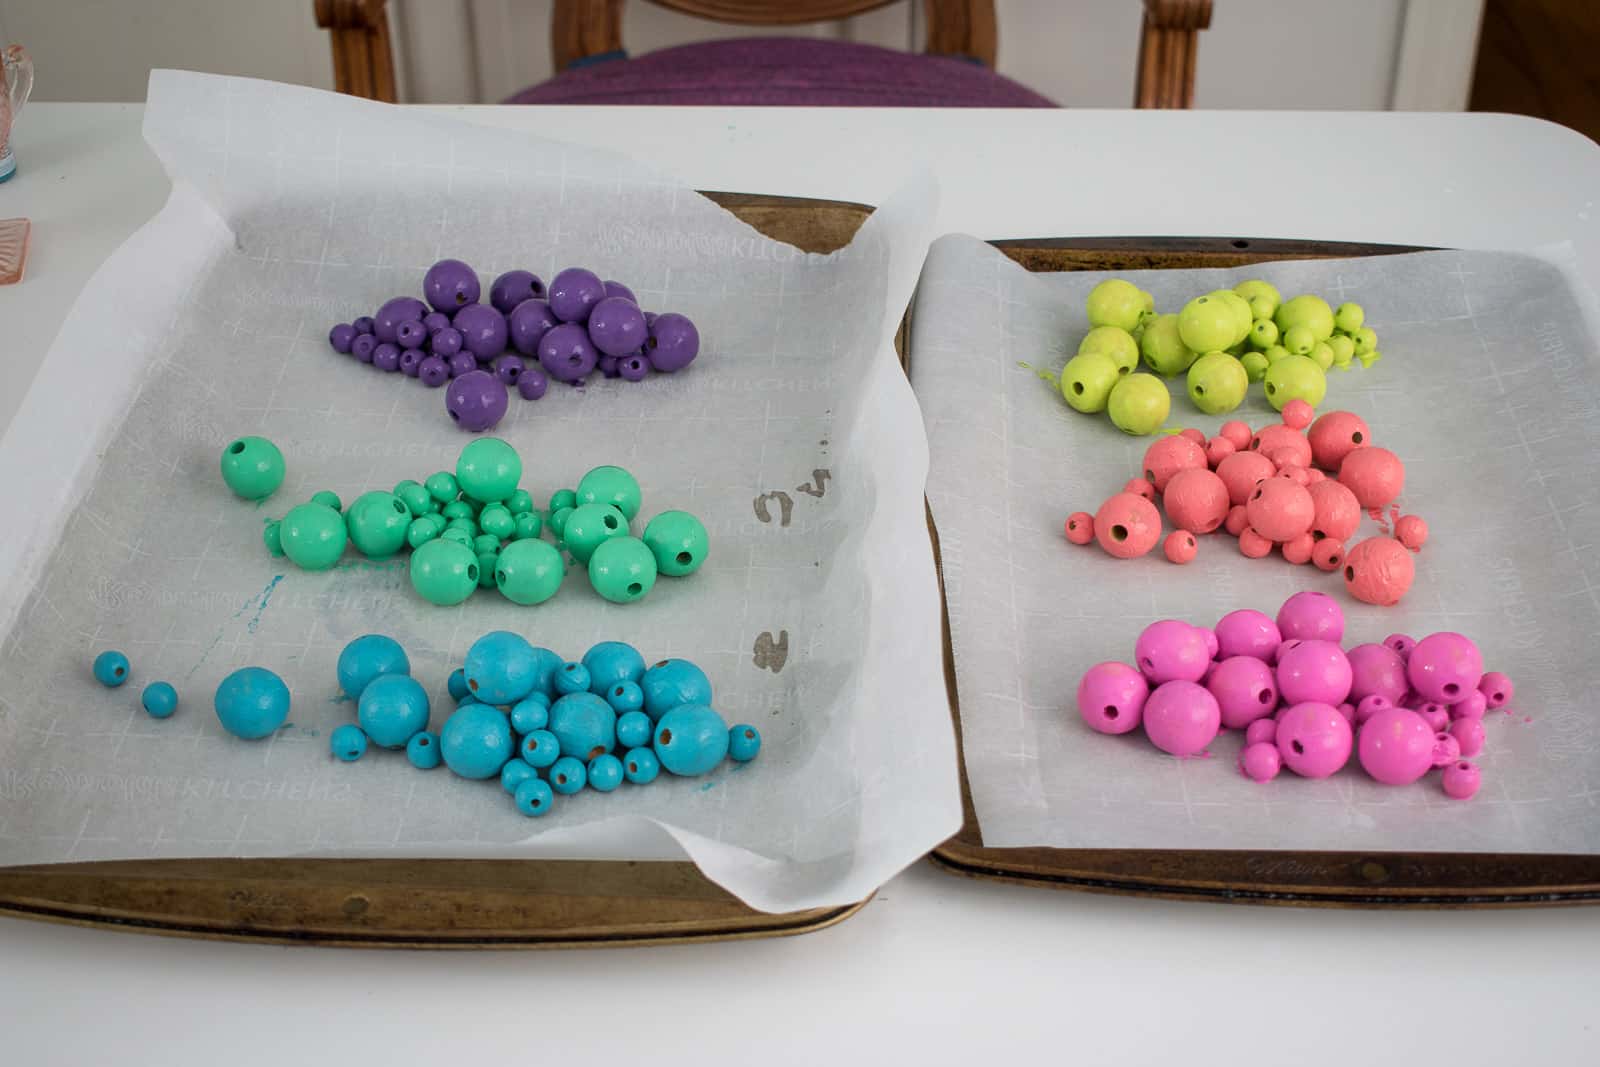
Use a skewer to separate the beads so they don’t stick to each other when dry.
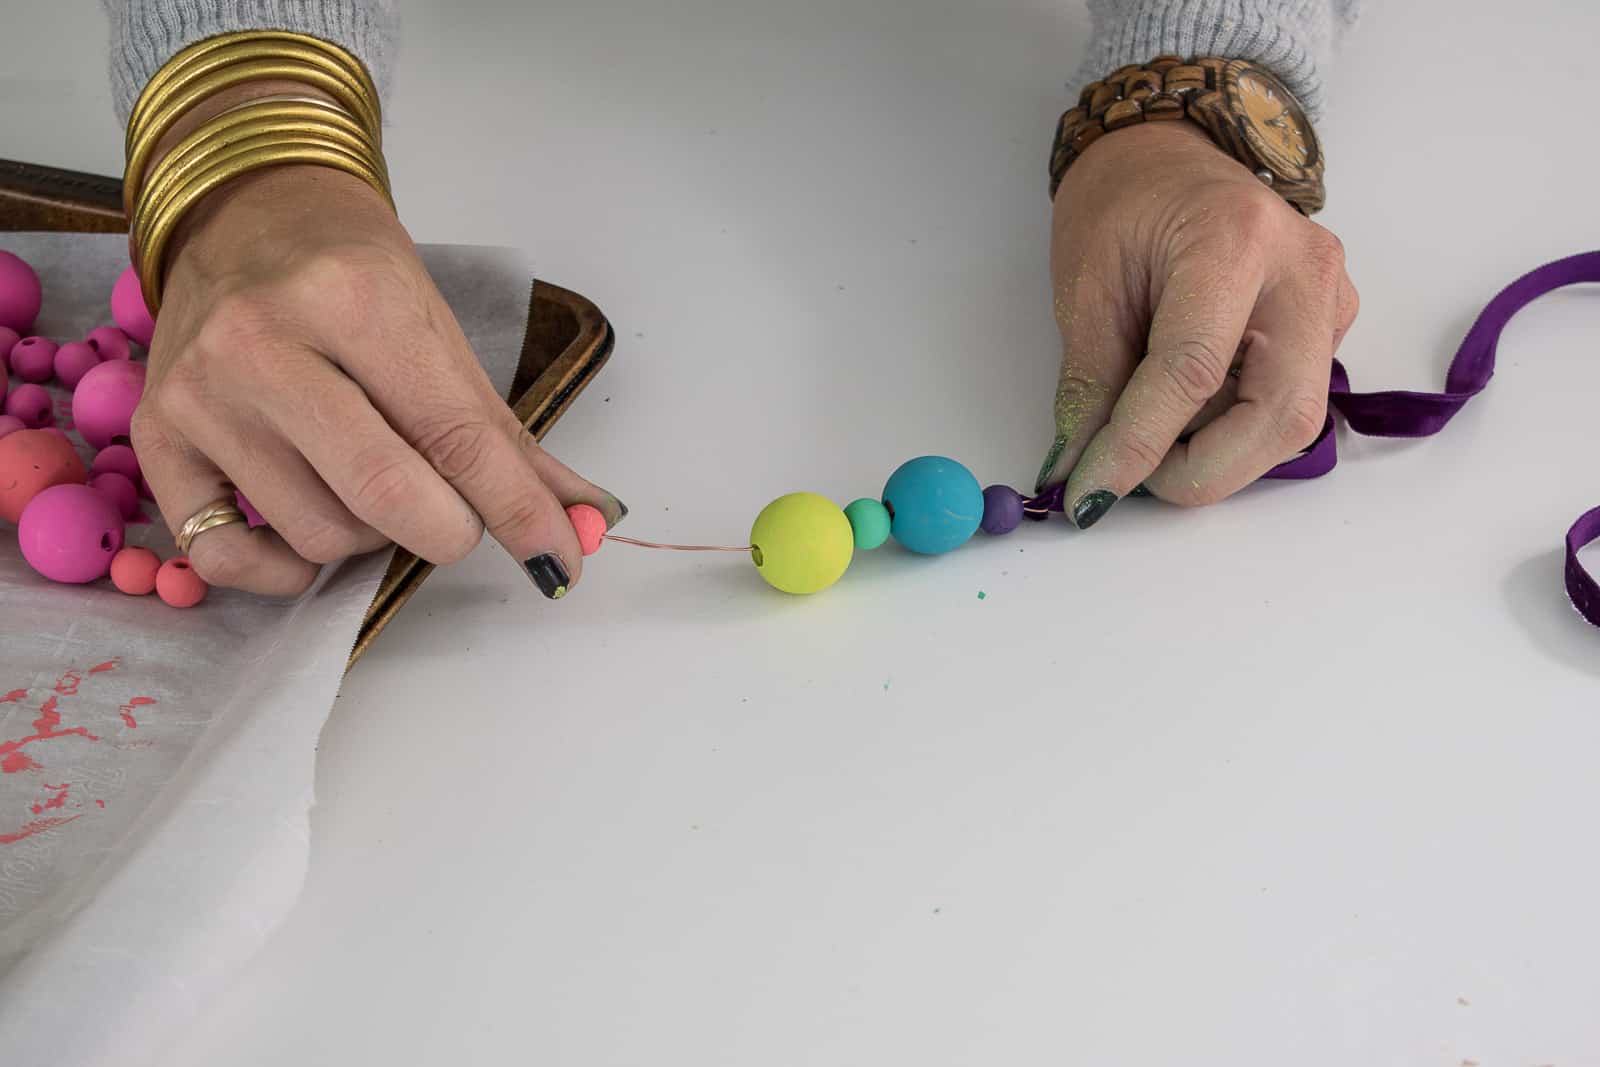
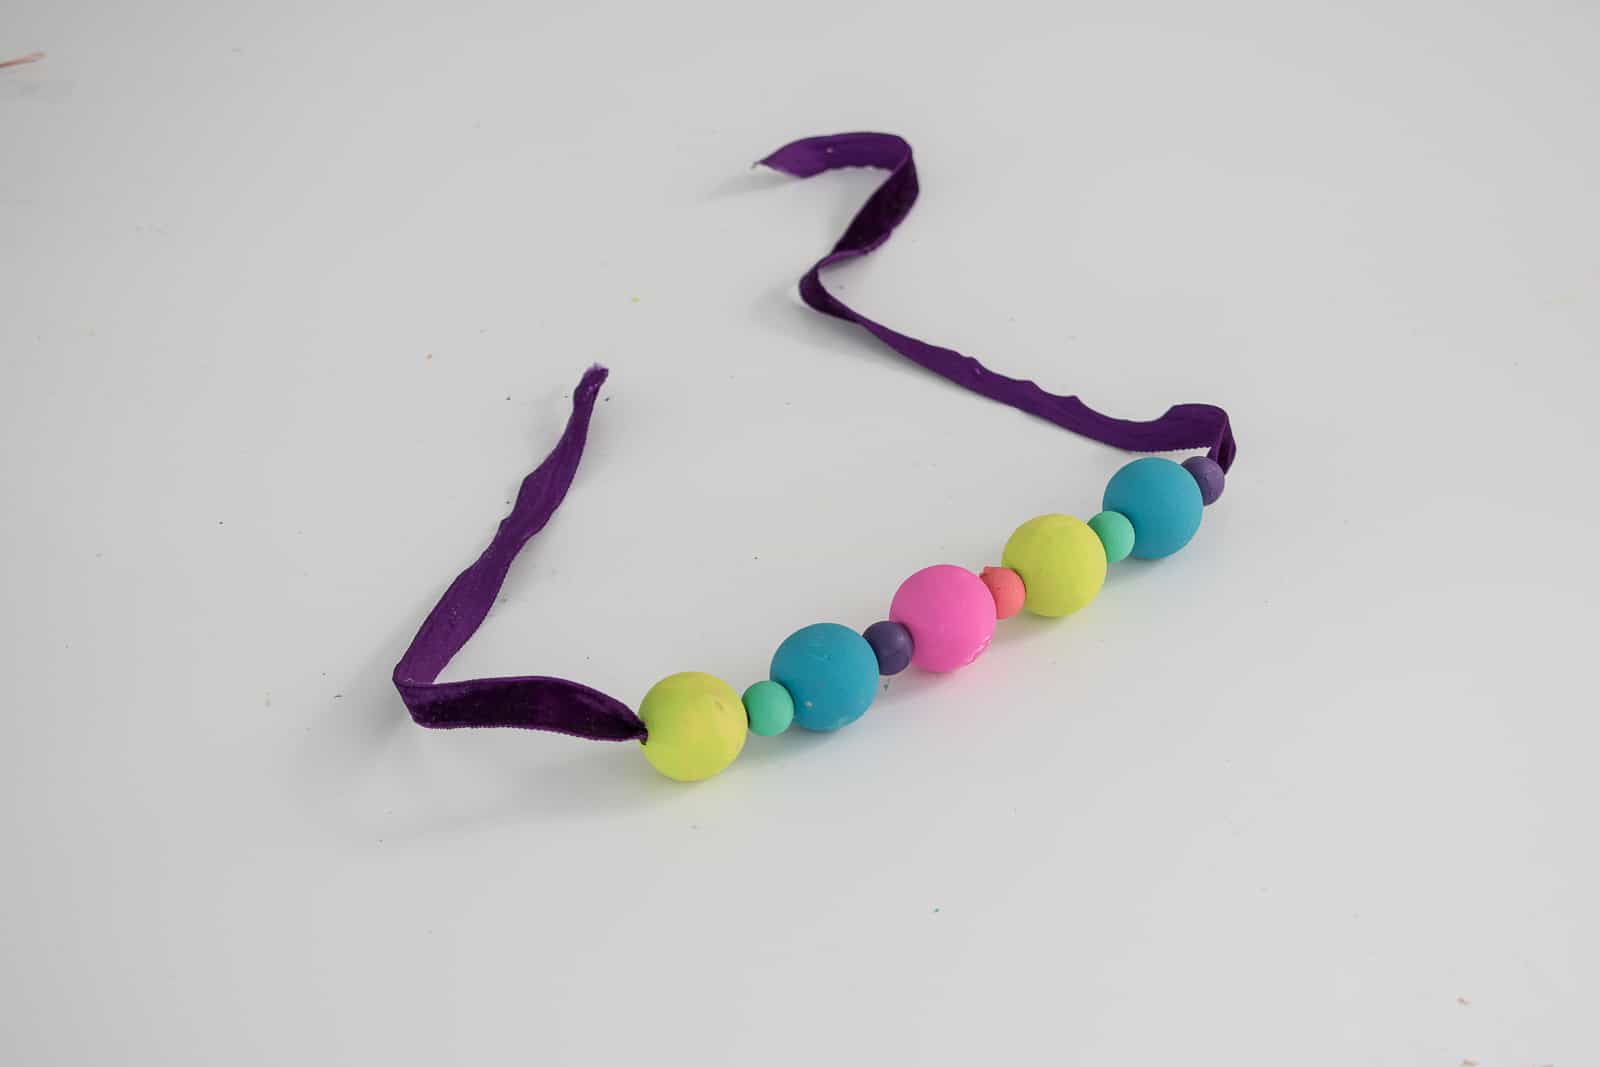
Step 2. Thread the beads onto ribbon
I took a small gauge floral wire and poked it through the end of my ribbon. Then I used the wire to help thread the beads alternating one large with one small. I determined that 5 of each size was about the right length.
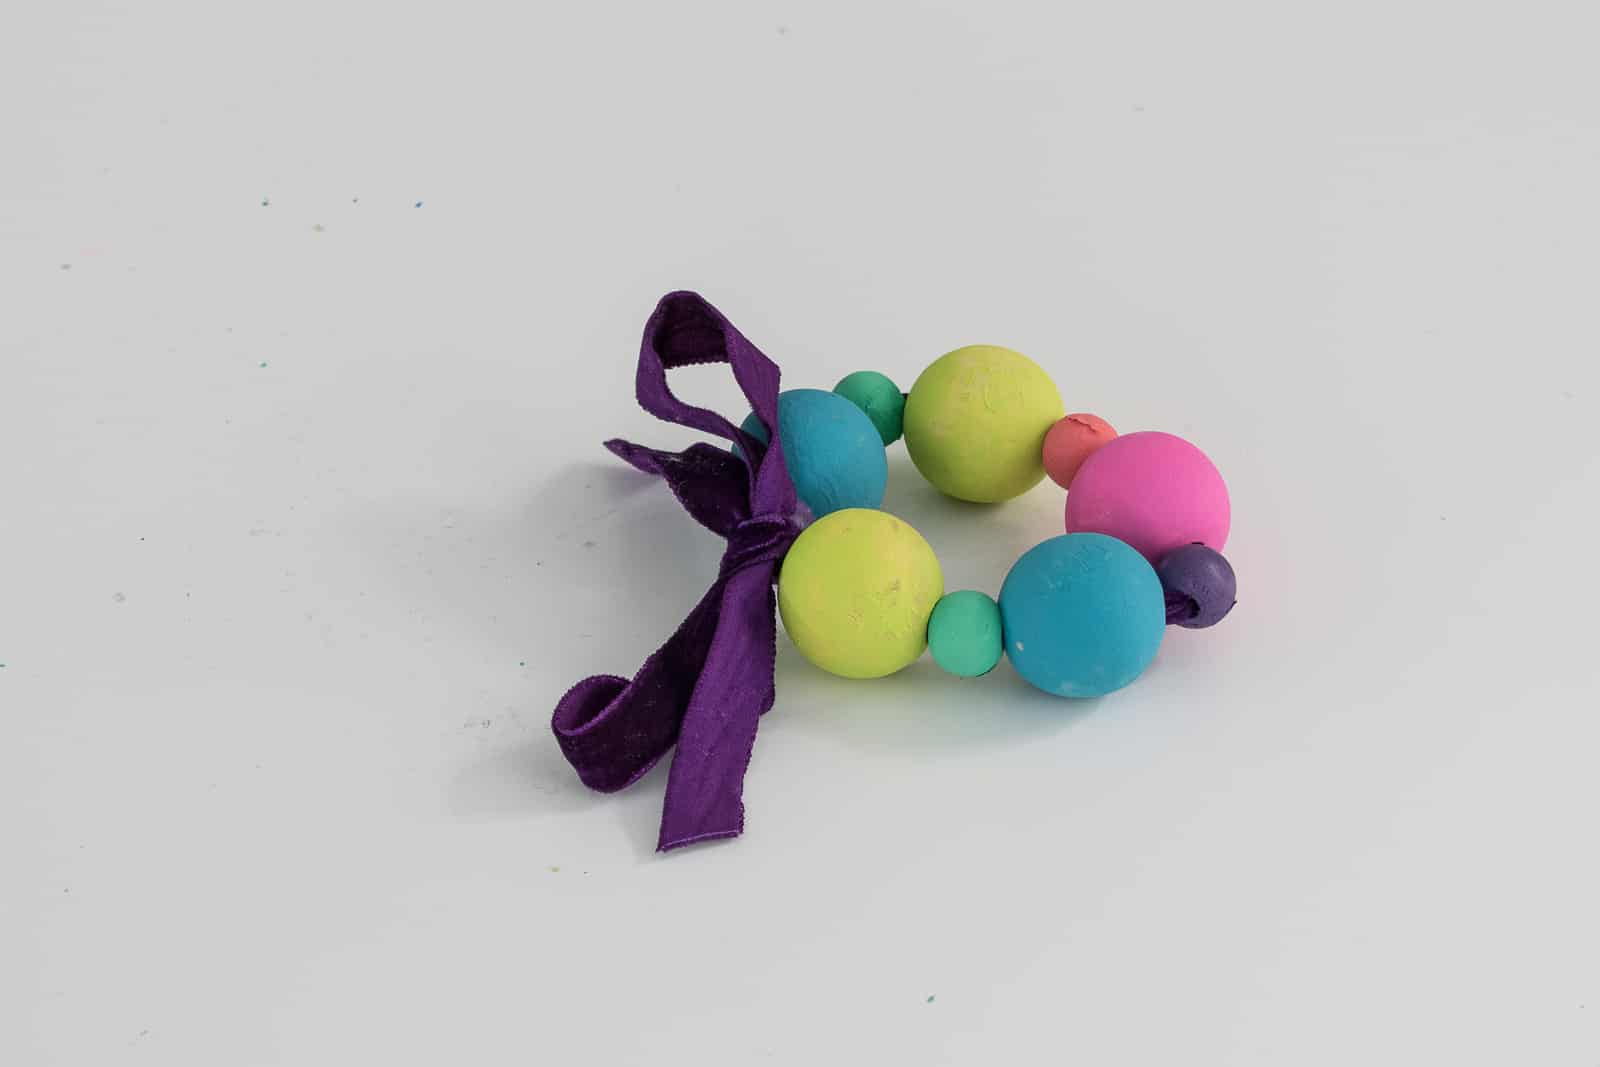
Step 3. Tie the ribbon to form the napkin ring
I tied the ends of the ribbon tight thereby pulling the beads into a circle and finished it off with a bow. You could do this another way and either skip the bow or add a tassel… up to you!
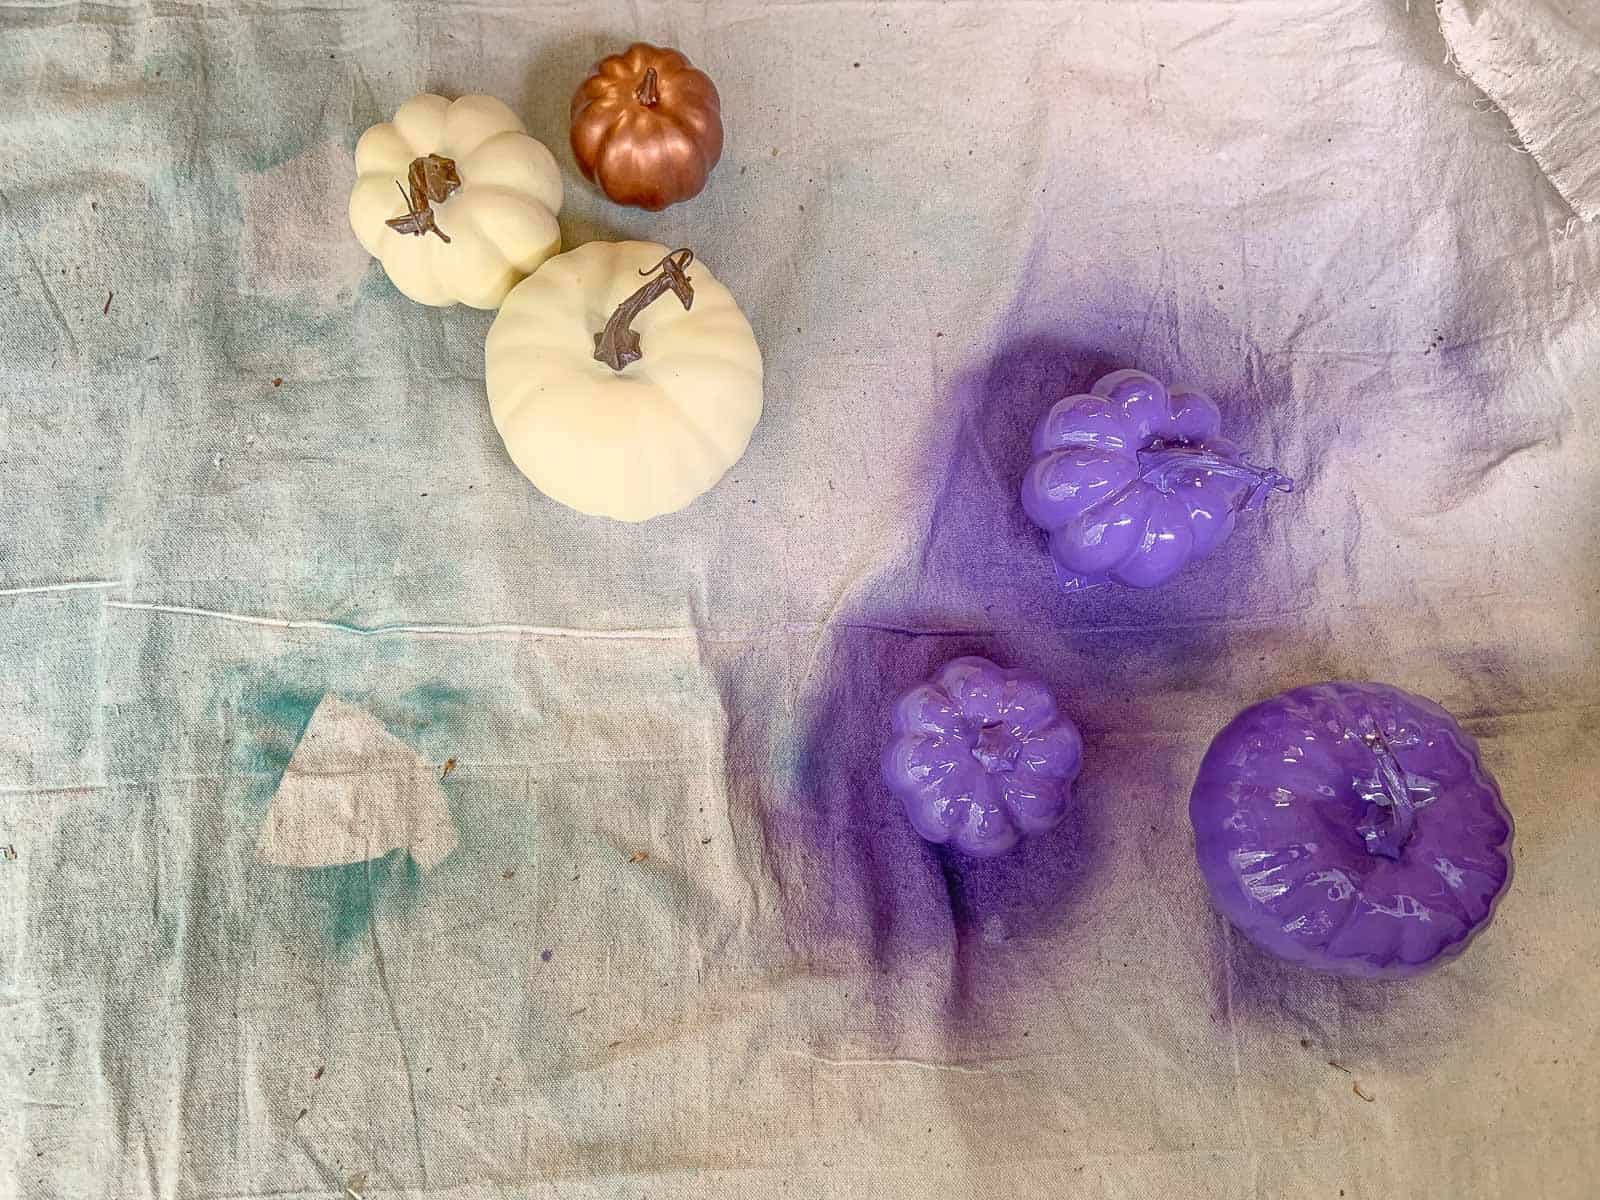
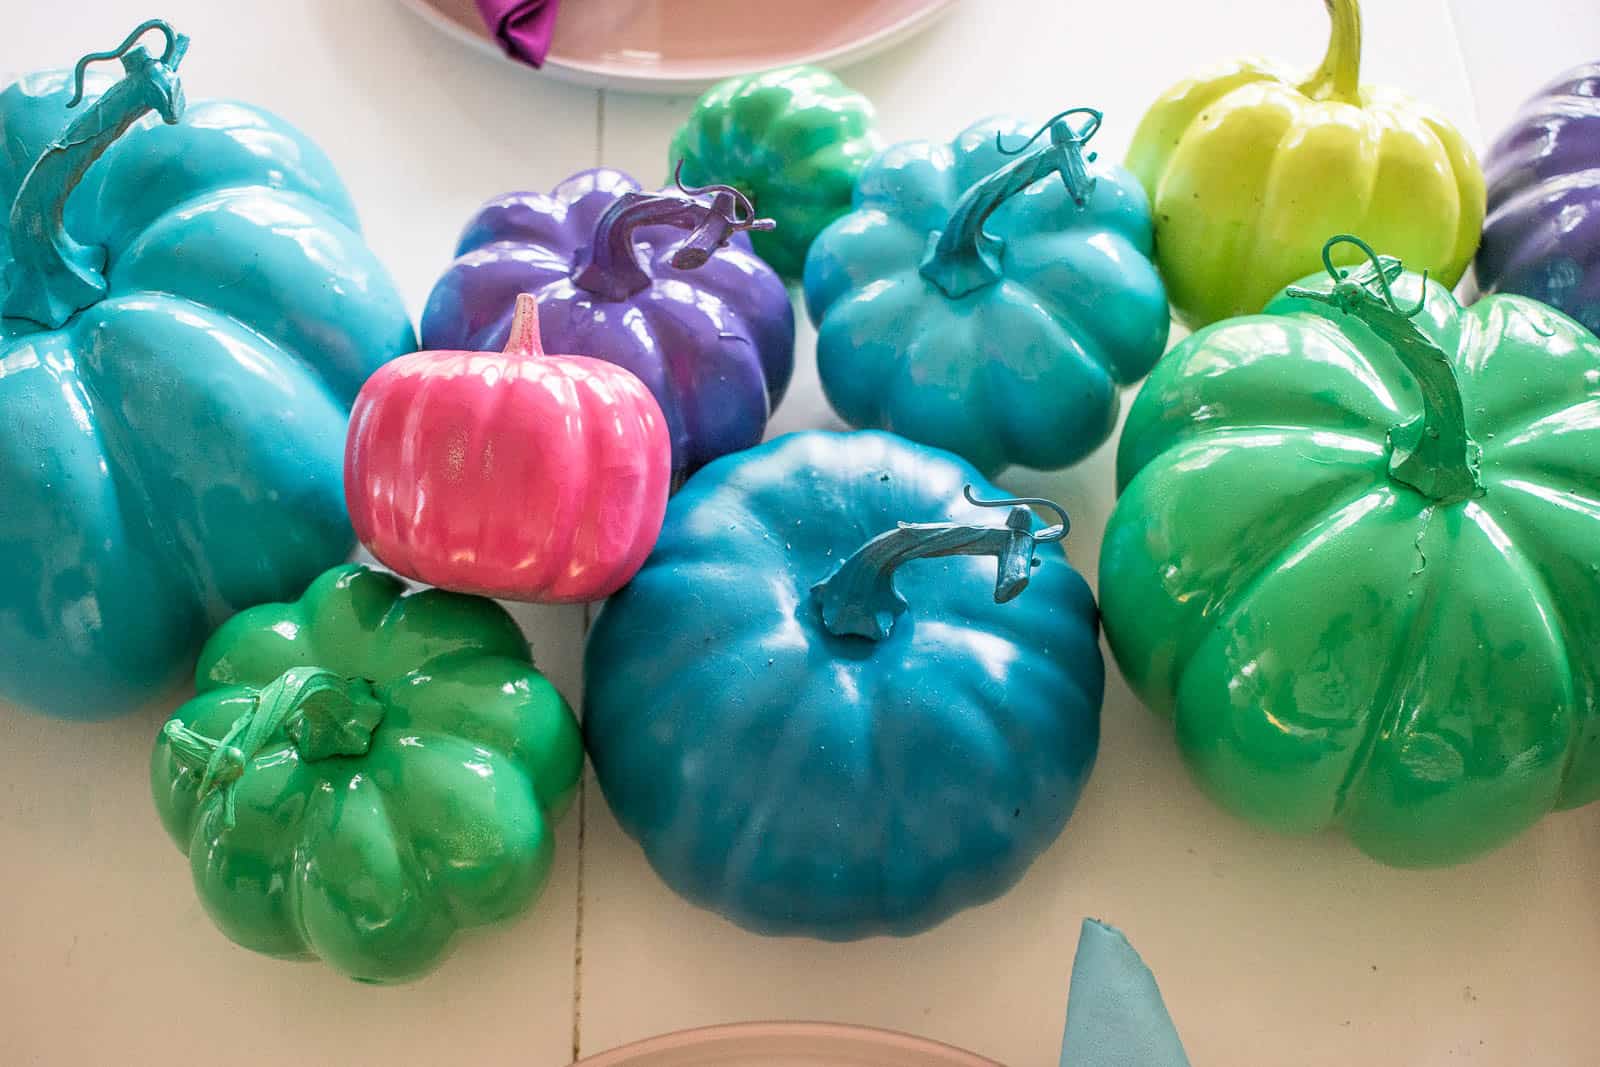
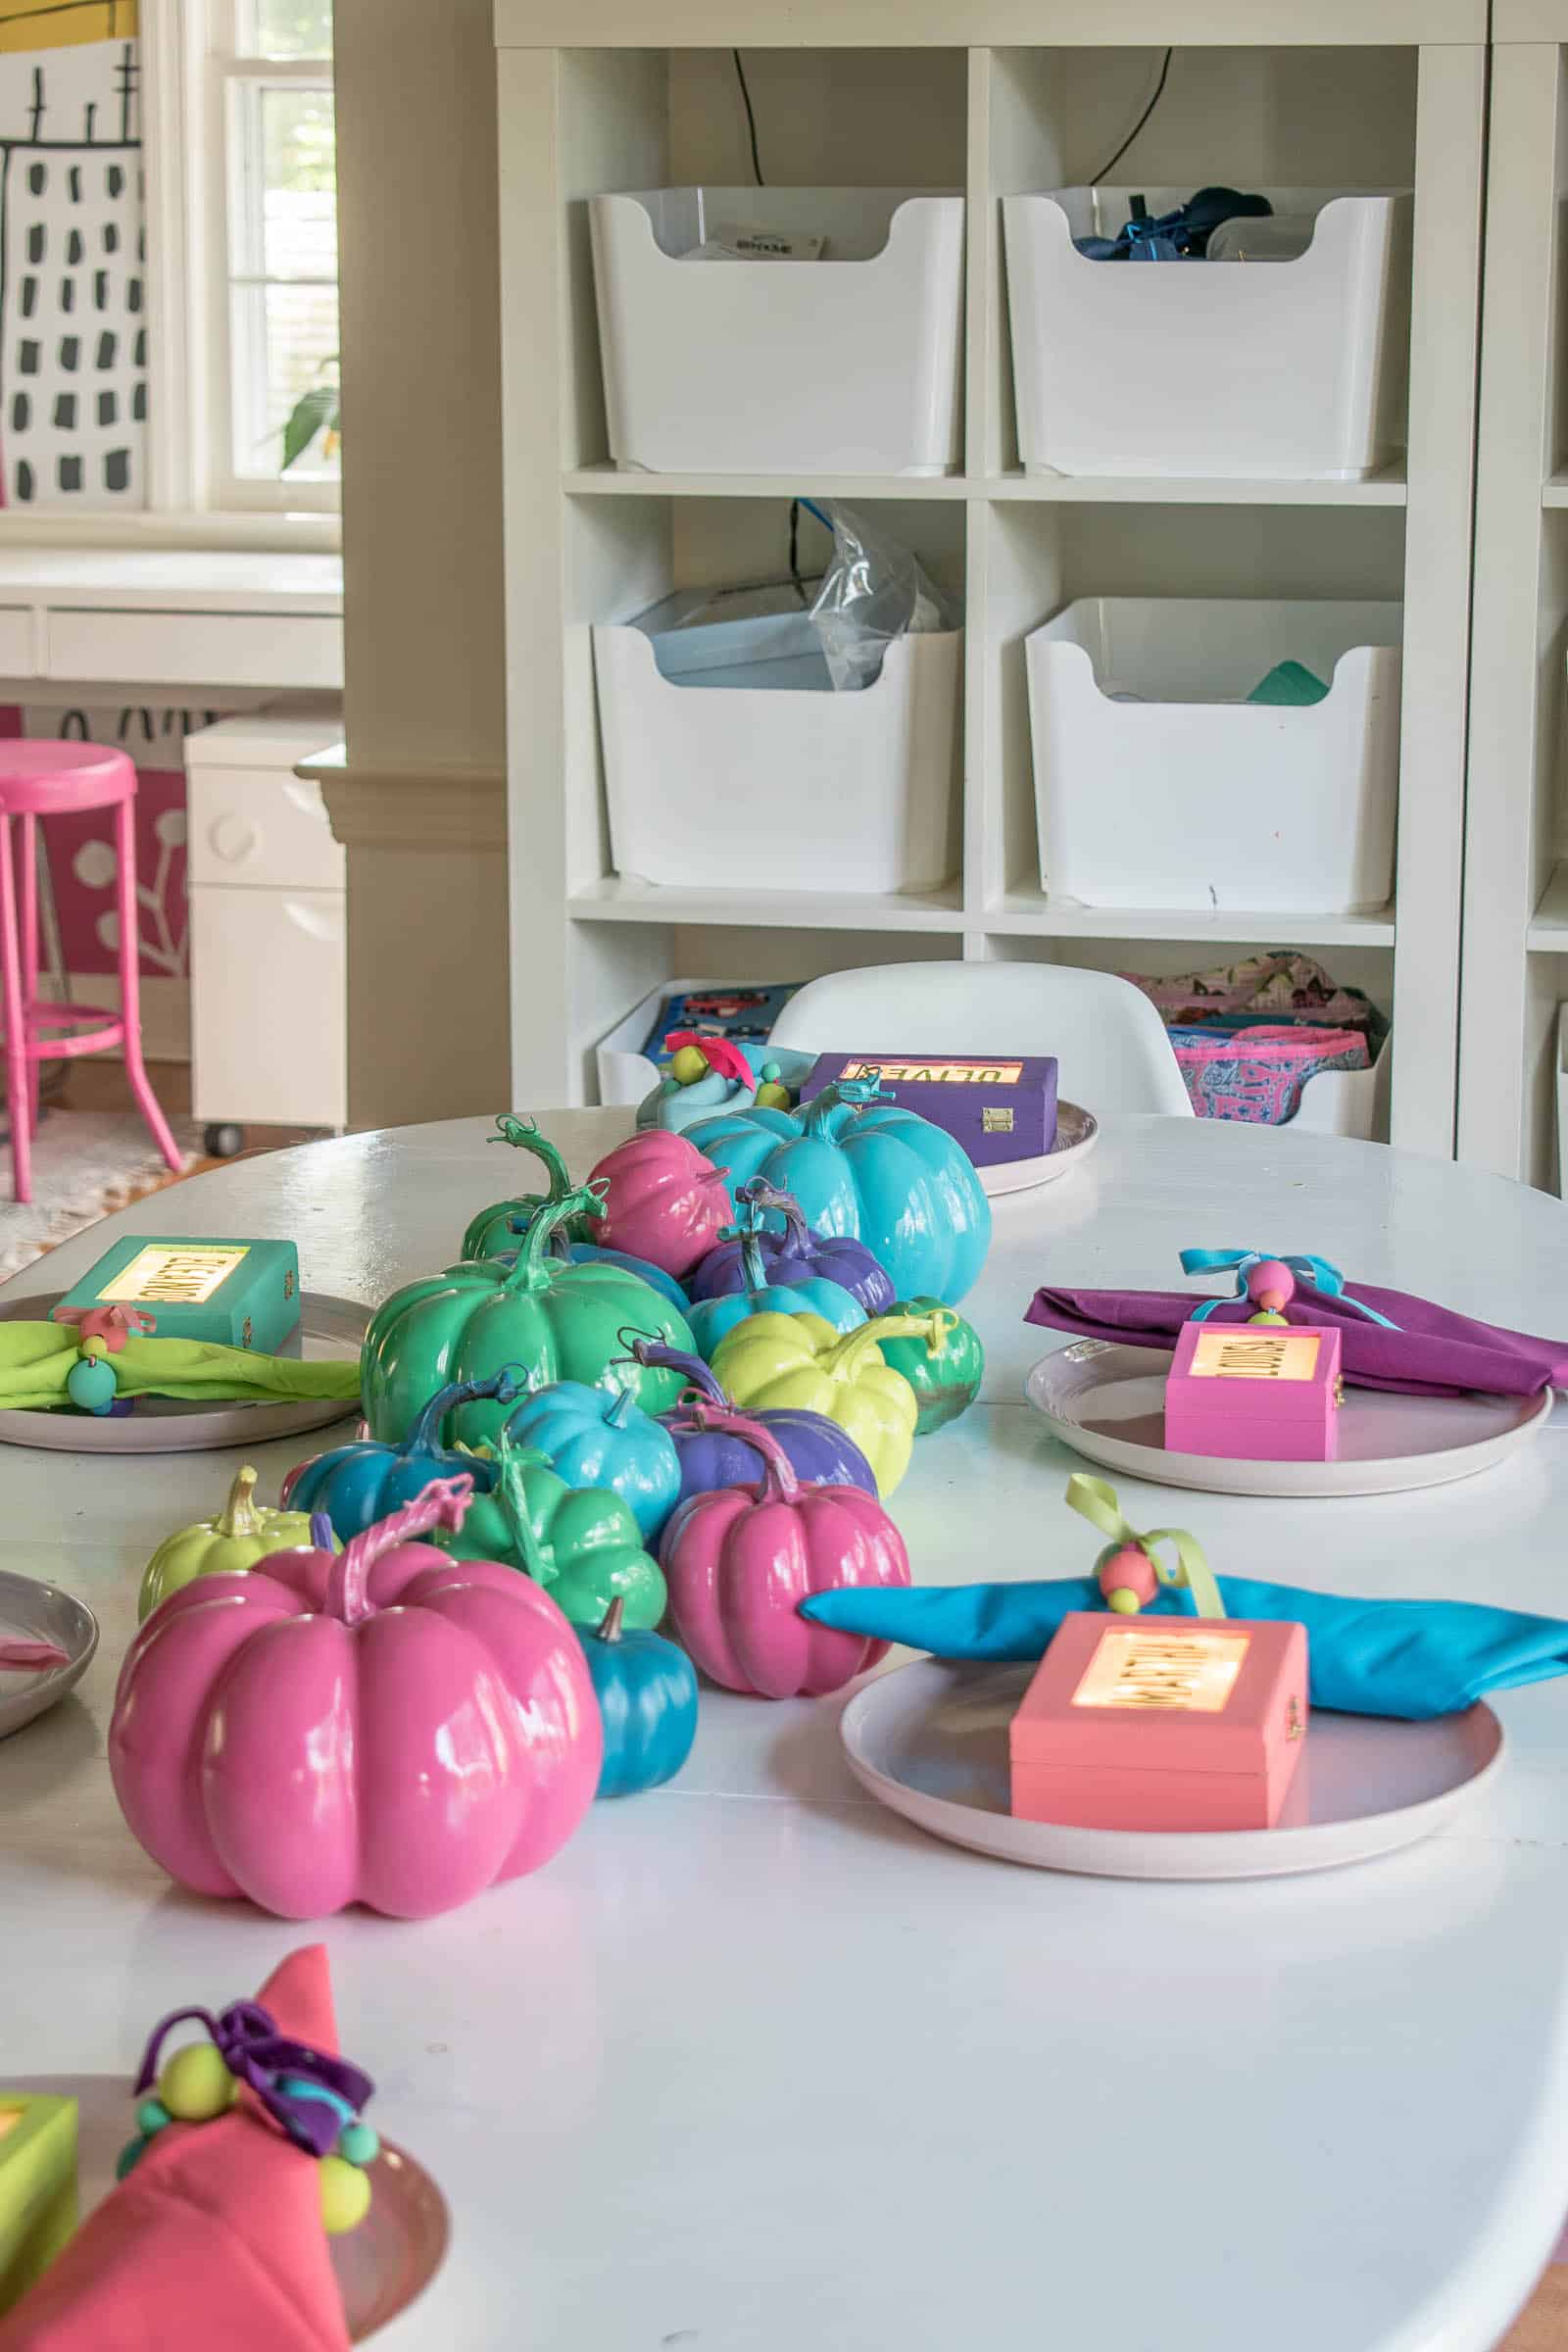
Painted Pumpkins
For the centerpiece, I kept it SUPER simple and spray painted a couple dozen faux pumpkins. I tried to use paint that corresponded to the boxes and the napkin rings to tie the whole tablescape together!
I love how bright and cheerful the table looks… and I KNOW the kids will love it. They saw me photographing their boxes and already tried to sneak them away into their rooms… if there’s something I know kids like- it’s a trinket holder.
To elevate the spray painted pumpkins a bit, it would be easy to add some faux succulents or even some grocery store flowers the morning of your holiday. Our kitchen table is tight for space so I left it alone, but I’d love to see what you guys do with this if you make these for your table!
Colorful Table Decor Materials
- Unpainted Wooden boxes
- Utility Knife
- Assorted Craft Paint
- Tracing paper
- Cricut/ Cricut vinyl (optional)
- Hot glue gun
- LED Mini lights
- Wooden Beads
- Ribbon
- Floral wire
- Faux pumpkins
- Spray paint


These are just the best…great for any kind of party with a gift for the guest to take home!
Thanks Debbie! Sorry I didn’t see your comment sooner. And I agree! Would be a perfect party favor!
I love this idea! Could also use later on Christmas mantel over the stockings. Cute cute!
I love that idea!!! These colors would actually fit with our mantel perfectly!
Love These! Thinking about them as a favor for the kids at our Christmas party or for CHANUKAH(we embrace it All) to hold their gelt.
Oh my gosh… would be perfect for that! Great idea!
You know how I feel about colorful holiday decorations…it’s my jam. This is so cute and looks pretty easy! Win for everyone 🙂
Haha! You are the master of colorful holiday decor!!
Gorgeous. The boxes are really amazing. They would be such a lovely gift for someone.
Thank you, Maria! I agree! An easy project!!