
Day 1: Simple Wooden Shapes Ornament
Psssst… this post *might* contain affiliate links: see my disclosure here.
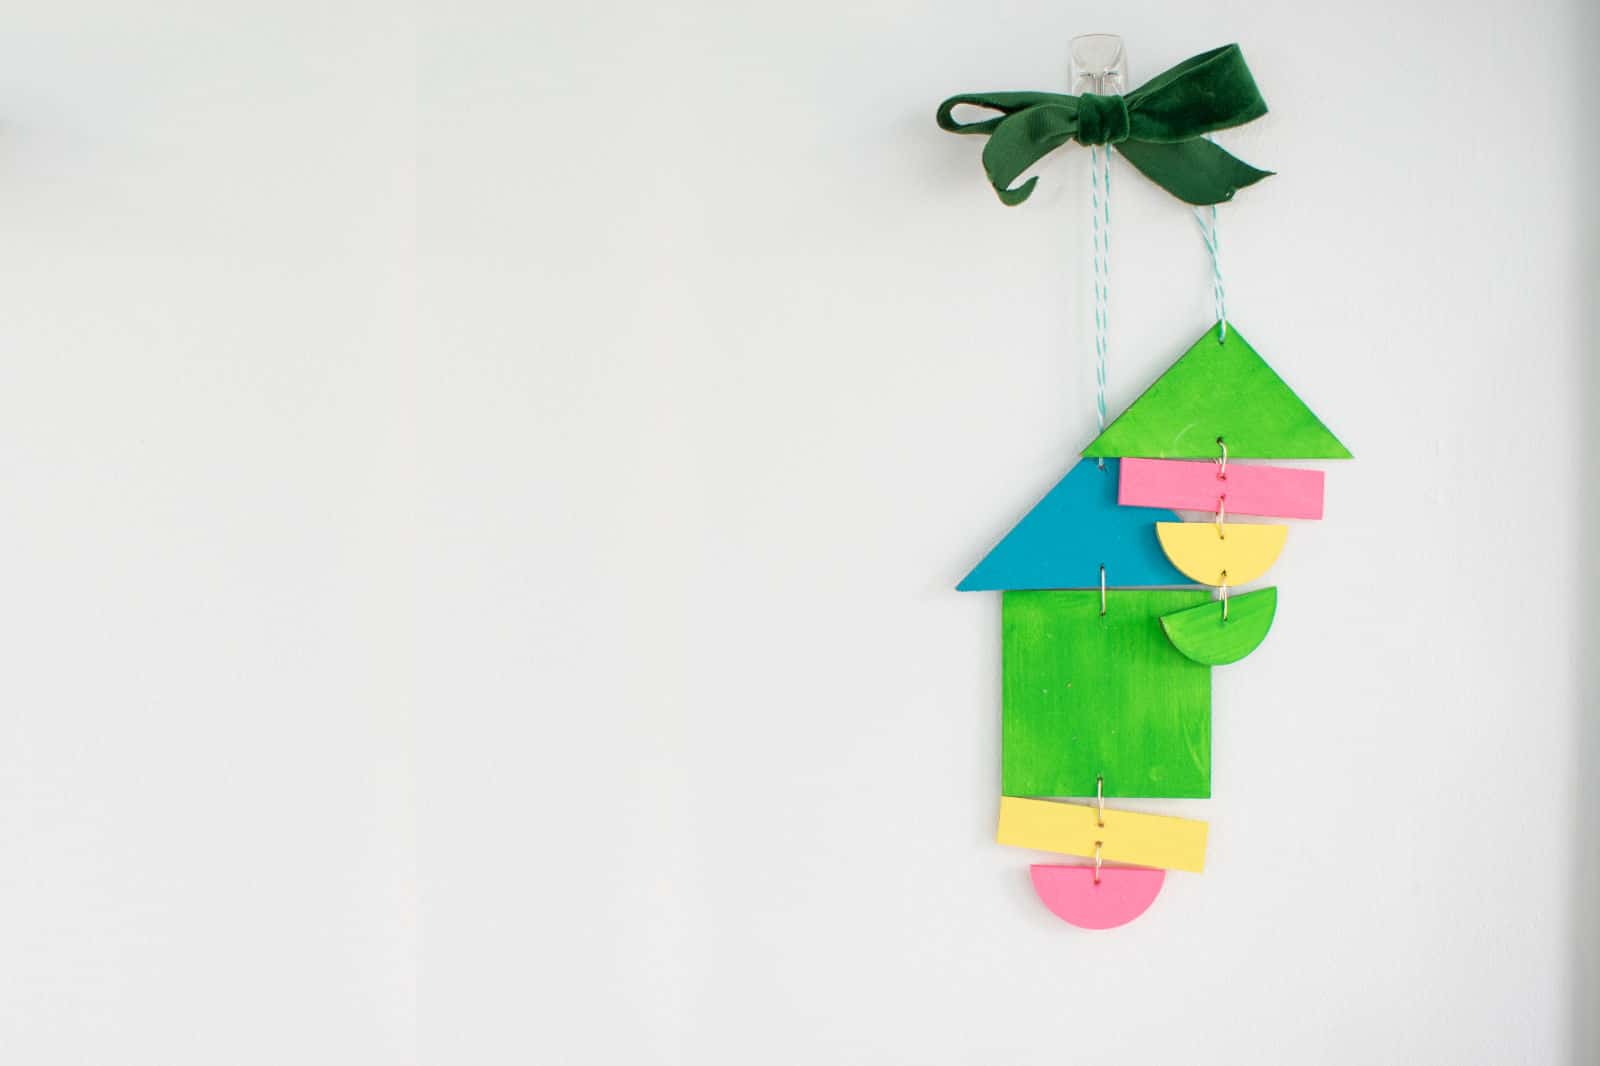
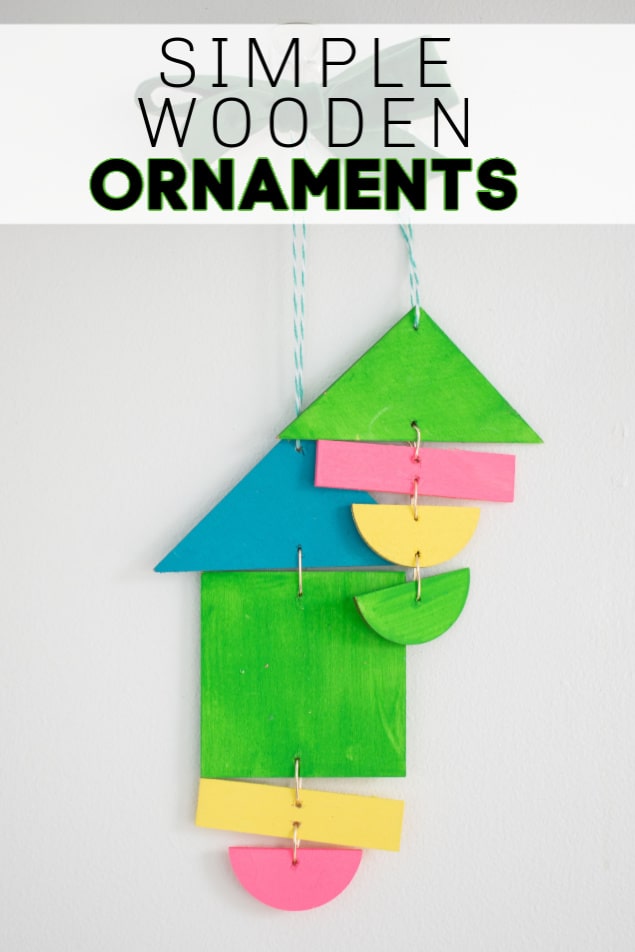
Budget Modern Wooden Shape Ornament
These basic wooden ornaments are chic and modern and totally budget friendly!!
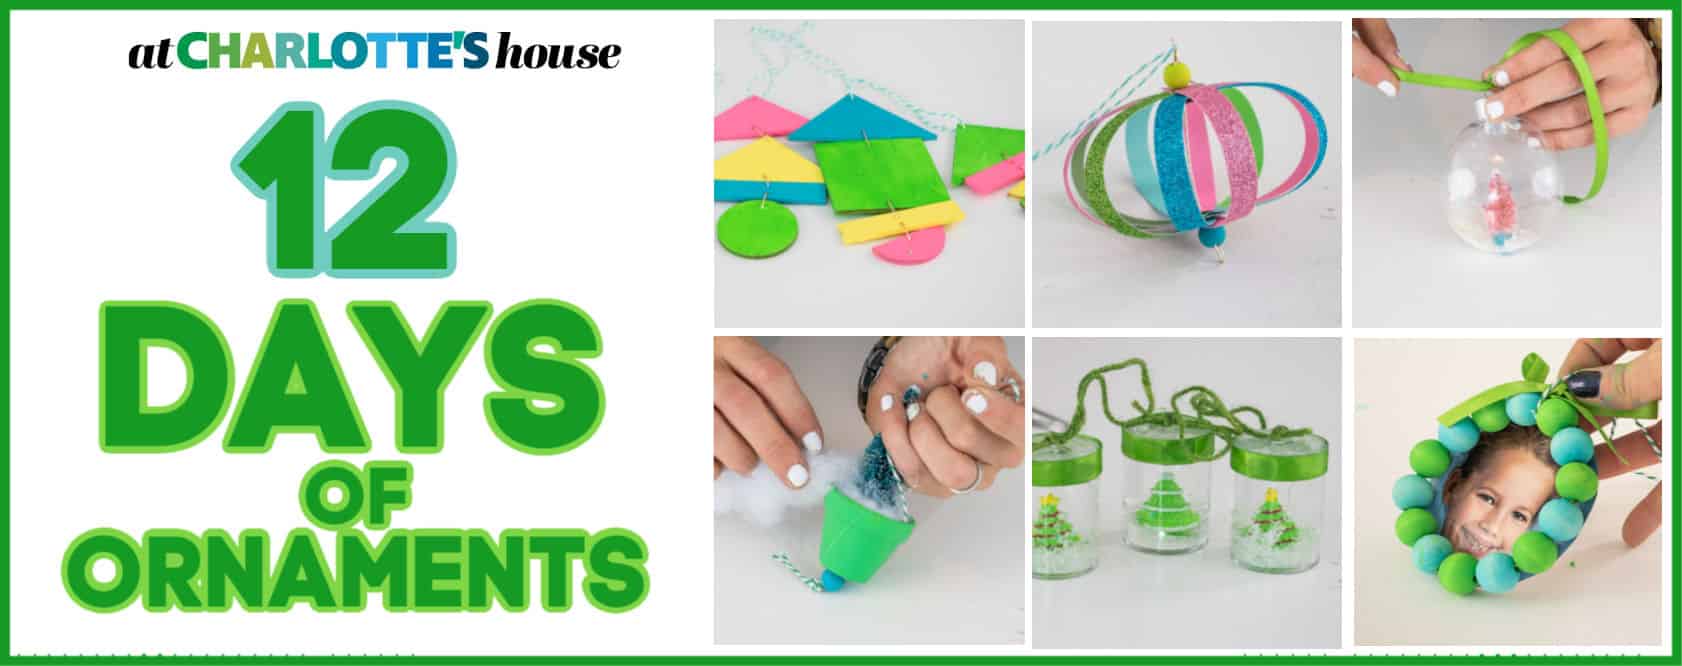
TODAY’S THE DAY! I’m kicking off 12 Days of Ornaments again this year and I have some really fun ornaments to share with you! The one thing they all have in common? They’re simple. They require minimal materials. And they’re all super cute!!! Materials for this ornament are listed at the end of this post, but check back in a day or two for a link to a FULL materials list for the whole series.
Shop my favorites!
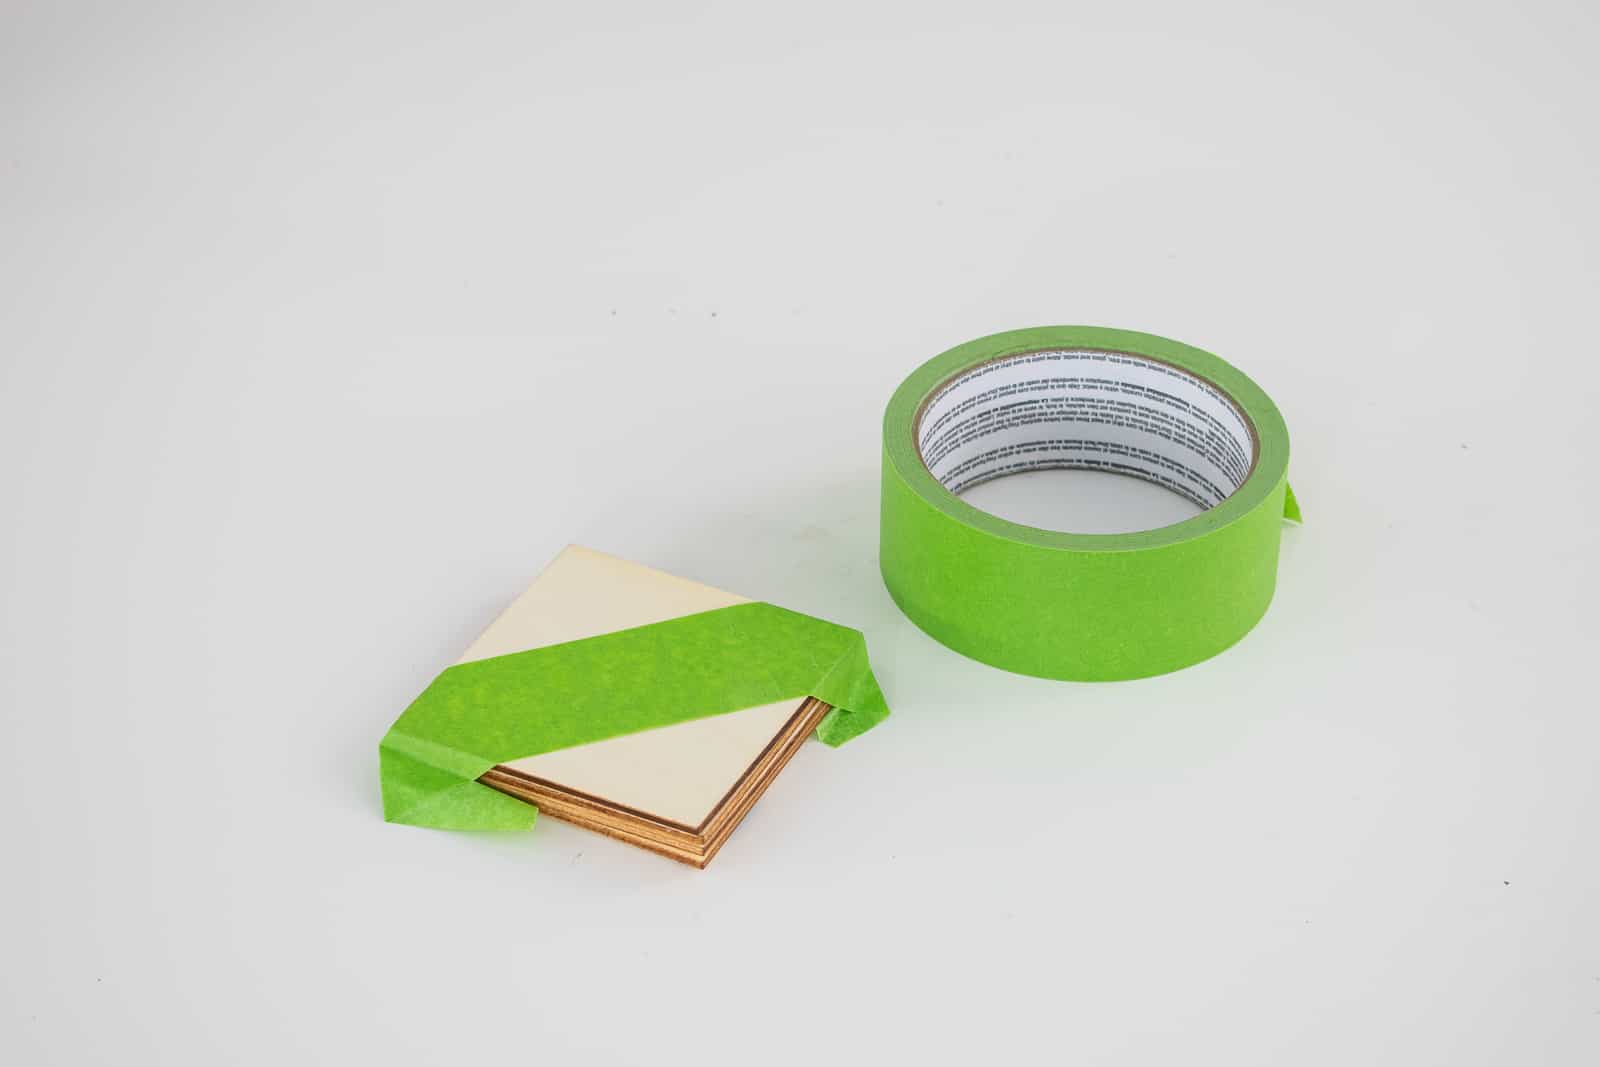
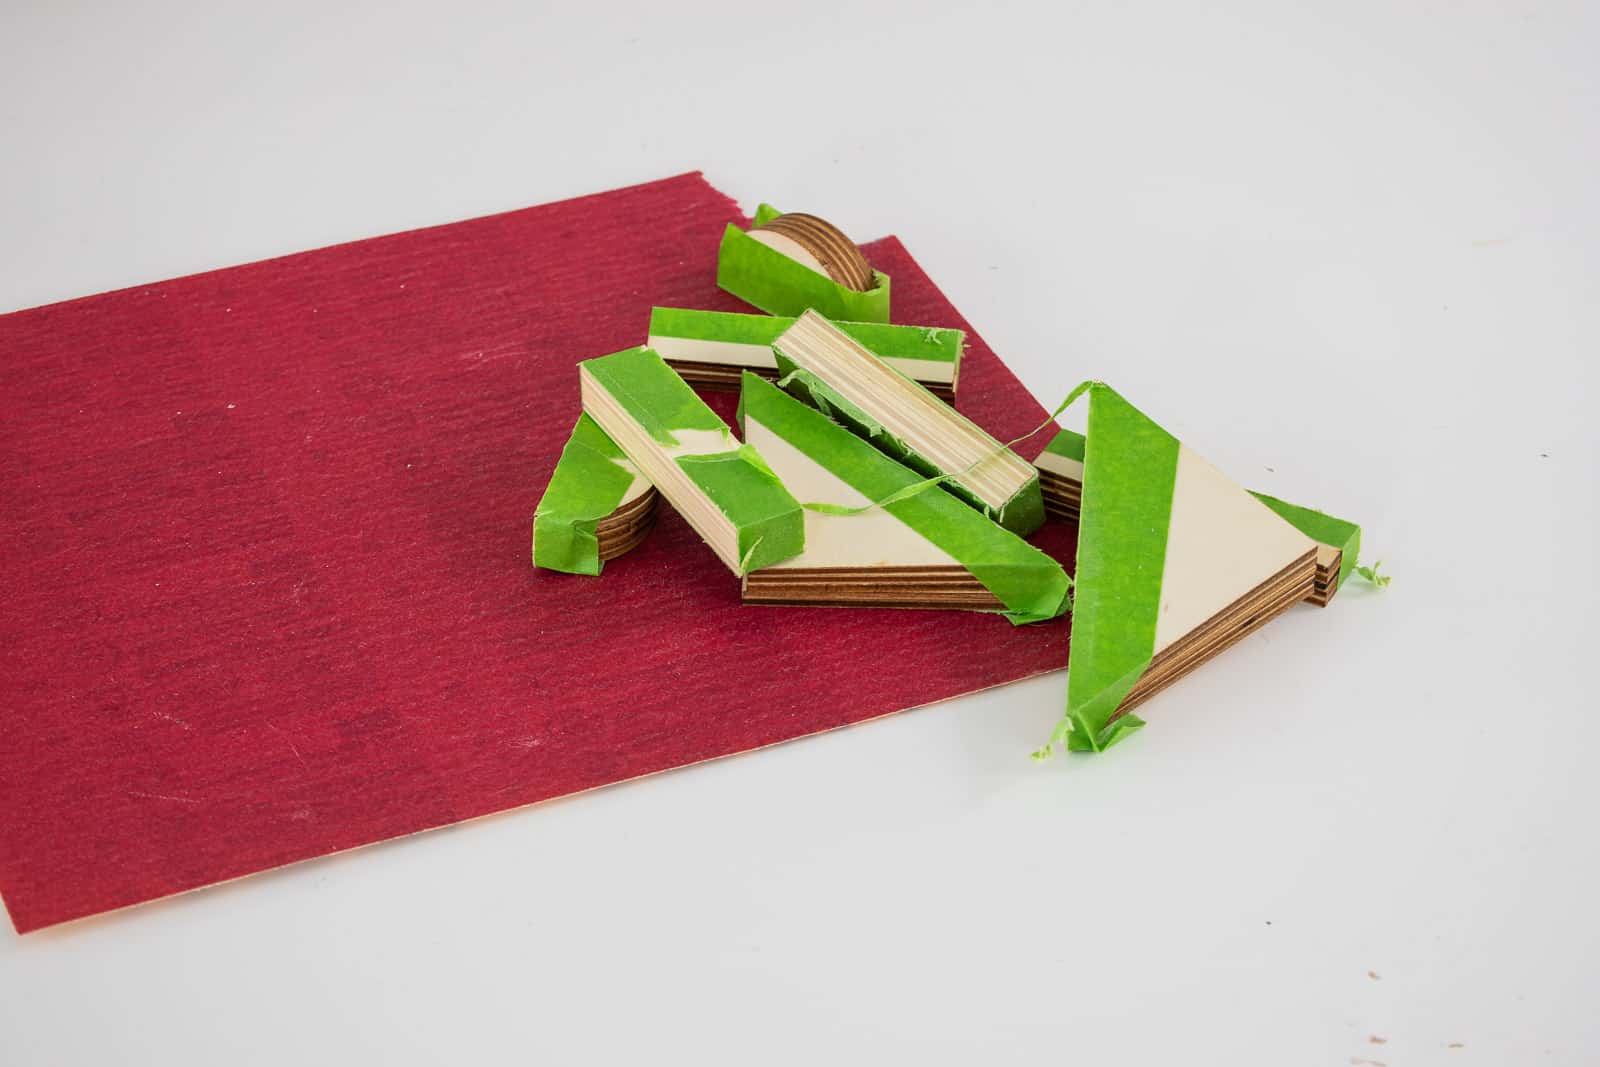
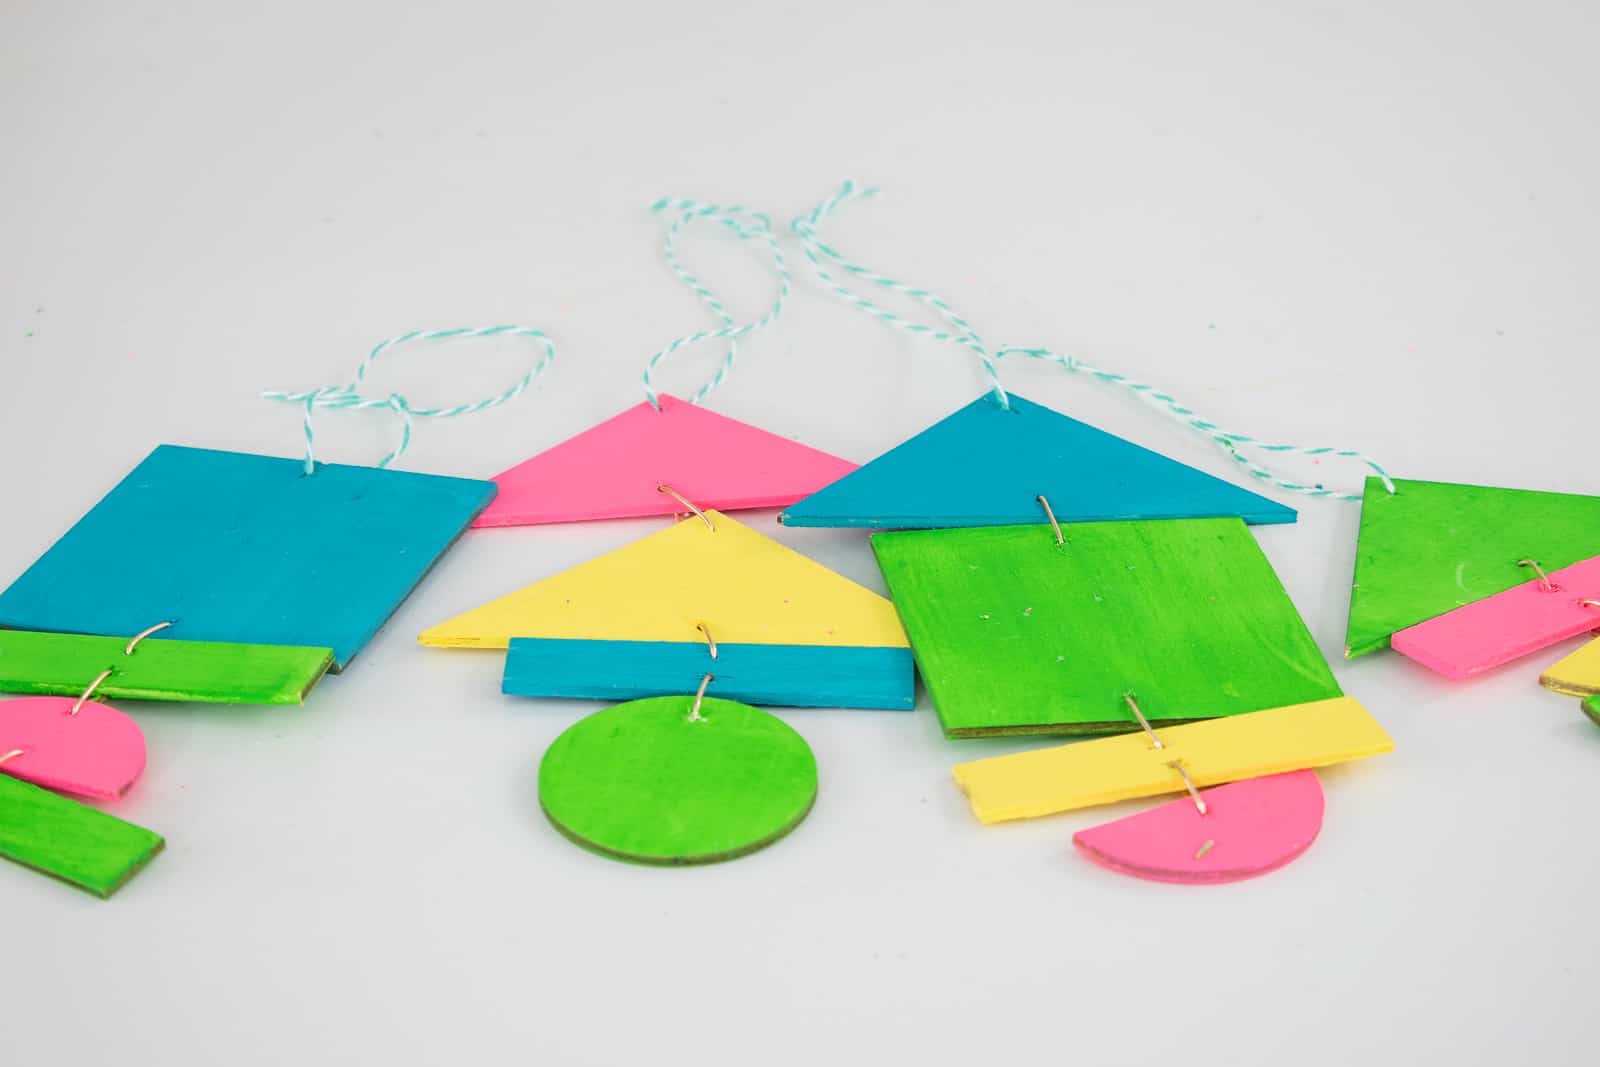
Step 1: Cut your shapes
You can PURCHASE wood in any shape you like or… start with squares and circles like I did and simply cut them down with a super sharp utility knife or a circular saw. If using a saw, use some painters tape to prevent tear-out and to allow you to cut a few different shapes at once! Sand each edge to smooth out.
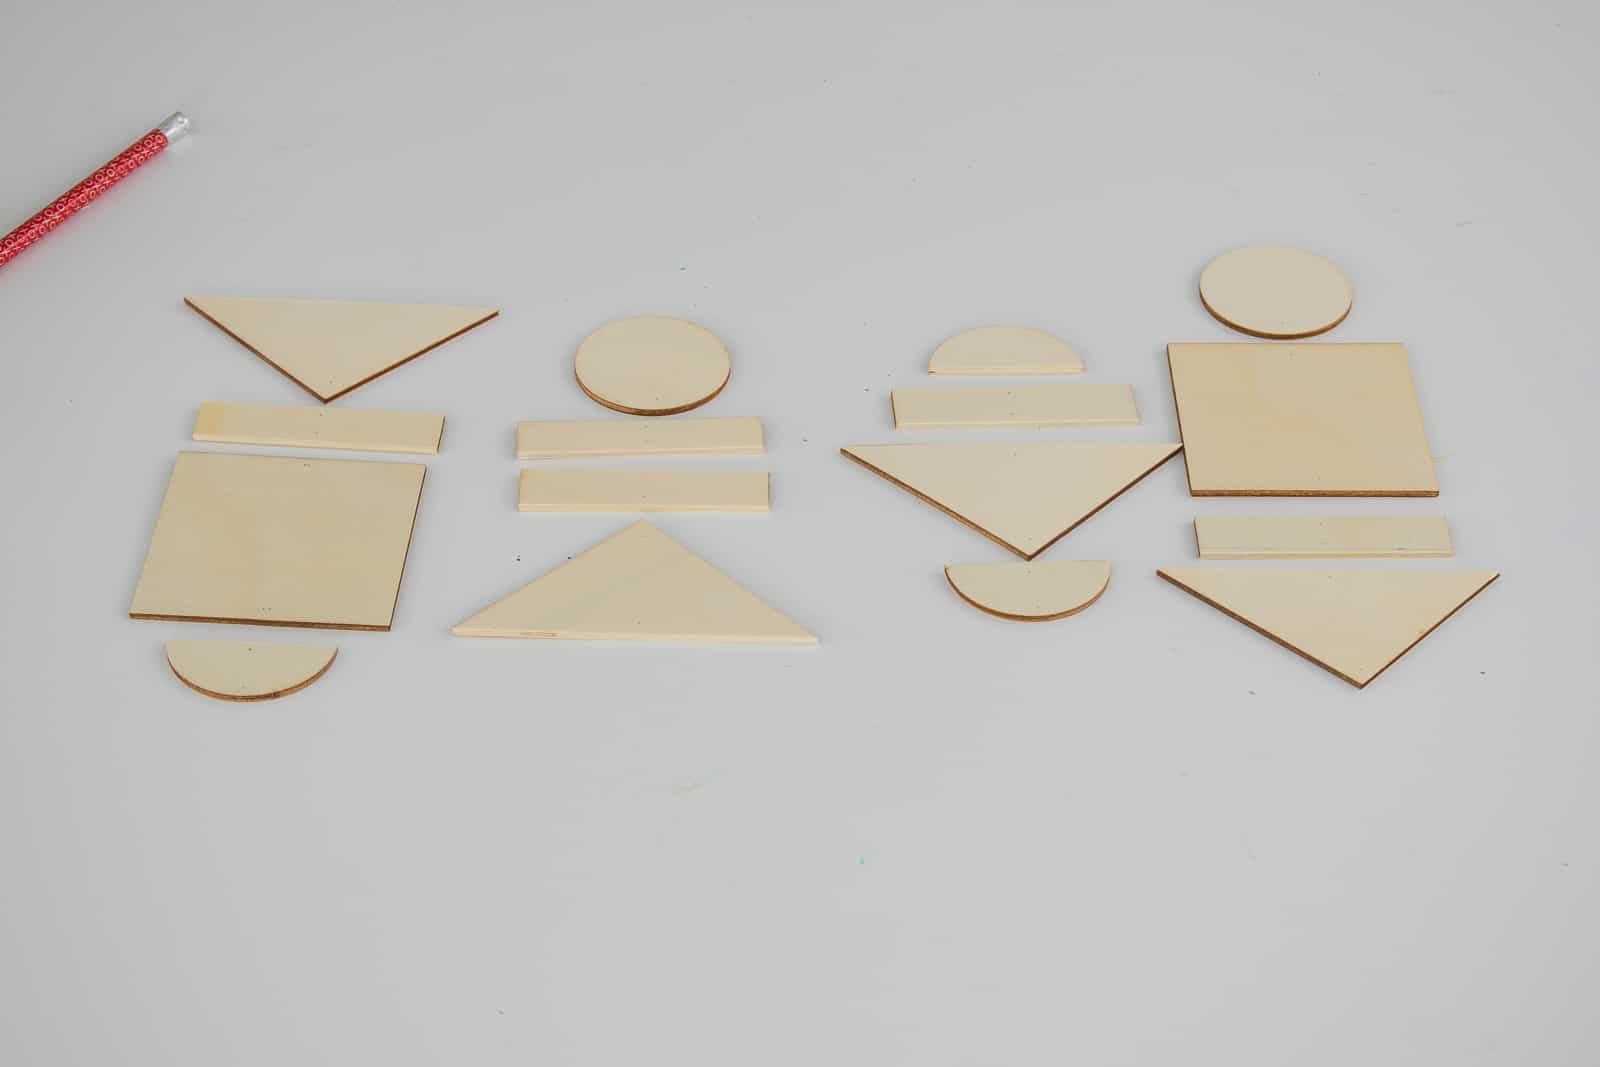
Step 2. Lay out your ornaments
Using 3 or 4 shapes per ornament, lay out your shapes. Make a small mark in the middle of each shape on the top and at the bottom. (The bottoms shape on each ornament doesn’t need a mark!)
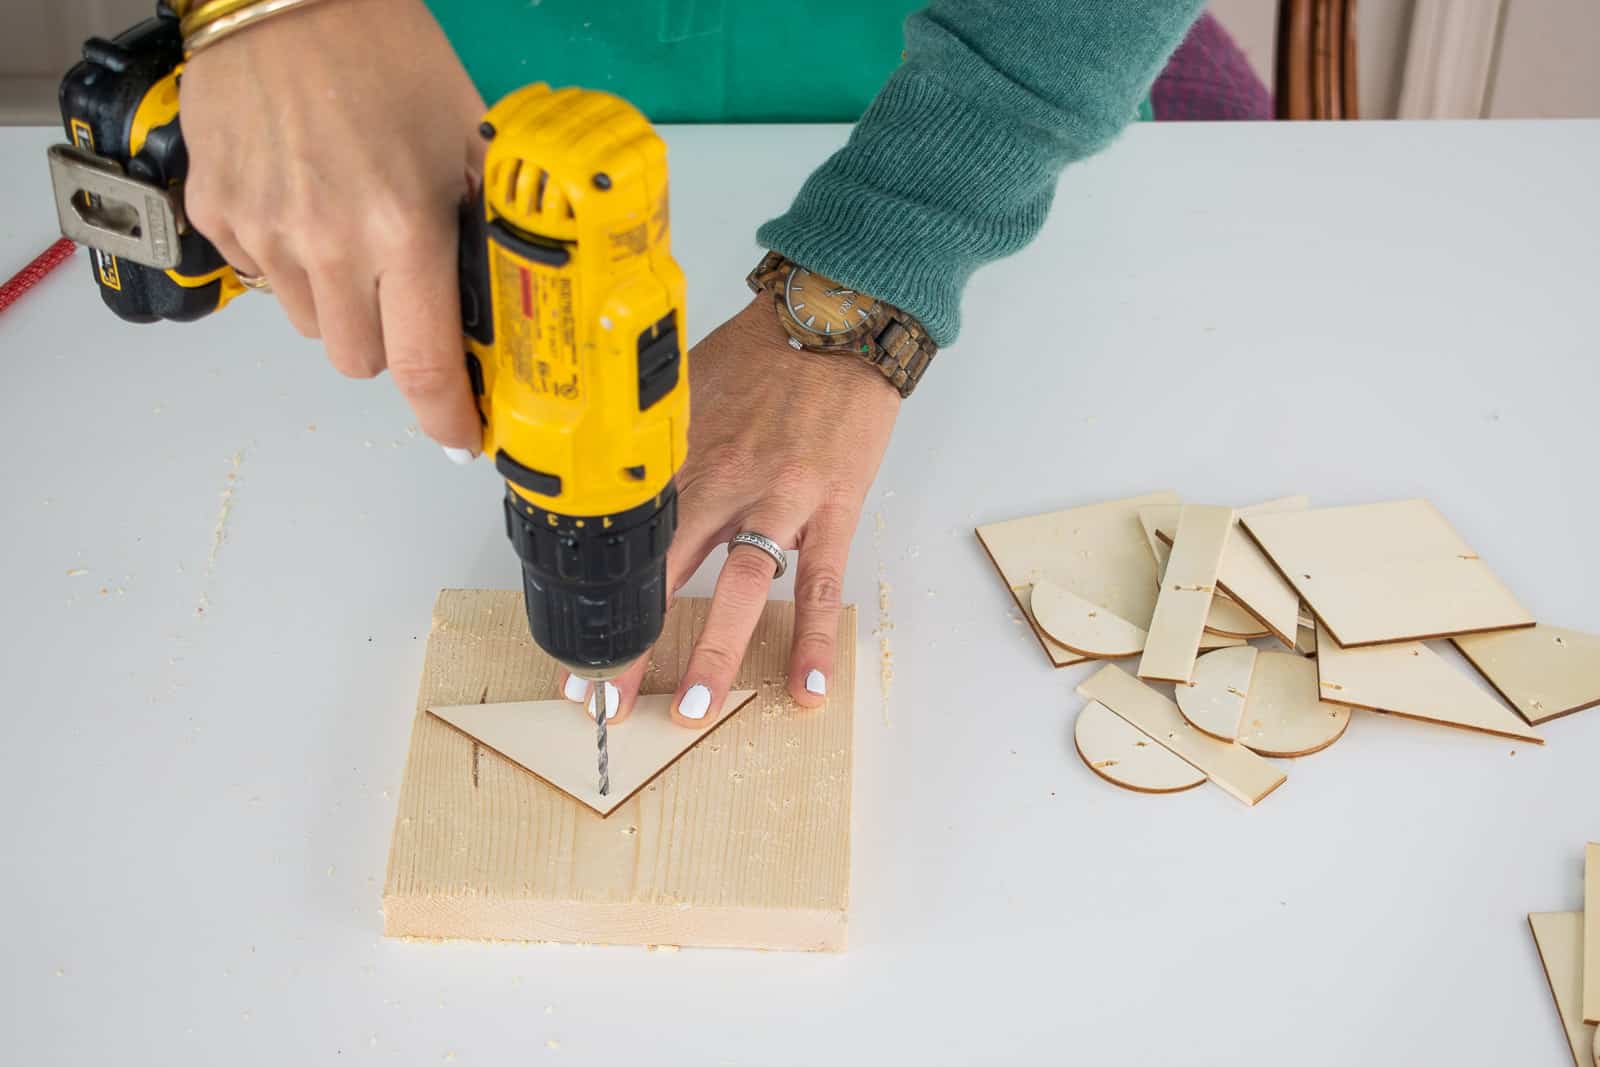
Step 3. Drill holes*
Drill a small hole through each of your wooden shapes where you made a mark in Step 2.
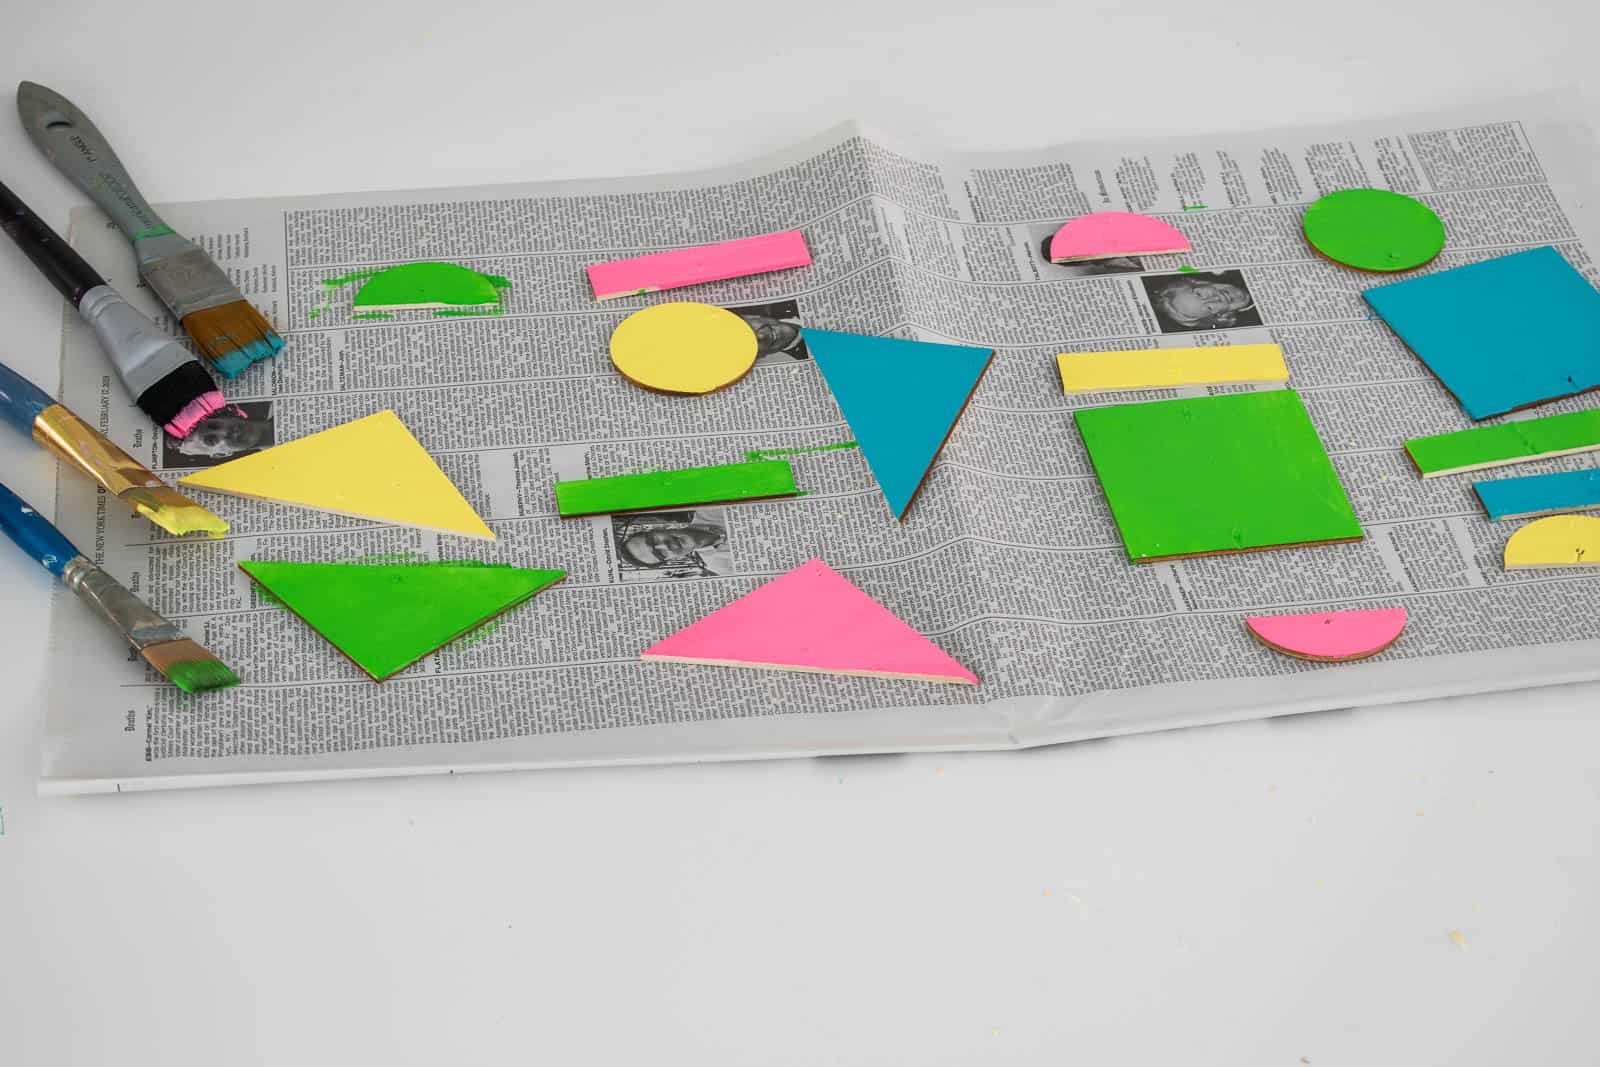
Step 4. Paint (optional)
Paint the front and back of each wooden shape with basic acrylic craft paint. It goes without saying, that if your style is more neutral… these ornaments would look just as chic with unpainted wood!
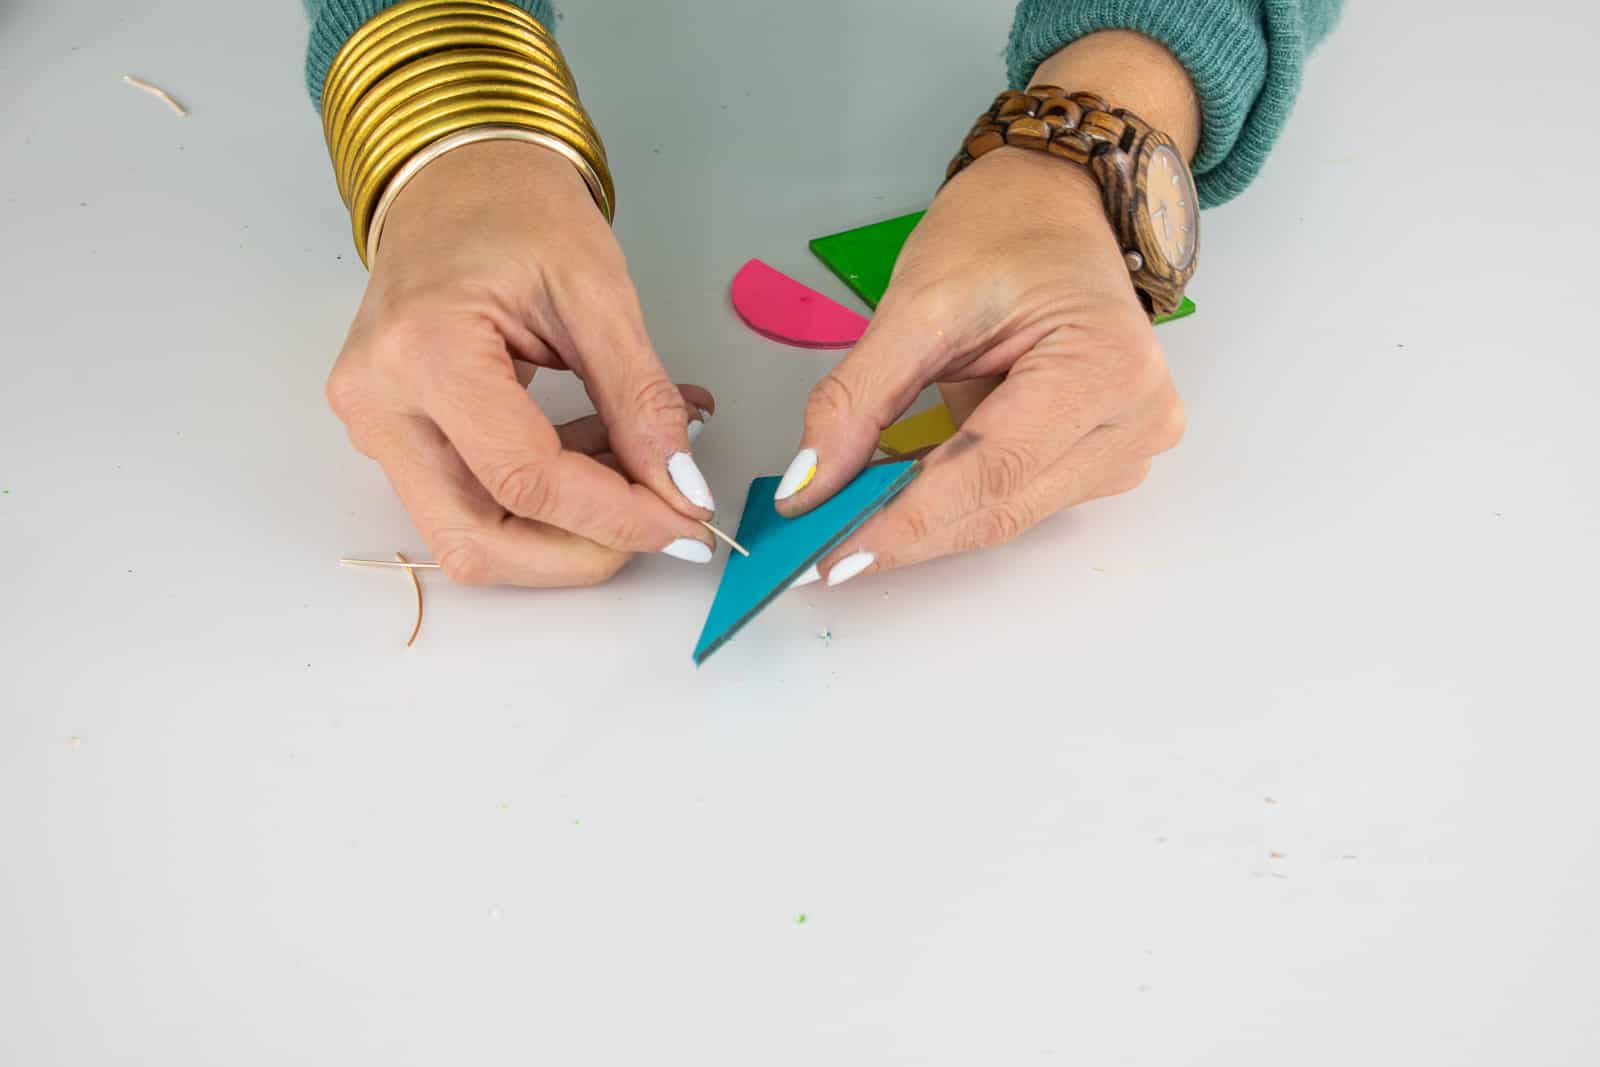
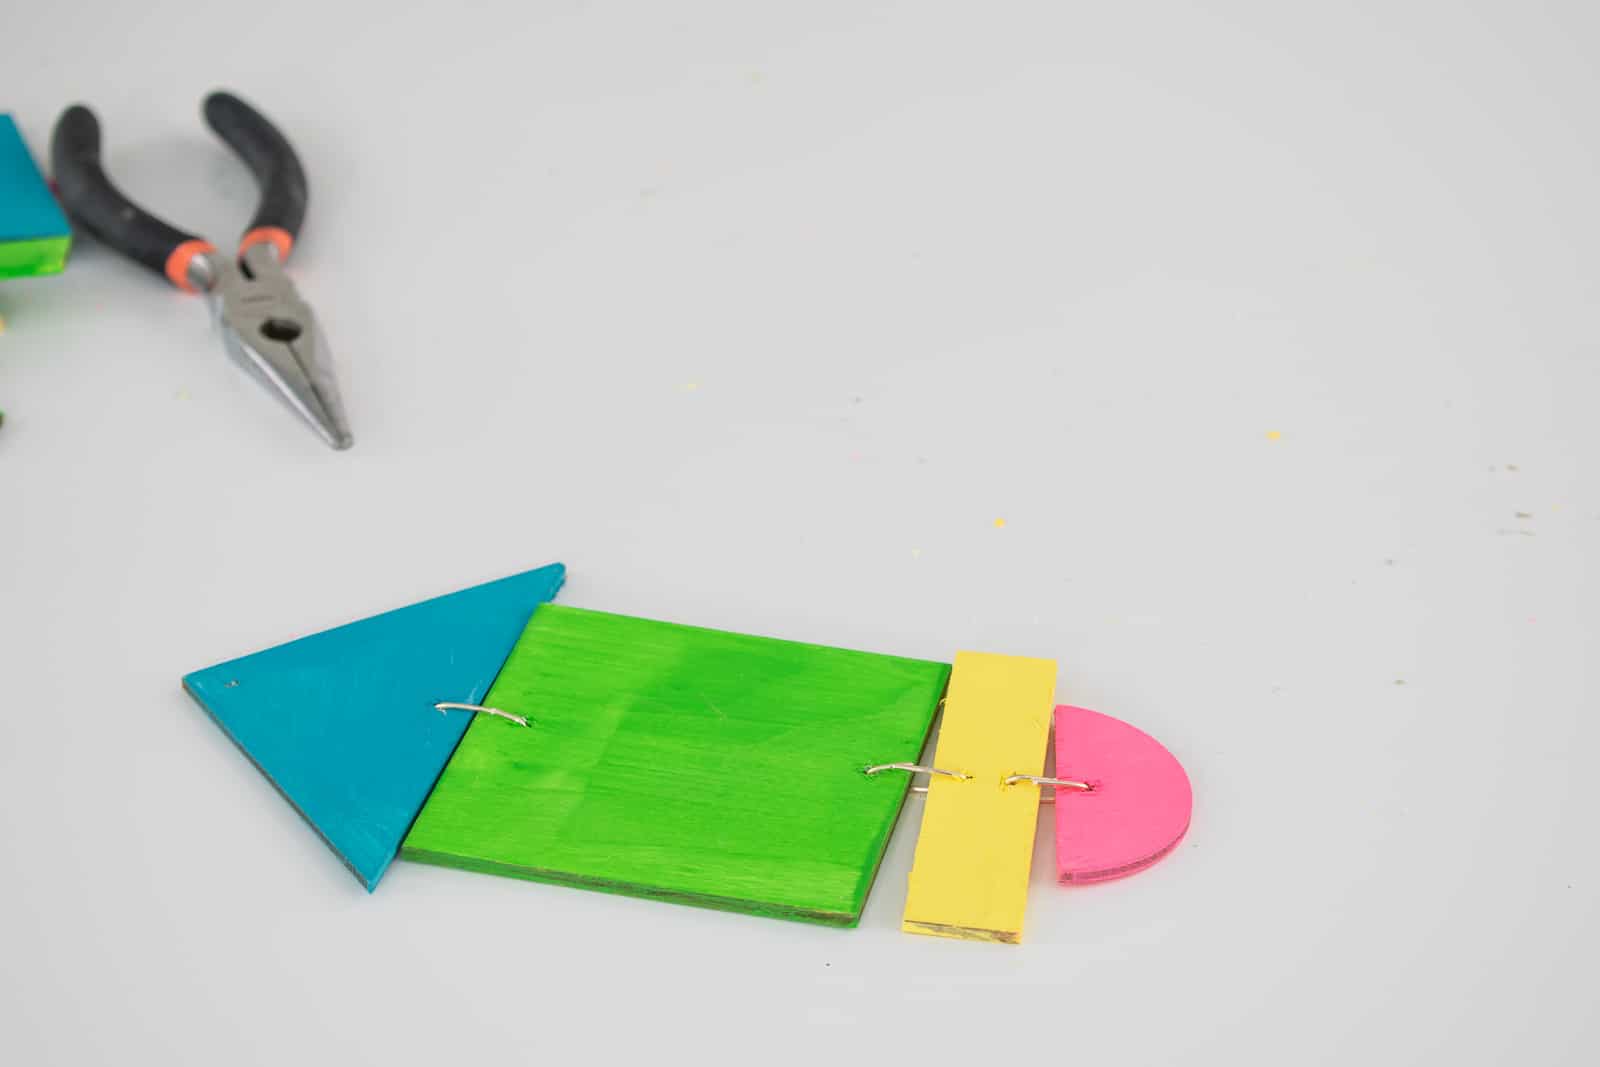
Step 5. Attach the shapes
Using the wire and some needle nose plyers, connect the wooden shapes. I played around with a couple of techniques, but the one I ended up using was to simply place a short piece of wire through the two shapes and then crimping the ends like a staple.
Step 6. Add twine for hanging
I thought some colorful bakers twine would look nice with the colorful wooden shapes so I folded over a very thin floral wire and used this as a needle to help pull the twin through the hole in the top of the ornament.
THAT’S IT!!
Materials for Wooden Ornaments:
- Wooden square
- Wooden circles
- 18 gauge floral wire*
- craft paint
- SHARP utility knife or saw to cut the wooden shapes
- sandpaper
- twine
- drill*
* If you want to skip the drilling, you can simply glue small piece of ribbon onto each shape. If you go this route, you obviously won’t need the wire in the materials list.

Reminder that I will be sharing a new ornament each day for the next 11 days so make sure you check out both my blog and my YouTube channel for tutorials! Since today is the first day, I wanted to link back to LAST YEAR’S series! Check them out below!


Don’t Miss Out
Become An Insider!
Signup for exclusive tips, and tricks from Charlotte’s House!
Let’s chat!
I love comments from you, so feel free to leave your thoughts and ideas below! And don’t forget to follow me on Instagram for even more!