At Charlotte's House

  • About
    • PRESS
    • TELEVISION
    • BLOGGERS HEART HABITAT
    • DISCLOSURE & PRIVACY POLICY
  • HOLIDAY
  • HOME TOUR
    • RENTAL HOME TOUR
    • HISTORIC HOUSE
    • FIRST HOUSE
    • ROOM REVEALS
    • SEASONAL HOME TOURS
  • GALLERY
    • FLEA MARKET & THRIFT SCORES
    • CRAFTS
    • FURNITURE FIXER UPPERS
    • WALL DECOR
    • OTHER STUFF…
  • PODCAST
    • PODCAST EPISODES
  • SHOP
    • SHOP INSTAGRAM
  • CONTACT
    • SPONSOR/ ADVERTISE
    • SUBSCRIBE

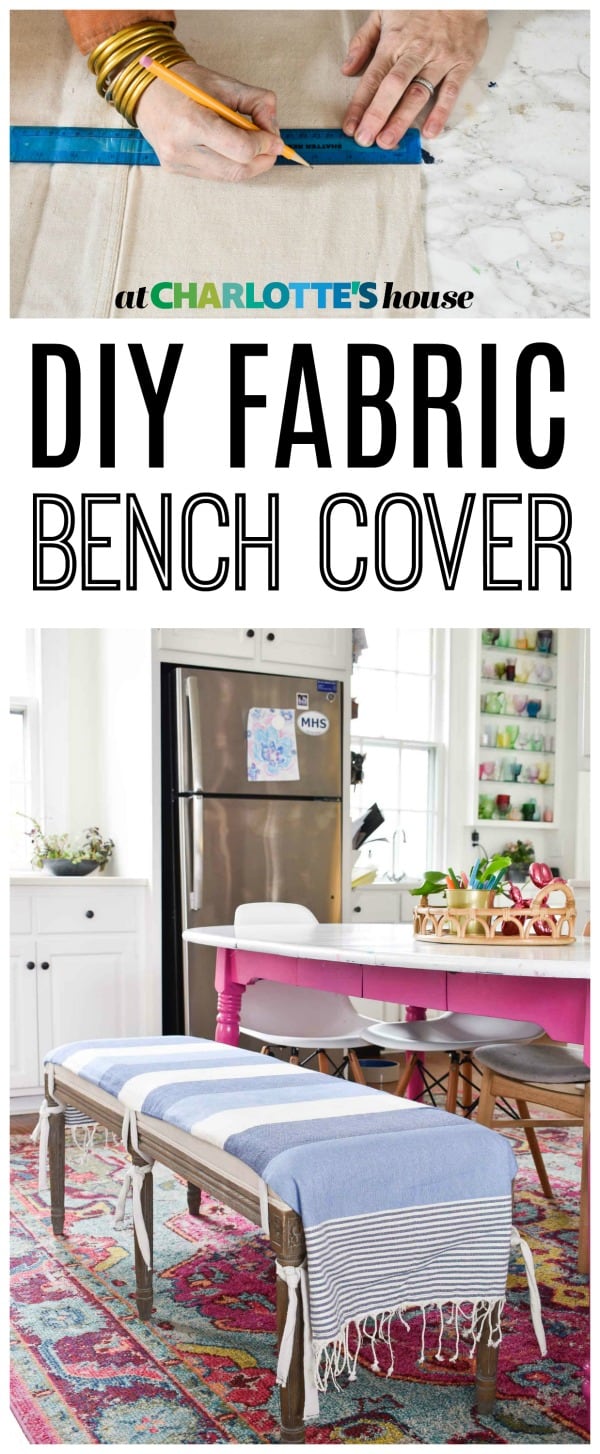
Fabric Bench Seat Cover

Psssst... this post *might* contain affiliate links: see my disclosure here.

May 7, 2018

DIY Upholstered Bench Cover

hand sewn DIY bench seat cover

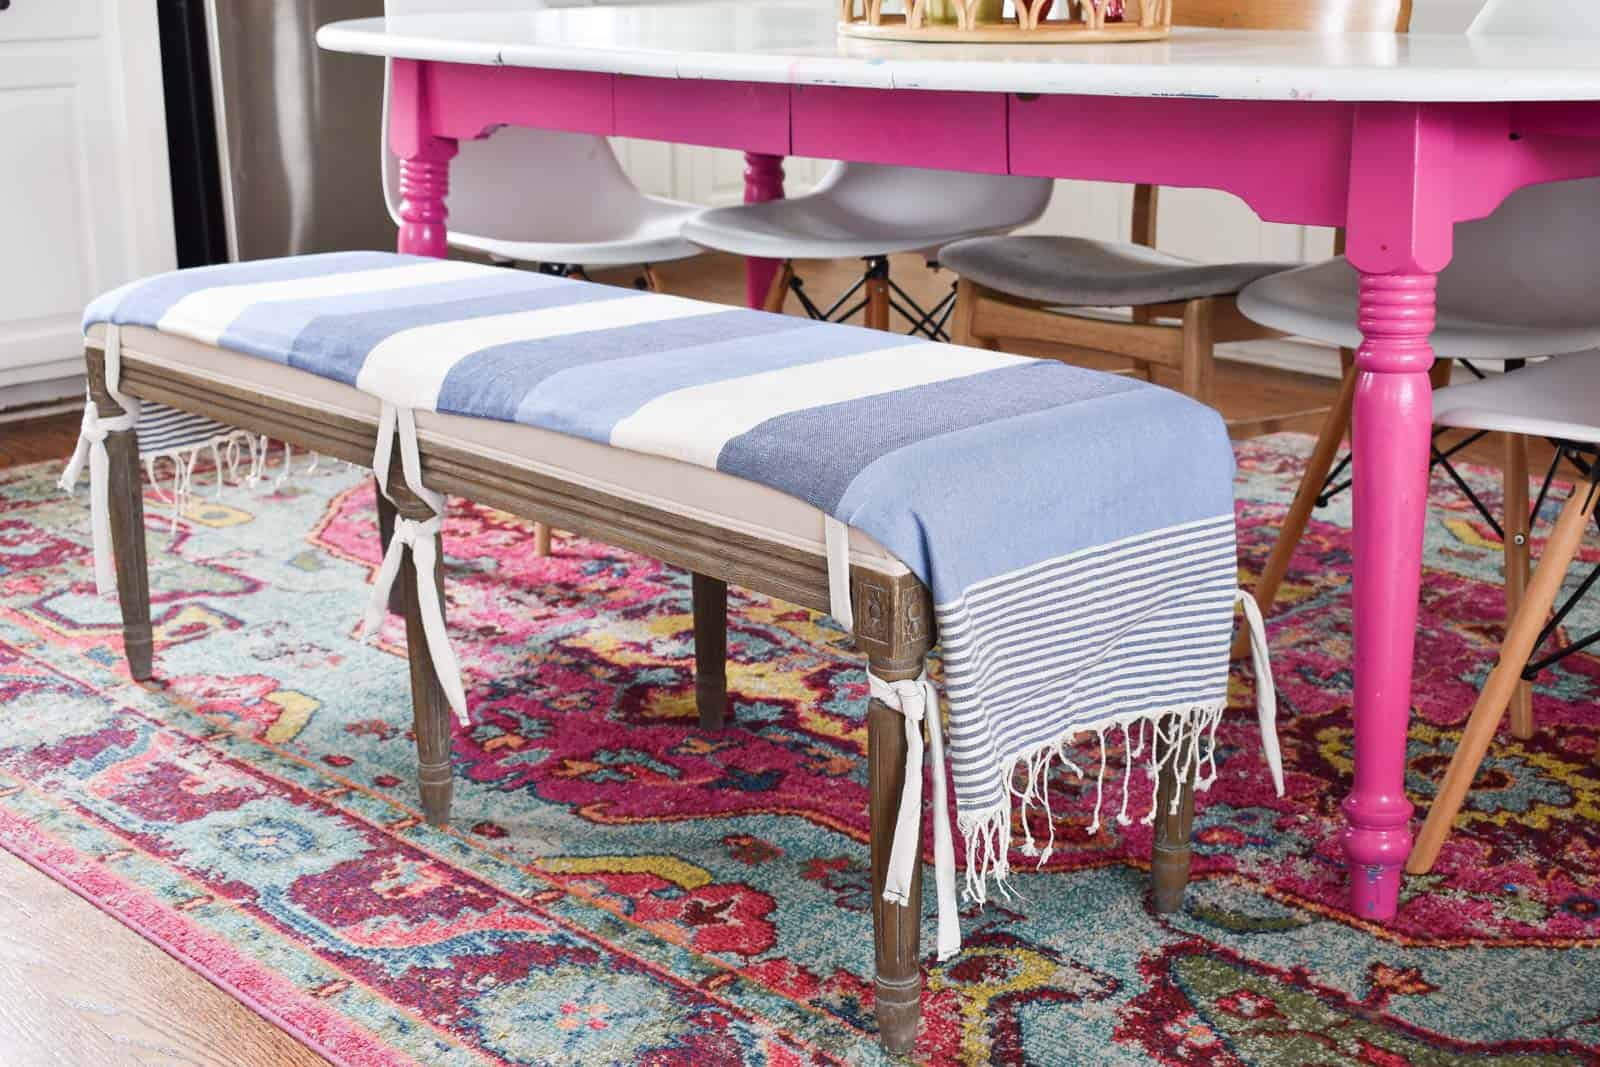
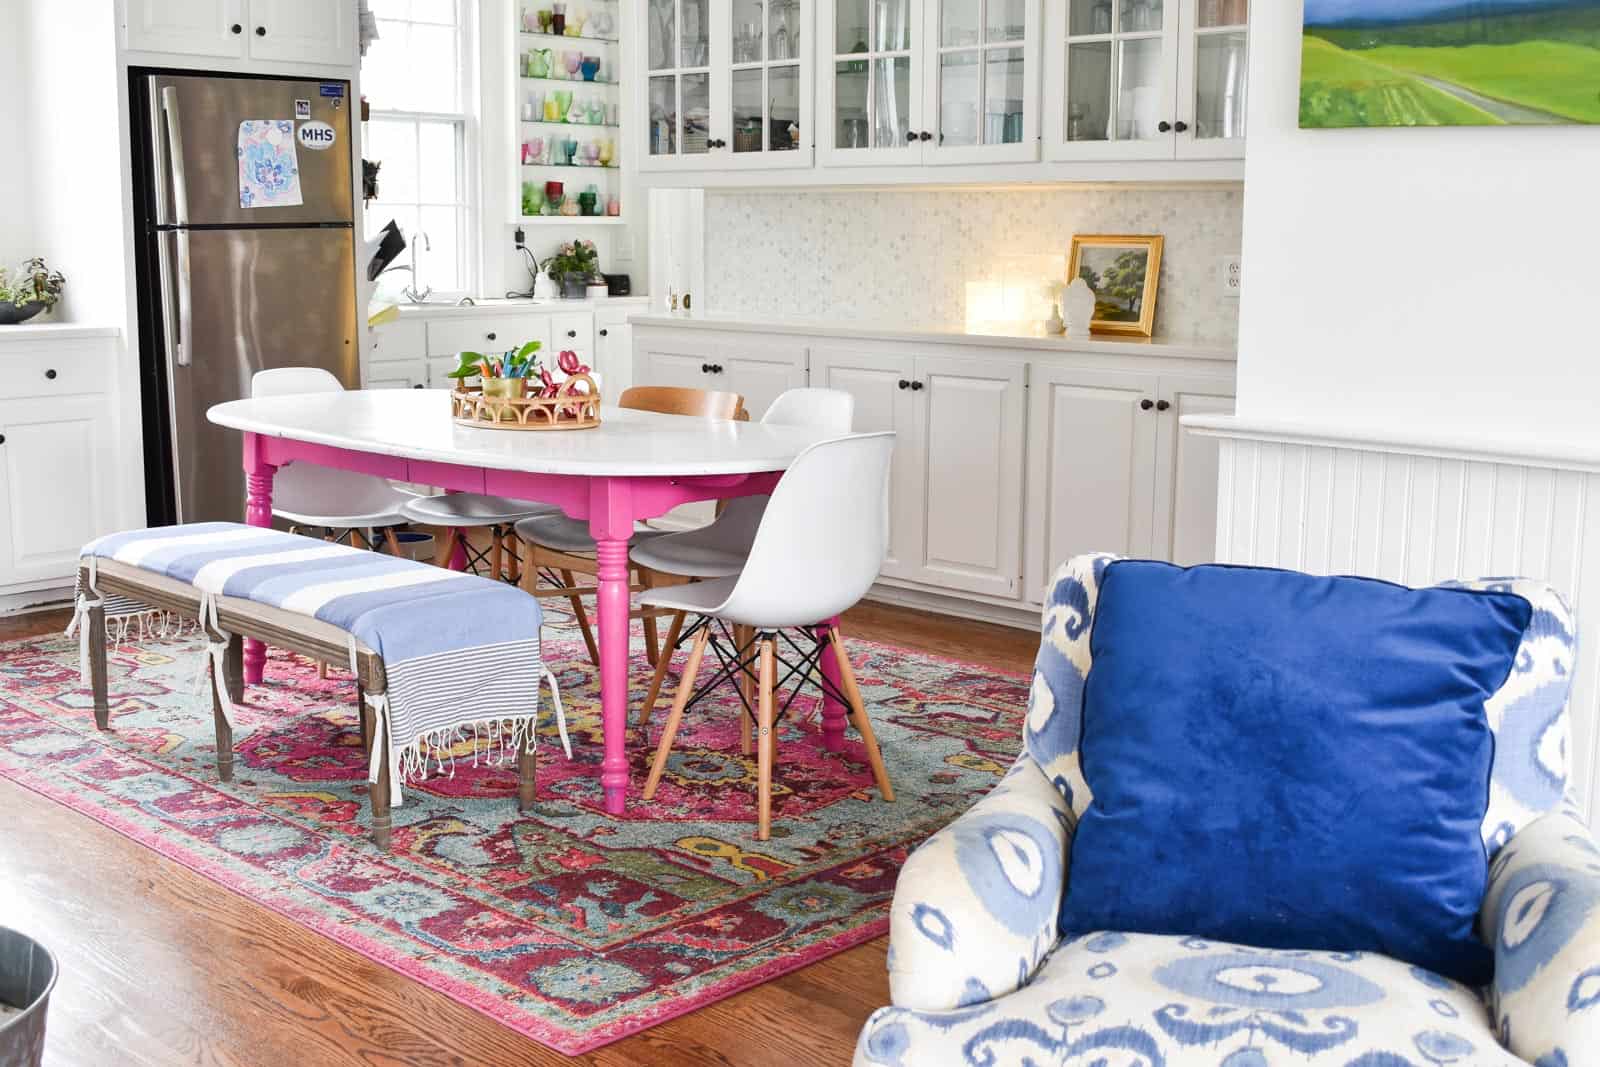
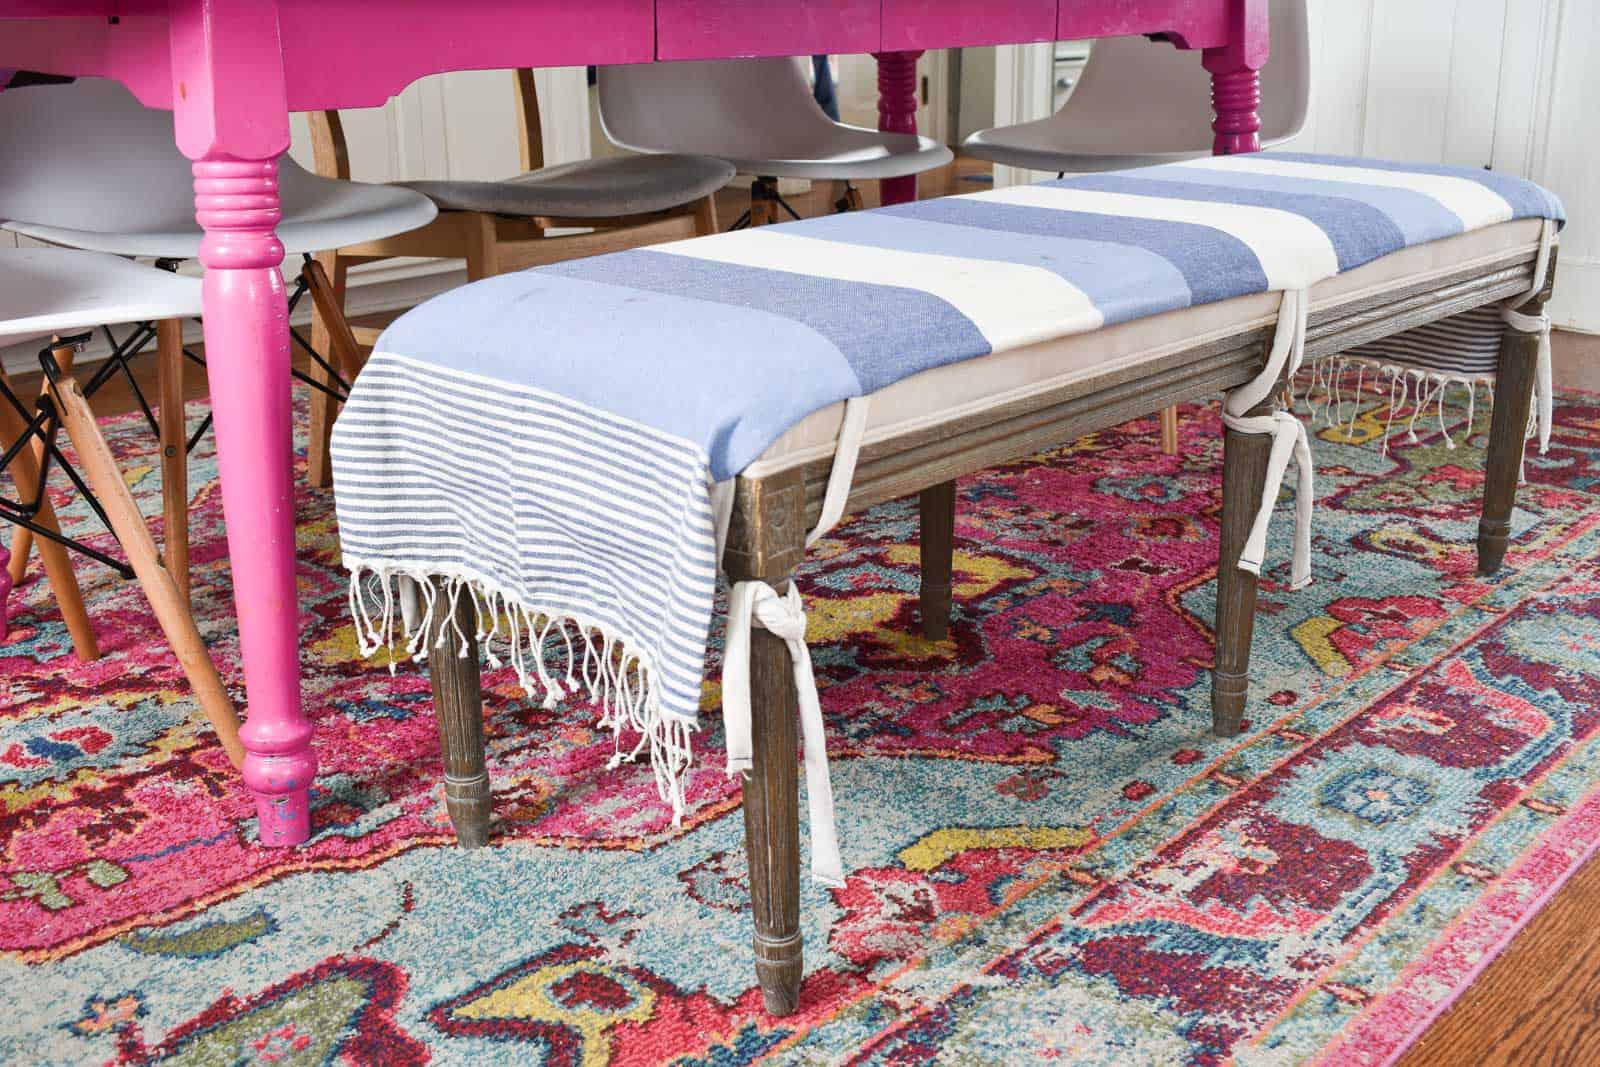
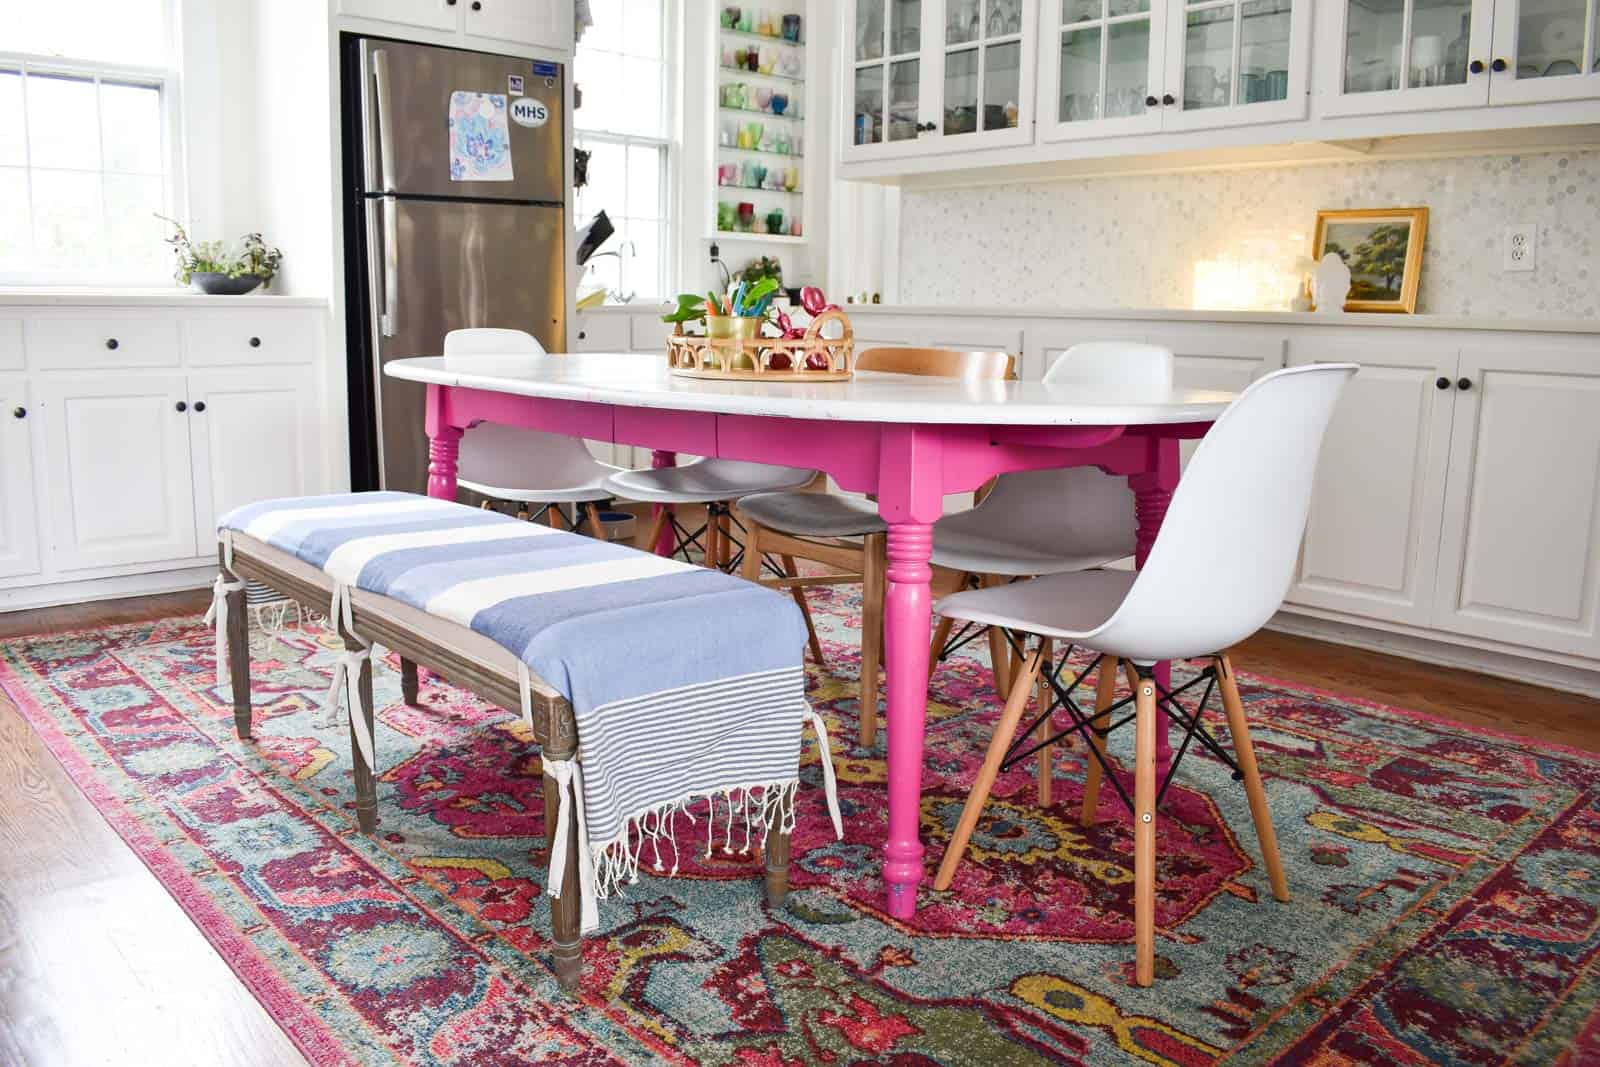
A few weeks ago, I brought in this bench to our kitchen table. It’s great for the kids, and actually seats a few more booties than the existing chairs. Only problem was… the upholstered seat was getting TRASHED. Or at least it was on its way to getting trashed. Until I sewed a simple cloth cover!

Bench at foot of the bed in master bedroom

This Turkish towel was the perfect length, the perfect color, and had just the right amount of pattern (stripes for the win!)
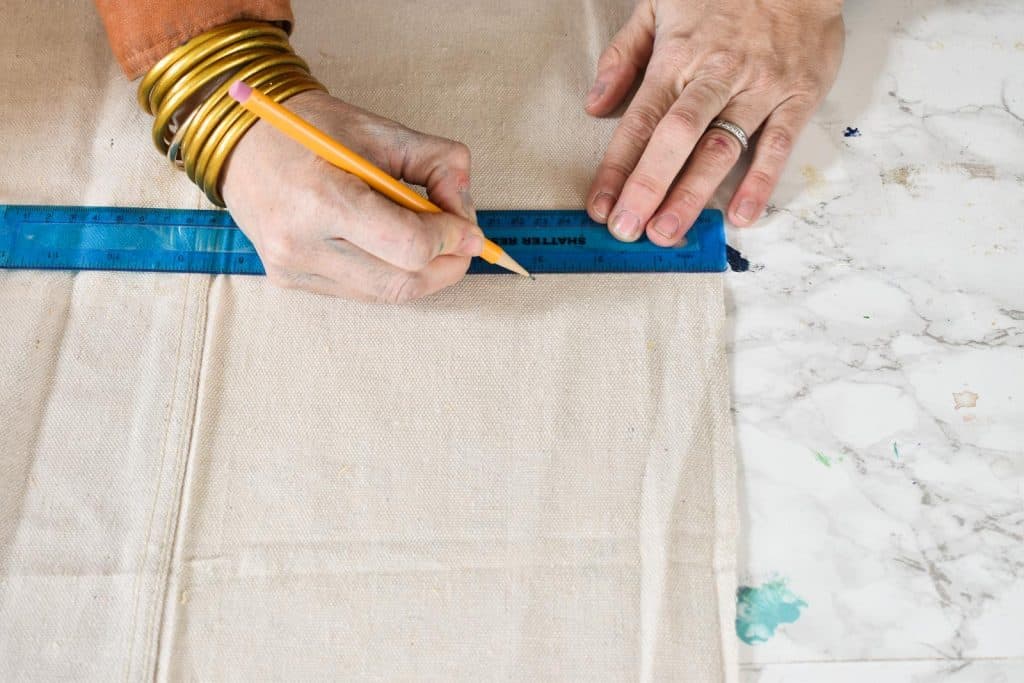
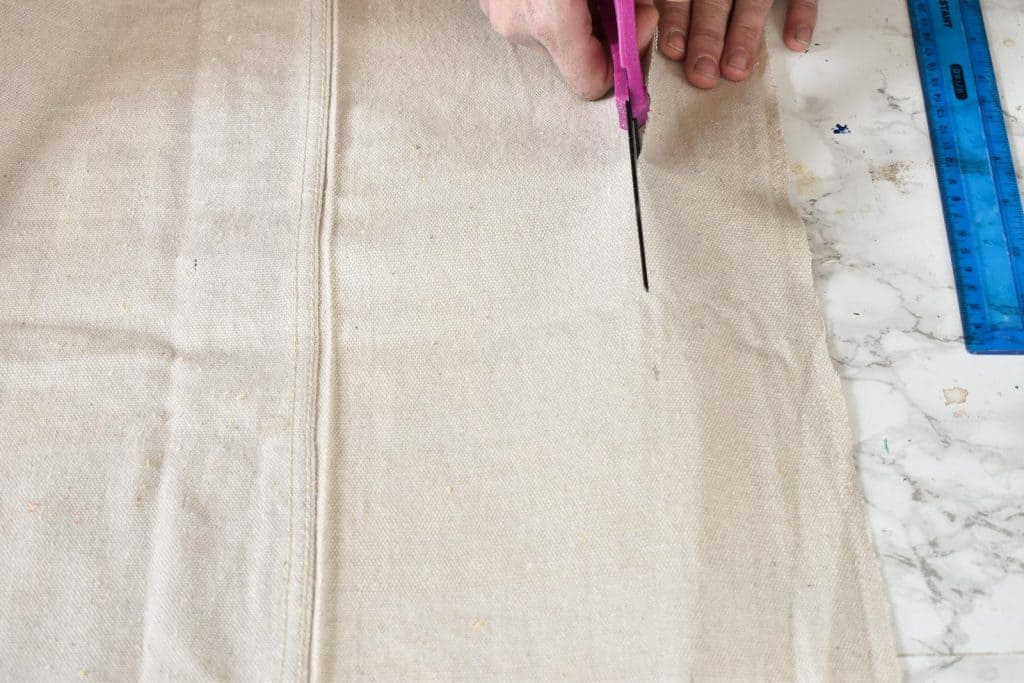
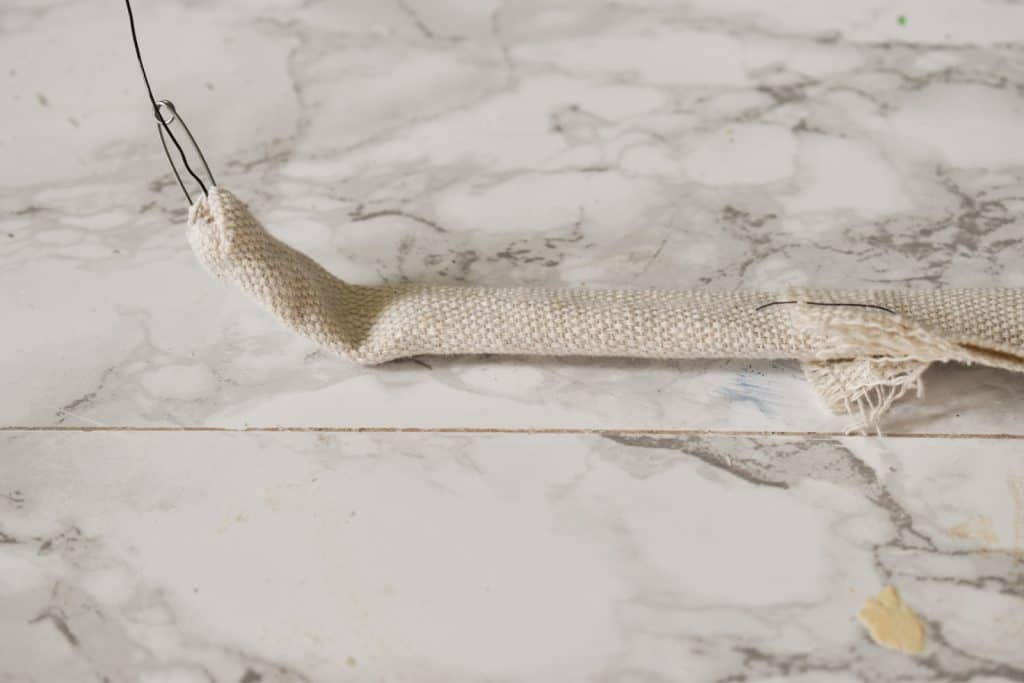
Step 1. Sew Tabs

I used an old drop cloth and cut 3-inch strips. I folded the strips in half, and sewed the seam. Trim the excess fabric.

measure and cut strips out of drop cloth

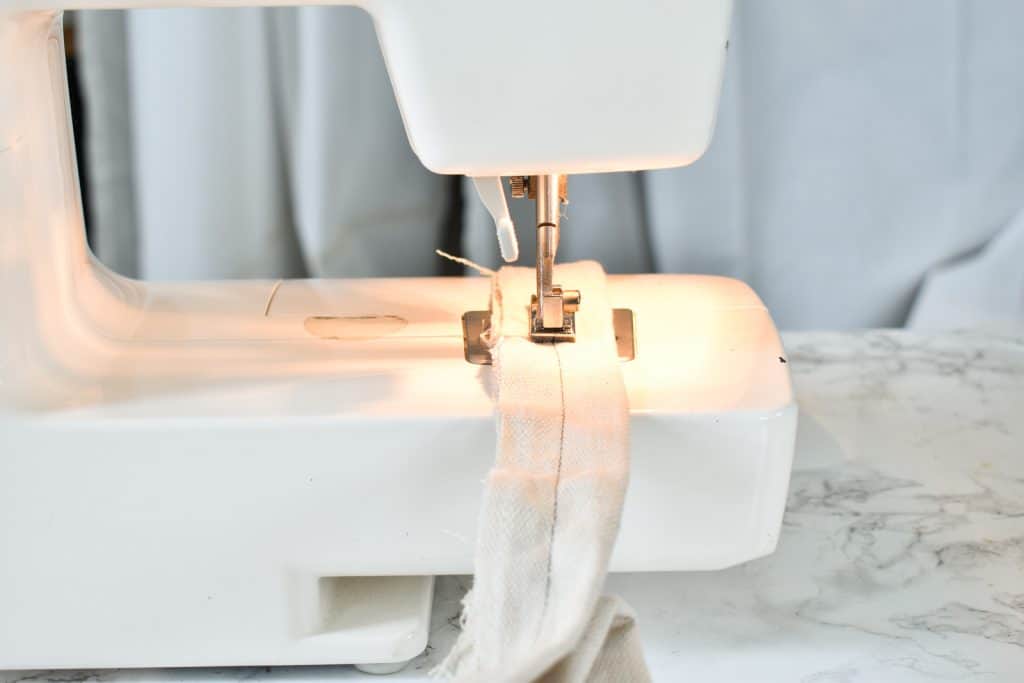
I’m SURE there’s an easier way to do this, but I threaded a wire through my strips, and then pinned the end of the wire to the end of the strip so that I could sloooooowly pull it inside out.

pull tabs inside out so seams are in the middle

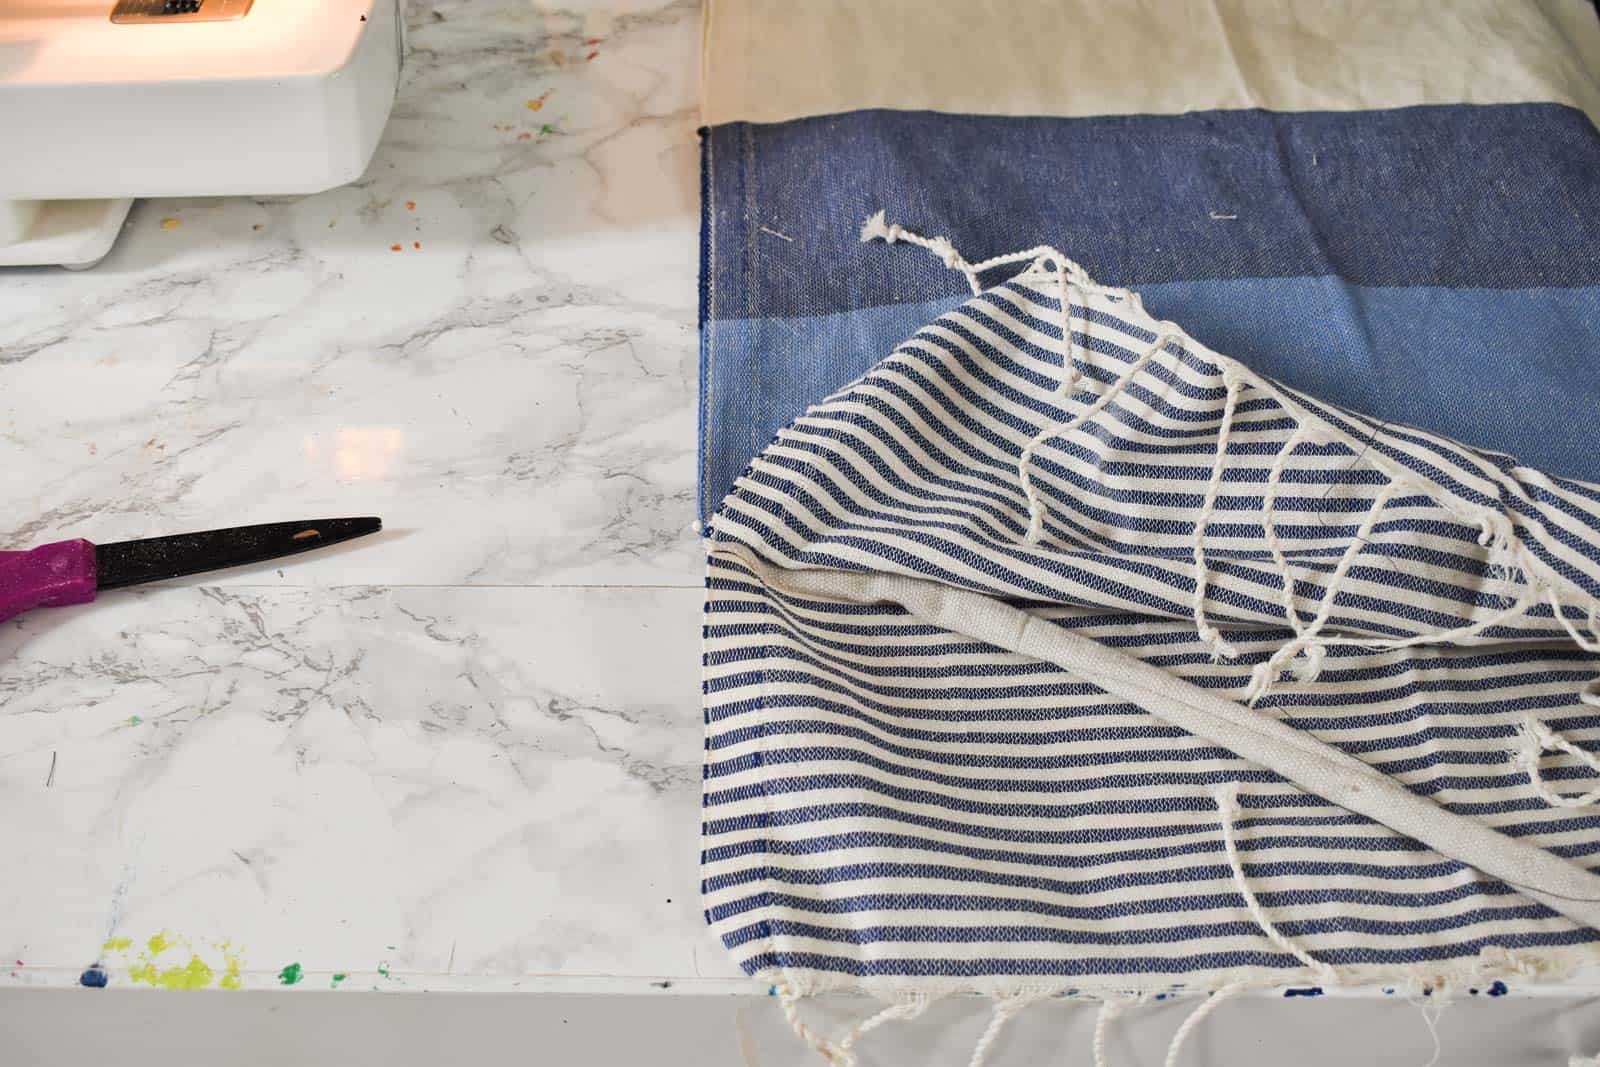
Step 2. Cut Turkish towel

Fold the Turkish towel in half, and cut down the middle.

Step 3. Assemble bench cover

Place the right sides of the fabric facing each other, with two of the tabs  pinched in the middle ends aligned with the edge of the fabric. (Our bench has three legs so I added a pair of tabs at either corner and then two more pairs on either side of the fabric in the middle.) Sew both sides of the fabric leaving the ends open.  Turn inside out and you should have a length of fabric, with closed seams and three sets of tabs along each side.

sew tabs onto turkish towel cover

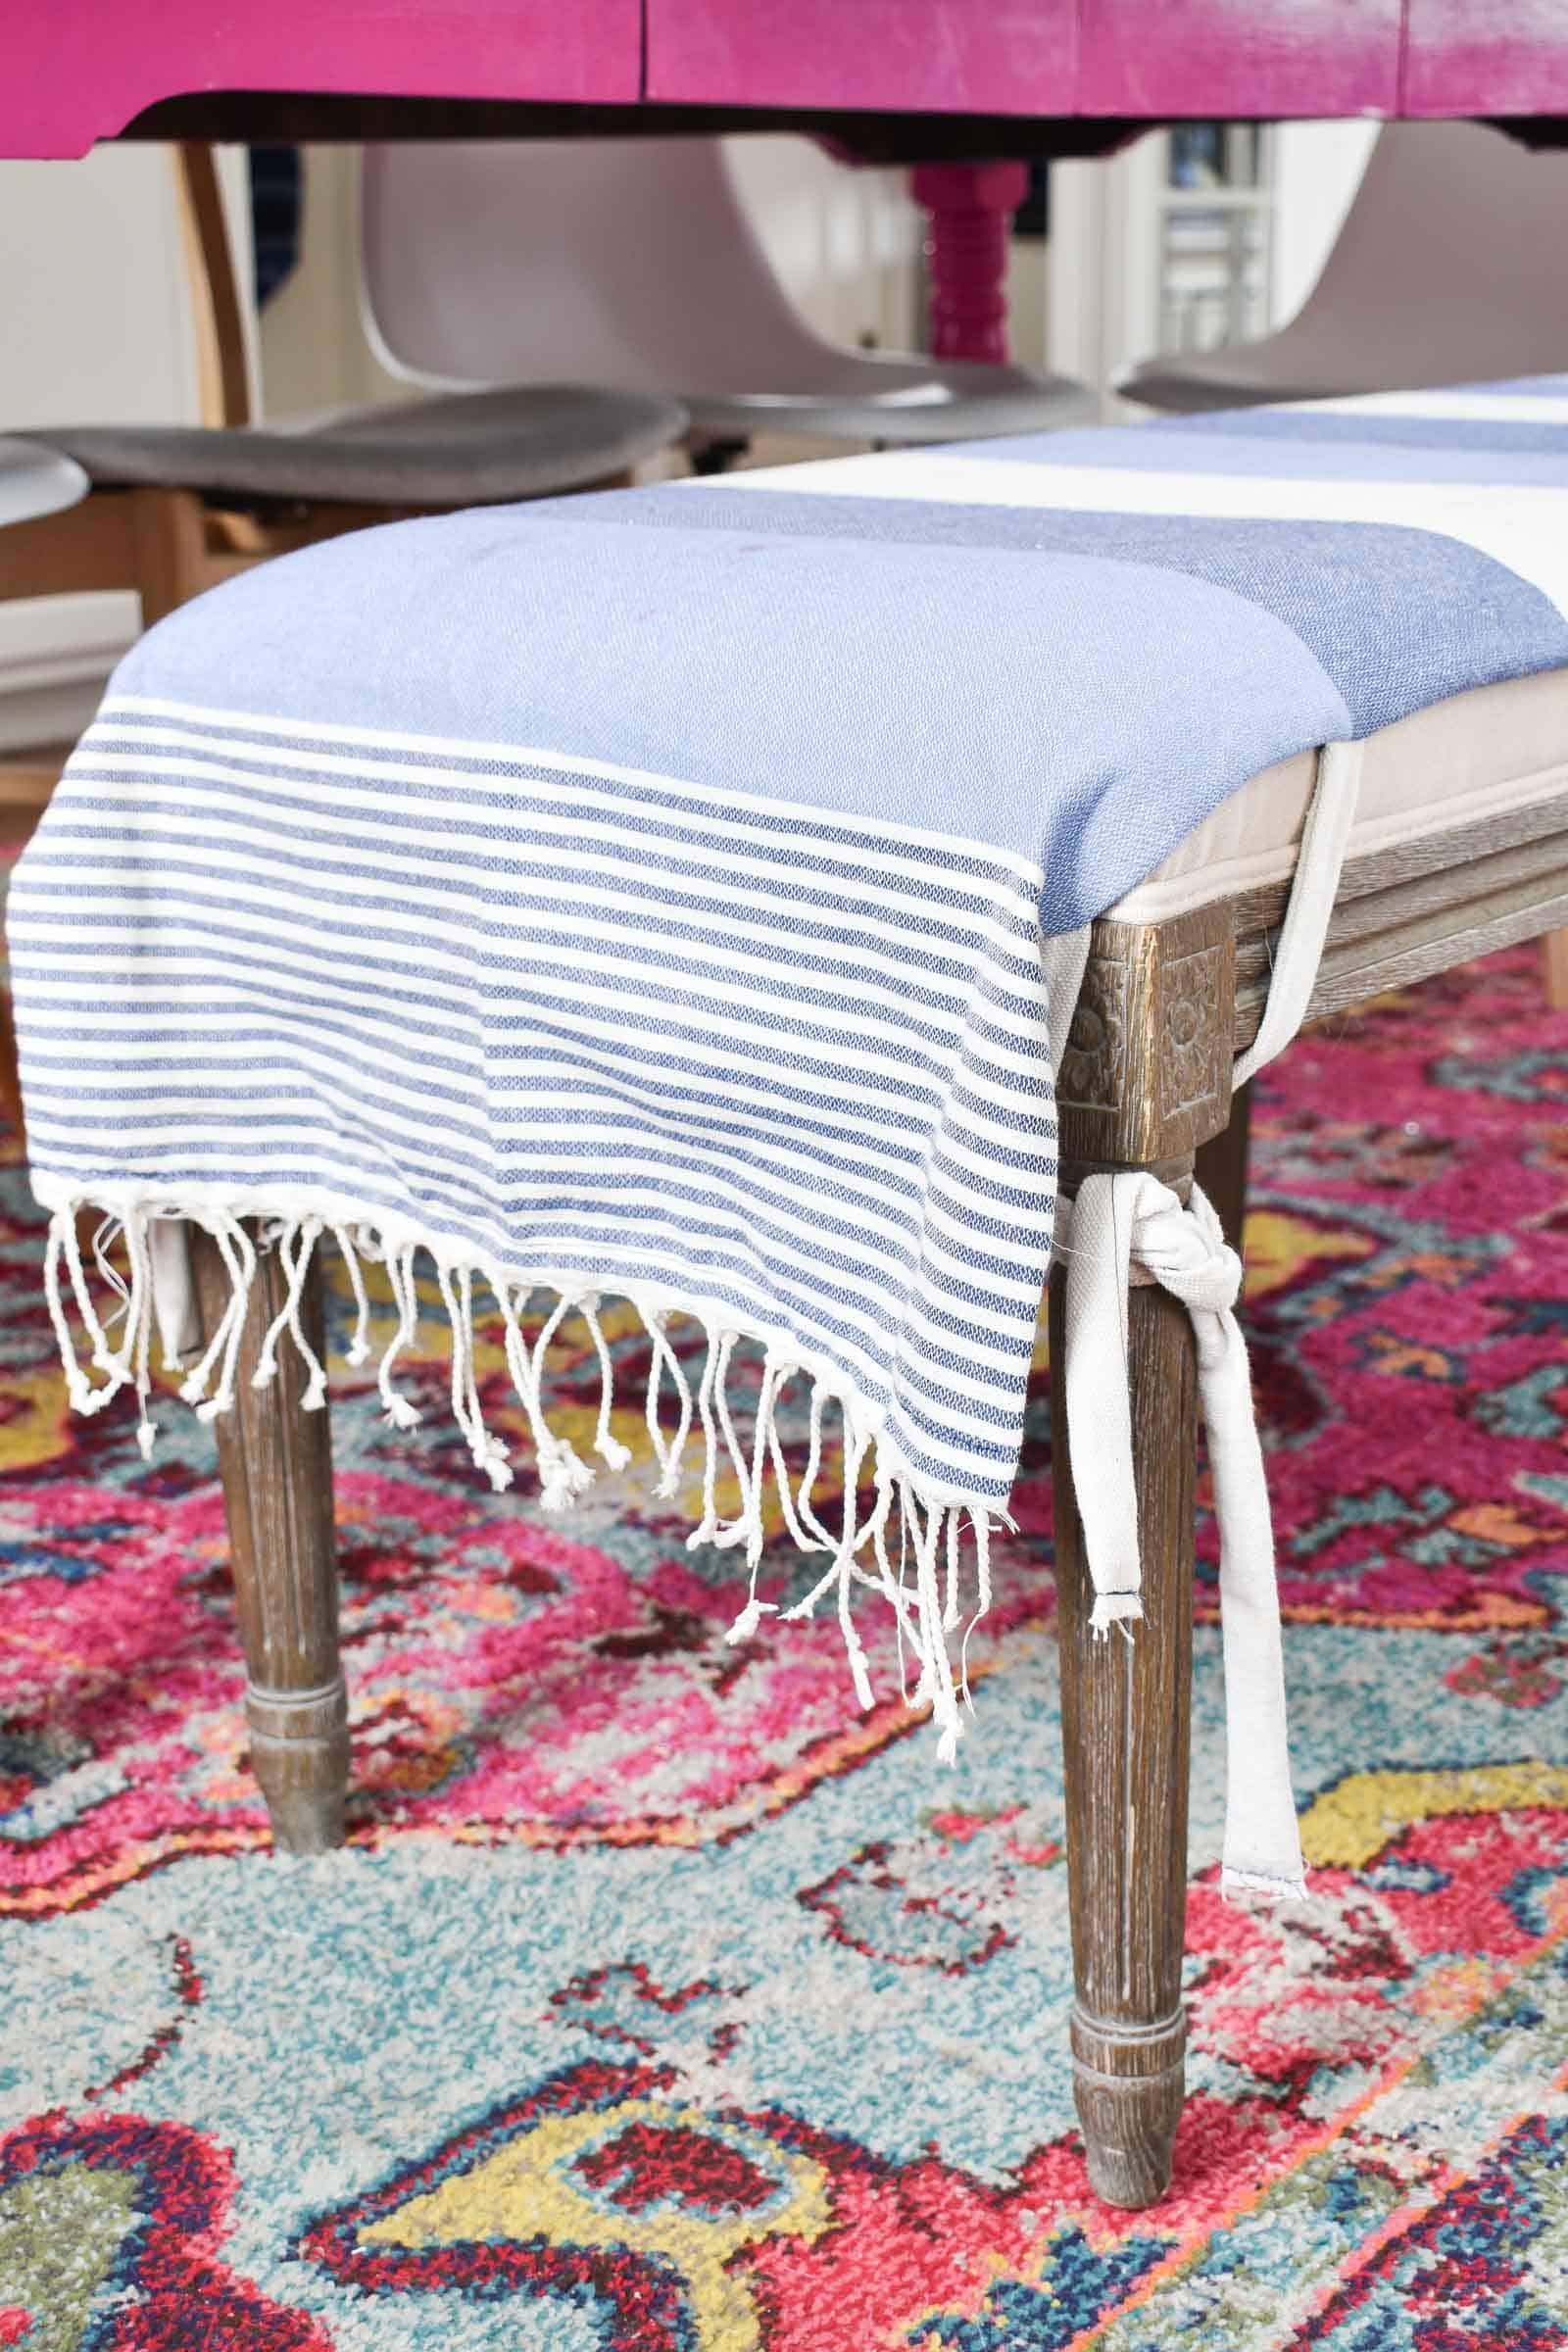
Tie in place and serve pasta with red sauce to your hearts content!

hand sewn bench cover bench seat cover

A couple ways to make this even easier… You could use ribbon or rope instead of the tabs. I happened to have drop cloth and it happened to match the Turkish Towel I ordered. The right size table runner could be another option in which case, you could just sew tabs/ ribbon to the underside of the runner and call it a day. You get the idea.

hand sewn bench seat cover turkish towel bench seat cover

The cover is already doing its job… I can flip it over to buy myself some time but then it’s easy to remove and throw it into the laundry while the kids are sleeping.

If it’s easier to see how this all came together, check out the video tutorial here… (and SUBSCRIBE while you’re at it, pretty please!):

pin this image to pinterest

I wanted to protect our upholstered bench at the kitchen table so I made this simple DIY fabric cover.

XO Charlotte

Leave a Comment · Sewing

Leave a Reply Cancel reply

Your email address will not be published. Required fields are marked *

*It's not you, it's me... don't mind the CAPS LOCK!
  • Email
  • Facebook
  • Instagram
  • Pinterest
  • Twitter
  • YouTube

SEARCH

Lover of color, wrangler of chaos, thrifter of all the things.

Hi, I'm Charlotte! I'm fixing up our 100 year old house and artfully hoarding armchairs in the garage. I love color. I love flea markets. I love a little mess. My days are spent writing, painting, sanding, laughing and negotiating with our 5 kids. You can read more about us here
amazon-shop

SUBSCRIBE

Sign up for my newsletter and get access to my super duper secret and exclusive FB Group... I'll answer questions, share tips, post funny memes. It'll be awesome. (If you're not on FB- hi Dad- I'll still answer any design or thrifting questions... email me!)

Recent Posts

Christmas Present Upholstered Ottoman

Christmas Present Upholstered Ottoman

Children’s Christmas Playhouse Makeover

Children’s Christmas Playhouse Makeover

Day 12: Marbled Colorful Epoxy Ornaments

Day 12: Marbled Colorful Epoxy Ornaments

Spray Painted Christmas Planters

Spray Painted Christmas Planters

ach-popular-posts
ach-house-tour

WHAT TO WATCH

AS SEEN ON

rr-logo-1 sidebar-as-seen-on-2 sidebar-as-seen-on-1-1 bh-sidebar-1 design-sponge-1 houzz-sidebar-1 mass-appeal fmf-sidebar-1

COPYRIGHT & USE POLICY

All images and text shared on this site are the property of At Charlotte's House unless stated otherwise... and I'm SO thrilled that you're here visiting. I'm delighted for you to Pin or Stumble or Share or Tweet to your hearts delight providing all links are directly to "At Charlotte's House" (not "source" or "photo credit", etc.). If you are a blog or an individual and would like to mention a post of mine please only use a SINGLE image and link back to my original post. I invite brands to contact me directly for image-use terms. Do not alter, crop, edit or add/ remove watermarks from my images. I do not accept guest posts of any kind at this time. If you have any questions, please contact me. For more information, see my full disclosure and privacy policy.

@atcharlotteshouse

No images found!
Try some other hashtag or username

Copyright © 2019 · Simply Pro Theme by Bloom Blog Shop.