
Graphic Dollar Store Art
Psssst… this post *might* contain affiliate links: see my disclosure here.
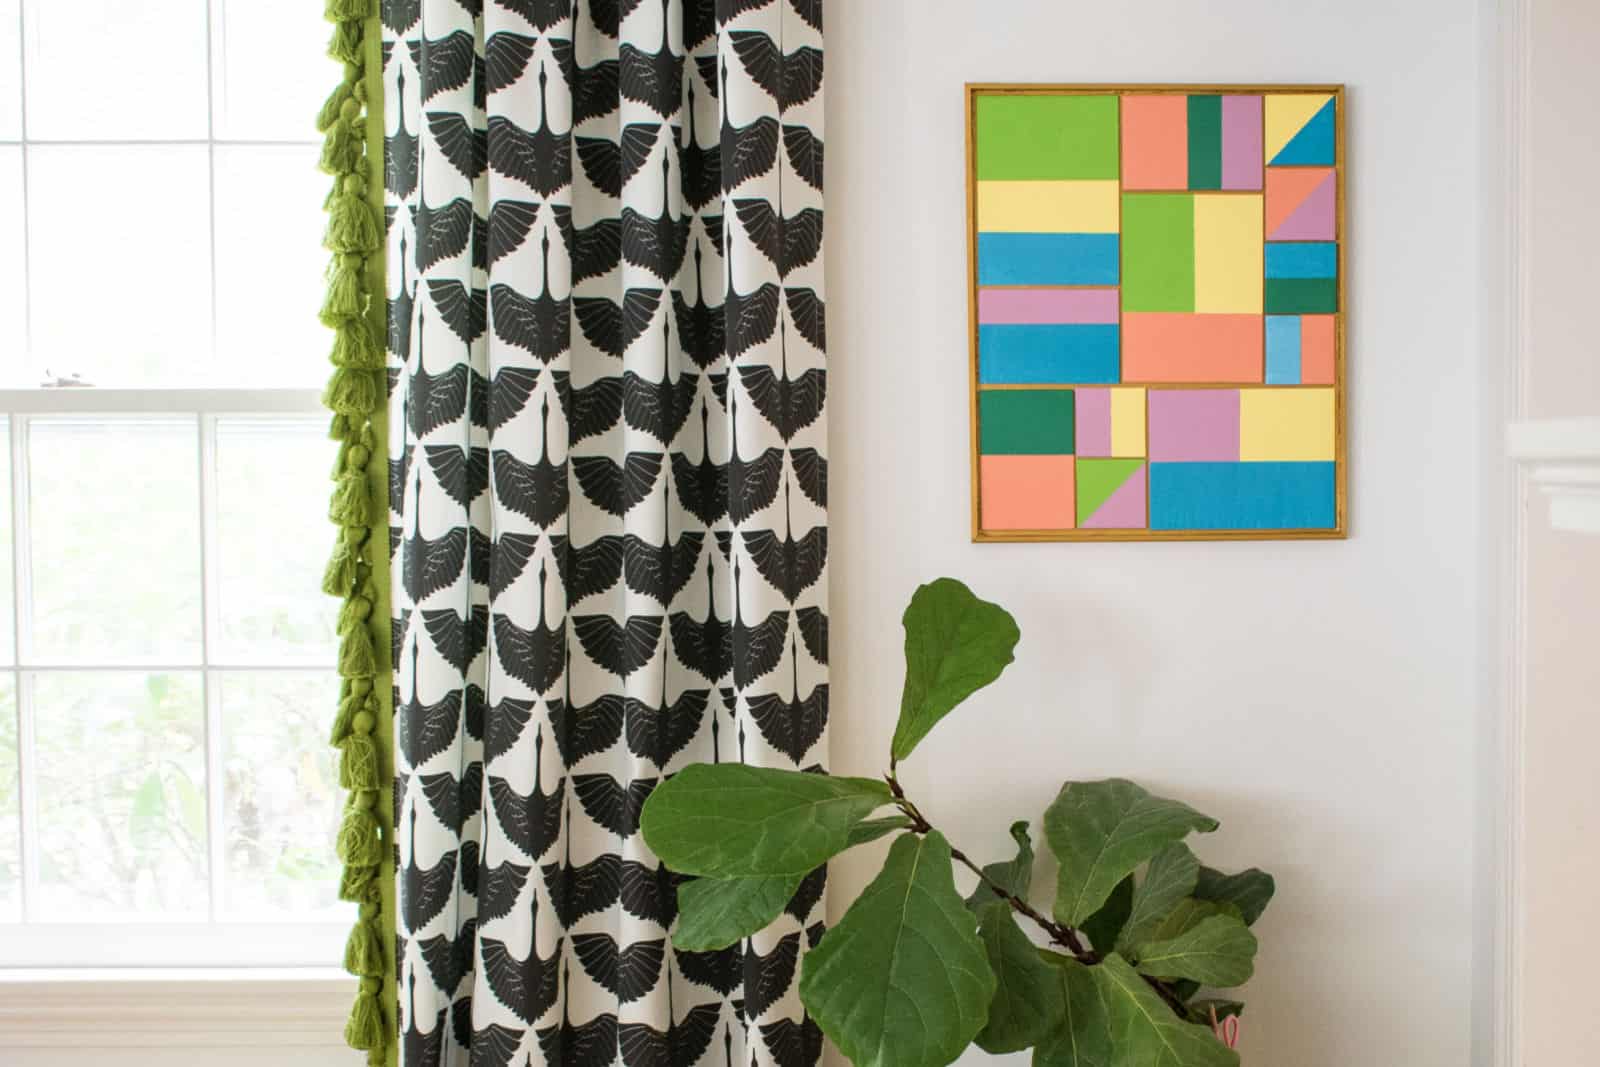
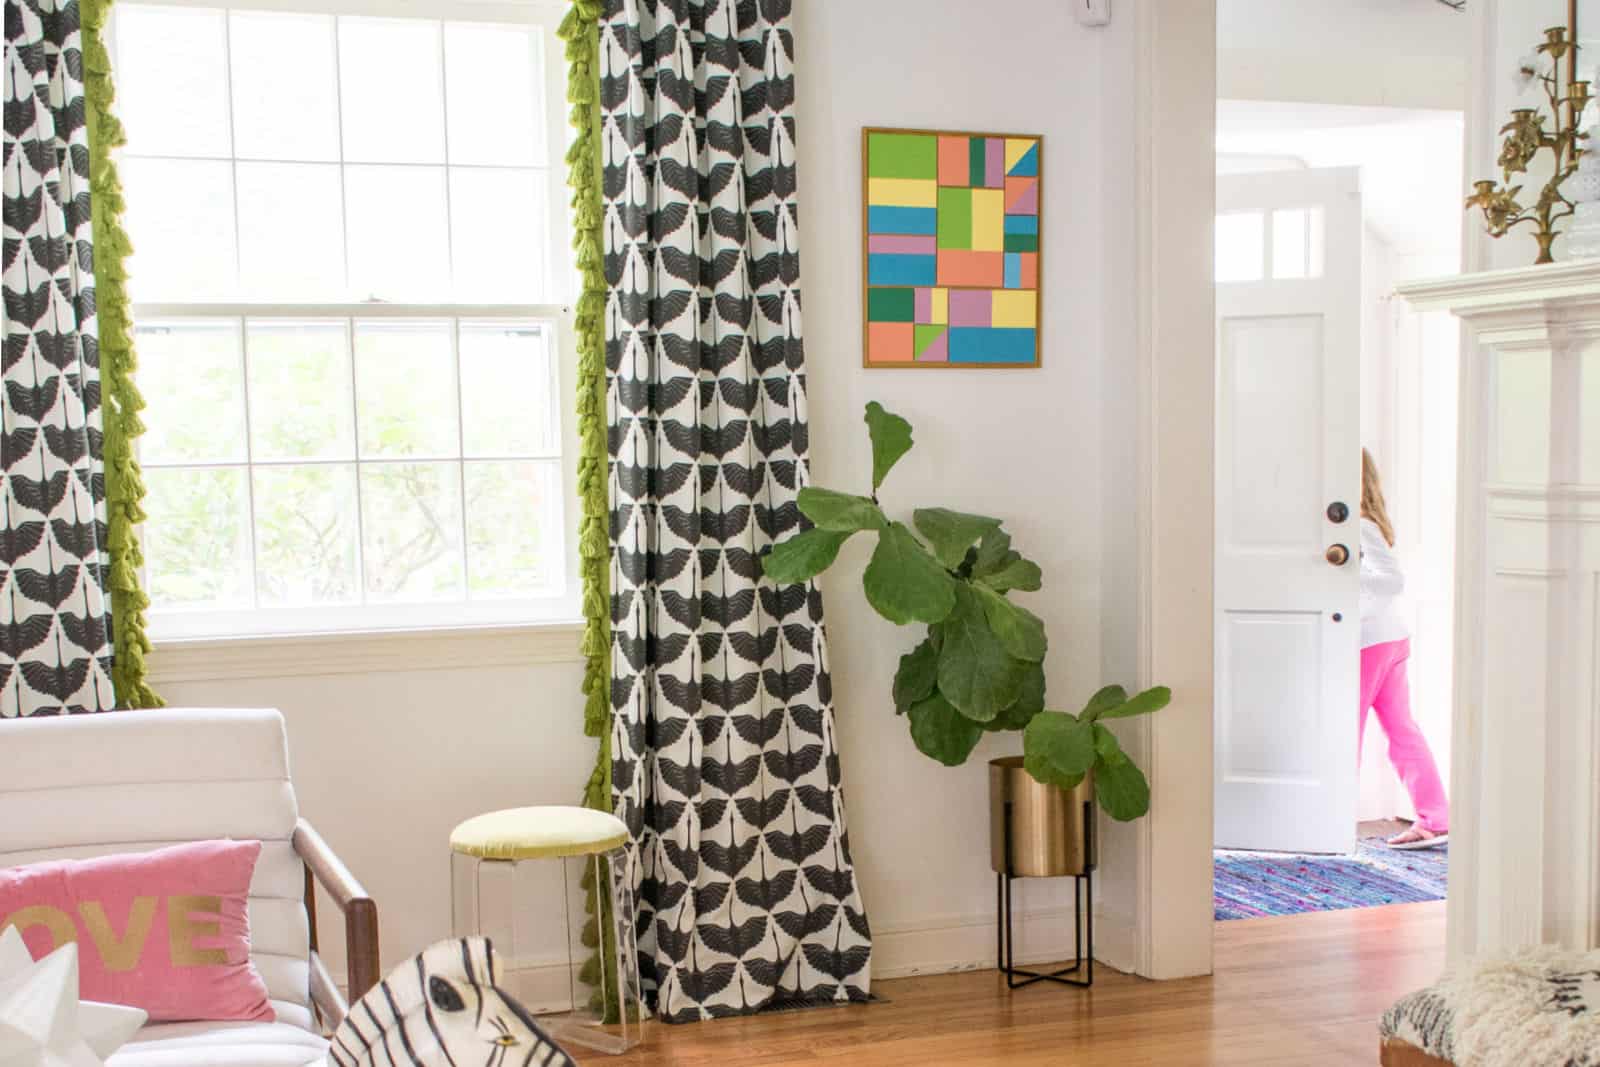
How to Make Budget-Friendly Graphic Artwork
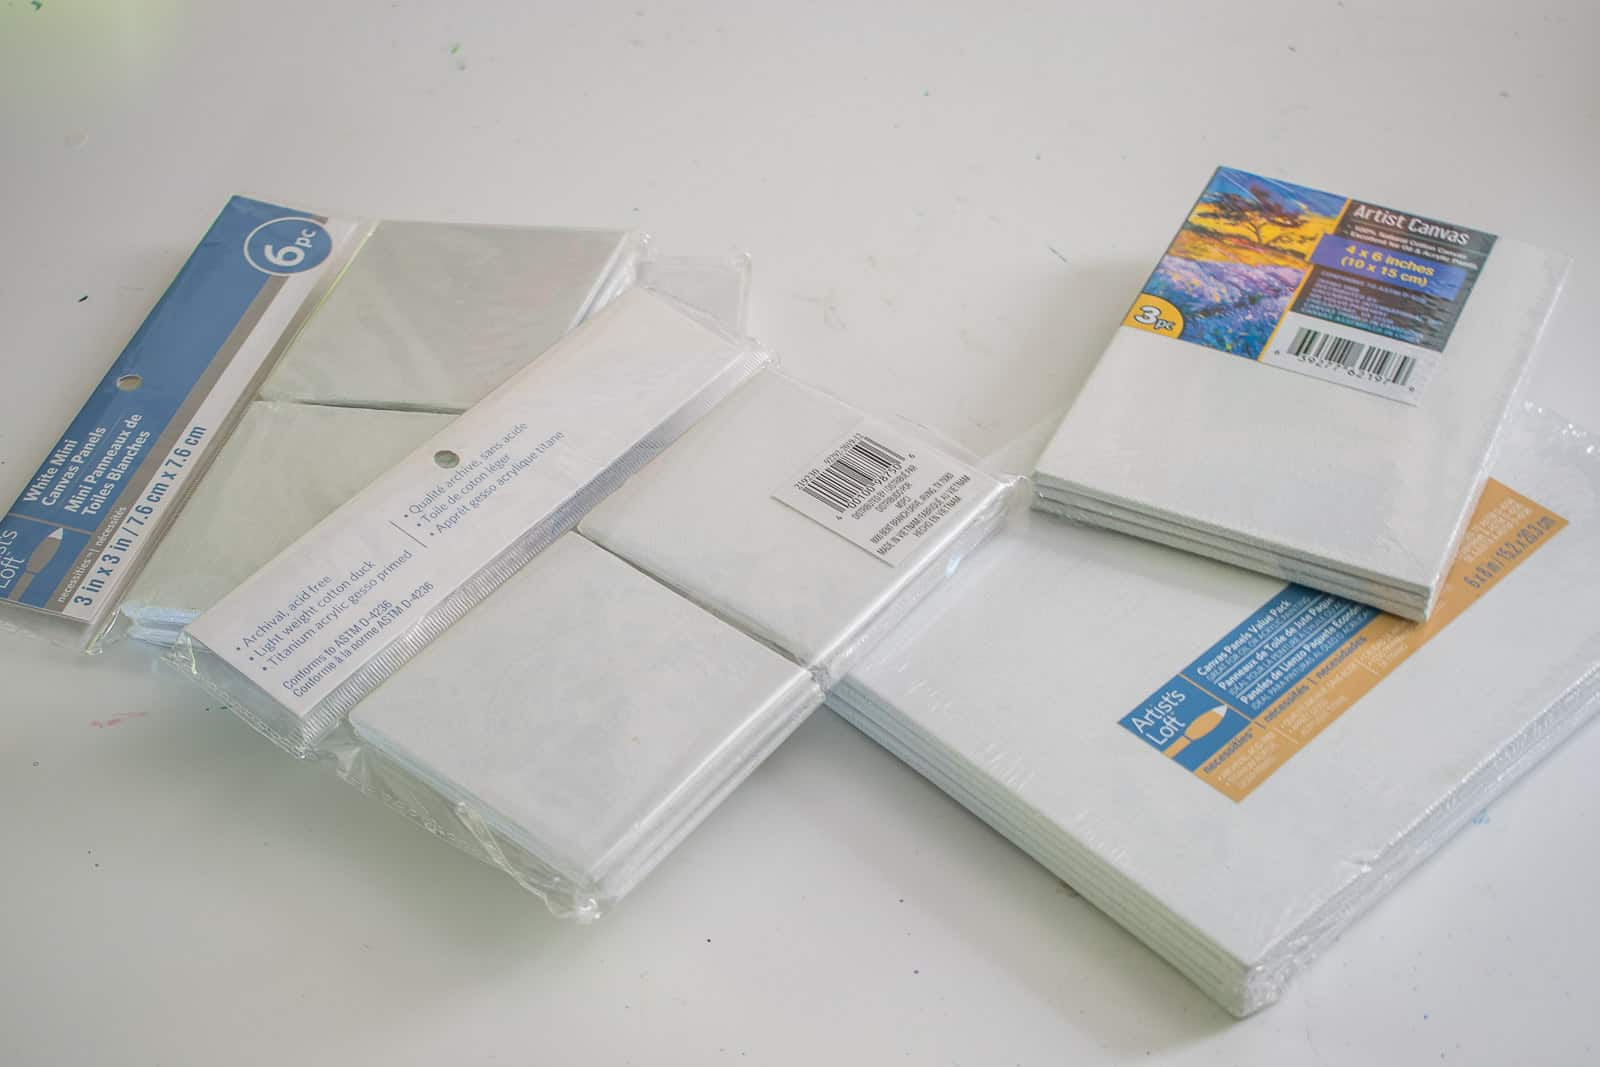
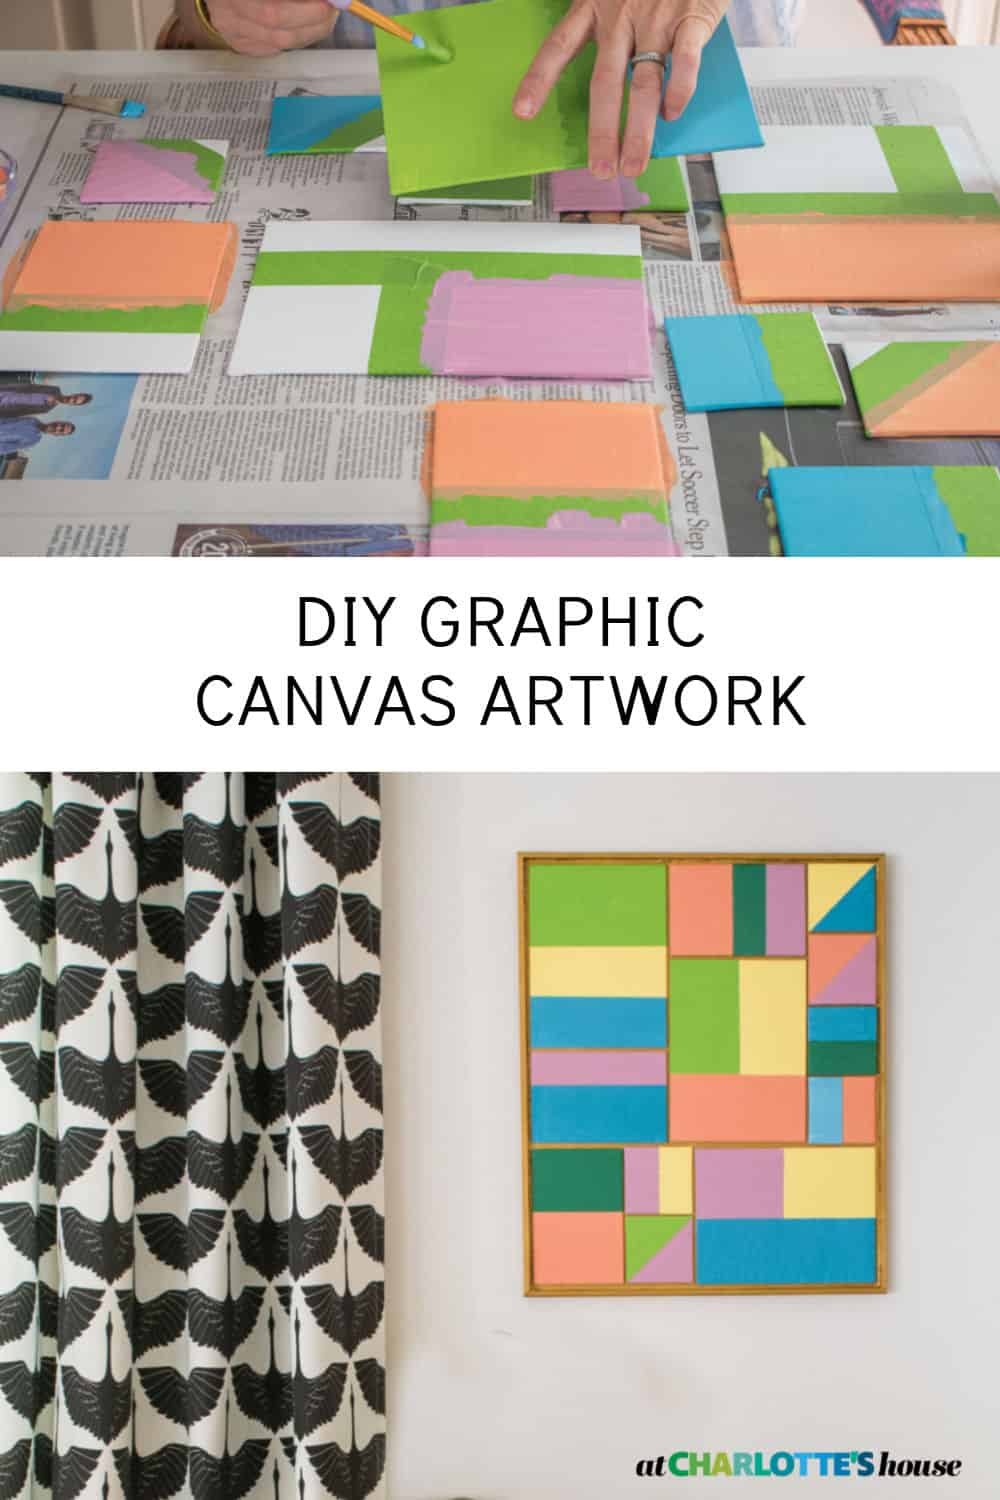
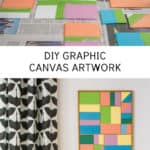
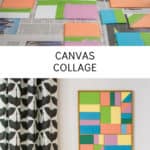
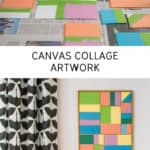
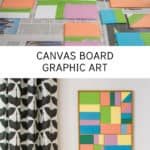
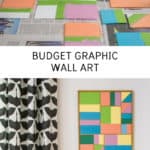
I used dollar store canvas panels to make this color blocked art.
I’m always drawn to these little canvas boards. They come in all sorts of sizes (including cute little 2-inch squares) and… I found a bunch of them at the local Dollar Tree so… I had a bunch in my stash. I’ve been meaning to put them to good use and today’s the day.
Shop my favorites!
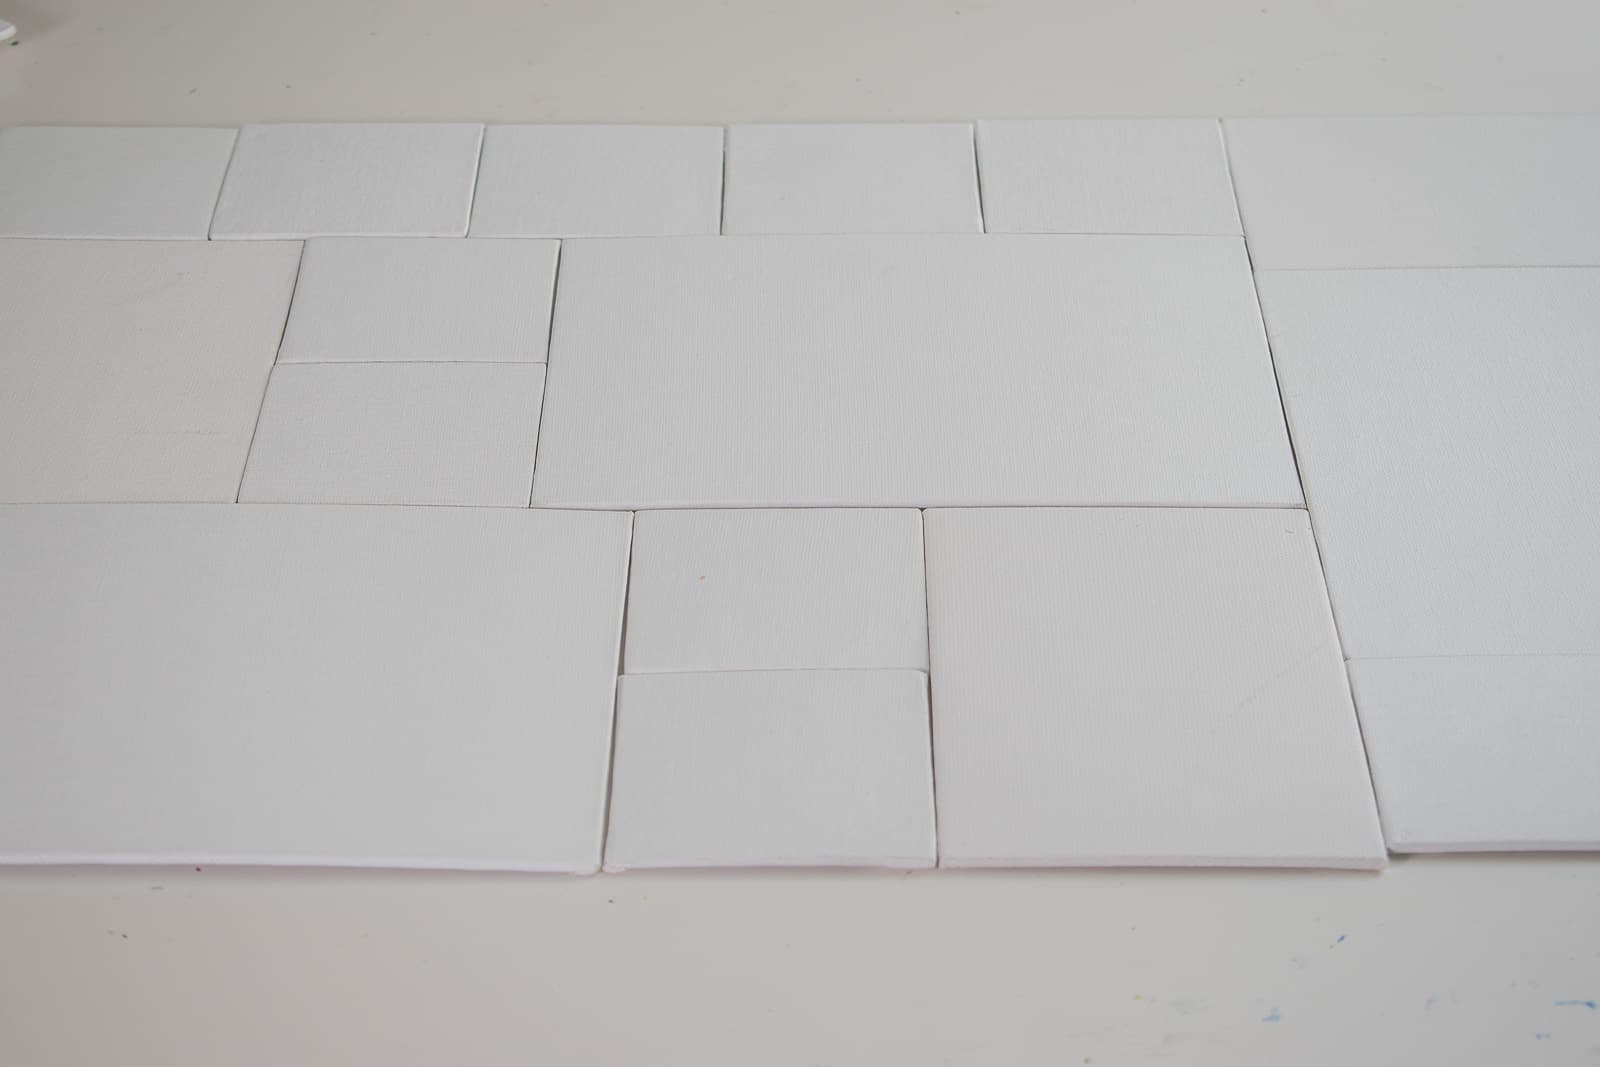
Step 1. Arrange the canvas boards
This is where your middle school Tetris skills will come in handy! Figure out how to fit your canvas boards together. No magic here… just make it rectangular or square.
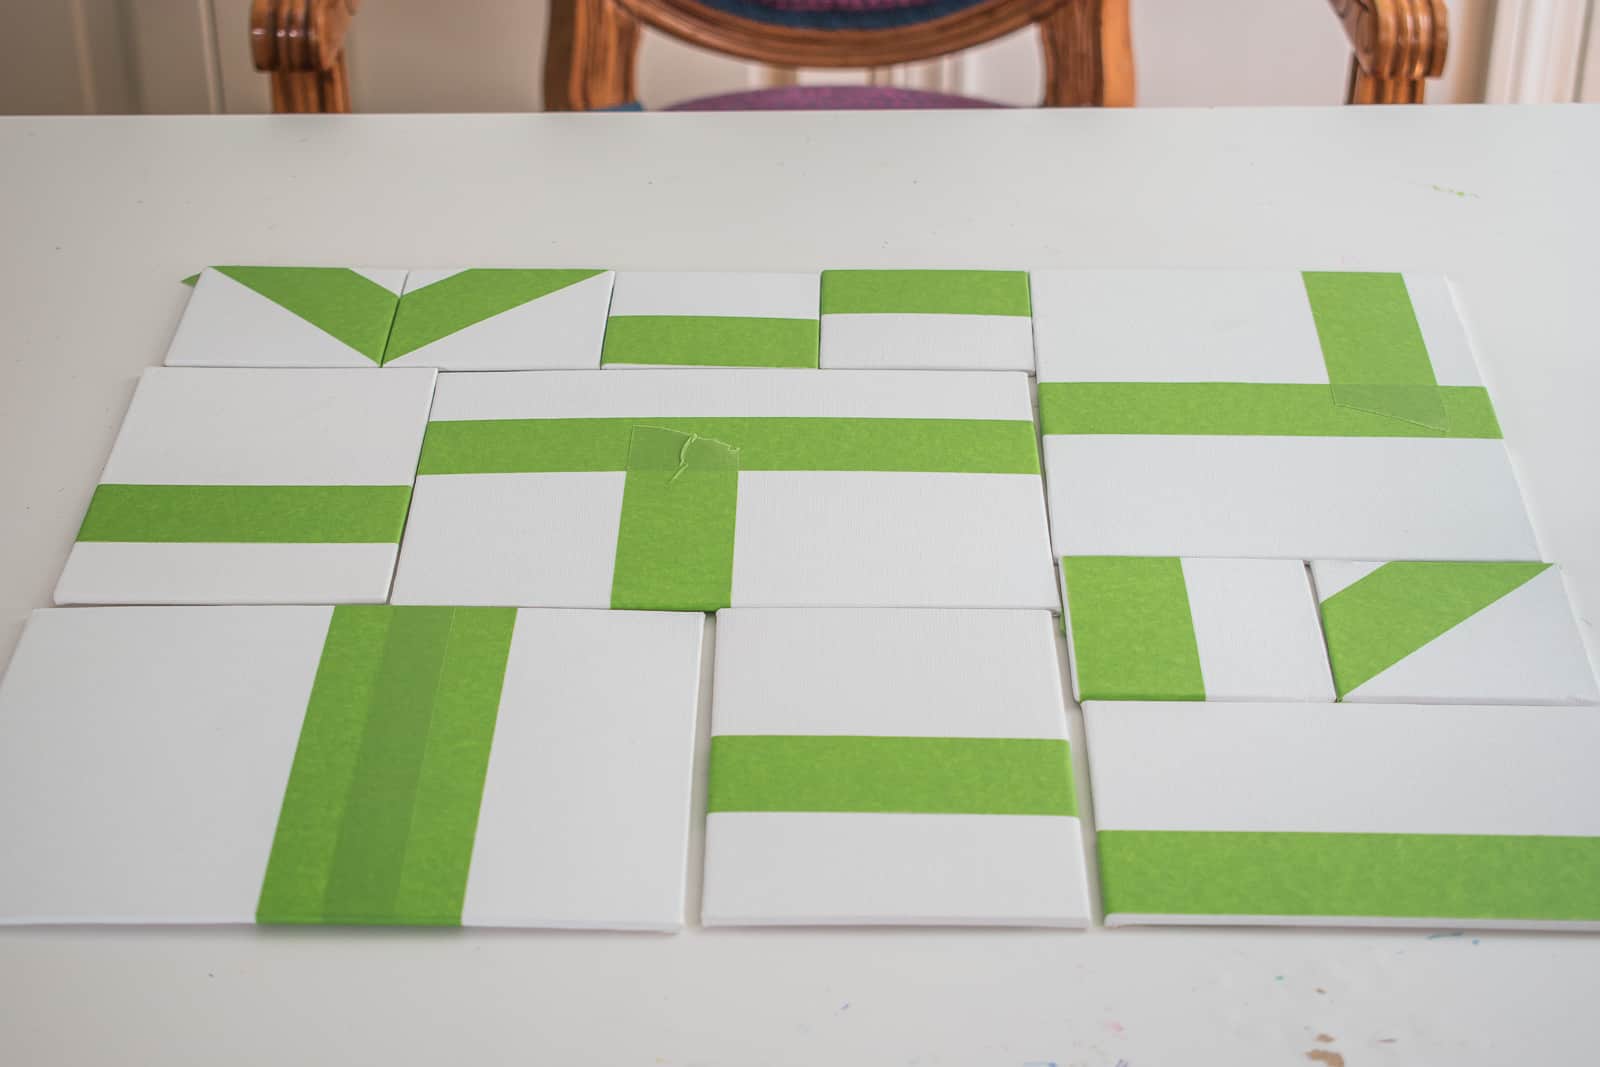
Step 2. Tape your boards
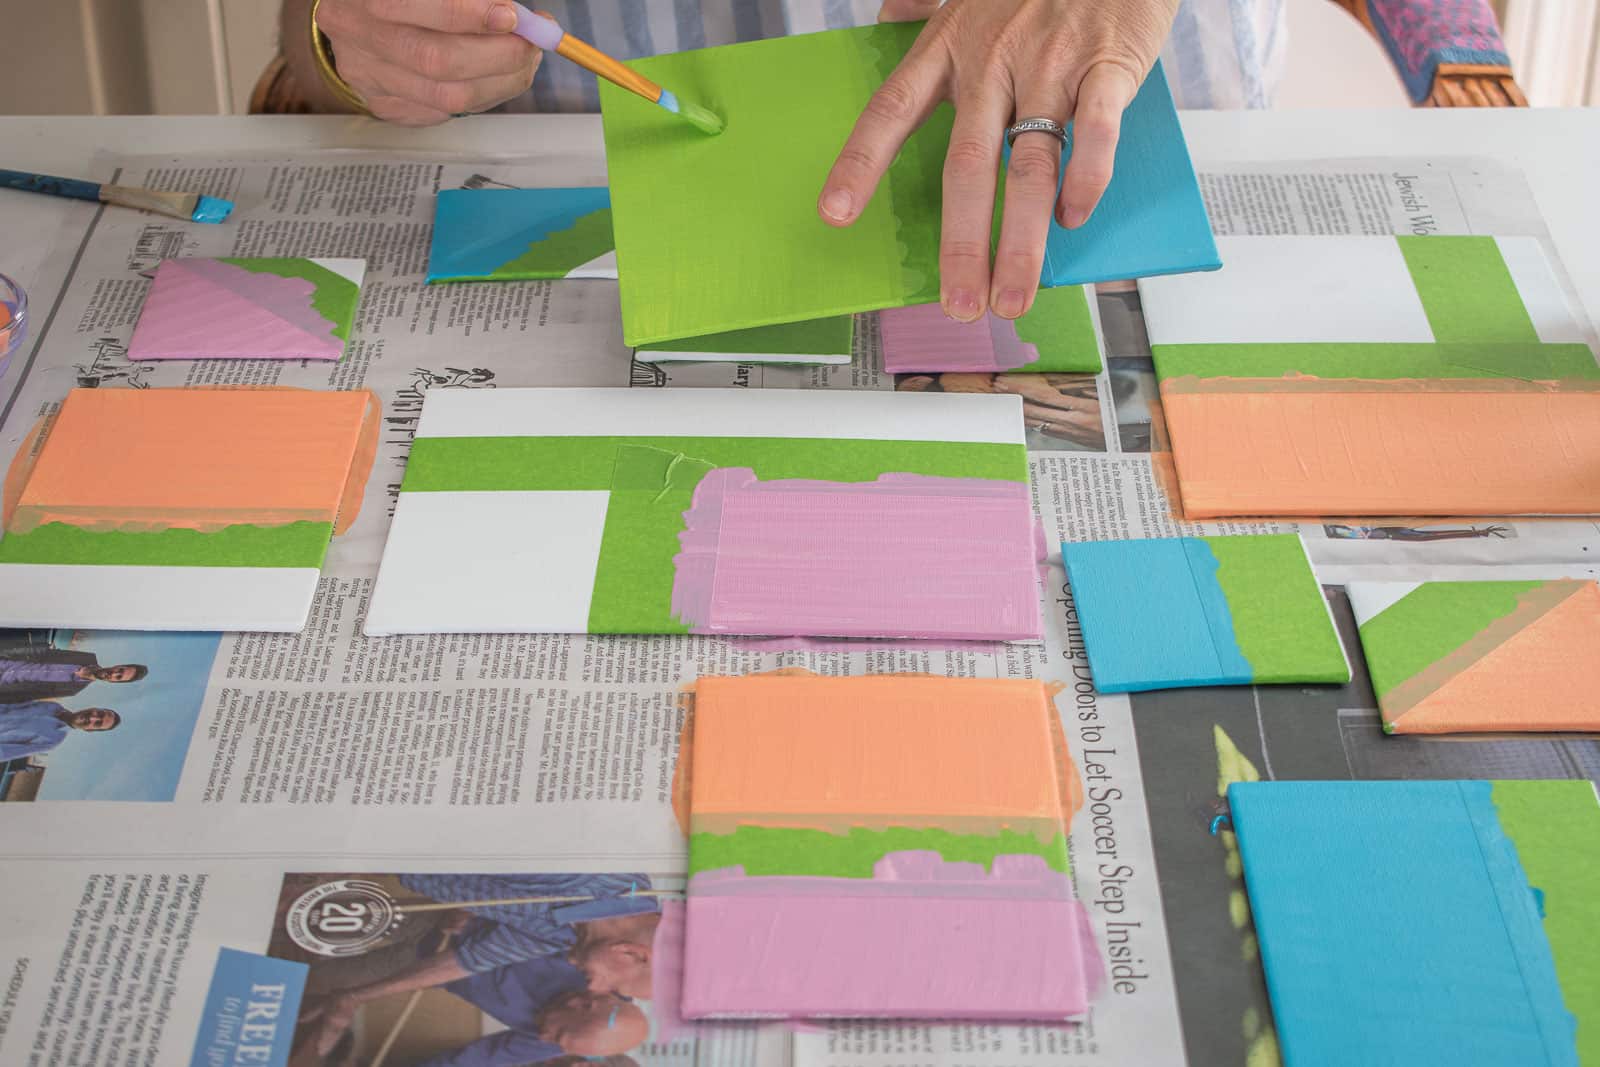
To add a little more pattern and interest to the artwork, I taped off my boards. I just randomly eyeballed where to tape. Note: you can either tape first, and then paint… which means you’ll need a second round of tape OR you can paint all the canvases once and then add the tape.
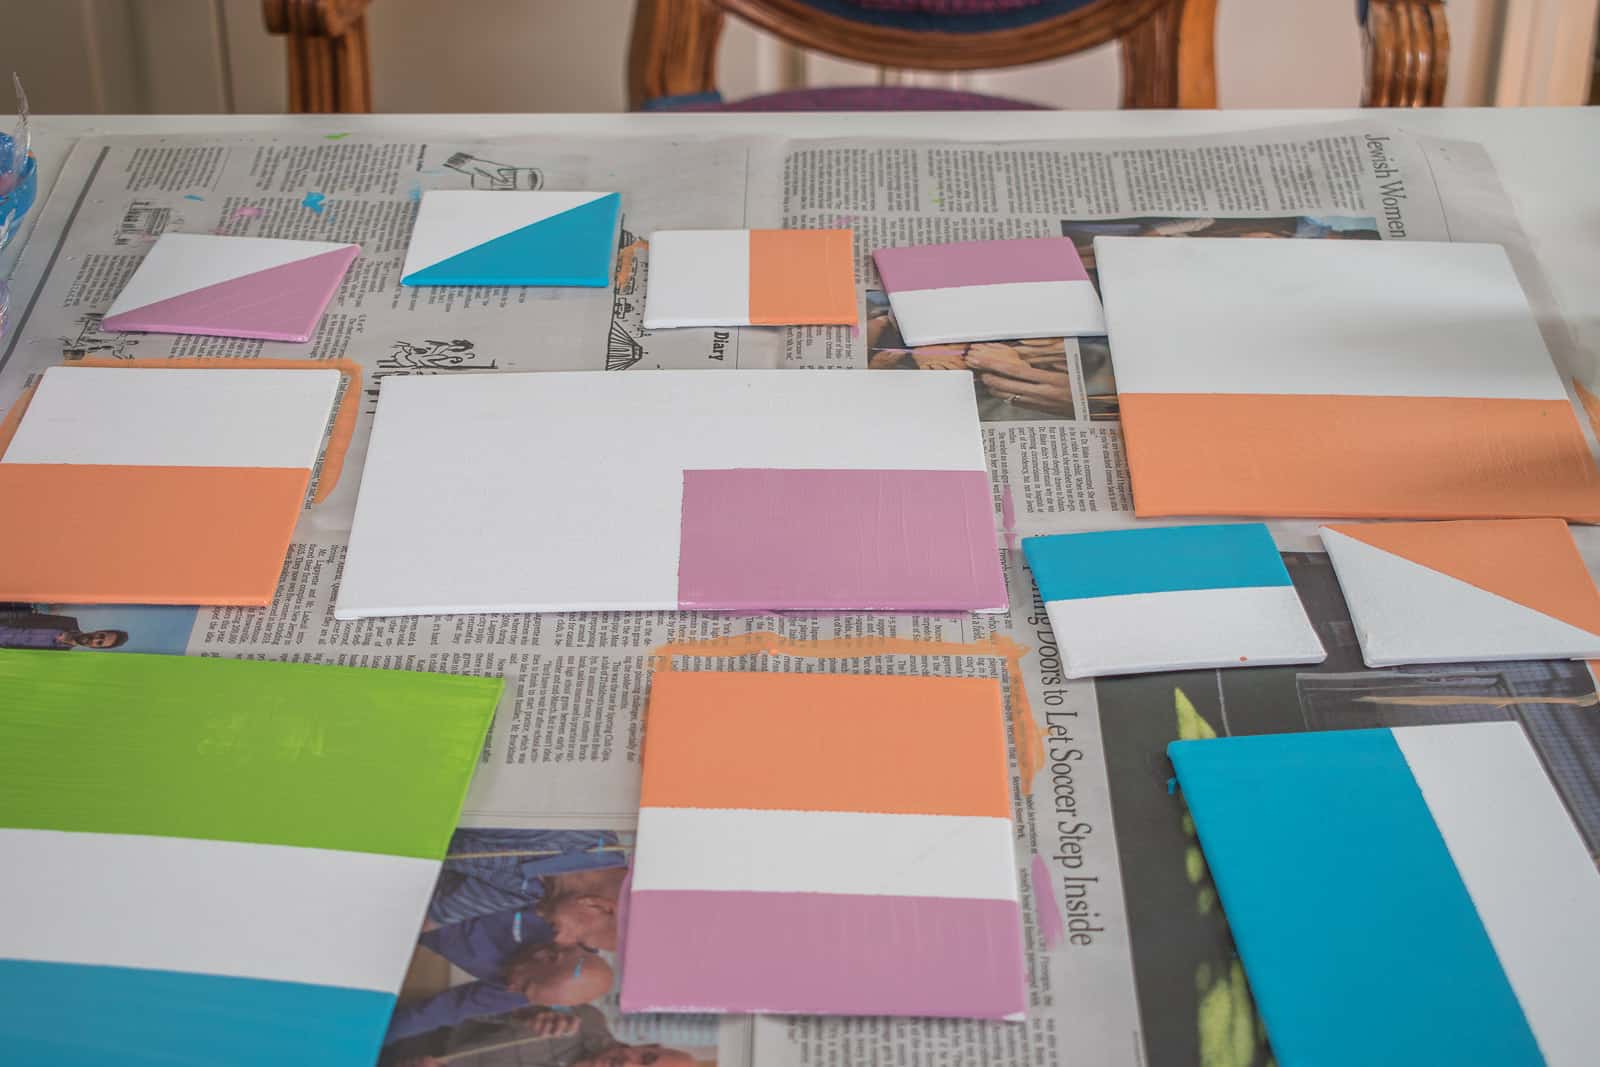
Step 3. Paint your canvas
I’m drawing from our living room for the paint colors and using basic acrylic craft paint.
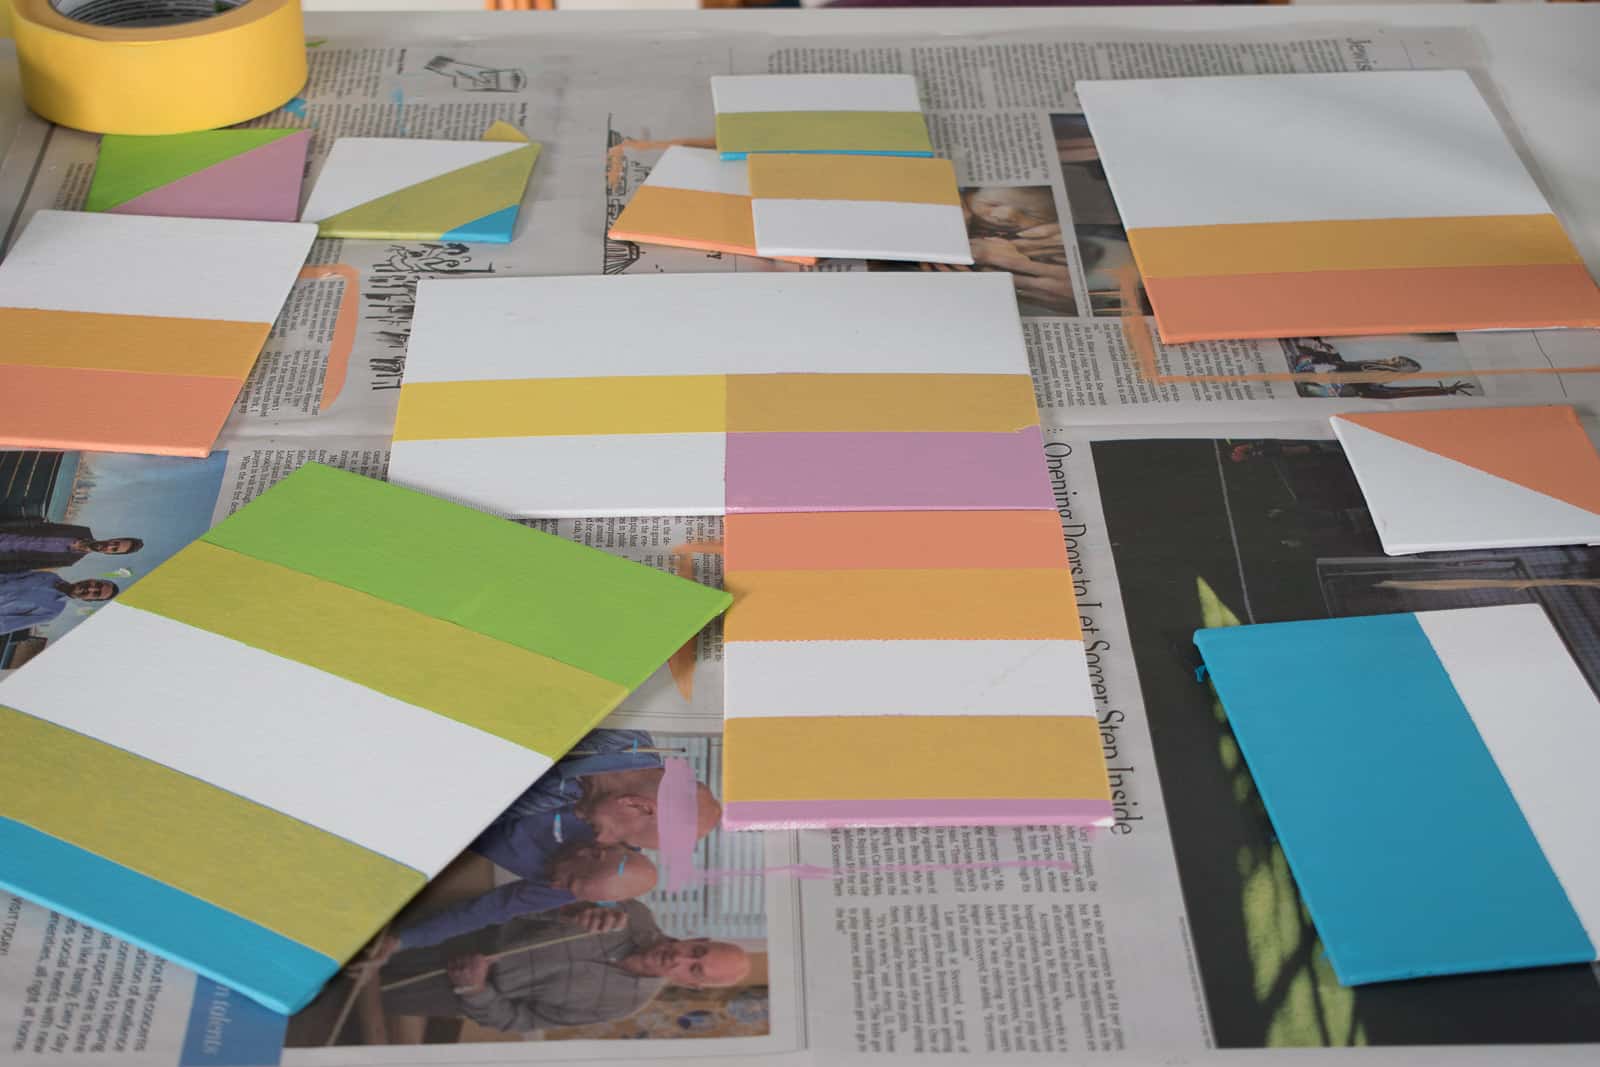
Step 4. Second coat and touch ups
Because I taped off my pattern first, I had to remove the tape and reapply in order to paint the rest of each canvas. With craft paint, a second coat is often necessary for the best coverage. For the second round of taping, I used Frogtape Delicate because it was going over the freshly painted canvases.
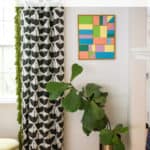
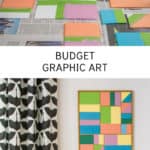
Step 5. Build a Frame
OK. So now I had a dozen small graphic canvases but I needed to make them into one big graphic canvas. I had some hardboard in my garage and painted it gold since I knew the canvases would have gaps between them. To feel legit, artwork needs a frame. And my favorite frame is a simple piece of trim. (I’ve done something similar here and here.) I didn’t want to see the hardboard so I glued the frame onto the sides.

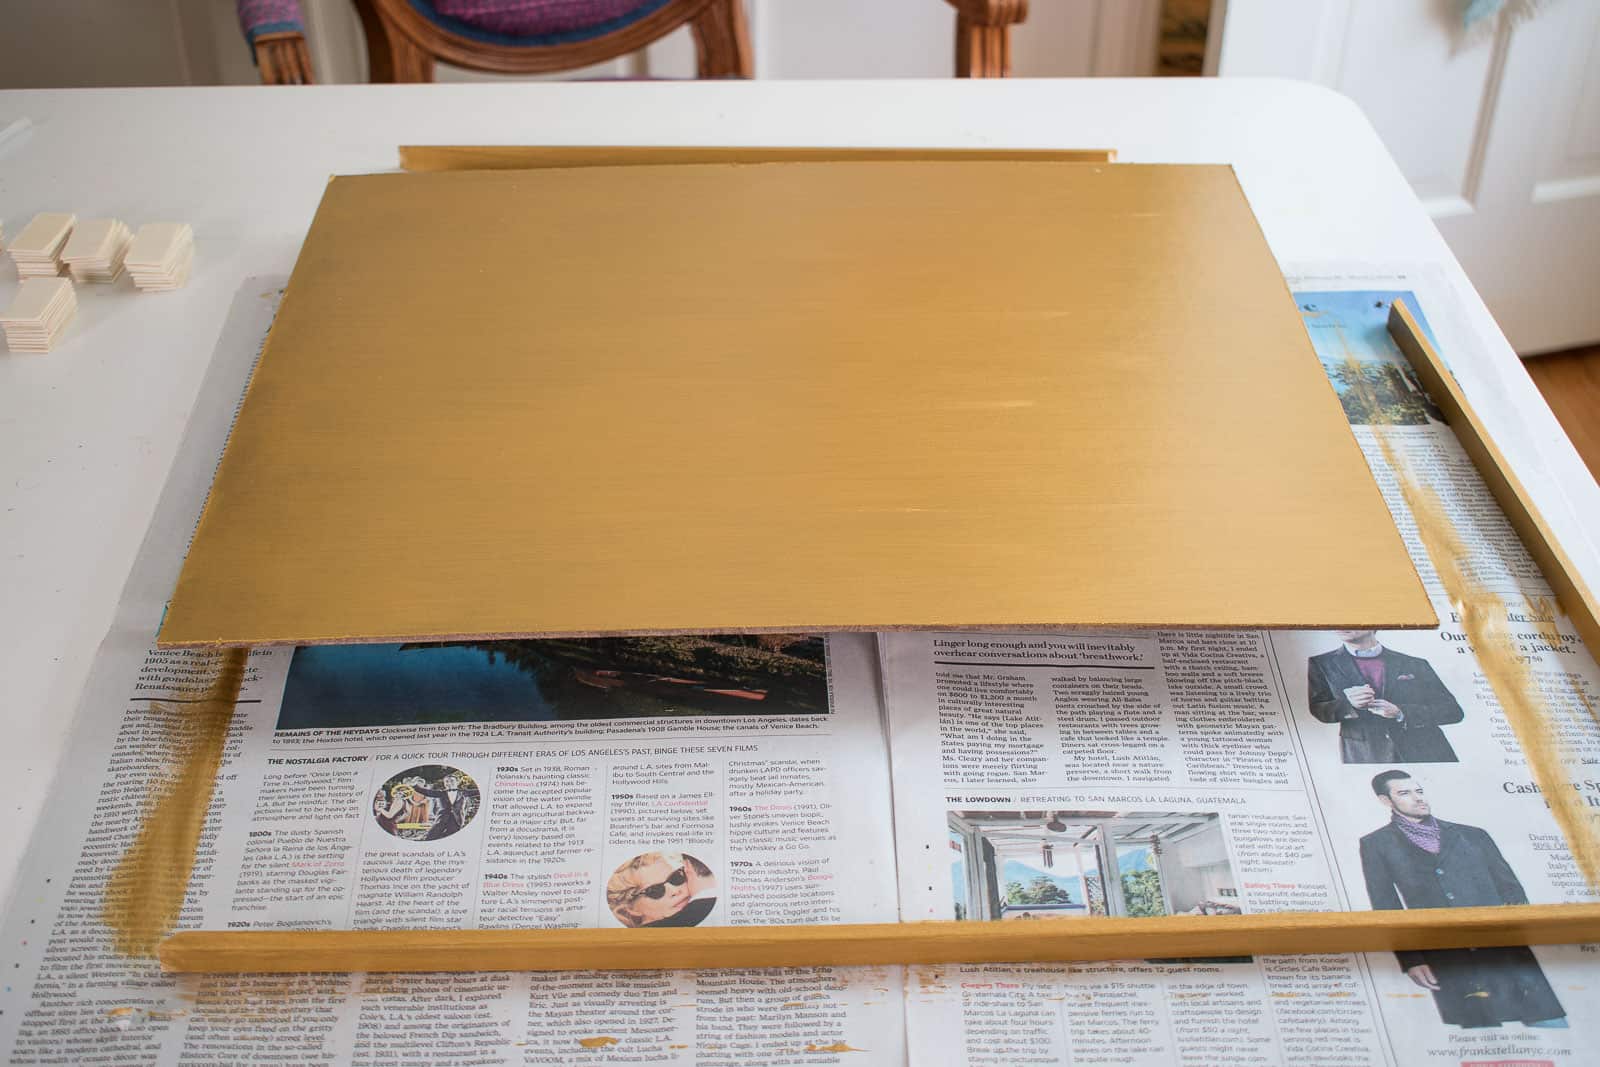
But hardboard is thin and flimsy and I didn’t cut the straightest edges so… I went over the corners with a bead of paintable caulk to cover up any gaps. (The hot glue was plenty strong enough to hold the frame in place so the caulk is just to clean up any rough edges.) After the caulk was dry, I went over with a coat of the same gold paint.

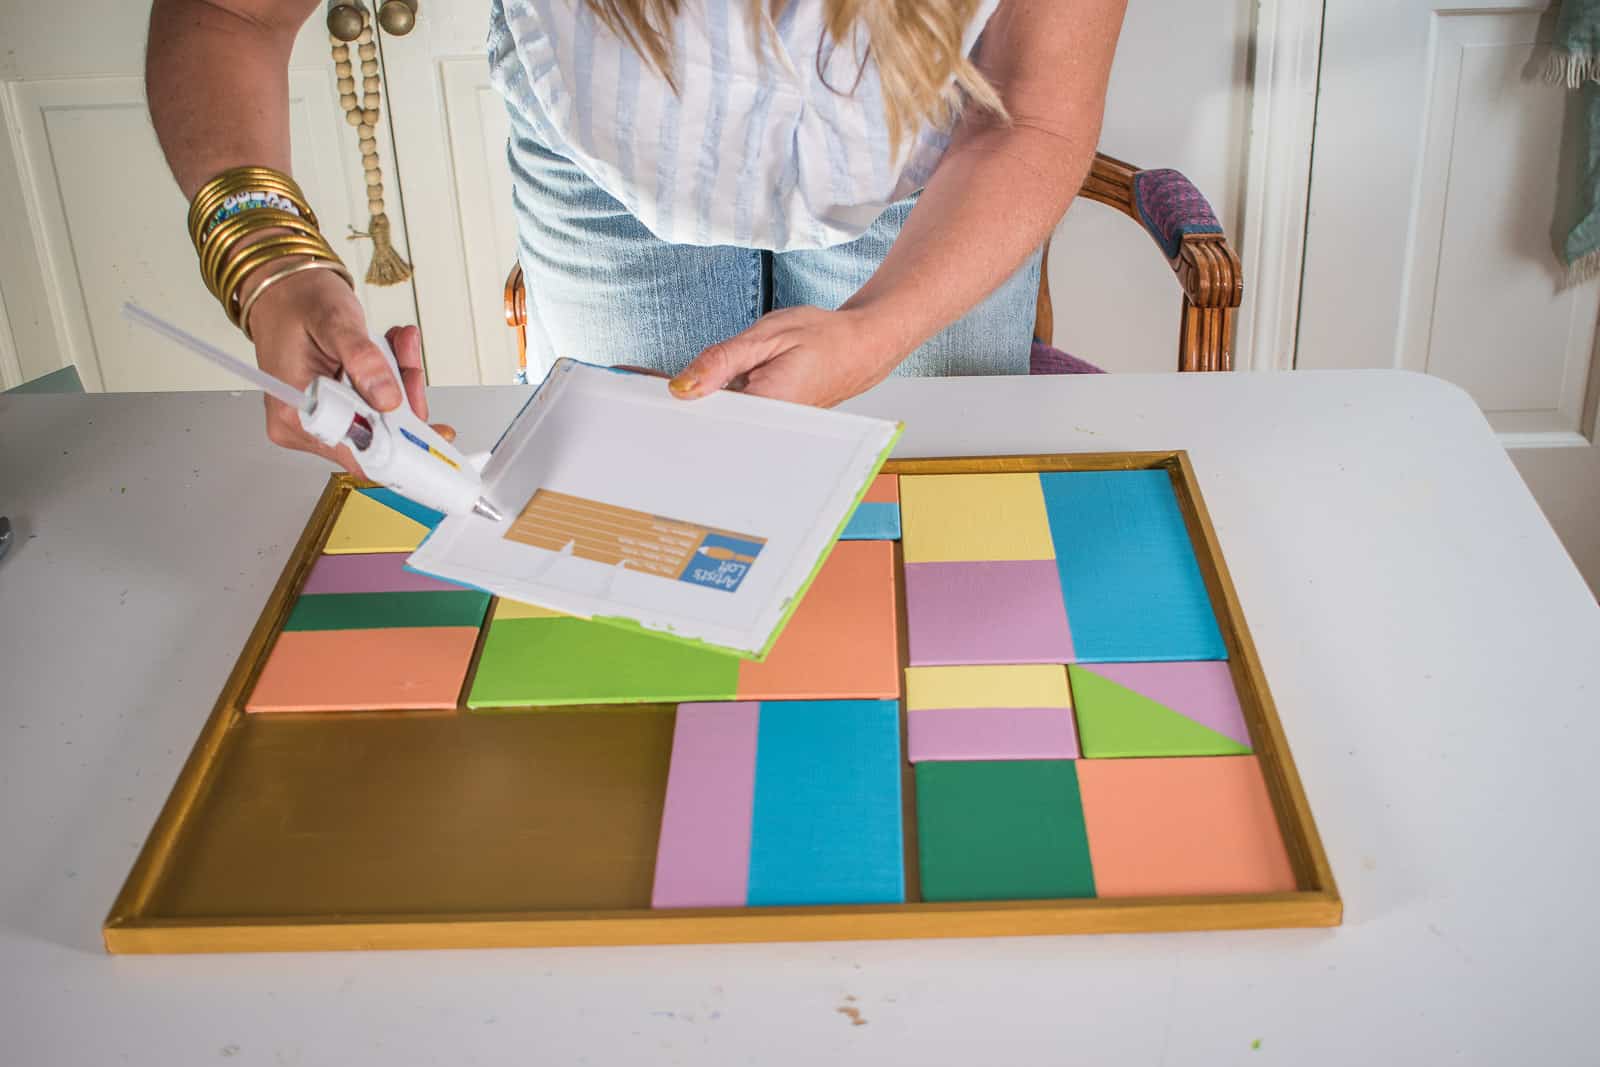
Step 6. Mount the Canvases
Because they’re not perfectly square, I opted to mount them a tiny bit apart from each other to help conceal any irregularities. I just glued them in place with a hot glue gun.
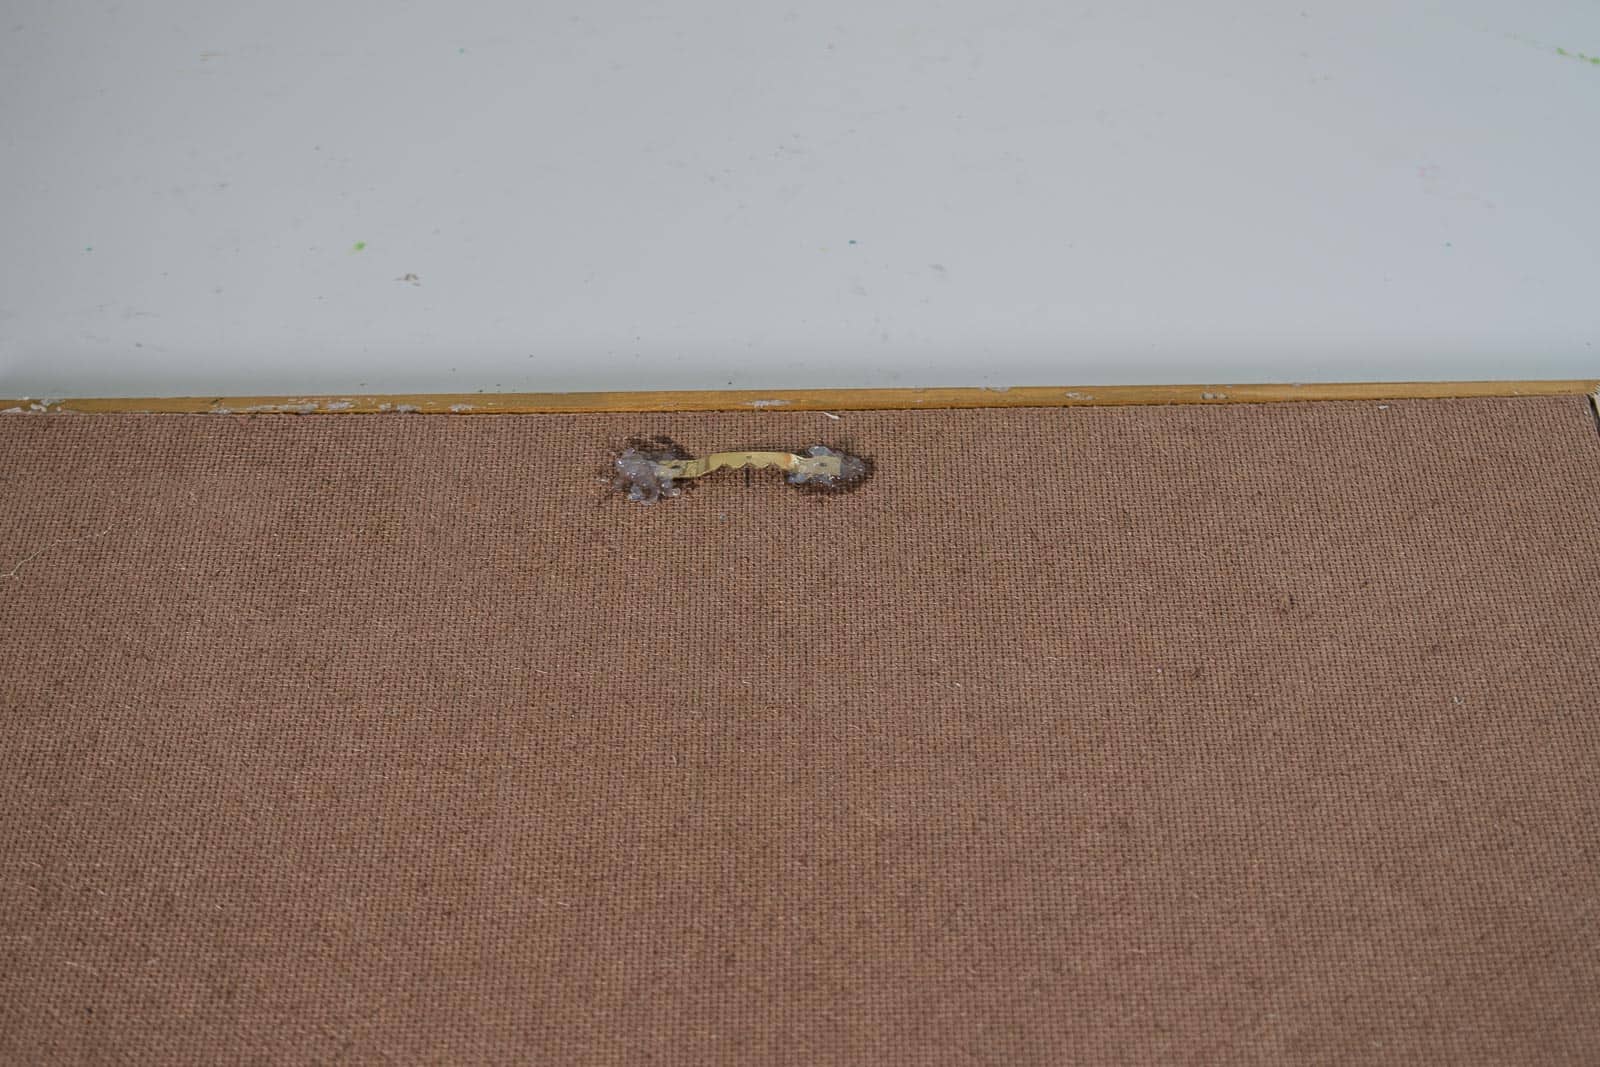
Step 7. Attach hanging hardware
I had one of these tooth picture hangers and hot glued this onto the hardboard to attach the artwork to the wall!
Whenever I finish a project I think about all the ways someone could execute this and I LOVE the idea of doing this artwork as a collaborative piece. Choose the color pallet and hand everyone a few canvas boards to tape and paint. Then imagine how fun it will be to bring everyone’s artwork together into one graphic piece!
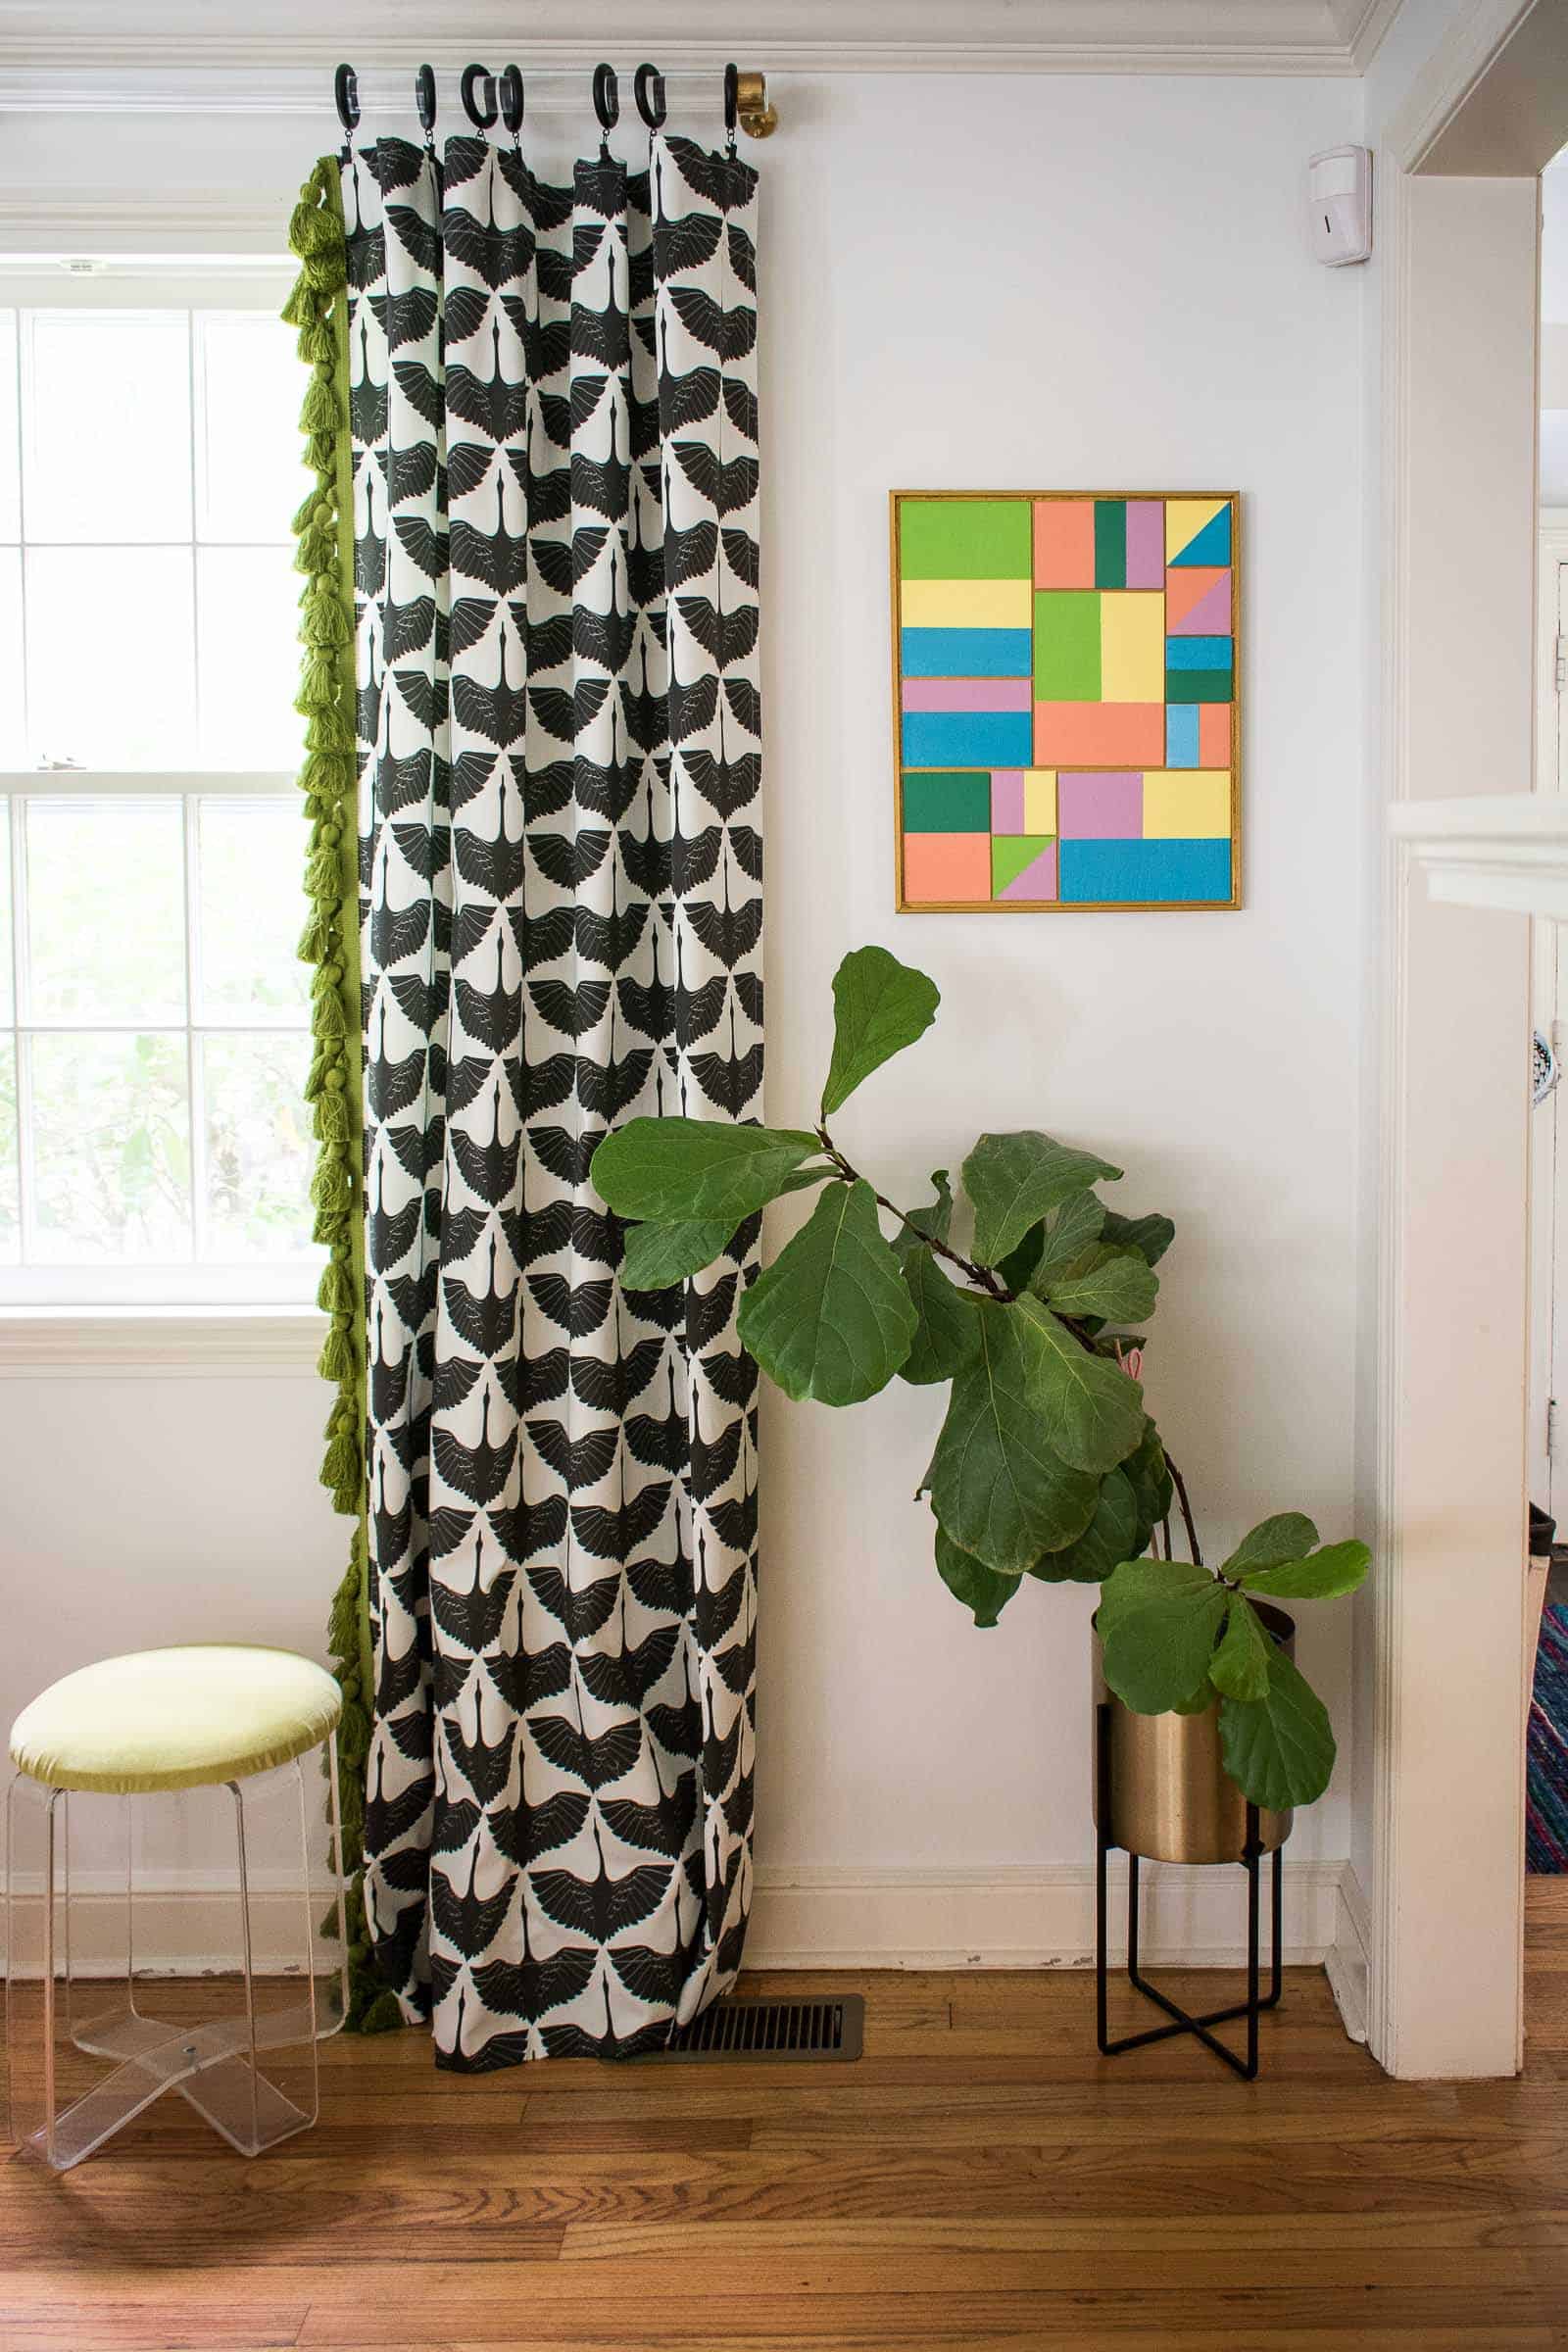
I’m still lukewarm on the colors I used, but seeing them in the space helps… I’m going to sit with them for a while before I make any decision! Also, I made this for zero dollars because everything was in my stash so if that’s not budget friendly… I don’t know what is!


Love the idea of a collaboration! Thanks!
Thanks!!! Me too! If I were still teaching, I’d try it with my class!
It looks Great and is super creative!!💕
Thanks, Tina!
I love the 60s (or is it 50s?) throwback with modern colors. So cute!
Haha! It’s totally retro and I have no idea what era. 🙂 Thanks!!