
How to Build a Terrarium Table
Psssst… this post *might* contain affiliate links: see my disclosure here.
How to Make a Mossy Terrarium Table
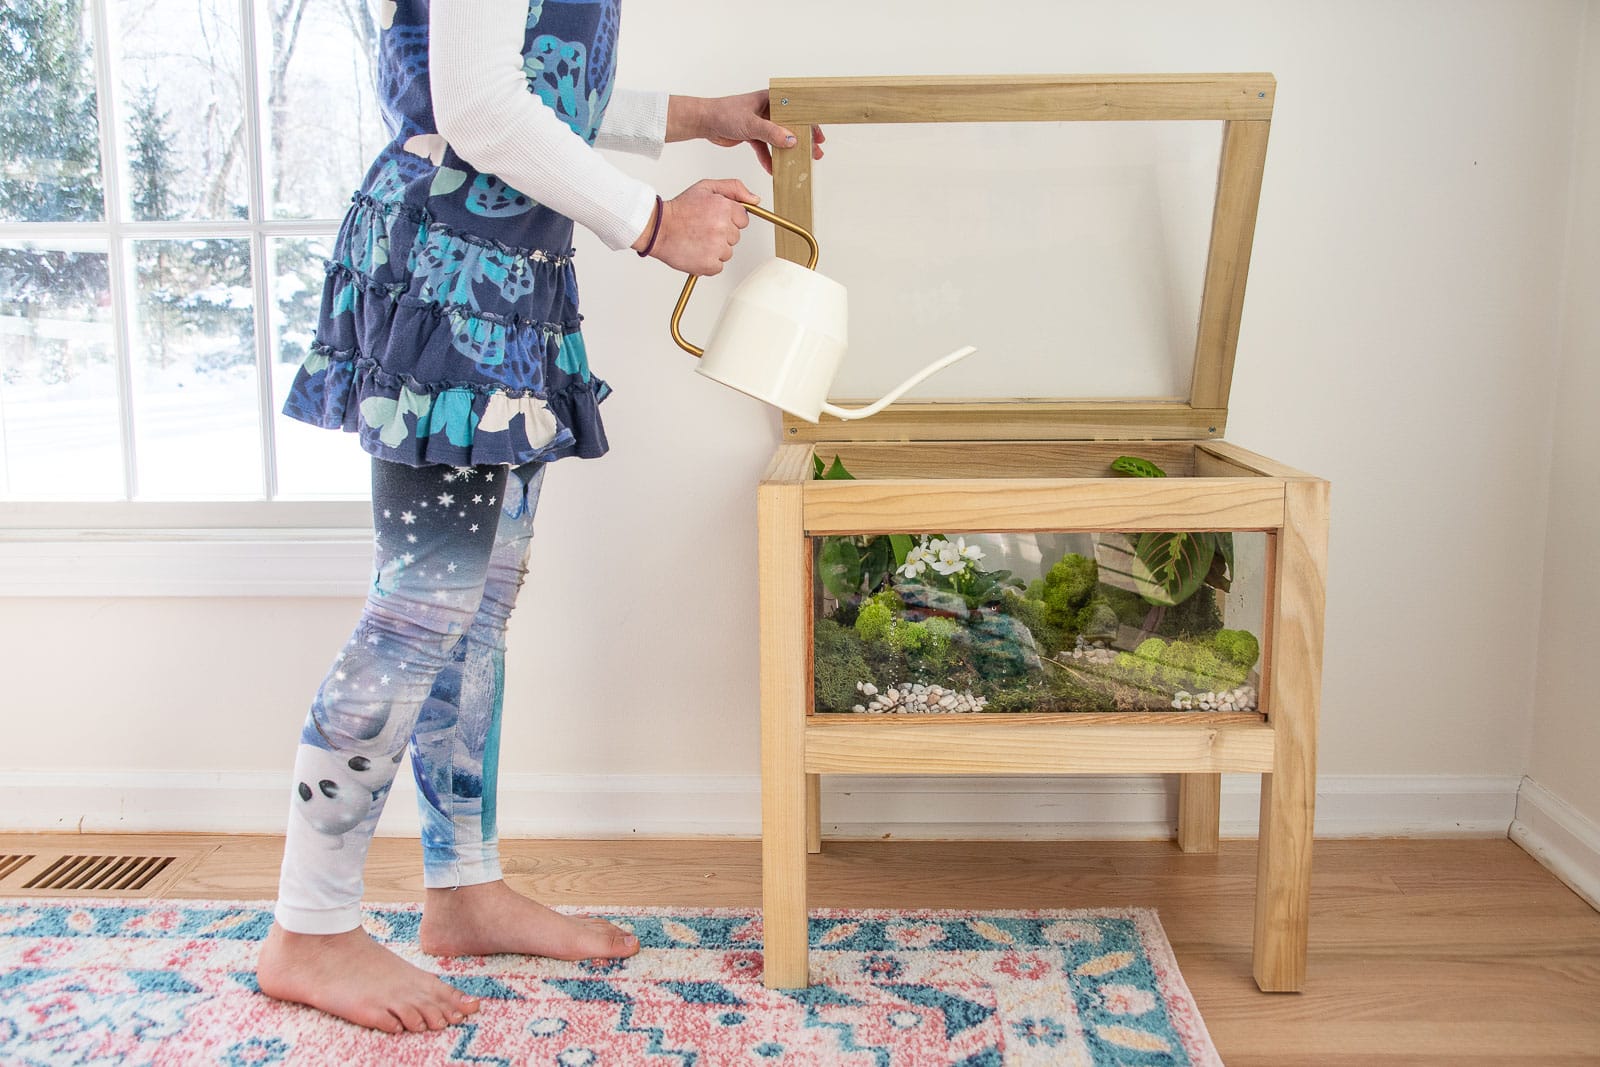
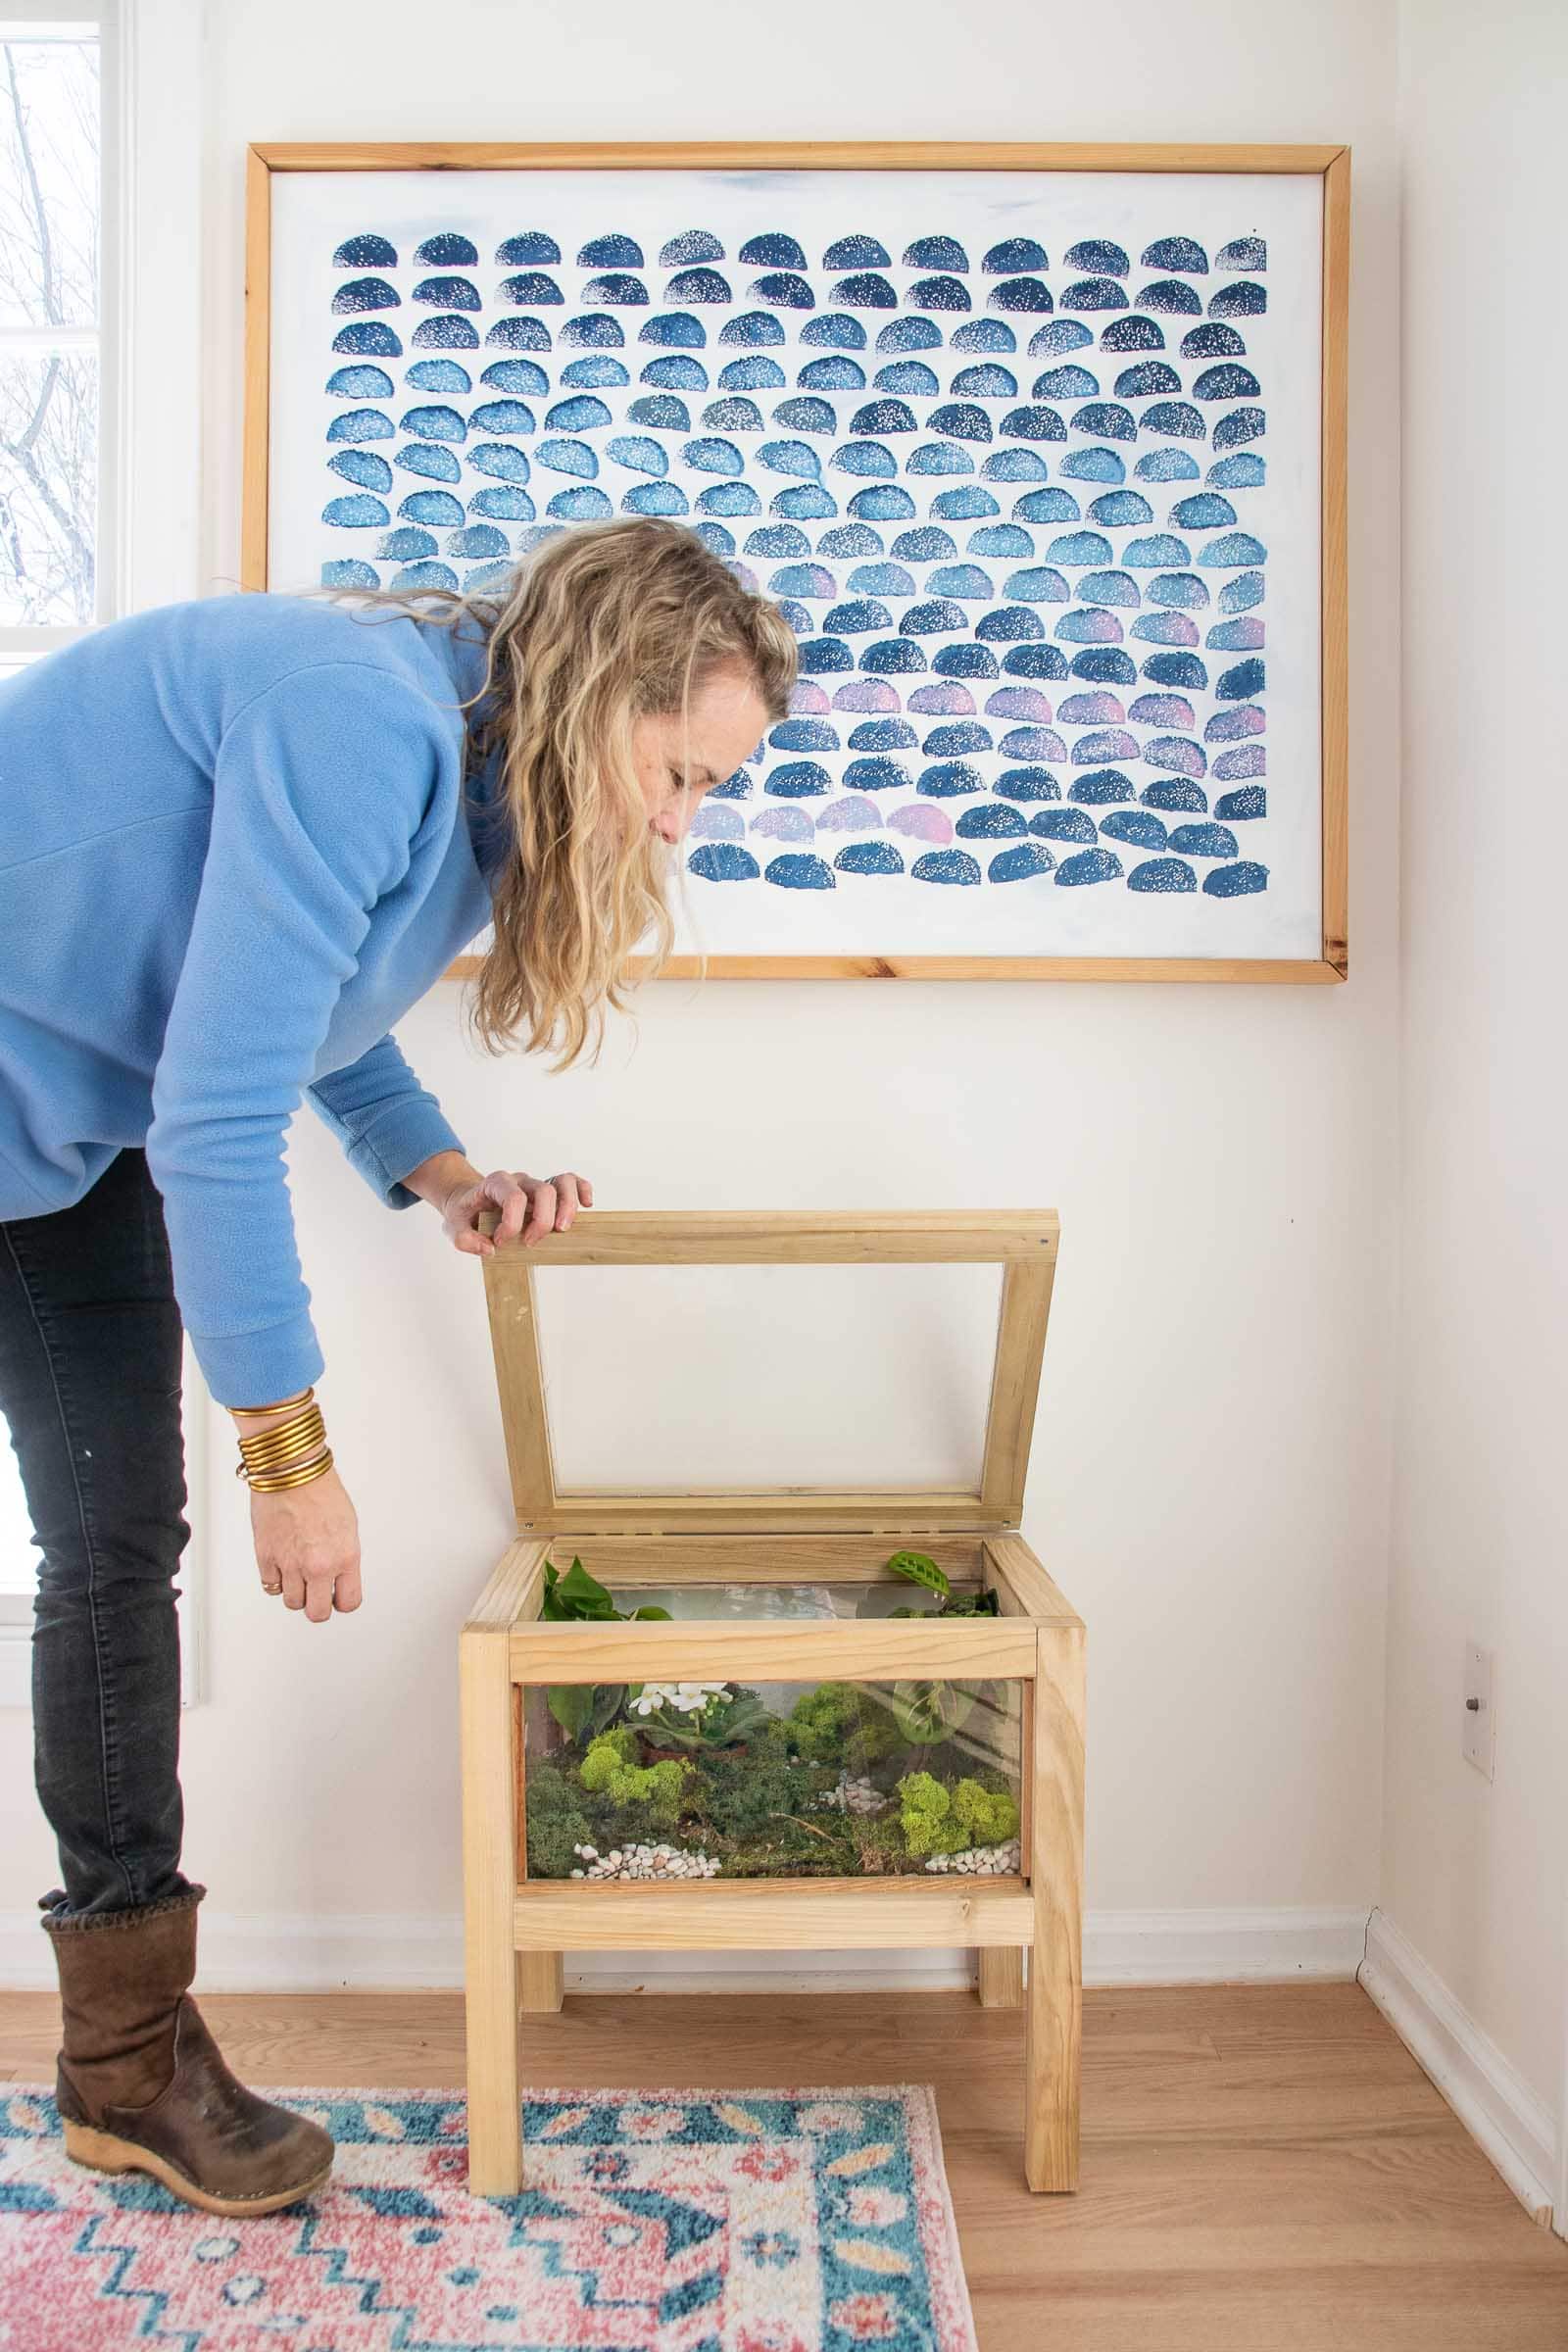
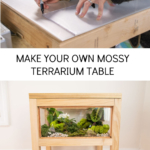
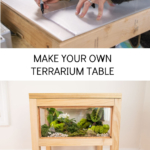
I made this DIY table with a hinged lid and space inside for my own mossy terrarium.
Disclosure: I’m partnering with The Home Depot and their DIY On-Trend Workshops, inspired by Pinterest, to share this post with you.
Shop my favorites!
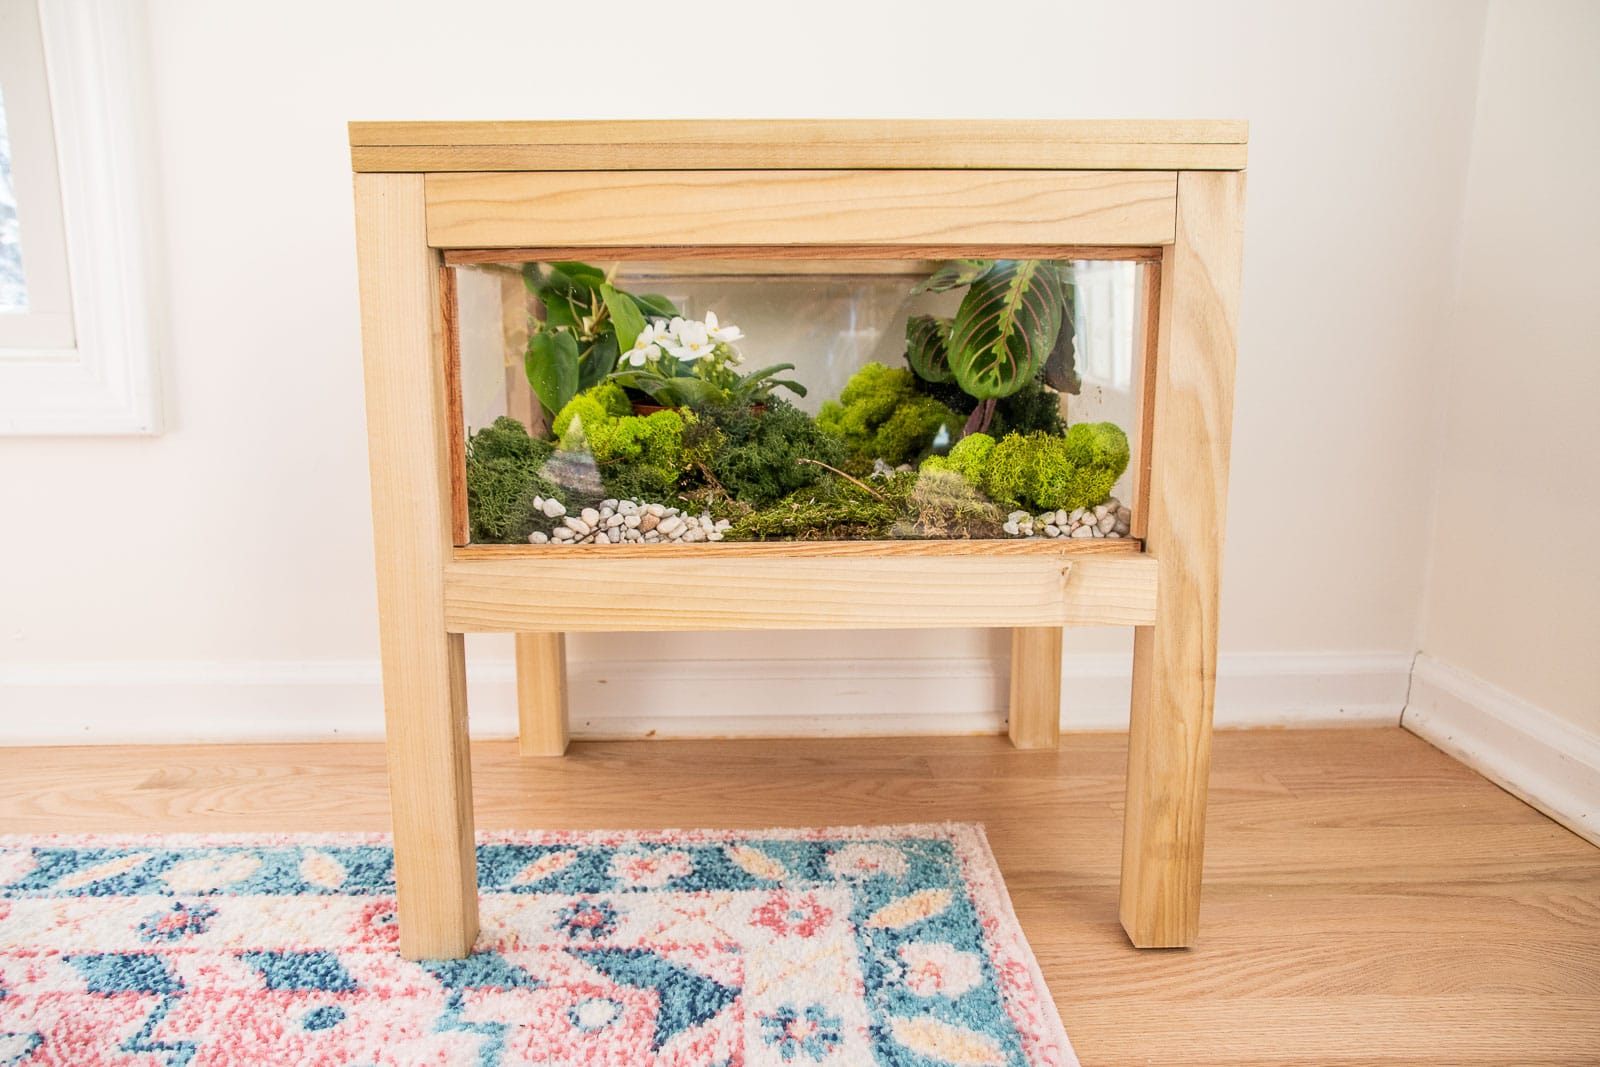
Lush mossy terrariums are my favorite and this time of year I crave the low maintenance greenery more than ever! Rather than fill yet another glass container with moss and plants, I figured I’d make something a bit more permanent: a terrarium table! This table lives in our sunny family room and looking at this green leafy table while snow is still on the ground out the window brings just a little bit of peace and Zen to a not always calm space (if you know what I mean…). I’m working with acrylic sheets because… kids, but this would work just as well if you wanted to sub the acrylic for glass. I’m also working with 2×2 poplar hobby board (actual dimensions 1.5 x 1.5). These hobby boards also come in oak if you like the look of that grain better.
Step 1. Build the top
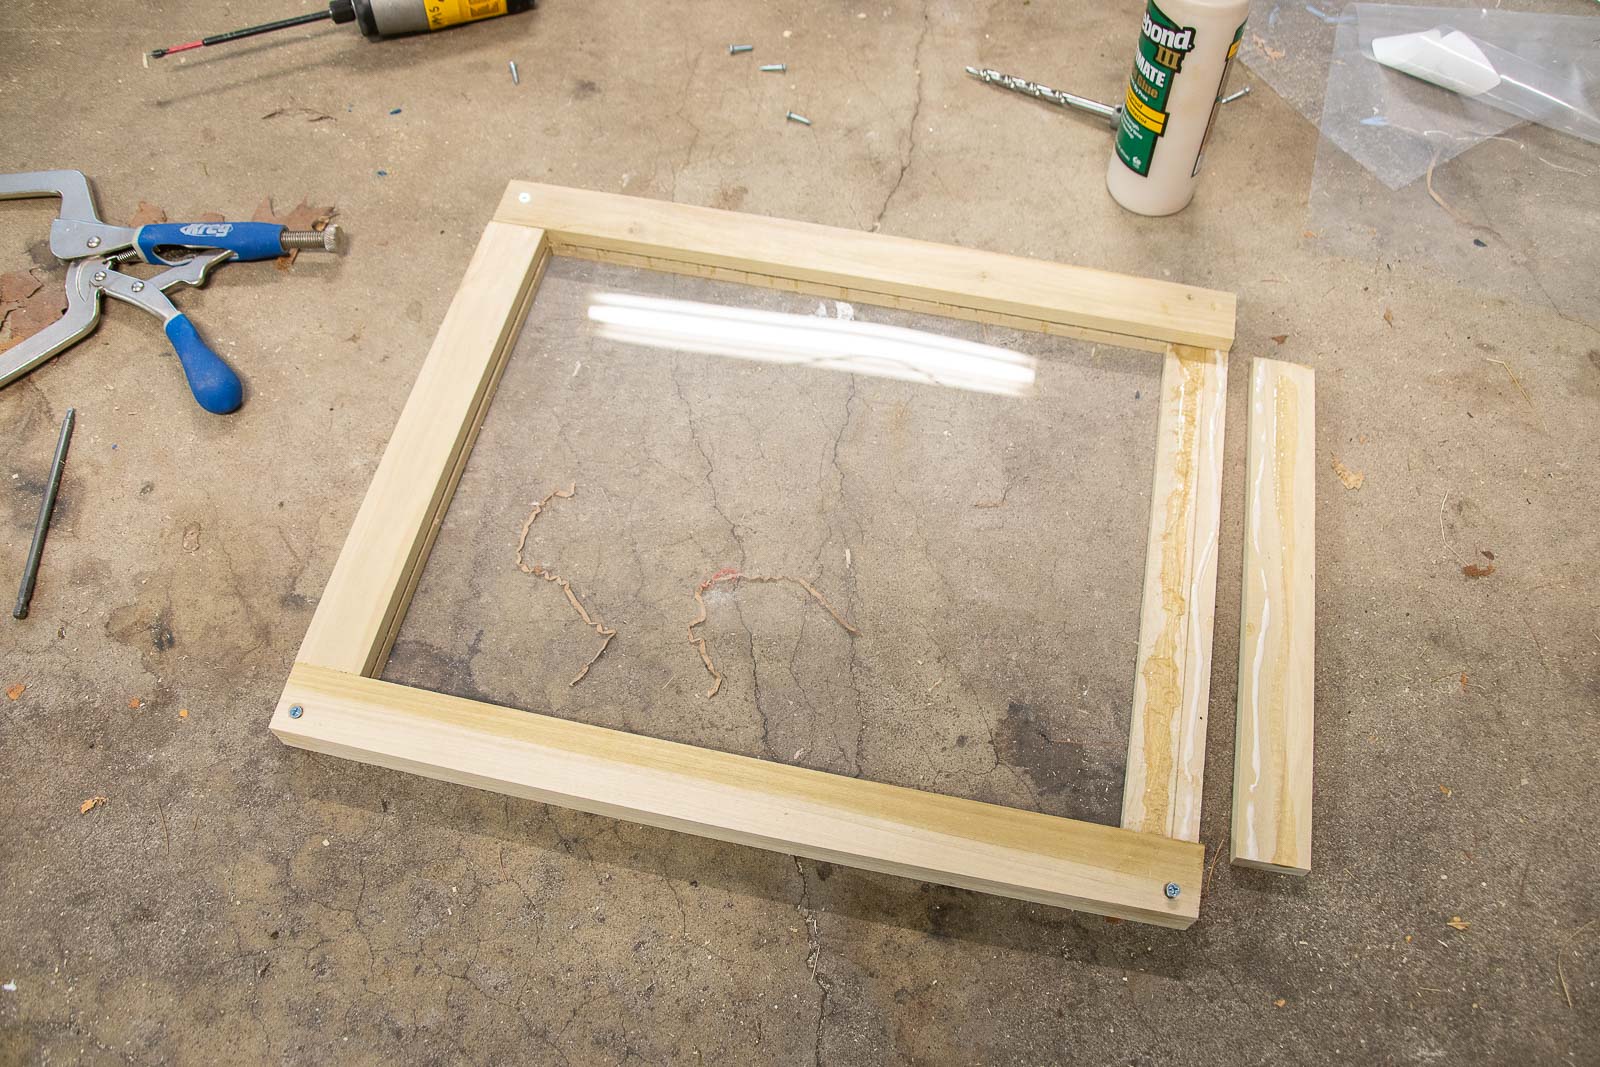
This was a bit of an experiment, but… I’d say it worked! I started with the top so that I could build the base to fit (which I thought would be easier to build.) I was most limited by the size of my acrylic so I started by marking this with a straight edge and cutting that with my Dremel Ultra Saw and a plastic blade. You won’t see the edges so don’t worry if they’re a little rough.

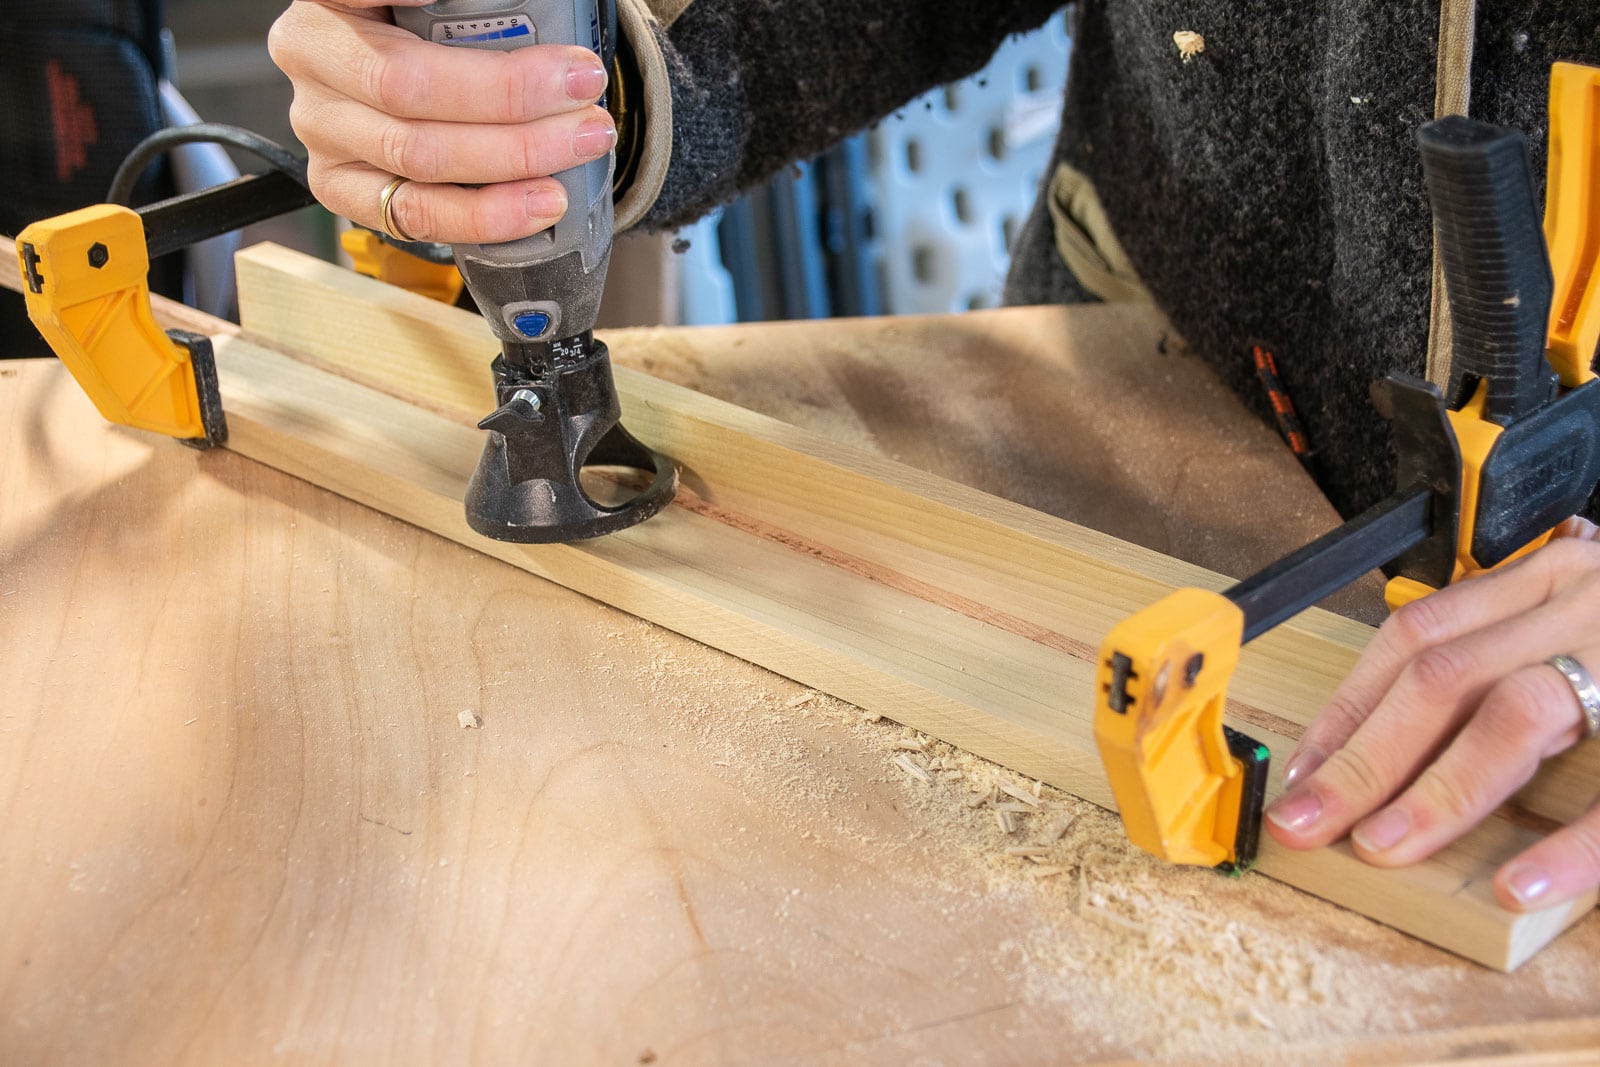
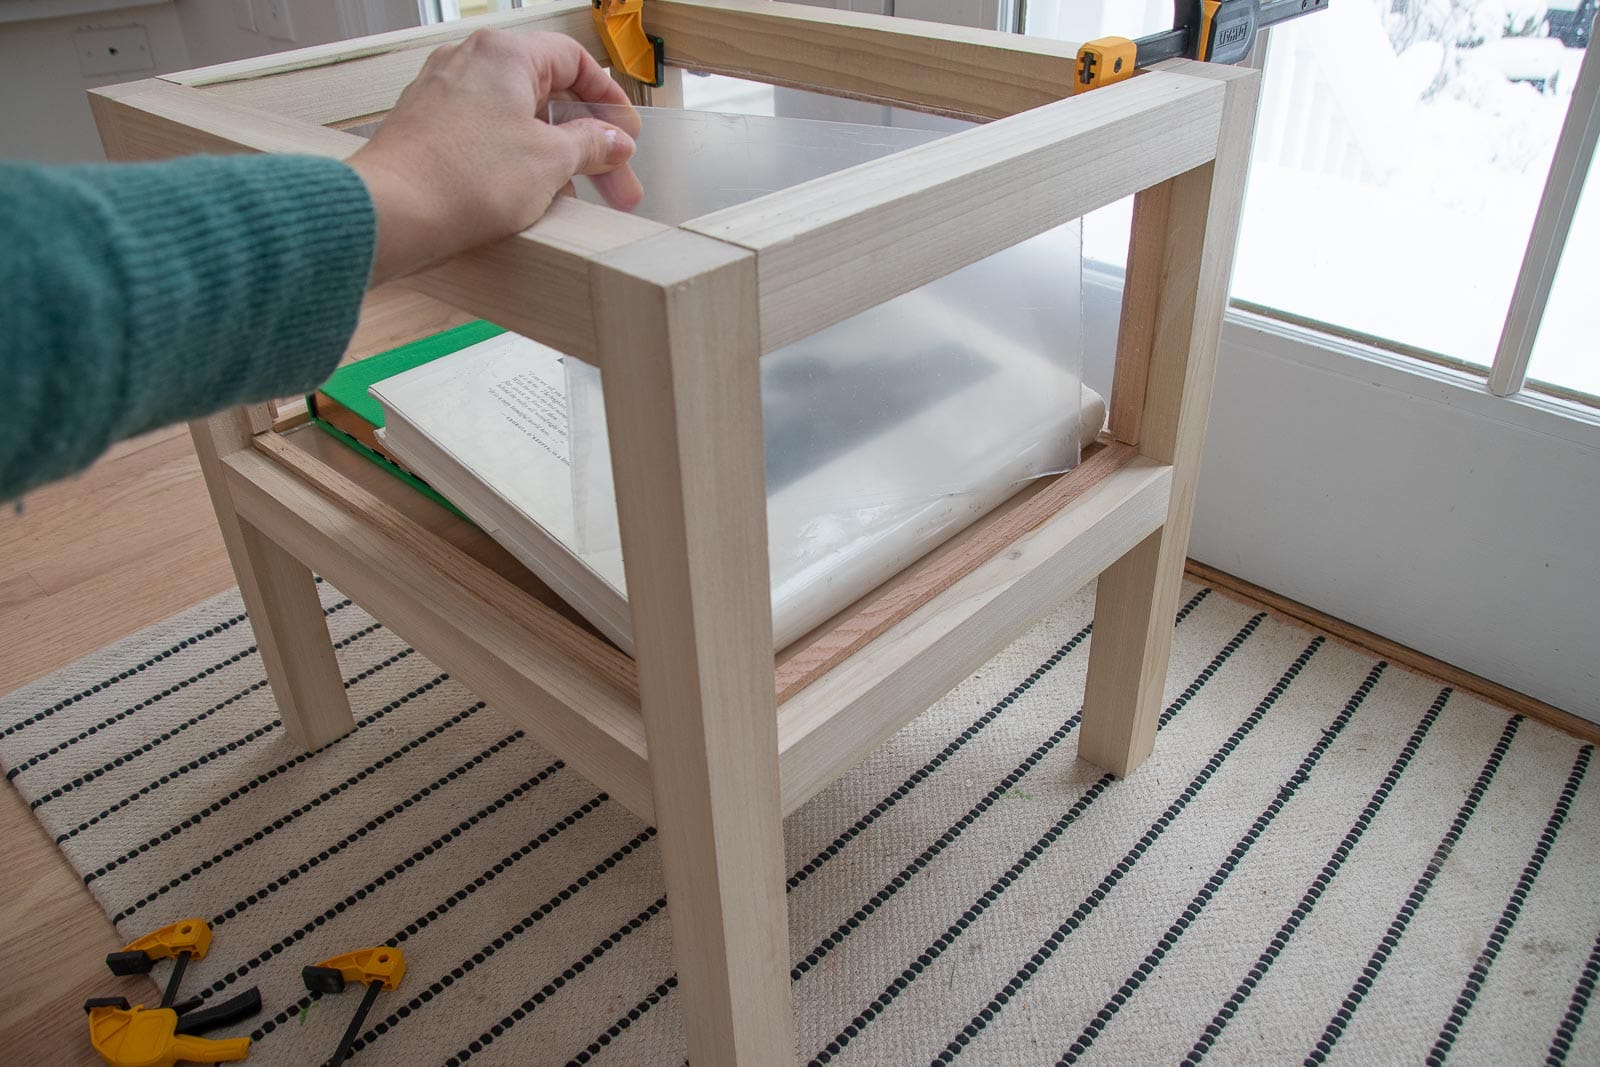
To create a frame for the acrylic, I sandwiched it between two pieces of poplar hobby board. I didn’t want to see that acrylic edge so I used my Dremel rotary tool to route out the middle of the hobby boards on one side of the lid. It’s not super clean, but I clamped boards to either side to give me a bit of a jig and then routed out about 1/8-inch so the acrylic could rest in place. Again… you won’t see this because of the hobby board that will rest on top.
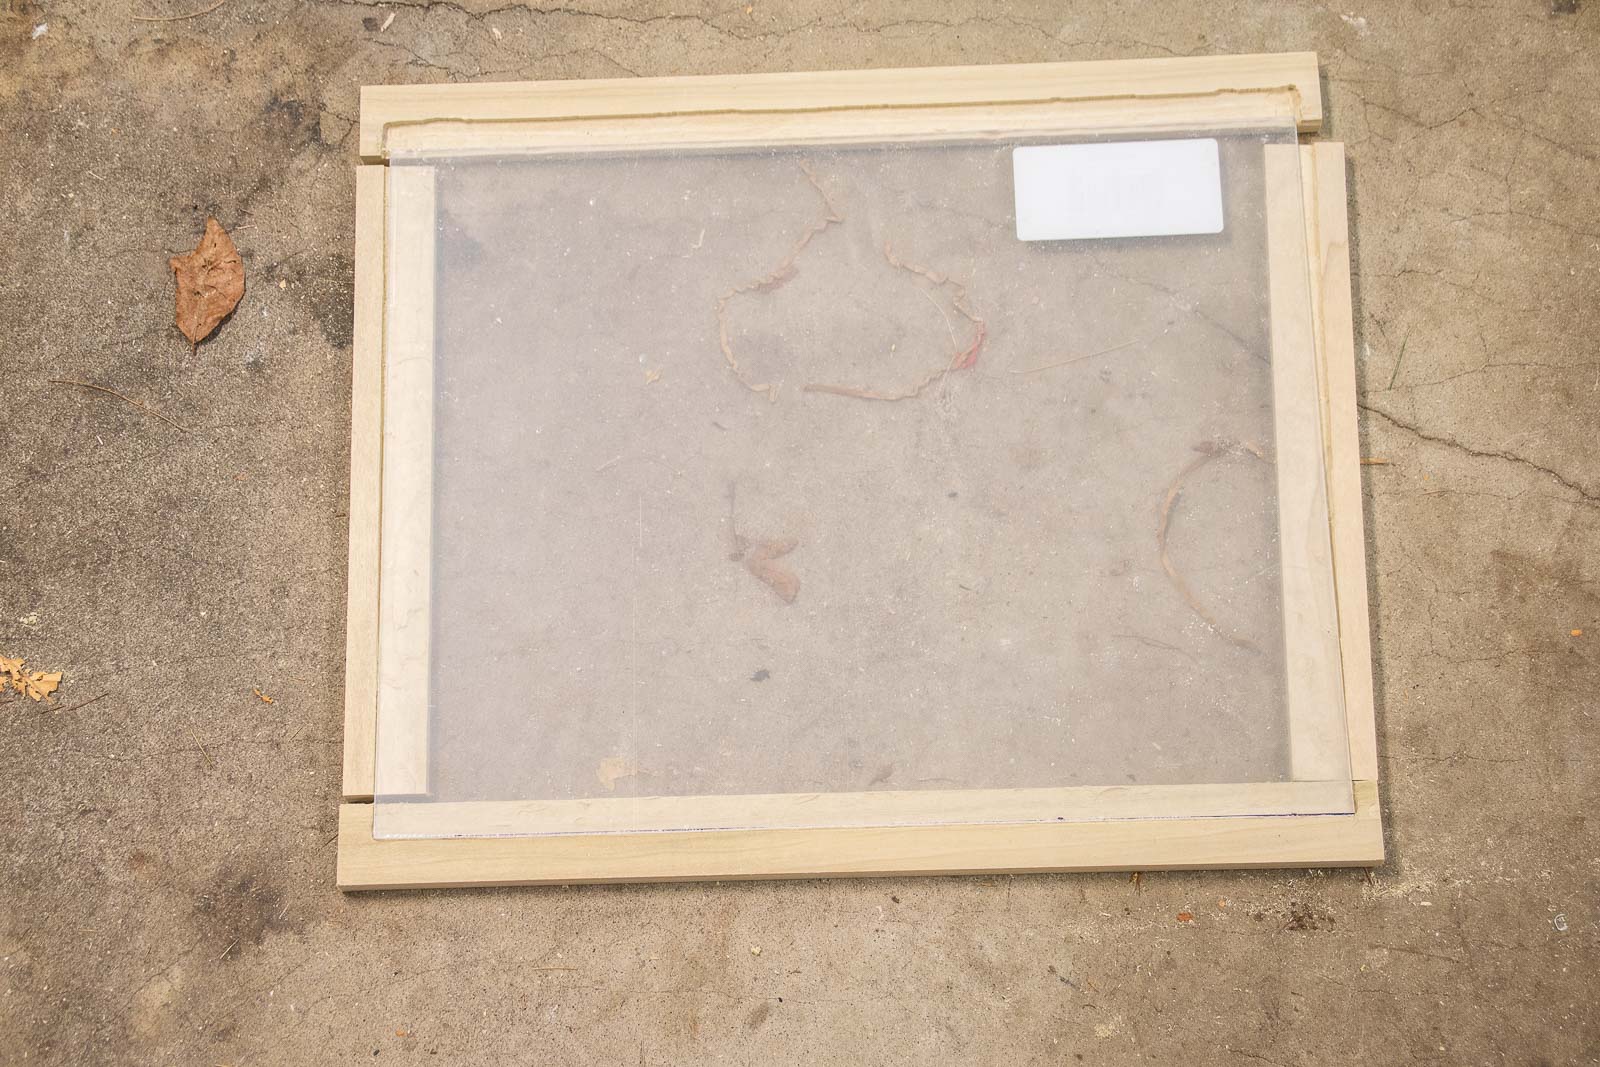
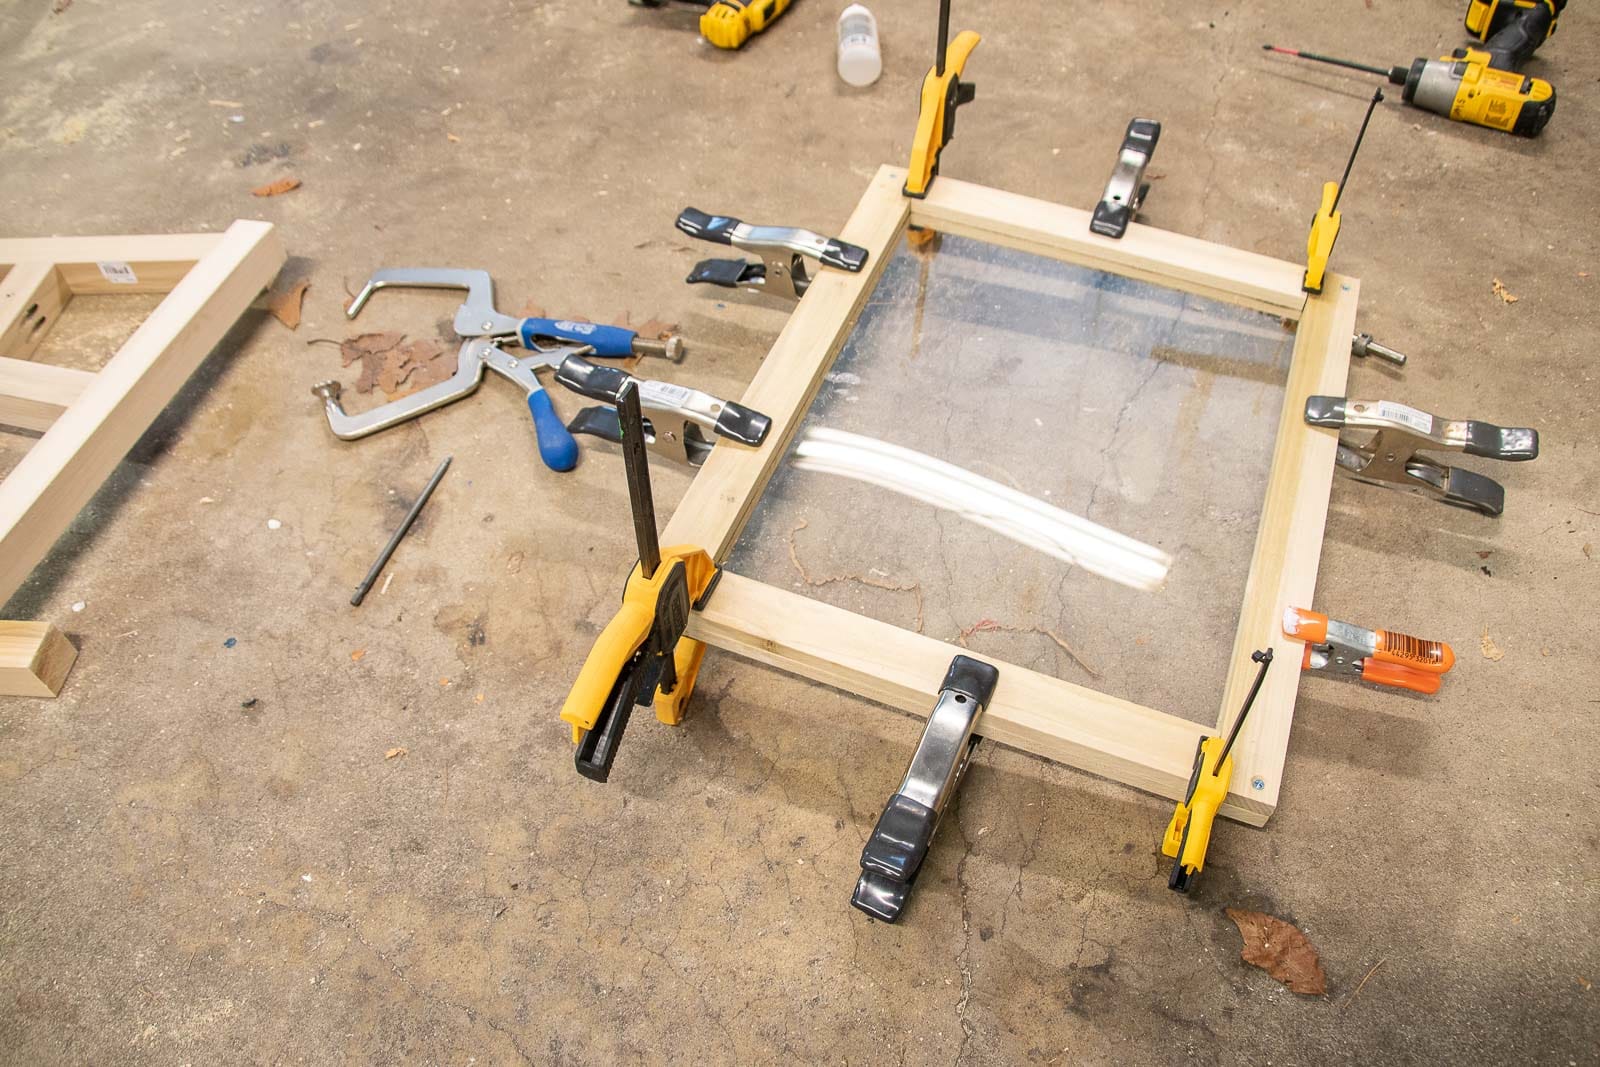
I assembled the lid in two steps. The first step was to glue and clamp the bottom half of the lid (with the routed grooves). Use your speed square to make sure the corners are 90 degrees.
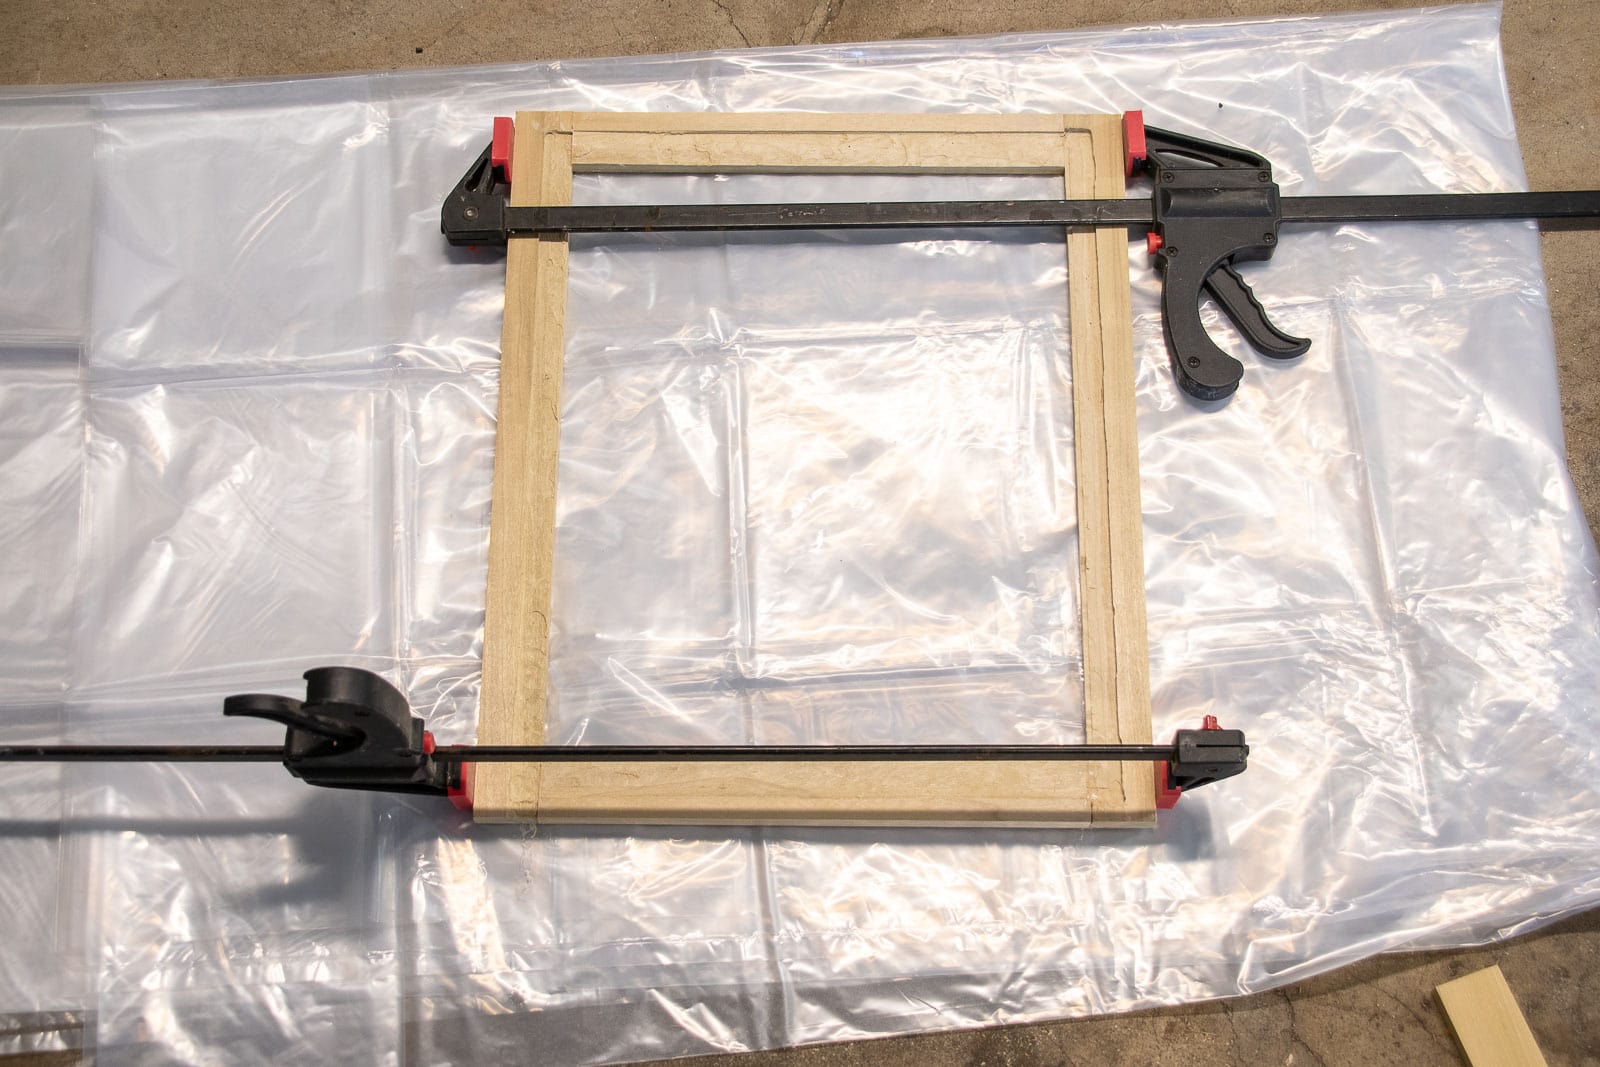
Once the bottom half has dried, grab your silicon and squeeze a bead along the routed groove. Remove the protective plastic sheet and carefully place your acrylic. Use wood glue on the exposed poplar and glue the top half of the lid in place. Essentially you’re sandwiching the acrylic between the two pieces of poplar. Clamp and let dry. I used a recessed drill bit in each corner and also screwed the top boards in place.
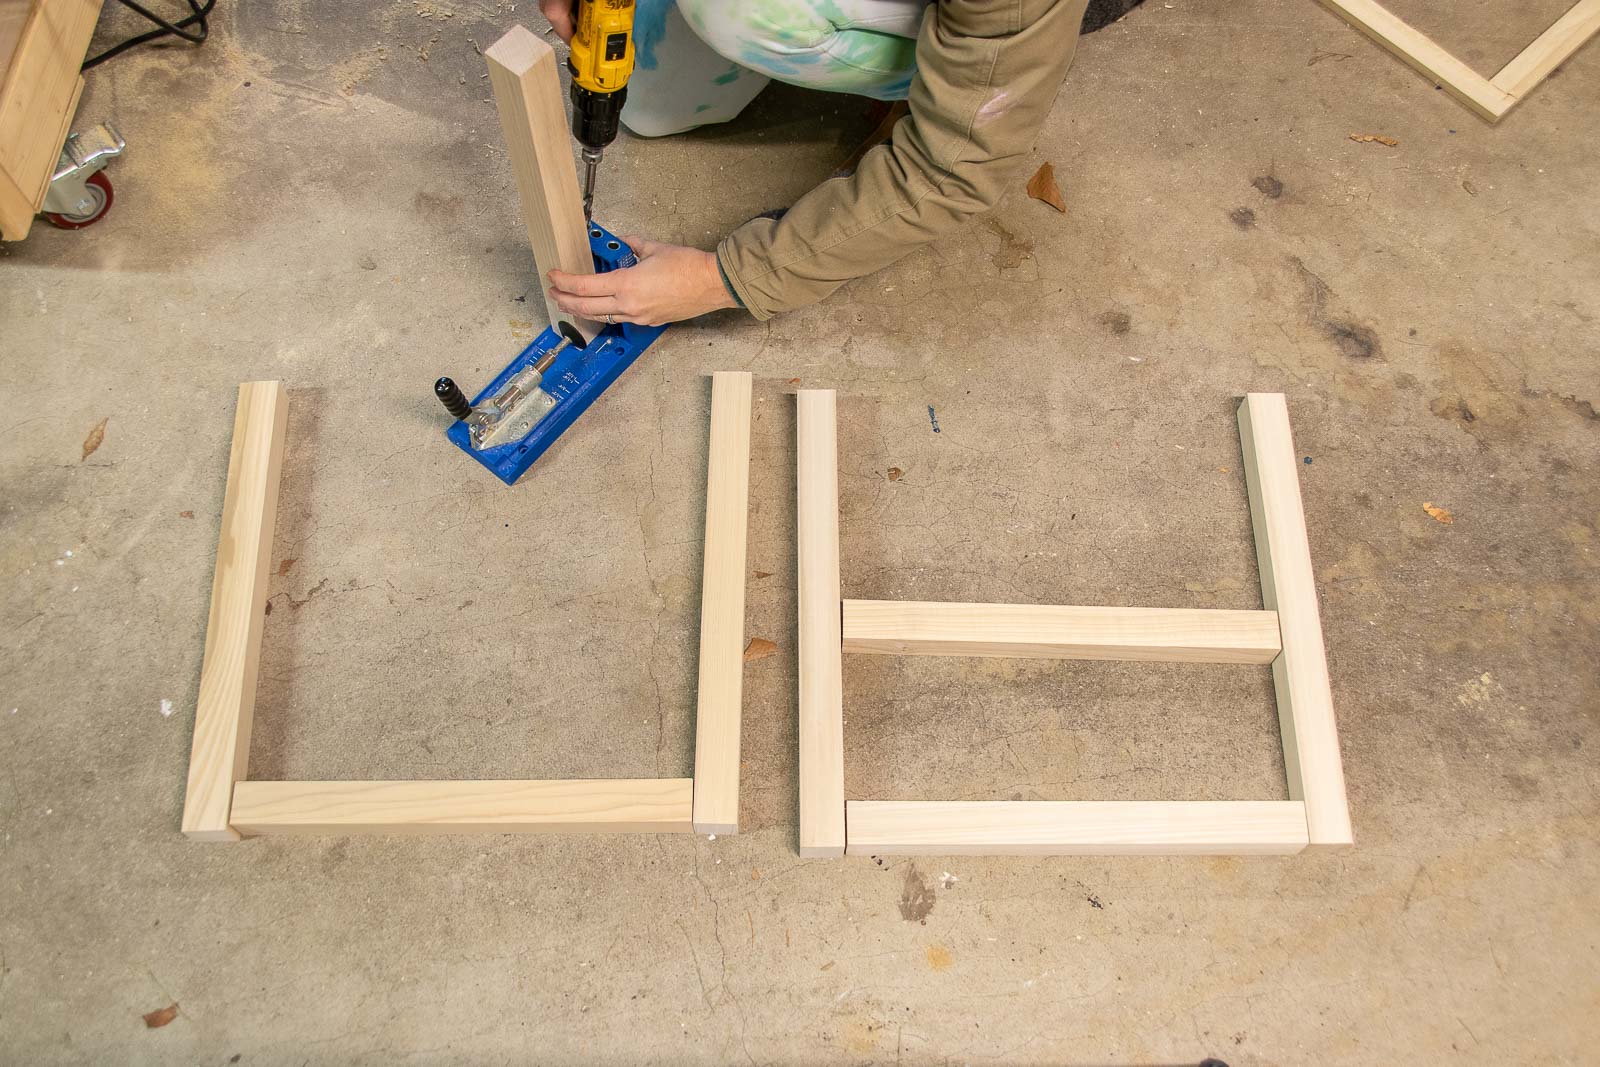
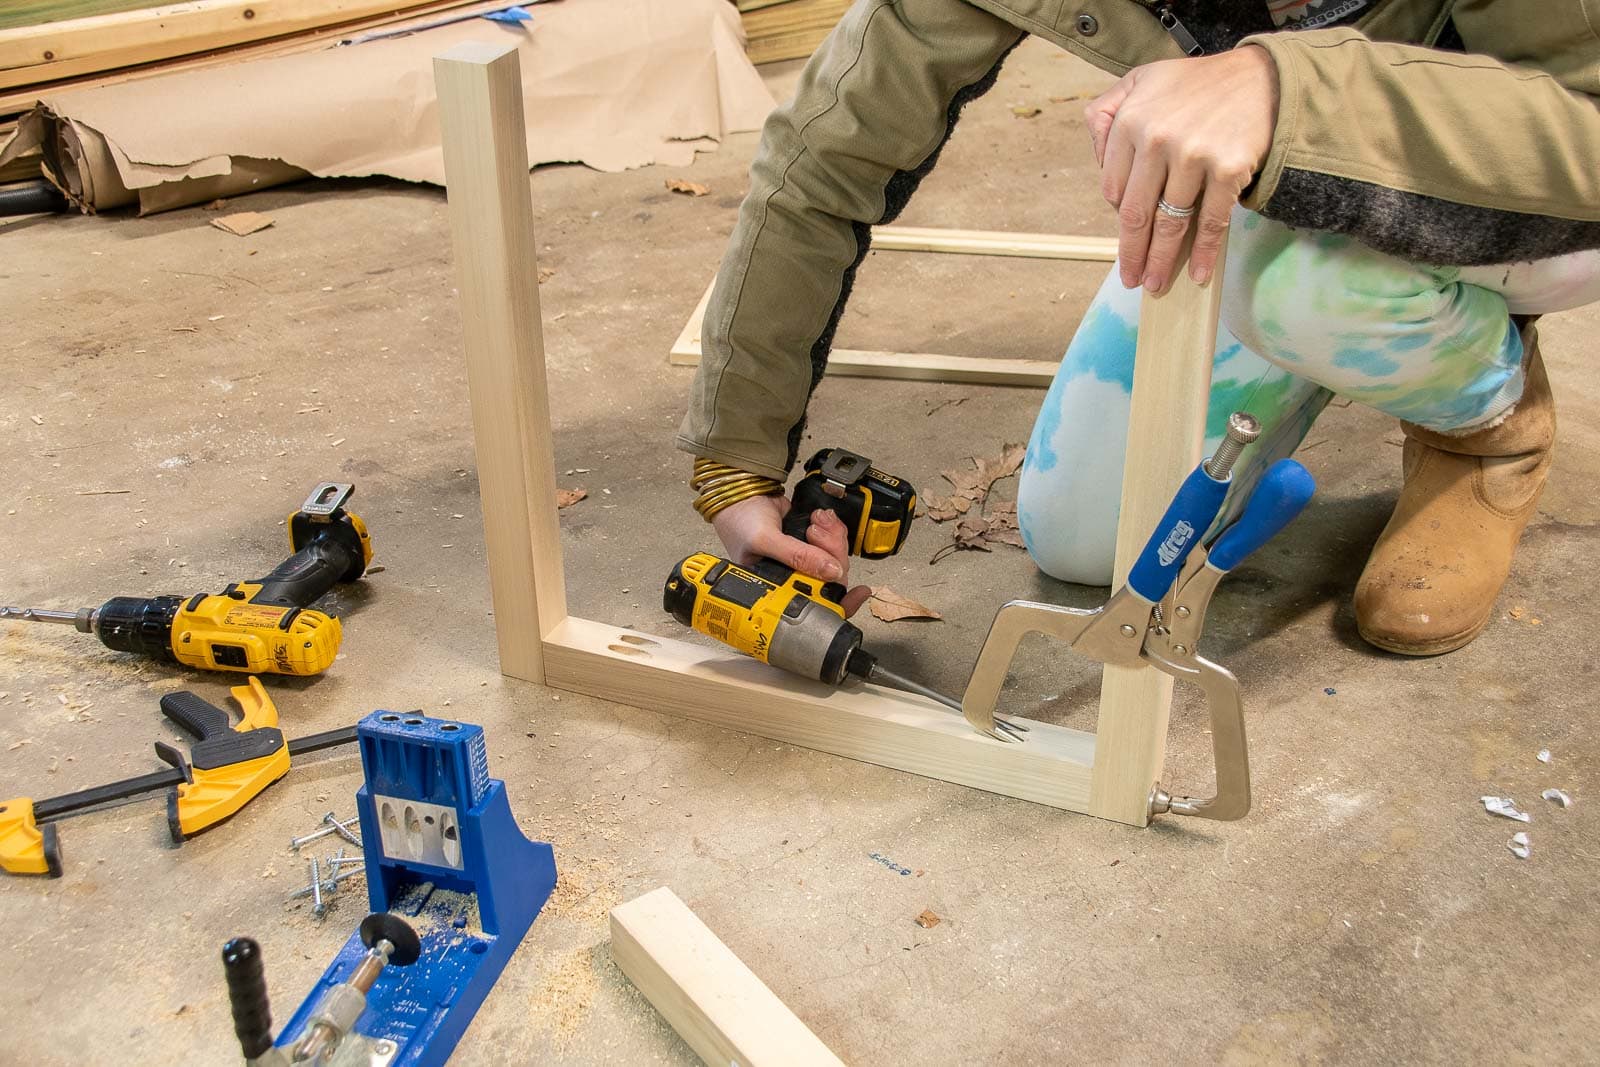
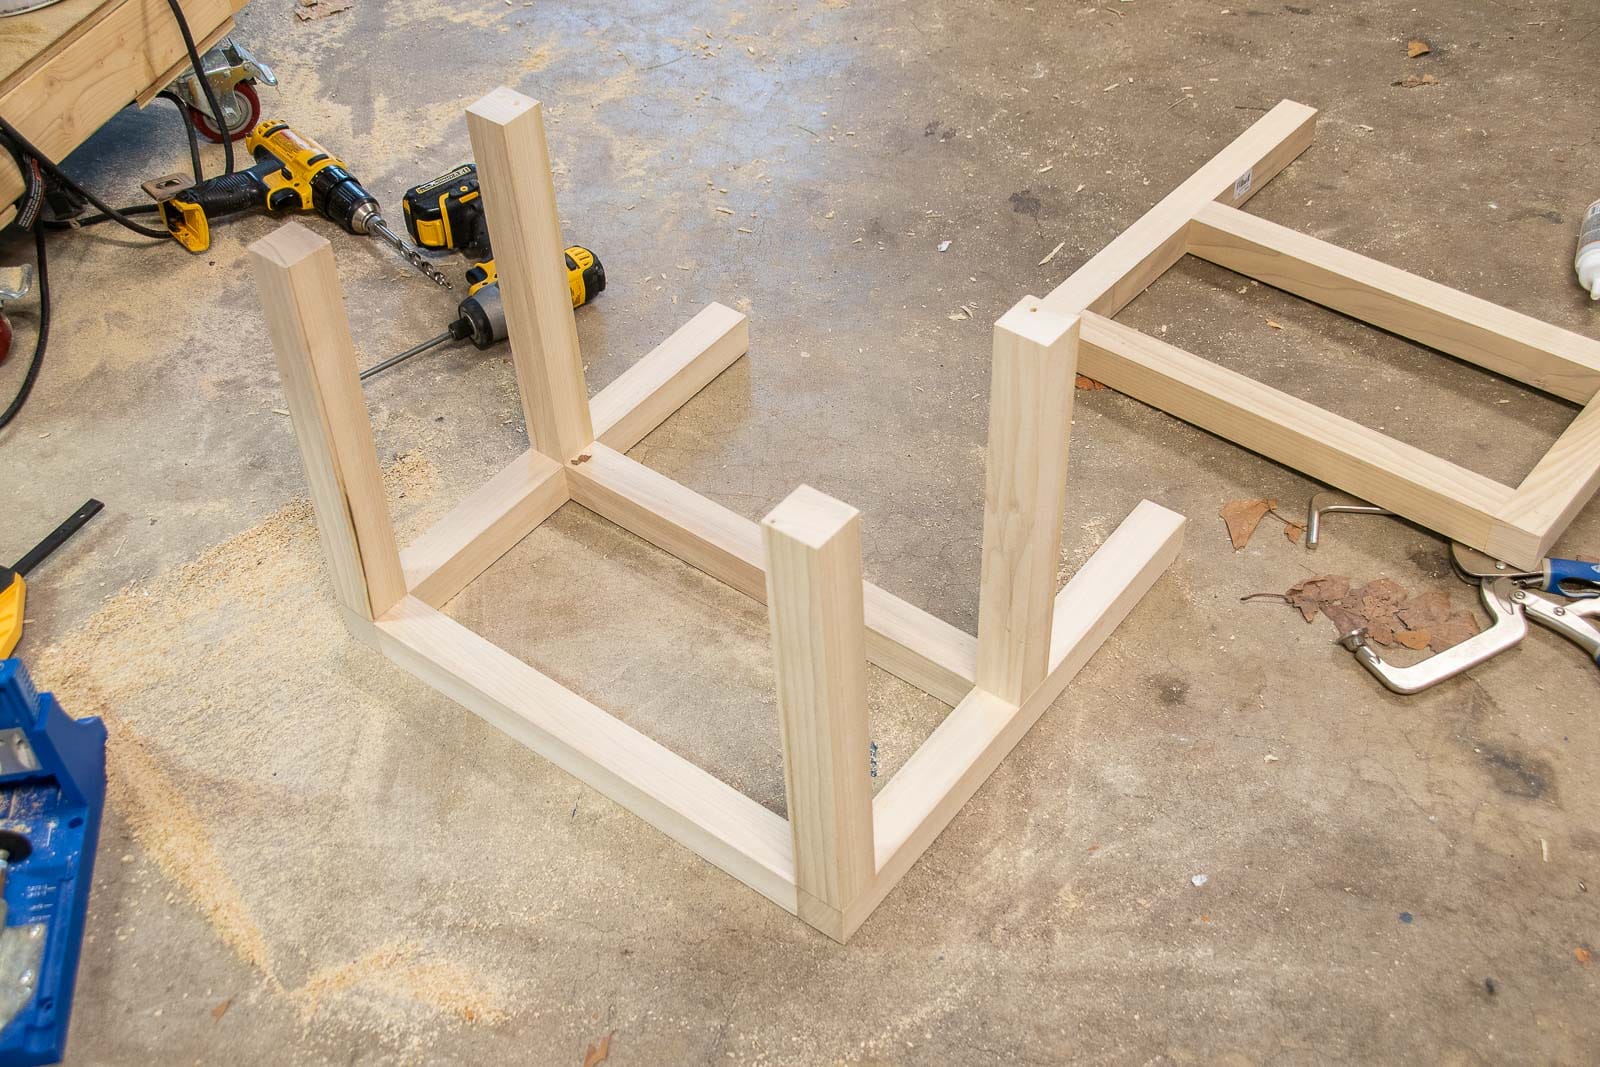
Step 2. Build the table base
Cut four table legs and 8 cross braces. Make sure the finished dimensions of each side are the same as the lid! Attach the cross beams to the long sides with pocket holes. Next attach the side cross beams with pocket holes to the front of the table. Finally, attach the back of the table.
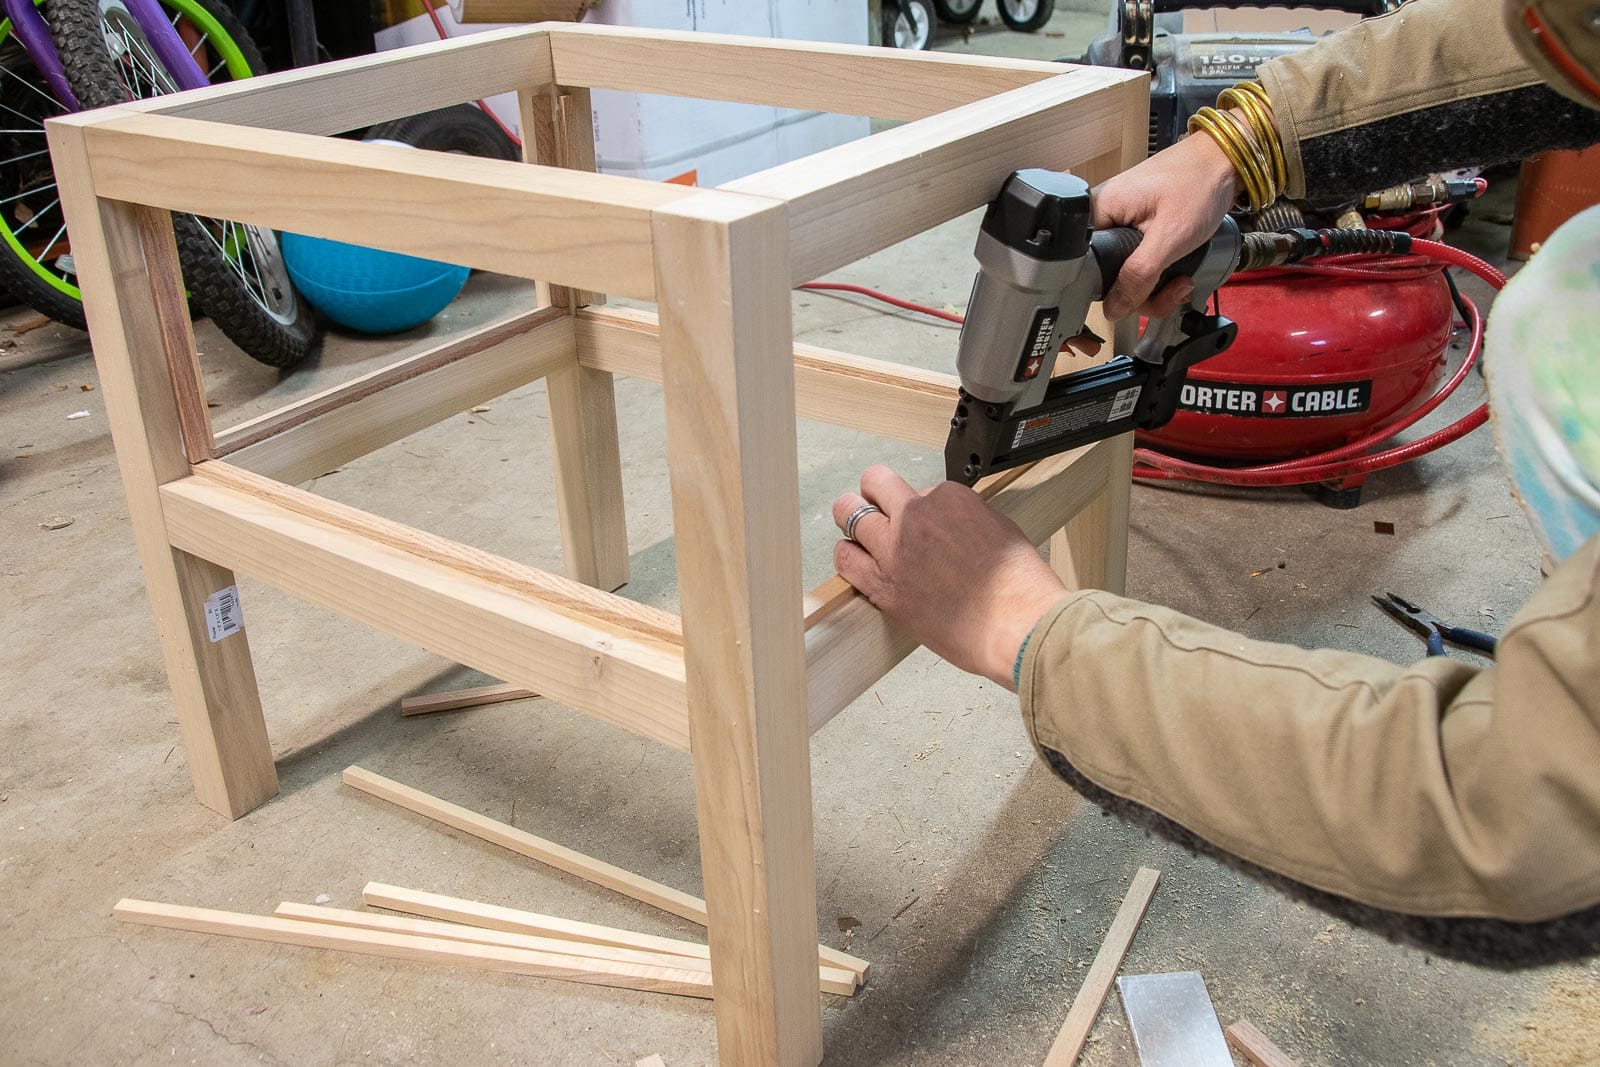
Step 3. Attach the bottom and side supports to the table
To give the terrarium table base more stability, I attached square dowels around the inside of the table as supports for the underlayment and acrylic. I attached square dowels with pin nails and wood glue. For the acrylic sides, I repeated the same process as the base of the table, but used wood trim that was a bit more low profile. I used a piece of scrap acrylic as a place holder so that the trim pieces were set back just the right amount to allow for the acrylic to sit flush with the inside edge of the table. Again, I attached these trim pieces with wood glue and my pin nailer. Let dry.
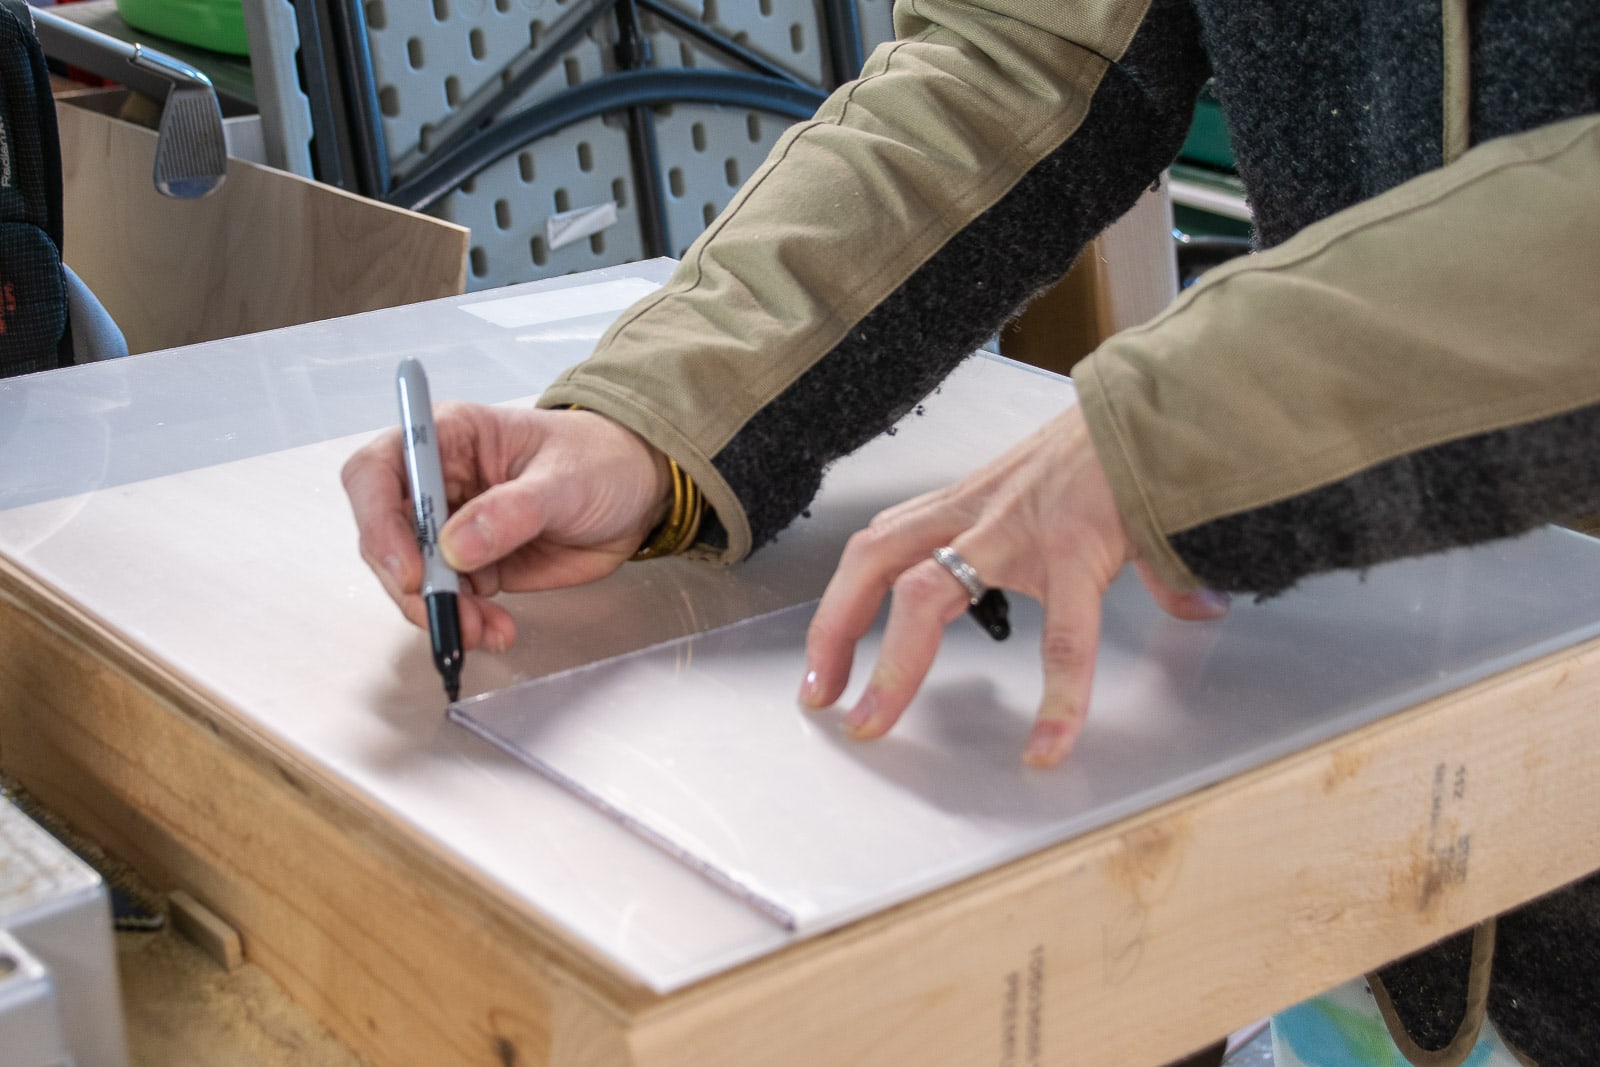
Step 4. Cut the Acrylic
Once the table was built, I felt comfortable measuring and cutting my acrylic sides and the base. With the protective sheet still in place, I used a speed square and a Sharpie to mark my cut and then used the Dremel Ultra Saw with the plastic blade to cut each piece to size.
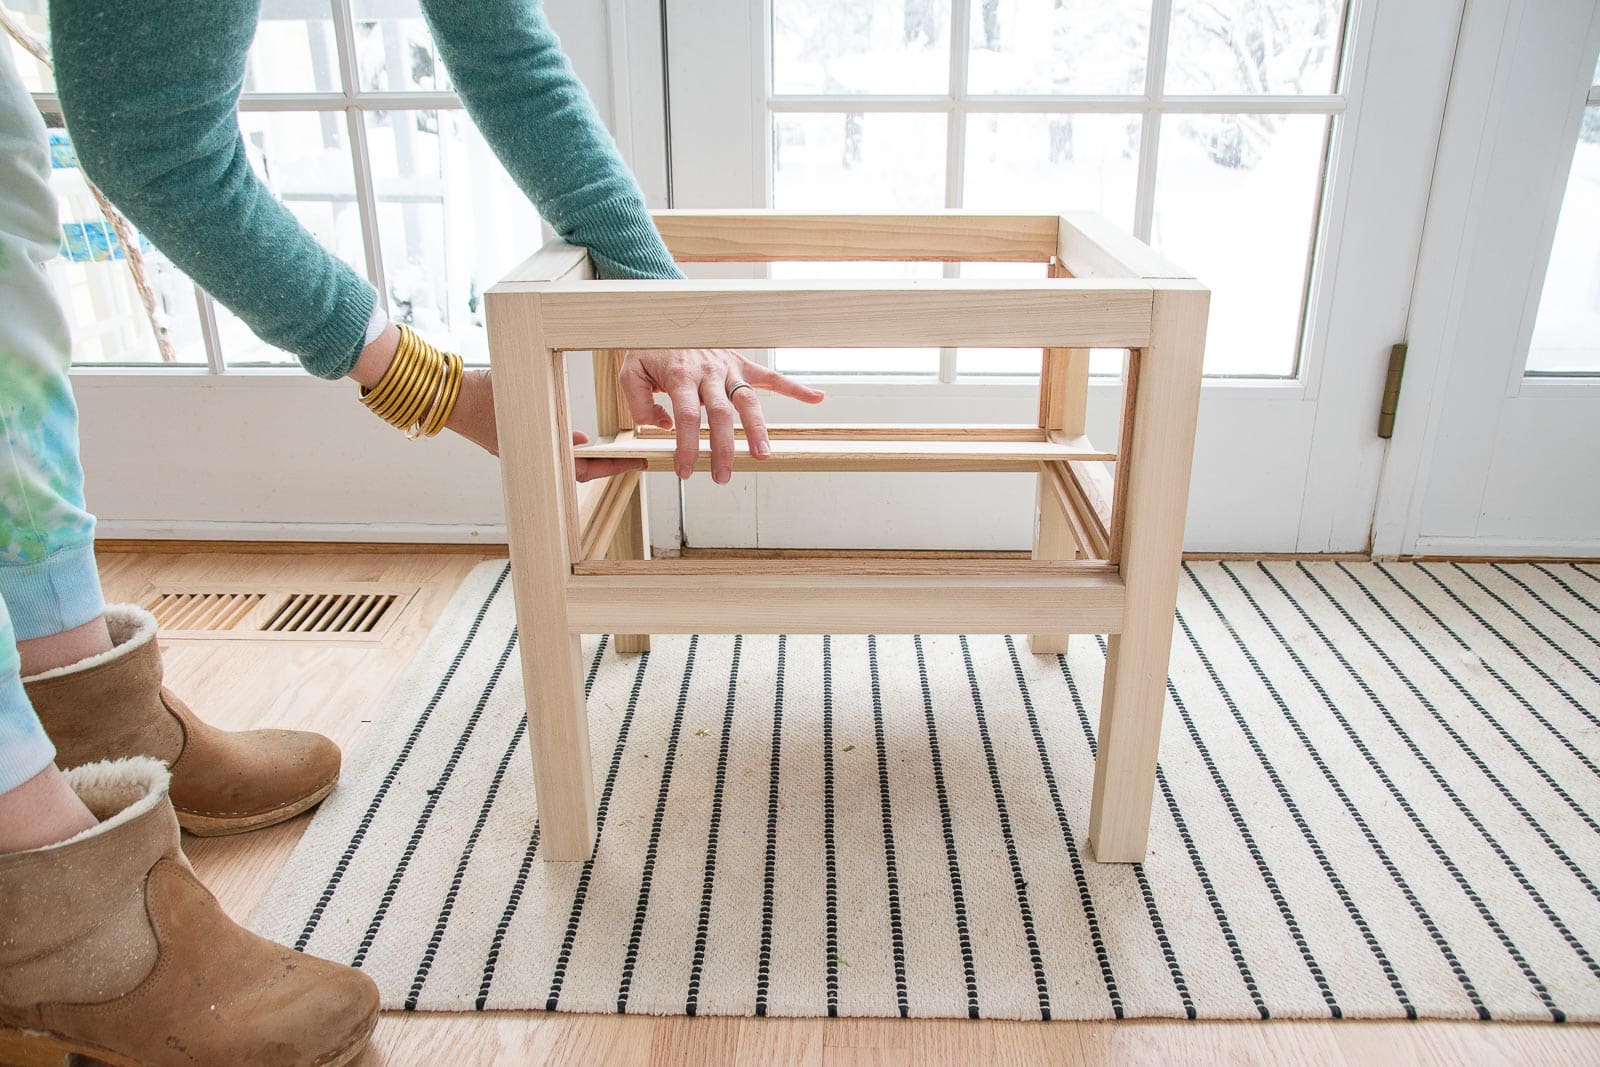
Step 5. Insert the base and the sides of the table
I attached the underlayment base first with wood glue. Next, I used the silicon to adhere a sheet of acrylic to the base and then the four smaller sheets of acrylic for the sides. Clamp these in place until the silicon has dried. Go back over these corners with another bead of silicon to ensure all the edges are sealed.
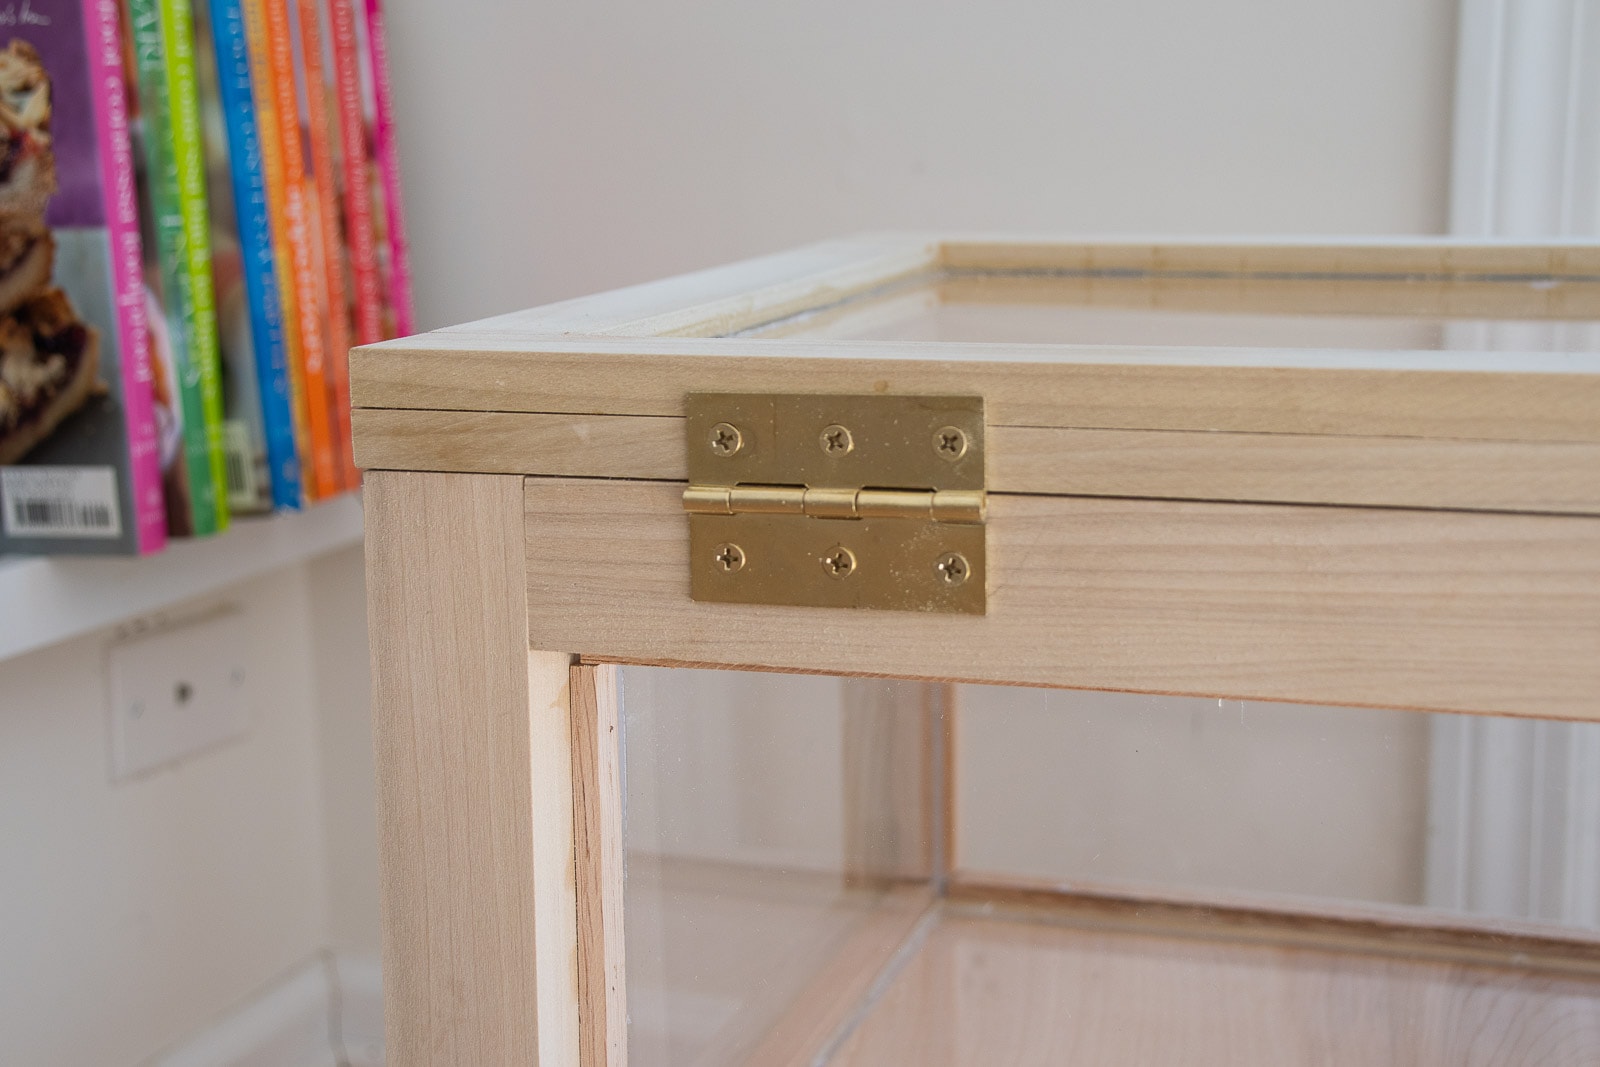
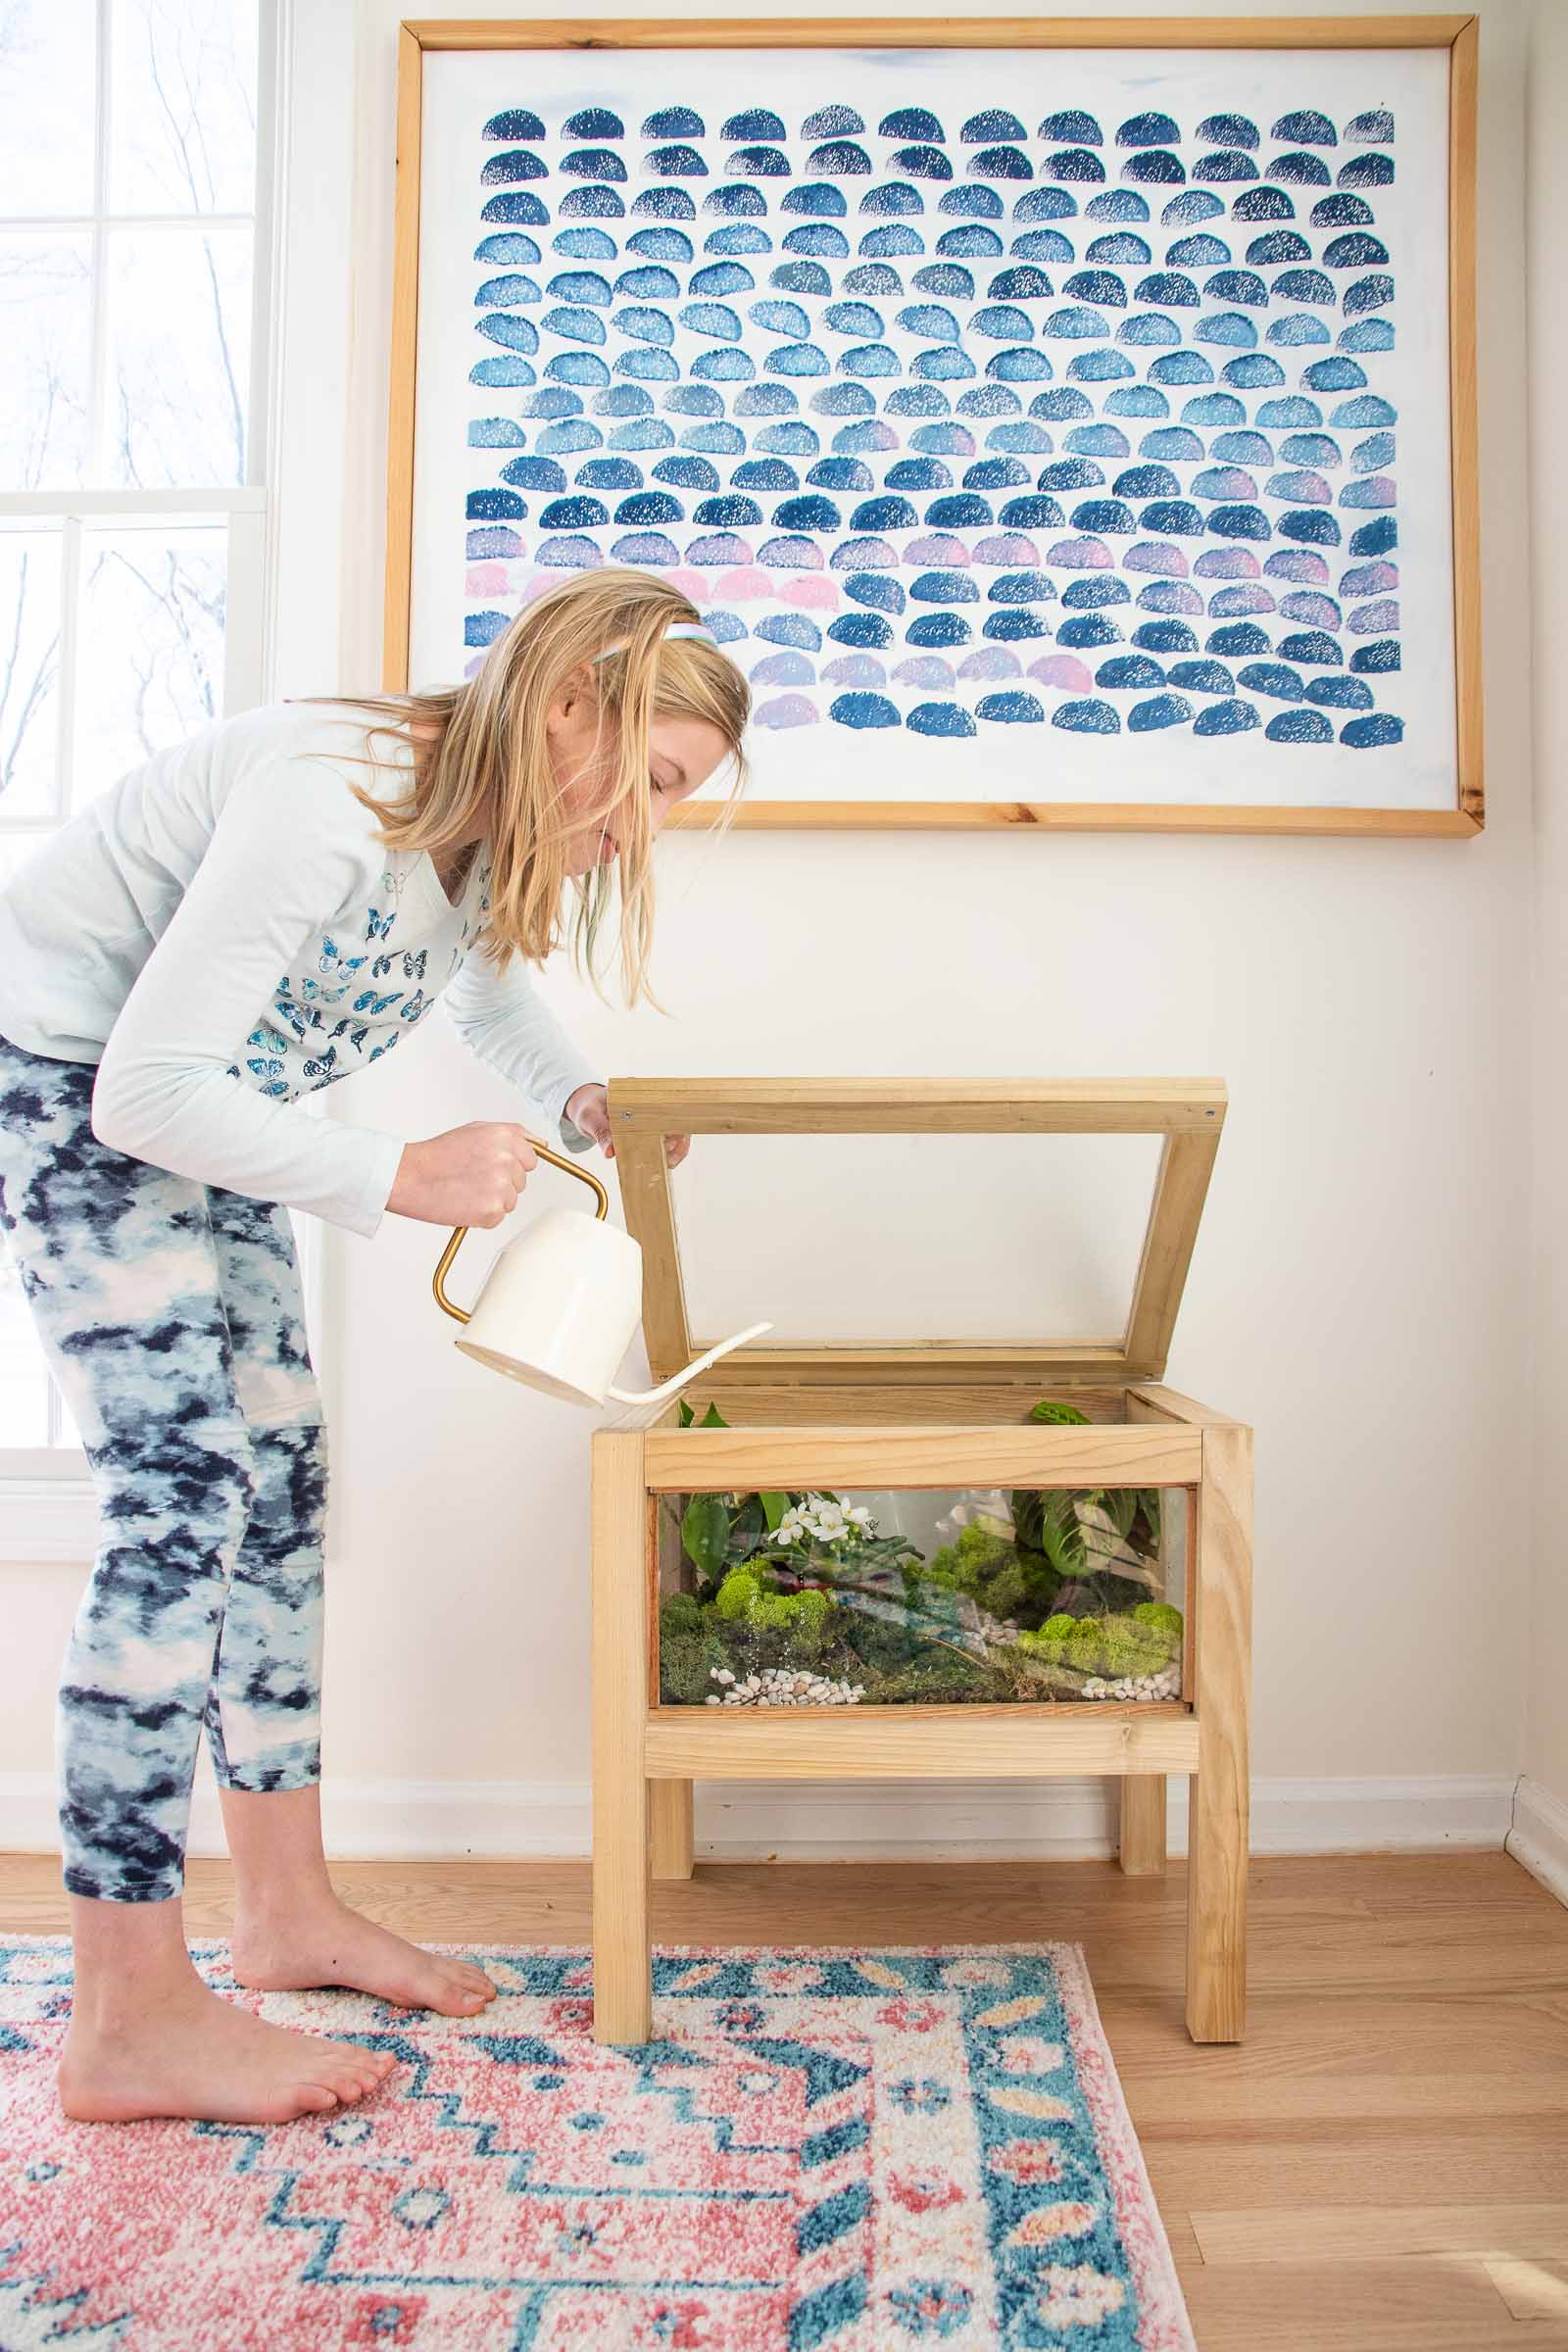
Step 6. Attach the lid
Measure and line up two hinges on the back of the lid. Pre-drill so as not to split the wood and then screw in place.
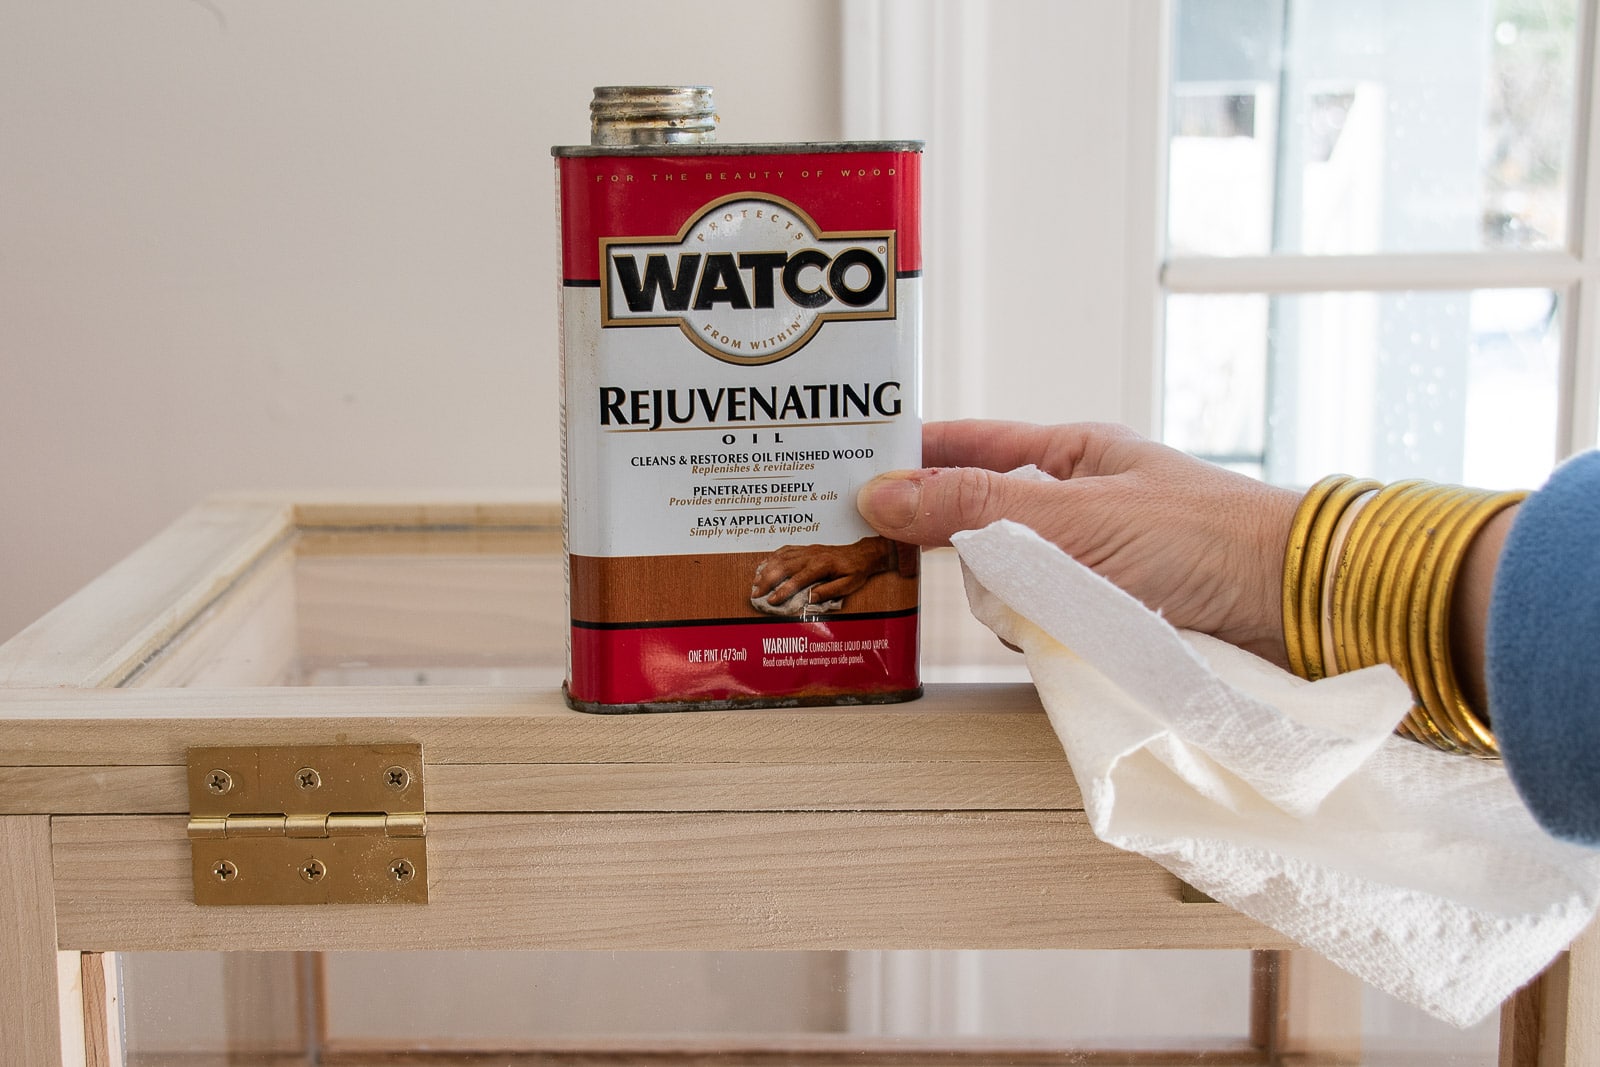
Step 7. Oil the wood
I wanted to preserve the natural wood tone so I didn’t want to paint or stain this table, but I did sand it down smooth and go over it with a coat of wood refinisher just to bring out the grain a bit. It still has a wonderful natural finish, but it’s just a little more ‘sparkly’. (Not a technical wood working term…)
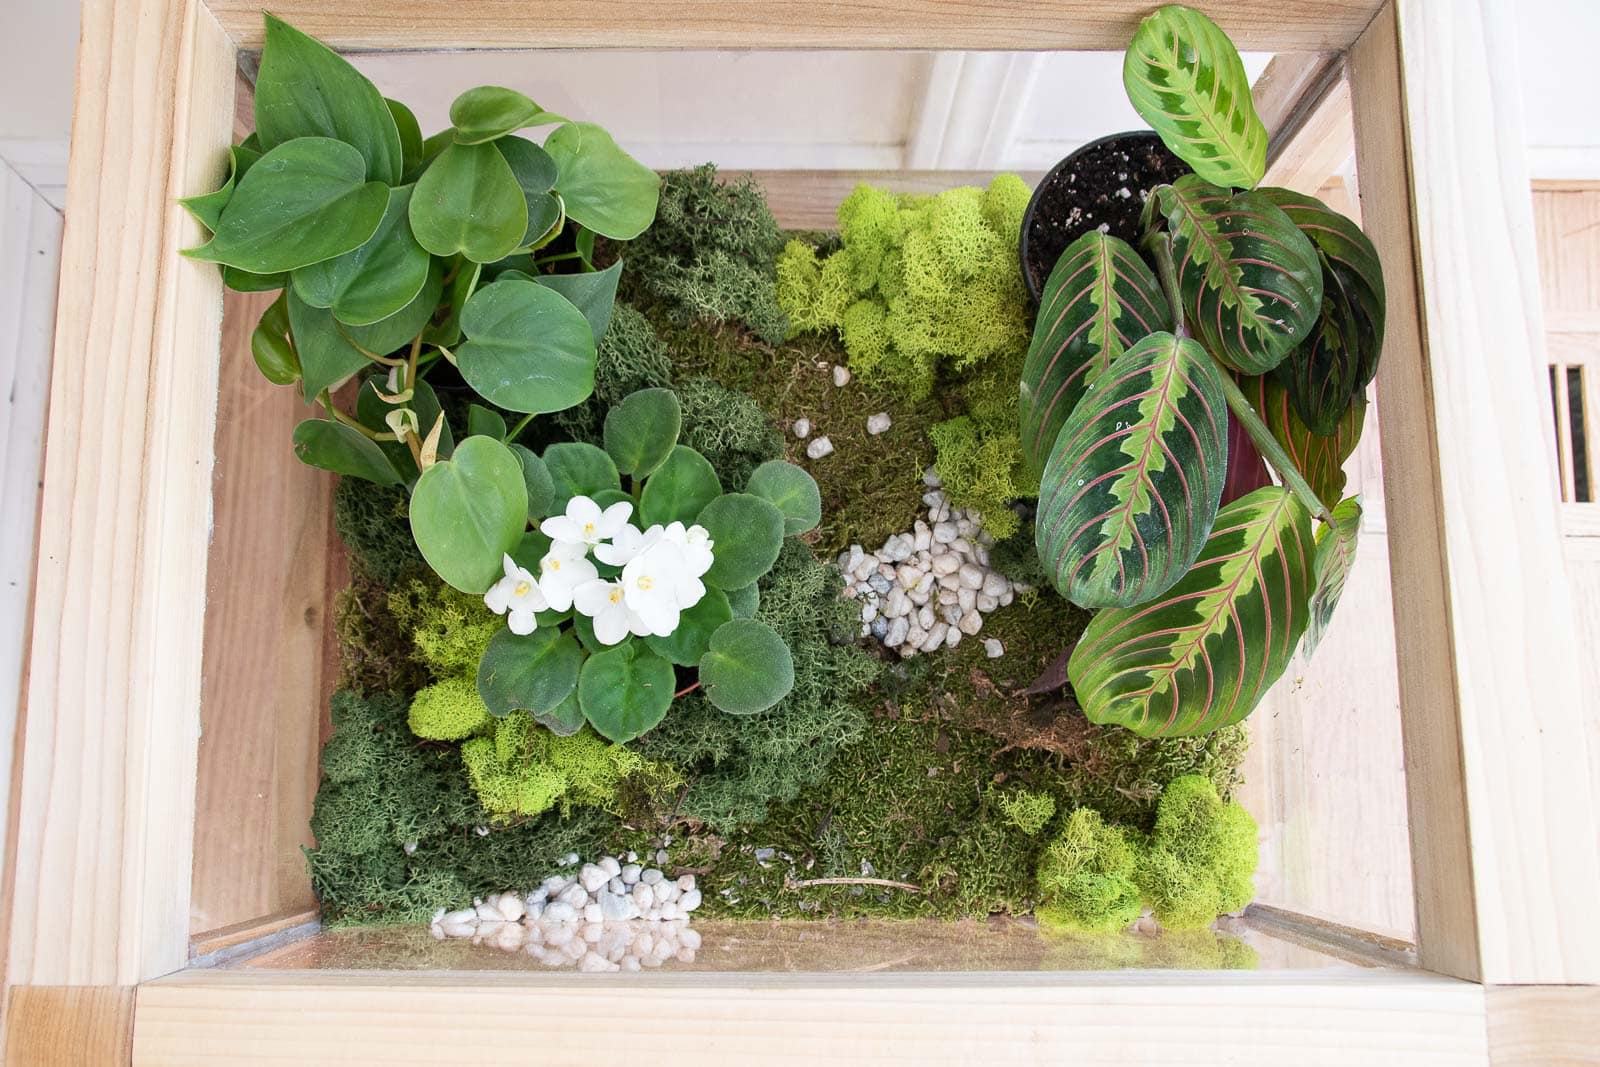
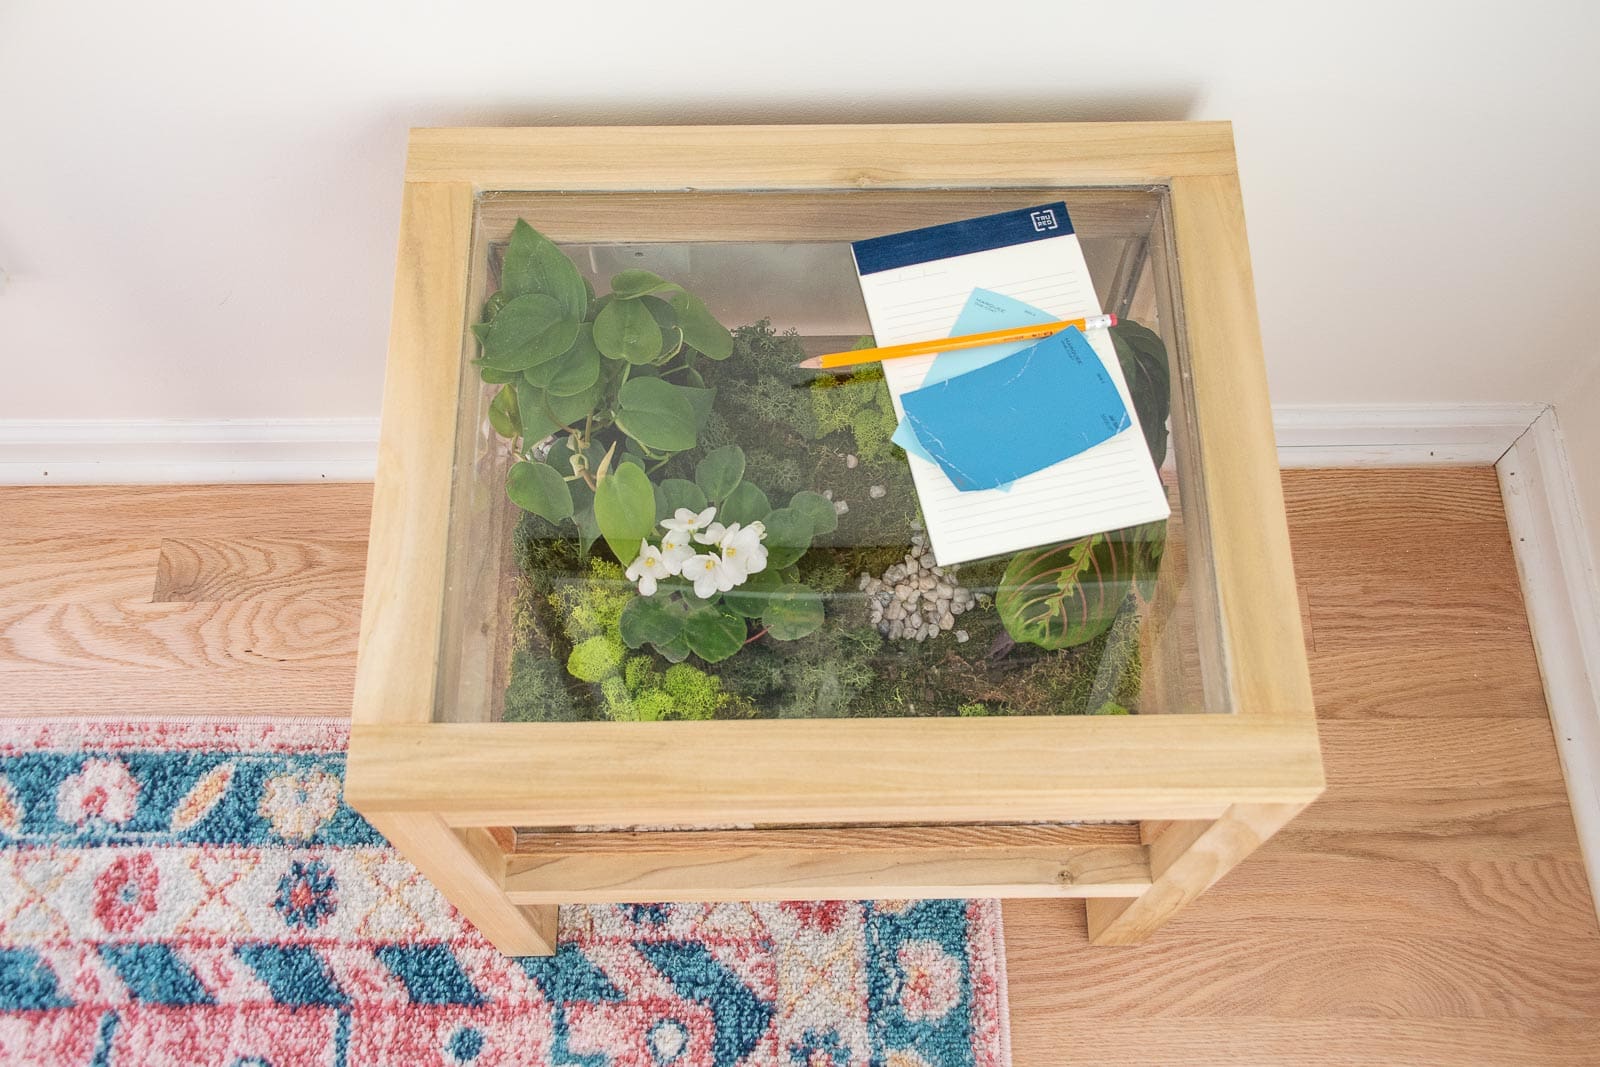
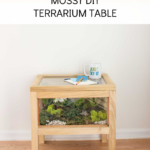
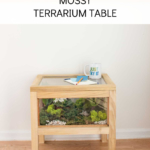
Step 8. Add Moss and Plants
I wanted the moss to be the star of this show, but I did add a couple smaller plants and some decorative rocks to add a little texture and variety to the terrarium. The table is ‘water tight’ but I don’t plan to have anything too damp in here just to play it safe. I kept my plants in their grow pots and have them resting on pebbles so there won’t be too much standing water.
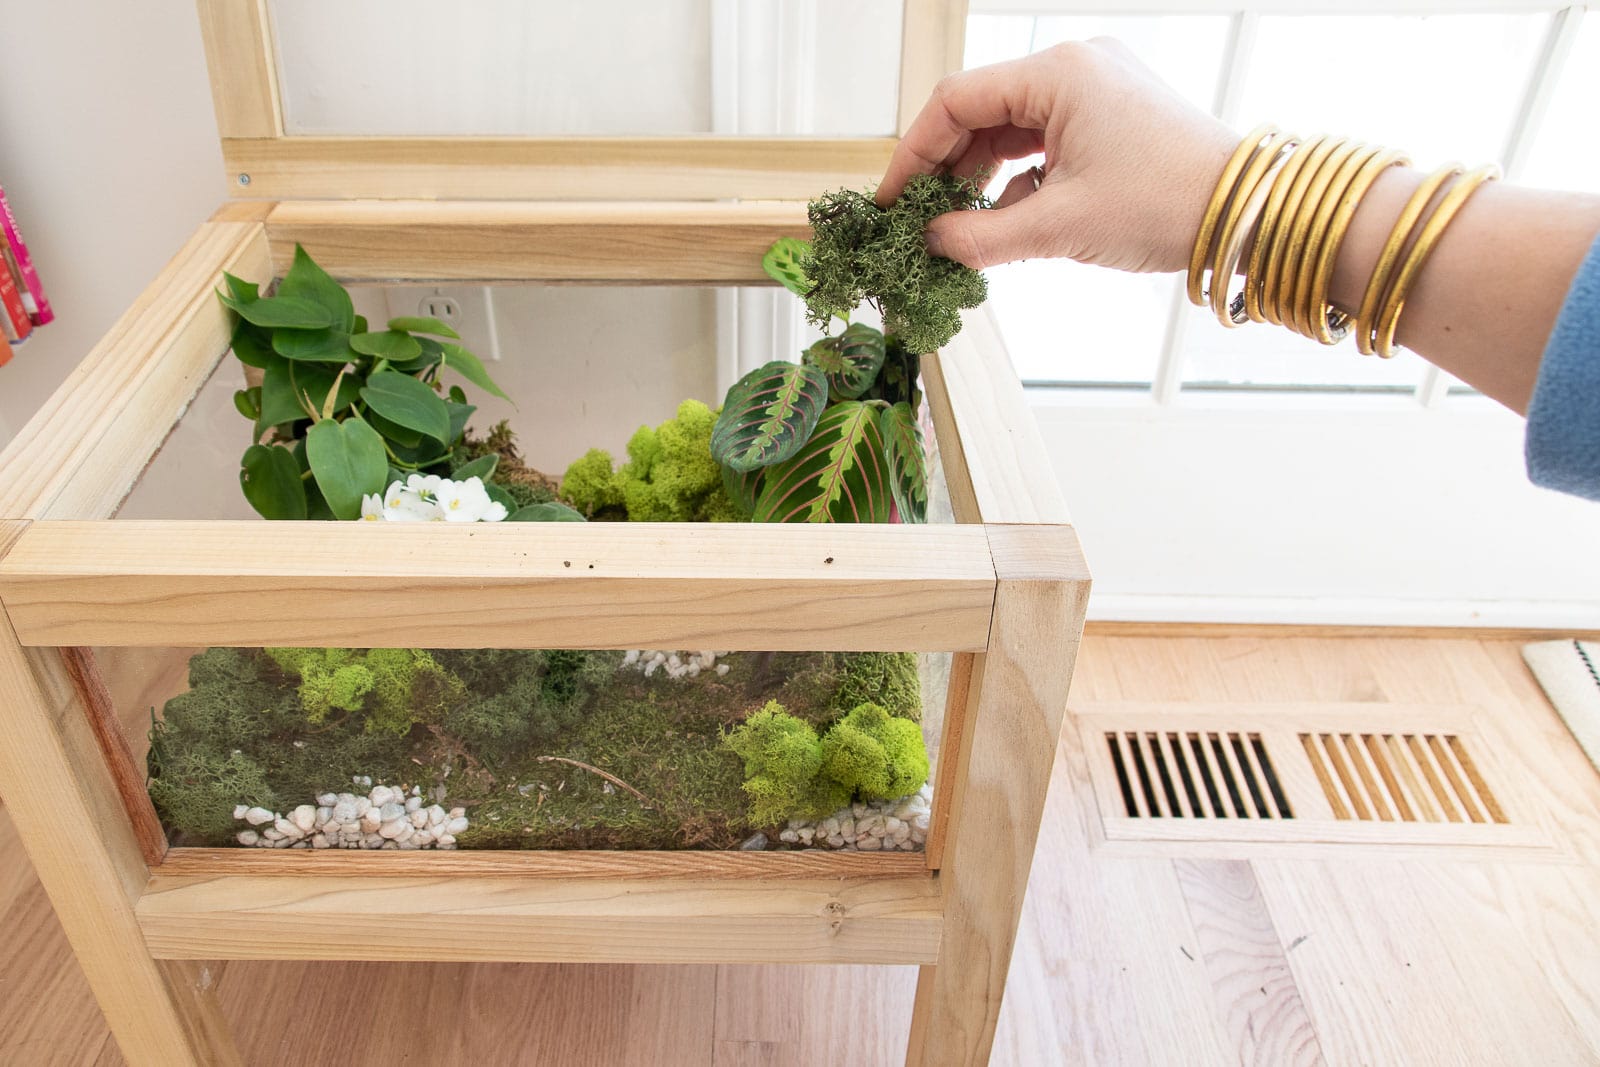
I LOVE how this turned out and it is in the perfect spot in our kitchen sun room. Not only does it look so sweet and green, but hopefully I won’t forget to water it because I get to look at it every day! NOTE: I have this in a VERY sunny window so condensation often builds up inside the table. I’ve had to adjust my plants accordingly to find ones that are happy in this moist environment. I’ve also added some felt pads under the table lid to allow for a little more air circulation so that it doesn’t warp from the condensation. The advantage of this working as a legit terrarium is that the moss has stayed lush and bright and colorful. There’s nothing quite like sitting with my morning coffee as a play a game with the kids and putting my cup down on top of a thriving terrarium!
Terrarium Table Materials:
- Acrylic Sheets
- Poplar 1.5 x 1.5
- Poplar hobby board
- speed square
- Kreg Jig
- Dremel Rotary Tool
- Dremel Ultra Saw
- Plastic blade
- Silicon
- Wood glue
- 2×4 plywood underlayment
- Clamps
- Hinges
- Wood Rejuvenating Oil
- Assorted Moss (I used sheet moss and reindeer moss.)
- Pebbles
- Countersink drill bit
- wood trim
- square dowel
- pin nailer

Make sure you head over to HomeDepot.com for more fun and creative DIY ideas, step-by-step videos and instructions and to complete Pinterest trending projects at home!


Love it!
Thanks so much, Louise!!
Oh gosh… this would be amazing for a fairy garden. YouR moss gArden is so cUte! I’m going to need a drEmel now.
Yes!!! It would be adorable!!
You always do Such fun, CREATIVE projects! I love FollowiNg you and seeing all thw fun things You do❤️
That’s so sweet of you, Kathy!! Thanks!!
Wow !
thats a job well done.
Super nice !
( the caps lock caught me out lol….)
Haha! Sorry! Thank you!!