
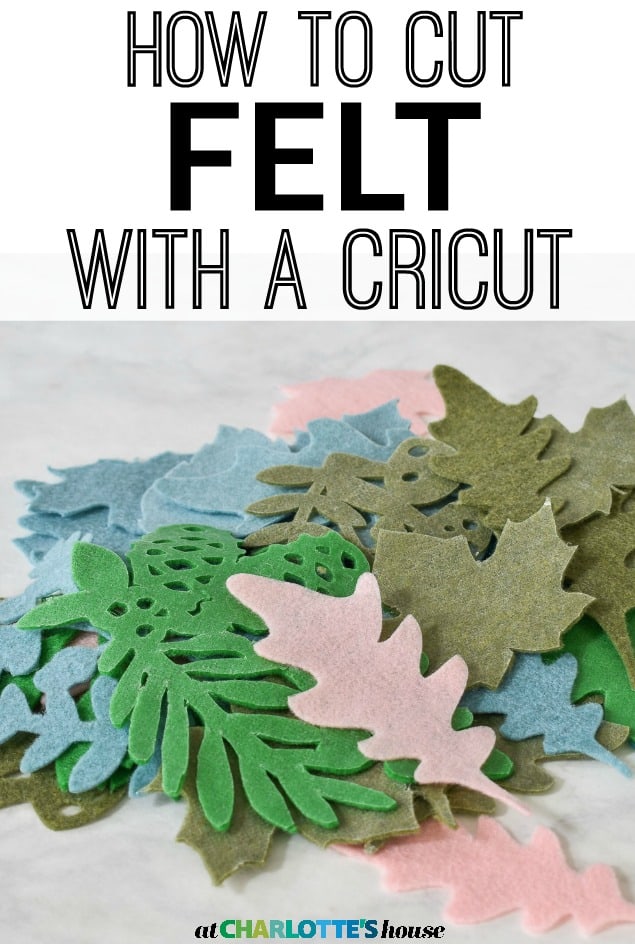
How to Cut Felt With a Cricut to Make a Fall Table Runner
Psssst… this post *might* contain affiliate links: see my disclosure here.
How to Cut Felt with Your Cricut
I have to confess. I was planning to share this with you ages ago. But then one project after the another came and posted and this fun fall table runner got ignored! I think part of my hesitation for sharing is that this doesn’t scream “fall” to me and I also fear that I combined one too many ideas (one of my weaknesses!). But the BIGGEST takeaway for me with this project was actually not the craft itself but rather a technique I learned for my Cricut: how to cut felt!

Shop my favorites!
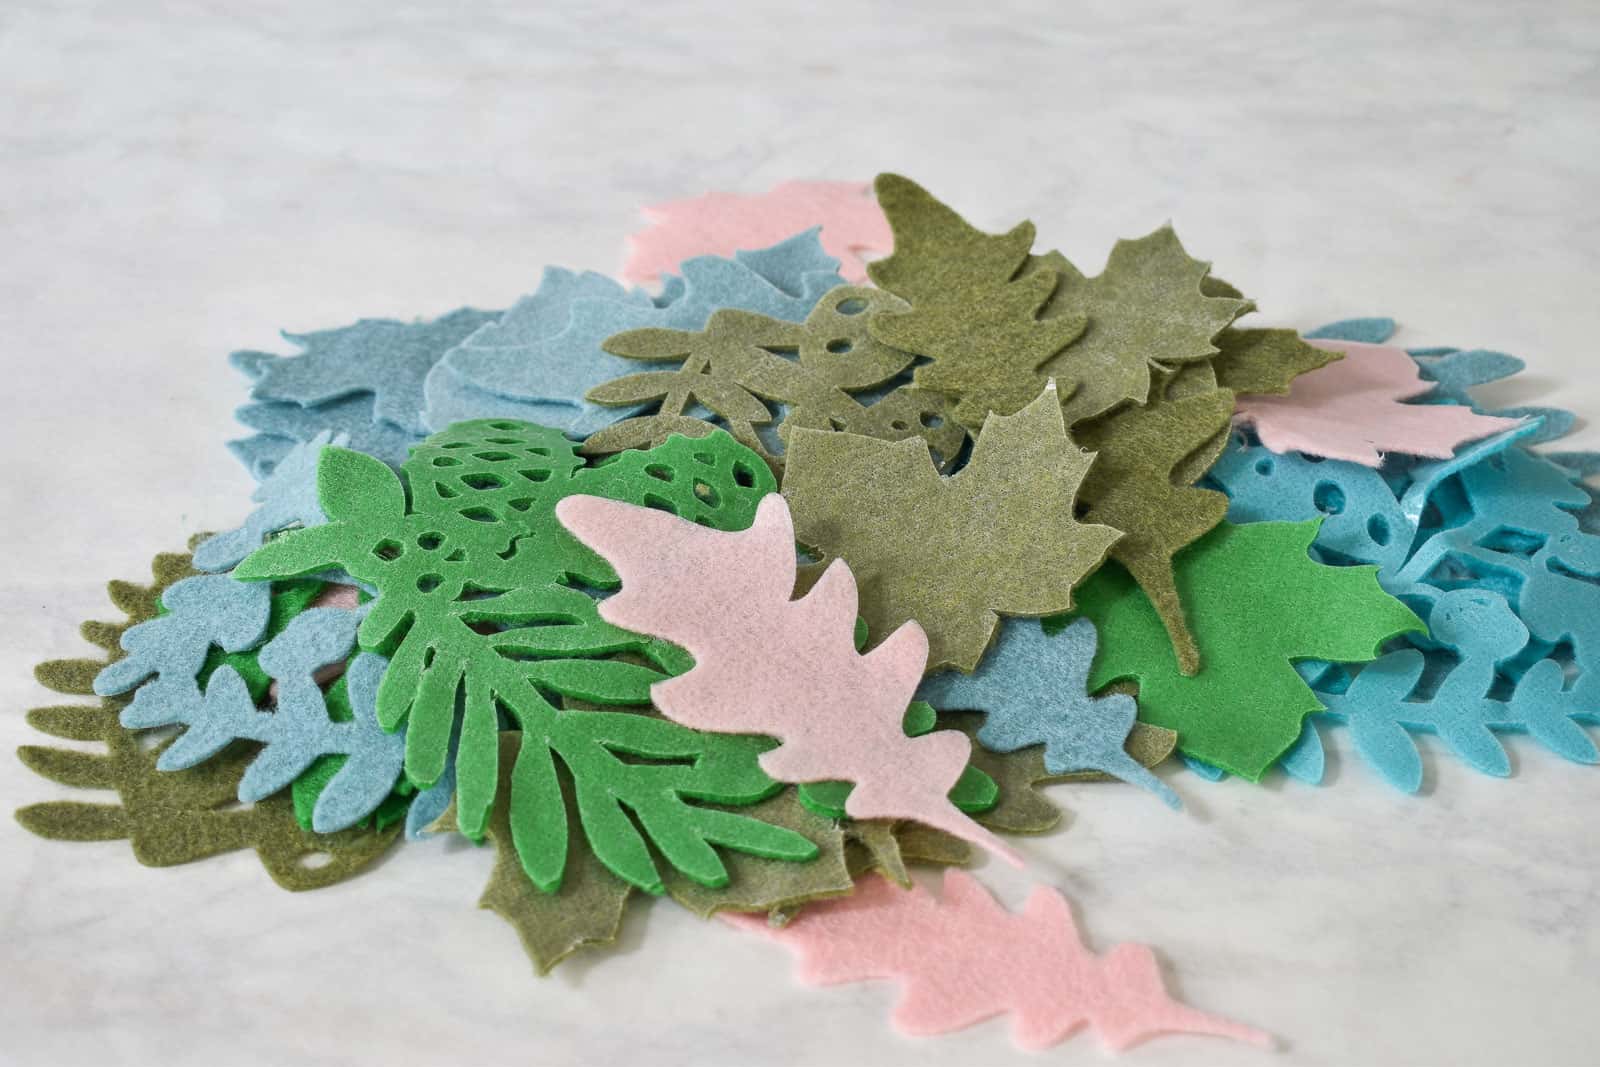
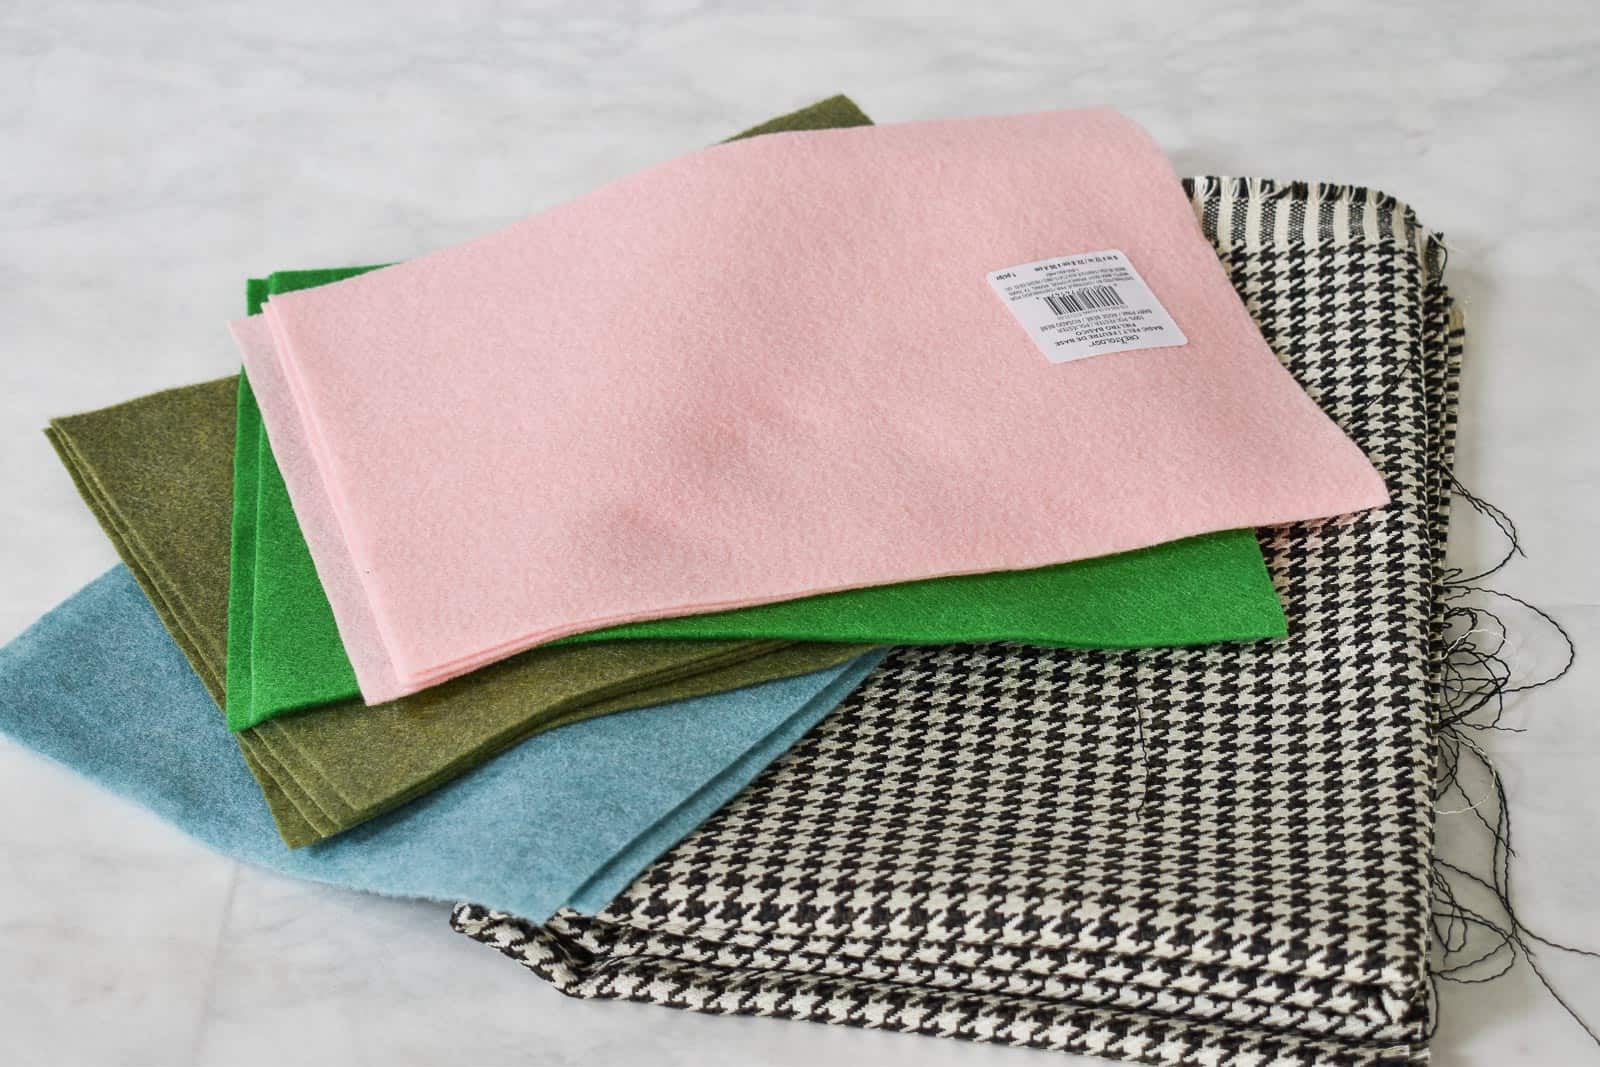
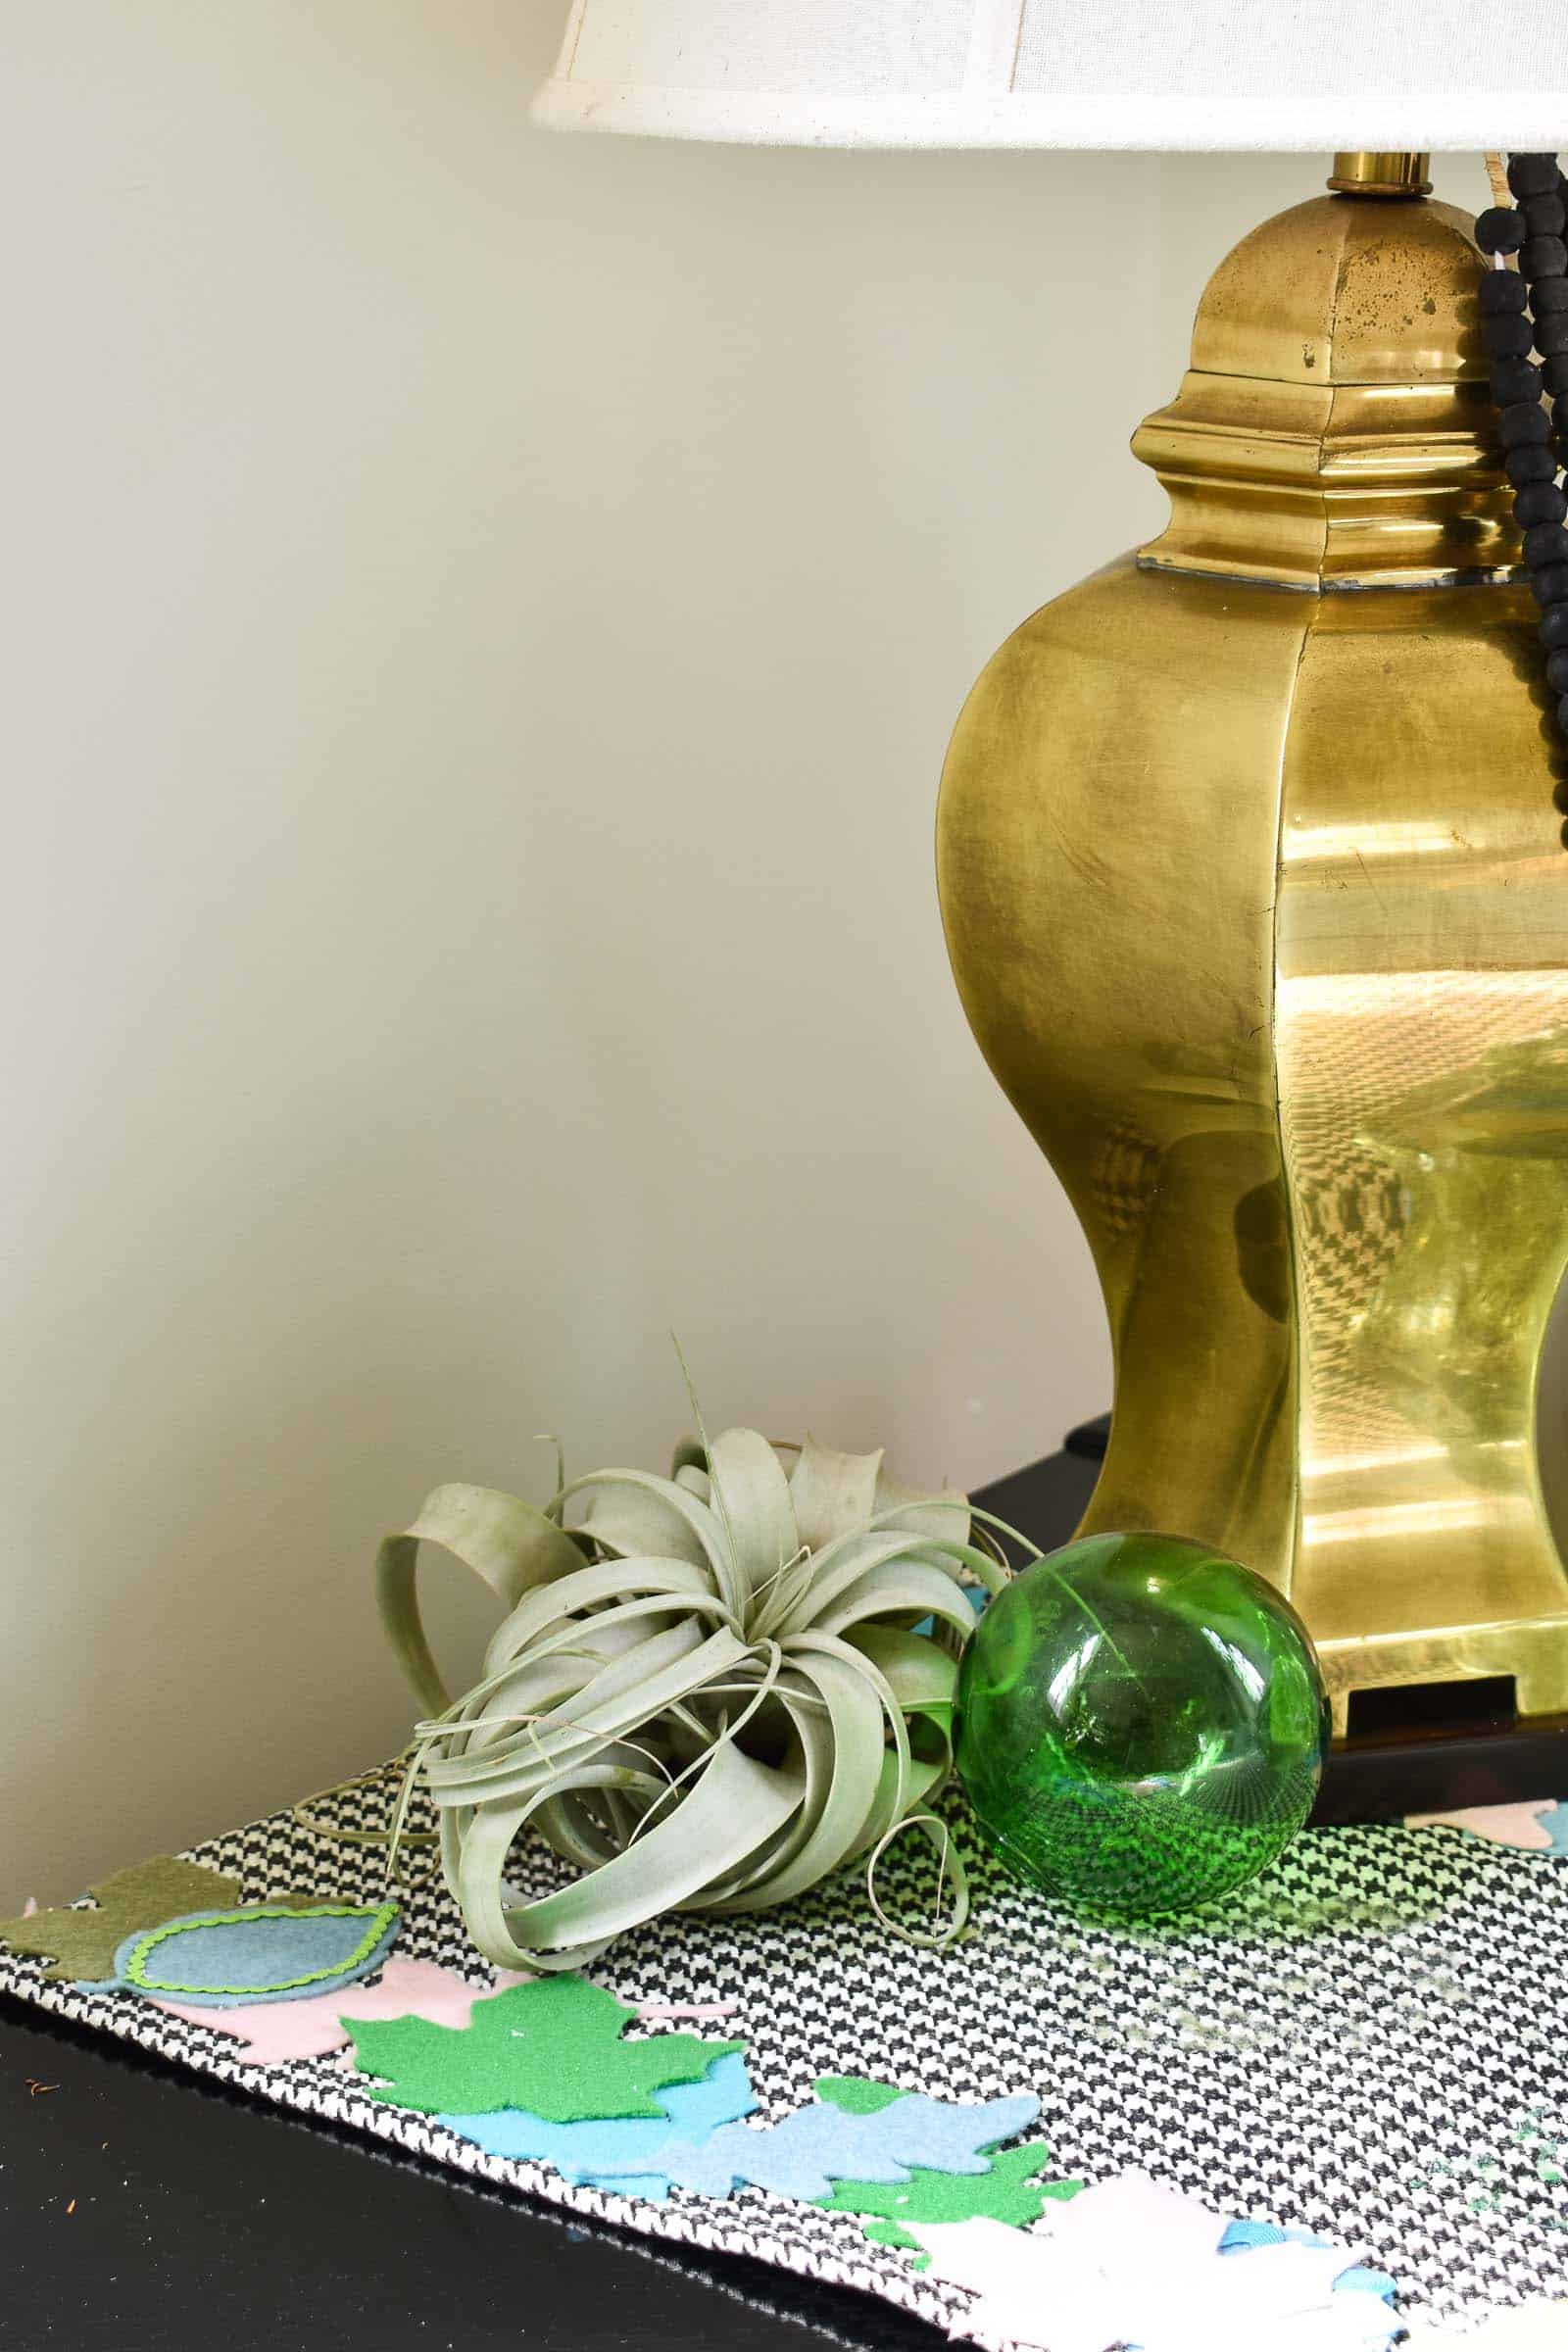
Felt is one of my favorite materials to work with because it’s colorful and cheap! I had this grand vision for a table runner surrounded by vibrant leaves accented with gems and sequins and sparkles. #Extra in the best possible way. And then I went to Joann and fell in love with a houndstooth fabric. Off I went with a pile of felt, my fabric and my Cricut.
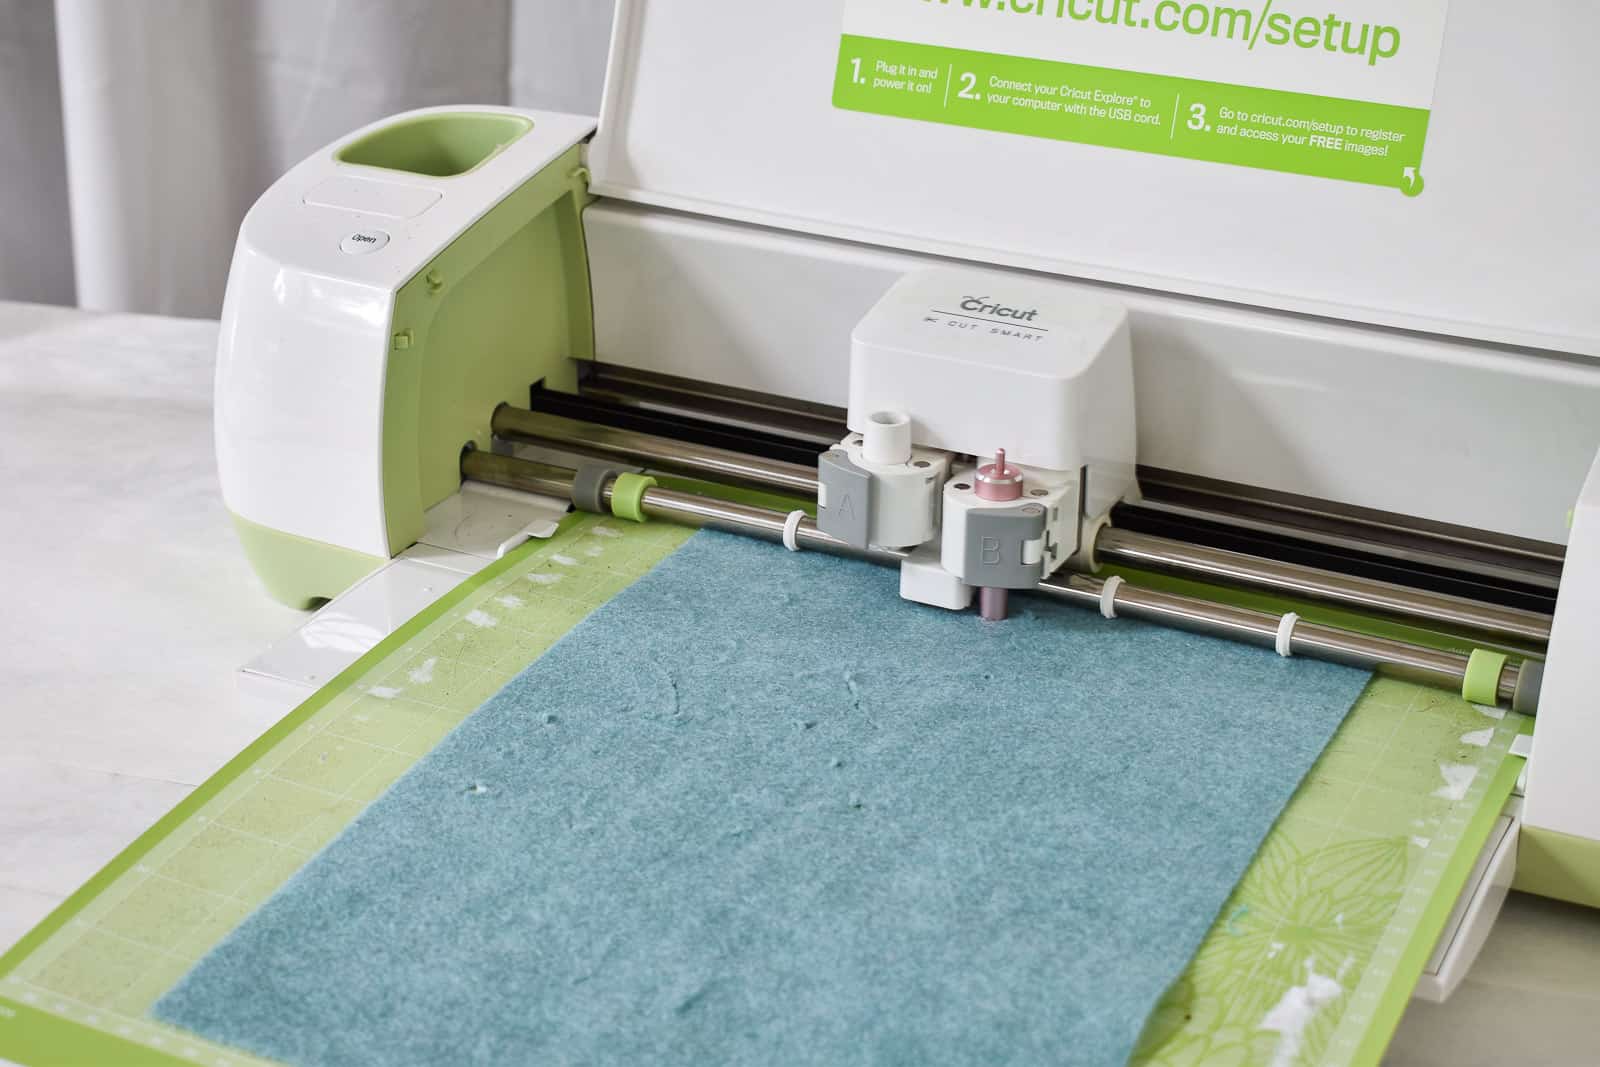
Step 1. You need a special blade
Here’s the first thing I learned when I went to cut felt. I needed a special cutting blade. No problem. I grabbed this one here.
Step2. You need to protect your mat
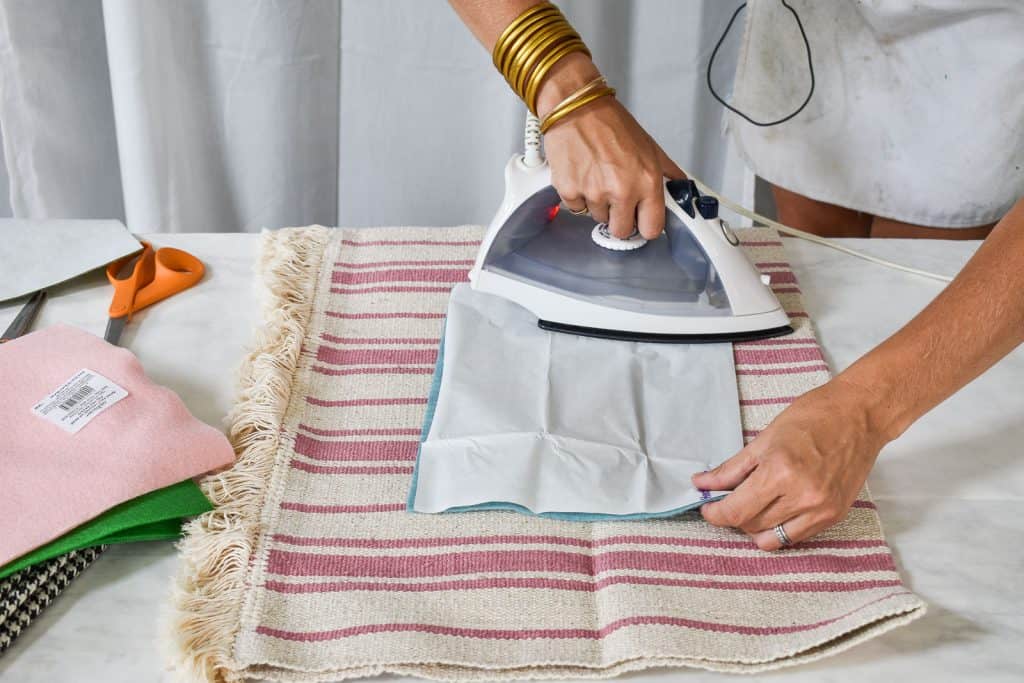
I also learned that I needed to protect my cutting mat from the very fuzzy felt, so I needed this iron on adhesive. Note that I didn’t bother to get a fabric mat… my regular green one worked just fine.
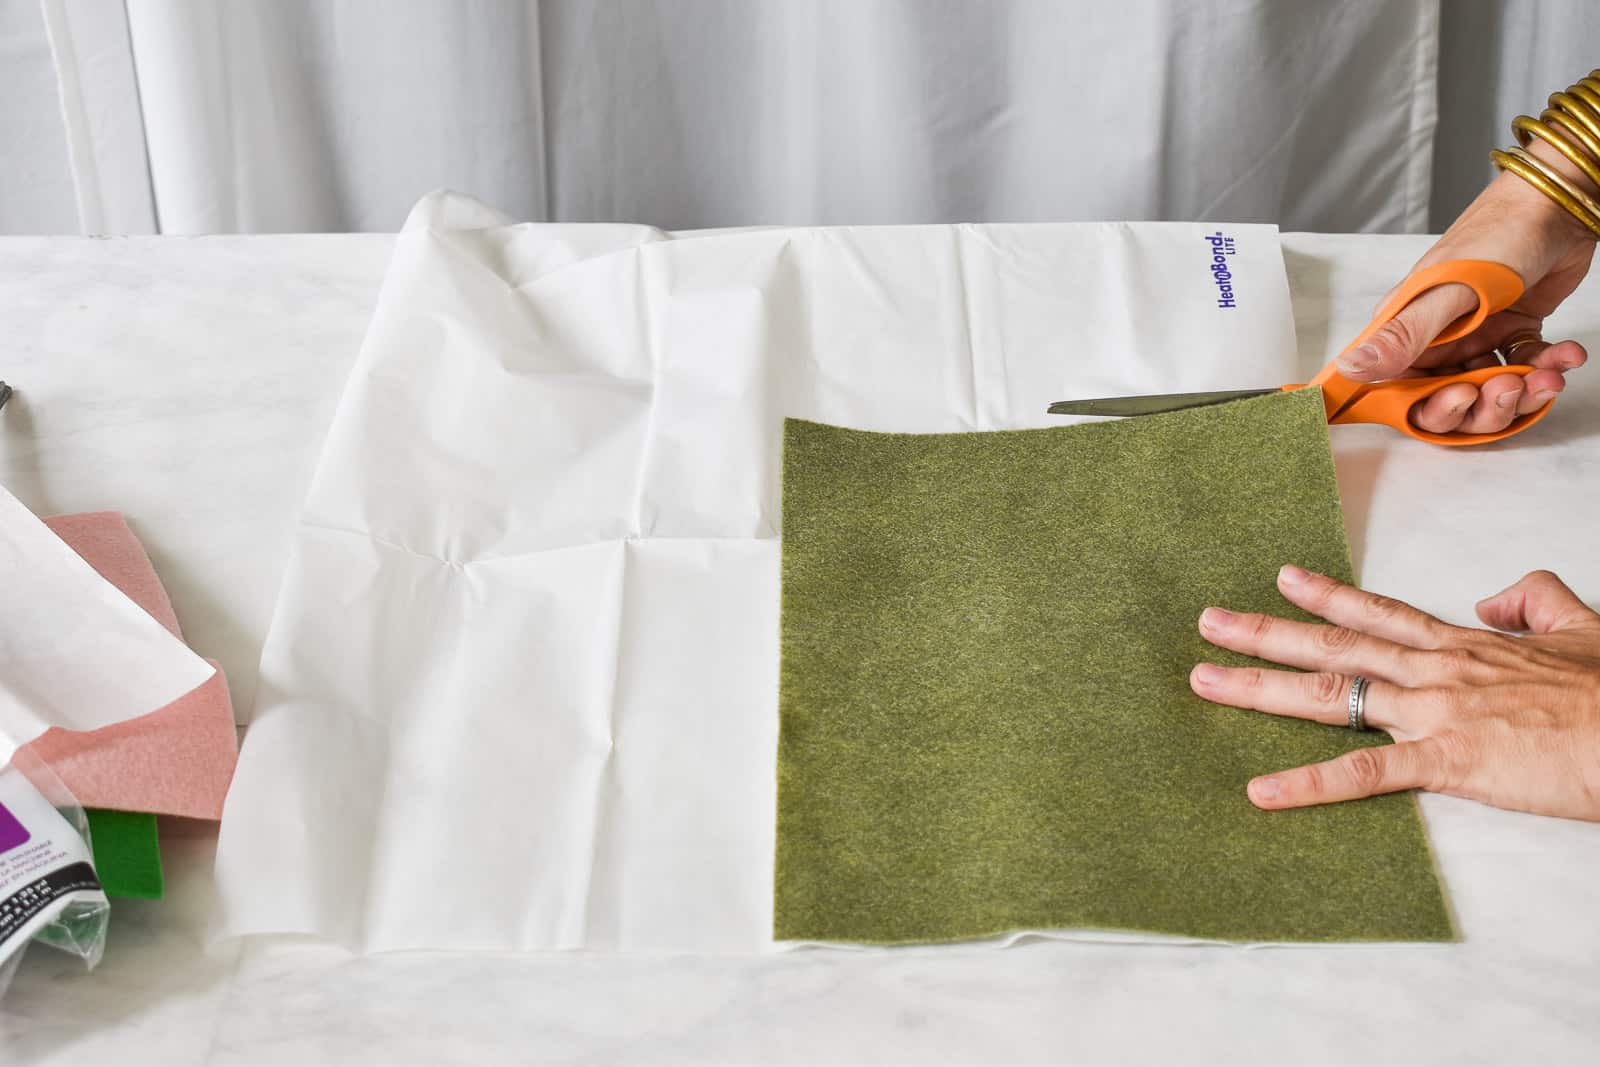
Step 3. Iron on adhesive
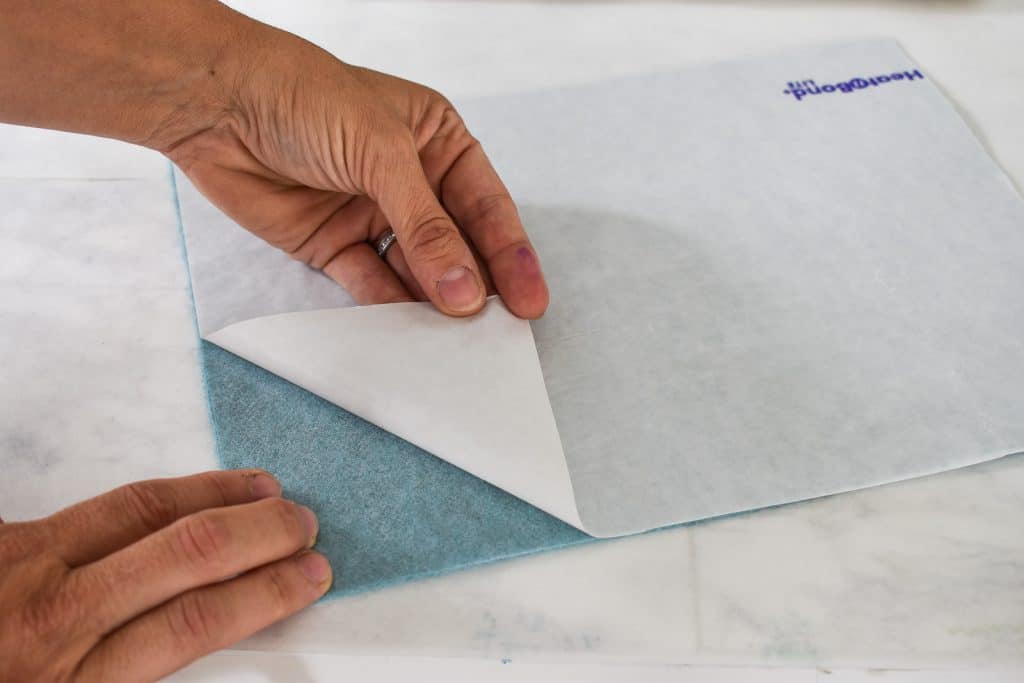
Alright. First step is to iron on your adhesive to one side of the felt. It’s super simple and you just need to follow the directions on the package. Set your iron to medium heat and place your heat ‘n bond paper side up onto the felt. Hold your iron in place on the heat ‘n bond for 2-3 seconds. Remove the paper backing and you’re ready to place the felt adhesive side down onto the cutting mat.
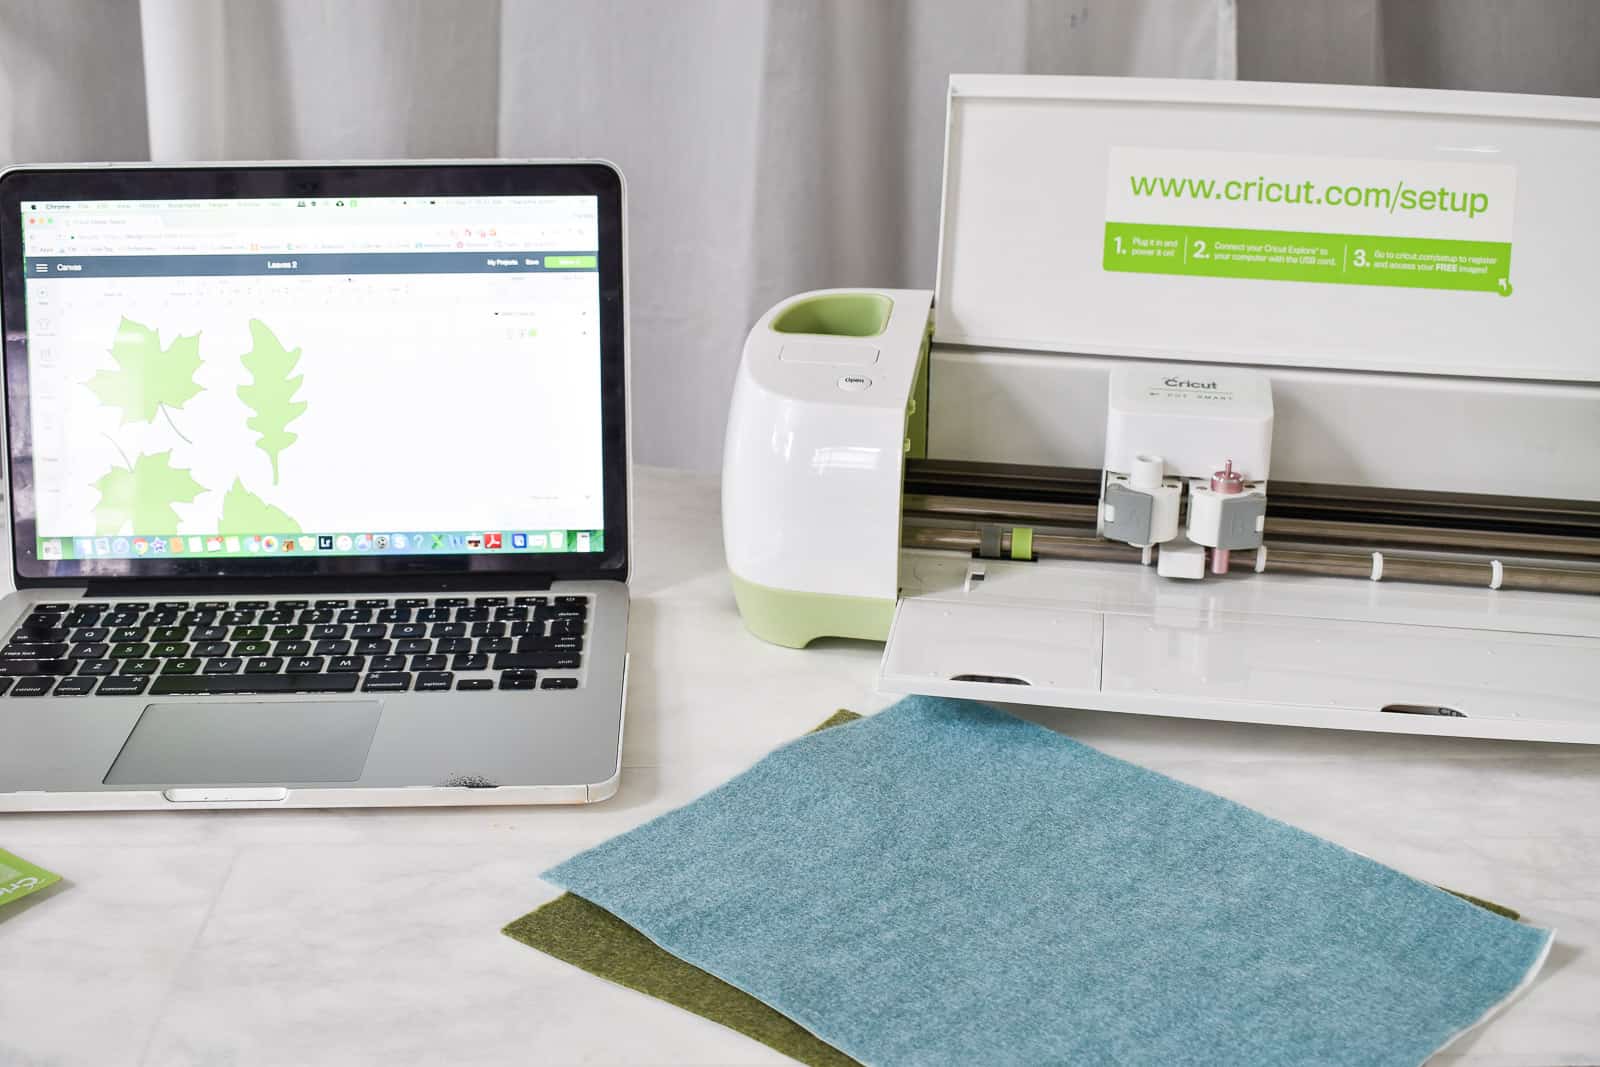
Step 4. Adjust your Cricut cut settings
I started with my cut depth set to ‘fabric’. As my blade felt like it got duller, I upped my settings for a deeper and deeper cut which seemed to help.
Step 5. Choose an appropriate cut pattern
I chose a SUPER intricate pattern and it cut fine the first time, but subsequent cuts weren’t quite as crisp. I enlarged the pattern a bit which helped, but ultimately I’d say that you will have more success with simple cuts when felt is concerned.
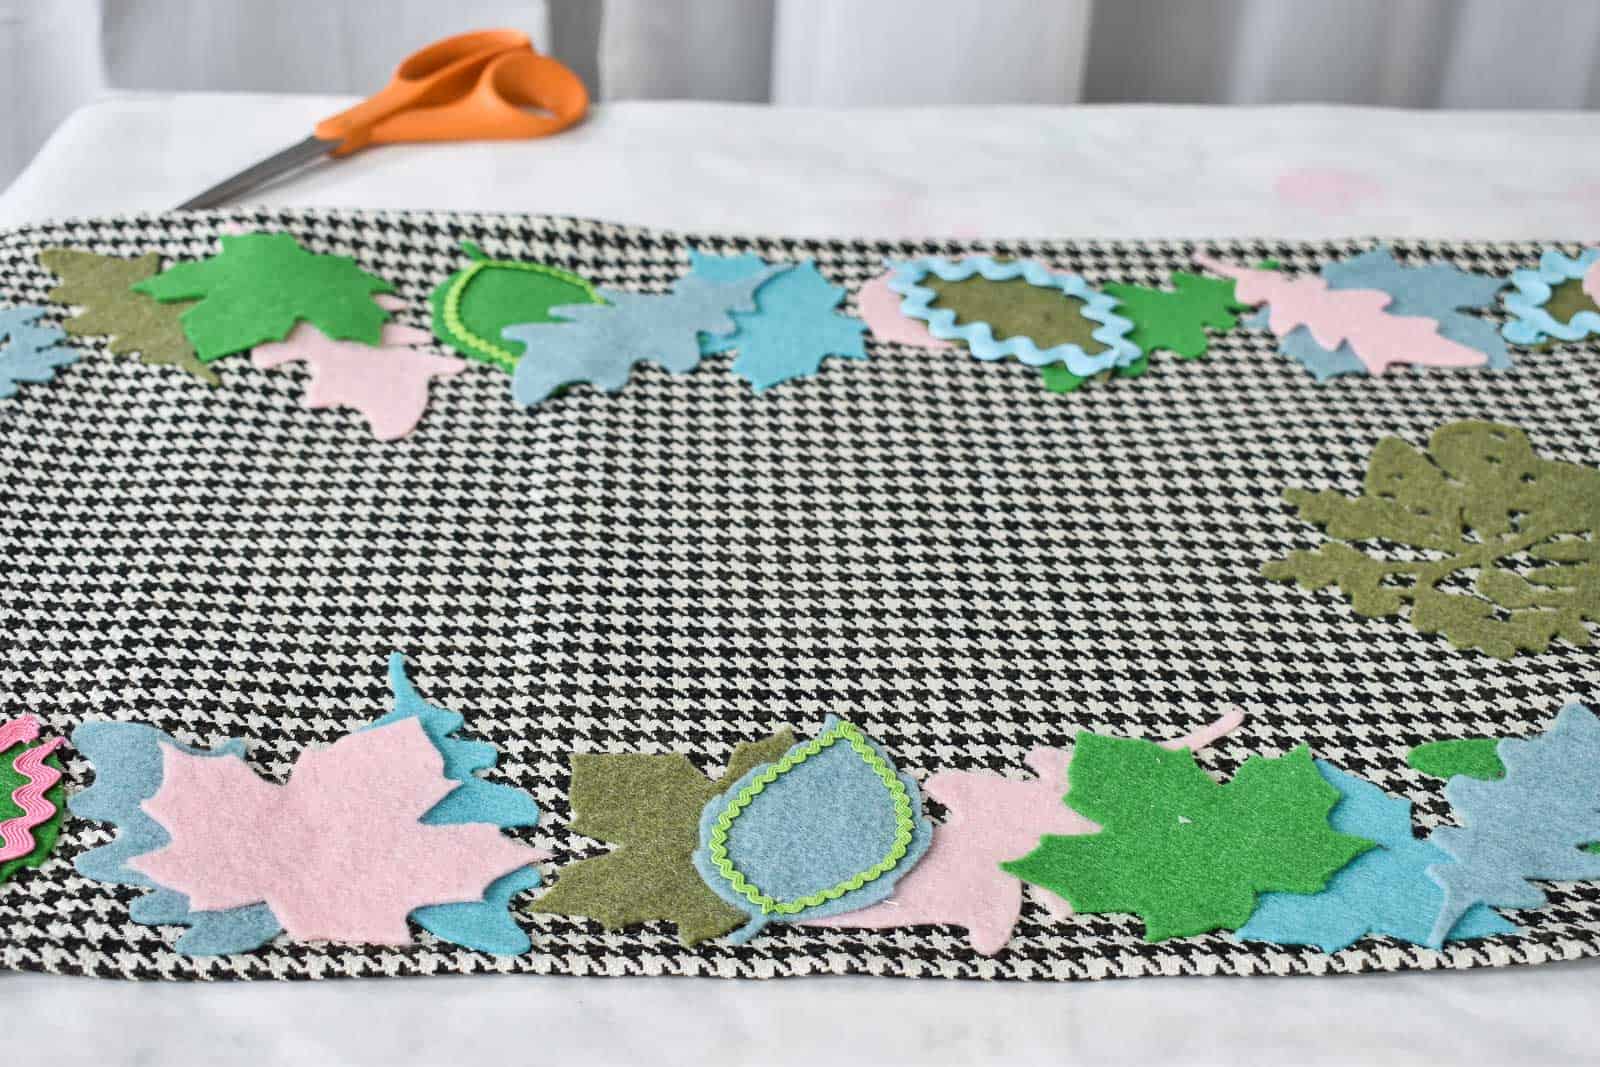
Once I’d cut out a pile of leaves, I prepped the fabric. You all know that I can barely sew a straight line, so that’s all I did. I ended up leaving either side of the fabric untouched because I liked the fringe, but I ironed and hemmed the two long sides.

I experimented with heat ‘n bond to attach the leaves, but it didn’t really work on the houndstooth so I used this fabric glue.
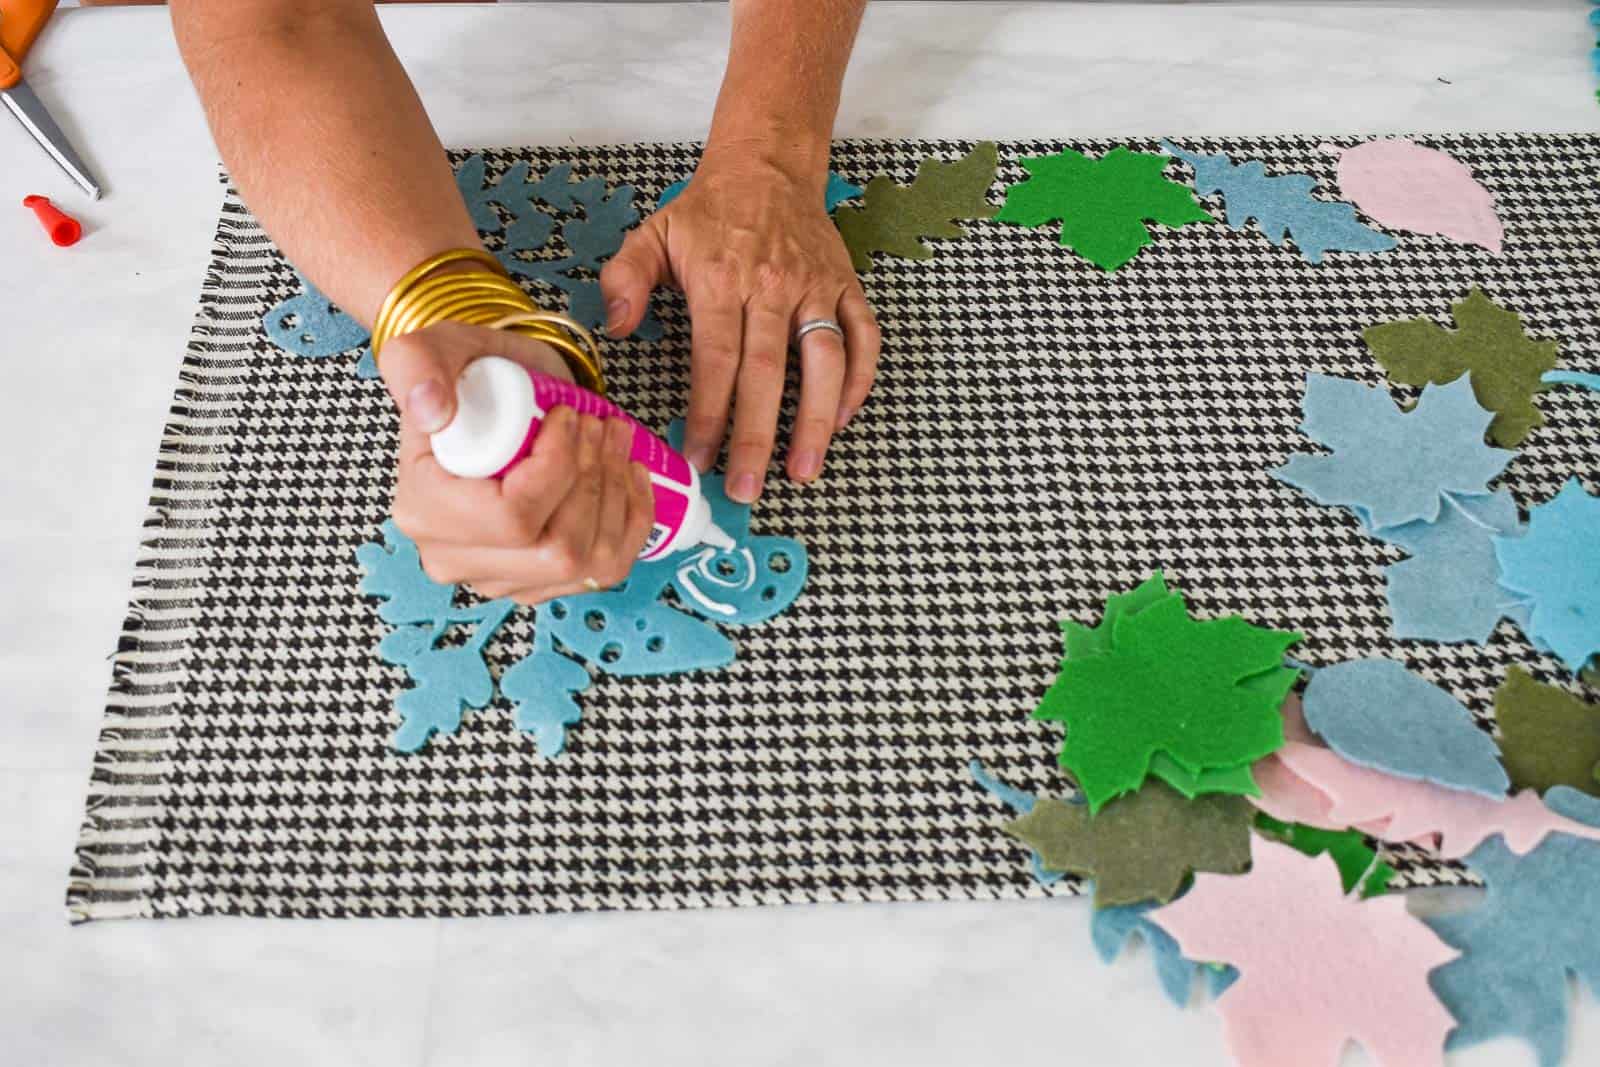
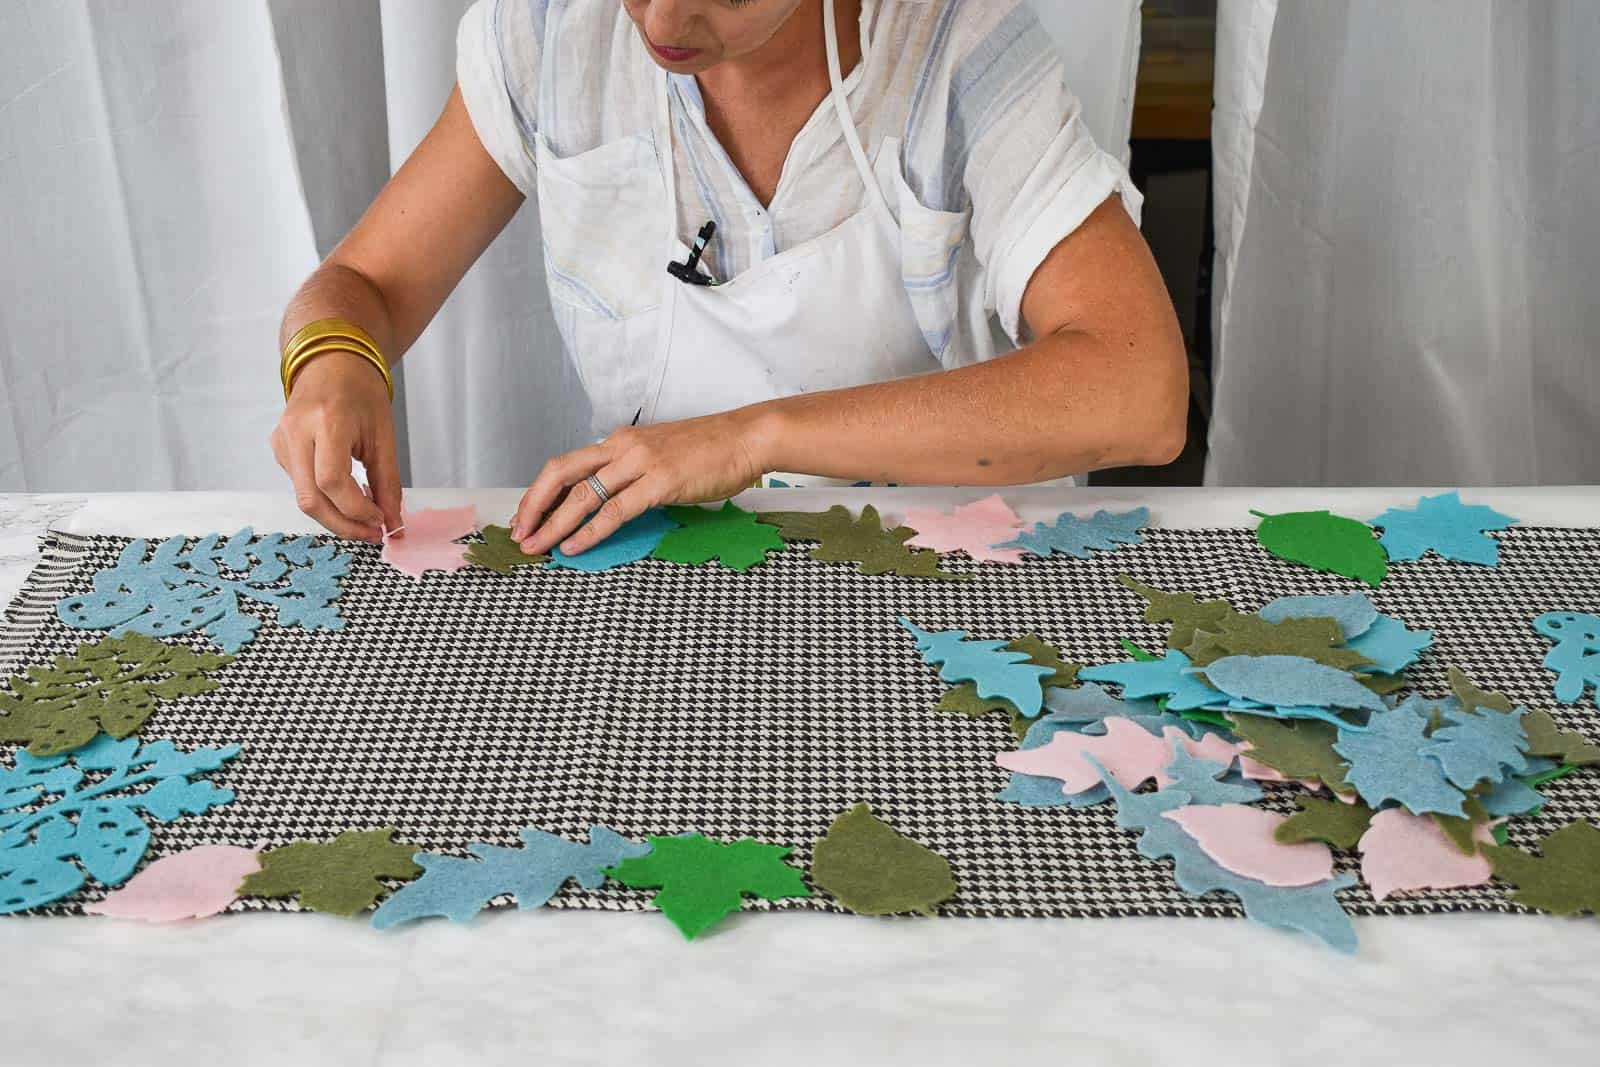
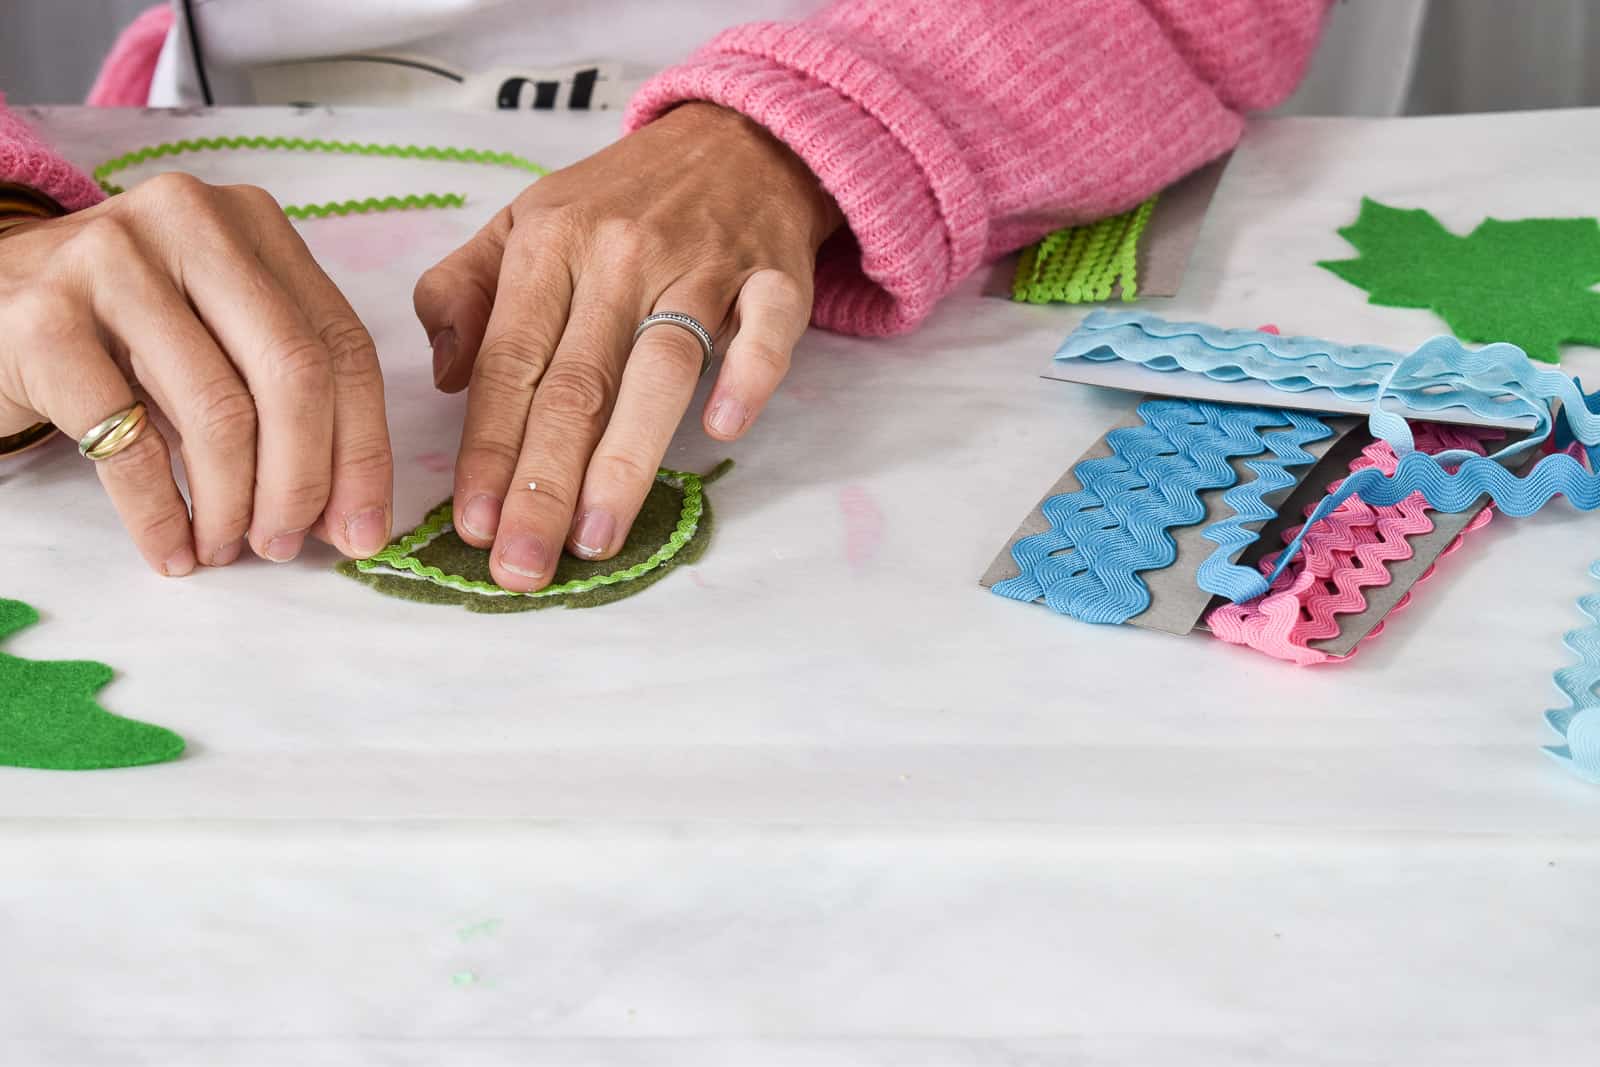
And here’s where the wheels came off a little bit… I bought this rick rack because I was still preoccupied with the whole ’embellishment’ thing. So I glued some of that onto a few more leaves and added those to the whole leafy bordery thing. Not the best idea, but not the worst.
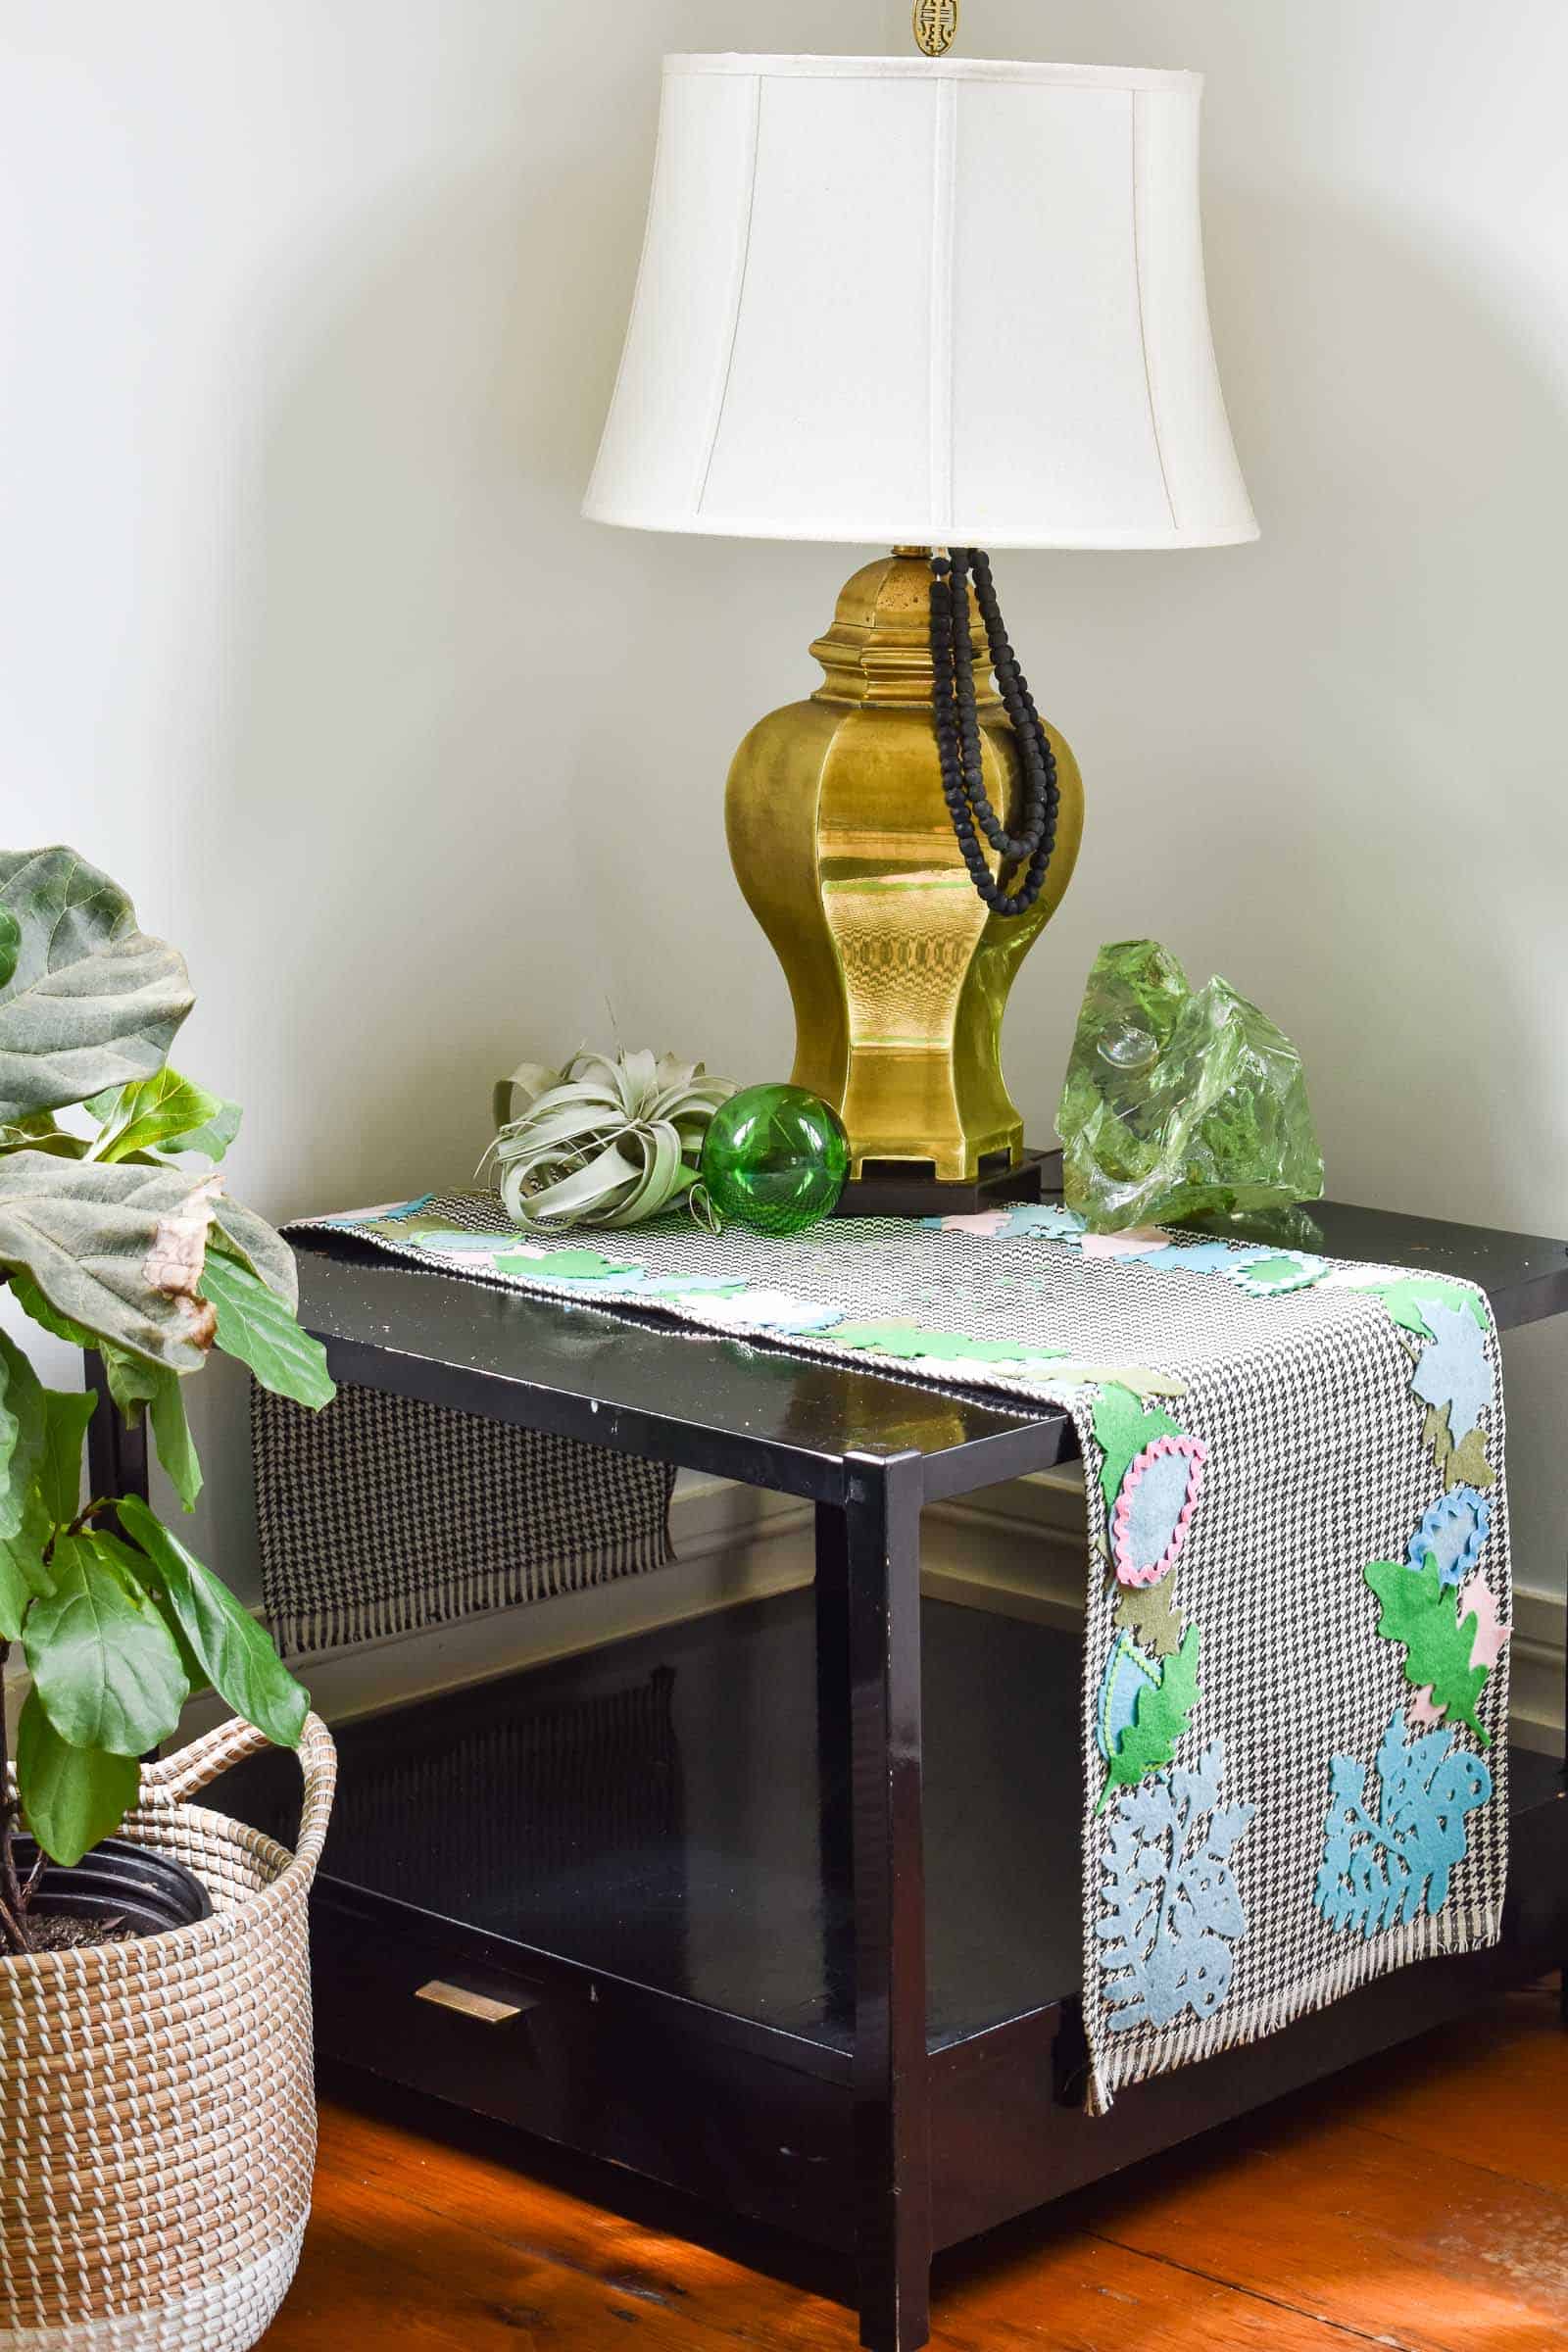
The colors of this runner are actually great in our living room so I set it up there in the corner. I may bust it out again in the spring to style it a little differently.

Here’s a video if you want to watch the Cricut (and me!) in action:
Have you guys ever had a craft project underwhelm you when you were finished? Leave me a comment and let me know!


Thanks For sharing your fun project! I learned new stuff from your post! ??
I think it’s beautiful! Don’t worry so much. I found your post really helpful. Thanks for writing this up.
Thanks, Audrey!
thank you for this example. I would like to know WHAT TYPE OF BLADE YOU USE. sINCE YOU SAID YOU NEED A SPECIAL ON. I REALLY WANT TO MAKE SOME Christmas TREES, TO HOLD SILVERWARE. dON’T KNOW WHERE TO START HOWEVER, DUE TO THIS I UNDERSTAND. aNY WAY WHAT TYPE OF BLADE? tHANK YOU
Hi Diane! I linked to it right in the post. This one: https://amzn.to/31UYsv6 Good luck!
What cricut did you use for this project? I have an air2 and would love toknow if i can do it.
This is an older post so I used whatever model came out first! Haha!
I use the rotary blade to cut my felt and I get crisp cut lines every time!
I didn’t have this option on my Cricut, but yes… would work!
If you are not putting the felt on anything but just want the leaves how do you cut them out without messing up your mat?
I’d probably use a removable interfacing to protect the mat. So one that you can apply to the felt before cutting, but it will peel away after.