
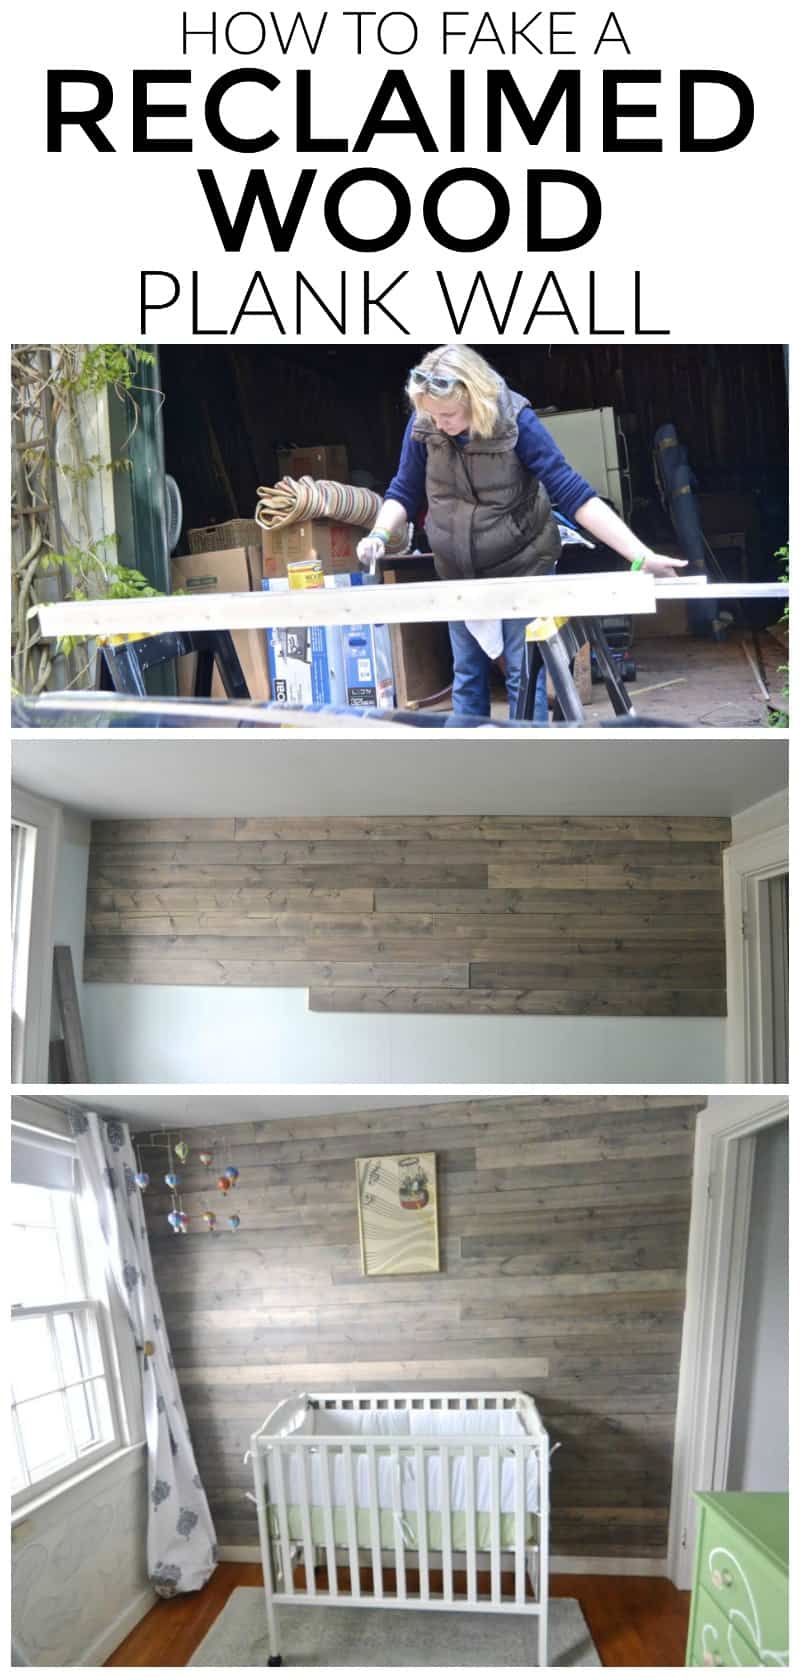
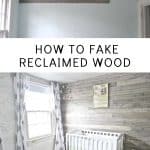
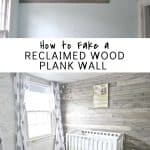
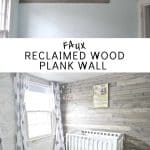
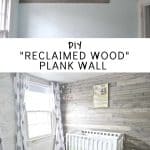
How To Fake A Reclaimed Wood Plank Wall
Psssst… this post *might* contain affiliate links: see my disclosure here.
If you found me from Pinterest, HI! WELCOME! Check out some of my most popular posts here. And feel free to stalk me here!
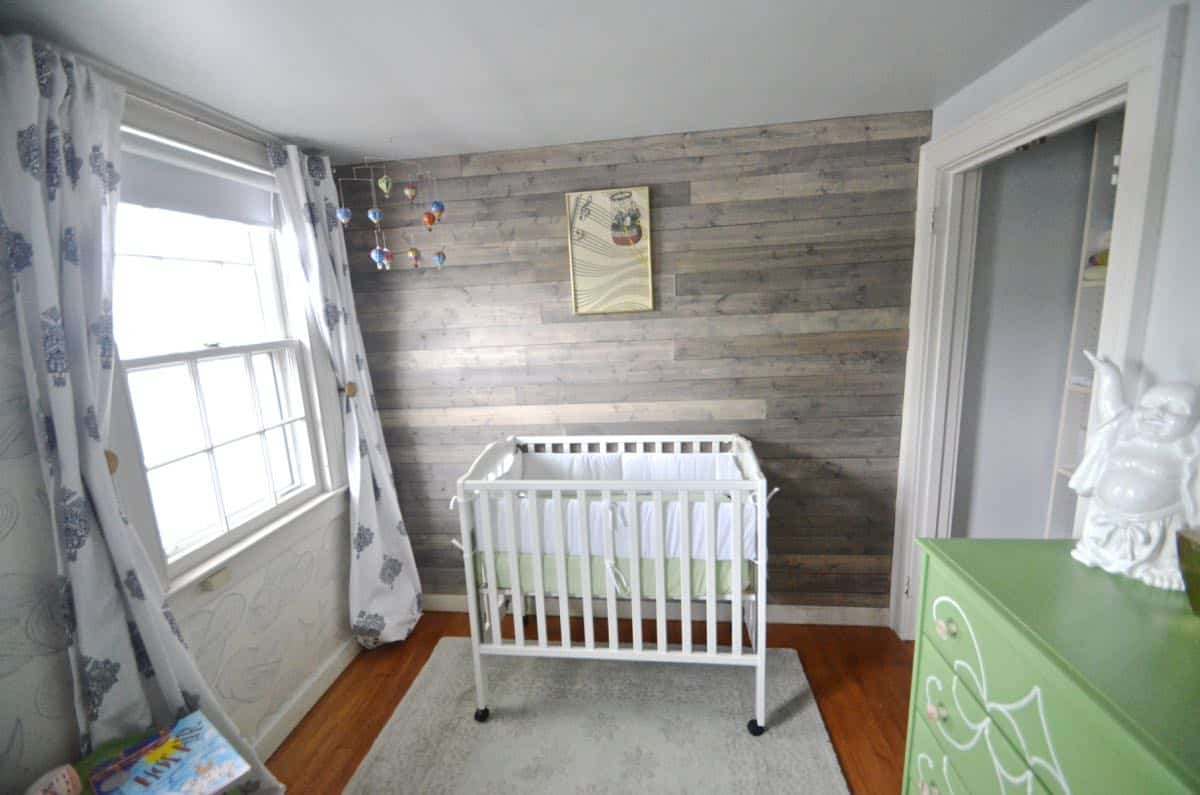
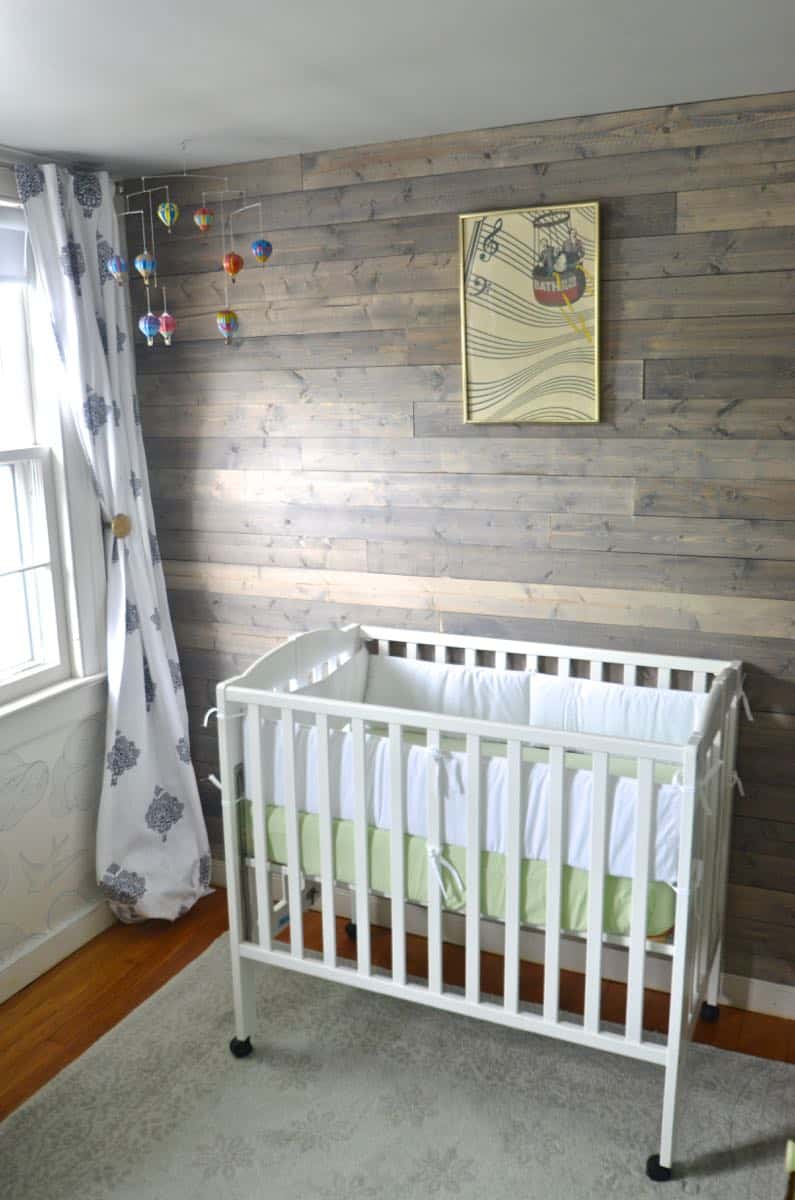
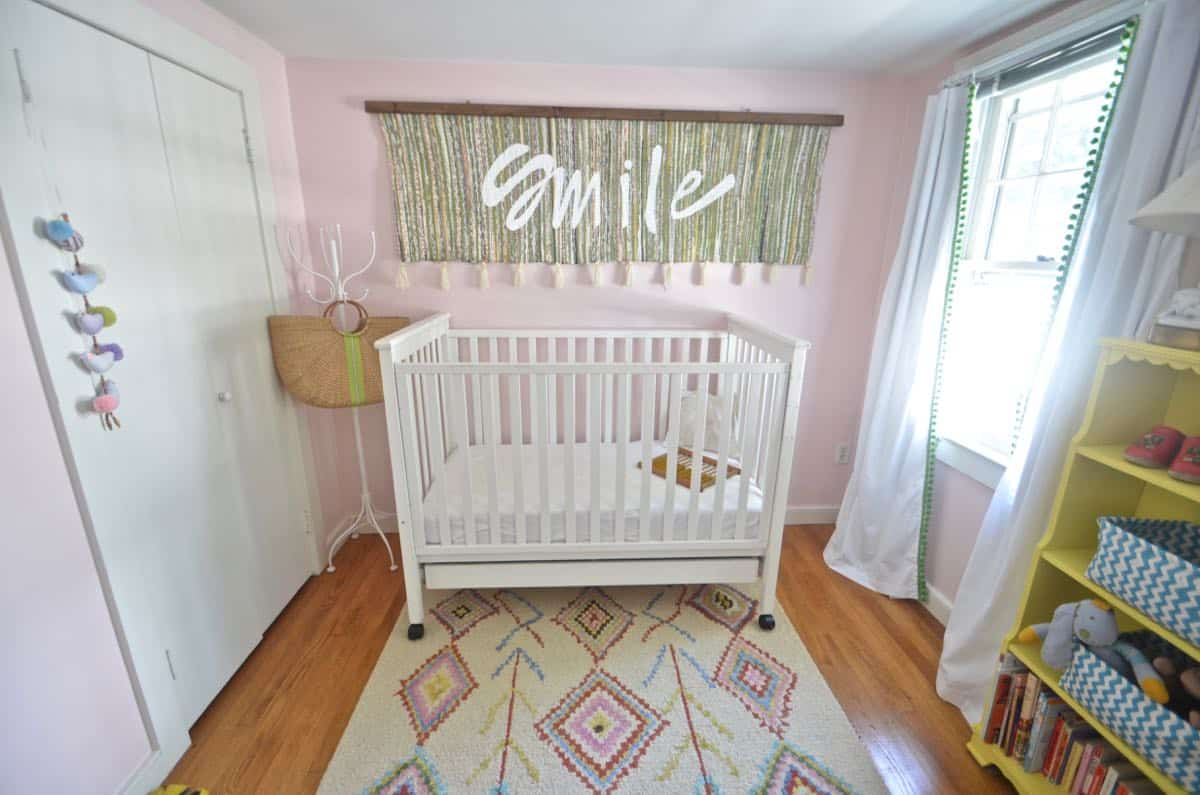
DIY Wood Plank Wall for a Nursery
Just in time to welcome Baby Arthur, I shared the finished nursery on the blog! And I promised to post about the gorgeous plank wall. Good news… it was SO simple. Without further ado, here’s a play-by-play on how to install your very own!
Shop my favorites!
Materials for Plank Wall
(affiliate links included for your convenience):
- 1x4s
- nailgun
- stud finder
- stain
- miter saw
- jigsaw/ circular saw
- tape measure
- Optional: rubber mallet and crow bar for any hypothetically misplaced boards…
Step 1. How large is your plank wall?
The first thing you’ll need to do is figure out your rough square footage. I decided early on that I couldn’t manage the logistics of an actual reclaimed wood wall… 8.5 months pregnant and dismantling pallets do not go hand-in-hand. Also… there are funky chemicals that sneak their way onto pallets on occasion and for a nursery… better to play it safe. So new wood it was. Our wall was about 96 inches long and about 96 inches tall. Reminder that a 1 x 4 is actually NOT 4 inches wide… it’s more like 3.5 inches wide. Meaning… I’d need 28 boards (each 96 inches long) to cover the wall.
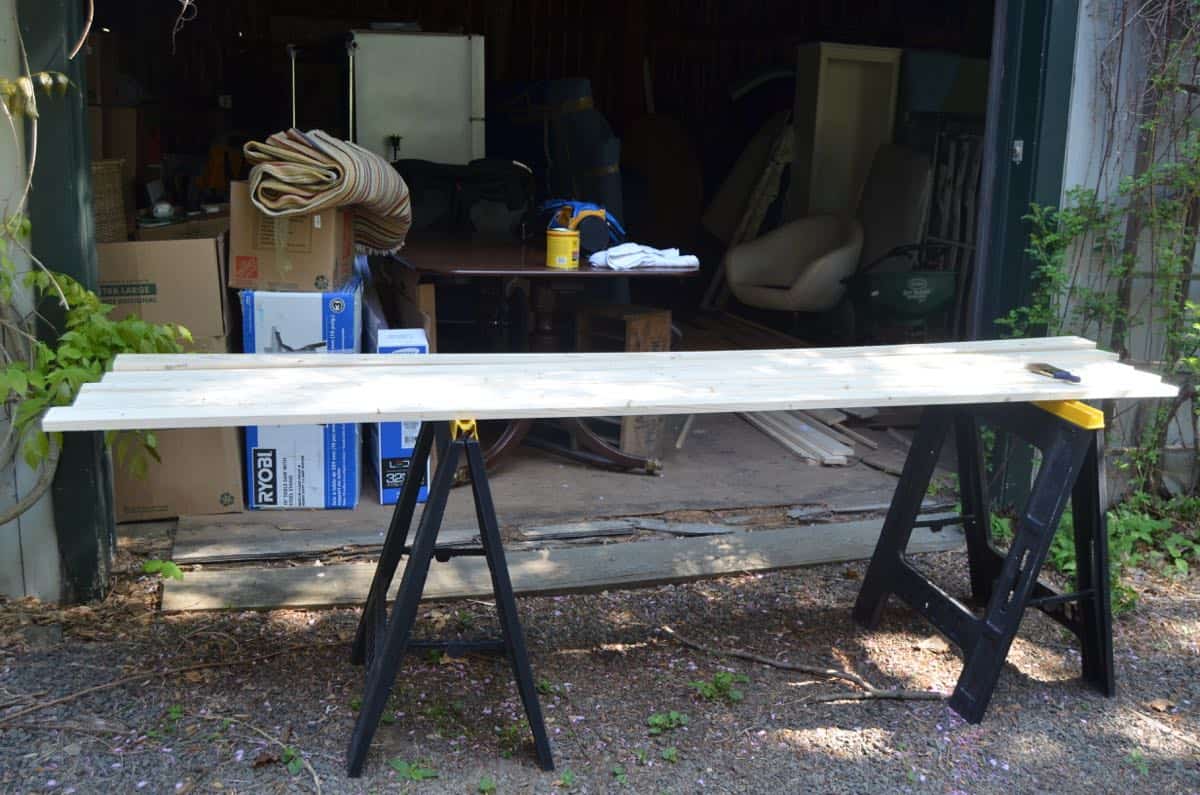
I started by staining all the wood with Minwax Classic Gray. Working outside because of the fumes, I painted the stain on with a foam brush and wiped it off almost immediately. I made sure to paint the sides of the boards but didn’t worry about the backside of the boards, obviously. This step took maybe 1.5 hours? (Updated: wood stain has a fairly potent odor so make sure to work outdoors or in a well ventilated space per the product instructions.)

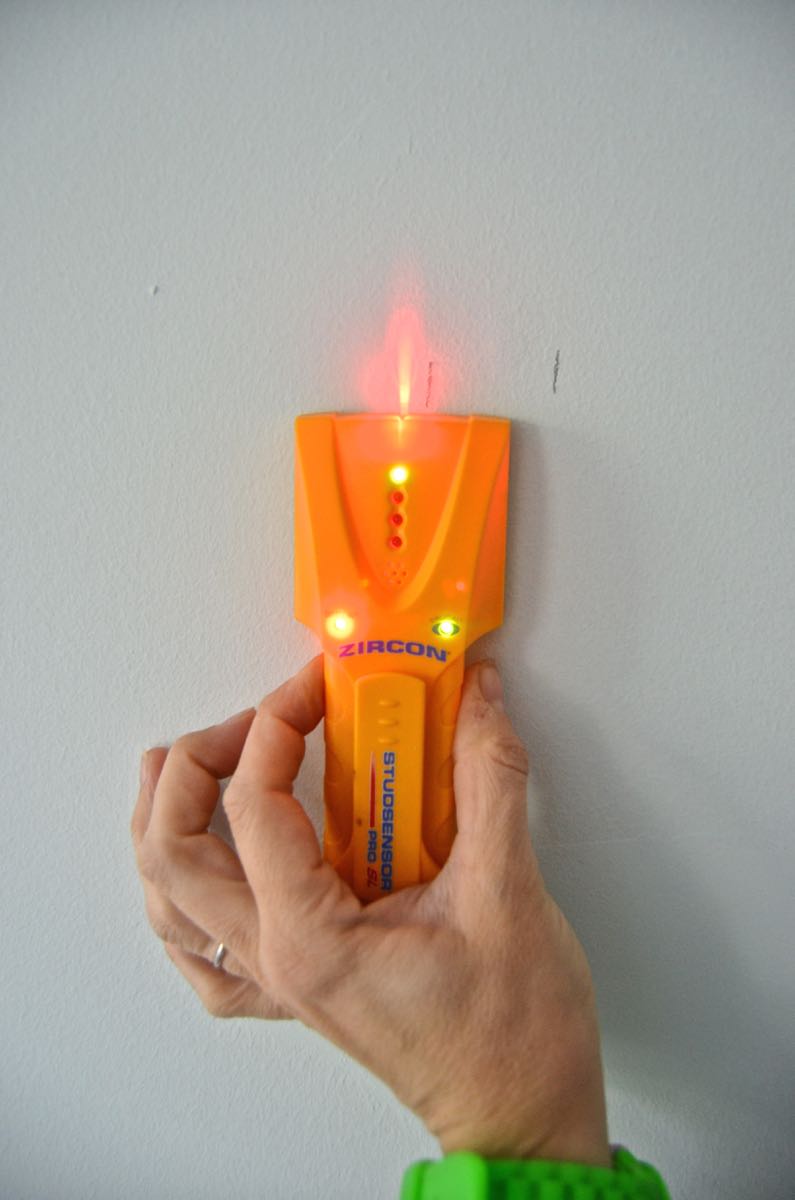
Step 2. Prep Wall for Plank Installation
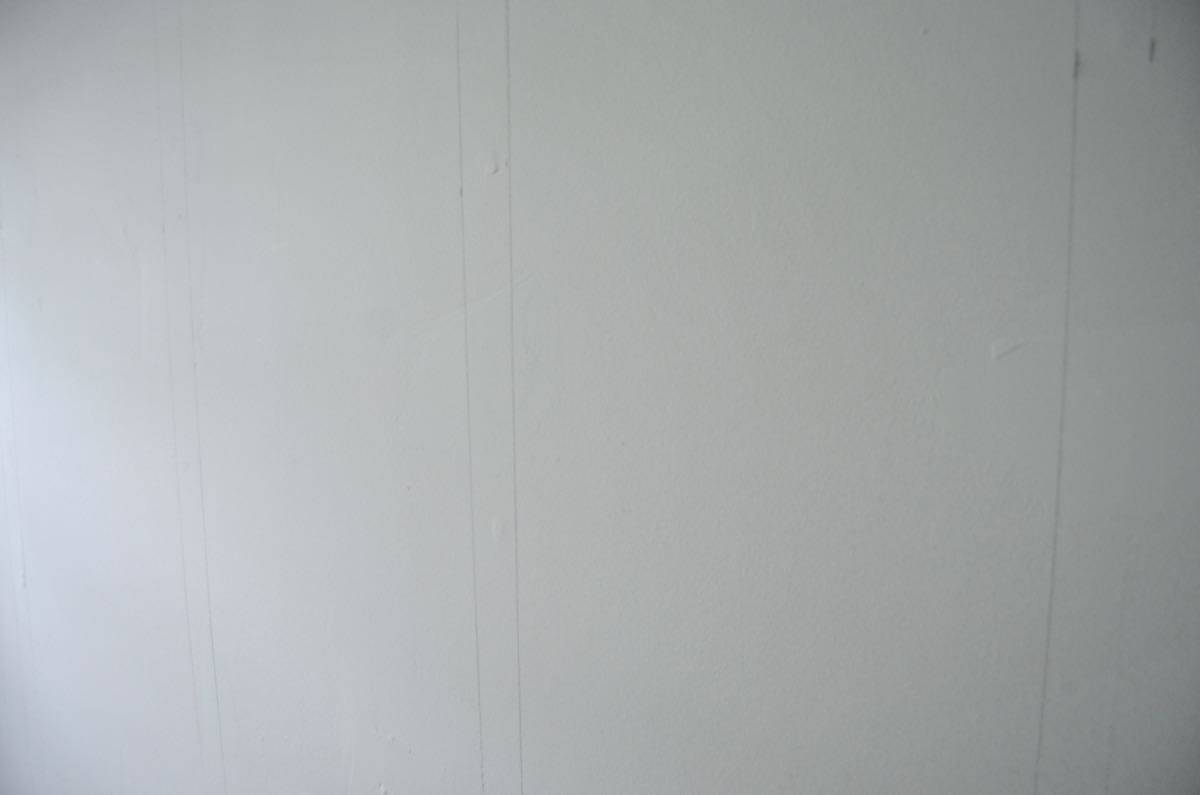
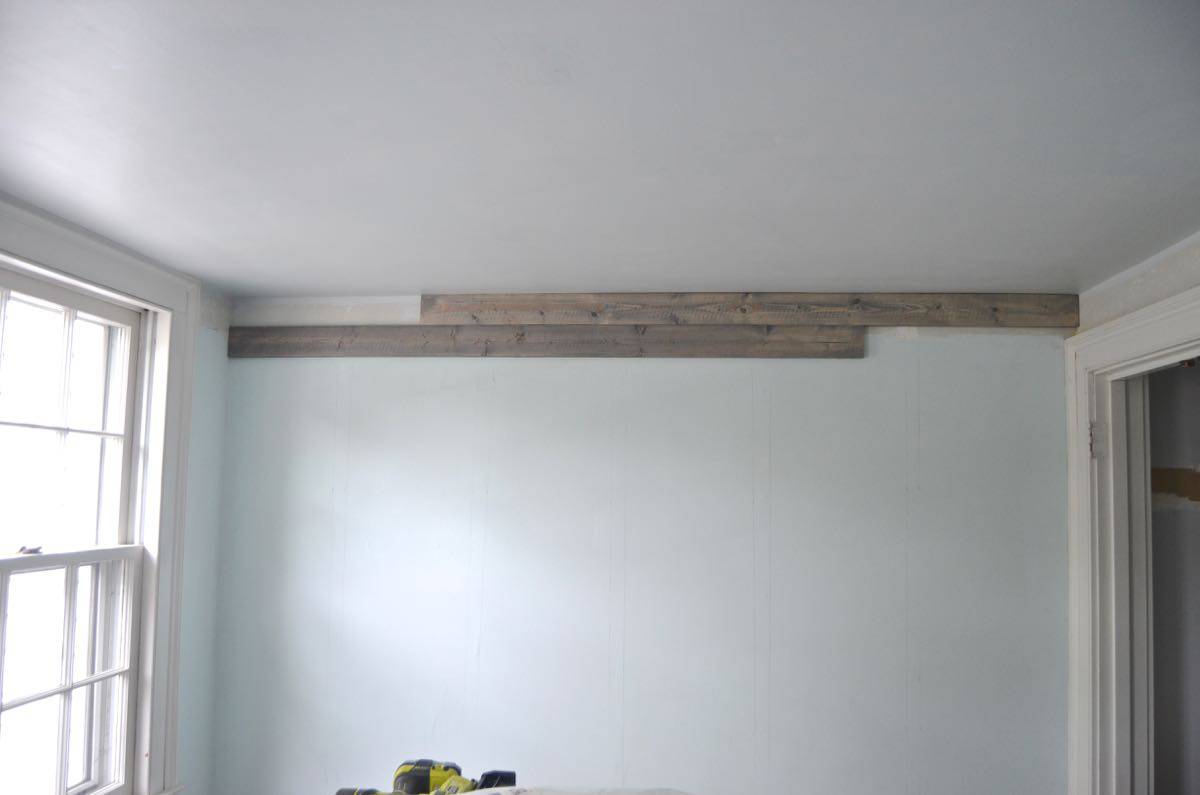
With wood stained, I was ready to start the installation. Unless you want to anchor every board (I did not), find your studs and mark them on the wall. We have an old house, so no guarantee that the ceiling and floors are level. Double check that your ceiling isn’t way crooked, and then start there. If you have any weird angles or need to make up some small gaps… you’d rather have this be against the floor rather than up high against the ceiling where everyone can see. I FINALLY got a chance to use the amazing Ryobi airstrike nail gun for this project. This was sent to me months ago, but the decision to put our house on the market put a kibosh to the outdoor shed I had in mind for it. The powerstrike is biiiig. It’s heavy and not the easiest tool to fling around, but… for a project like this it’s ideal. I didn’t need to drag out our compressor or wind a mile of tubing up to the nursery. The airstrike is a stand alone pneumatic nailer and worked like a charm for this plank wall.
Step 3. Install wood planks
My system for this plank wall was to randomly cut 3 or 4 boards and nail them against one side of the wall making sure to nail them into each marked stud. Next, I measured the necessary lengths to complete the row and scrambled downstairs to cut the next few boards with the miter saw. I learned early on, that I could only work a few boards at a time or else I risked having gaps between the boards. I also wanted to stagger my cuts so it looked somewhat random. Going back and forth I slowly worked my way down the wall.

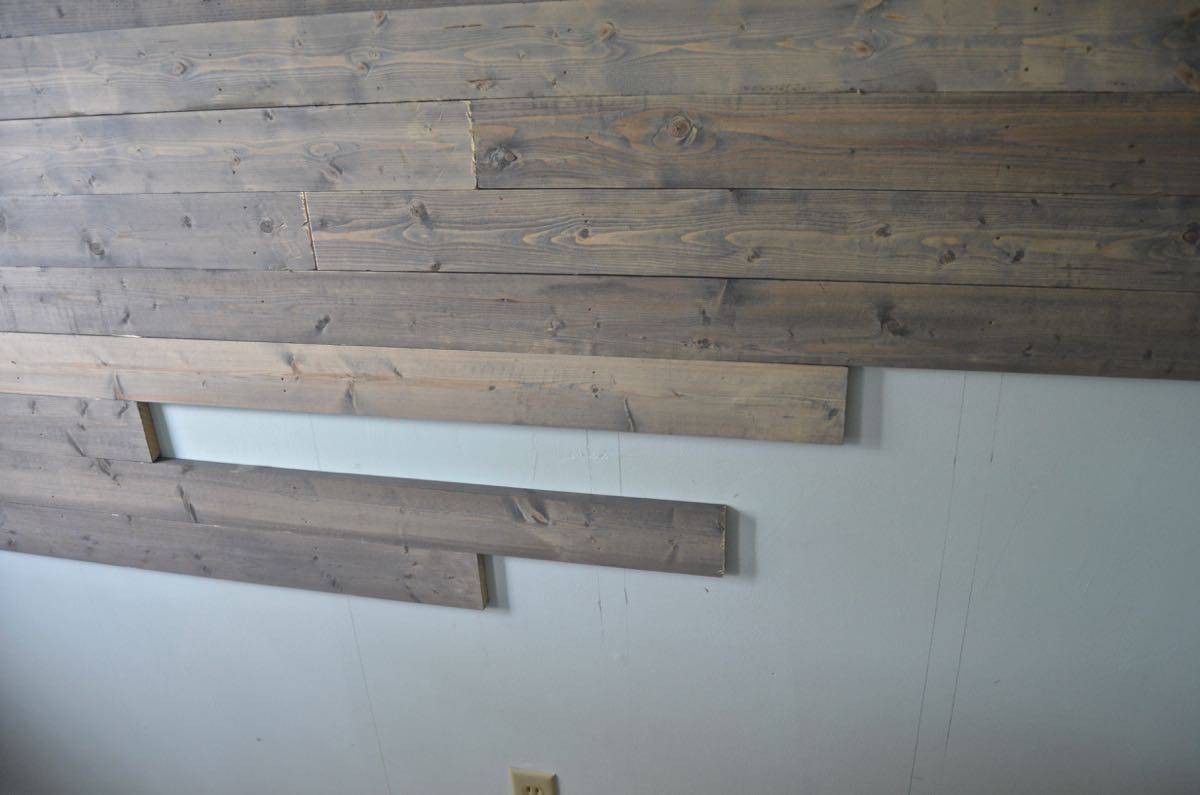
Every once in a while, I would nail in a board and find a gap like this… nothing a crow bar and a little realignment couldn’t fix.
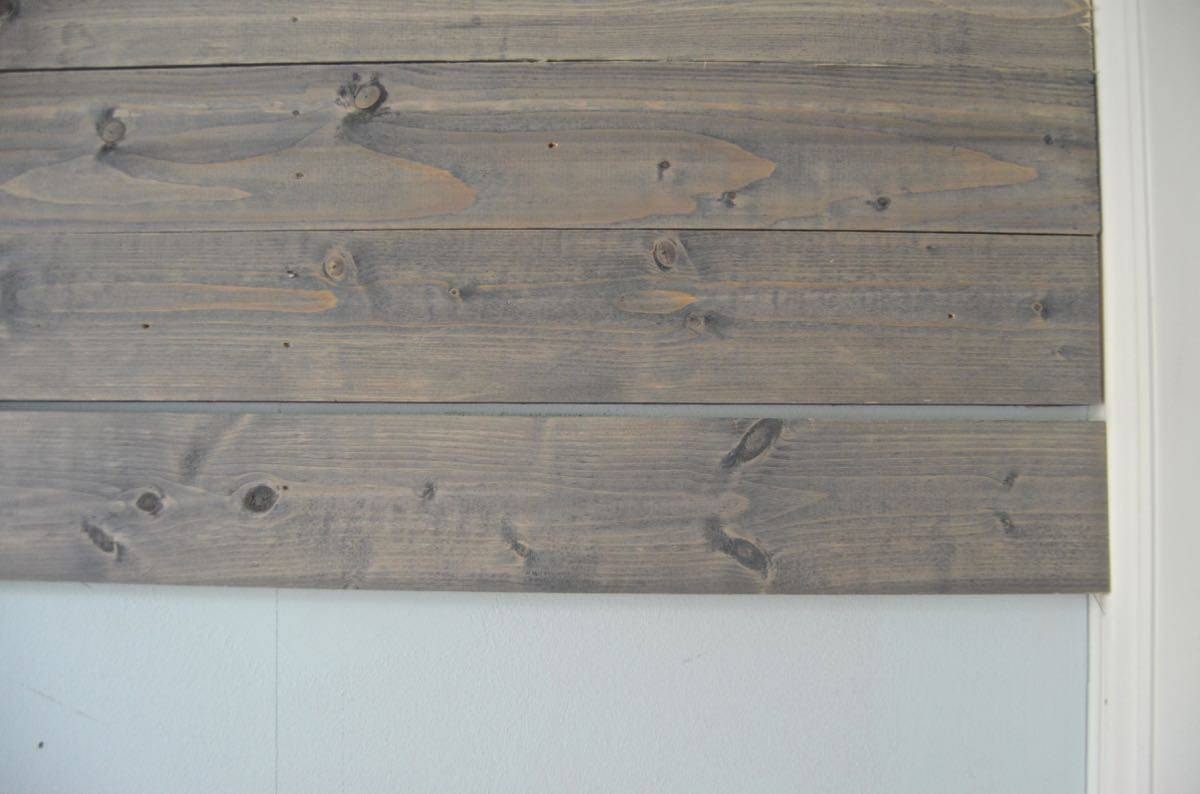
I needed to split my board in half with a jigsaw to fill the last small gap along the baseboards. I also found that having a rubber mallet was helpful for sneaking in some of the tighter fitting boards. Because I was using new wood, the boards were all fairly flush to each other, but I went over the wall with some sandpaper to smooth out any corners or splinters that I could see.
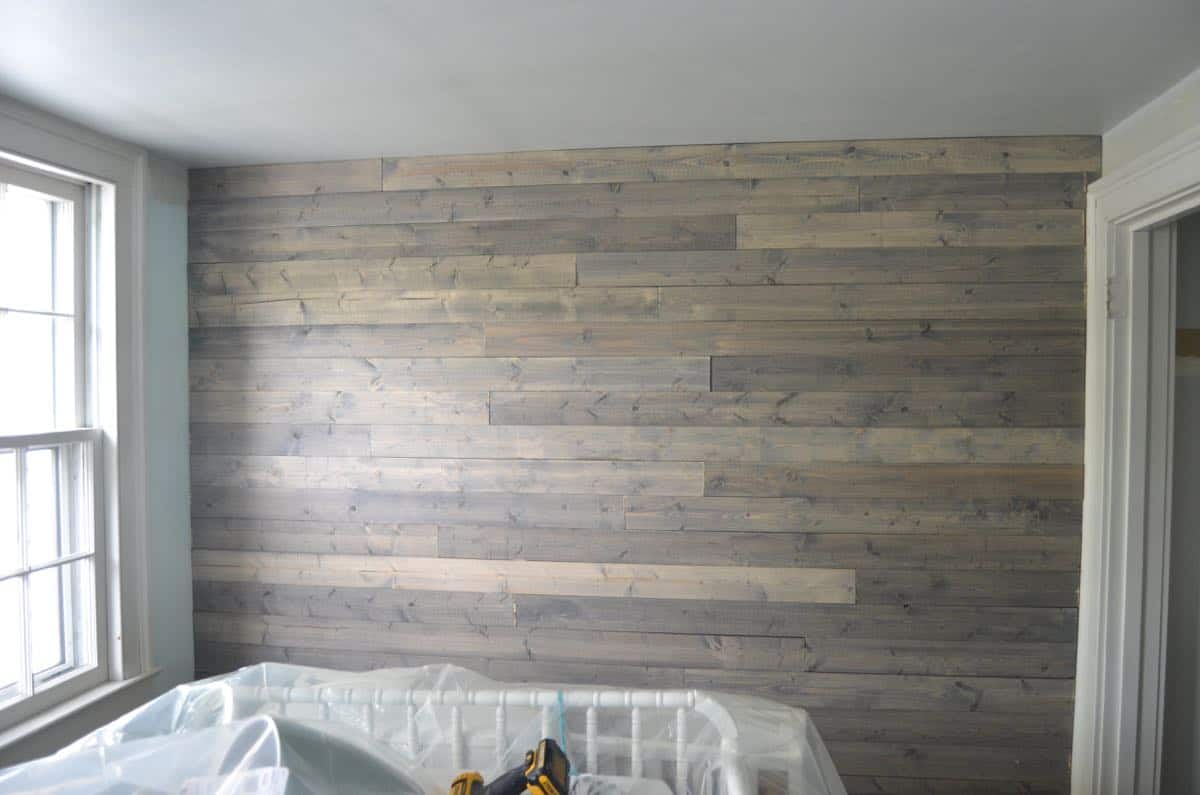
And that’s it! Finished in one short afternoon. I was super tempted to measure well ahead of myself and install a dozen boards at once, but was glad that I slowed down to go a few rows at a time and measure each one. Promise, it’s as easy as it sounds!
Wanna see how the whole room looks? Here’s my original post about it.
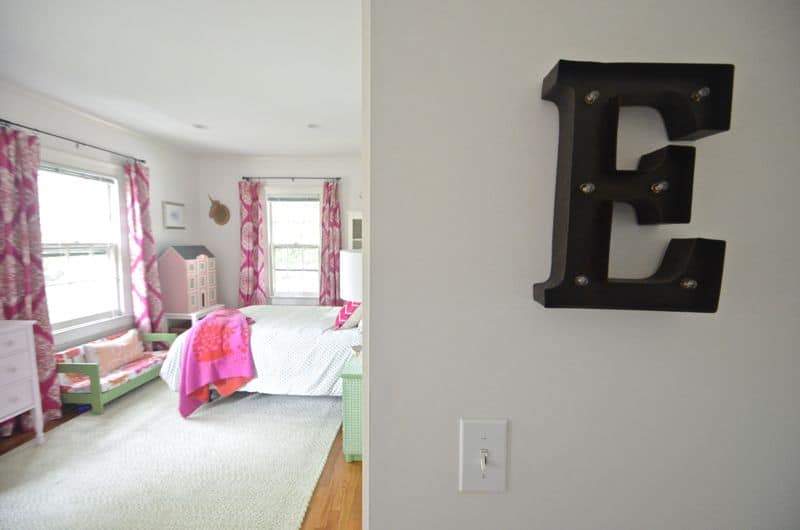
I’ve shared a few other kids’ rooms in this new house. Eleanor helped me with hers:
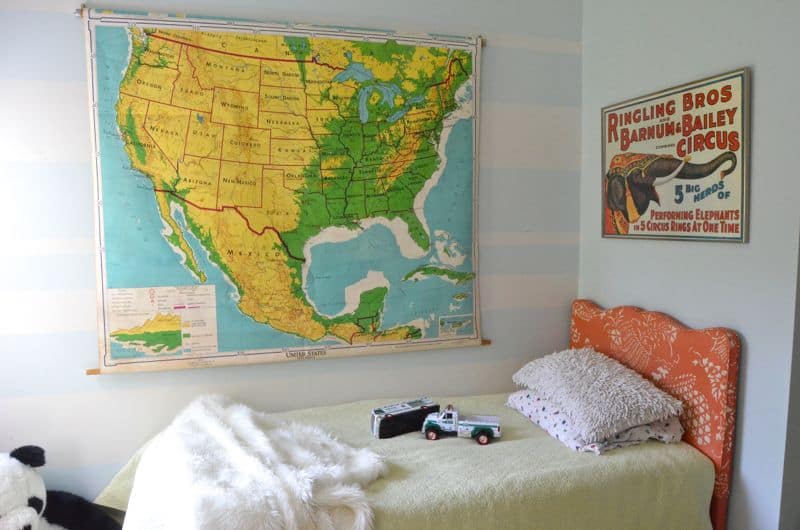
Oliver mostly likes that he has Superman featured in his, but otherwise it was a quick project to pull his space together:
And Louisa’s room is just like her: bright and cheery:
Stalk me on social media and follow me on Facebook, Instagram and Pinterest!


It looks awesome, Charlotte!! Love that grey stain, too!
Some readers told me there’s an actual “reclaimed wood” stain, but this worked pretty well when it was wiped right off… not too dark! xx
You can purchase a vinyl rug that looks just like that wall. I have the plank vinyl rug in my hall. It would be a lot easier than cutting and staining all that wood.
Good to know! Great option for folks who don’t have the time or resources to do the real wood!
Beautiful! I’ll say it again— wish you could come and do my whole house! 🙂
Looks great! What kind of wood did you get? And I am assuming this was not T&G, right?
Hi! This is just regular ol’ 1×4 pine from Home Depot. Not T&G.
Love this! I found you on Pinterest while doing research on plank walls. Did you just use one color stain? It looks like they are different colors but I’m thinking it is just the different shades of wood.
Hi Amanda, Thanks so much! Yes… this is only one color: Minwax Gray. The color variation has to do with the fact that I was painting on the stain and then rubbing it off almost immediately to give it that weathered look. After a while, the rag I was using was more saturated so I’m sure that helped with the variation also! But same new wood: pine 1 x 4s. Good luck!
Hi there! I love your wall! I am in the middle of doing a similar process but using different shades of stain to give a look of different types of wood of varying age. I am also putting it on one wall of my baby’s room. But I’m wondering if you had any issues with not sealing the wood? I keep debating whether to do that and whether or not to seal them first or all at once after they are on the wall. I keep thinking if something needs to be wiped off, it might be easier if it is sealed? Thoughts? Any insight would be greatly appreciated! Thanks!
Hi! Yours sounds amazing! I was super lazy and didn’t do a thing to the wood. I definitely think you’re right that sealing it would make it much easier to clean, but… it will also change the look of the wood so I’d be careful you don’t use anything with too much sheen… shiny barn board might look funny. I also think it depends on which wall you have it… mine is behind the crib, so my biggest concern is splinters, but… I went over it with sandpaper a bit AND not sure that would even be of interest to the baby as he gets older. TBD! I don’t see why sealing them on the wall after the fact would be a problem if you want to see what you think for a bit! Good luck!
Gorgeous! I love it! Question: what did you do at the base? i assume the 1×4 was thicker than your base board. Thanks!
Hi Alyssa,
I’m SO sorry… this comment slipped past me!! The 1 x 4 was basically the same width… 3/4″. It might be *slightly* wider, but nothing that stood out for me! Unless you’re looking for it, it appears to be flush. Hope that helps… a MONTH too late. Gah!
Hi there!! I love your wall, I’ve been wanting to do this for my sons room, however he has a light switch and plug in on the wall. Did you have to worry about either of these? If so how did you work around them? I don’t want them to be sunken into the wall, I wasn’t sure how to bring them forward. (Does that make sense?) thanks in advance!
Hi! This wall has one plug but I just cut the wood around it… it’s only 3/4″ thick so not super awkward, but… there are ways you can extend the outlet if need be. It requires simple electric skills, but ask at the hardware store and they should be able to guide you to the right size for your outlet/ switch! https://www.google.com/search?q=plug+extension&espv=2&biw=1414&bih=563&source=lnms&tbm=isch&sa=X&sqi=2&ved=0CAcQ_AUoAmoVChMI0Yy9qsmMyQIVSBk-Ch0ZHgCB#tbm=isch&q=outlet+extension+box
Good luck!!
Thank you so much!! I knew there had to be something, I just wasn’t sure! 🙂
Beautiful! Thank you, thank you, thank you for posting this! This project truly was a labor of love and I plan on doing this to my entryway and who knows what else. I’ve always been a DIYer and look forward to this project.
Thanks for sharing!
Thanks, Debbie!!! Good luck with your entryway… I was pleasantly surprised by how easy this was!!
Wonderful post! We are linking to this great content on our site.
Keep up the great writing.
Did you mention the costs anywhere here?
I am looking for a cheap solution to do a wall, thanks !
Hi Charlie, Not sure that I did… depends on the cost of lumber in your neck of the woods, but I’d estimate it was between 1 and 200 dollars? Each board was about $8 and it required quite a few as you can see. Reclaimed wood might be a cheaper option if it’s available in your area… or of course pallet wood.
I love this idea! It would cost a lot less than Stikwood products. Thanks for the idea!
I haven’t heard of Stikwood, but no question this pine is one of the more affordable woods at Home Depot! I was so pleased with how authentic it turned out! Good luck!
I absolutely ADORE Stikwood, but searching for something more affordable lead me here! This look is almost spot on with Stikwood, but my pocketbook will appreciate this DIY quite a bit more 🙂
Oh great! It’s still not *super* cheap just because of the cost of lumber, but it’s a pretty good alternative!! Thanks!
Oh how I love this! This is EXACTLY the look I’m going for in my treatment room! I’m an esthetician and my spa room has a big wall that’s useless and I don’t want to clutter it up with shelves or pics. This will be so simple to clean simply by vacuuming with the brush attachment. Thank you so much! Congrats on your baby!
Thanks, Denise! Sounds perfect!!! You could probably give it a coat of matte polycrylic to seal it even more if you needed! Sounds like a lovely treatment room! Wish you were nearby so I could come and check it out. 🙂
Hi!
did you install this directly on the dry wall ? or did you have to put something in between
thanks
Patrick
I did! Just right on top of the painted wall. I suppose if the wall is super wavy then you might have a problem, but I was able to make do!
Really lovely. What length of boards did you use? That’s always a curious thing for me. Thanks!
Hi Jennifer! Thanks! I started with 8 foot lengths since those fit in my car, but from there I used random lengths to make sure they were staggered… does that make sense? I basically cut my 8 foot boards into varying lengths so when I installed them, it looked random.
What color are the walls in the room?
Hi Cheryl, I used Behr’s Tin Smith on the walls and the ceiling in there. The first one I tried read as a lavender… I love this one.
Hi there thank you so much this is one of the better step by step tutorials I’ve seen. I had one question in regards to finding the studs, did any of the planks that you nail gun into the wall get nailed into drywall alone and not into a stud? Meaning if any of your boys were too short for too long to meet where the stud was did you just go ahead and mail it into the drywall?
Hi! Great question. Every board hit a stud in a couple of places… I was careful not to cut them SO short that they couldn’t. Typically studs are 16″ or 24″ apart, so I made sure that none of my boards were shorter than that. For the end pieces that DID have to be short… I just nailed them in… yes. 🙂 Those pieces are small enough that the weight shouldn’t be a problem for the nails in the drywall.
Quick question about the Ryboi nailer – were you able to finish that entire wall on one battery? Currently shopping for nailer and am wondering how much you can get done on one battery. Thanks –
Hi there! Sadly… I have NO memory, but… I believe so. There actually aren’t that many nails in use here… perhaps 2 or three per board so I’d guess the battery should last. I will say the advantage of this nailer is that you don’t need to purchase an air compressor, but… the one I used is fairly heavy. For this small room, it was great because I didn’t have to lug the compressor, but typically I prefer my pneumatic one for ease of use!
The tutorial itself is great, however the fact that there is no real disclaimed regarding this stain is unfortunate. I am 8 and a half months pregnant and live in New England where it’s the dead of winter, so had no choice but to complete this in my ventilated basement. Well my husband and I have been up ALL NIGHT trying to get these fumes out of our house…nothing is working!
All of our heat is going right out the window (literally!) My lungs burn, I feel sick, I also have a 20 month old asleep upstairs… My FIL is stopping to grab several Industrial Box Fans as soon as our local Walmart opens at 6am because we are so desperate.
Several articles of DIY projects on the internet complain or warn about the odors from this stain and how impossible they are to get rid of, particularly this brand! I bought the same one being used in this tutorial and saying I regret this decision is an understatement. Hopefully we can get rid of these fumes soon… I would definitely advise against using this stain, especially if you have to use in indoors (again we were in a well-ventilated basement…. and have been desperately trying to “air out” for SEVERAL hours).
At this point this was just a big waste of time and money because we had to move all of the wood outdoors in the snow (not dry at this point) and seal up all of the supplies and also move them outdoors to try and help with the odors….
Long story short, this was not worth it. Cute tutorial, but there should be more of a warning regarding the stain. I would definitely do a water based next time…or a different brand.
My main priority now is the health and safety of my family, especially my LOs.
Hi Ashley, I’m SO sorry this happened to you! I’m sure you guys were super frustrated. I’ll go back and update my post to include mention of the fumes. It’s always important to follow the directions on product labels and for any paint or stain, working in a well-ventilated area is essential and is usually highlighted on the label. As shown in this tutorial, I stained the wood outside and brought in into the home when dry, but I understand exactly what you’re saying about working in New England when temps are cooler… it can be a big challenge. Hopefully when the stain has dried, the odor will clear out. Best of luck with Baby #2!
Hi Charlotte,
We are building a new home and I want this look in my foyer area but with more of a white wash look. However, after talking to some people in the wood business I am fearful of the wood drying out and starting to warp or pop from the wall. Have you had this issue with your wall? Some of these wood suppliers are suggesting you need to use reclaimed or kiln dried wood so as not to have warping/popping happen. Your thoughts???
I completely understand what they’re saying since that happens a bit with pine like this. It has NOT happened on this wall and I’m not sure whether that’s because the boards are smaller or what. I suppose you could stick with pine because it’s the cheapest and just know that down the line, you might have to replace one or two boards if they do get super warped on you? Probably still worth it b/c of the cost? I also made sure to hit a stud in a few places when installing each board, which also probably helps a bit to keep it in place! Good luck!
This project looks great and i was wondering if you jusT apPlied one coat of stain To each plank or did you do Multiple layers on some
To Achieve the variety of coLor?
Thank you,
Michelle
Just 1! Pine is pretty soft so it just absorbed the stain a little differently… I wiped it off really fast which I also think helped since the stain didn’t fully soak in to it’s full ‘color’ if that makes any sense.
I love the wall you did. Sounds fairly easy also. I’d like this look for my kitchen table. IT is 3’x6′. Would you advise nailing or gluing? If gluing, what brand? I think I should seal it because of spills, when finished. Right?
Hi! That could definitely work! My first question is do you care about the existing table? If so… you’ll want to join the wood pieces to each other first to create a topper and THEN place that onto the table. I’ve never done anything like this, so I would probably attach with a combination of wood glue and screws/ nails. I’d probably glue the boards onto the table and hold in place with very thin brad nails so there wouldn’t be too many holes to patch. Then I’d screw from underneath into the wood. Regarding the finish, your paint store might be the best bet since you’ll need something food safe? I’ve used plain ol’ polycrylic on my dining room table and have been very happy, but double check! Good luck!
Hi , this really looks great just wondering though You saNded before you stained it corRect? And did you hand sand?
Hi Tristan! I actually didn’t sand much! I certainly eyeballed each board before applying stain and removed and tear out from the ends from where I’d cut it, but I didn’t sand every edge on every board. (Although I maybe should have…)
I see an electrical outlet in one of the photos. did that have to be moved out/adjusted for the thickness of the wood?
Hi there! I cut the wood to go around the outlet, but otherwise did nothing. It’s not one we ever use but a normal plug would just fine.
i love this!
i have a couple questions. when you mentioned that sometimes a gap happens, and with these stock 1×4’s, from working with them often i know that there will likely be many gaps when creating a wall like this. you said it’s nothing a crowbar & realignment can’t fix – Can you explain how you go about fixing the gap?
as well, i’m planning to do a wall exactly like this. However, after doing research, i was planning on doing something additional. I was going to attach 1×4’s vertically on each stud. then i was going to attach my ‘barnwood’ horizontally, nailing them into those vertical boards. i just figured this would prevent lots of nail holes directly into my wall, and rather the nails would just go into the vertical 1×4’s. what are your thoughts on this? As well, the wall that I’m doing does not create a corner of the room on both sides. the right side is a corner with another wall, but the left side is just where the wall ends. after i attach all my ‘barnwood’ (whether or not i use the vertical 1×4’s under, however if i do, then the barnwood would be ‘raised’ off of the wall about 0.75″) – how would i make the edge of the open side of the wall aesthetically pleasing? especially if i do the raised version.
thank you!
Hi there! So two things… you can totally use your technique but a couple of things to be aware of: 1. you won’t be able to stagger the boards anyway you like which might make it look different than mine. Also… any wall outlets will be *really* recessed which could be problematic. Re. the corner… I would maybe end your floating wall 3/4″ shy of the corner so then you could conceal the rough edge with board perpendicular. Does that make sense?
I absolu love your wall and think it looks amazing so i got on amazon to see how much they charge for wood planks and found your picture on a product being solD on there……..wallPlankdepot
5.0 out of 5 stars 6 Reviews
Self Adhesive Wall Panels/Reclaimed Weathered Wood Wall Planks/Peel & Stick Rustic Reclaimed Barn Wood Paneling
THANK YOU, Megan! I’ll go say something. Really appreciate the heads up!
Hello,
I love your wall. I am in process of doing something similar in our nursery But am WORRIED about splinterS. We bought planks of wood at homedepot with different stains but the wood is super rough and even with sanding it still has some splinters. Did you have this issue or know how to get around that?
Hi Candi! Sorry for the delay! I was working with common pine so it was pretty smooth to start with, but I never noticed Arthur paying much attention to the wall. You could give it a clear coat of polycrylic perhaps?
i have been lOving thIs wall forever. I just tried putting classic gray on pine wood and it looms very gray. Your wall lookS mUch more rustic and has more brown. Any ideas as tto The diffErence?
All I can think of is that I wiped my stain off almost immediately! You can also play around and mix stains to get the tone you’re looking for! Good luck!