
How to Make a TV Easel
Psssst… this post *might* contain affiliate links: see my disclosure here.
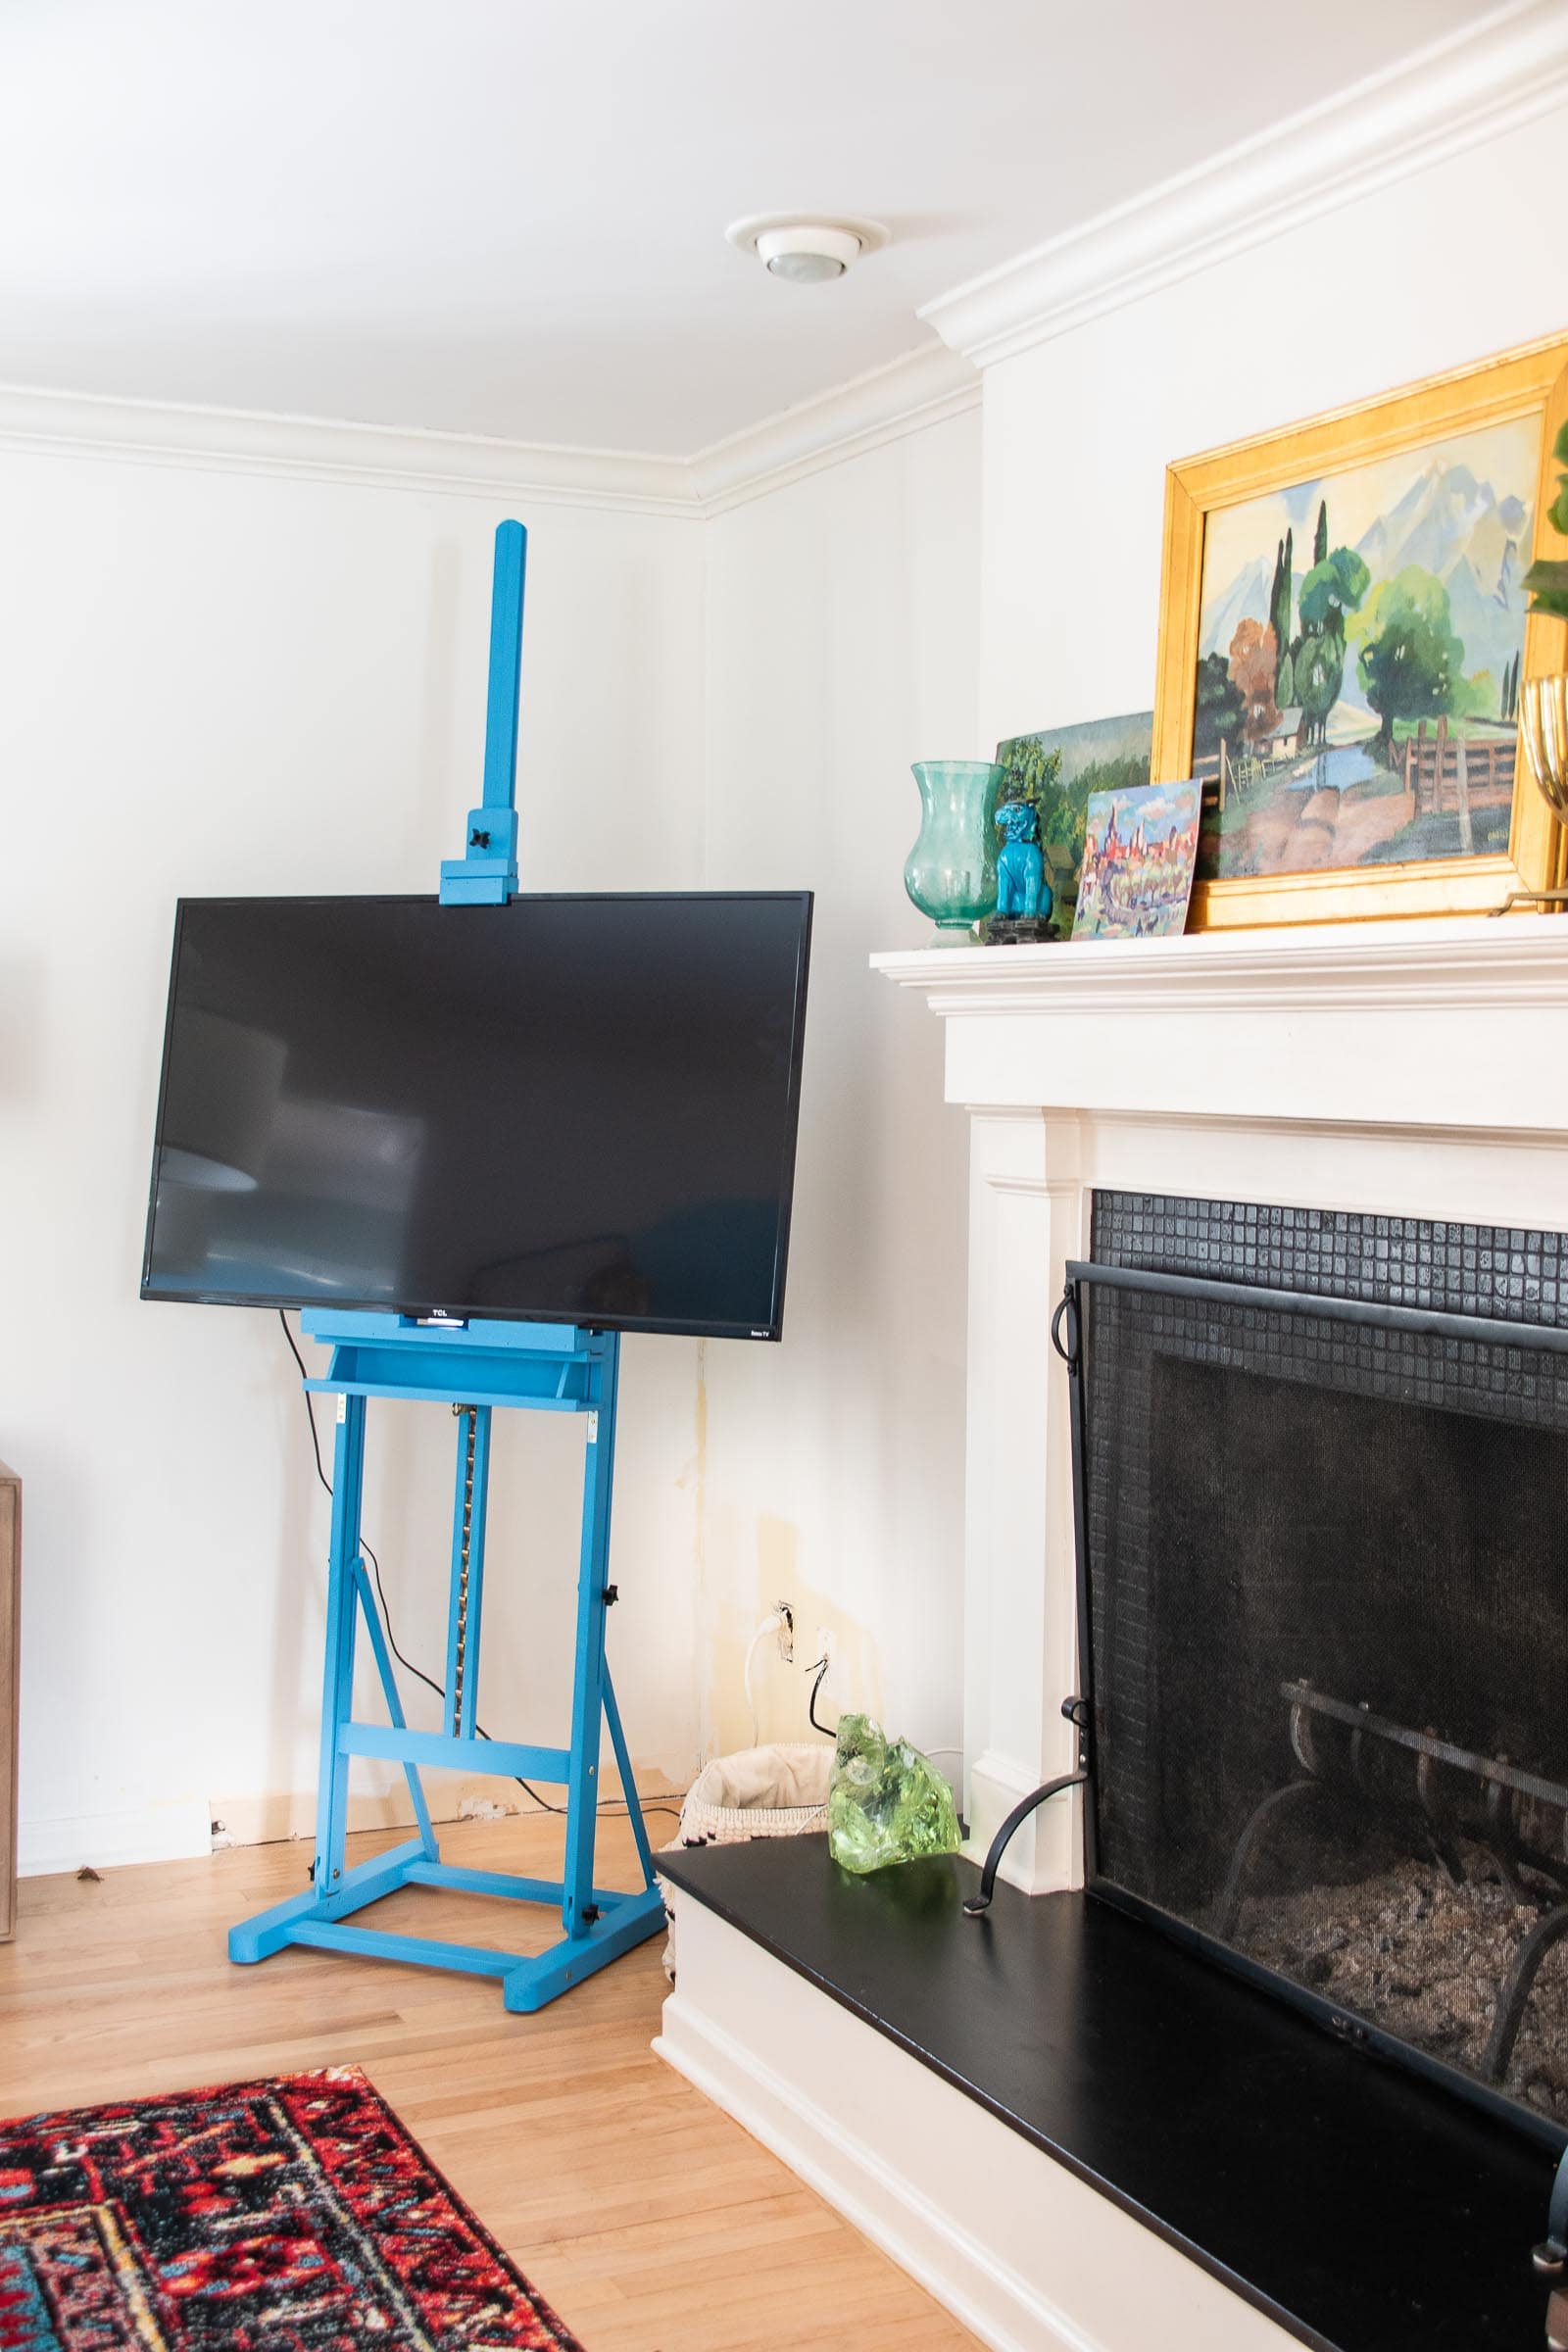
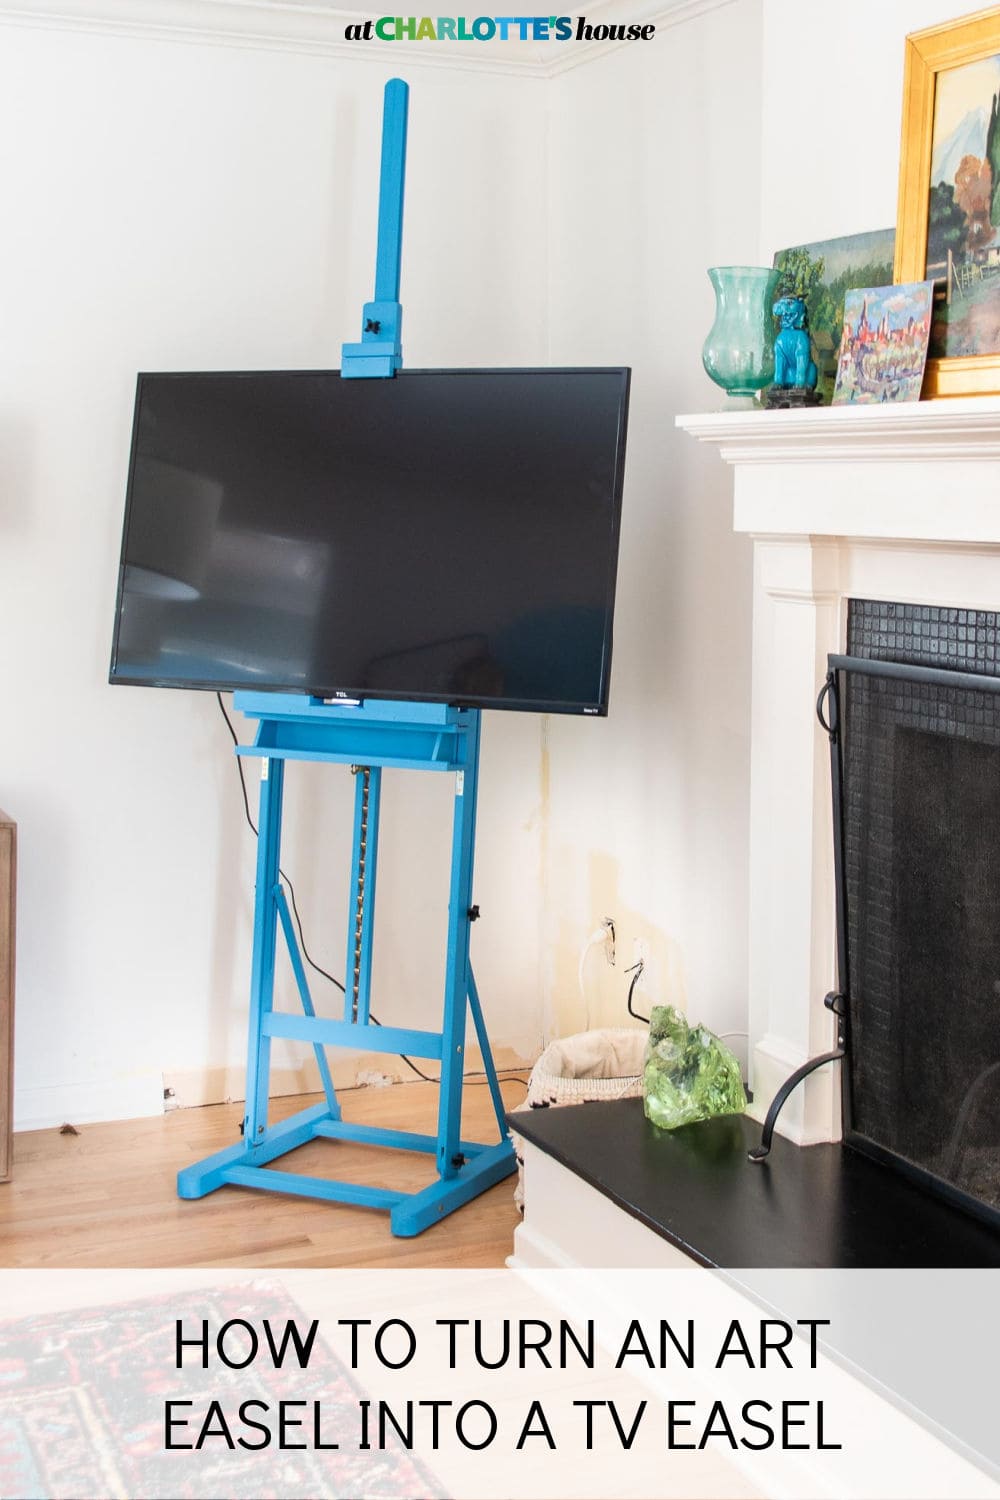
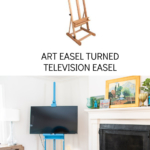
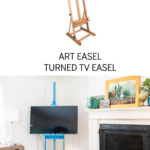
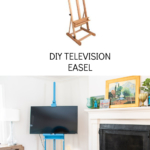
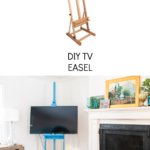
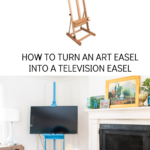
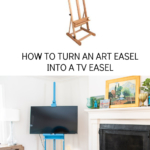
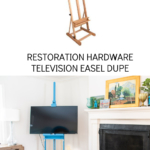
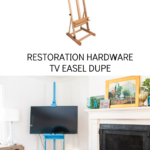
How to Turn an Art Easel into a Television Easel
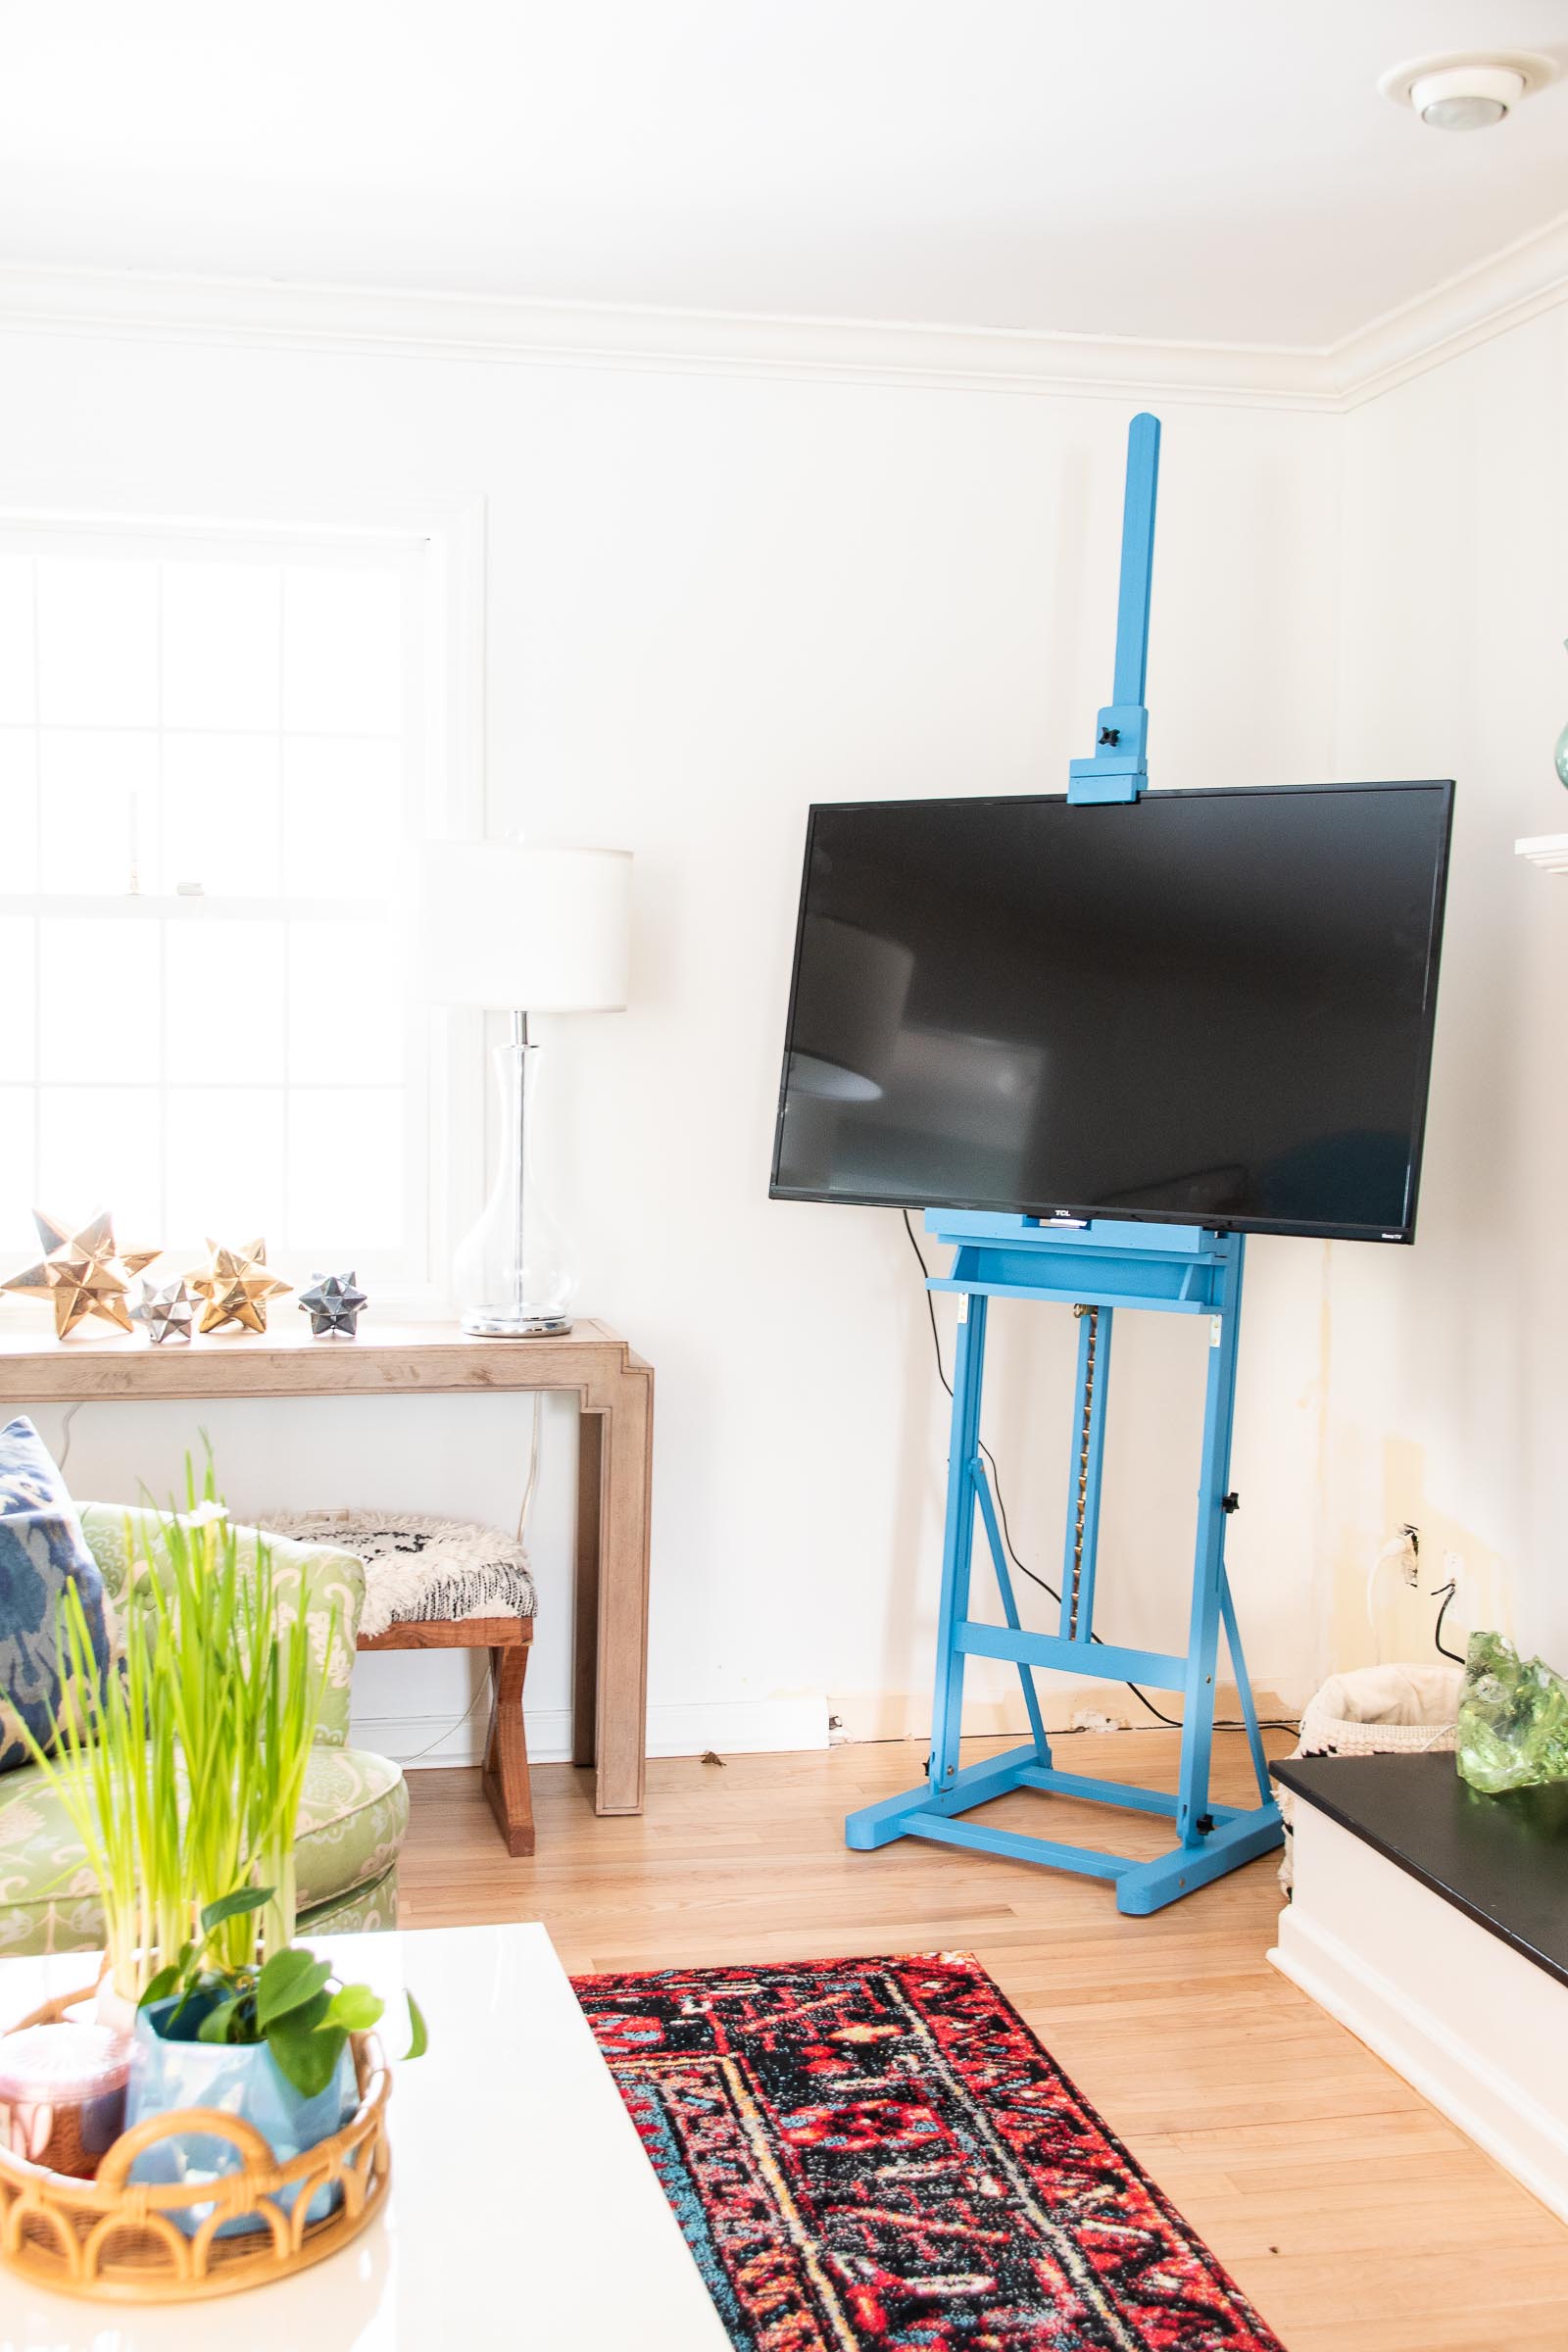
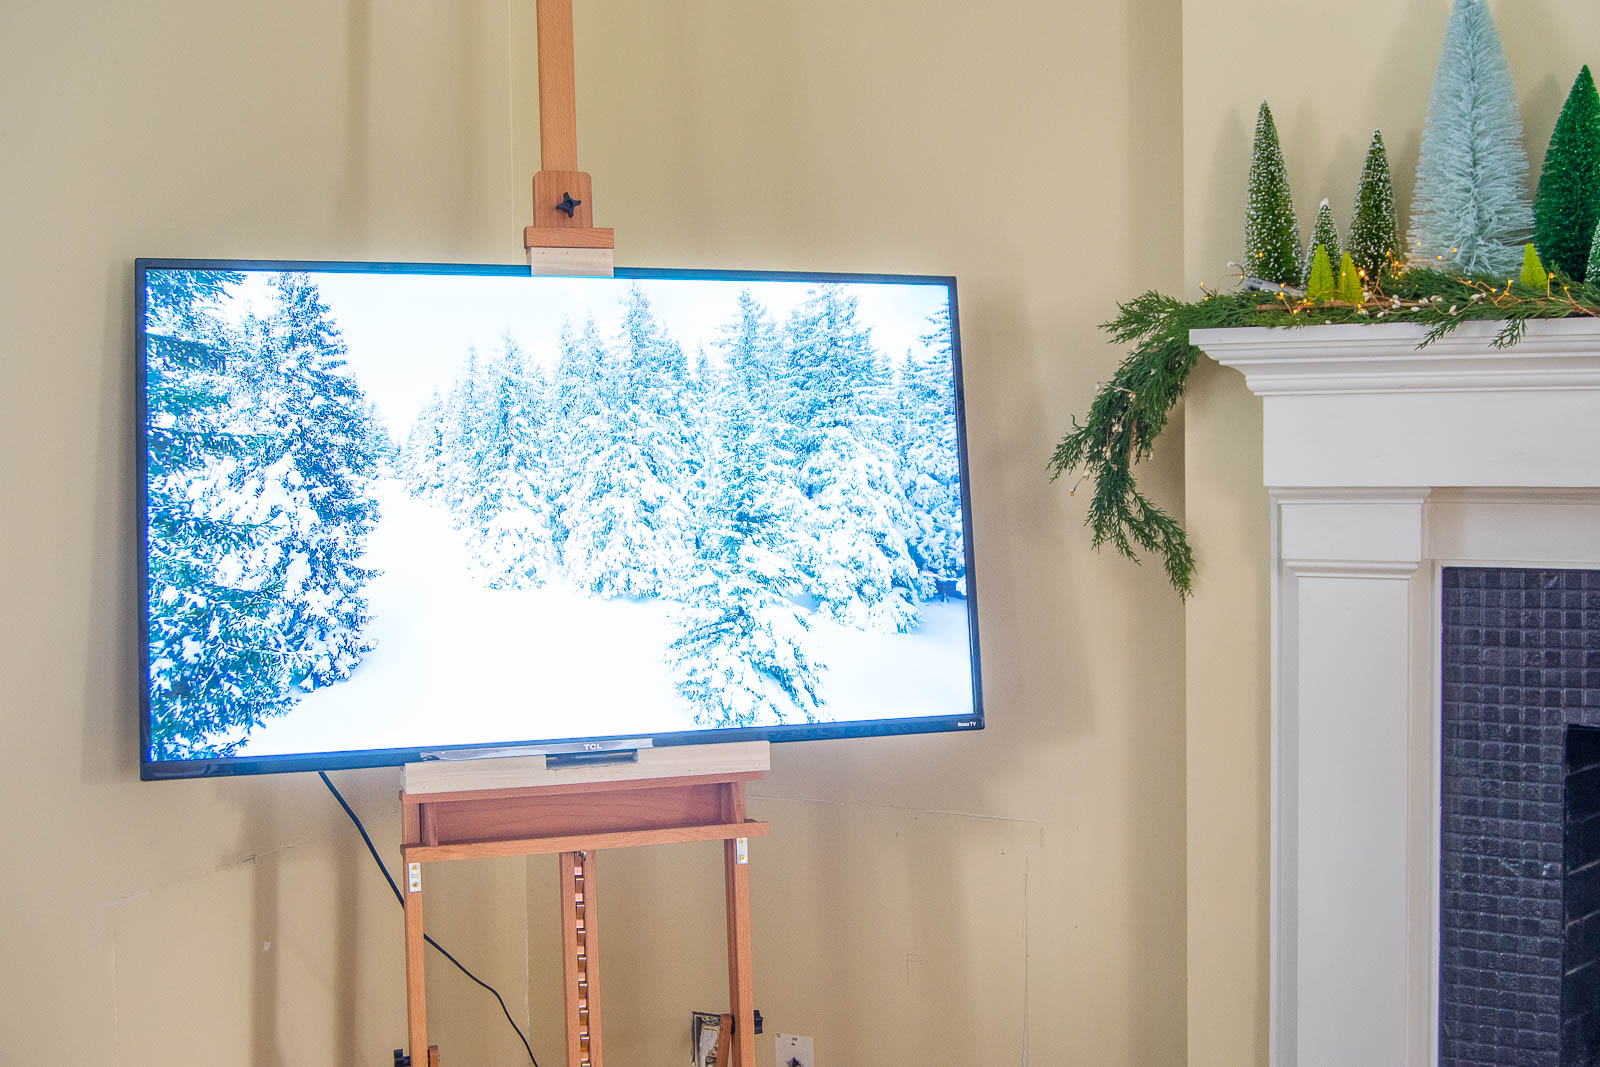
We had big plans to mount our TV over the mantel in the new house. I even pulled out the built in corner cabinet that was in there so that our floor guys could sand and refinish the floor underneath. And then we moved in and realized that the area over the mantel was… solid concrete. Could we have mounted the TV? Sure… but it was a little high, there was no power box and… we didn’t trust ourselves to safely deal with all of this. I started going down the road of finding a piece of furniture to hold the TV but they all just felt big. Restoration Hardware makes TV easels that are amazing but also… like a LOT of money. So I spent a fraction of that to MacGyver our own tv easel and it works GREAT. Here’s how I did it.
Retrofitting an Art Easel to Fit Our TV
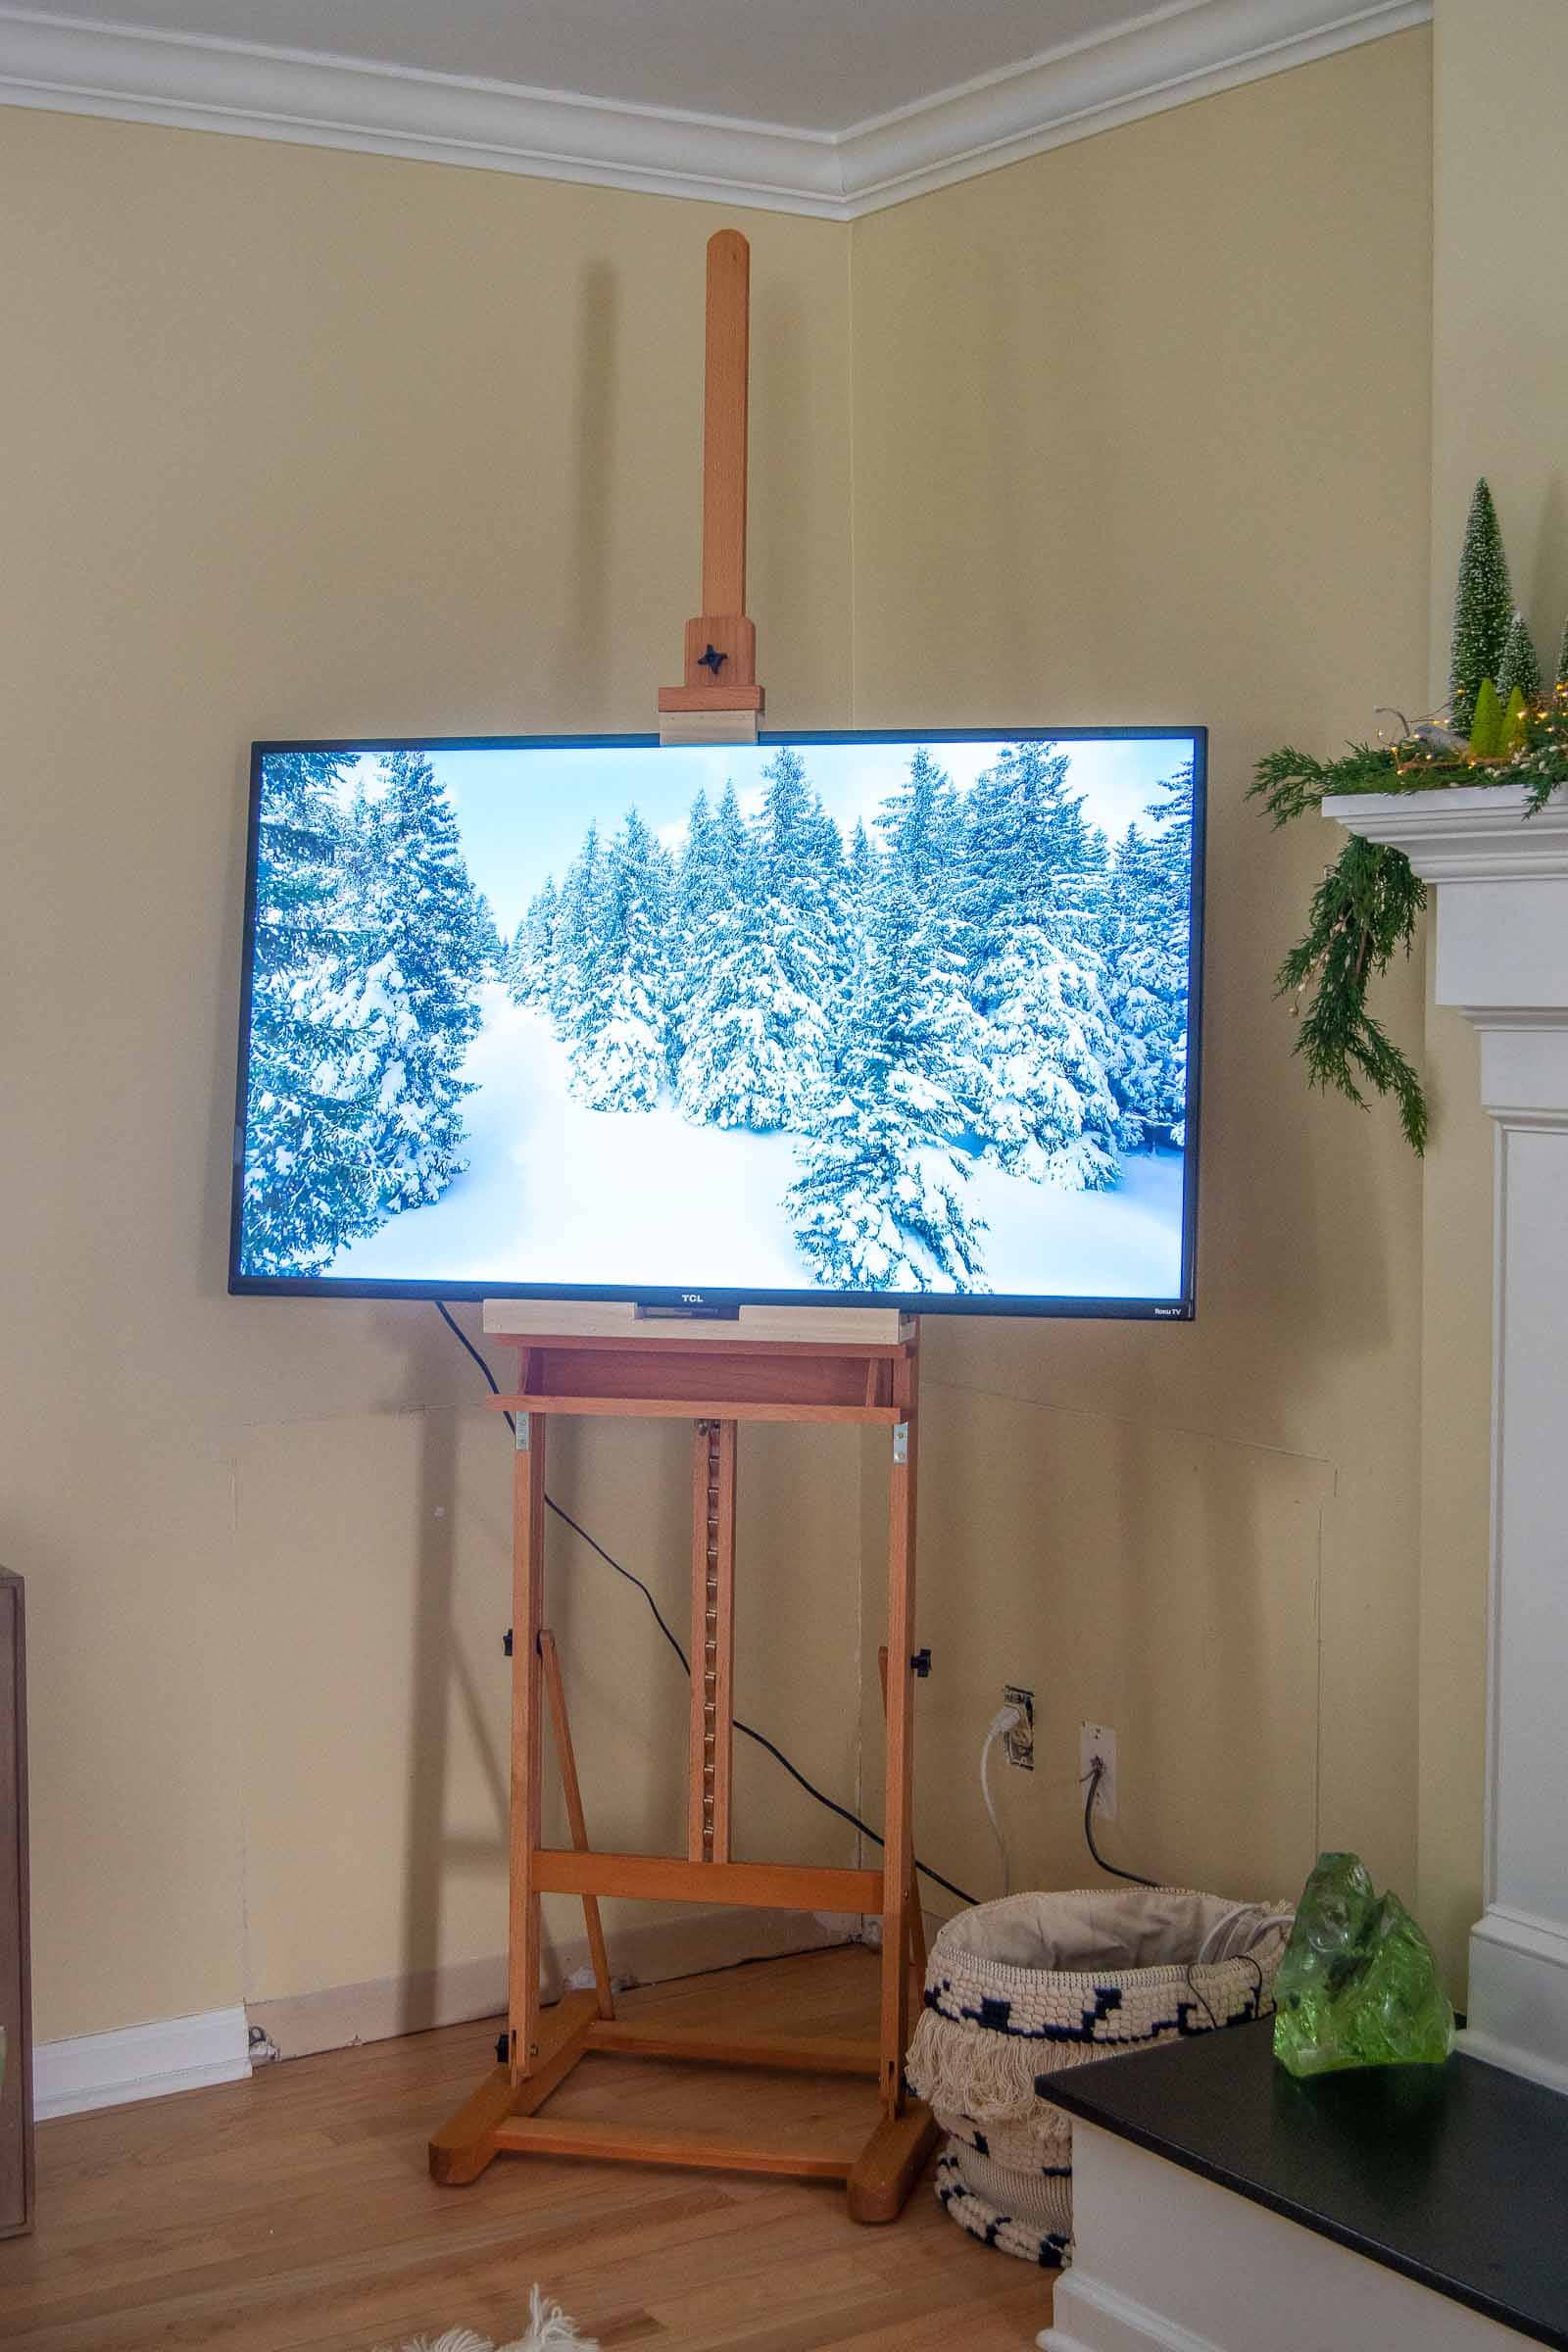
Note: I was dealing with a broken camera at the time, so there are process shots missing, but hopefully you can still see how I did it and apply the same logic to whatever easel you try to retrofit!
Shop my favorites!
Originally I searched Craigslist and FB marketplace for an old vintage easel. I found a couple that would have been amazing but they were a little pricey (like a couple hundred dollars) and they were BIG. Like the stand alone was 3+ feet wide. Just for sh*ts and giggles I searched online and found one on sale for just under $100. (I got this one here.) One of the reasons I was confident with this plan was that we have a VERY skinny TV. When we moved, we cut the cord and now have YouTube TV so no cable box or anything which makes this much easier. You can still see the cord down the back of the easel but I don’t really notice it.

Build out the support tray for Underneath the Television
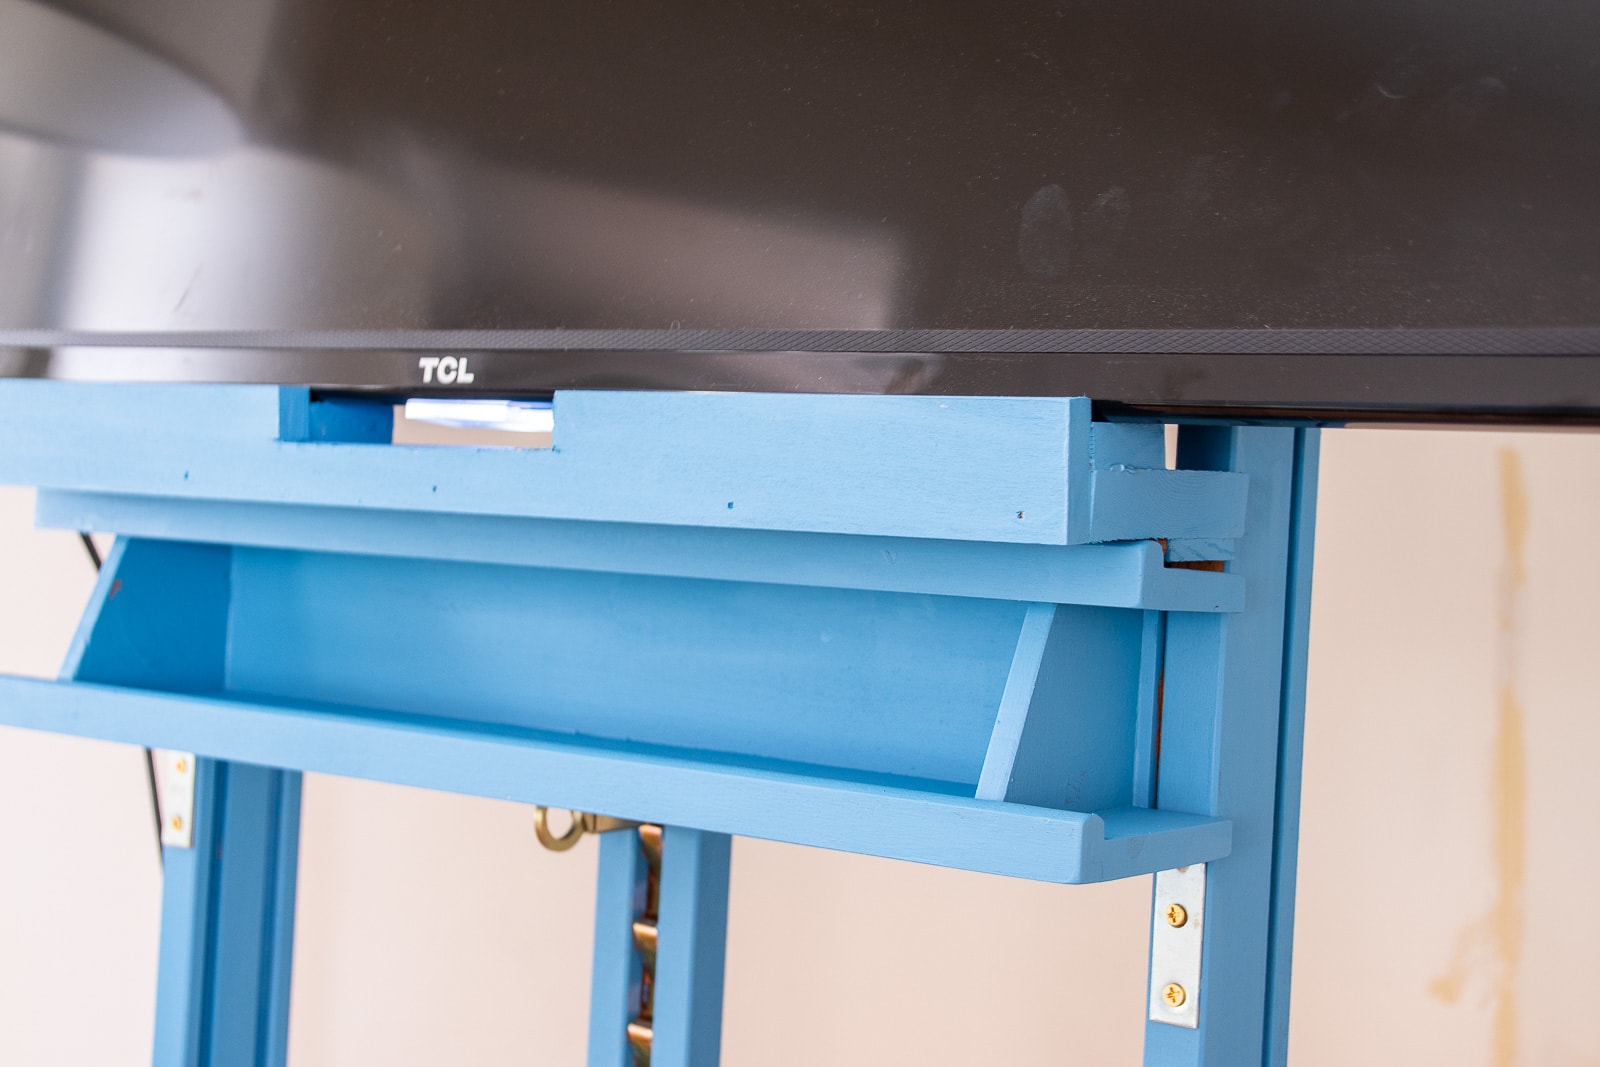
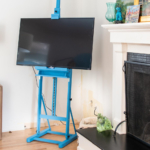
The one and only step is to build out the tray that will support the TV on the bottom, and the brace that will hold the TV in place on the top. Your easel may look different, but for mine, I used poplar craft boards because they were about the same width as the other boards of the easel. I started with one board deep enough to accommodate the TV. With wood glue and brad nails, I attached another board to the front to stop the TV from sliding off. Lastly, I glued another piece of poplar on the bottom so that this rig would fit snuggly onto the easel tray. Once this was all dry I was able to screw it in place down onto the tray of the easel.
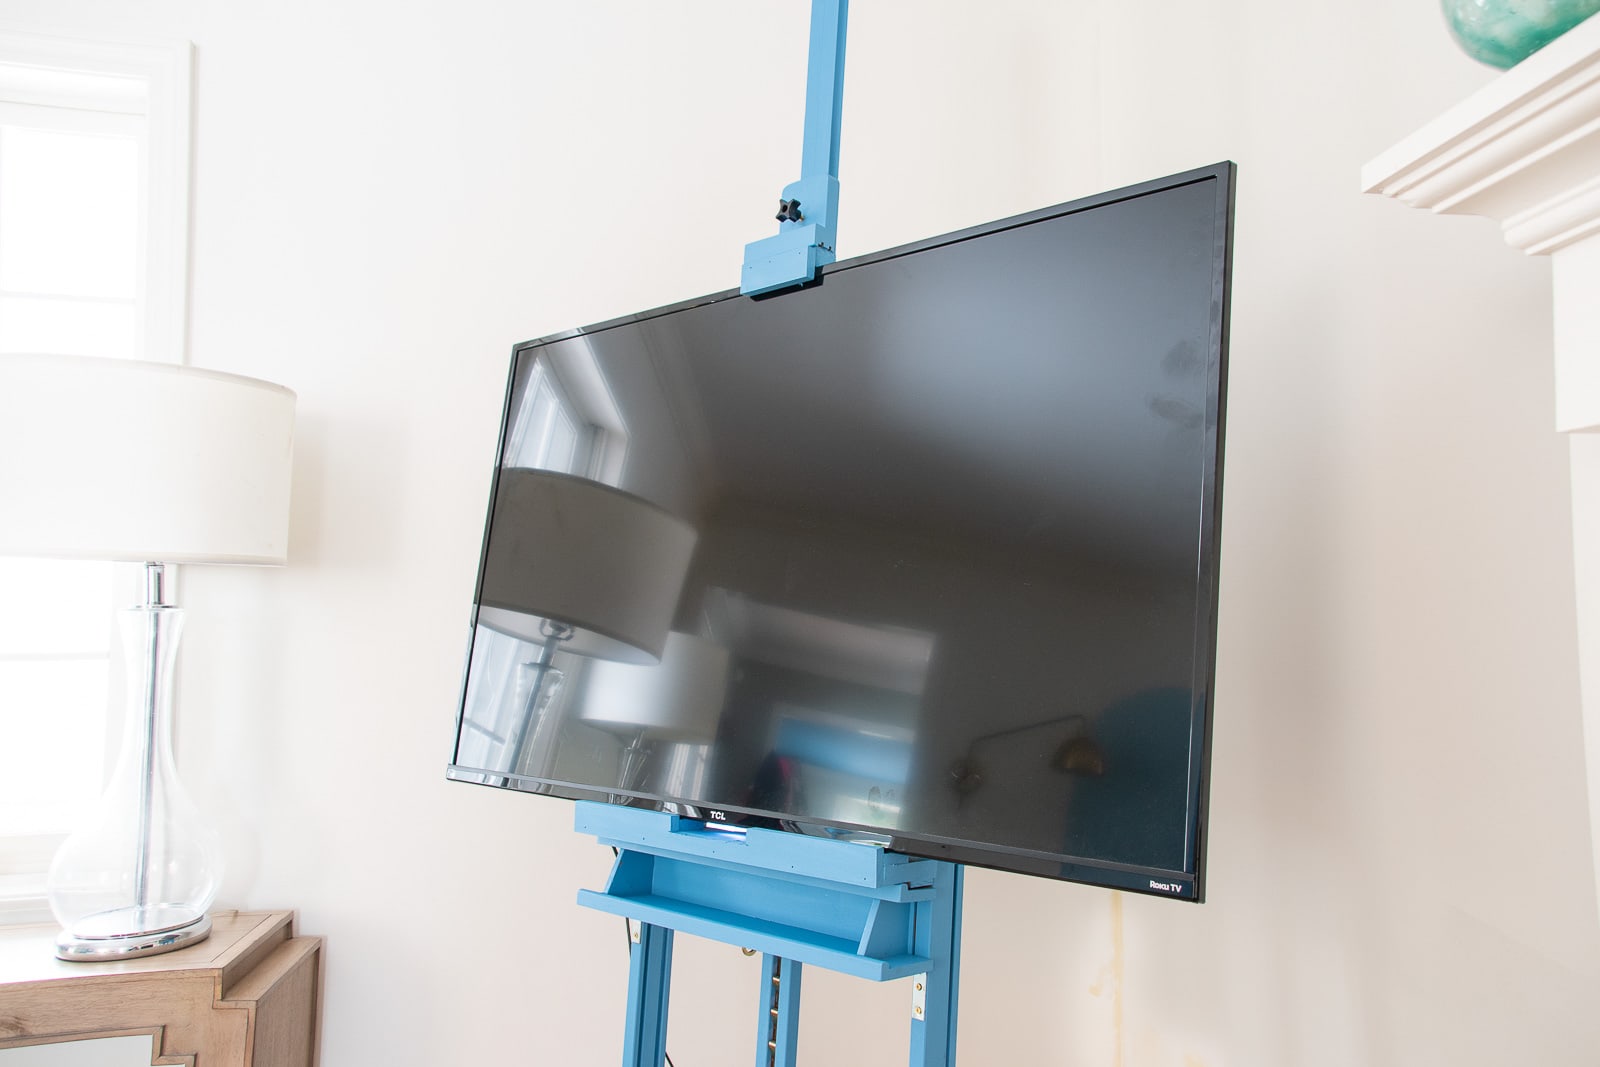
Our television has the sensor right on the bottom so I had to cut away a few inches of the wood support. If I’d noticed this at the beginning I would have just used two separate pieces of wood for the front edge.
Build a Top Brace for the Television
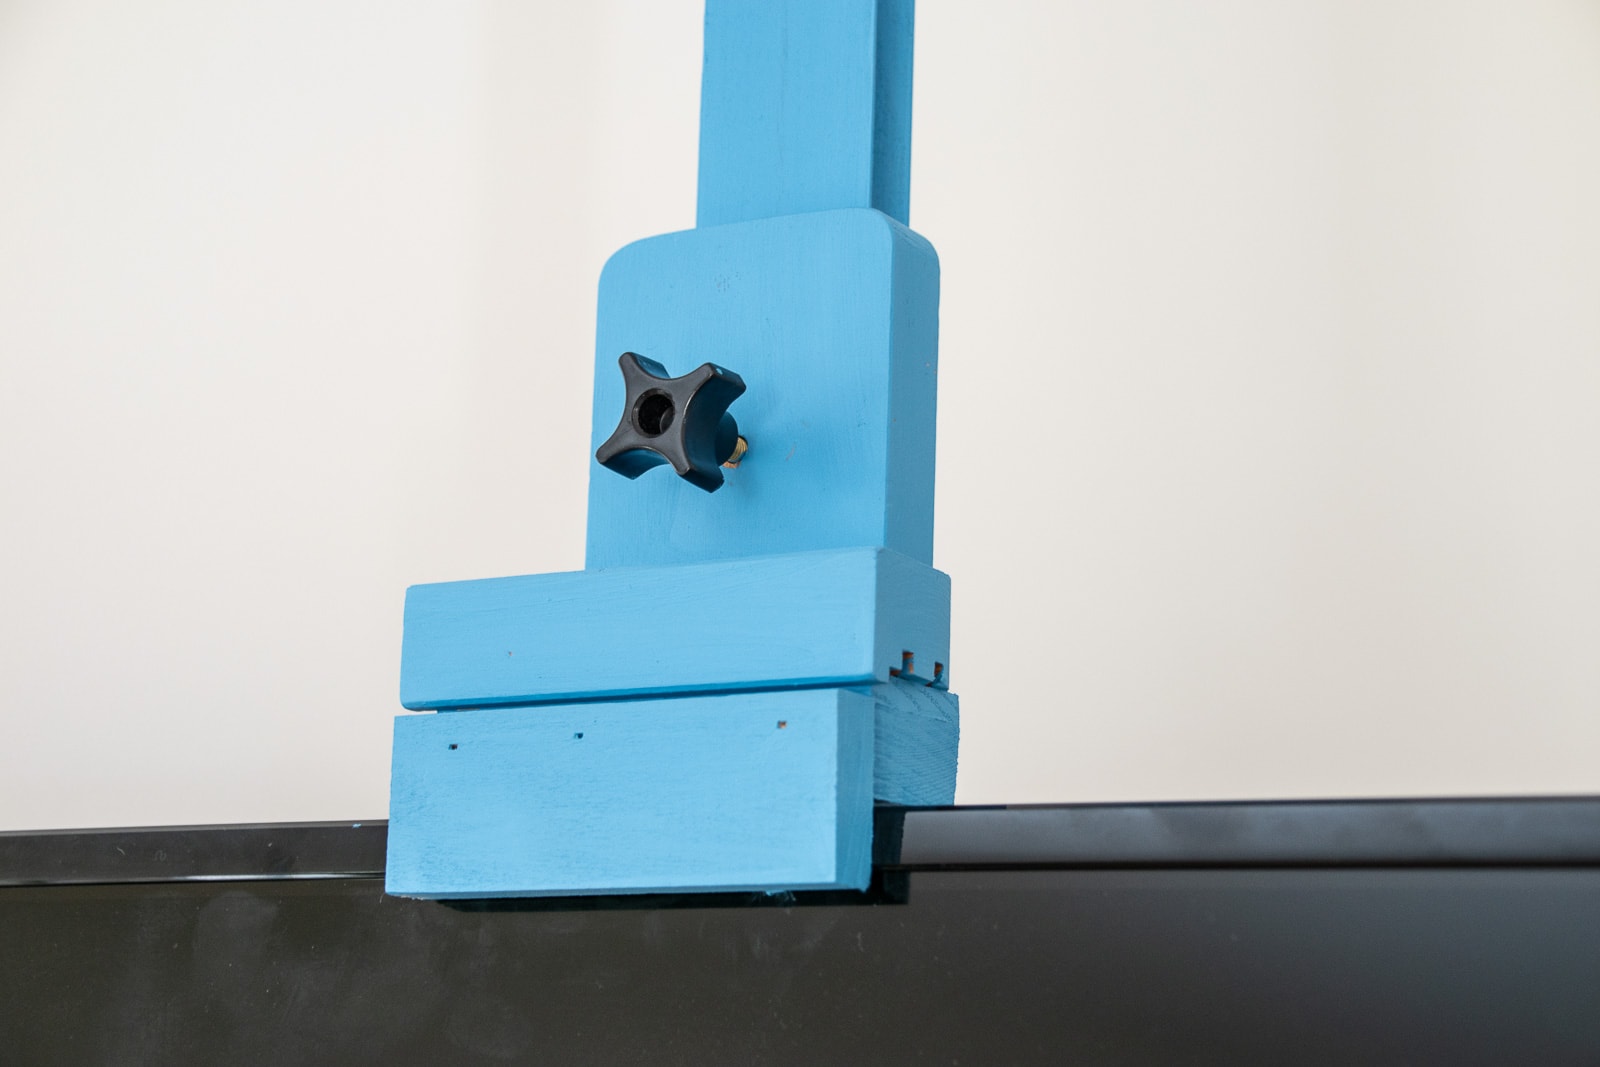
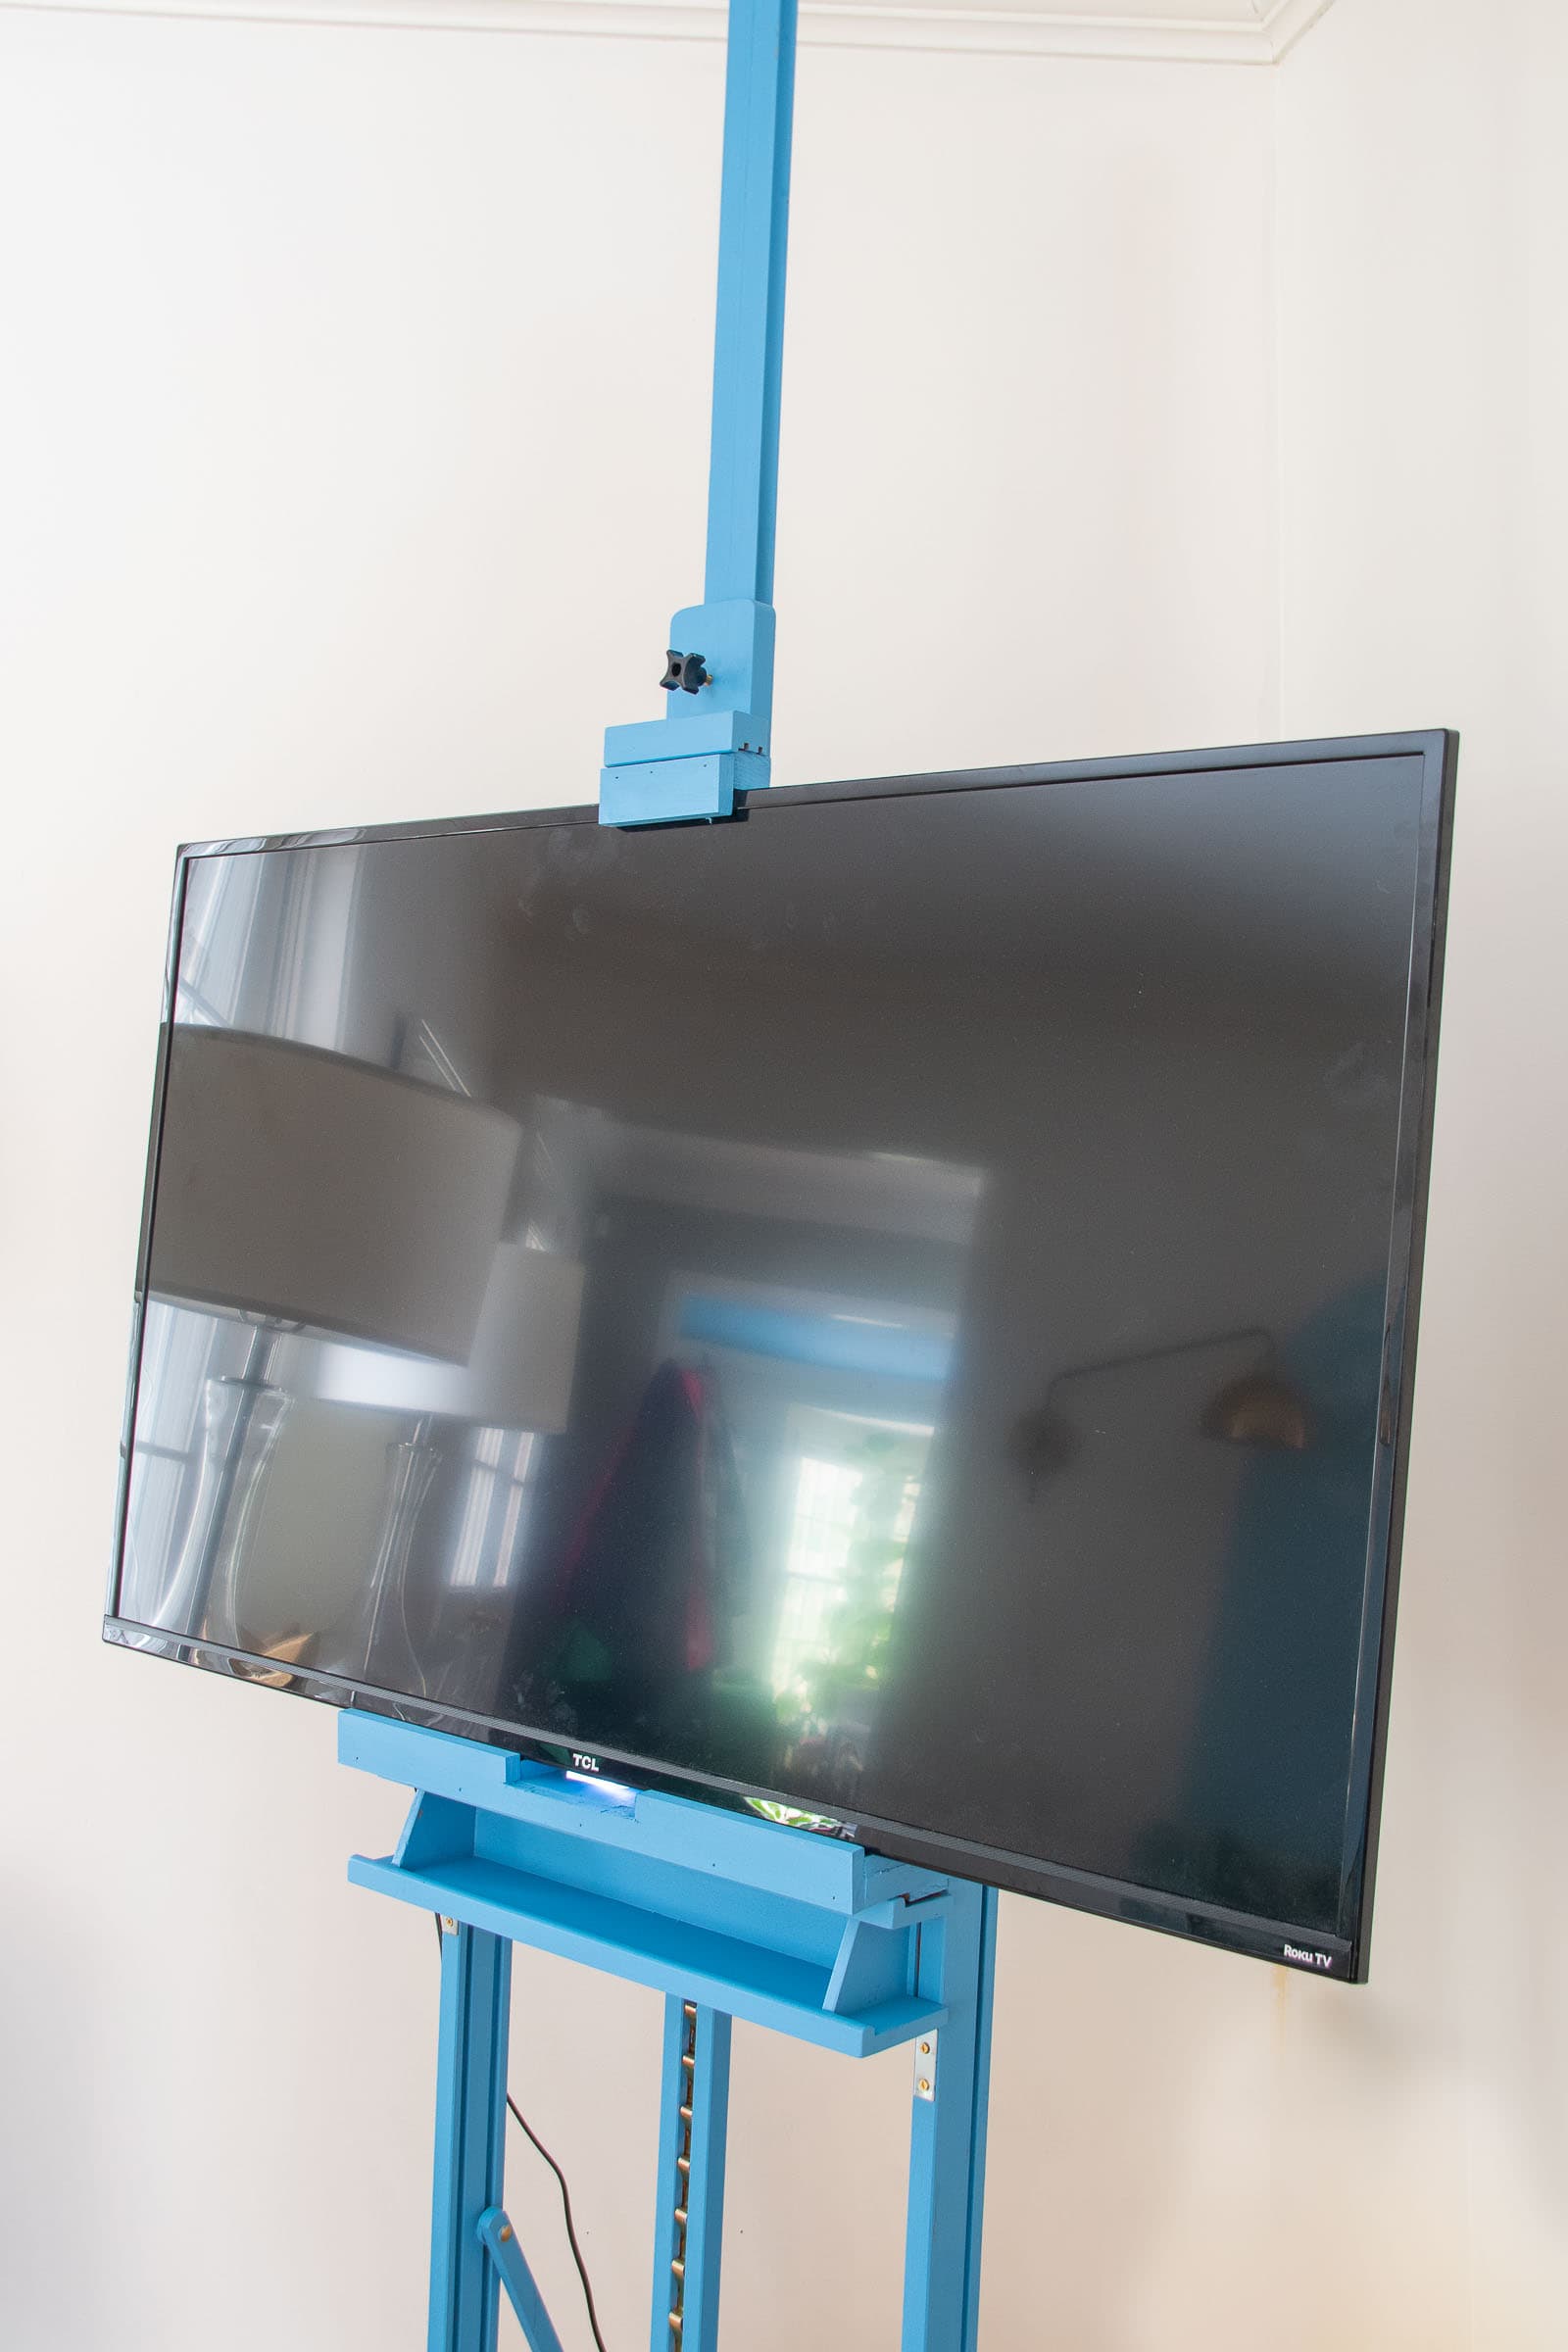
Just as I built the bottom brace to hold the TV in place, I build a similar brace for the top of the TV using wood glue and brad nails. I screwed it in place and it was able to slide back over the easel as intended but now with the added piece.
Support the Bottom of the Easel Tray
The easel is adjustable and has metal grooves that hold it in place. But it’s designed to hold a canvas so I didn’t want to risk this giving out. I added L brackets underneath the the tray to give it some extra support.
You can see in these pictures that the wood I added didn’t match the wood of the original easel. It’s possible I could have sanded the poplar and tried to match the stain of the easel, but… I actually didn’t love the way the stain of the easel looked with the color of our floors. I also believe in ‘going big or going home’ especially when it’s with something like a $100 easel. This blue is the same blue as our living room ceiling and one of my favorites: Jet Ski by Behr.
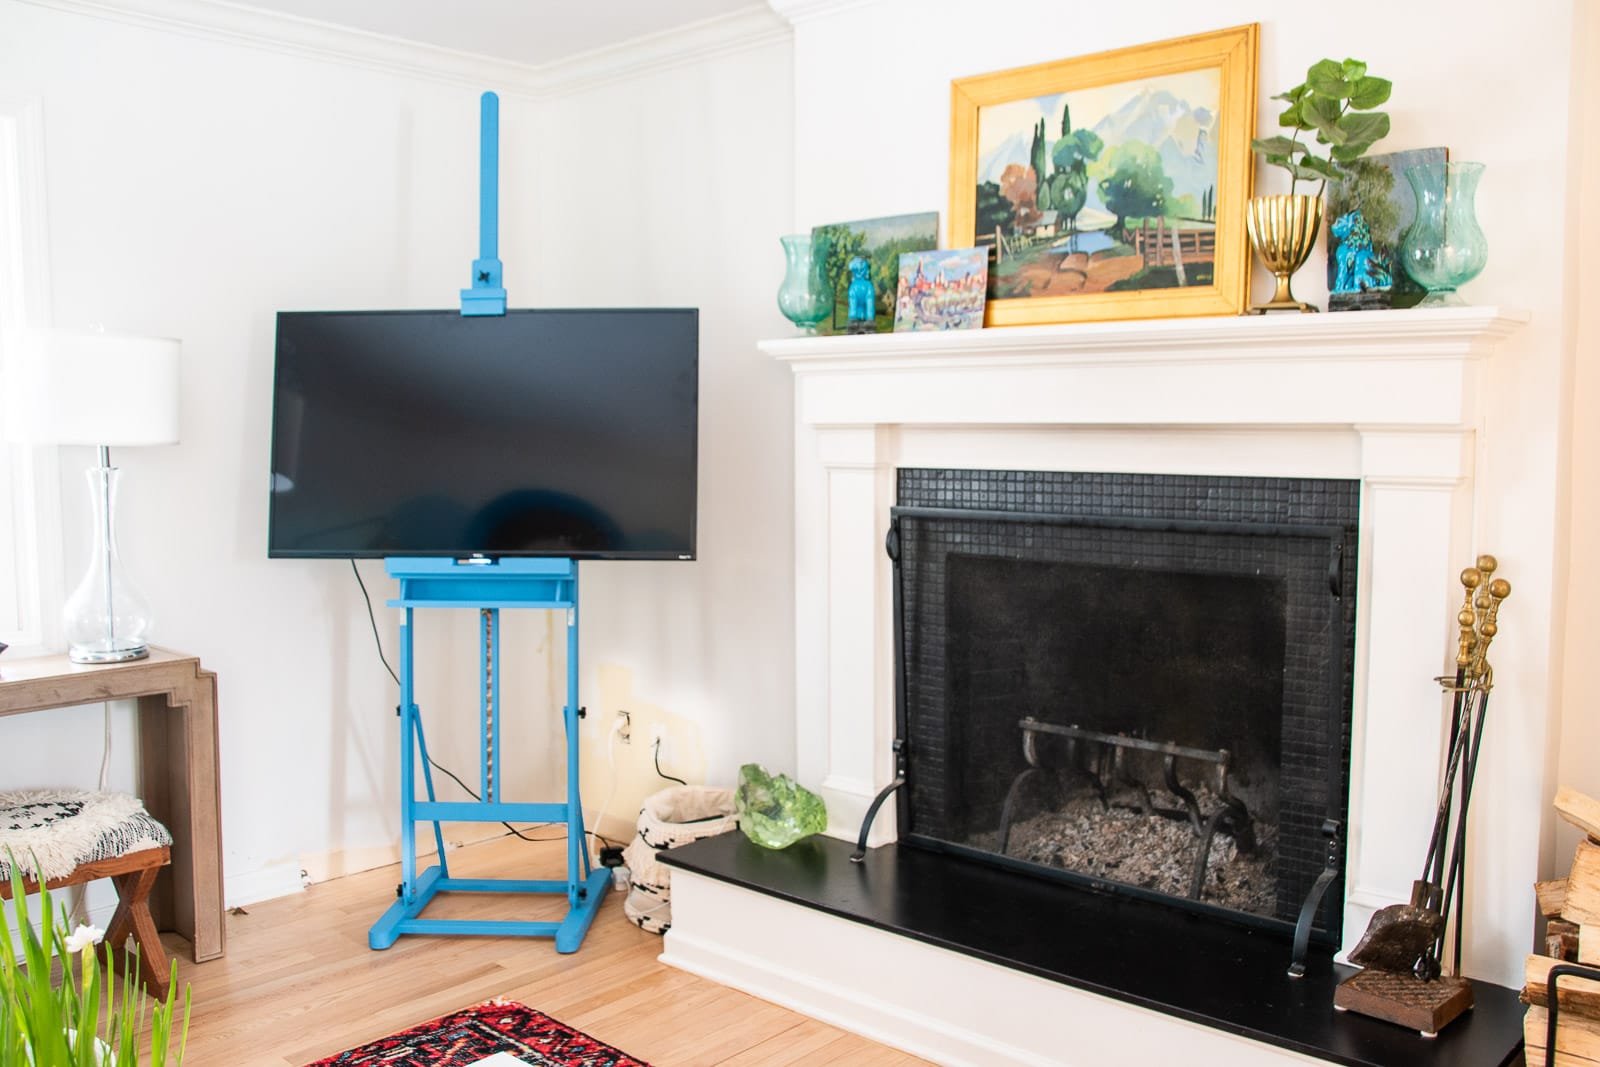
I love that the television easel props up the TV just like we needed, but it doesn’t feel like a big piece of furniture in the corner. In fact, it’s not on wheels, but it can easily be angled or moved back into the corner as needed.


Looks gOrgeous! Love the blue!
Thanks Diane! That’s become one of my go to’s recently!!
So darn cute and creaTive. But i would exPect nothing leas from uou.
MWah! Thank you, Shelly! xx
Wow ! Creative and beaUtiful idea. Two ideas to add to your Tv and easel: how about Make a frame for Tv like a picture frame? Add command strip for attach frame to tv. And use command strip for the Wires to hide them ?
Would be lovely! I’m afraid the frame would get in the way of the easel clamps but it would look great I agree!
I love how you reimagine and repUrpose things…really makes one look at things in a new light
Thank you! It’s one of my favorite things… to repurpose and reimagine! xx
Clever maker..
Haha… Thank you! So pleased that it actually worked!! 🙂
Love it
Thanks, Linda! xoxo
Love the blue! 💙
THanks!! It’s become one of my favorite colors in this house! xx
I knew it was going to be blUe! It looks great.
Haha! Had to match my mural! THank you!!
Very clever and beautiful to boot!
Thanks! Nice to have it be a bit of a feature in that corner! xx
Looks great!
Thanks so much, Becky! Appreciate it!! xx
Creative + Love the pop of blue!
Thanks!!! It’s becoming a favorite shade of mine! xx
Love it and very creative.
Thanks so much!!
Creative, clever and colorful
Beautiful as always
Thank you! So so kind! xx
I thought it Would be green :), but I loooove it like THIS!
Haha! That would have been lovely too!!
This is super impressivE and creative
Thanks Sarah! Such a great budget solution!
It looks great!! The blue is gorgeous!!😍
Isn’t it the prettiest blue?!
Yes!!
Looks great; i love the blue. I’M impressed by YOUR problem-solving DETERMINATION.
Gah! The random capitalization! It’s all fun, games, and circus mirrors, right?
Haha. Yes… It’s part of my theme. I keep meaning to change it… 🙂
Thank you! That’s so kind!
I have a question about your tv easel. We have a flat screen tv that doesn’t have any kind of “frame” around it. Would/should we mount the tv to a slightly larger piece of thin plywood to protect the top and bottom edges of the tv’s “glass”? edges?
I bought a gently used RH tv easel stand which I’m trying to adapt to use with our Sony Bravia. Kind of freaked out that I might damage the screen.
Good going on your easel stand!
I’m not sure! *IF* you can screw a piece of plywood onto the back of the TV, then I’d guess maybe err on the side of caution?
I just found your site and I’m so happy to have things in common. The love of color and DIY projects, plus we live in the same state (I’m in Norwalk). The easel for the TV stand is such a cool idea!!!!!
Oh yay! Yes! That has been a game changer for us and was such an easy solution!
Hi I love this project!! We have a similar issue above our fireplace so this is a life saver. Just out of curiosity, what is the size of the TV on the stand? I’d like to maximize our TV size without making it look lop-sided.
Sorry for the delay! Our TV is about 44 x 26… and the flat, lightweight kind!