
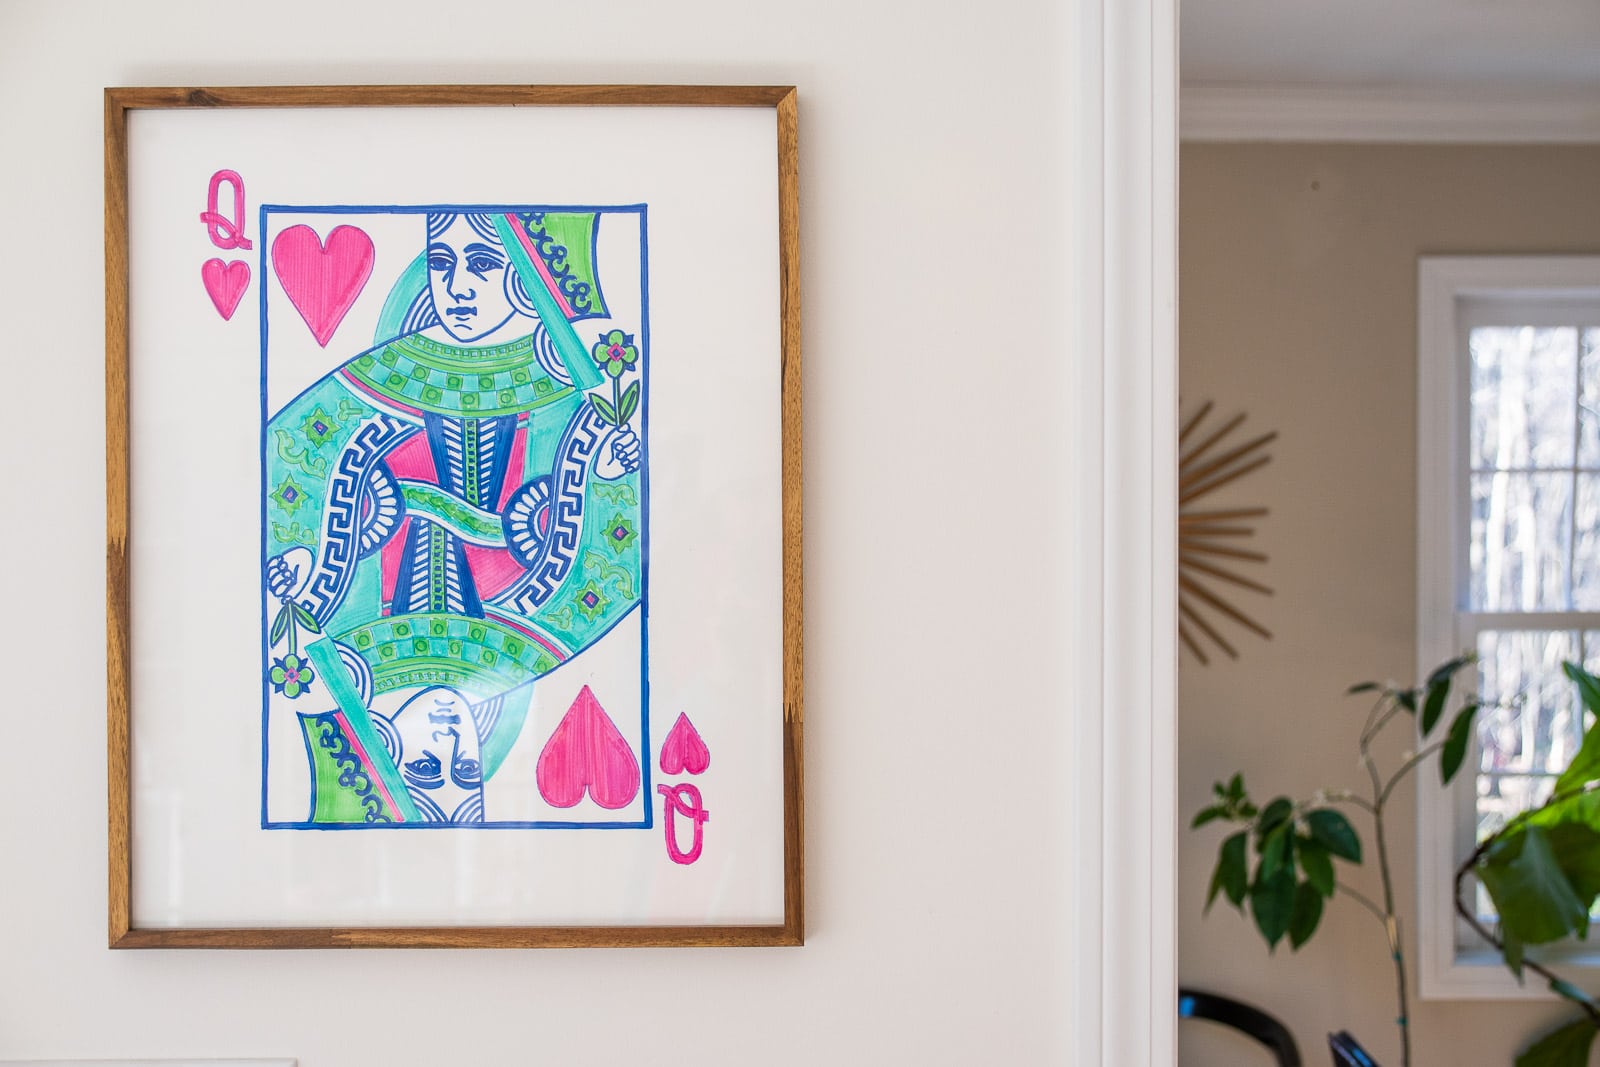
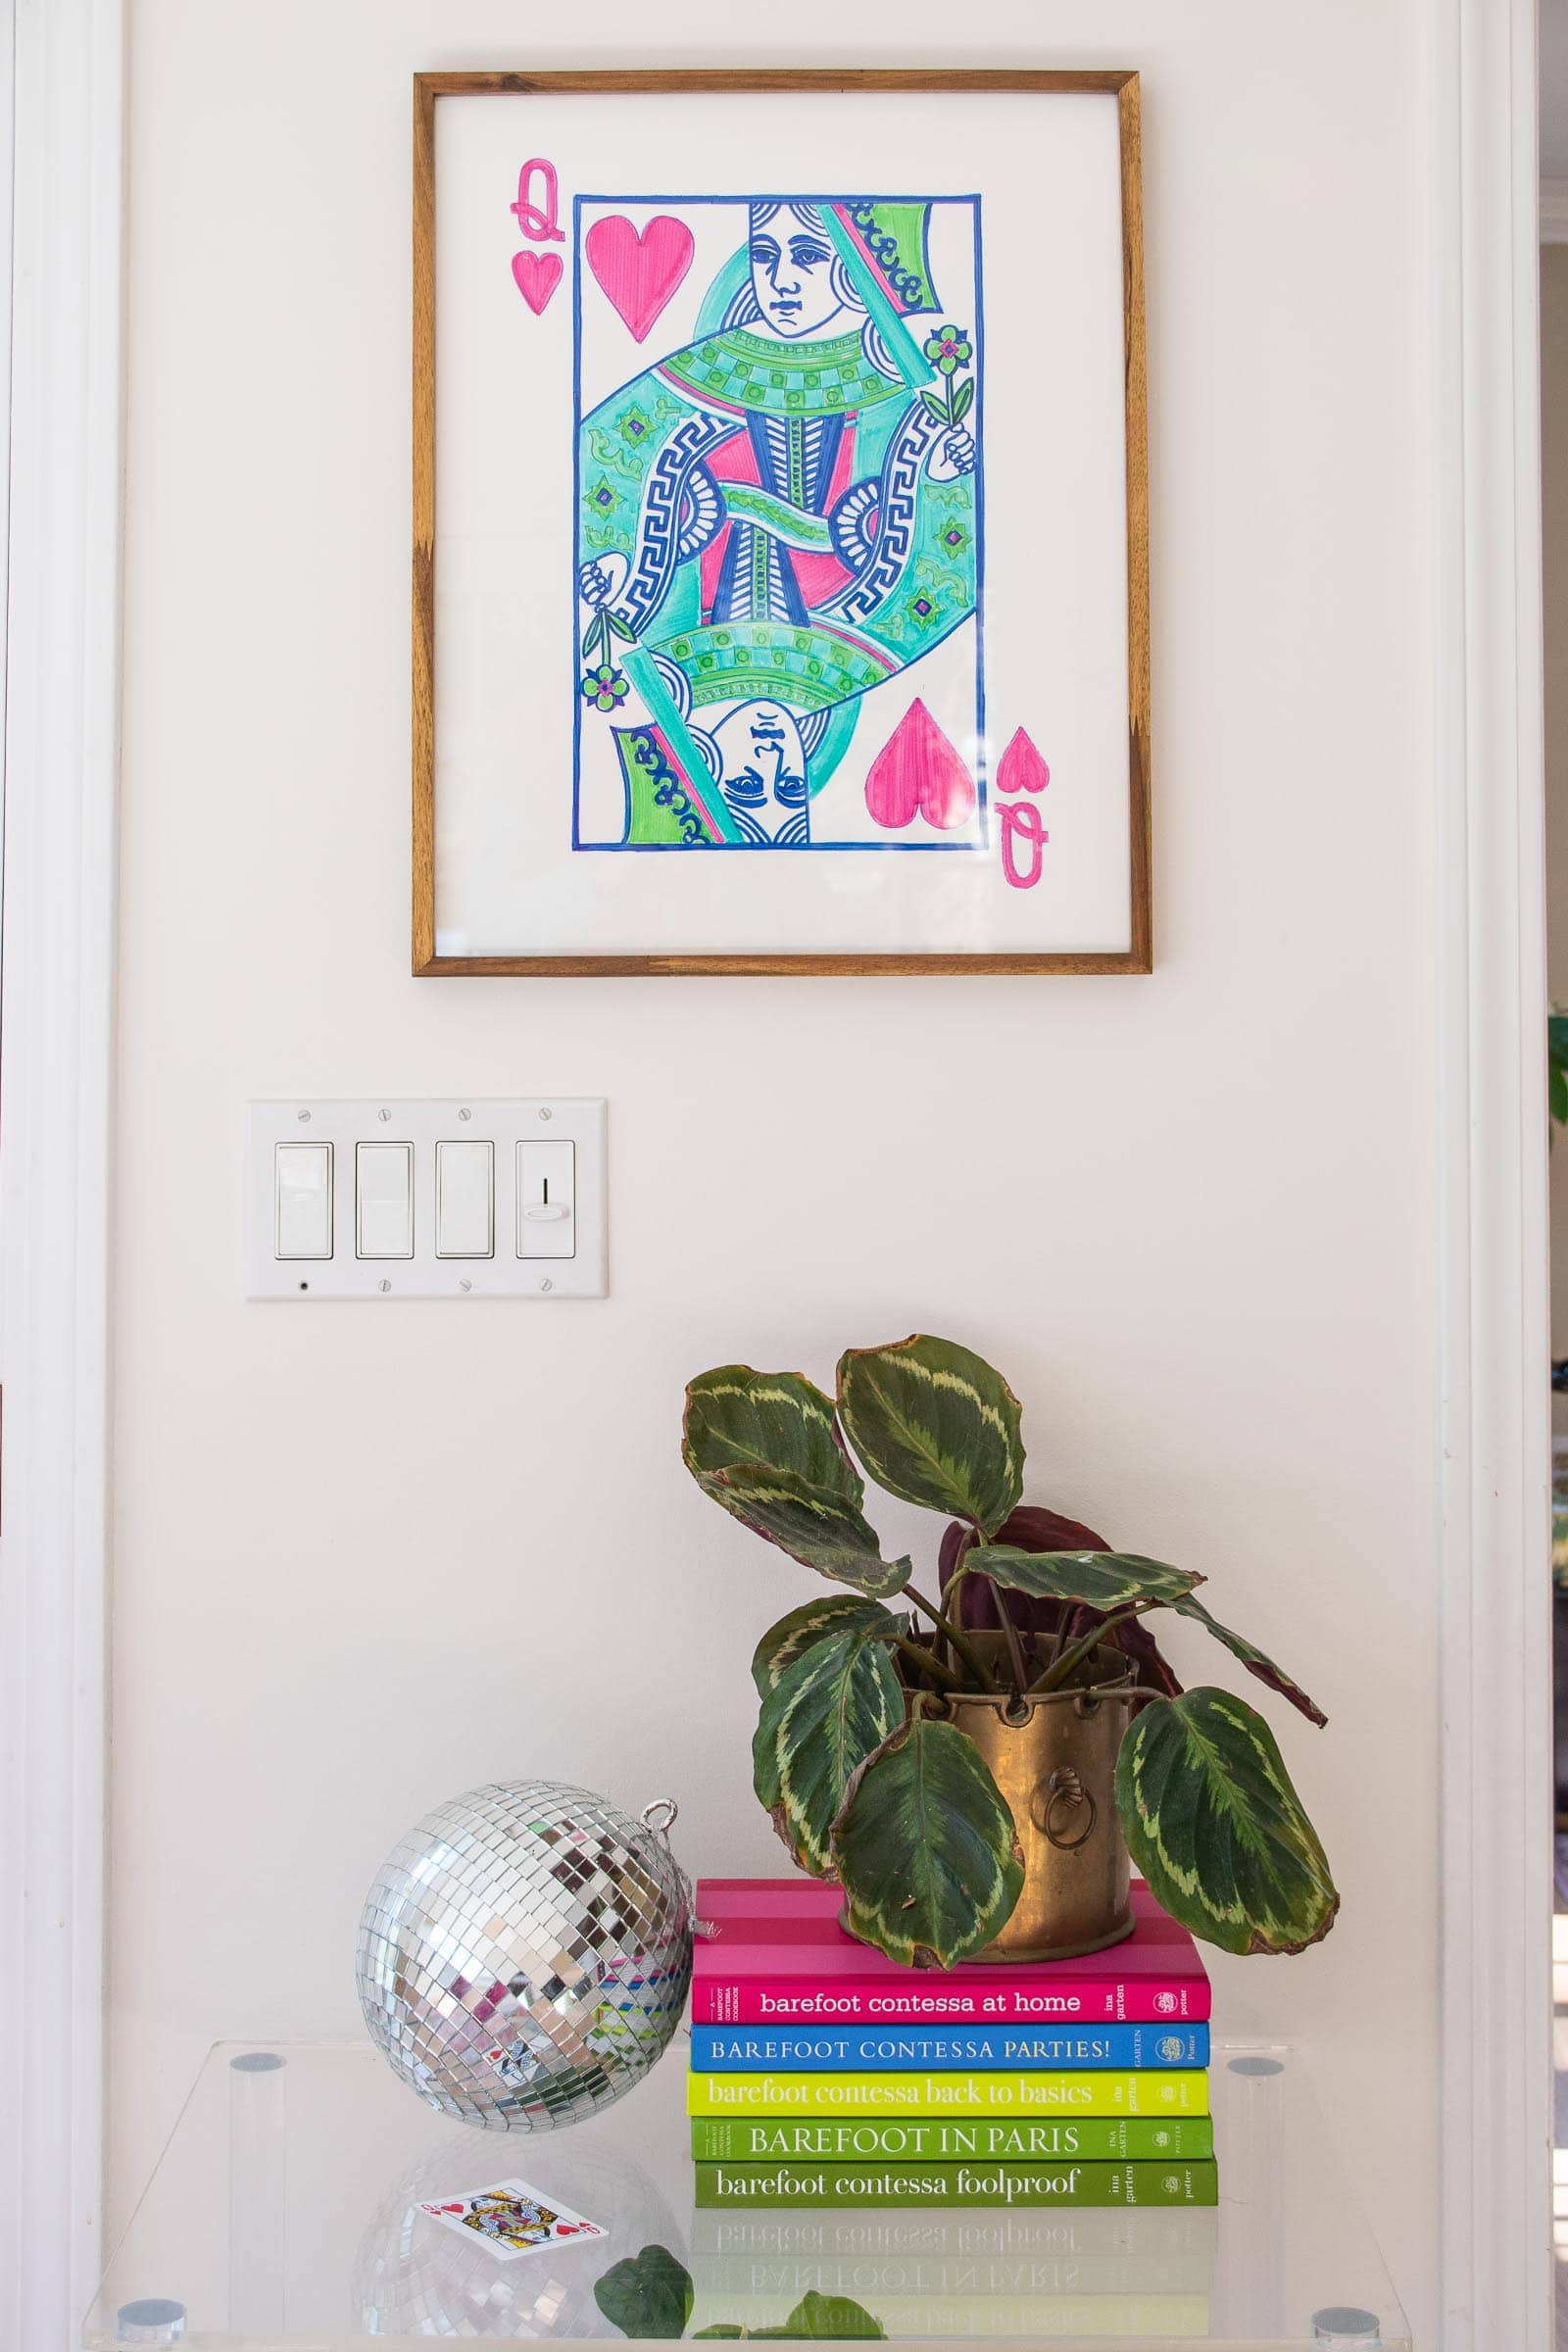
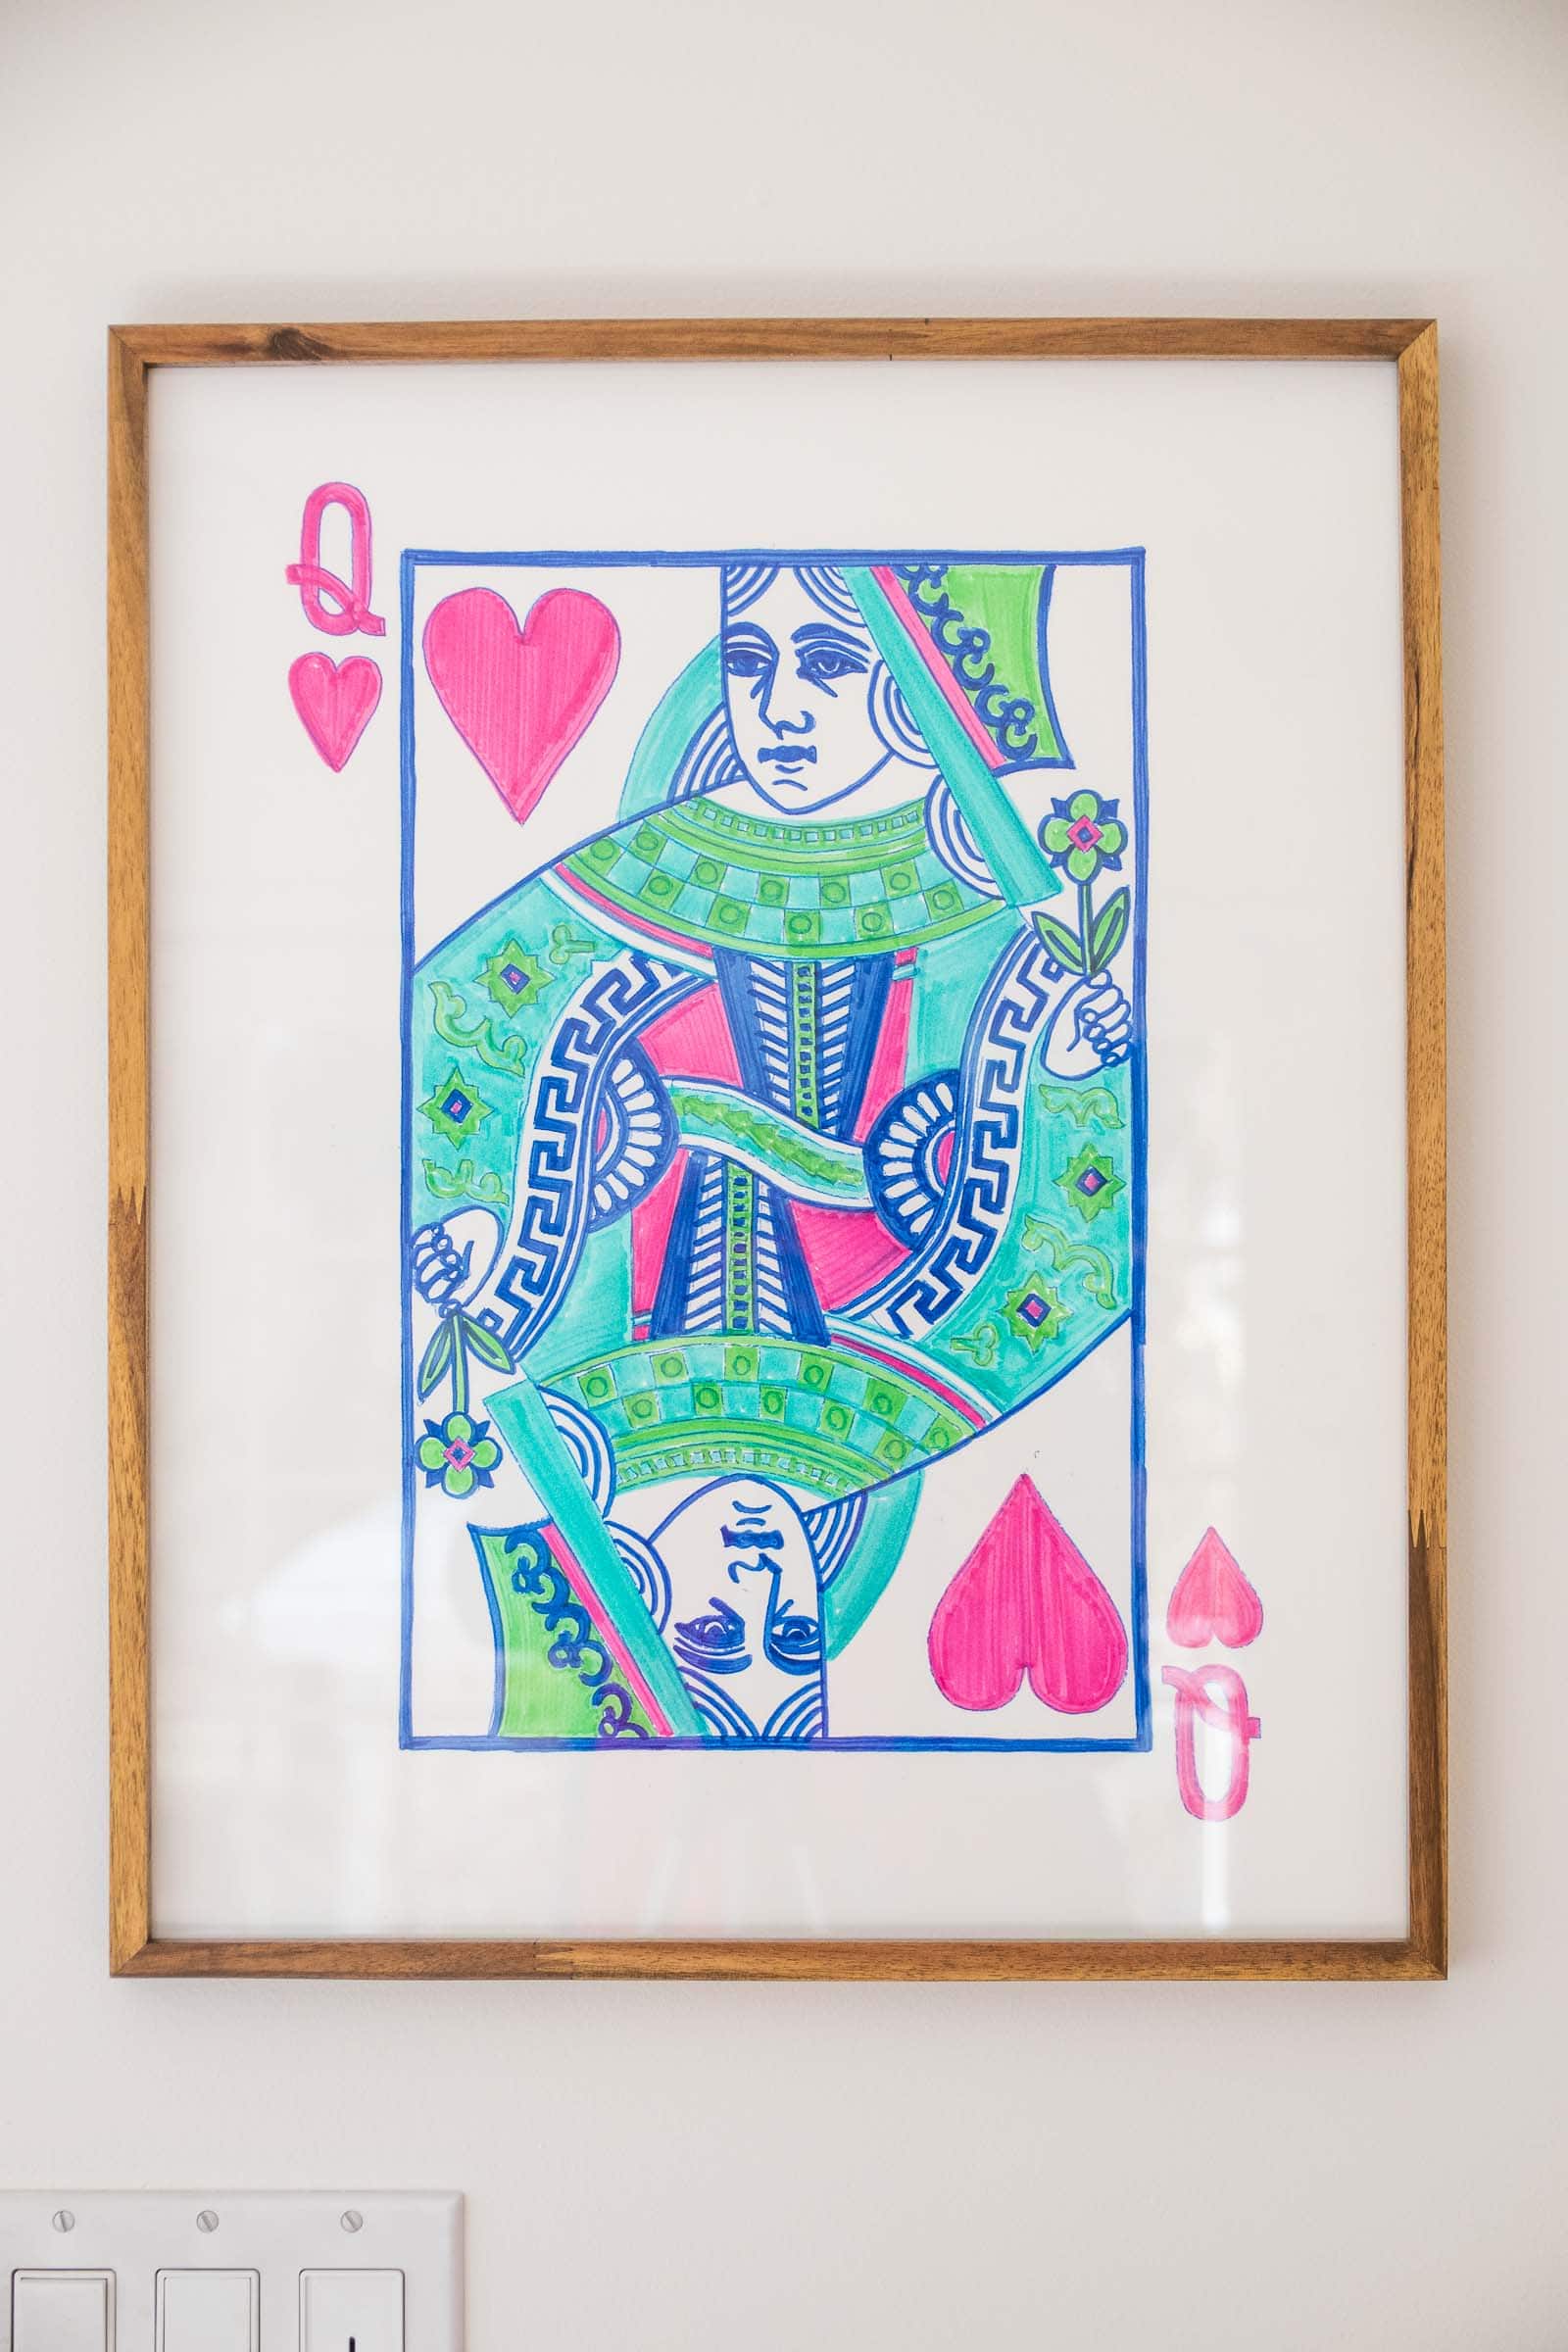
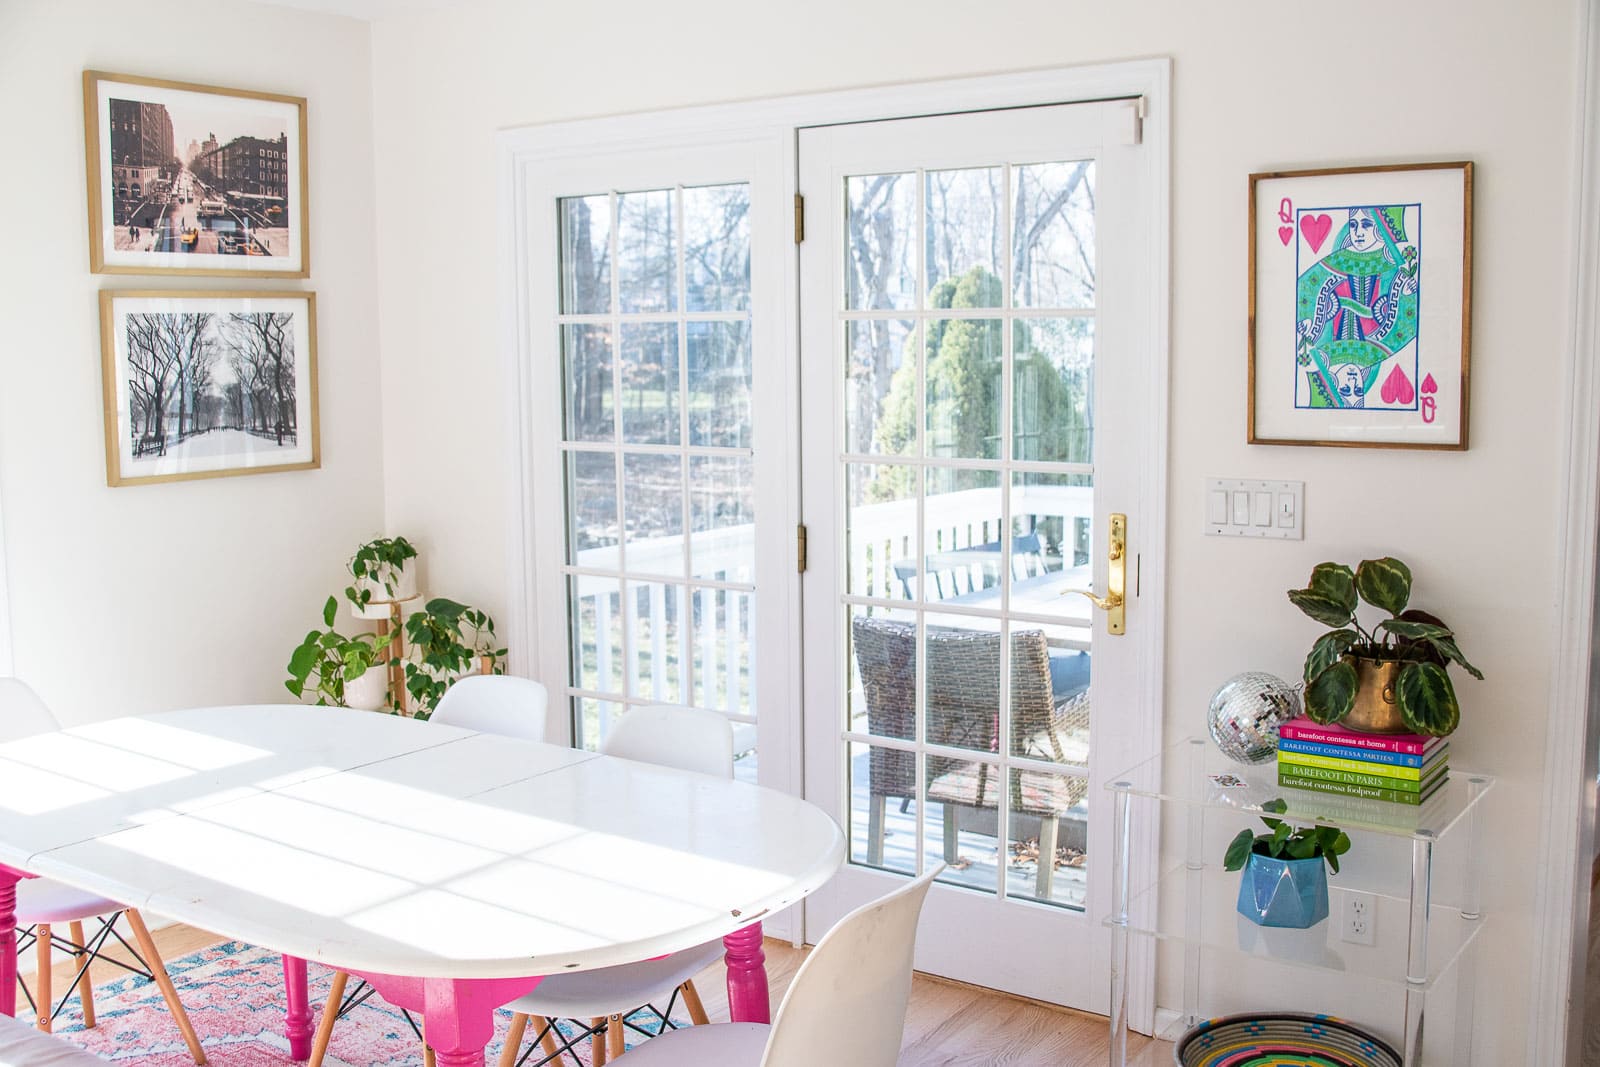
Oversized Queen of Hearts Artwork
Psssst… this post *might* contain affiliate links: see my disclosure here.
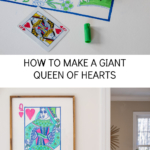
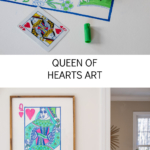
How to Make a Giant Queen of Hearts
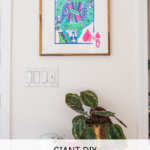
I love this twist on a typical playing card by making it oversized with different colors!
Disclosure: I’m partnering with JOANN to bring you this colorful Valentine’s Day Craft.
Shop my favorites!
Growing up, I spent every summer visiting my grandparents in Massachusetts. Both sets lived in the same town so for one glorious month I would bounce back and forth between Granny/ Grandpa and Grandma/ Uncle Dave. One thing that was a constant between the two homes was playing cards. Solitaire, Spite and Malice, Gin, Hearts, Spit… so many I’ve probably forgotten. I practiced shuffling. I learned variations of solitaire. You get the drift. Needless to say, I have always loved the classic design of the King, Jack, and Queen. What better artwork to make for Valentine’s Day than a giant colorful Queen of Hearts! But how are we going to get that tiny playing card into a big ol’ frame on the wall? Read on… here’s how!
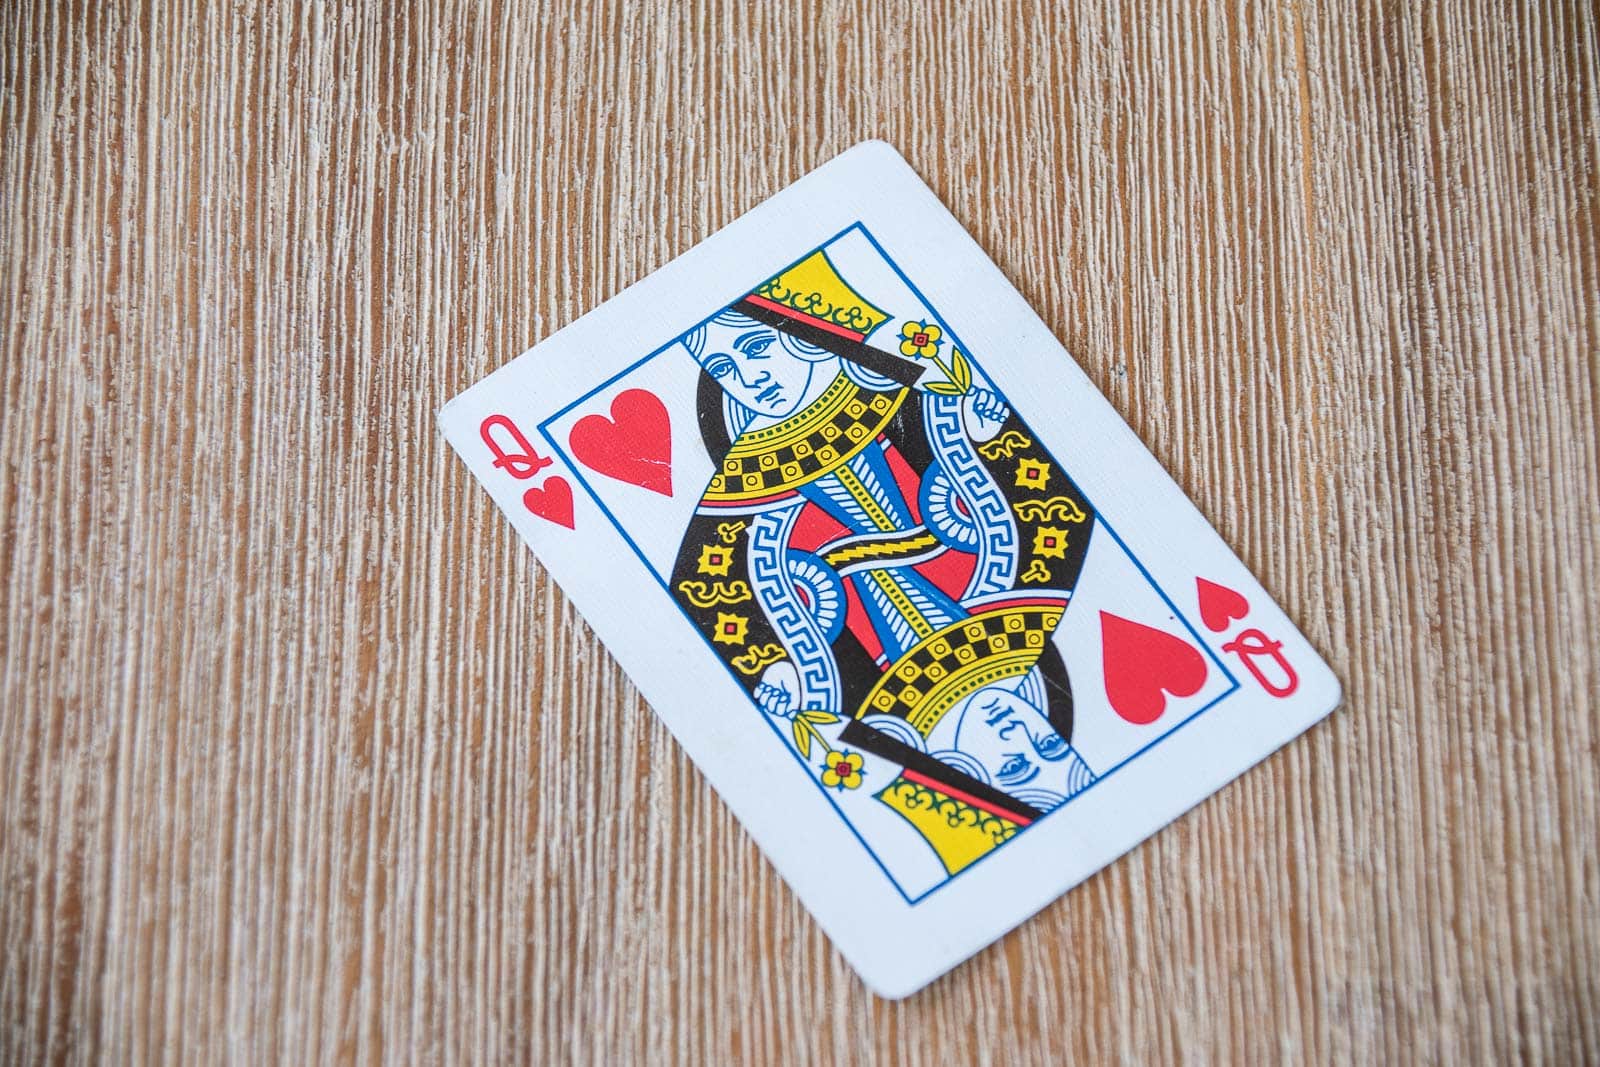
Step 1. Scan the Greeting Card
I use an app on my phone, Genius scan, which makes this super easy. Essentially you want to make the playing card black and white. (A photo copy can technically work but read ahead to see what you need to do next.)
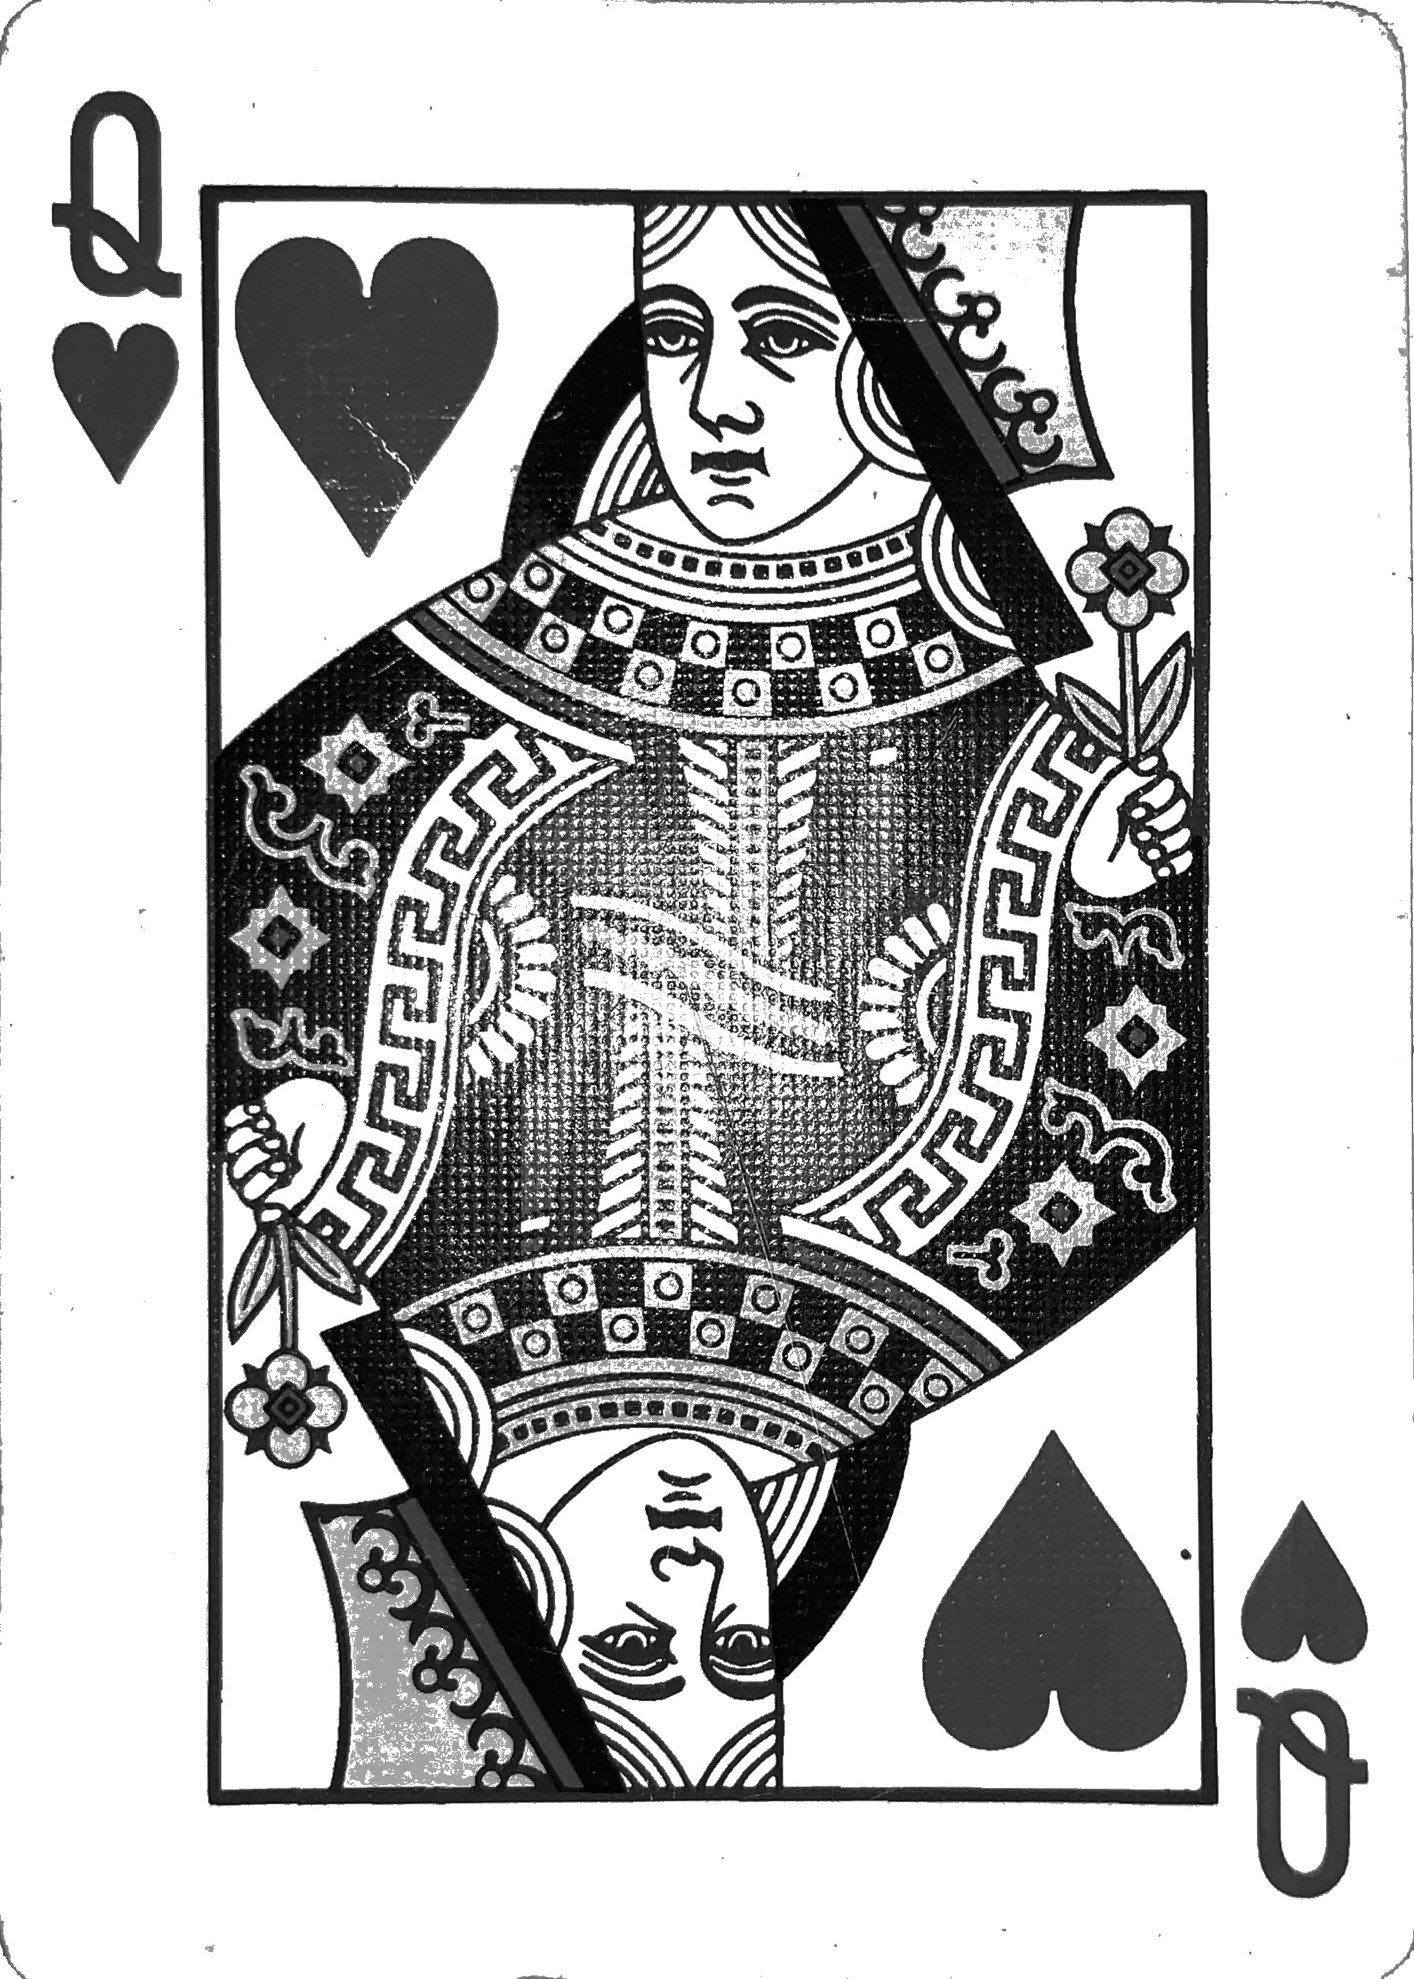
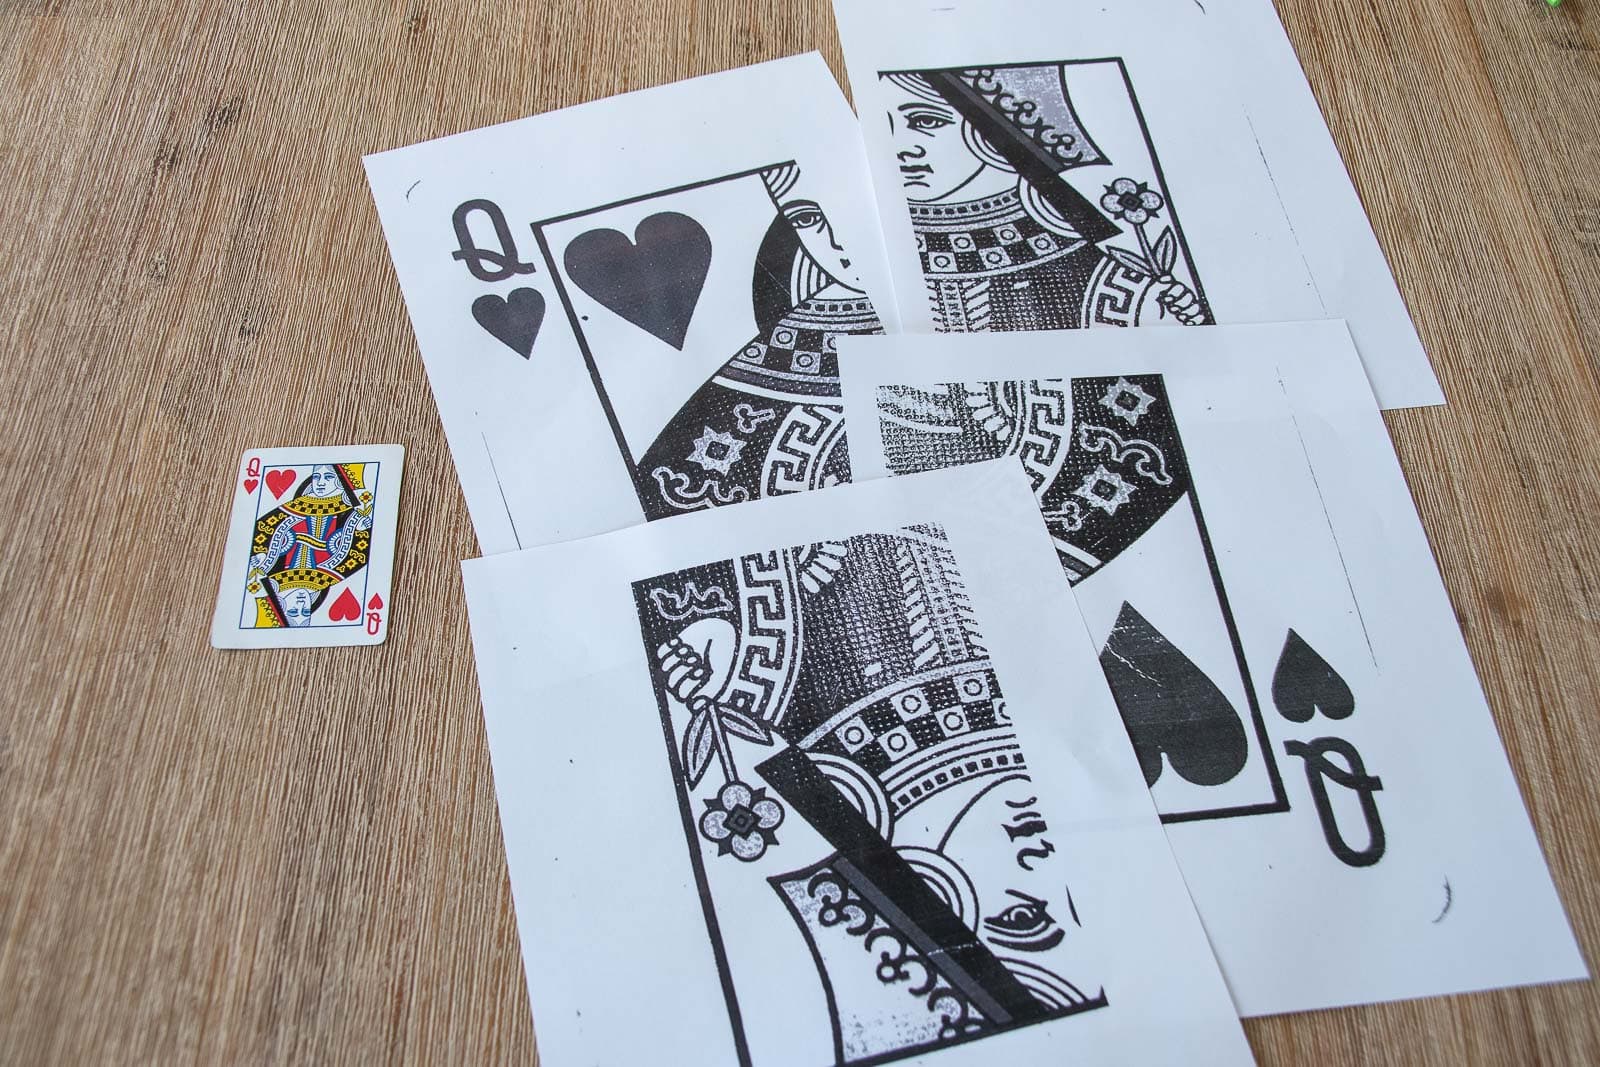
Step 2. Enlarge the image
In order to enlarge the one smaller image, I found a place online that split my scanned queen of hearts into a 2×2 grid. (I.e. it took one images and split it into 4 even parts. Once I had my image in a 2×2 grid, I could enlarge each quarter (and more importantly print onto a piece of standard paper) to create an oversized queen of hearts. I used PicMonkey to make each of the 4 quadrants 8×10 so that the finished piece would be 16×20. (Note: this can also be done by enlarging by a certain percentage on a copier, it was just easier for me to use PicMonkey. Tape together the enlarged quadrants to puzzle together the complete (but enlarged) queen of hearts.
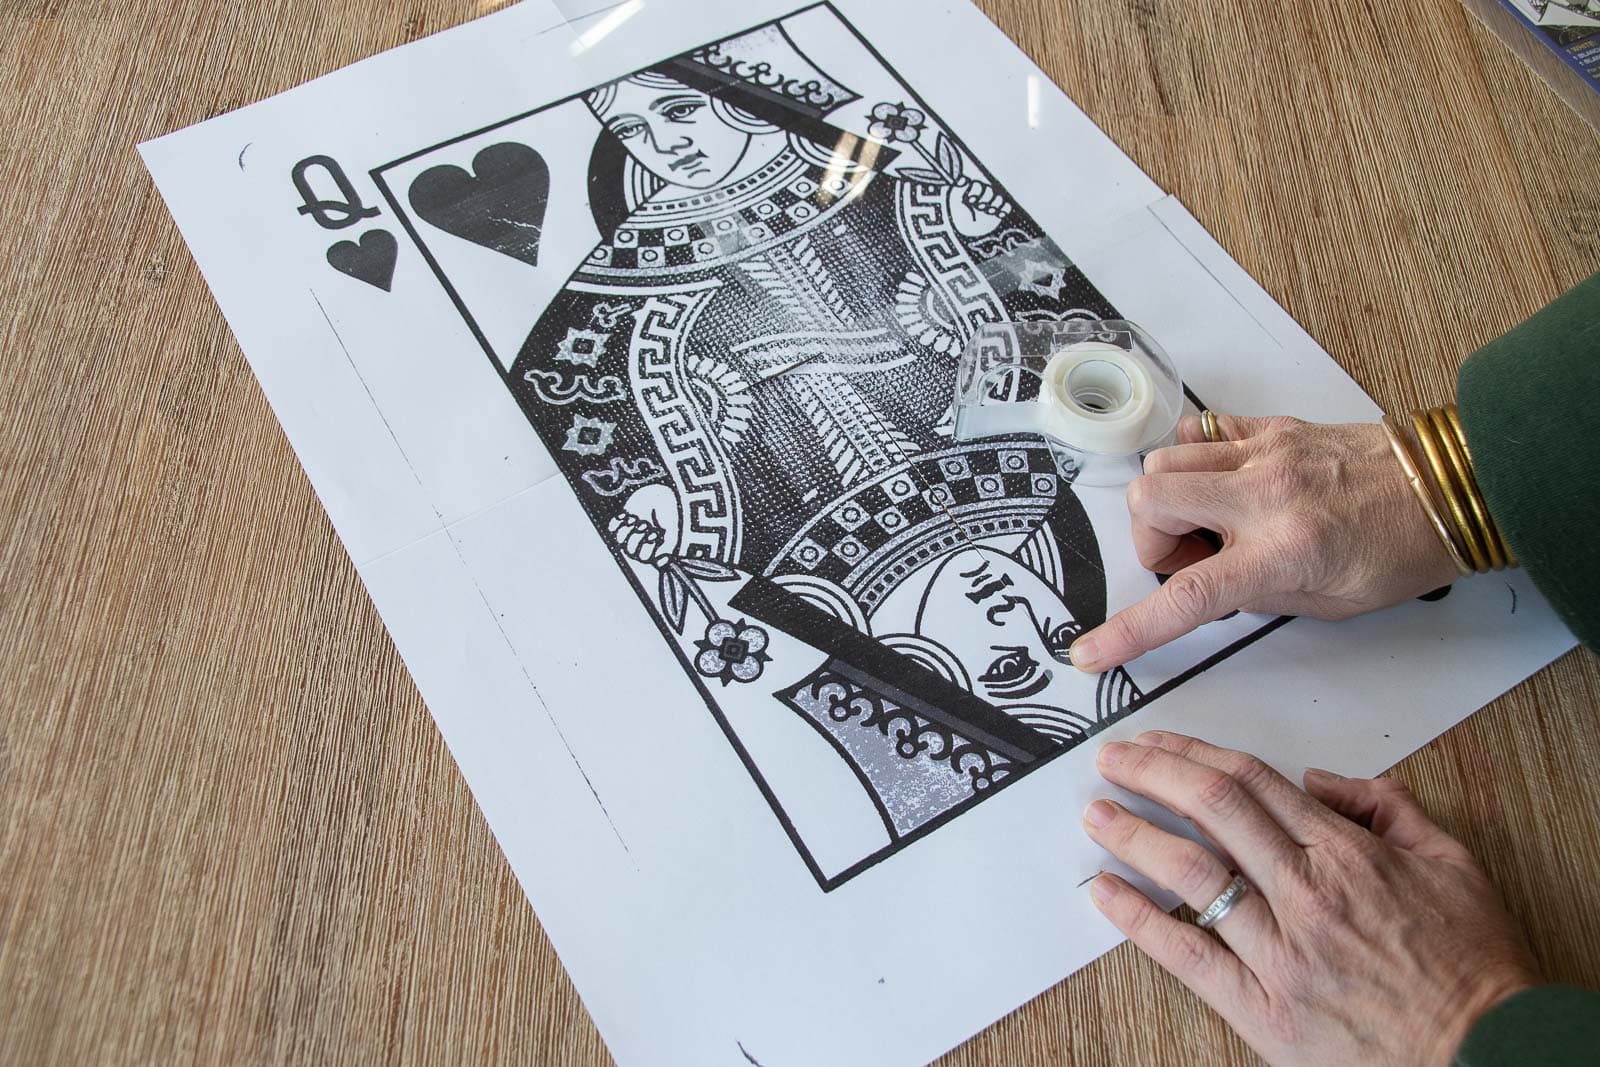
Step 3. Transfer Image
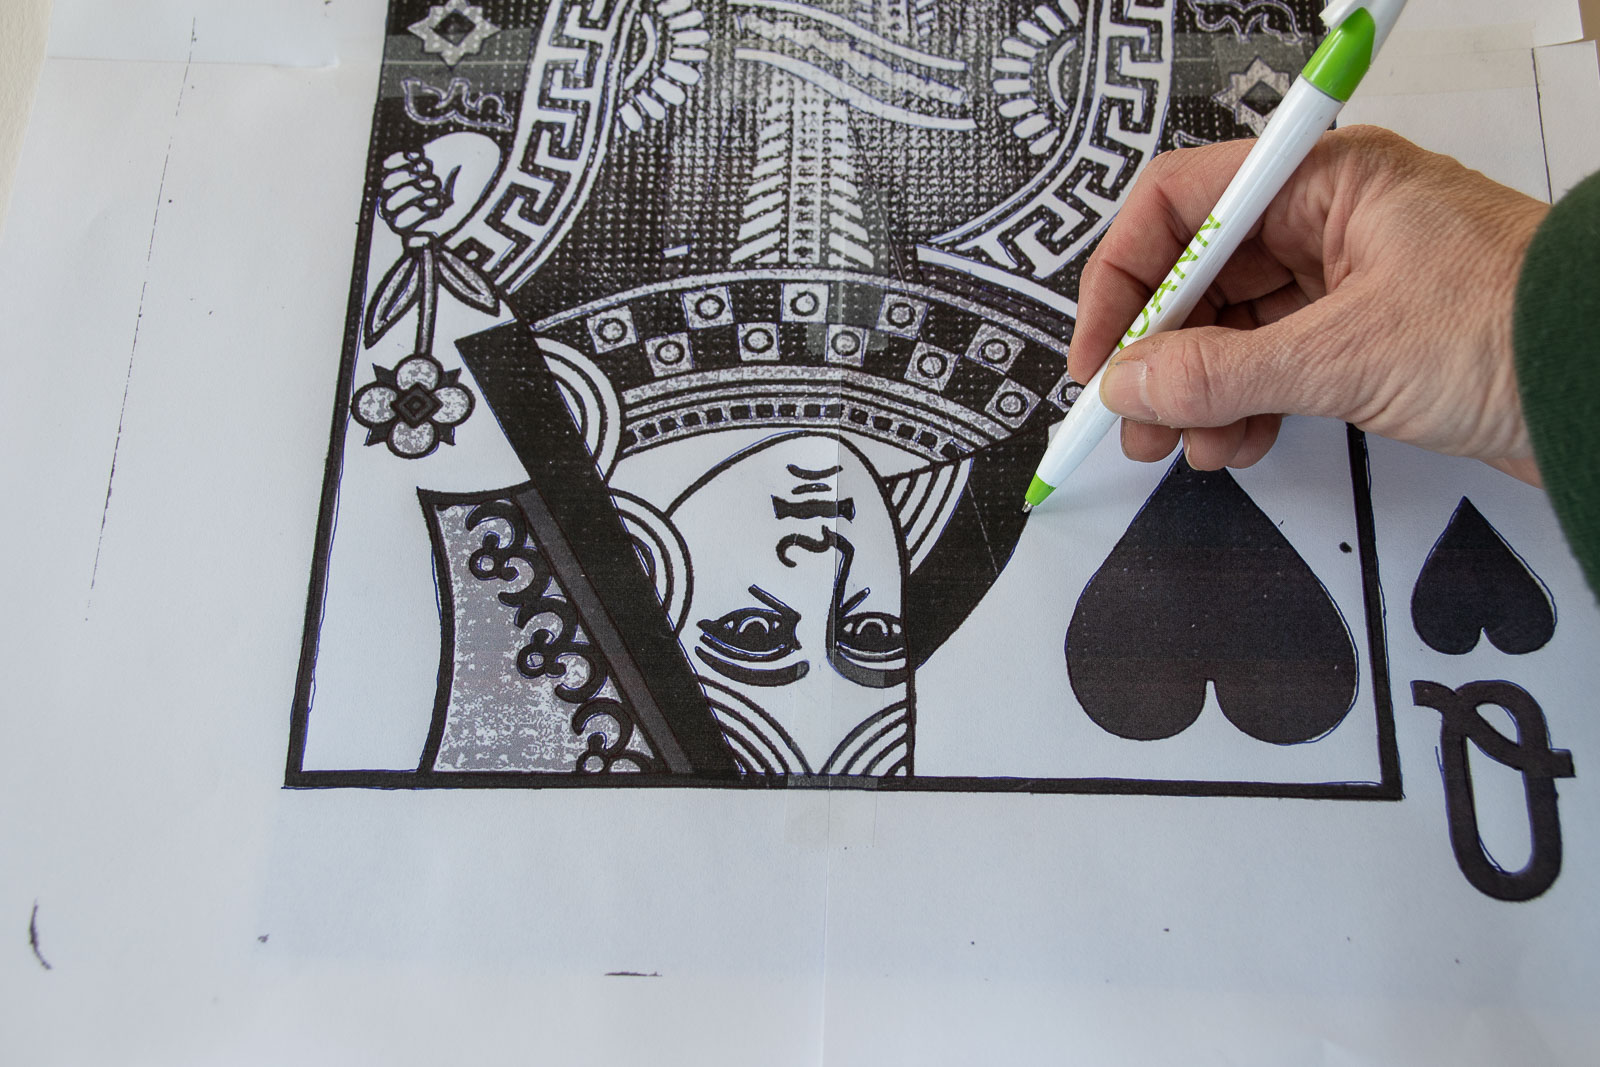
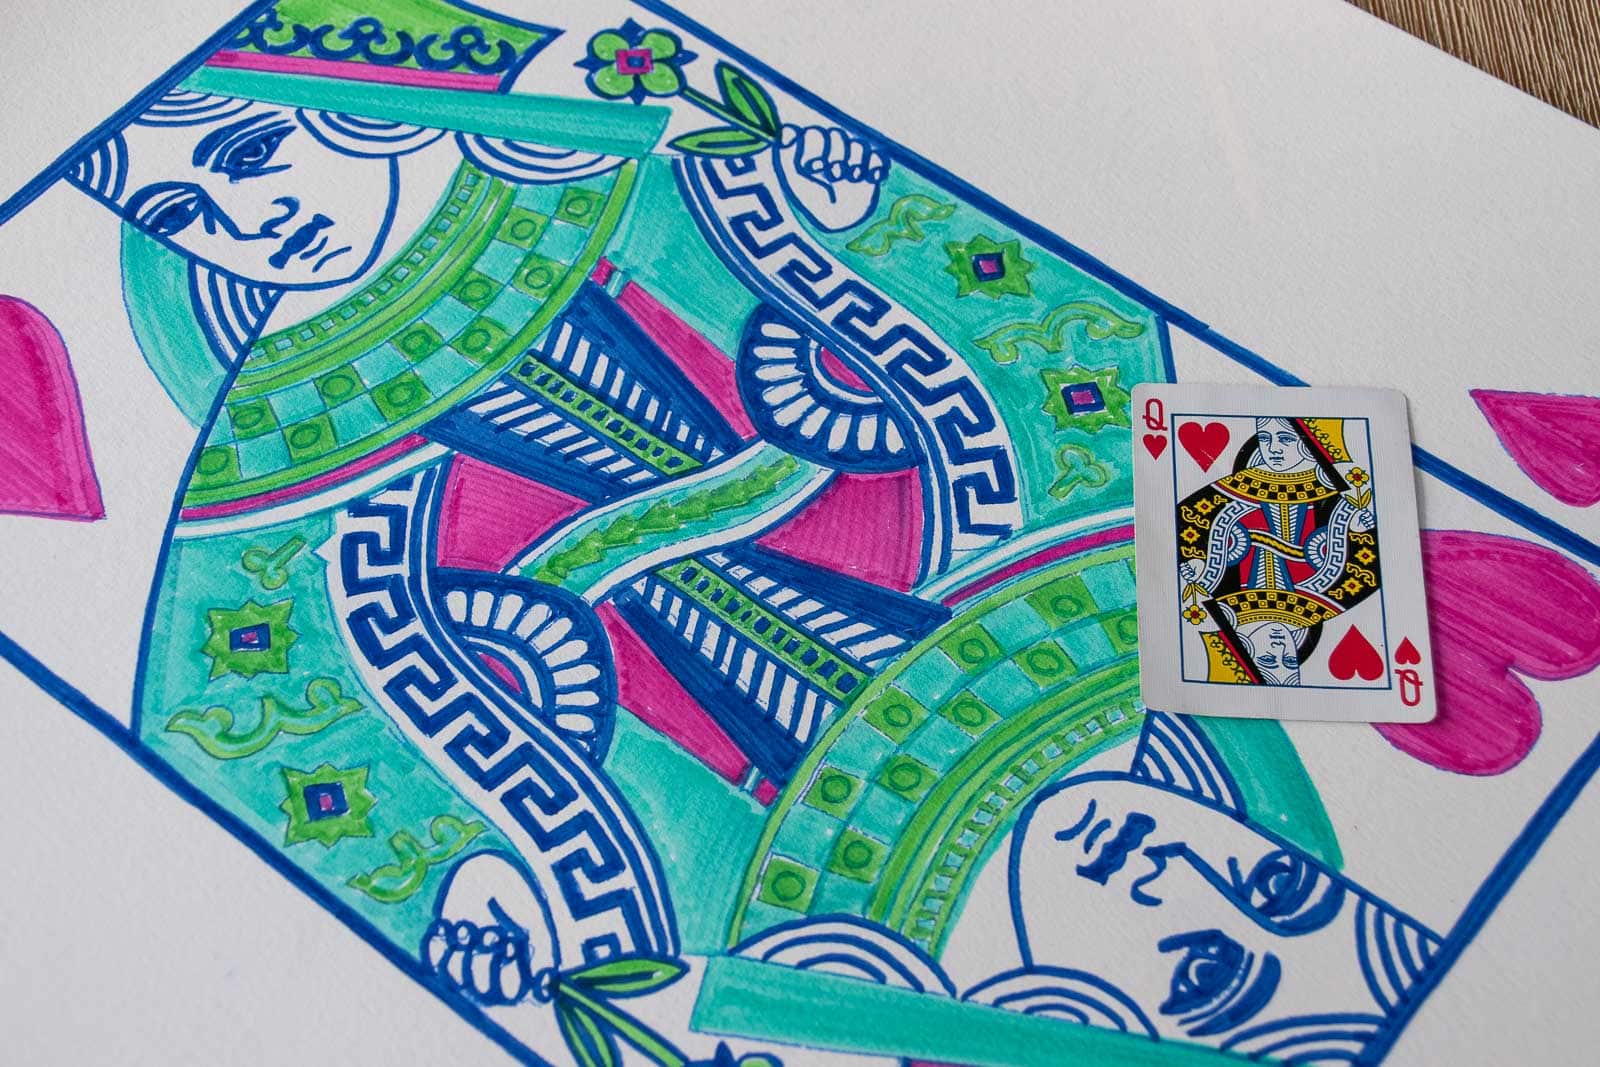
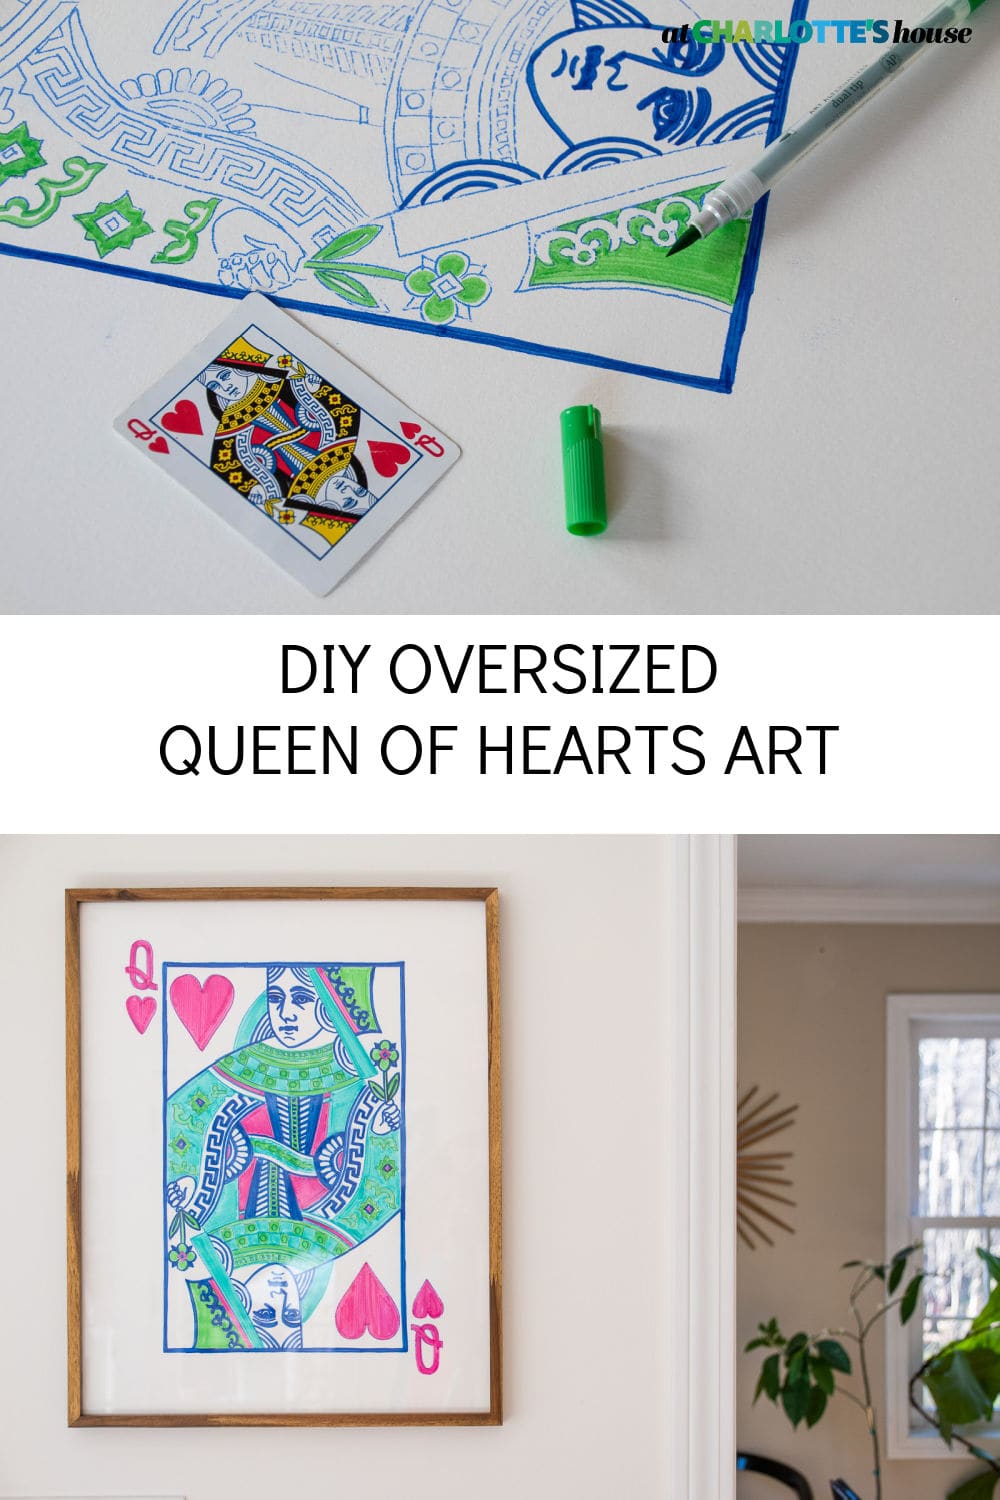
OK. So we have a giant queen of hearts puzzle but how do we get this onto paper?! Transfer paper. That’s how. This is old school carbon paper, folks and it’s so fun to work with. You can find it in either the paper section of the craft store or in the sewing notions aisle. Center and tape your queen of hearts onto a sheet of heavyweight paper (I’m using watercolor paper). Place a sheet of transfer paper between your queen of hearts and the watercolor paper. Carefully trace over the queen of hearts with a ball point pen or sharp pencil. The harder you press, the darker the line will be… in hindsight I should have been gentler, but the transfer line typically can erase off if you make a mistake.

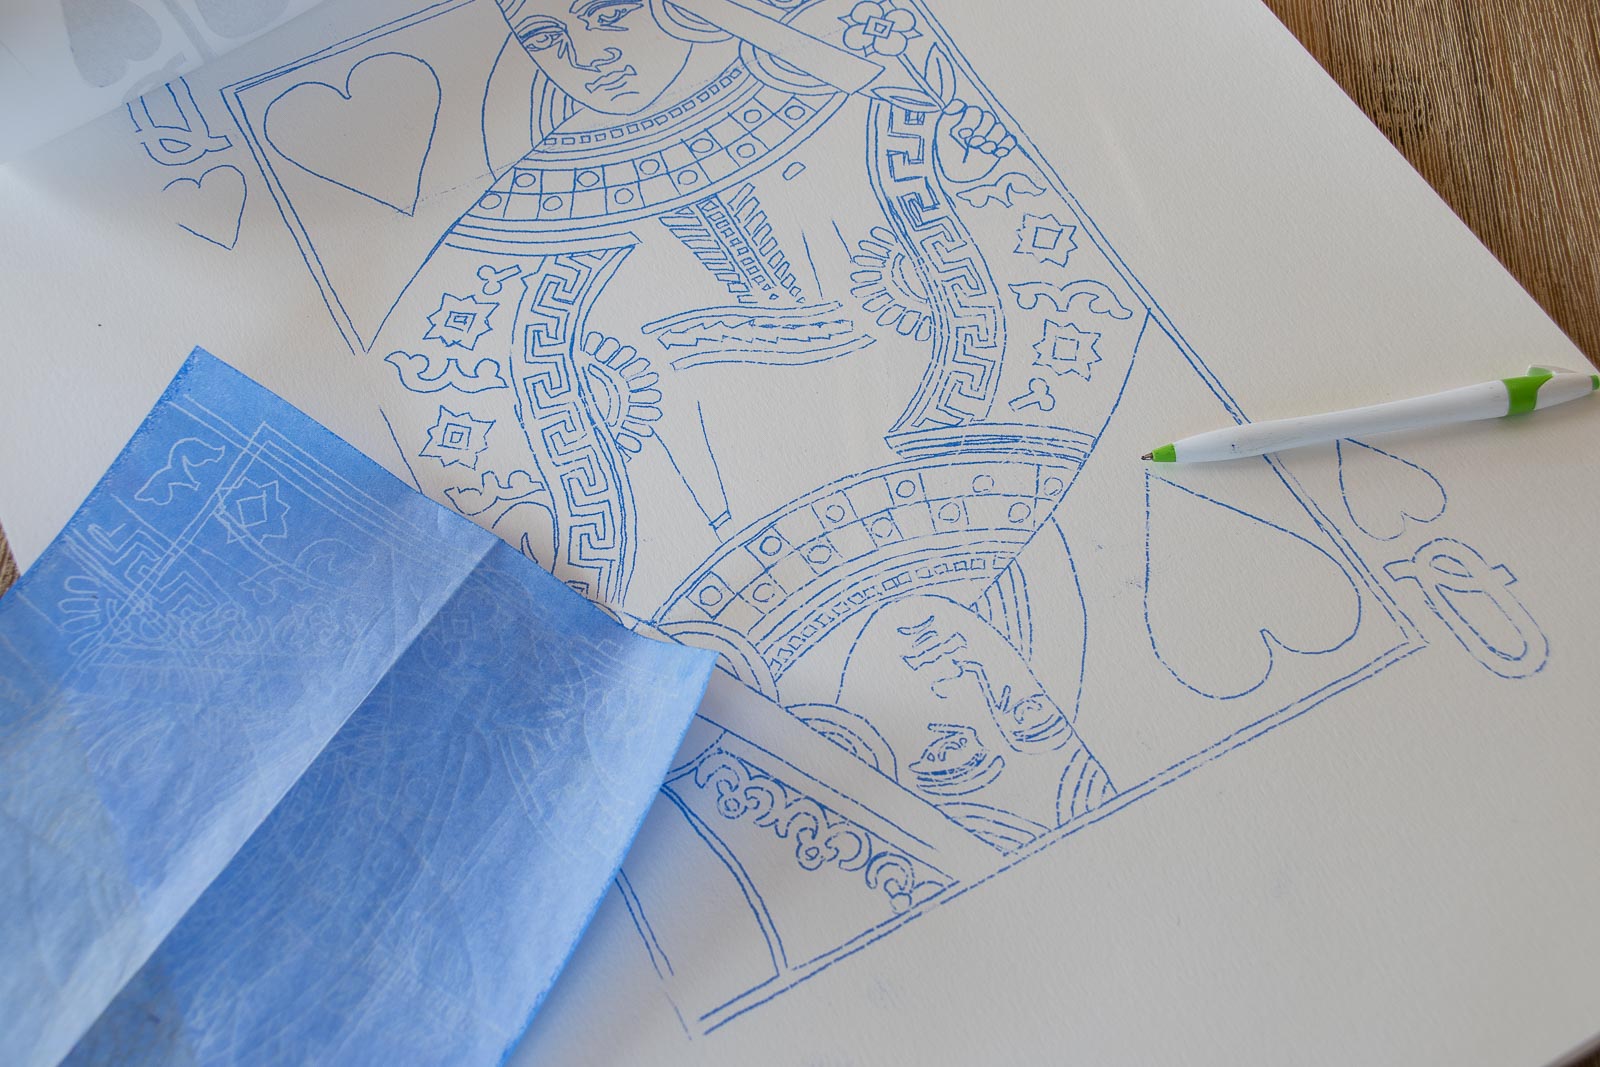
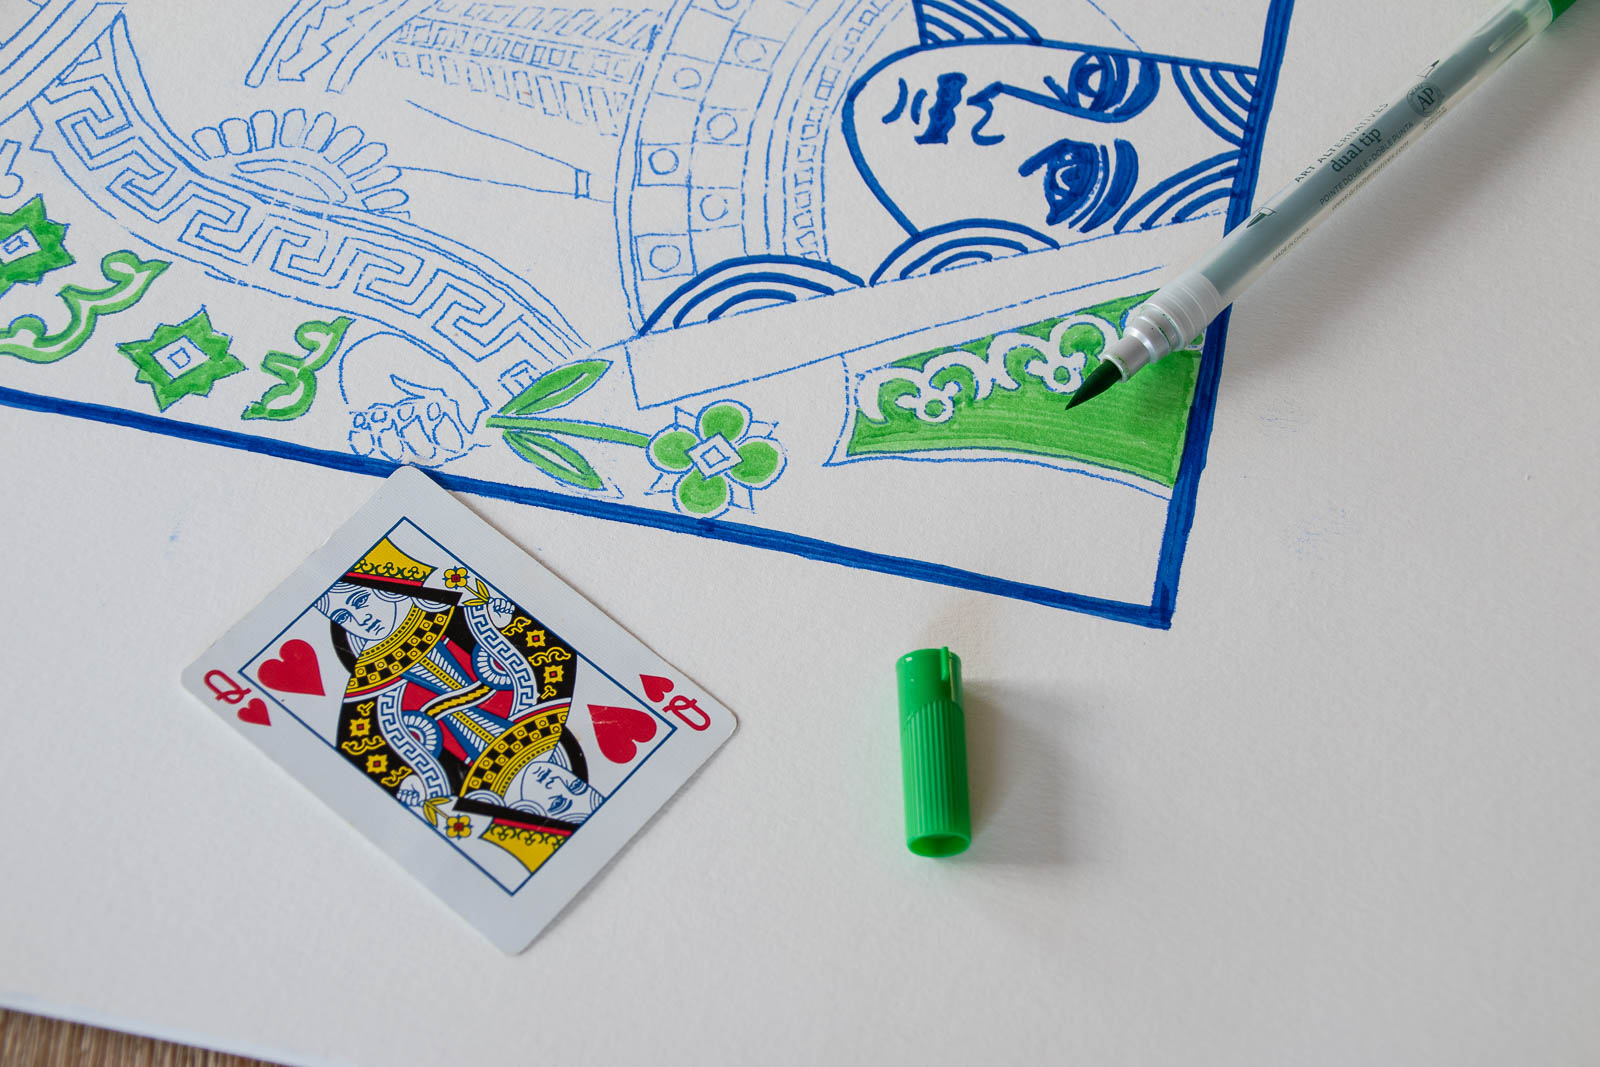
Step 4. Color!
This is the fun part. It’s like a giant queen of hearts coloring page. I assigned each color on the playing card a color from my pen set. Did I mix up my colors immediately? Yes. Yes I did. I secretly love the idea of making a few different iterations of this and hanging them as a grouping somewhere. I’m using dual tip markers but was able to color in just about everything with the wider tip so this whole project only took a couple of hours!
This would be a really fun way to recreate a note or a small drawing from your scrapbook pile… it’s fundamentally busy work so the perfect for listening to a podcast or watching bad TV. Not a lot of concentration or brain power required!
Materials:
- Watercolor Paper
- Transfer Paper
- Markers
- Frame
- Playing Cards
- Printer/ tape
Click here to see all of my other simple Valentine’s Day projects!!


So fun! I love it.
Thank you! It was like a grown up coloring project!
Soooooo good! Totally trying this out. ThNk you for sharing!
Yay! It can work with so many things! Good luck!
Super fun. Thanks For sharing.
Thanks, Sara! Appreciate it! xx
Love the colo
Thanks!! It’s a fun spin on the traditional colors of the playing card!
You could totally Andy Warhol this project. Very cool.
Oh the possibilites are ENDLESS! 🙂
GreaT project! Thanks dor sharing!
Thanks so much Louise!!xx
This is So cool! I love tHe idea of A groUpIng oF thEm!
Right? Same image with different color schemes? Could be cute! Thanks! xx
Love this! So creative!
Thanks, Ashley! This was a fun project!
So fun! I love this!!!
Thank you, my dear! xoxo
Cool colours♥️
Thank you! All my faves!! xx
Love this brillant idea!
Thank you! I love a good simple craft project with great results! 🙂
I love the finiShed project! So creative.
Thank you, Sarah! xx
So cool! Who did you get online to split the scanned card from your phone into a 2×2 grid. Staples or an office supply store? Also, do you just send a pic and ask them to split into 2×2 grid or is there some fancy term to ask for? Thanks,
Hi there! I think I used this site: https://pinetools.com/split-image to create the 4 images but then I used PicMonkey to print them each out as 8×10. You can also just go old school and print out the image, then cut it into 4 pieces and use the photocopier to enlarge each piece.