
How to Make the Holiday White House Birch Trees in Your Own Home
Psssst… this post *might* contain affiliate links: see my disclosure here.
DIY Holiday Birch Trees Inspired by the East Colonnade at the White House
I made these budget friendly cardboard versions of the White House birch trees for holiday decor this year.
Story time: I got to decorate the White House for the holidays. Yeah. THAT White House. THE White House. As seen in the American President, the West Wing, and Dave. Having grown up 5 miles from the White House, you’d think I would have known that… this volunteer opportunity is open to the public. The White House releases a link at the end of the summer and anyone can apply. They try to choose a representative group of people from each state with a mix of experienced designers/ crafters/ florists and teachers, veterans, etc. I had a group of dear friends join me which made my week at the White House even more exciting.
Shop my favorites!

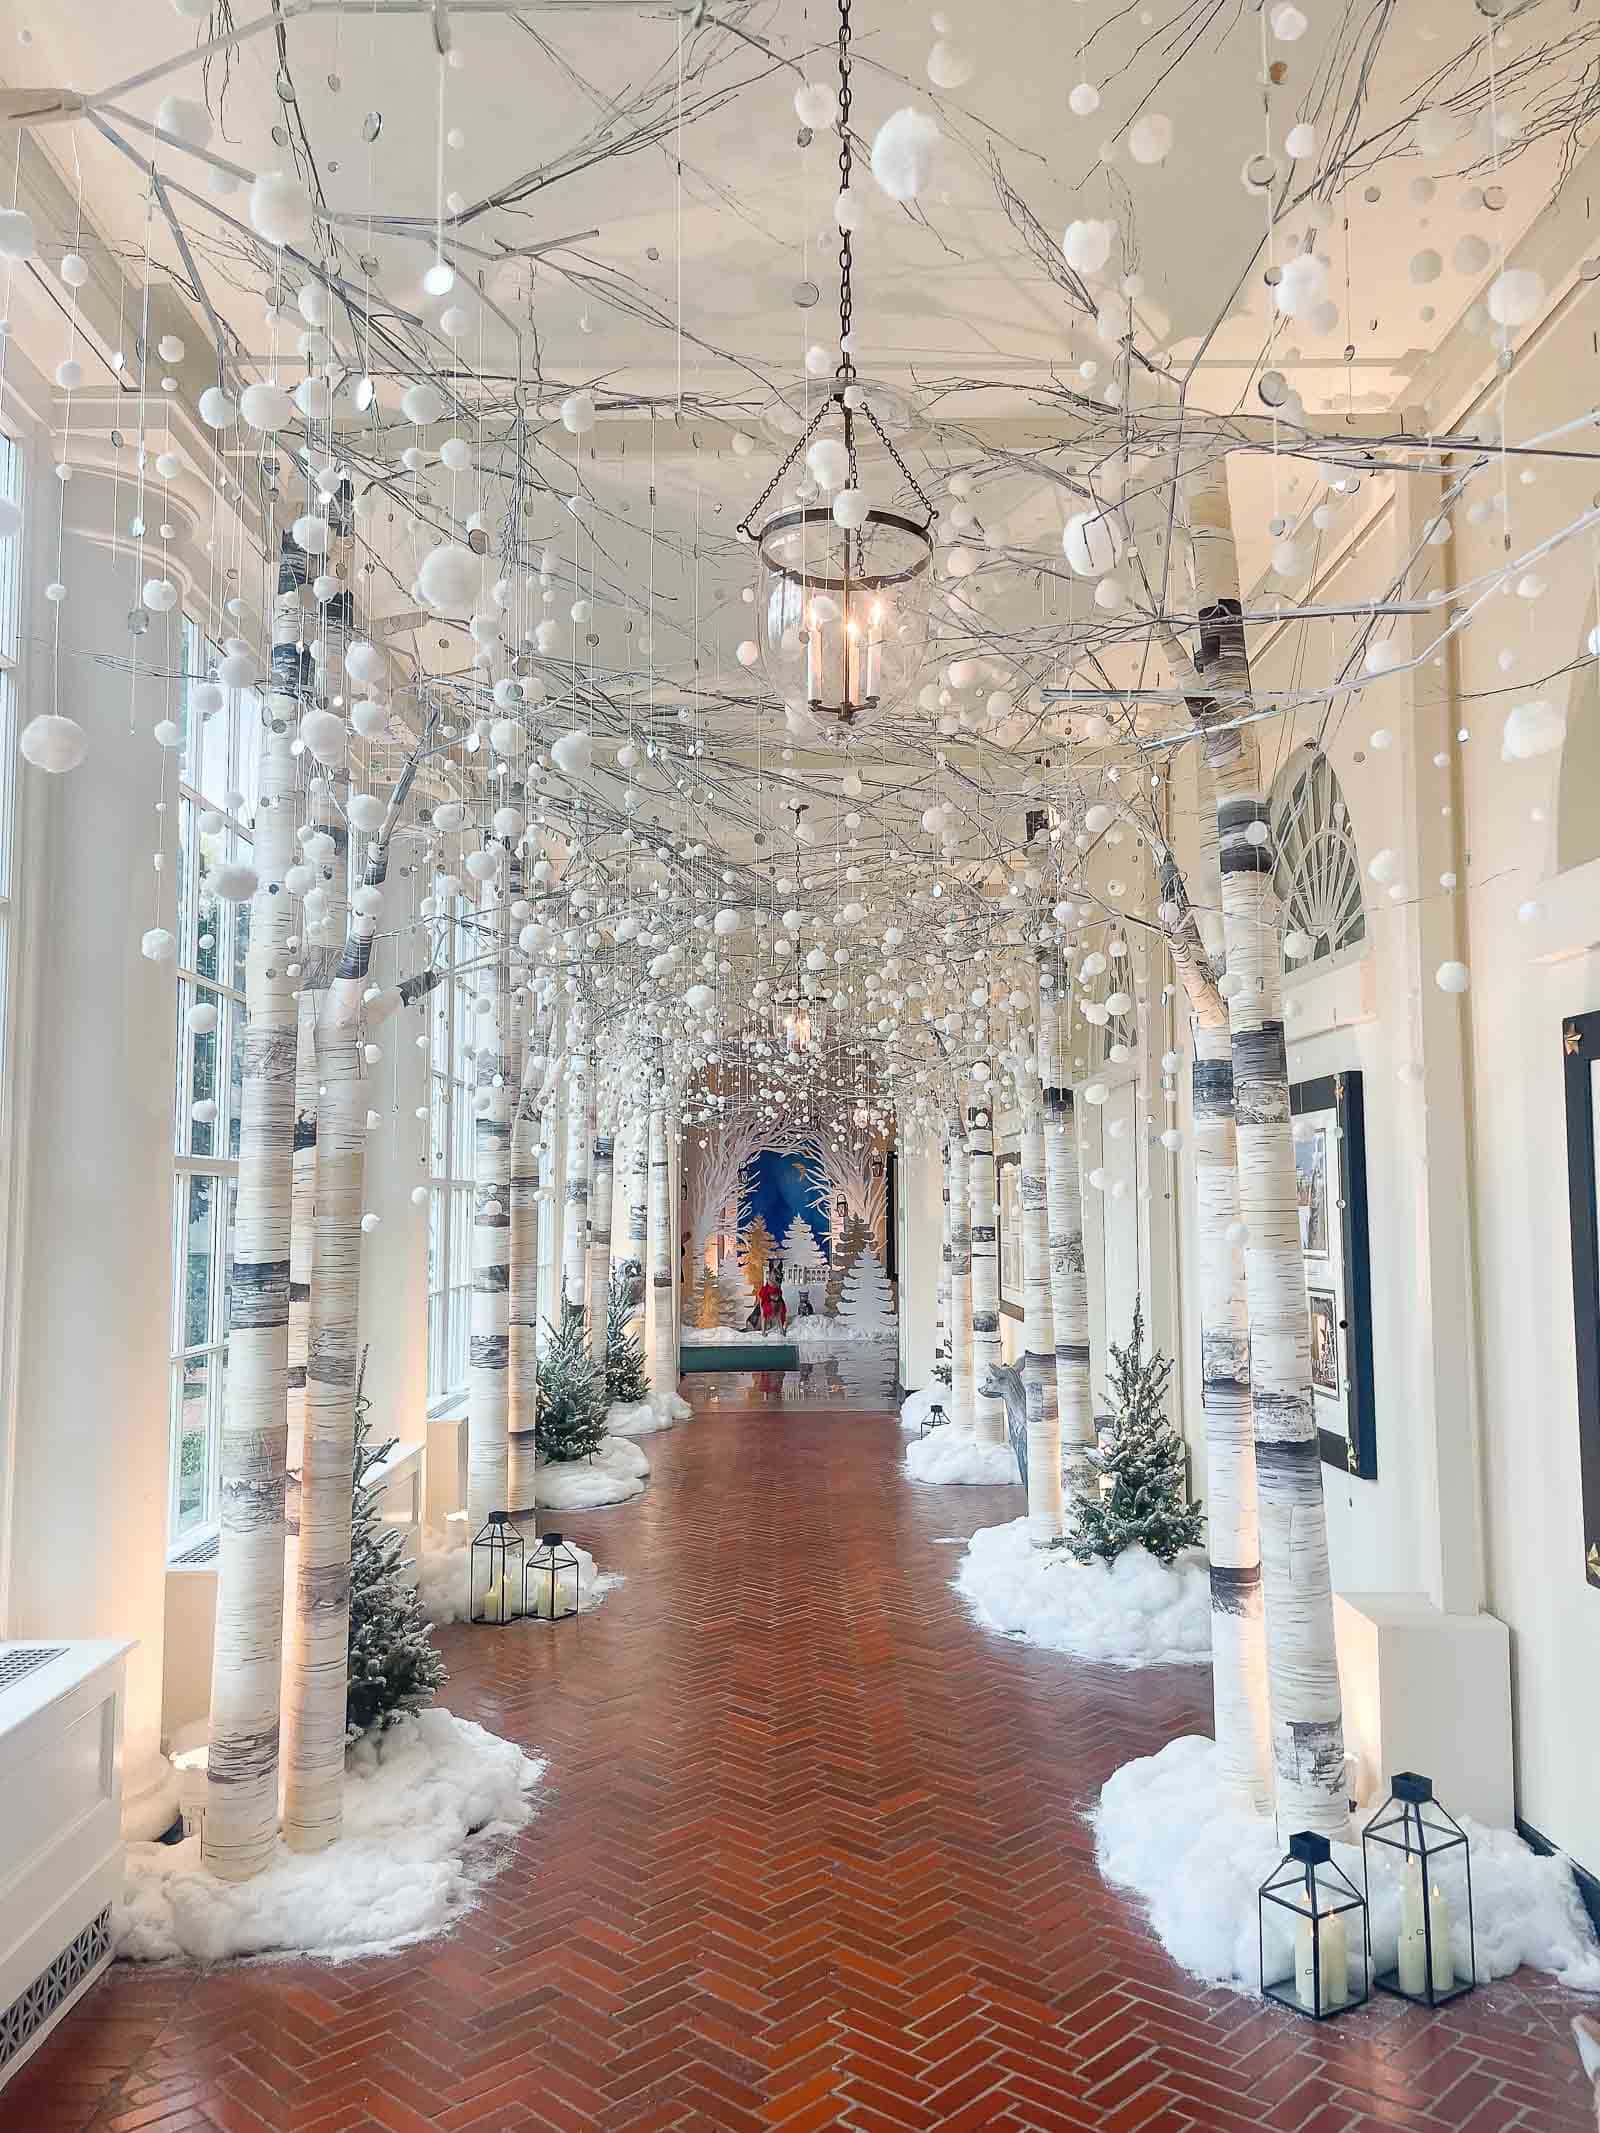
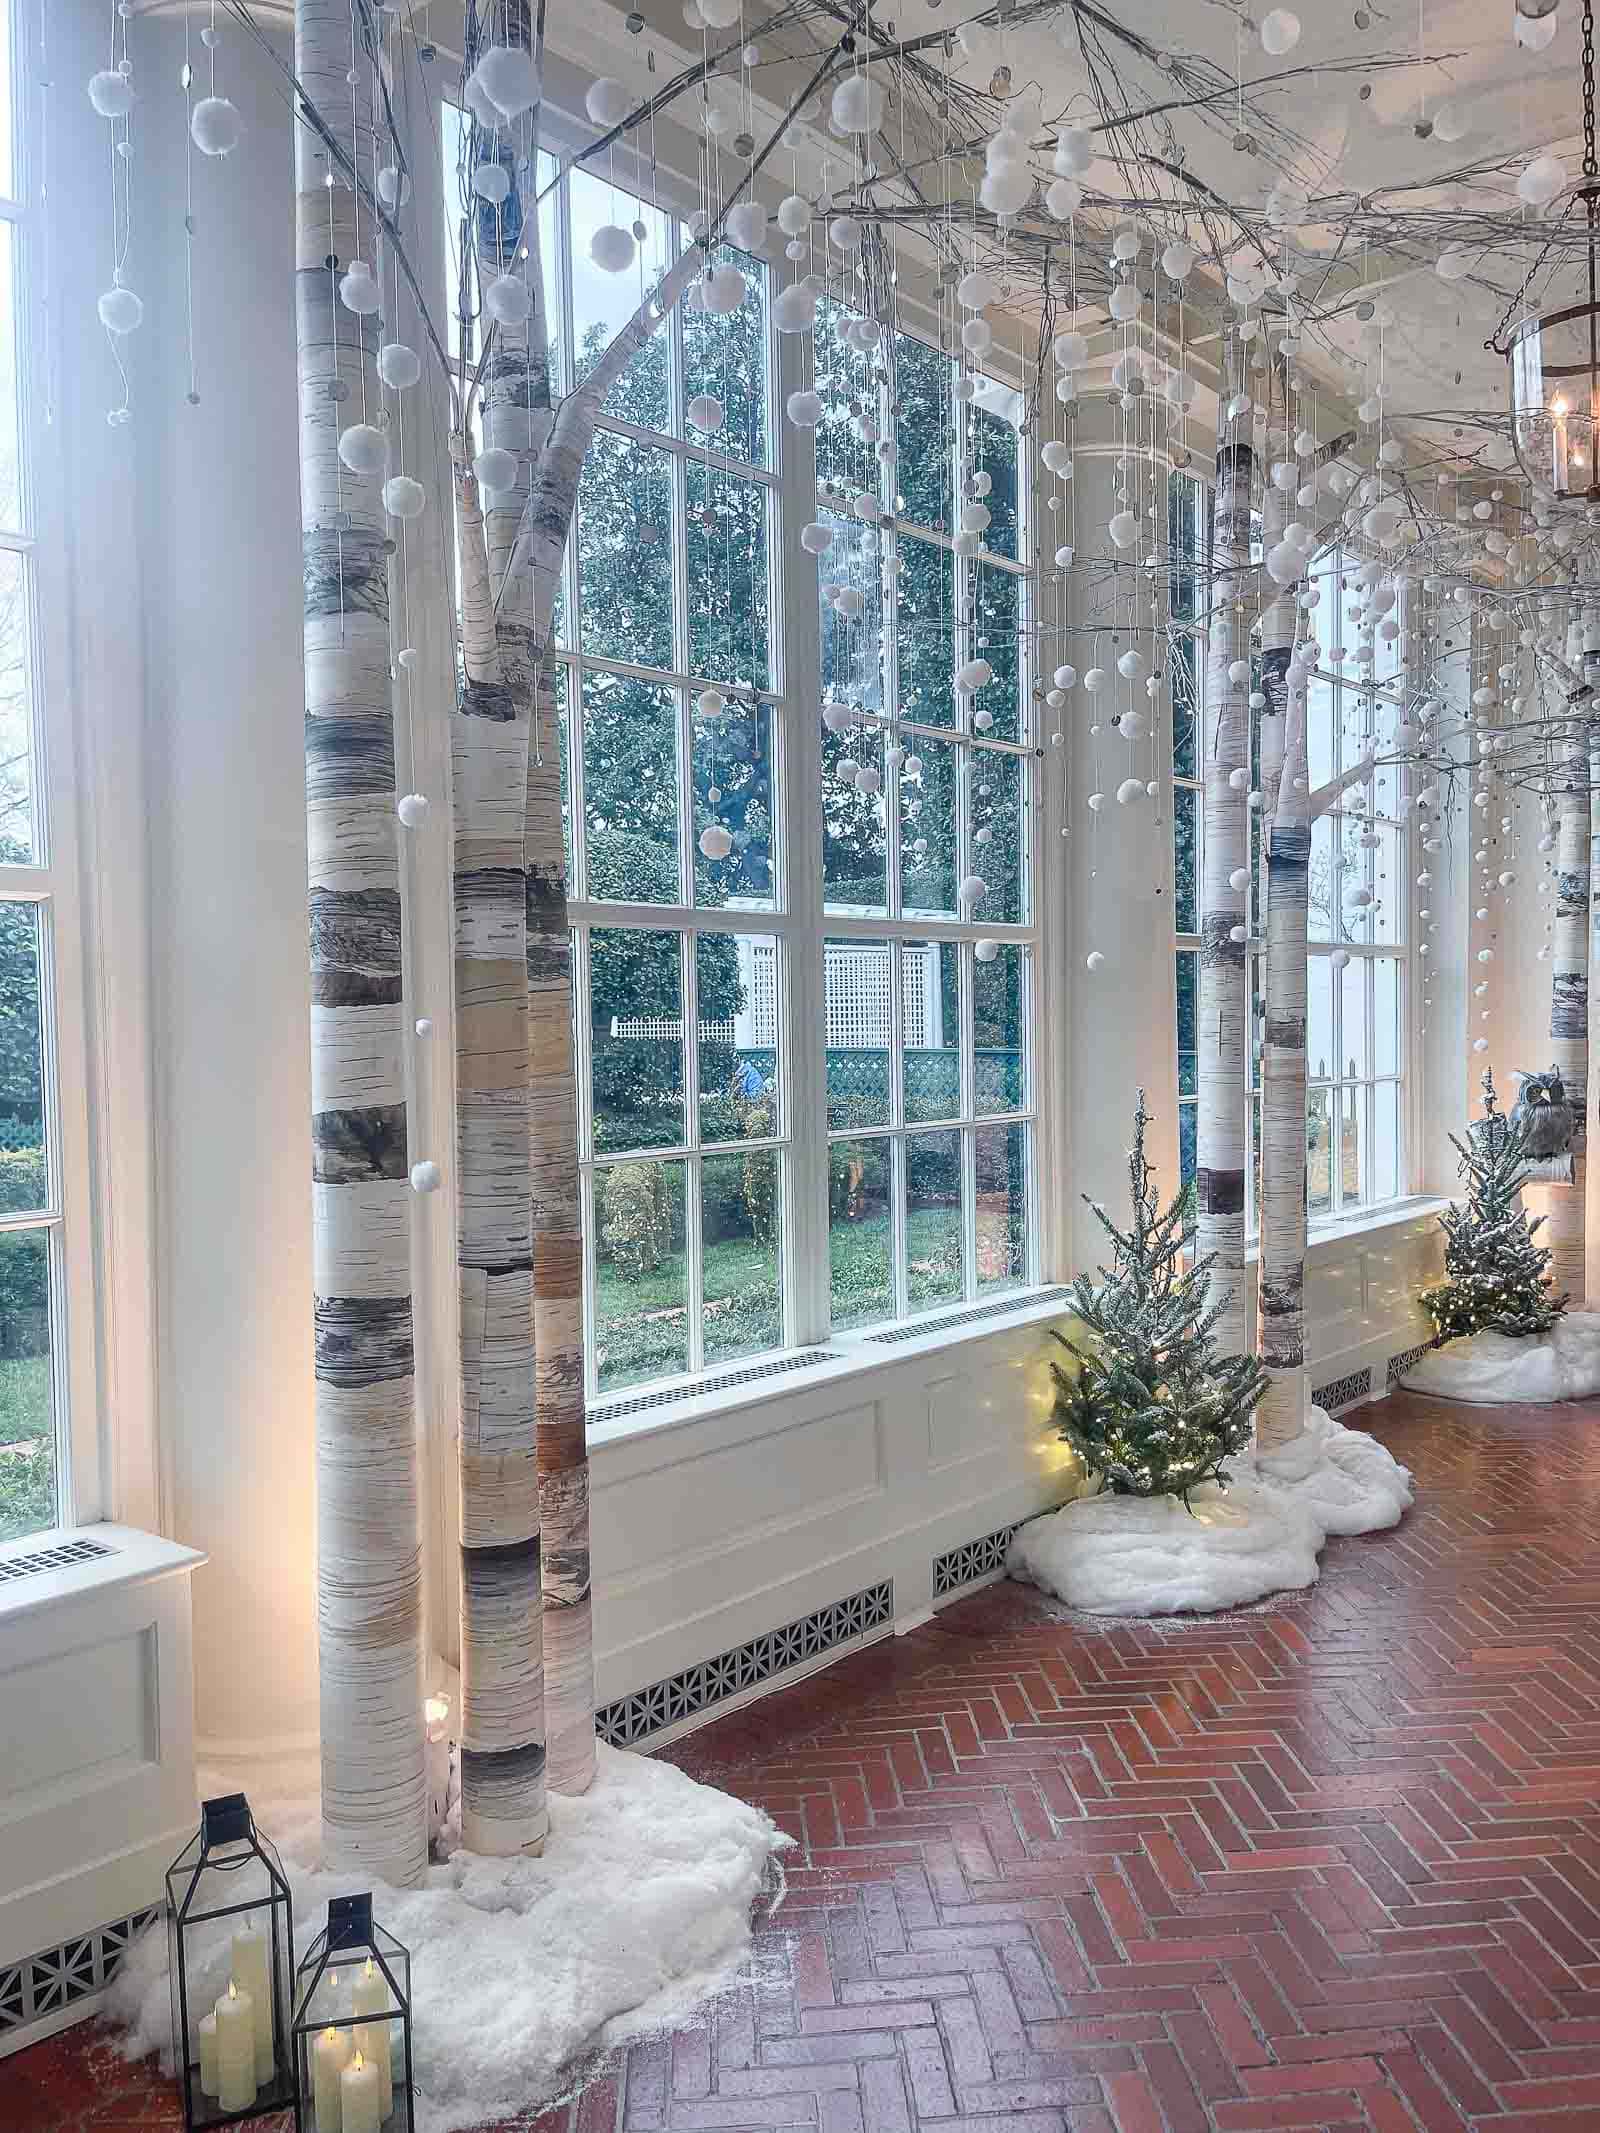
The volunteers were split into groups to decorate each room (our team was in charge of the Red Room and the State Dining room). I *loved* our room, but the most magical space in the building- in my opinion- was the East Colonnade lined with handmade birch trees and garlands of mirrors and pompoms. Experts conceived of the birch trees in the White House, but I wanted to try my hand at recreating this in my own home!
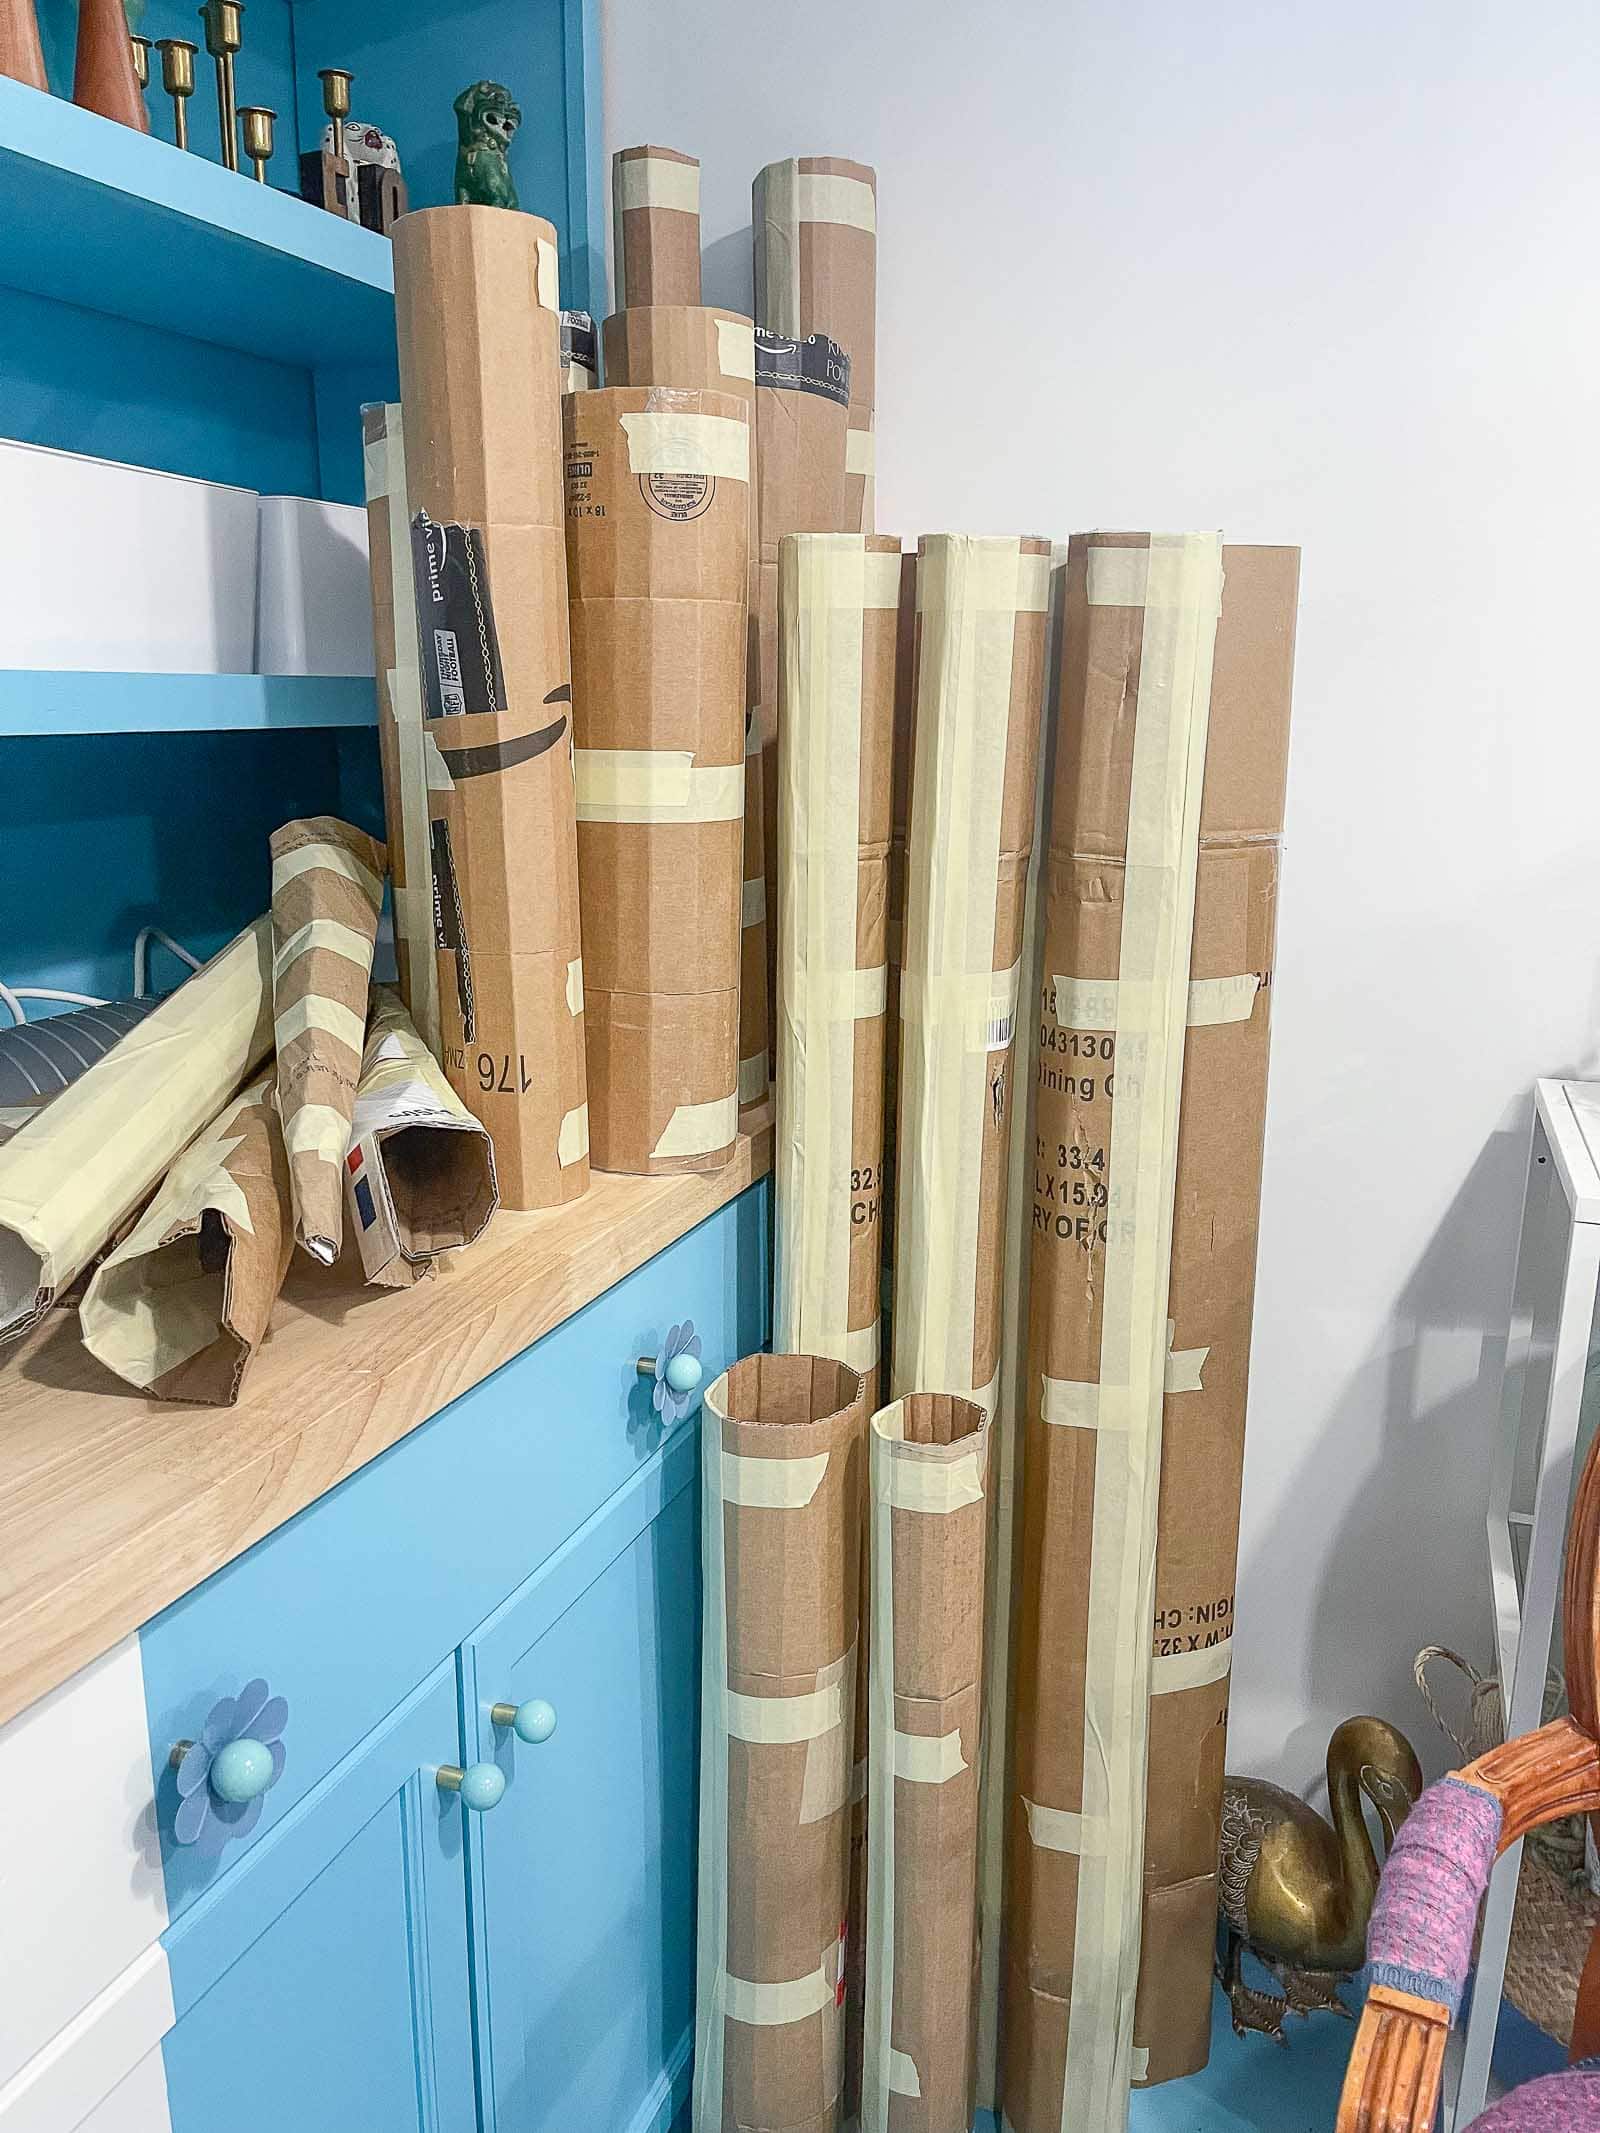
Step 1. Let’s Shape Some Cardboard Birch Trunks
My new favorite material, cardboard, is the hero of this craft. You’re going to need a bit of it so keep your eye out for larger/ longer boxes. To start, you’re going to cut the cardboard with the corrugation running length wise if possible (this will help make it easier to bend the cardboard). Roll your cardboard into a tube and secure in place with masking tape. Repeat.

My tubes were naturally slightly different diameters so I was able to insert a narrower tube inside a larger tube and tape together to make a longer trunk. Did I mention you’re going to use a lot of tape? Ha!
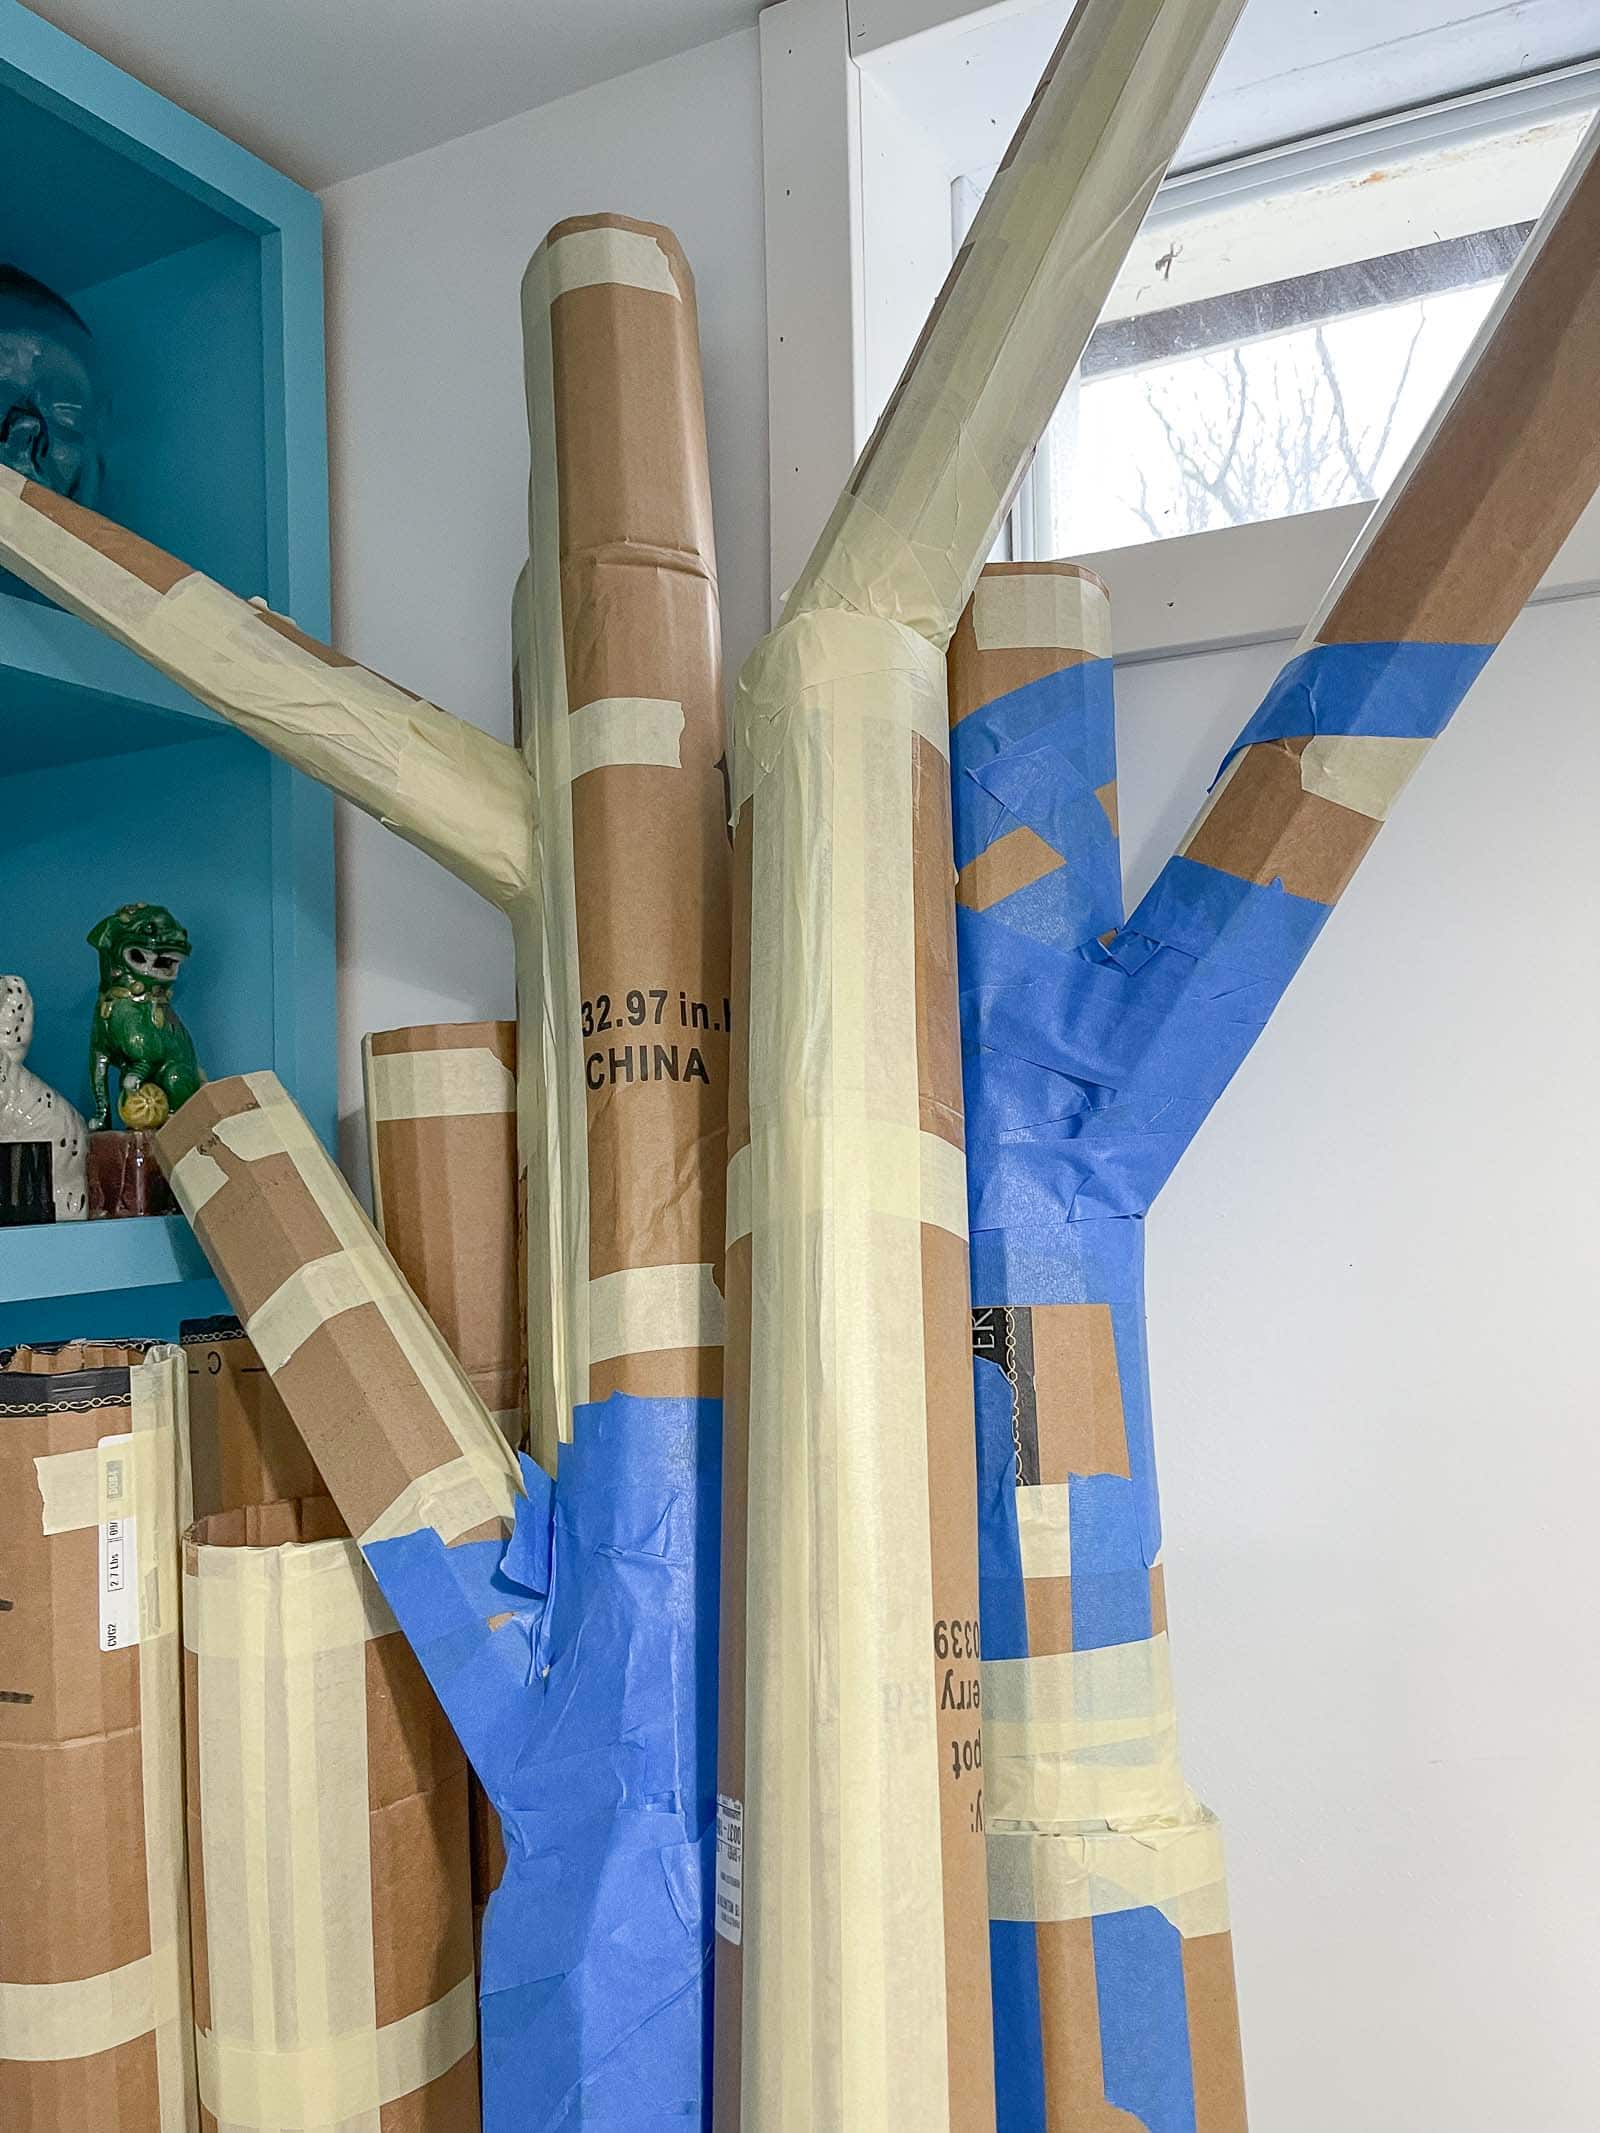
Step 2. Adding Limbs to the Birch Trunks
To add some limbs and make these tall tubes look more like trees, make some skinnier, shorter cardboard tubes. Ultimately I liked the look of the straight tubes, but I also made some that were more conical to experiment. I attached these limbs by cutting one end at an angle and then taping it onto the trunk. Don’t worry if it looks kind of sloppy… you’re going to cover all of this so keep wrapping with tape until the limb feels secure.
Step 3. Adding Branches to the Birch Trunks
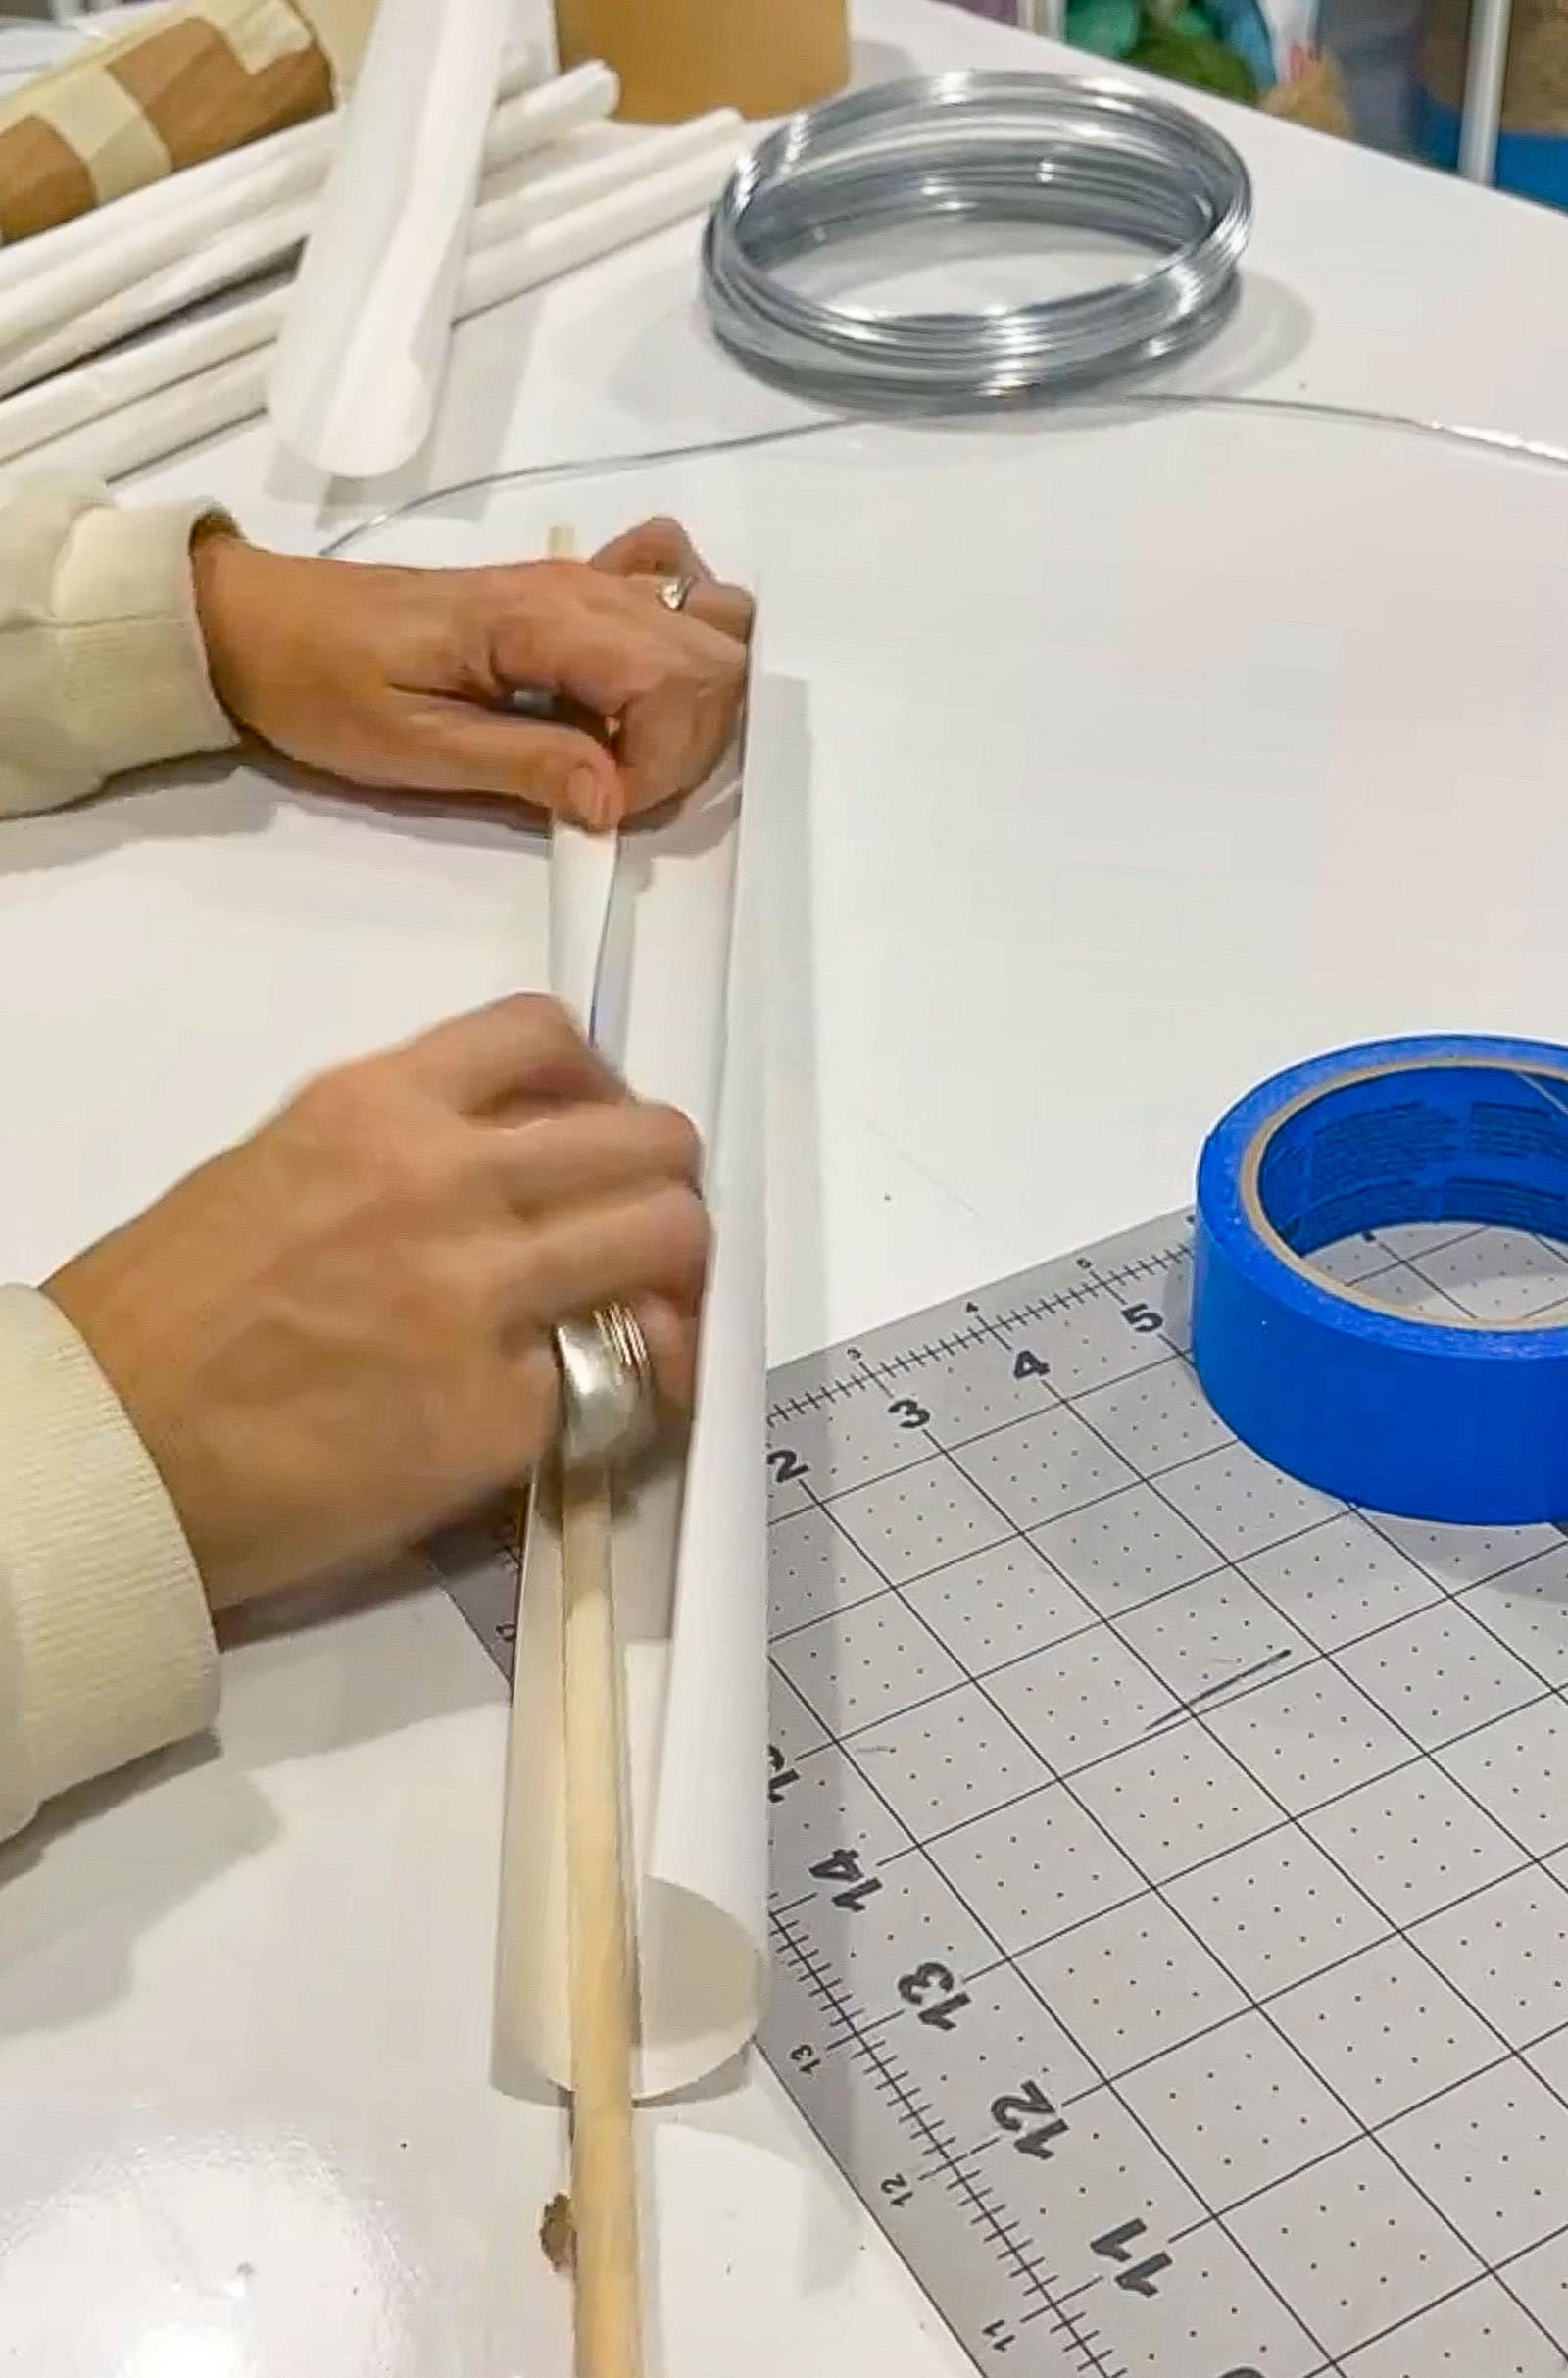
I picked up some heavy gauge wire and cut it into 18-24″ lengths. Bend the lower 3-inches of the wire and tape in place on the tree limbs. Next I rolled up skinny tubes of craft paper, secured with hot glue, and slipped these over the wire to give it a bulkier, straighter look. If you make a small cut at the end of the paper tube, you can slide it over the wire where it meets the cardboard tube and tape in place.
Step 4. Making Birch Bark
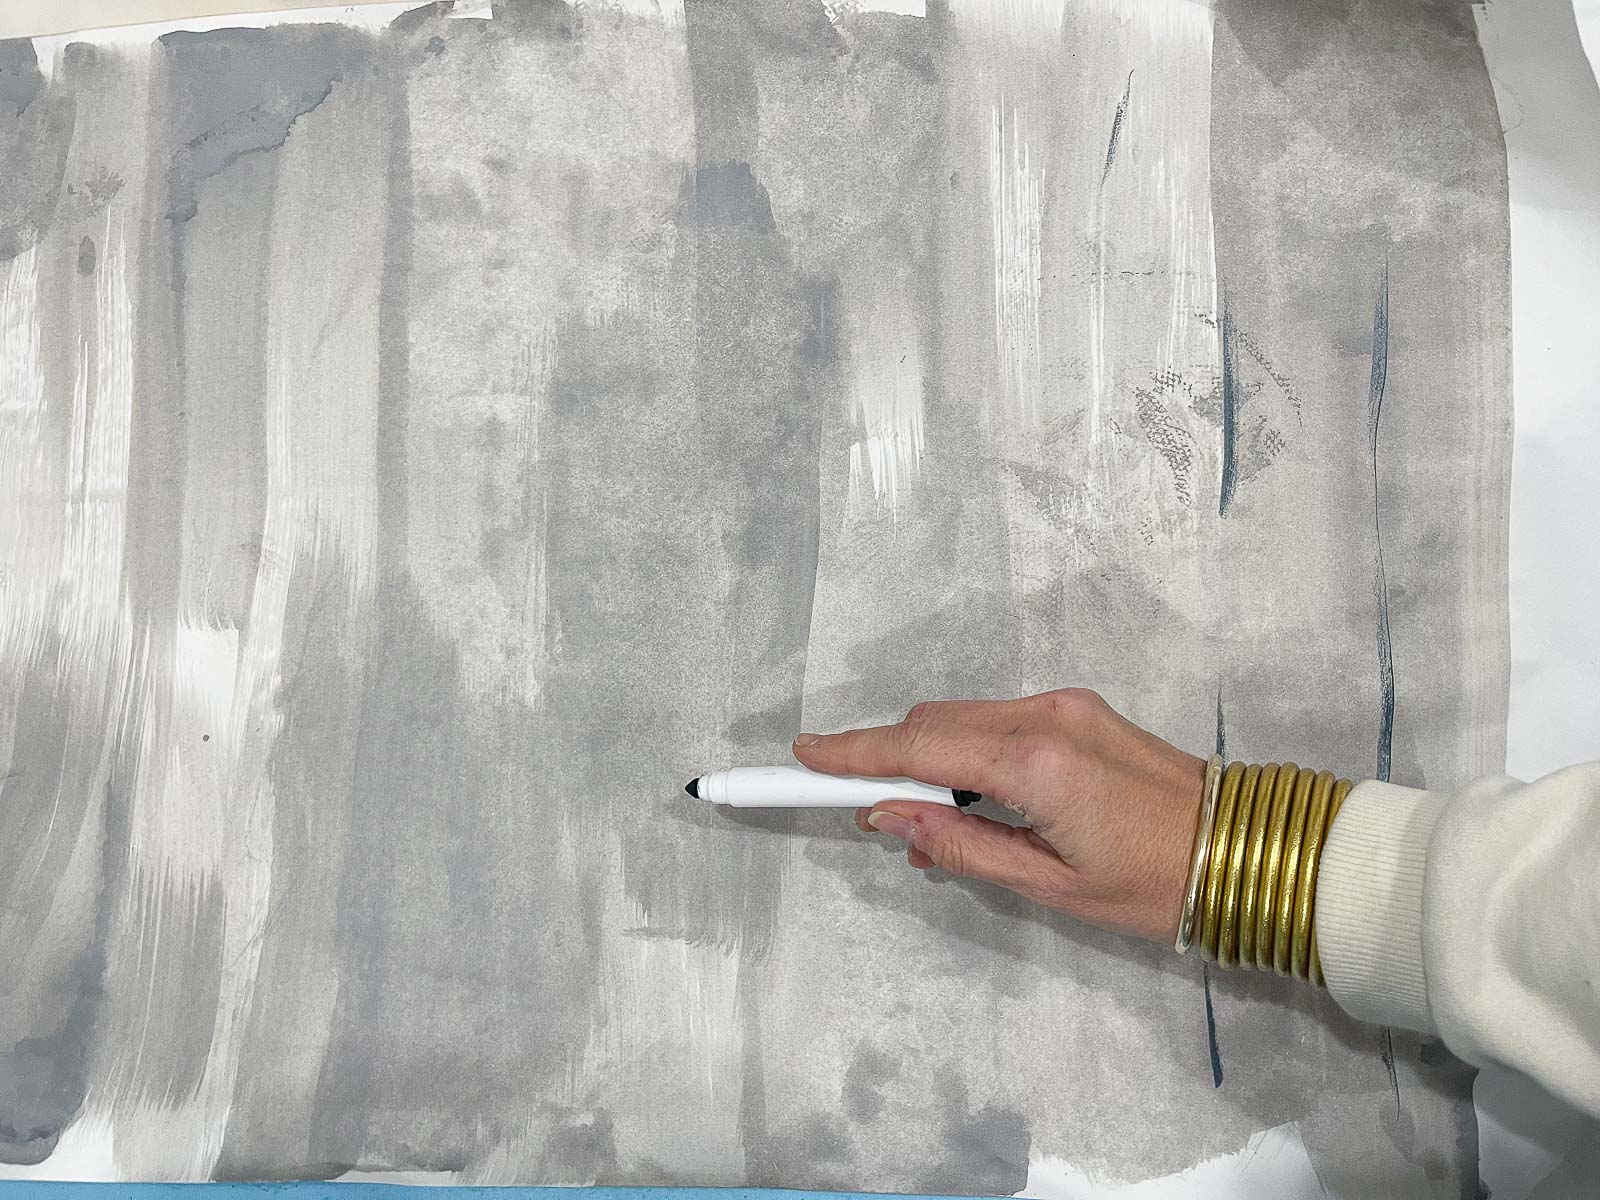
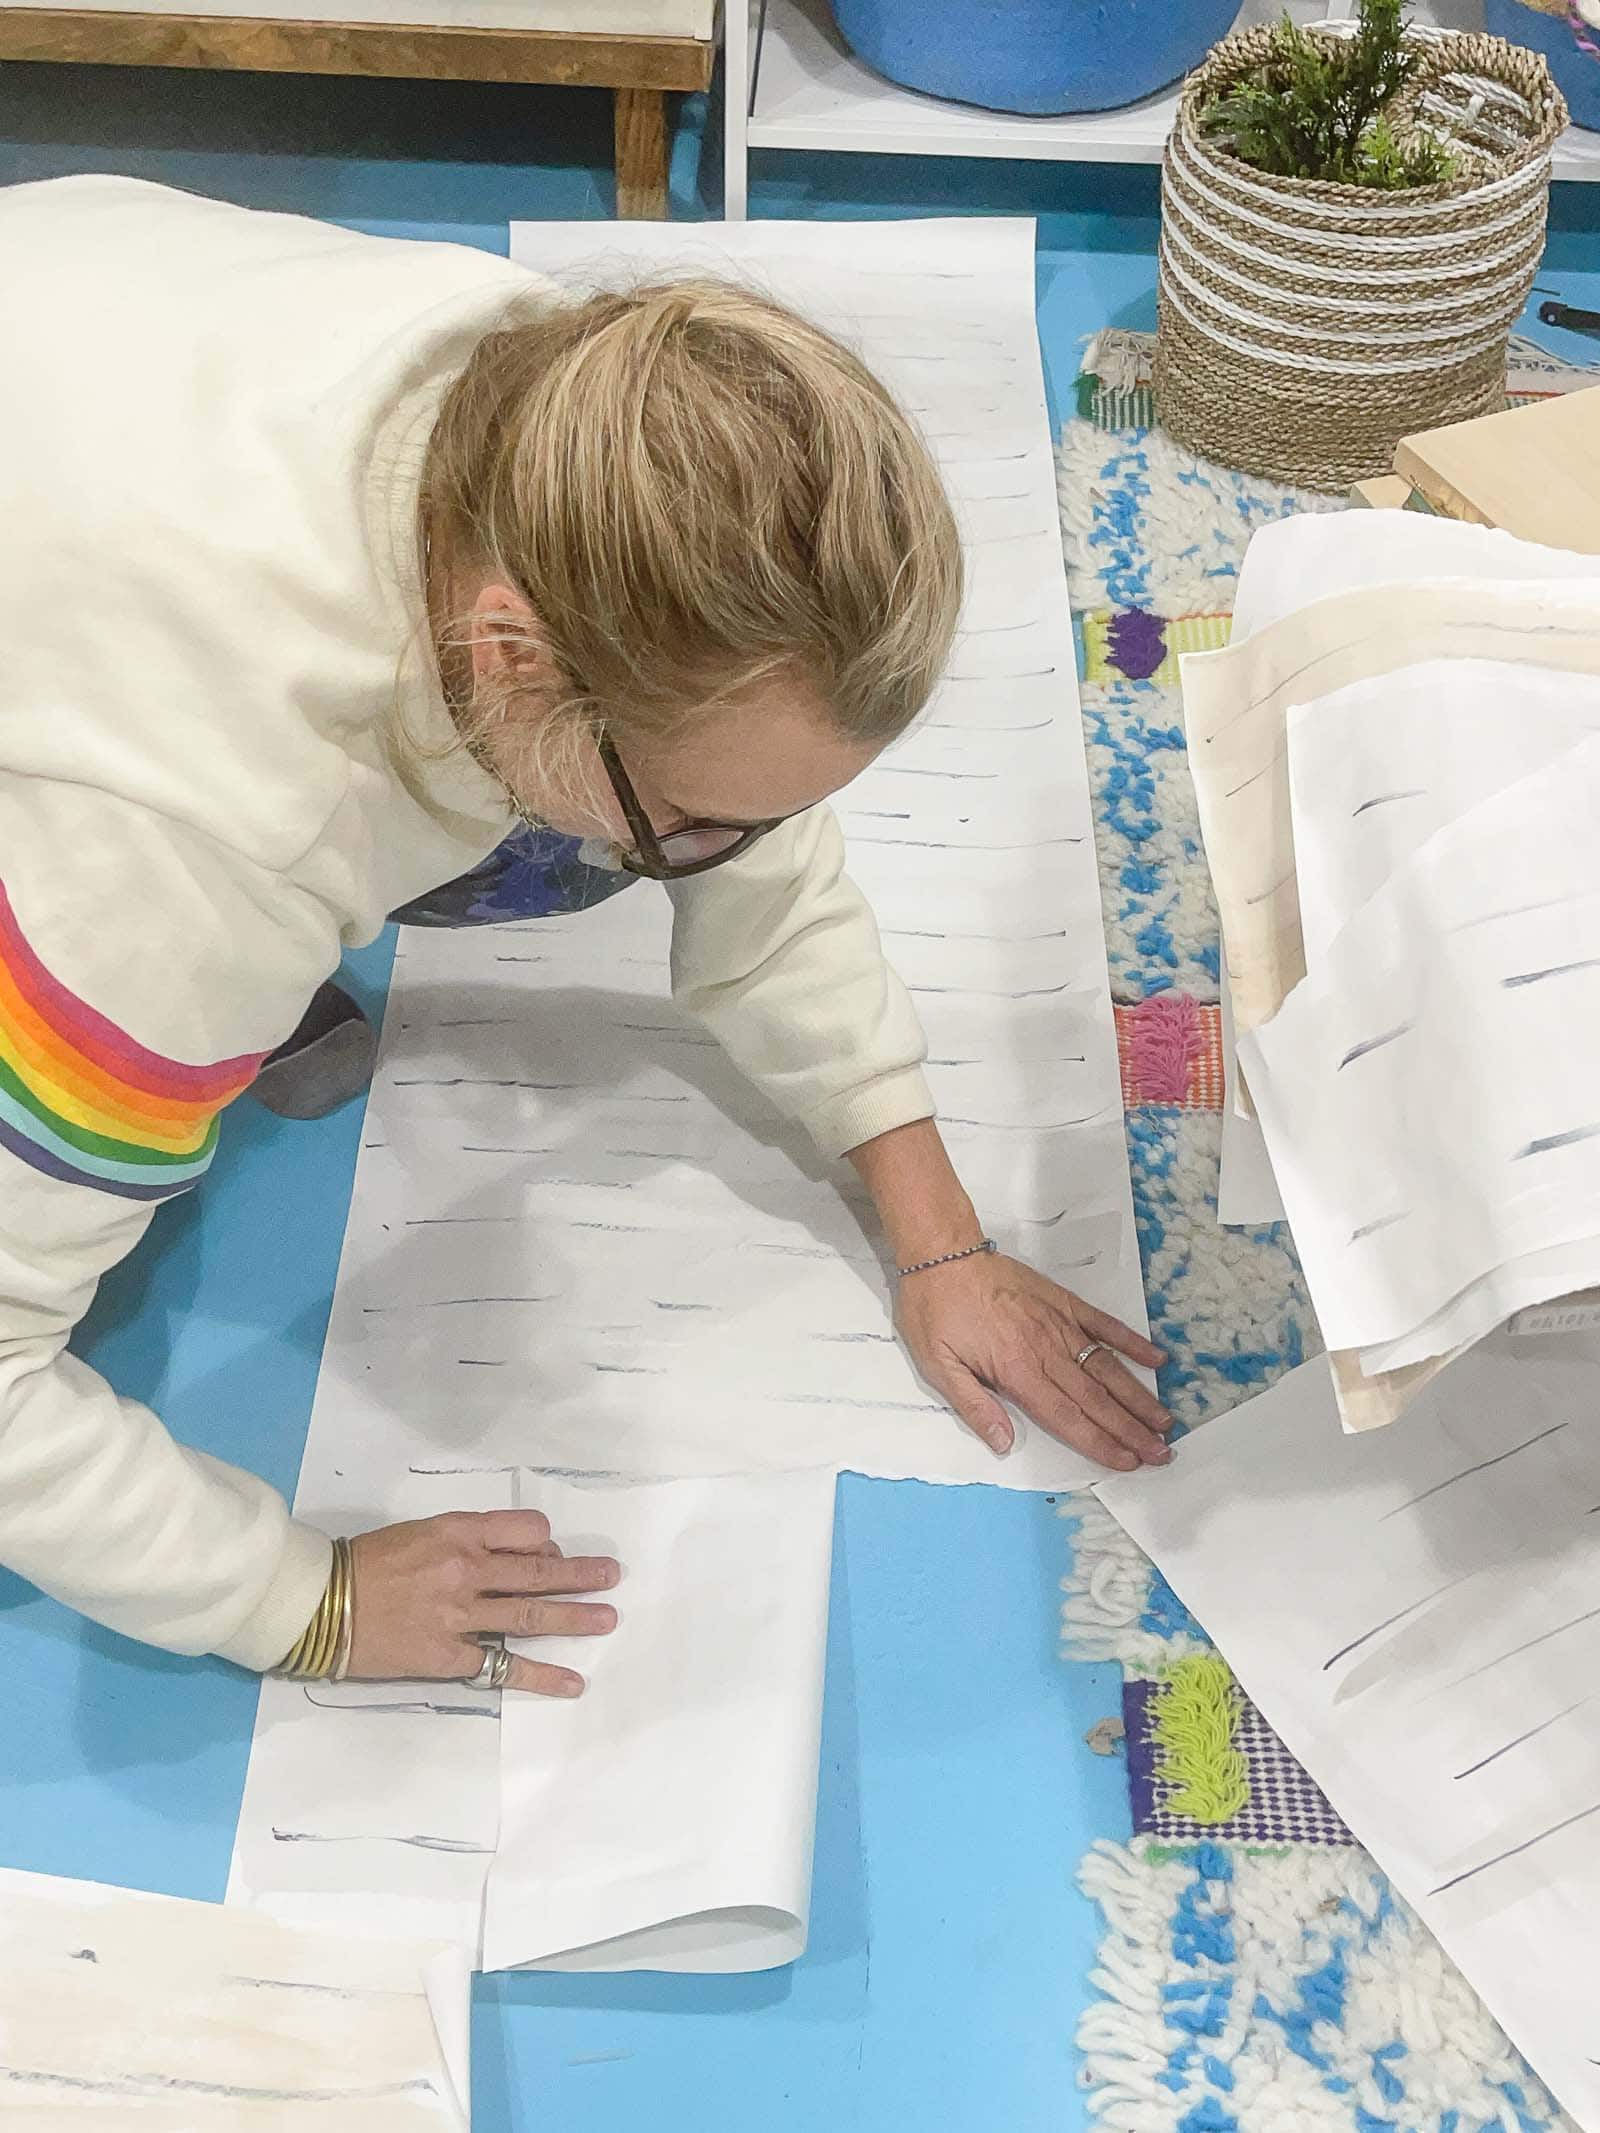
This was how the trees in the East Colonnade came to life… the texture and layers of the bark was the real artistry. For my trees, I grabbed a roll of craft paper and a handful of assorted brown and beige craft paint. Roll out a length of paper and paint a light wash on each length. You’ll go through a LOT of paper so work fast and vary the shades and darkness of each wash. If you want to experiment with textures, go for it! This would be the perfect place to let your kids step in and help since there’s no way to really screw this step up. Put paper aside to dry. Once dry, go back with a black marker and quickly add some horizontal dots and dashes.
Rip the paper into 10-12″ lengths and turn on your hot glue gun!
Step 5. Assembling the Birch Trees
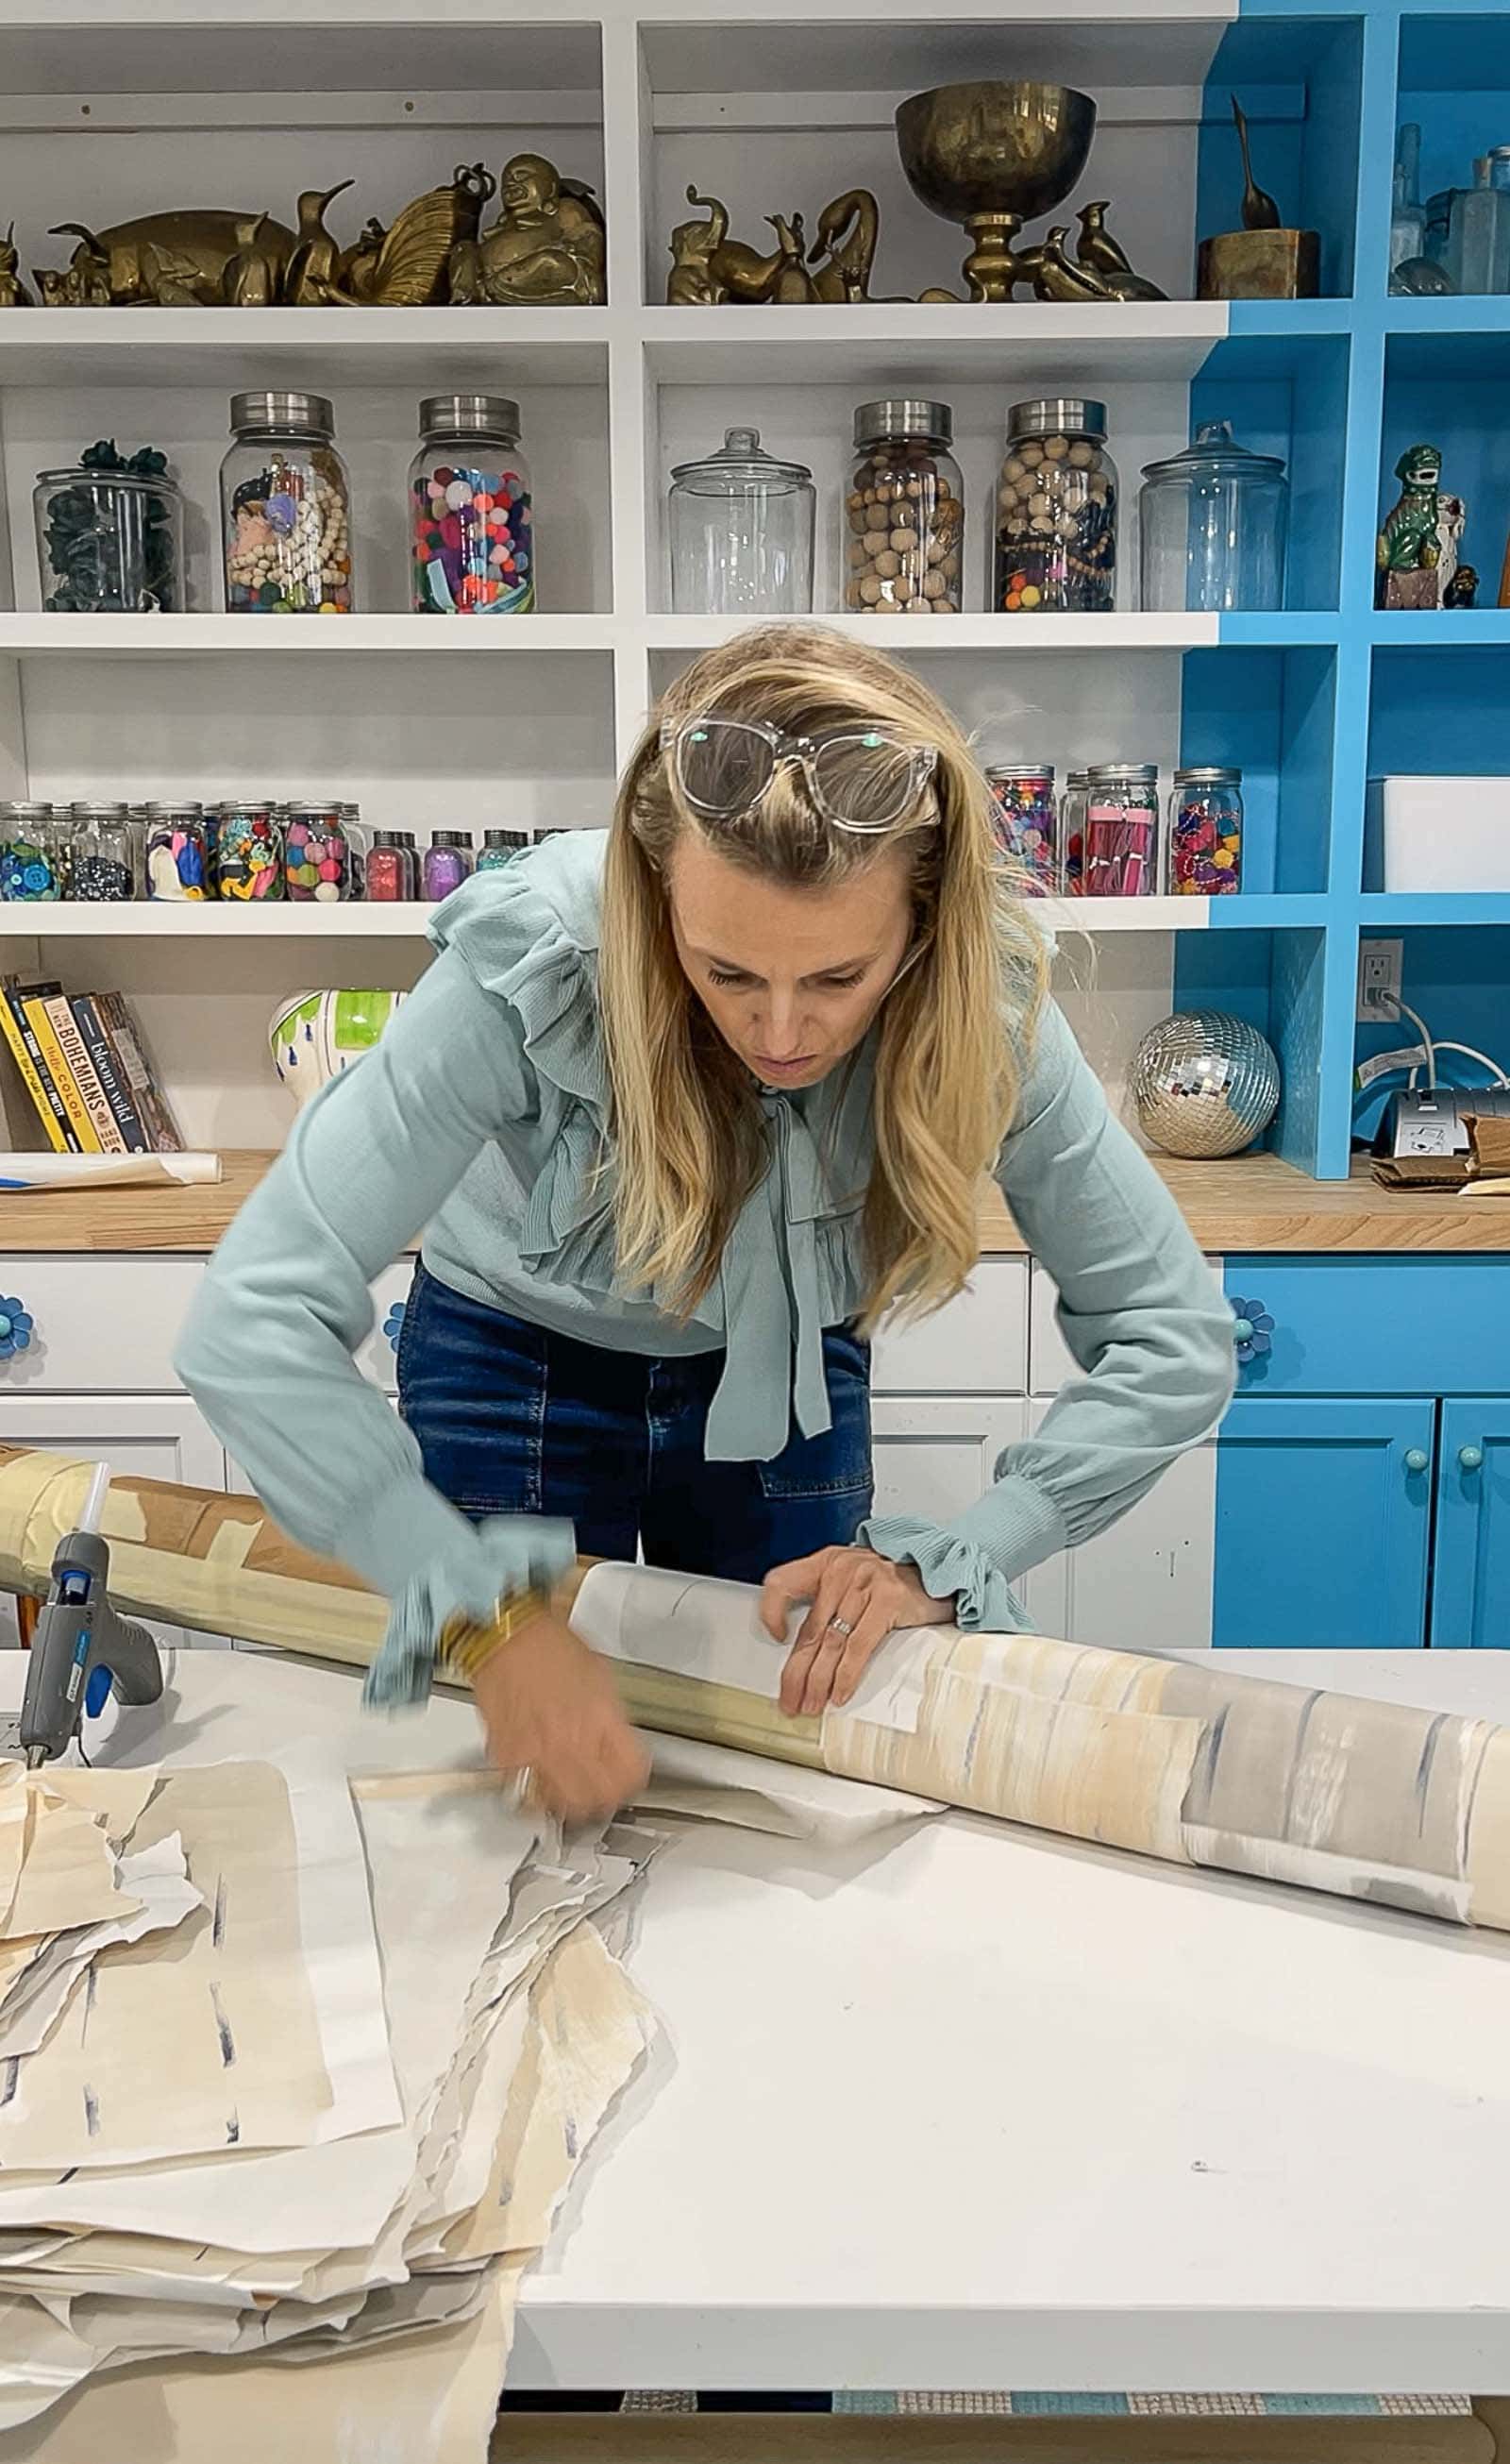
Wrap a piece of your painted birch bark around the cardboard trunk and secure with the hot glue gun. Overlap another piece of bark wrap the trunk and glue in place. Repeat until the entire trunk and limbs are covered with bark.
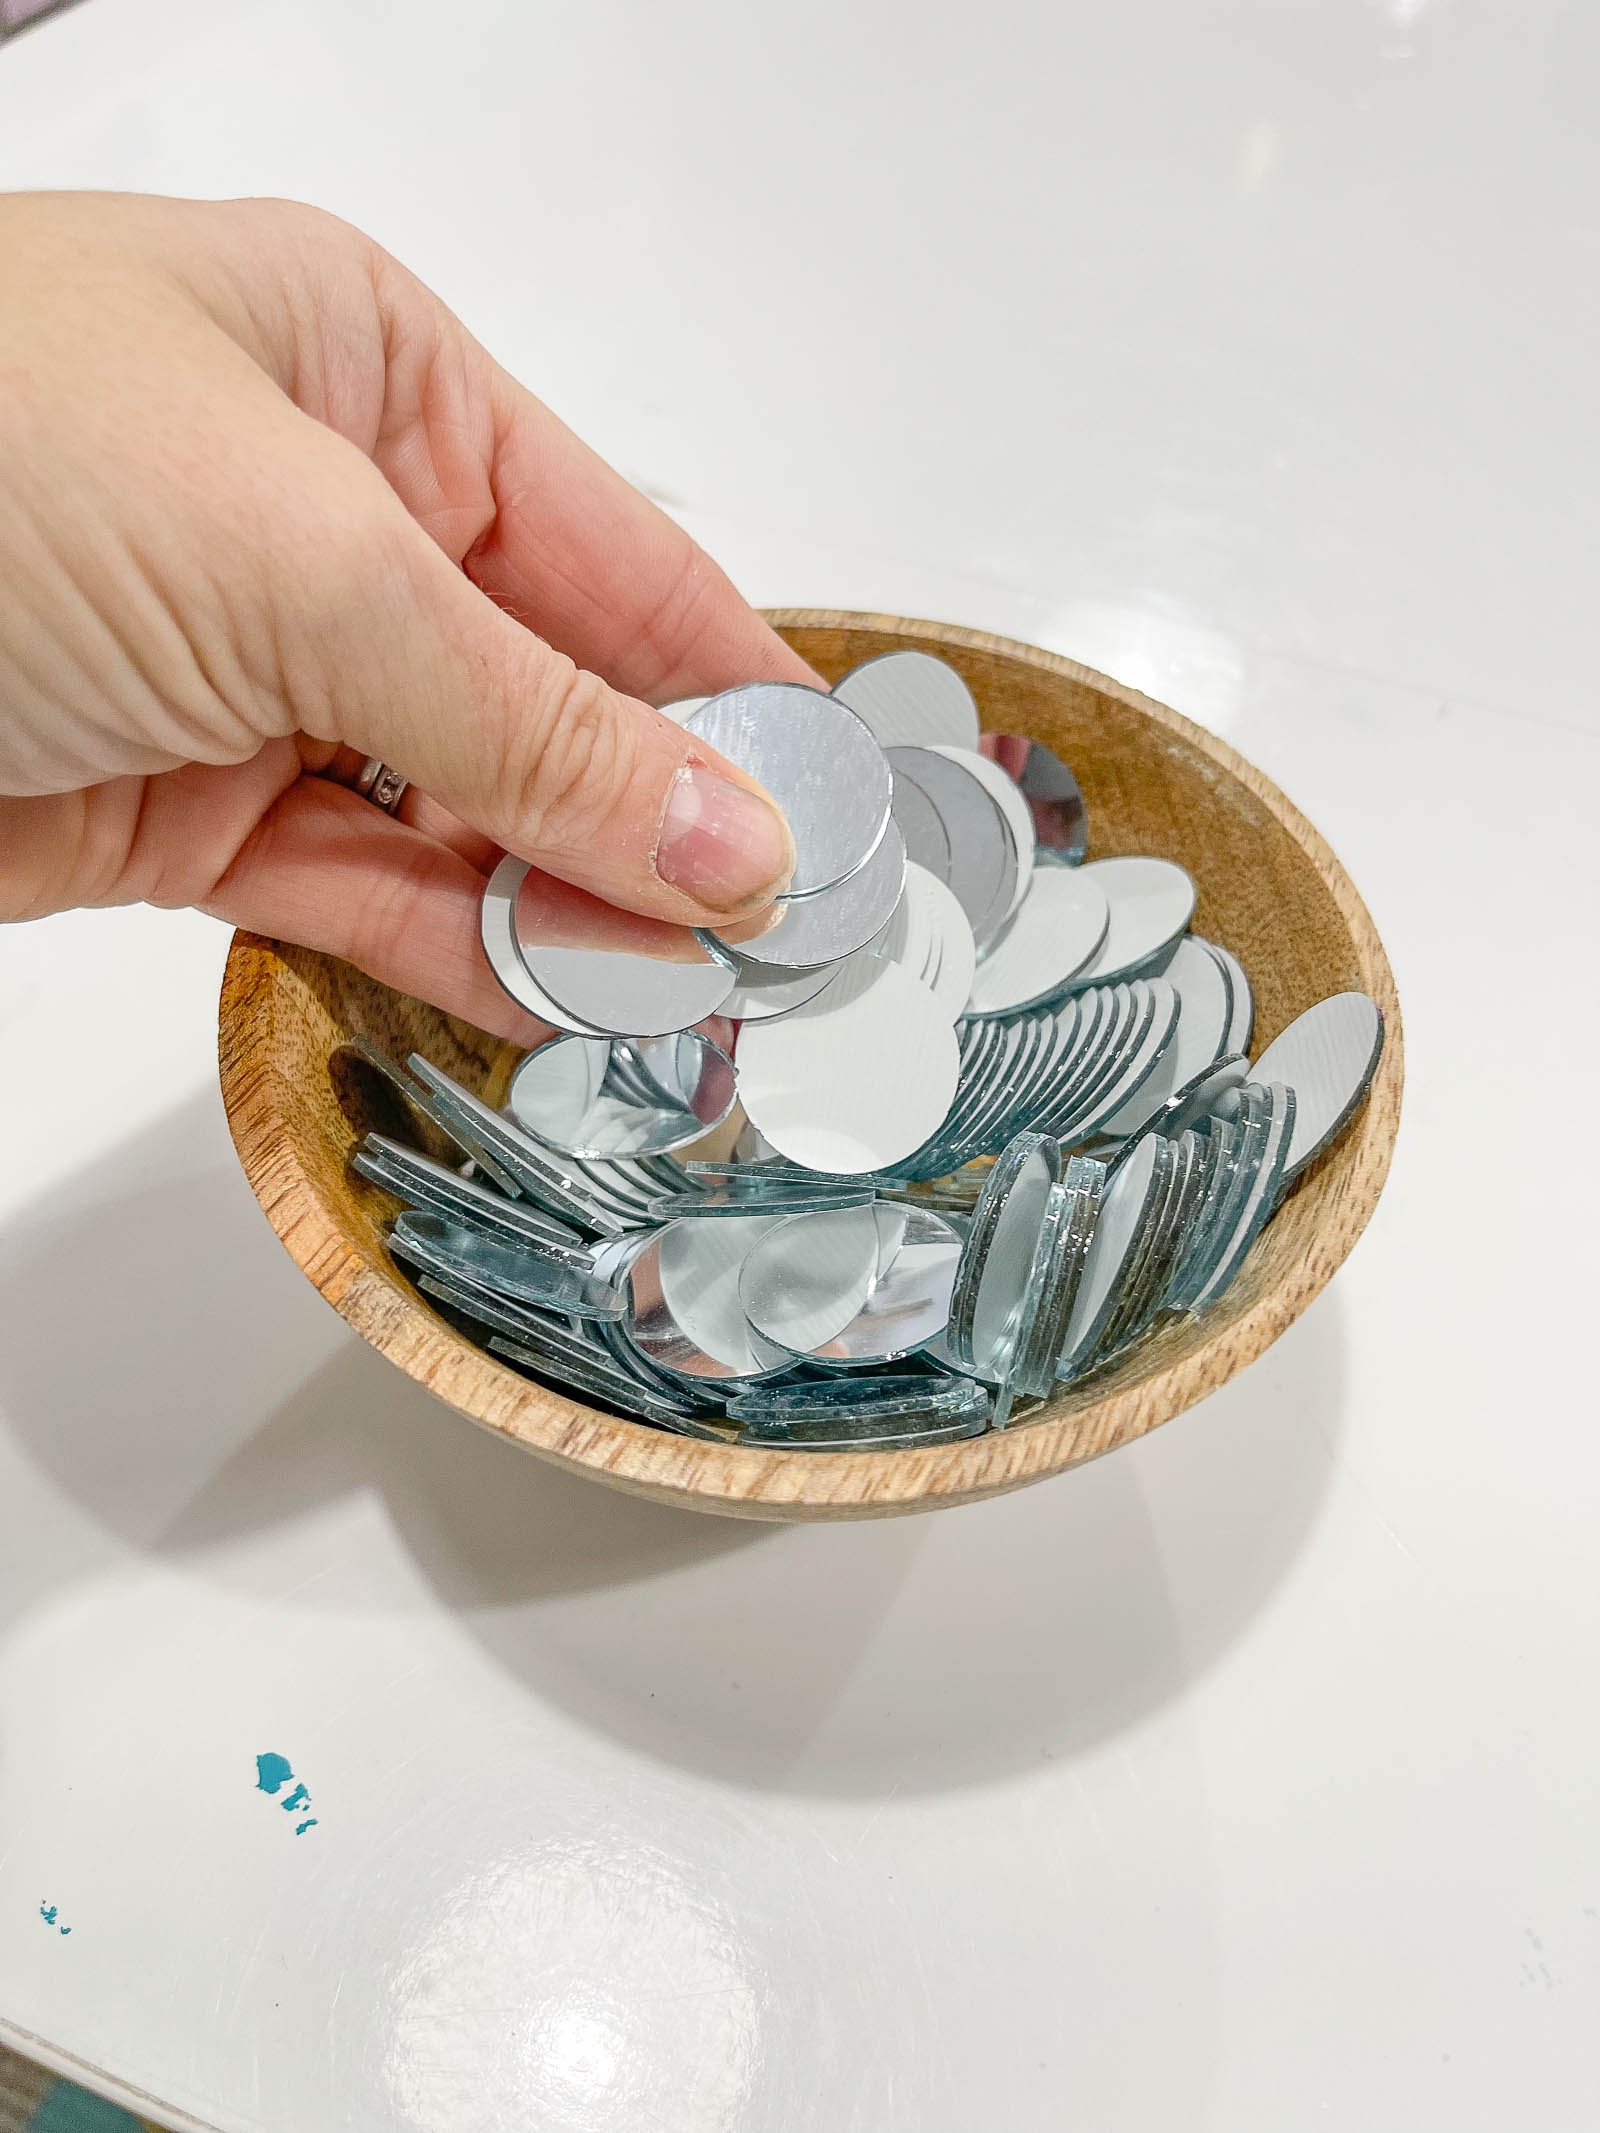
Step 6. Make A Mirror Garland
I *highly* recommend a silicone mat like this to help you make these garlands. Hot glue won’t stick to it so it’s easier to make the garlands without burning yourself. Glue these mirrors every three inches onto a length of monofilament for about 4 feet. Repeat until you have desired amount of garlands.
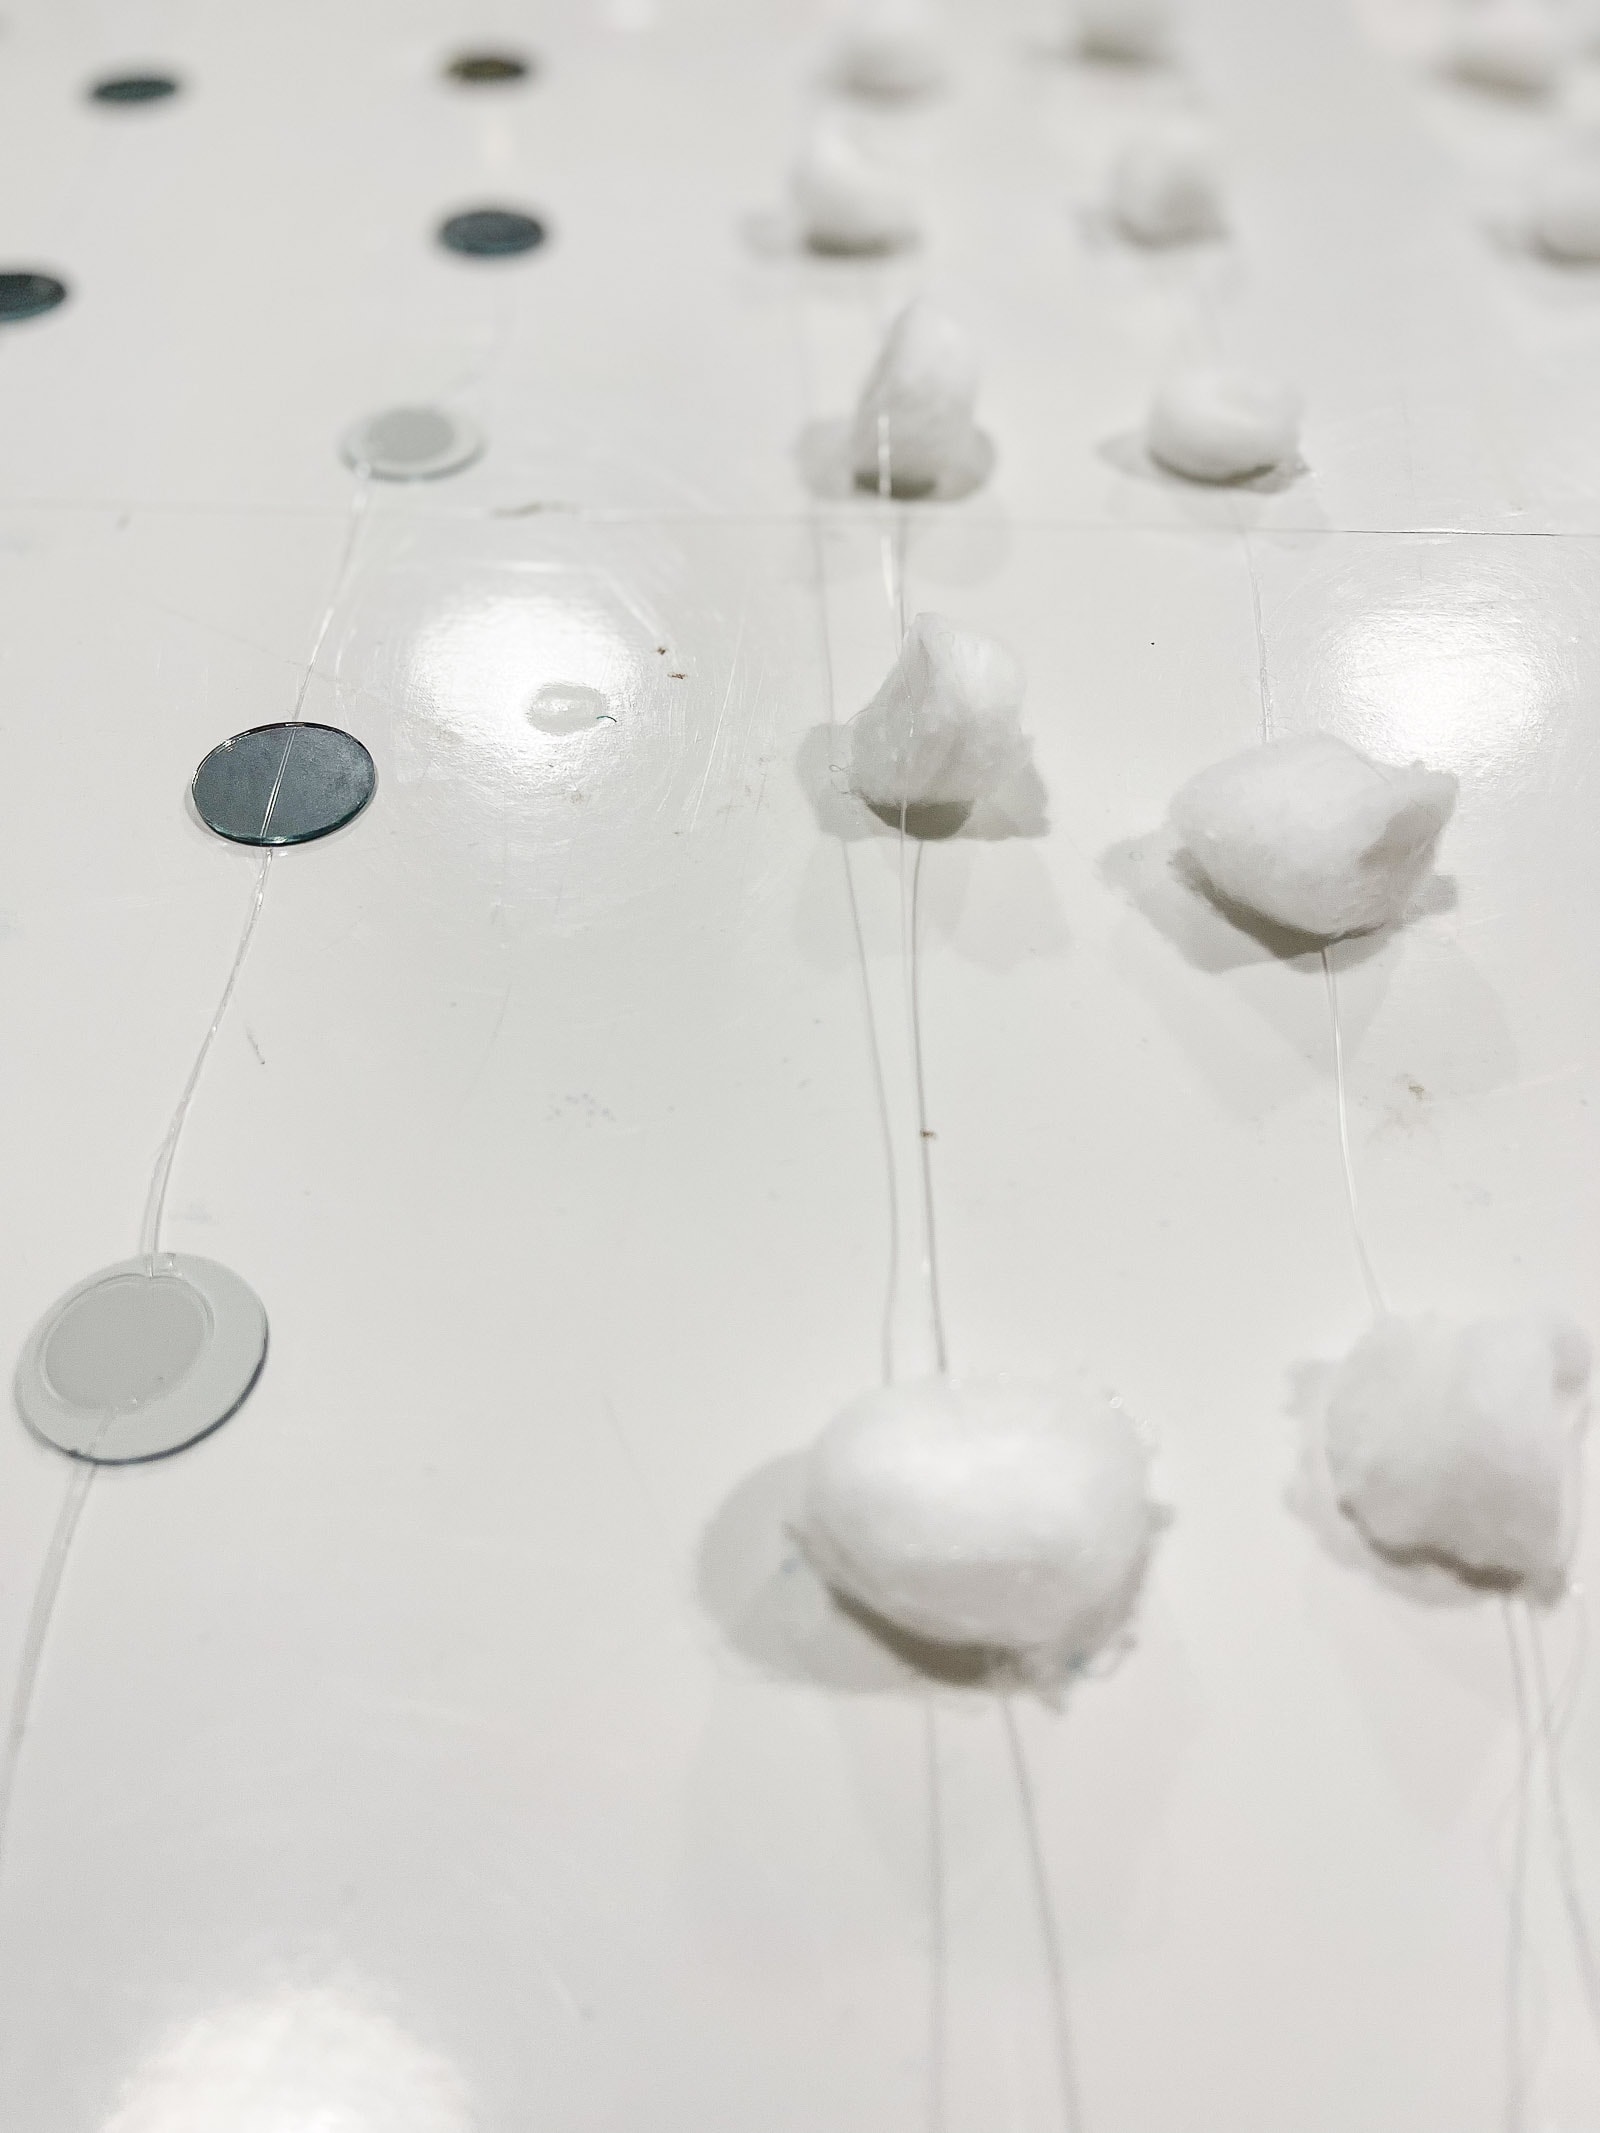
Step 7. Make a ‘Snowball’ Garland
The artists at the White House used pom poms, but I used small cotton balls. Glue onto monofilament every three inches just like you did with the mirrors.
Step 8. Installing the Birch Trees
I used monofilament to hold the birch trees in place and tied it onto brad nails tapped into the corner of the door frame trim. They’re very light so it’s pretty easy to tie them in place.
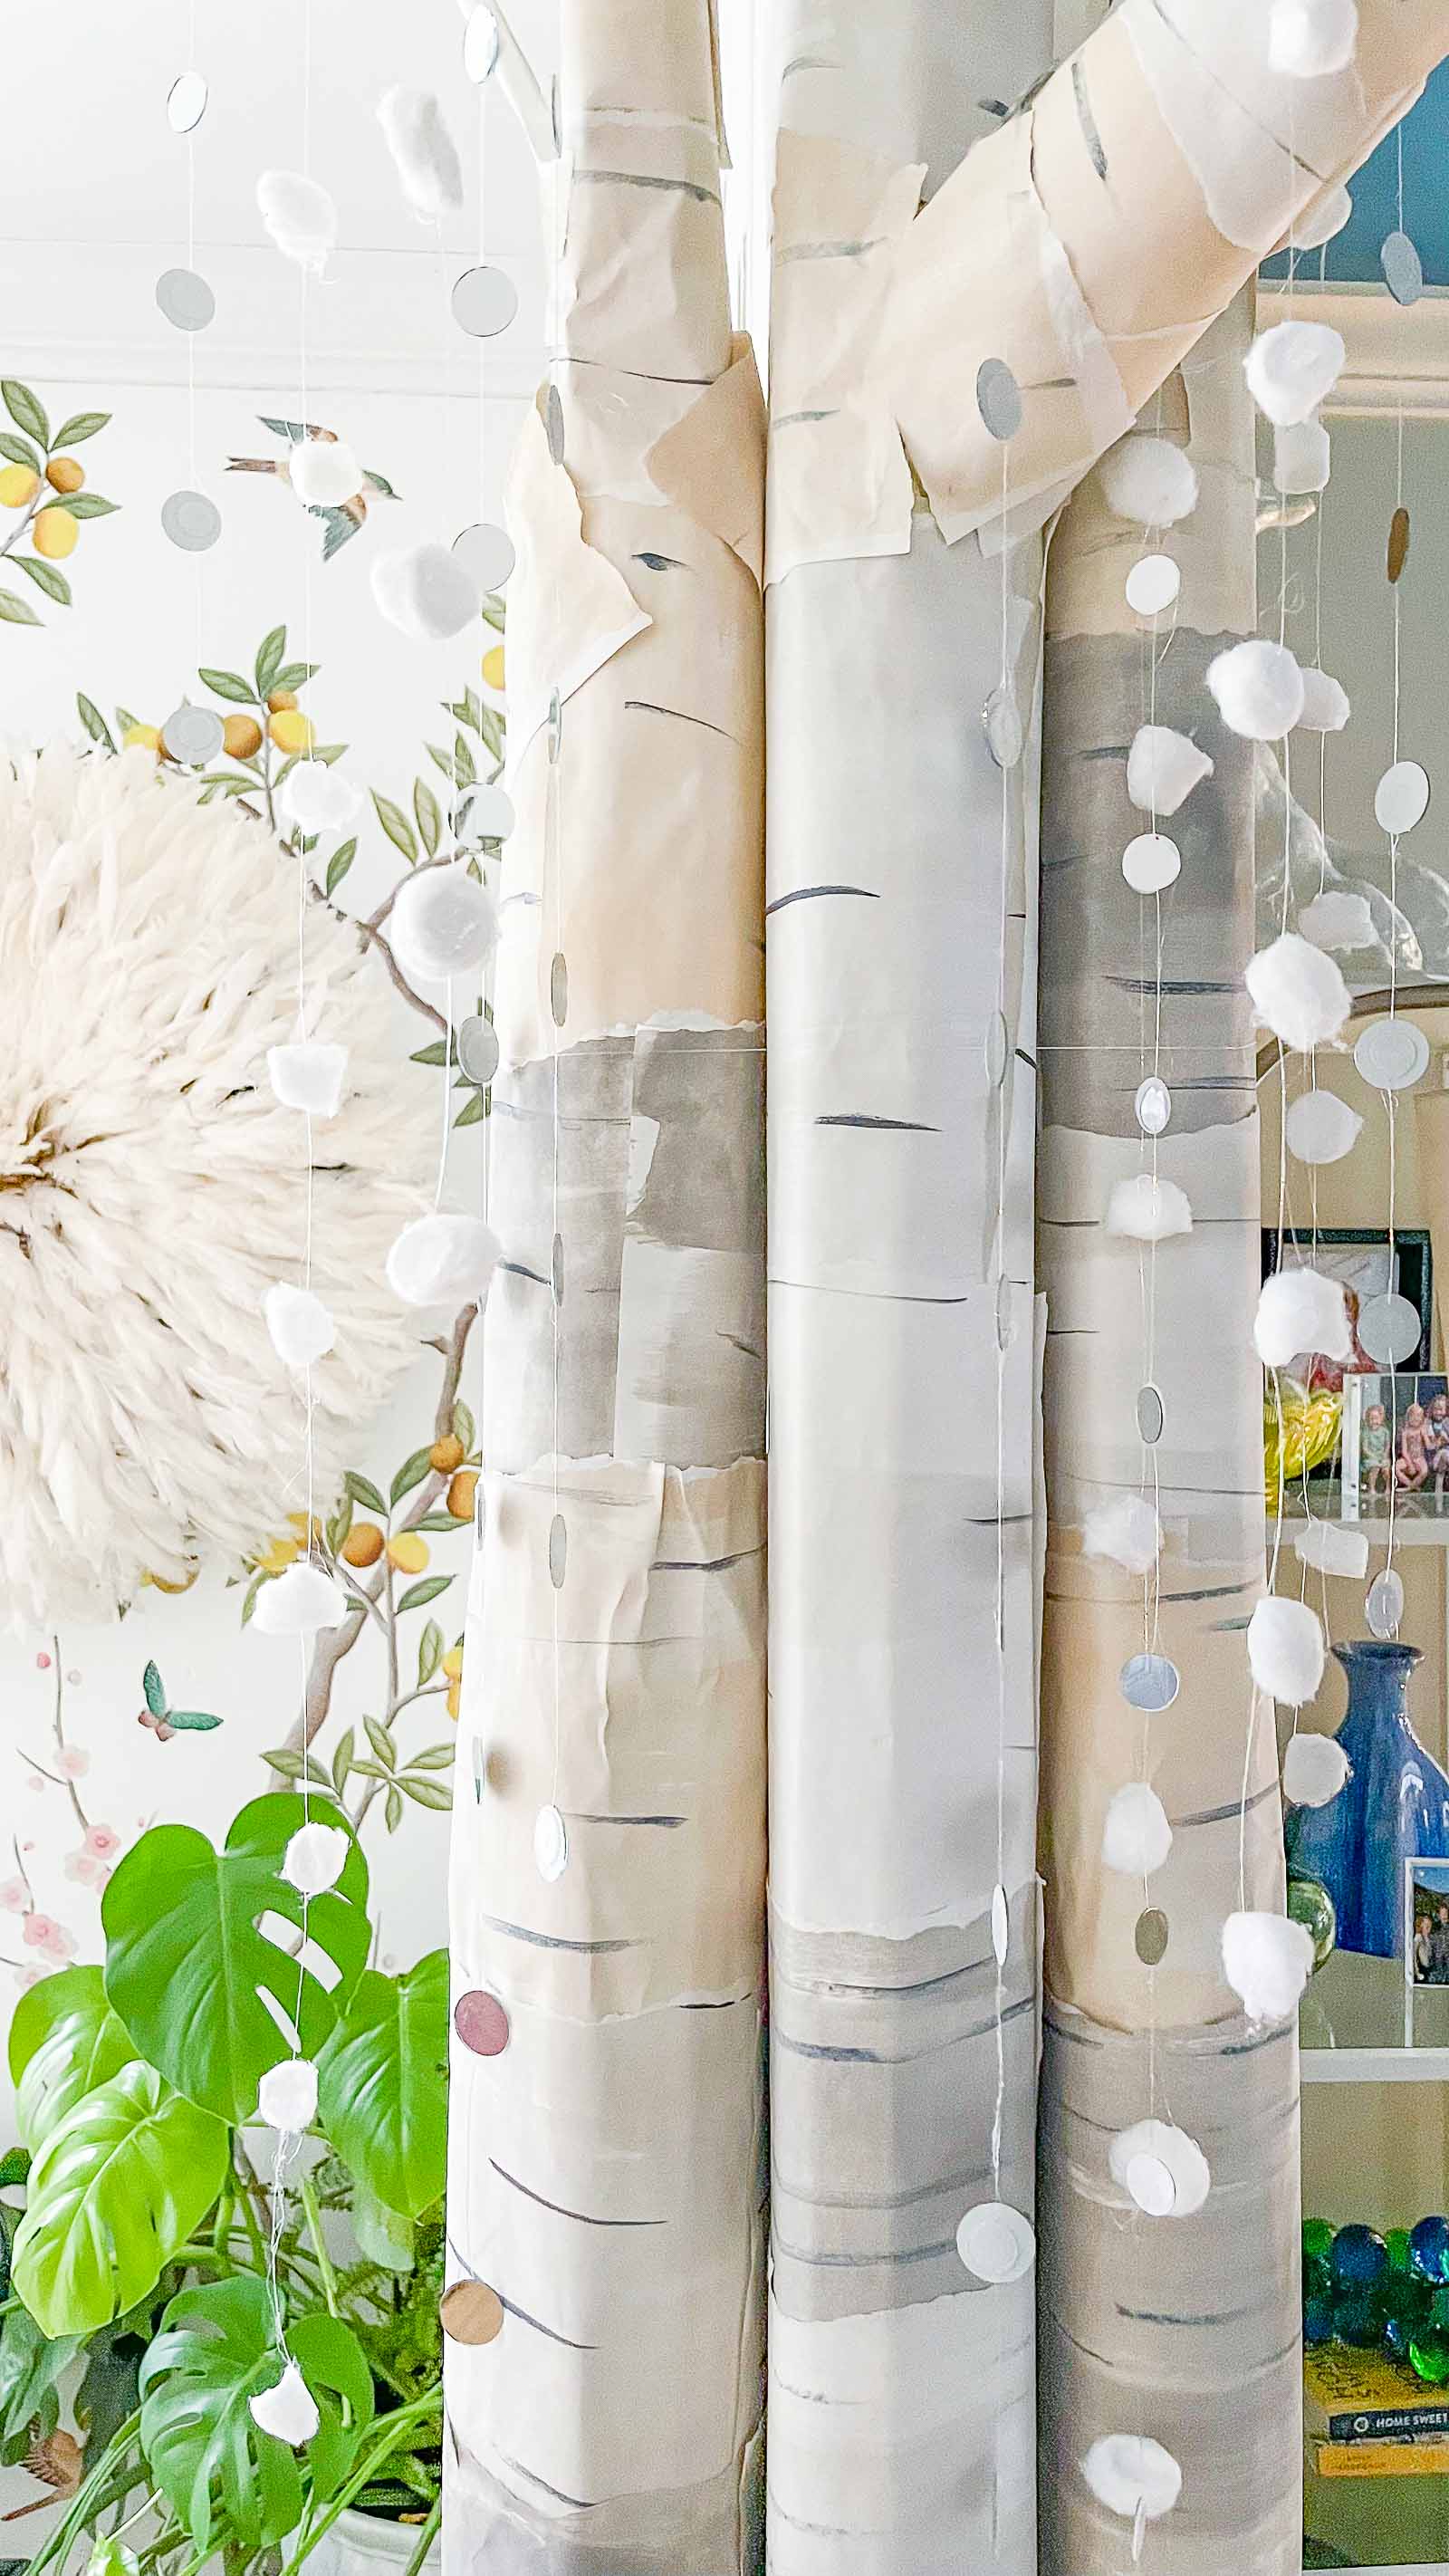
Glue the garlands onto the branches and limbs of the birch trees and trim accordingly.
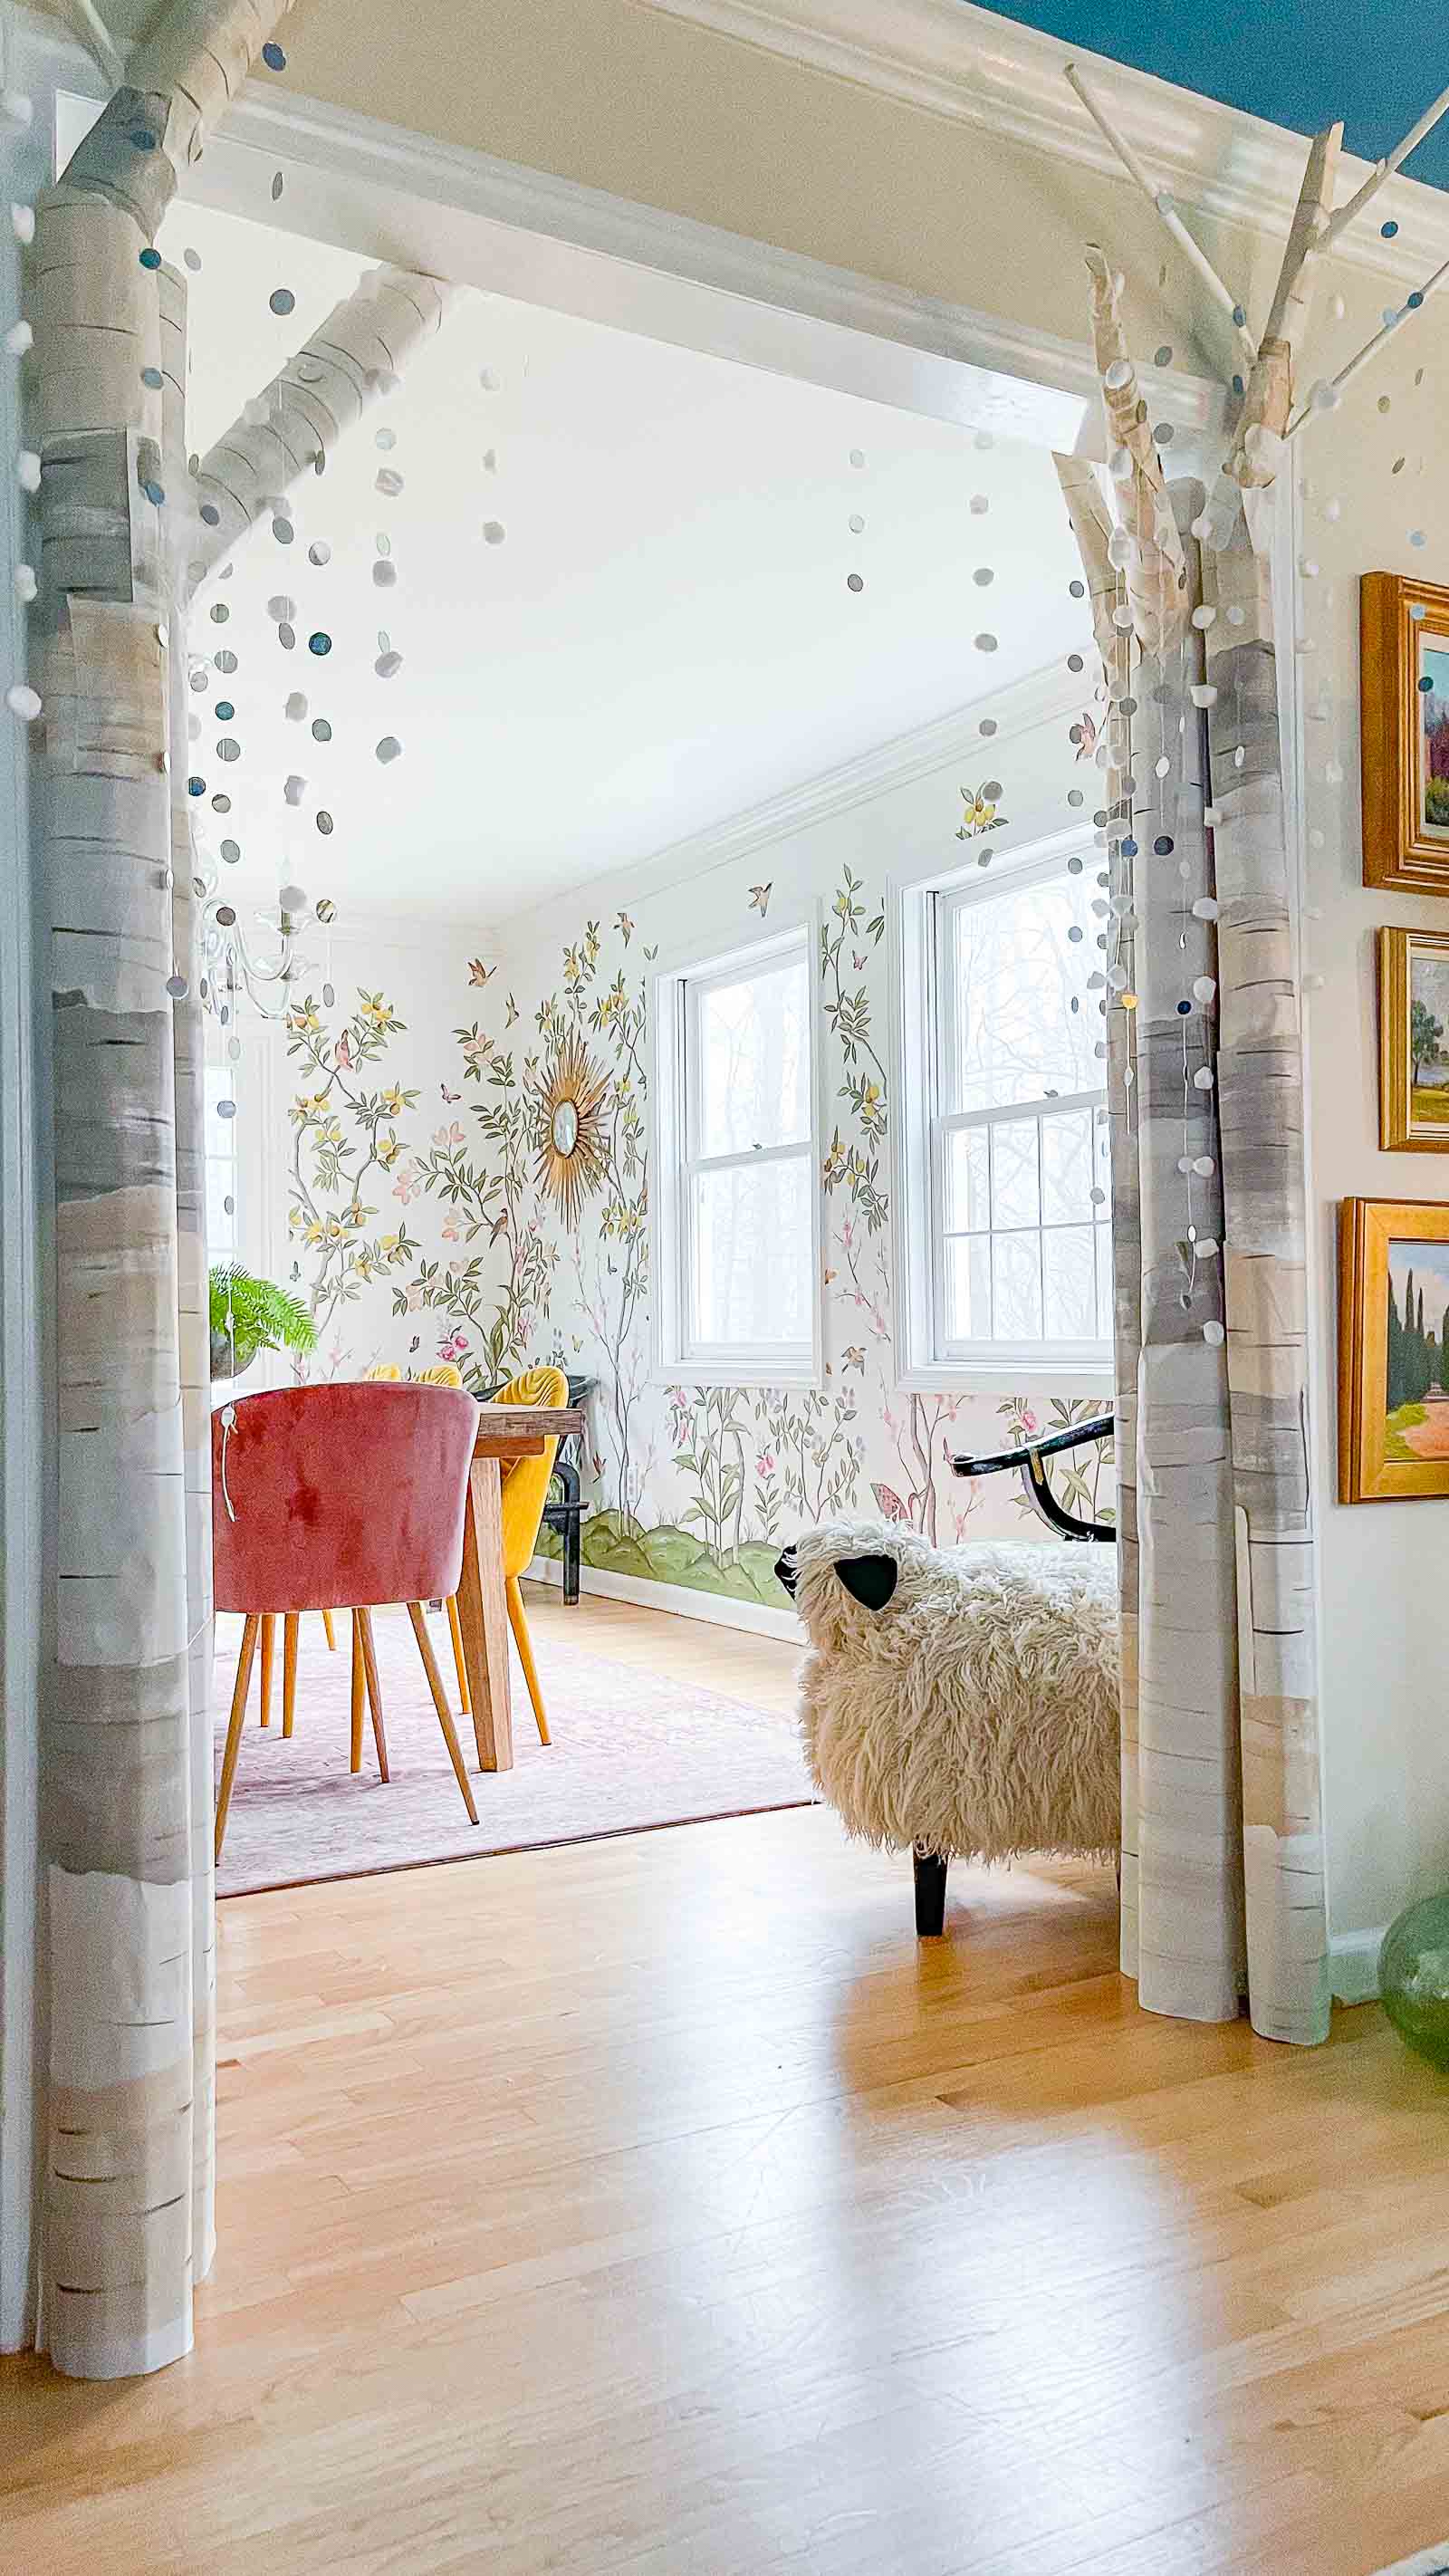
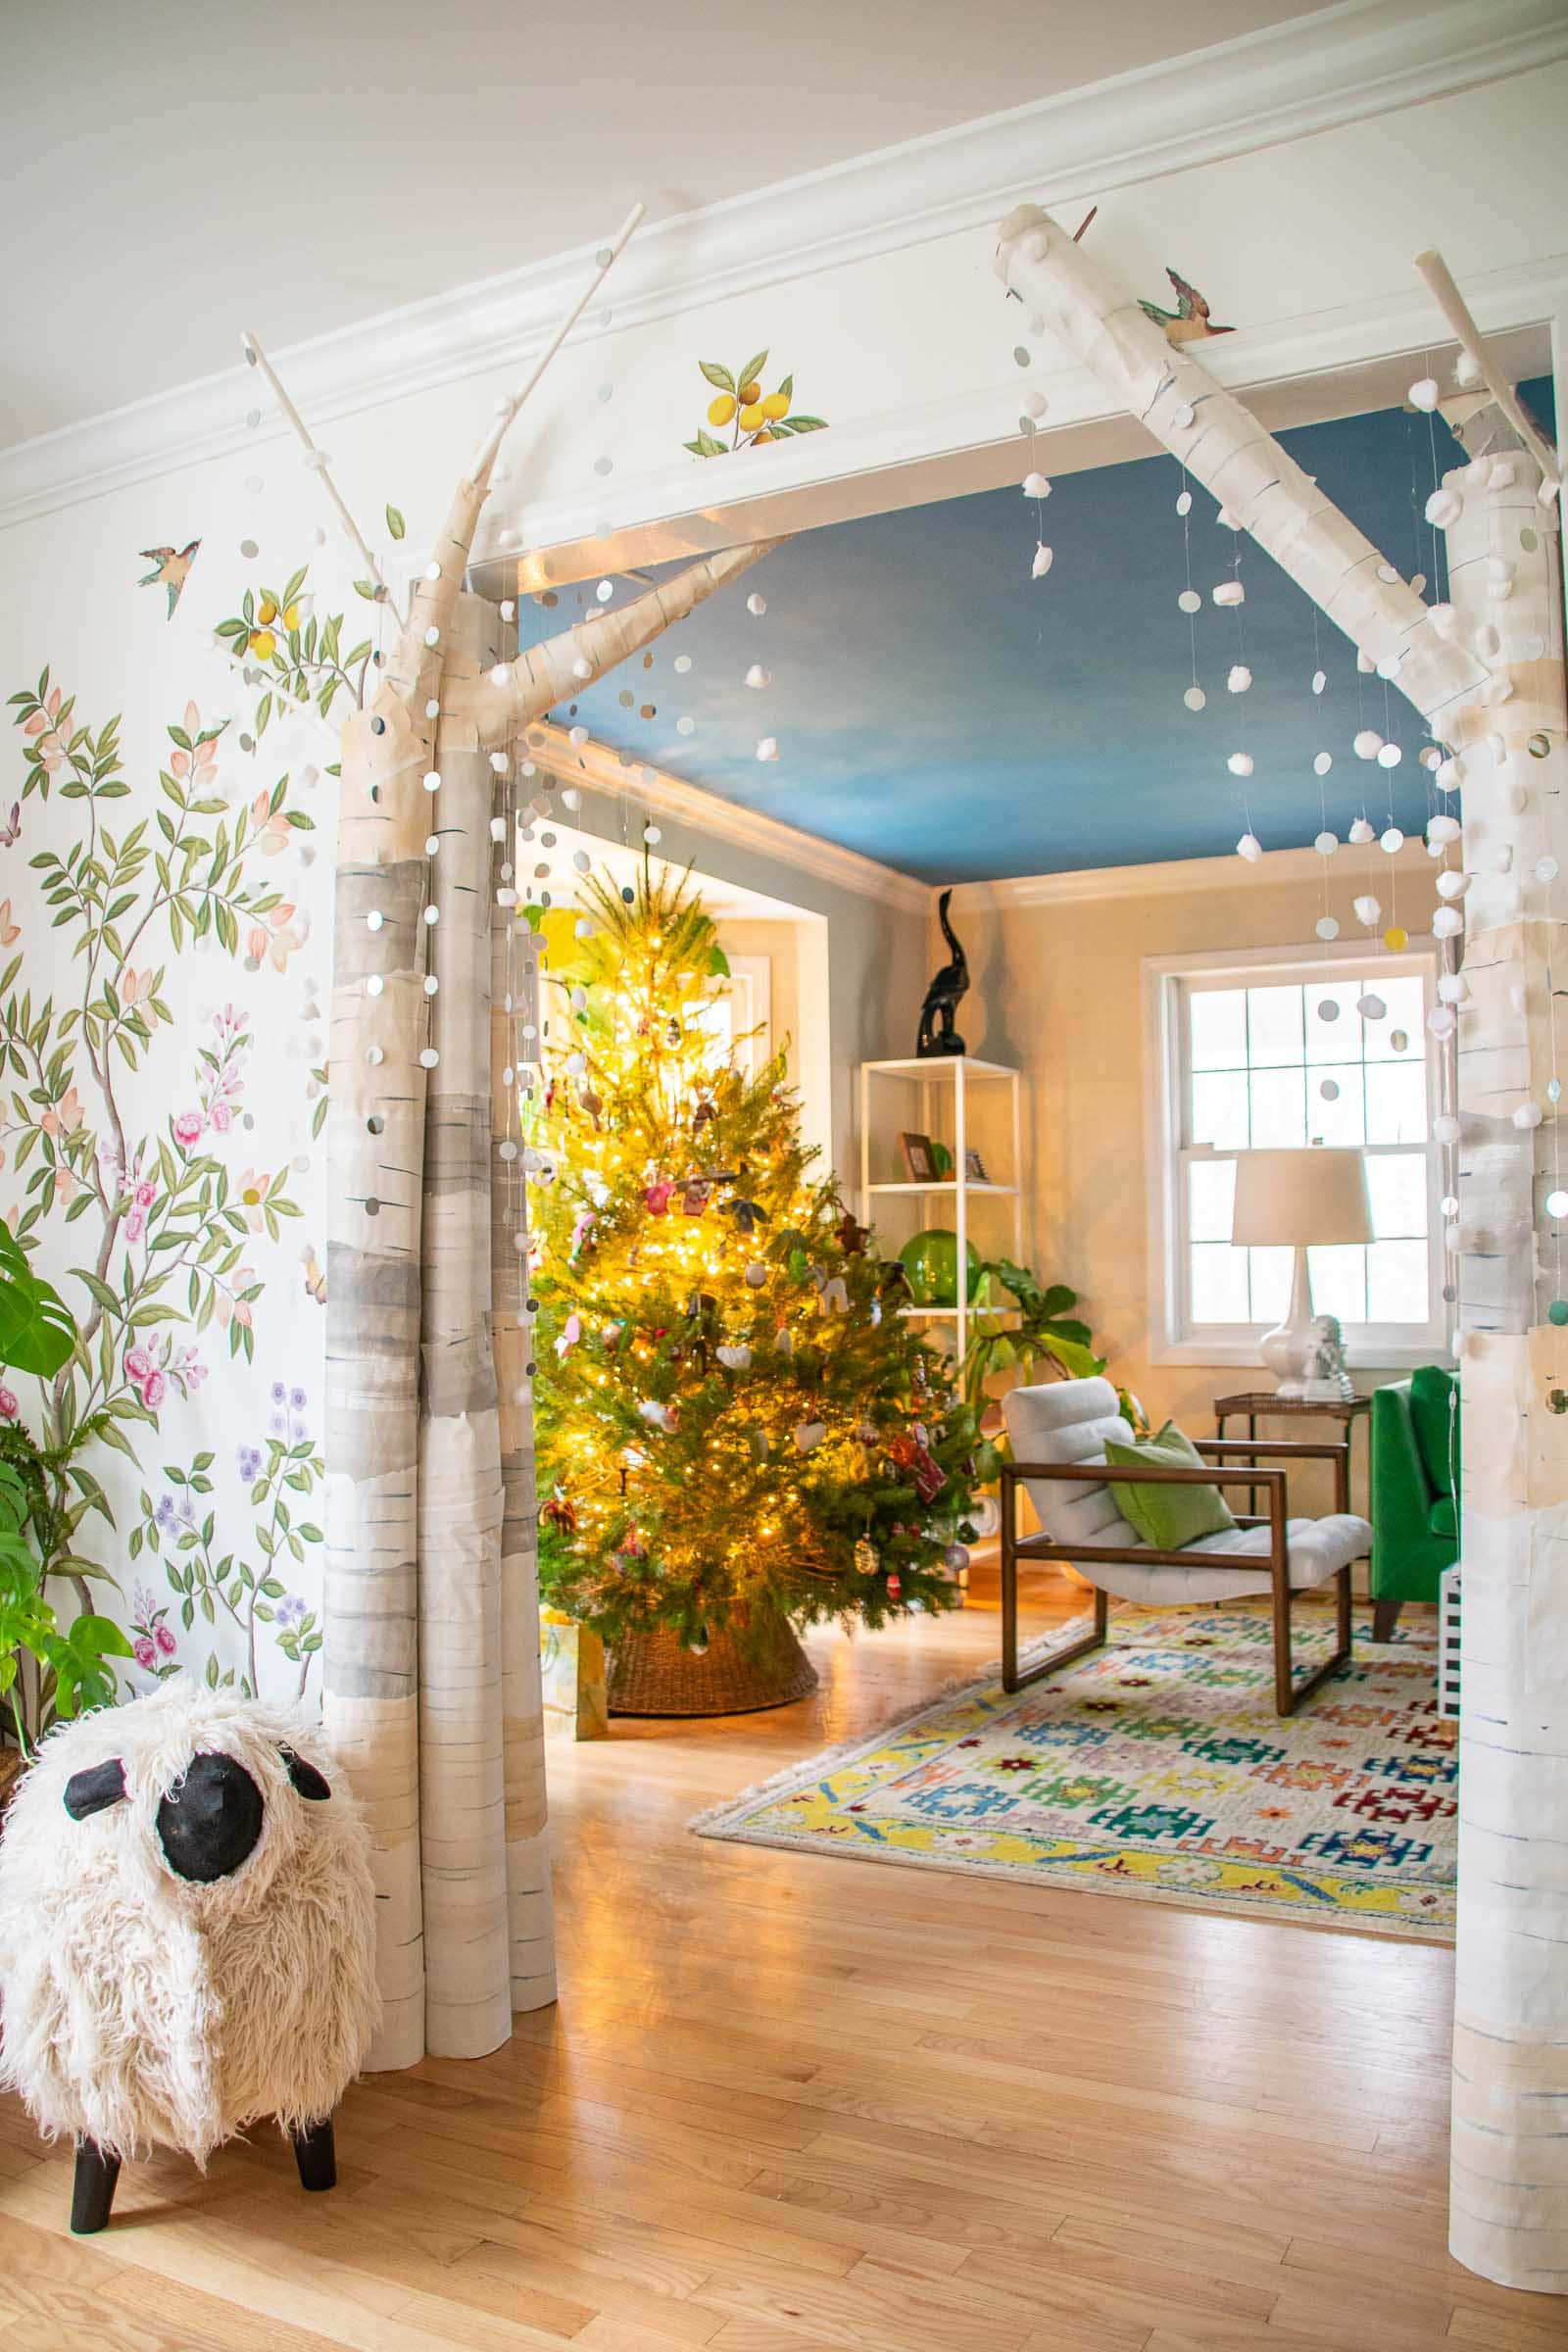
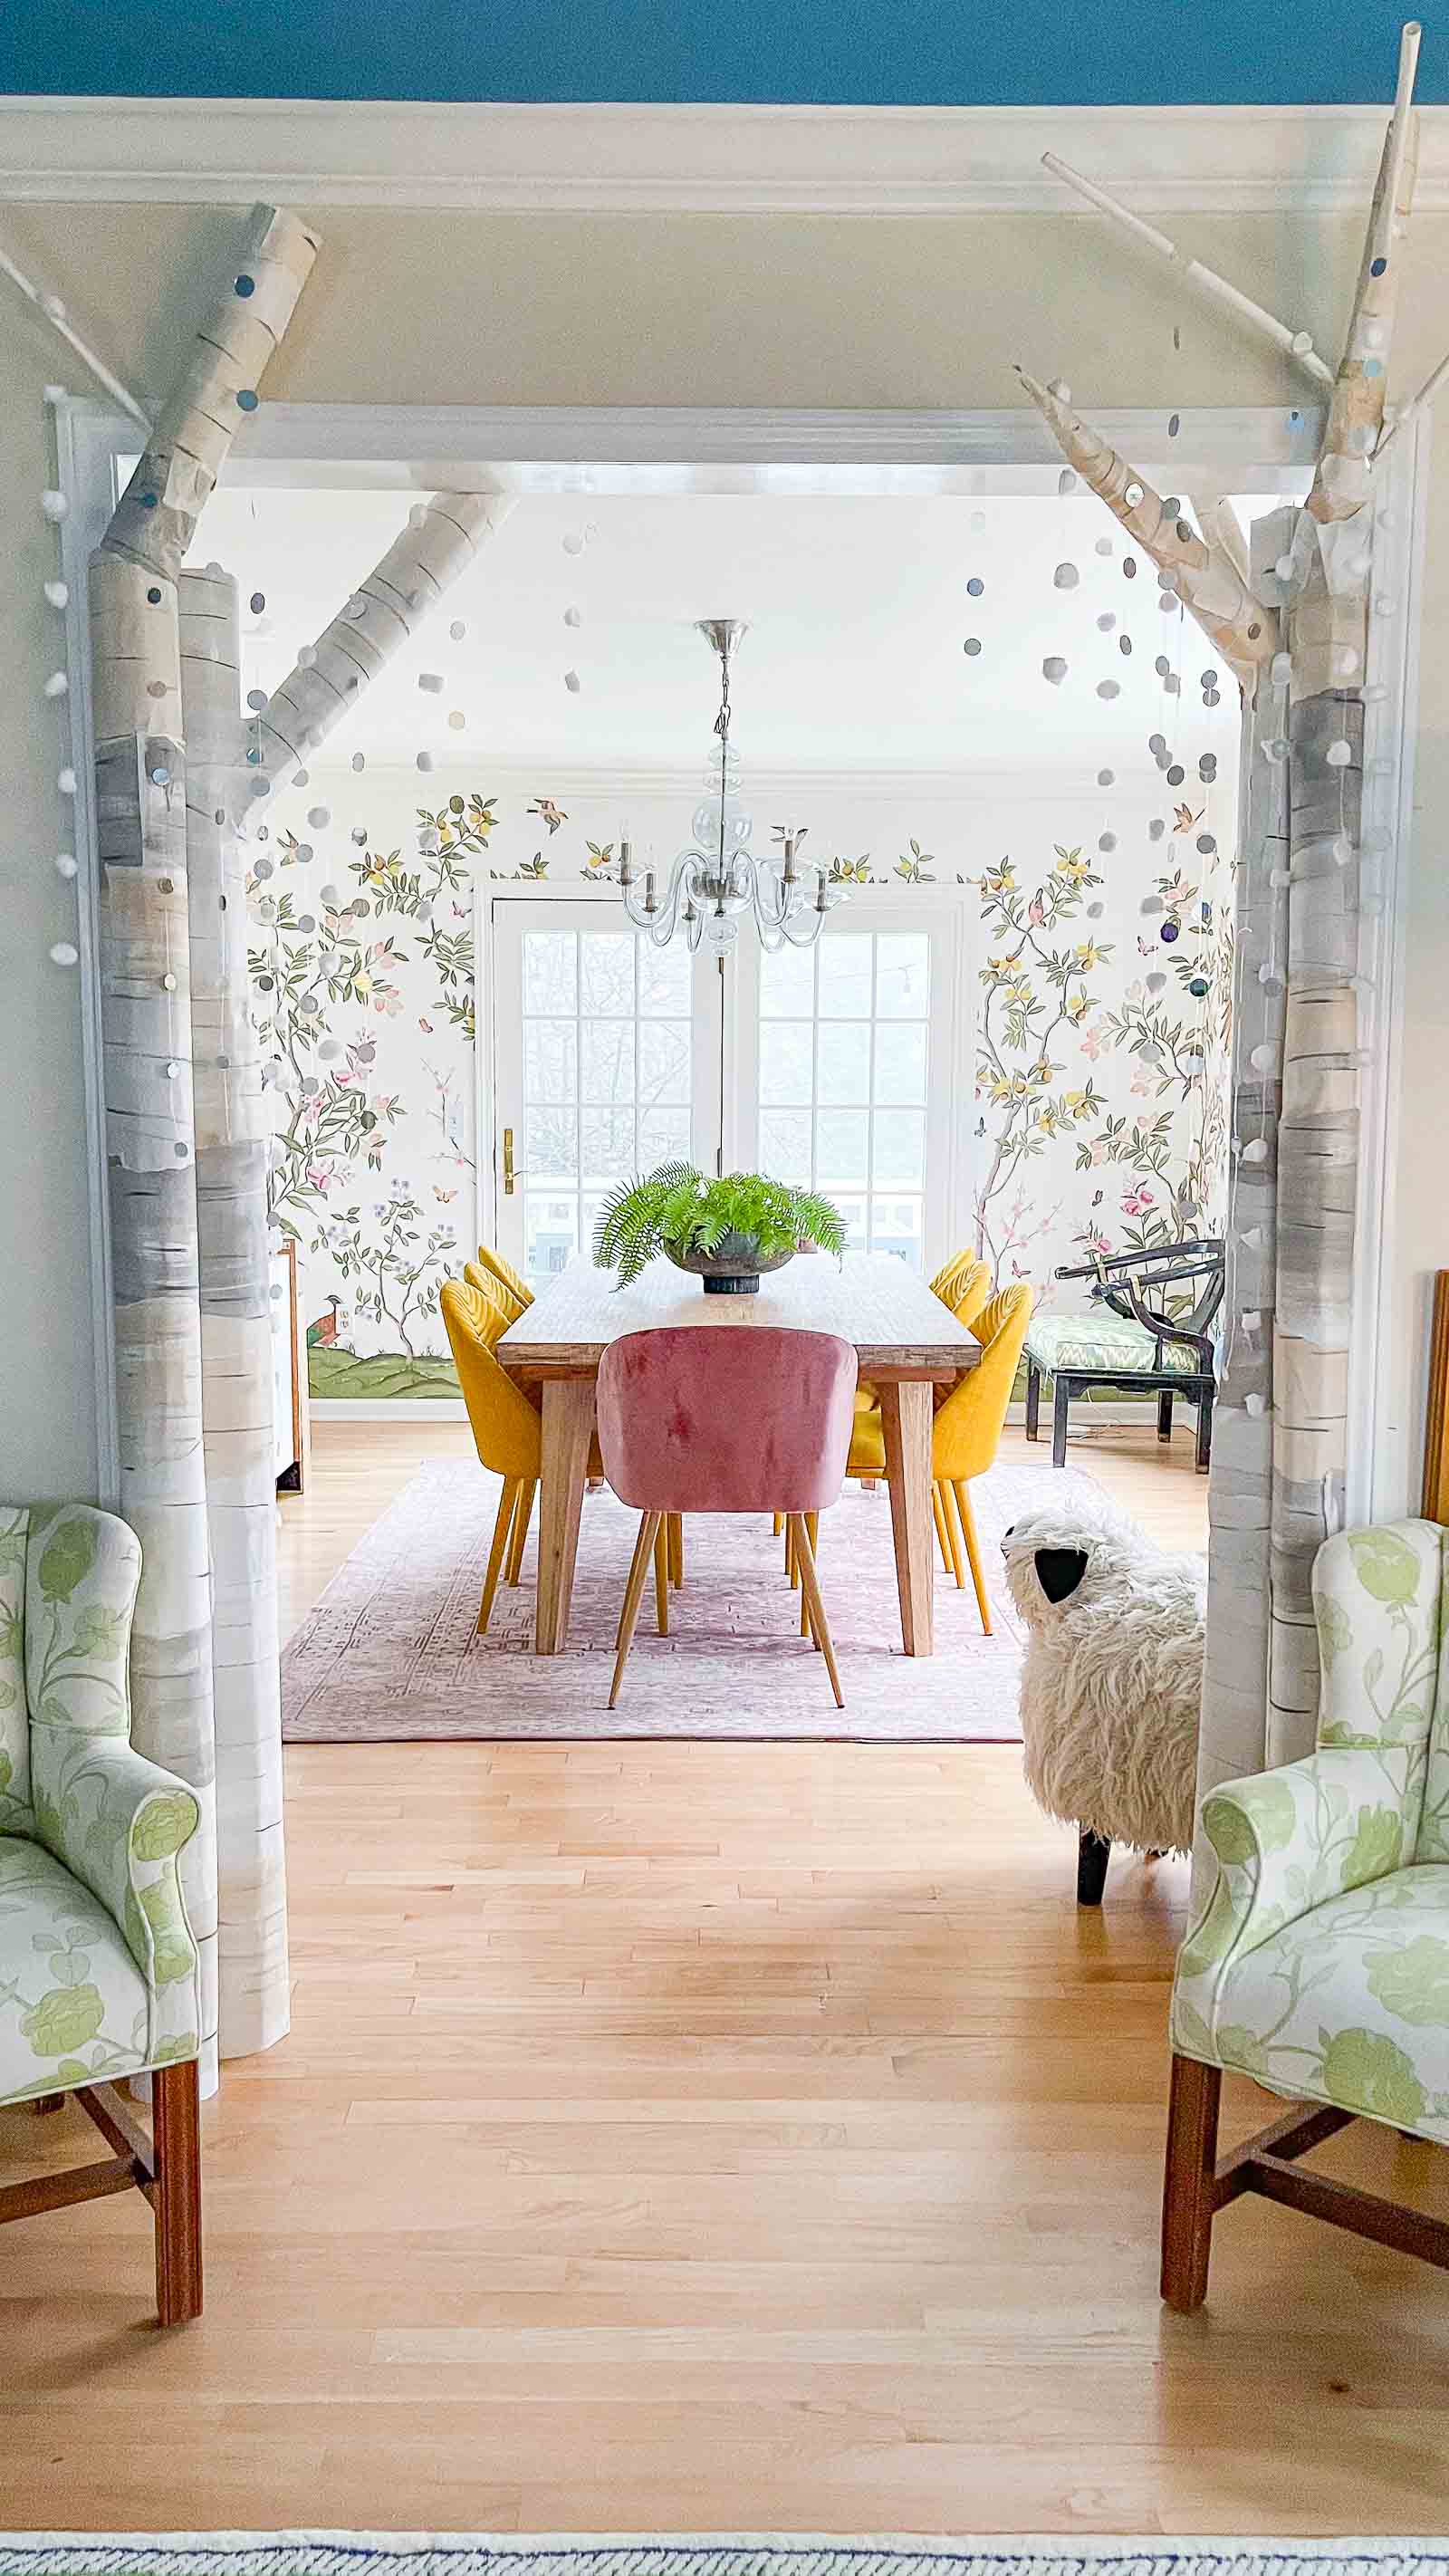
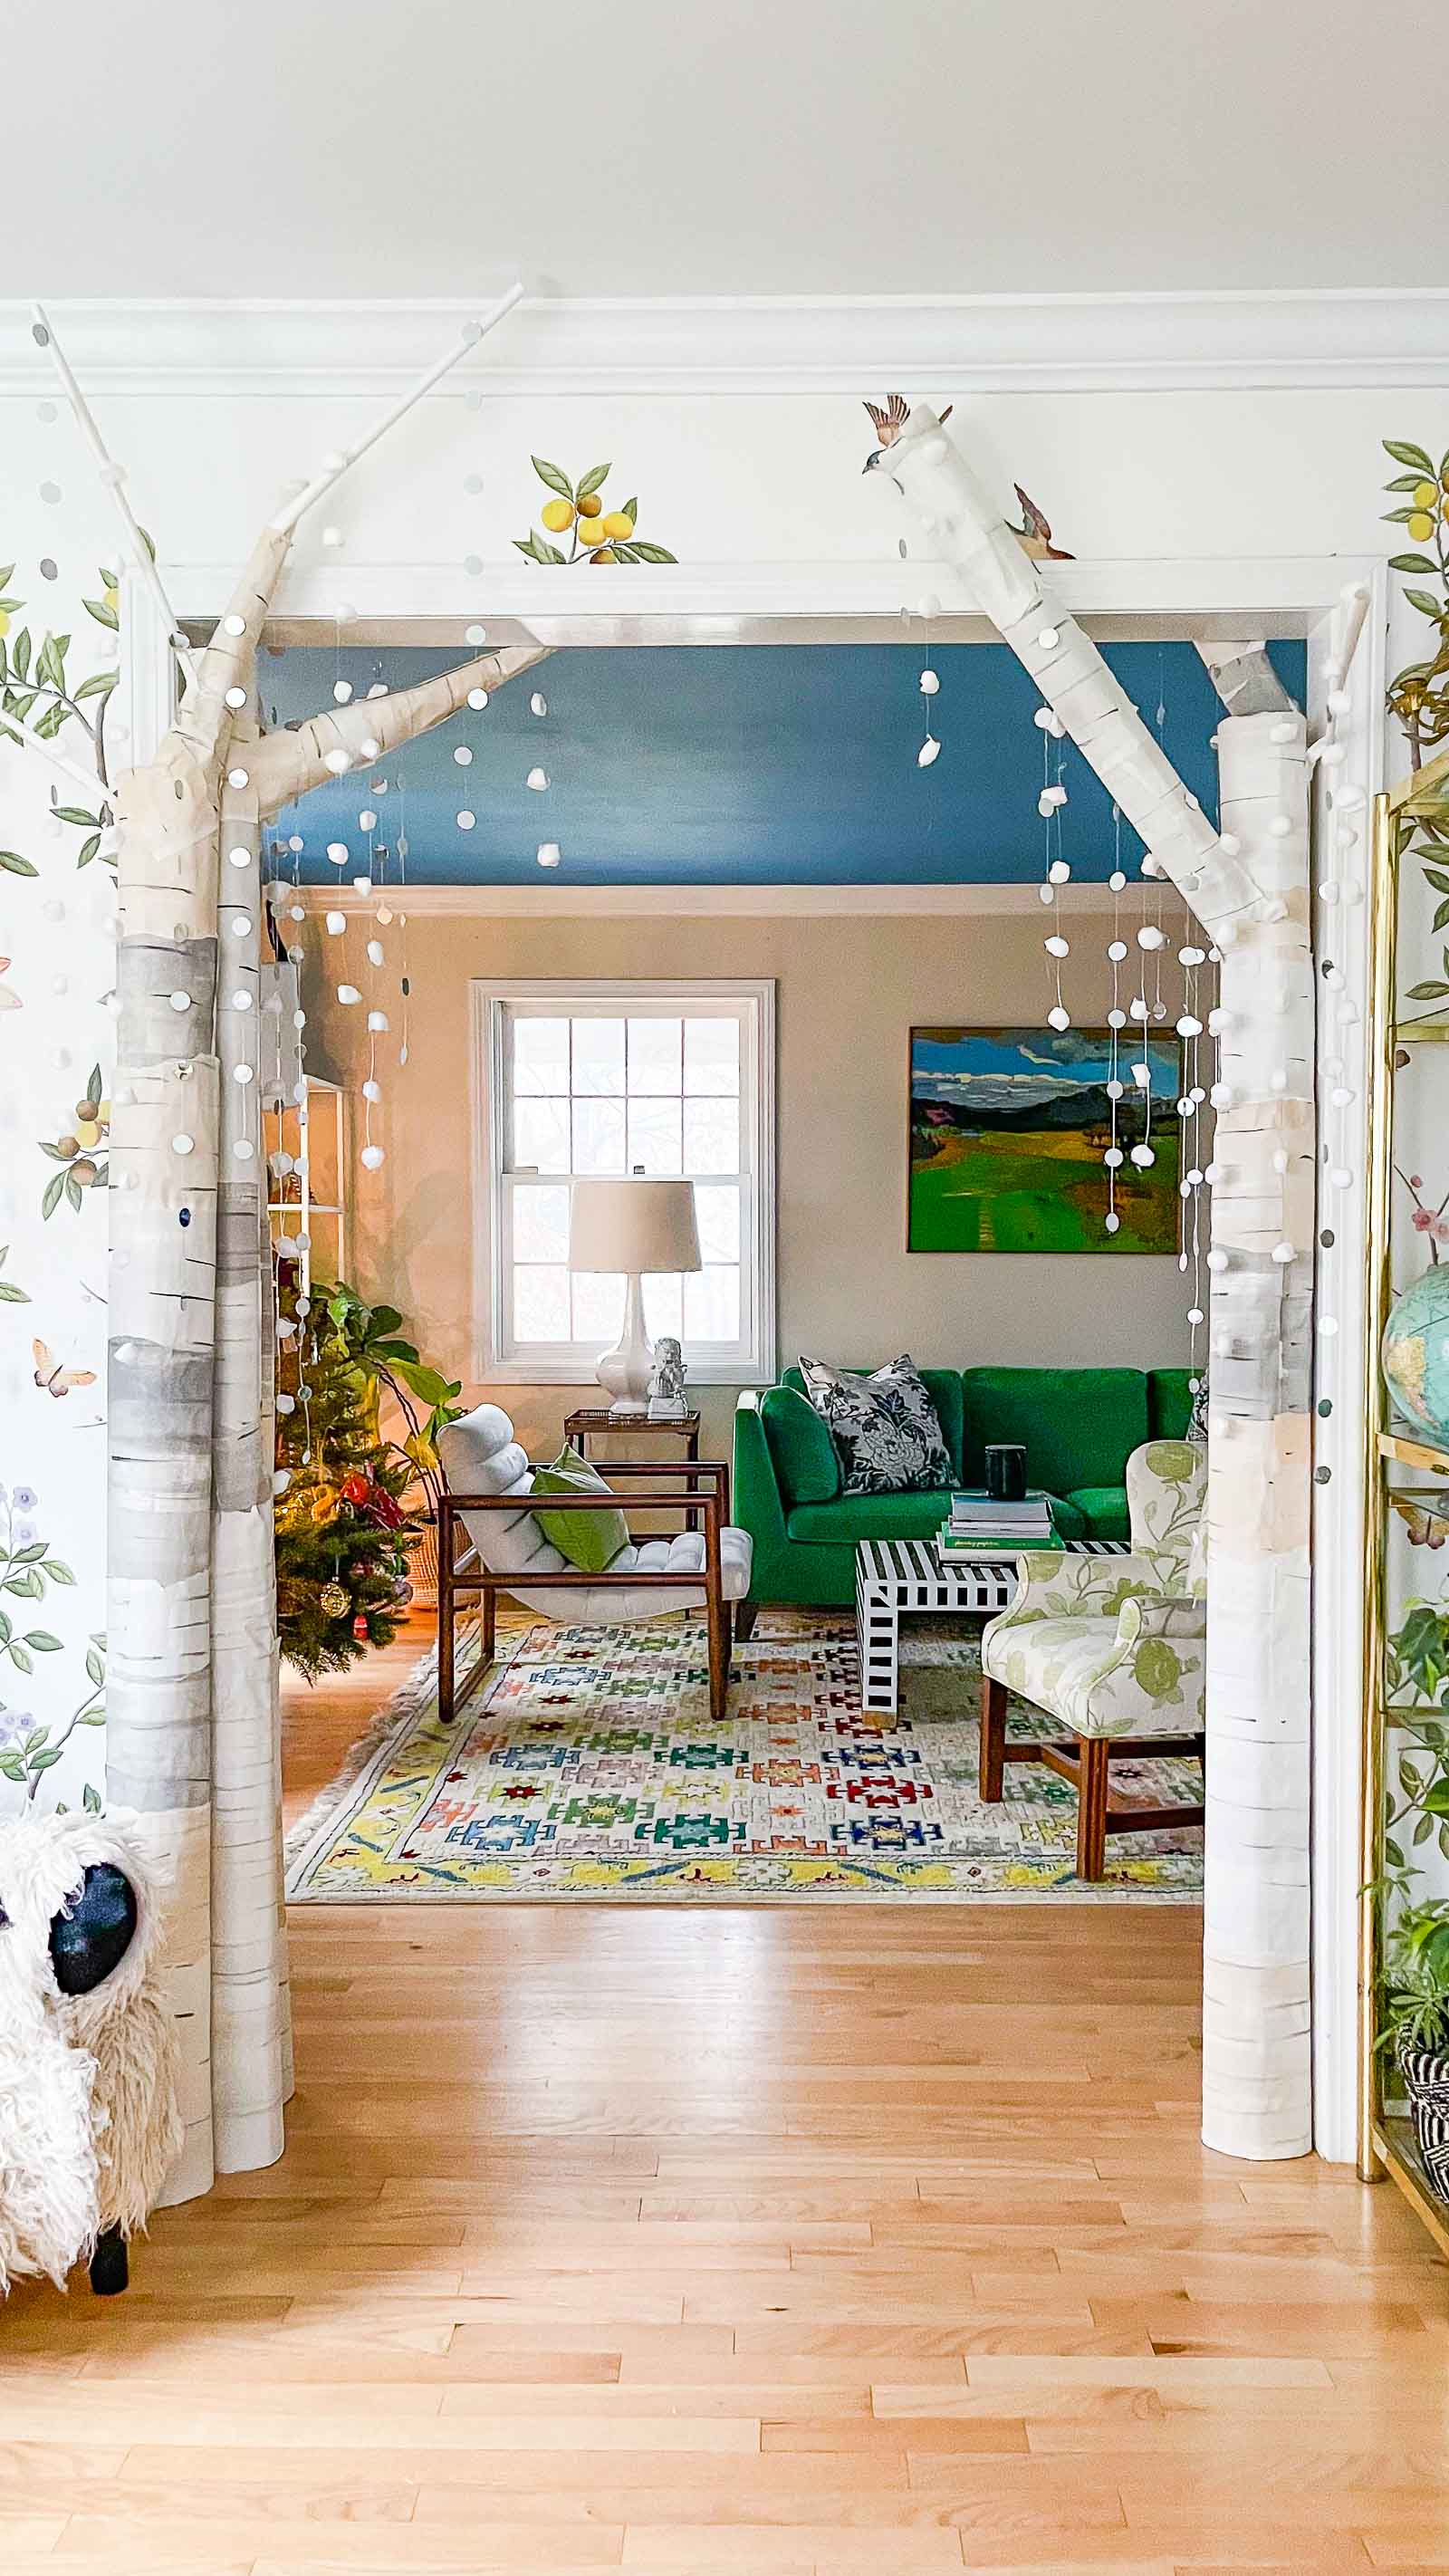
That’s it! It may feel like lots of steps, but I can assure you each step is super easy and ends up going faster than you might think. I love the way these birch trees look on either side of the cased opening between our dining room and our living room, but these would be beautiful in lots of places, for lots of occasions. Leave me a comment and let me know if you try this and where you put your birch trees!
Materials:
- Cardboard
- Utility knife to cut cardboard
- masking tape
- glue gun
- craft paper
- craft paint/ brushes
- Wire
- Round mirrors
- Cotton balls
- Monofilament
- Silicone Mat
One last time… here are the ones from the White House:
And here’s my homemade DIY version:


I was decorating that year too and this is the project I worked on! Loved it and love seeing your take on it. Nicely done.
That was the MOST beautiful space!!!!
How did you keep the trees standing?
The cardboard was rigid enough to stand on it’s own… I used some monofilament tied around them and tacked to the door frame to keep the trunks in place.
I work at a health center. We are decorating our individual spaces in a “winter wonderland” theme. I am going to try to recreate these gorgeous birch trees to surround the podium at which I stand. Thank you for this lovely inspiration.
This makes my day!!! Yay!! xx