
How to Strip Paint From Wood Furniture
Psssst… this post *might* contain affiliate links: see my disclosure here.
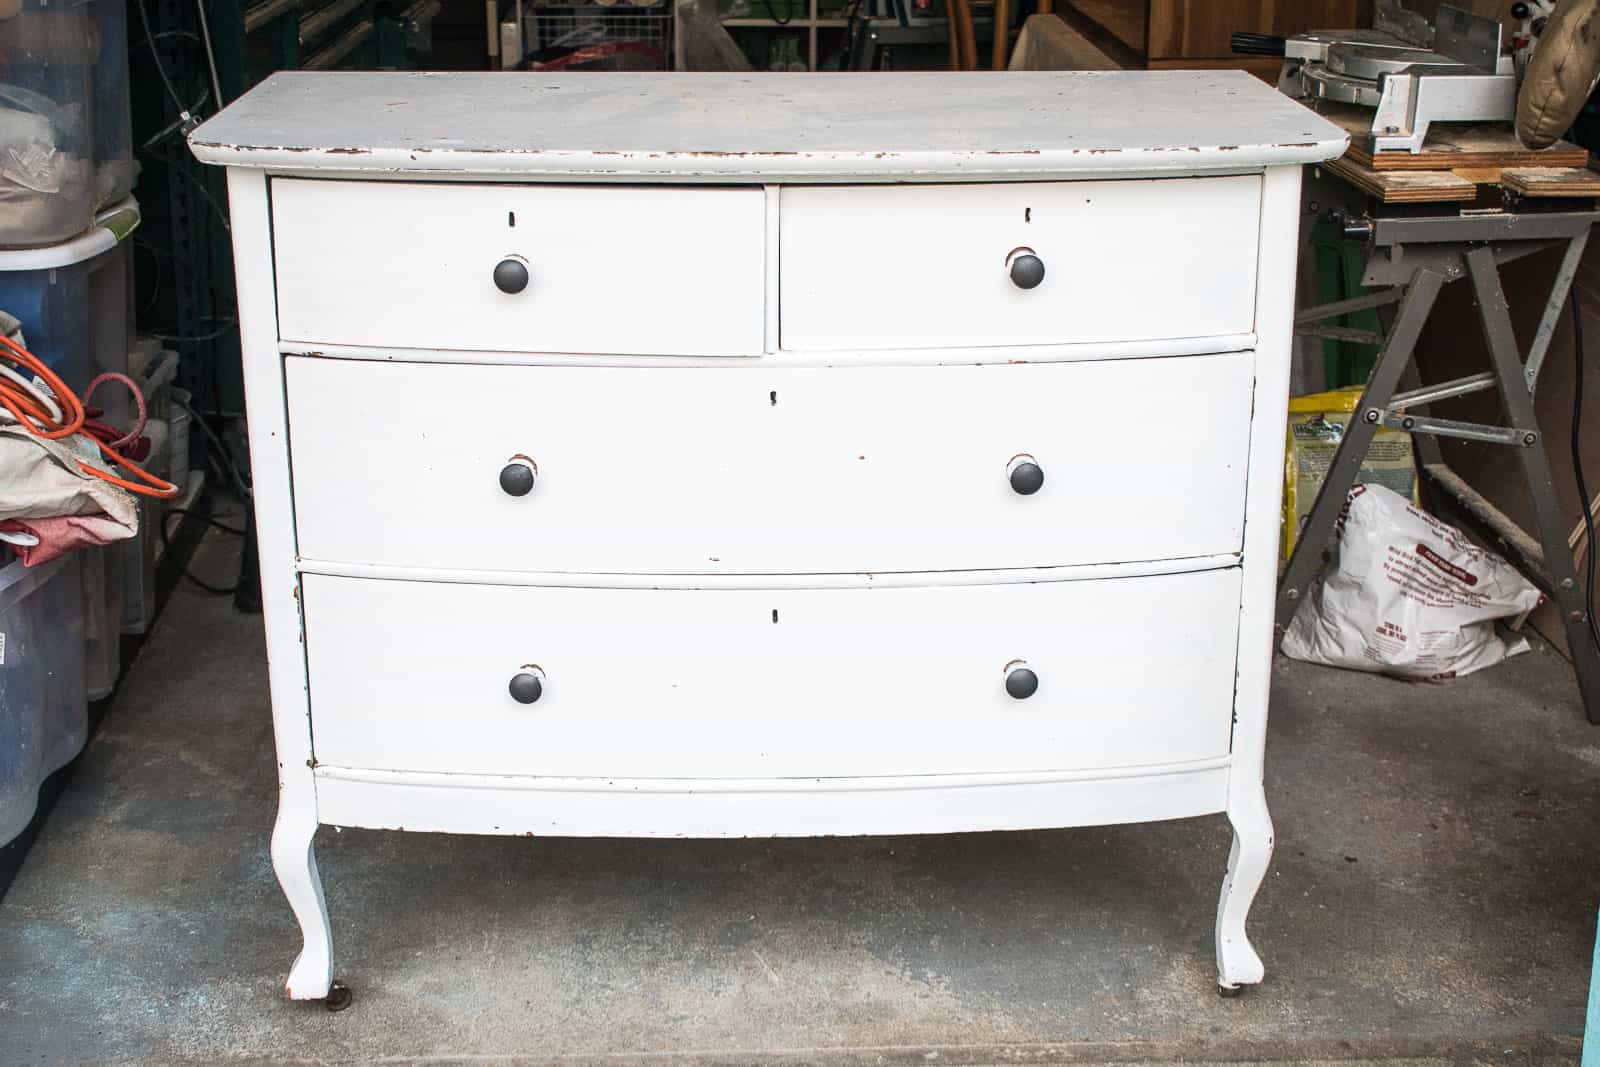
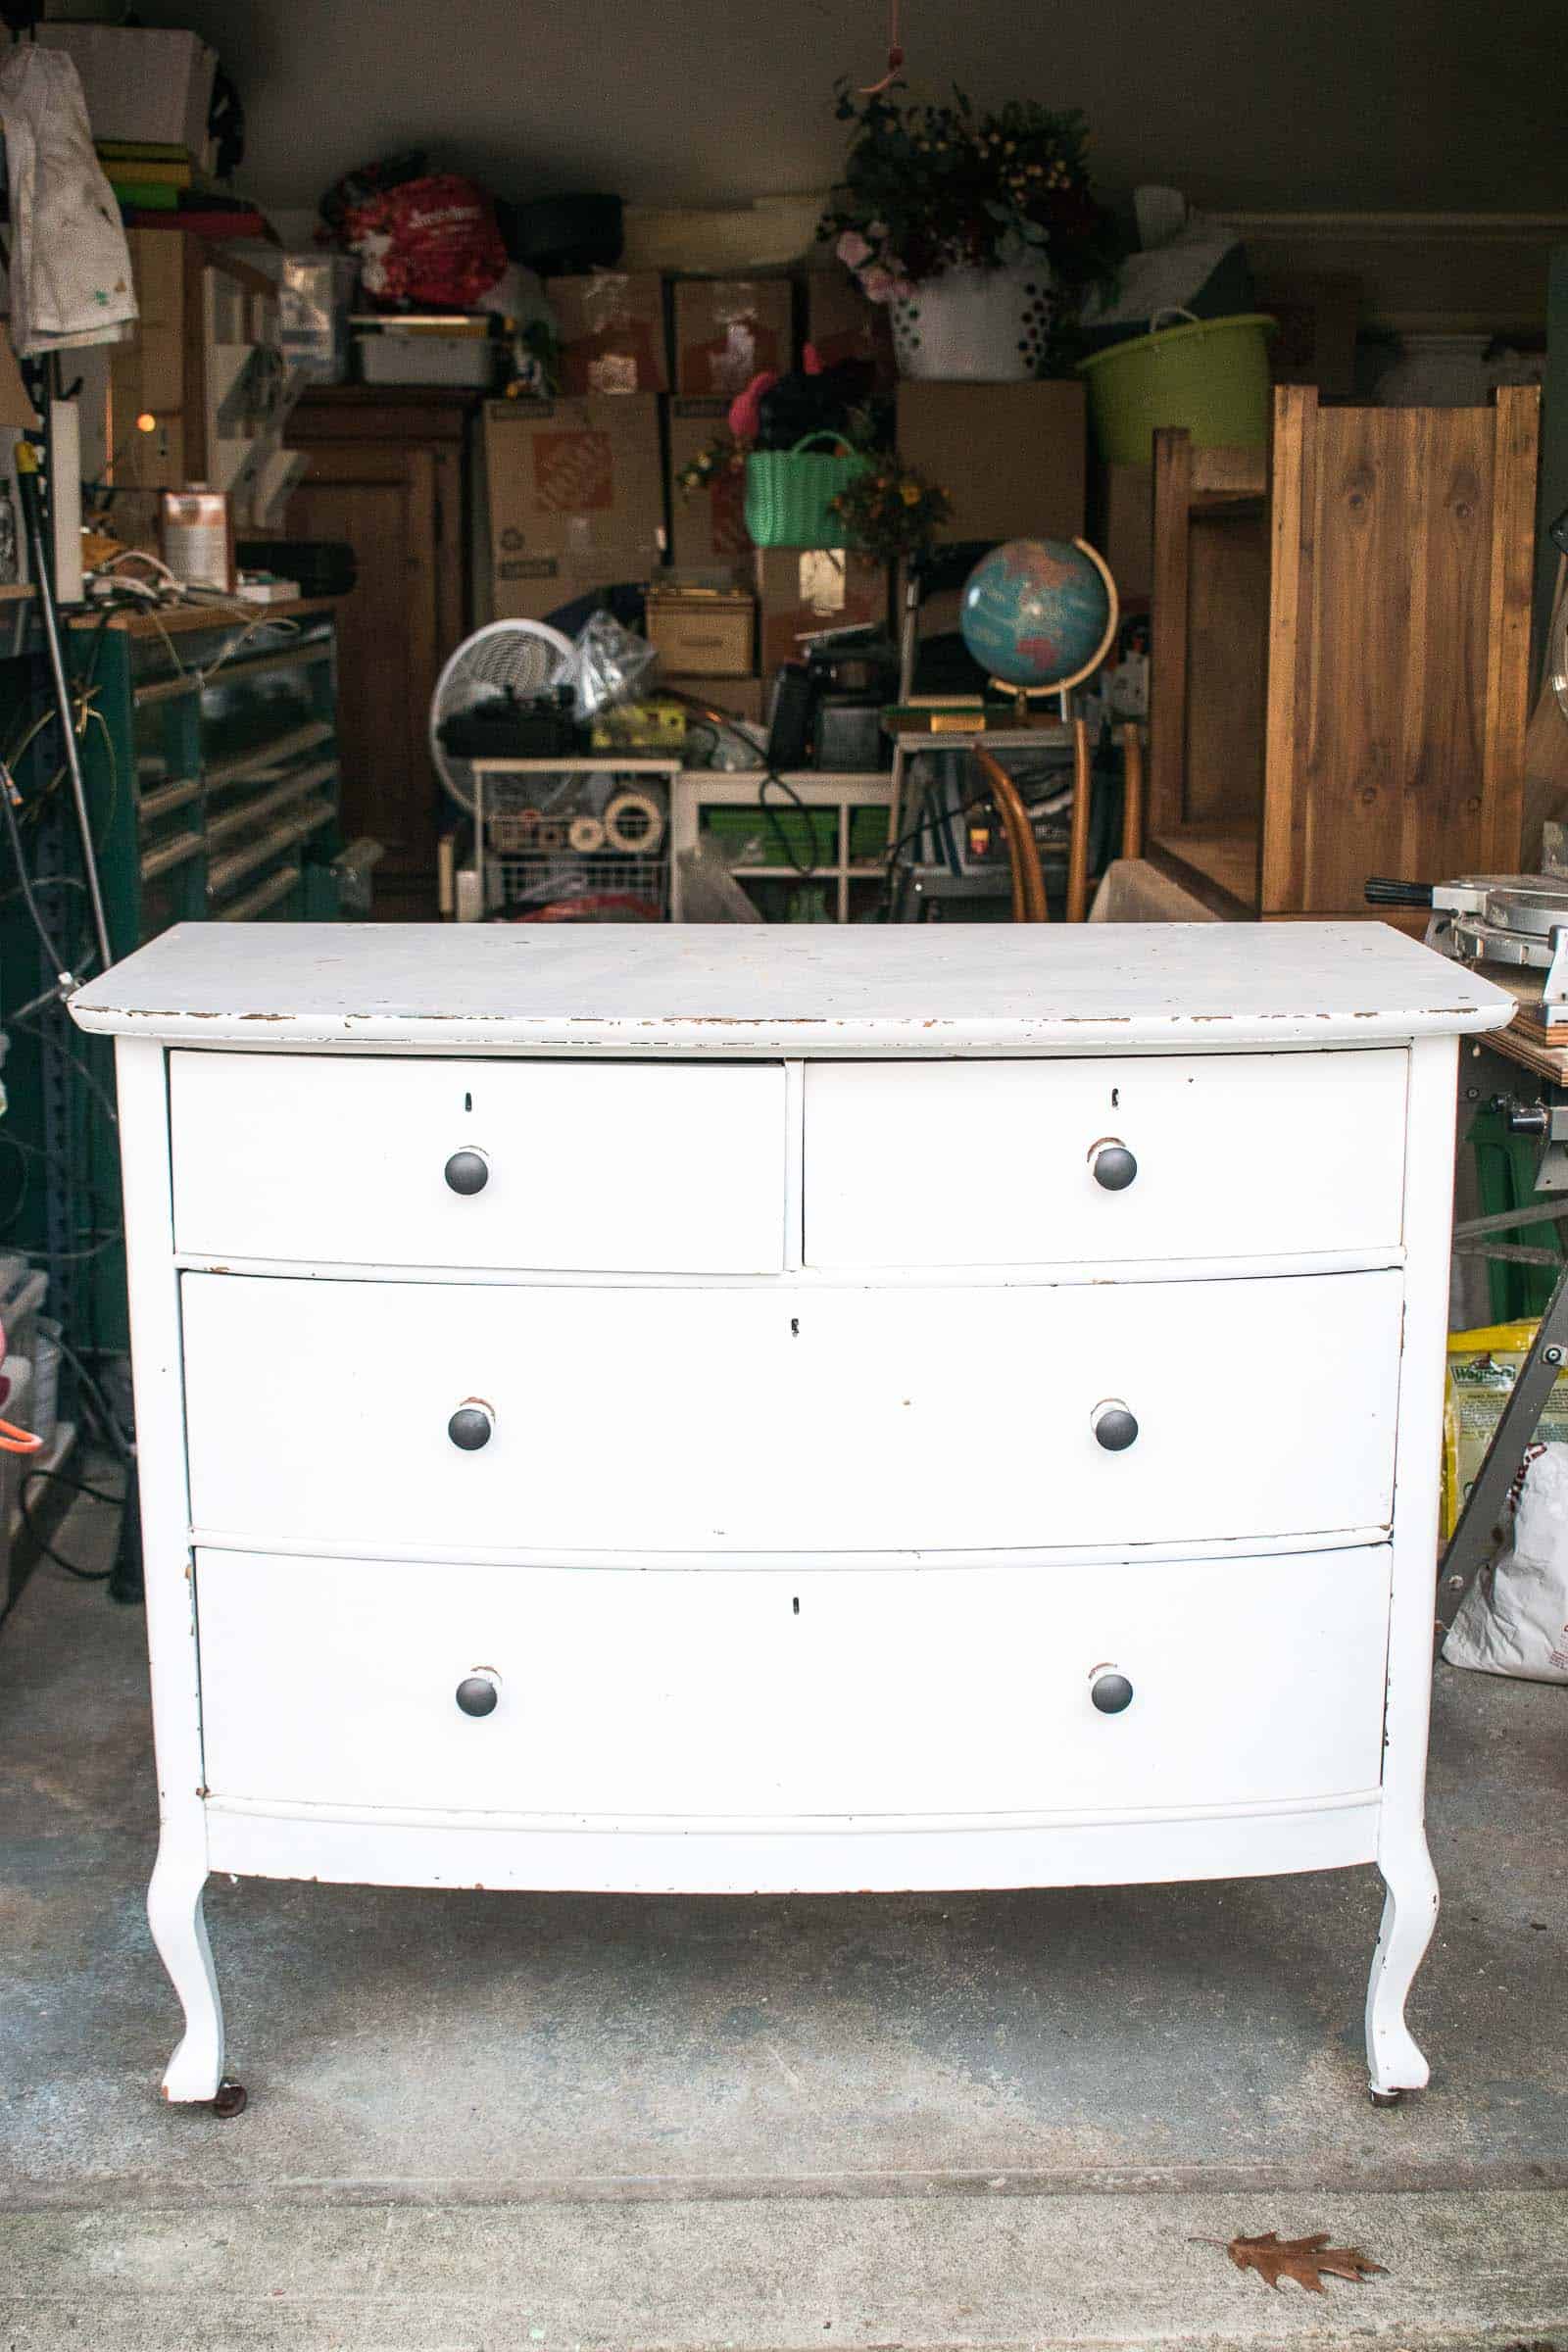
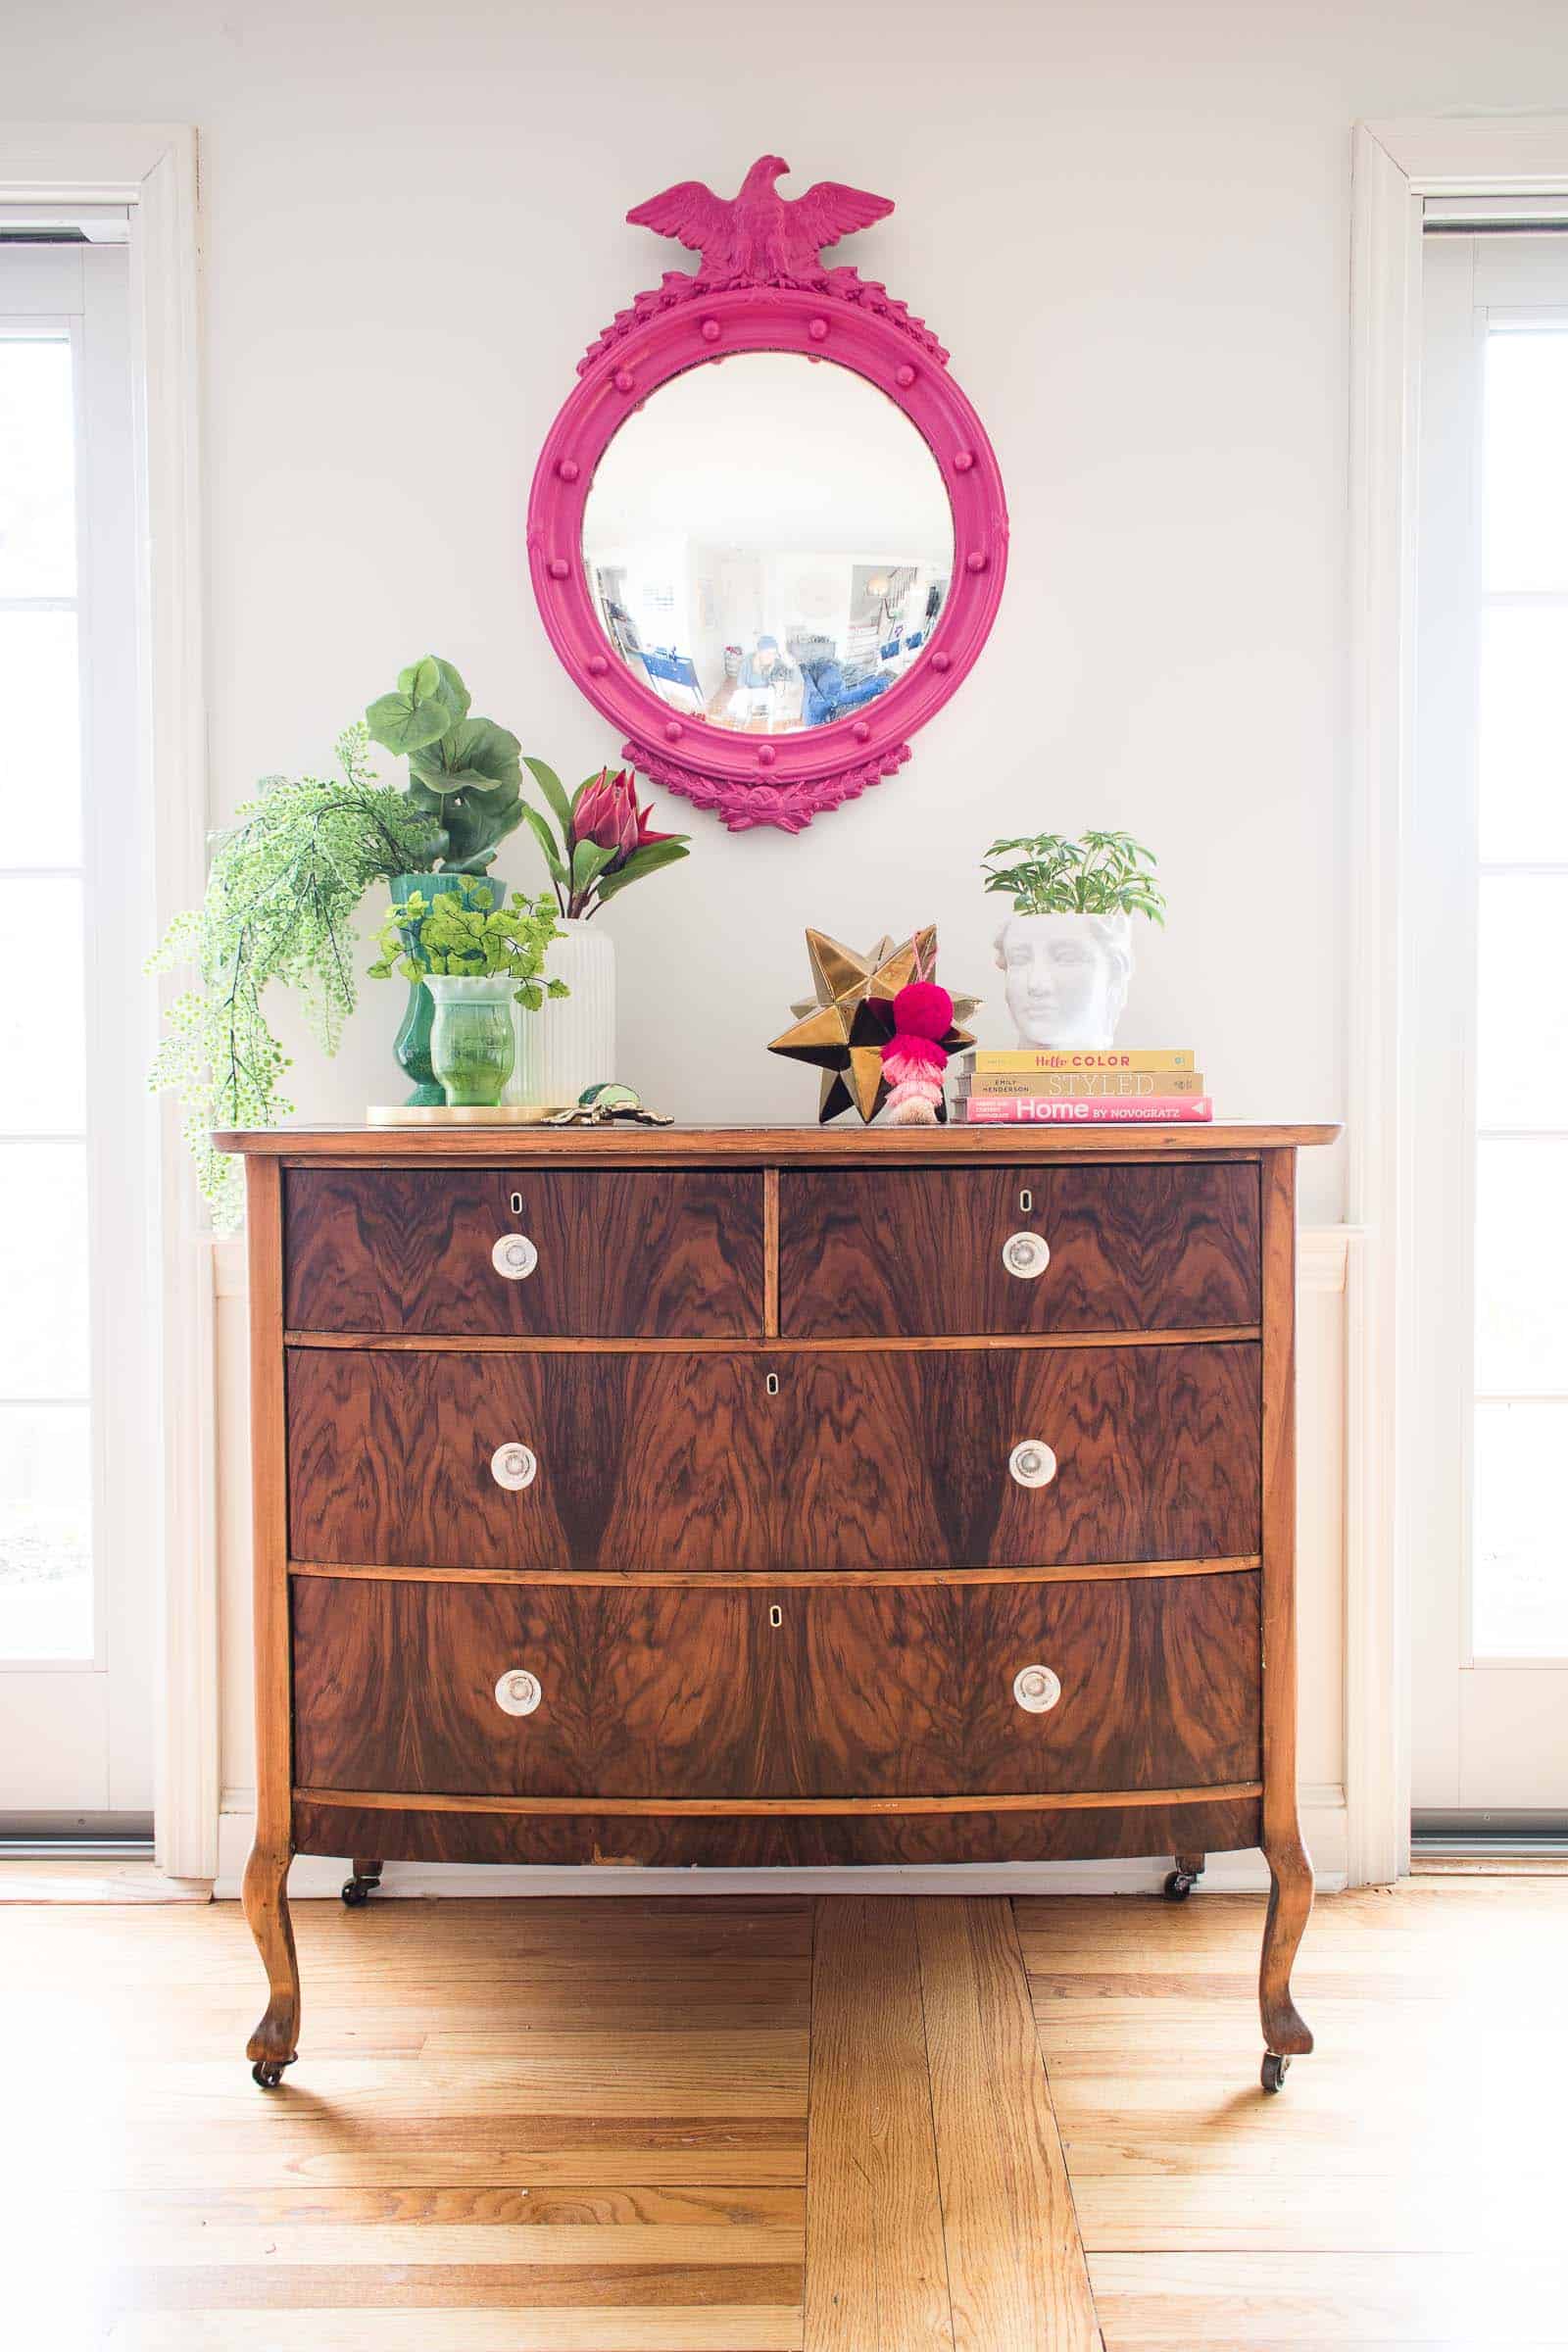
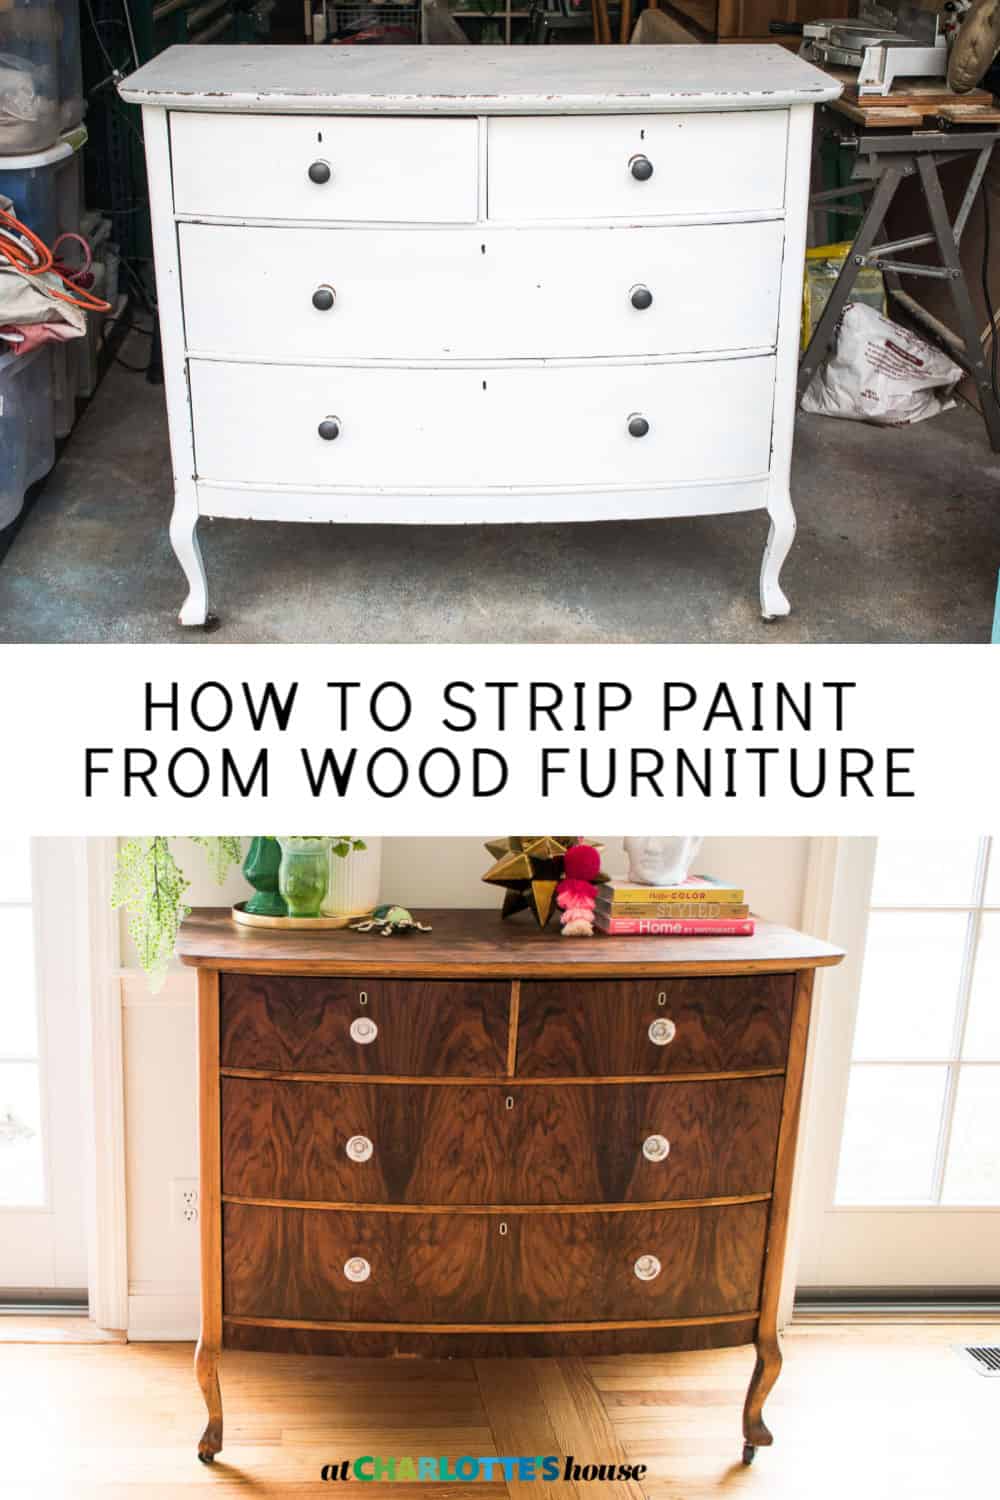
Stripping Paint from an Old Wooden Dresser
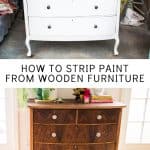
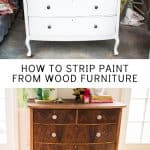
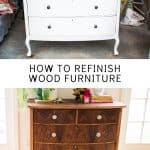
I found this old wooden dresser and stripped the paint to reveal a gorgeous wood grain veneer.

Disclosure: I’m partnering with Mohawk on this post and was excited to try some of their wood refinishing supplies: tung oil, drawer lubricant, and a Wax Wash remover to help remove wax and grime.
Shop my favorites!
I went to the Restore for a beat up piece of wooden furniture and found this dresser for $40. I could tell it was solid wood and figured it would be a nice before/ after because of the paint removal, but I had ZERO idea what I would uncover…
Step 1. Prep Your Work area
Stripping paint is a little messy and a little time consuming but it doesn’t need to be hard. Put down a drop cloth or newspapers, get some rubber gloves and a disposable paint brush. For added protection, you might want a mask, but that probably depends on what stripper you’re using and where you’re working (I recommend working outside regardless of what stripper you choose). You also will need somewhere to put the scraped paint… I used a paper bag. I started with some stripper I had in my stash and I think that maybe it had expired because you can see it didn’t work very well the first time through. I ultimately ended up using Citristrip. It’s a little less toxic, can be used indoors, and… worked like a charm.
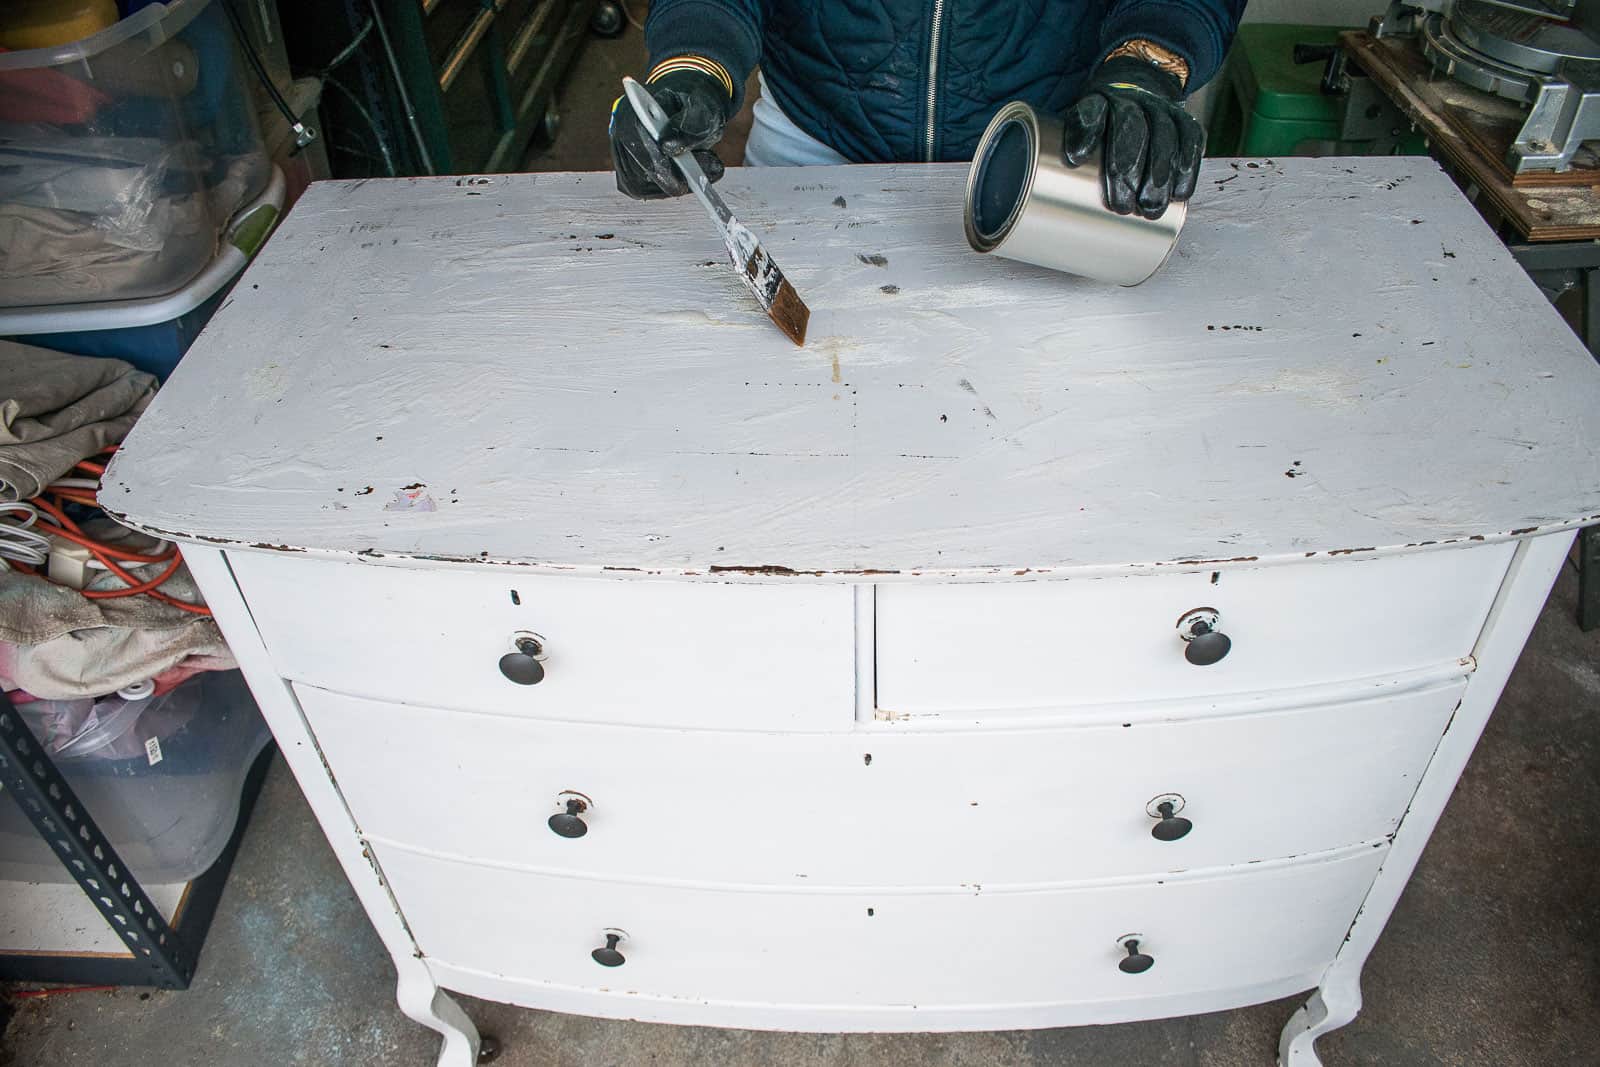
Step 2. Apply the Paint stripper
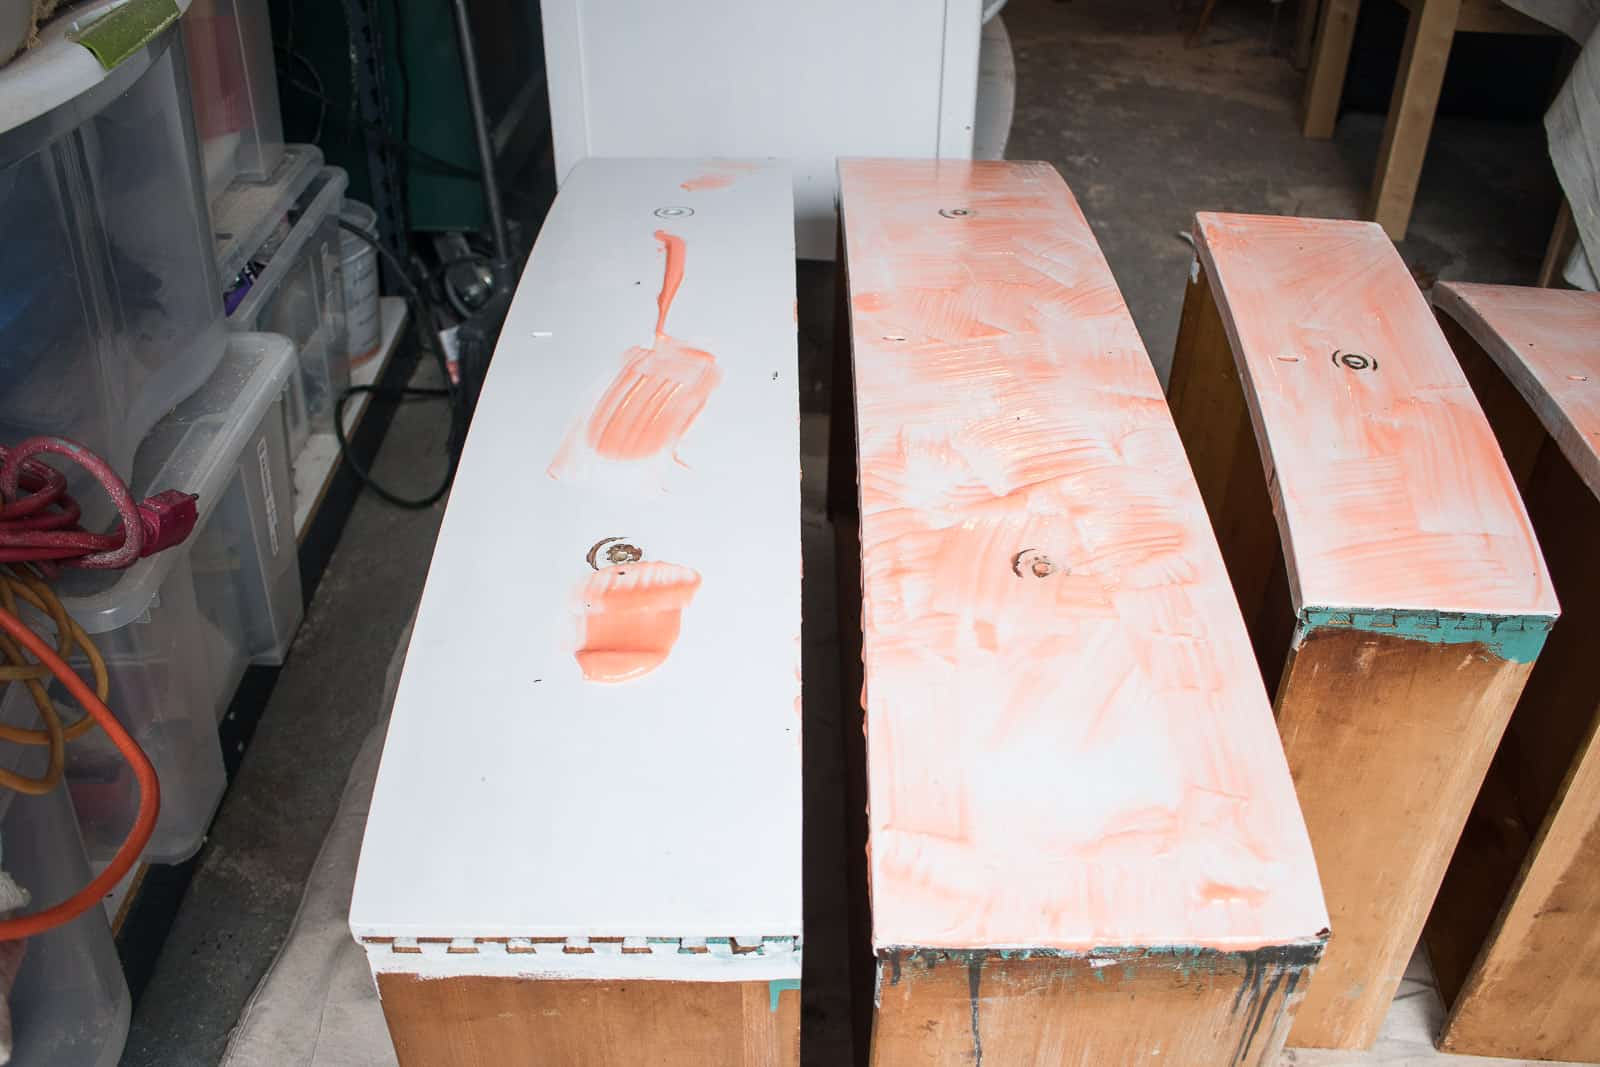
With a paint brush, spread the Citristrip over the surface of the dresser. It’s pretty thick so I could have painted the vertical surfaces, but it was easier to work with the surfaces while they were horizontal so I stripped this dresser incrementally. I used a fairly thick coat just to be thorough, but it was probably overkill. We didn’t have any saran wrap when I started this process, but placing plastic wrap over the stripper after you’ve applied it to the paint prevents evaporation and may give you better results. (The first picture is me applying the first type of stripper… Citristrip is a nice orange gel.)
A note about timing. The Citristrip label said to leave the stripper on the surface for 1-24 hours. For most of the dresser, I let the stripper sit overnight, but that had more to do with the fact that I applied it quickly each afternoon and then had to go get the kids at school, so I let it sit until they got on the school bus the next morning.
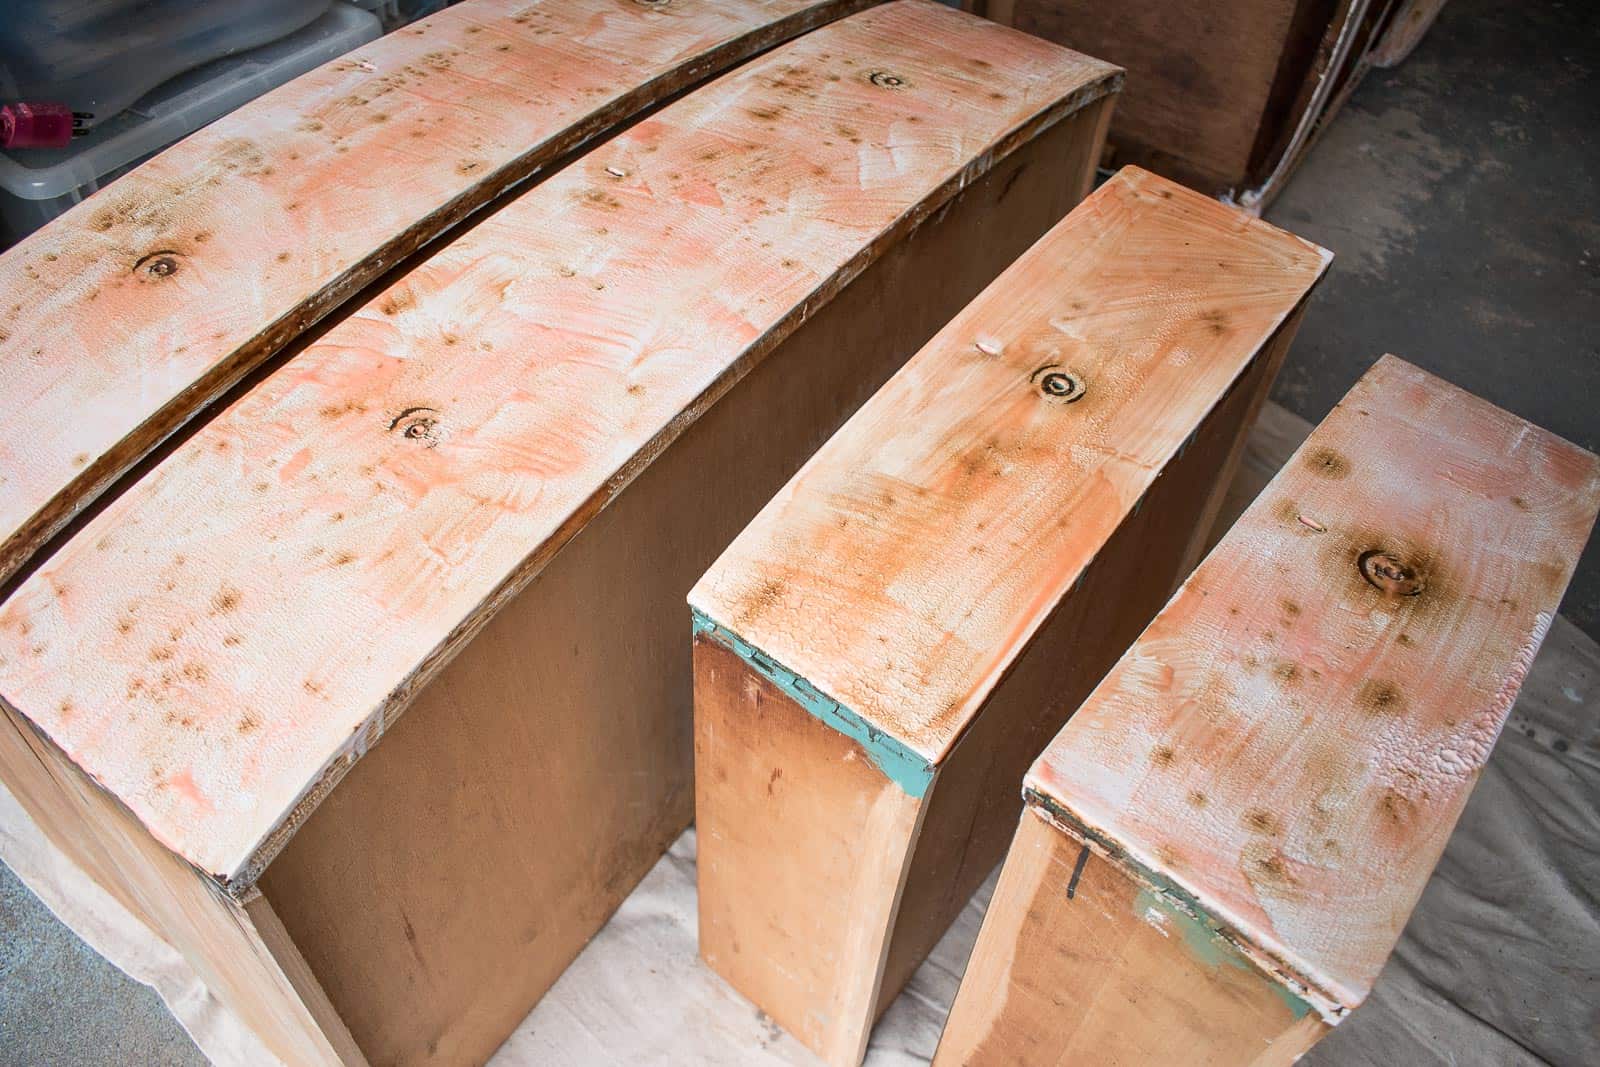
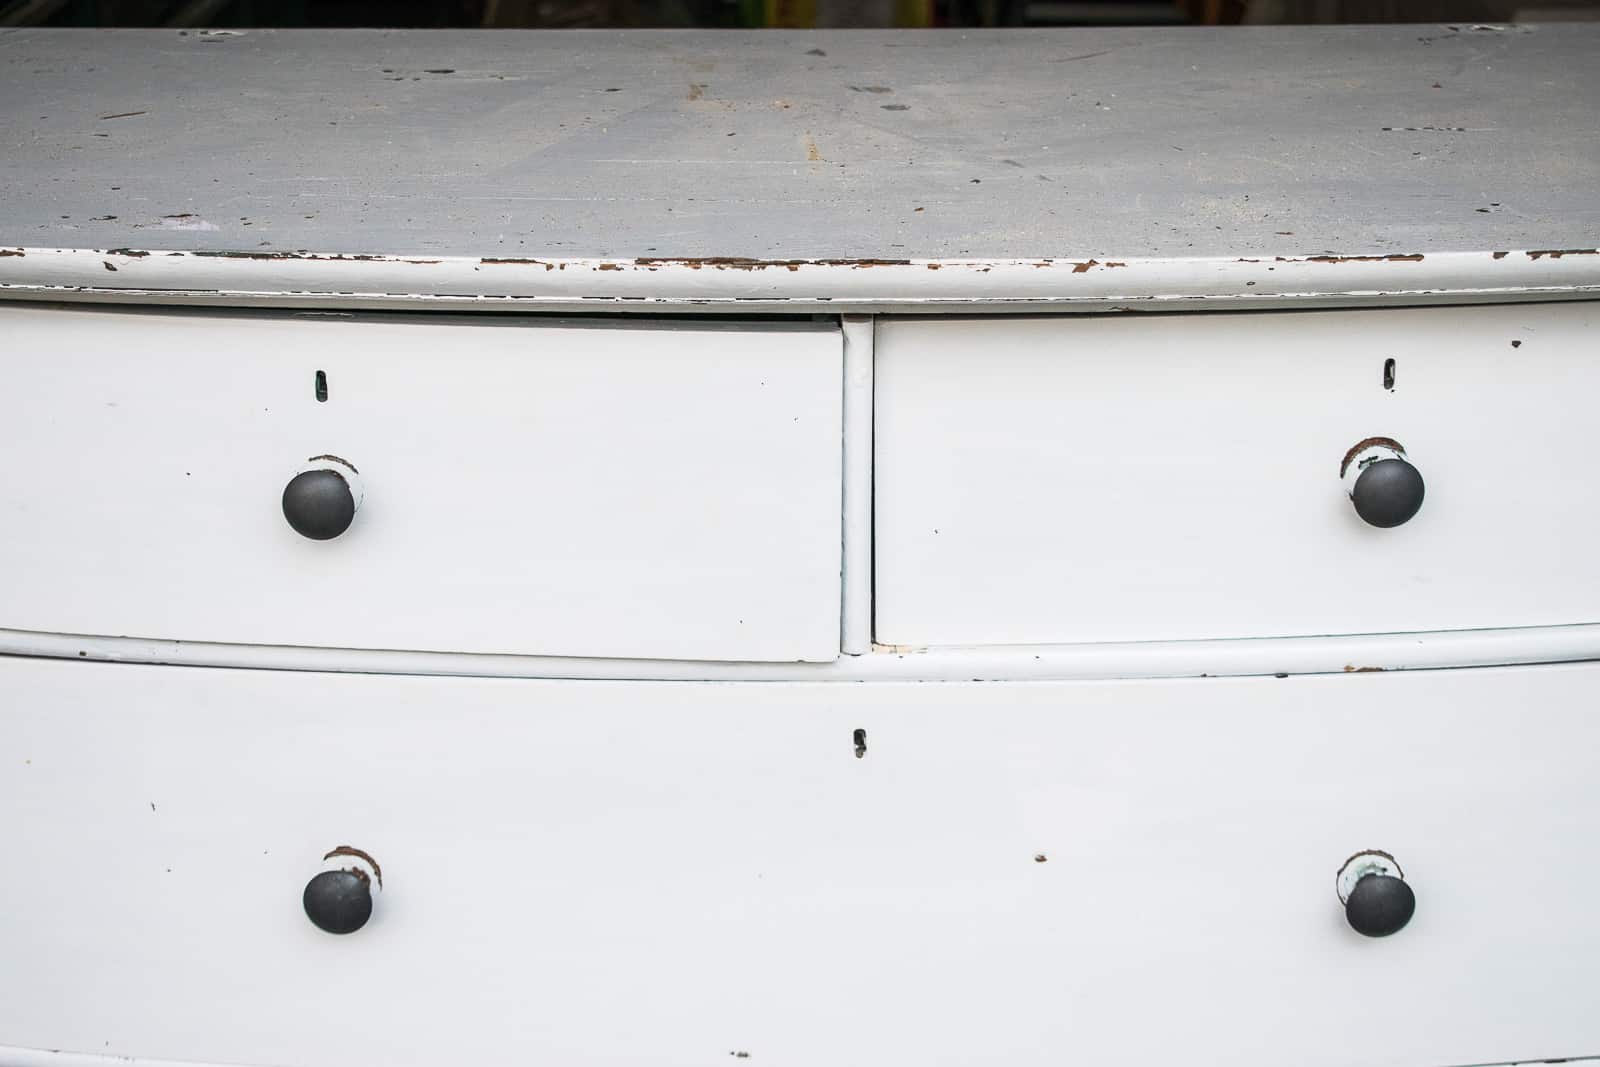
You can tell that the stripper is working when you see the paint bubbling up from the surface of the wood. I used a 5 in 1 painter’s tool to scrape the paint off the surface, but I was careful not to be too rough and scratch the wood. The benefit of the painter’s tool is that it comes with a tip on one side which is helpful for paint stuck in nooks and crannies. With delicate wood, a plastic scraper might be safer! I dumped the scraped paint into a paper bag, but have old rags and paper towels handy because it can be messy.
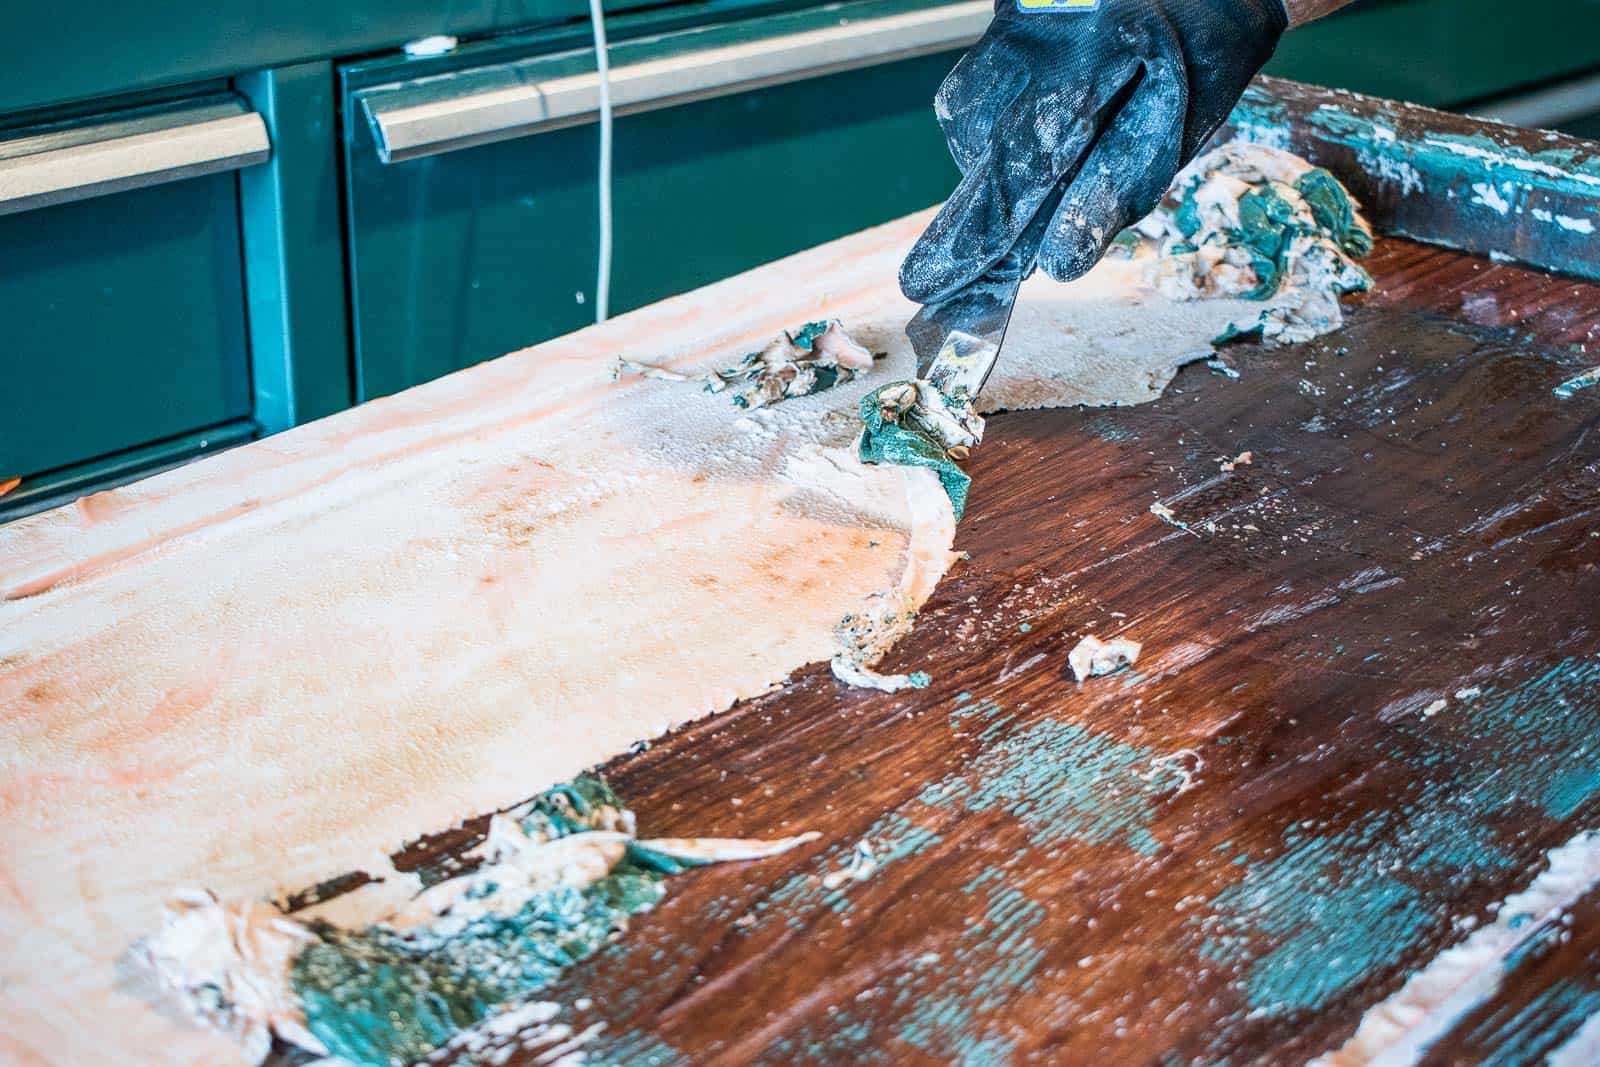
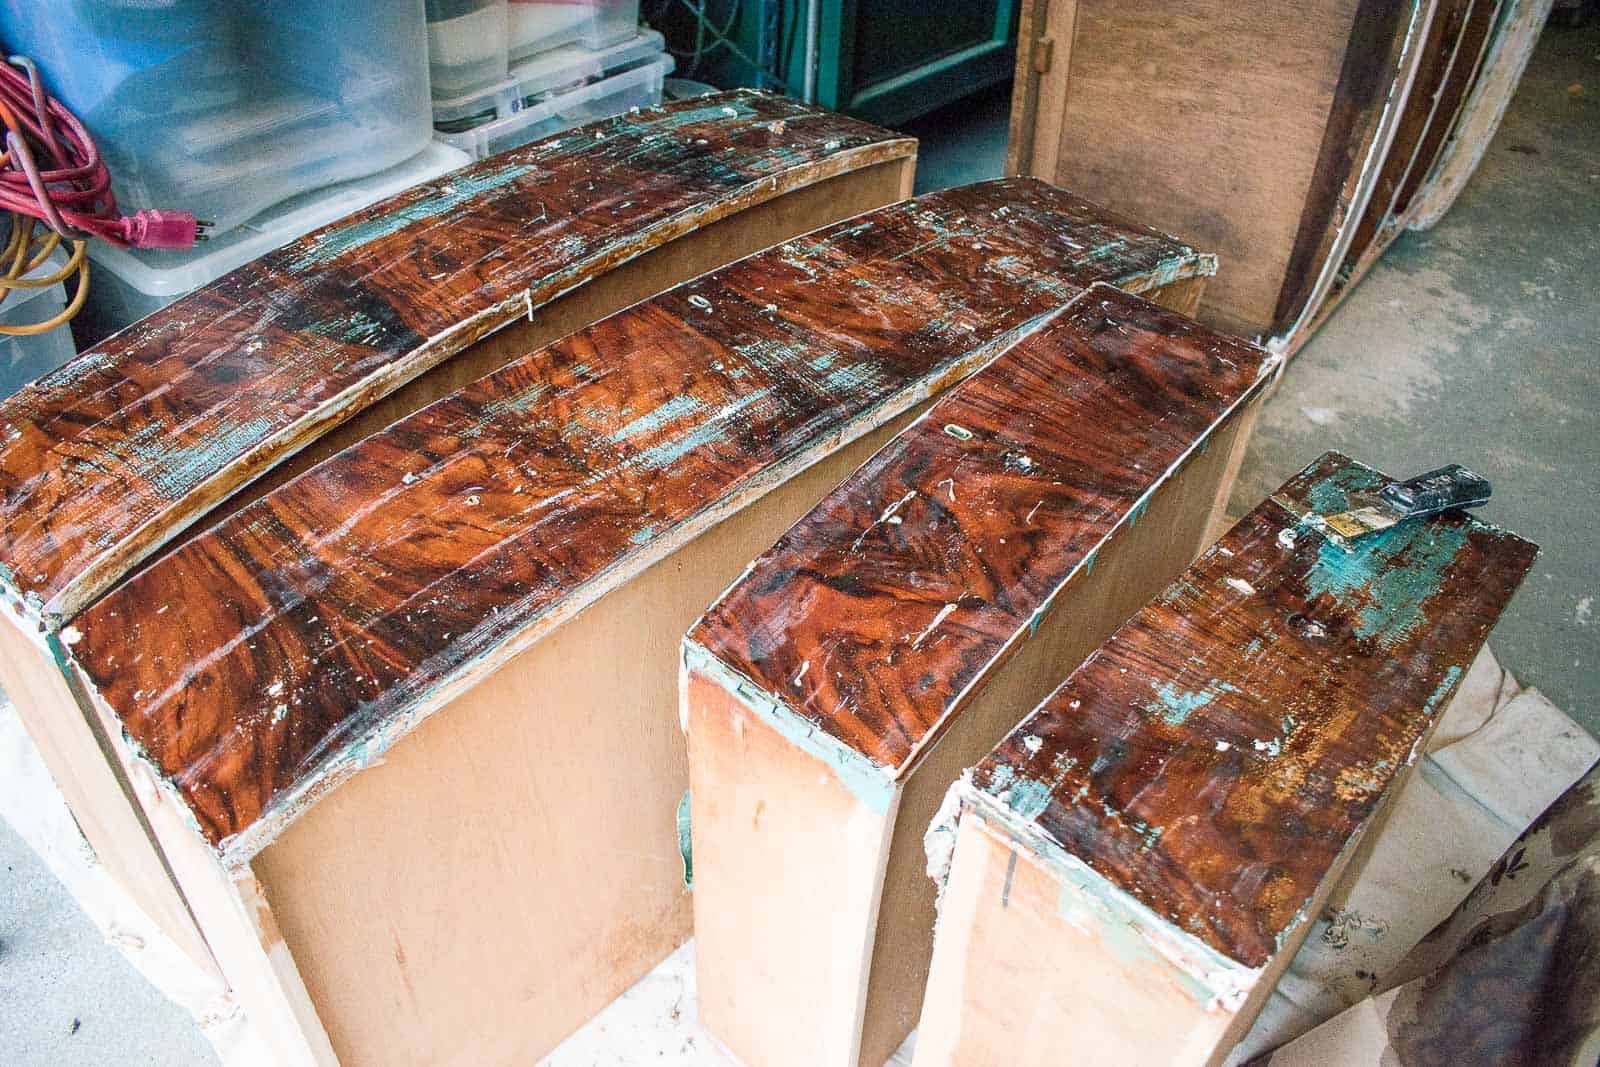
I discovered that my dresser had two coats of paint on it, and in some places the bottom layer of green paint didn’t come off with the first round of Citristrip so I had to brush on another coat of stripper and repeat the process.
Step 3. Cleaning the Wood once it’s been stripped of paint
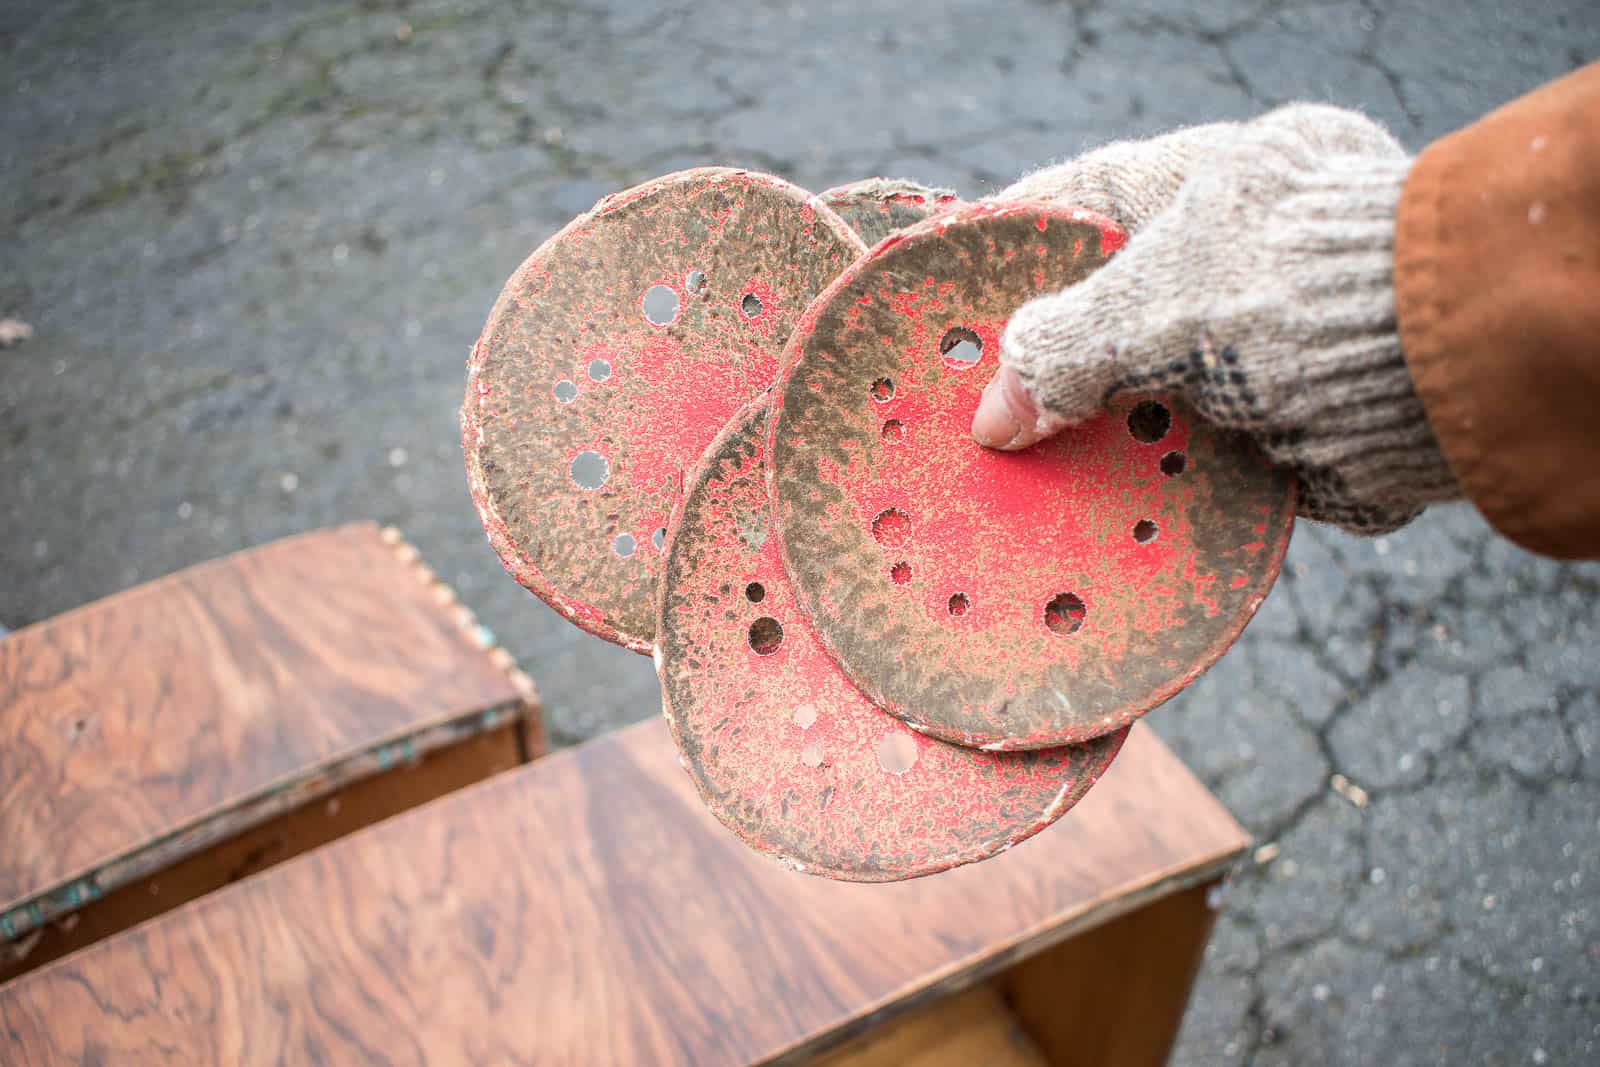
Once all the paint had been scraped from the surface of the wood, I wiped down any excess stripper so it didn’t leave behind a film. With 120 grit sandpaper, I carefully sanded with the grain to remove any remaining paint residue or other imperfections in the wood. It’s important to work WITH THE Grain whenever you’re dealing with raw wood in order to preserve the finish as best as possible.
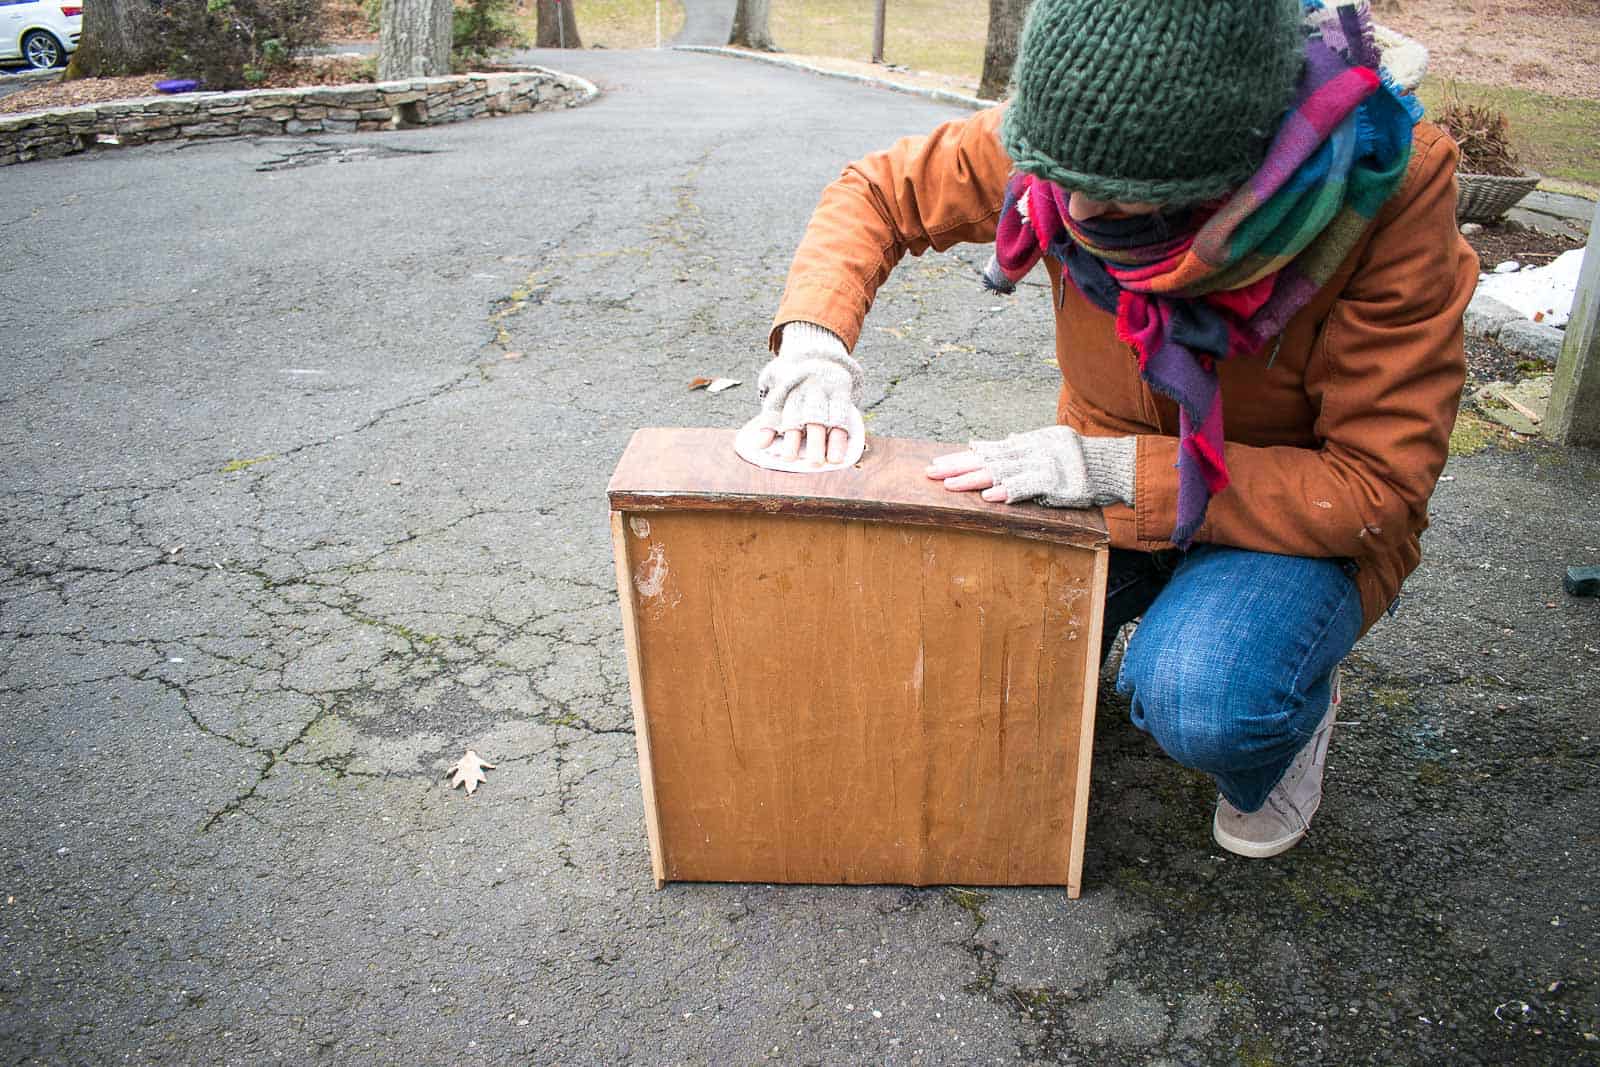
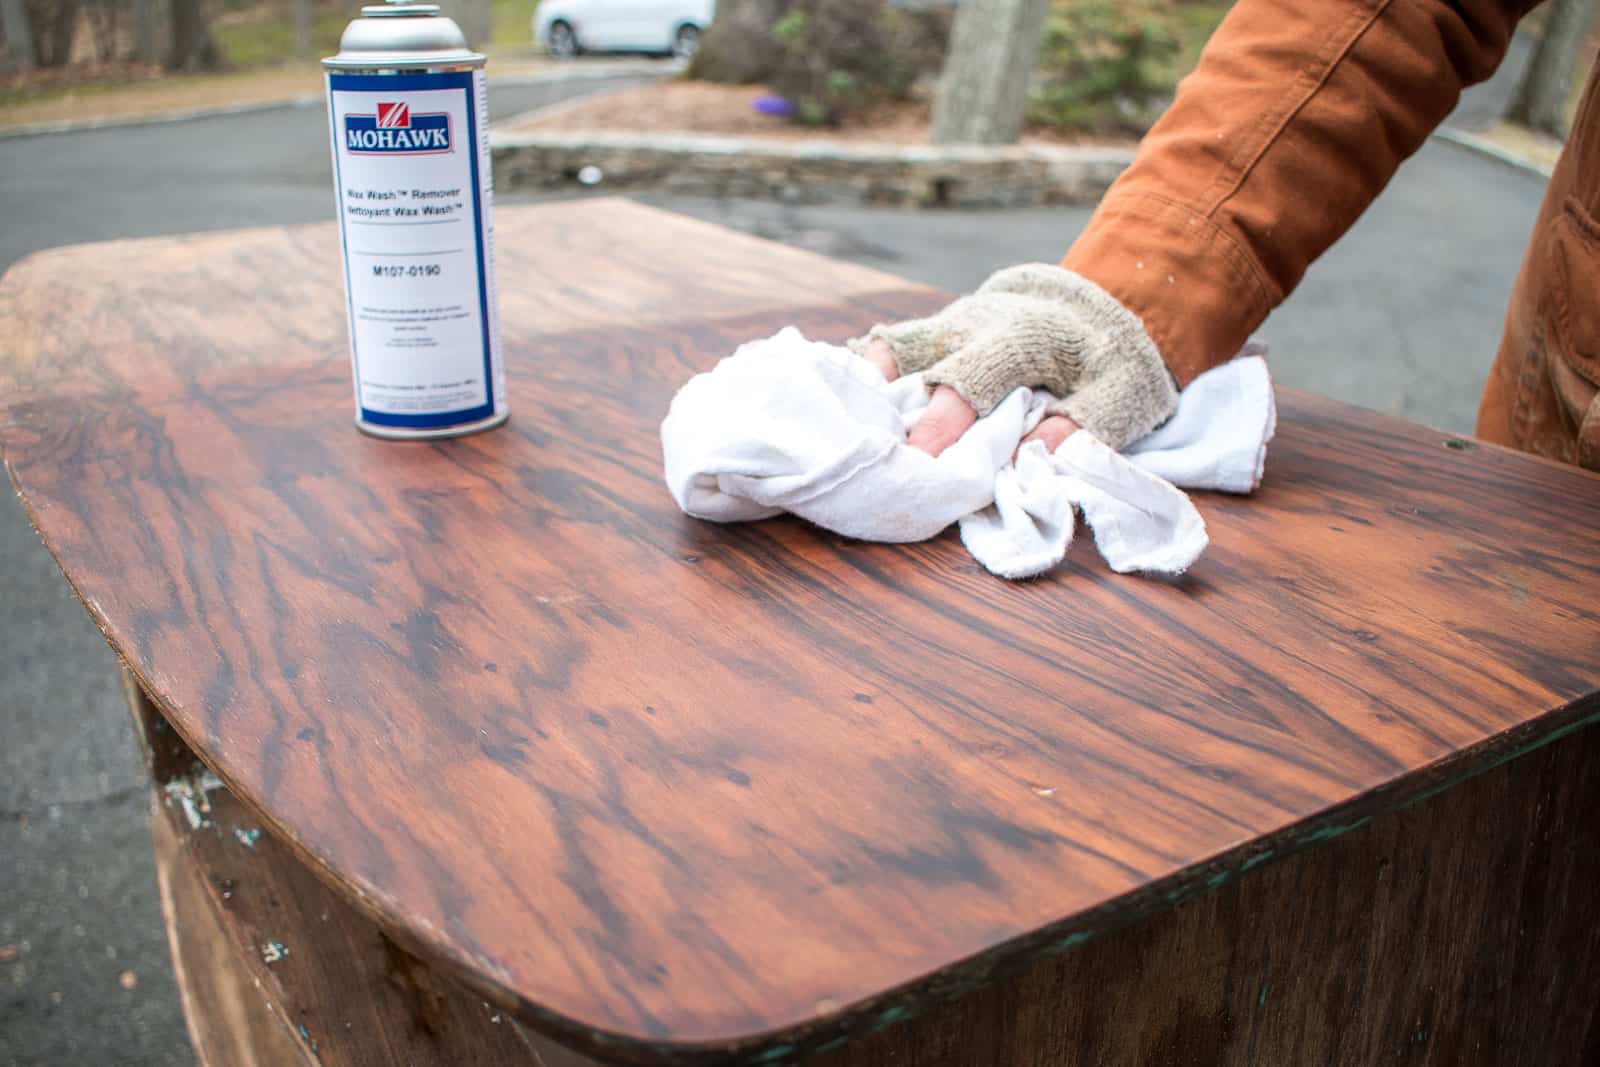
One of the products I received from Mohawk was this Wax Wash spray cleaner to remove oil, wax and foreign materials. At a couple times during this process, I sprayed the surface of the dresser with this cleaner and wiped it down with a rag to remove dust/ wax/ debris. See all the wax building up on the sandpaper?
Step 4. Bringing Out the Wood Grain
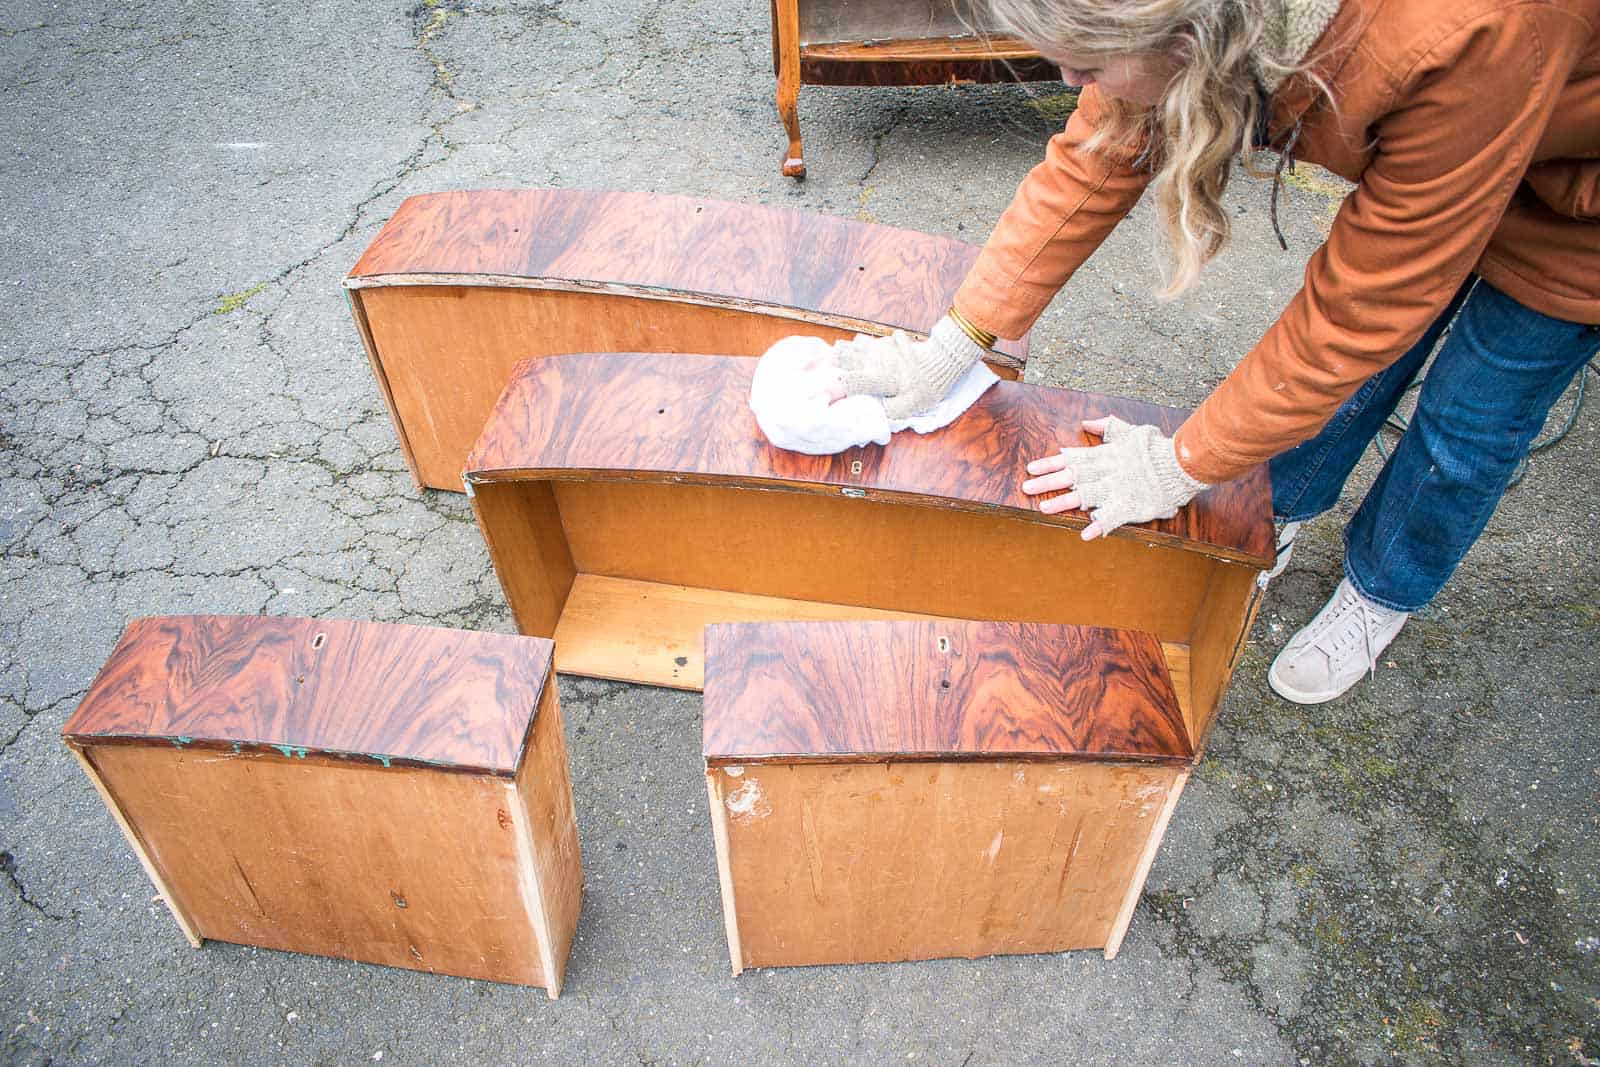
With the surface of the dresser clean and void of paint, it was time to make that grain shine. I’m using Tung Oil. Tung oil is a drying oil that’s made from the seeds of the Tung tree so it will soak into the wood grain and create a water resistant finish. You have to follow the directions in order to avoid a sticky build up and it will need to be reapplied on occasion, but I couldn’t be happier with the end results. I started by brushing the oil onto the dresser and let it penetrate for 15 minutes.
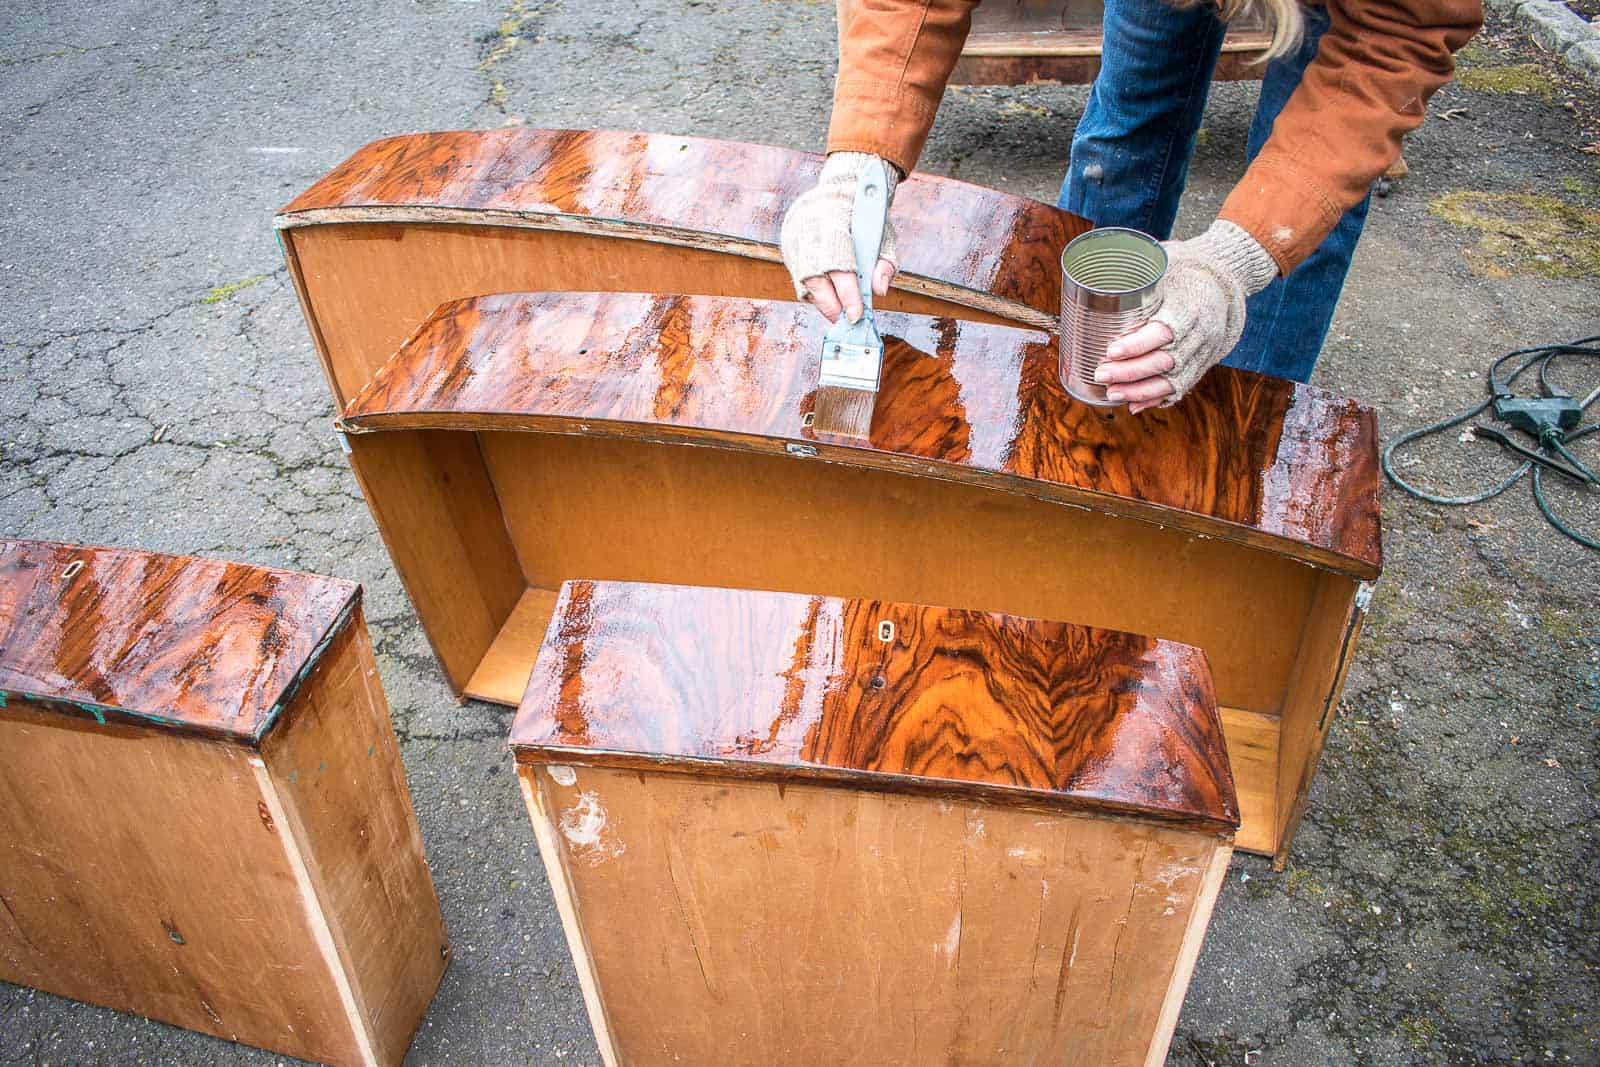
Then I wiped off all the excess oil with a cotton rag. Tung oil needs to sit outside for 24 hours between coats (it has a bit of a smell). The more coats you apply, the richer the finish. I applied three coats to my dresser. Between coats, I sanded the wood surface with a super high grit sandpaper/ steel wool (like 600) and then reapplied the tung oil.
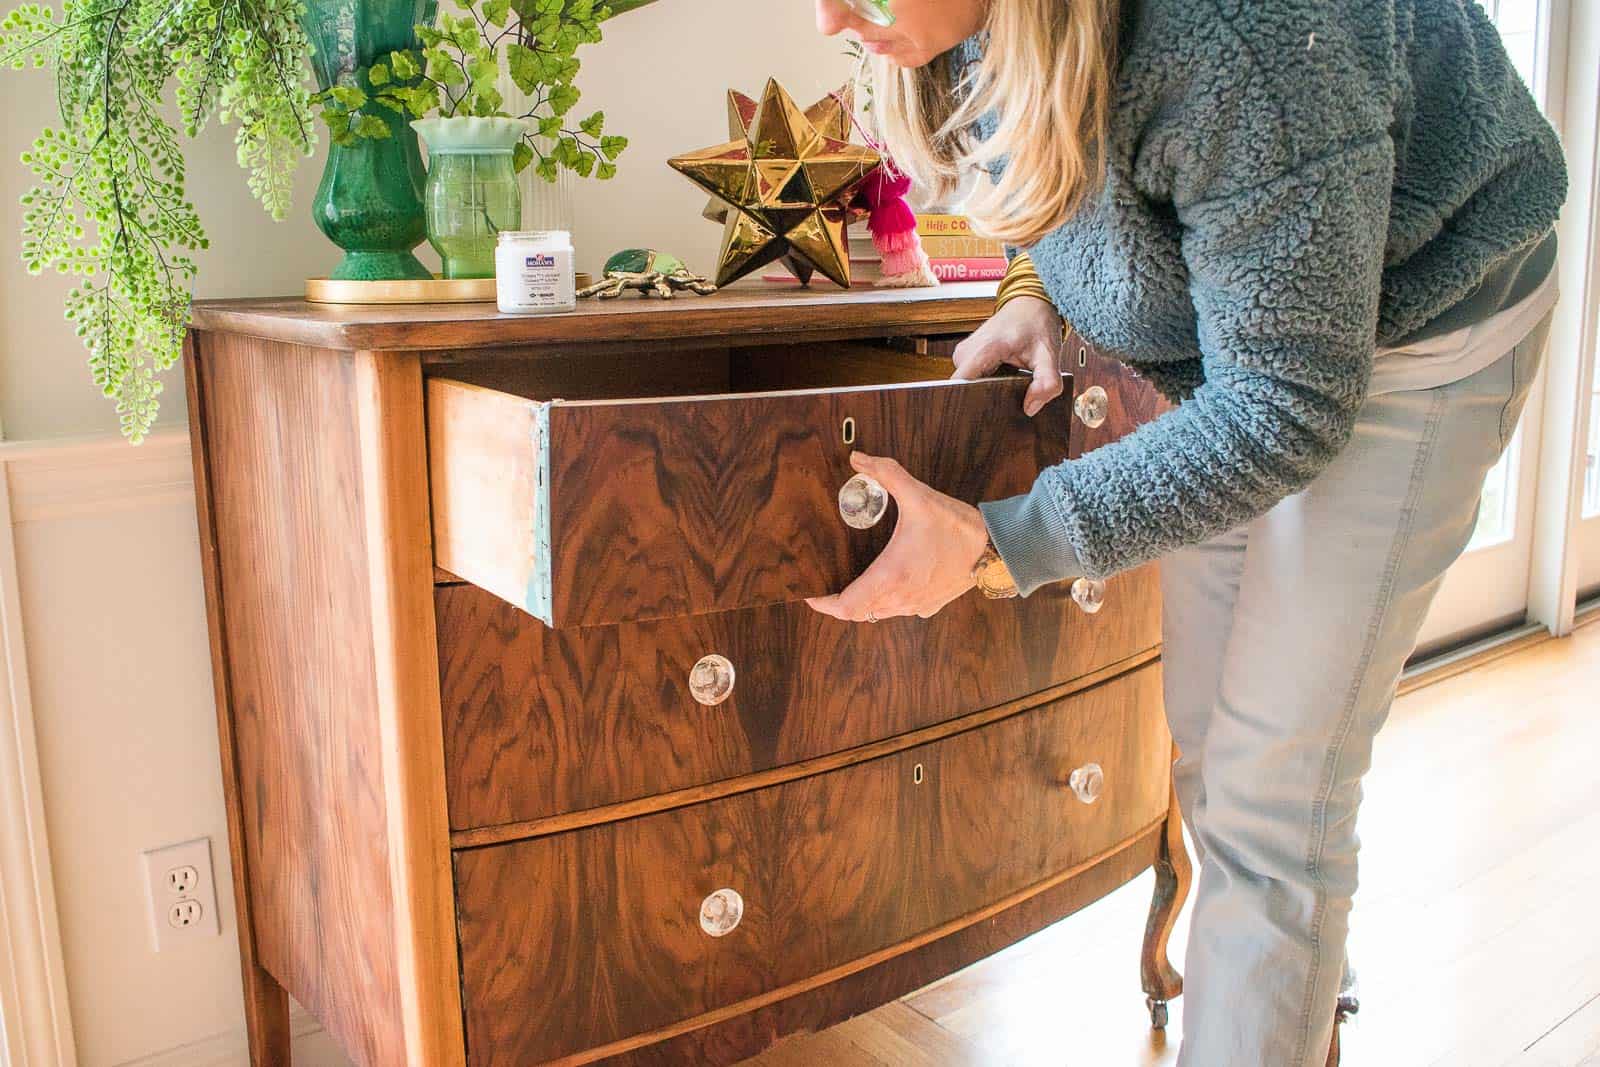
Step 5. Touching Up the Wooden Drawers
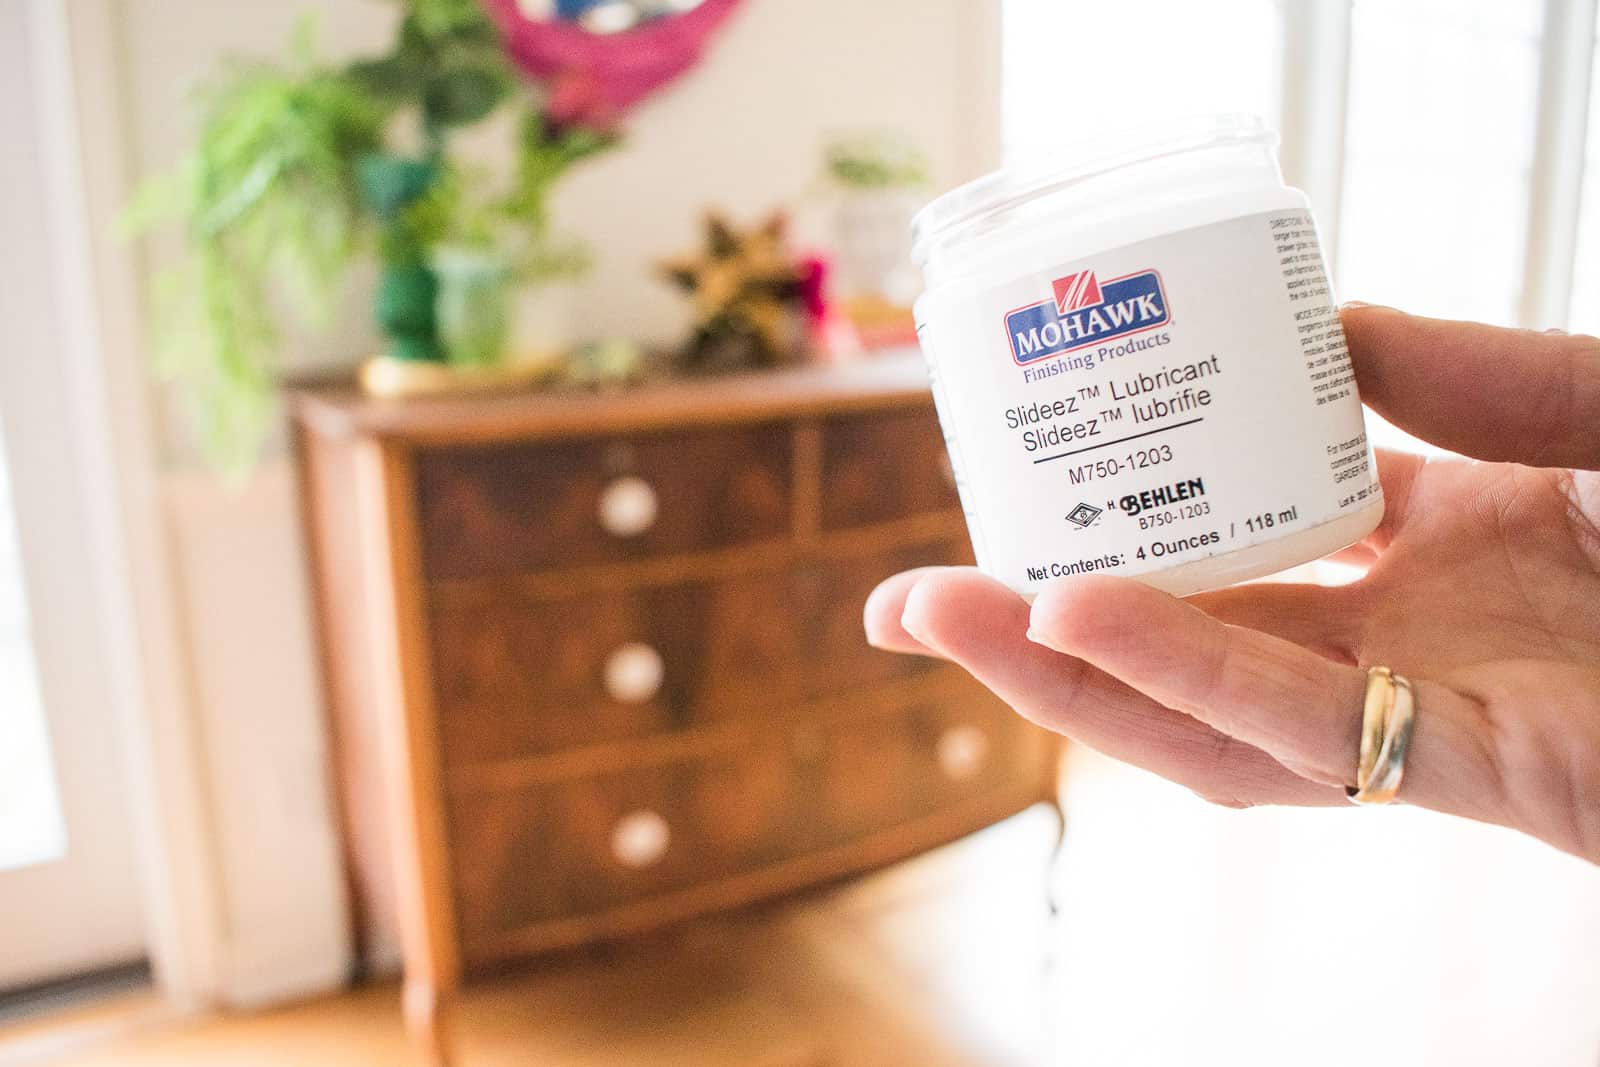
The drawers were in pretty good condition as far as their shape… no warping or deterioration. The dovetail joints had come loose on many of them so I simply re-glued with wood glue. To keep them sliding nice and easy, I used some of Mohawk’s Slideez drawer lubricant. I wiped it on the drawers and the inside rails of the dresser and it makes it super easy to slide these wooden drawers in an out of the dresser. Drawer lubricant is a must with old wooden furniture… it can make the difference between a sticky irritating bureau and one that works smoothly and easily!
Step 6. Finishing Details
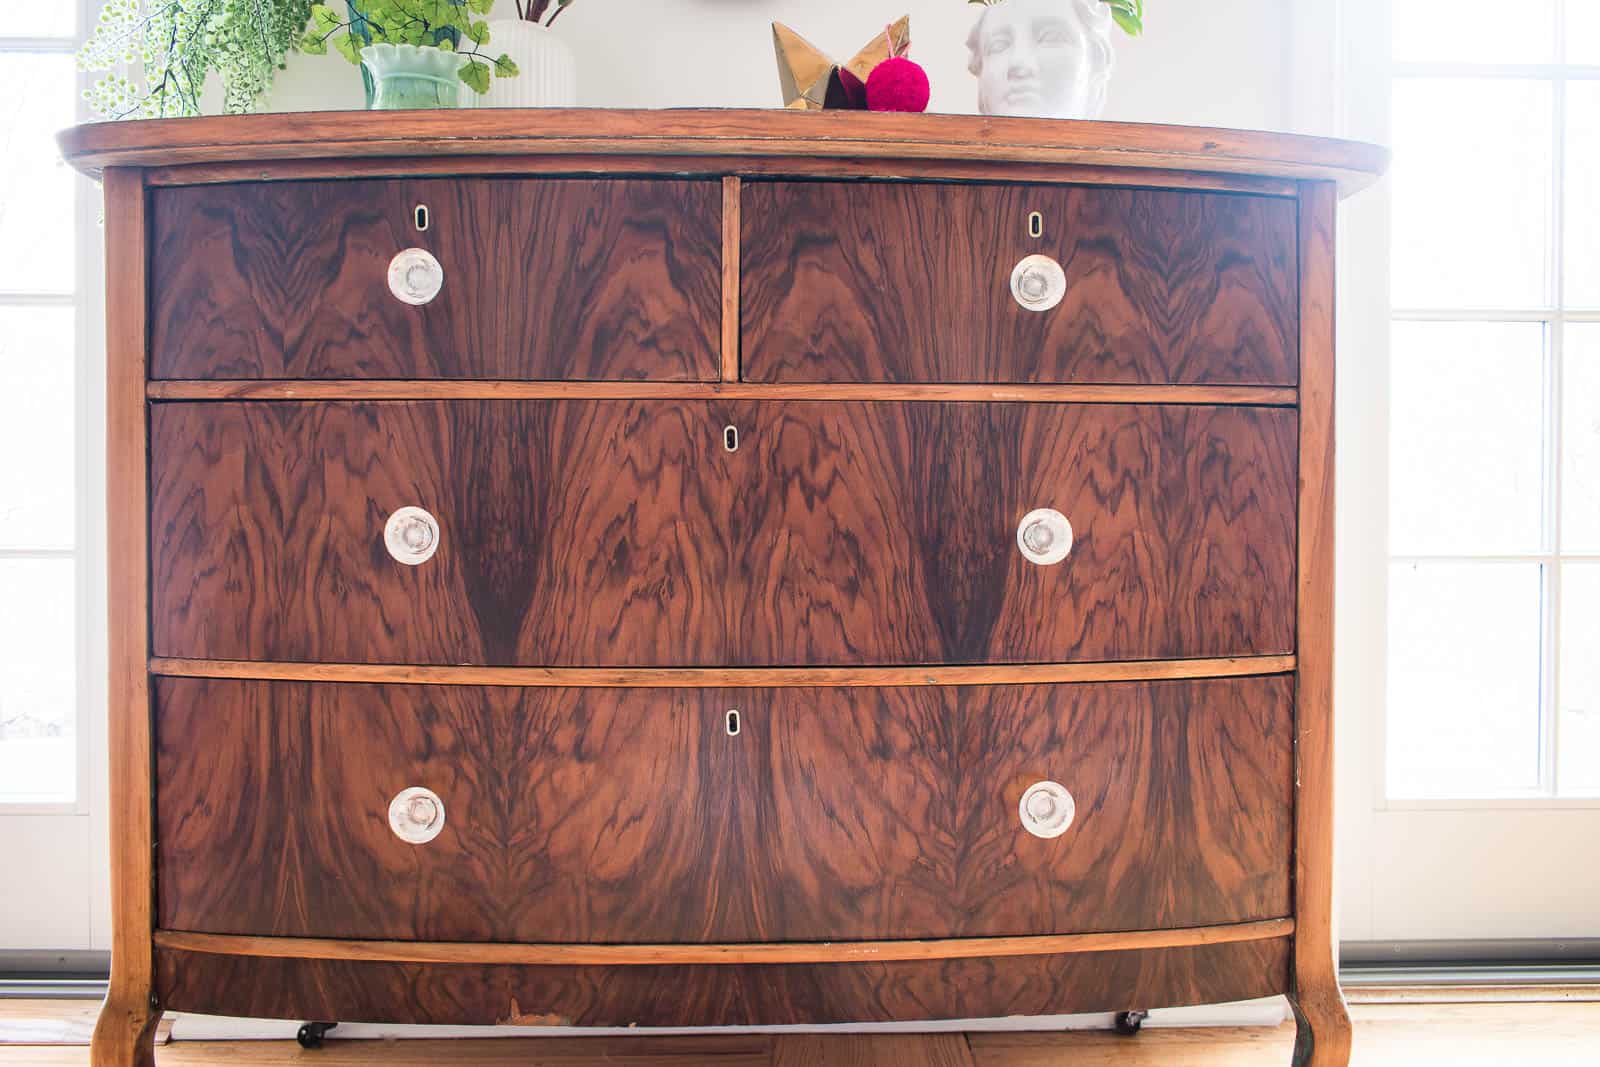
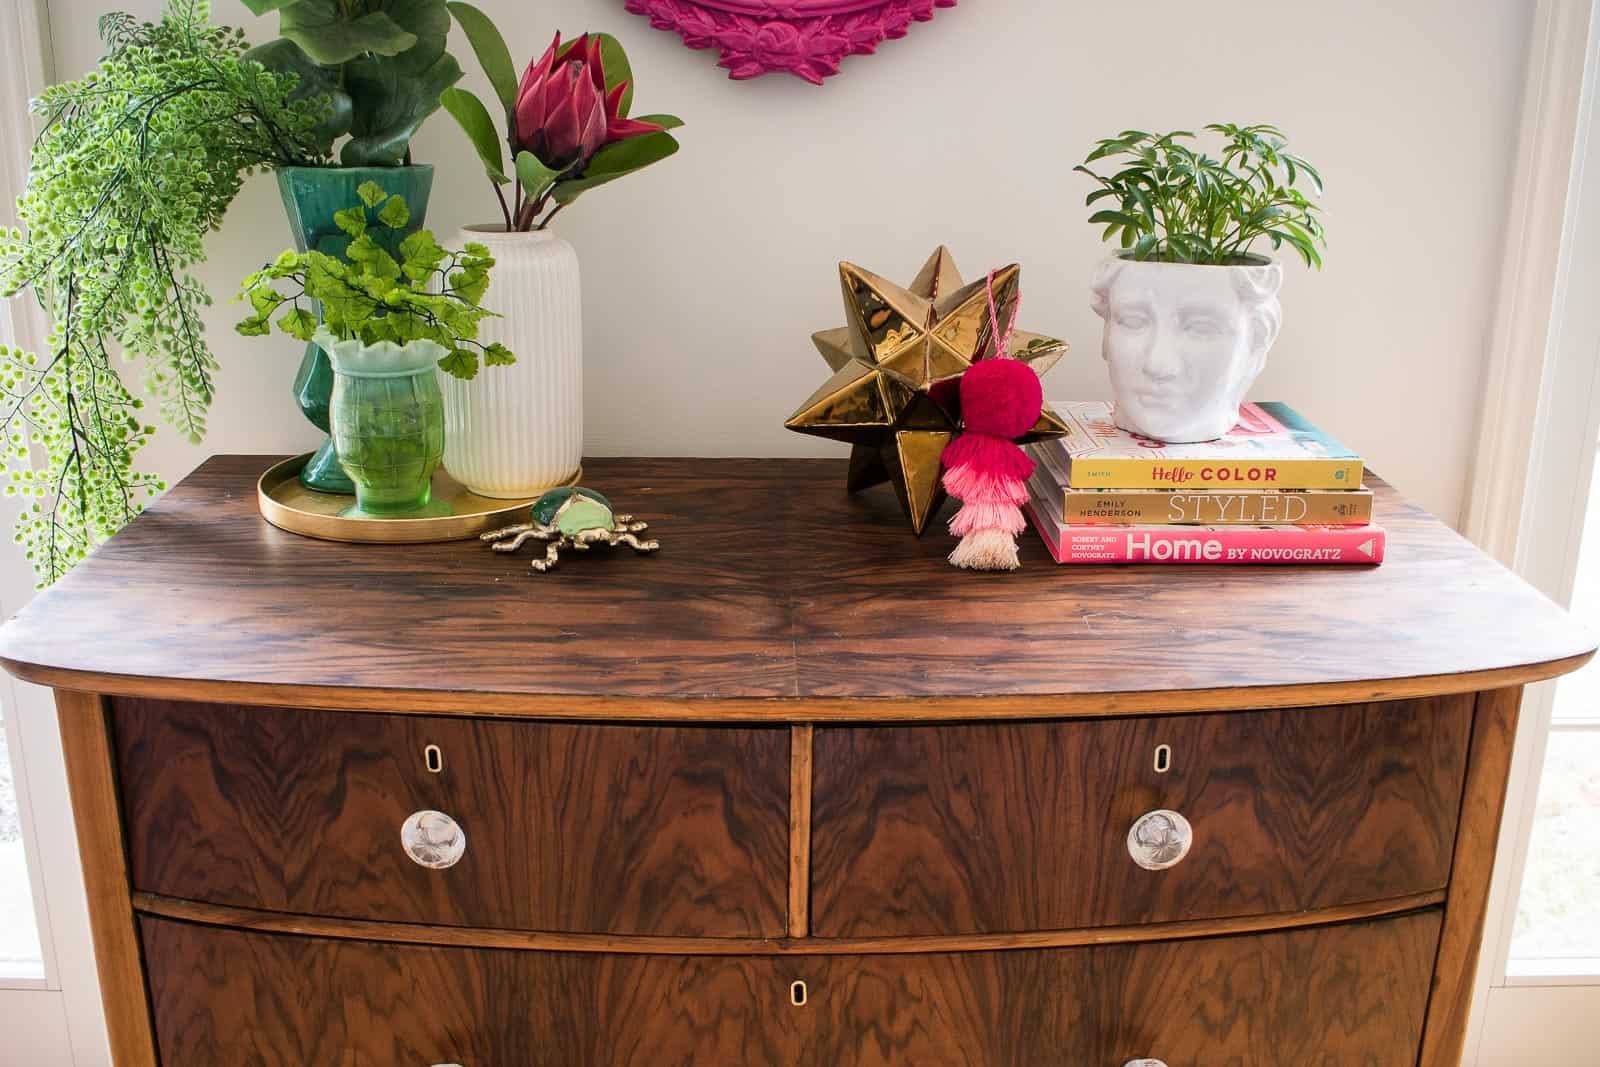
I replaced the knobs and after MUCH deliberation, settled on modern glass knobs. They don’t compete with the wood grain and they let those sweet brass keyhole escutcheons shine through.
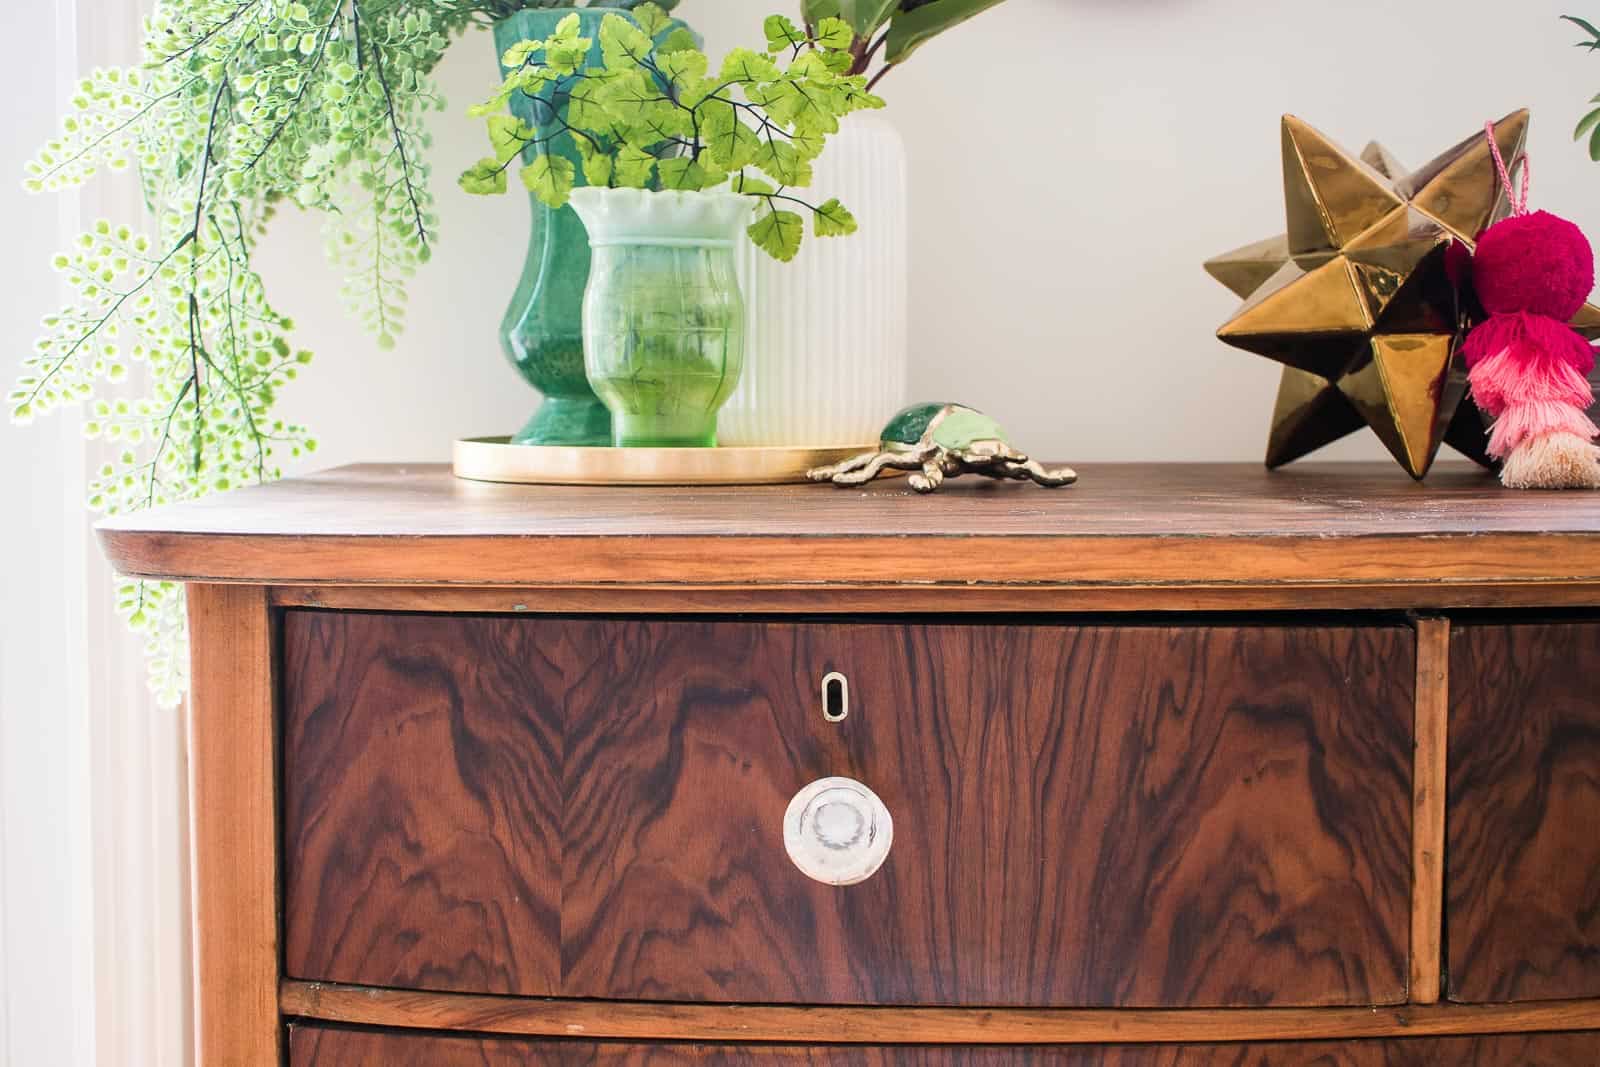
I don’t know a ton about wood but this is a thin veneer that’s been applied to the fronts and the tops of the dresser. Perhaps a tiger Walnut or a mahogany. Regardless… I didn’t have to do much to bring out all its glory. Typically, I’m a big fan of painted wood, but in this case… it’s hard to believe someone would cover up the incredible artistry and grain on this dresser. There are still places on the dresser were you can see remnants of the old wood. It’s not a perfect refinishing job, but personally I love that there’s an echo of the past in all of this.
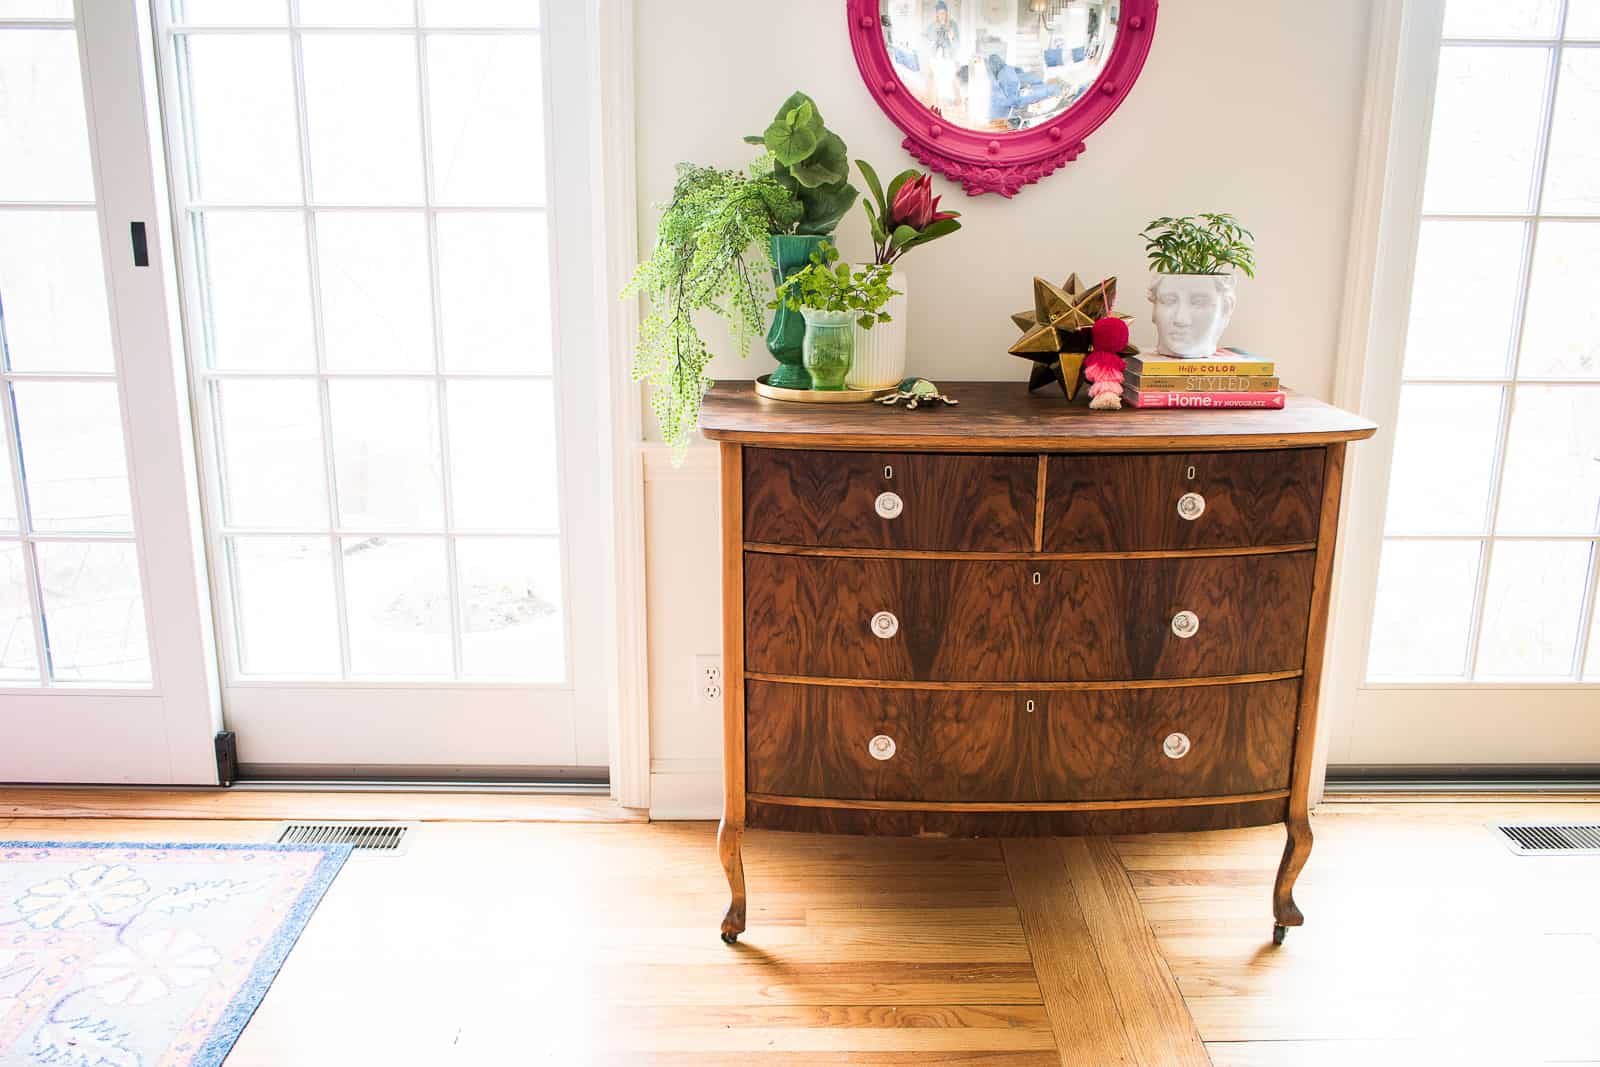
This is my favorite part. Remember that old sad painted wood dresser that was chipped and dinged up? Here’s the before and after:
And a close up before and after:
Thanks again to Mohawk for sending such a perfect arsenal for bringing this old piece back to life! I’m beyond pleased with the treasure I uncovered!


Wow! what a difference. I am so glad you took it back to its original beauty. Great job!!
Me too! Such a happy accident that all that grain was hiding under there!
So beautiful!! I love this so much! I can’t believe that wood grain!
Me neither!!! Made me look good! 🙂
That looks utterly gorgEous! Home run!
Thanks, Noreen!! I feel like I should play the lottery too! I got so lucky!
What a beautiful, Incredible result! Thanks so much for creating and sharing this awesome tutorial. I’ll be getting some mohawk products for sure! 🙂
Thank you!! I’ve loved partnering with them and learning about their arsenal! All have such great results!
Wow. I gasped when i saw the first pic! How amazing it must have been to uncover that gorgeous burled wood on the front!
Yes!! I couldn’t BELIEVE what was hiding under there!!
I love the results of your dresser and the idea to only strip partially as my dresser has lots of pleats and details that could be very stubborn!! I appreciate you taking the time and energy to put this article together. I once again find myself personally spending way too much time both reading and commenting. Thank you.
great job!
Thanks so much!
I just stripped my first piece of furniturE! This post helped give me the confidence. Thank you!
I love hearing this! Yay!
Do you have a list of supplies you used?
Hi Bonnie! All supplies were linked in the post. Was there something specific you were looking for? Thanks!
What a complete gem. That is a keeper to pass down For generations to come- magnificent!
Thanks! It’s really lovely!!
One of the best refinishing posts I’ve read – thank you for going into this level of detail re: products used, # of coats, # of hours and indoor/outdoor conditions for each stage of the process. I love to see furniture made of quality materials be reclaimed and brought back to its original glory. my father has used similar steps to refinish a vintage tea table and an antique bed. you know you’re rounding the bend when it is tung oil time!
Thank you Chris! I know what you mean! That’s become my favorite step!! 🙂
Thanks for posting
We have 2 doors that we thought not to paint but go natural wood. Your way of teaching is priceless.
Good luck!!!
Your links aren’t working anymore. I was wondering what Tung Oil you used
Thanks for letting me know! I used this one by Mohawk… it’s told at other places, this was just the first link I grabbed: https://www.woodworkingshop.com/product/M7011596/?srsltid=AfmBOoqJjggj02N1y6mjDsI1g7lRZmPdP25IJJQed8A0IX_J1IhRKuAb