
Epoxy Jewelry: How to Make Resin Bracelets
Psssst… this post *might* contain affiliate links: see my disclosure here.
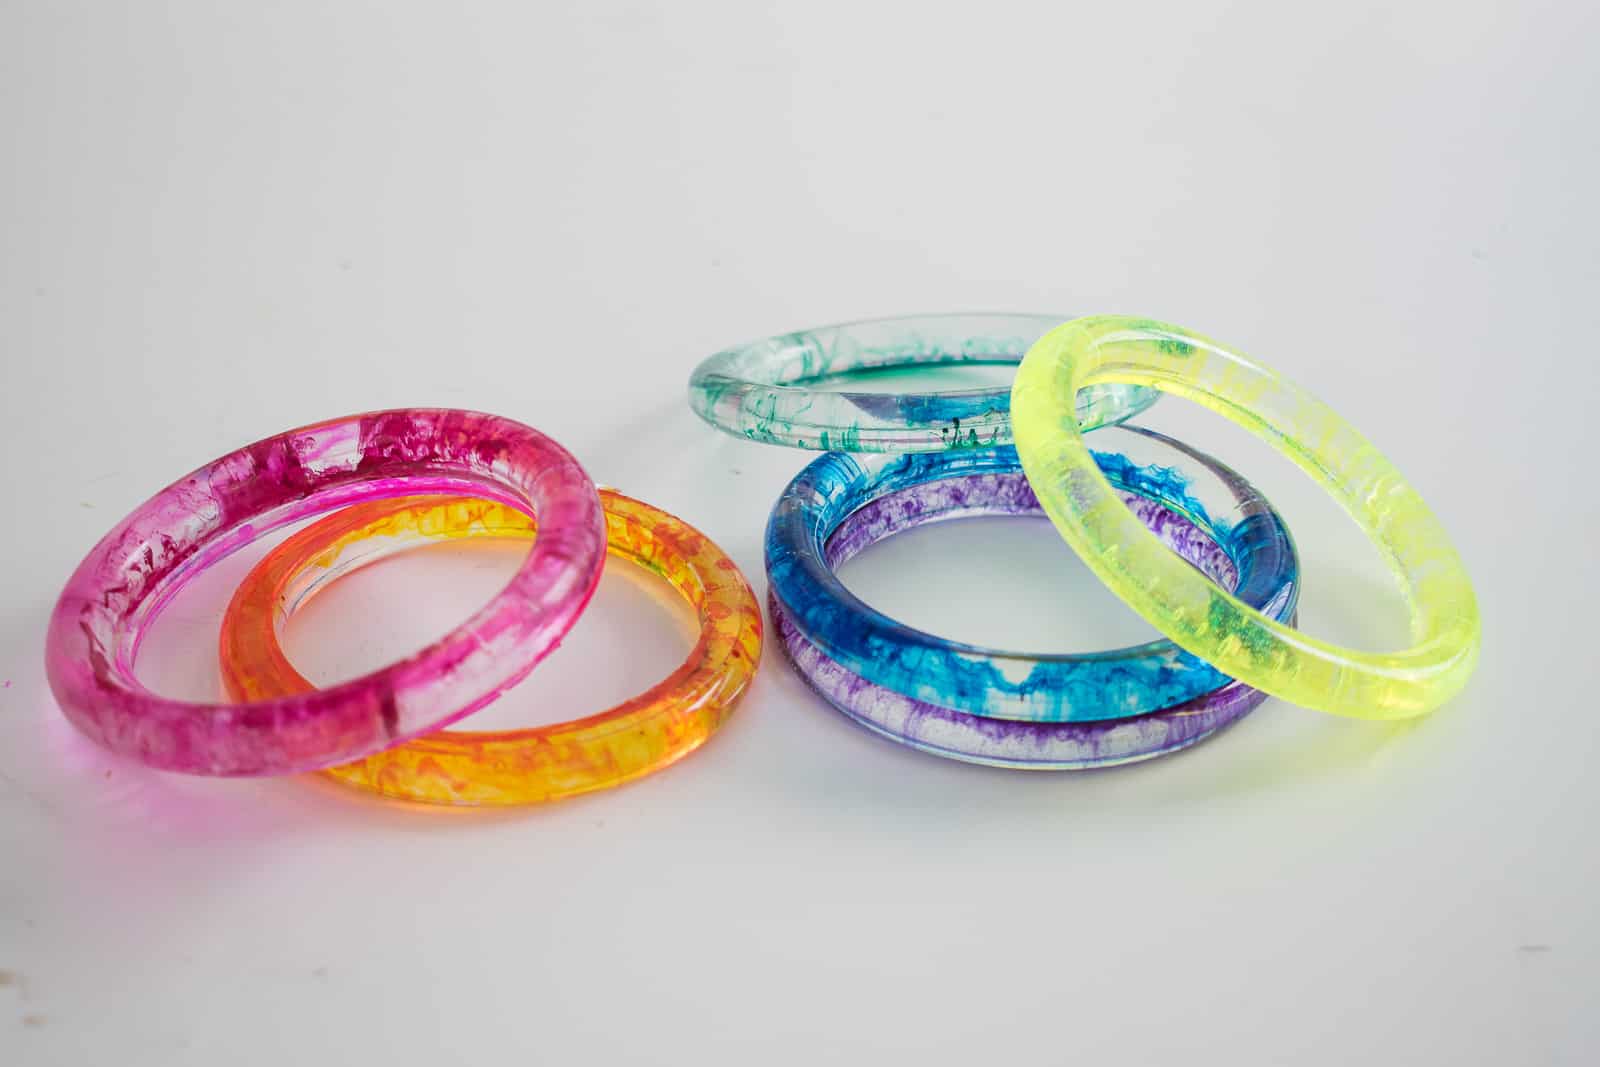
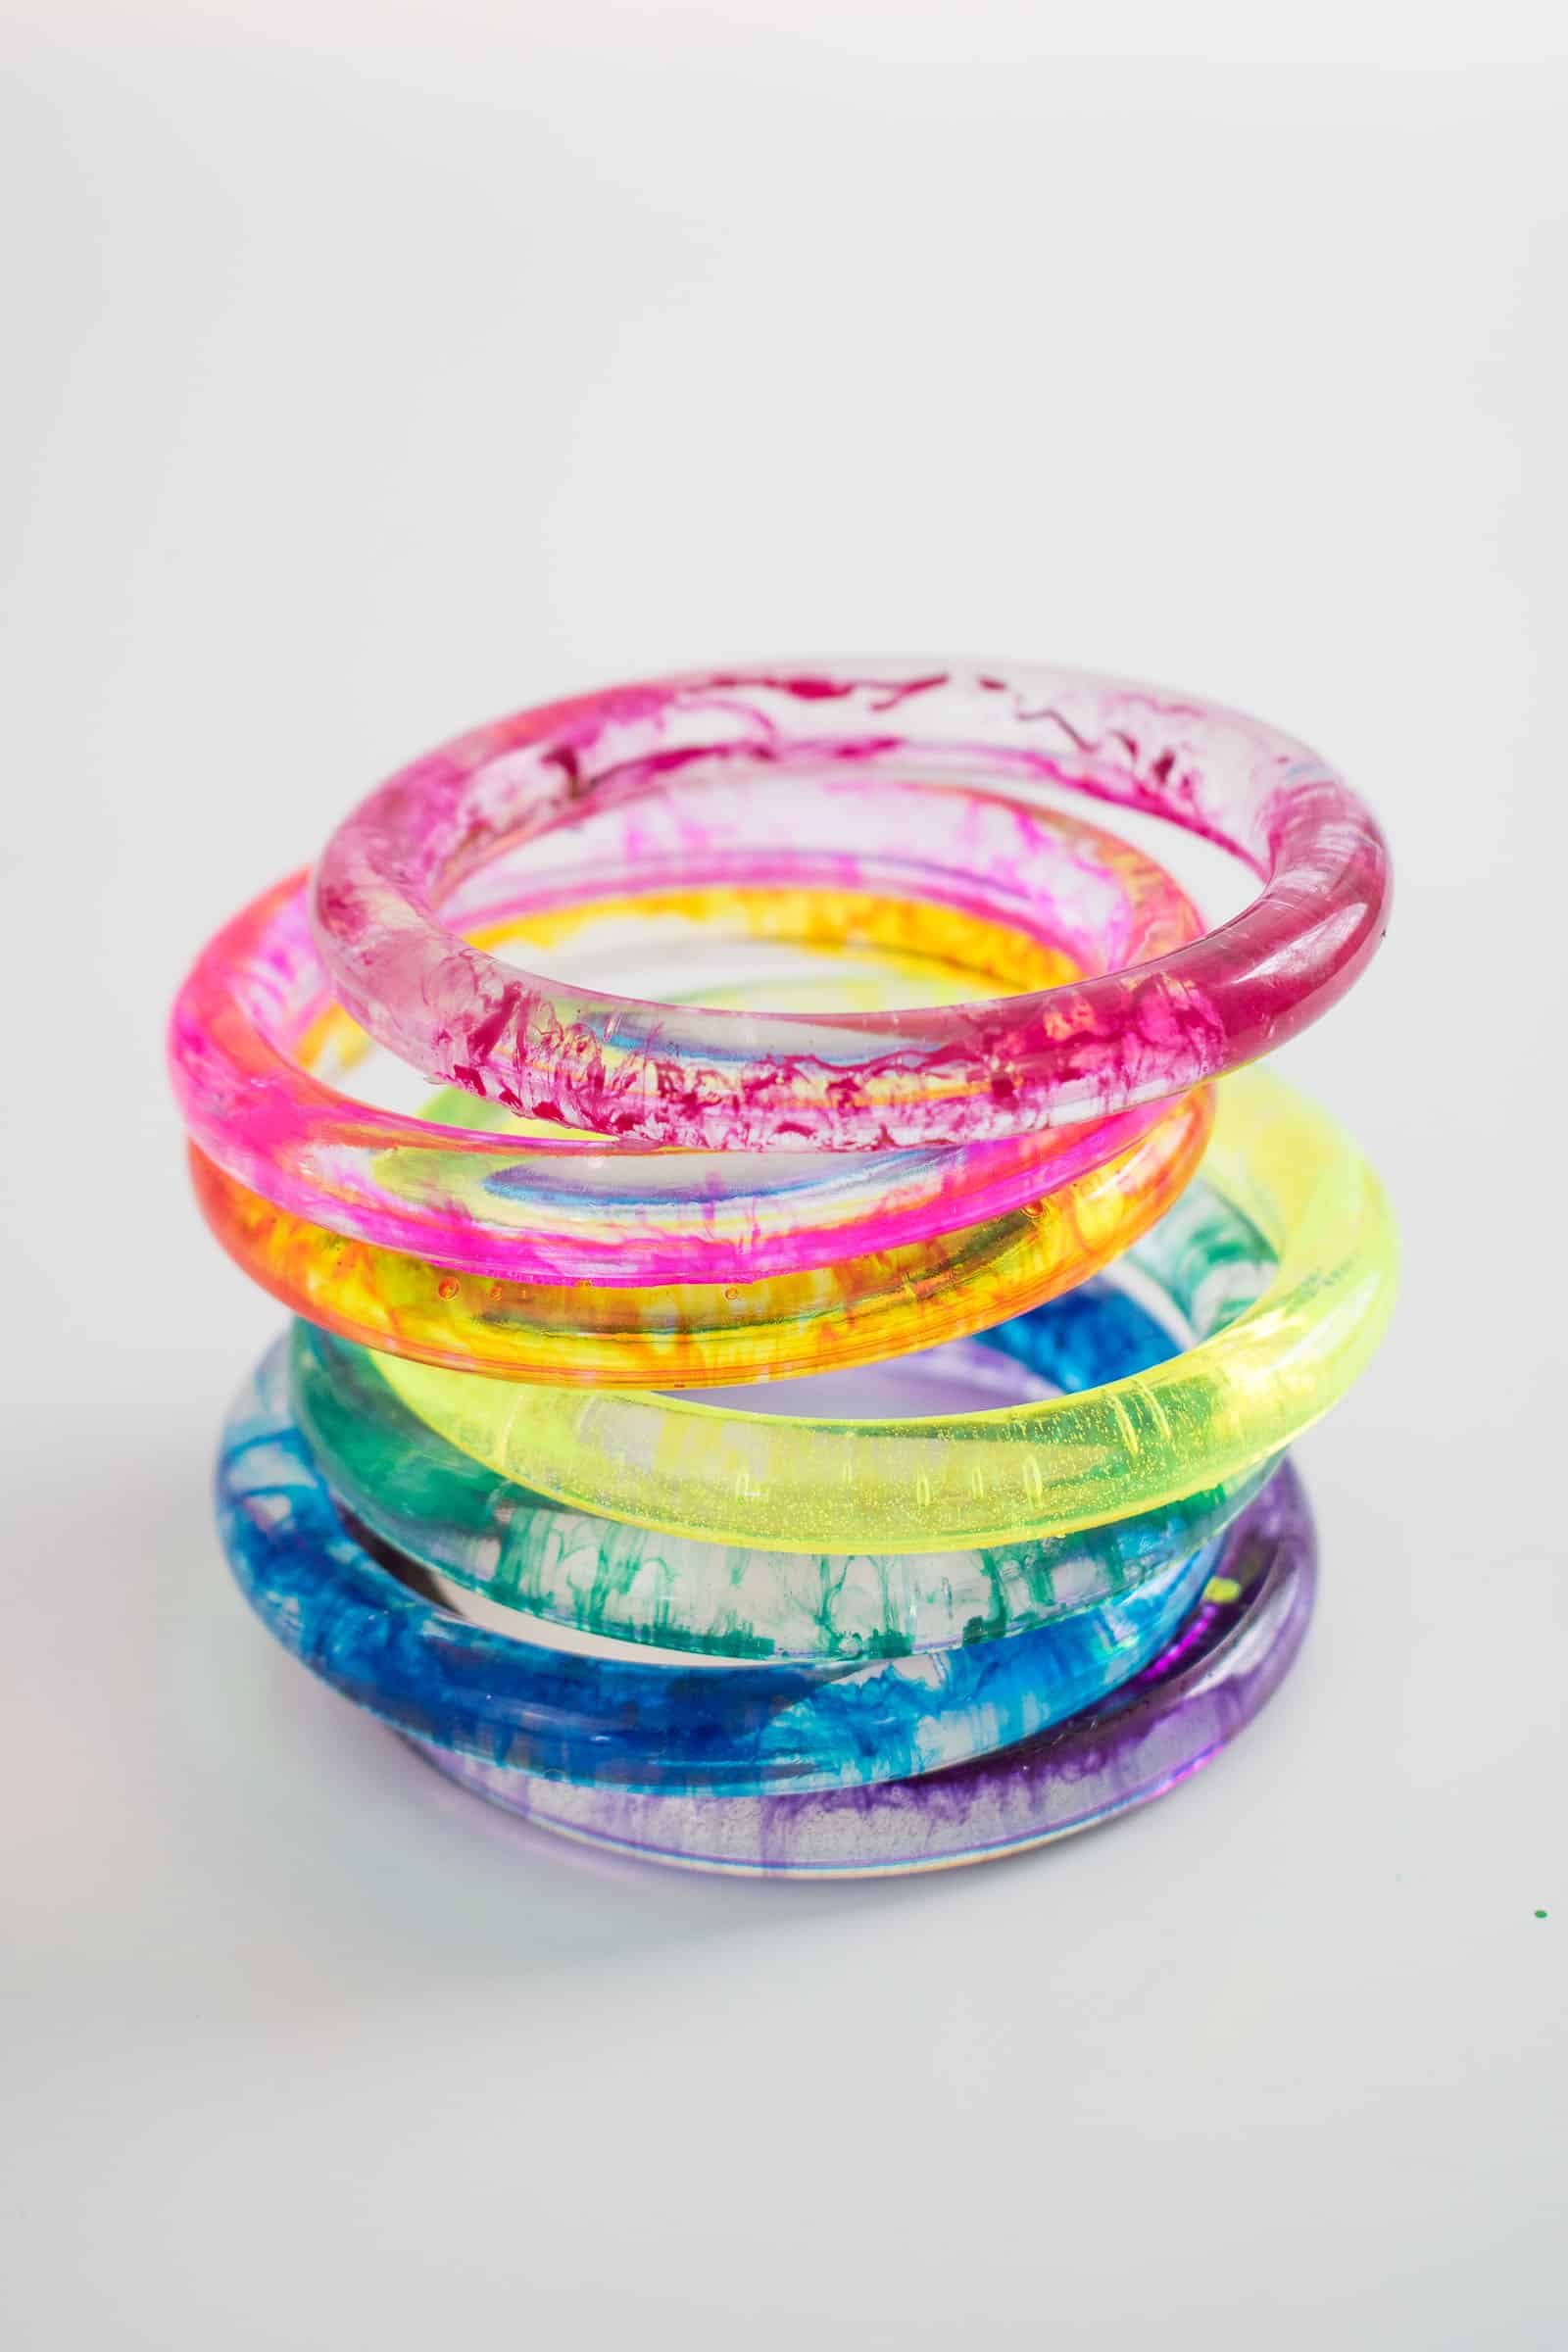
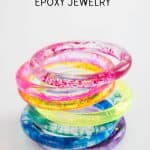
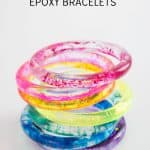
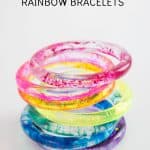
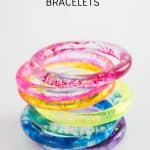
DIY Resin Bangles
I’ve recently started experimenting with epoxy resin and made this colorful jewelry!
Epoxy resin is a fun material to work with and I’ve been experimenting with different applications. I made these ornaments for Christmas, this epoxy inlay tray and, just recently, this kids table with jungle animals inlaid in the top! The basics of epoxy are pretty simple: mix a hardener with an epoxy and then pour it where you want. The fun for me has been noticing all the ways I can use this fun medium in my projects. Today, I brought it to a level that anyone can appreciate: JEWELRY! (Materials list at the end of the post!)
Shop my favorites!
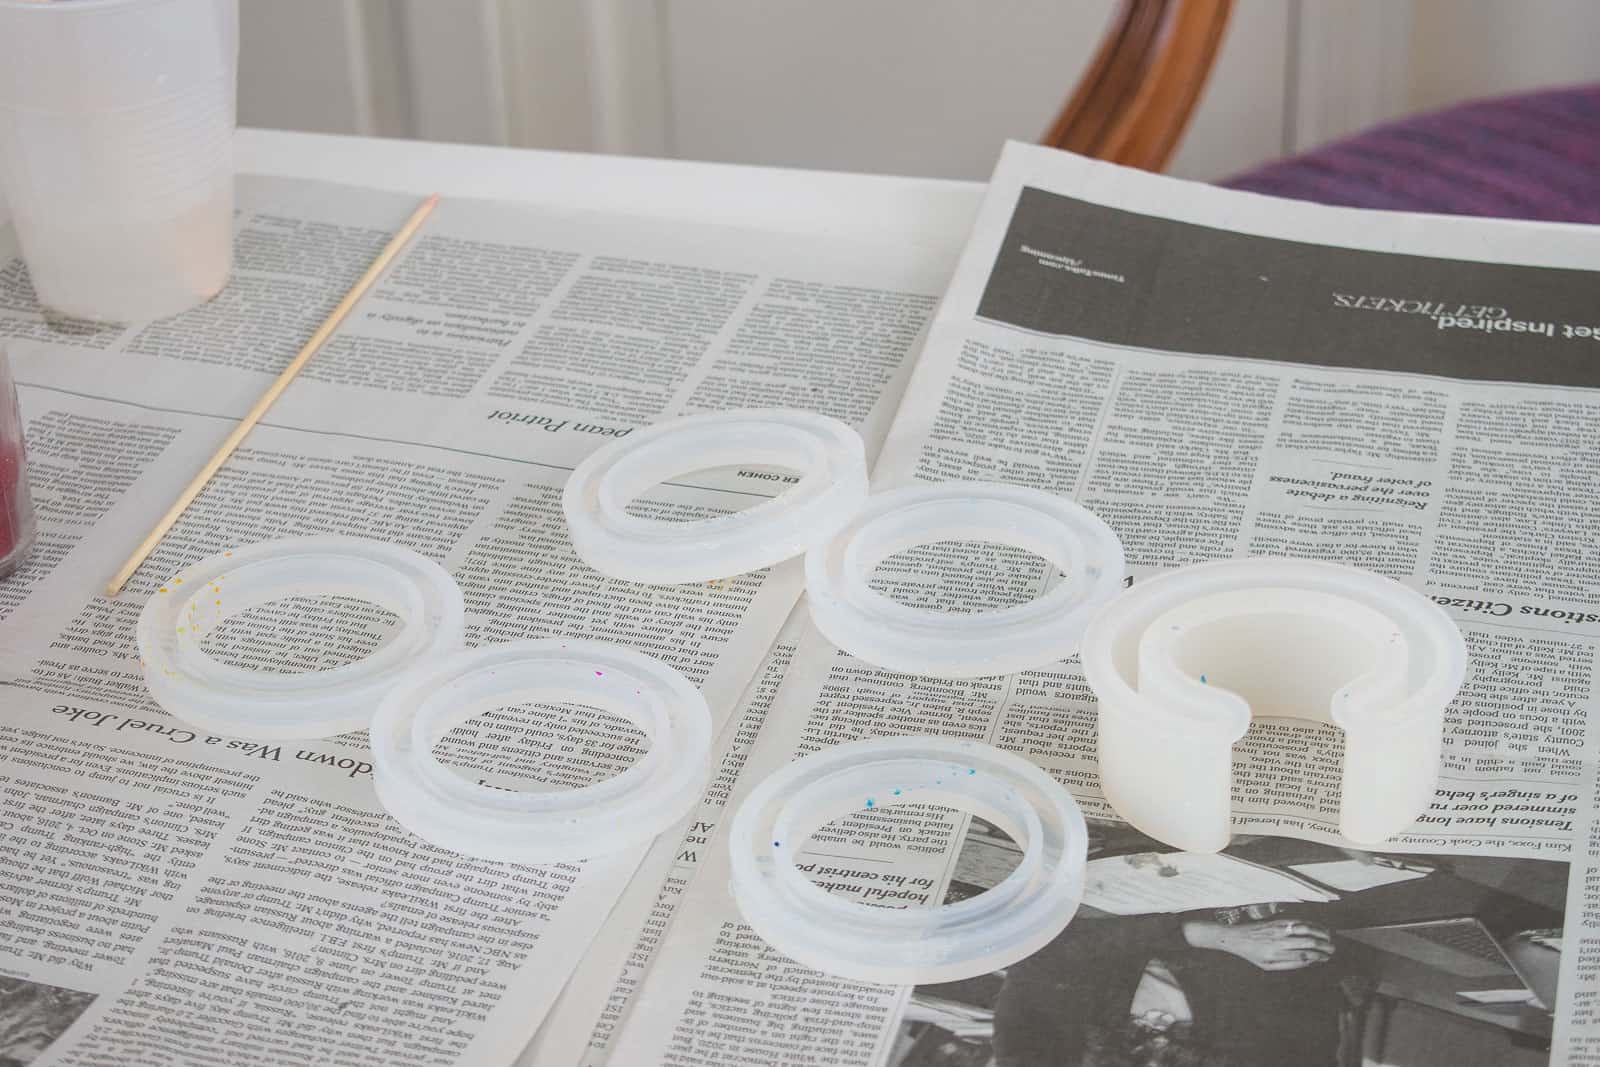
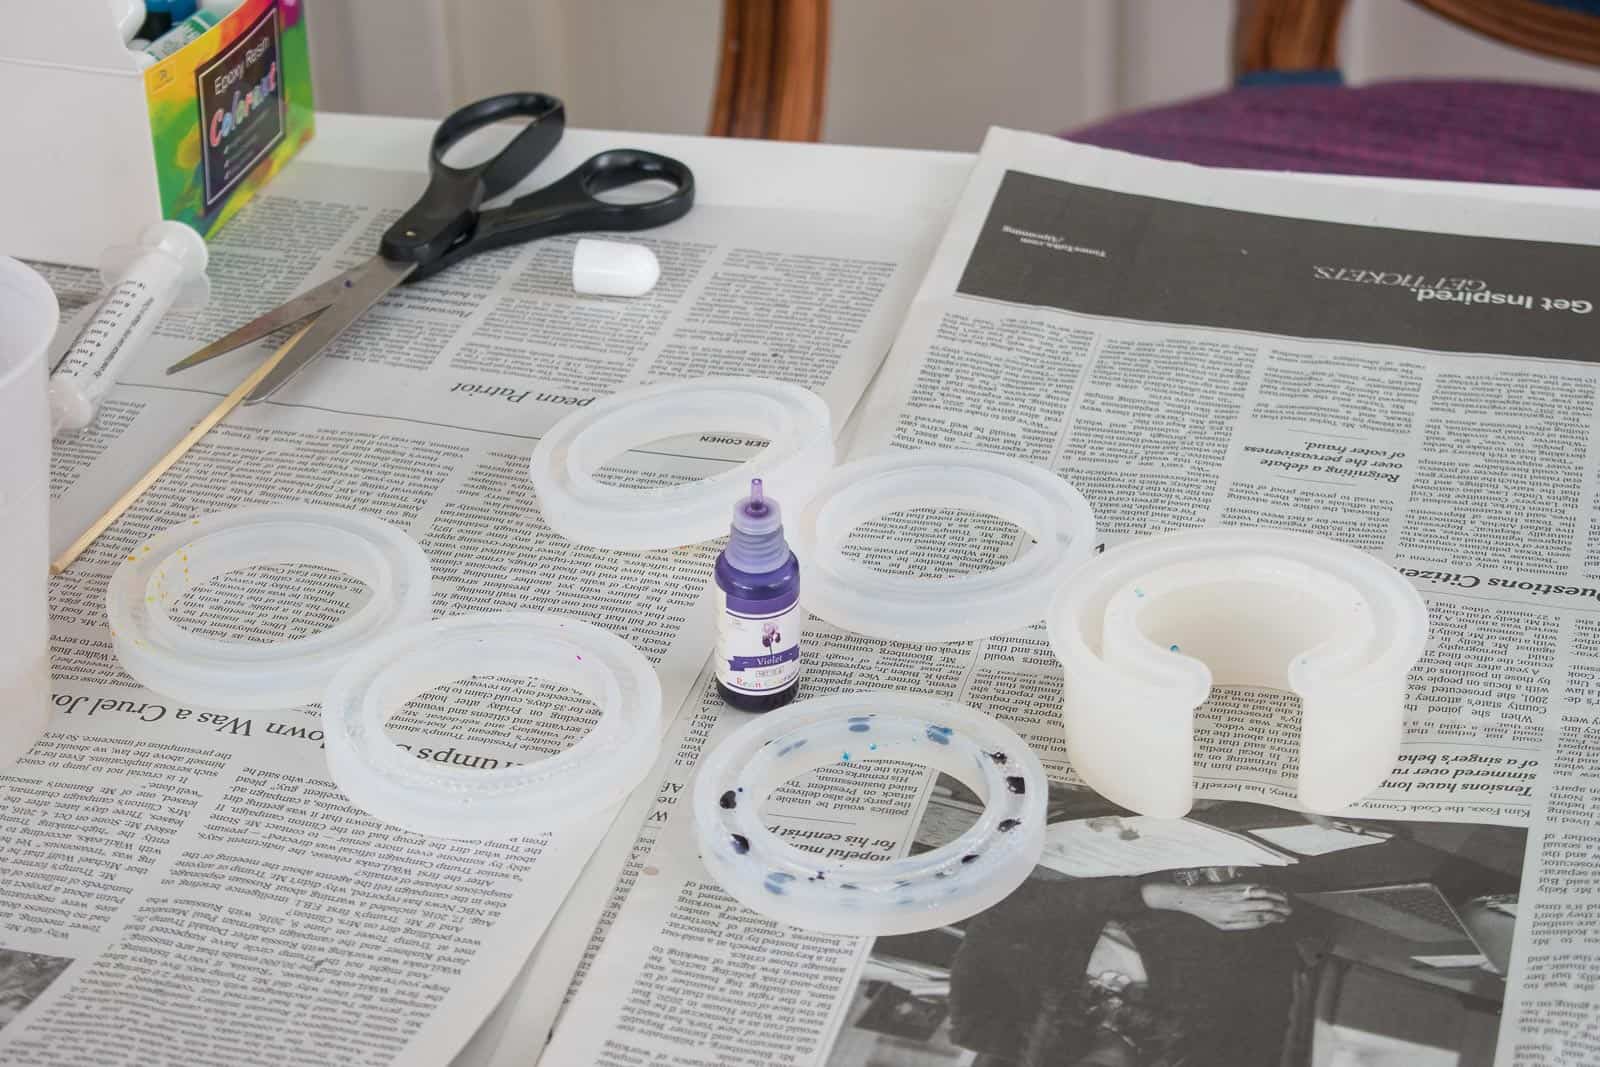
Step 1. It’s all about the Jewelry mold
Once I started searching for various mold on Amazon, I was hooked. I picked up two bracelet molds for under $10 each: a set of bangles and a chunky cuff.
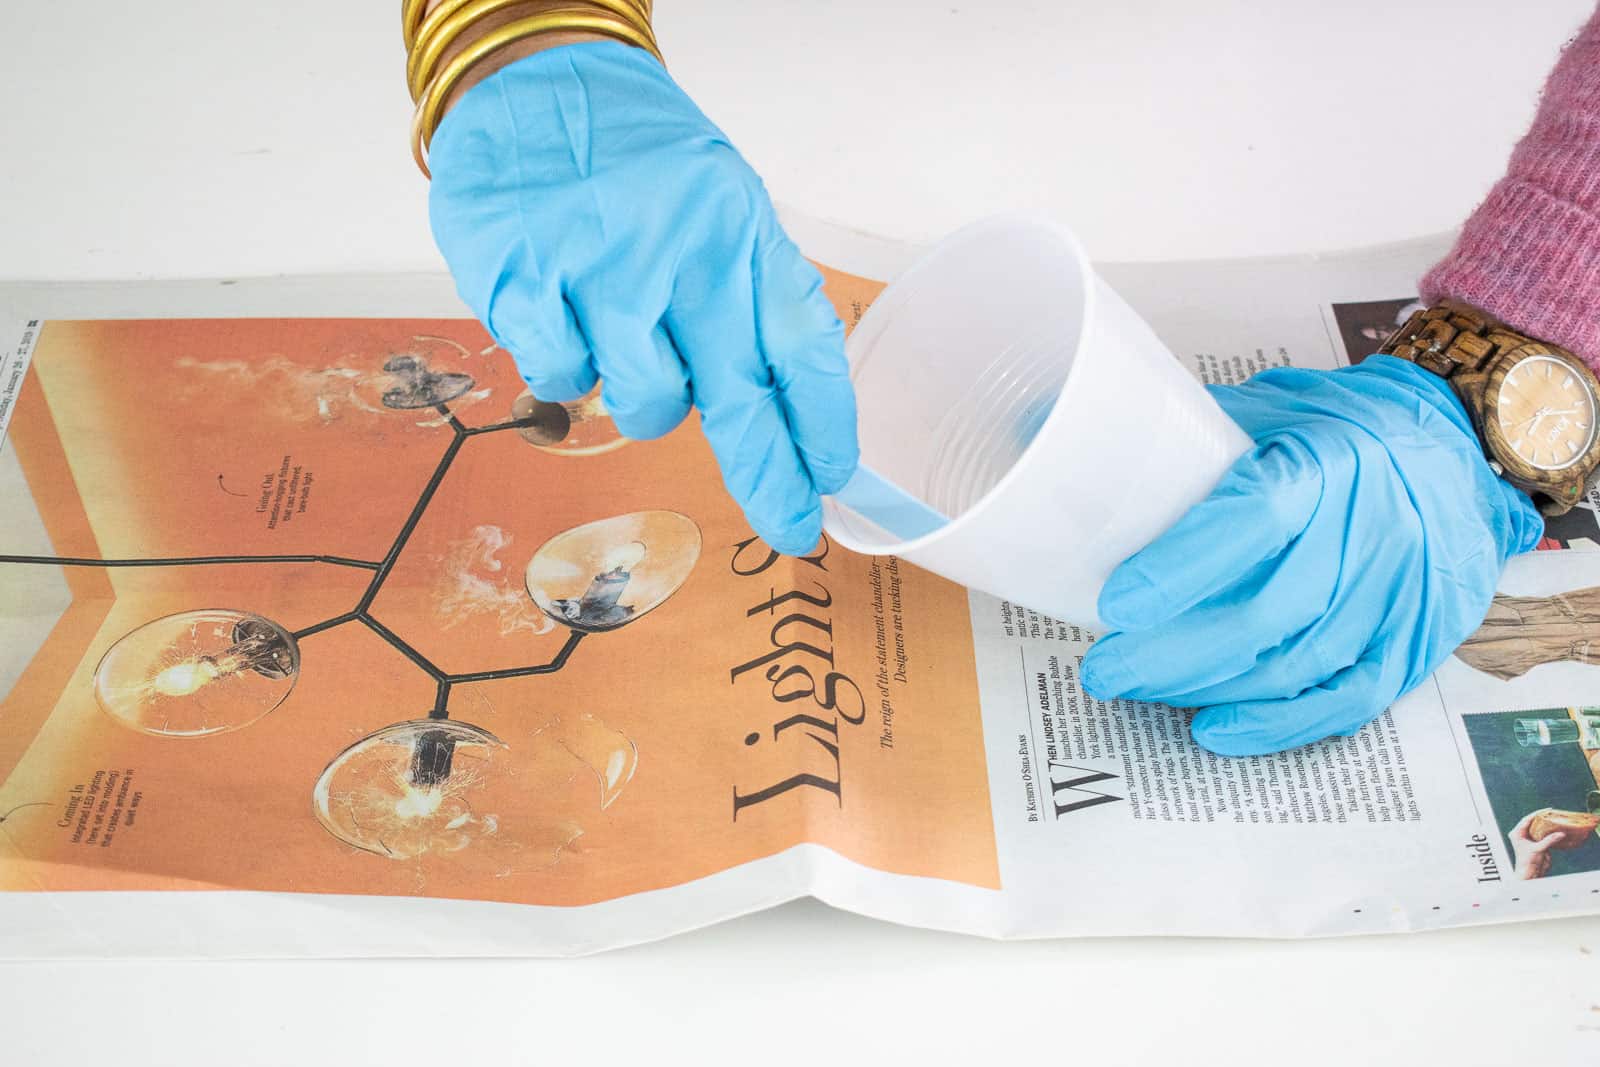
Step 2. Mix the epoxy
I’m using MAS Epoxies Art Pro and love the results. Follow the directions on the package (1:1 hardener to epoxy for this one) and mix throughly for at least 2 minutes. I typically use disposable plastic solo cups and use the lines on the cup to help me measure. It’s imperative that you mix throughly and… be ready for a little mess. I’m getting better but newspaper and rubber gloves are essential when you’re starting out.
Step 3. Set up your jewelry molds
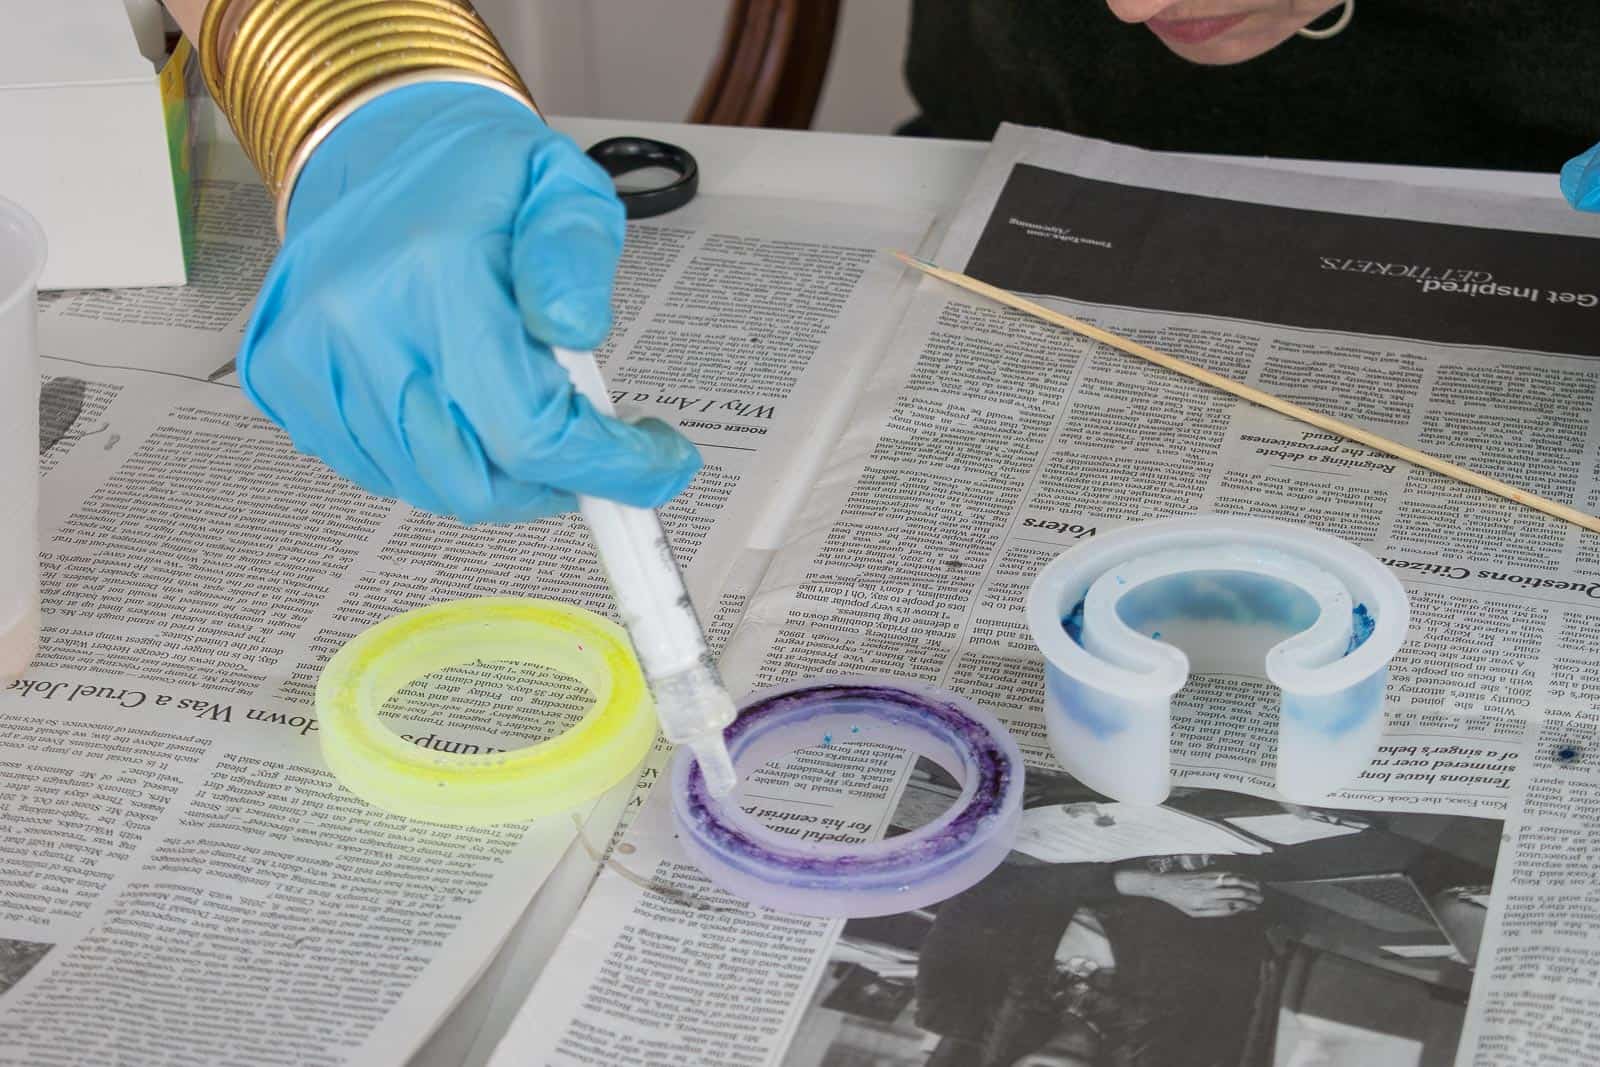
I didn’t do a great job with this, but make sure your molds are sitting on a LEVEL surface. If they’re off balance at all, the epoxy will set on one side of the mold and your jewelry will be uneven. Another thing I learned the hard way is that, because these molds are so small and the epoxy is fairly thick, pick up some plastic syringes to help you fill the molds.
Step 4. Find the right epoxy pigment
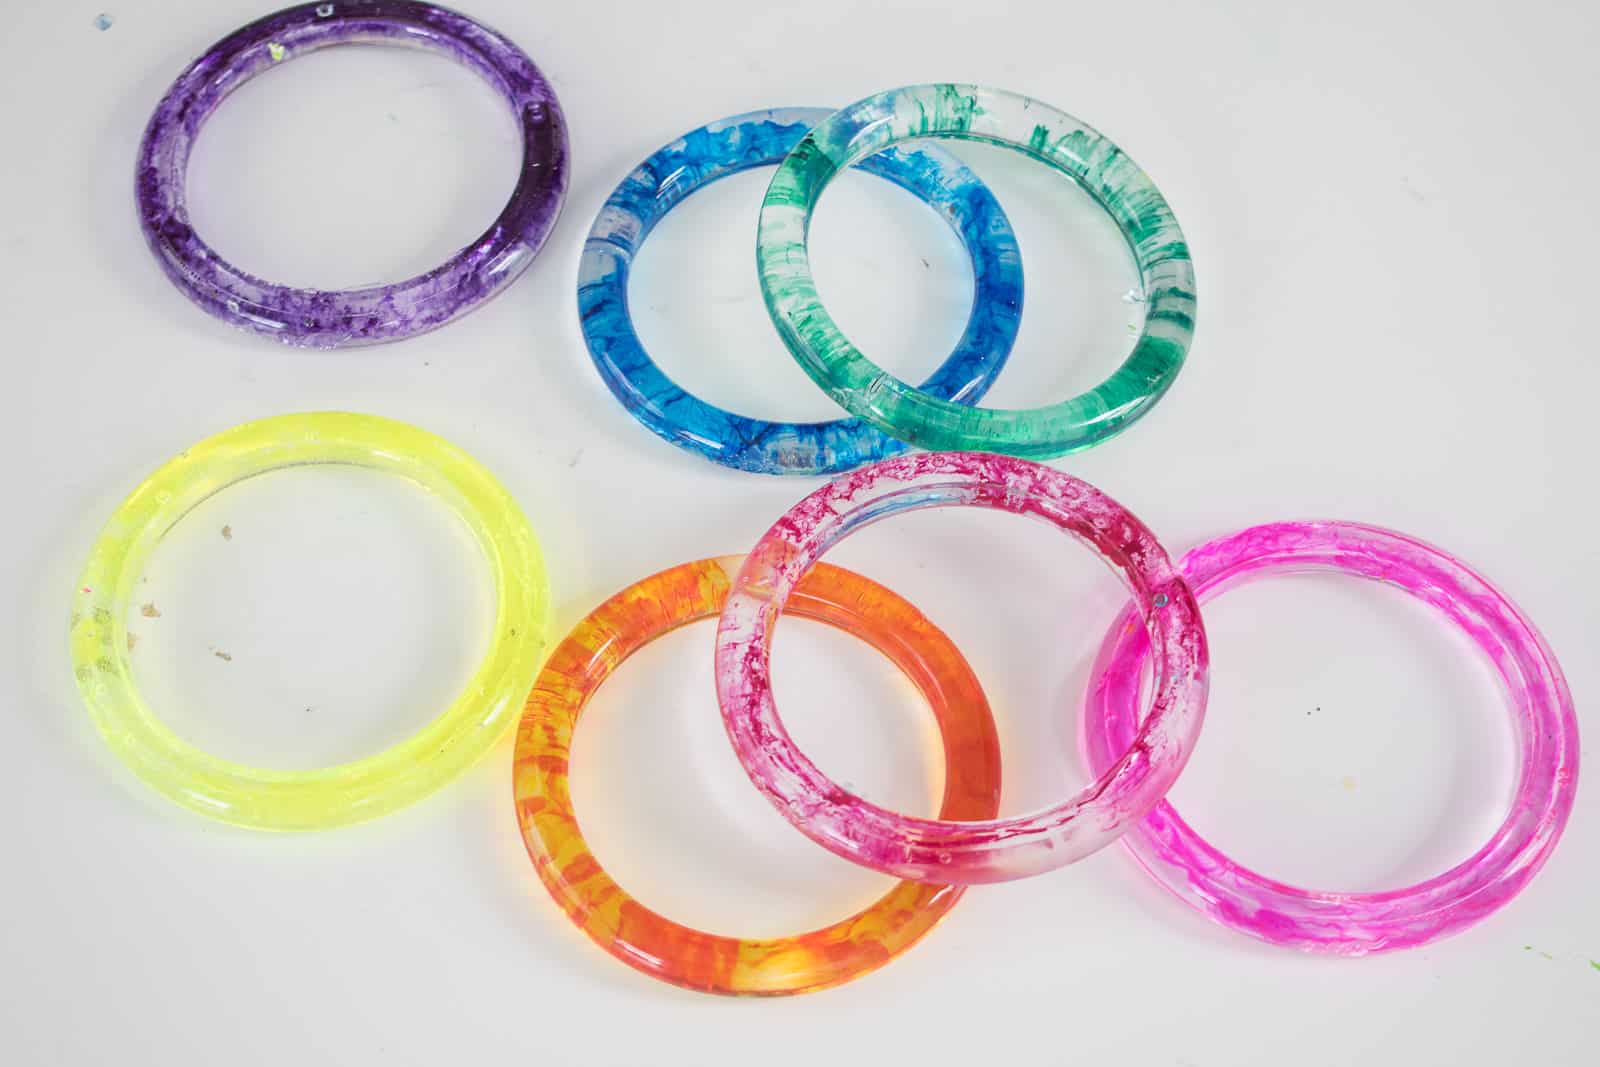
For these bracelets, I’m using this set of liquid color. I add the pigment directly into the wet epoxy and love the vibrant results. You can also add the pigment to the epoxy first for a softer watercolor effect. Powdered pigment is also a thing, but I find it to be more opaque so didn’t want that for these bracelets.
Step 5. Add the epoxy to the mold
This epoxy will sit for about 15 minutes before it starts to cure and get too thick so you have plenty of time. Using a syringe squirt a layer of epoxy into the mold. I filled each mold about half way with clear epoxy before adding the pigment. For the bangles I added a drop of one color sporadically around the mold and then went back with a wooden skewer to mix and stir the pigment a bit. I didn’t do this very much because I wanted more of a marbled effect, but obviously the more you manipulate the pigment in the epoxy, the more uniform the color will be in the mold.
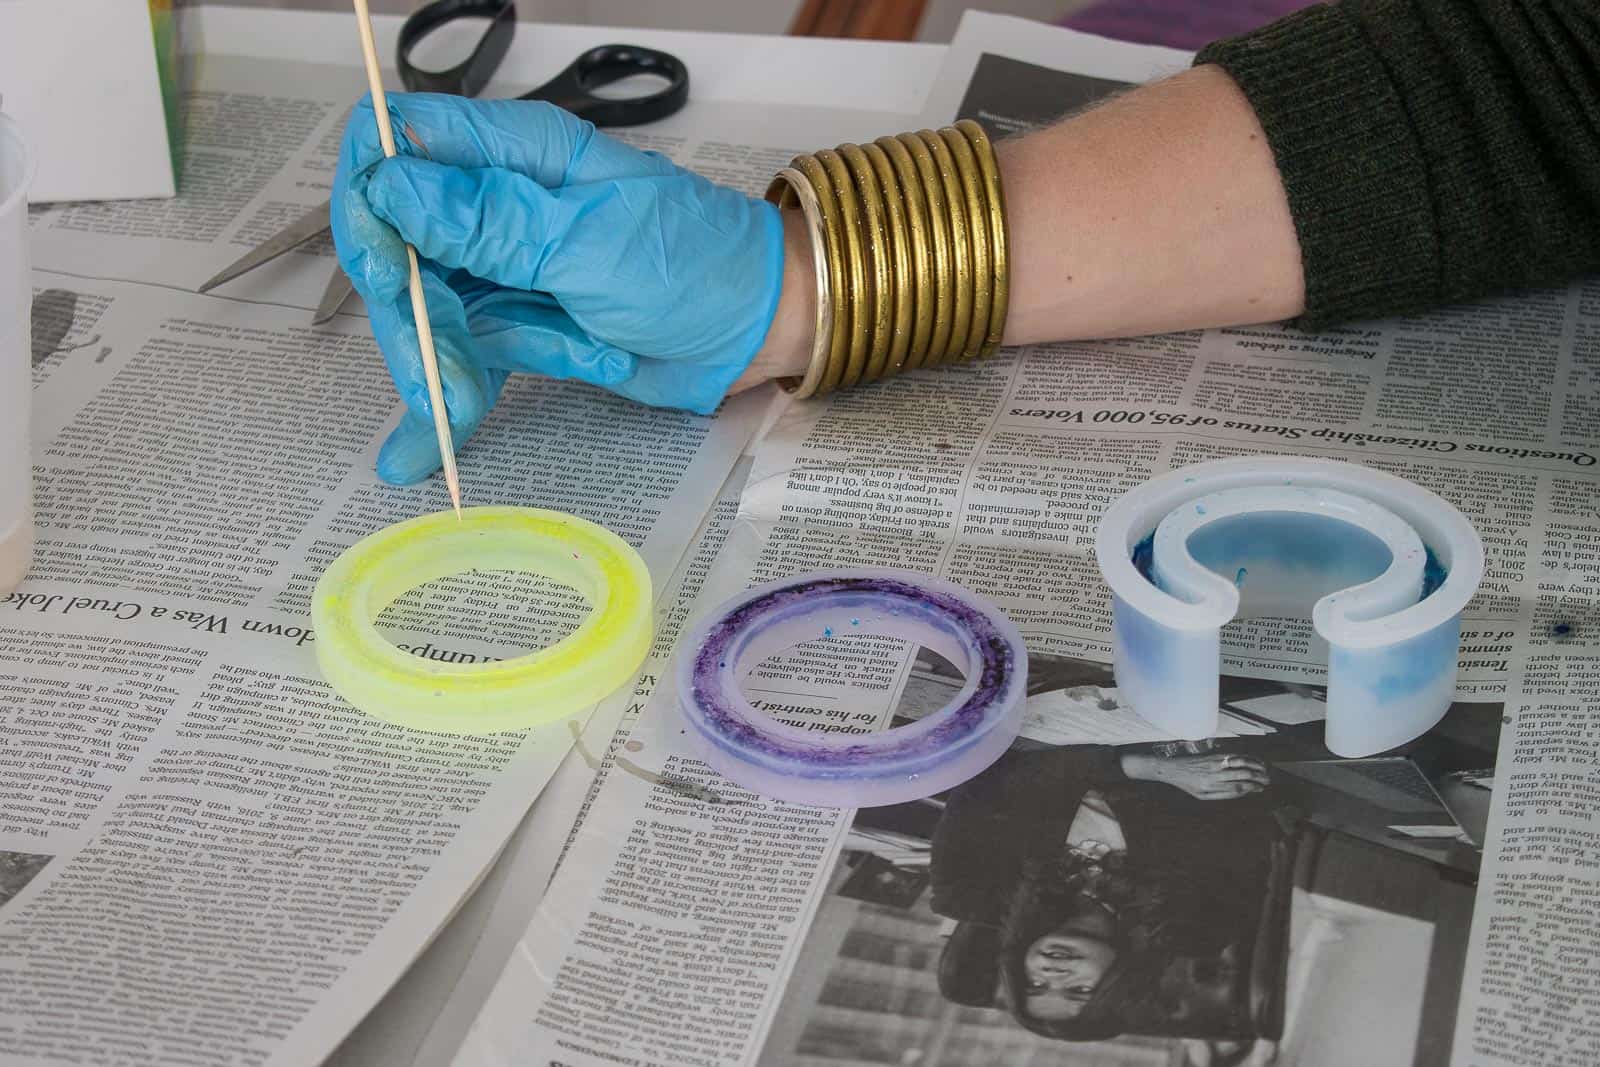
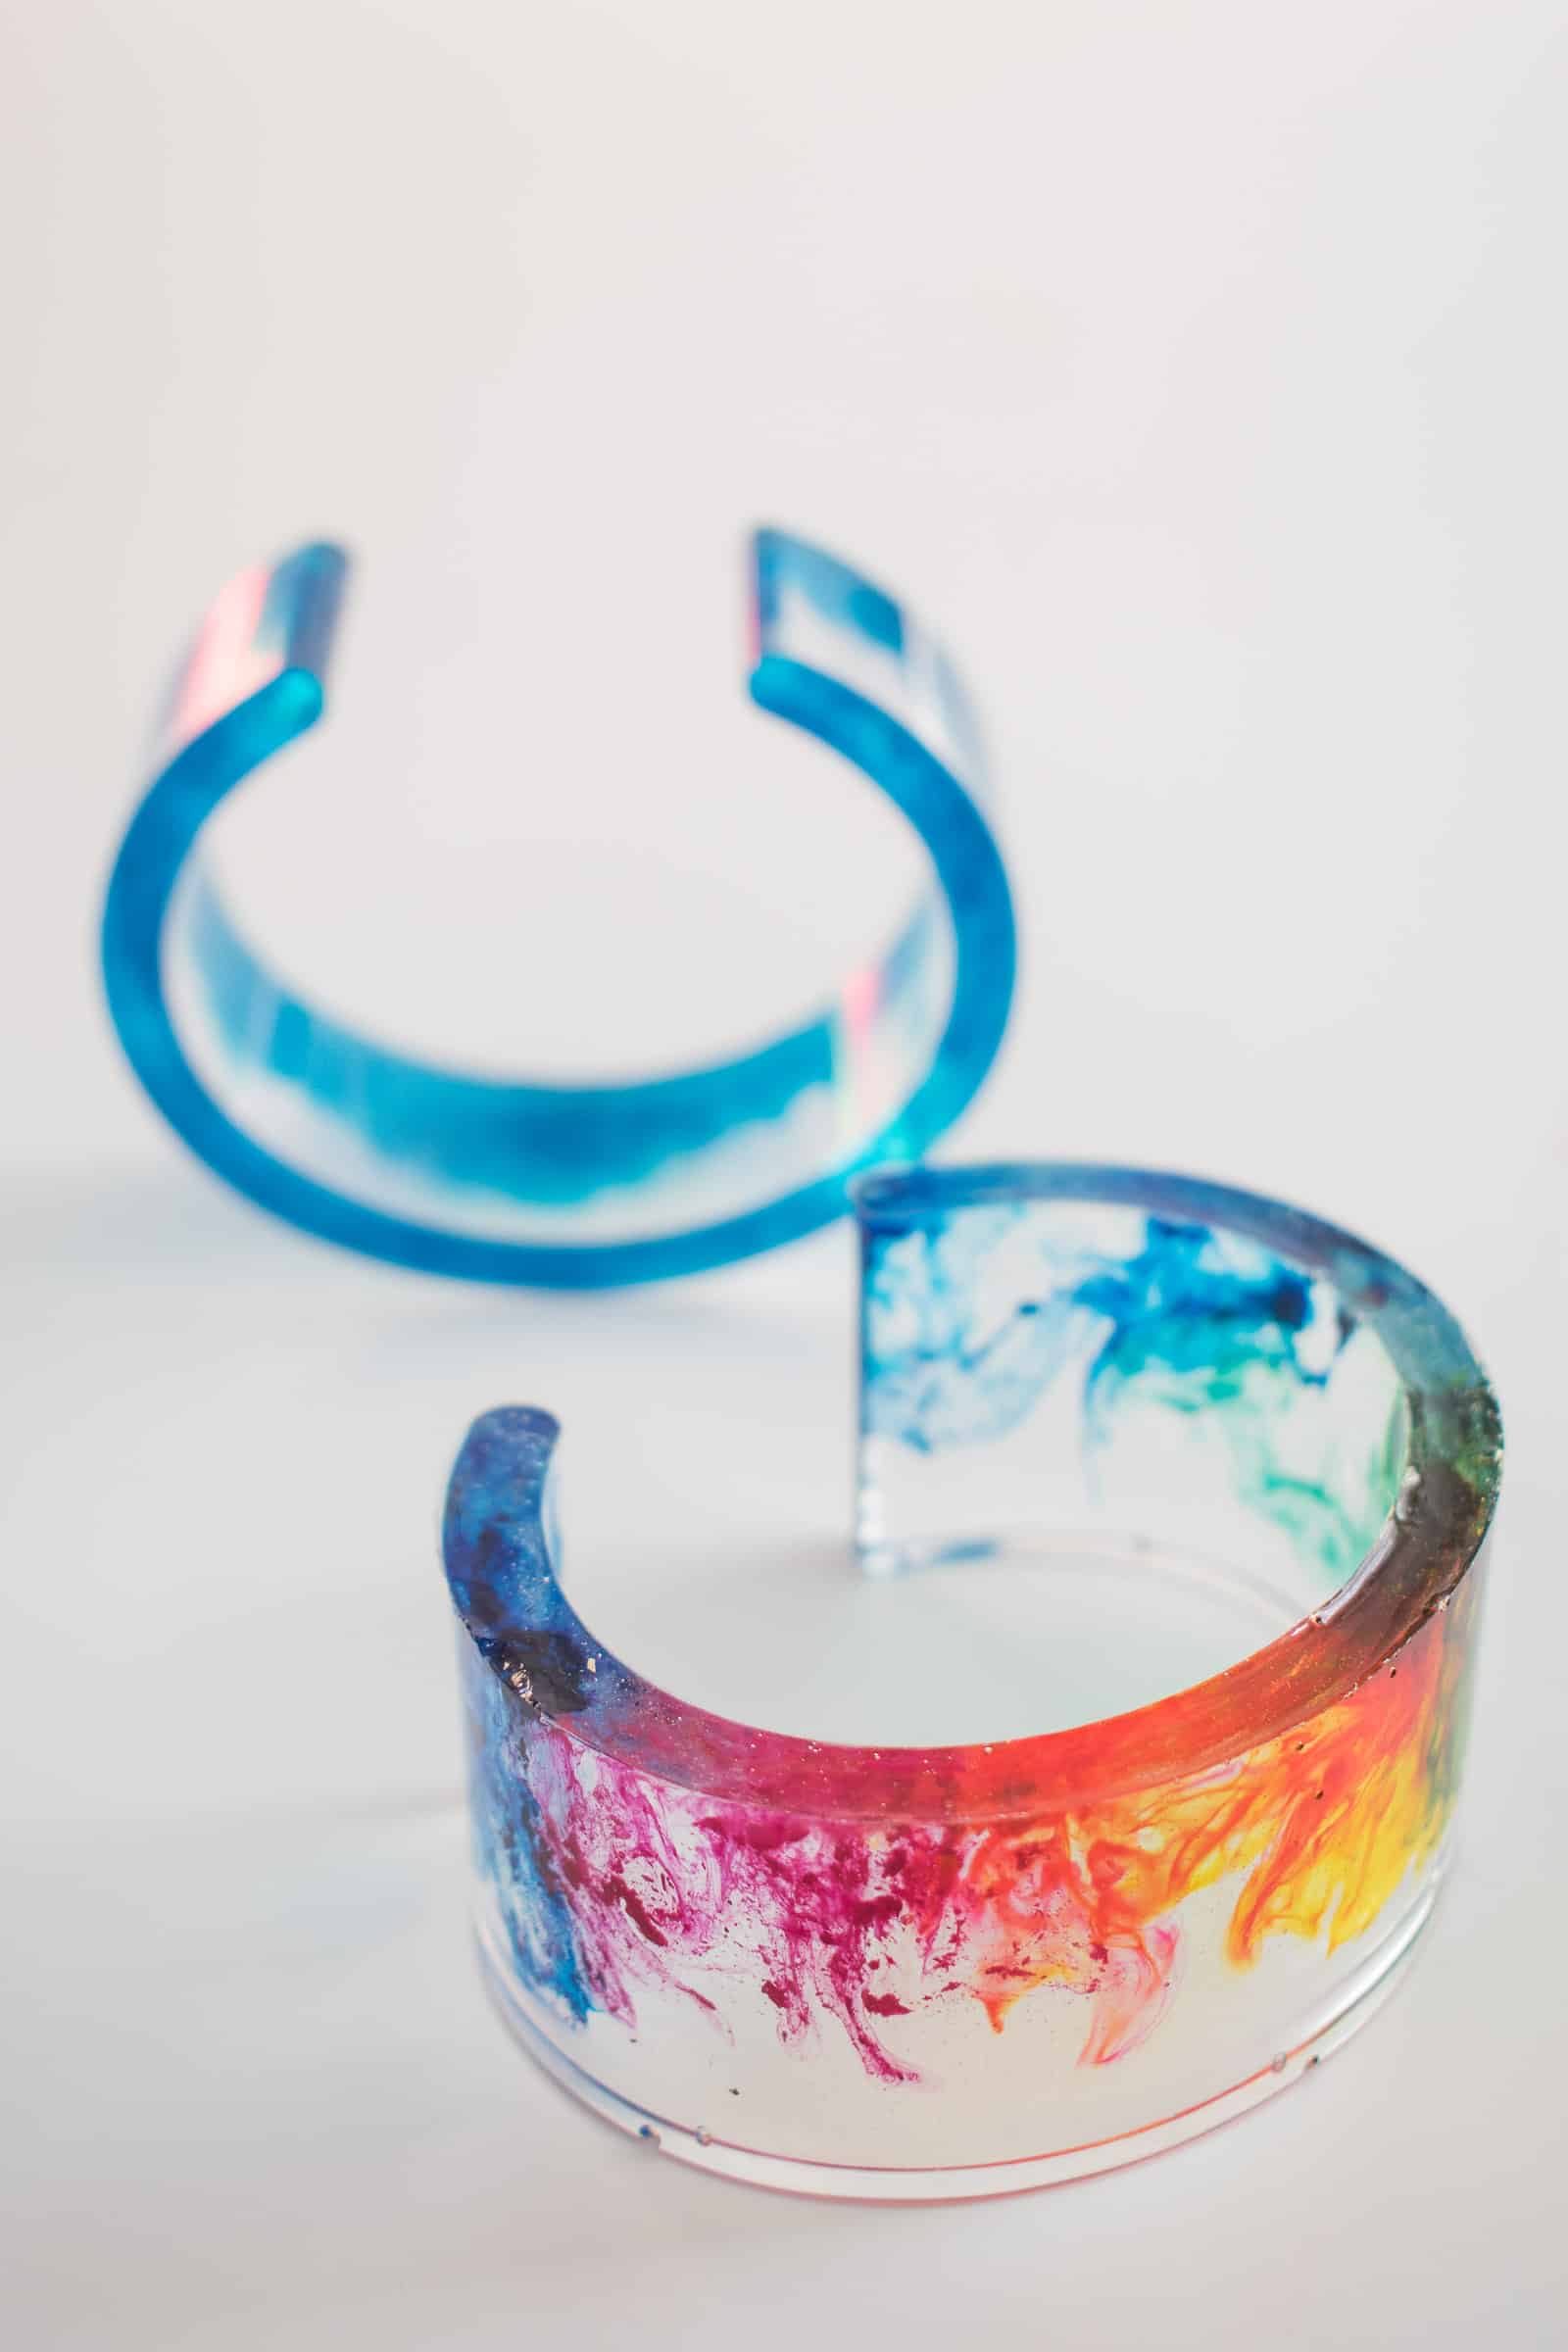
Because the cuff was a little deeper, I used all of the colors for a marbled rainbow effect. Note: There was ONE cuff that didn’t set up correctly because I used too much liquid pigment and it must have effected the chemistry of the epoxy… where the pigment settled in the epoxy, the finished piece is a little soft and malleable. Not sticky… just kind of rubbery.
Step 6. Finishing the top surface
The only part of this that took me a little time to figure out was the top surface of each bracelet. The first time I tried this, I ended up with a slight concavity because of the surface tension/ meniscus of the liquid epoxy. It’s nothing obvious, but the top edge of each bangle isn’t perfectly round. (A meniscus is the curved surface at the top of a column of liquid.)
To correct this, the second batch I made I went back and added another syringe of clear epoxy to the top edge about 15 minutes after I’d poured. Essentially I wanted to fill the top of the mold to the tippy top. (You know when you fill a glass of the water as high as it can possibly go and you can see the top of the water just peeking out over the lip of the glass? That’s what I was going for with the bracelets.
The second batch isn’t perfect, but it’s pretty close. The epoxy is super thick so it’s not as hard to achieve that meniscus.
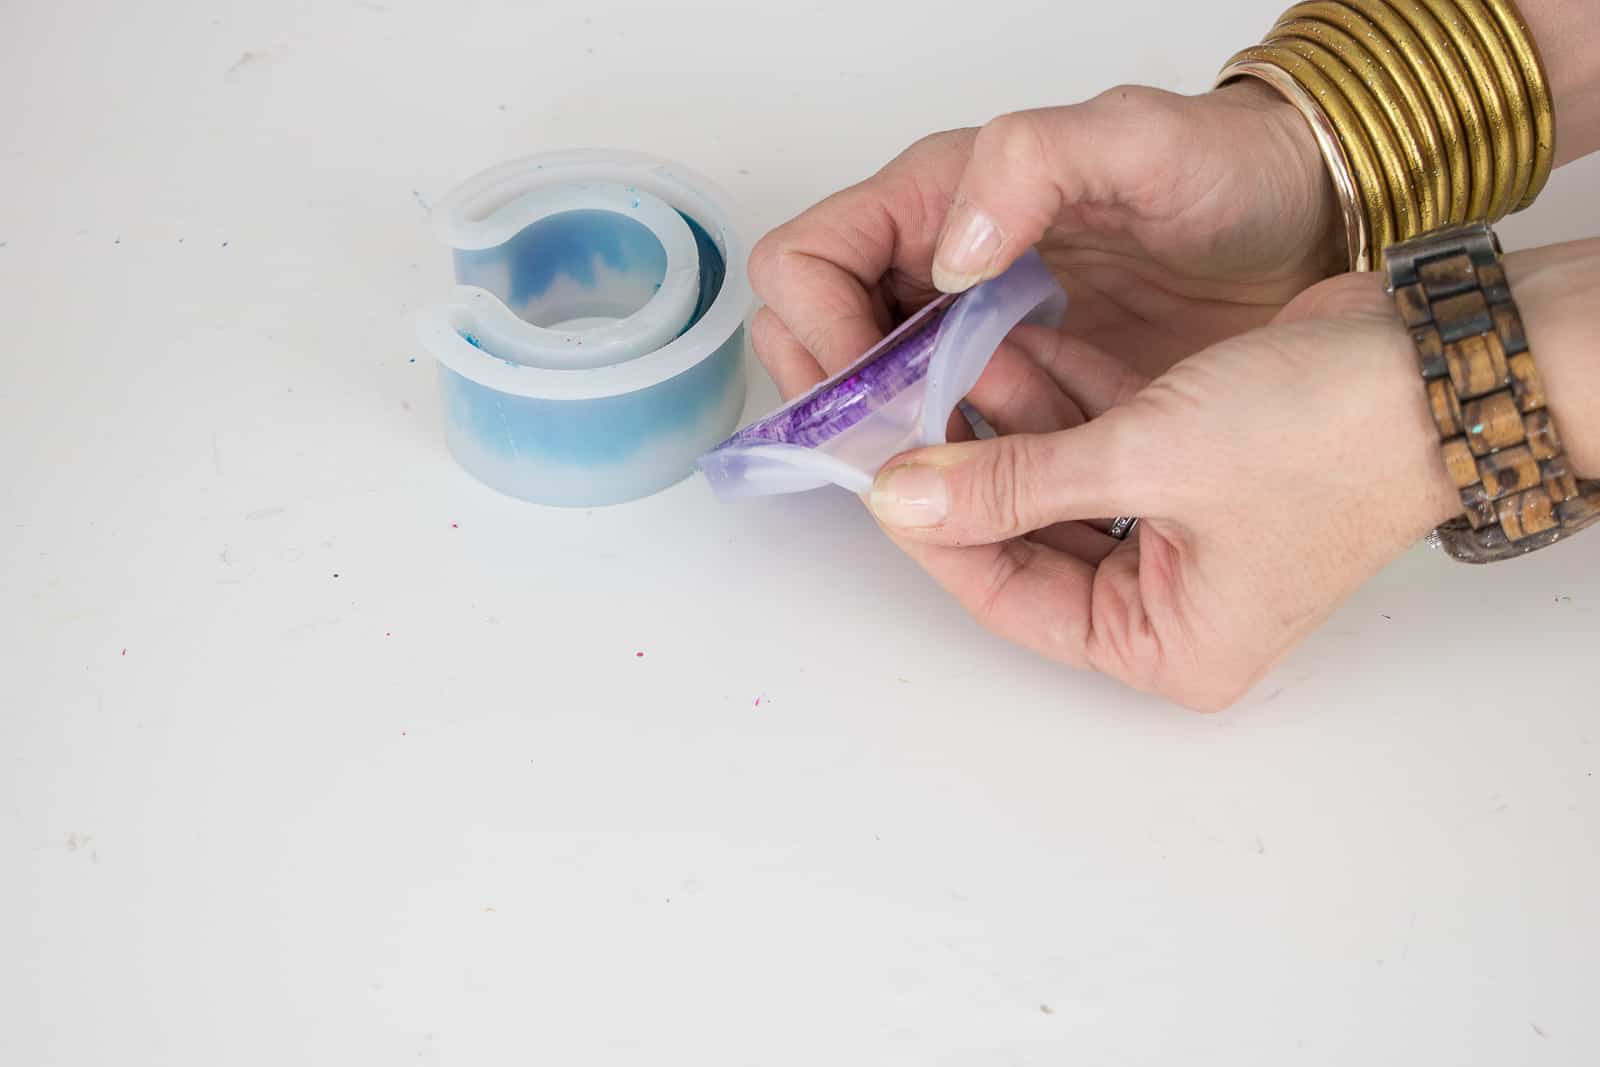
Step 7. Finishing and removing the bracelets from the mold
Typically with epoxy, as it hardens it gives off tiny air bubbles that you remove by exhaling or blowing hot air across the surface of the epoxy. I attempted to exhale on each of these bracelets but the molds were so thin, that I’m not sure whether this did any good. I didn’t notice too many bubbles in my bracelets either so I’ll just assume that my breathing did something.
I let the bracelets sit for a day or two and they came out of the silicon molds super easily. I removed one batch a little early and the epoxy was slightly soft so I was able to lightly shape those bangles into more oval shapes.
Overall, I LOVED this project. I never met a piece of colorful jewelry I didn’t love and these fun molds made it very easy for me to experiment with some coloring and pouring techniques. You won’t use much epoxy on this project either which is another major bonus! Let me know if you have any questions!

Materials for DIY Resin Jewelry
- Silicon Cuff Mold
- Silicon Bangles Mold
- MAS Art Pro Epoxy
- Liquid Pigment
- Wooden skewers, disposable cups, newspaper


Those bracelets are so you! I love how you mixed the colors in the cuff.
Thanks, Ashley!!! Just a little bit obsessed with them! 😉
I want to make epOxy cuff bracelets out of paper colLage, but i have absolutely no idea how to do this. Any ideas?
I’m not sure what you mean by paper collage? So you’d like paper to be the bracelet itself? I’ve seen people use a brush and paint epoxy on as a top coat, but you’d need to make sure the bracelet was elevated so the epoxy doesn’t pool underneath it.