
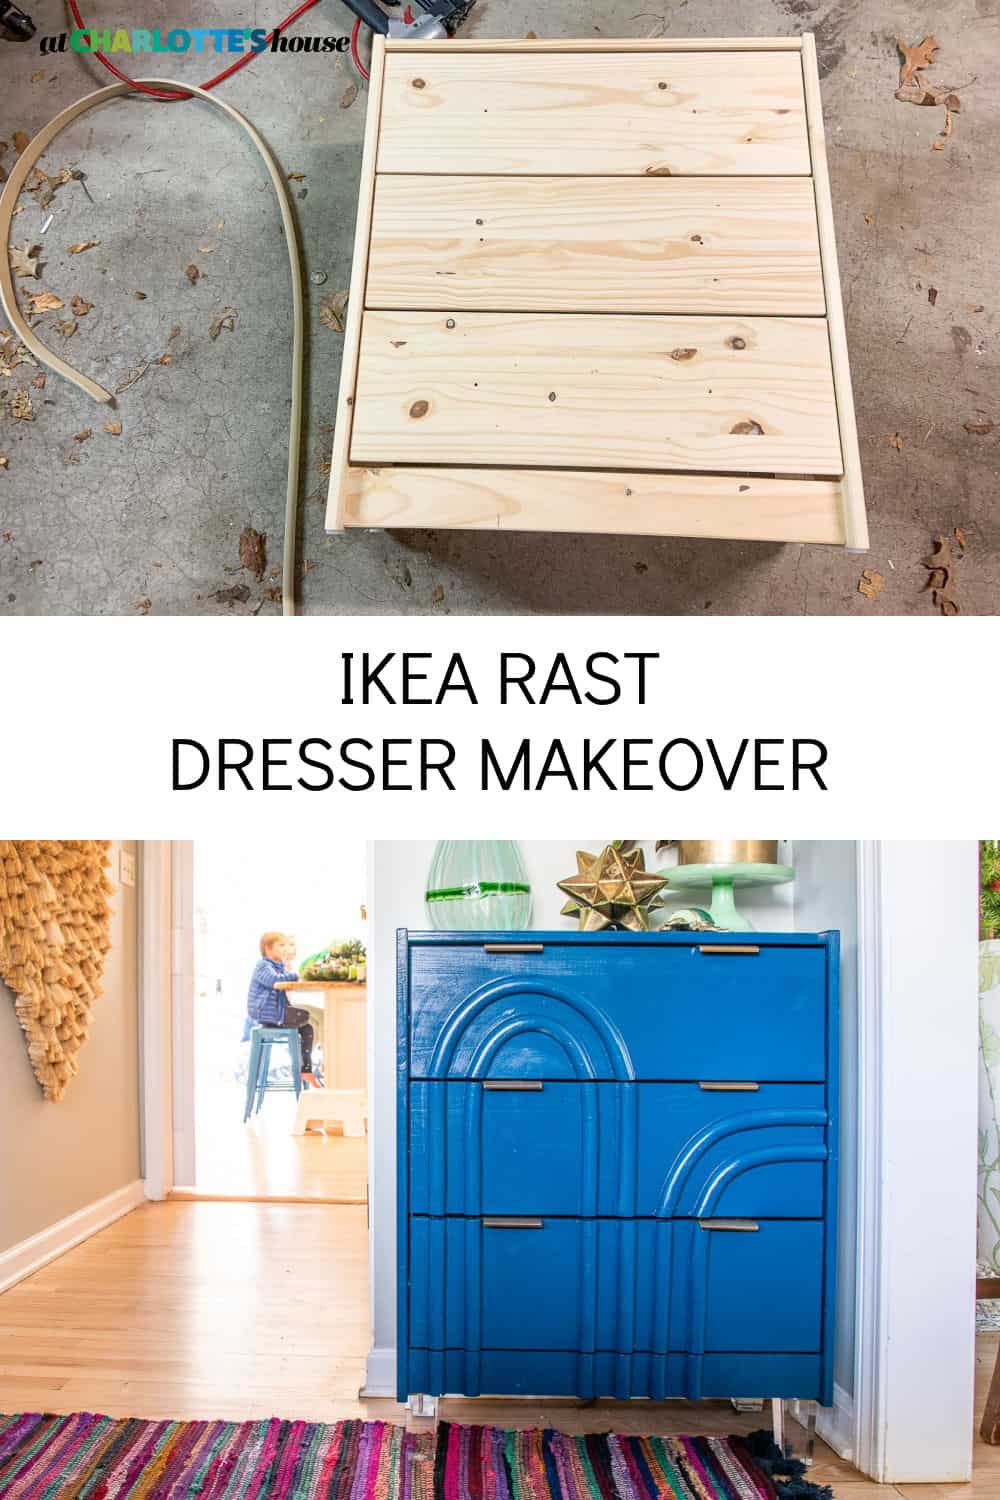
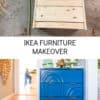
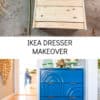
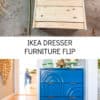
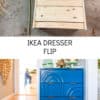
Ikea Rast Dresser Mid Century Makeover
Psssst… this post *might* contain affiliate links: see my disclosure here.
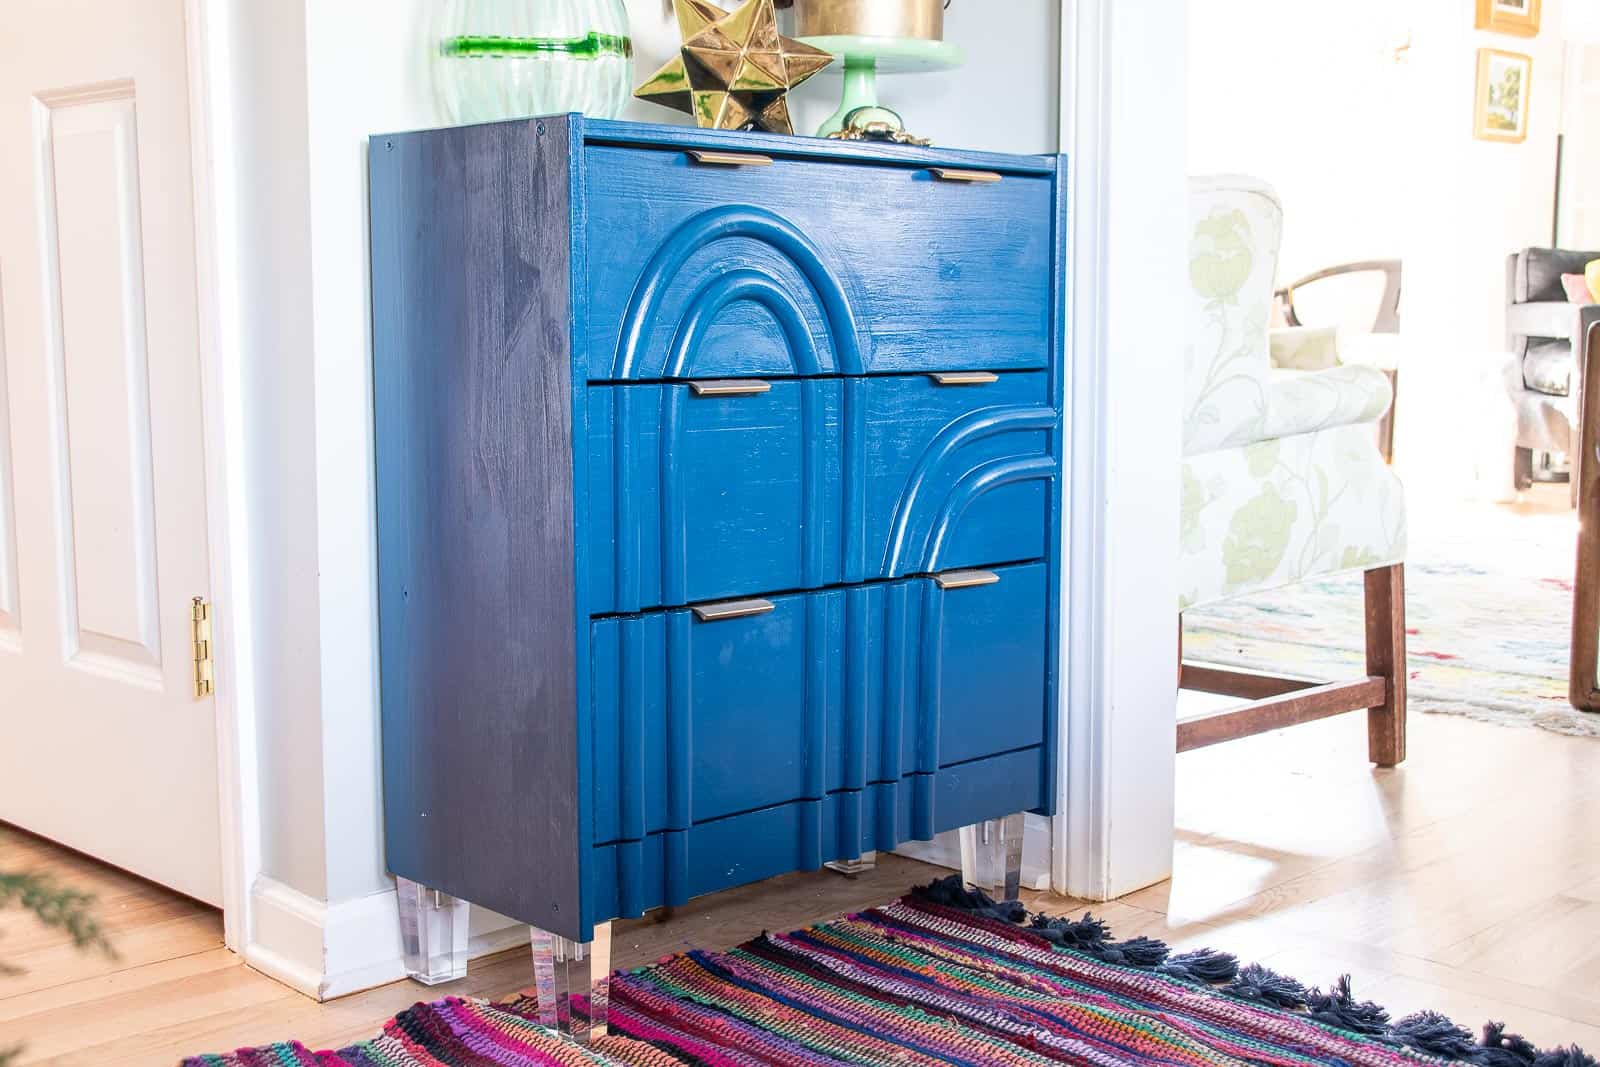
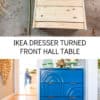
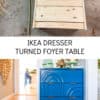
Ikea Rast Dresser Turned Mid Century Show Stopper
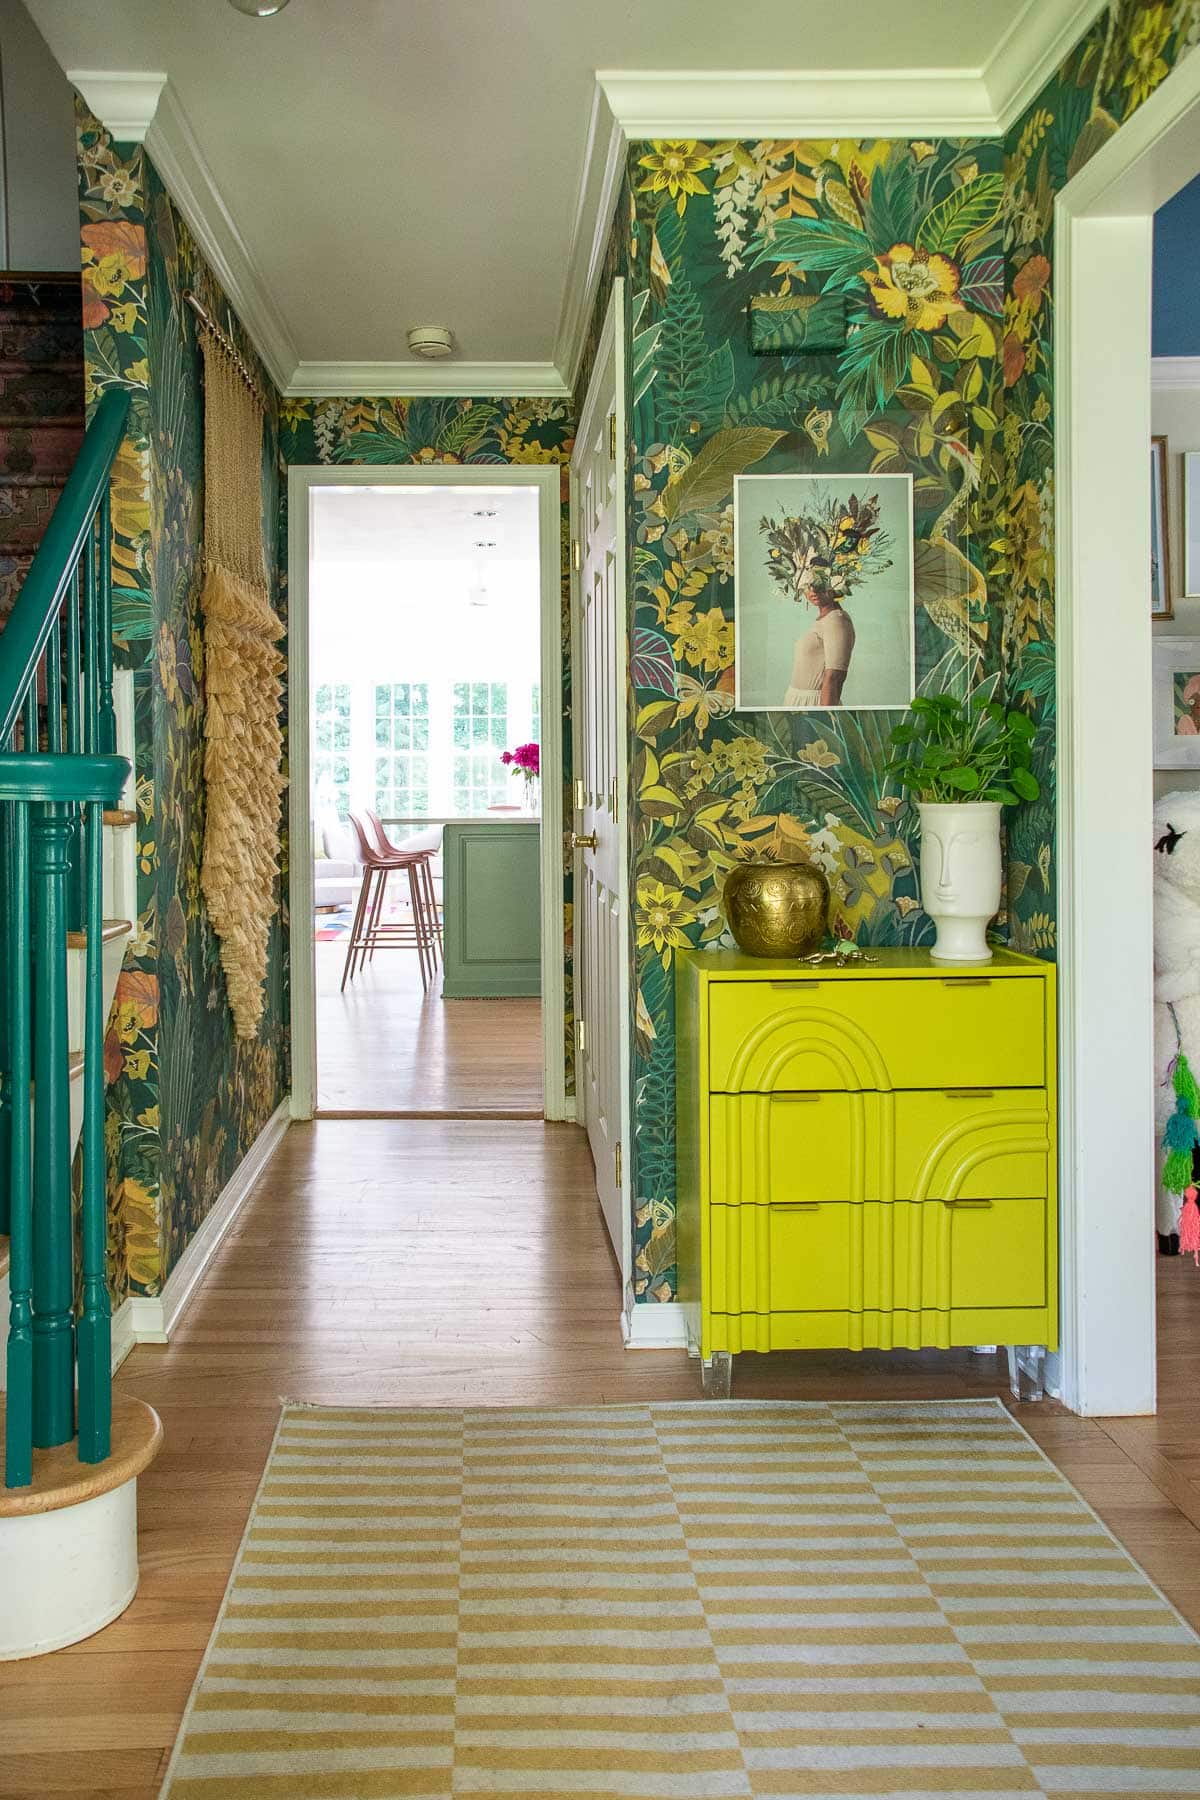
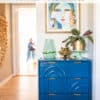
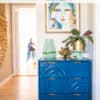
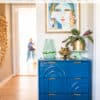
This simple Ikea Rast dresser got a modern update for our new foyer.
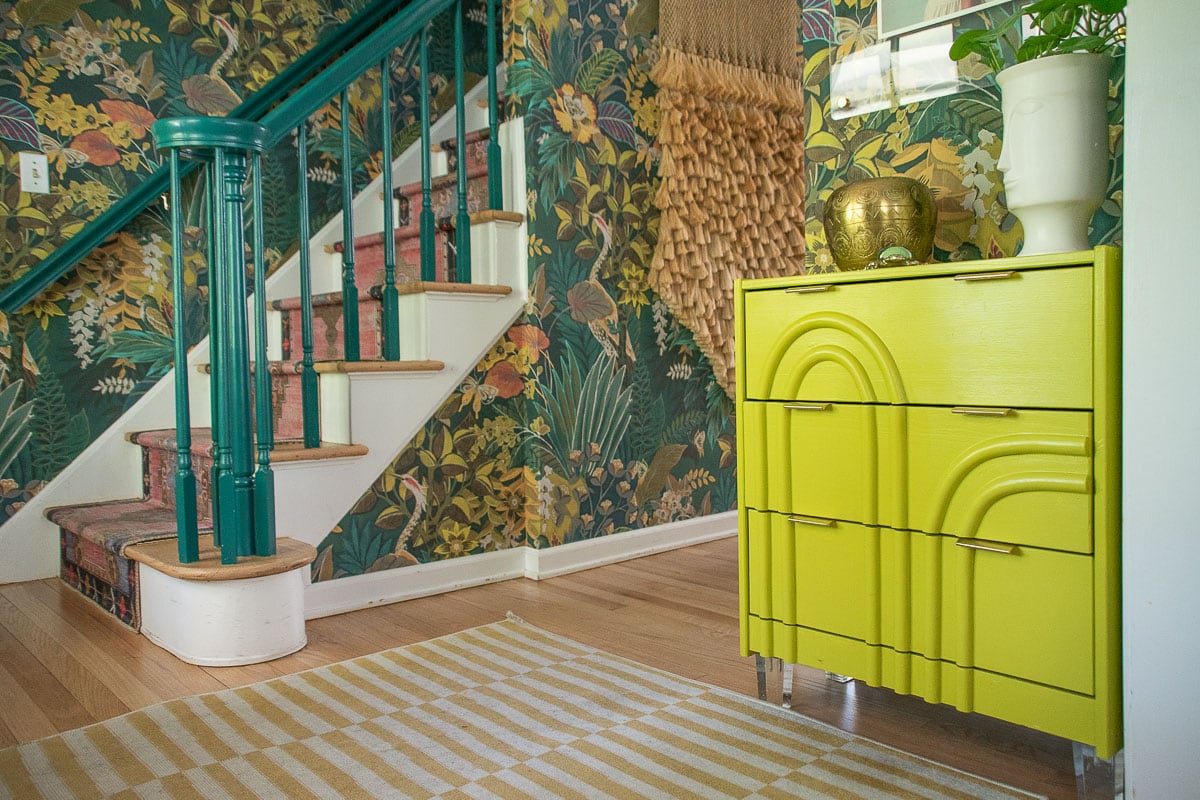
The Ikea Rast dresser is a staple in DIY makeovers. It’s super inexpensive and, unlike lots of Ikea products, is made of wood! I’ve been drooling over this sideboard for years so I decided to turn my $40 Ikea purchase into something chic and modern and more appropriate for our new foyer! I’m working with a new material to me: flexible trim/ flexible moulding. It’s not necessarily budget friendly, but it did exactly what I wanted it to do!
Shop my favorites!
Modern Ikea Rast Hack
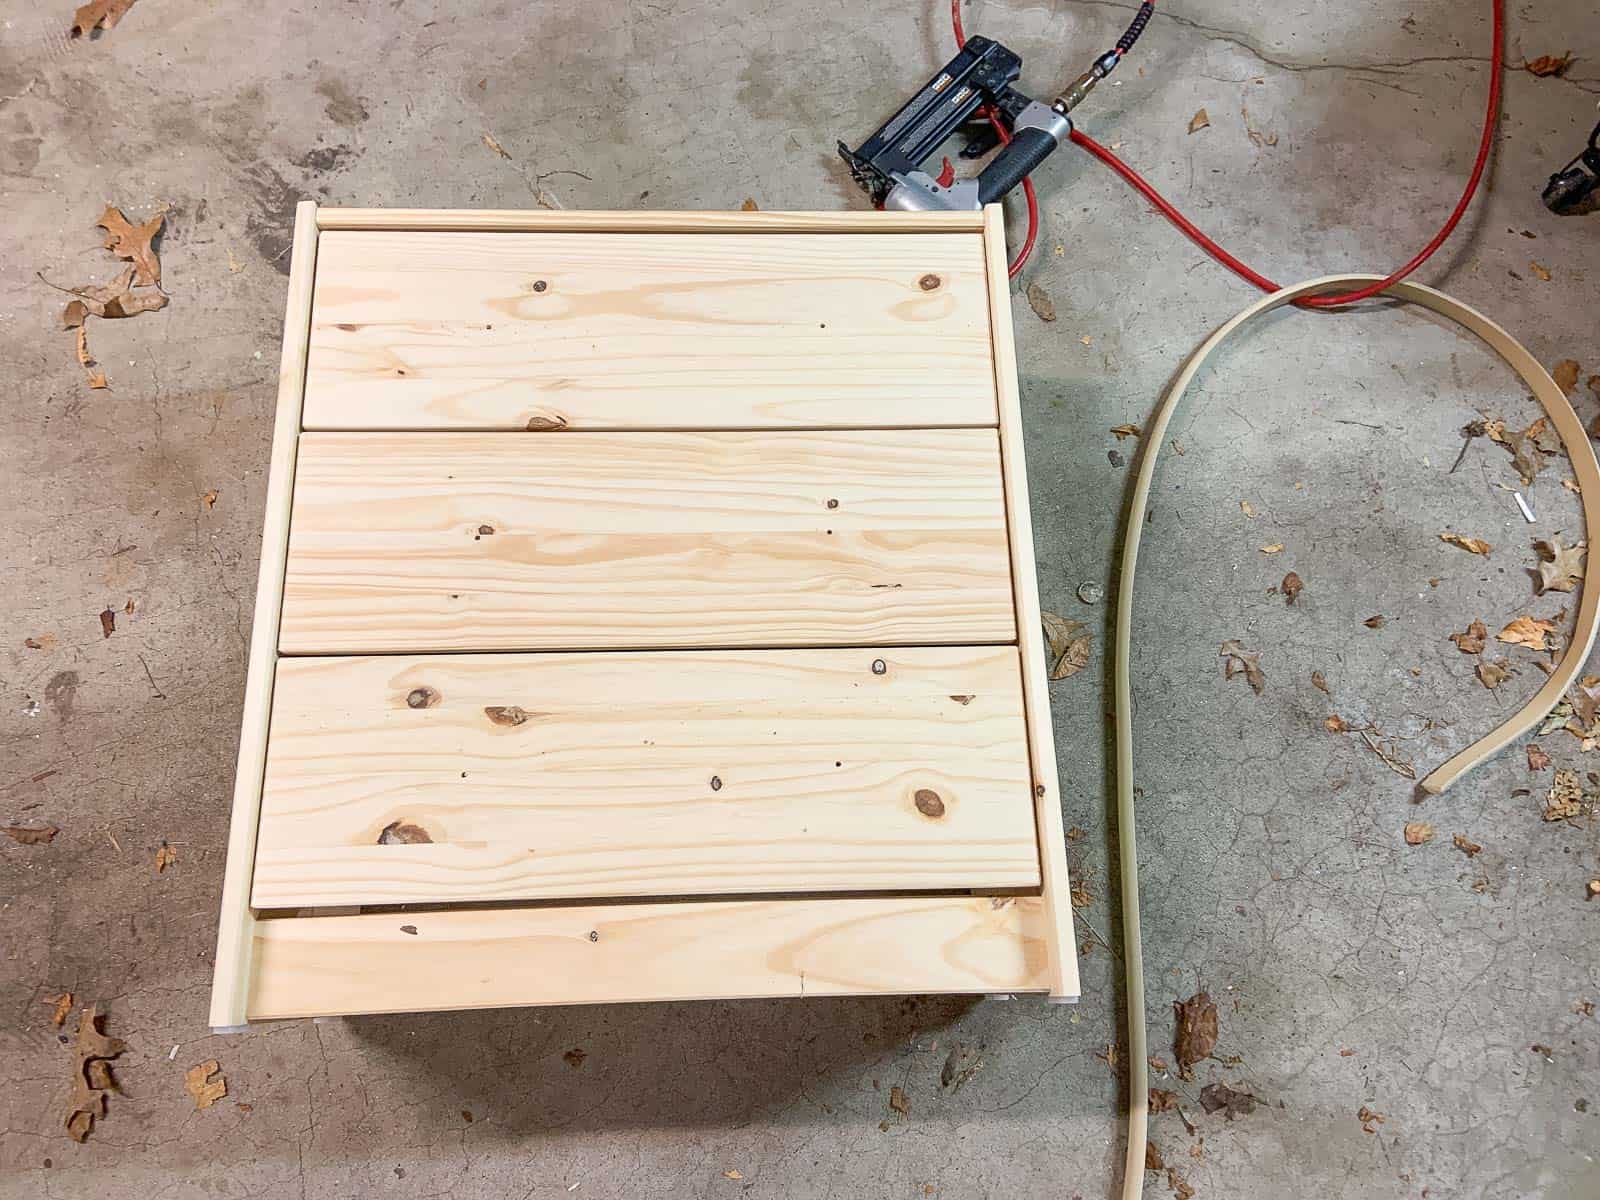
Step 1. Build up the kick plate
The bottom kick plate of the Rast dresser is inset from the drawers so I needed to build this up so it would be flush. A 1×3 piece of common pine fit perfectly but, in hindsight, I probably could have used the included kick plate and tweeked how assembled this part of the dresser. I used wood glue and my brad nailer to attach the 1×3.
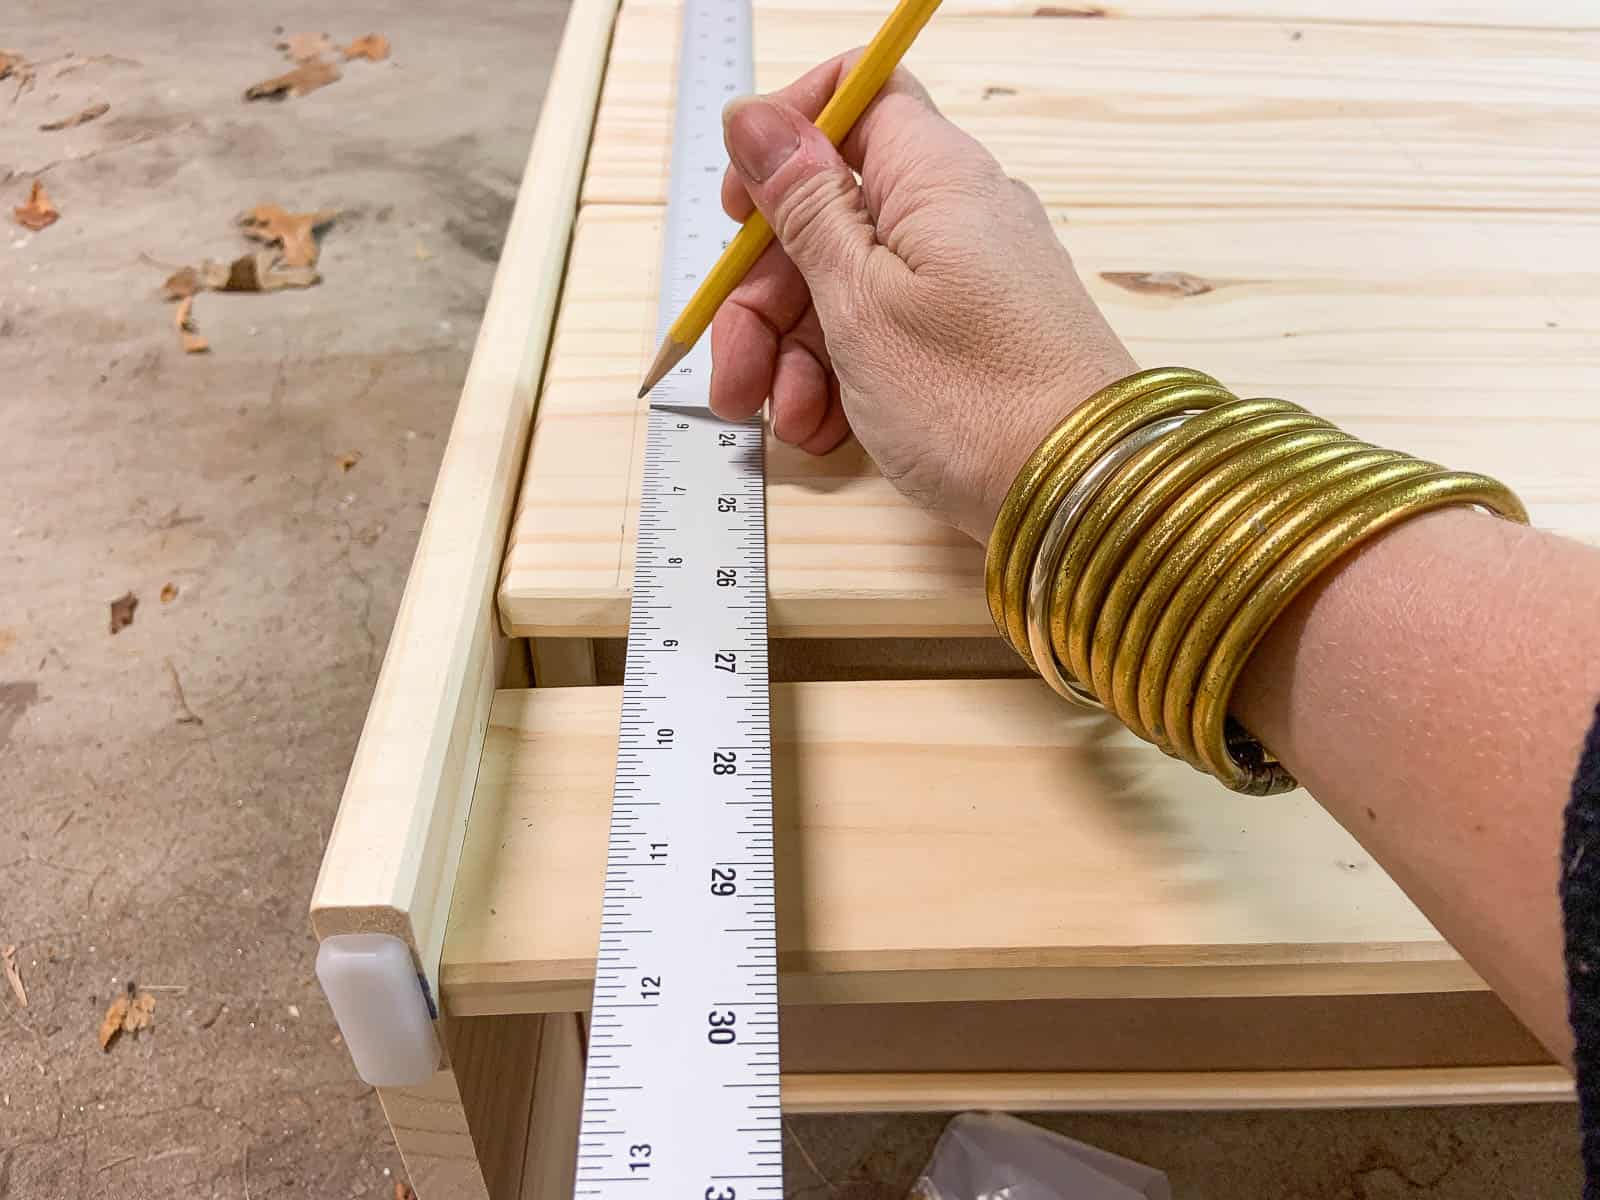
Step 2. Measure for trim
I used a ruler to mark guidelines for the trim. I didn’t mark out the arches themselves but the trim naturally curved where I wanted it if I lined it up with the straight lines. I marked out where the new handles would go as well to make room for them.
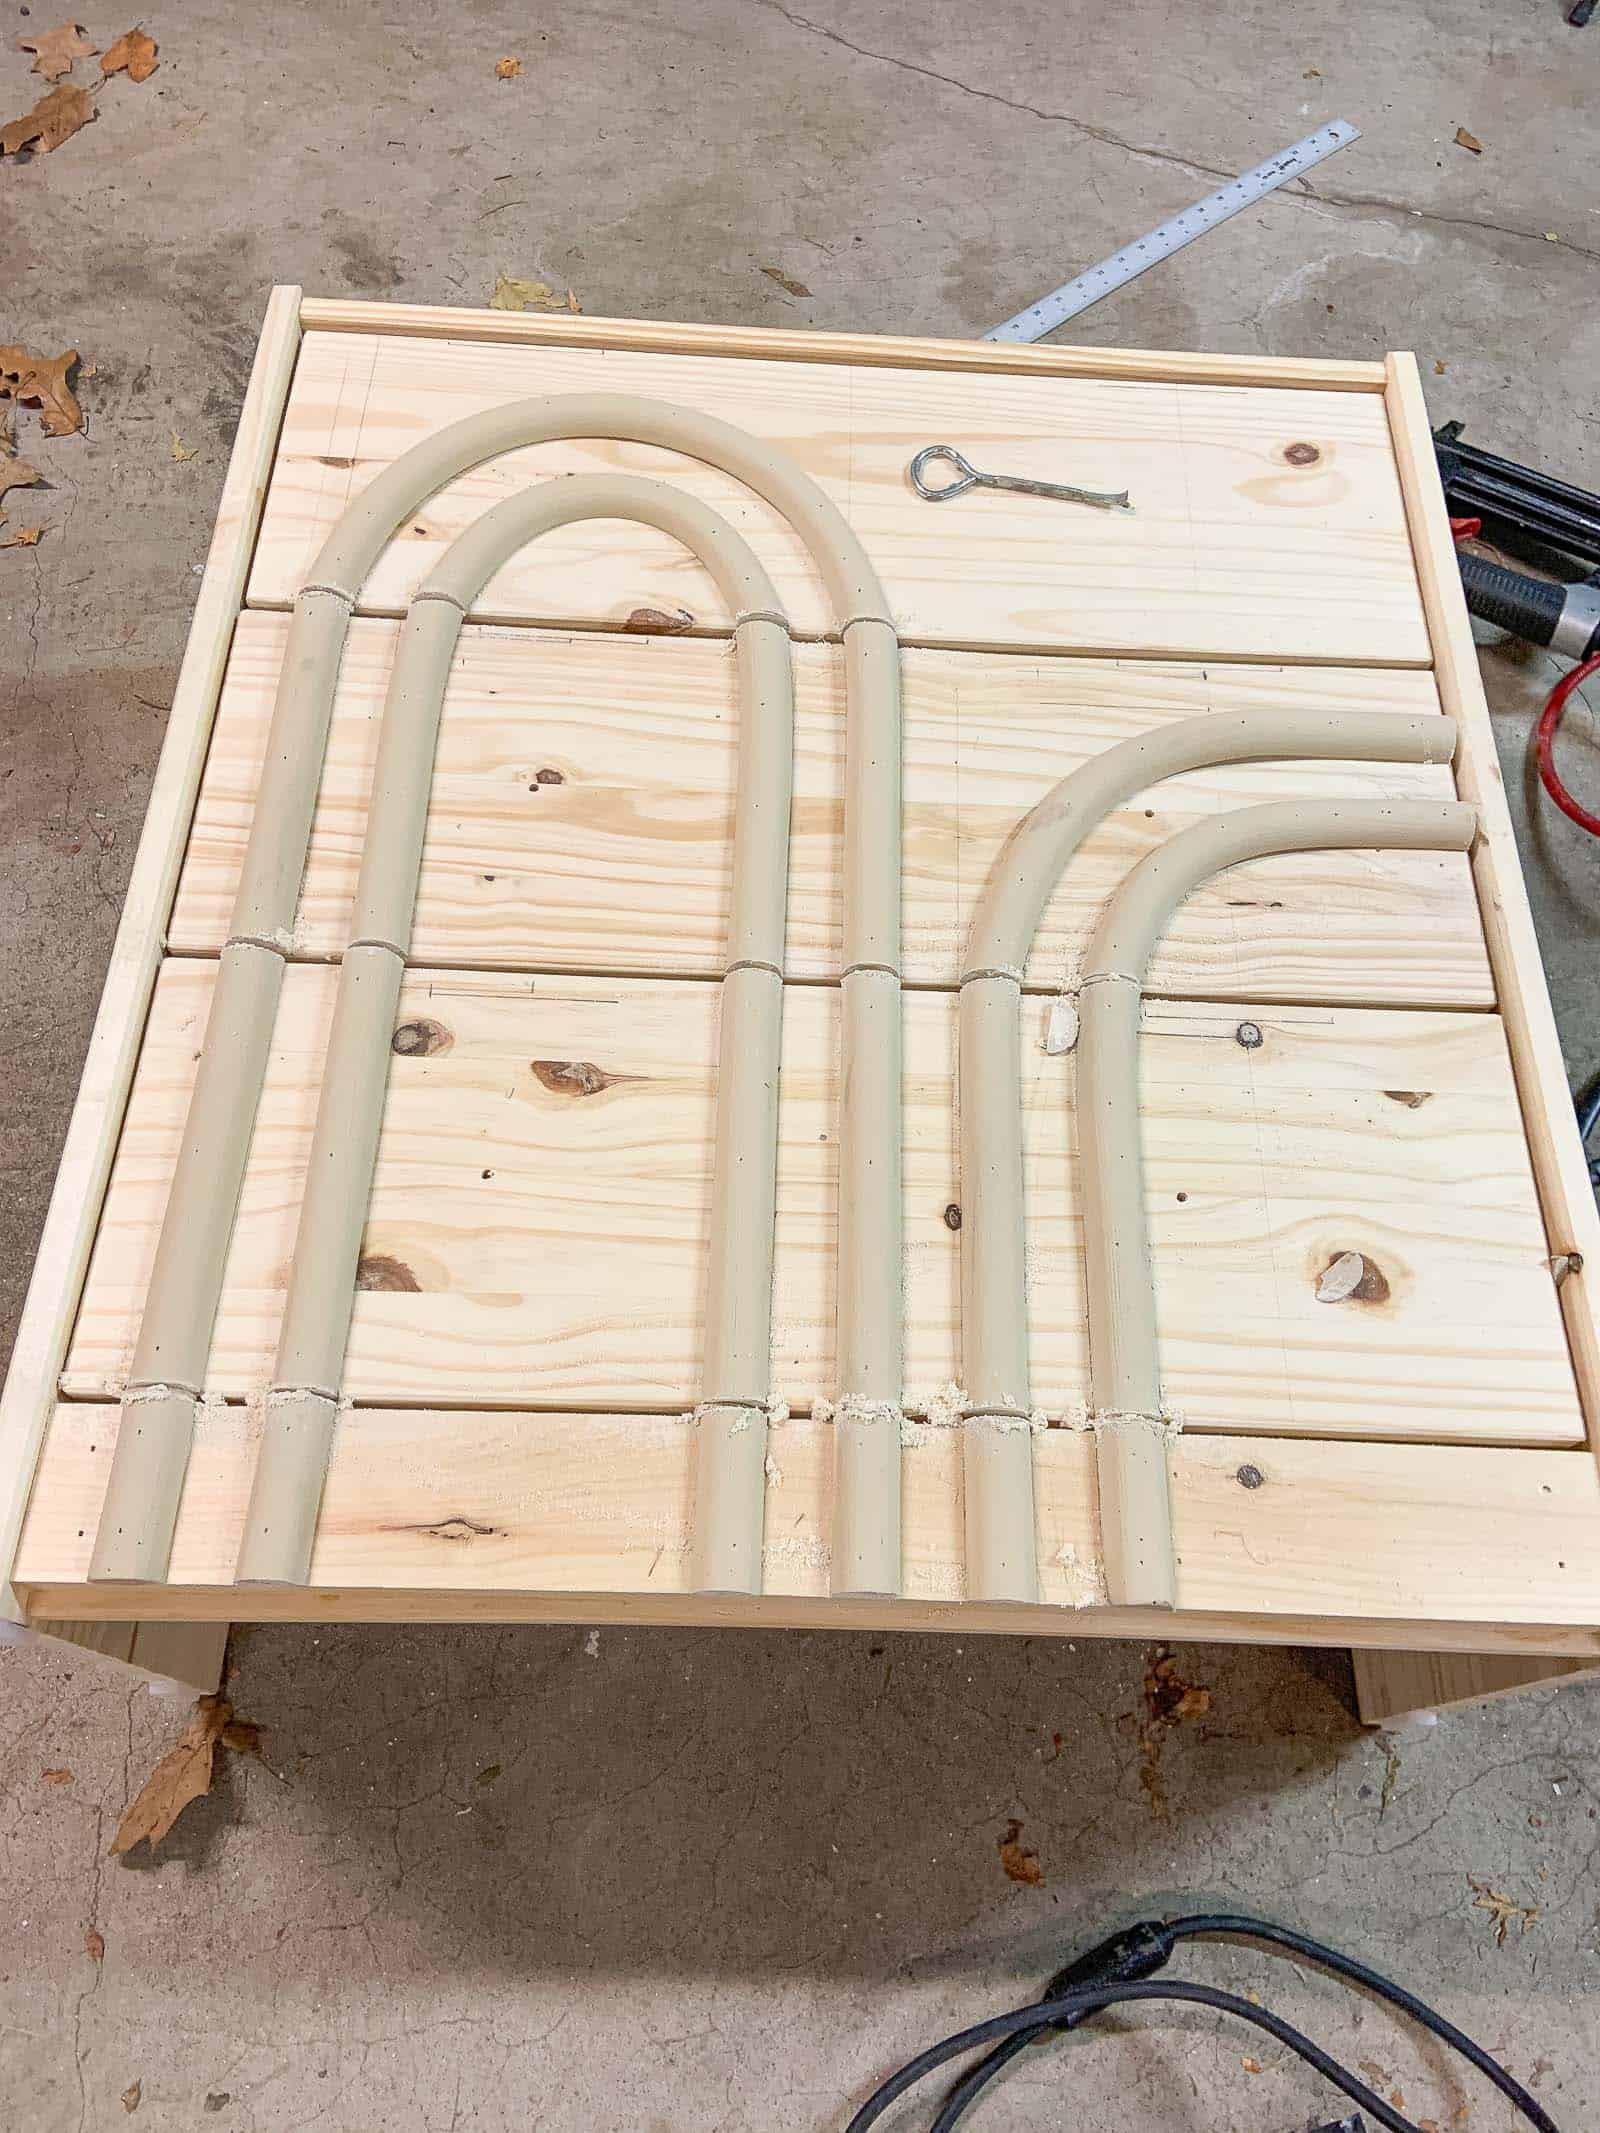
Step 3. Attach the trim
A nail gun is important for this and, as you can tell, I was distracted by wrangling my trim so I didn’t take pictures. Essentially I made sure to nail the trim close to the edges of each drawer and then every inch or so along the curves. I had to hold the trim in place firmly before nailing. It helped to train the trim a bit in advance before nailing it in place.
Note that I’m attaching the trim right over the three drawer fronts. I’ll cut the trim in the next step.
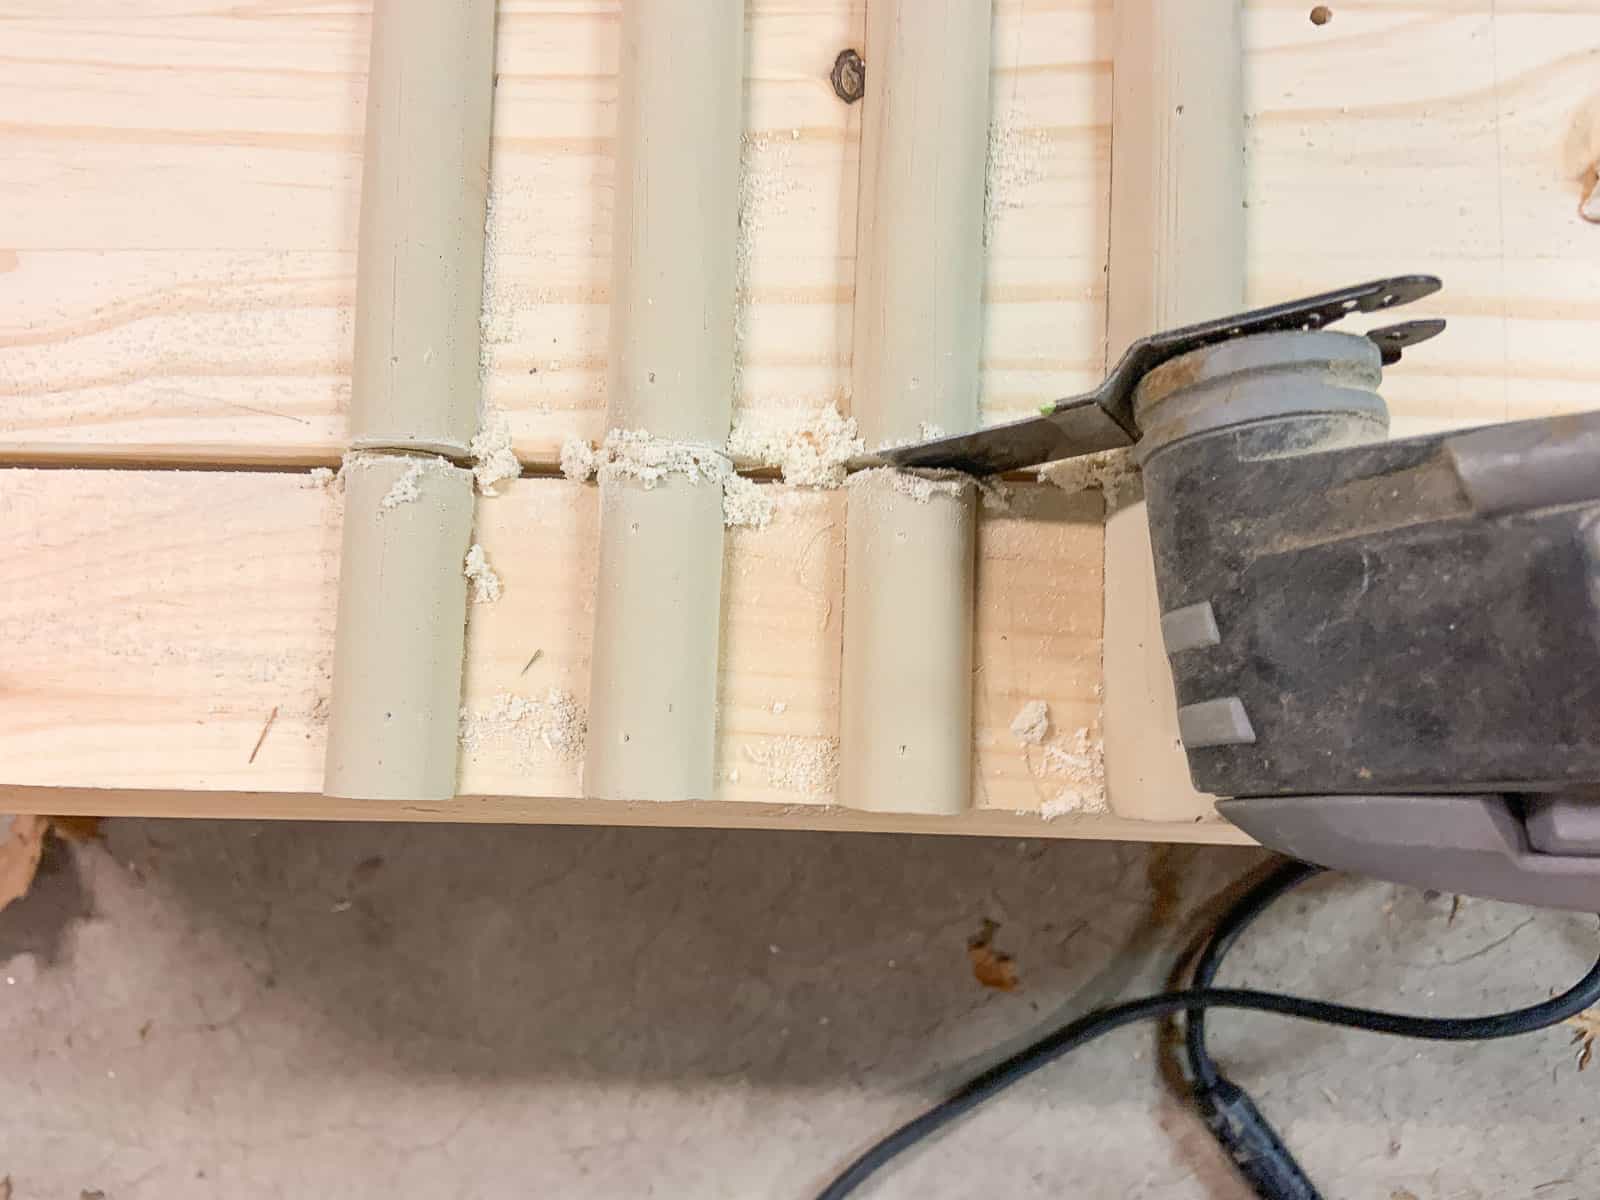
Step 4. Cut the Trim
Obviously we need to be able to open and close the drawers, so I used my Dremel multi max to cut the trim any place there was a gap (bottom kick plate and drawers).
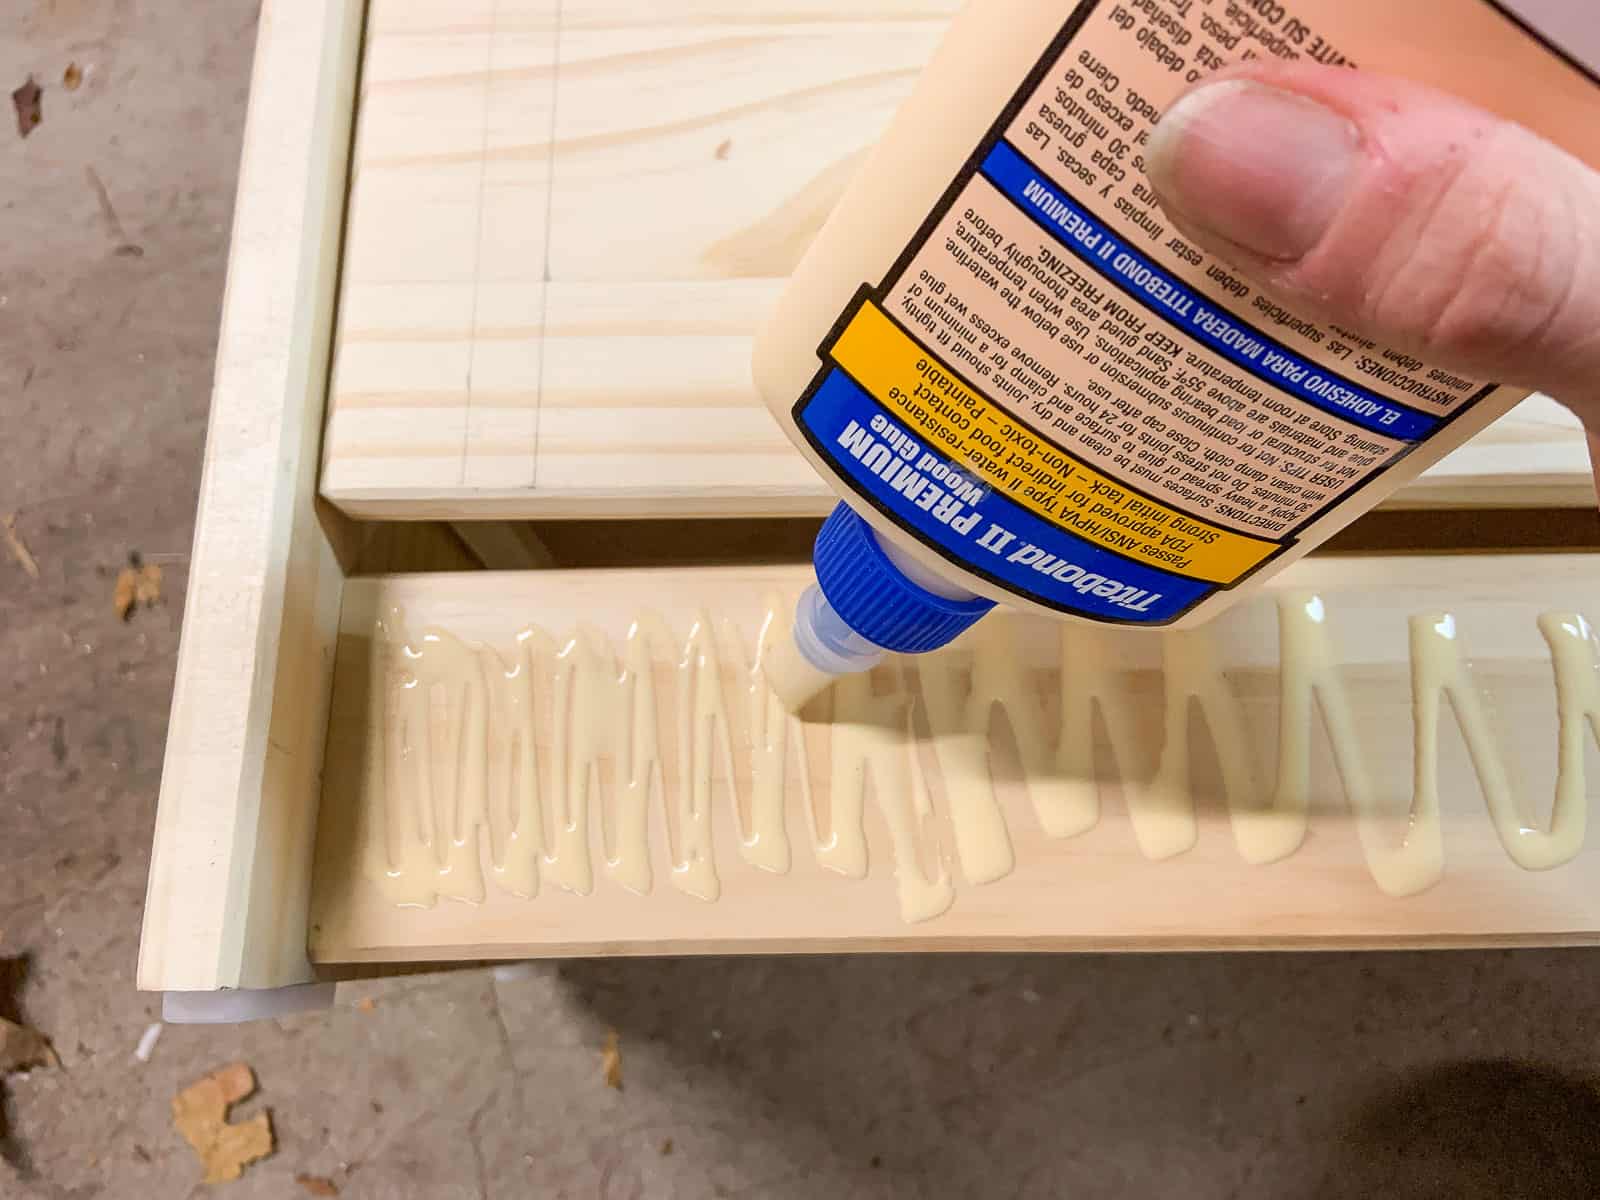
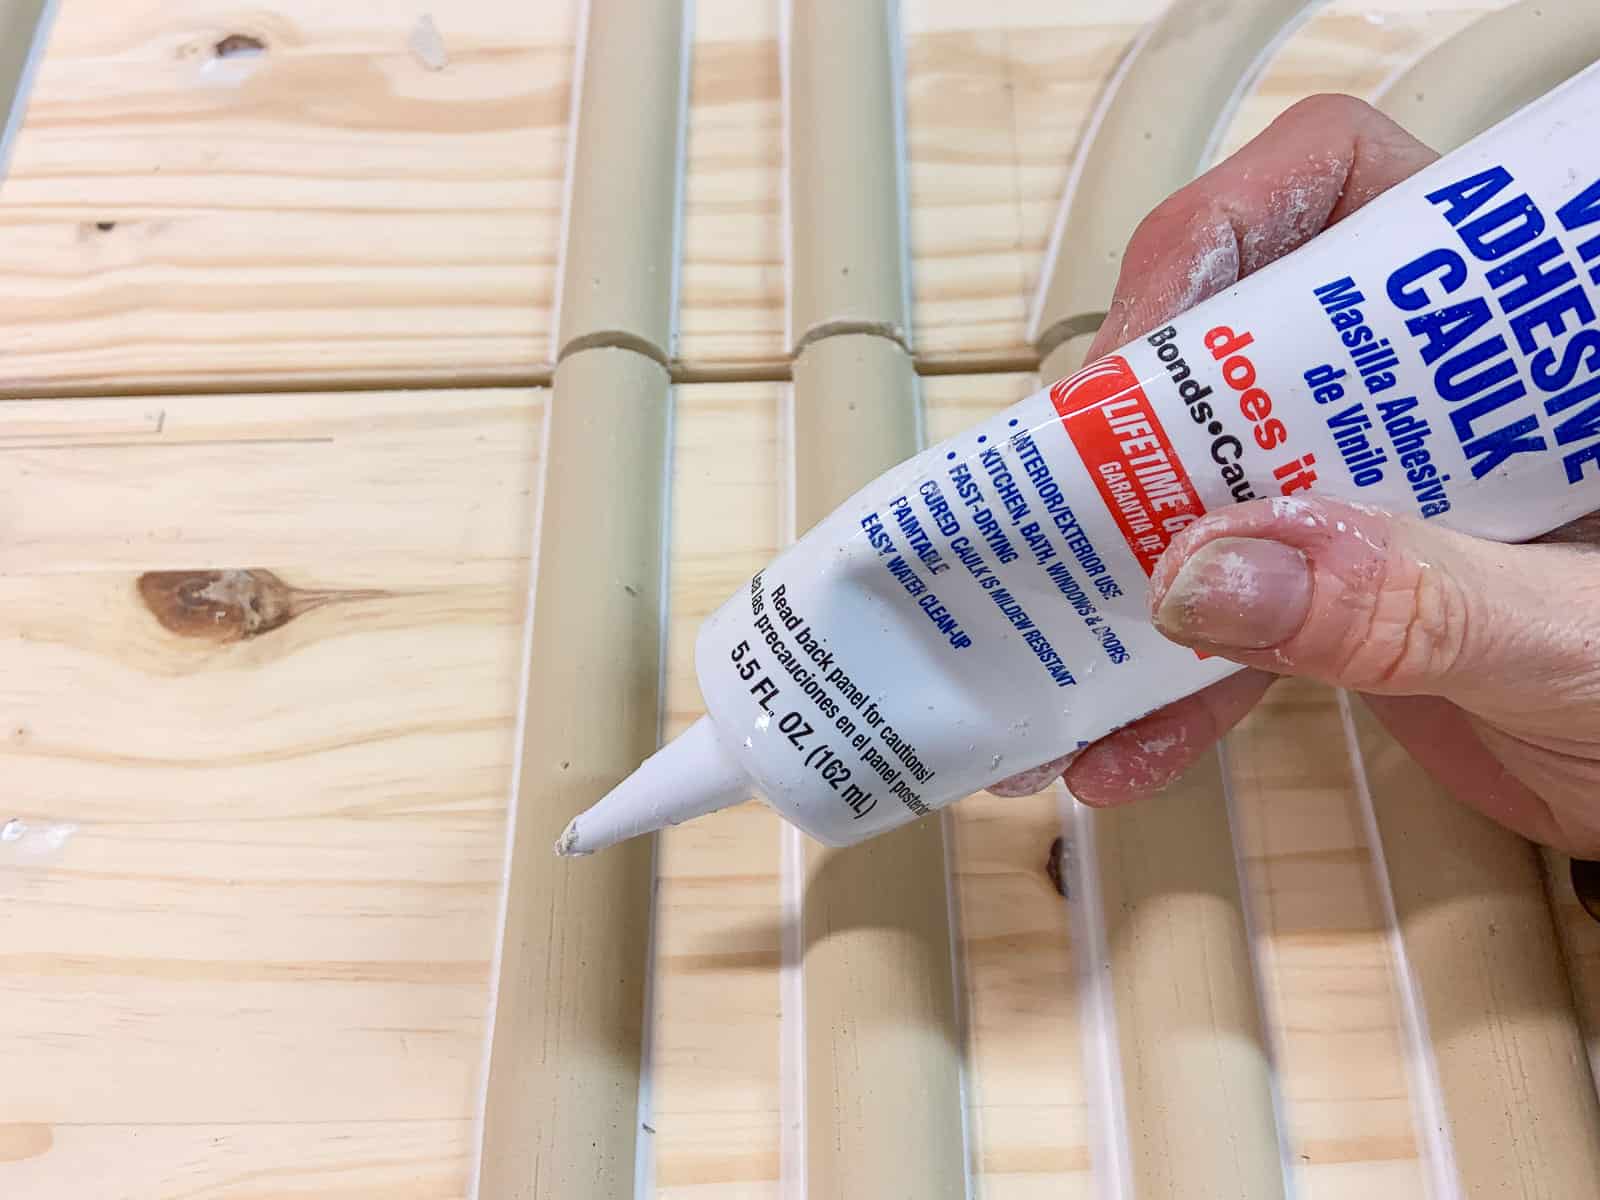
Step 5. Caulk and Fill nail holes
To fill in around the molding, use paintable caulk. And then to cover the nail holes and the predrilled holes for the cabinet knobs, use wood fill. Sand smooth.
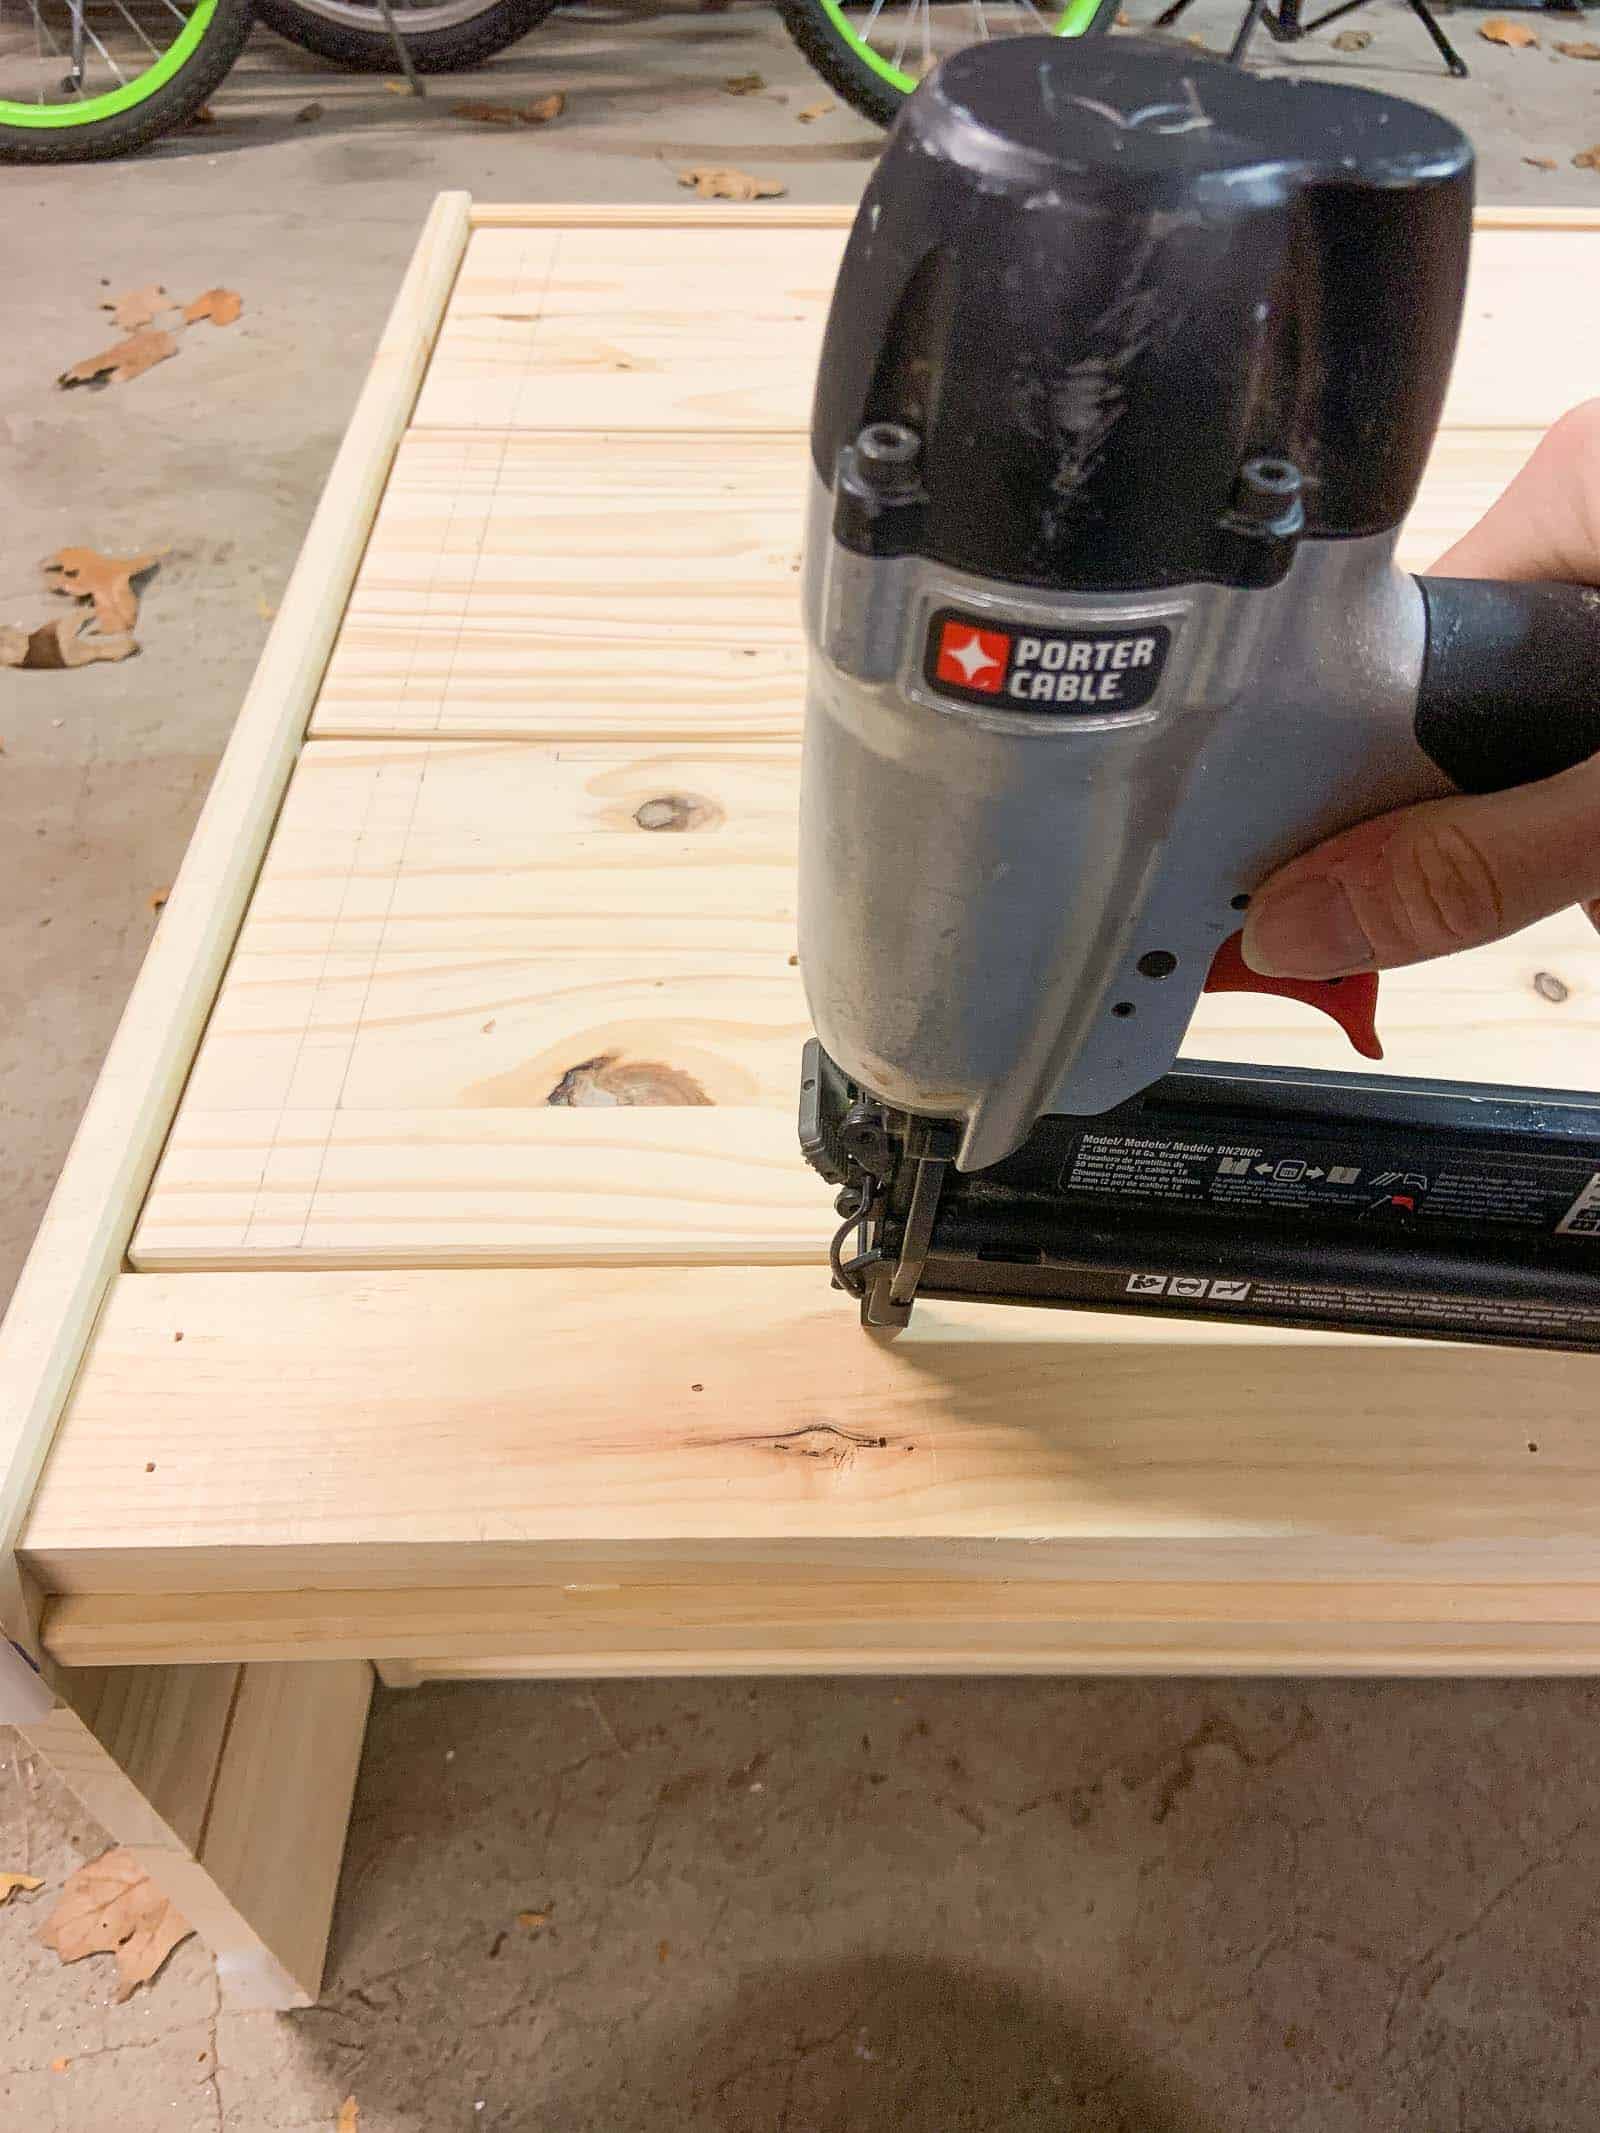
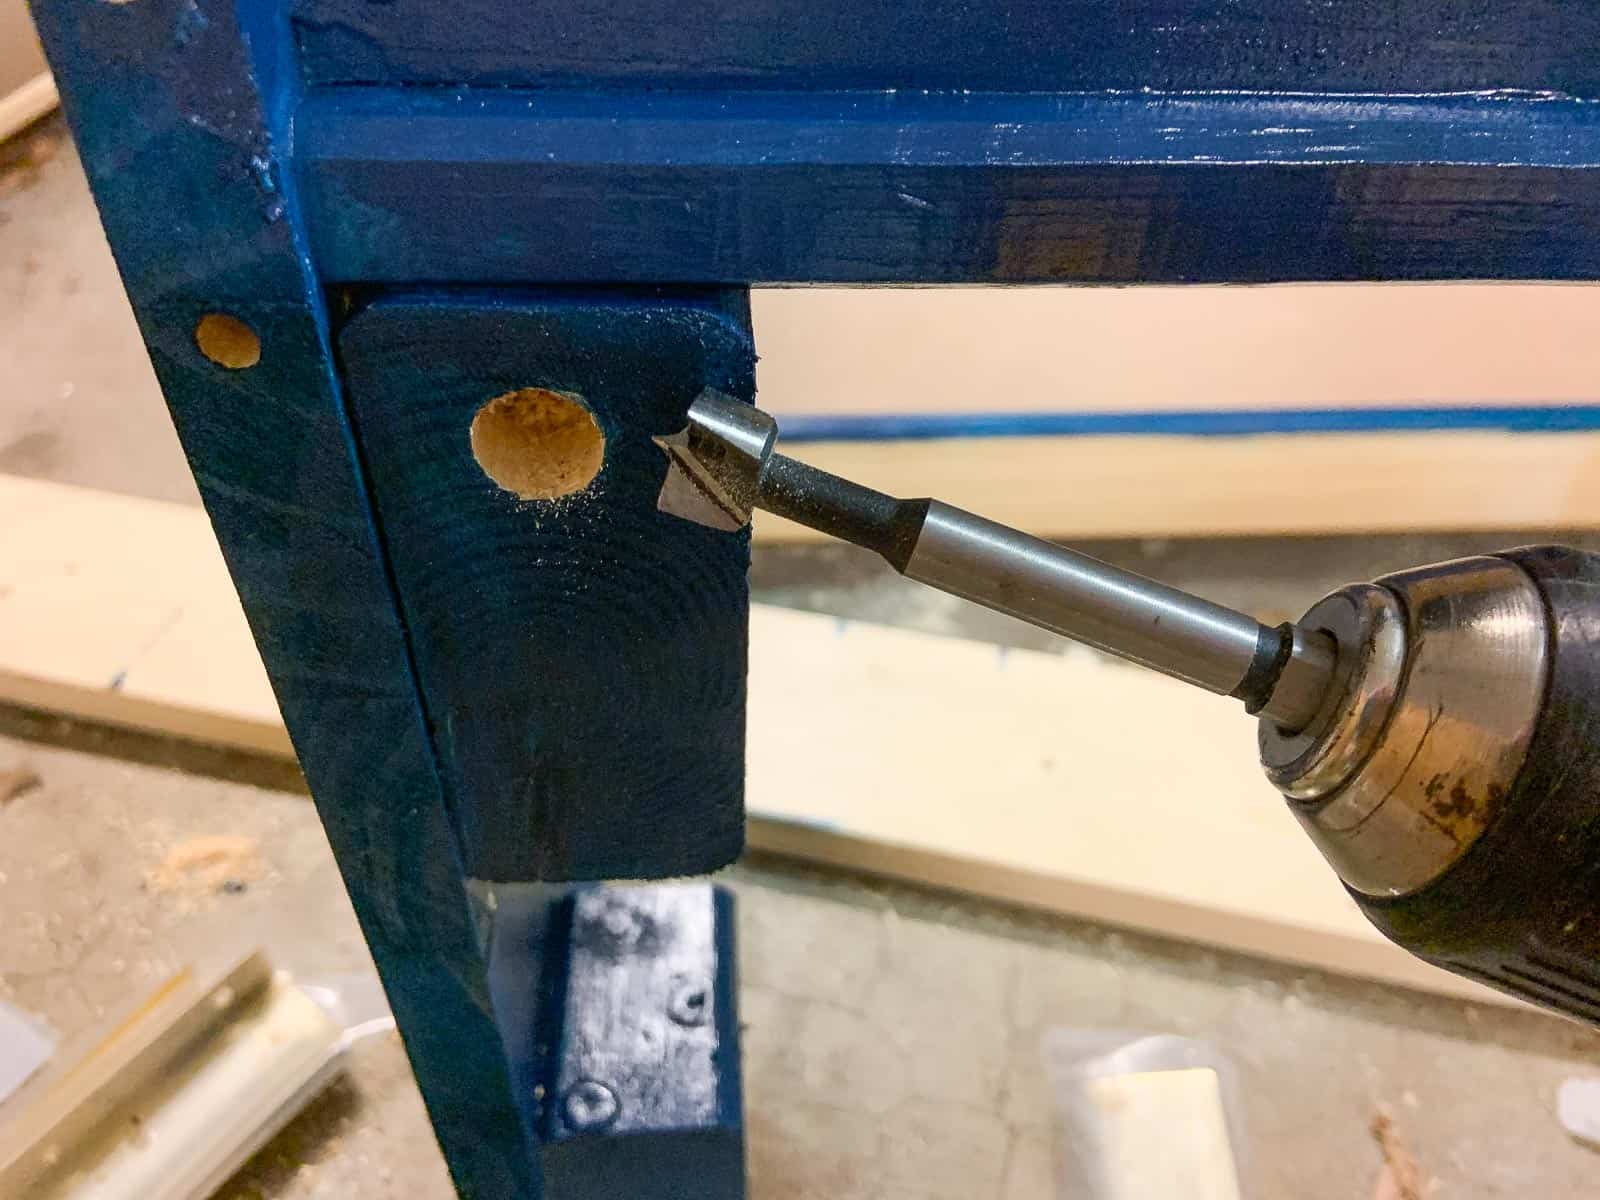
Step 6. Add support blocks for furniture feet
The dresser as-is felt awfully short so I wanted to elevate it with some furniture feet. (I picked up these acrylic ones last spring!) To create a space for the feet to attach, I needed to sister some 2×4 sections into the sides of the dresser. I used wood glue and wood screws to attach these pieces. The feet that I used had a center thread that I needed to drill a hole for and then I could screw them in place.
*Don’t be surprised by the peek of blue paint here…. before I had the foyer wallpapered as shown here, I painted this a simple blue. Eventually it got that citron makeover.
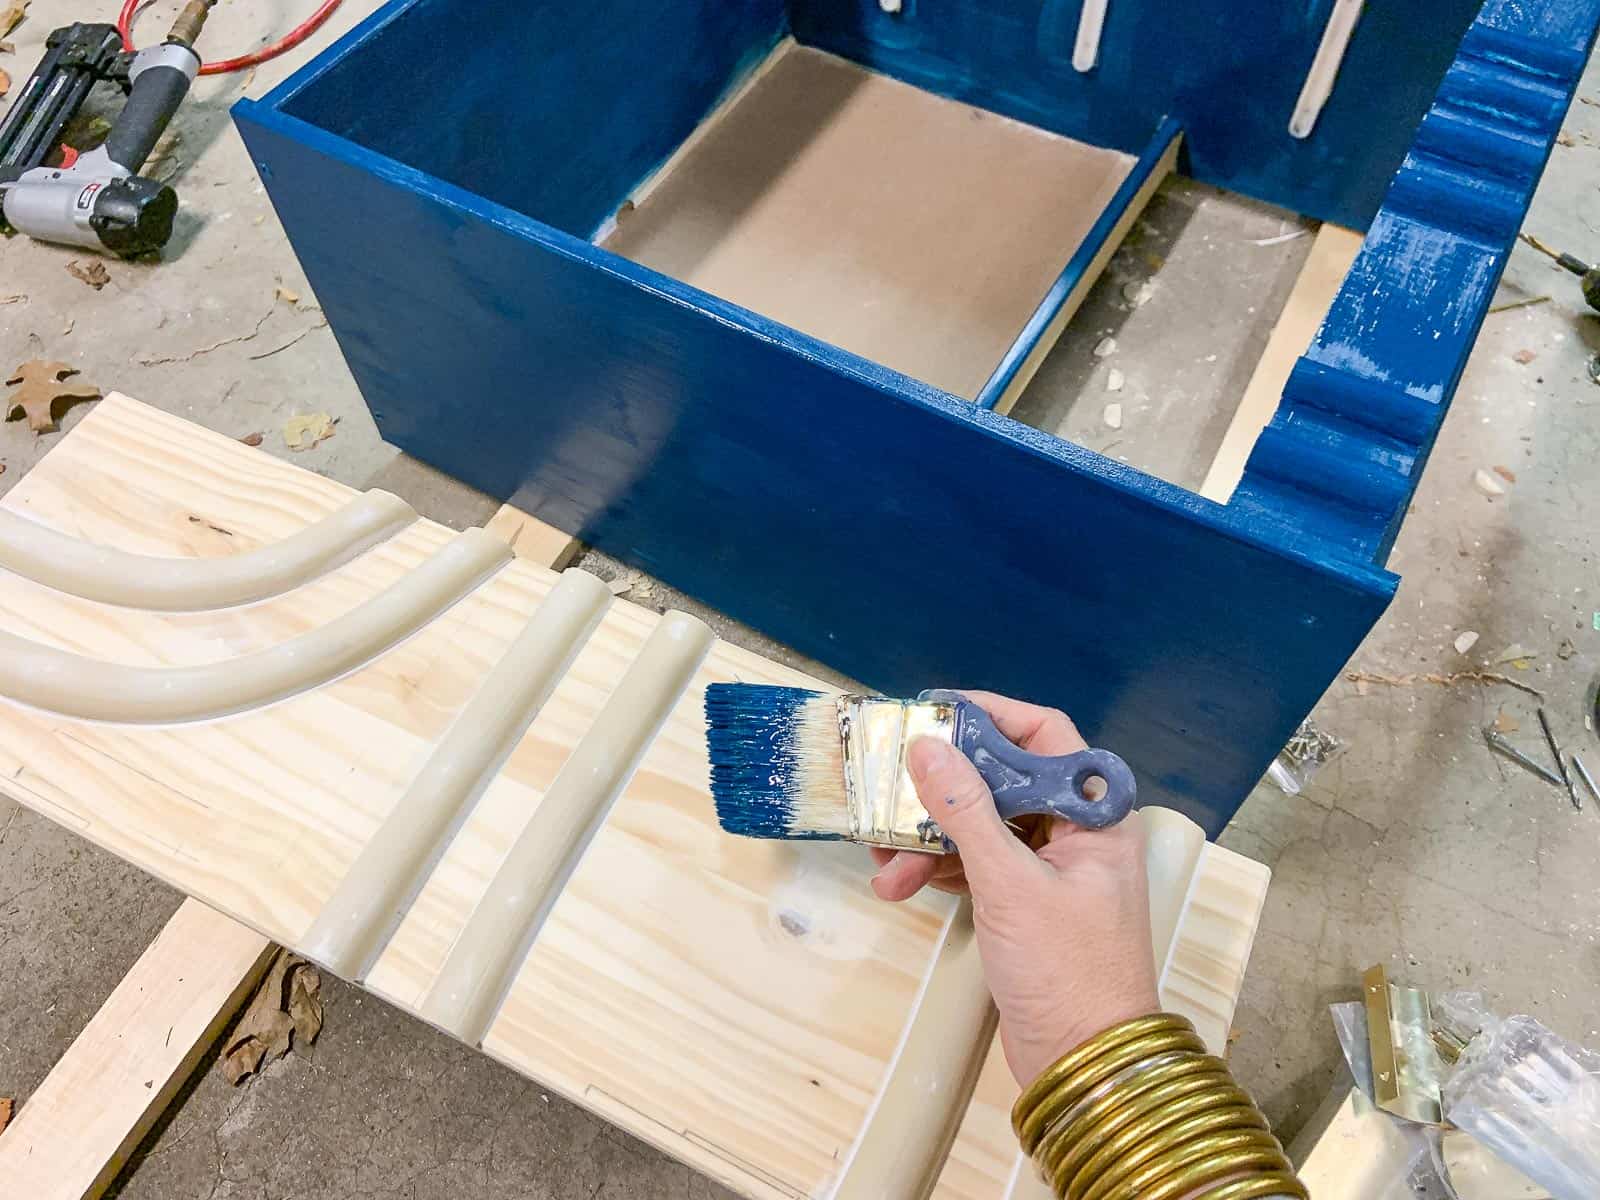
Step 7. Paint
I wanted this to feel modern so I used a high gloss latex paint. I should have sanded the dresser first. It’s a smooth wood for sure, but the high gloss paint magnifies every little imperfection so… lesson learned.
Once you factor in the full cost of materials, this dresser cost me about $100 so it’s not necessarily a budget project. That said, I love the way it turned out and I suspect something like this would cost much more. Also… it’s always fun for me to see whether my ideas will actually work so it was nice to scratch that DIY itch!
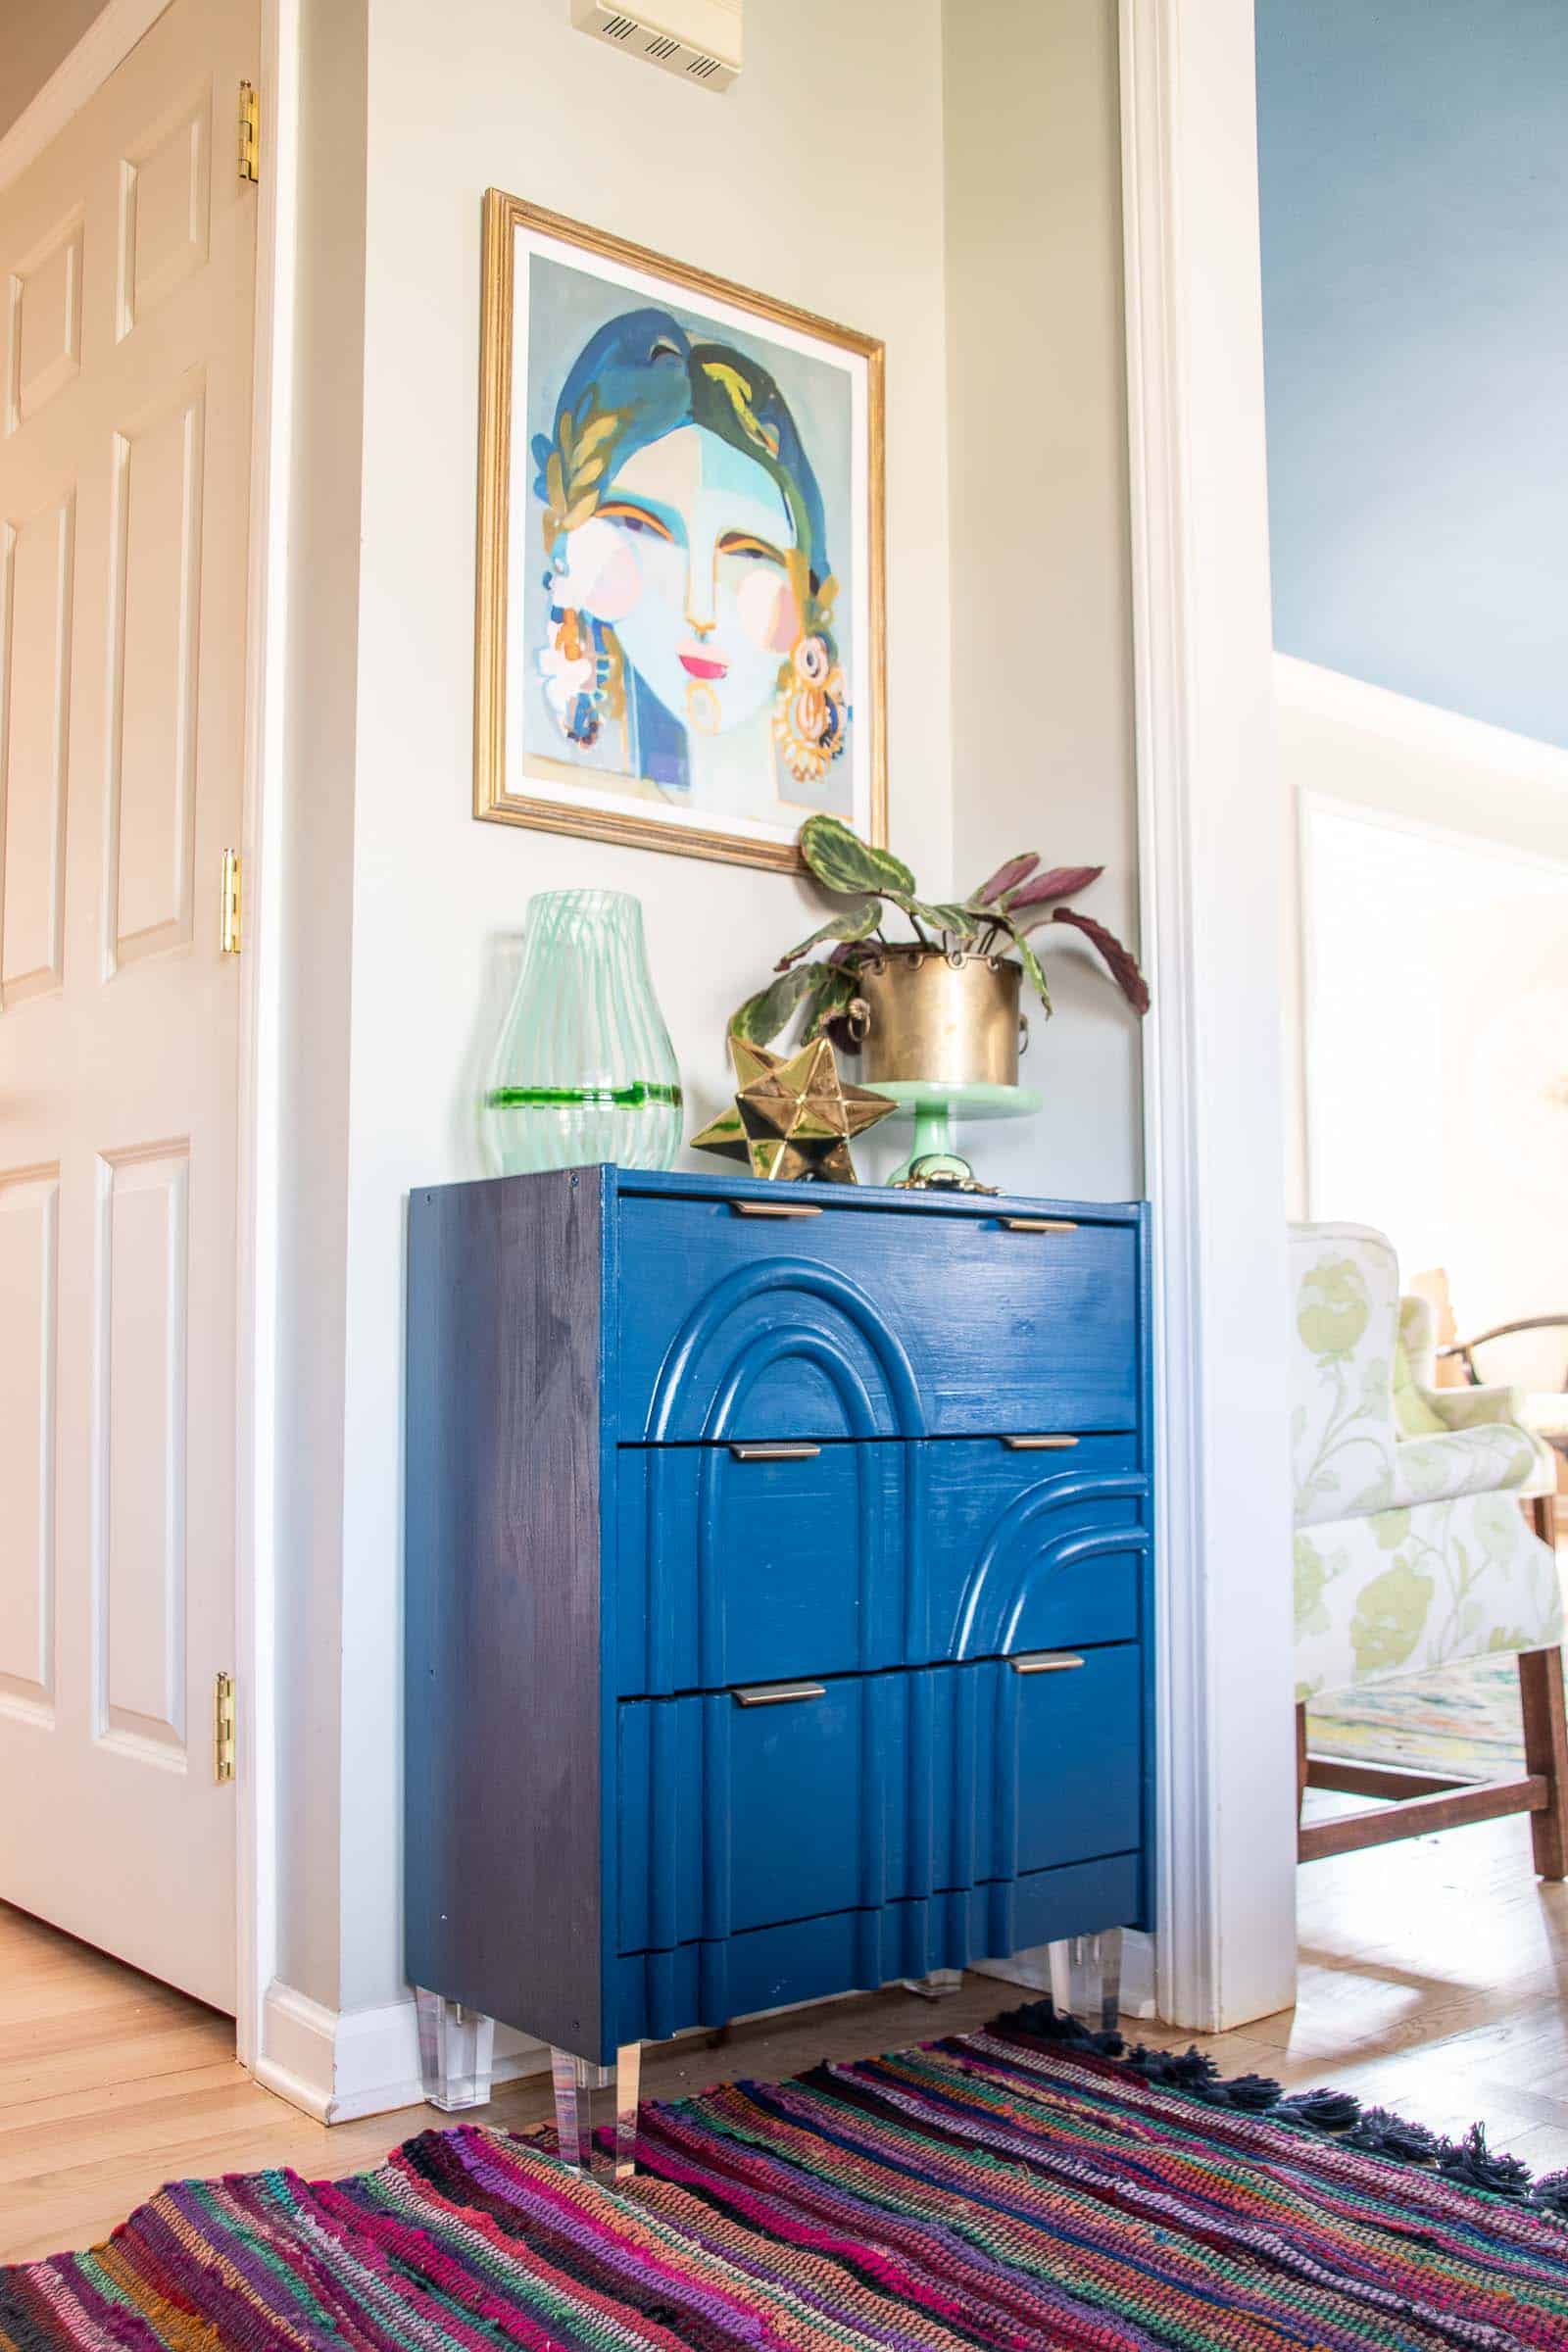
And just to give another glimpse of how it looks now after getting repainted to match the new foyer, here ya go!
Materials List:
(*Affiliate Links)
- Ikea Rast Dresser
- Wood Glue
- Flexible Moulding
- Caulk
- Acrylic Feet
- Brass Handles
- Brad Nailer
- Compressor
- Dremel Multi Max


I love the color that You chose! It looks wonderfUl in that spot.
Thanks, Allison!! I’m so happy it fills the space so well!!
It looks so good! Im always inspired by your creativity!
Thank you! You’re the sweetest!! I love it when the ideas play out the way I hope! 🙂
This is amazing! I don’t know how you come up with these ideas. So great!
Thank you! I’m always looking for a way to DIY the things I love!
That’s fabulouS – love the colour. you’re crazy talenteD.
So kind of you!! Thank you!!
Love it! What visiOn you have! The acRylic feEt are 🔥!
Arent they lovely? Thanks!!
Wow!! so creative! Love it.
Thanks so much, SandY!!
very nice!
Thanks, Jennifer!!
Love it ans love the feet!!
Yes! I love those too! They really help to elevate the piece… literally! 🙂
This has to be one of my fav ones to date!!
Awww thanks so much!!! So sweet!
Fantastic! Love everything about iT! You are so innovative! 💙
xoxo Thank you!!!
Great color and love the transf!
Thank you! The before/ after is fun!!
This is GORGEOUS!
Thank you thank you! Really appreciate it!!
Just gorgeous! Love the new harDware, colour aNd acrylic Feet!
Thanks! Lots of little tweeks made such a difference!!
AWESOME
Thanks, Steph!!! xx
I am in love with this Piece. And the paiNting paired with it?!? Double love!
This is so amazing. I am in awe of your ability to tramsform!
*traNsform
Thanks so much, Missy!! xx
You make it look Easy~lOve the legs.
Aren’t those so sexy? Love them too! Thanks!
Charlotte, this is beautiful! You are so creative.
Thanks, Debi! I really appreciate it!
I love your pRojectS but this One iS my new favoritE!
Thank you!! This one was fun to see come to life!
Great job, always amazed at your creativity
Thanks, Ellen! I love it too!
This really came out greaT! Great color, Shine, and Molding- very cool!
THanks, Noreen! I’m so happy it worked! 🙂