At Charlotte's House

  • About
    • PRESS
    • TELEVISION
    • BLOGGERS HEART HABITAT
    • DISCLOSURE & PRIVACY POLICY
  • HOLIDAY
  • HOME TOUR
    • RENTAL HOME TOUR
    • HISTORIC HOUSE
    • FIRST HOUSE
    • ROOM REVEALS
    • SEASONAL HOME TOURS
  • GALLERY
    • FLEA MARKET & THRIFT SCORES
    • CRAFTS
    • FURNITURE FIXER UPPERS
    • WALL DECOR
    • OTHER STUFF…
  • PODCAST
    • PODCAST EPISODES
  • SHOP
    • SHOP INSTAGRAM
  • CONTACT
    • SPONSOR/ ADVERTISE
    • SUBSCRIBE

Nuts And Bolts Framing

Psssst... this post *might* contain affiliate links: see my disclosure here.

April 29, 2014

Last Monday, I shared the kids’ new stencil wall over at VRAI Magazine and I promised to dish the deets about this DIY floating acrylic frame.

I made a floating acrylic frame using simple nuts and bolts. Easy AND affordable!

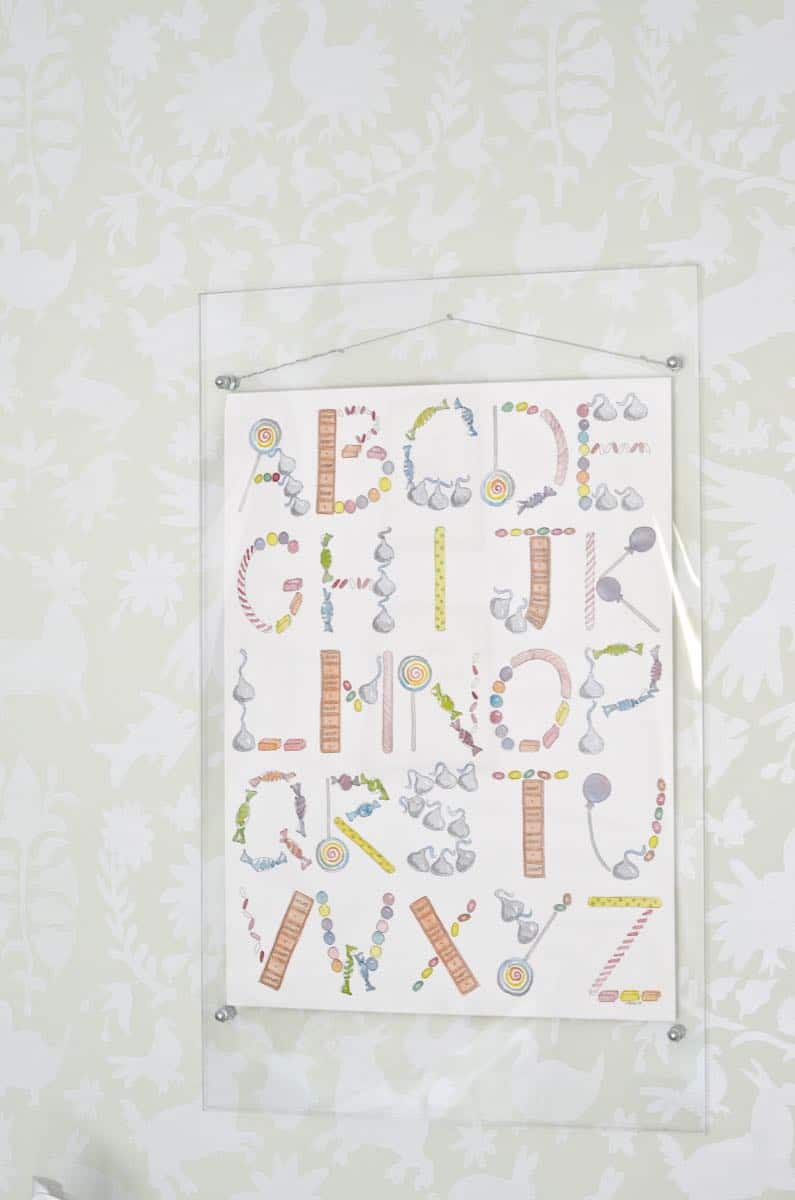
That wall used to have a sweet quilt hanging on it, but after the blood, sweat, and tears (not really, but I like the faux drama) of stenciling that thang… I couldn’t bear to cover it with the quilt. Time for new artwork.


I’d seen this AHHHHMAZING post by the genius Kristin and loved the oversized clear acrylic frame. Even more… I was drawn to those three magic letters: D-I-Y.

I made a floating acrylic frame using simple nuts and bolts. Easy AND affordable!

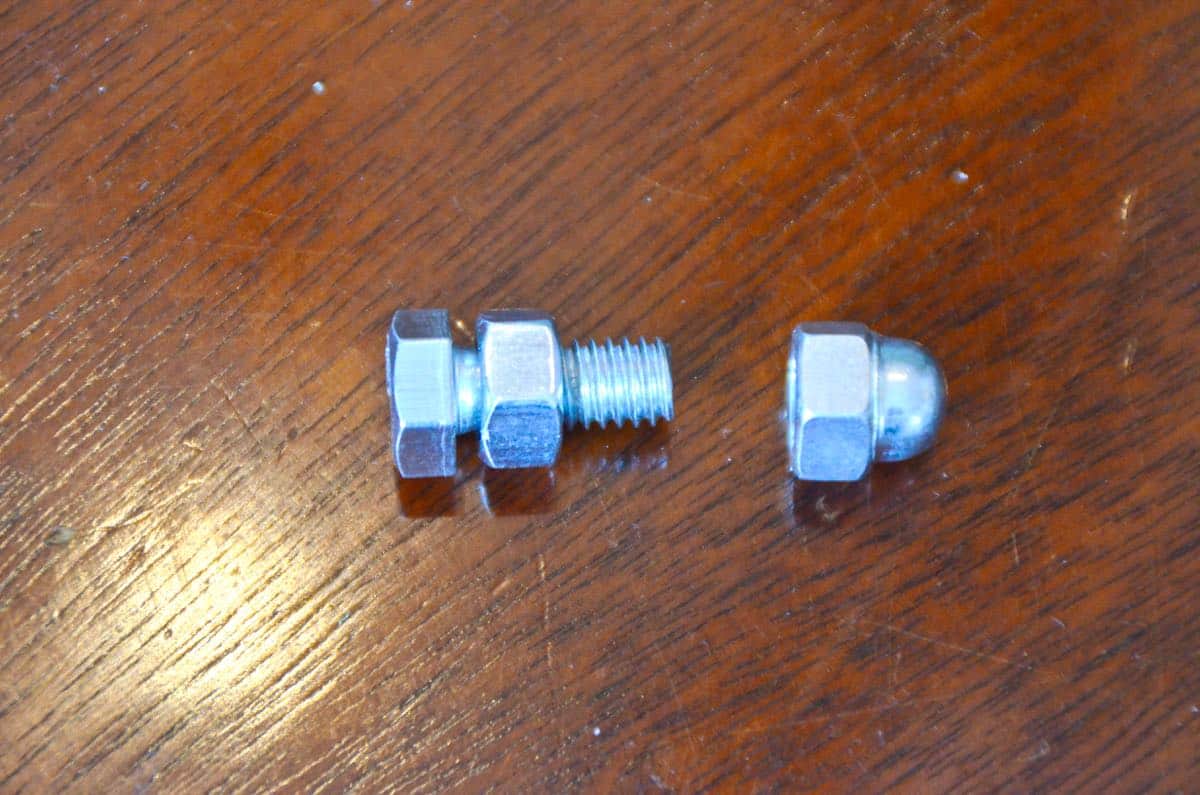
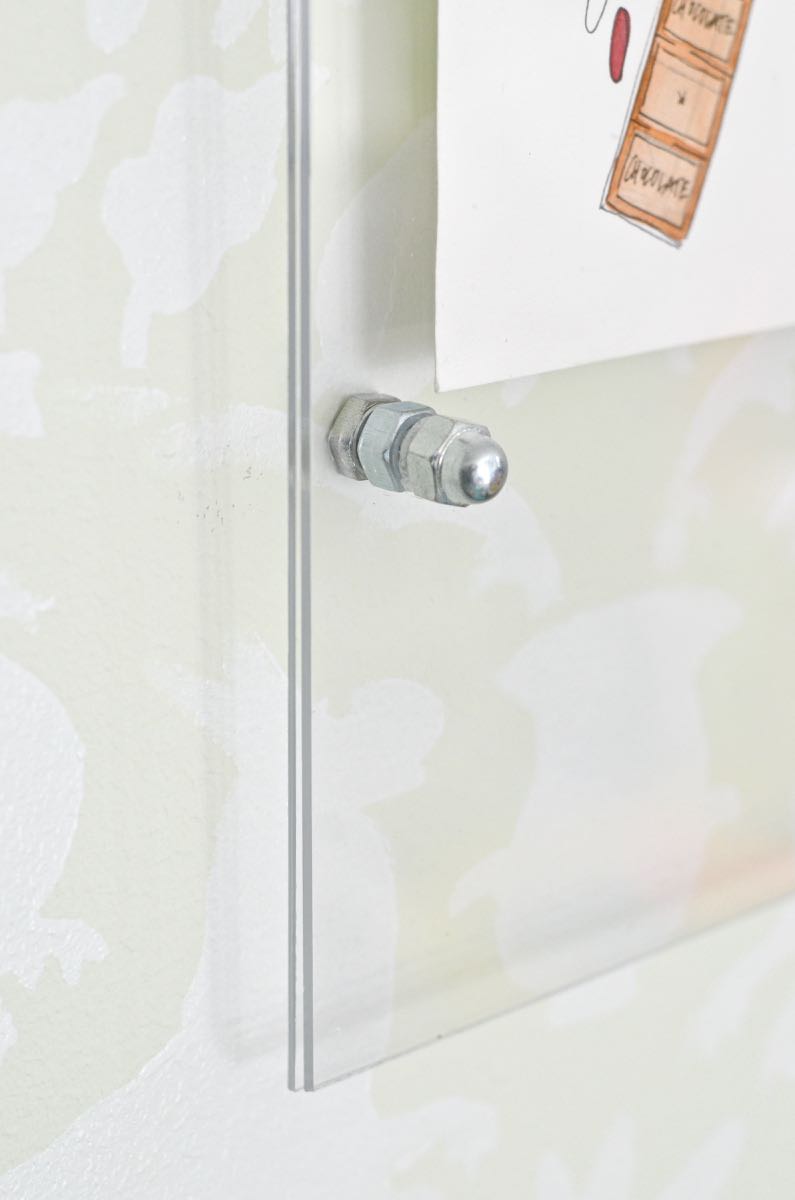
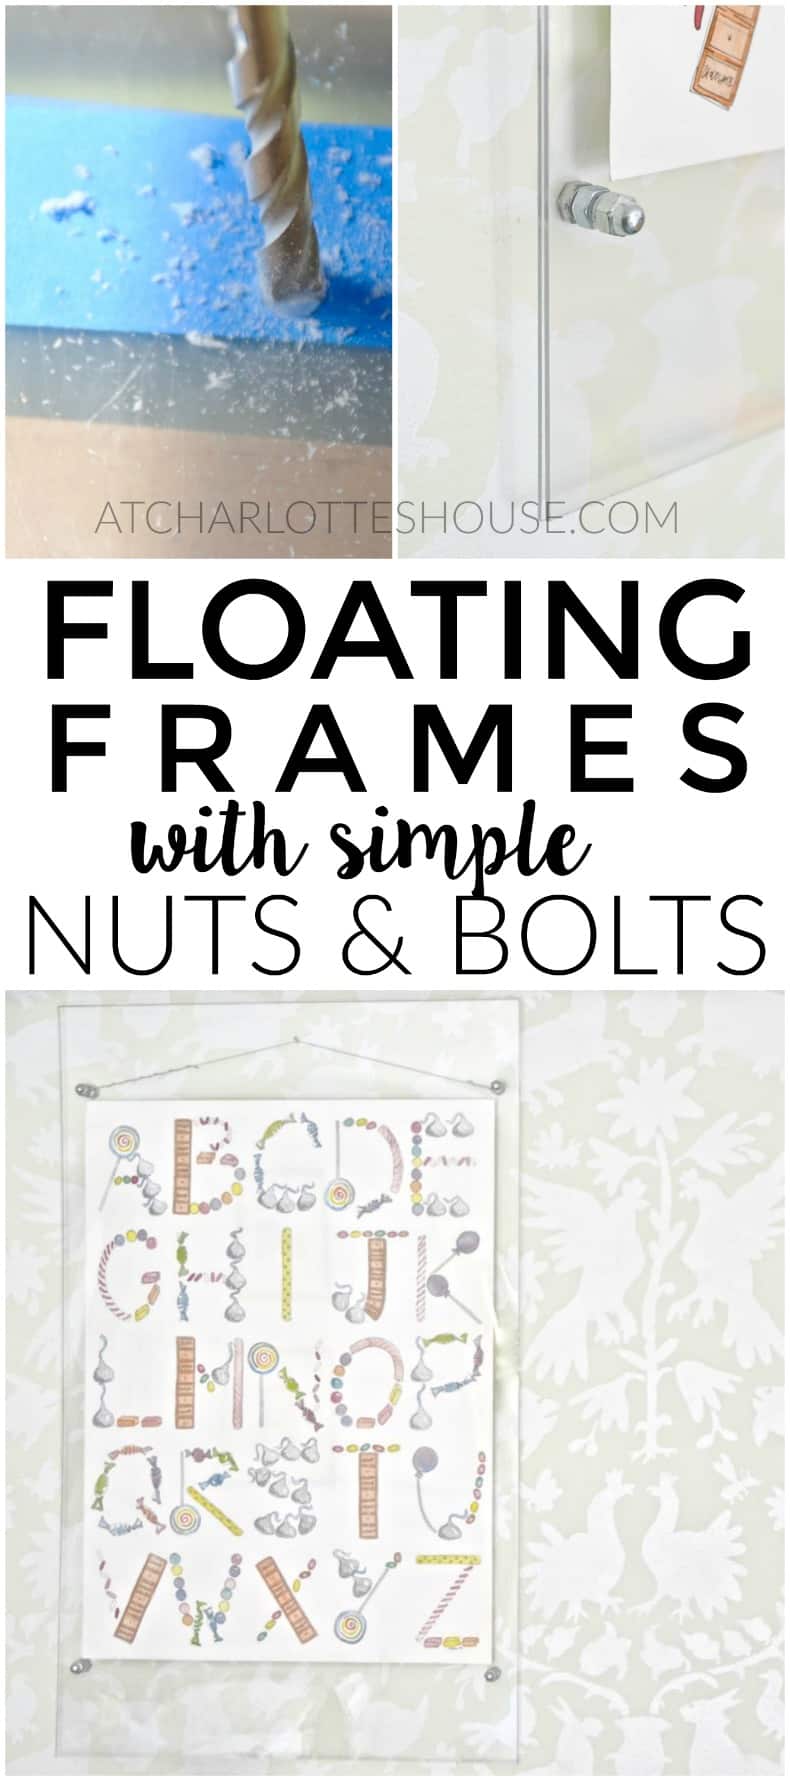
Kristin used hardware she ordered online (but I’m too impatient for that mail-order jam) so I decided to rig something a little different and a little more casual from the hardware aisle at Home Depot. I ended up getting these machine screws (flat on the end without a point), one nut and these cap nuts.

I made a floating acrylic frame using simple nuts and bolts. Easy AND affordable!

First, I needed some acrylic. Home Depot carries sheets of acrylic near their window pane replacement glass. Unfortunately, they don’t cut it for you (it looks like Lowes might…). I was lucky and one of their standard sizes worked fine for my artwork. Be warned, acrylic ain’t cheap. This is the thinner option and each sheet was $15, so this frame cost $30. Not crazy, but not exactly frugal.

I made a floating acrylic frame using simple nuts and bolts. Easy AND affordable!

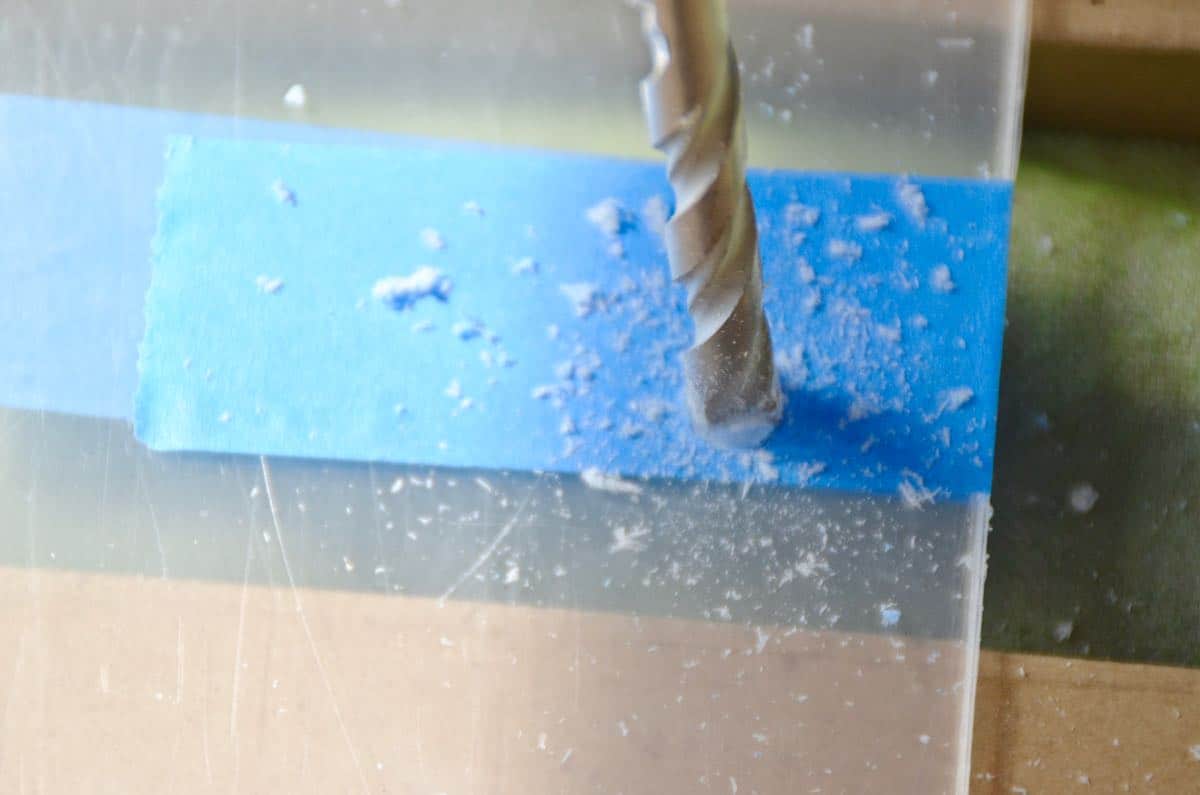
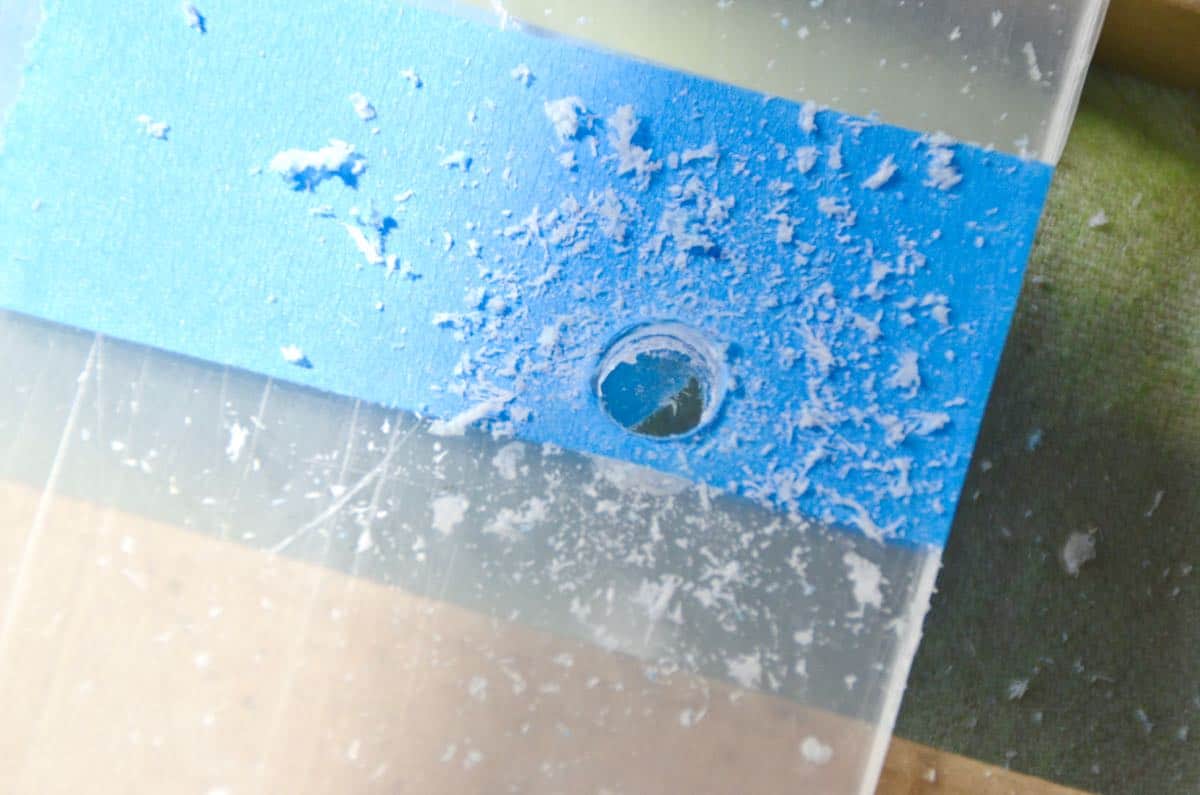
I googled around for ways to drill through the acrylic without cracking it, and ultimately just… drilled. I left the protective plastic on top and put a strip of blue tape down as well. And then I slowly drilled, baby, drilled. No problemo.

I made a floating acrylic frame using simple nuts and bolts. Easy AND affordable!

I made a floating acrylic frame using simple nuts and bolts. Easy AND affordable!

The artwork is pinched pretty well between the 2 pieces of acrylic, but I used a few strips of double stick tape just to be sure. The screw goes through from the back and the cap nuts are on the front; I needed the nut on the back because the screw was too long to pinch the 2 sheets effectively without the extra width of the nut. I was careful not to tighten the screws too much and crack the acrylic. I wrapped a wire around the nuts in the back of the frame.

I made a floating acrylic frame using simple nuts and bolts. Easy AND affordable!

I’m not crazy about the wire showing through the frame…. but I don’t hate it. It’s a casual space and this makes the whole thing sort of deconstructed. If you HATED the wire, you could simply wrap two very small loops of wire around each nut on the back of the frame and use two nails for hanging.
I made a floating acrylic frame using simple nuts and bolts. Easy AND affordable!
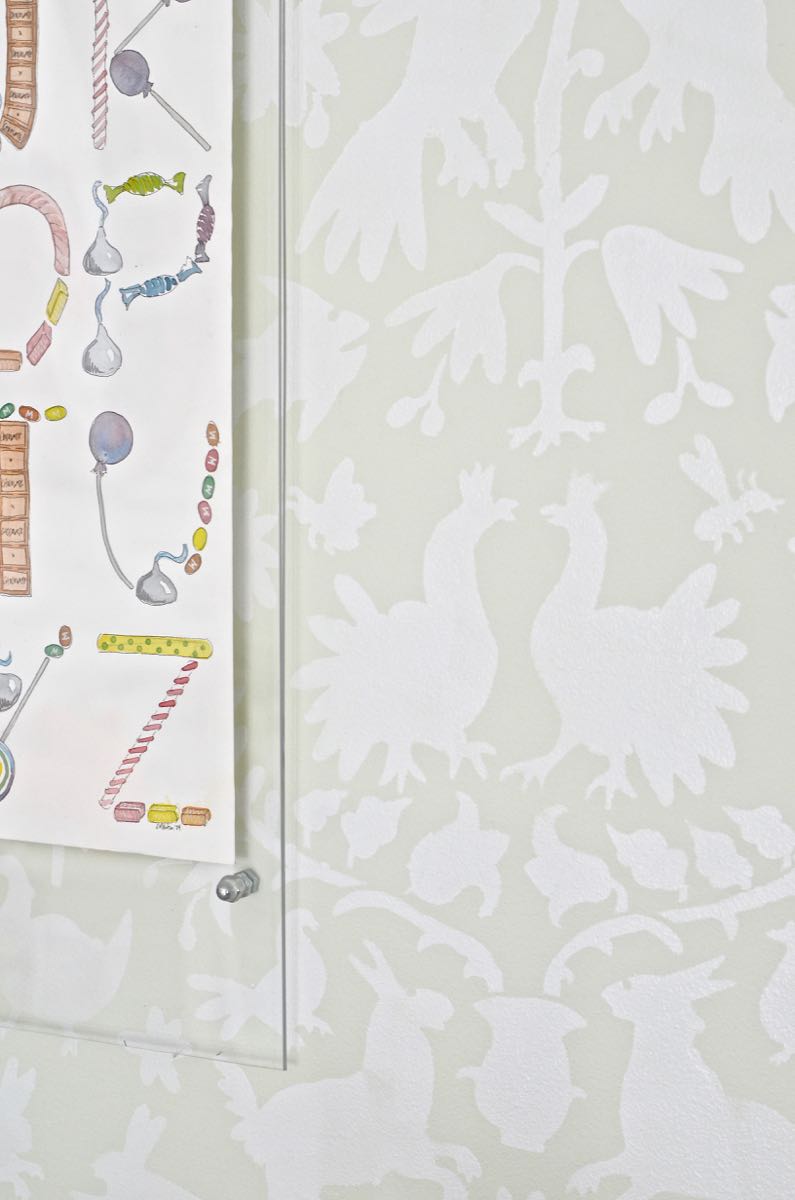
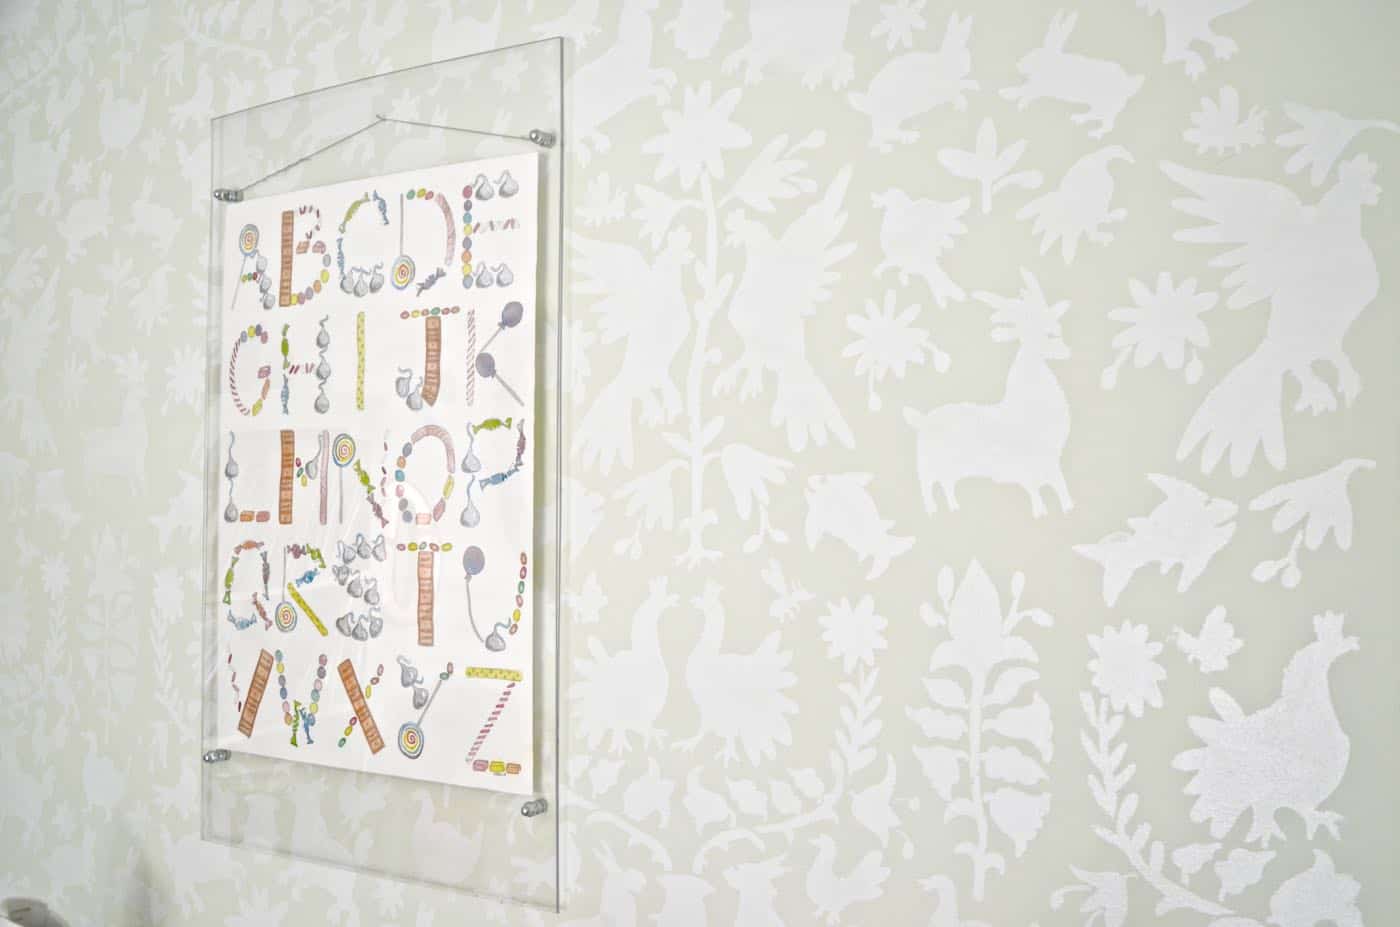
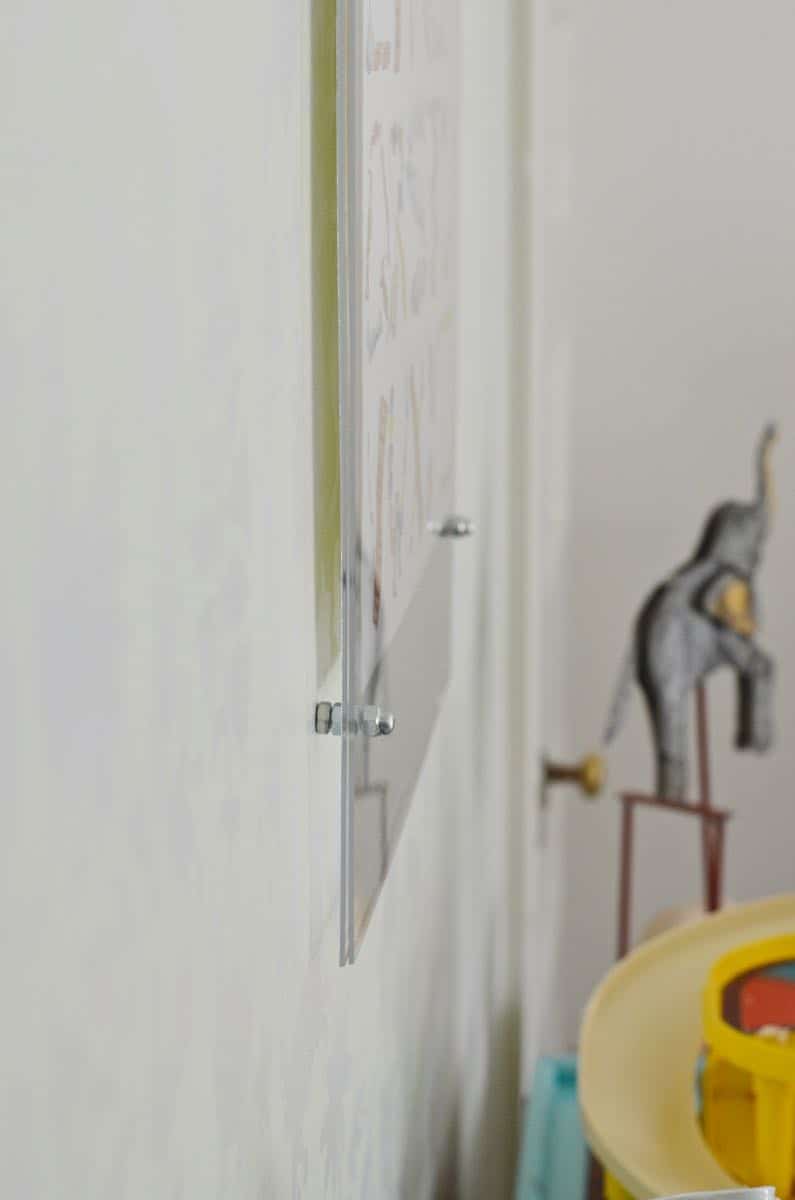
I love the way this frame doesn’t block the shiny new stenciled wall and I love that it’s calm, cool, and collected. I’d like to add one more eventually, but for now this one’s a great complement to the new accent wall!

I made a floating acrylic frame using simple nuts and bolts. Easy AND affordable!

Update: I planned ahead and ordered the proper mounting hardware to make another set of these floating frames. Check out the results!

pin-me-button

These floating frames cost $30 and I LOVE them... I'd love to use a smaller size and make a whole gallery wall!

XO Charlotte

5 Comments · Wall Decor

Comments

  1. Dena says

    April 29, 2014 at 7:28 pm

    LOVE! Such a great idea! I think i might have some left over plexi, too. Pinning.

    Reply
  2. Laura says

    April 14, 2015 at 10:53 am

    I love your wall! I read your tutorial but didn’t see where the stencil was from– do you mind sharing?

    Reply
    • Charlotte Smith says

      April 14, 2015 at 11:04 am

      Not a bit!! It’s this one from Cutting Edge Stencils… LOVE that pattern: http://www.cuttingedgestencils.com/otomi-tribal-wall-pattern-stencil.html

      Reply
  3. Lecia says

    June 17, 2015 at 3:05 pm

    Thank you for the instructions. I have a picture that needs a frame like
    this but was not sure how to implement. My idea would be to use a thin chain or ribbon with a bow and
    extend above the frame. Great post.

    Reply
    • Charlotte Smith says

      June 17, 2015 at 3:10 pm

      Great!! Glad you got some ideas… love the idea of a chain/ ribbon! Good luck!! xx

      Reply

Leave a Reply Cancel reply

Your email address will not be published. Required fields are marked *

*It's not you, it's me... don't mind the CAPS LOCK!
  • Email
  • Facebook
  • Instagram
  • Pinterest
  • Twitter
  • YouTube

SEARCH

Lover of color, wrangler of chaos, thrifter of all the things.

Hi, I'm Charlotte! I'm fixing up our 100 year old house and artfully hoarding armchairs in the garage. I love color. I love flea markets. I love a little mess. My days are spent writing, painting, sanding, laughing and negotiating with our 5 kids. You can read more about us here
amazon-shop

SUBSCRIBE

Sign up for my newsletter and get access to my super duper secret and exclusive FB Group... I'll answer questions, share tips, post funny memes. It'll be awesome. (If you're not on FB- hi Dad- I'll still answer any design or thrifting questions... email me!)

Recent Posts

Frozen 2 Craft Projects

Frozen 2 Craft Projects

Kids Gift Guide 2019

Kids Gift Guide 2019

Christmas Present Upholstered Ottoman

Christmas Present Upholstered Ottoman

Children’s Christmas Playhouse Makeover

Children’s Christmas Playhouse Makeover

ach-popular-posts
ach-house-tour

WHAT TO WATCH

AS SEEN ON

rr-logo-1 sidebar-as-seen-on-2 sidebar-as-seen-on-1-1 bh-sidebar-1 design-sponge-1 houzz-sidebar-1 mass-appeal fmf-sidebar-1

COPYRIGHT & USE POLICY

All images and text shared on this site are the property of At Charlotte's House unless stated otherwise... and I'm SO thrilled that you're here visiting. I'm delighted for you to Pin or Stumble or Share or Tweet to your hearts delight providing all links are directly to "At Charlotte's House" (not "source" or "photo credit", etc.). If you are a blog or an individual and would like to mention a post of mine please only use a SINGLE image and link back to my original post. I invite brands to contact me directly for image-use terms. Do not alter, crop, edit or add/ remove watermarks from my images. I do not accept guest posts of any kind at this time. If you have any questions, please contact me. For more information, see my full disclosure and privacy policy.

@atcharlotteshouse

No images found!
Try some other hashtag or username

Copyright © 2019 · Simply Pro Theme by Bloom Blog Shop.