
Roman Shades 2.0
Psssst… this post *might* contain affiliate links: see my disclosure here.
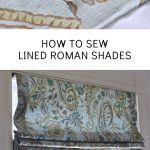
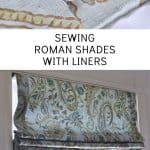
How to Sew Roman Shades
I’m a firm believer in the power of a good window treatment. It softens the space AND keeps the neighbors from getting an eye-full… win-win. For our home office makeover, I was originally going to sew another set of lined curtains, but…. once the built ins were in place… I thought curtains would be too much. Time for Roman Shades 2.0.
I made a set of Roman shades a while back for the kids’ room and I love them. They were a little more complicated because I wanted them to have black out liner, so these ones don’t have as many steps. If you read that post, I suspect these will seem much easier! I mean, I’m not good for much, but hopefully all my past ‘Roman Shading’ can benefit someone, right?!
Shop my favorites!
Step 1. Measure for the Shades
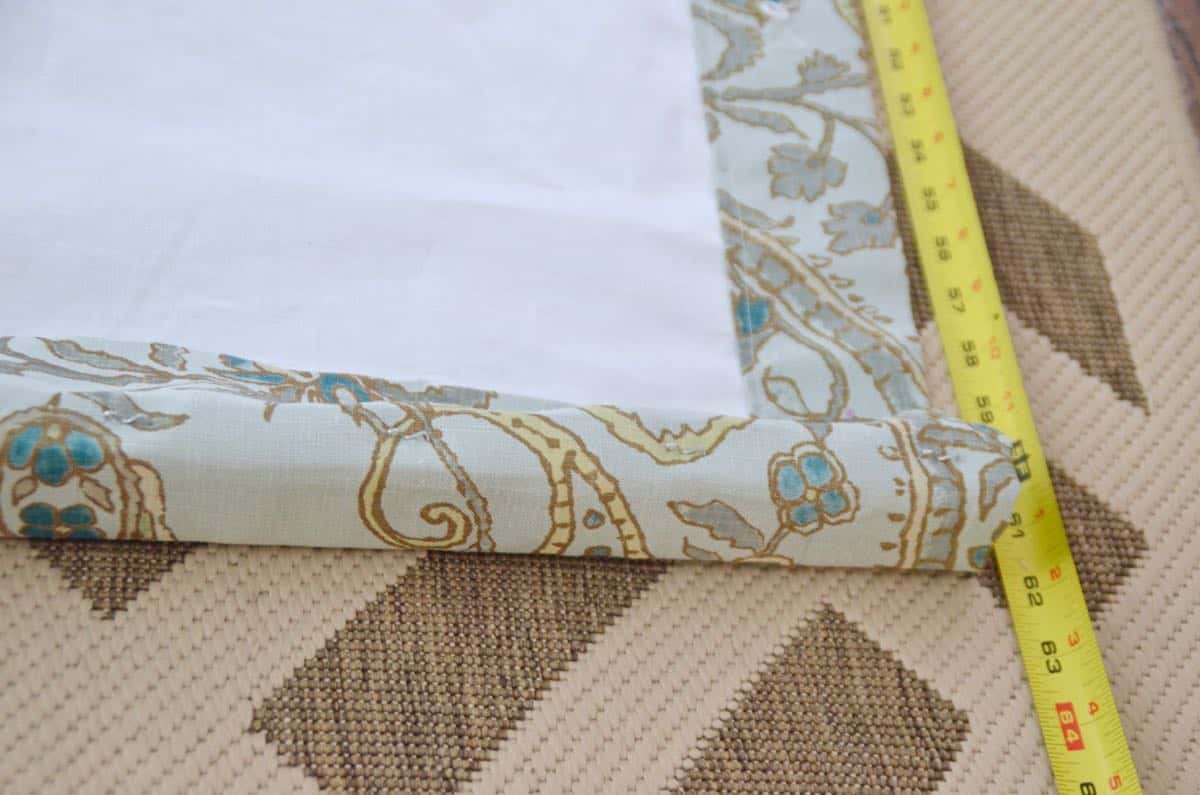
Okay, for Roman Shades, there are two ways to mount them… inside your window (inside mount) or sitting on the window trim and falling in front of the window (outside mount). I chose the inside mount. This affected how I measured for the shades… I measured the inside dimensions of our window (width and height) and cut my fabric 6 inches wider and 12 inches longer. You’ll see why later.

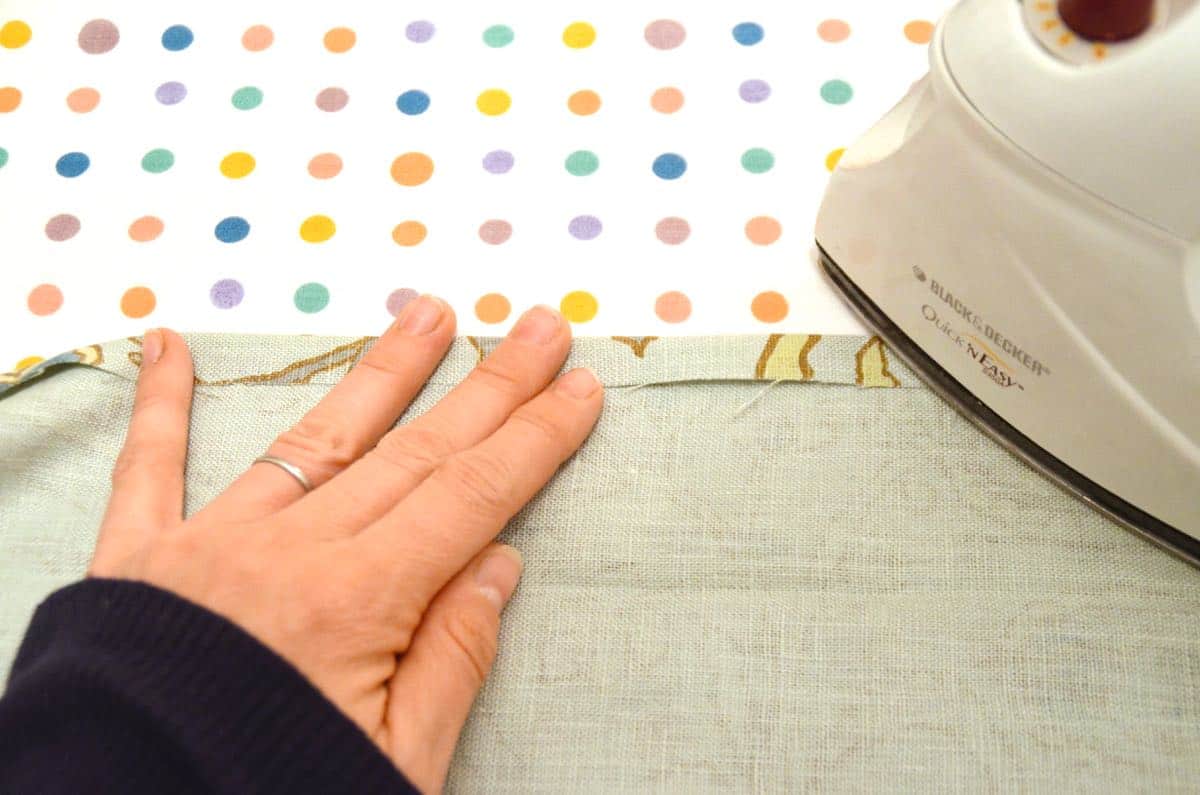
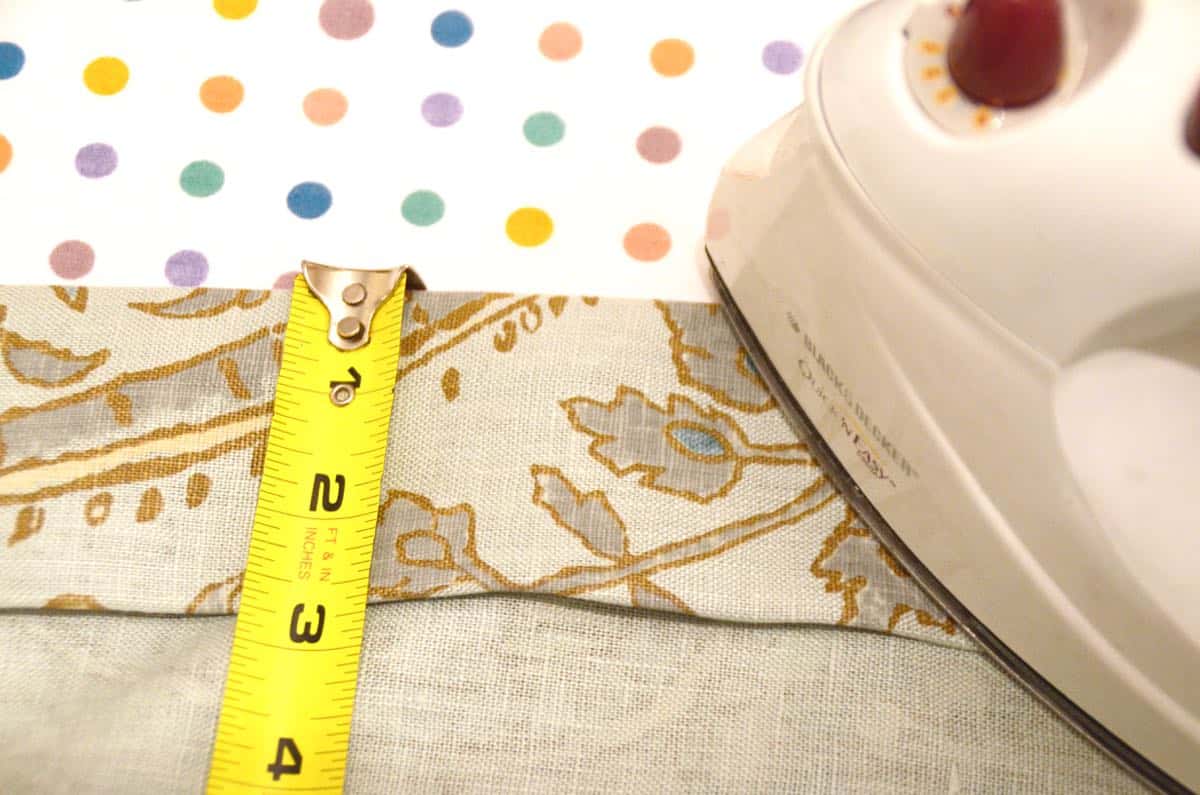
Step 2: Iron and Hem the shades
I loved how the extra bit of lining made the dining room curtains feel more legit so I grabbed some simple cotton lining when I had a coupon at JoAnn. First… get your iron on. This sucks, but is a MUST. Fold under the side edges of your shade fabric 1/2″ and iron. Then fold the side edges another 2.5″ and iron.
Step 3. Add the lining
Cut your lining so that it’s slightly narrower than your shade fabric. Lay your lining on top of the shade fabric and fold your two ironed sides over the edge of the lining.
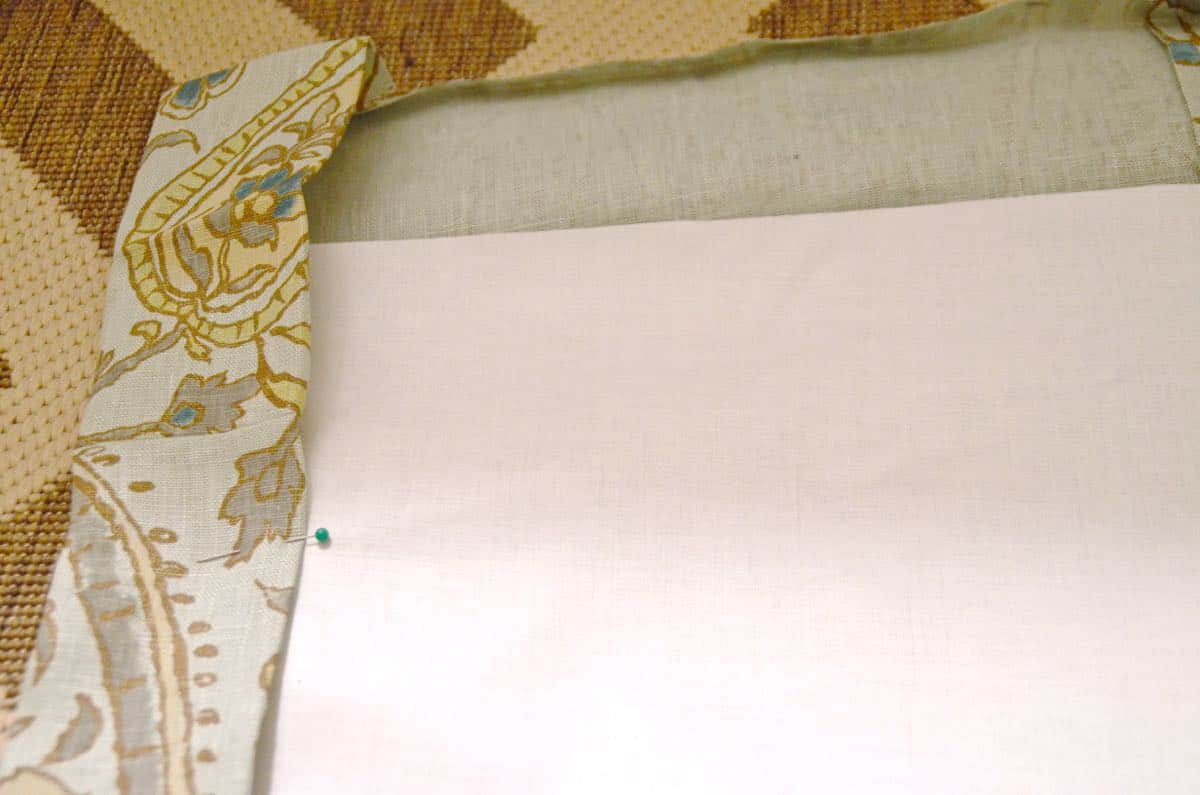
I didn’t mind having a seam along this edge, but for a cleaner look you can hand sew the edges.
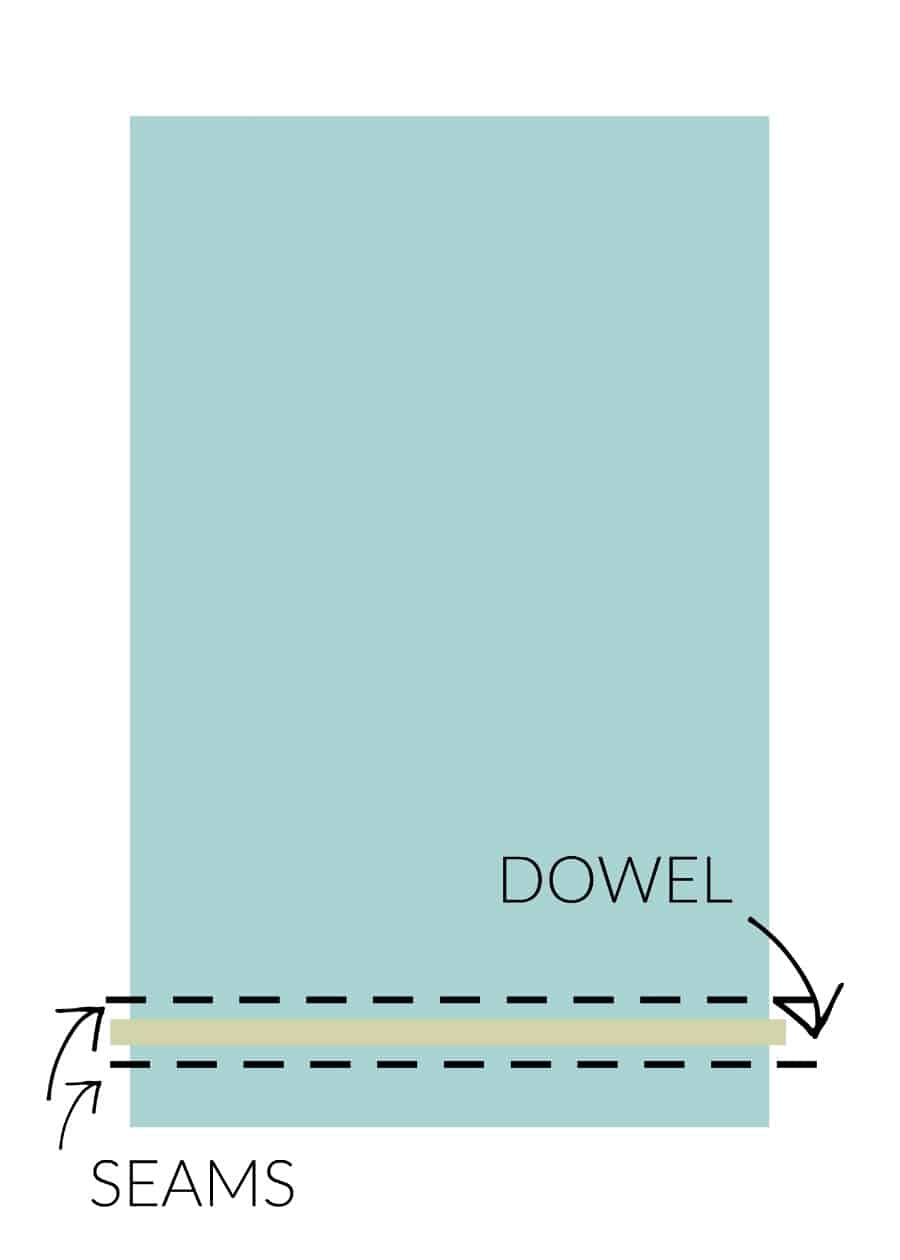
Step 4. Sew hem with room for dowel
For the bottom of each shade, I pressed the exposed edge under 1/2″. Then I hemmed this about 3″. My dowel rods were maybe 3/4″ so I sewed a second seam an inch below my hemmed seam in order to create a little pocket for the dowel rod to slide into. I like having the extra 2″ of fabric below my dowel, but you could certainly just slide your dowel into your hem if you wanted.
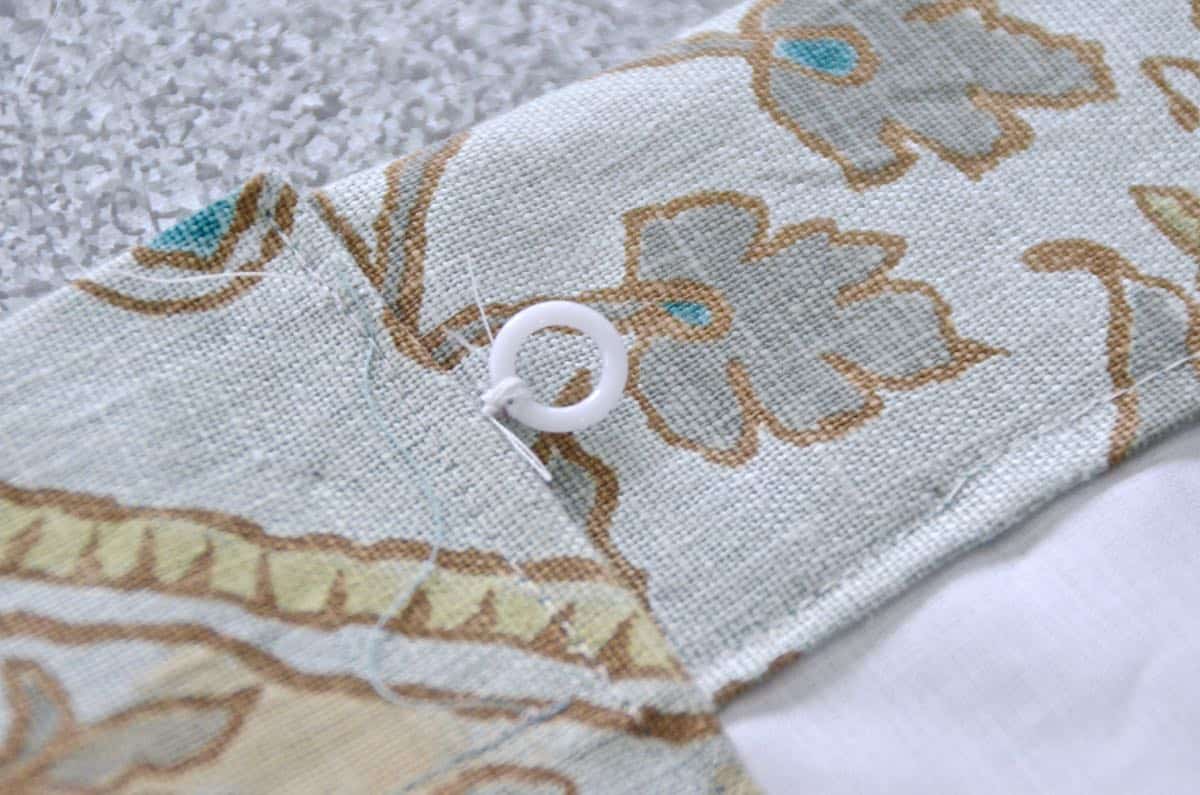
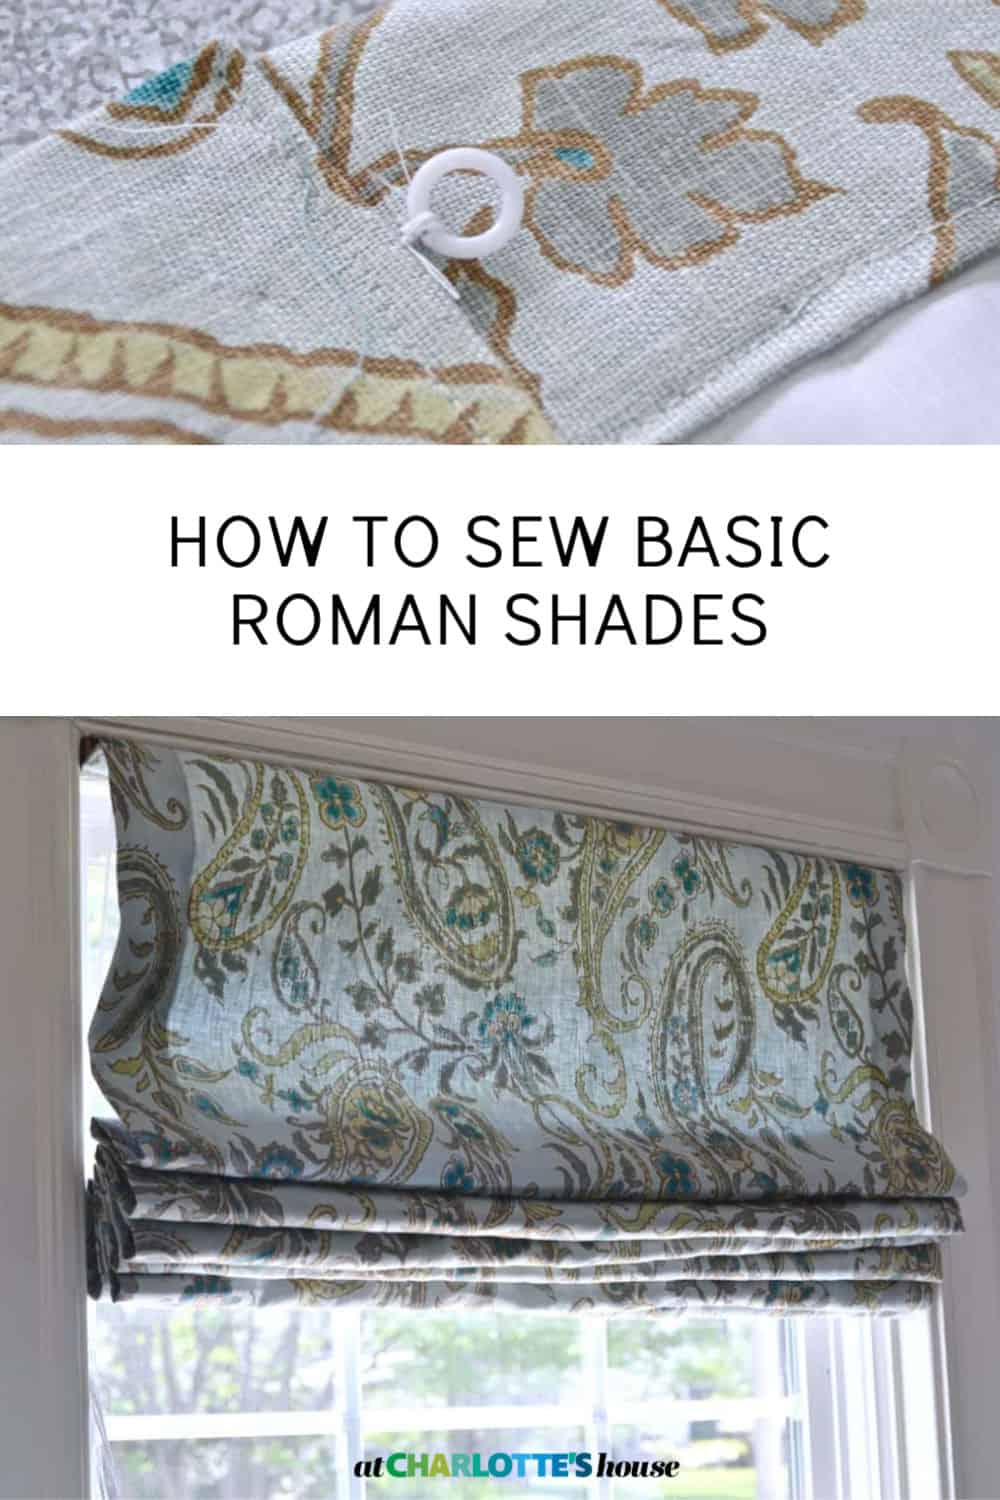
Step 5. Sew plastic rings onto shade
This go around, I also skipped the pre-made ring strips and just hand sewed each plastic ring onto the back of the shade. Pretty sure I got caught up on Great American Dream Builders… you guys are watching, right?!
Step 6. Attach shade to mounting board
For the top edge, I made sure I triple measured how high the window was and then marked this on my fabric. I used a 1 x 2 cut to be a smidge narrower than the shade. I lined up the mark on my fabric with the top edge of the board and then wrapped the fabric around the board with a staple gun.

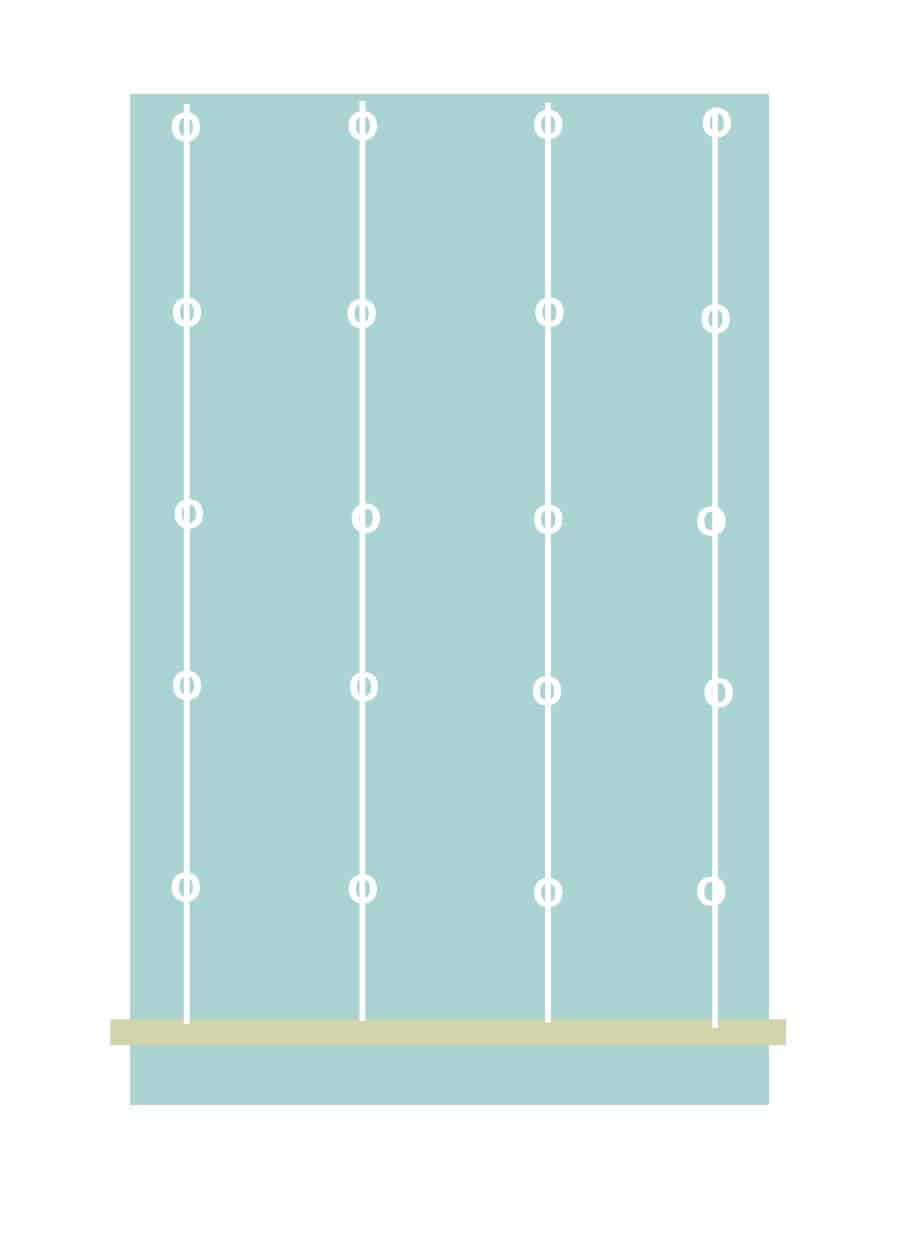
Step 7. Screw in eye rings and thread cording
I screwed in 4 screw eyes in line with my plastic rings.
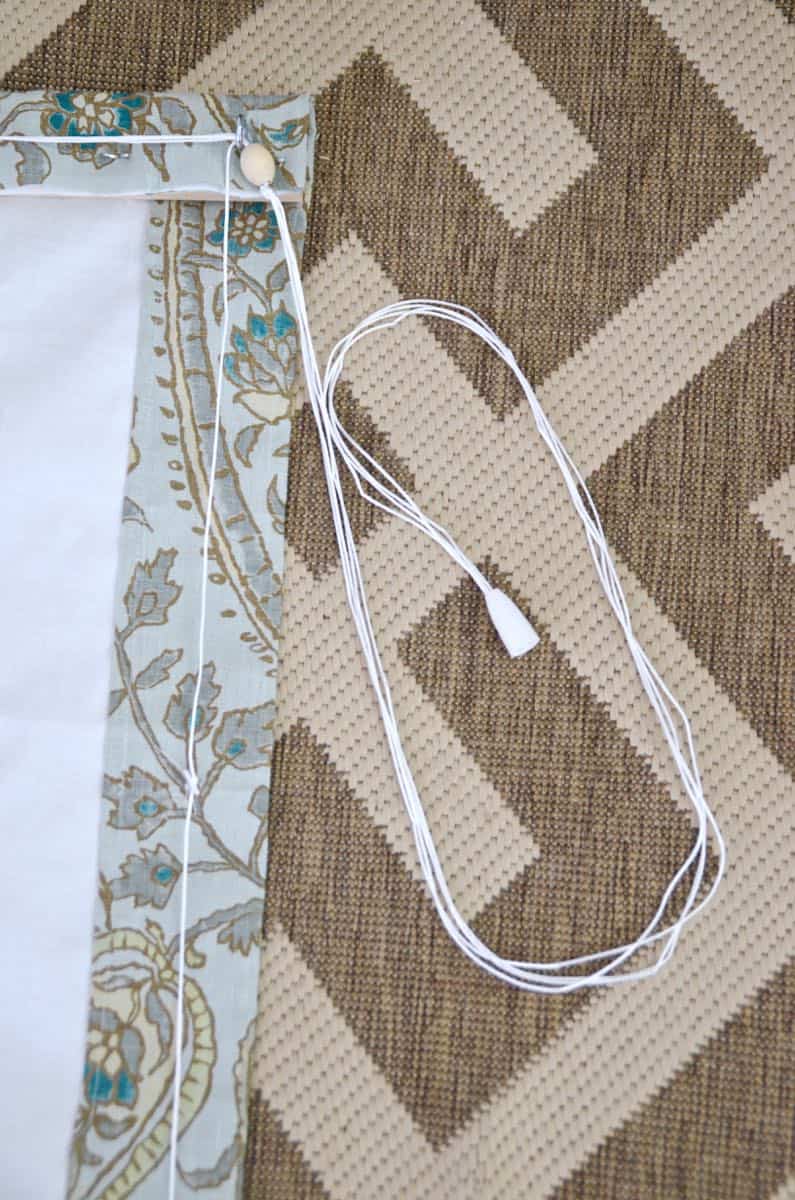
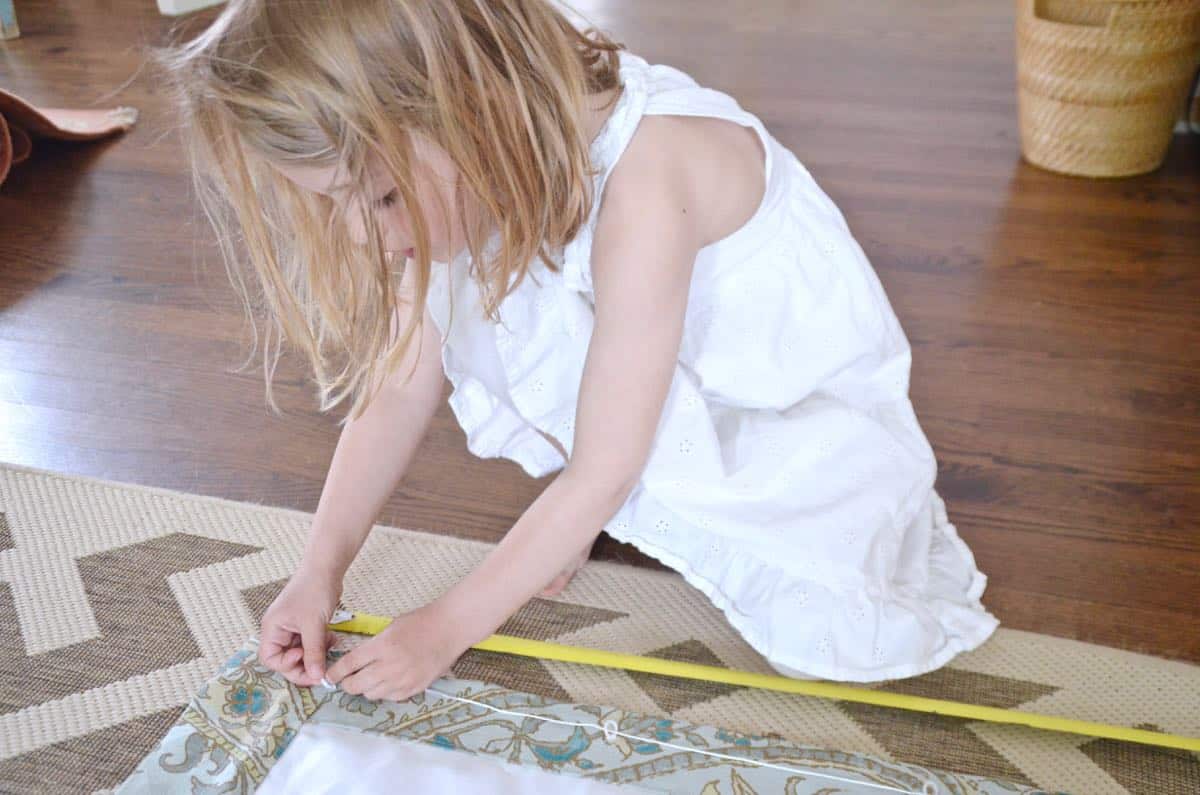
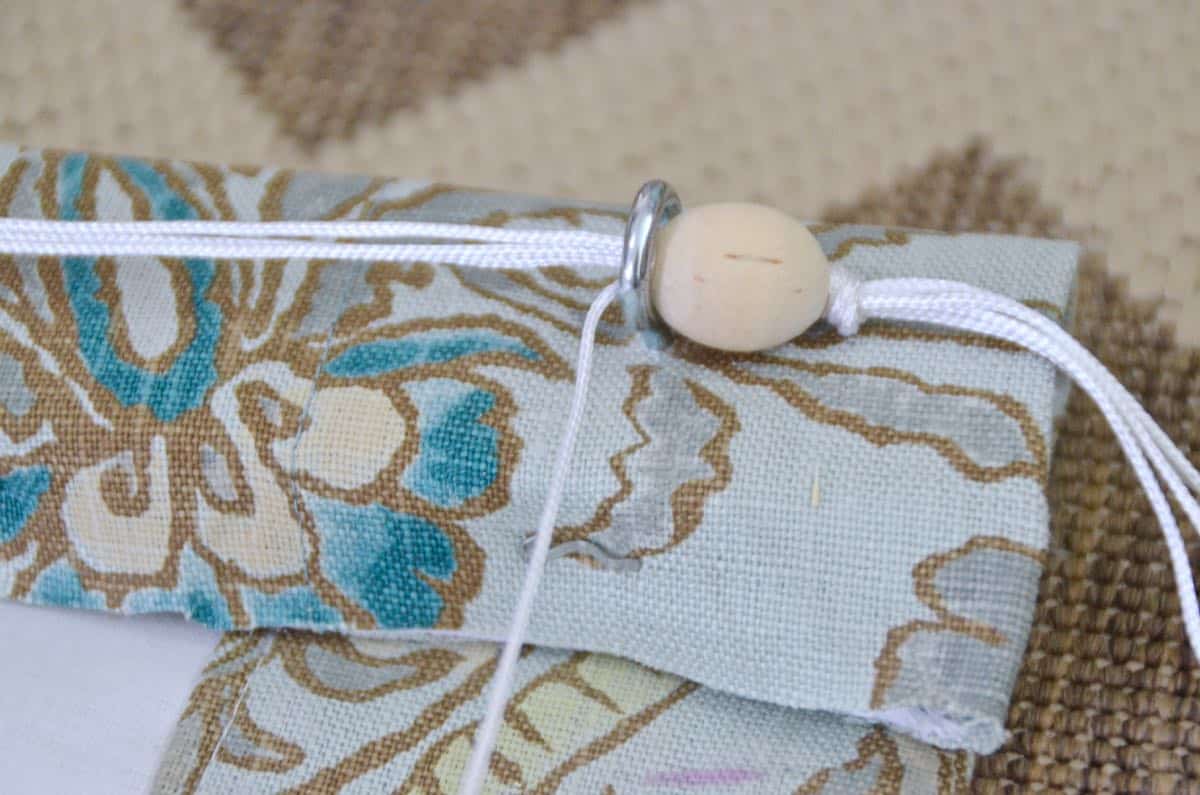
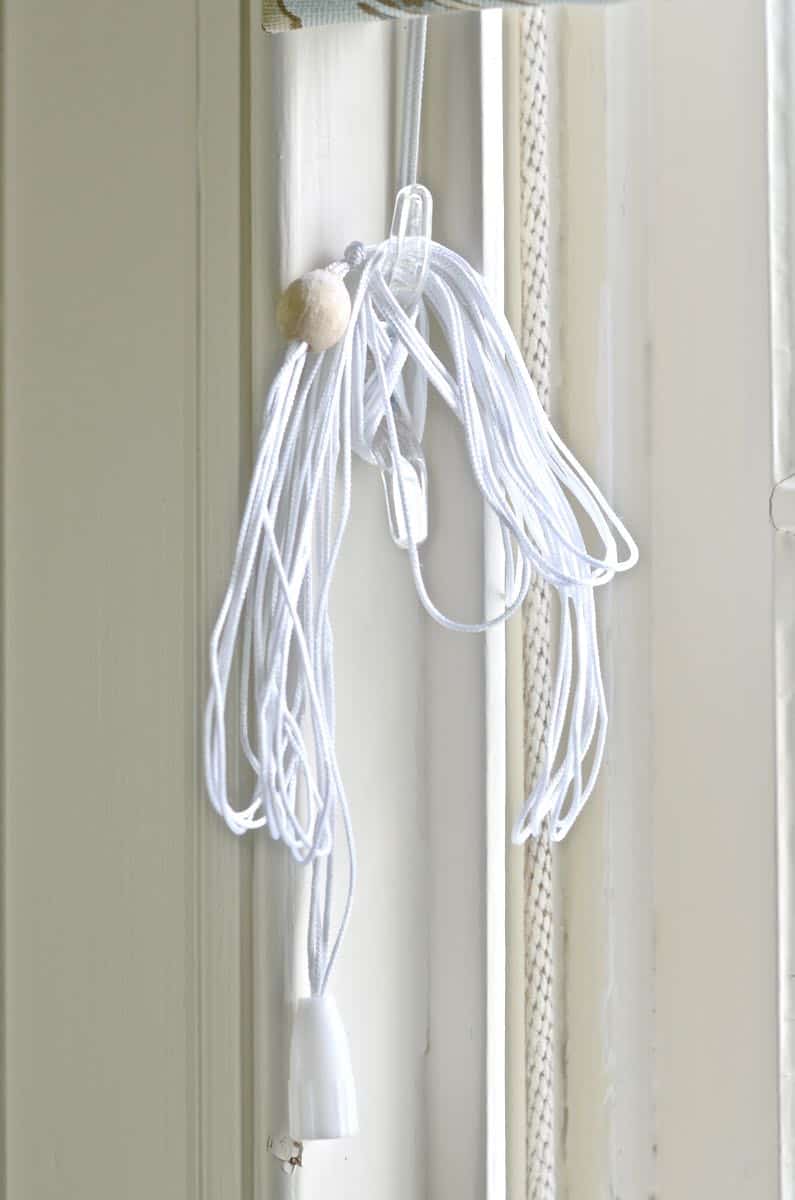
Eleanor helped me thread the cord through all the rings. To keep the cord from coming loose, I threaded it through a wooden bead and tied a knot. I didn’t get a fancy locking thingamajig for the top this time and just rely on the cleat screwed into the window frame to hold the blind in place.
Caution:
Roman shade cords are a big-time strangulation hazard so I made sure to screw the cleat in well above the reach of the kids so the cords are never dangling loose.
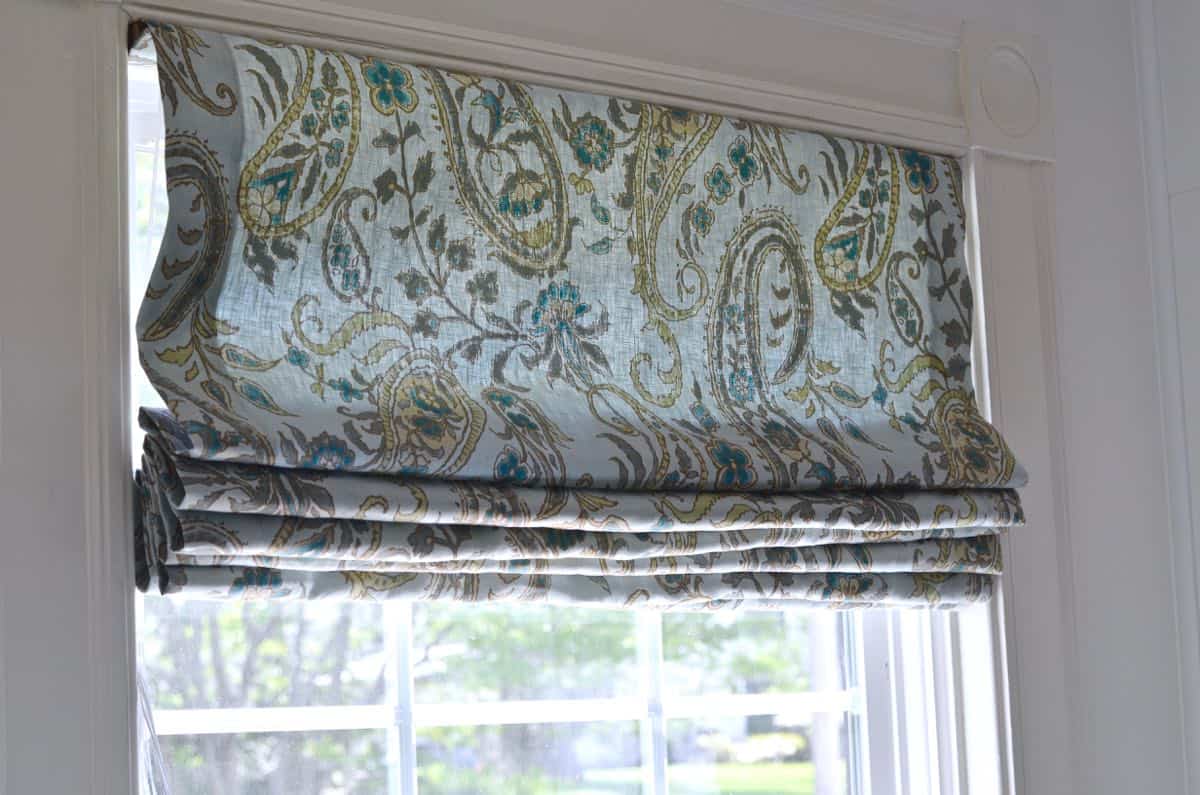
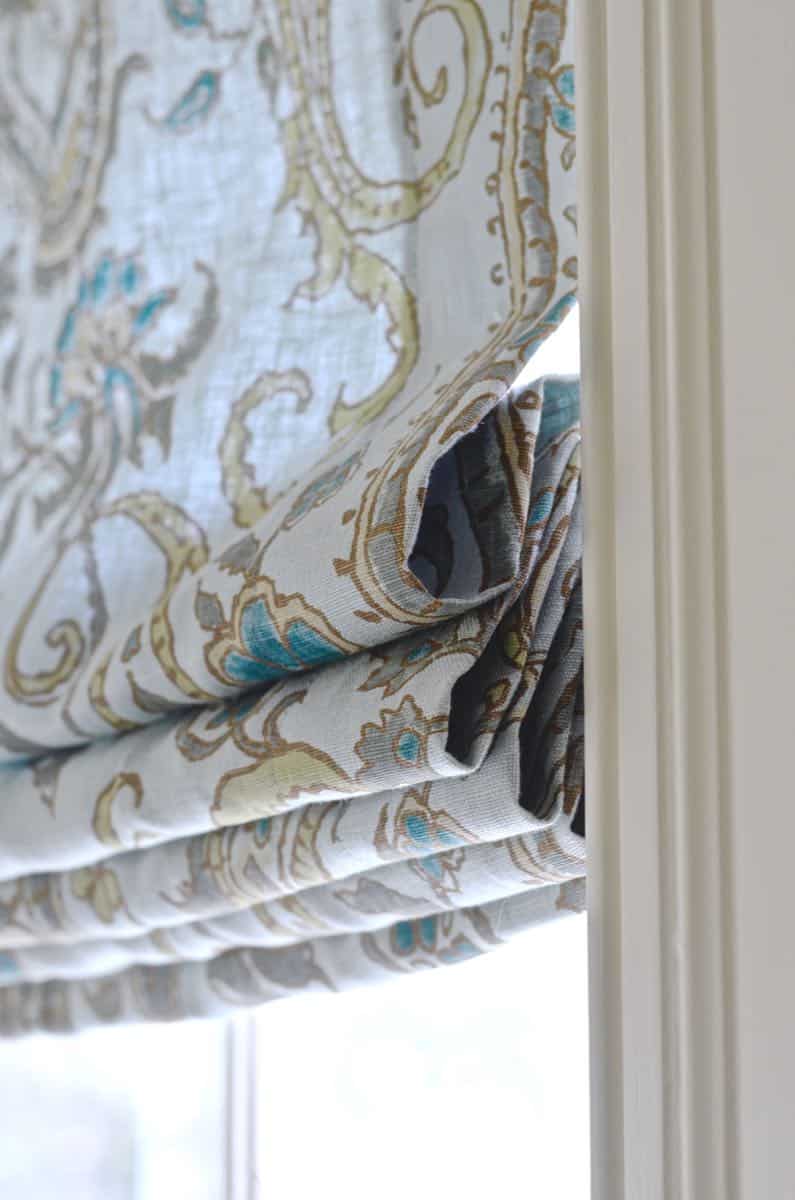
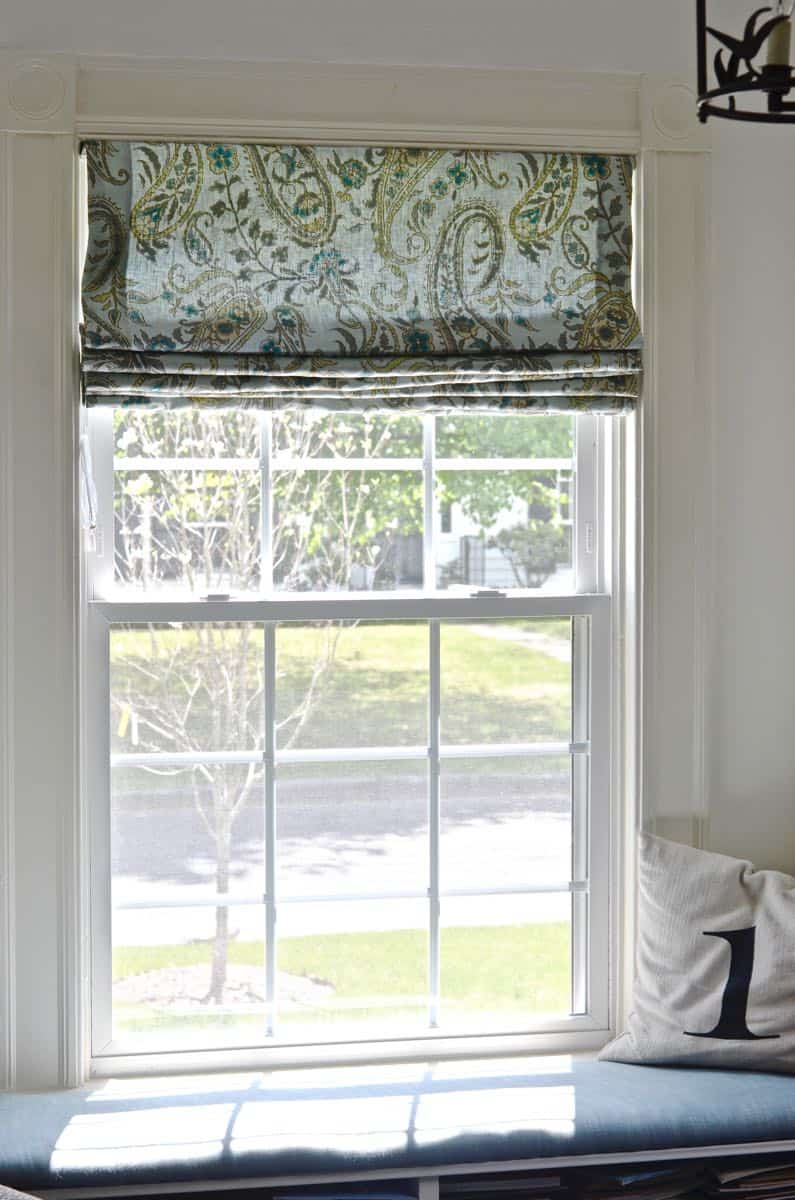
You’ll hate me when I tell you this fabric was picked up at the flea market a while ago and it worked perfectly for this space. I love it.
Don’t they bring the room together so nicely?


Absolutely love this idea and the very clear instructions on how-to-do. Hmmm Looking at our front living room window, am thinking they might be a good candidate for a roman shade. I have a sheer curtain and then heavier drapes, but the open/close mechanism has been non-working for a long time now. A roman shade could look really good there. LOL, yet another project to add to my wanna-do list. I’m collecting quite a variety of such projects. Oh, the fun in store as they get going.
Jane, My list is never ending too. 🙂 Roman Shades are pretty simple…. just a few straight lines and some rings. I say go for it!
Where diD you get the fabric? I ab lovE it.
Hi!!This fabric was actually from the flea market! I’ve always loved it!
I keep meaning to try this.
You just made it look so easy with really great instructions… Now I have no excuses.
Also, I keep forgetting to tell you that I love the new logo.
Thanks, Pat! It was definitely easier after having sewed a pair already, but it’s not fancy sewing… just straight lines. 🙂 And I LOVE the logo… thanks!
I’m not sure how you would thread the chords,. I see you have several, why and how do I figure out the pull chord to open and close the blinds? [email protected]
Hi! There are rings on the back of the shade. Cords thread through that. You need several to evenly pull up the shade. These cords go up through the rings and then come back down beside the shade so they’re the pull cord.
Hello! I have a question for you, the plastic rings you put on roman shades hAve they ever just all broke on you? Like because of the sun?
Hi Terry! I haven’t had that problem! I could see how that might happen over time if there’s a ton of son/ moisture from the window I suppose?
Your directions are not very clear on how ot thread the cord and make it all work.
Sorry! You just run the chord up through the rings and then along the rings at the top of the shade! Not sure if that helps…
Great job Charlotte! I am a bit disappointed to hear that fabric is vintage because it’s beautiful. Thanks for a very informative tutorial. I have a few windows I might have to try this on. Wonderful work!
I know. 🙁 I swear I found the link to it at some point… it may not be ‘vintage’ but it’s probably more expensive than the $12 I spent on it! 🙂
Thanks so much for posting this. You’ve done a such a great job explaining the steps that I’m losing my trepidation about tackling this.
YAY! You can do it! 🙂 Sewing the rings is a little fussy, but the shade itself is just a rectangle… good luck!!
Charlotte this was the very first post I saw when I opened up Pinterest today. Hey I know you!!! My new friend. Love love love how your DIY roman shades came out. I have made DIY no-sew roman shades with mini blinds and with fabric over bamboo shades and they are both B.A.D. I can’t even blog about them. I really need to learn how to thread the bobbin on my sewing machine because you are making me feel confident that even I could make shades that are beautiful like yours.
Lisa! I read this on my phone and then totally forgot to log back in and reply! Gah!! Isn’t it so fun when we see our friends work on Pinterest! I feel the same way!! And I’m a crap sewer, so if I can do these… you can do these. 🙂 xx
Hello, i love this post! But i don’t understand if you use a plastic shaft or wood shaft. Are you used?
Hi Carol,
Thanks!
I used a wooden dowel along the bottom of the roman shade and then another small wooden board across the top in order to attach it to the window frame. I hope this answers your question. I’m not sure what you mean by ‘shaft’ but these are the only two things besides fabric I used… Good luck!
WOULD LOVE TO SEE HOW YOU MADE ROMAN BLINDS WITH A blackout LINING BUT THE LINK ABOVE TO THAT post Doesn’t GO ANYWHERE (and a search on your site turned up nothing). Can you help a sistah out?
Also, I have no idea why some words are in all caps, sorry about that, am totally not yelling.
Hi Mae! I didn’t bring over all the content from my old site so that post might not have made the cut. I made the lined Roman Shades exactly the same way, but I bought a black out curtain, cut it to size and hand sewed it in lieu of the lining you see on these shades. Hope that helps! Same process… just layer the black out curtain on top! Good luck!
Hey there. Could you tell me How you attached it to the window frame? Thanks!
I just screwed up through the board at the top of the shade into the window trim. Hope that helps!
Yes, that was my question too. I’m going to give this a try… I’m replacing some heavy drapes so I’m going to use the drape fabric for the Roman blinds. No risk if I mess it up :). (it’s not letting me turn off the all caps, not sure why. Not doing this on purpose!)
Good luck!! You *might* have to sew some dowels into the shade panels to keep the fabric from drooping a bit but see how they look! Good luck!
Interested in how this TURNED out using drap.
I’m not sure I understand your question?
How do you think THIS SHADE WOULD work using lined linen curtains?
So you’d use a linen curtain panel to make this Roman shade? I think that would be perfect!
Hello
These are so lovEly thank you for great instructions… i made blinds before but the pleats didnt line up great and where sort of wonky!! any tips on getting the rings spot on to prevent this HAPPENING?
Oh gosh.. how frustrating! I’d say be very careful when measuring your fabric so that the rings are placed at the same place on either side! Perhaps safety pin them in place before sewing to make sure they look straight! Good luck!
I love these! But I need a little more information on how you lace the strings. One through each ring, then where? Help! I can’t seem to get this part.
Hi Bev! So the laces tie around the loop at the bottom of the Roman shade and then they loop through each ring to the top of the shade. They then run along the top, through the rings, until they connect to whatever toggle you’re using to raise/ lower the shade? Does that make any sense?
What is The advantages of having dowels on each Fold aNd not. ihave seen thE roman nlinds done both ways. Yoursjust had the dowel on the bottom.
I think it’s just a cleaner look… if the roman shade is wider, the fabric can sag in the middle of each fold without dowels. Multiple dowels could also make the roman shade a bit bulkier so a lot of it is simple aesthetics!
Looks great. How far apart were the rows and columns? I am about to make a simple roman blind just like yours. I really like the look of yours folded up. My roman blind will measure 57”(h) and 39”(w). When you sew the rings the thread must come through to the front side yet i cannot see it in your pic? How did you do this? (Sorry for the caPs, can’t get the lower case to work!)
Hi Michelle! Regarding the rows and columns, it’s totally aesthetic… I believe I had 4 columns of rings so one ring on either side and then 2 rings evenly spaced across the middle. For rows… it depends on how deep you want it to ‘pleat’ when you pull it up… I’m guessing mine were around 8-inches each. I’m sorry we’re in a different house now or else I’d go measure! Re. sewing the rings, I used a matching thread color and just made a tiny little series of stitches. They’re only a millimeter or so and disappear into the pattern a bit! Good luck!
Thanks ChatloTte! A big Help! Putting the rings on today.?
i am making a shade that for a window that measurs 33 3/4” . I want to kNow if you would use 3 or 4 rings across. I made 2 other shades measuring 21 3/4 wide and used 3 rings acroSs oN those . What would do .?
Hi Cynthia! I think I’d be inclined to add 4 rings across… it helps keep the shade from sagging so it can’t hurt to have a little extra! You’ll essentially have a ring every 12 inches this way (one on either edge of the shade and then two evenly space across the middle.) Good luck!
Hi, Charlot!
I love your idea and how it turned out. Is there a way to wash these kind of blinds, since I want to make one for my bathroom?
I would think a good dry cleaner could handle them, but you’ll have to dismantle the shades in order to clean them. I doubt they’d get that dirty in a bathroom, but maybe attach with velcro if you’re hoping to launder? Good luck!
That’s a really good SUGGESTION! Thank you SO much!
Great! Good luck!
What great instuctions! These look just like the ones i saw in RoyalWindowTreatments.center
Thank you so much!!
HOW much space do you use in between for the rings? perhaps I missed that but i didn’t see. thank you
Hi Claudia! It’s mostly an aesthetic decision as it will determine how long your ‘gathers’ are when you go to pull the curtain up! So 12-inches between rings will mean that the folds when the curtain is pulled up are 12″ long. Hope that makes sense!
Hi Charlotte, I have used your directions to make 2 shades for our hall windows and love how they came together, as well as how easy your instructions were! I am ready to sew on the rings – my question is did you sew through both the lining and curtain fabric? I couldn’t tell by looking at your photos.
Thank you!
Hi Terri! I’m so happy it worked for you! YES! I did sew through both. I made sure to use a thread that matched the pattern and from a distance you can’t notice the small little stitch. Good luck!
Well, This has inspired me!! This is exactly what i am wanting for my breakfast area windows. I sent a message to a lady that makes Roman shades just YESTERDAY to see if she would give me a quote, but after reading this, i think iam going to try to do it myself and save some money!! your instructions seem so simple!!! thank you so much for sharing your knowledge! I cant wait to get started!!!
Oh yay! Let me know how they turn out!!
I am ready to take this project on!
My quesTion is how do i the thread through the plastic rings (what direCtion?
Hi Lindsay! I’m not sure I understand exactly… the string should go vertically through the rings I just used a needle and thread and sewed around and around one edge of the ring.
Great instructions! Thank you,
I’m going to use your instructions but I’ll need to add a dowel for the folds as my windows are quite wide. For this would you suggest just sewing a 1″ pocket or so for the rod? Also I’ll be mounting outside the window casing. Any suggestions?
Hi Janet!
That’s exactly what I’d do! I have to make a set with rods coming up and that was my plan. Good luck! And the outside mount shouldn’t change anything… just make sure you get brackets that will allow you to clear the molding!
Great looking shades. Great tutorial. I have same question as a few others, regarding the lacing up. I know you have attached lace cord to bottom inside rings, and threaded them througH rings vertically, but i see you have one cord strand down one side, yet several cords that spanned the top of shade (and have bead attached). It looks like 4 thread strands in total. DId you attach 3 cords down one side, and one on the other? ID like the specifics on the cord, so i can make this tout suite! Thank you! (Dont know why this is allcaps- i guess im excited about the project)
Hi Erin! I had four columns of plastic rings so each one needed it’s own cord. If you look at the diagram that shows the ring placement, each of those lines is a separate cord but then they all thread through the top of the shade to meet on which ever side you’d like the cleat.
Aha! I had the same question and this explains it. I am going to give this a try!
Good luck! Let me know how it goes!
Could you please explain what kind of cording you used, and possibly a source? Thanks so much for sharing!
Hi Anita! I use something similar to these: https://amzn.to/2KNuQJX I prefer the look of a thinner cord, but if you have a big heavy blind, obviously you might need something stronger.
Do you have directions on how to hang these (install)? thanks you
I typically use an L bracket into the window frame for an outside mount or just go straight through the 1×2 for an inside mount.
We have just finished out renovation and have beautiful molding. I purchased 95” drapes that I love the color, fabric, sheen (and they are Blackout). Now I don’t want to cover the cypress. Do you think I can make roman shades out of what I have? The fabric is not too thick and should lay like in the pictures.
Yes! I’ve done exactly the same thing with old curtains. The panels are usually plenty big enough!
Would it be possible To do this project with a tension rod at the top?
Hi! Sorry for the slow response… If the shades are essentially decorative, then definitely. I would be worried that the tension rod may not hold up to the weight of pulled the shade open though?
Hi there!
Thanks for the great tutorial. This is just what I have been looking for. I am curious as to the attaching of the “mounting board” to the window frame. I don’t see that part explained, and I am hoping to be able to somehow attach it without making any holes in the frame, as I am in a rental. Thanks for any help.
Hi there! I used L brackets and mounted the mounting board above the window to the drywall. You will leave small holes in the drywall but they should be easy enough to patch.
I am sure U answer thiS question
But hEre it is again my window is very wide 72” but only 36” long.
I am using pvc pipe for dowels how many should i use?? And how far apart??
Hi! I think dowel placement is primarily preference as they will determine how long your pleats are when you raise the curtain! Mine are usually 4-8″ depending on the height of the window. I’d play around and see what looks best to you! Good luck!
Hi, looks wonderful. Im going to give it a try. About how long do you think it TOOK you to COMPLETE?
Hi! It’s not too bad but I definitely don’t remember how long.:) A few hours maybe? Probably a bit more for the rings.
i realize I’m late to the party here. How did you determine how much vertical space to leave in between your rings? I’ve got a 30″ by 50″ window to cover. Is 4 sets of rings enough – I’m think I want about 20″ of fabric to remain at the top of the window at all times (ie no pulling up)- that leaves me 30″ of height – 2′ at the bottom for a hem where the first dowl will be – and 7″ in between each dowel rod…does that work
It totally depends on how ‘thick’ you want your gathers to be! E.g. If the rings are 8-inches apart, each gather will be approx 4-inches.
Hi Charlotte! I’m excited to try your roman shade tutorial. I’m wondering if you think I could use the roman shade tape with the little hooks already attached? If so – wouldn’t it show a lot of stitching through the front fabric (assuming I sew through the liner and main fabric). Thanks for any tips!
Yes! I don’t see why not! I’d probably still stitch only the rings themselves to avoid that stitch line, but the tap will keep them all lined up!
I live in the hot dry desert so lined mine with “warm windows” to keep out the heat in the summer.
That’s so smart!
Hello,
Trying to figure out how you run the cord through the rings. So it looks like your supposed to have a separate cord for each column of rings. Do you tie the cord to each ring as your running it down the fabric? Or is it just tied the the bottom ring only? Thank you
Hi! Just tied off at the bottom. Then the separate chords go vertically and then come together to run across the top of the shade into the corner will the drawstring will be.
When you thread the chord, do you go up then down then up and down again with one continuous chord??
Hi! Nope… there’s a separate chord for each vertical… then they all run together along the top and come together at the corner where you can pull the chord up or down.
Hi,
could I make this work on a single 36″ french door window??..could I just use a small screw to attach it to the door??
Yep! Absolutely!
I jUST NOW CAME ACROSS THIS POST AND i’D LIKE TO DO SOMETHING SIMILAR IN OUR KITCHEN WINDOW.
mY QUESTION IS, HOW WAS IT ATTACHED TO THE INSIDE OF THE WINDOW AT THE TOP? IS THERE ANY WAY YOU cOULD YOU ILLUSTRATE WHAT YOU MEANT BY “L-BRACKETS” AND “MOUNTING BOARD”?
Maybe the images in this post will help: https://atcharlotteshouse.com/how-to-sew-roman-shades-like-a-professional/
i *LOVE* VINTAGE fabric thank you soooooo much for this tutorial. cant wait to try it!!!!!!!!!!!!!!!!!!!
Thank you and good luck!!
so happy–it worked!!!!! lol
Yay!!!
https://idecorzone.com/roman-blinds/
I think this post proved that your are my best friend
Great, simple instructions! Thanks for pictures too.
Thank you! Most welcome!
Parabéns! Seus trabalhos são maravilhosos, obrigada por tudo e muito sucesso.
Thank you so much!
Please show me how to run cords through the rings. I’m not sure how they should be aligned Thank You
Hi! Essentially each chord should run from the last ring on the bottom of the blinds, straight up to the first ring at the top of the blind and then go through all the rings on the top until you’re at the cleat.