
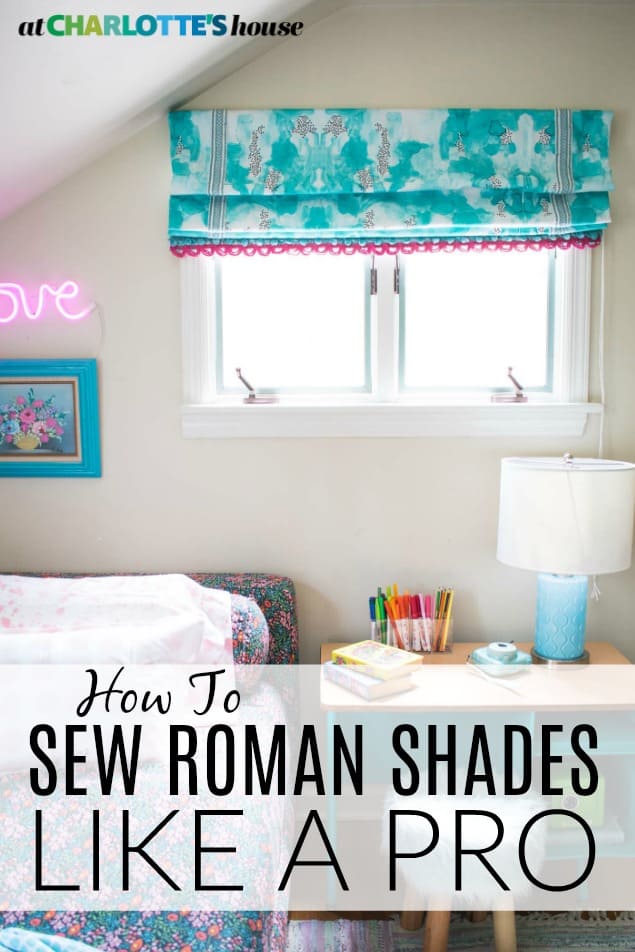
How to Sew Roman Shades Like a Professional
Psssst… this post *might* contain affiliate links: see my disclosure here.
Sewing Roman Shades the Right Way
I’ve sewed Roman shades before but I always cheated. This time I sewed them like a pro! (Check that… I sewed them very very similar to how a professional would, but obviously a pro would sew straight lines.)
Thanks SO much to Spoonflower for sponsoring this project and providing this amazing fabric by The Little Ivie Cloth Co.!
Shop my favorites!
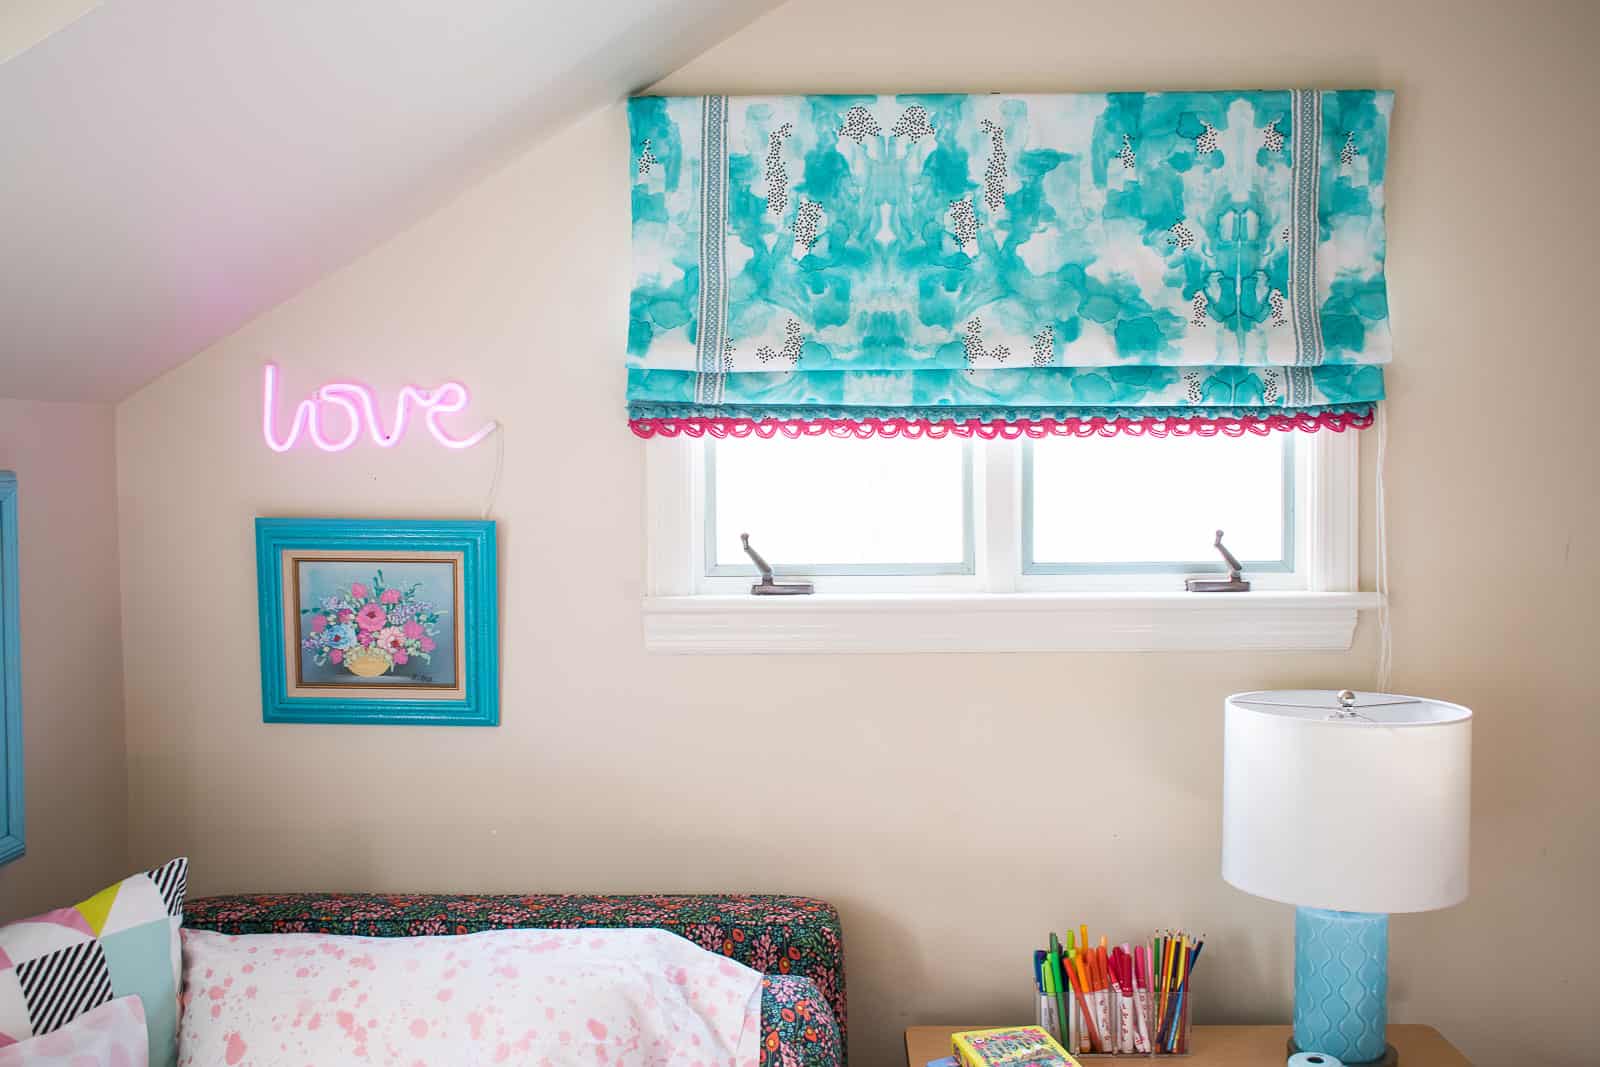
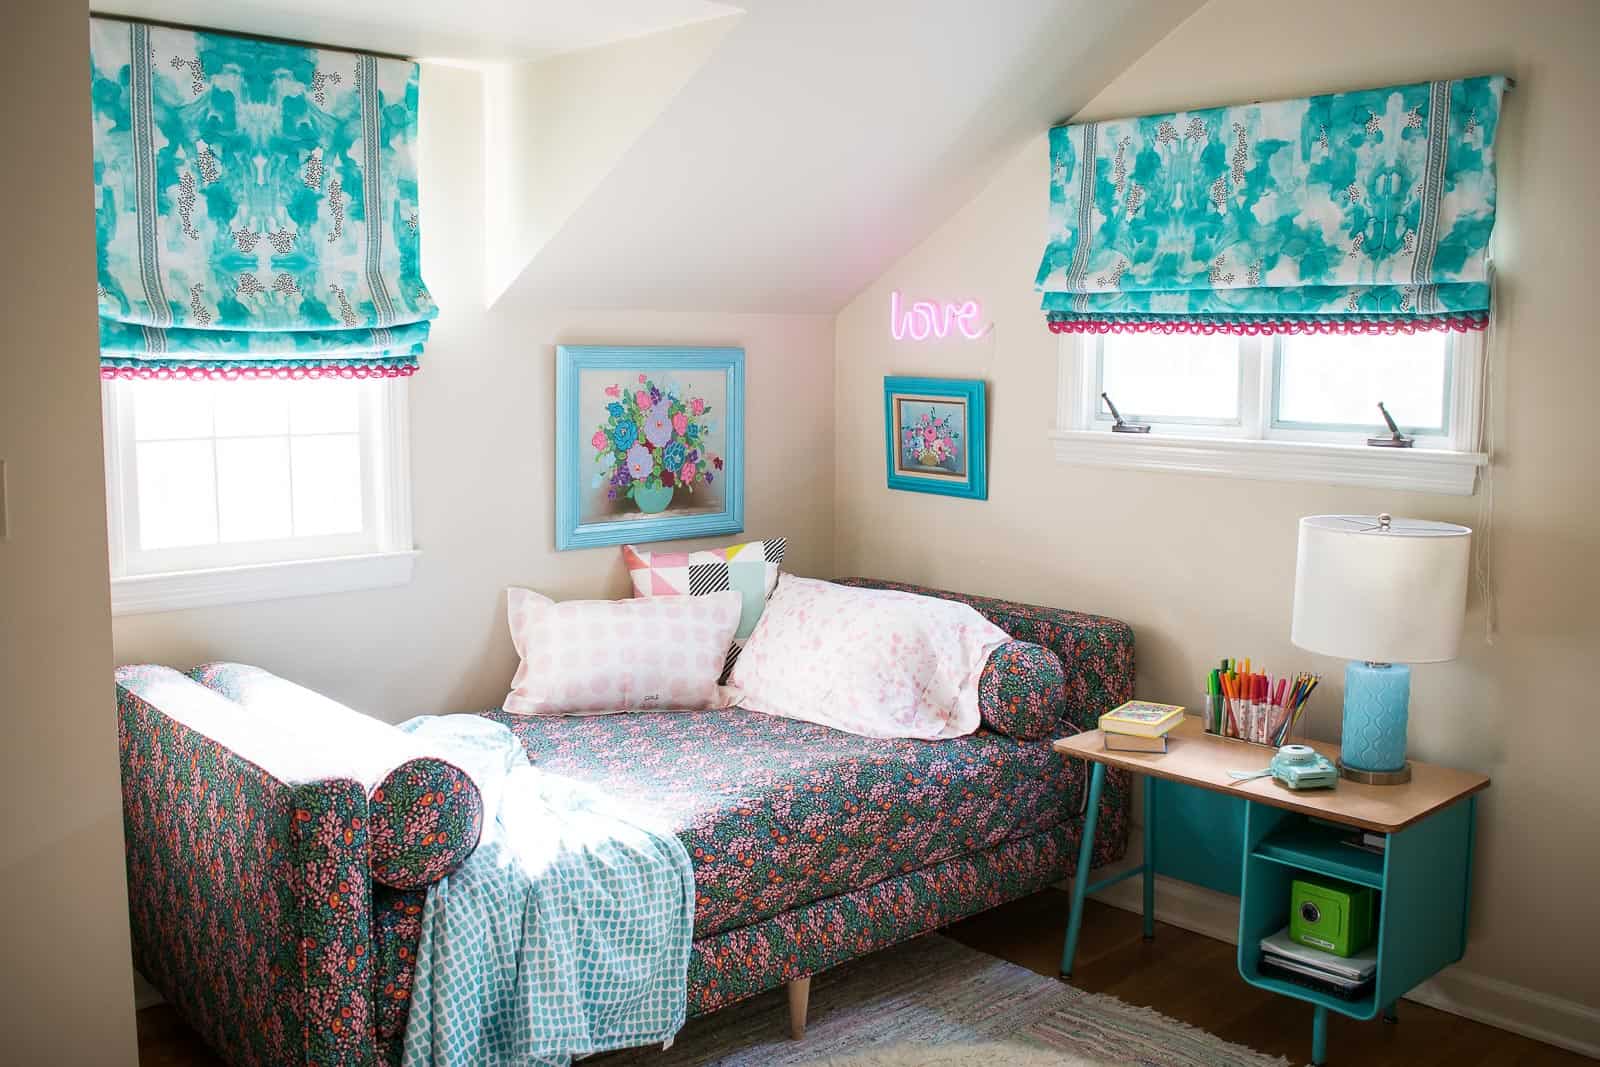
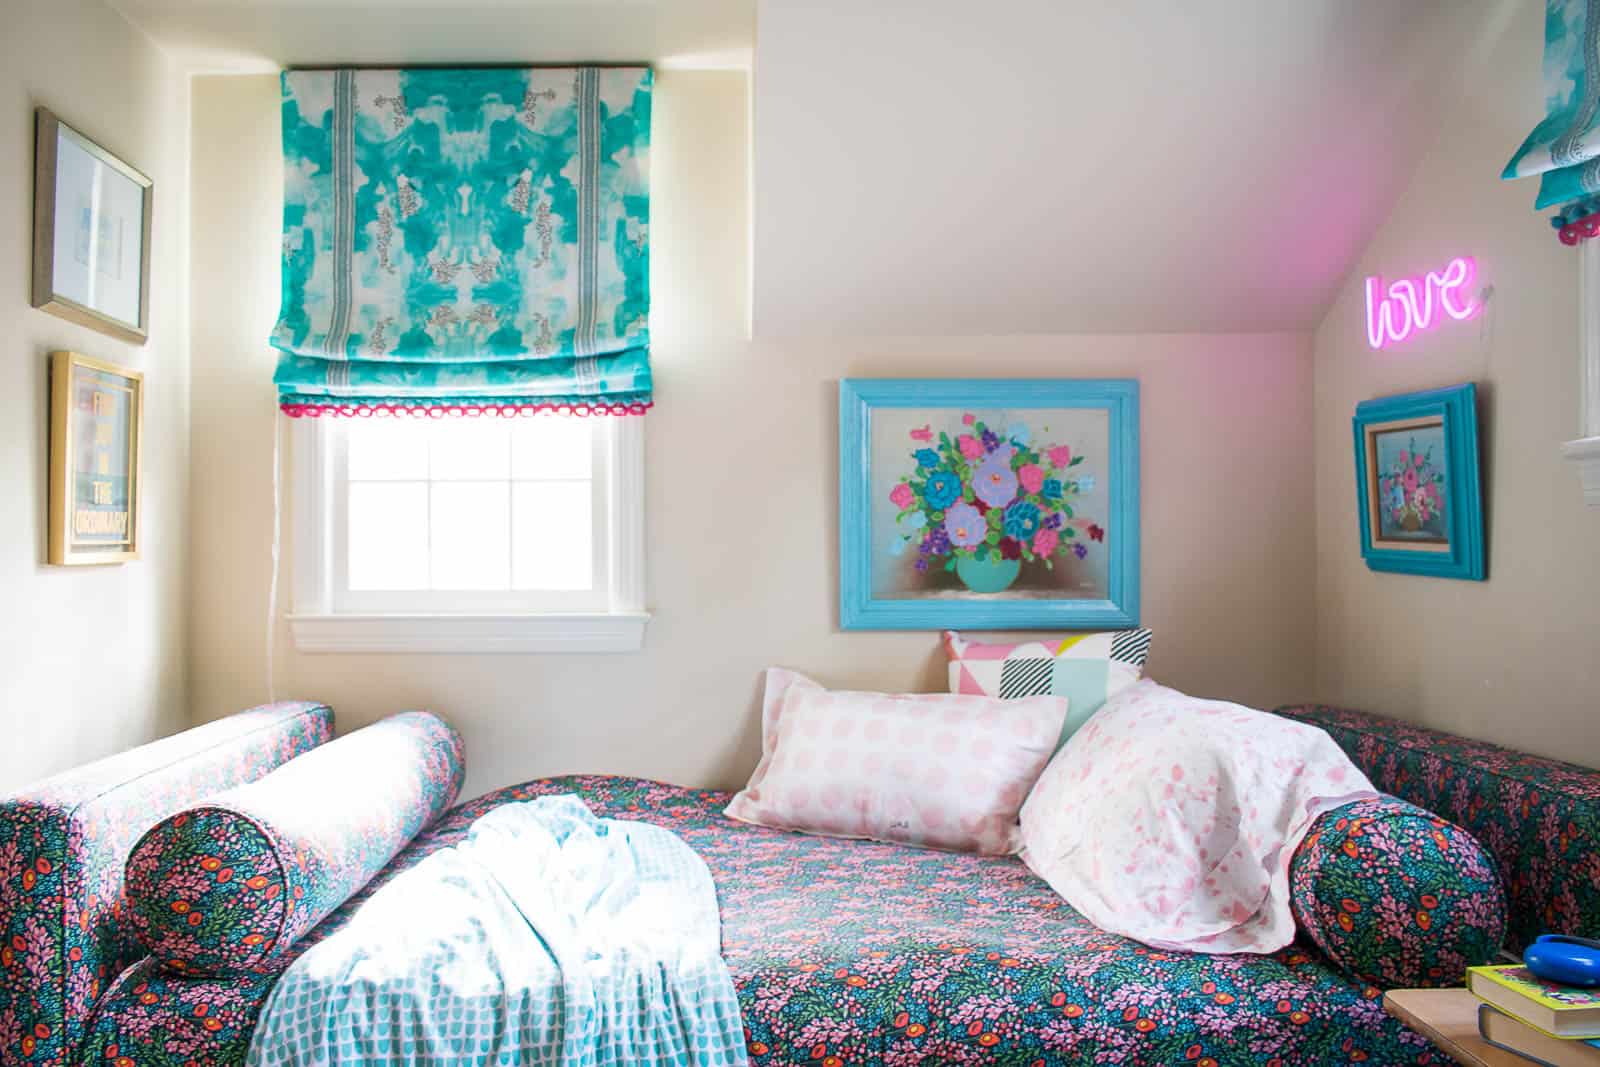
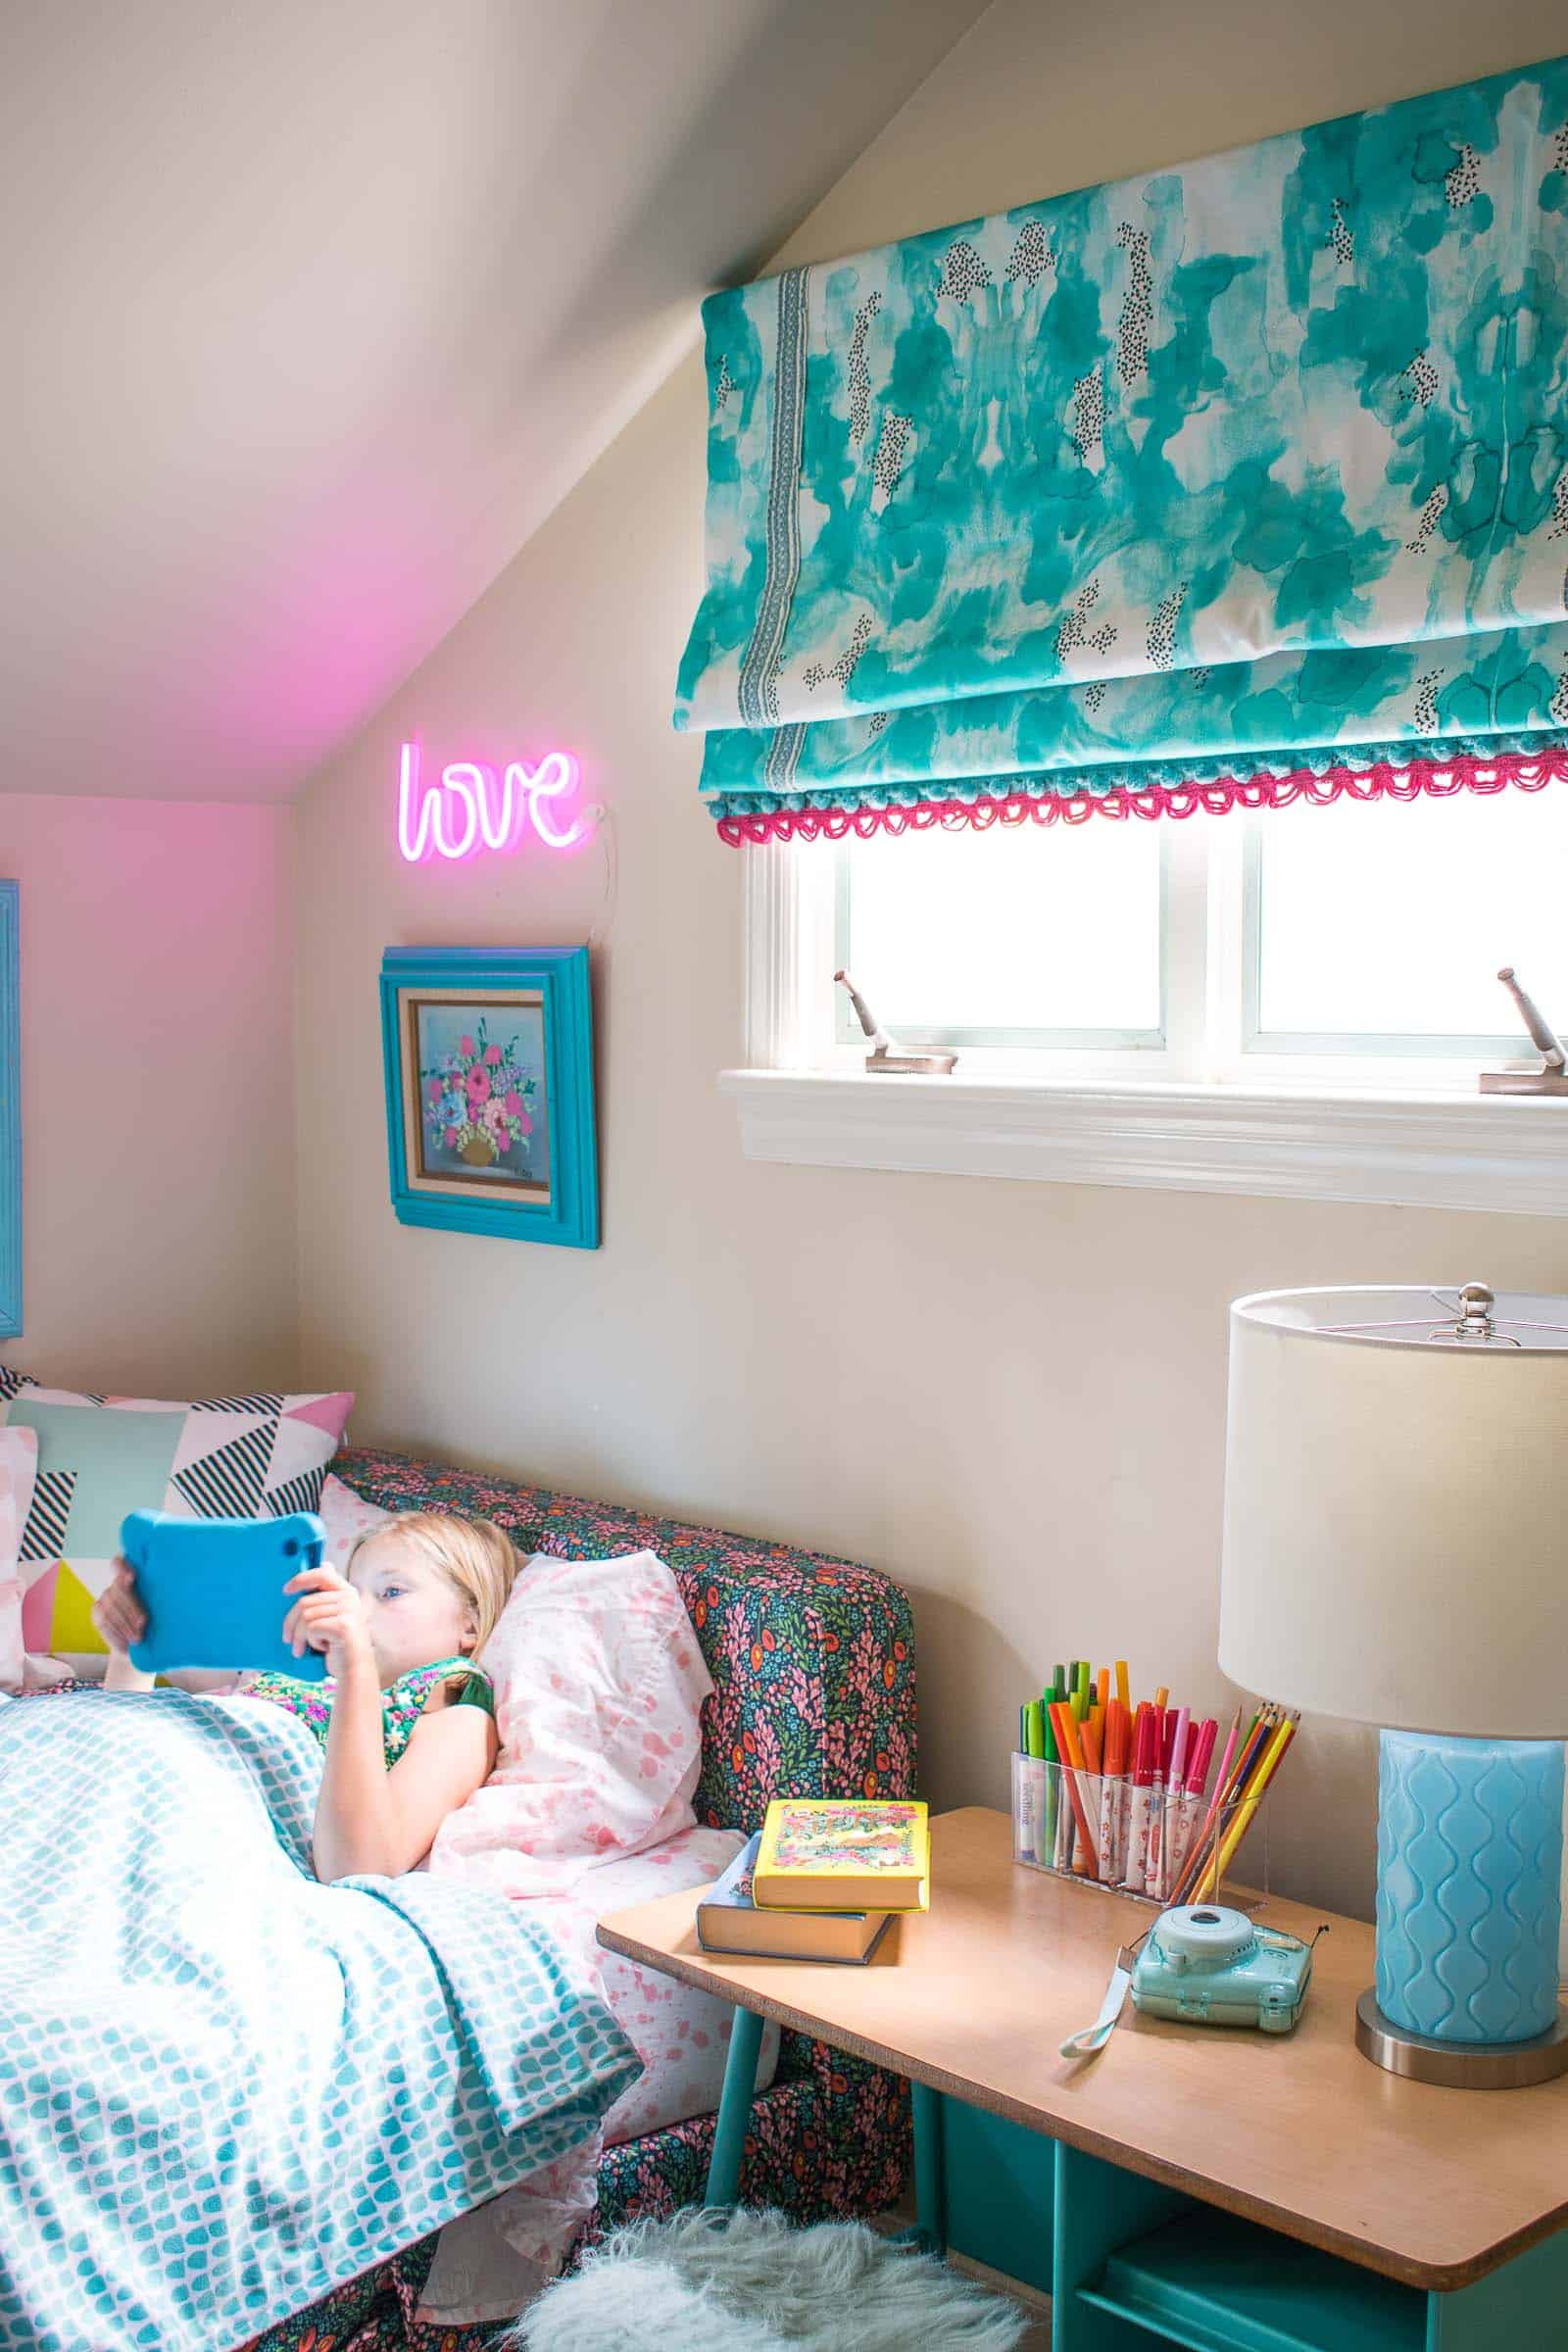
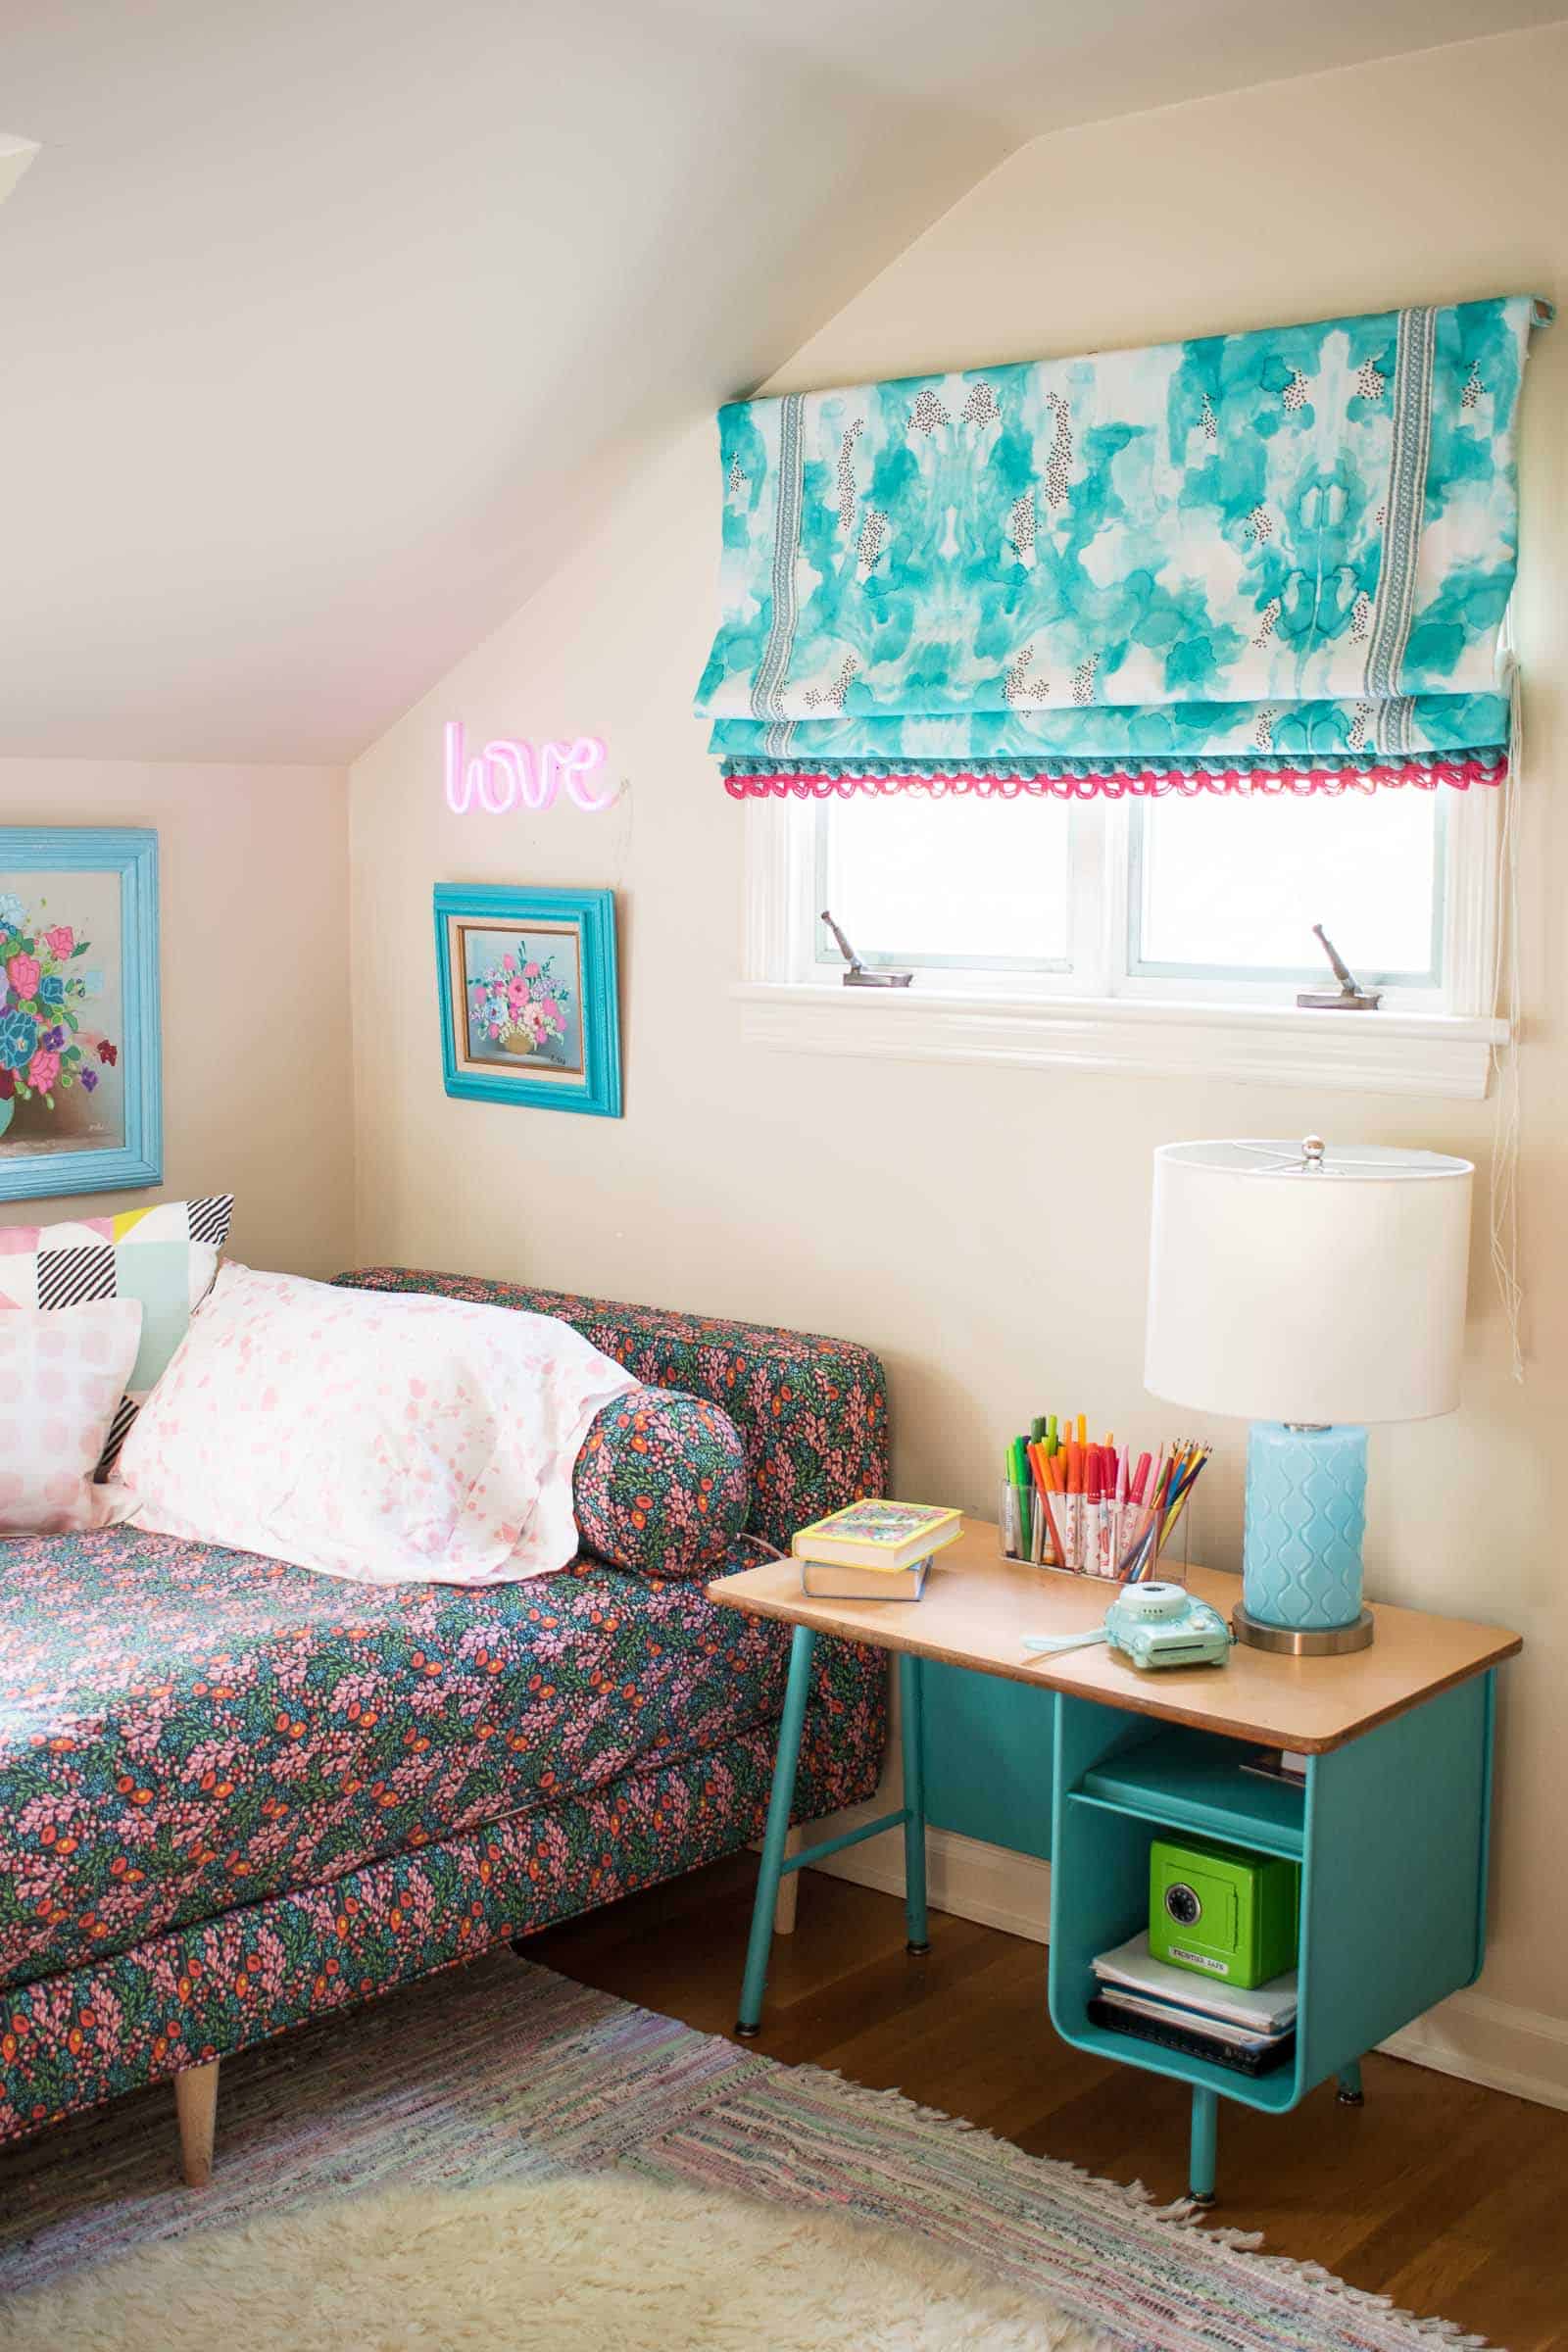
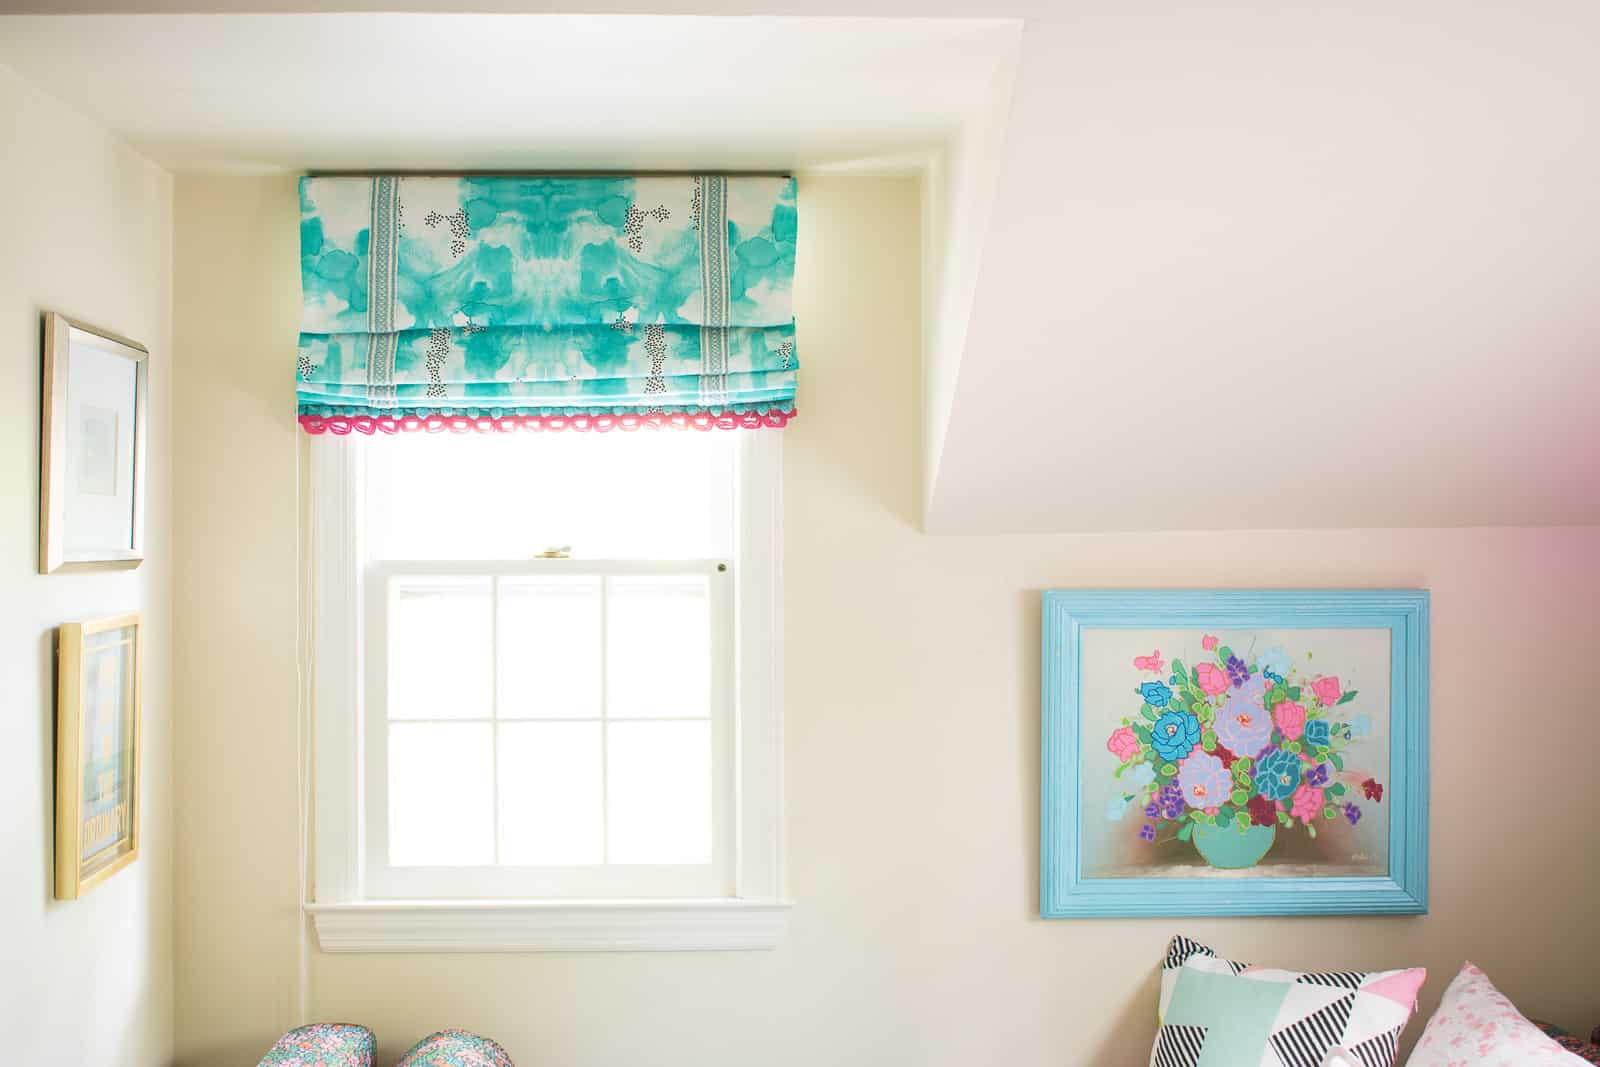
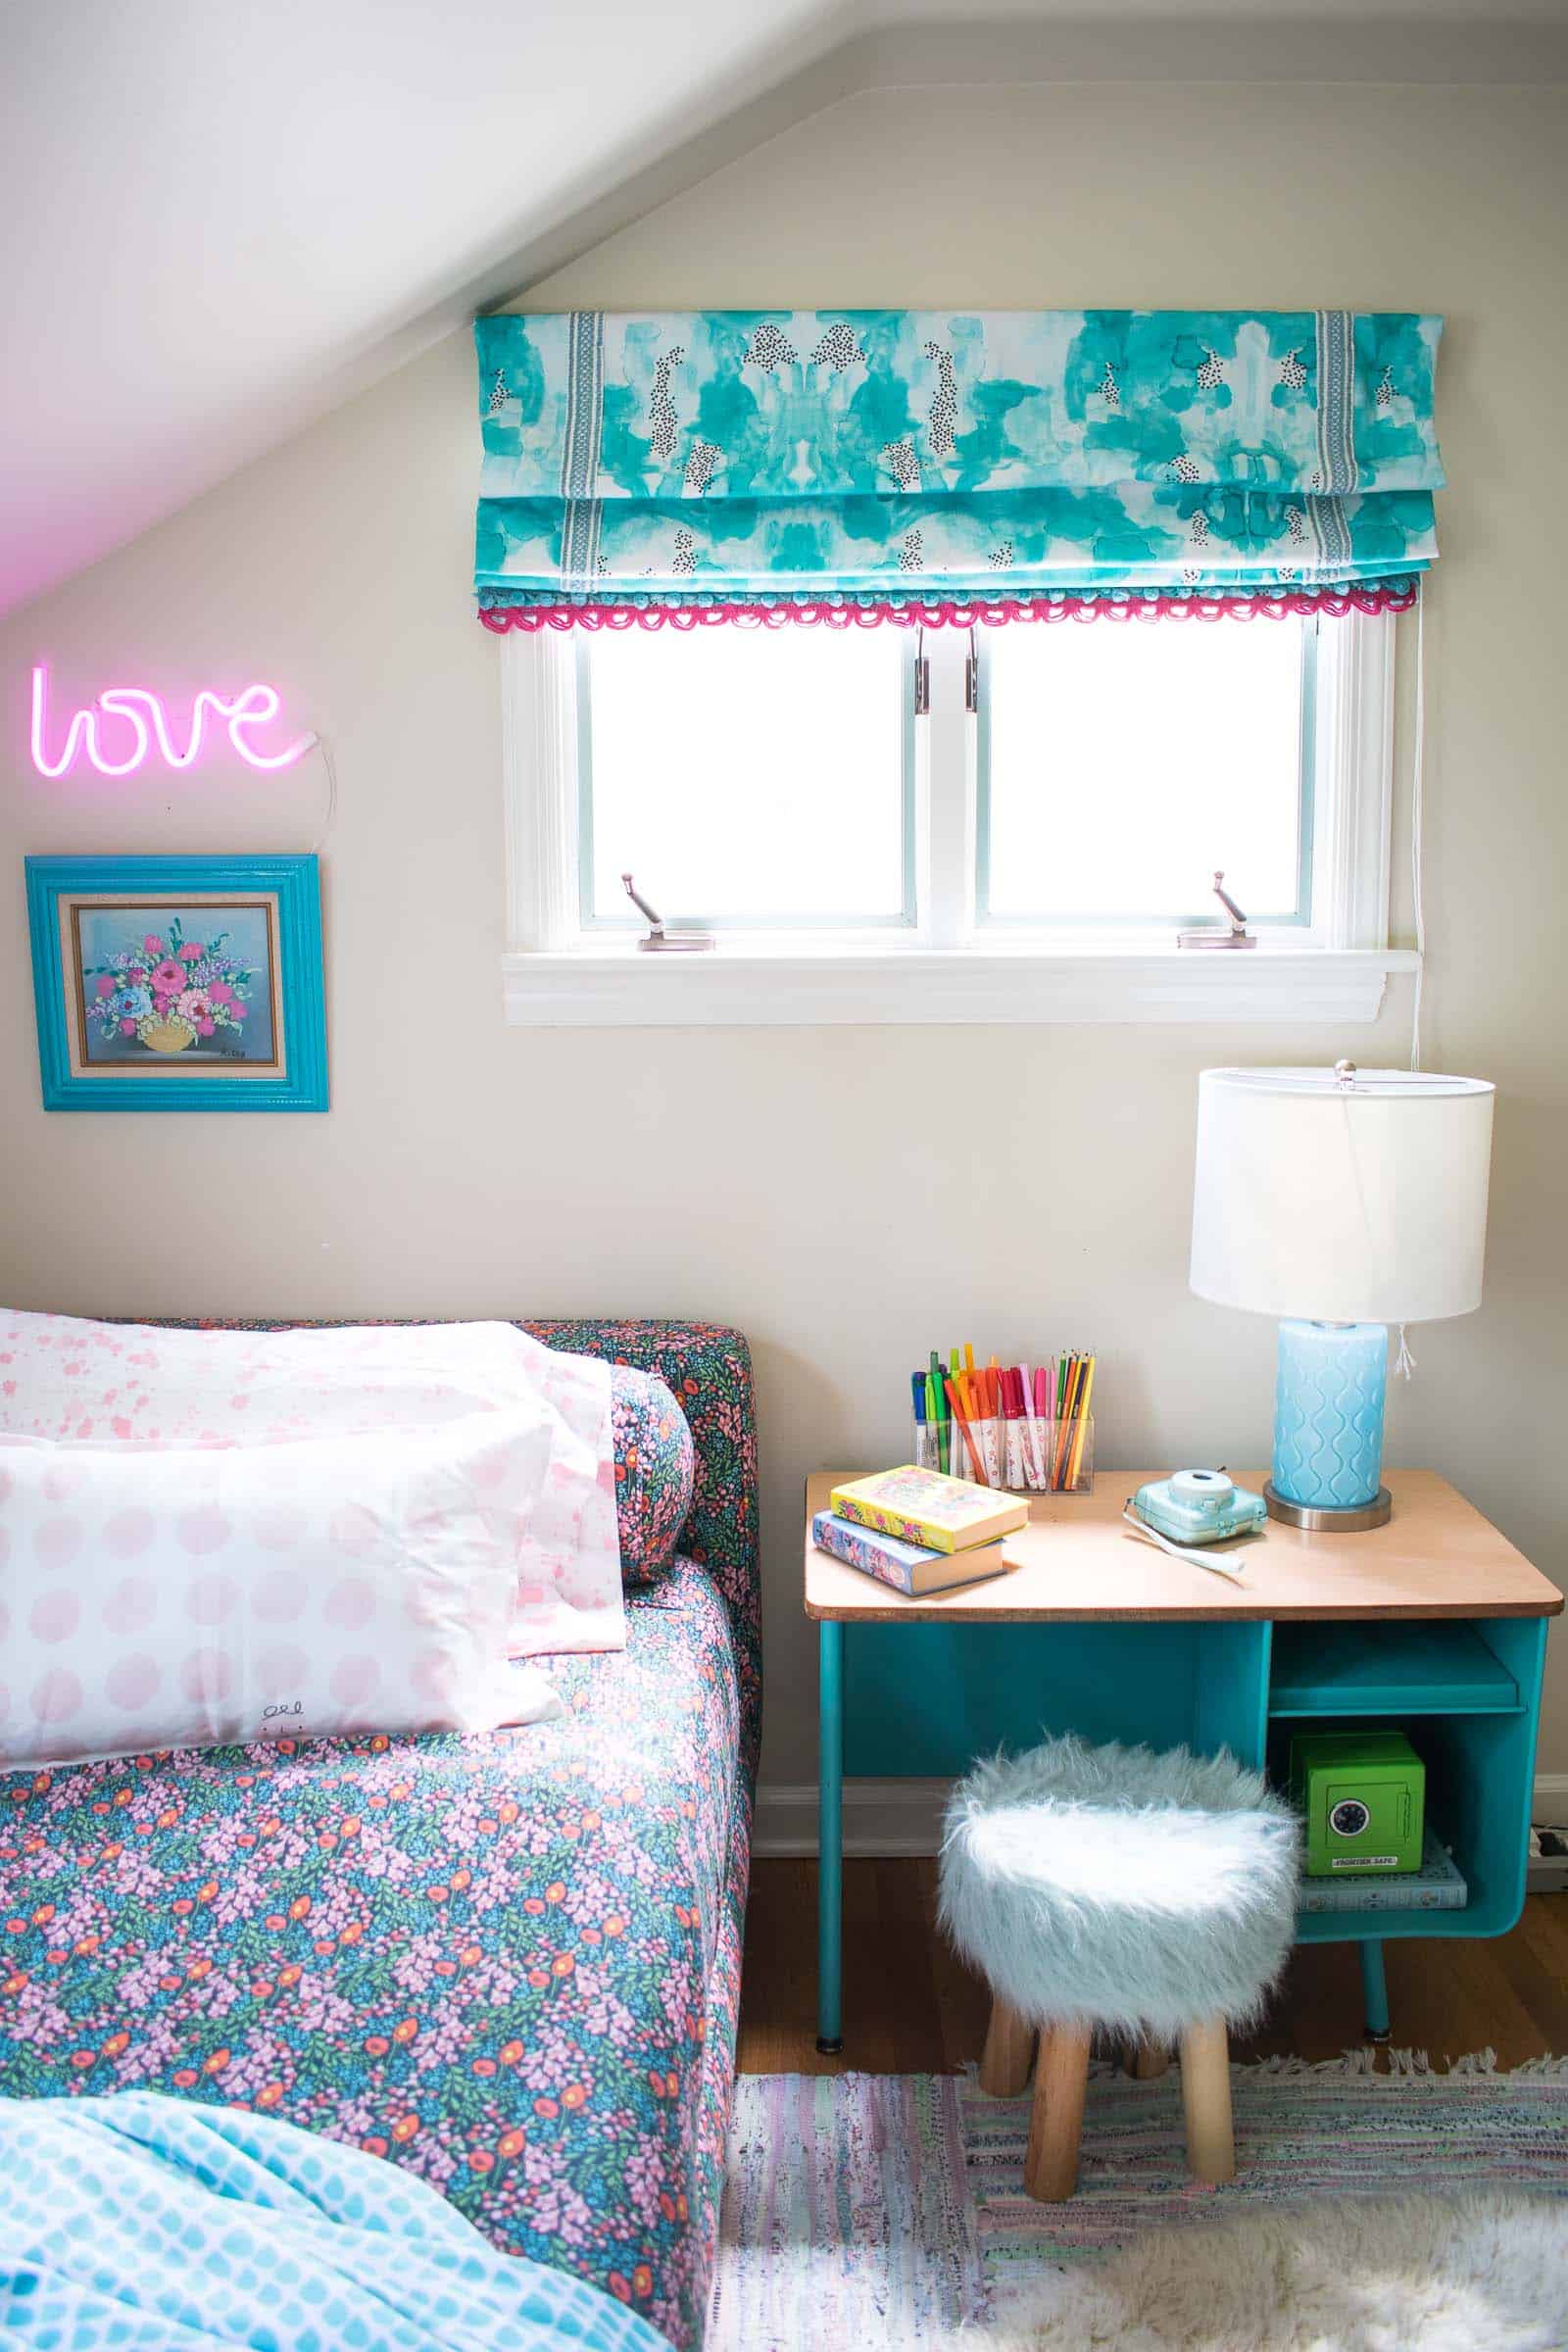
I preface every sewing project with the disclaimer that I am a TERRIBLE sewer. I break needles. I sew crooked. I jam the machine. It’s never pretty. But I did it and so can you! I’d already worked with Spoonflower on Martha’s daybed (see here) so I was so happy to bring that pattern into our fabric choice for the shades! We looked at lots of fabric samples and ultimately decided that this hand-painted blue watercolor would be a fun color but also look nice when the shade was open and therefore folded up. I chose the Cypress Cotton Fabric to give it a little heft! I also added some bedding from Spoonflower and love how cozy her bed looks now! (Shown here: lumbar pillow, square throw pillow, aqua ‘minky’ blanket, twin sheet set.)
Step 1. Determine the final dimensions of your Roman shades
The first step is to decide whether you want your Roman shades to hang INSIDE your window trim or OUTSIDE your window trim. Our windows in this house are *super* shallow so a roman shade wouldn’t fit inside. We were also looking to have these block as much light as possible so… for both those reasons we mounted them outside the trim. Because this decision affects the measurements, you need to decide this first.
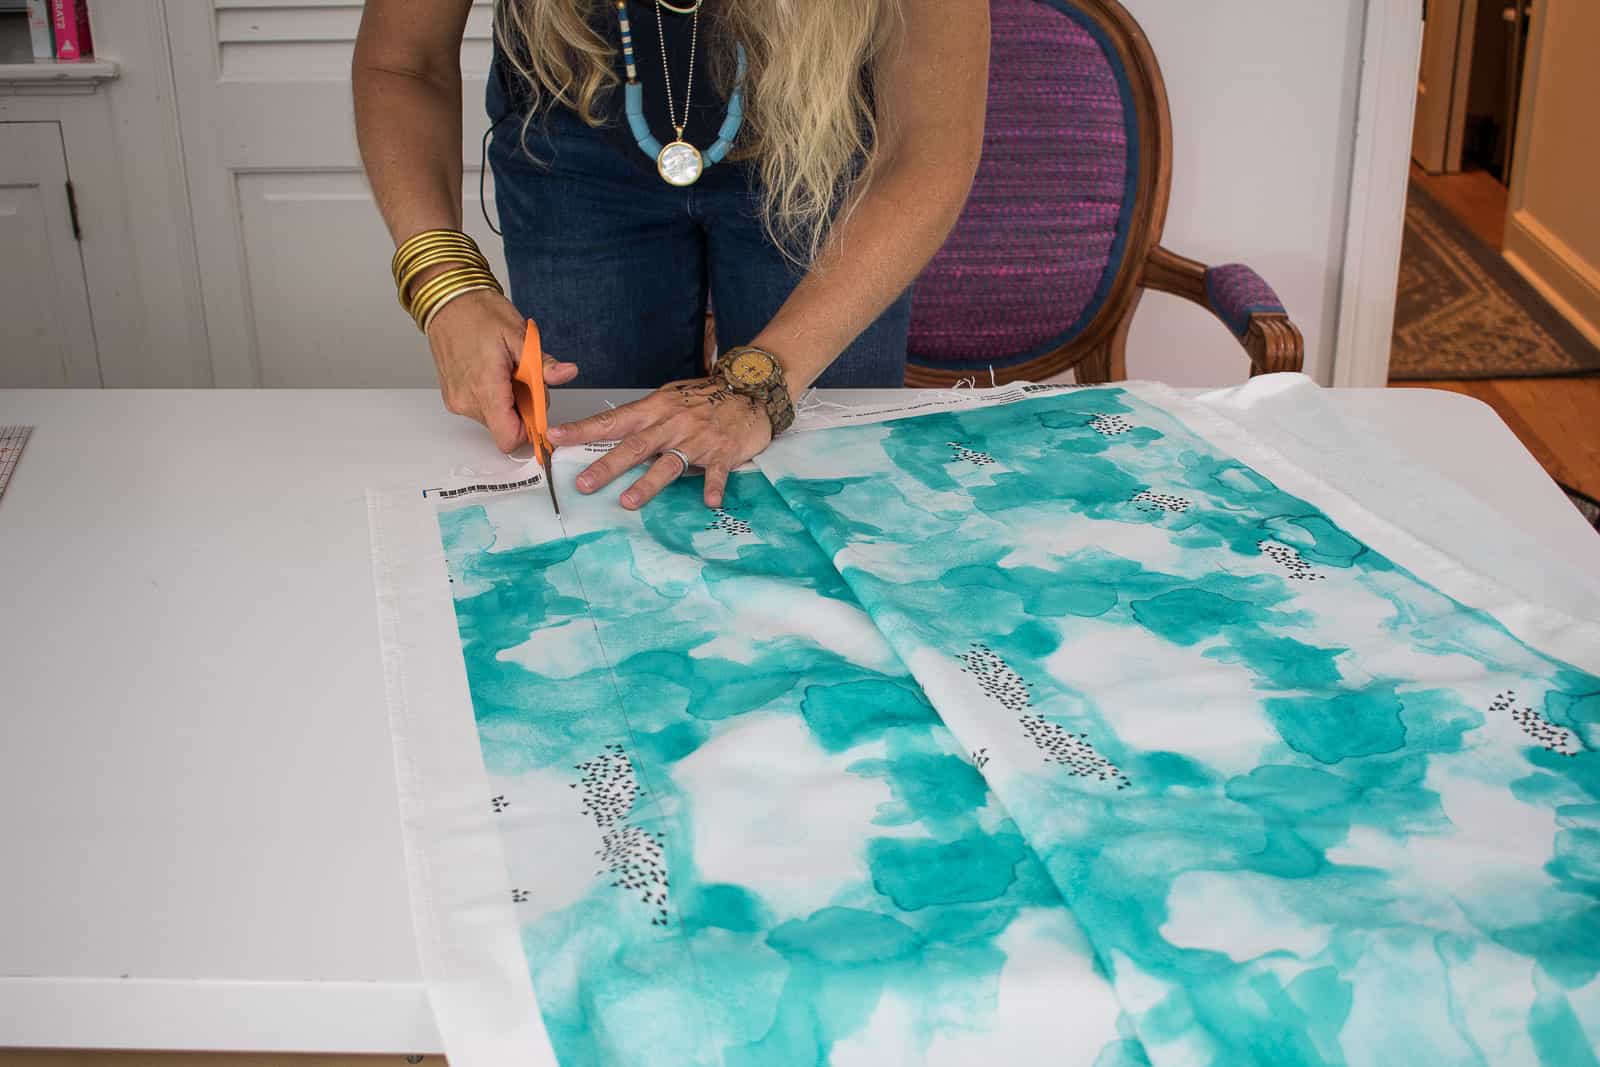
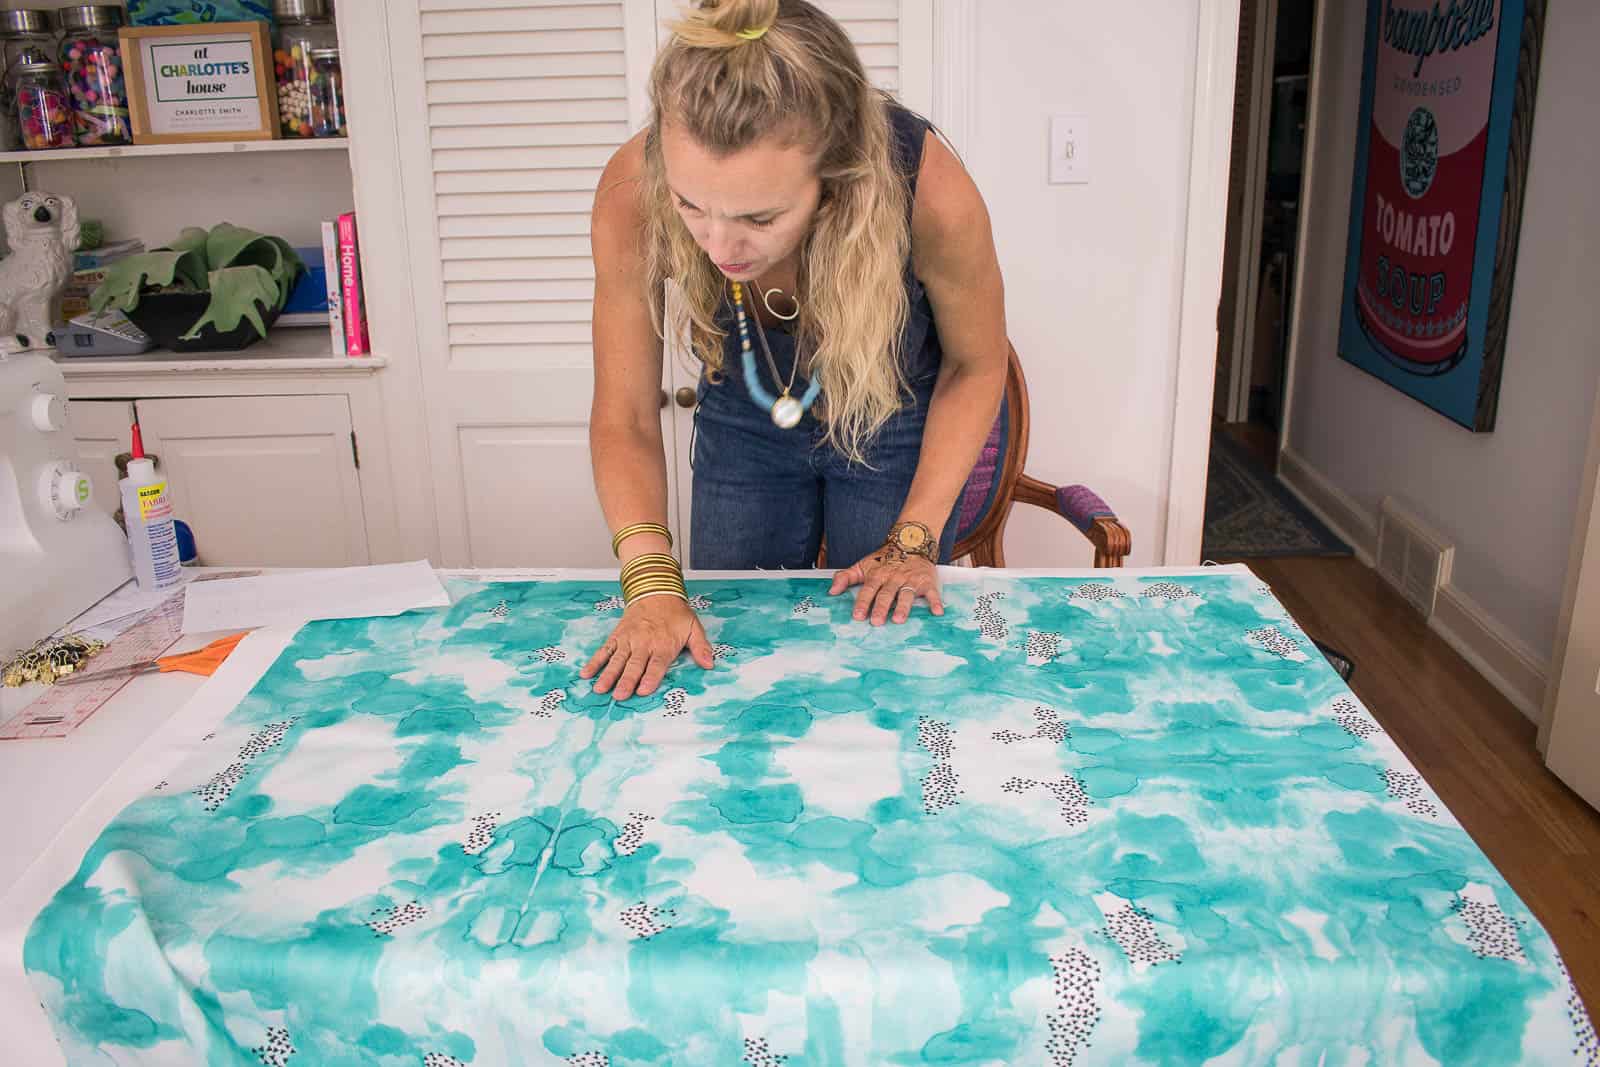
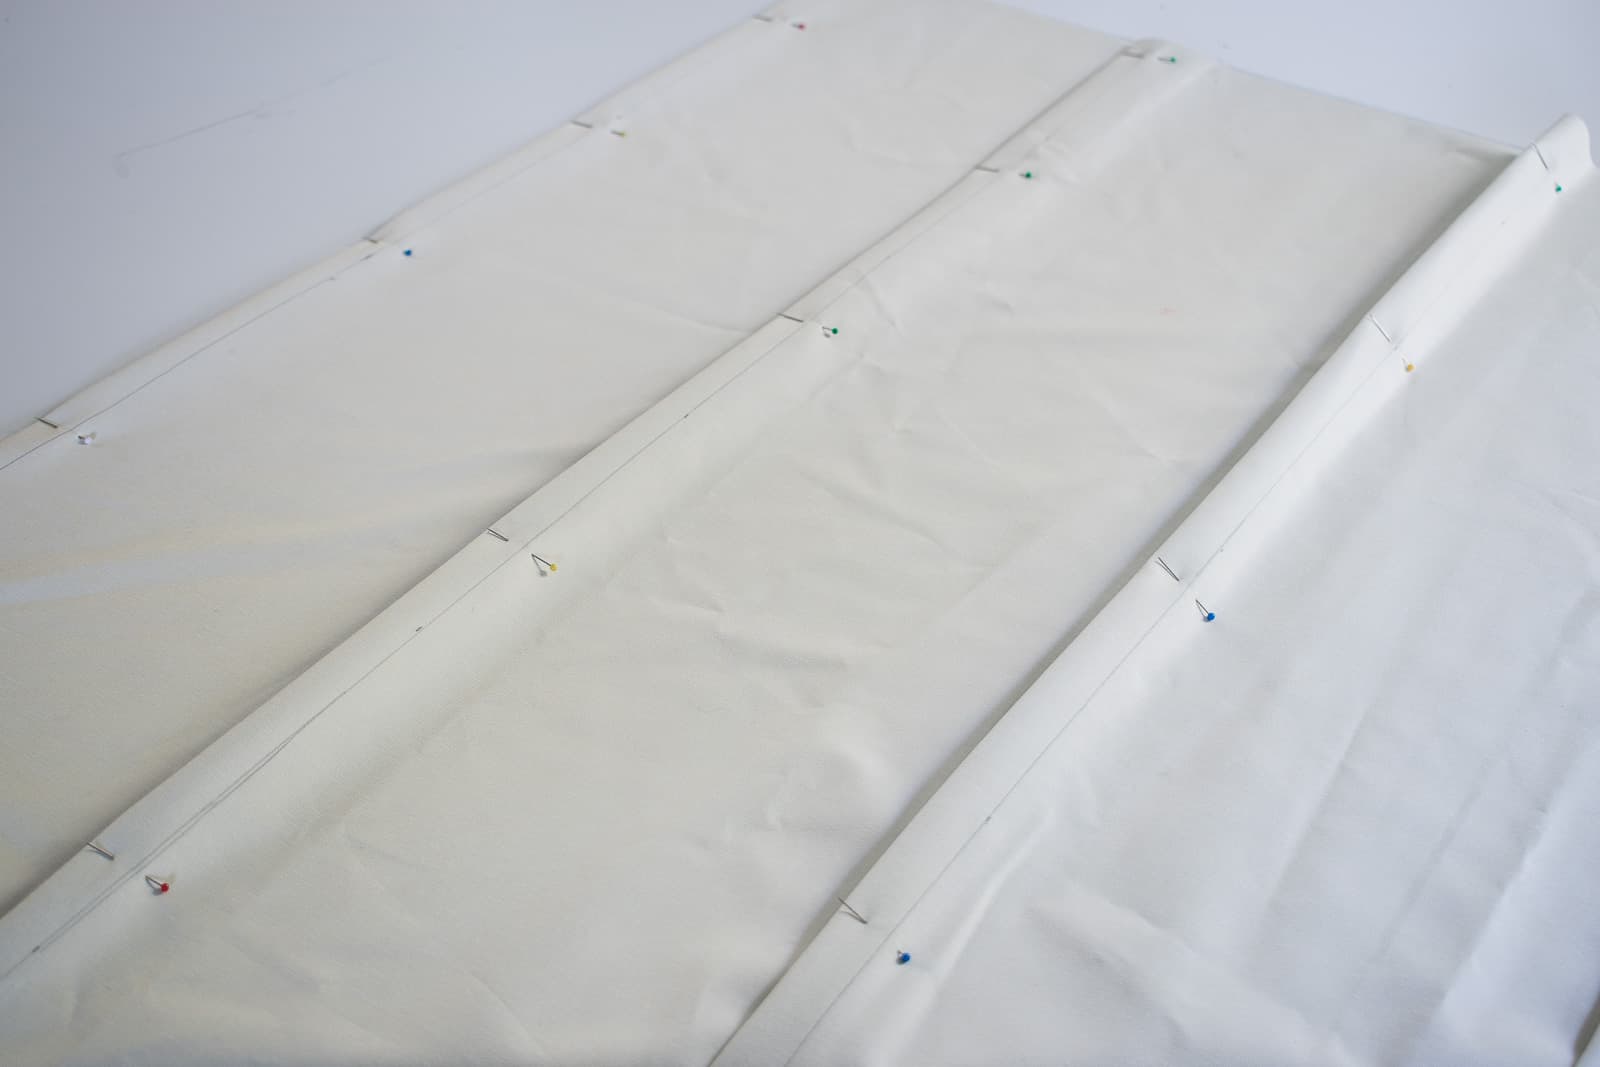
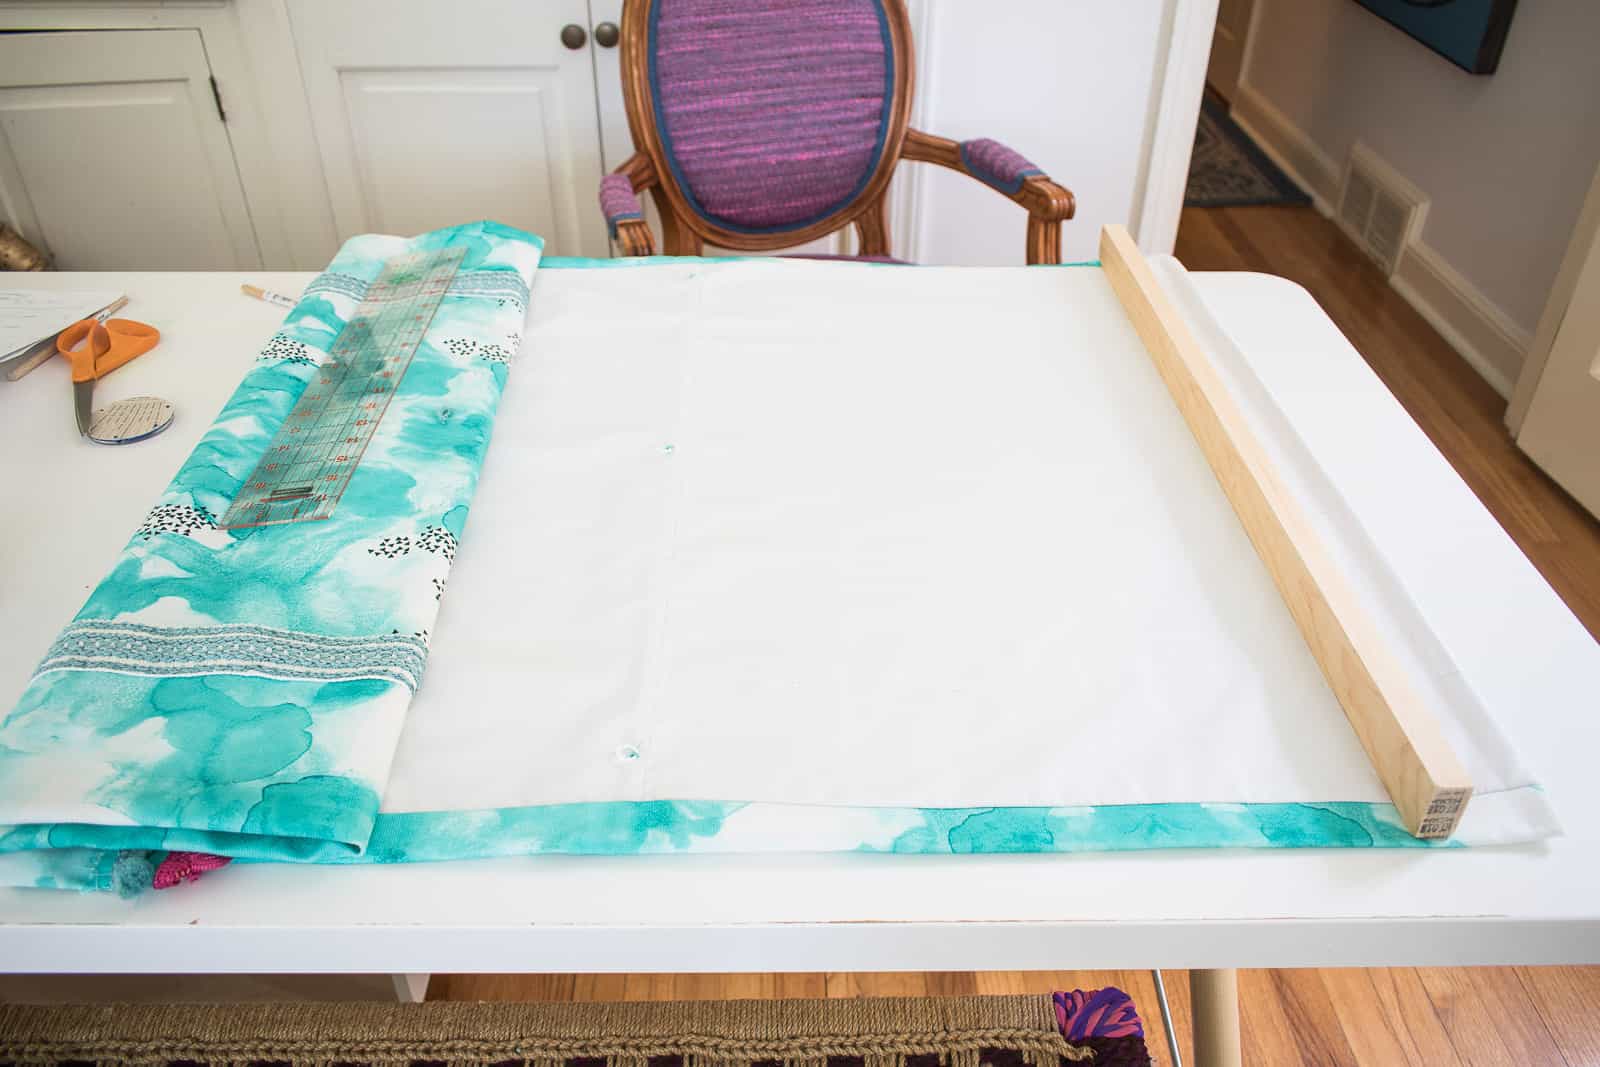
Step 2. Cut Your Fabric and liner
I started with the measurements I wanted the final shades to be and then added 4-inches to either side and 10-inches to the total length for seam allowance. I also decided to line my shades so I cut the black out liner 1-inch narrower than my FINAL shade width. (Hang in there with me to see why I cut it this size.) Whenever cutting fabric for a project like this, consider where the pattern will lie on the finished project.
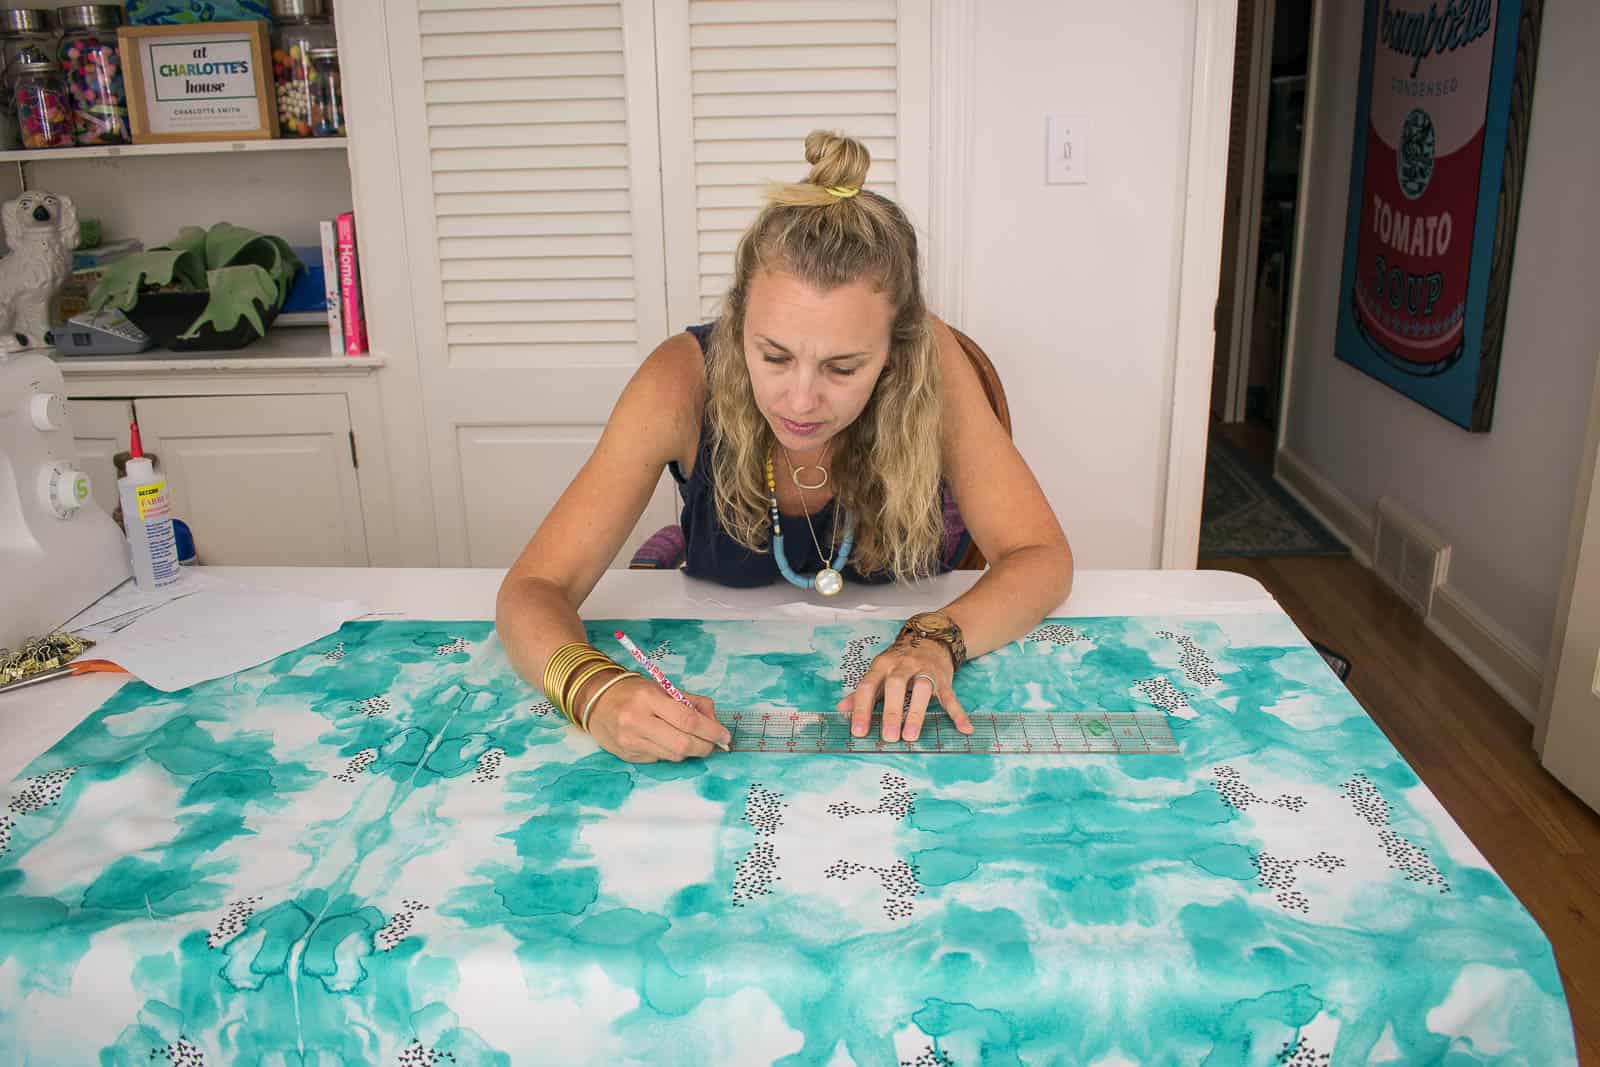
Step 3. Sew Rod Pockets
To give the folds of my Roman shades a bit more structure, I decided to add small dowels. I made dowel pockets in the liner of my shades by folding the liner about 3/4″ (or enough that the dowel could slide inside). I sewed the first dowel pocket 5″ from the bottom HEM of the shade (so consider seam allowance of the hem when sewing your pockets.) And then I sewed each dowel pocket 8-inches apart until I was within a foot of the top edge of my shade.
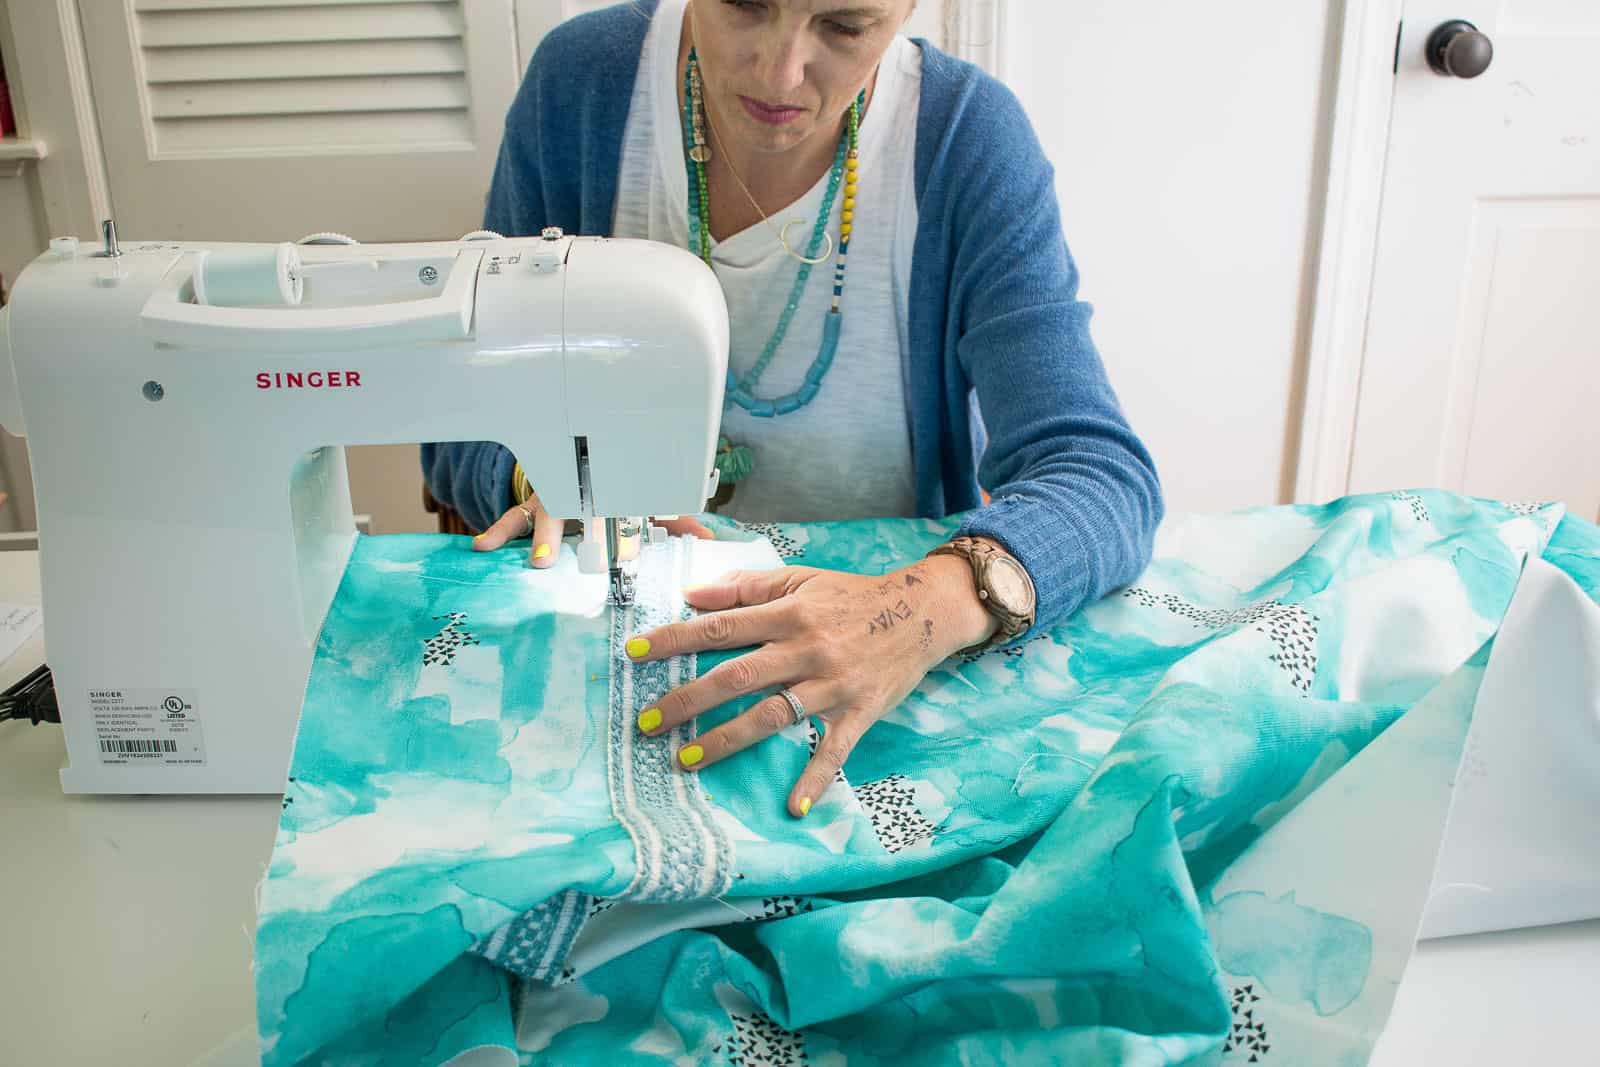
Step 4. Sew Trim to fabric
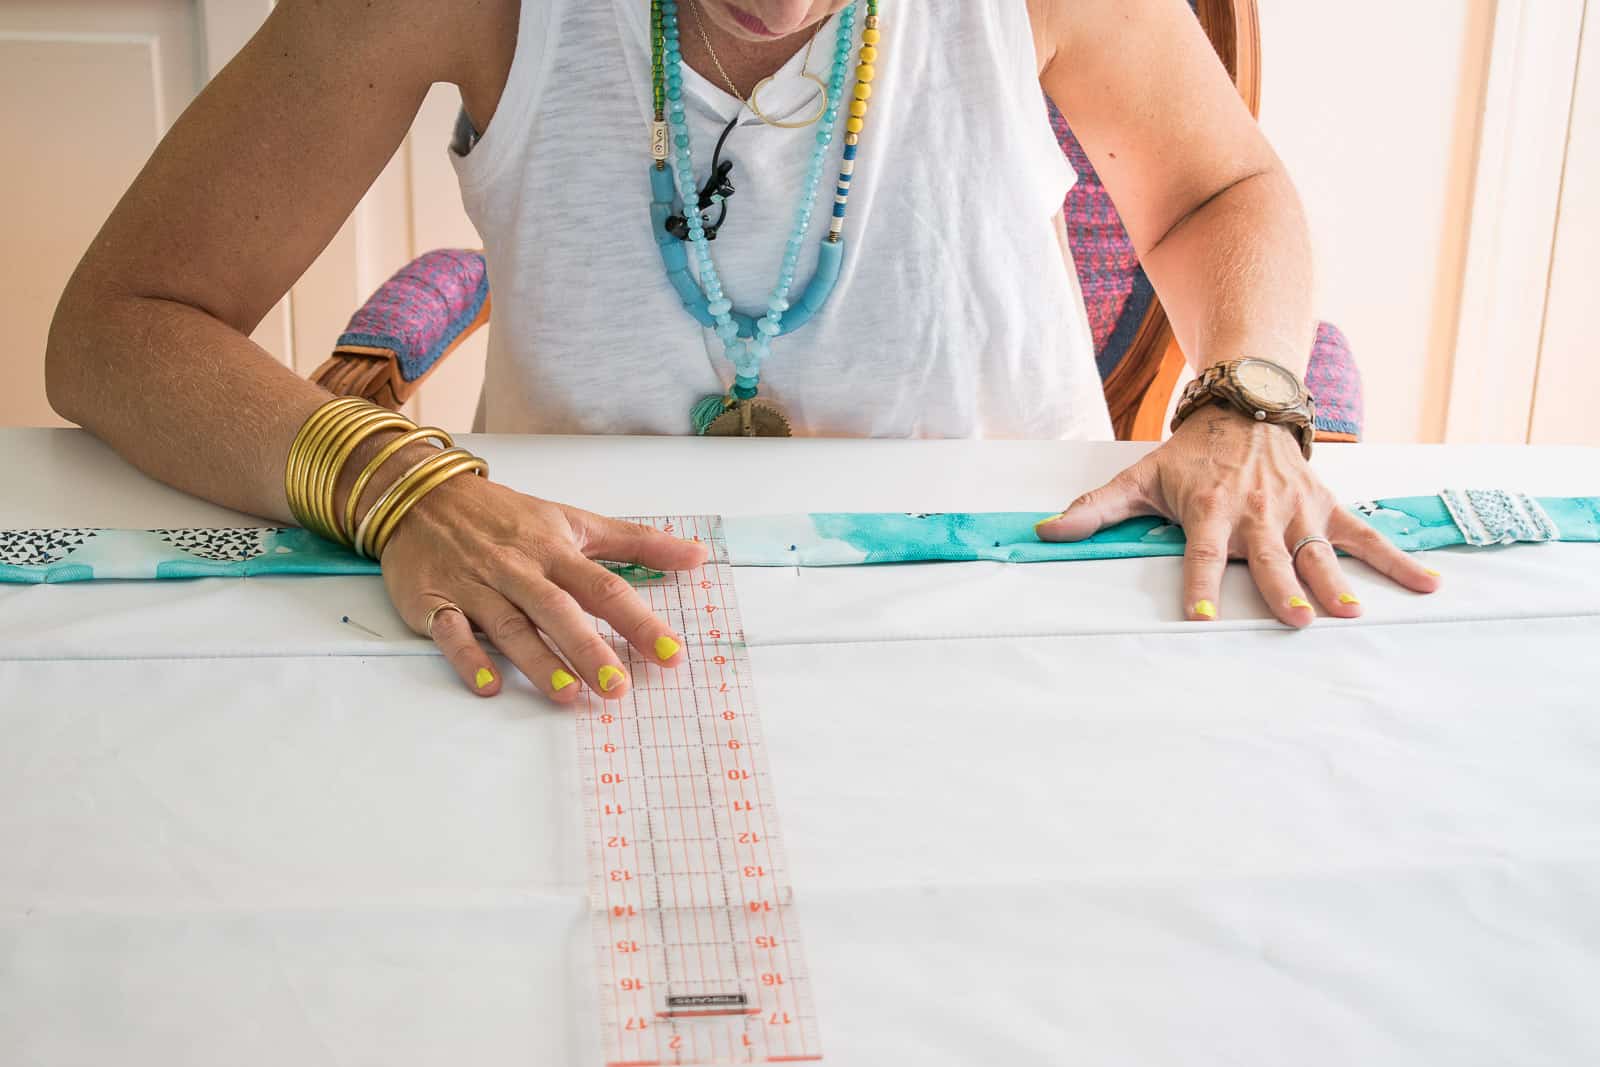
I wanted to give my Roman shades a few fun details so I added trim. I decided to sew the vertical trim because I wasn’t sure how glue would hold up to the folding that the trim would inevitable have to stand up to every time we opened and closed the shades. I pinned and sewed along each edge of the ribbon trim. (Special shout out to my neon yellow nails.)
Step 5. Sew Liner onto the Fabric
With the right sides of your fabric and liner facing each other, Sew along one side of the shade leaving a 1/2-inch seam allowance. Note: Your dowel pockets should be facing OUT at this point.
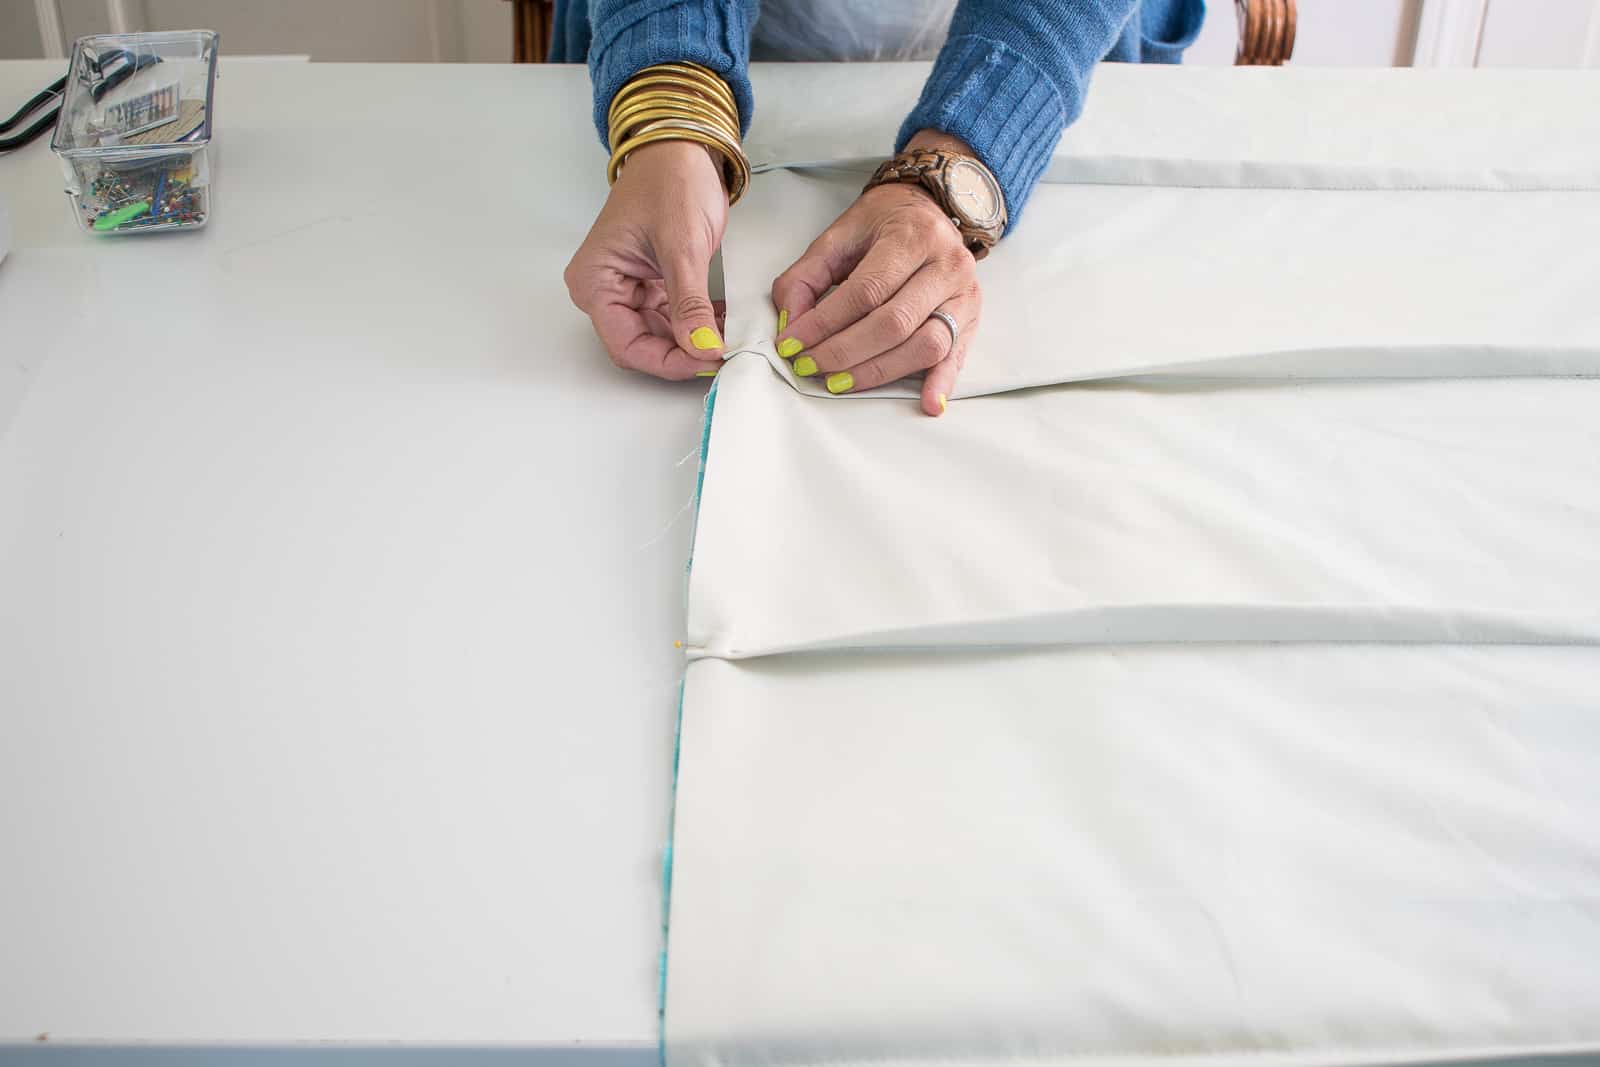
Sew along the other side with the same 1/2-inch seam allowance. Note: the fabric will ‘wrap around’ the liner on each side because the liner is narrower. This is correct!

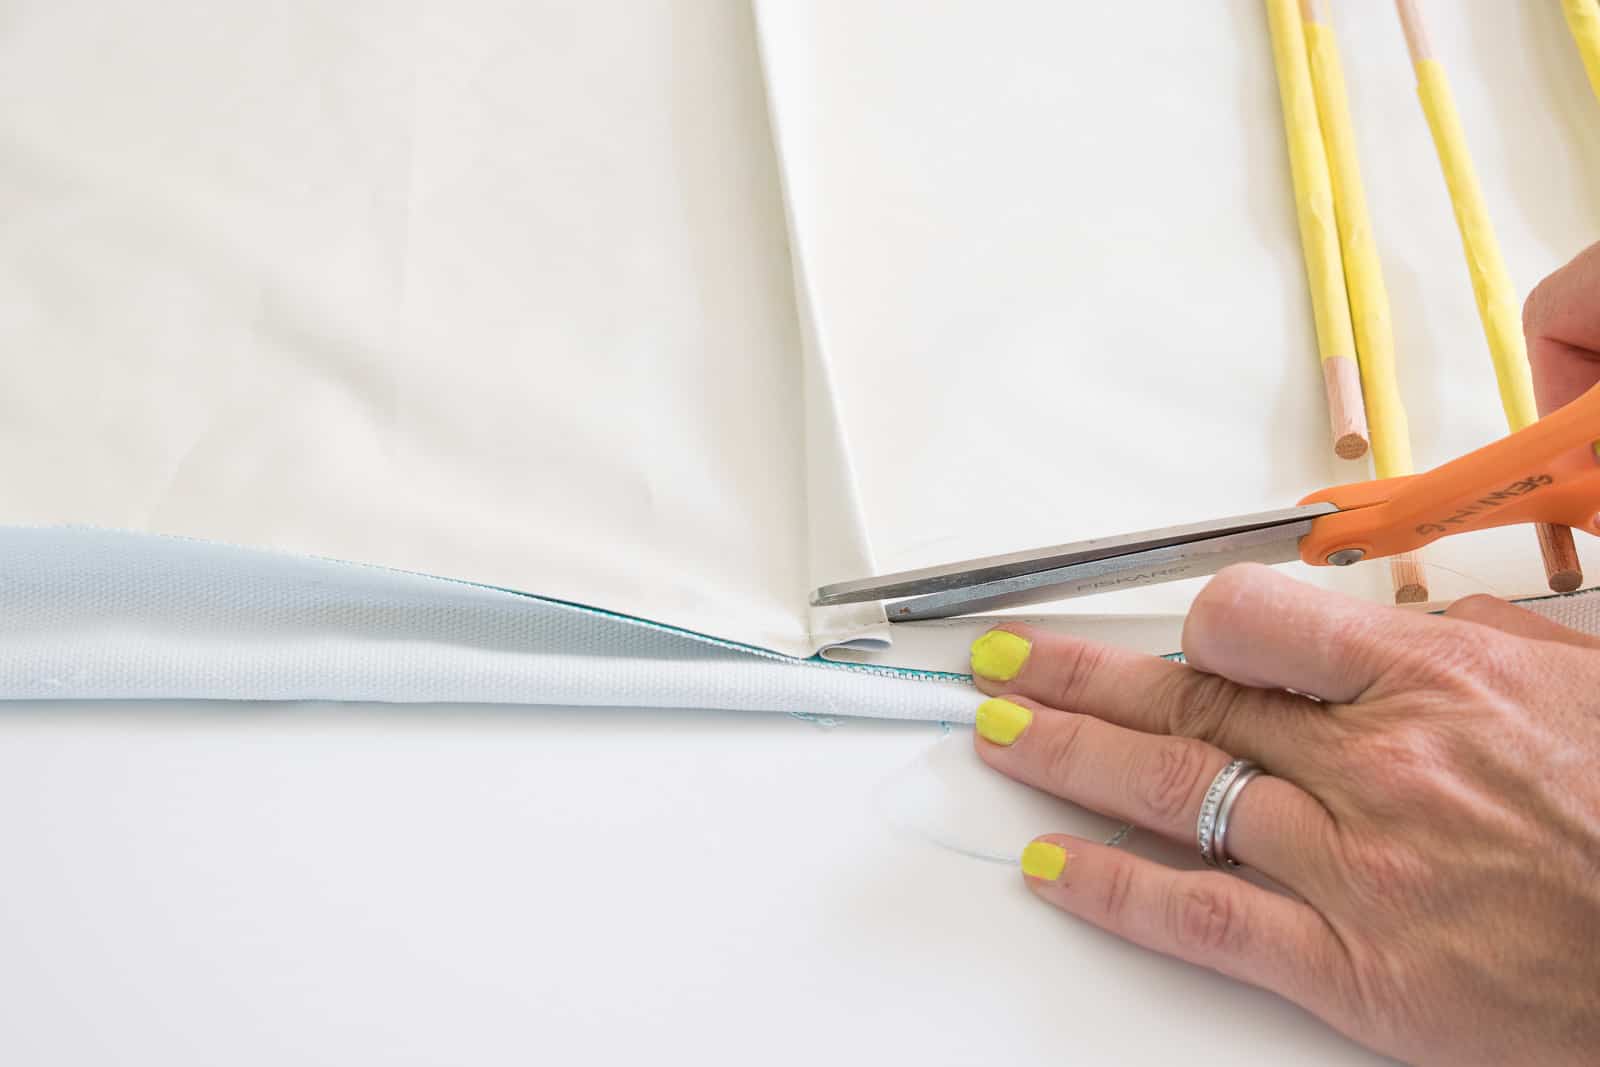
Step 6. Insert your dowels
You’ll notice at this point that your dowel pockets are sewed closed. I snipped one side to slide the dowels in place. (For one window, my dowels weren’t long enough so I had to glue an extra piece and secured with that yellow tape… not ideal, but seems to have worked.)
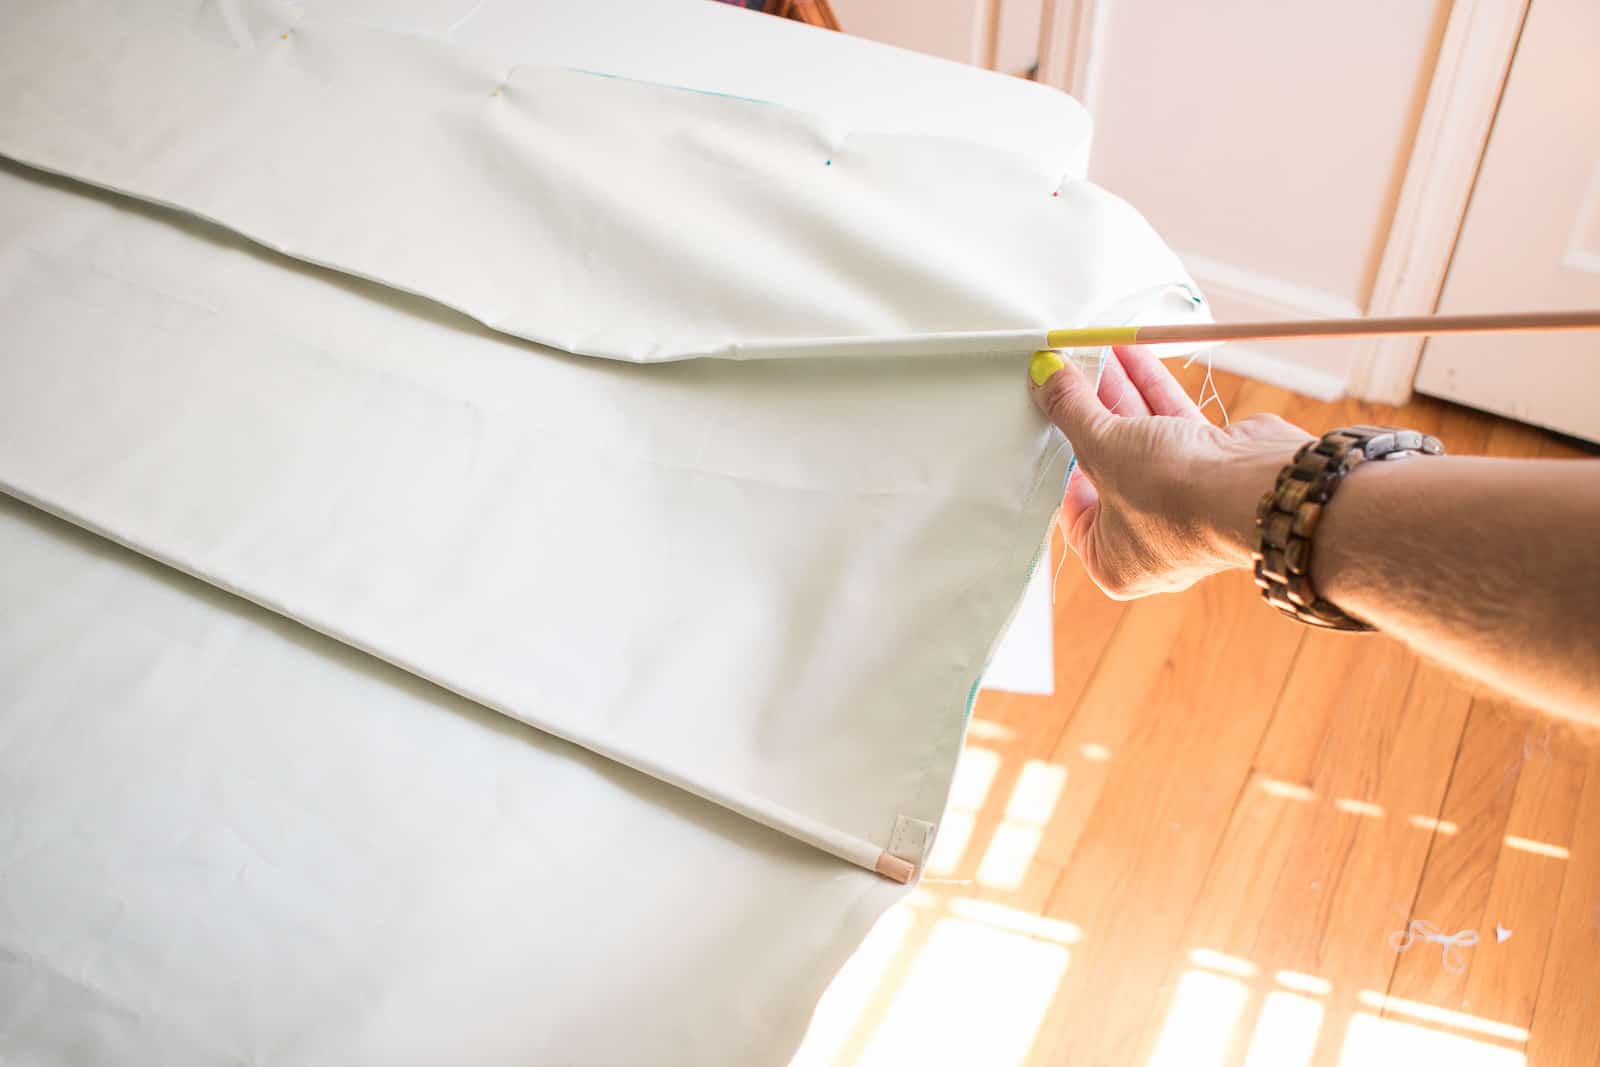
Step 7. Turn the shades inside out
Being careful of your dowels, turn the shades inside out so that the right sides are now facing out. Your dowels should now be inside your shades.
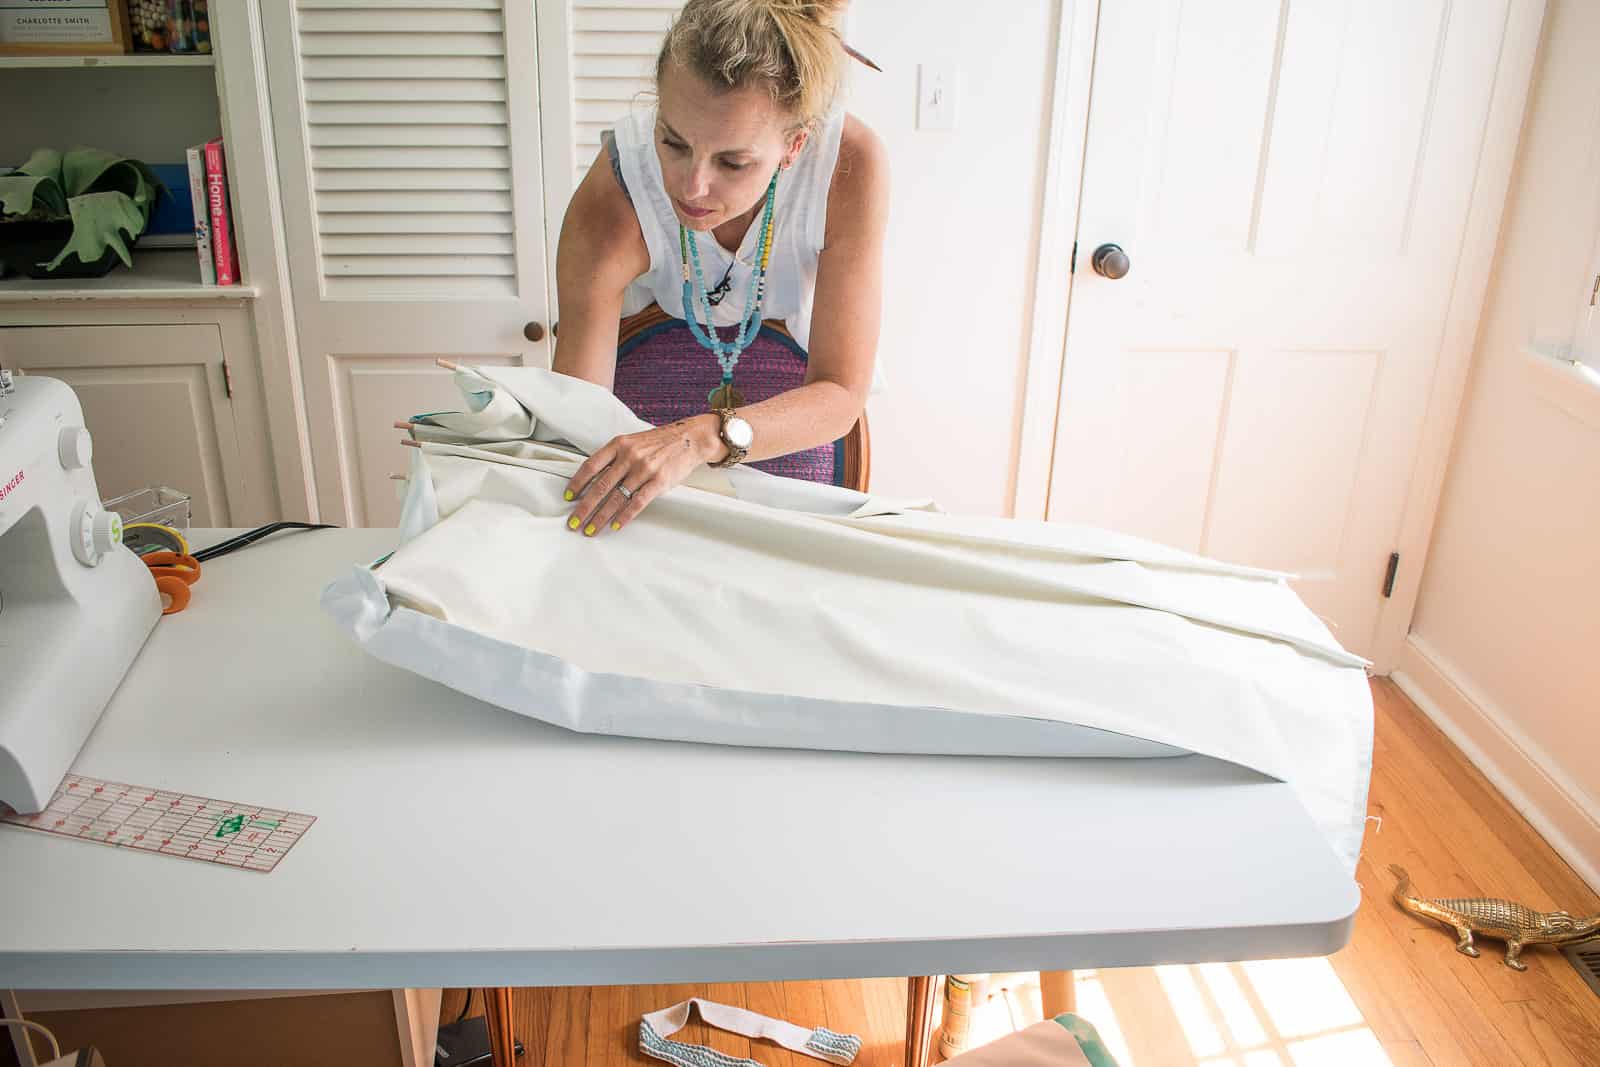
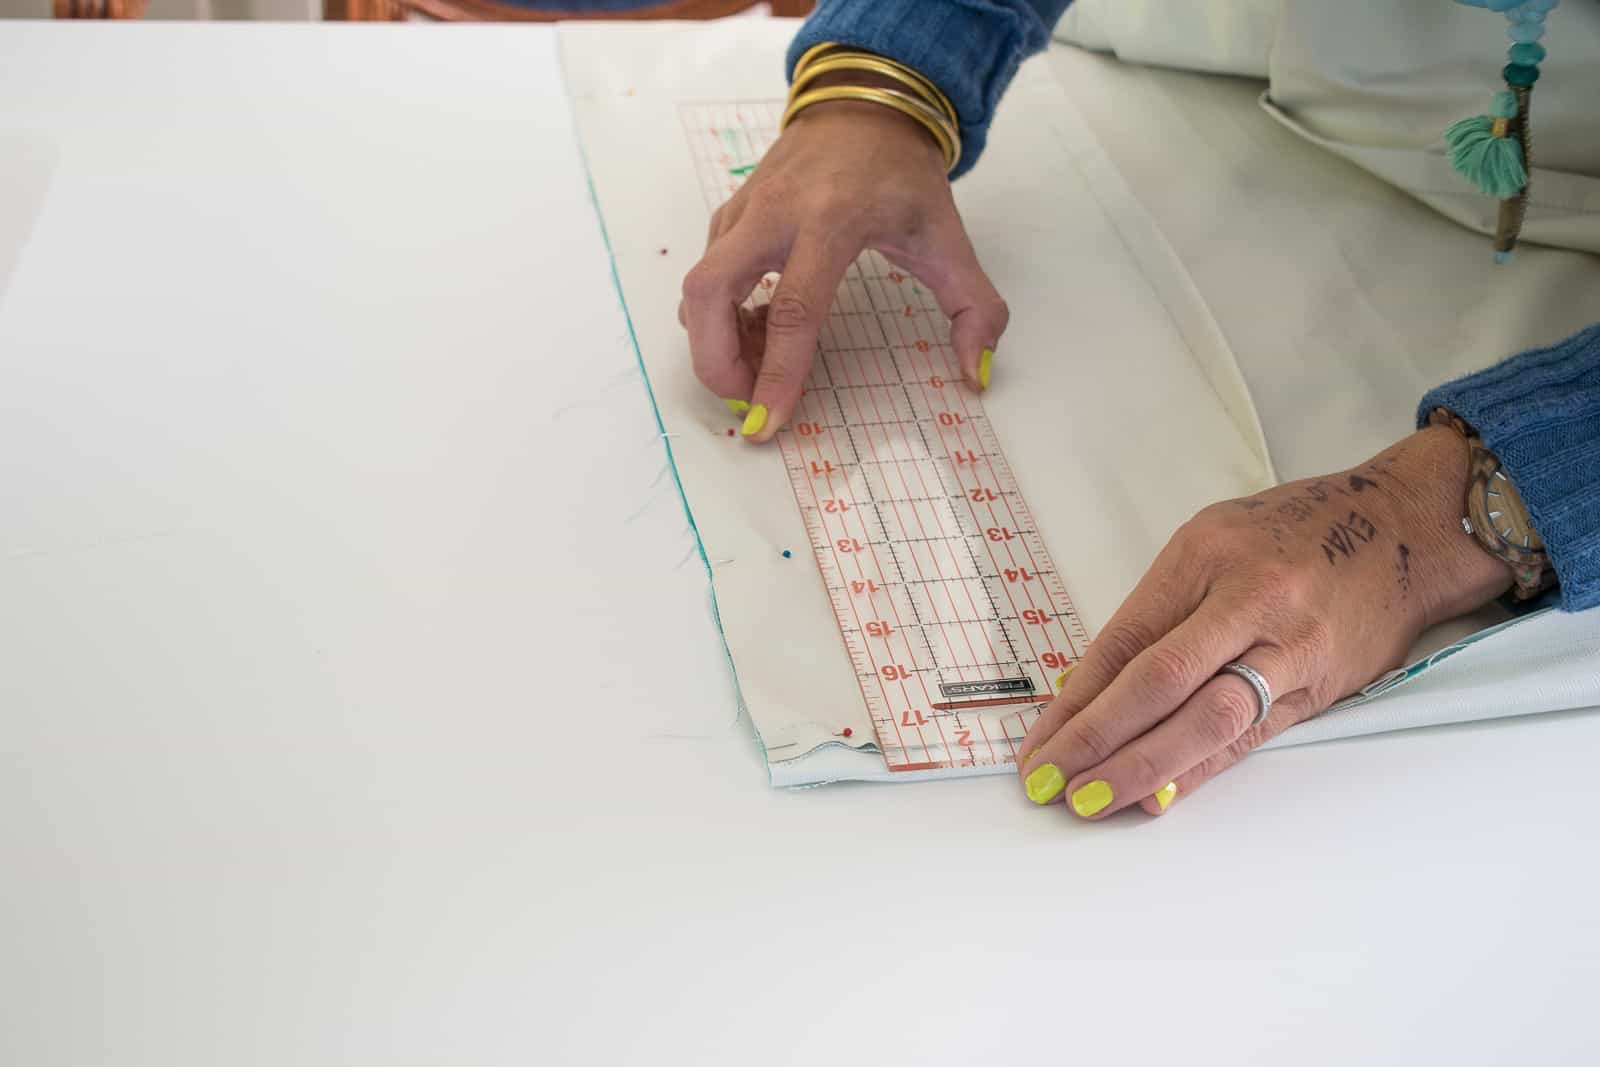
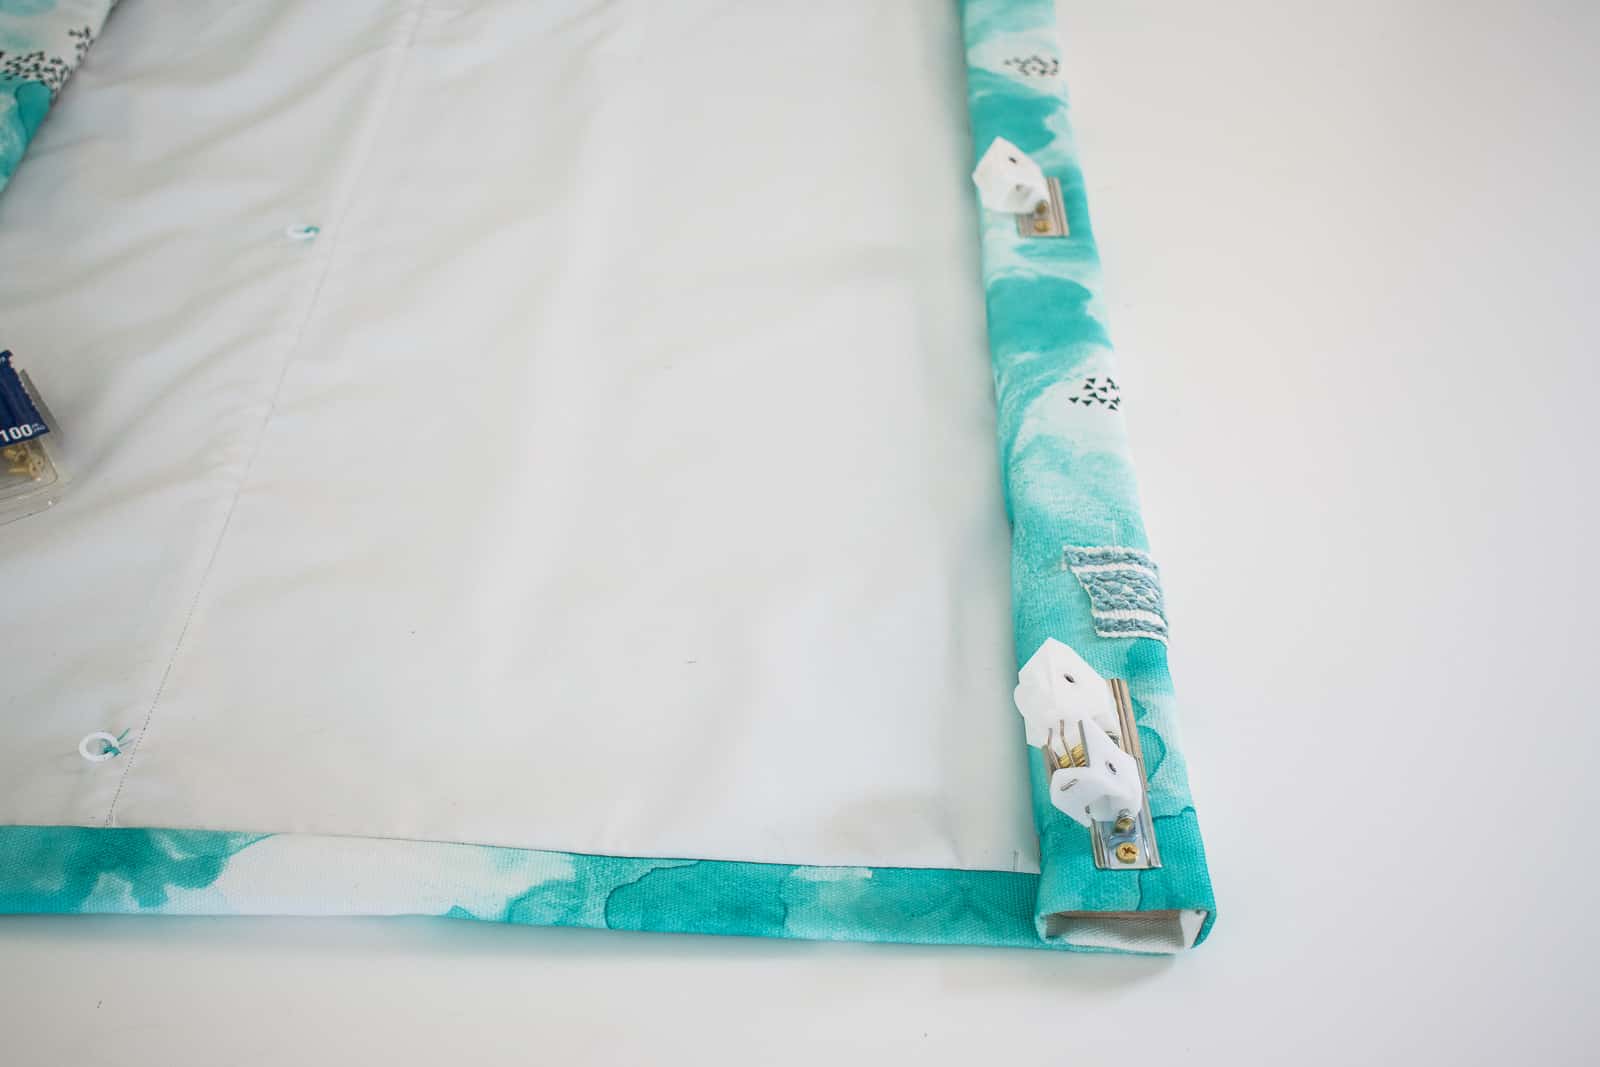
Step 8. Hem the Roman shade
Now you’ll need to measure a little bit. Make sure your liner is centered; I had about an inch of fabric on either side of the liner for reference. Fold the bottom of the shade up 1/2 inch, then fold it over another 2 1/2-inches. Pin and sew to hem.
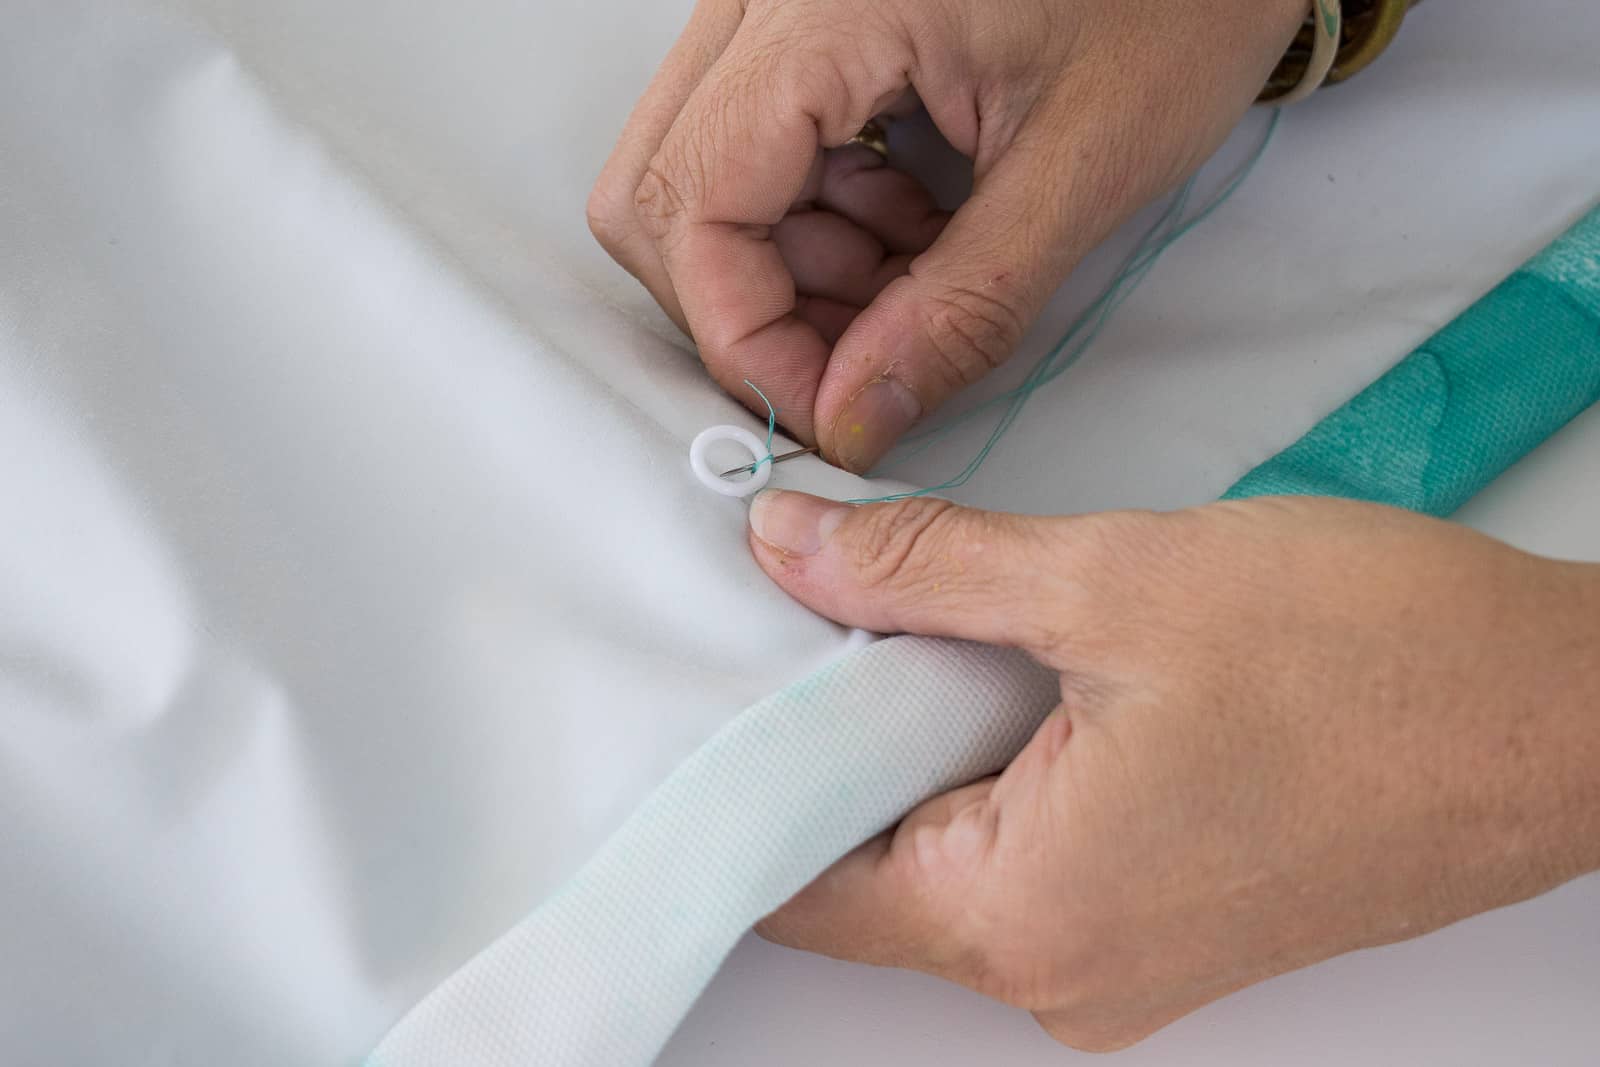
Step 9. Sew on your Rings
I reached out to a professional Roman shade maker and she said that it’s now required for her to use ring tape (I guess maybe to prevent choking?) so… keep that in mind. Ring tape is exactly what it sounds like… the plastic rings that you use to guide the pull strings are attached to a continuous piece of sheer tape. I opted to sew my rings individually so there wouldn’t be a seam going up the front of my shades. To determine how far from each side your rings should be, hold up your pulley and chord lock… the rings should line up with these… about 2 1/2 inches for mine.
Being careful to measure every 8 inches, sew your rings through BOTH layers of fabric making sure to go around the rod once or twice too. One curtain was narrow enough that I only needed 3 columns of rings, but I added 4 columns of rings for the wider one just to make sure the dowels were fully supported. Note: In these pictures my chord lock is actually backwards… I learned this AFTER I’d hung the curtain so yeah… that was fun to switch around.
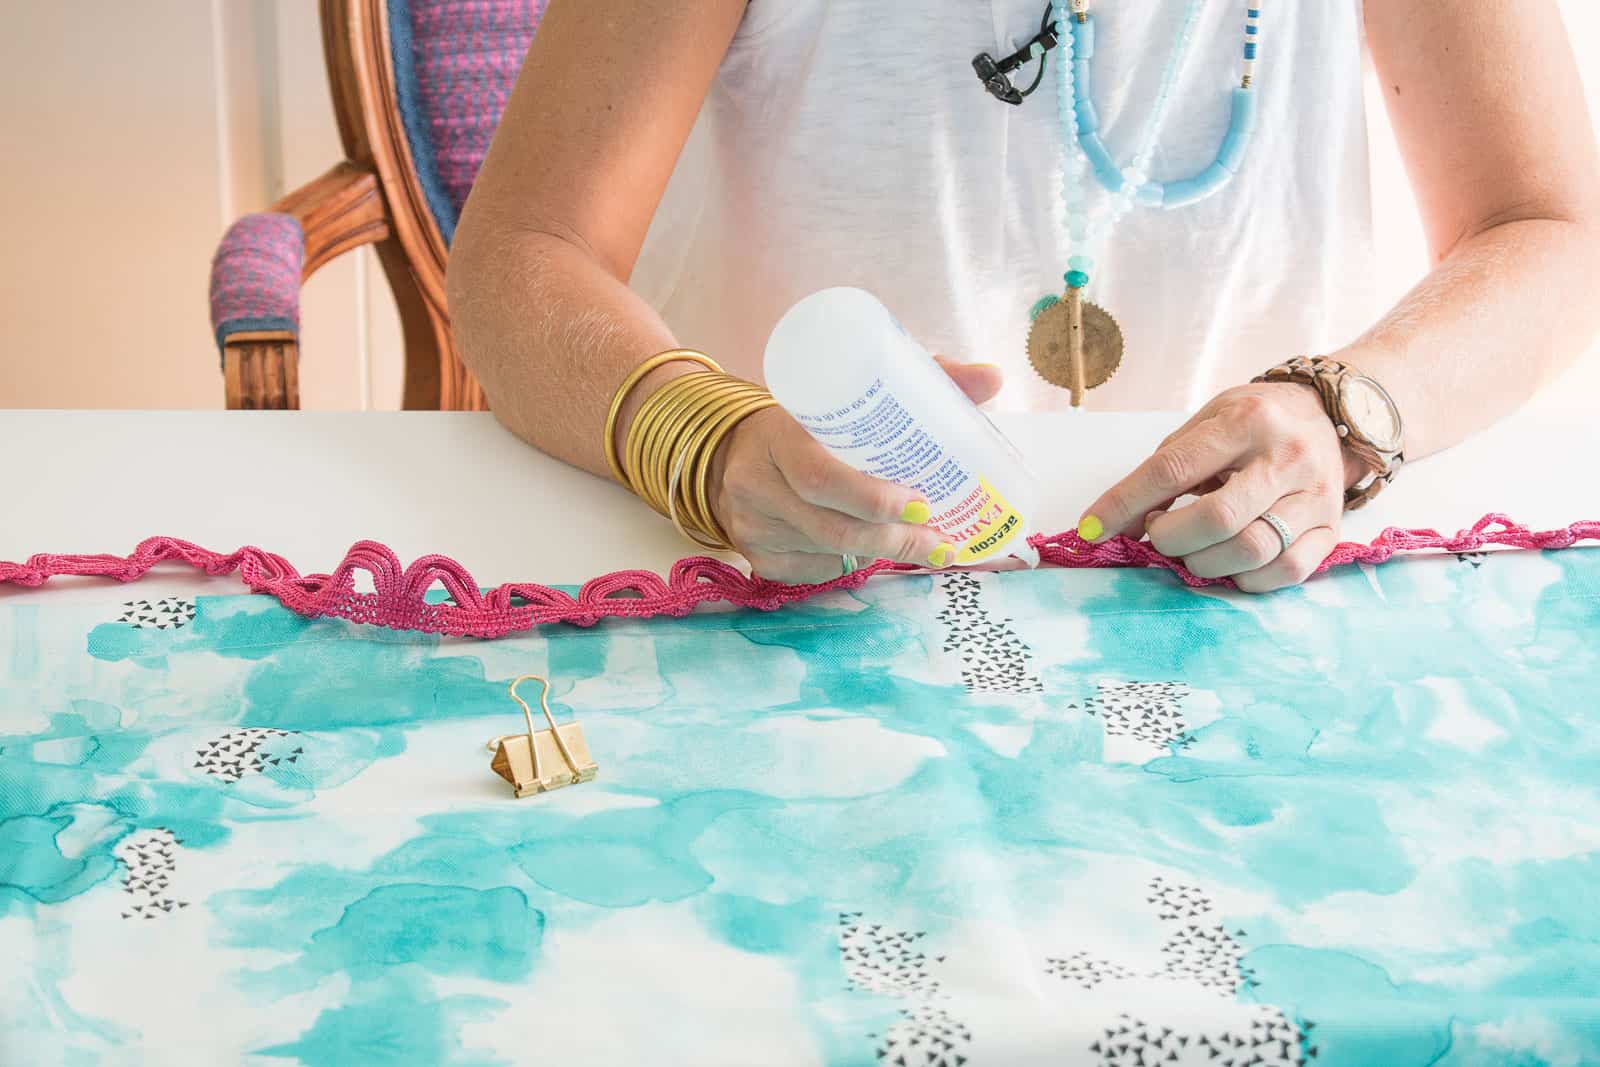
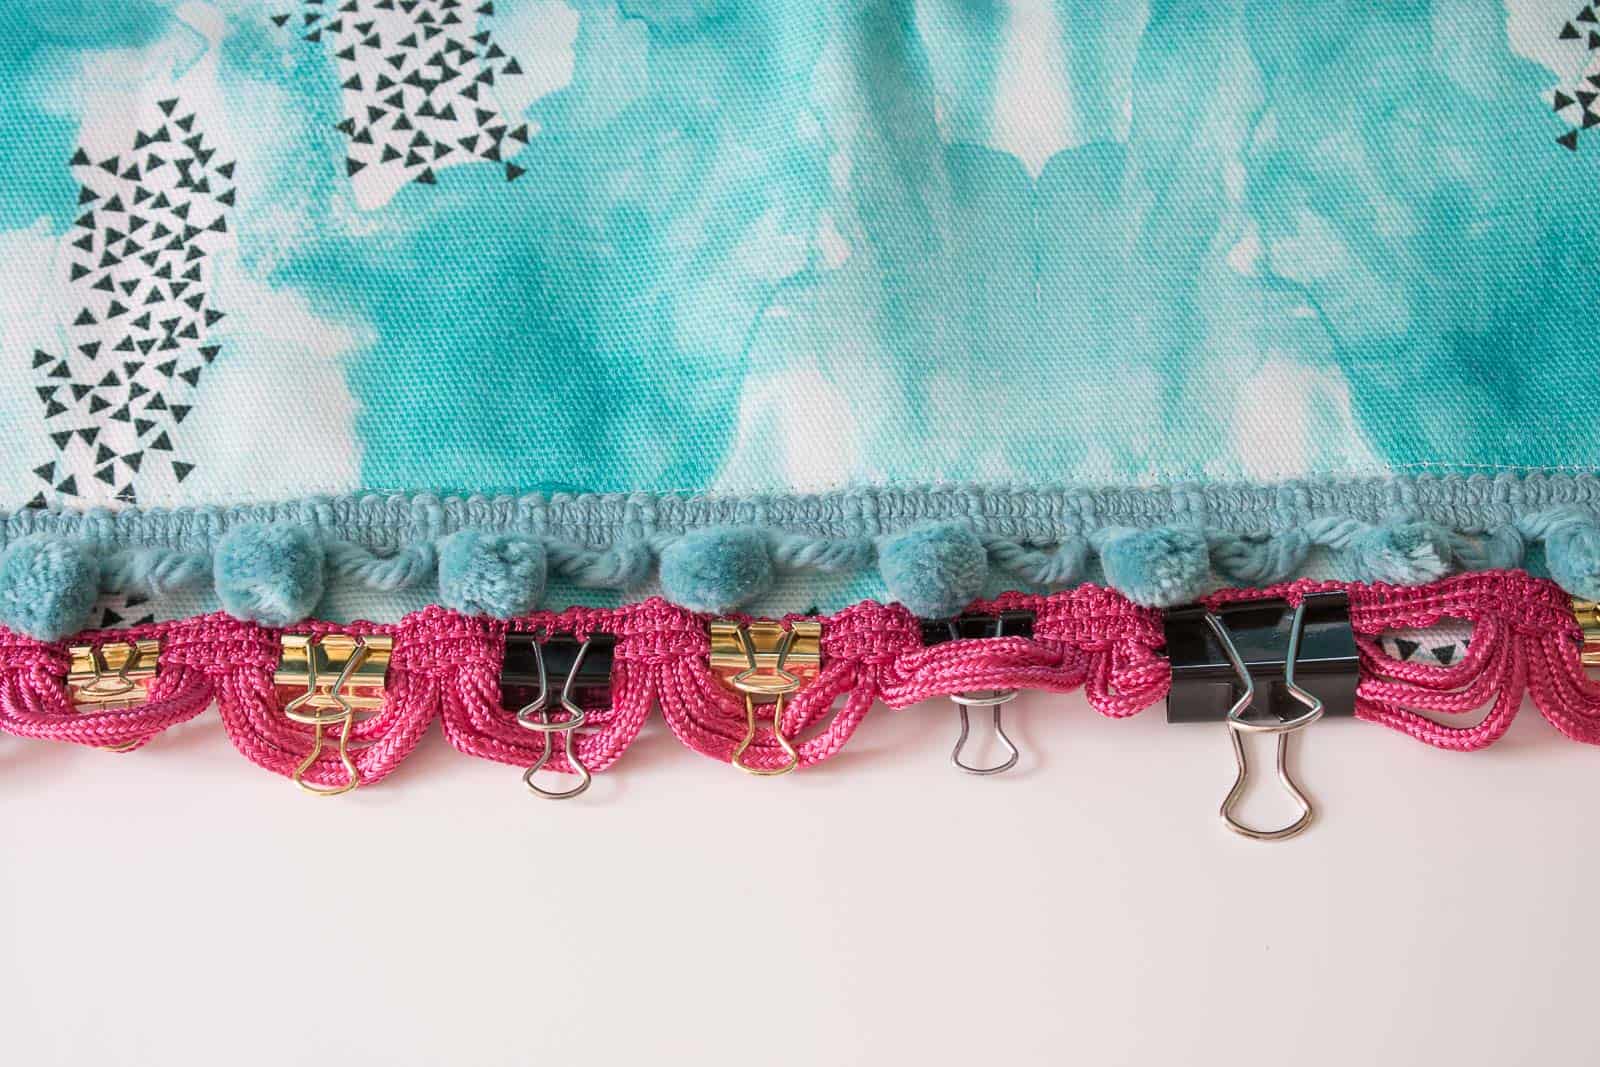
Step 10. More trim
I glued more trim onto the lower edge of my shade. And yes… for some reason I glued the pink trim on upside down. It made sense at the time, but now I wished I’d done it the other way. Shoulda woulda coulda. I clamped it in place to dry.
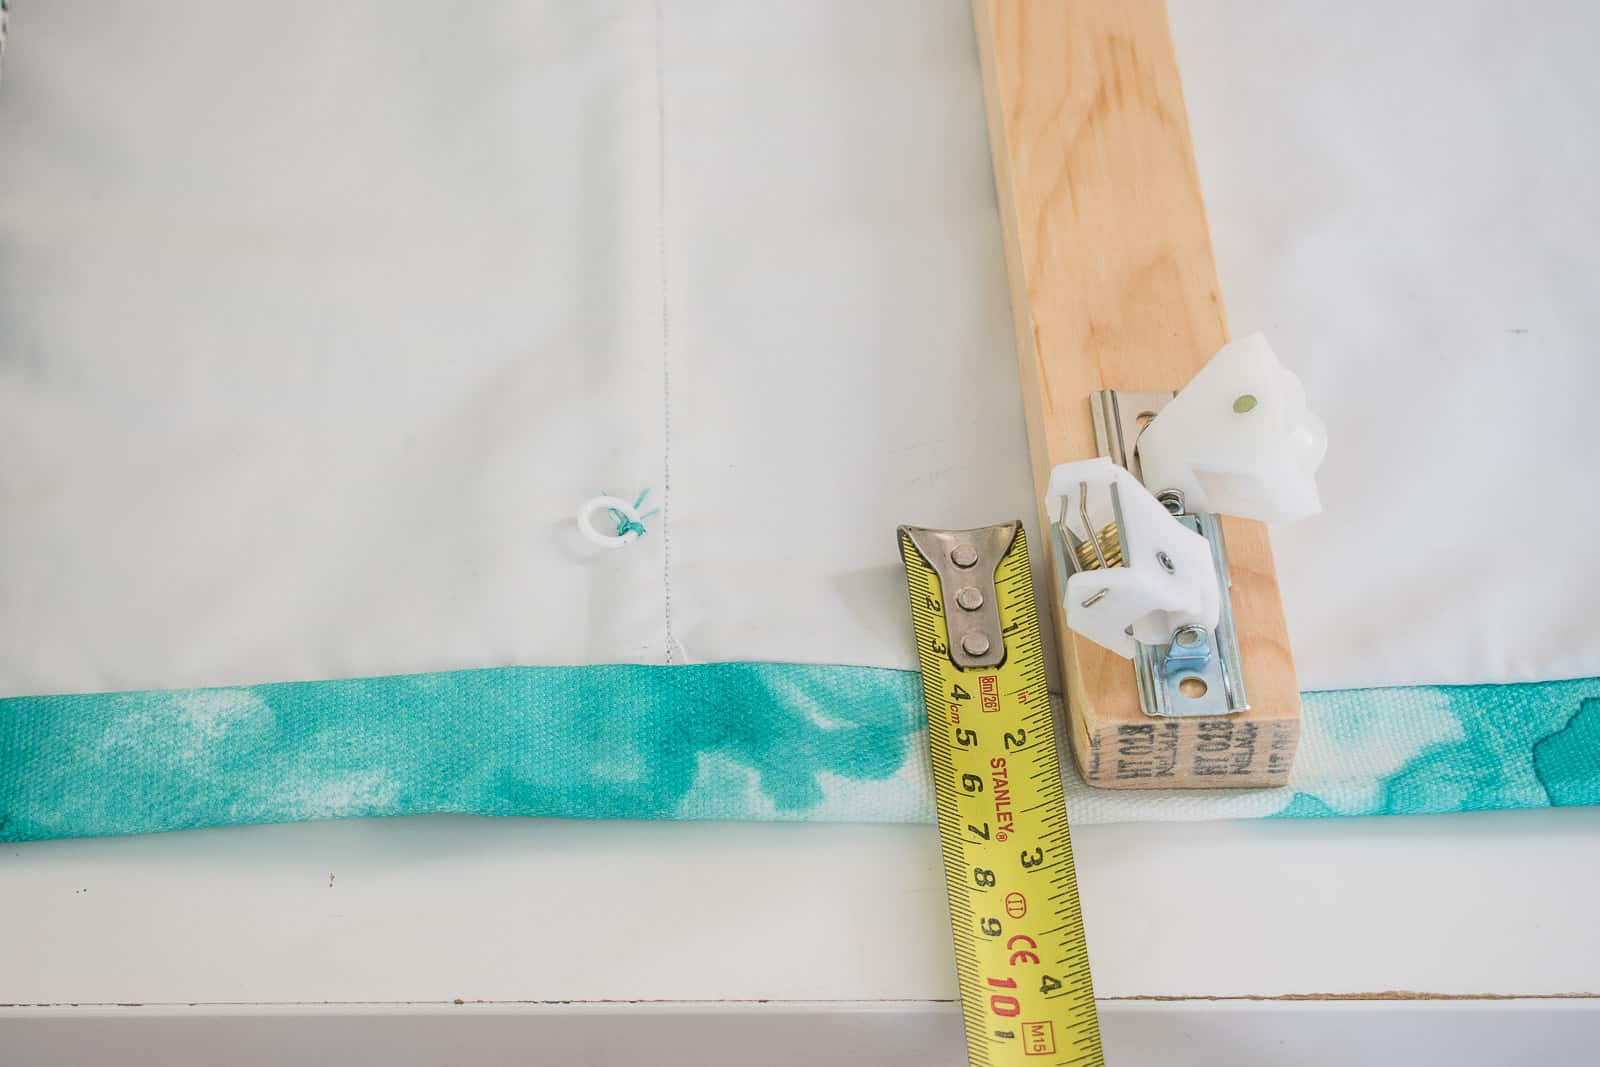
Step 11. Attach Roman Shades to mounting board
I used a 1×2 board that I cut a few millimeters shorter than the shades. You could paint the ends of the board to match your fabric. Did I? No… Skipped that step because this is the point of every project when I just want to be done so I get VERY impatient. I held my fabric up and determined where I wanted the top edge of the mounting board to sit. Then I wrapped the fabric around the board and stapled it in place.
Step 12. Attach pulleys and string the chord
Using a screw driver, attach the pulleys to the mounting board. If using a chord lock, you can overlap the screw hole with the pulley screw hole before attaching. Tie off each cord on the bottom ring and thread up through the rings, and then along the pulleys on the mounting board. I had to look on YouTube for tips on how to string the chord through the chord lock.. I used a pin to fish the chord through the wheels of the lock.
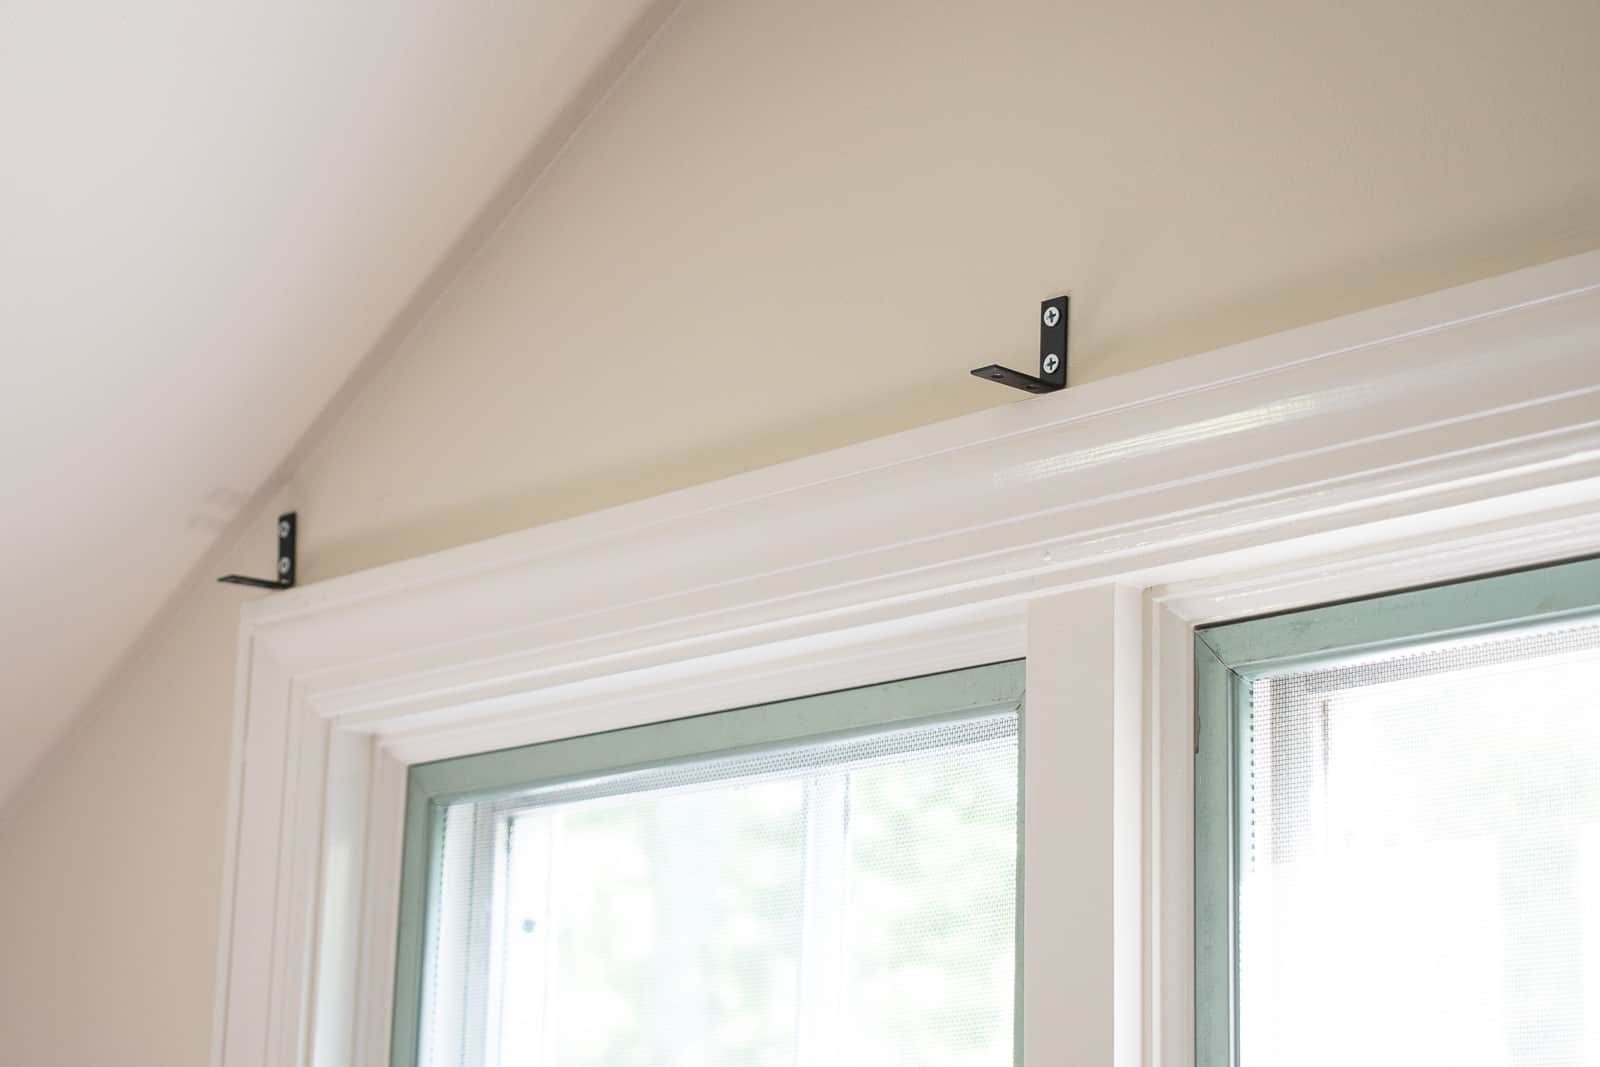
Step 13. Mount the shade
I used small L-brackets to mount my shades. I screwed them into the wall above the window trim (if not into a stud, then use drywall anchors). Then, with the shade resting on top of each bracket, I screwed the shade in place from underneath. Be careful your fabric doesn’t catch on the screw and start to twist when drilling through it.
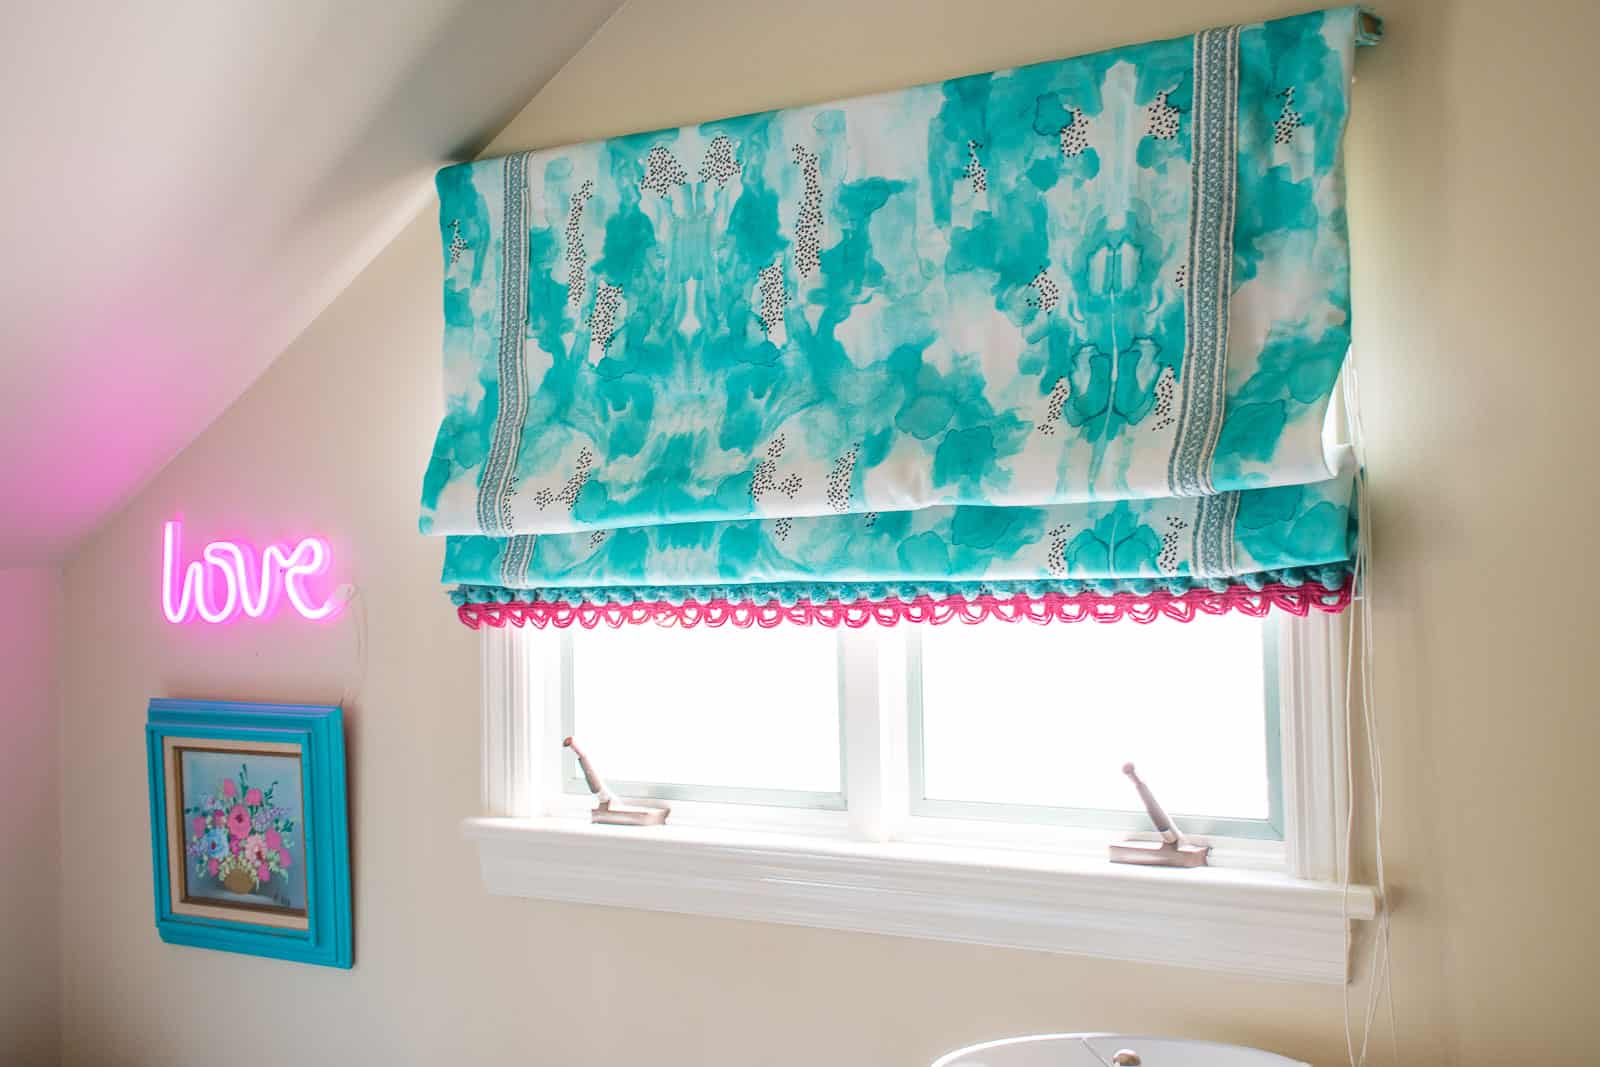
And that’s it. You just sewed Roman shades like a professional! There are lots of fancy options for what you can use for dowels or rings or chords… I stuck with the basics from the craft store and the hardware store. I did have to order the pulleys and the chord locks from Amazon, but otherwise the rest of the materials are pretty straightforward. (Full list at the end of the post!)
I posted about that super cute desk HERE.
I also wrote a post for the Spoonflower blog on 5 tips to decorate kids rooms that they can grown with! Check that out HERE.
Would I do this again? Yes. After making the first shade, the second one was much easier… I knew what to anticipate and what steps to take when. Is my sewing perfect? No. Did I make a few mistakes here and there… for sure. But I also saved myself a few hundred dollars and honestly, for a kids room, these look just fine!
Materials
- Fabric
- Fabric liner
- sewing machine
- dowels
- pulley
- chord lock
- Plastic rings
SHOP MY FAVORITE SEWING TOOLS


Whoa! great instructions, but tell me more about how to sew these dowel pockets. I can’t seem to get them even. There has to be a trick to it, or maybe it’s some kind of measure magic. Please fill me in. 🙂 Thanks!
Hi! I think it’s just a question of measuring and drawing guidelines. Are the pockets crooked across the black out fabric? Because they’re on the inside the curtains, it doesn’t have to look perfectly straight as long as they’re balance evenly up and down the curtain!
Use N L square or carpenters square to make sure your lines are straight across. Ad one or two pins part way on each side using the square, thEn fold to sew and the lines should be even.
Thanks for this!
thank you for sharing these instructions. I have the time to attempt making one of these to see if I can make more for my house. I do have one question about what size and type of cord you used. I want these to function smoothly.
Hi! From what I can tell… that’s more of an aesthetic decision. I usually grab whatever drapery cord they have available at JOANN… sorry I don’t remember which exact ones I used here!
Ahem, where is that bed from? It’s fabulous!!! I want one. Did you make it? Please tell!
Ha! Thanks! I *did* make the bed! Read all about it here: https://atcharlotteshouse.com/upholstered-daybed-reveal/
i’m excIted about these instx as the ones i made 16 years ago involved sewing On labor INTENSIVE POCKETS to backside of finished shade. Do you fave pic of sewn rings that go thrU both layers of fabric and tHe doweL? Im not understanding.
Hi Carol! Have you watched the video? Maybe it will help! https://youtu.be/Xv6QP9qw_Ds
Good luck!
Your instructions are really great. One thing im struggling with is did you Cut your lining longer than your face fabric to allow for the rod pockets? thanks!
Hi! Sorry for the delay! Yes! Exactly!
Hi Charlotte,
I just learned to sew in April and am tackling your Roman Shade. It is taking me forever since I am a newby and Always have to study the directions carefully, but I am loving how it is coming together!! I’m sewing the rings on now and am a little confused. I’ve watched the video too, but still trying to understand the rings. Do you just sew them onto the liner, or do I need to go through the front fabric too? THANK YOU!
Hi! I think you’ll have the most luck if you go through both! THe rings are what will essentially pull the fabric up so if they’re not attached to both layers, I feel like it might not go up and down smoothly! Good luck!
Thank you, Charlotte! That’s very helpful! One more question…(sorry)….What size mounting brackets work best to hang the shade without seeing Part of the brackets above the top of the shade? I picked up 2″x2″, but unless I’m looking at it incorrectly, I’m not sure how to hang it without seeing about 1″ of bracket sticking up above the shade. I’m looking online for 1″x2″ L brackets, but I’m not finding any so far. What type of brackets do you recommend?
Oh gosh… I think mine were small. Maybe 1×1 even?
Such a helpful video and istru tions. The window i need to cover is large (almost 60”). Do you think a roman shade is a good idea and how many rows of rings would you RECOMMEND? Also, am i UNDERSTAND it correctly that you knot the ring at the bottom of each row and then feed the Cord through the one row up the side to the 1 pullY on the far side of the shade? Im confused about that. ThaNks so much!
Hi! I’m actually not sure about that width? The fabric might droop/ sag a little, but you should be able to correct for that by adding extra rows of vertical rings. I usually space my rings something like 6-8 inches apart. That spacing is what dictates the height of the folds so see what looks best to you with your fabric! And yes… knot the cord on the bottom ring, feed up up the column of rings until you reach the mounting board at the top… then feed the cord across this board through the eye rings over to the pulley. Good luck!
how would you wash these?
Just like any Roman Shade you’d have to dismantle it a bit and then dry clean. Easier to vaccuum with the brush attachment and spot clean as needed!
How do you determine the Additional amount of lining fabric to to allow for the dowels? I think I heard you say 3/4″ so should I multiply 3/4″ by the number of dowel pockets? I will have 6 dowels not counting the hem for a heavier metal dowel. i am afraid I am going to mess this up!
Thanks!
Hi Sandy! That sounds right! I essentially folded the fabric around my dowel and marked how much fabric was needed. It’s fine if the pockets are a little big… just don’t make them too small! 🙂
Thank you for the instructions. Why do you Cut the Fabric 4 inches wider than the desired width on Each side? I can see .5 inch for the seam allowance and .5 inch for the Wrap around the side with the smaller liner. But that is only 1 inch wider each side.
Hi there! The fabric wraps around the sides by about 3 1/2 inches and then folds over 1/2-inch for seam allowance.
Hi Charlotte,
Your directions for the roman shades make it easy to follow. My question to you is, how would you mount the shade on the inside of the window which is how I plan to mount them? Thank you!
Hi Sheila! Thanks so much! I would attach the shade to a board as I showed and then drill up through the board into the top of the window frame! Good luck!
Thank you so much for this wonderful post! I stumbled across it and have now used this method to make roman shades for my bedroom and my son’s room. The supplies purchased from amazon work like a charm. one important update to these instructions is that you need to cut your liner about 7-10 inches longer than your fabric to allow for room to make the rod pockets. You can always trim any extra liner before you sew the sides (fabric to liner). Thanks again- your post was super helpful and your site is charming.
So glad it helped! Thanks!!
If you use ring tape do you sew it to shade and lining on each side of tape
I would have the ring tape just on the back of the shades… I’d love to sandwich it between the shade and the lining, but then I’d have to cut the lining to make room for the rings to poke through!