
DIY Budget Wallpaper
Psssst… this post *might* contain affiliate links: see my disclosure here.
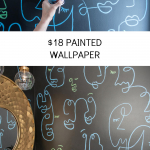
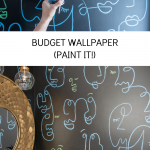
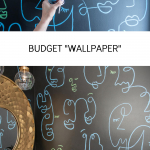
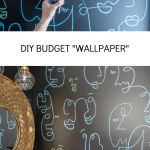
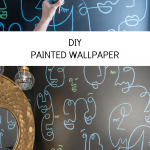
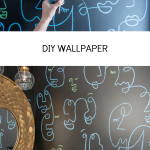
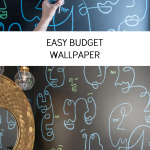
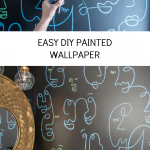
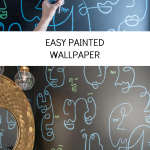
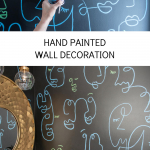
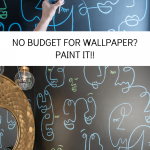
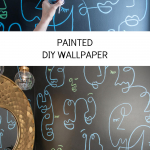
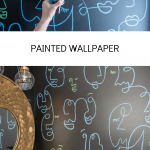
$18 Imitation Wallpaper in our Powder Room
How to paint your own wallpaper for a budget makeover.
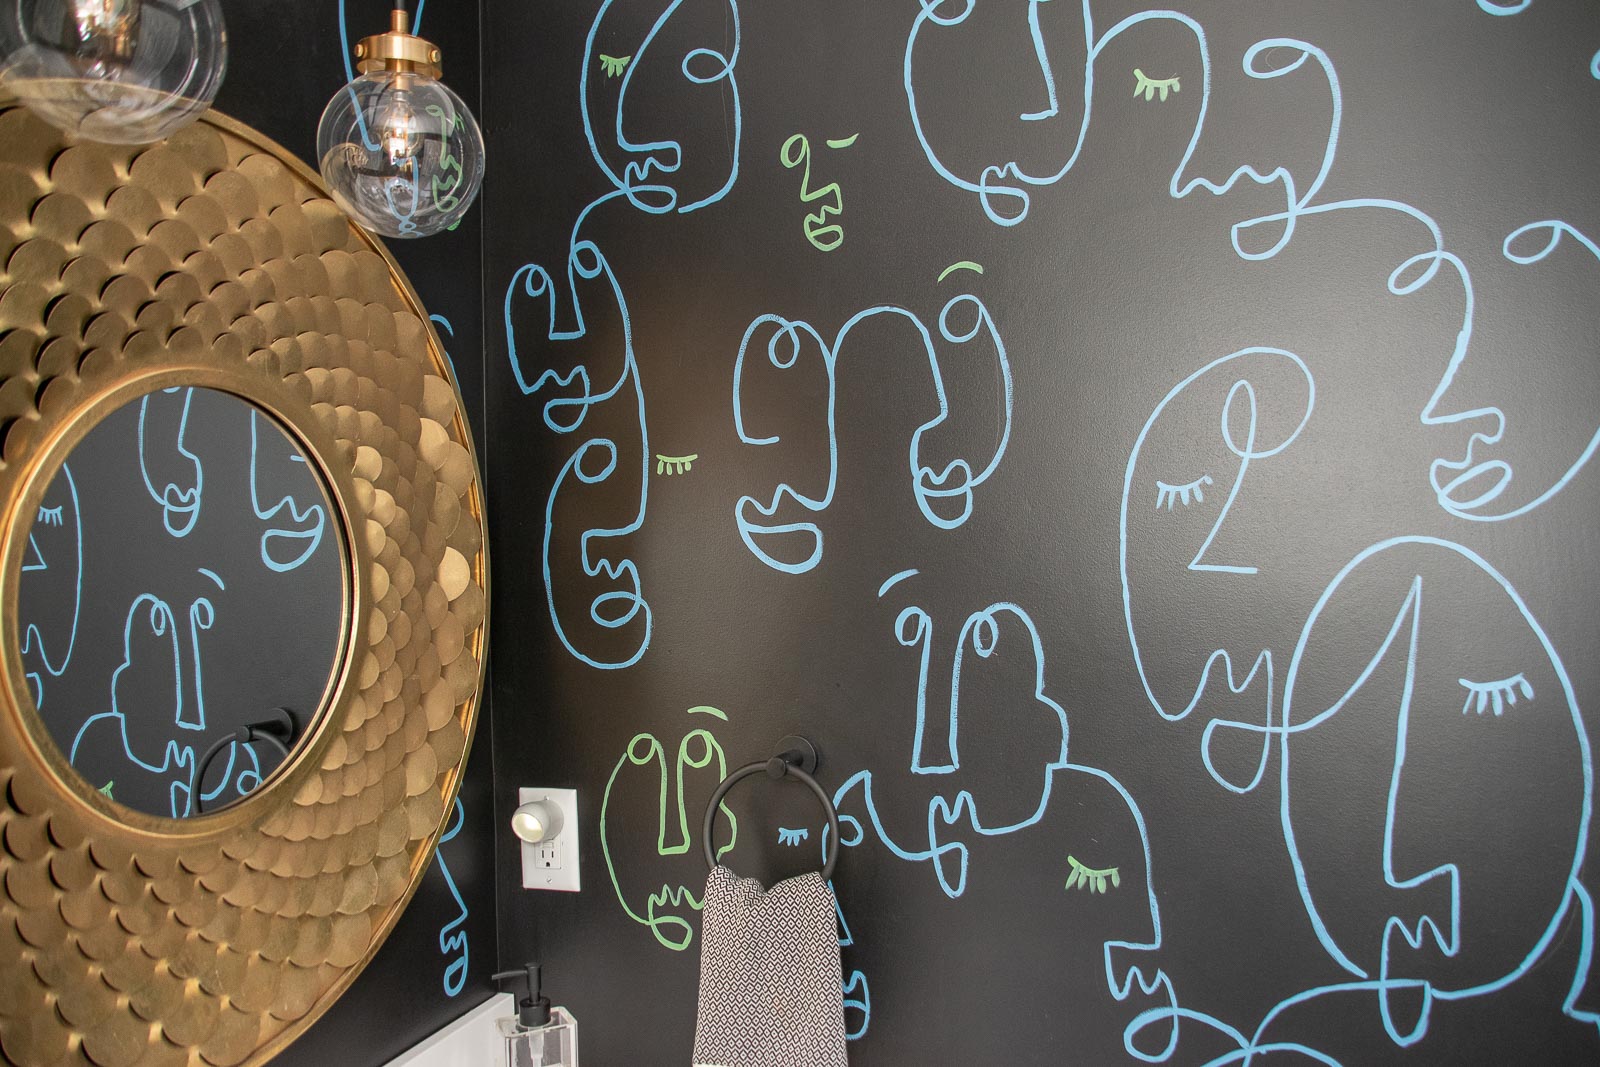
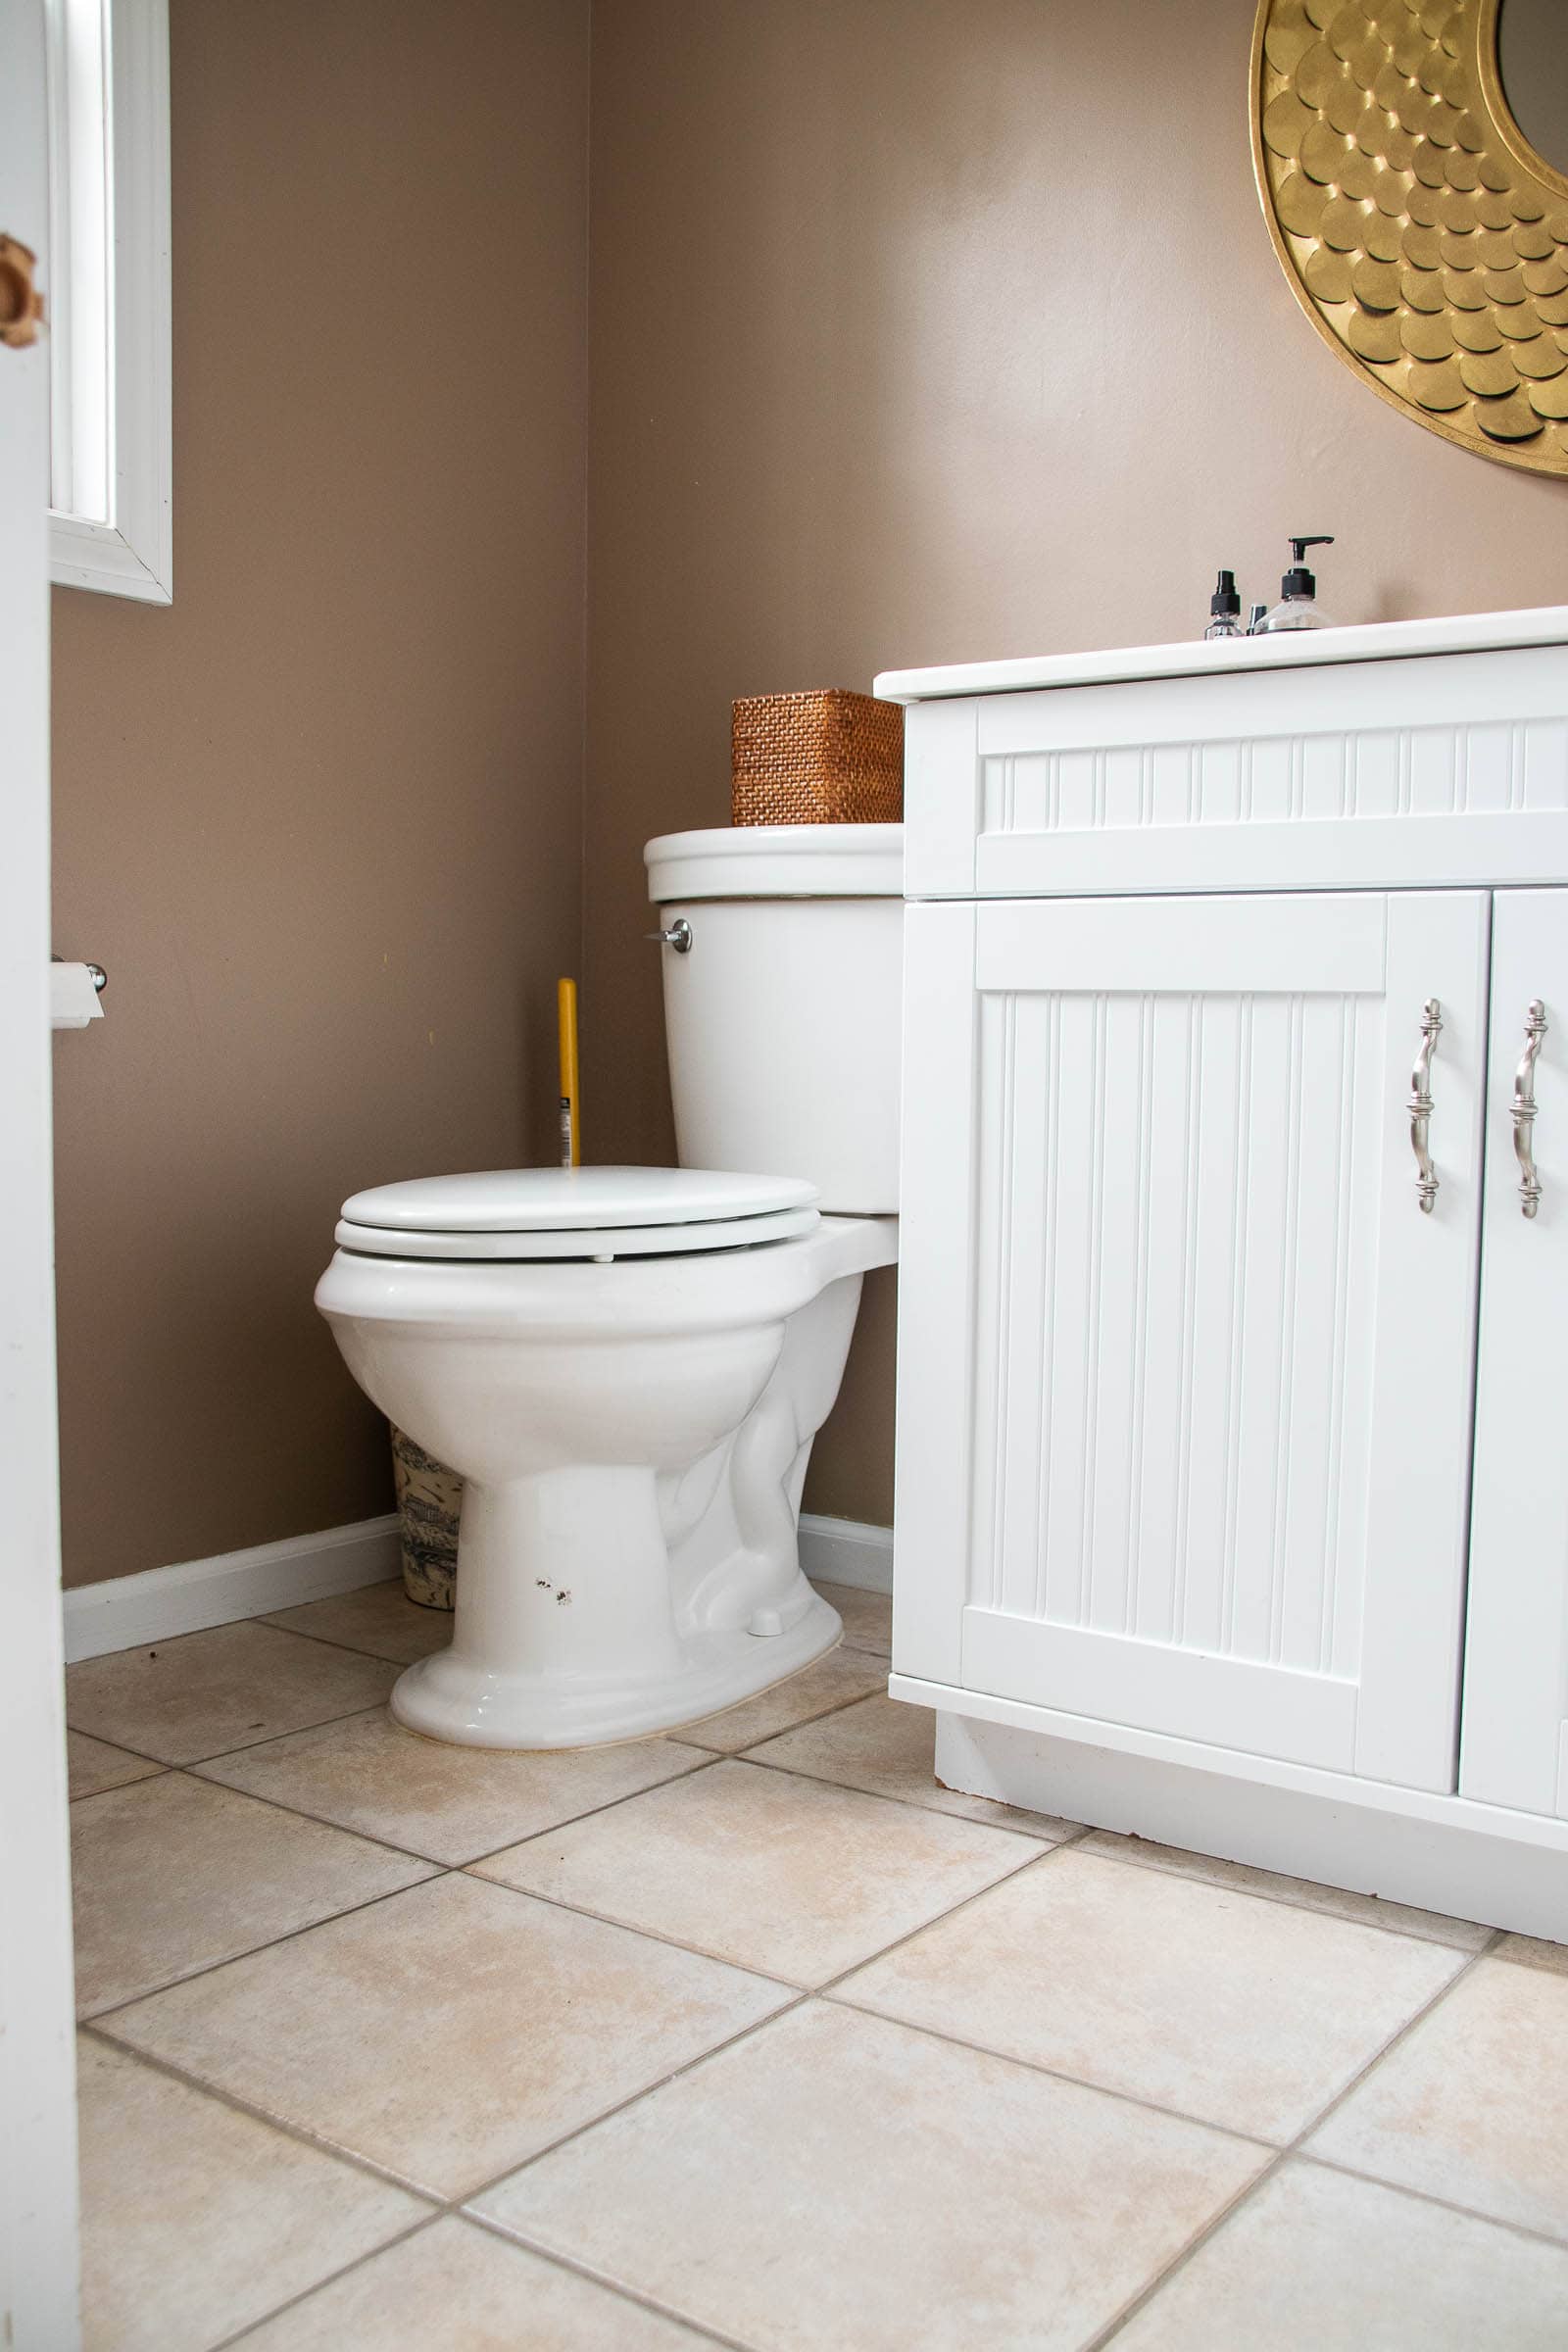
When I added new floors to our powder room, I needed to give the walls some love at the same time. Truth be told, I always thought I would wallpaper the powder room so all I wanted was a quick and cheap way to give them a temporary update. Since the floors were black and white, I opted for a bold black paint on the walls (Behr Limousine Leather). Buuut… I didn’t stop there. I love the whimsical artistry of single line drawings like this. In fact, I’ve added similar wallpaper to my cart many times in the past. Here’s how I brought that same feeling onto our powder room walls without spending a fortune on actual wallpaper. This was the space before (snooze fest):
Shop my favorites!
Step 1. Plan your Design
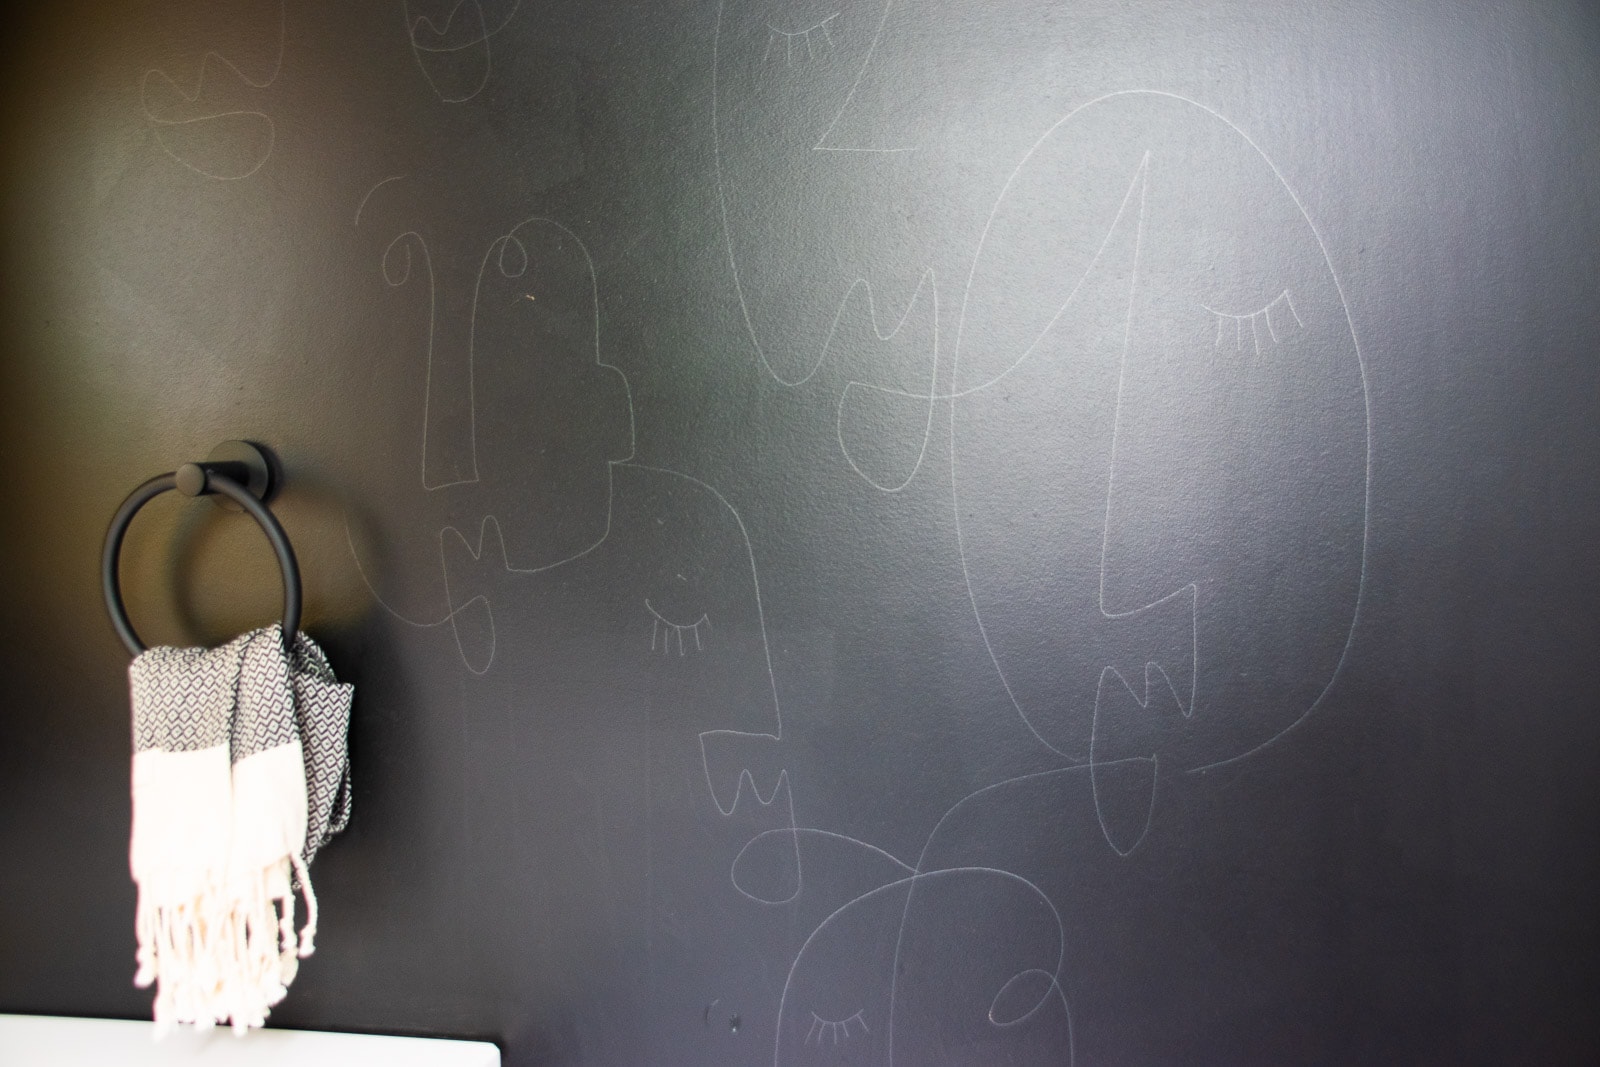
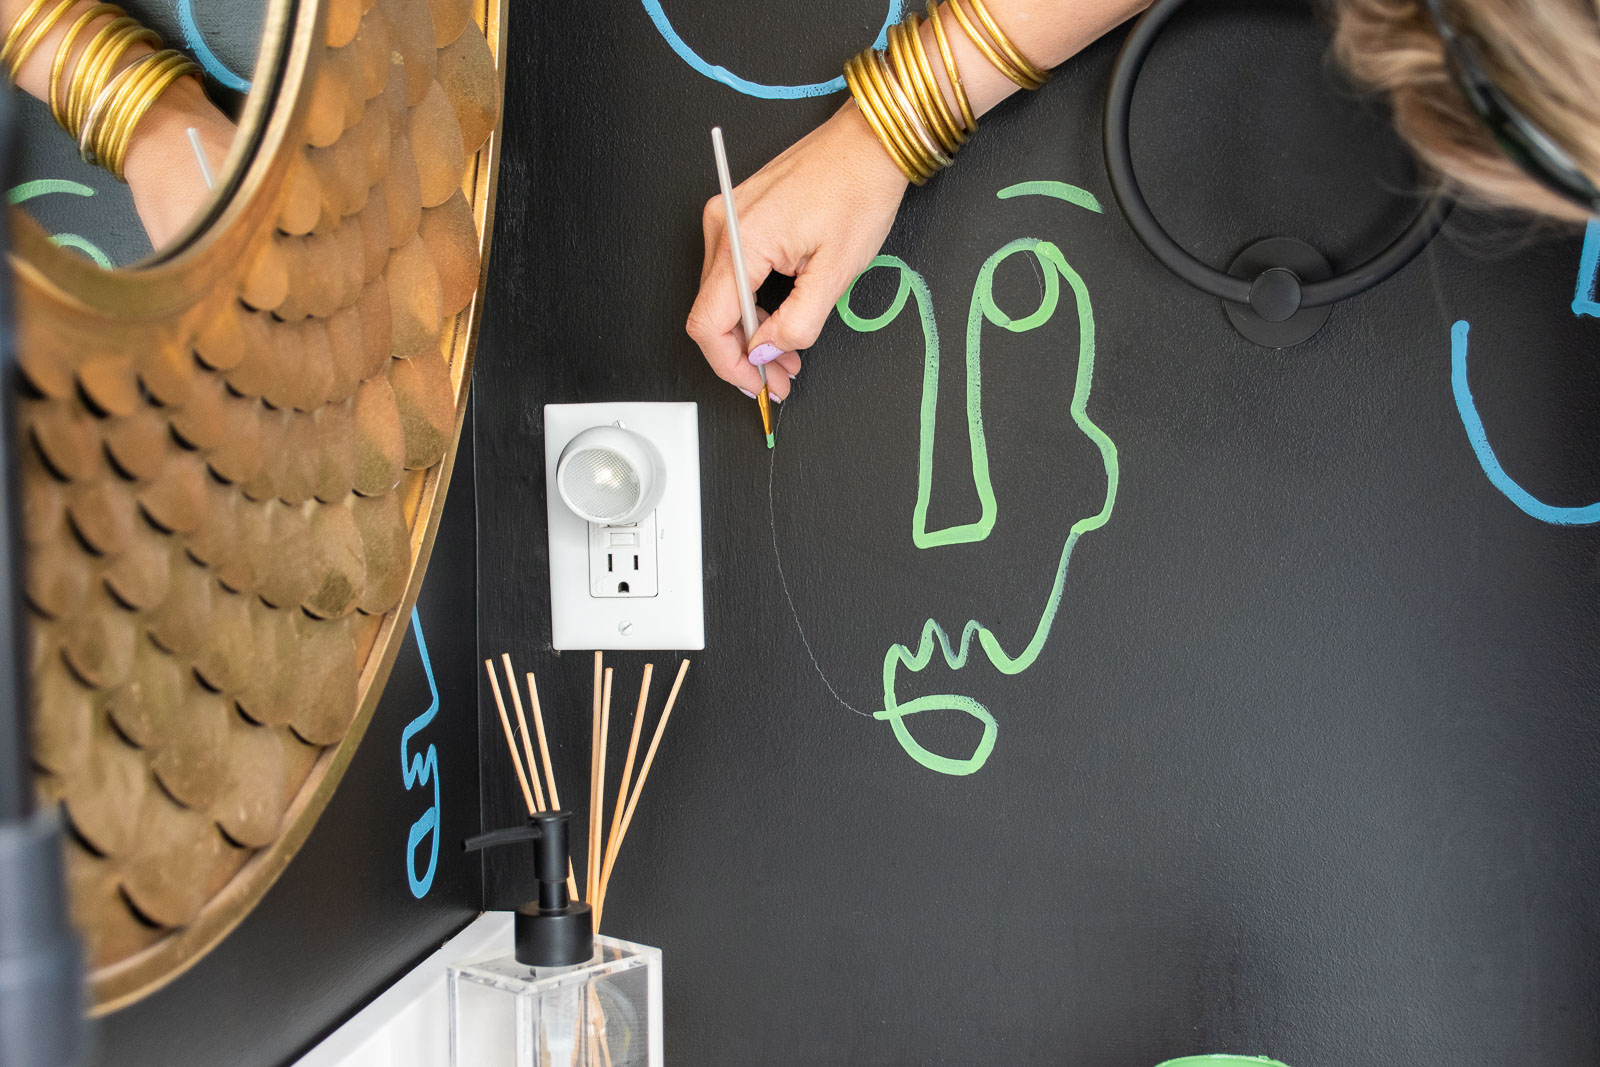
I looked at a few different versions of this continuous line drawing and then drew my own version onto the walls with pencil (chalk might work too and would be easier to clean up). The trick with this specific design is to try and relax and just let the silhouette flow. I taped a few pieces of computer paper together to give myself space to practice before I had to draw directly on the wall. Once I felt comfortable with the design I moved onto the wall! If you’re not confident in your drawing ability, there are a couple ways you can still transfer a design onto the wall. Projection is an easy way. A second way that’s a bit more cumbersome if doing a while wall is something like a carbon transfer paper. You can make your own my rubbing with a pencil on the back of a piece of paper and then drawing from the other side to leave a mark behind.
Step 2. Add paint to the Design
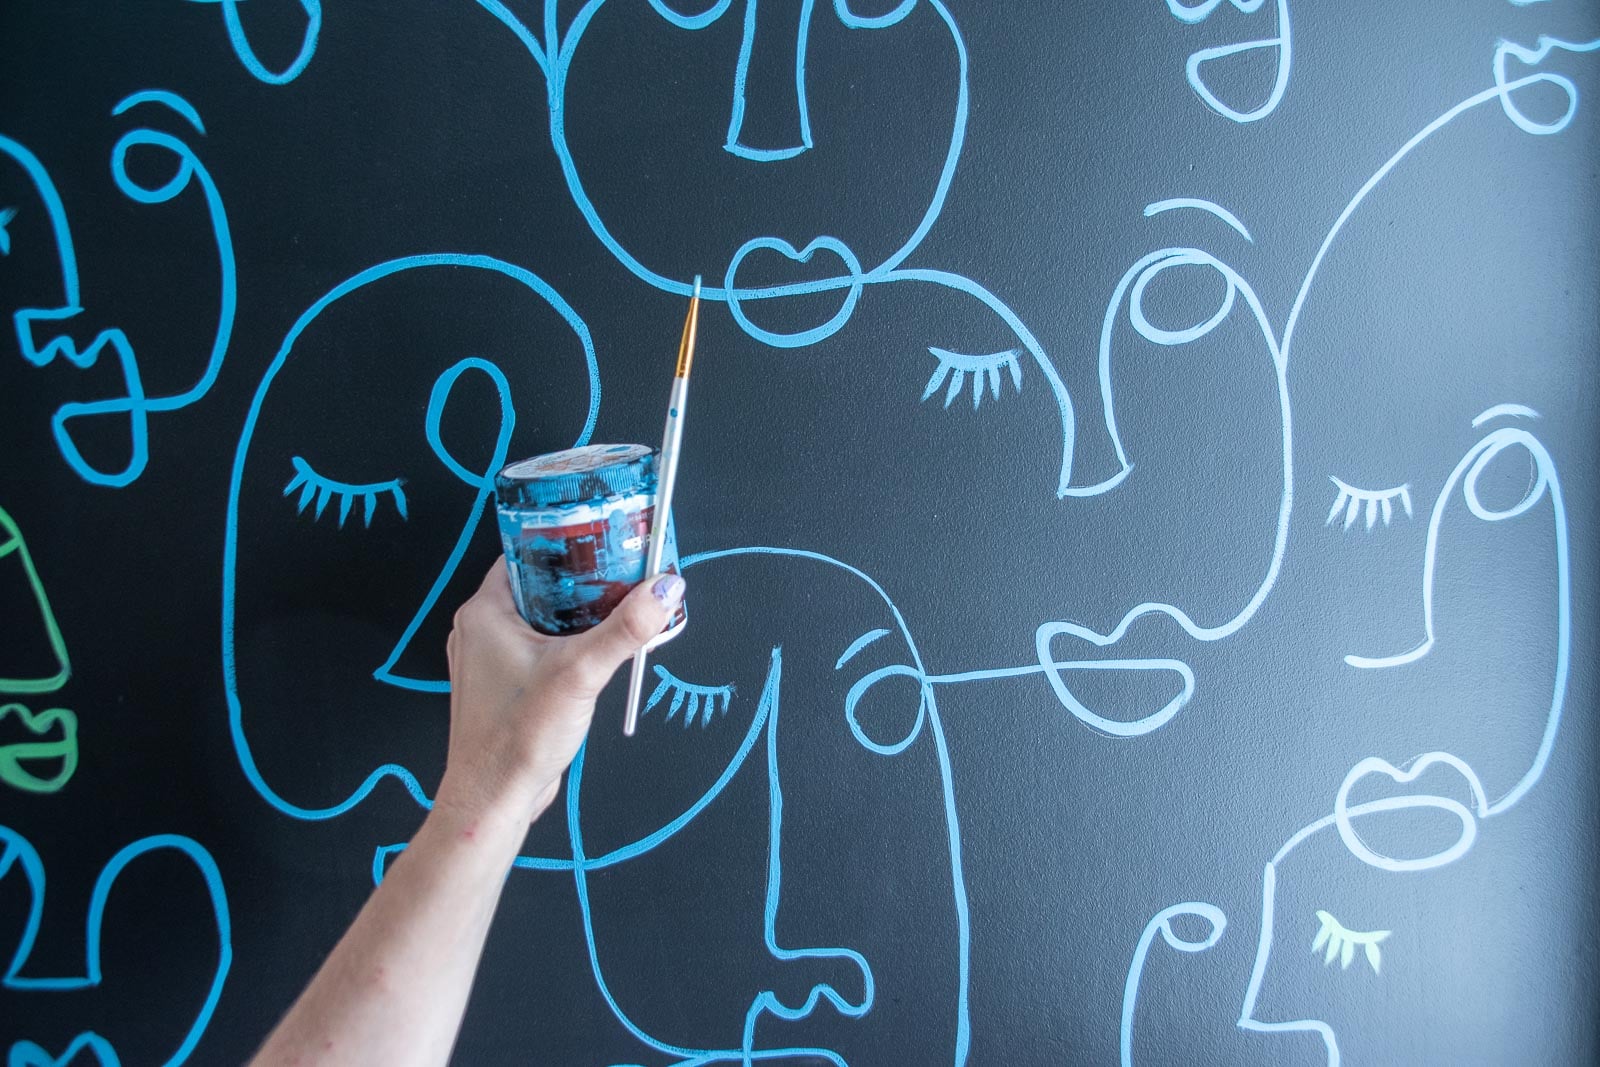
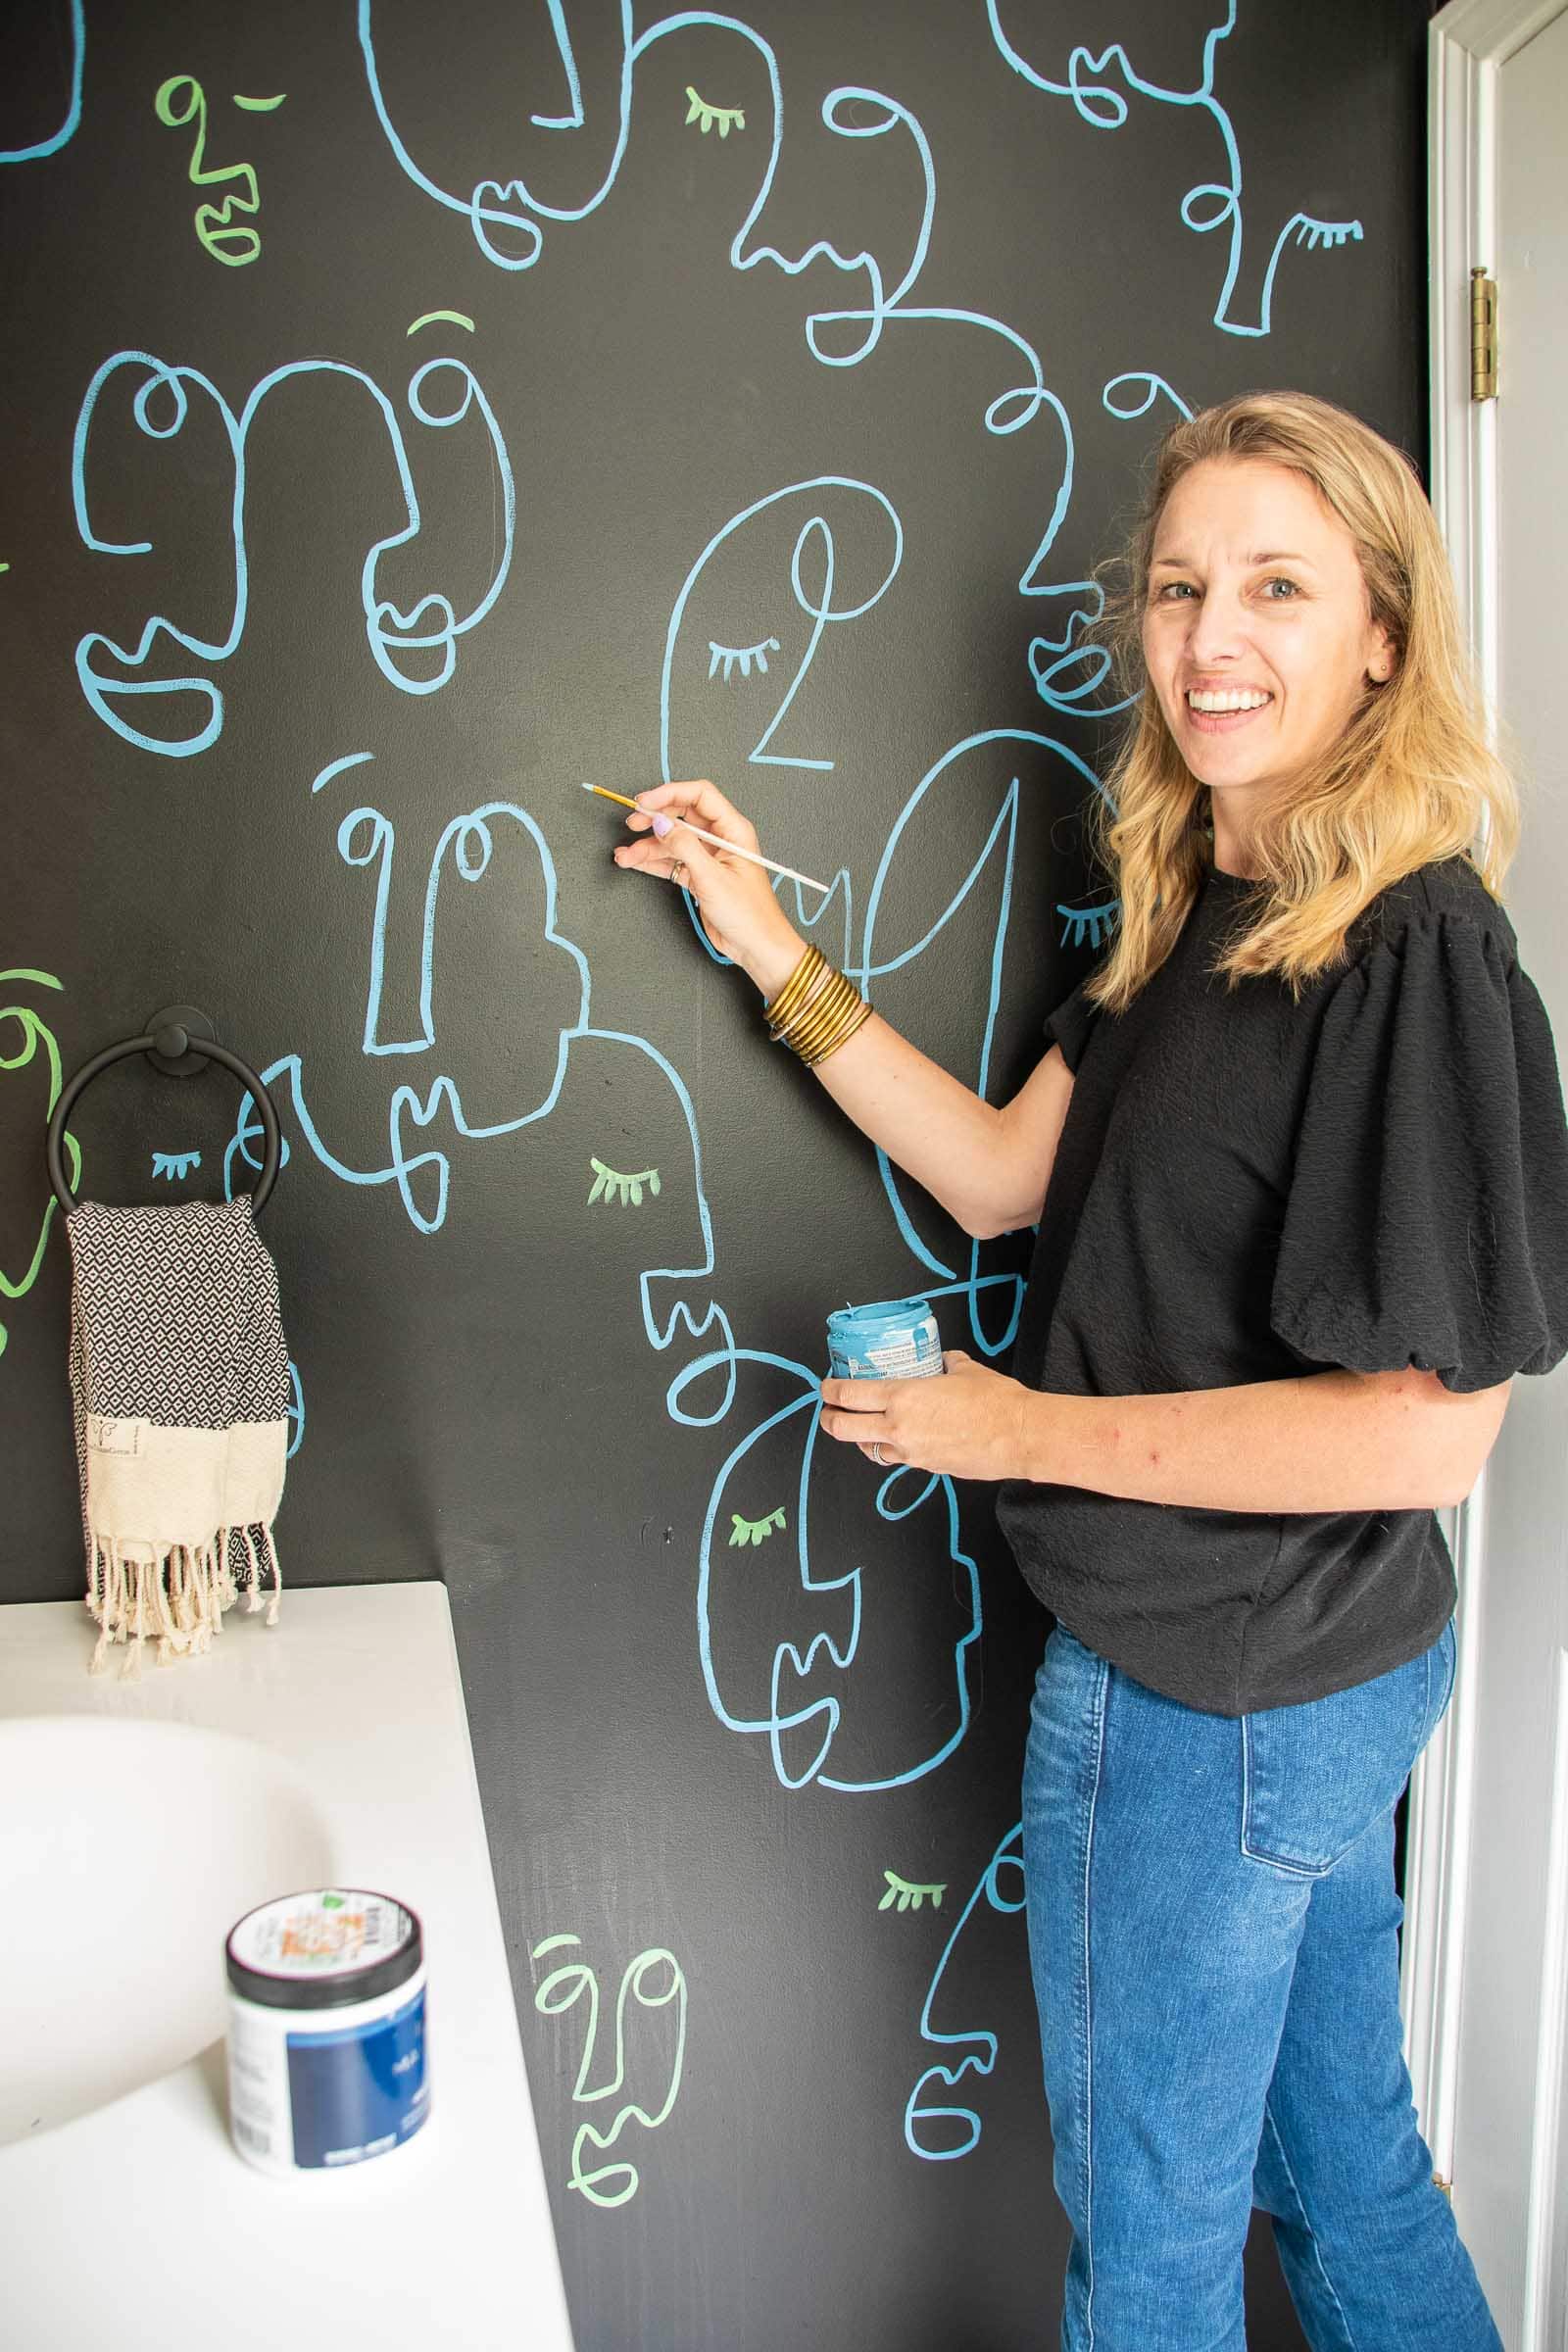
With a detail brush, trace over the pencil line on the wall. A note about brushes… ultimately, use any brush that works *for you*, but there are a few things to consider. The tip of the brush will dictate the shape of the paint line. I wanted this line to be skinny so I wanted a brush with a tip at the end (vs. a flat brush or an angle brush). I used a “filbert” tip brush with is similar to a round brush that ends at a tip except for the angle at the top is a bit more gradual. Also? It’s what I had on hand. I’m working with a variety pack like this that I picked up in the paint aisle.
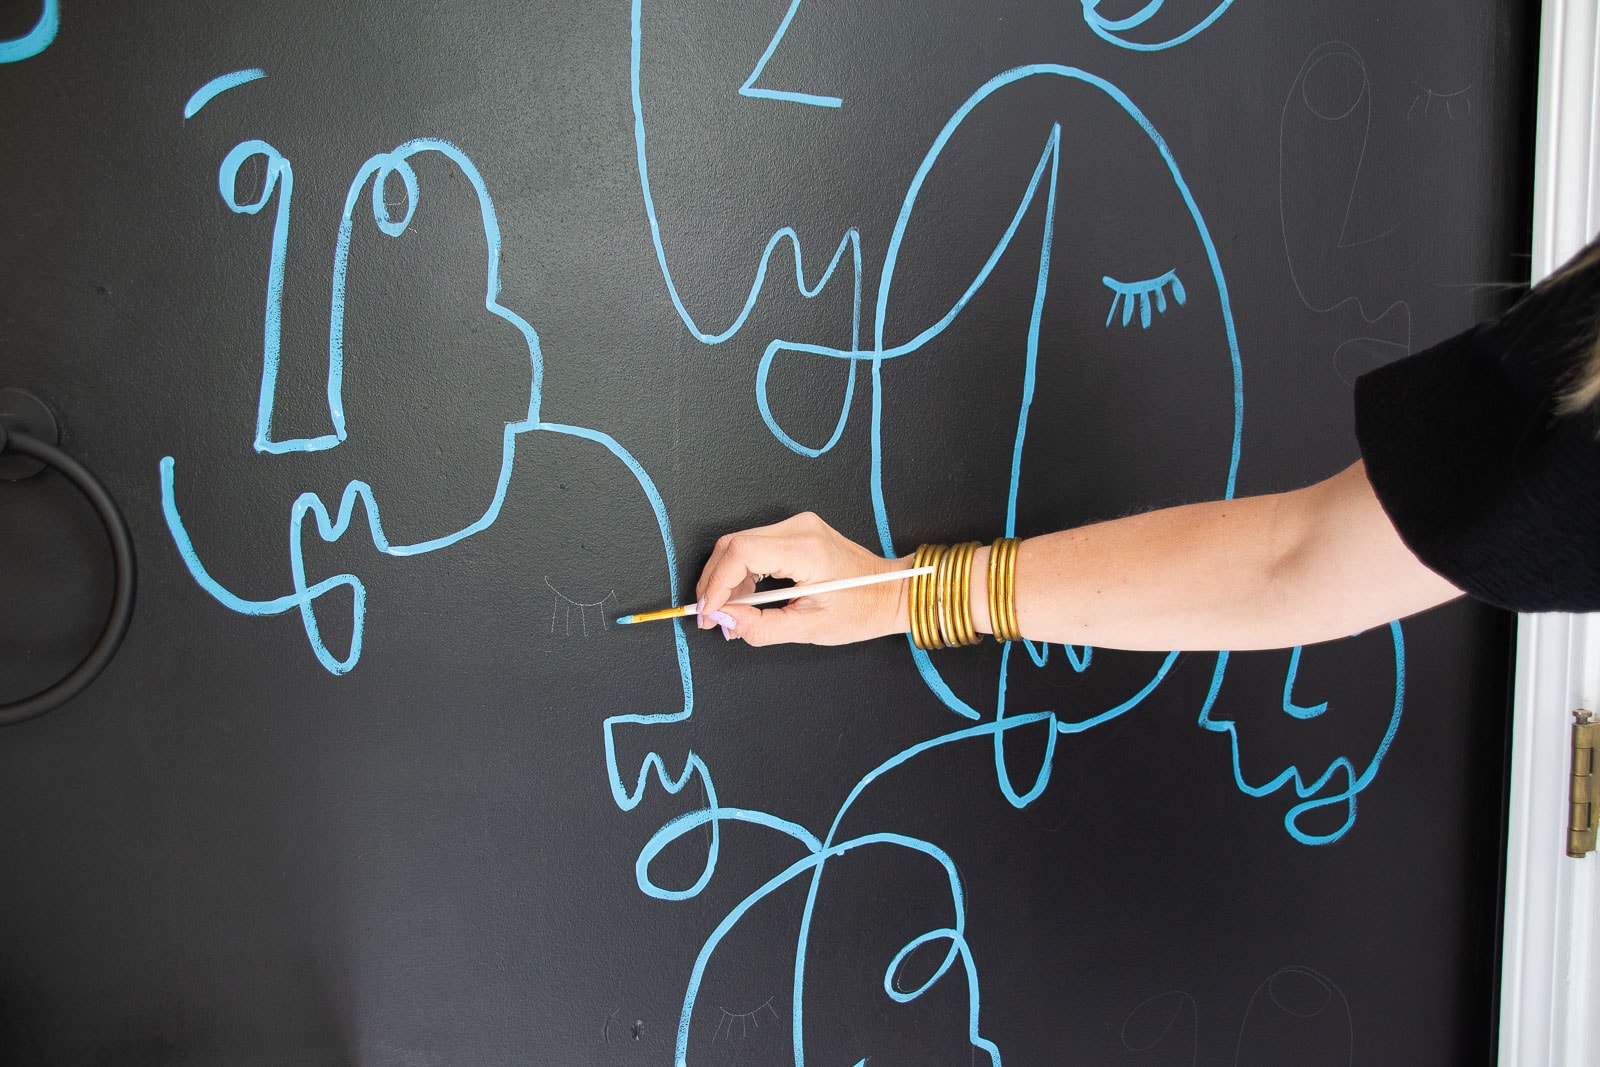
Here are my pointers for paint. You will find that moving the paint brush in one direction feels more fluid and smoother than the other. Don’t fight it! The point of this is to be fluid and smooth so relax as much as you can. It might also help to hold the brush further down the handle to give yourself a more relaxed grip. I chose a brush that allowed me to apply a bit of pressure but still gave me a relatively thin line. I smaller brush might have been TOO skinny and a thicker brush might not have looked as uniform since it would have been harder to control my pressure down on the brush. Bottom line, find a brush that gives you the right line thickness when you paint in the most comfortable manner.
Step 3. Clean Pencil lines
There will probably be leftover pencil lines from where you didn’t paint over them perfectly. My paint is an eggshell finish which means it has a bit of sheen to it. I was able to wipe away those pencil marks with a damp cloth. If you have flat paint or just want to try other methods, a basic spray cleaner or magic eraser should work too. (Using the pencil eraser will typically leave behind smudge marks from the rubber eraser.)
Step 4. Nope. There is none.
That’s it! I added a second accent color to my designs, but didn’t do anything as far as adding a top coat. I’m using interior latex paint so just like you wouldn’t do anything after painting a wall, I’m didn’t do anything to my “wallpaper.” If I ever get sick of this design and want to paint over it, I’ll have to sand these line drawings a bit so that you can’t see the outline through the next coat of paint, but for now… I love it! It’s not going anywhere!
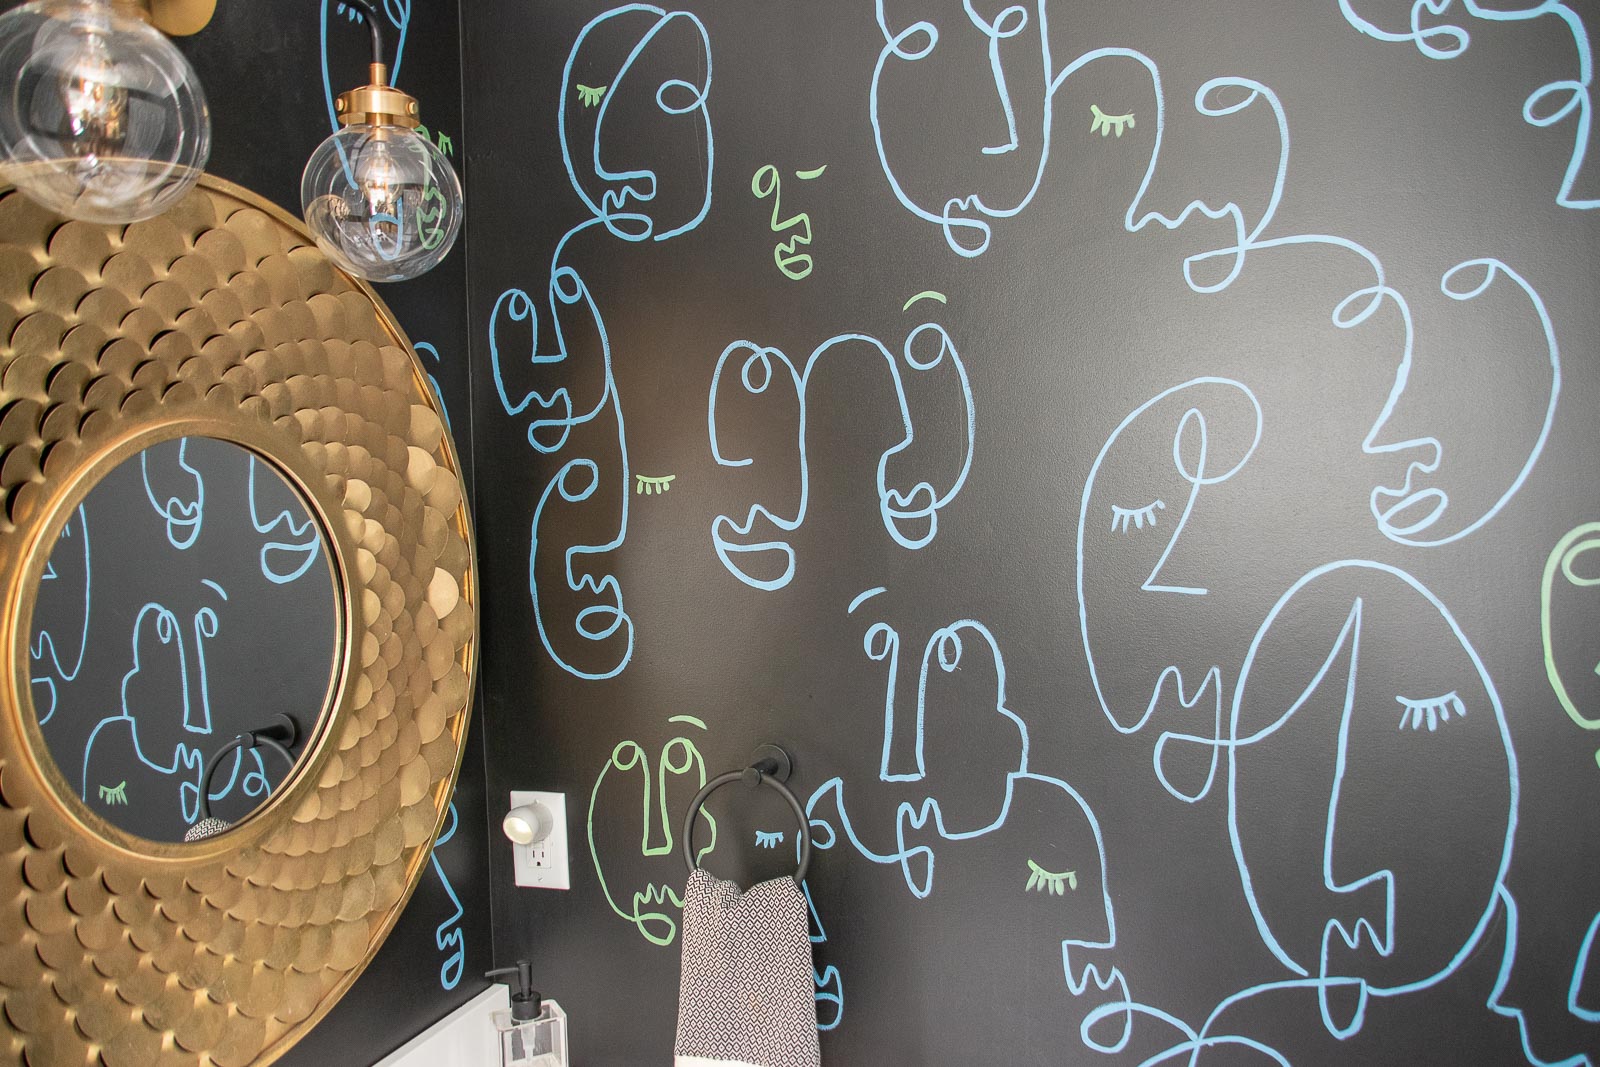
Check out the full powder room reveal here.


Don’t Miss Out
Become An Insider!
Signup for exclusive tips, and tricks from Charlotte’s House!
Let’s chat!
I love comments from you, so feel free to leave your thoughts and ideas below! And don’t forget to follow me on Instagram for even more!