
DIY Picture Frame and Foyer Makeover
Psssst… this post *might* contain affiliate links: see my disclosure here.
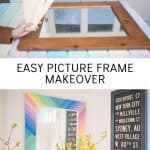
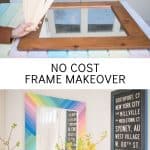
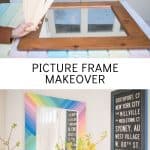
Foyer Update and Budget Rainbow Picture Frame
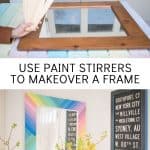
I made this zero dollar rainbow picture frame and gave our foyer a functional makeover.
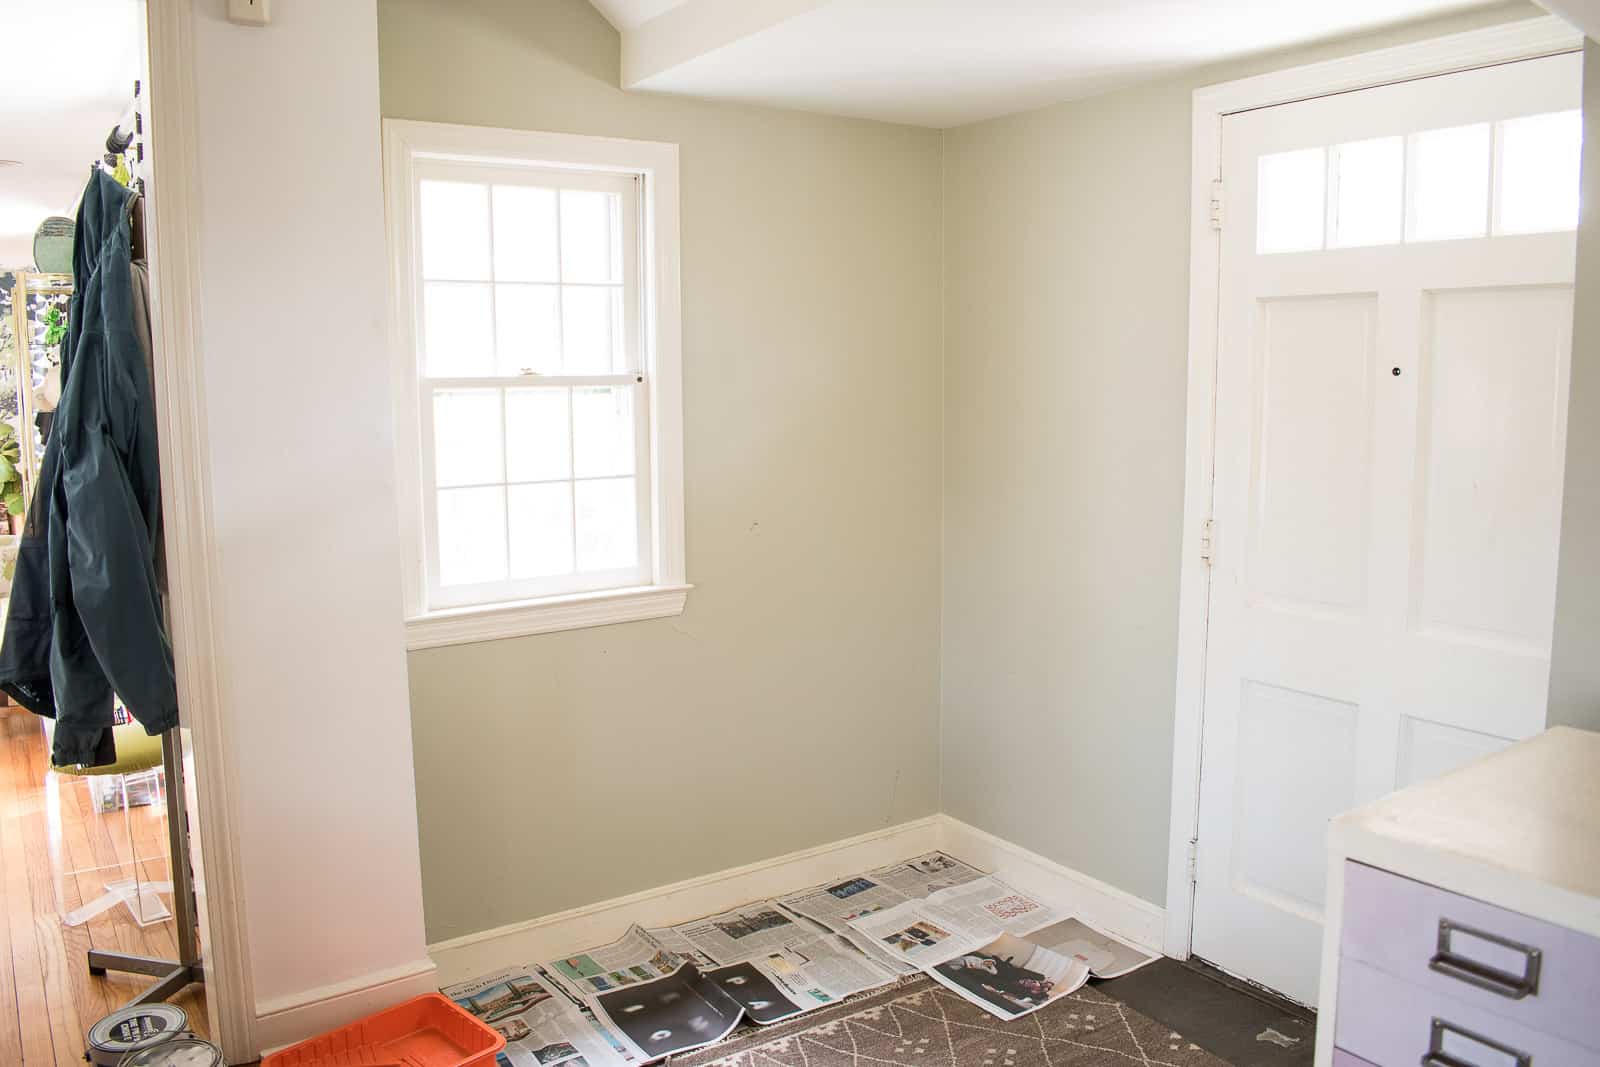
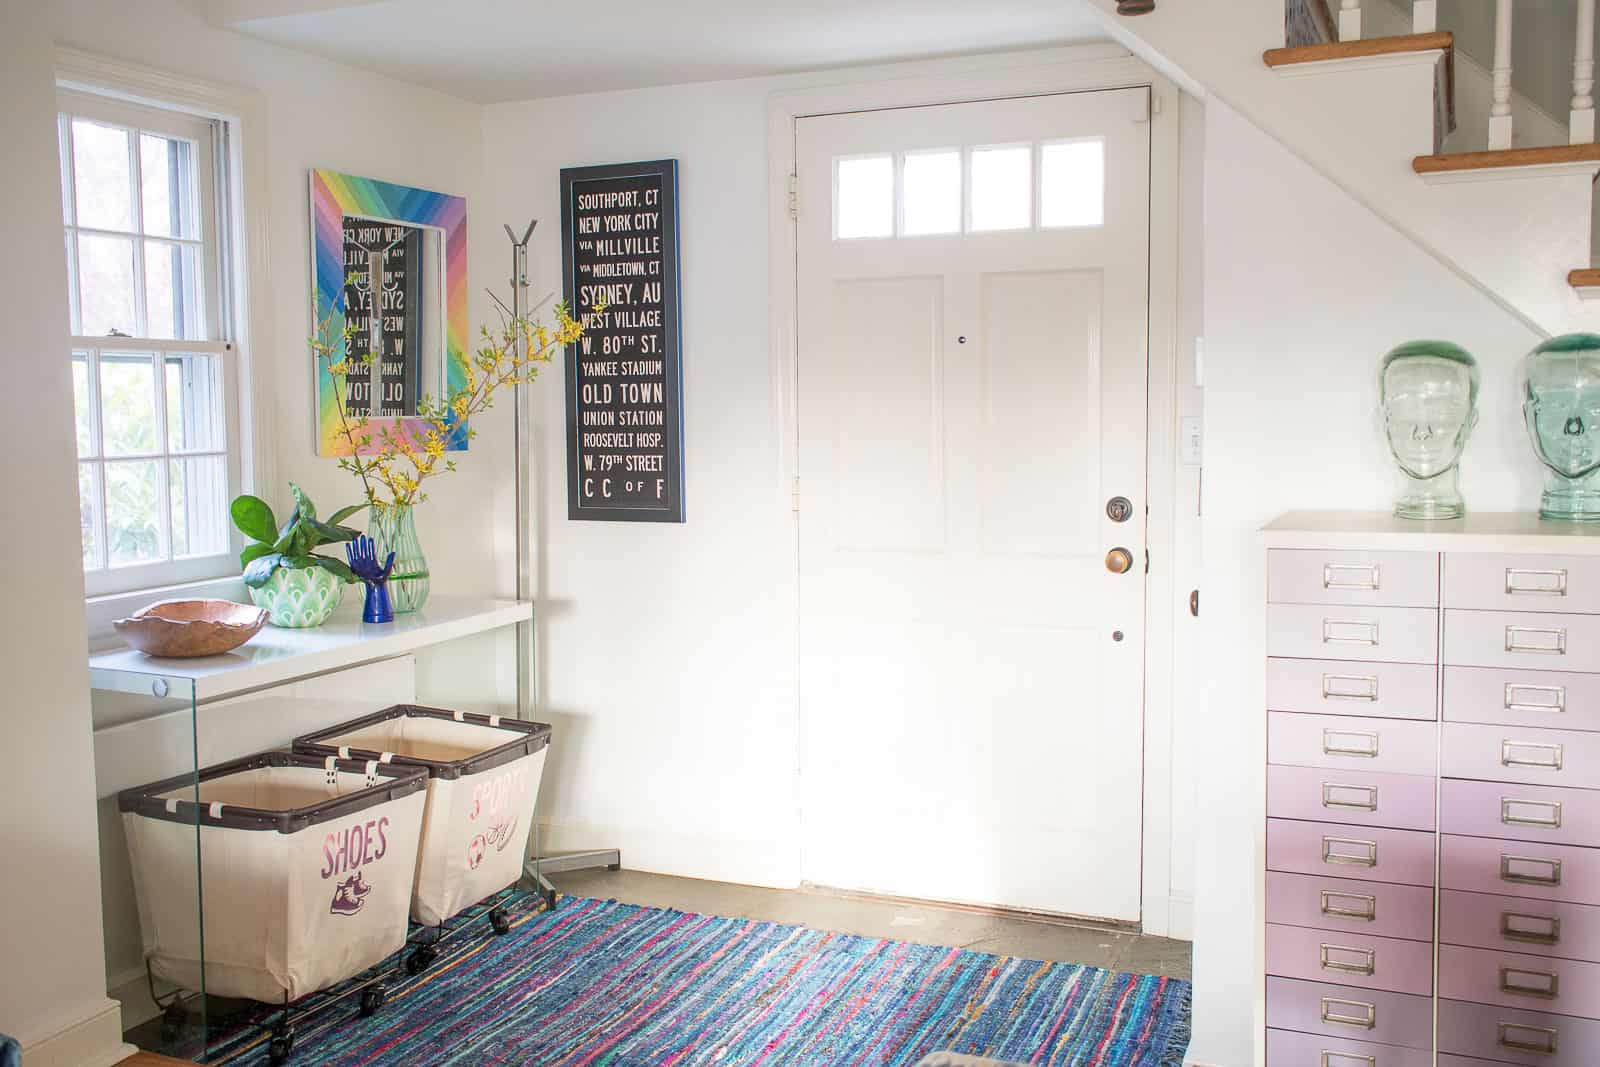
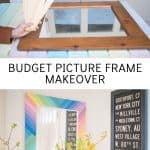
I gotta say… now, more than ever, finishing a project feels so good! I was THRILLED to team up with my friend Rebecca Propes to makeover six feet in our house this past weekend, and you guys couldn’t have been sweeter about our reveals! I decided to makeover our front little foyer to make it more functional for our family, but I also wanted to share a mirror makeover I did years ago in our old house and never posted about. Here’s how the foyer looked when I started…
Shop my favorites!
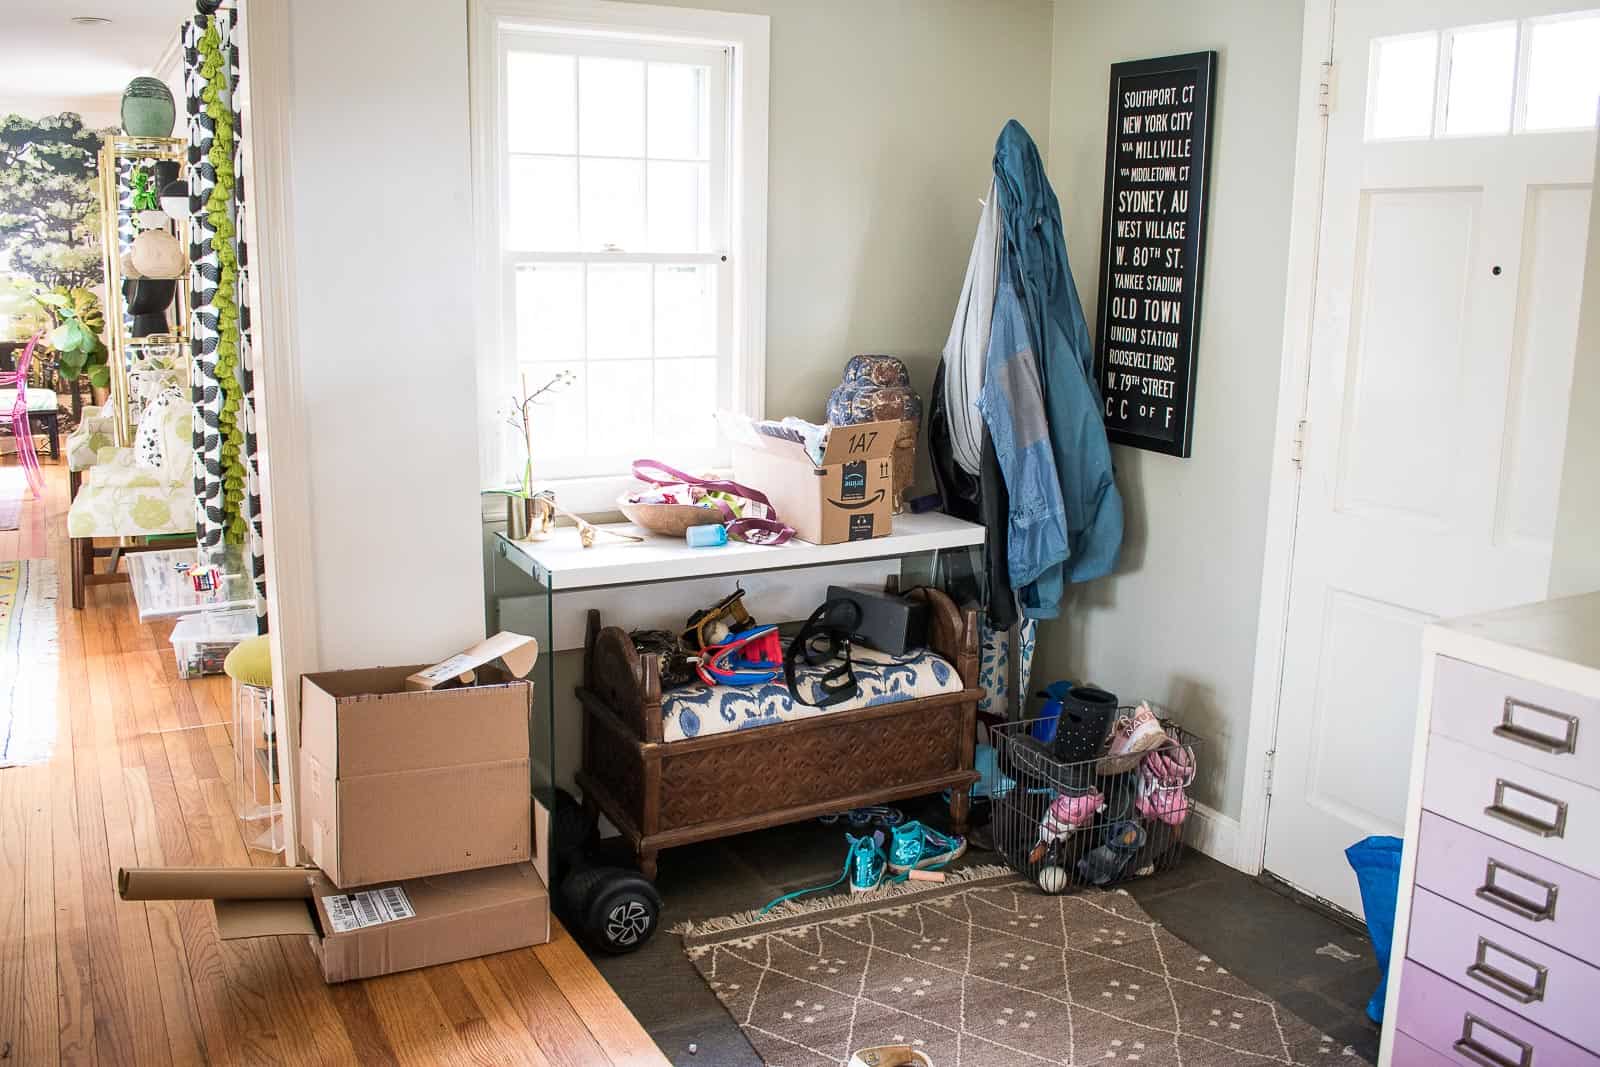
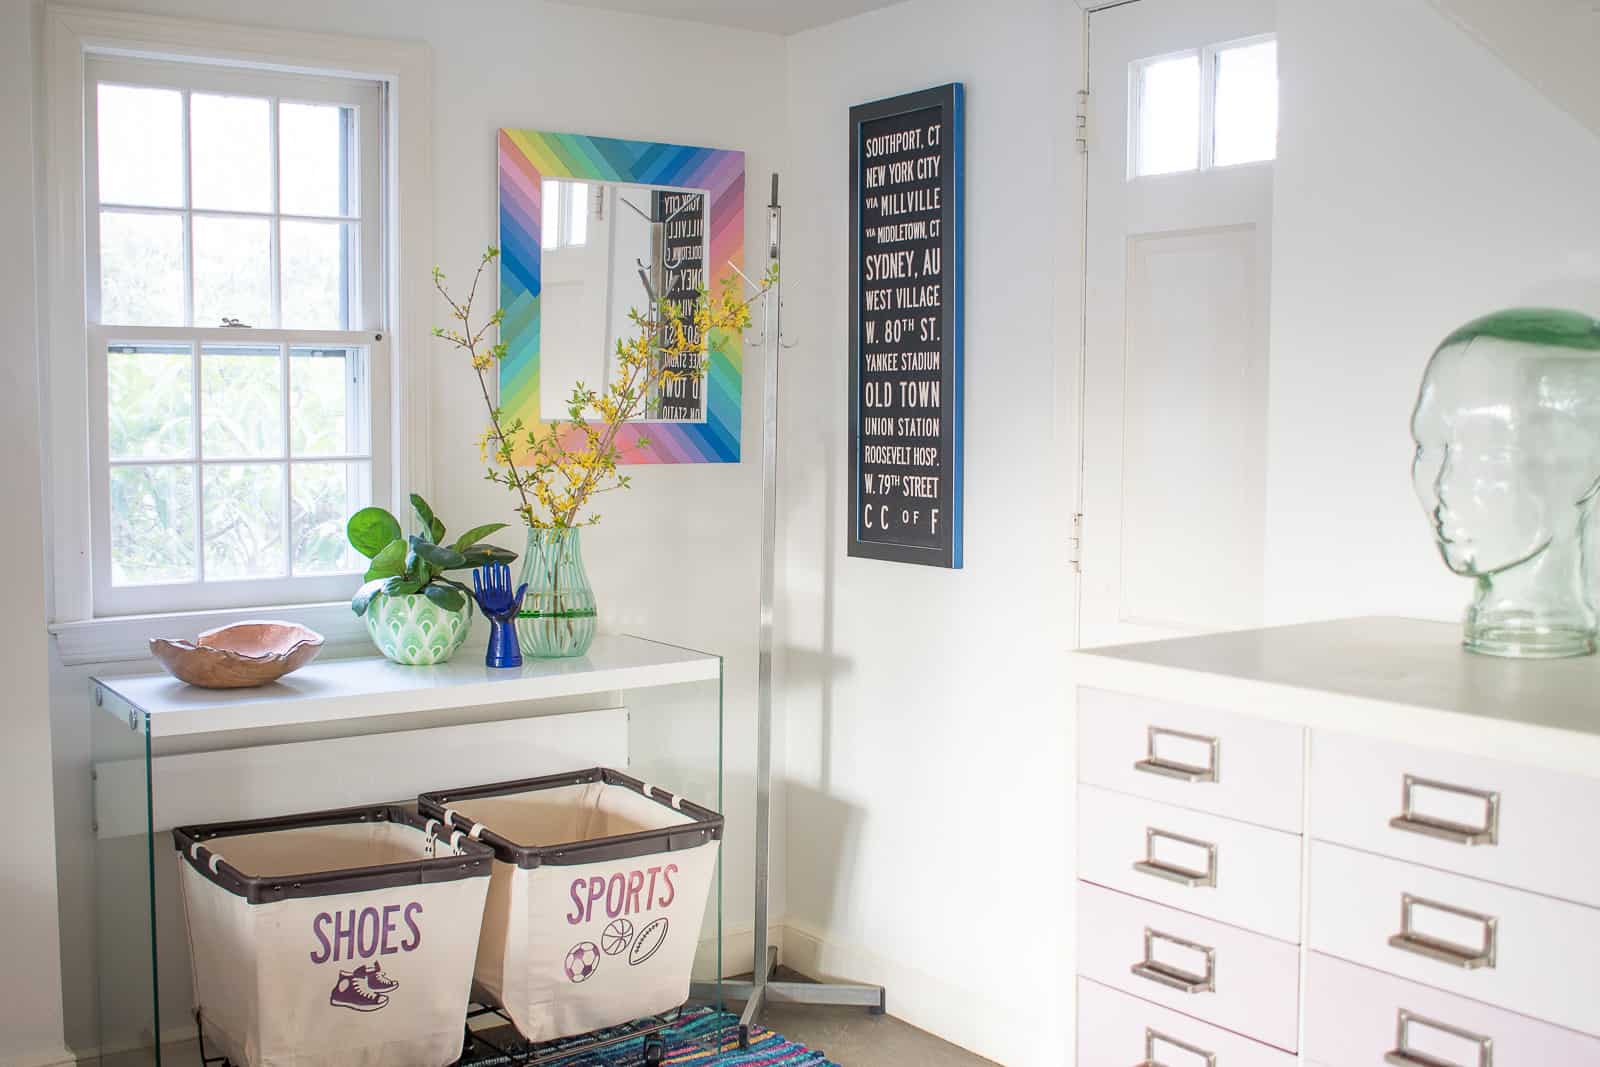
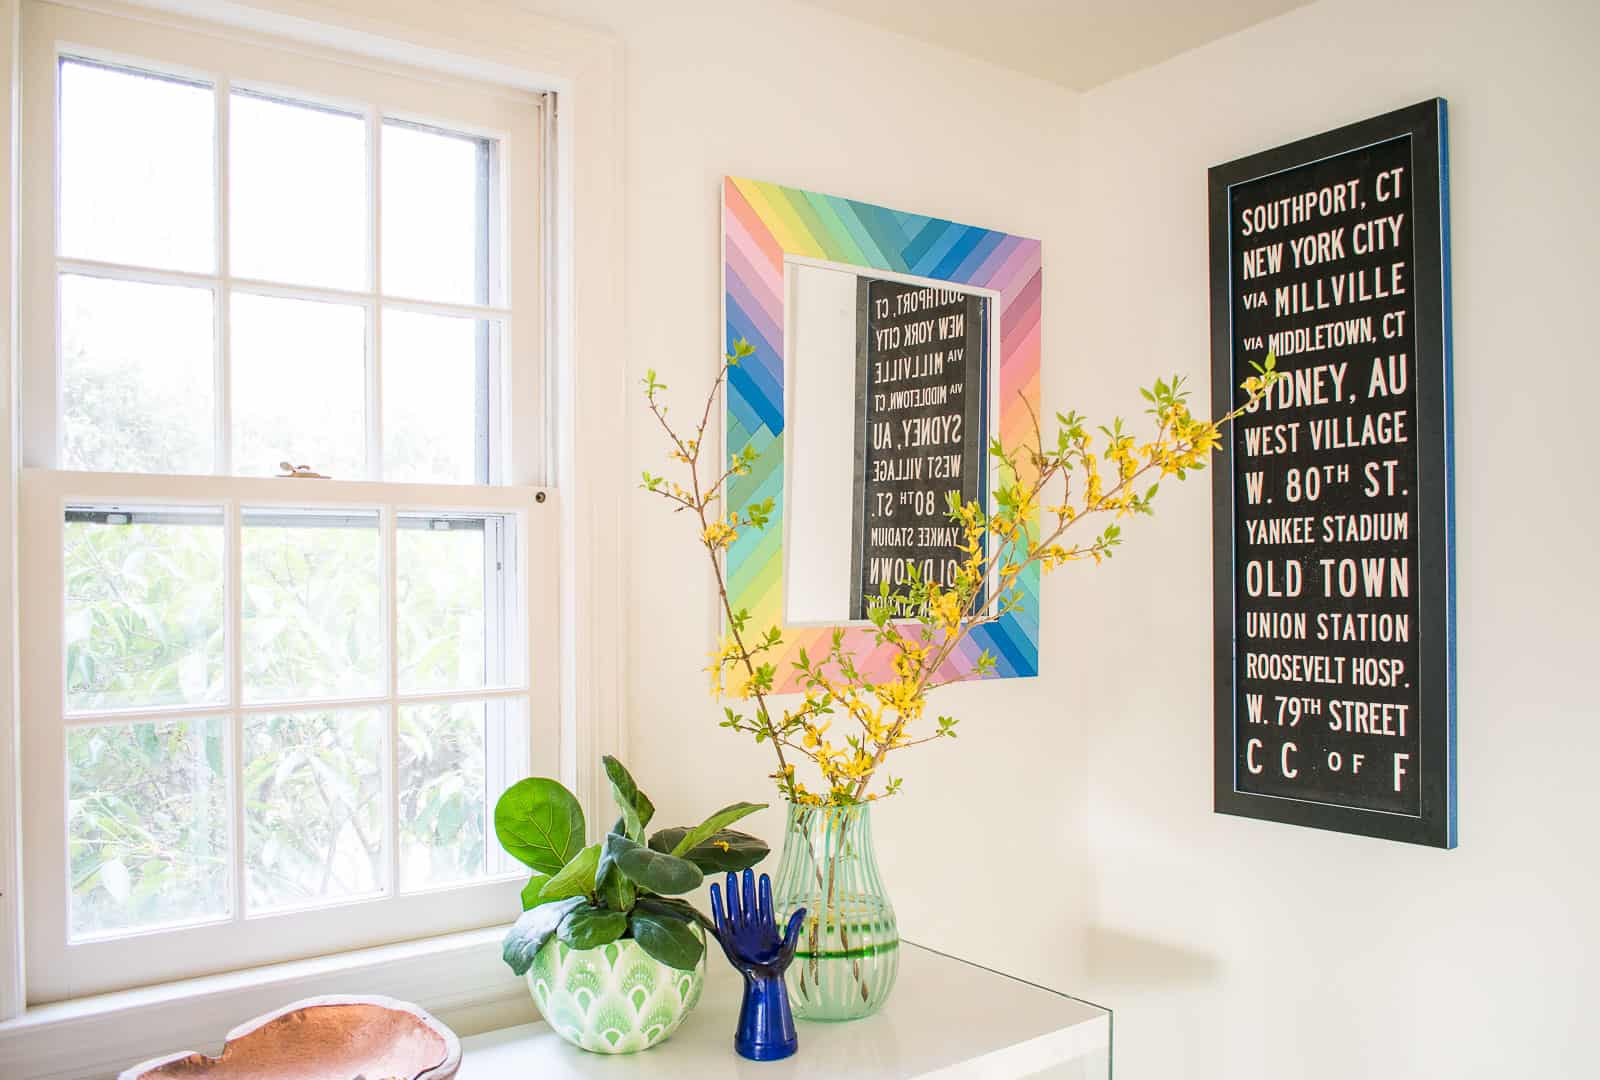
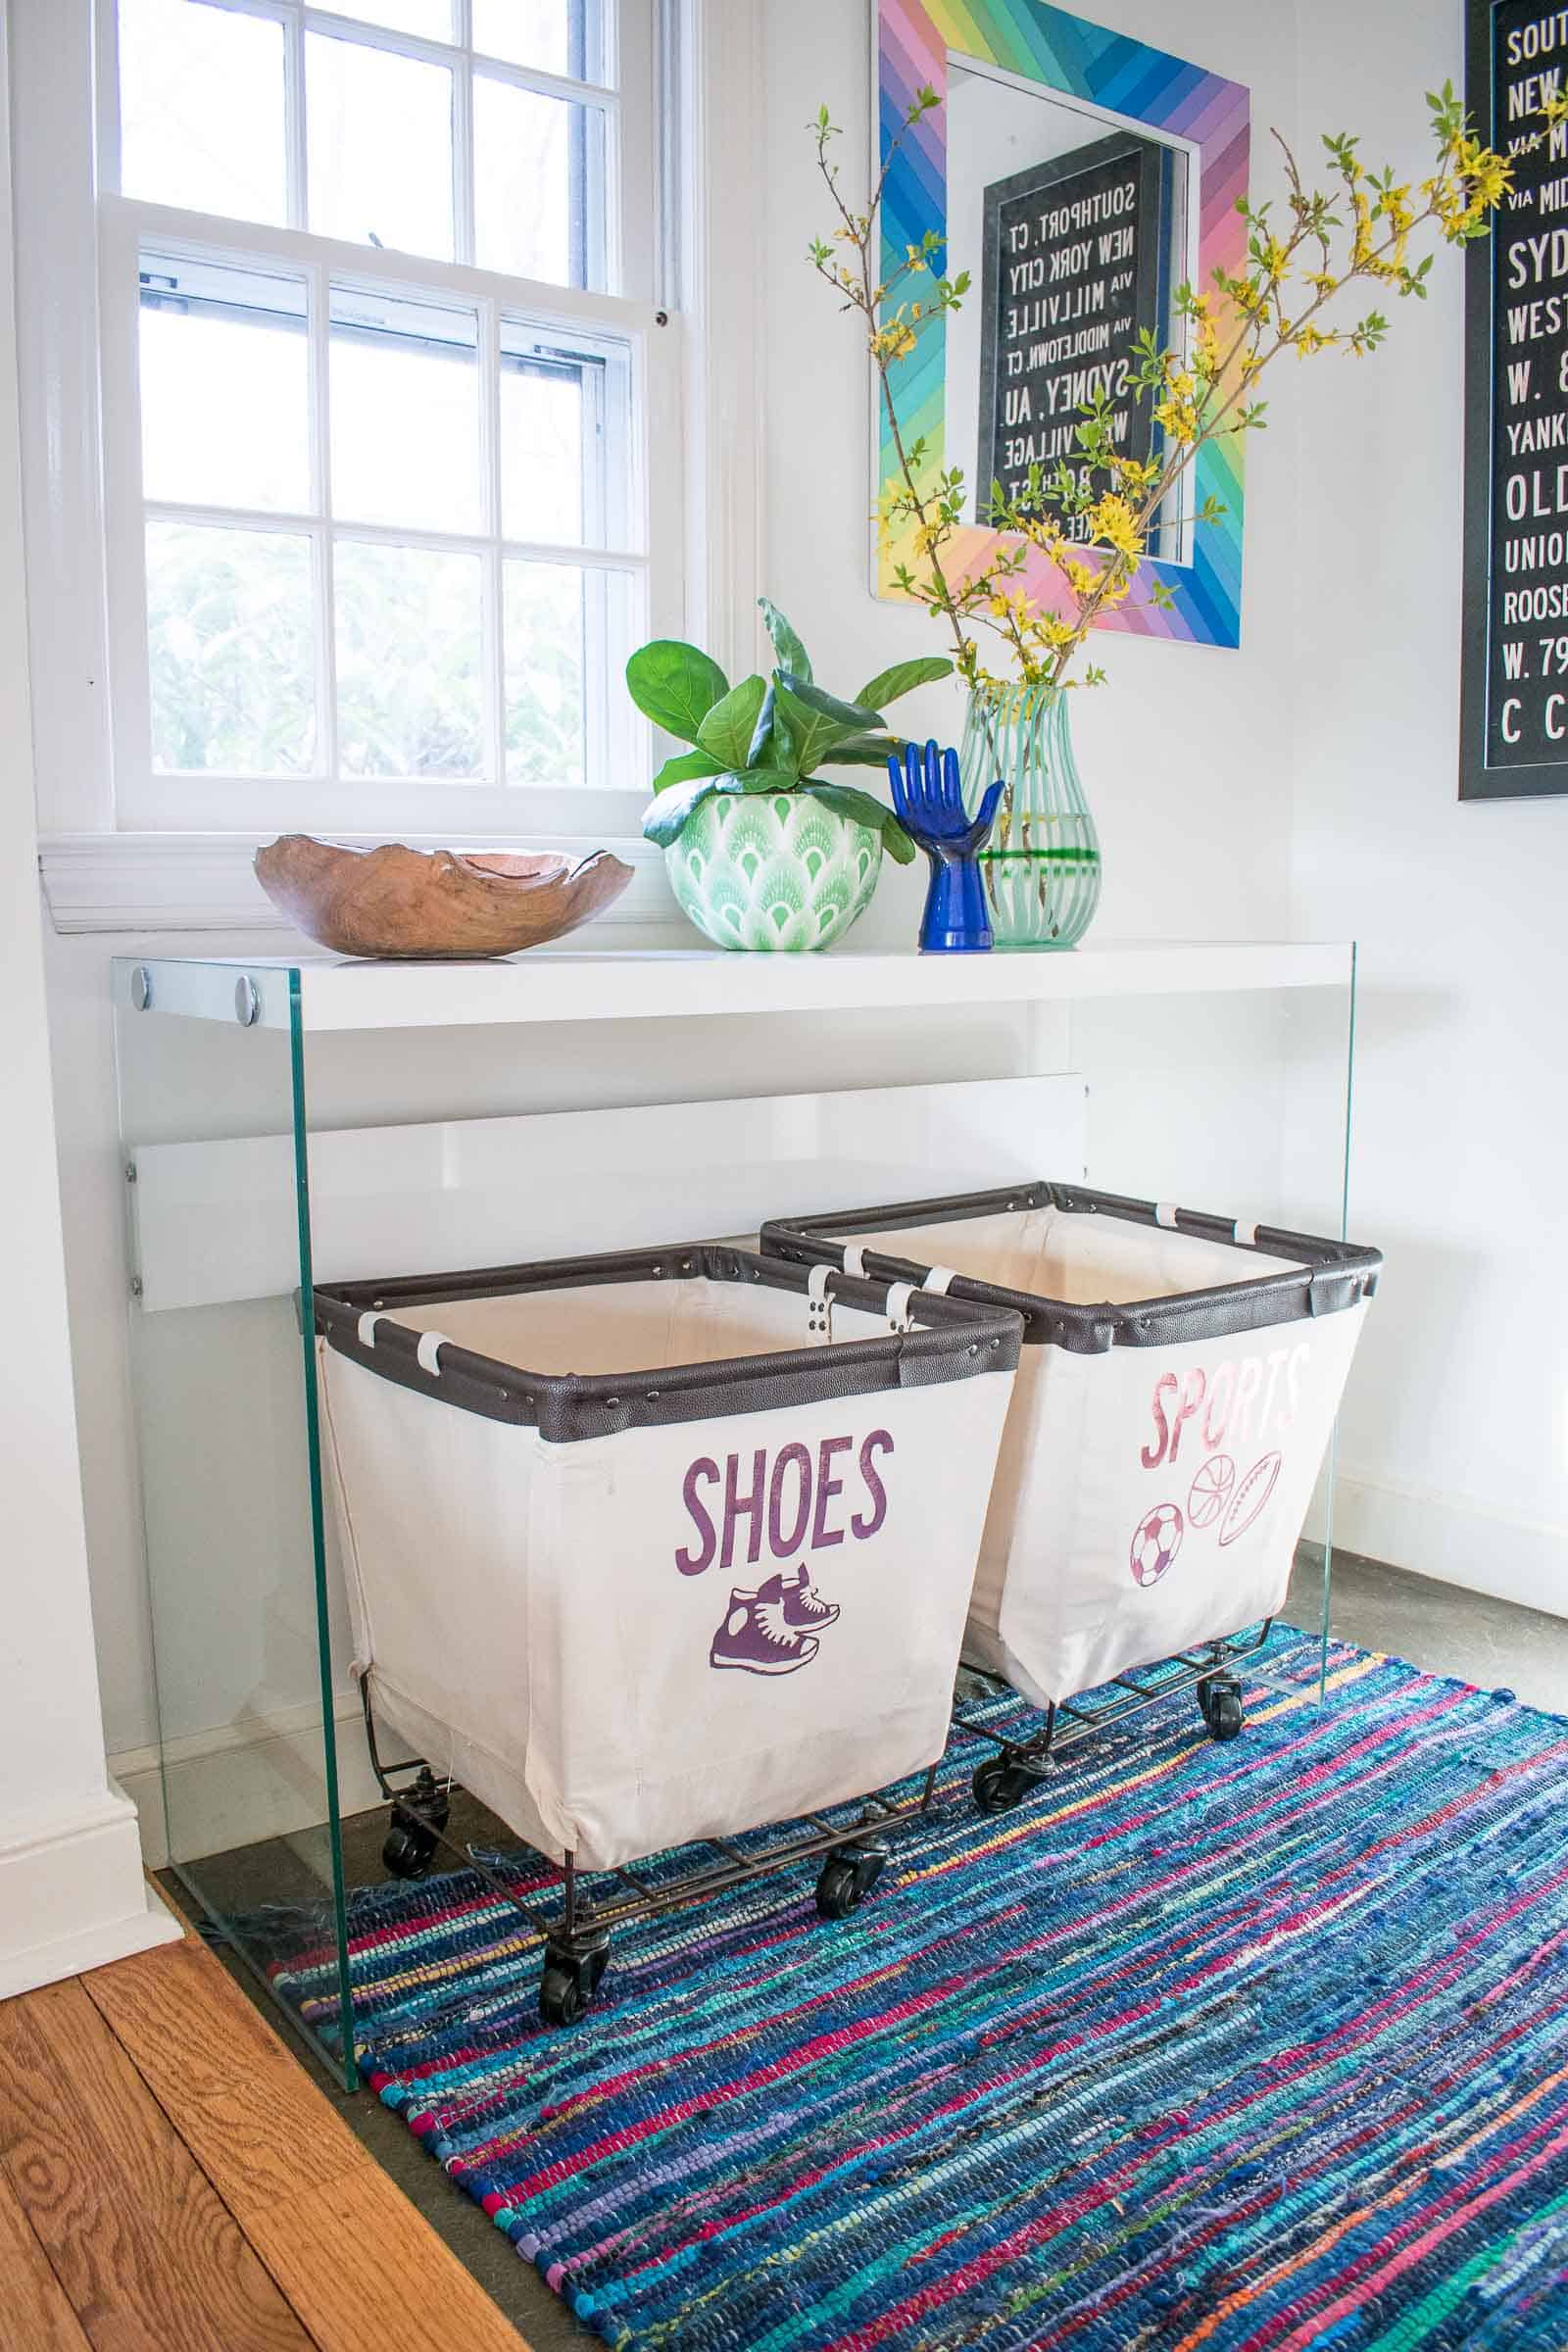
First, let’s talk about the foyer. It’s a small little space, but ends up with lots of items dumped on the ground: shoes, backpacks, cardboard boxes, etc. It was also the same greige that the rest of this room used to be which, turns out, was surprisingly dark. First order of business was painting, but then I wanted to bring in some storage and my DIY mirror.
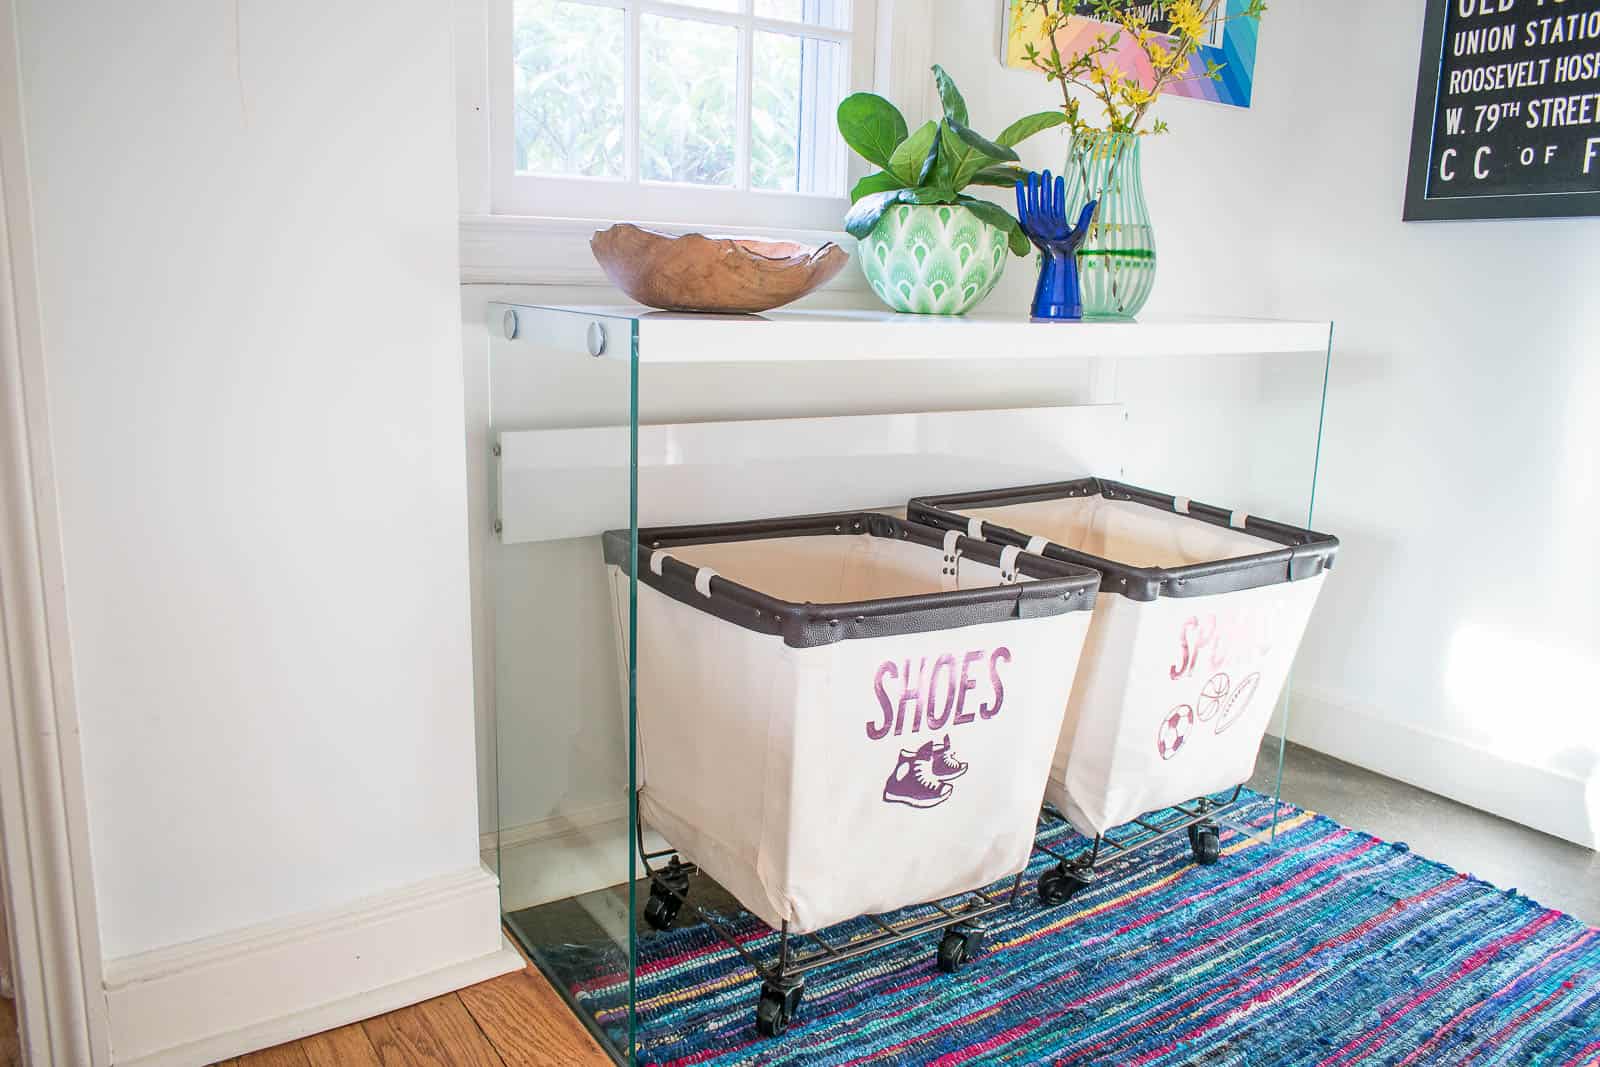
We had the bins leftover from my laundry room/ guest room makeover in the old house. You can see that reveal here. I wanted to bring in some color (obviously) so figured I’d add some labels to the bins with my Cricut. In a non-quarantine world, I would have looked for a brighter blue to tie the bins into the family room, but… the only iron on vinyl I had on hand was a metallic pink. I tried to echo the font of that subway art above and added graphics so my non-readers don’t have any excuses for not putting things away!
It’s a little hard to see, but I also added some tape to the outside and inside edges of that black subway frame just to break up the black a bit. I considered a bright pink, but didn’t have the right shade… so I pulled the blue from the rest of the room behind me.
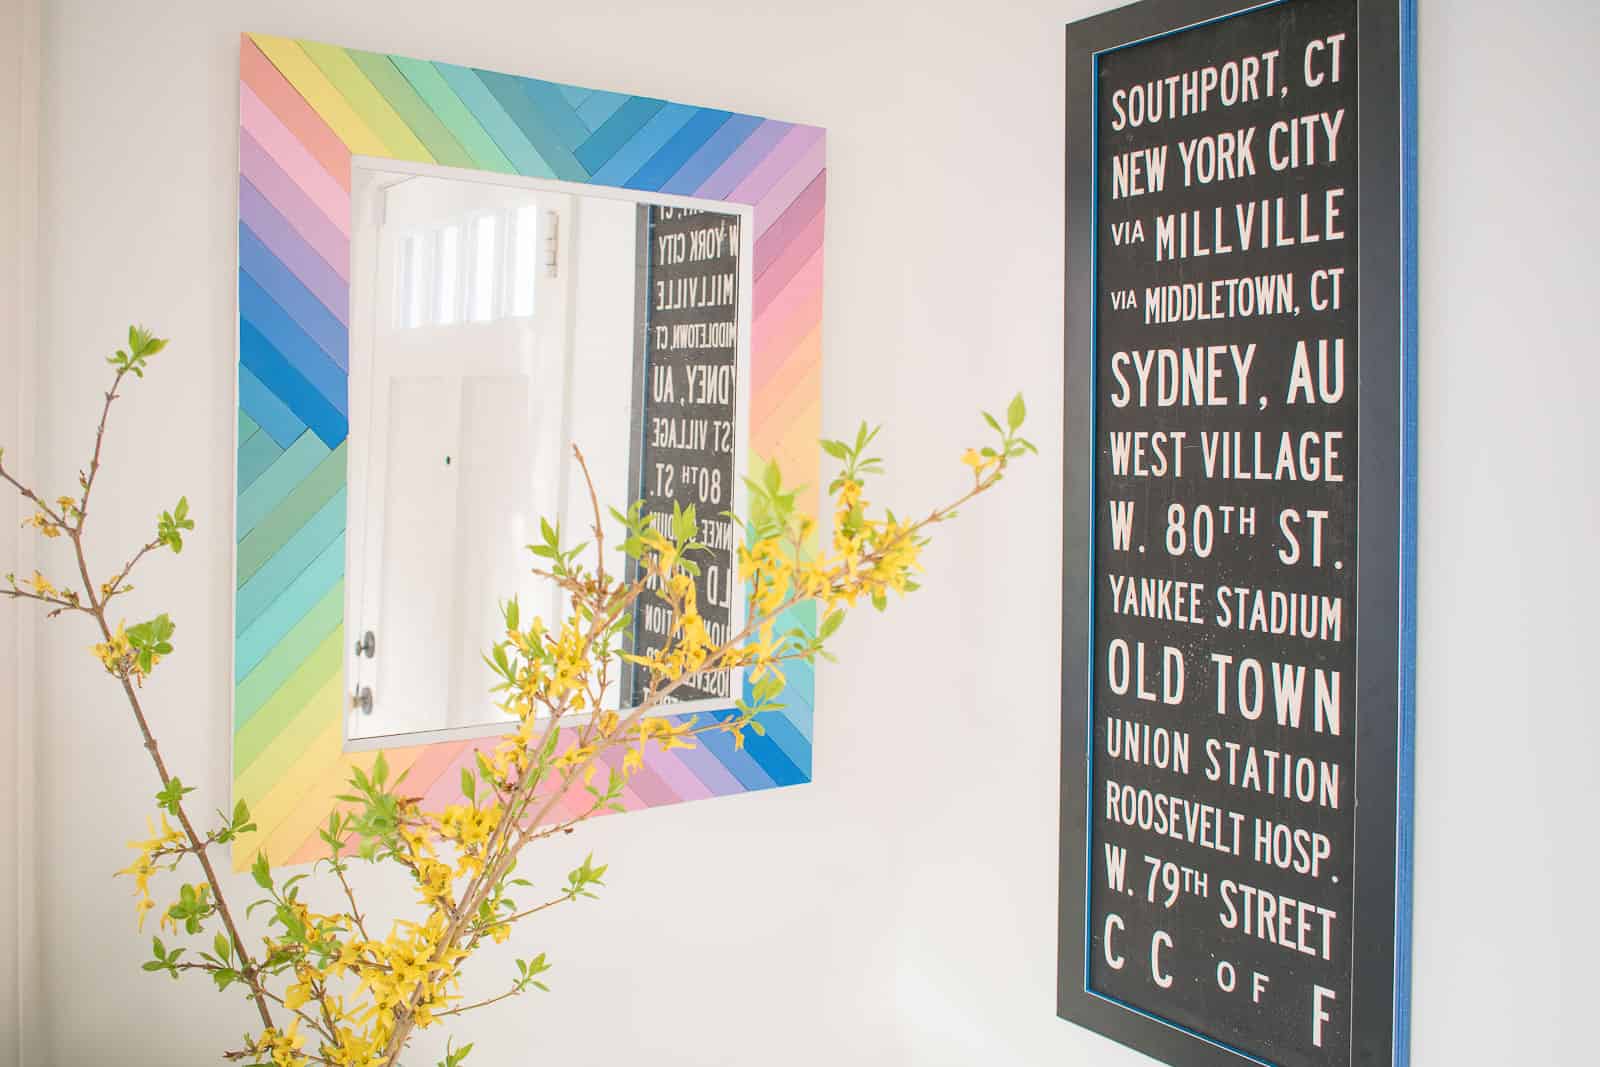
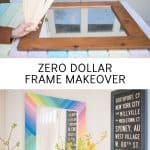
DIY Rainbow Mirror Frame
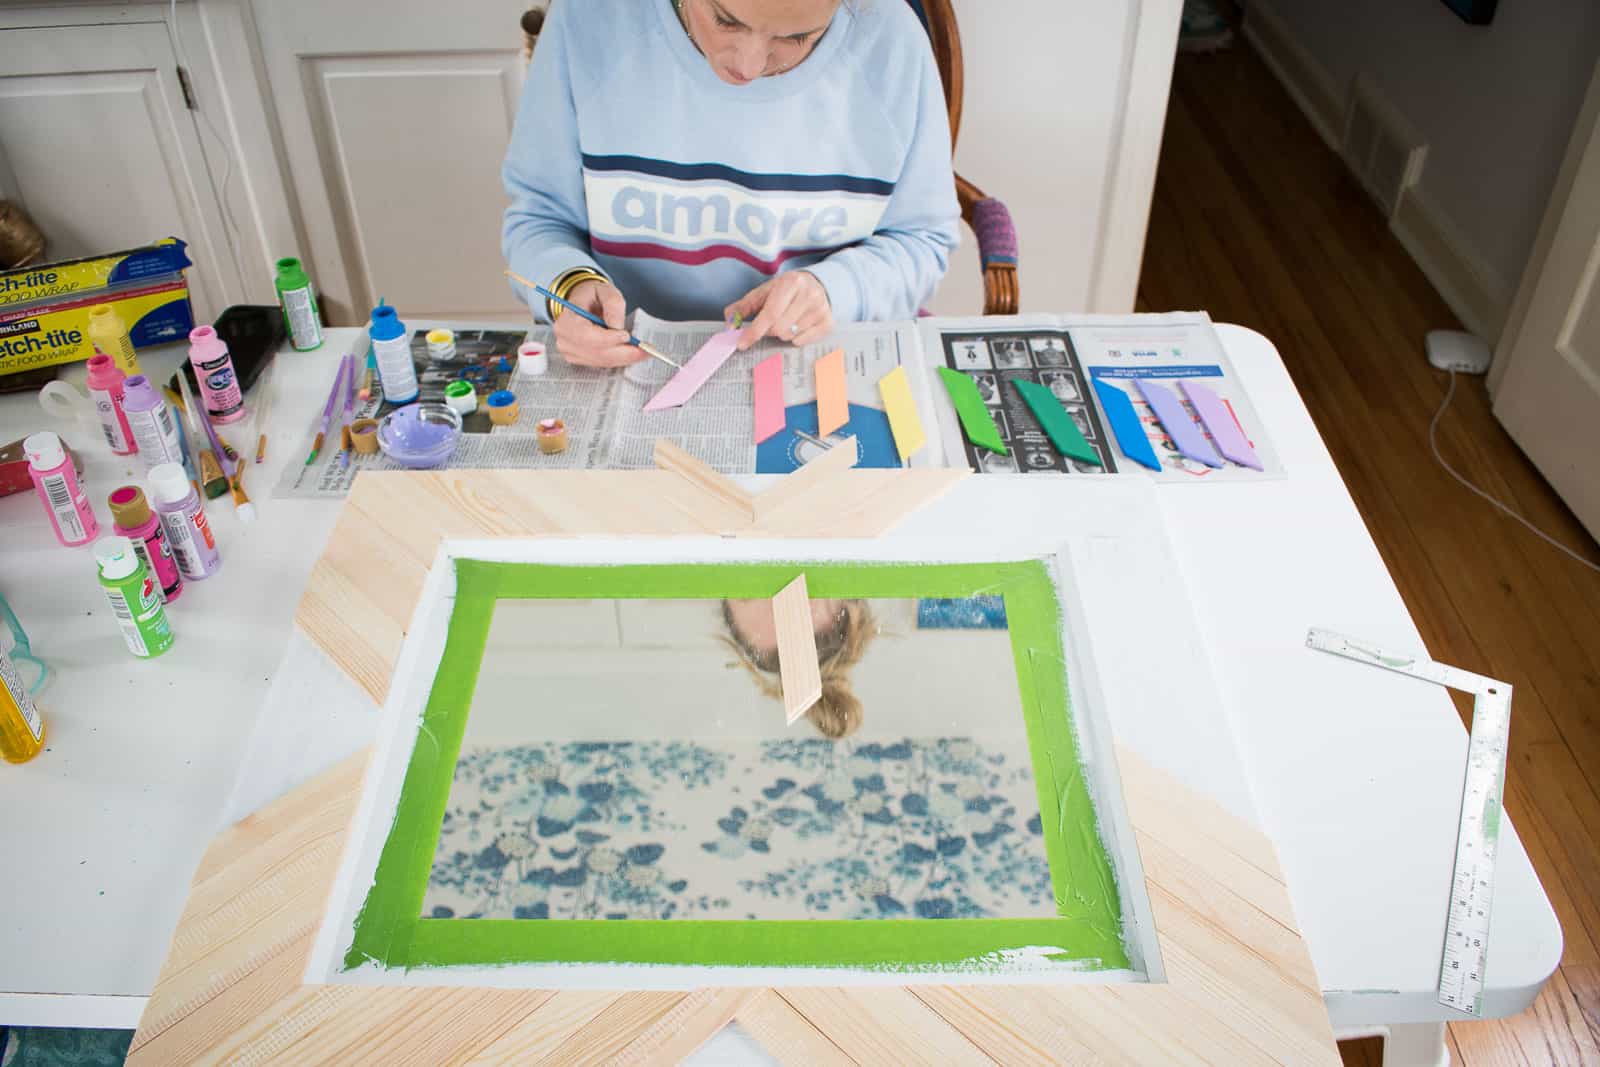
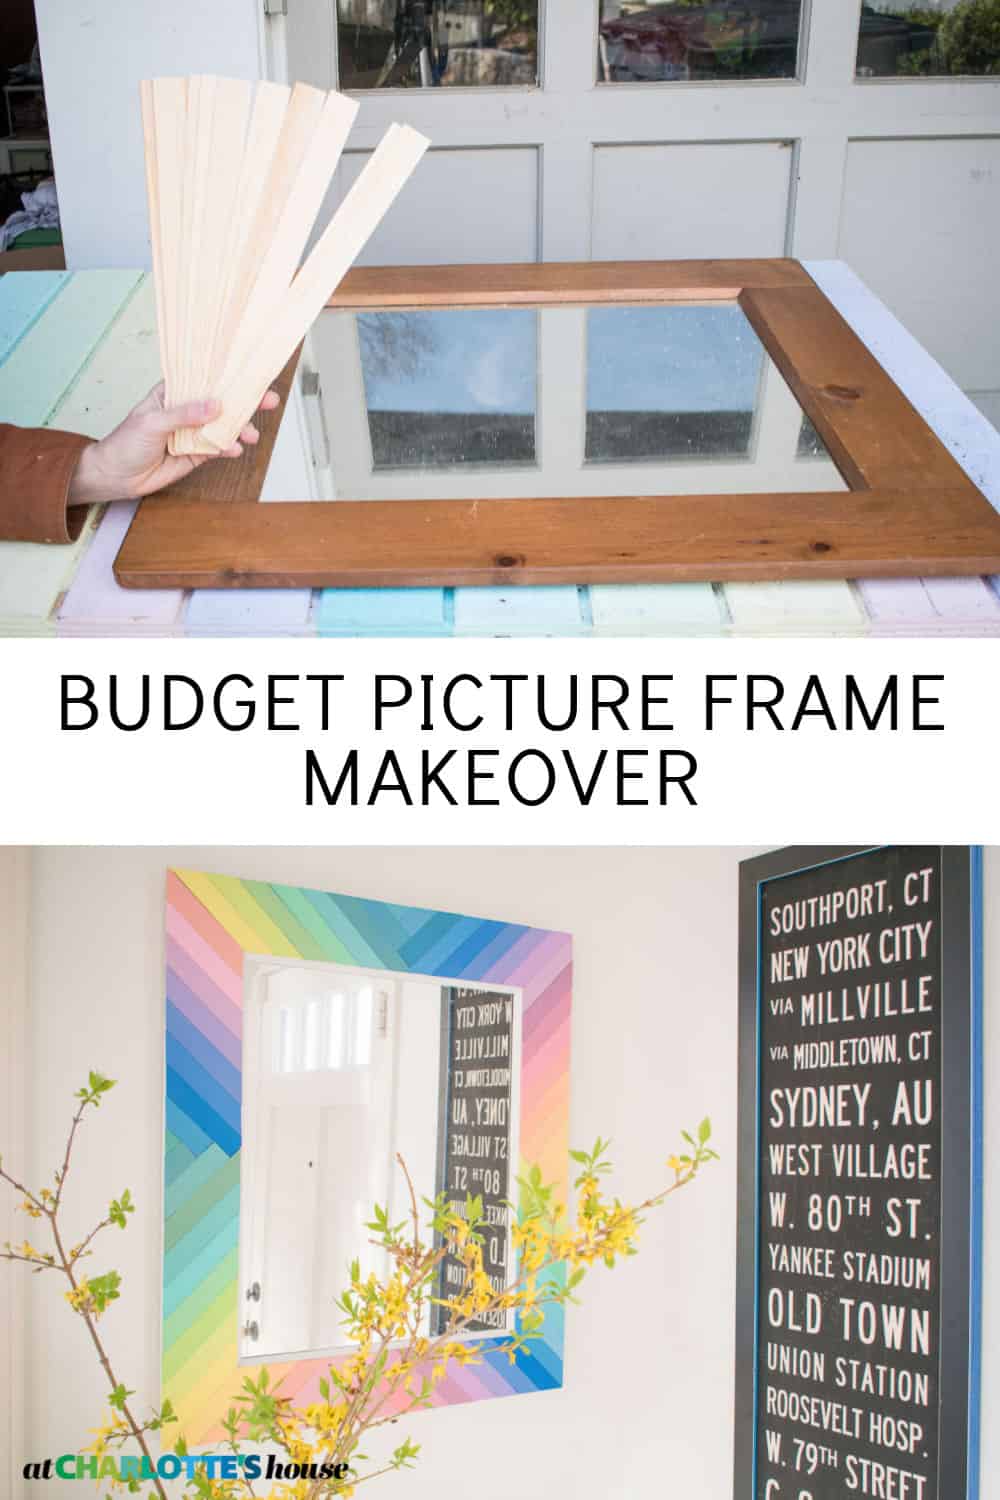
I’ve kept you waiting long enough… I suspect you want to see how I made that fun colorful mirror. For free. Yeah… you read that correctly… I made over that mirror for free. I originally made a mirror like this when I was on Rachael Ray and was challenged to make over an entire bathroom for $65. The magic ingredient is: paint stirrers. For Rachael Ray I went around to my local paint stores and asked them to give me as many as they could. Some gave me 5, others gave me 2 dozen. It all kind of depends. If you don’t feel like driving all over town to beg for paint stirrers, Home Depot sells them in packs of ten for something like $1.
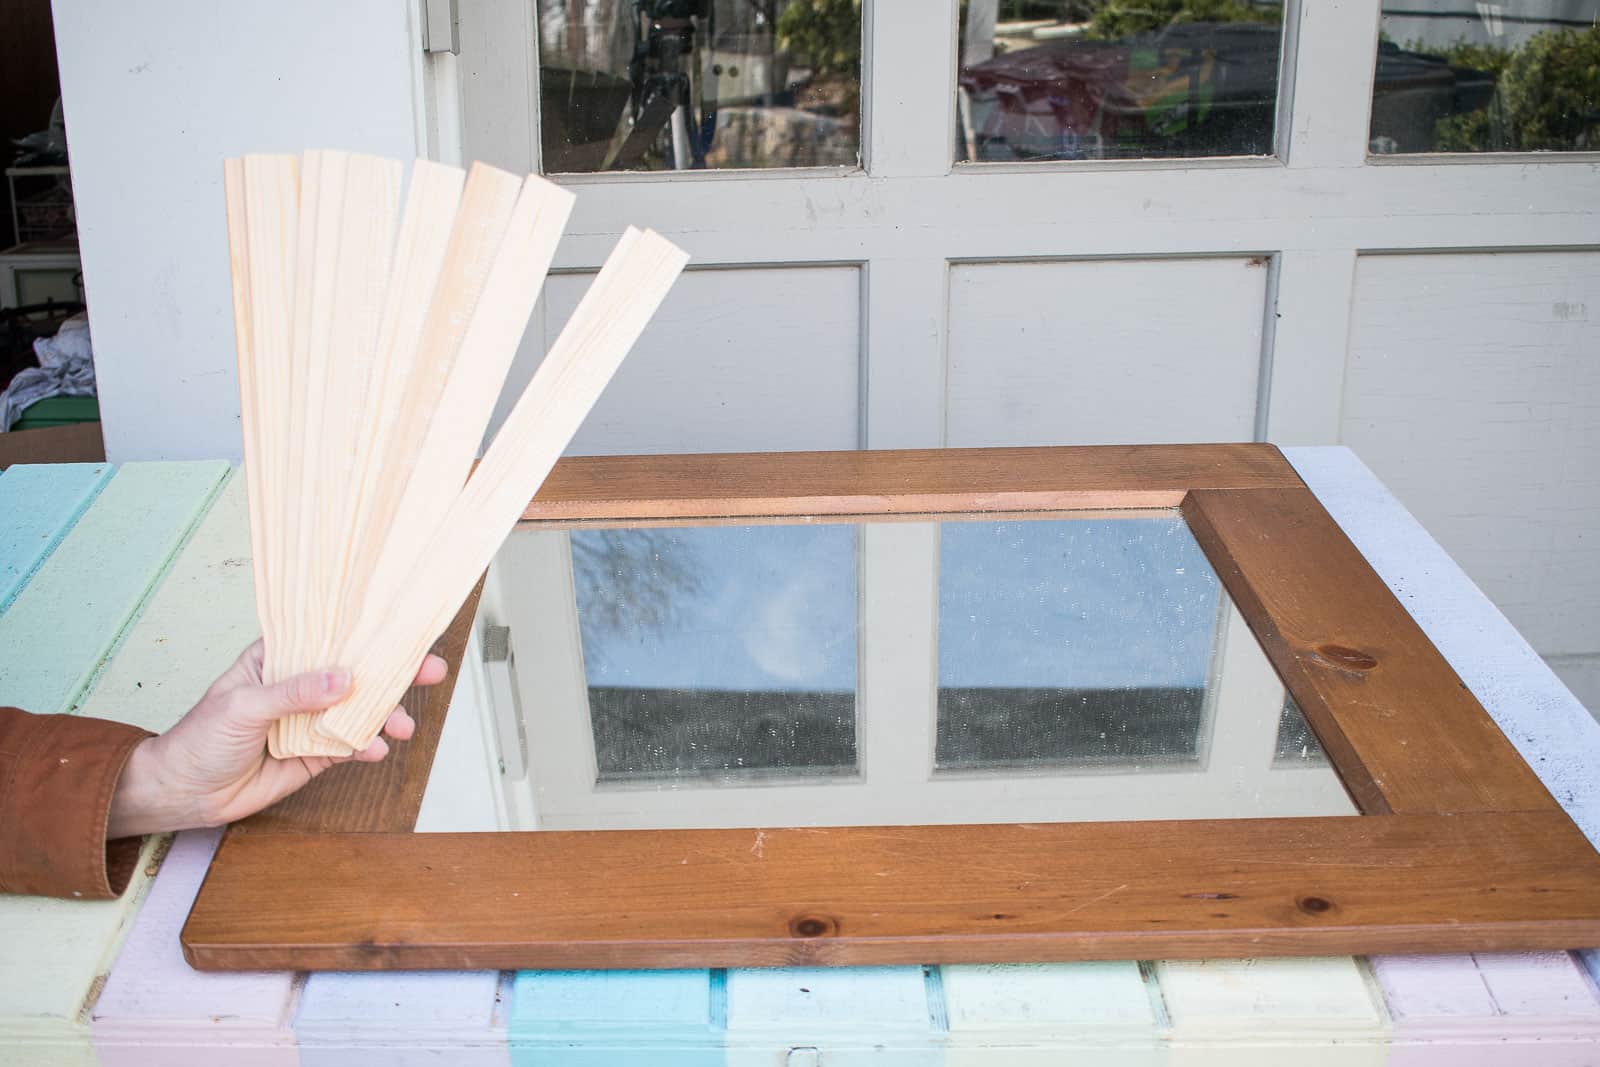
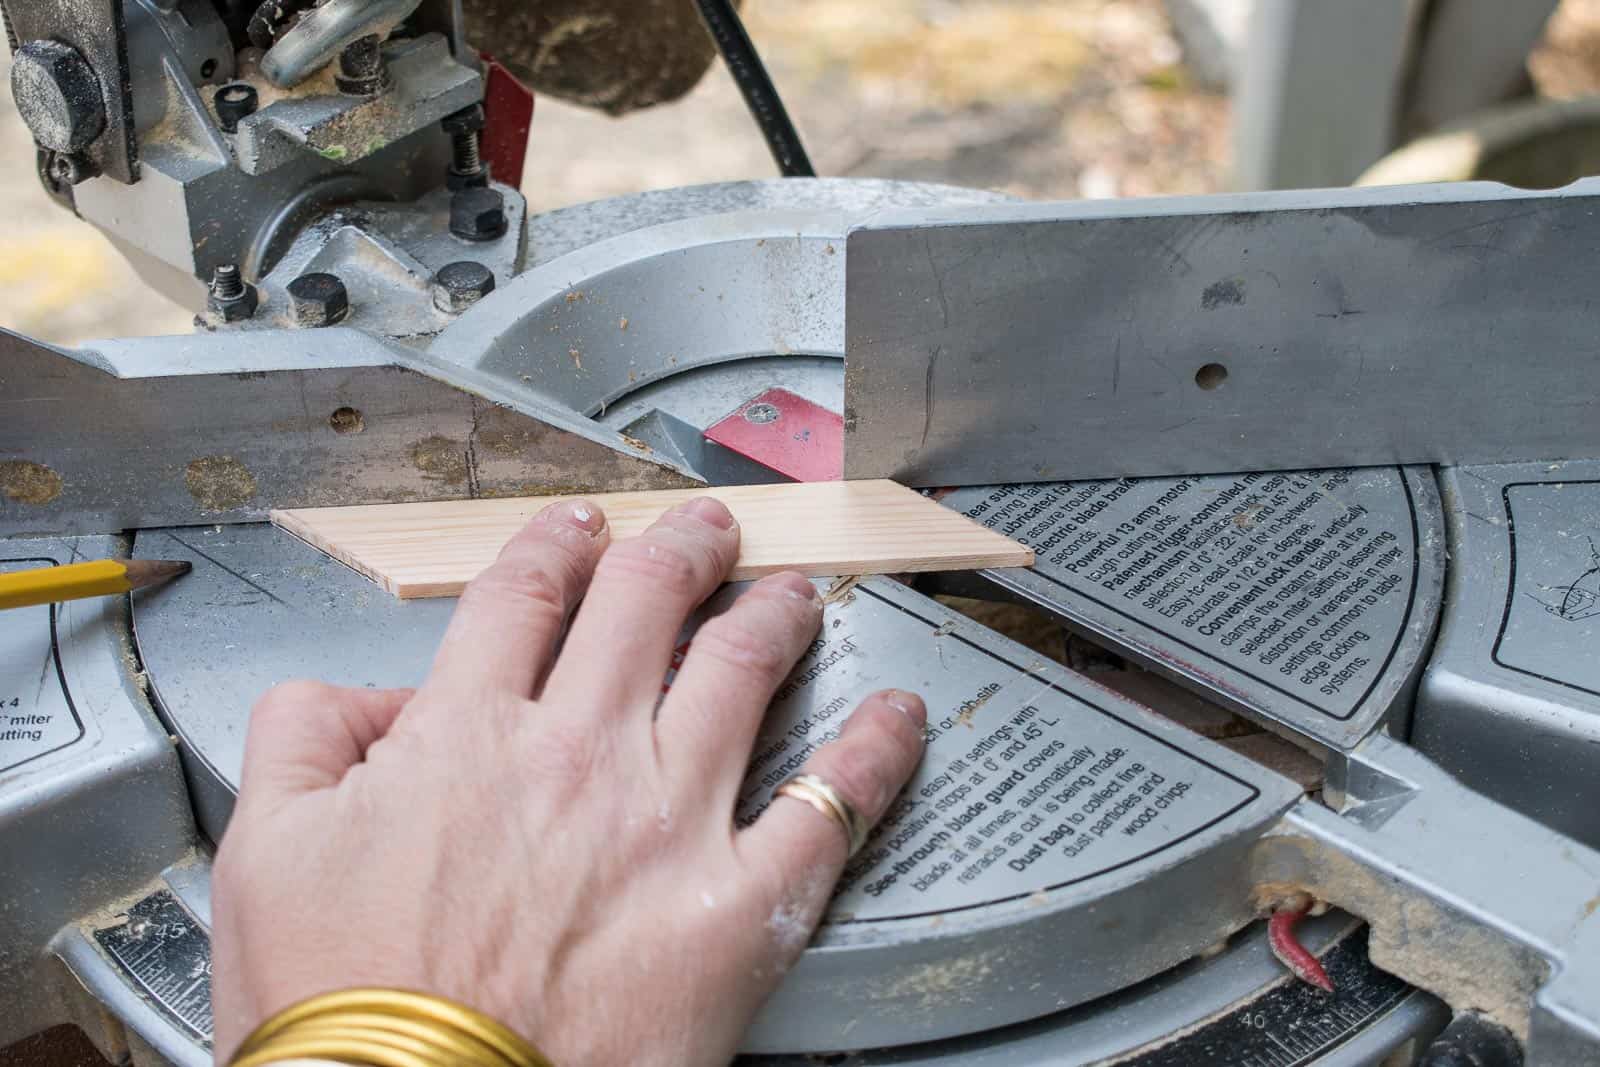
Step 1. Cut the Paint Stirrers
I cut mine at 45 degrees on either end and opted to have them angled in towards the middle of each side. You can always keep them all facing the same way so they just look like angled stripes. I made a pencil mark on my saw so that I could line up my paint stirrers each time without measuring each one individually.
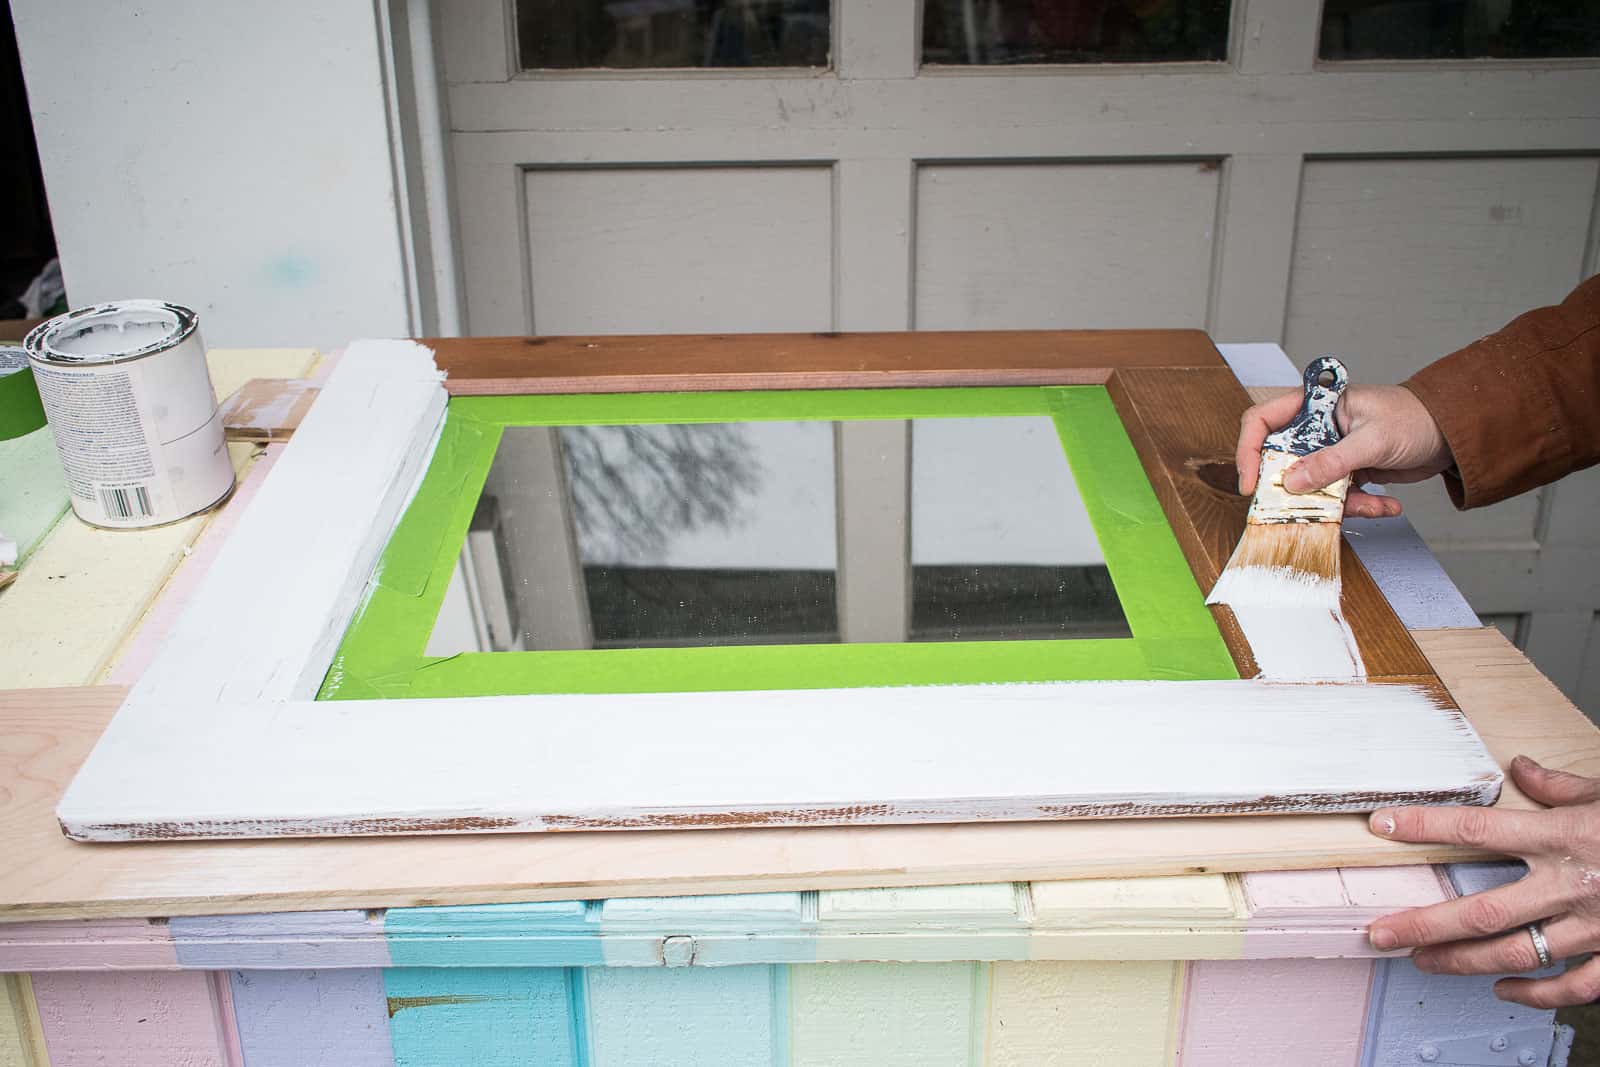
Step 2. Prep the Mirror
Lightly sand the frame and paint it. I used a white paint because I knew it would be visible on the inside rim of the frame and the outside edge of the frame. I painted the whole thing in case there were any gapes between the paint stirrers.
Step 3. Paint the Paint Stirrers
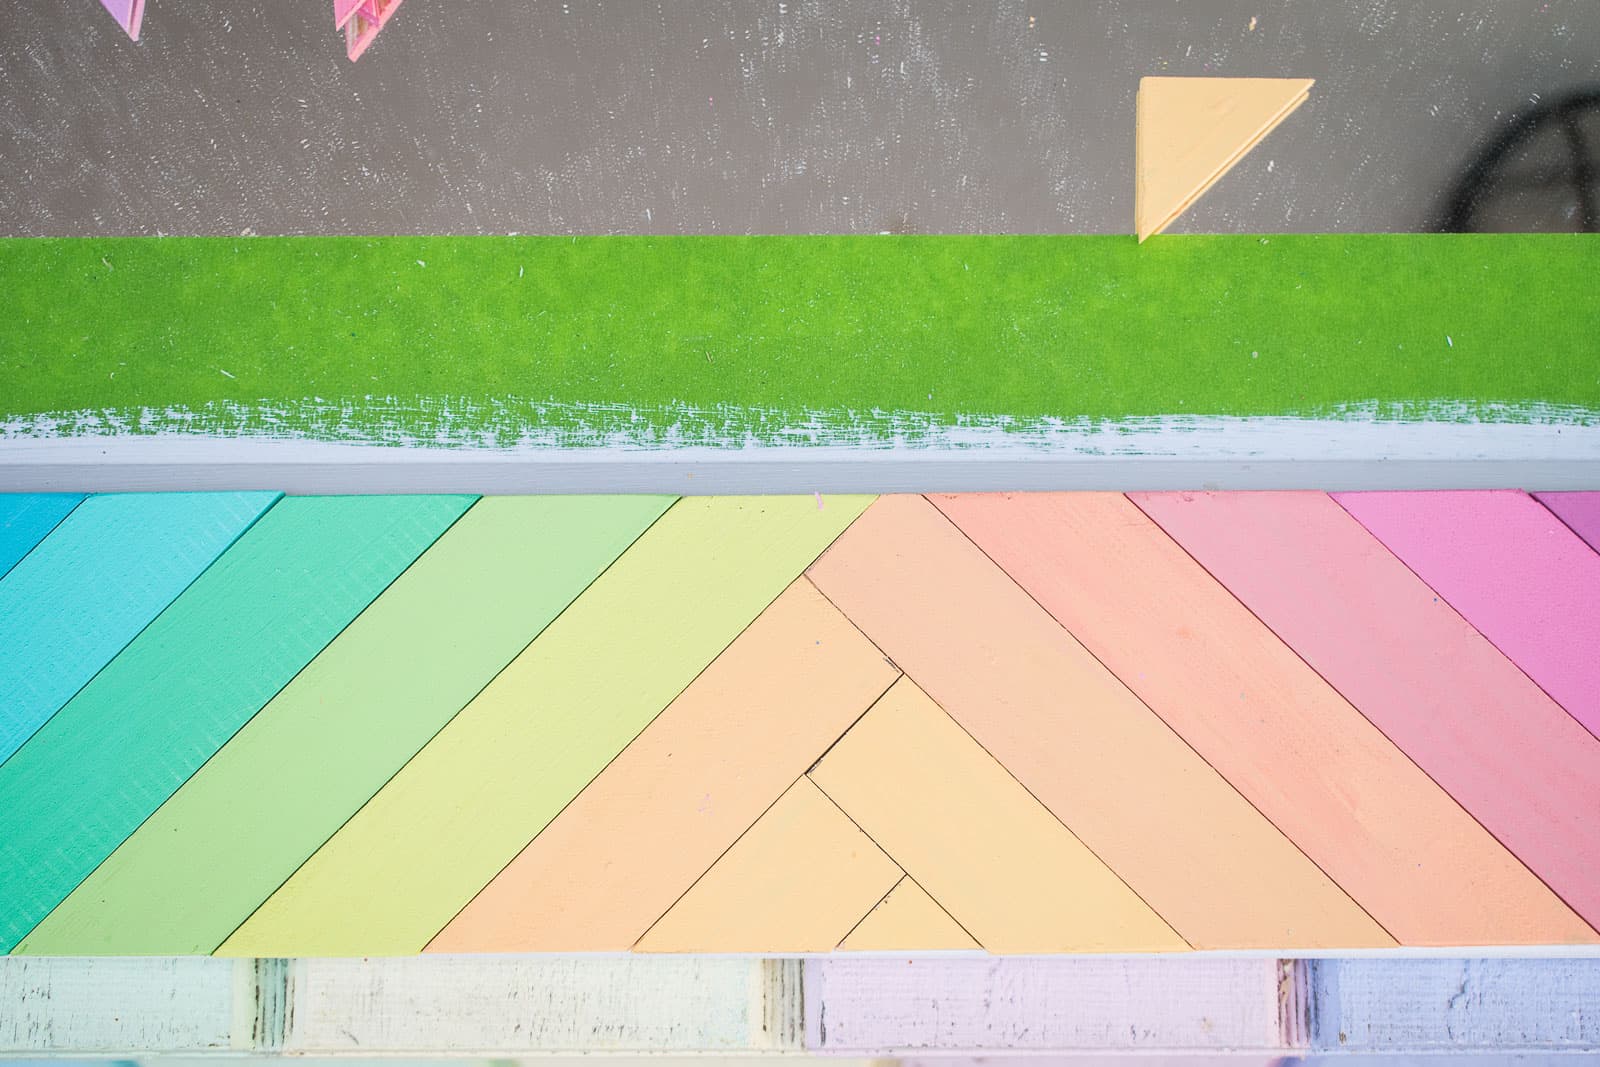
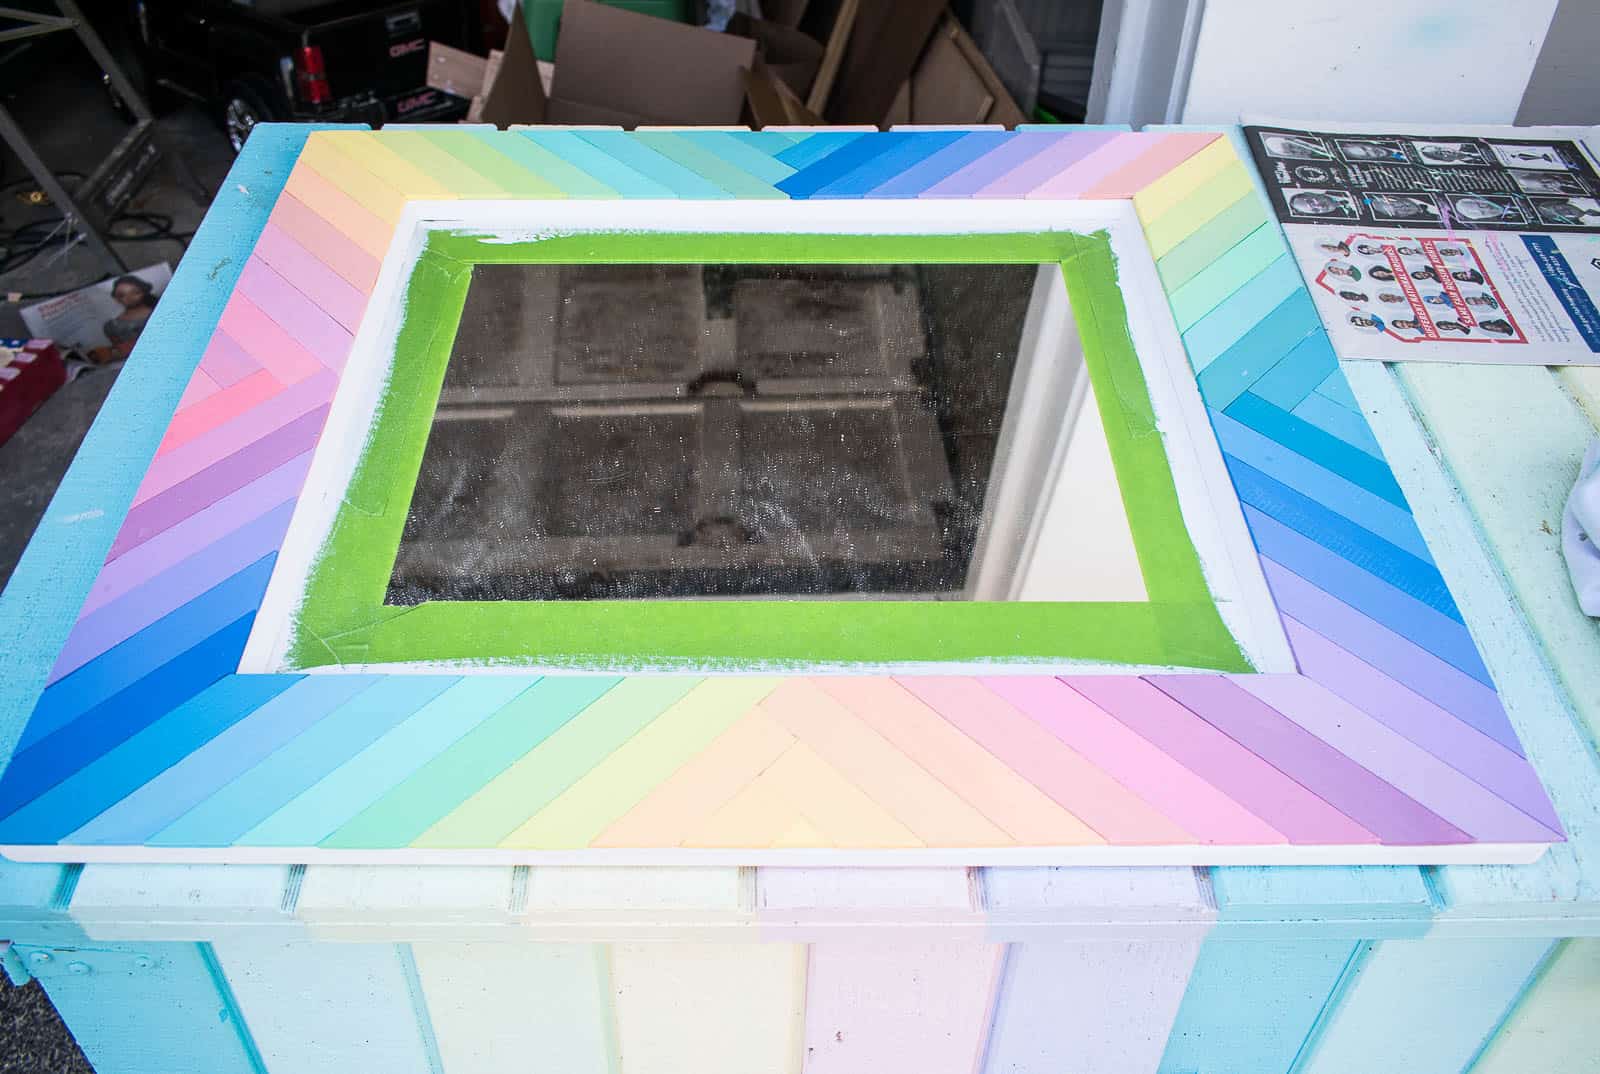
Here’s where I struggled the most: which colors. I started by painting my stirrers a basic ROYGBIV rainbow… and it felt a little cliche. Like a primary school rainbow. There are lots of colors in the room that I wanted to reference, but the main colors are blue, fuchsia and the purple ombre cabinet. I didn’t want to limit my pallet to those three so I ended up using all the colors but added maaaaany different hues to the mix. It’s A LOT of color… but I don’t hate the way it looks in the corner.

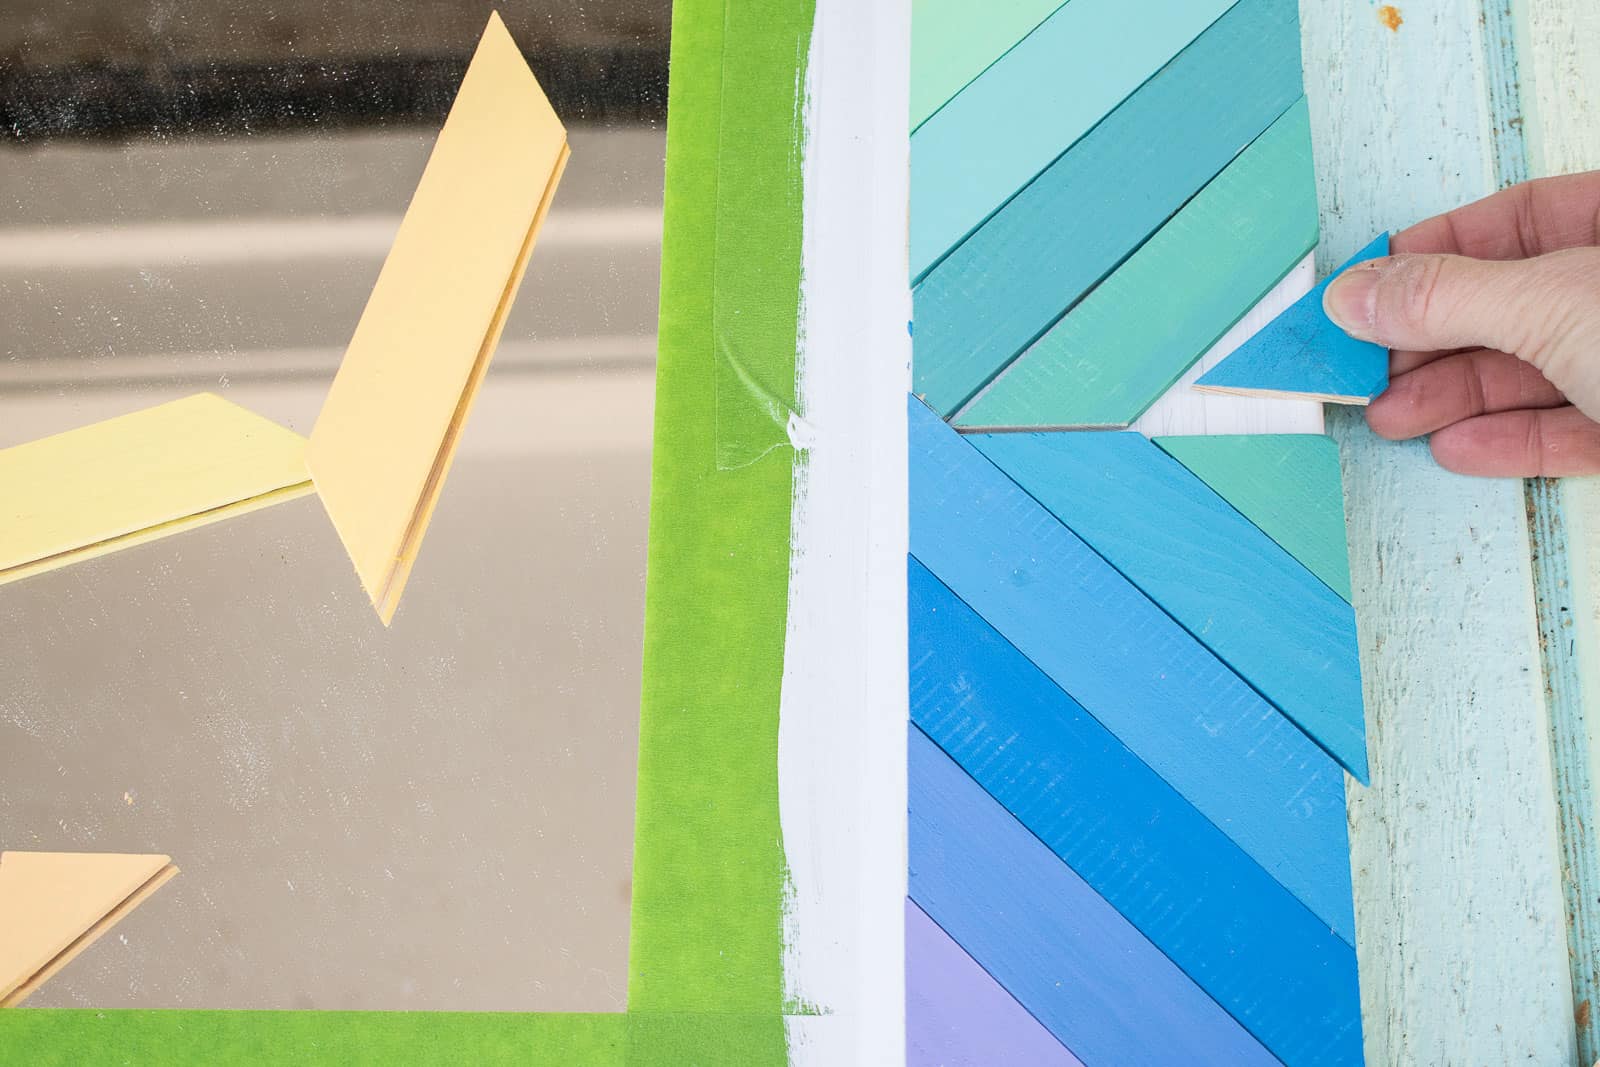
Step 4. Glue the Paint Stirrers in place
I used wood glue to glue my paint stirrers in place. For the center of each side where the stirrers meet, I had to cut the stirrers down. I started by lining up the angles down the middle (first photo) but ultimately opted to stagger them at right angles because they don’t come together exactly in the middle of the frame (second photo).
Aaaand… that’s it. I didn’t give them a top coat or anything… just hung the mirror and gave myself a pat on the back for my zero dollar update. Lots of ways you could arrange the paint stirrers and lots of ways you can add color (or not… stain would look amazing too!)
This little corner in our house looks so much brighter and happier… all it took was a coat of paint and a bit of color. The biggest pain point was the lack of storage in this part of the house. We have a mudroom so I was resistant to creating a drop spot for shoes, etc. here in the foyer… but after living here for a year, it was clear that the space needed *some* type of storage. I also brought out that chindi rug from storage and I’m not sure what took me so long… color for the win. Always.


Oh hello that’s the cutest mirror ever! I love the geometric shape you added with the paint sticks. Geniusss!
Love this! The rug really tied it all up!