
How to Prep and Tile a Floor
Psssst… this post *might* contain affiliate links: see my disclosure here.
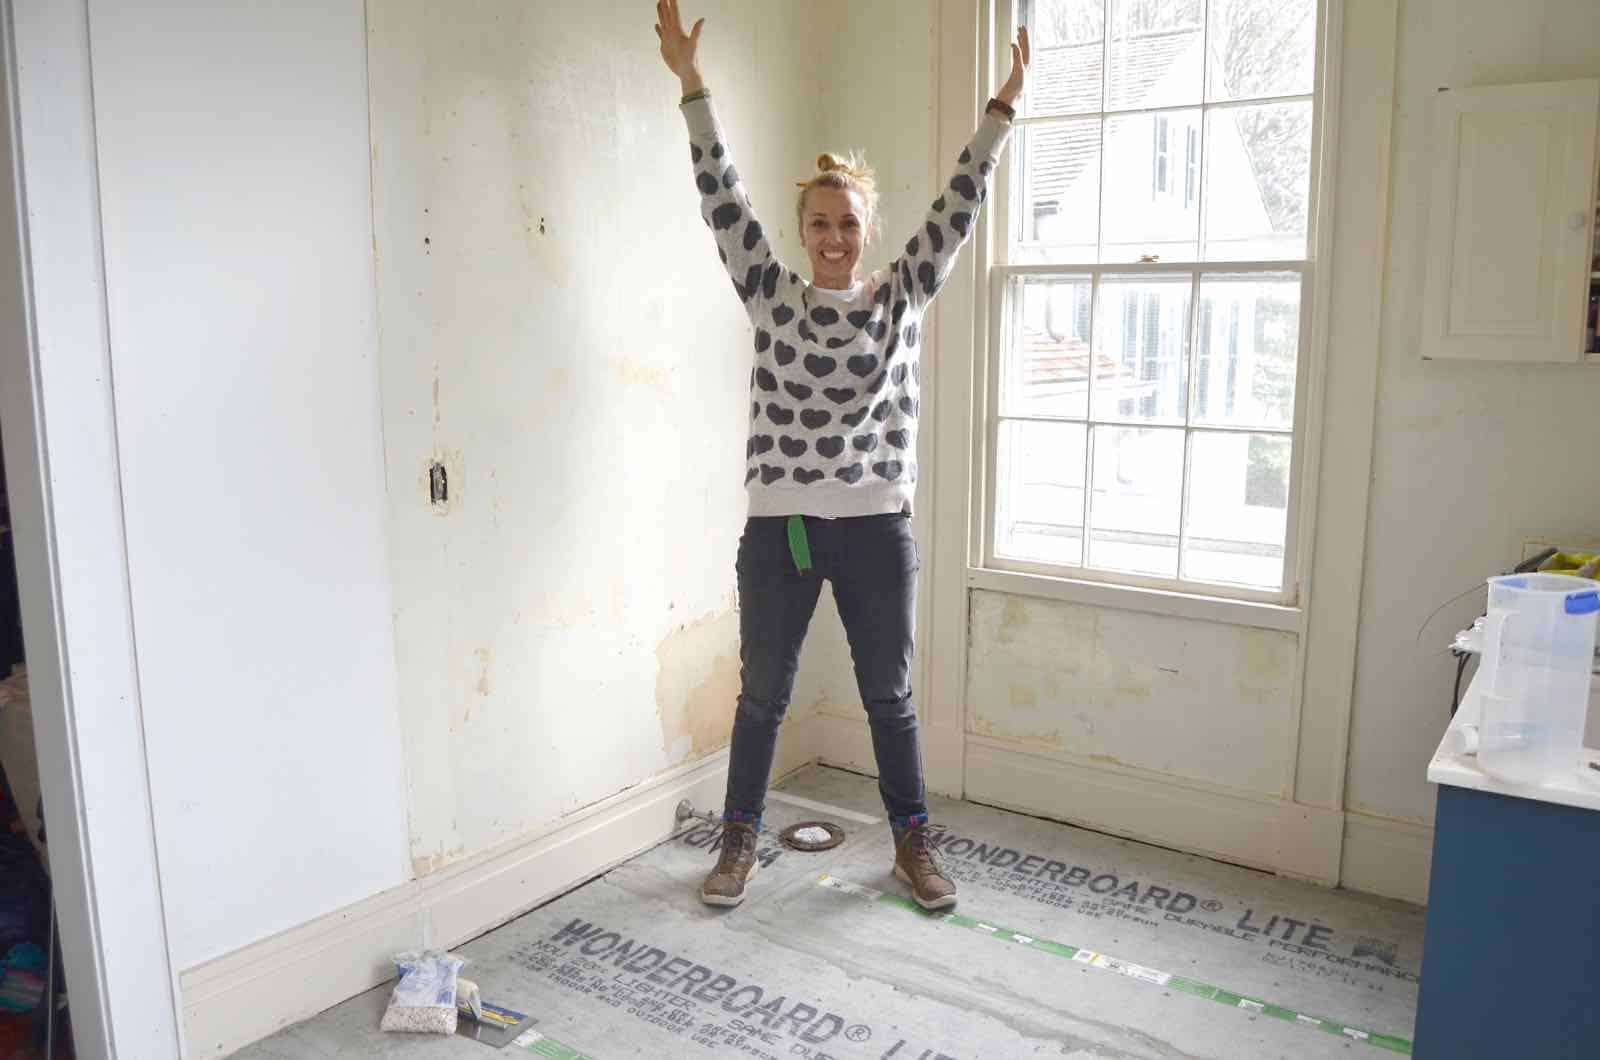
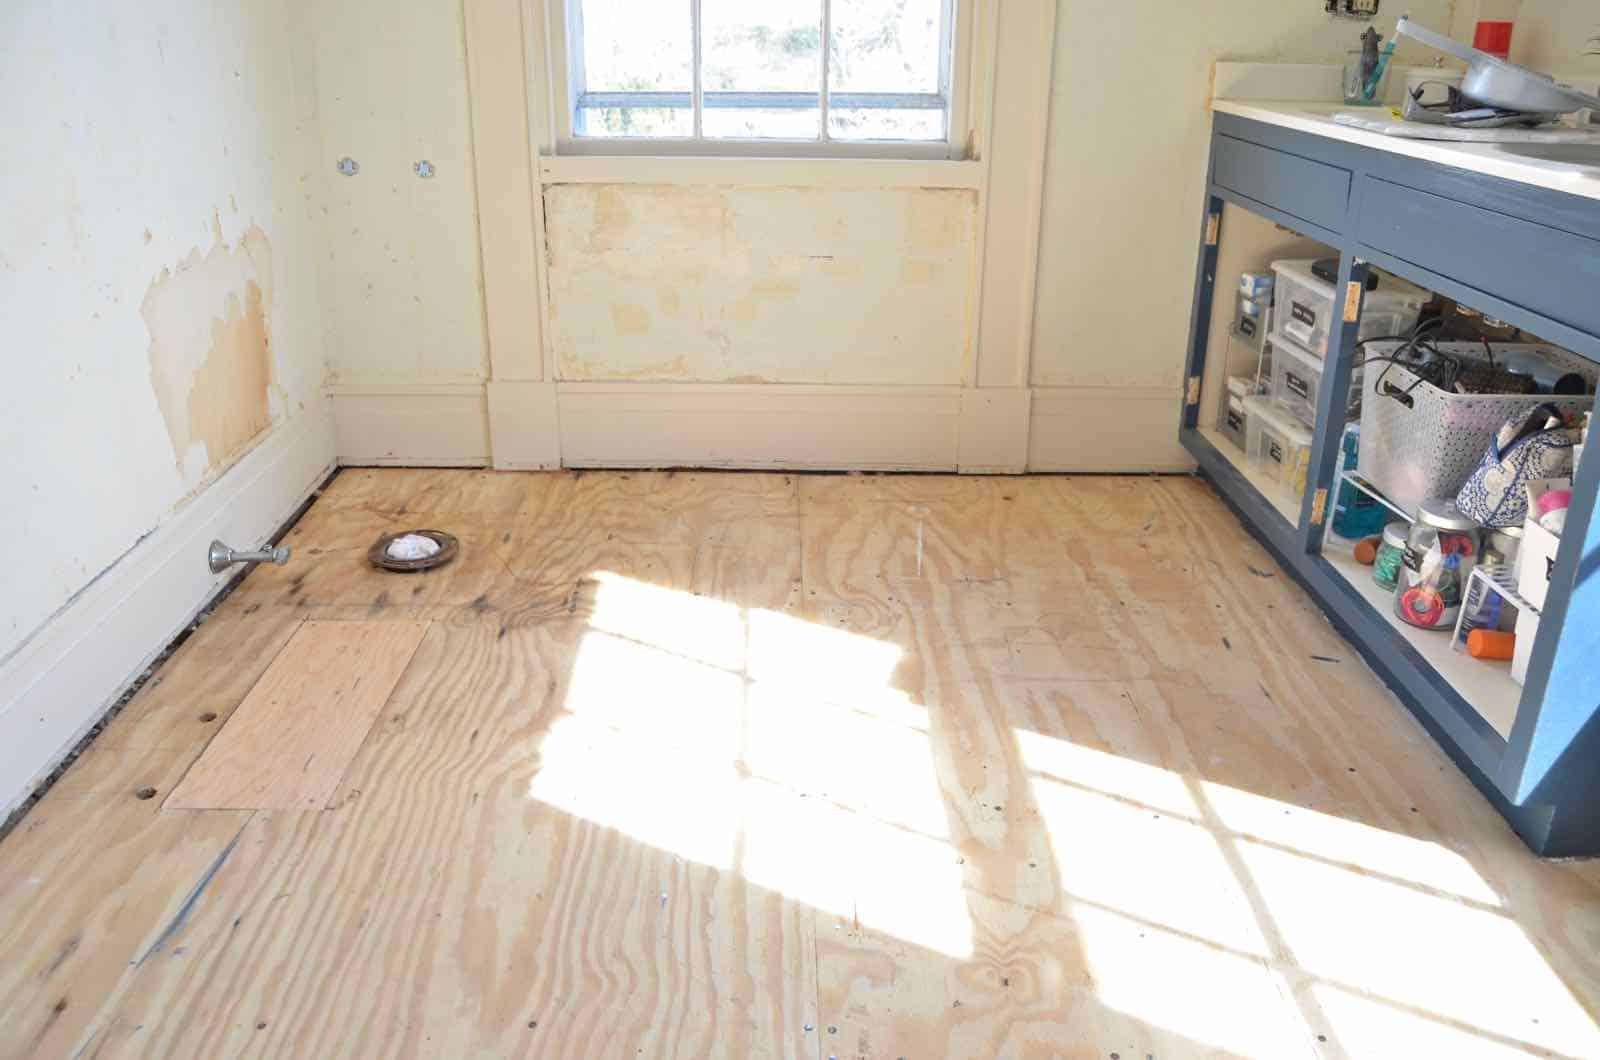
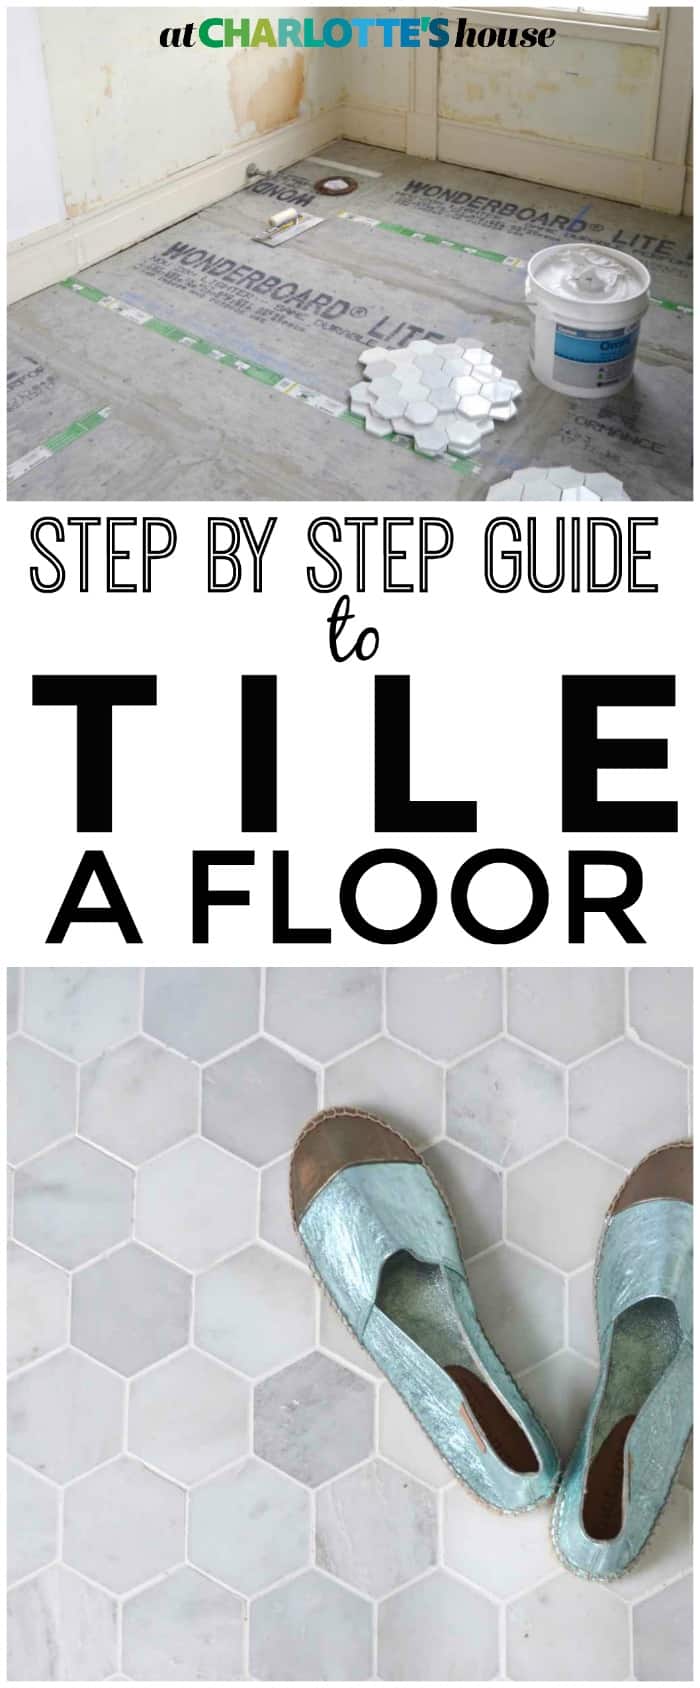
Gah! I’ve been radio silent on the master bath front, and I’m SO sorry! I’ve actually had much of the space done for a couple of weeks, and I’m waiting on ONE piece of art to photograph and share the reveal! Last time I gave you an update, I was talking about patching the subfloor, which meant I was ready for tile! Like any DIY, the preparation is 75% of the challenge. Tiling is no exception.
Tile Preparation Step 1
Sweep and vacuum the subfloor.
Shop my favorites!
Tile Preparation Step 2
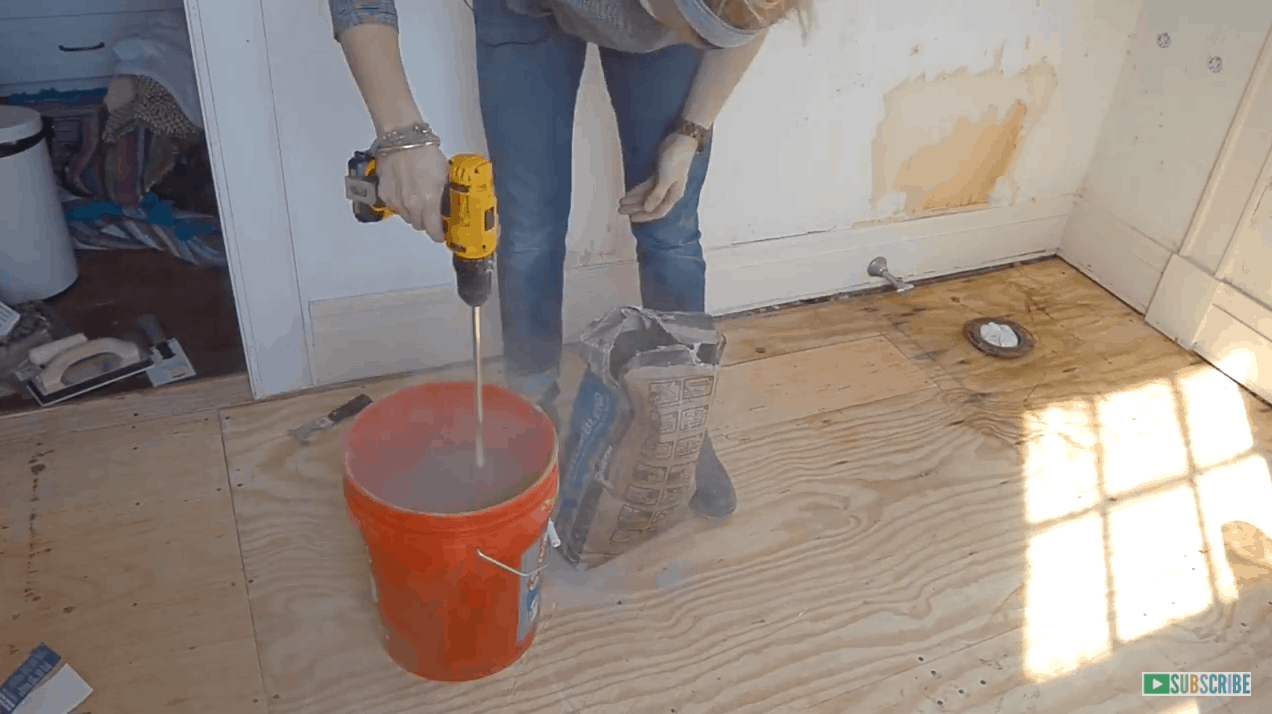
Mix your mortar according to package instructions. (Fill a pail with water and then add powder… mix with mixing drill bit until consistency of peanut butter.)
Tile Preparation Step 3
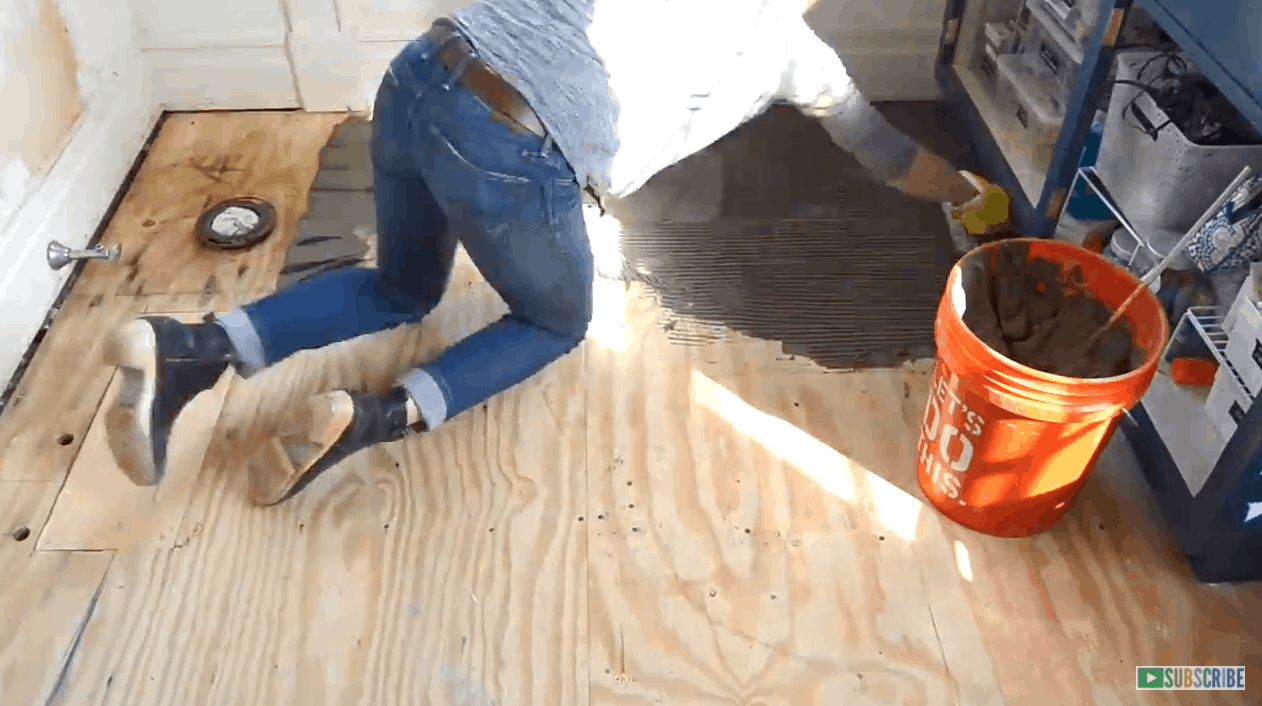
Apply mortar to subfloor and place concrete backer board on top. Use screws intended for backer board and drill through backerboard into subfloor. Leave 1/8″ gap between sheets of backer board. To cut the backerboard, use a scoring tool like this (affiliate)… use a straight edge, score the backerboard and then snap along the score line.

Tile Preparation Step 4
After 24 hours, go back and tape the seams between the backerboard sheets. If left untaped, these seams can cause cracks in your tile… no bueno. Taping the seams is quick and easy. Using a pallet knife, scrape a thin layer of mortar over the crack. Place your backerboard tape over the mortar and go back over with another layer of mortar. Using the pallet knife you should be able to get a thin smooth line.
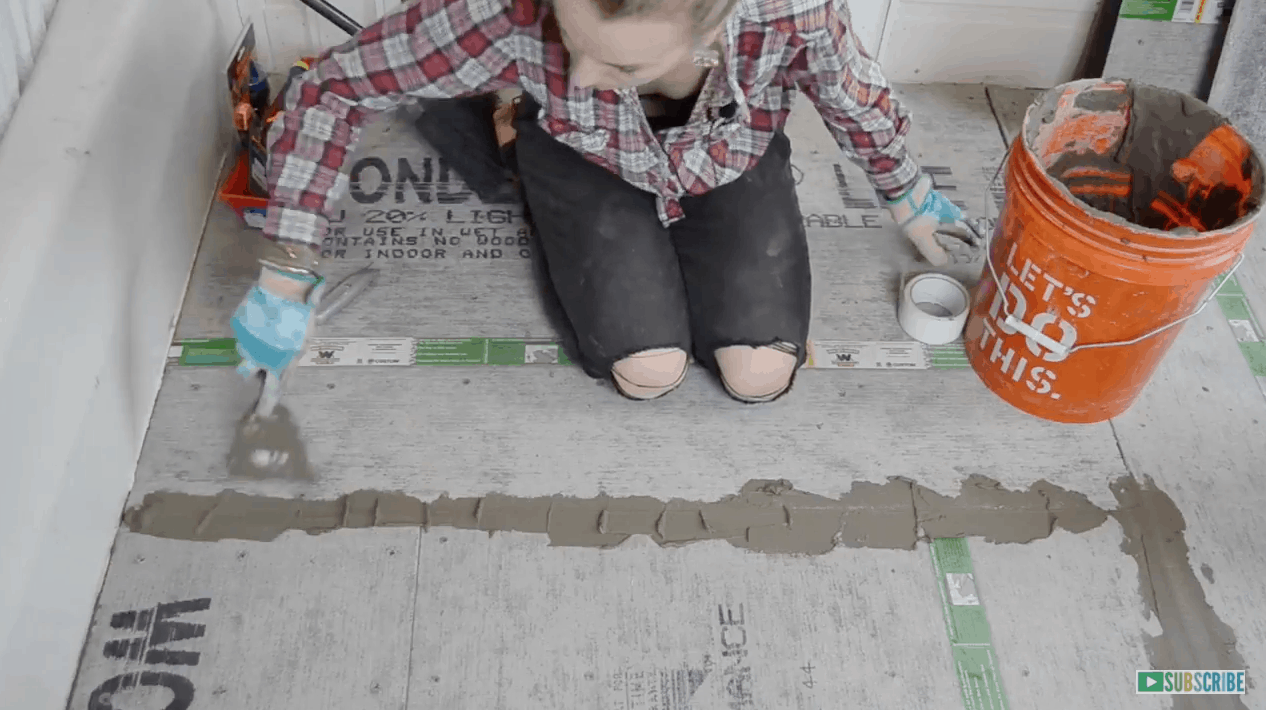
This video is probably more explanatory…
Onto the tile! Again, the video at the end is probably more helpful than this written tutorial, but I’ll outline the steps here for you to read through first.
Tiling Installation Step 1
Snap a guideline. Run a chalk line from the middle of the each parallel wall to get an intersection point in the middle of the room.
Tiling Installation Step 2
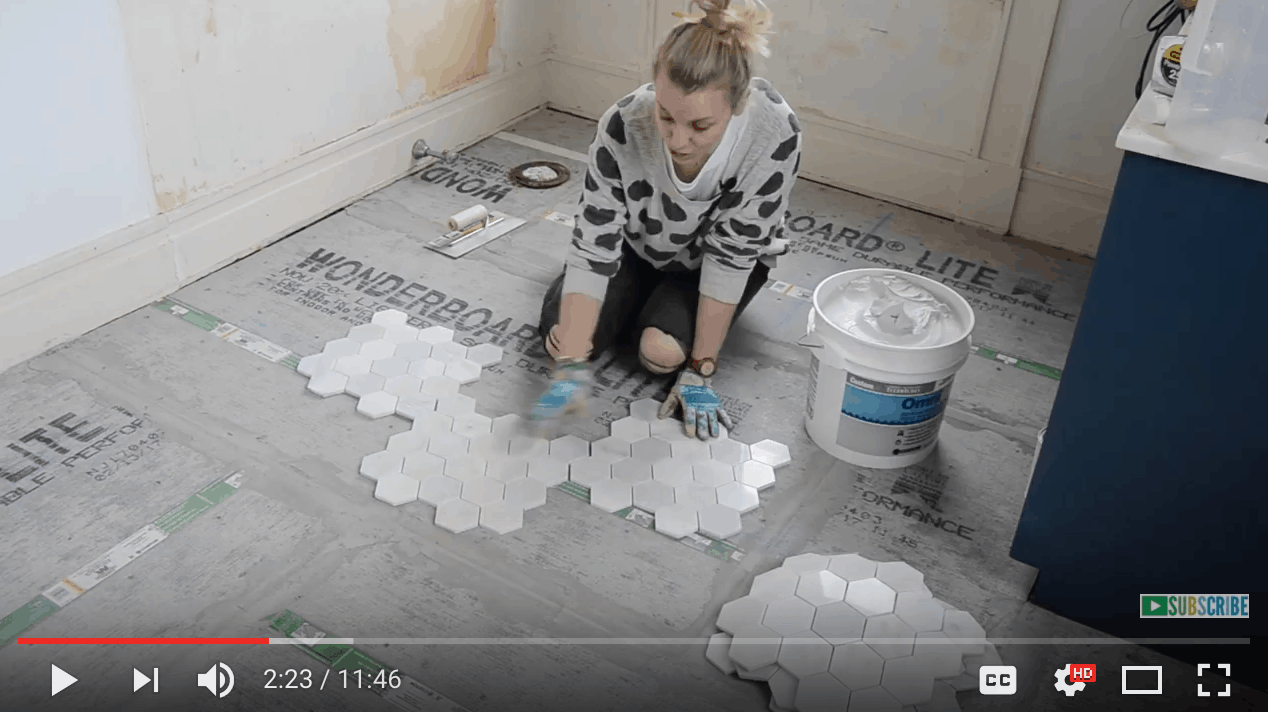
Dry fit your tile to determine layout, fit and pattern. If using a tile with any variegation or pattern within the material, consider opening up all your boxes and shuffling the tiles… there can be quite a bit of difference between each batch.
Tiling Installation Step 3
Mix thinset or…. use premixed thinset. I used the premixed just to save the extra step of mixing.
Tiling Installation Step 4
Use a pallet knife or your trowel to spread a thin layer of thinset over the backer board. Select a trowel with notches that correspond to the size of your tile and pull the notched edge across the thinset. This will leave behind enough thinset to adhere your tile to the backerboard, but not so much that it oozes up between your tiles.
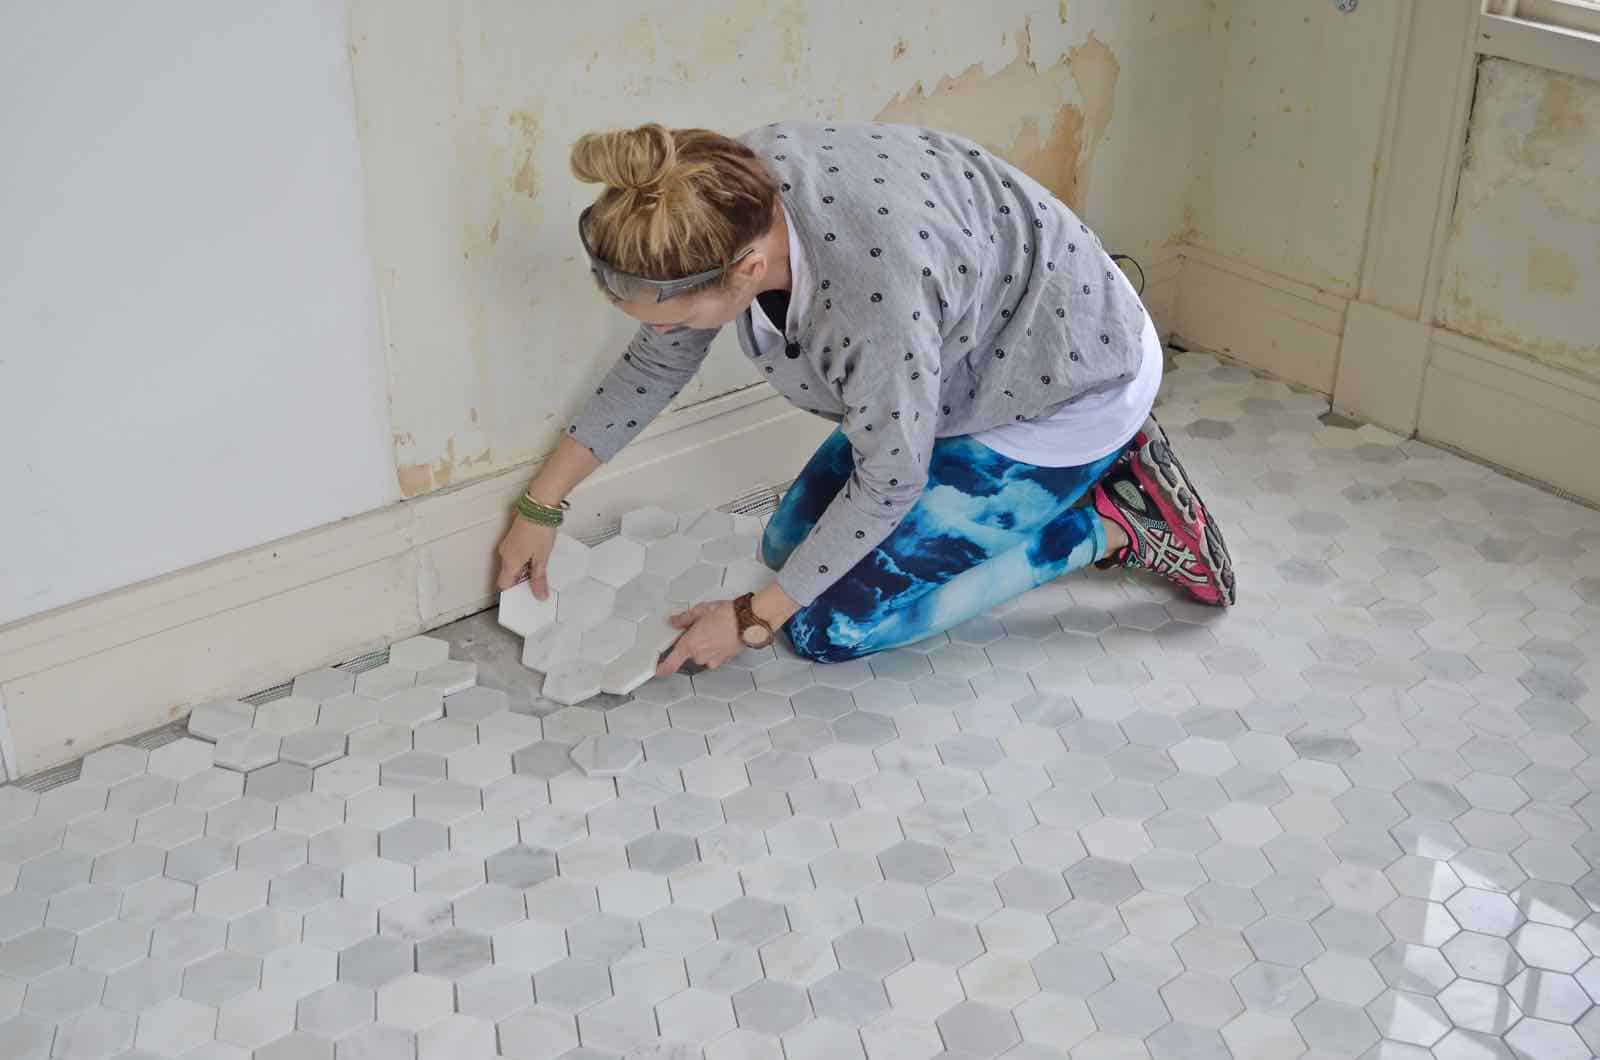
Tiling Installation Step 5
Lay the tile onto the thinset and make sure it’s aligned with your grid lines. Press down firmly to set in place. Wipe away any thinset that may have come up and over the tiles.
Tiling Installation Step 6
Place appropriate sized spacers around your tile, spread more thinset, and continue to lay down your tile. (Note: This process will be the same whether you’re working with smaller tile on mesh sheets or larger individual tiles.)
Tiling Installation Step 7
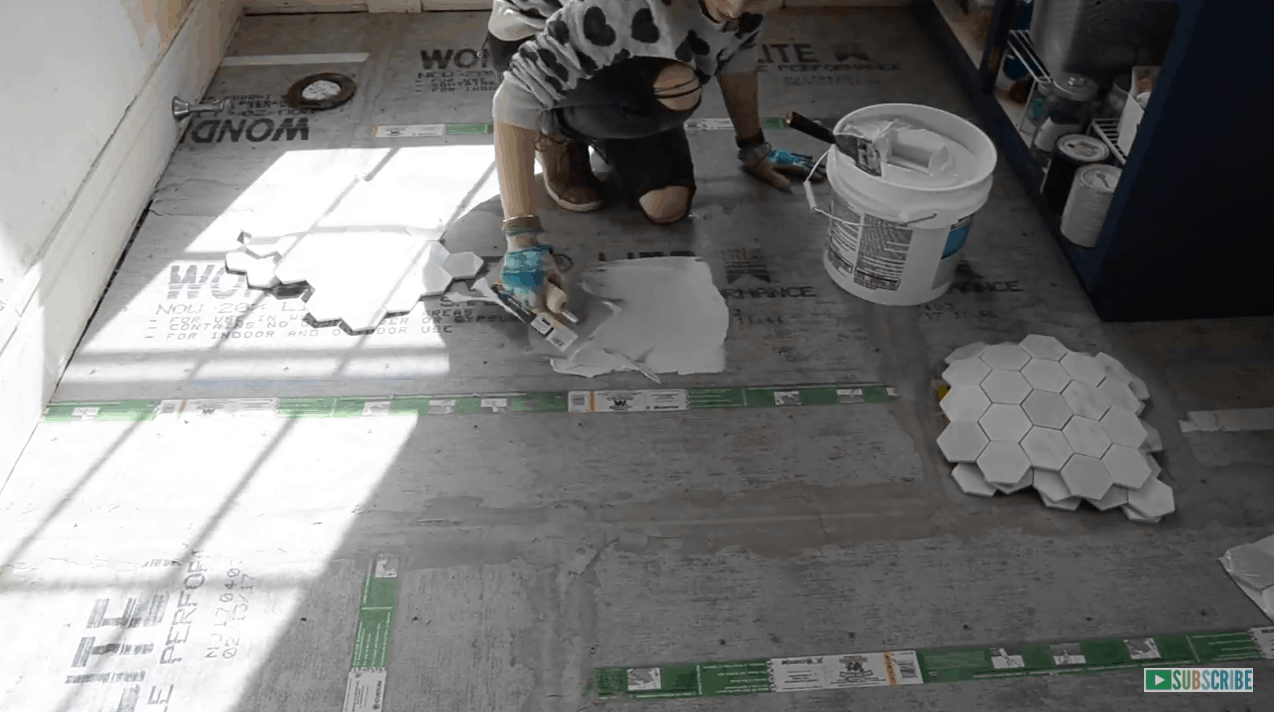
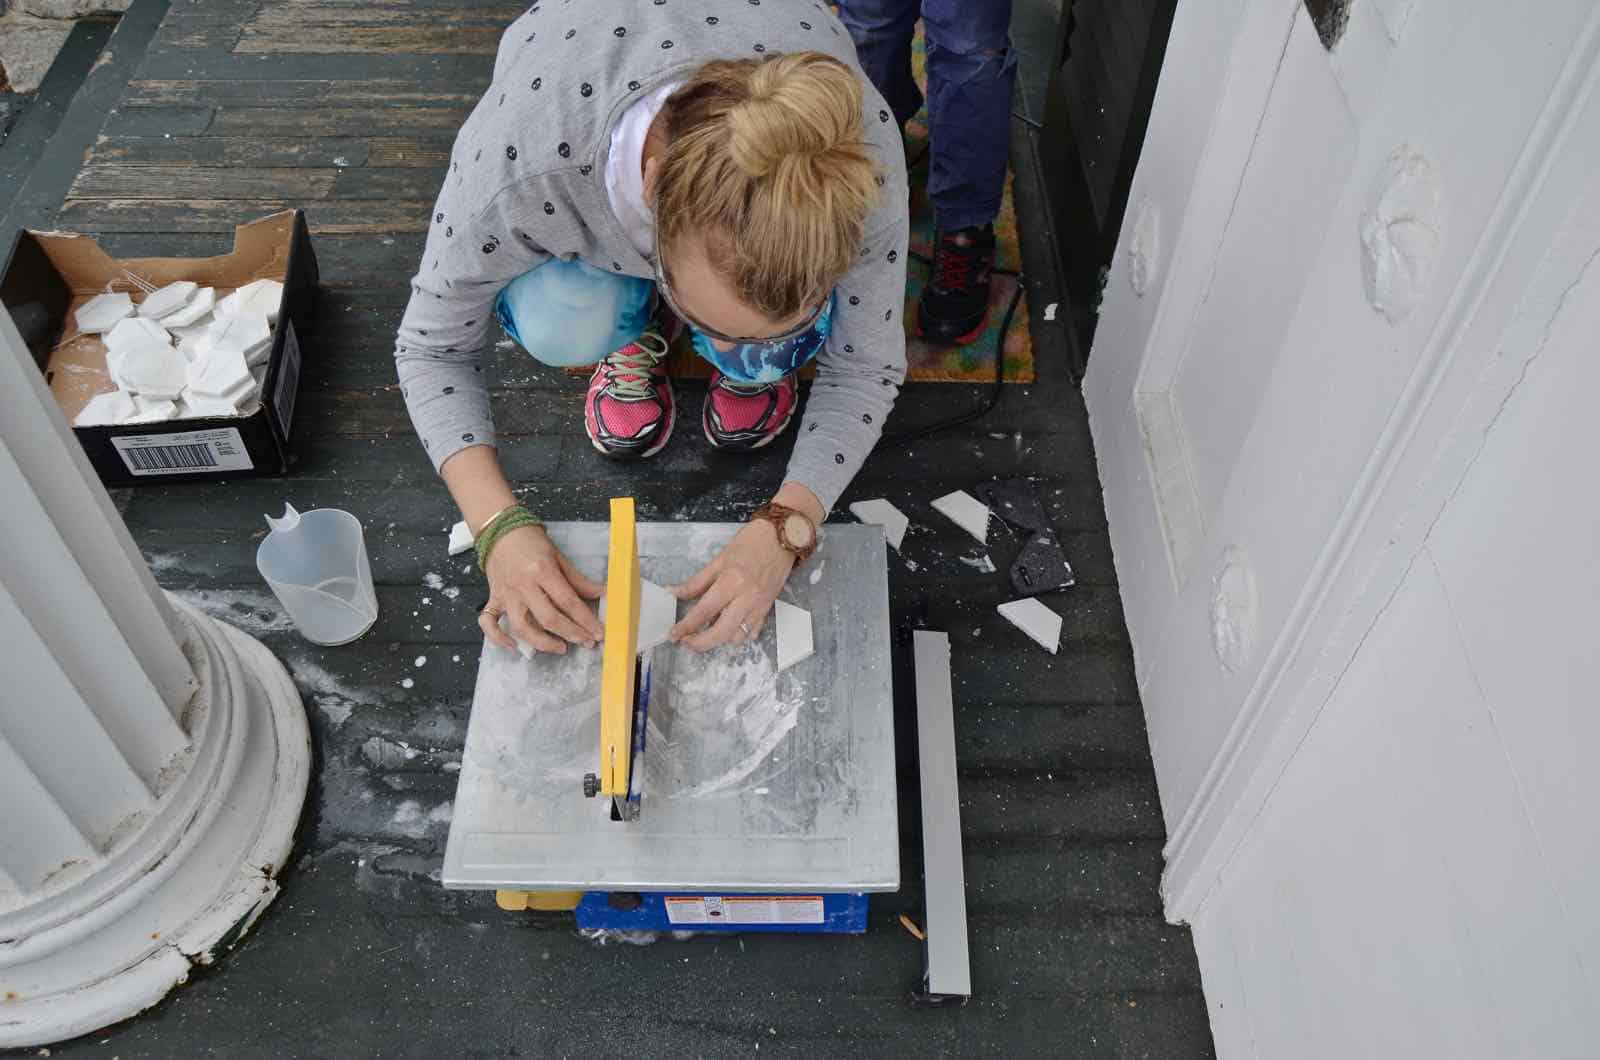
At some point, you’re going to reach an edge or the wall and it will be necessary to cut your tile. There are a couple of different affiliate options. Option 1. Tile nippers. For small thin tile like penny rounds, these are perfect. You can apply pressure on the tile and the clippers will break the tile in a smooth line. Option 2. A tile scoring tool. This is a little more cumbersome, but easy to navigate if you don’t have too many tiles to cut. Run the sharp wheel back and forth over your cut line a dozen times or more to score the tile. Then, flip over the tool and pinch the tile to snap along the line. Option 3. A tile wet saw. I chose this method and am so glad I did… Using a tile saw is much the same as any other saw, you simply need to ensure that the special diamond blade is always moving through a full reservoir of water beneath the cutting surface. Unlike a regular saw, a tile saw isn’t cutting through the tile, it’s *grinding* through and a dry blade can cause chipping and splitting.
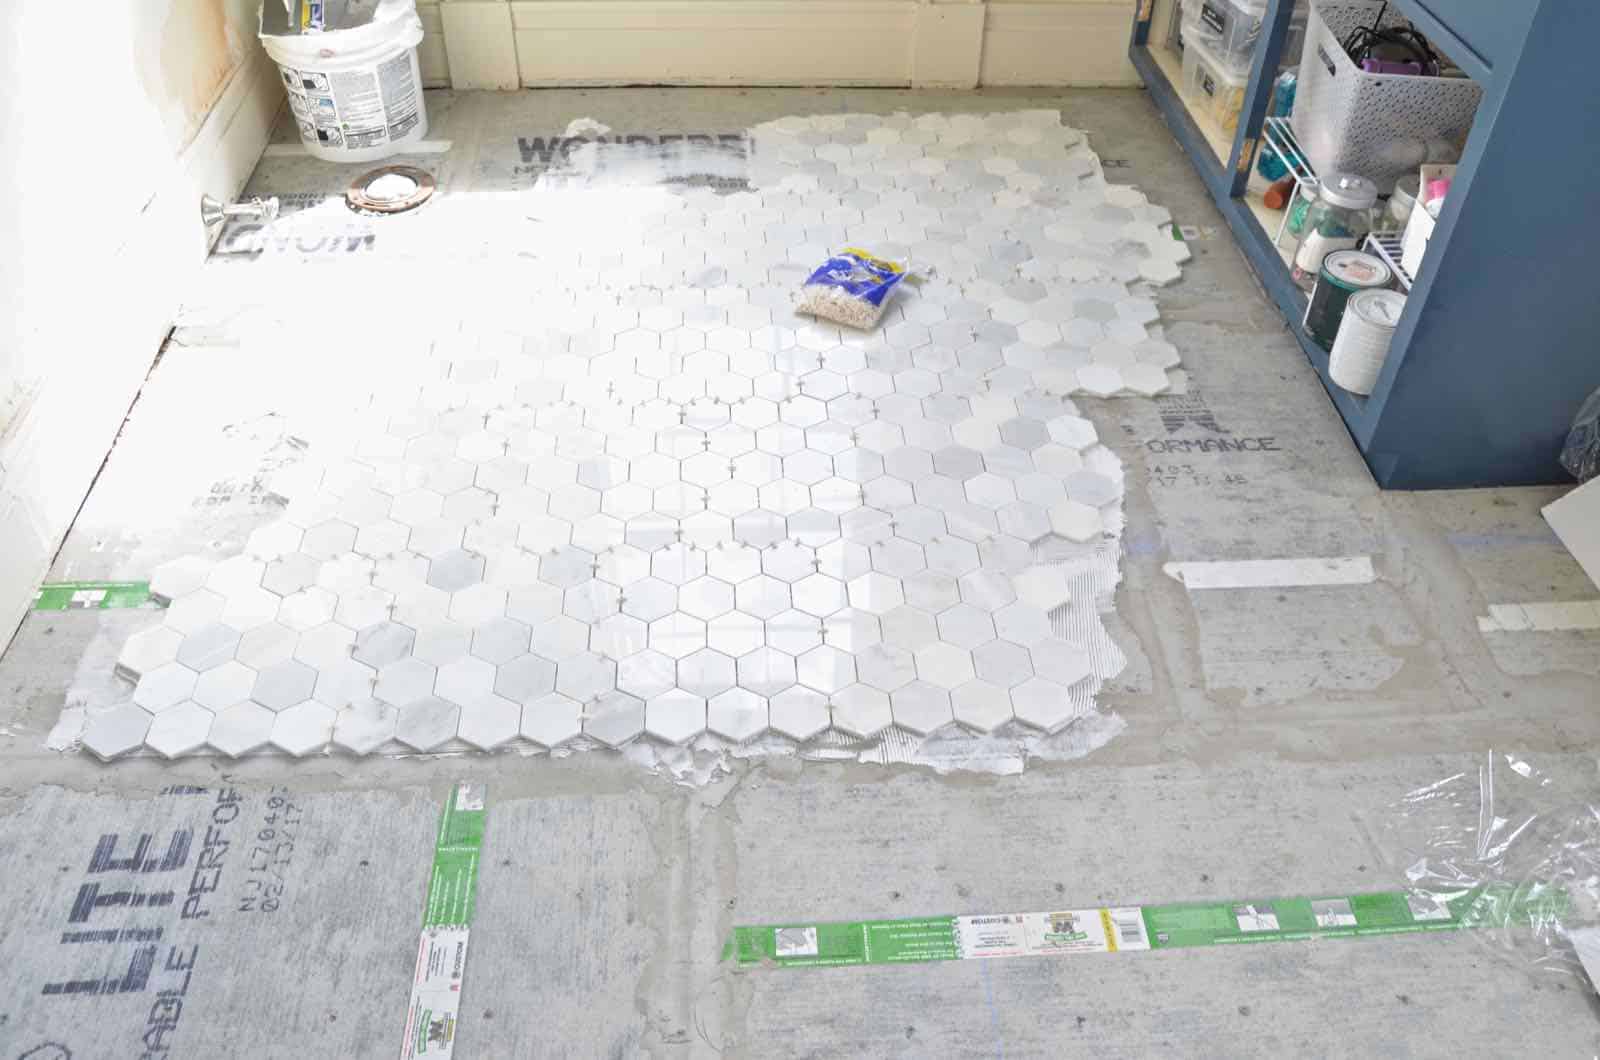
Let tile set up on thinset for 24-48 hours without walking on the floor.
Tiling Installation Step 8
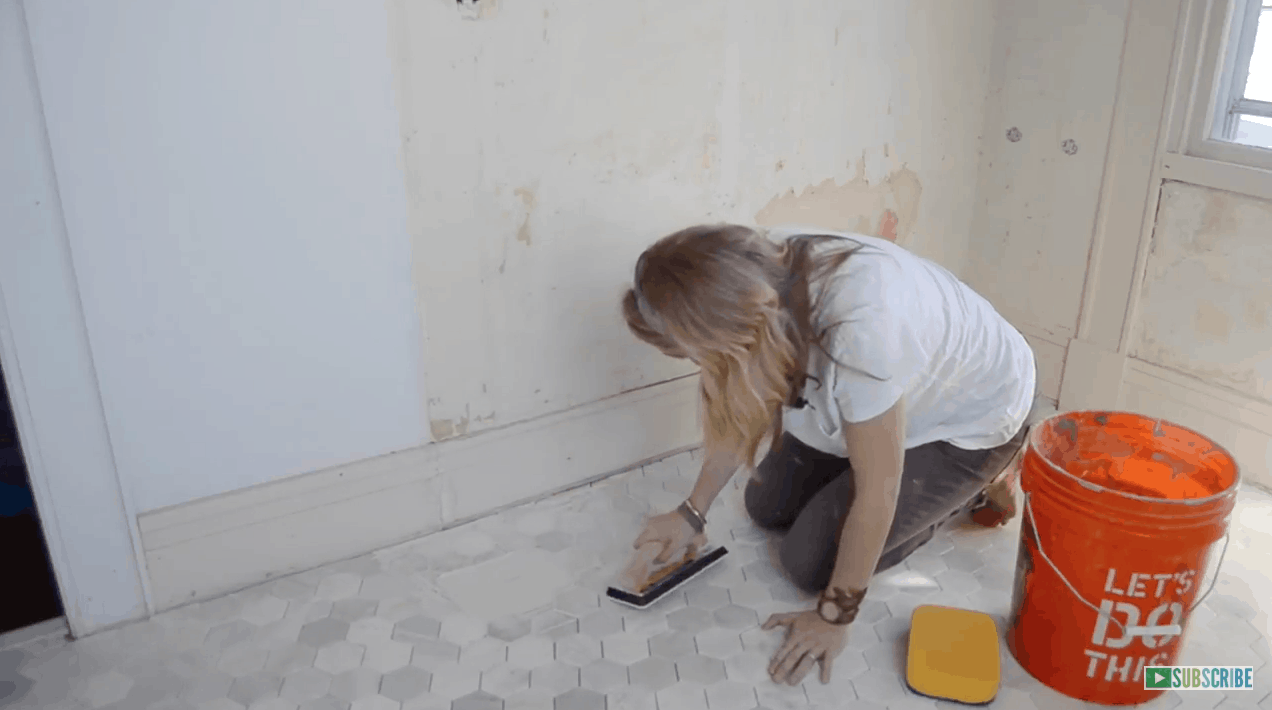
Grout! Grout is when a tile floor becomes a tile floor! If using tinted grout, premixed grout will prevent any disparity in color between batches. Otherwise, mix grout much as you did your mortar: fill bucket with water and then add grout. Mix until the consistency of toothpaste… you want the grout to stay on your pallet knife unless you flick it off. (Note: grout dries FAST… only mix as much as you are able to apply at a time.) Using a pallet knife or trowel, scoop grout onto your tile. With a grout float at 90 degrees, ‘pull’ the grout across your tile therefore filling all the gaps between your tile. Immediately go back over the tile with a sponge and fresh water to remove any residue or haze.
I know I know… SO much information in one post. I definitely think the videos are a little more helpful- seeing these steps is a little more informative, in my opinion.
If you have any questions, please leave a comment. And COME BACK TOMORROW for the full reveal!!!


The results look fantastic! Tiling a floor can be really fun, if a bit time-consuming. In the end, it’s all worth it to see your hard work come to fruition. Thanks for sharing!
Looks beautiful! What tile did you use?
Hi Julia! Thanks! I shared all the sources in this post here! https://atcharlotteshouse.com/master-bathroom-reveal/
Looks like Hard Work!
However, the finished product is awesome. THose tile work really look nice.
Thanks so much!
Thanks for this. I’m gonna share this to my fb.
Thanks for sharing the steps by step process. brilliant work!
Thank you for pointing out that you are going to need a pallet knife. I’m wanting to get new tile and want to find a contractor to help me install it. Hopefully, I can find the best flooring contractor in the area.
Good luck!
Thanks for sharing the article and tips for doing that. Great work.
Thank you!
Hi charlotte, floor looks nice!
The bucket of omnigrip caught my eye in the picture which brought me here.
I do this profeSsional for a living and Just wanted to offer a couple tipS for The future that i thought might help.
One is that omni gRip is not intenDed for floor install. Only vertical dry ArEas (such as a wainescoTting or a backsplash) and it is really a great product for that as it holds so well and doesnt require finish nails for mosaic backsplashEs. OmNi grip is also Made from organic matTer which is like food for molD so bathroom flOors and shower walls are espeCially a no no.
Two is that if you read the instructions On a bag of grout, you are not supposed to “wipe immediately” you are supposed to mix a certain amount of waTer, let Slack for 5 mins or 10 mins(whatever the manufactures specs are) mix again, then spread, let sit for 10-30 minutes and then wash. This ensures fuller joints,consIstanT coloring, and most importantly itll hold up to the WaRrantY should anything go wRong. Its also best to spread the grout at about a 22.5 degree angle to force the grout furthur into the joints and then cut it back at a 90ish degree angle to save you from having to work Too hard to wash it later. The Better the grout float,the Less washing.
Hope I dIdnt come off too critical, i really am impressed At the entire project youve done! It took me years in the trade to build up enough confidence to take On projects like this on my own so kudos to you young lady!!
Take care! -Mike Williams
Mike! Where were you a couple of years ago! 🙂 I’m frustrated about the OmniGrip… I’m SURE that was handed to me by a ‘helpful’ employee at the hardware store. I was also told the wrong thing when I asked for clarification about grout… live and learn. Thank you for the grout tip… I’ll remember that next time. Makes sense! I may hit you up whenever I tackle my next big project! I appreciate you taking the time to leave such helpful feedback! Best, Charlotte
Great makeover. I like your flooring desing ideas. It looks awesome and gorgeous. Thanks for sharing your post.