
Patching and Repairing Subfloor
Psssst… this post *might* contain affiliate links: see my disclosure here.
Replacing and Repairing Subfloors
Today I’m talking subfloors. Super sexy, no? As part of our master bath update, I had to learn how to patch and repair our subfloors. Before you begin to think that I have a clue… let me stop you. Here’s the deal with most of these big projects. You don’t know what you’re getting into until you’re there. Hence this subfloor 101. (Video of the process at the end of the post!)
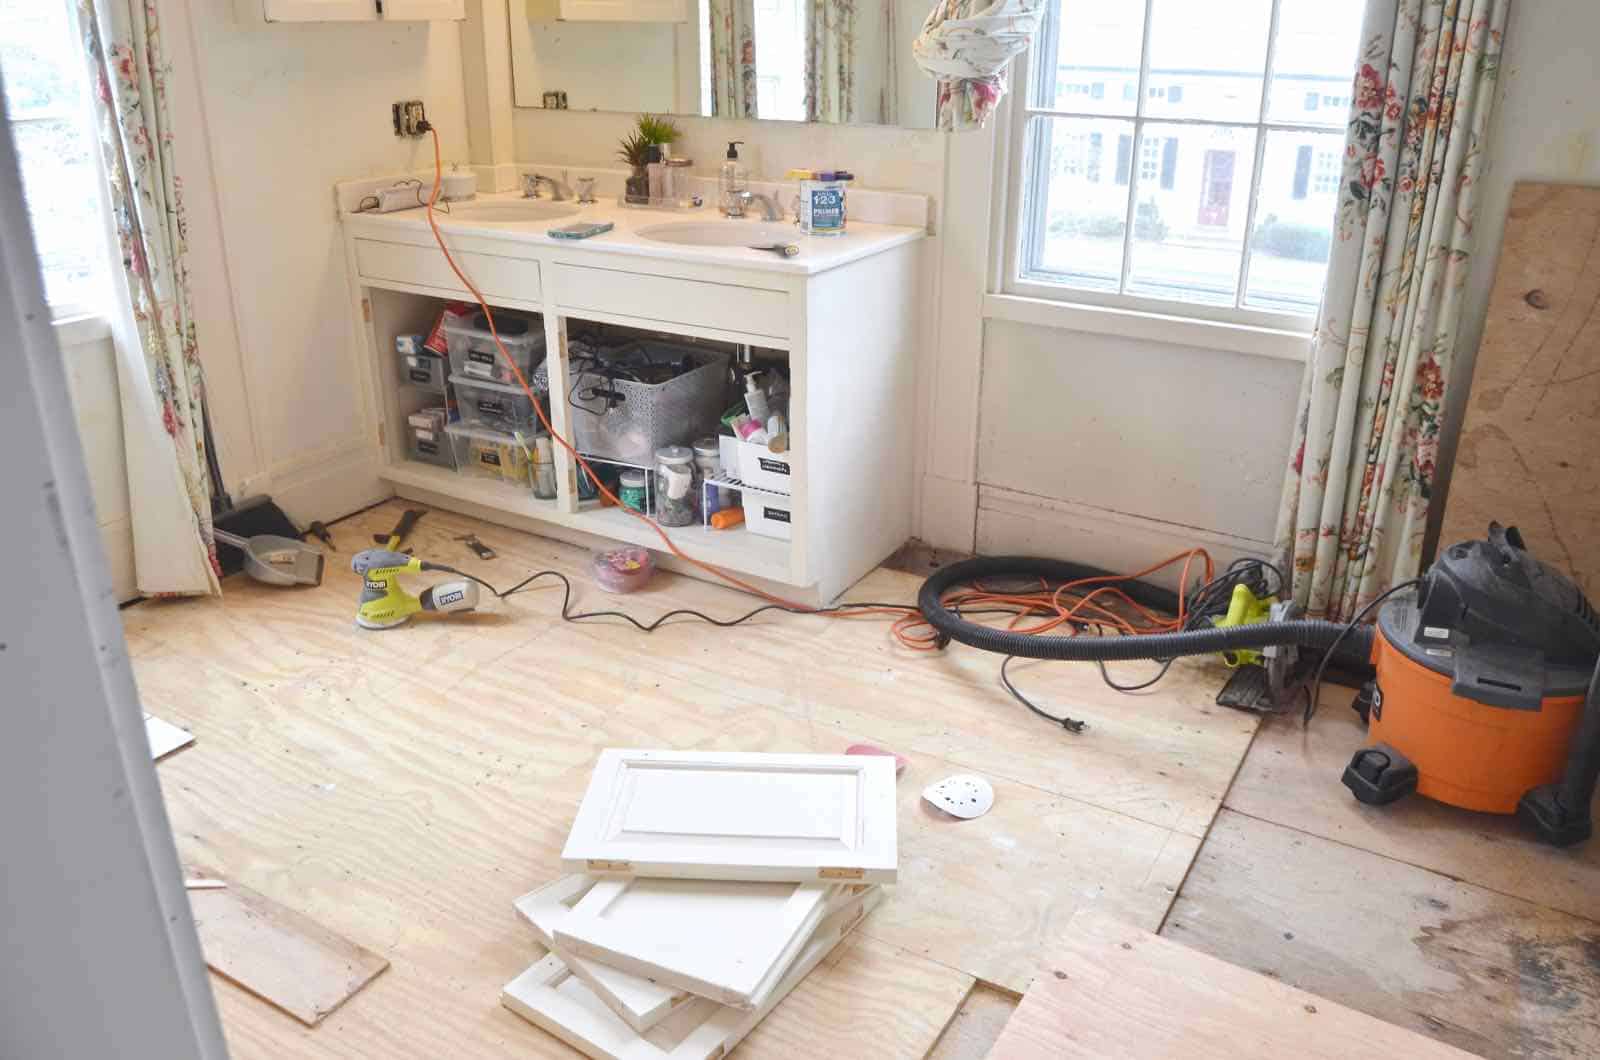
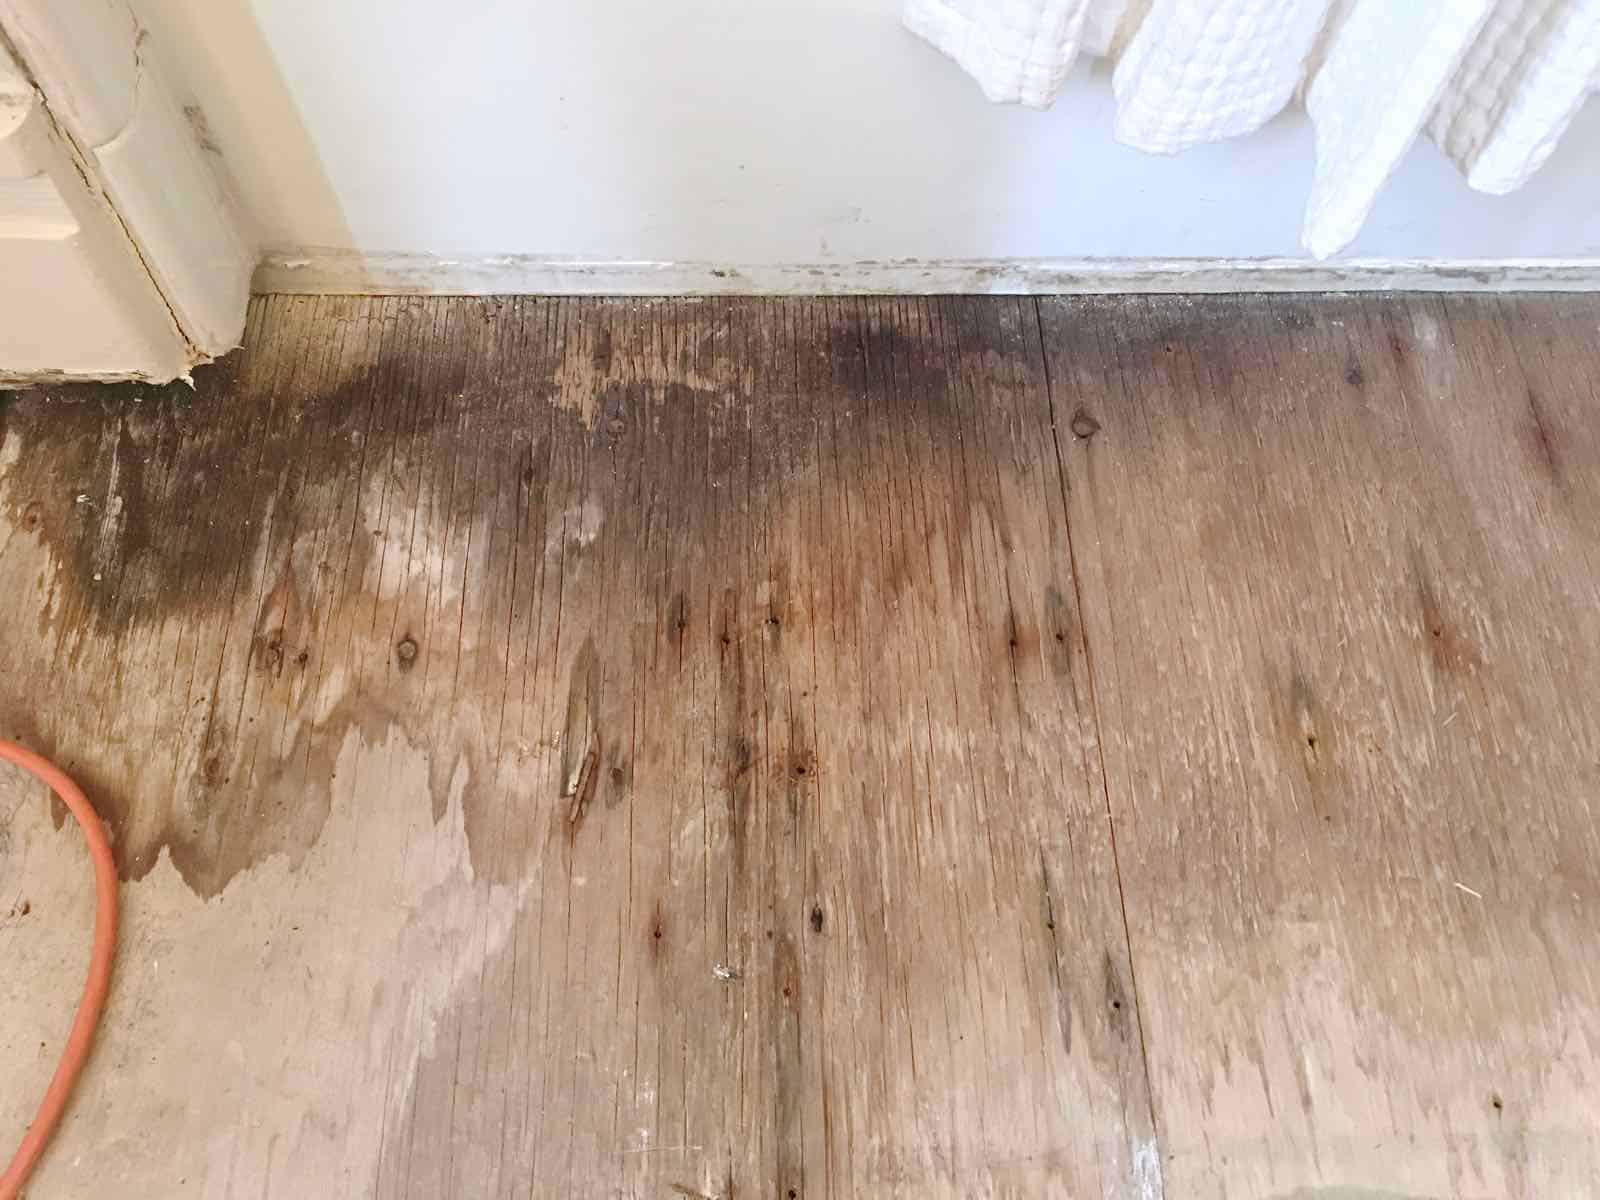
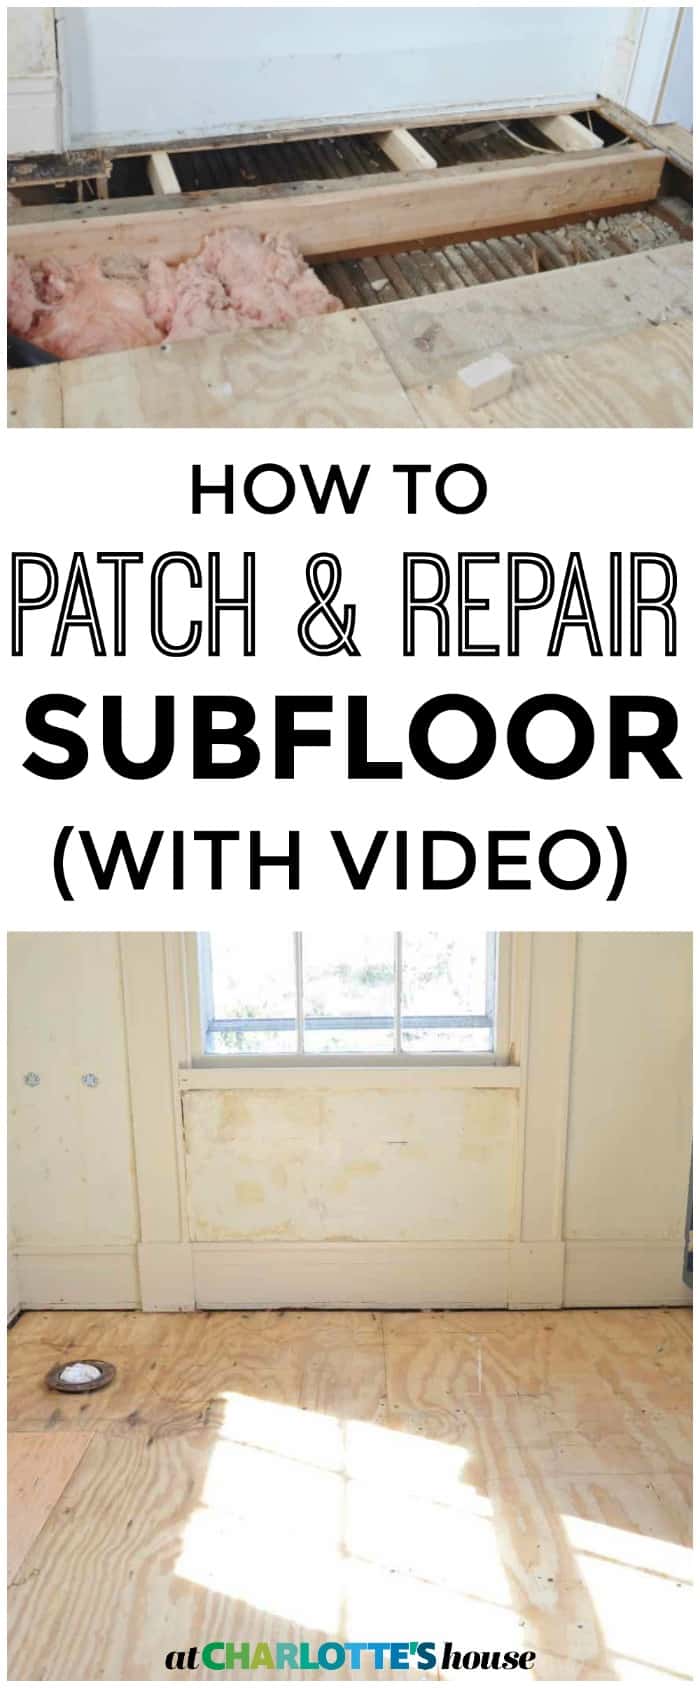
Let’s back it up to the last update I gave you on the bathroom… the vinyl adhesive tiles and the 1/4″ plywood it had been sitting on were gone. The bidet was gone. Removing both of these things left behind OBVIOUS water damage and rot next to the bathtub and a hole in the floor where the plumber had capped off the bidet line.
Shop my favorites!
I consulted with our contractor and then watched the heck out of YouTube both of which confirmed that patching a subfloor is TOTALLY do-able. Wanna know how? Cool cool.
How to Patch Damaged Subfloor
Step 1. Identify where your floor joists run
Typically you can see where the nail line is on the subfloor, but obviously a stud finder can work too. It’s important to know where the joist is because you’re going to remove the damaged plywood right up until the floor joist without cutting over the floor joist.
Step 2. Remove damaged subfloor
This is important. Big time important. You HAVE to know the thickness of your subfloor. Why? You don’t know what’s under the subfloor so for all you know, there are electric or water lines and you do NOT want to cut these. Set the depth of a circular saw to *slightly* more than your subfloor to avoid cutting through anything but plywood.
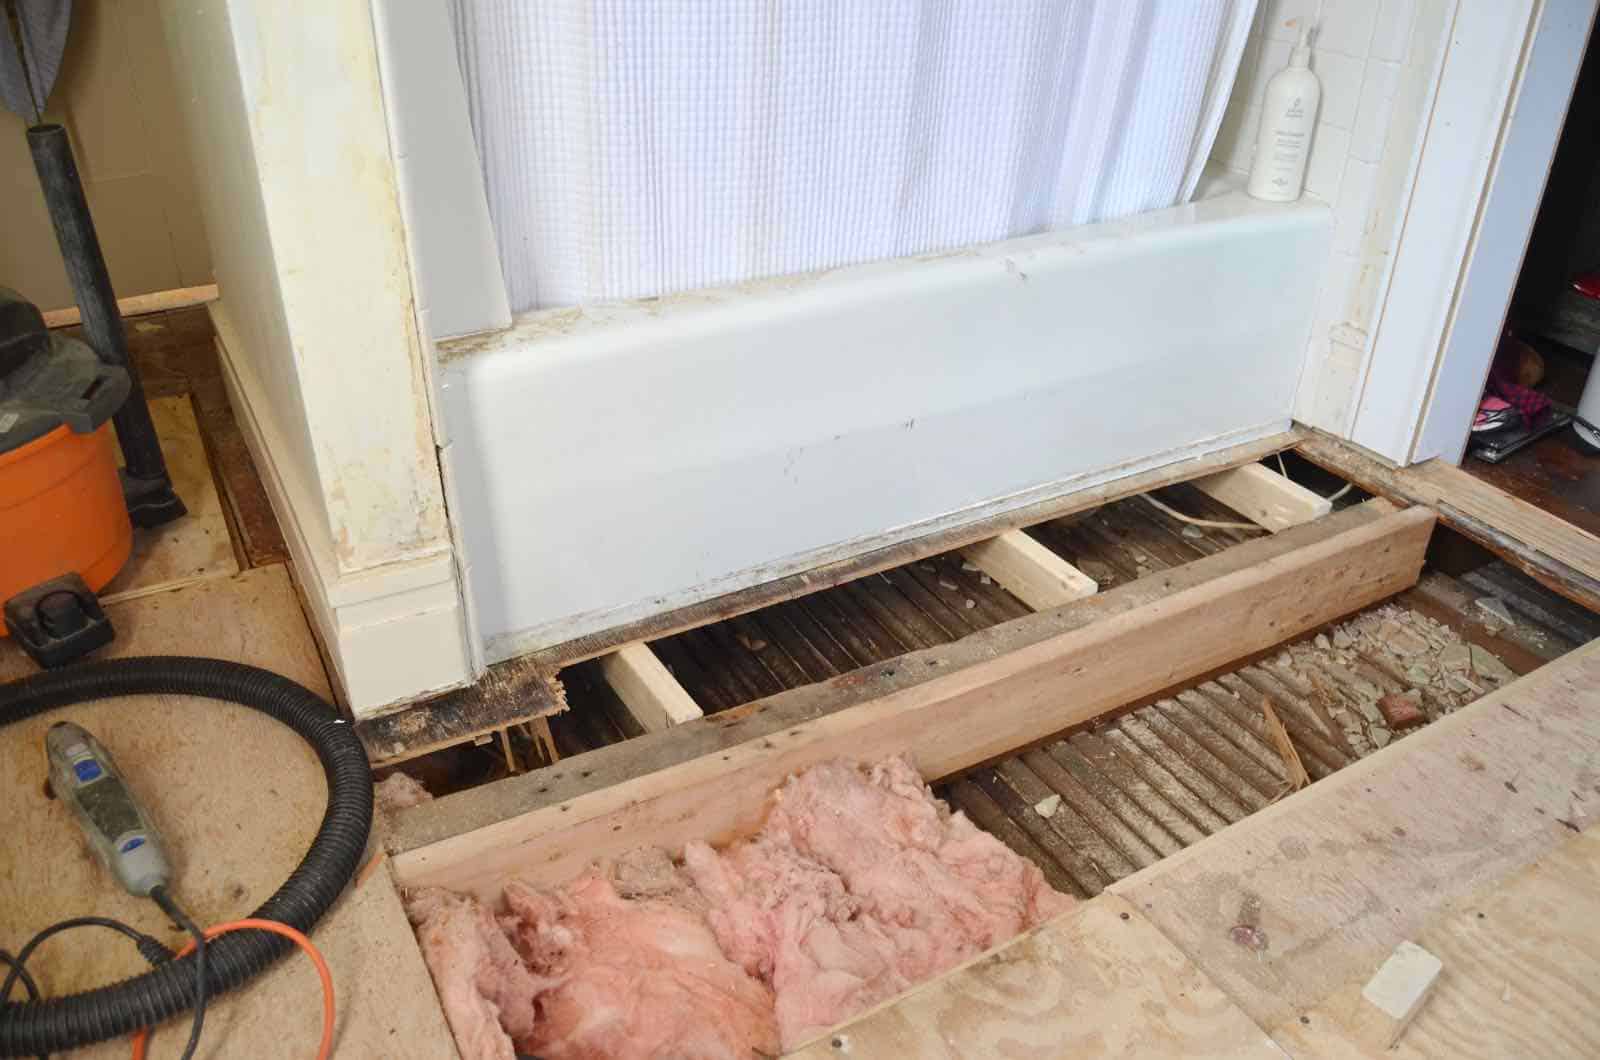
Snap a chalk line or use a straight edge to mark your cut line. Again, you want to cut just inside the closest joists that will allow you to cut out the damage.
Step 3. Sister a support board for the new plywood
Take a 2 x 4 (or 2 x 6/ 2 x 8), and screw it into the exposed joist being careful that the top edge aligns with the floor joist. Repeat on the other parallel exposed joist. These boards will now support the new plywood that you’re going to cut to replace the damage.
Step 4. Measure, cut and patch.
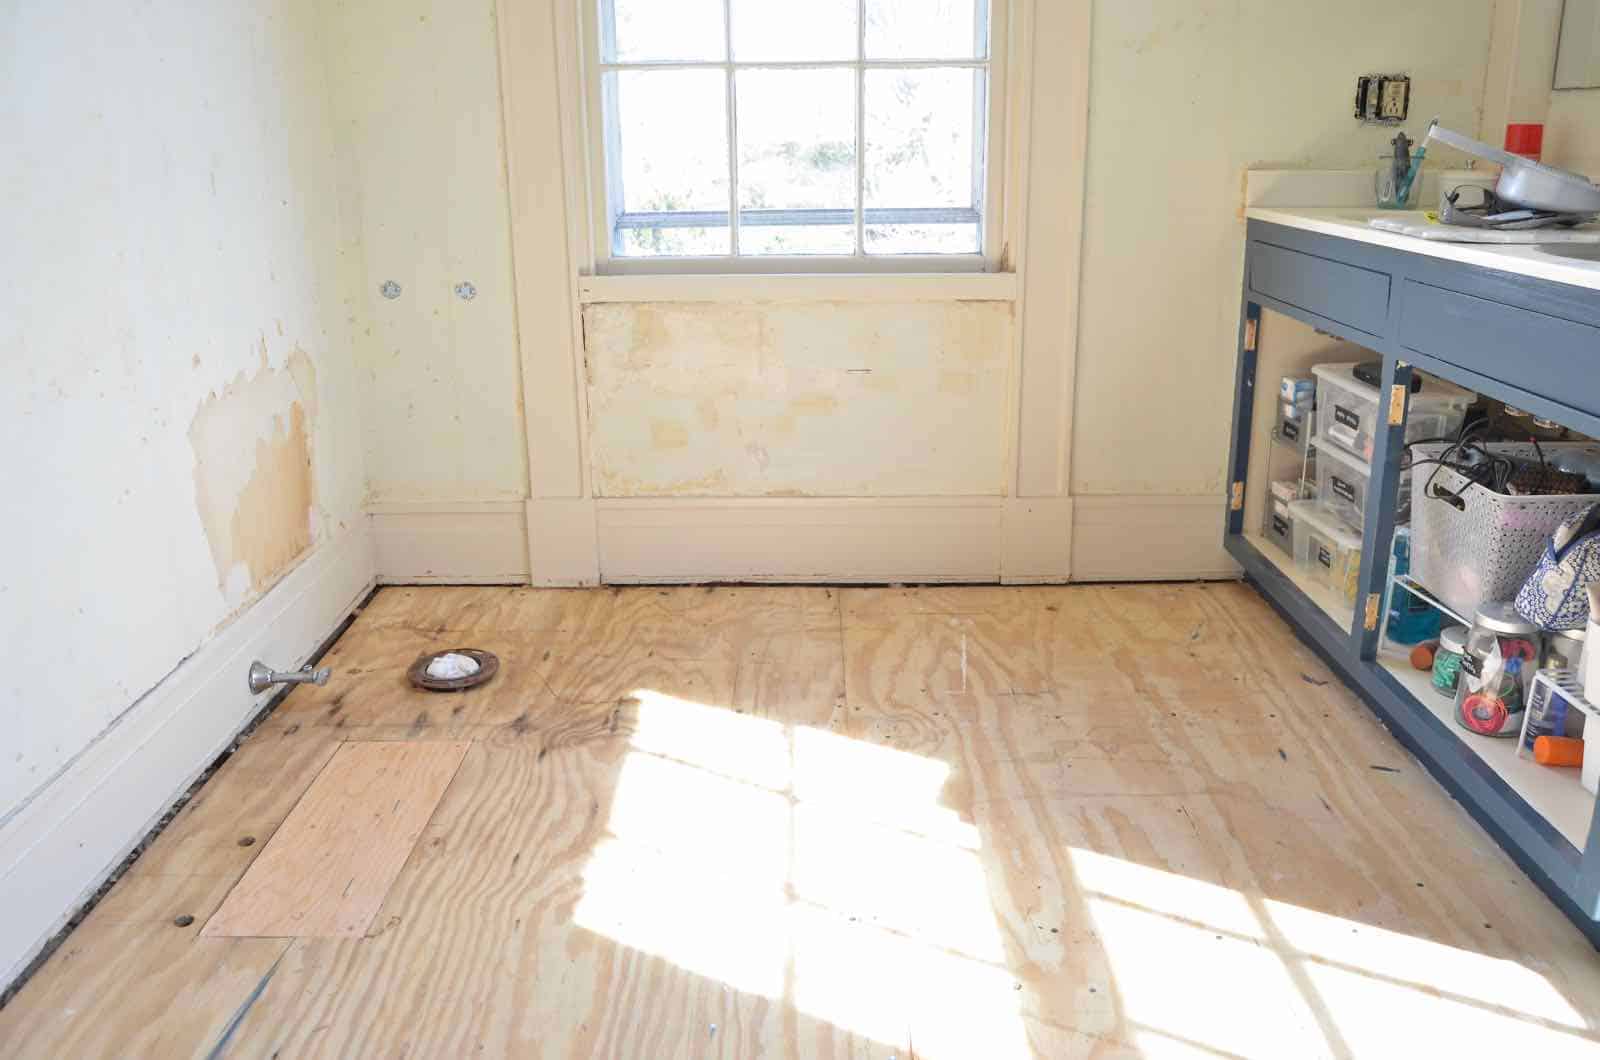
Use the piece of damaged plywood as a template and cut out a fresh piece of plywood. Hammer the new piece of plywood in place with 8D common nails (every 6 inches) being careful that you are nailing into the board you screwed into the floor joist. Make sure there’s about 1/8″ between the sheets of plywood to allow for wood movement.

I used 5/8″ plywood which I think is fairly common for a subfloor. Make sure your plywood is dry and, for best results, use a wood glue in addition to your nails!
This video is probably a better glimpse at the whole process… edited down to five minutes!
Coming up next? TILE! I’ve swapped out the sink fixtures, replaced the light fixture, sewed the curtains, and I’m hoping to finish painting the walls this week! Which leaves me… one barn door to build and a few floating shelves to hang. WE ARE GETTING CLOSE!
Thanks to SO many of you for the sweet pep talks and to all my rockstar friends who give me advice about all of this on the daily! It takes a village to DIY a bathroom, folks.
Check out my whole master bath series here.


Oh my! I’ve been scouring the Net for info on a rotten subfloor area next to my bathtub just like yours! Question-how did you know if the rot continued under the tub or not? I’d prefer not to remove my tub, but I don’t know if the rot continues underneath the tub. Thoughts?
Hi! Excellent question and I’m not entirely sure… The edge of the plywood was about 6 inches under the tub, so I just removed the entire sheet… I’m not sure I even considered whether it had spread because I simply wouldn’t have been able to remove it! :/ So… not much help! Edited: The tub itself is resting on the floor joists so the subfloor is more of a support layer for the tile… I think another reason I didn’t worry to much is that I wasn’t planning to tile under the tub so I only needed fresh subfloor in order to tile!
Yours is the best advice I’ve seen. I have a hole where my new bathtub foot is going so I needed to tie the patch into the joists. My husband suggested I just screw the patch into a board screwed into the underside of the adjoining floorboard. I pointed out that 1/4 of the bathtub. Water. and my weight in the tub would be relying on two little screws, but He didn’t get it. That’s why I am doing this job and not him. 🙂
Haha! Good luck!!
I need to repair floor base and the sheet rock that joins it in a closet.
Good luck! I was intimidated at first, but realized it was totally doable!