
Powder Room Makeover
Psssst… this post *might* contain affiliate links: see my disclosure here.
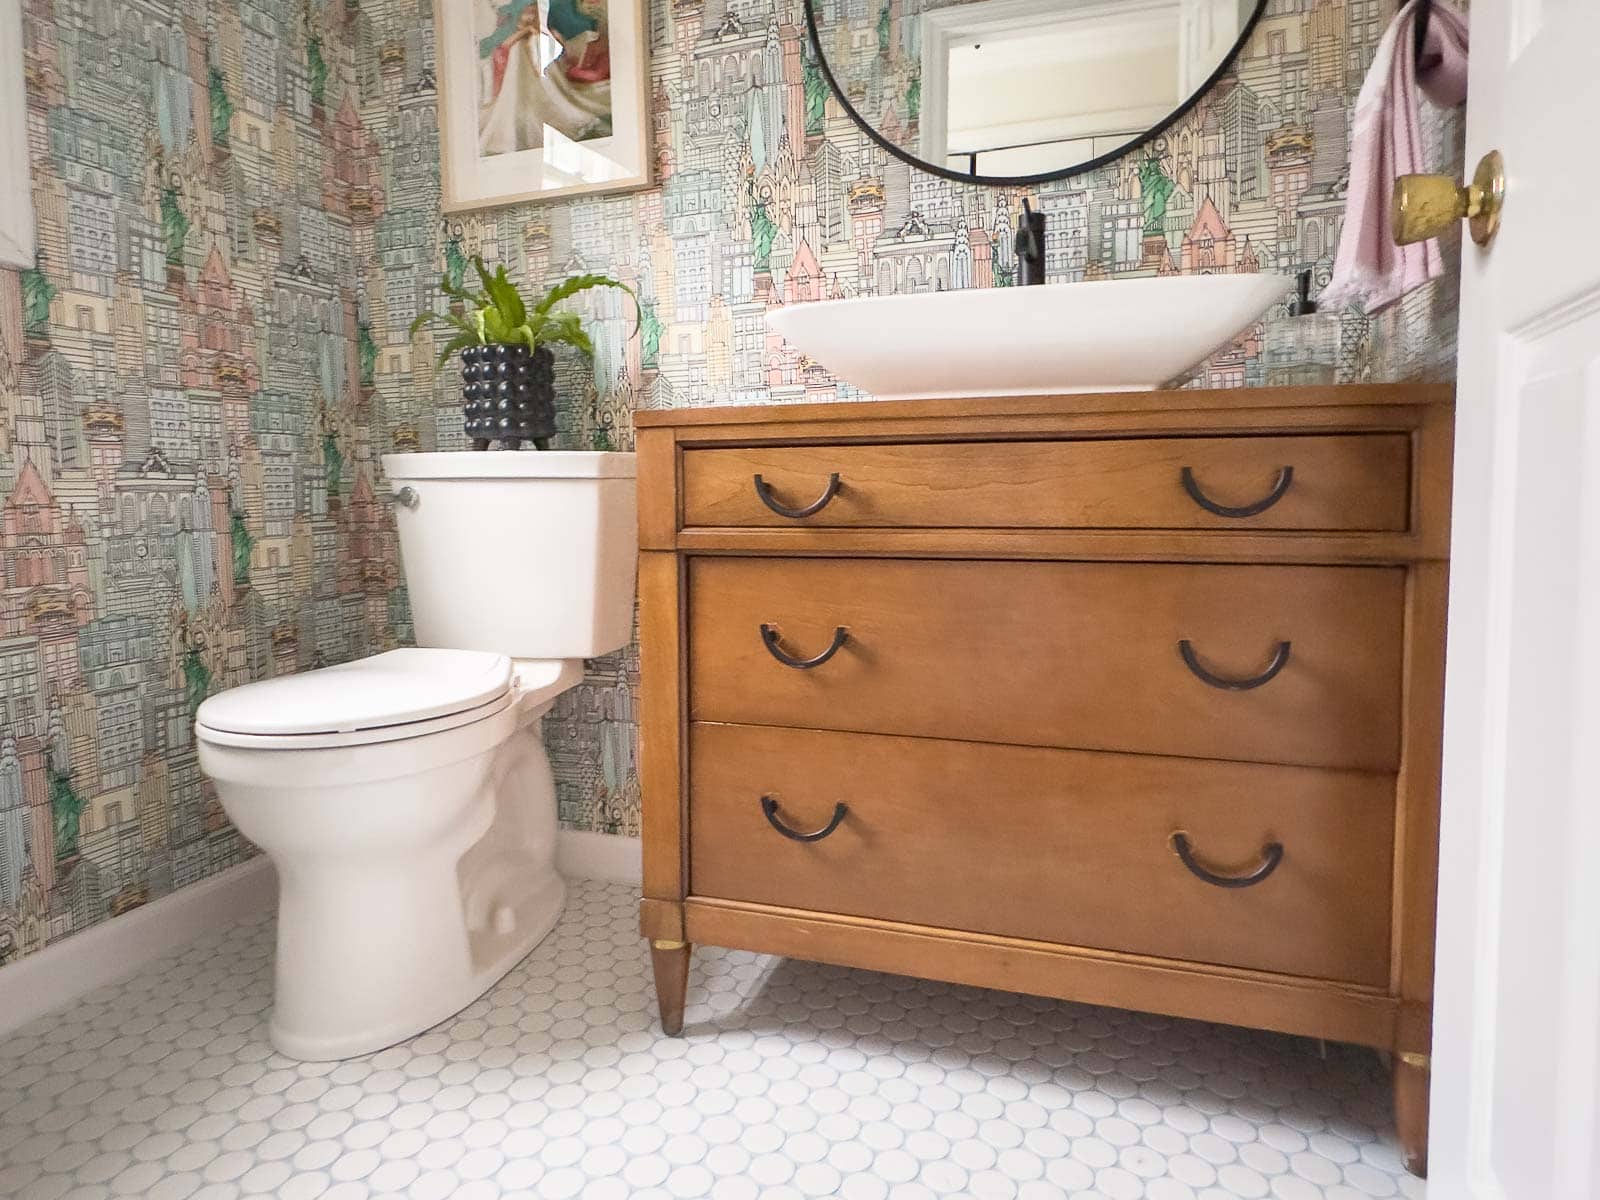
Adding Color and Style to Our Powder Room
After a mini makeover a couple of years ago, it was finally time to replace everything in our powder room: floor, vanity, wallpaper, etc.
Storytime: Growing up, we spend a few weeks every summer at my grandmother’s house in Massachussetts. It was unlike any other house I’d ever seen with floor to ceiling windows overlooking her lawn and the ocean beyond. I can still remember the salt water smell that would greet us every time we pulled into our driveway. Far acry from the humid ish of the Potomac River and Virginia in the summer. I digress, Granny had a small powder room on her first floor with magical green toile wallpaper and I remember sitting in that space gazing at all the scenes and figures in that paper. It was magical. When it came time to decorate my *own* powder room, I wanted to create that same feeling in our space! Keep reading and see how I did!

Step 1. The Design
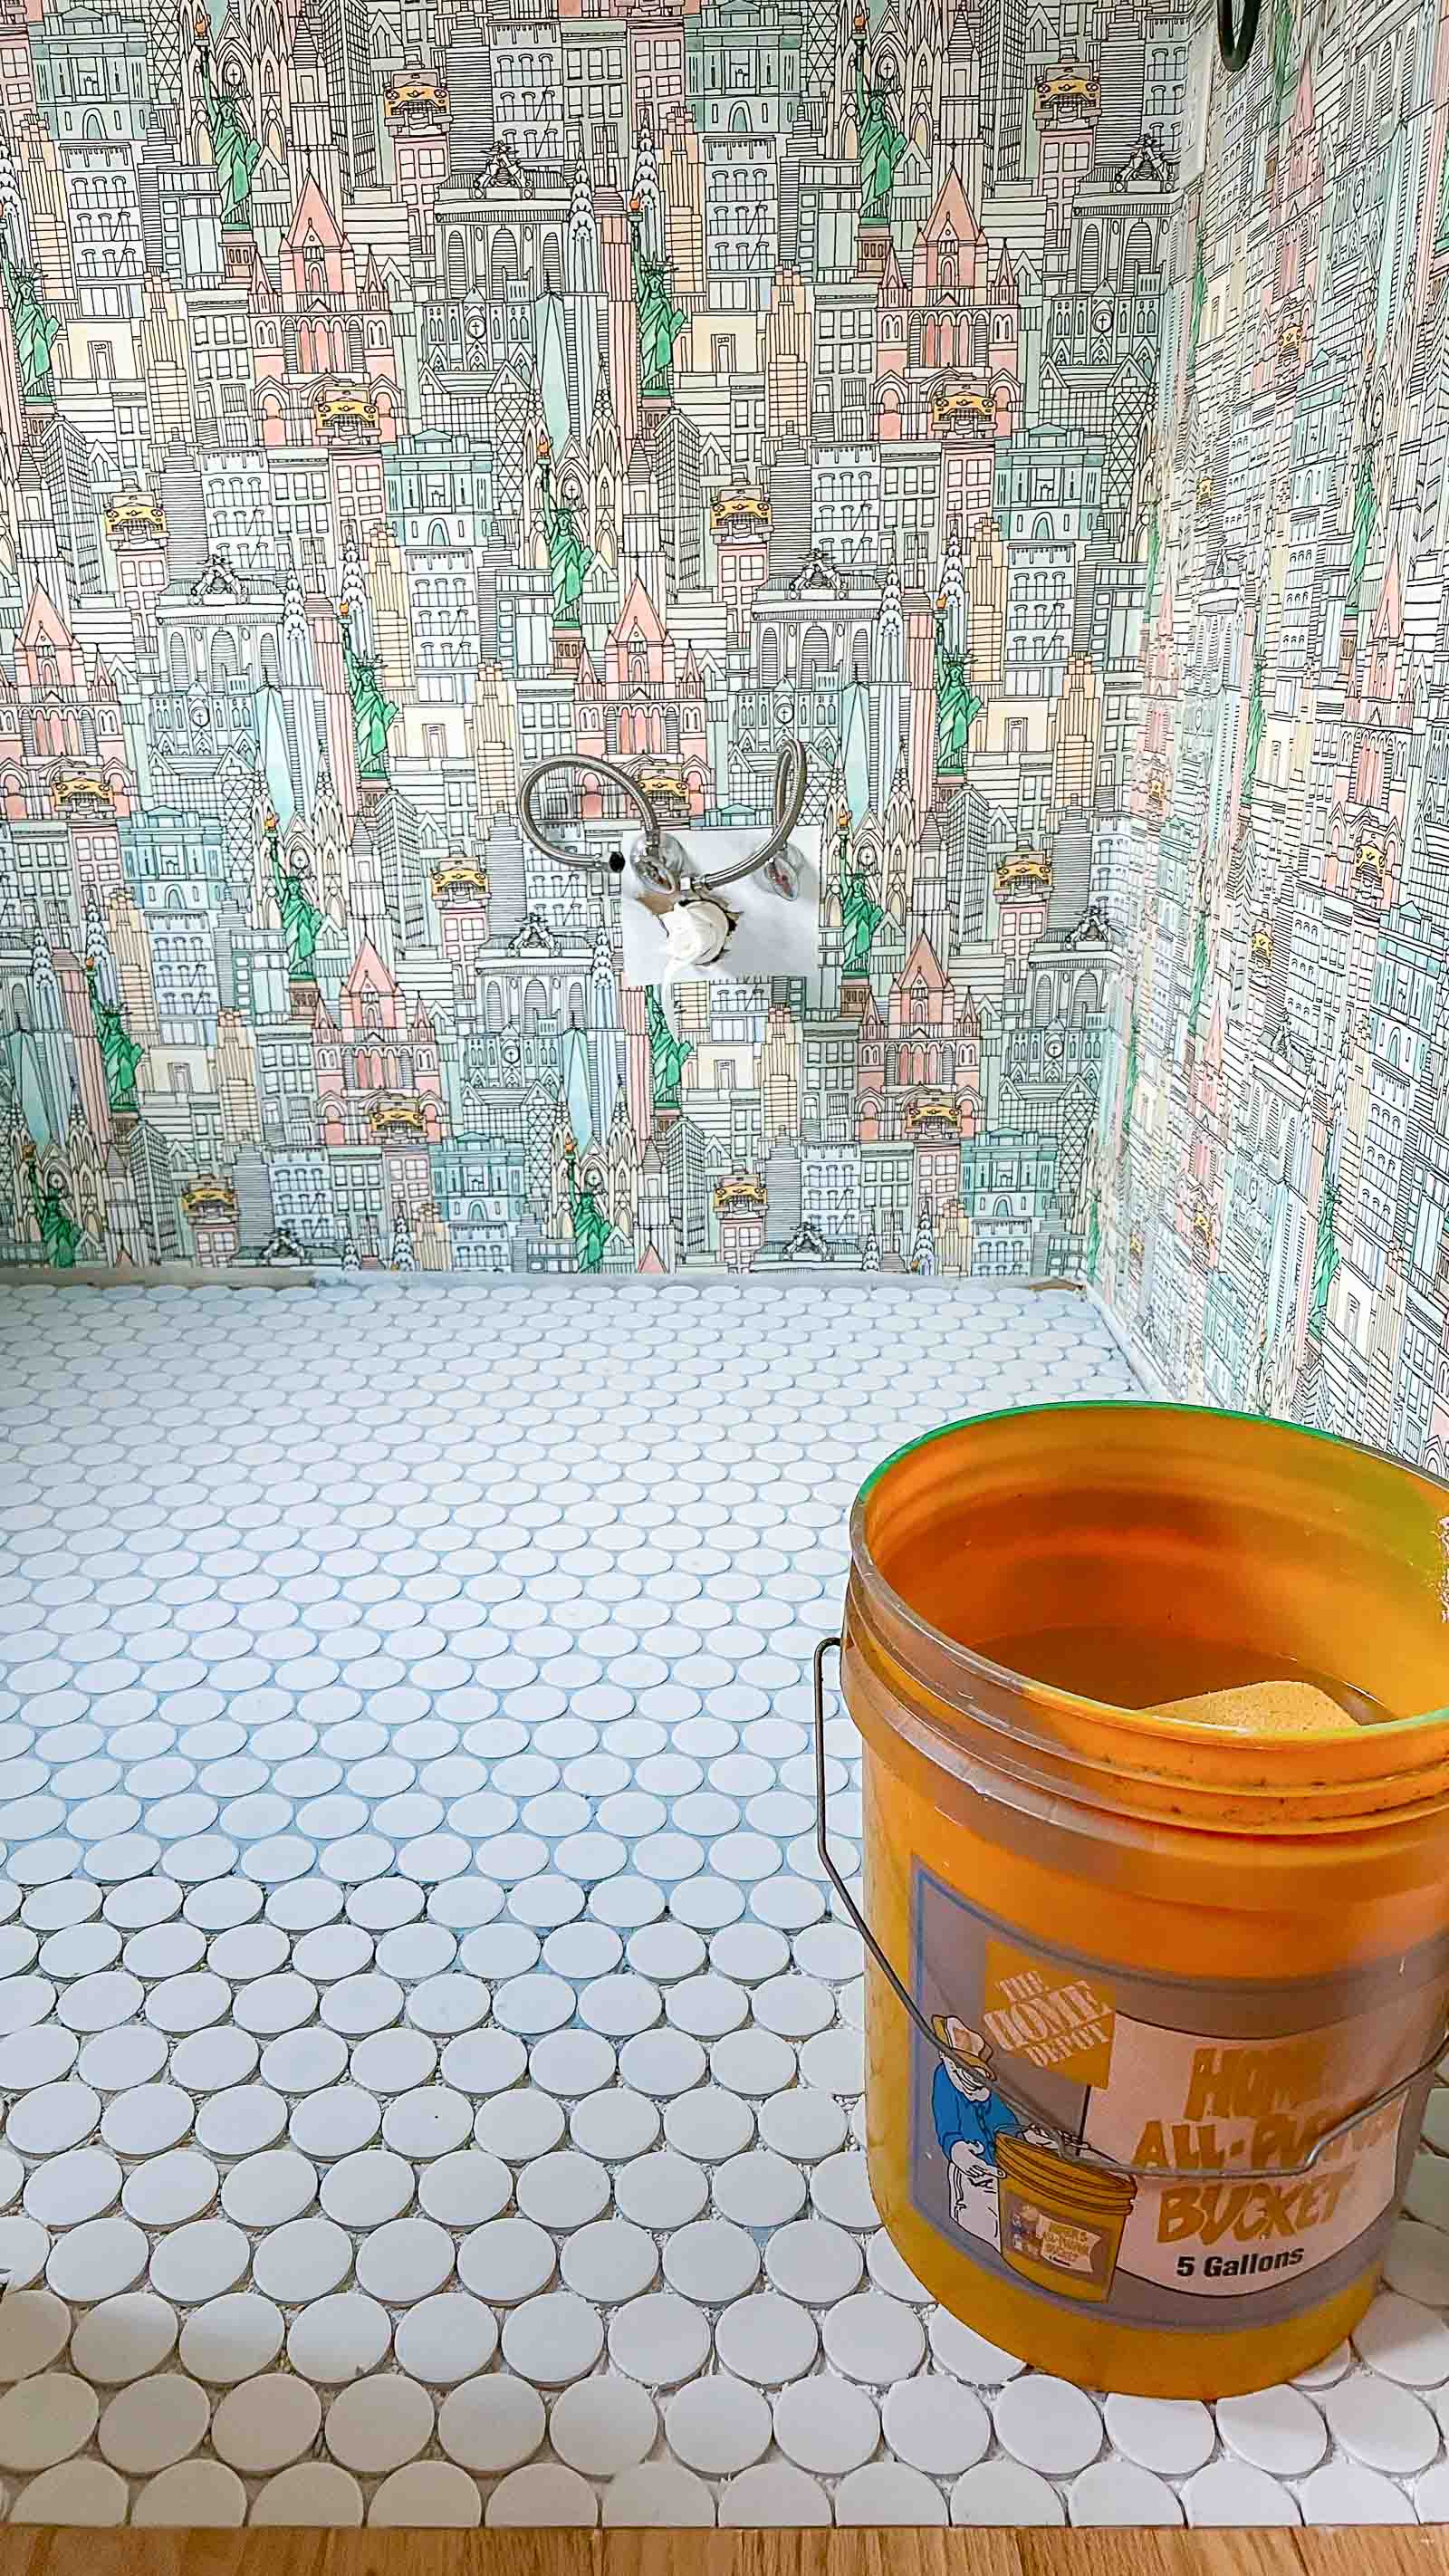
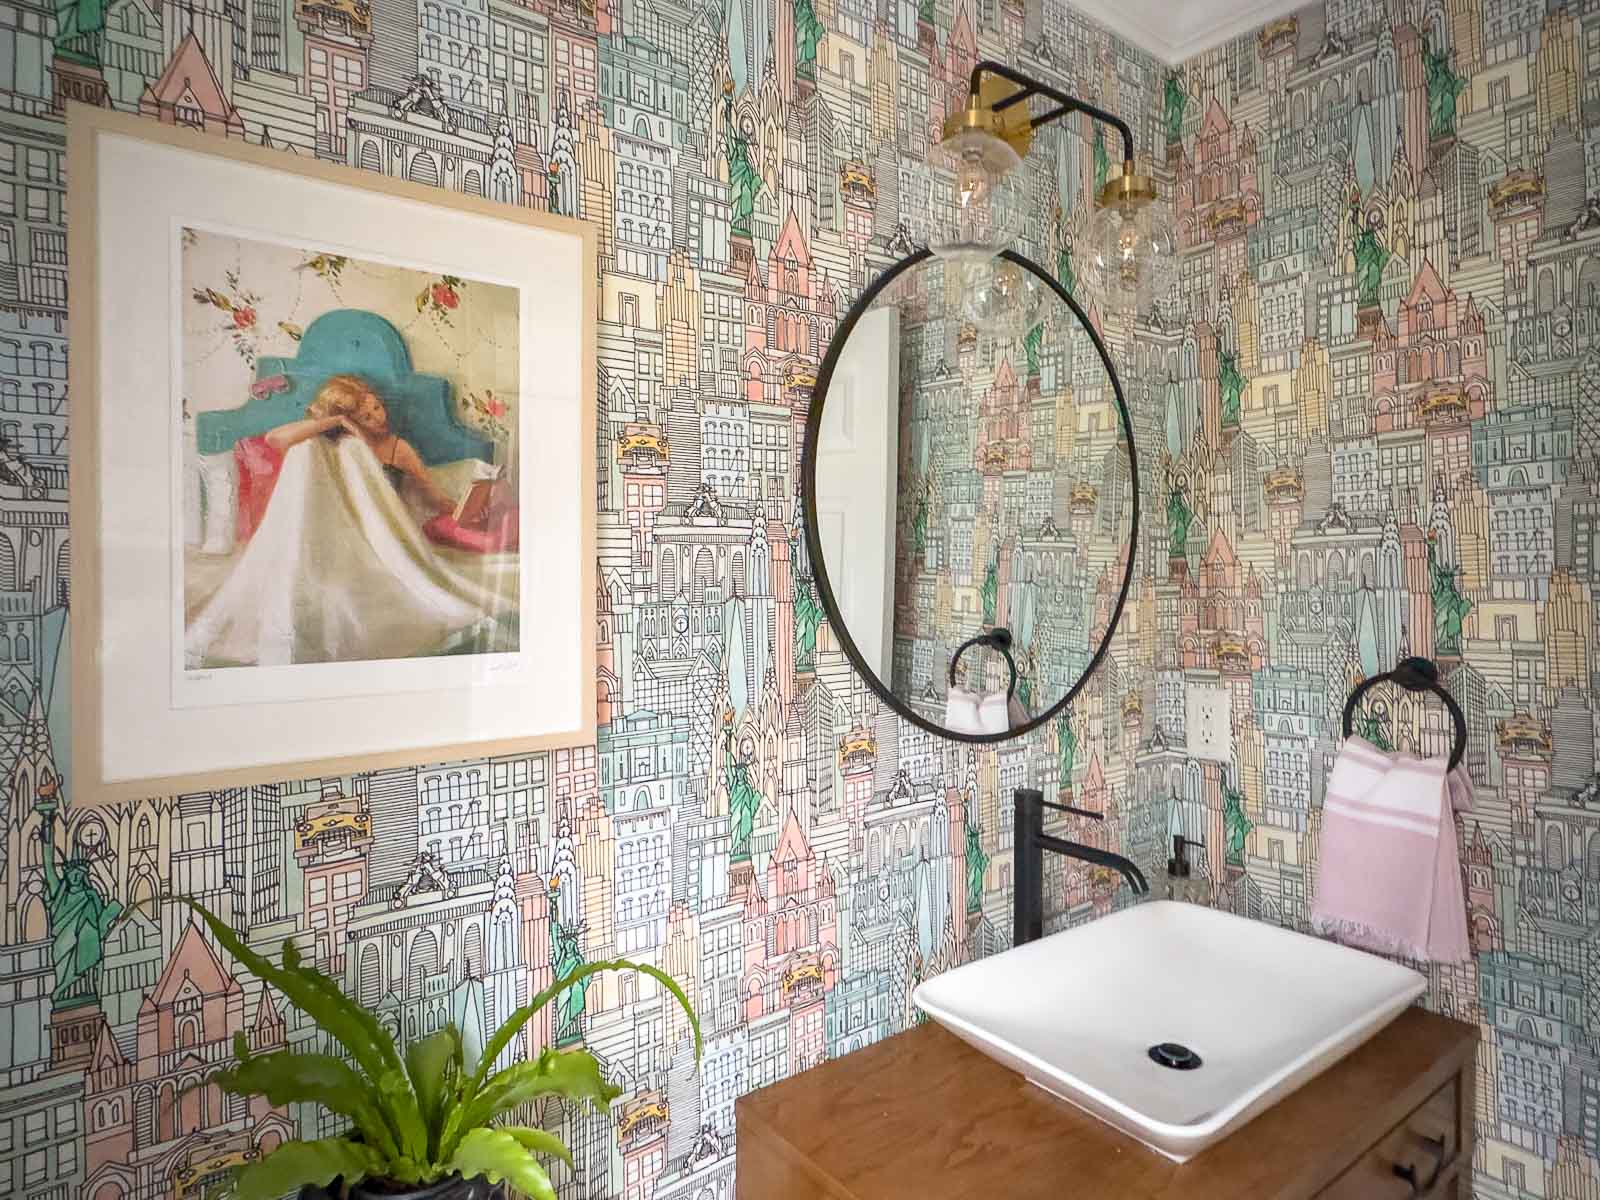
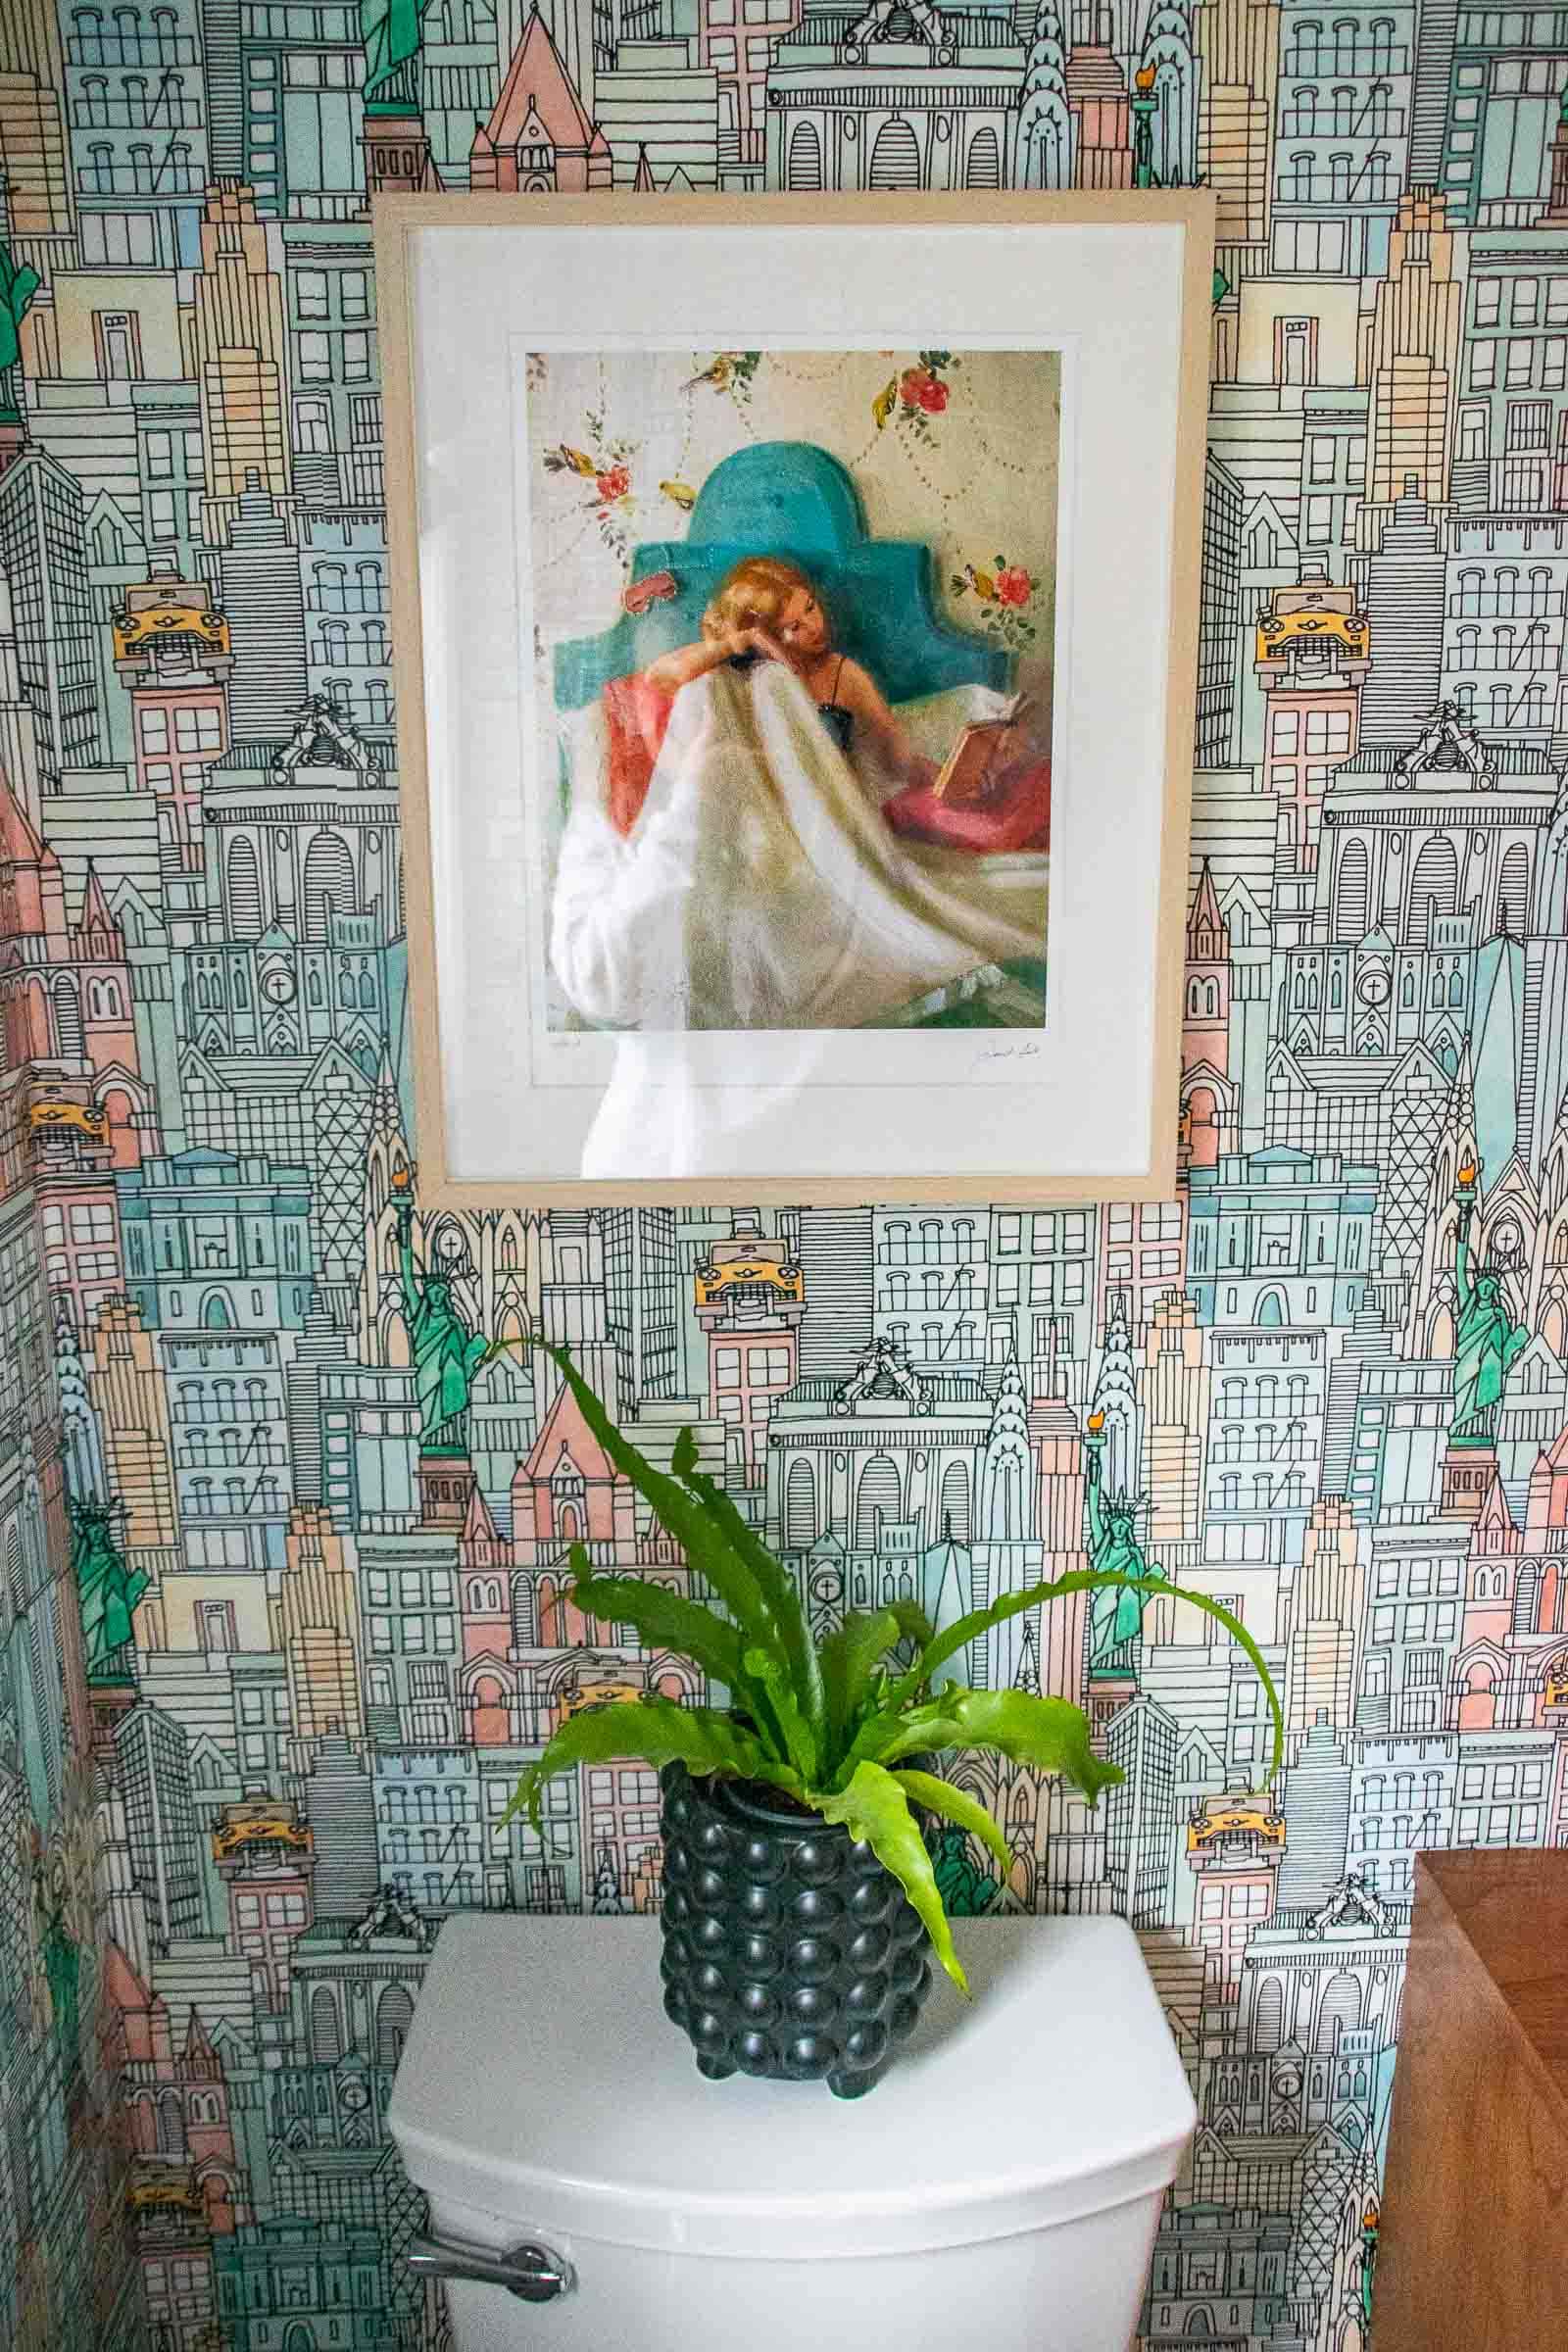
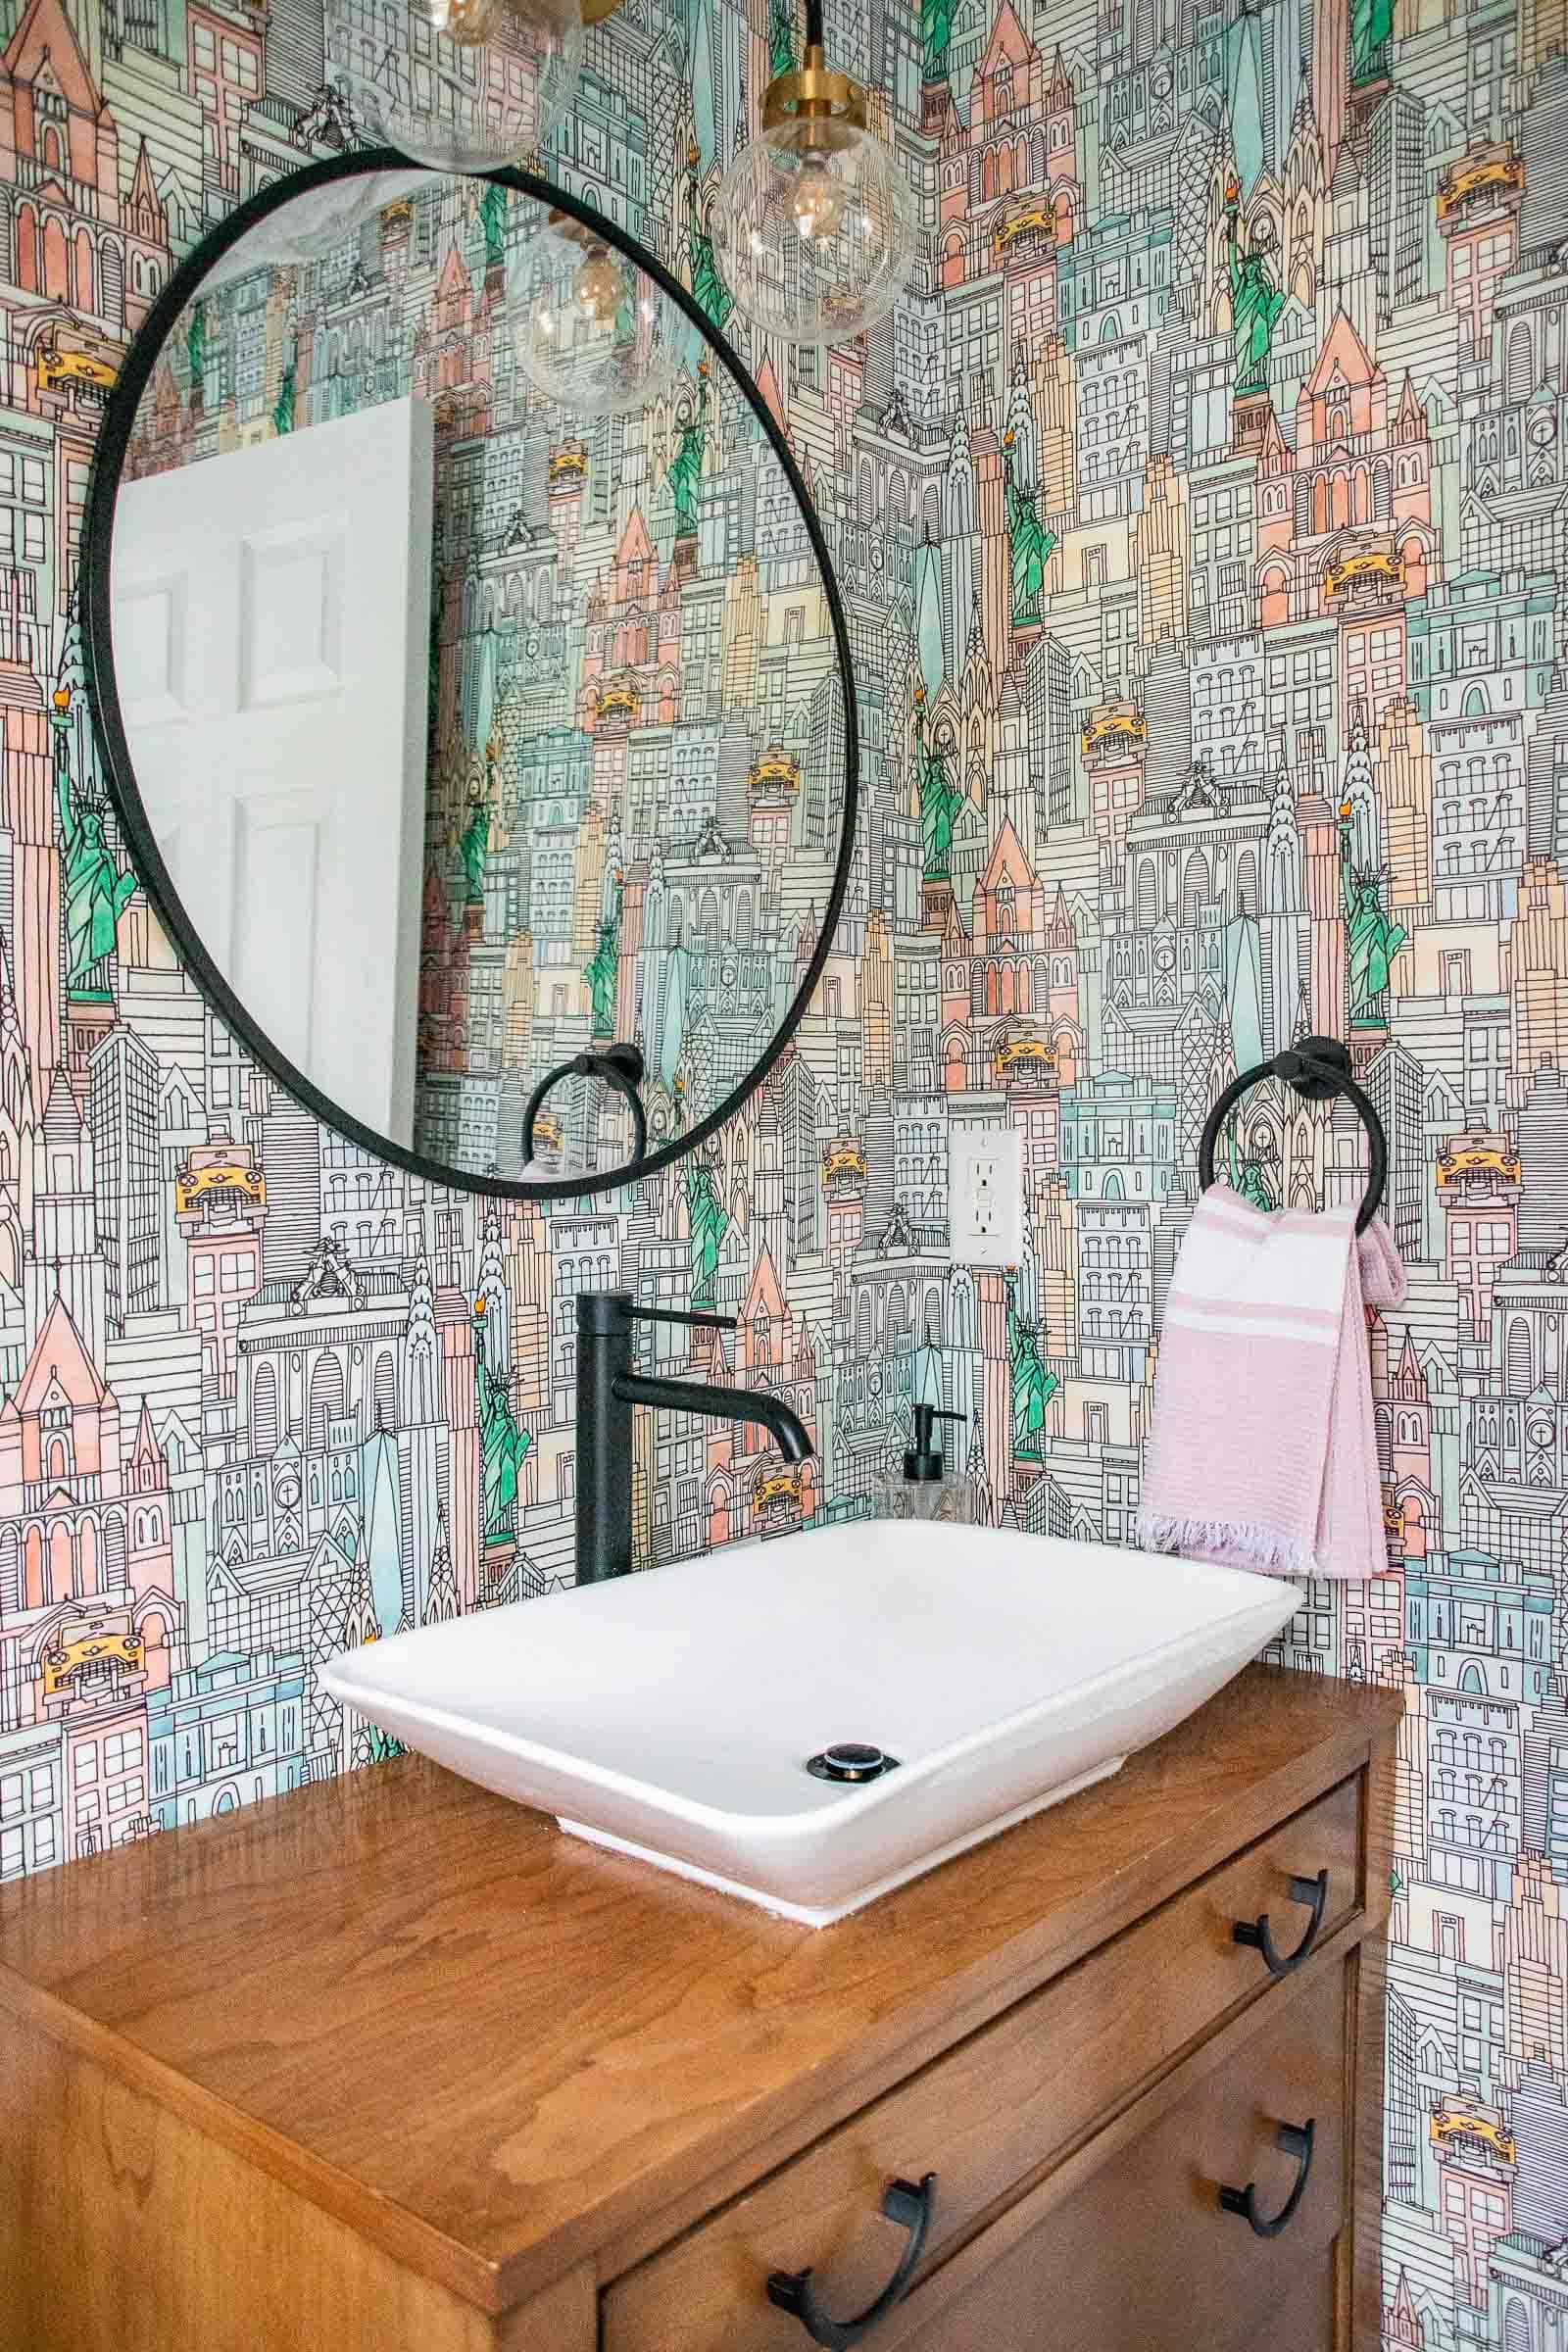
Whenever I design a space, I start with the big moments and in here, that was the wallpaper. After perusing Spoonflower for ages, I FINALLY landed on this whimsical colorful paper by Scrummy Things of a New York City street scene. It was colorful without being too wild. A different feeling than the bold botanical in our foyer but still… fun. With wallpaper selected, I moved onto the tile. Originally I envisioned a big bold colorful tile but it turns out that even for this 25 sq. foot bathroom, that would still be in the *thousands* of dollars. Not today.
Shop my favorites!
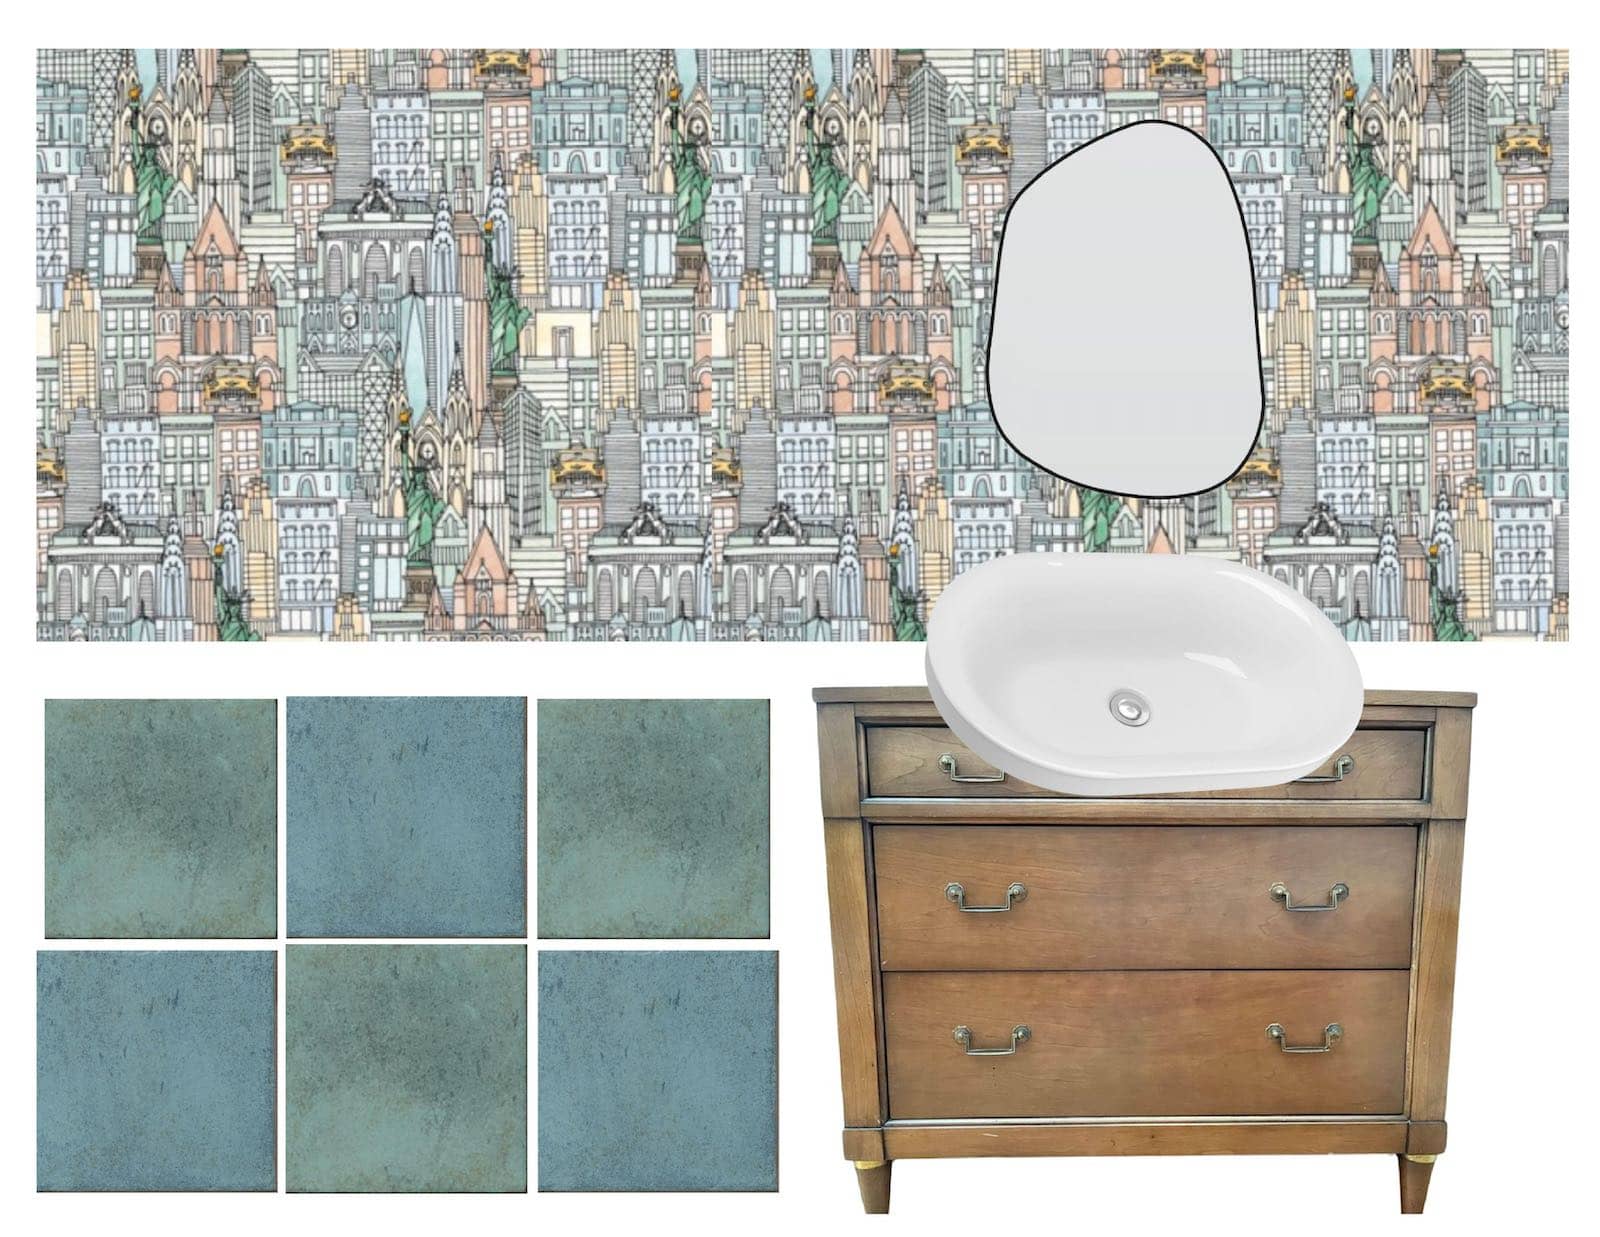
It occurred to me that a simple white tile is very cost effective and perhaps there was a way to bring in colorful GROUT. Turns out there is. Grout 360 sells sanded and unsanded grout in an array of colors and were the perfect solution. You better believe I have ideas for future projects using colorful grout!
Step 2. Demo
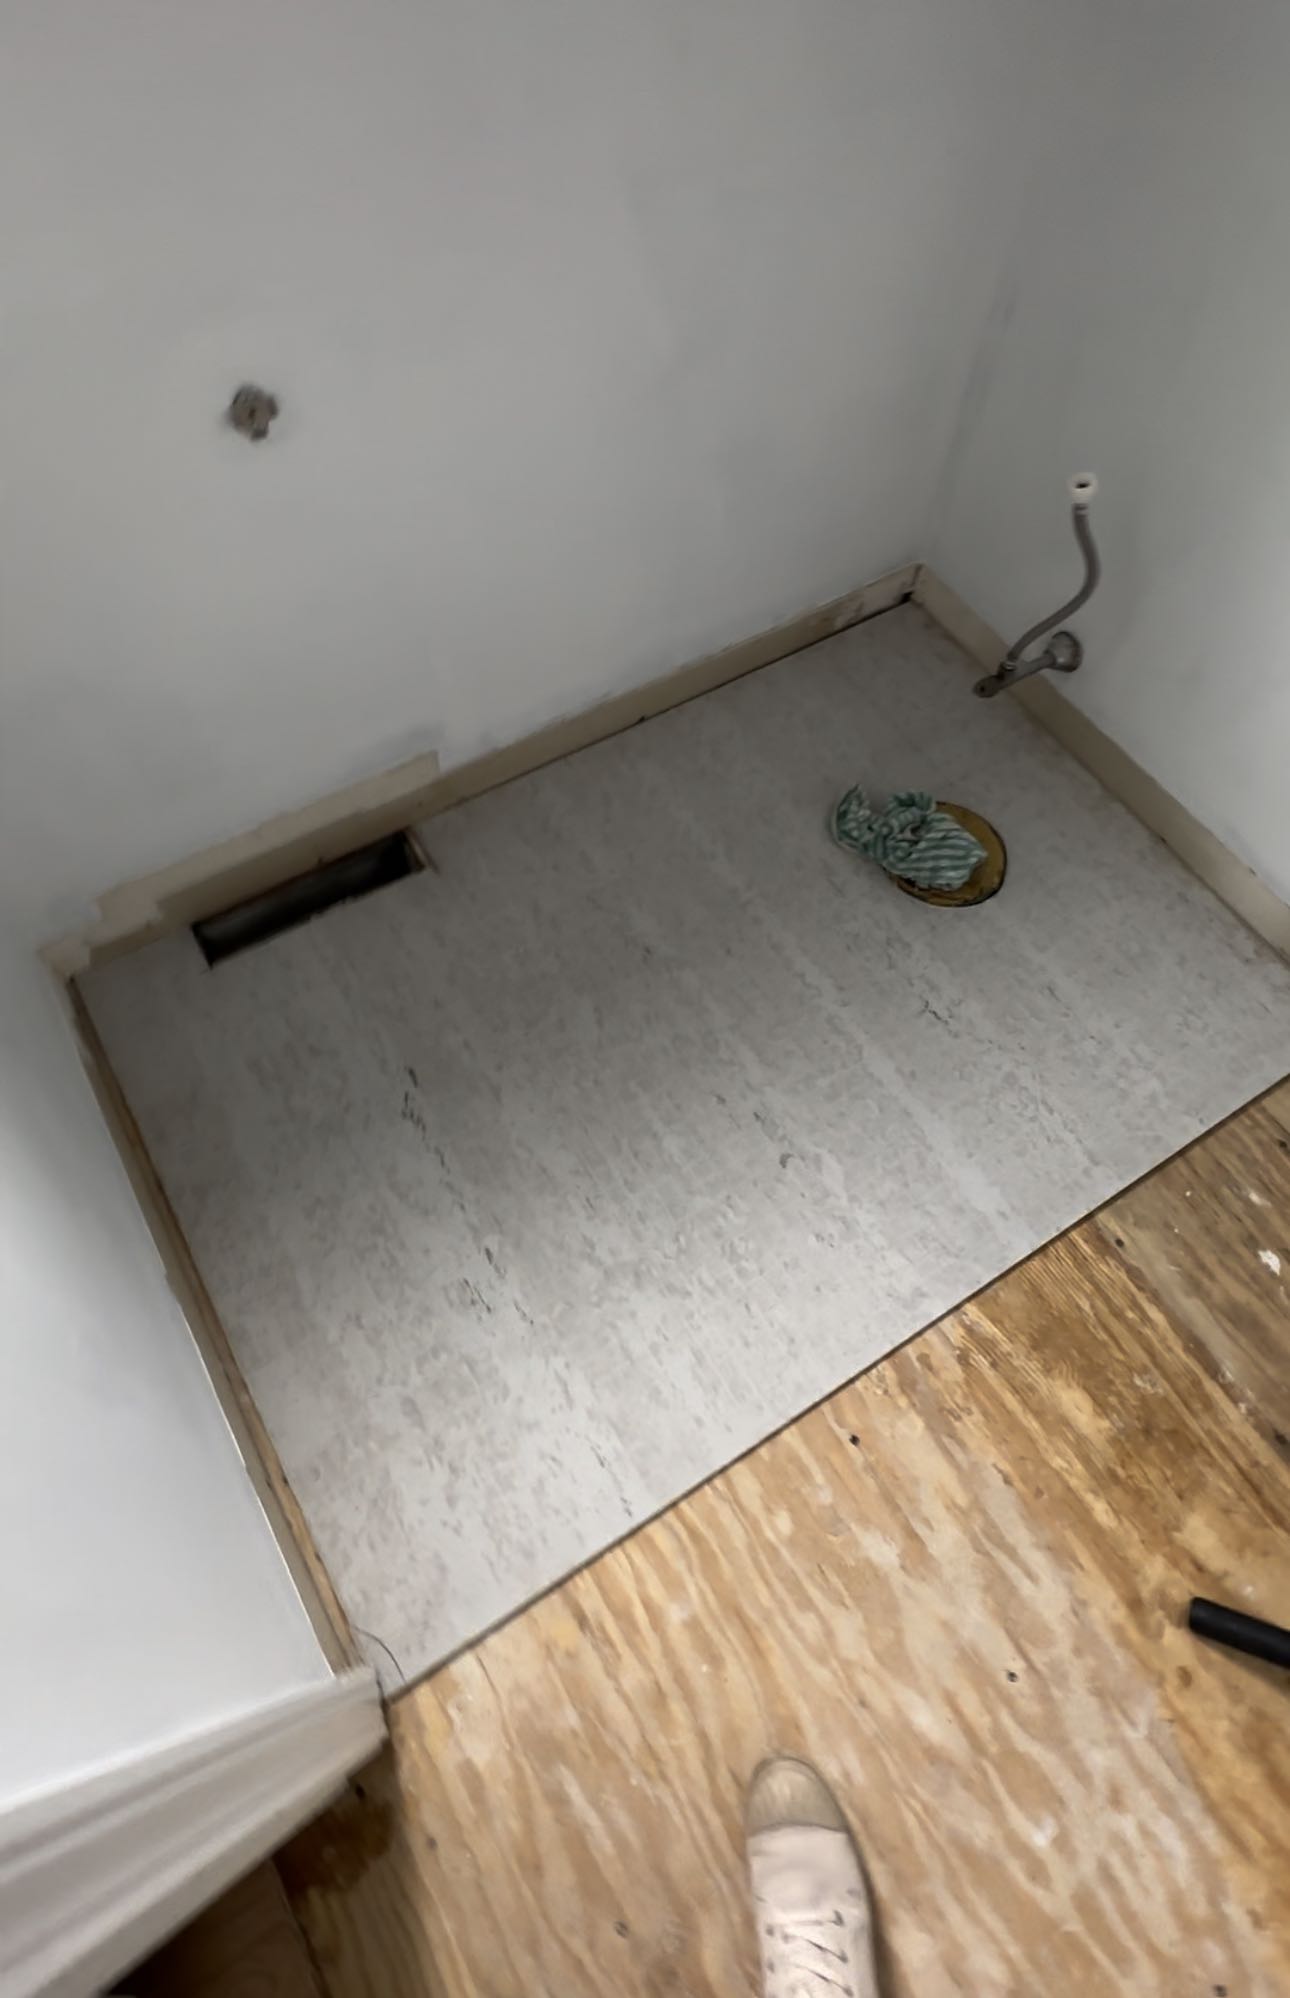
I didn’t do the best job photographing this project since I’m hoping to get a video together for you, but I pulled up the adhesive tiles I put down during this project. (Note: they held up GREAT… none of them were peeling up and the pattern was pristine… even after a toilet overflow situation.). The hardest part was removing the ceramic tile that was under the adhesive tile, but luckily this was resting on a sheet of vinyl so I could remove that and didn’t have to worry about the leftover thinset from the tiles. And don’t worry… our house was built in the 80s so no asbestos here. I unhooked the faucet and the sink drain and removed the vanity as well. At some point, I removed the baseboards to get up all the flooring and I opted just to install new clean white primed baseboards instead of keeping these old ones.

Step 3. Prep
Because I was hanging wallpaper, I primed the walls to make sure the black and the hand painted faces didn’t poke through the seems or along the crown molding. I did NOT do that in our dining room when I wallpapered and there are a few places along the crown where you can see the brown walls peeking through. (Note: These are screen grabs to show you the process but that explains why they’re such terrible quality.)
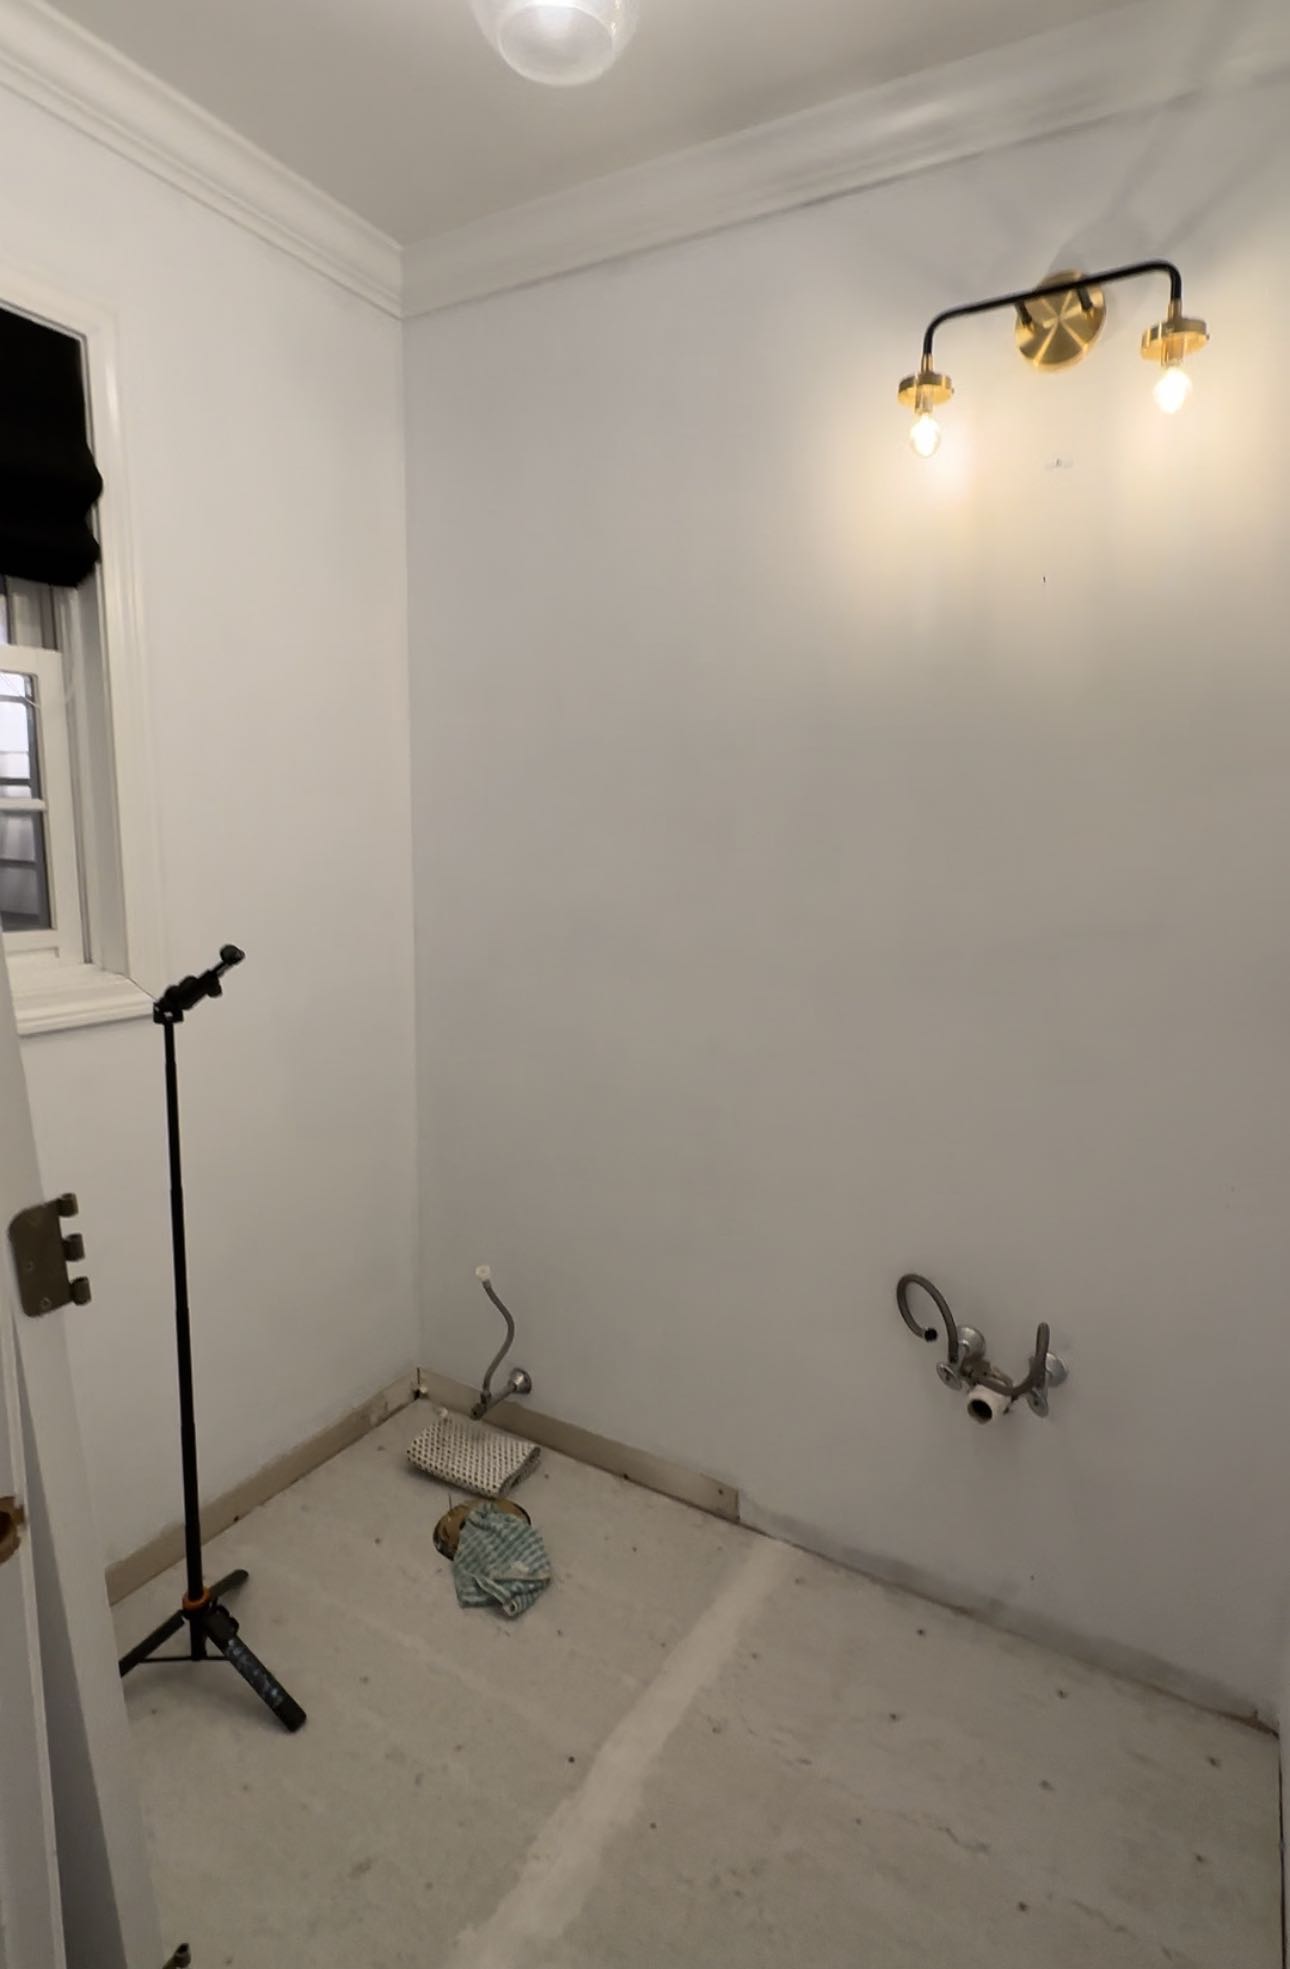
I had removed the toilet already to get to the floor below so all that was left was floor prep. I put down some cement backer board. This will help prevent any cracking in the tile since the wooden subfloor can bend and flex a tiny bit. It’s also recommended for spaces that can get wet since it won’t mold or rot.
Step 4. Tile
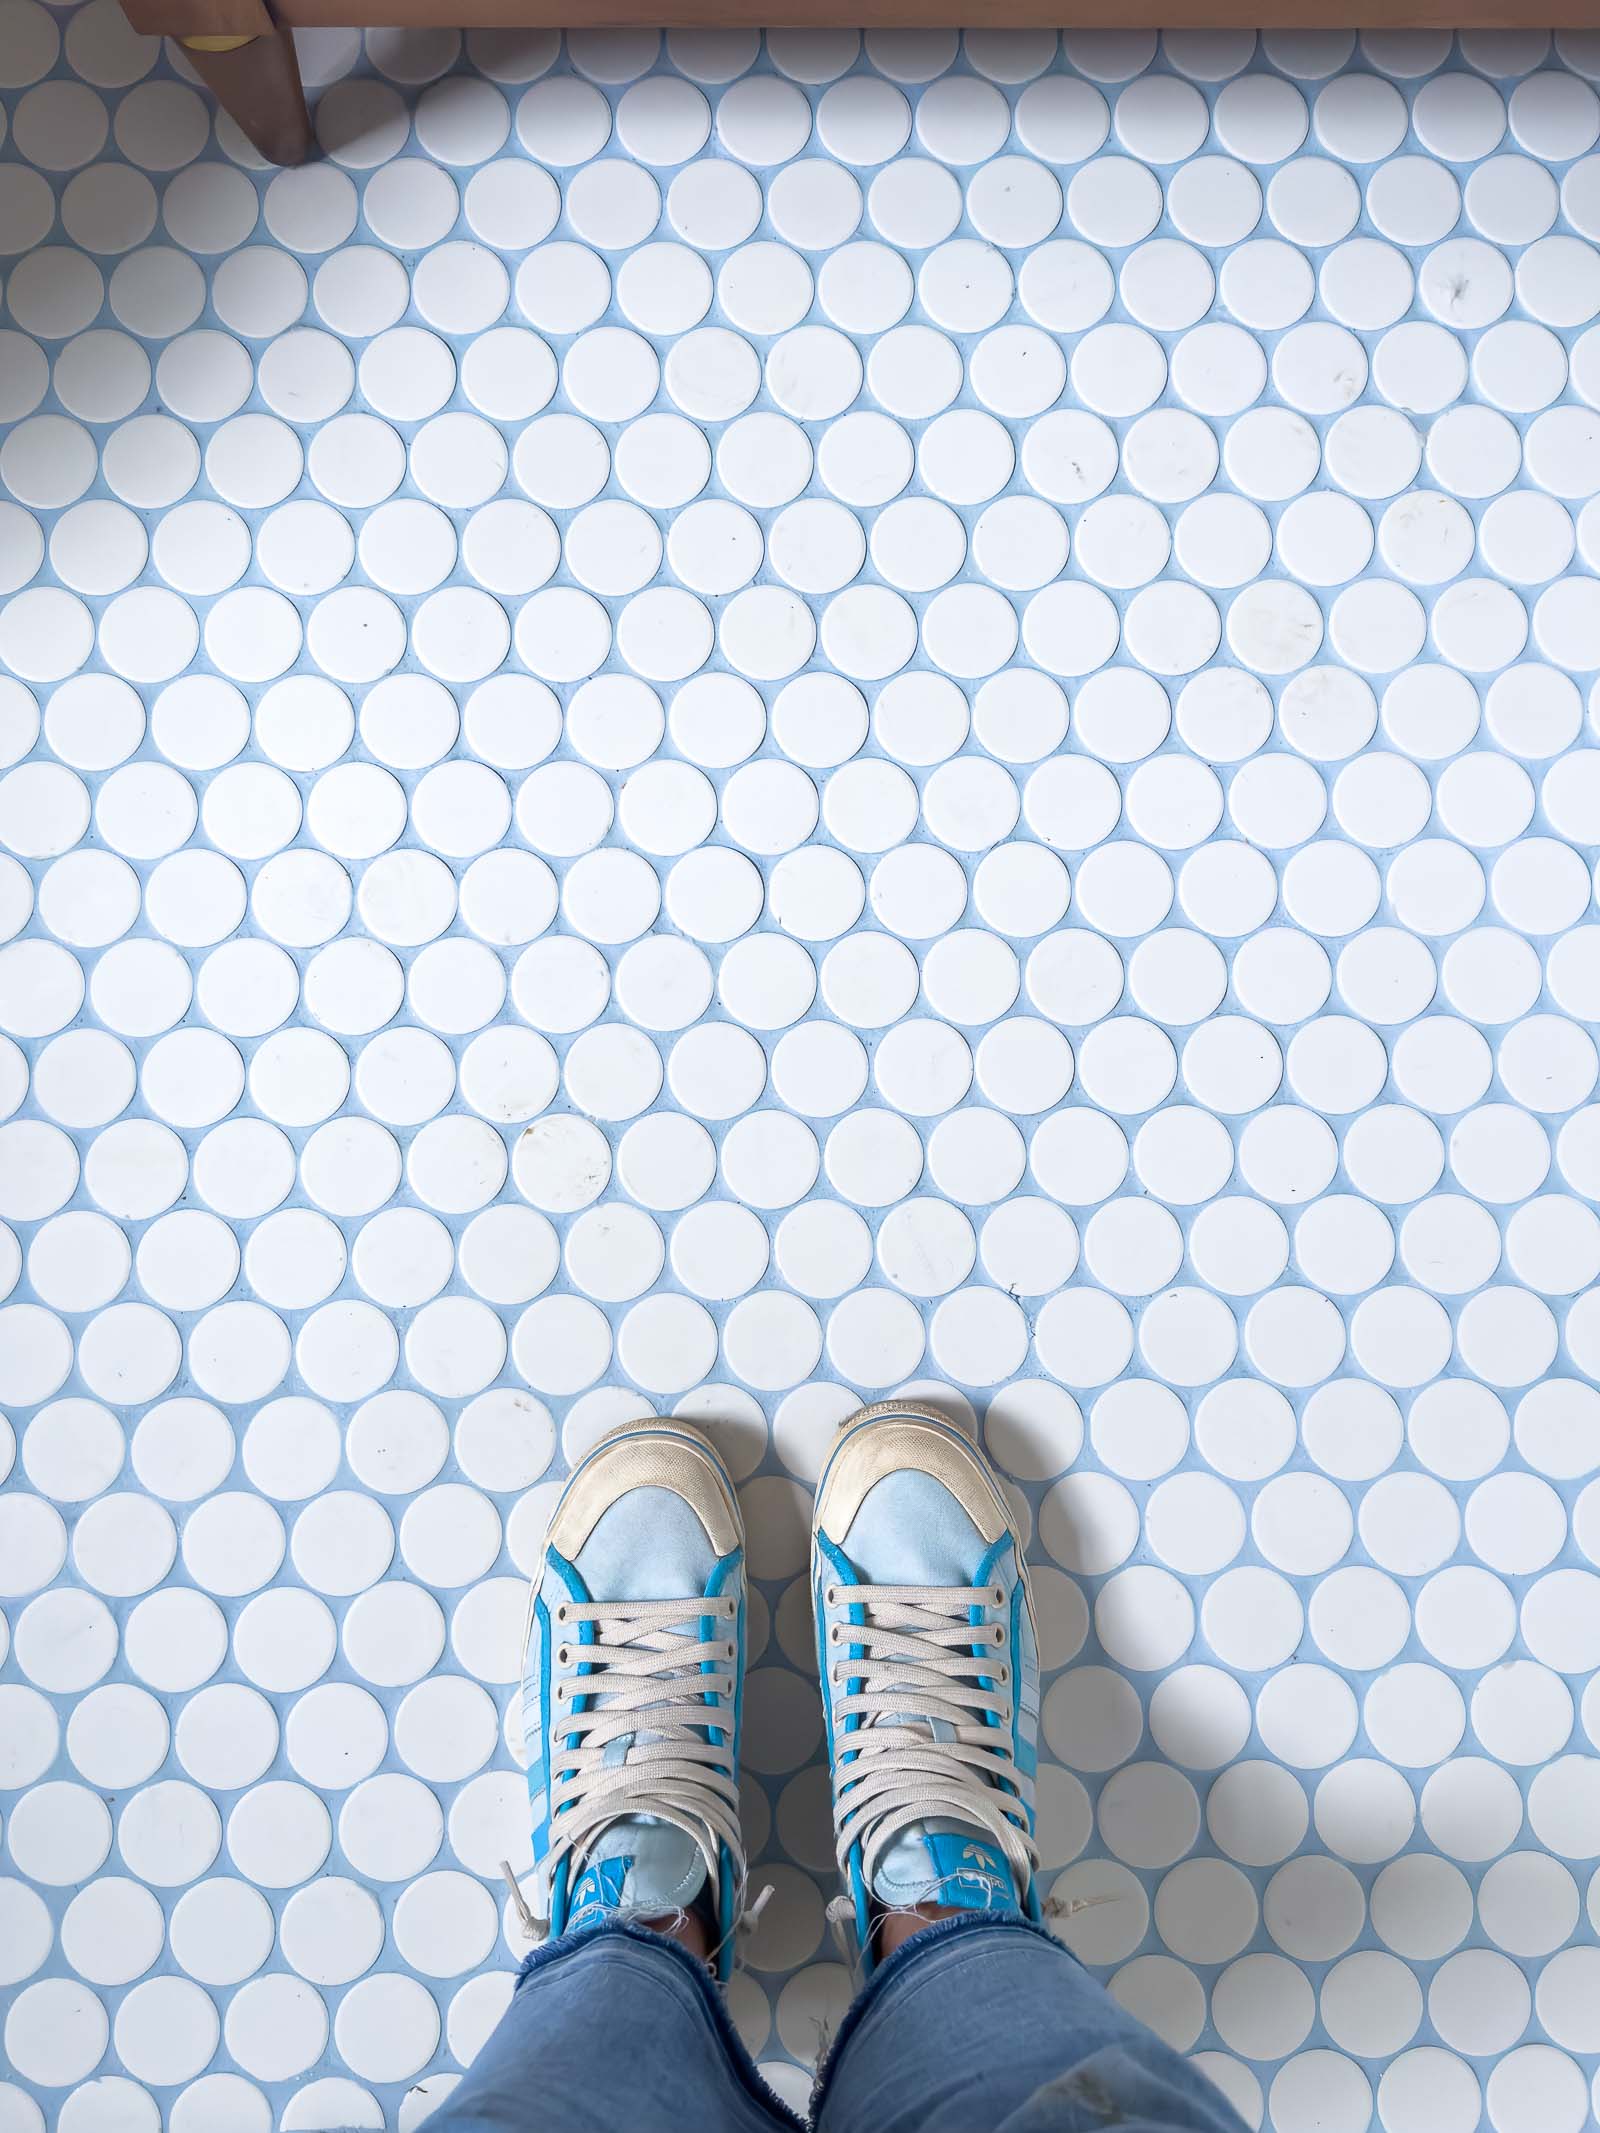
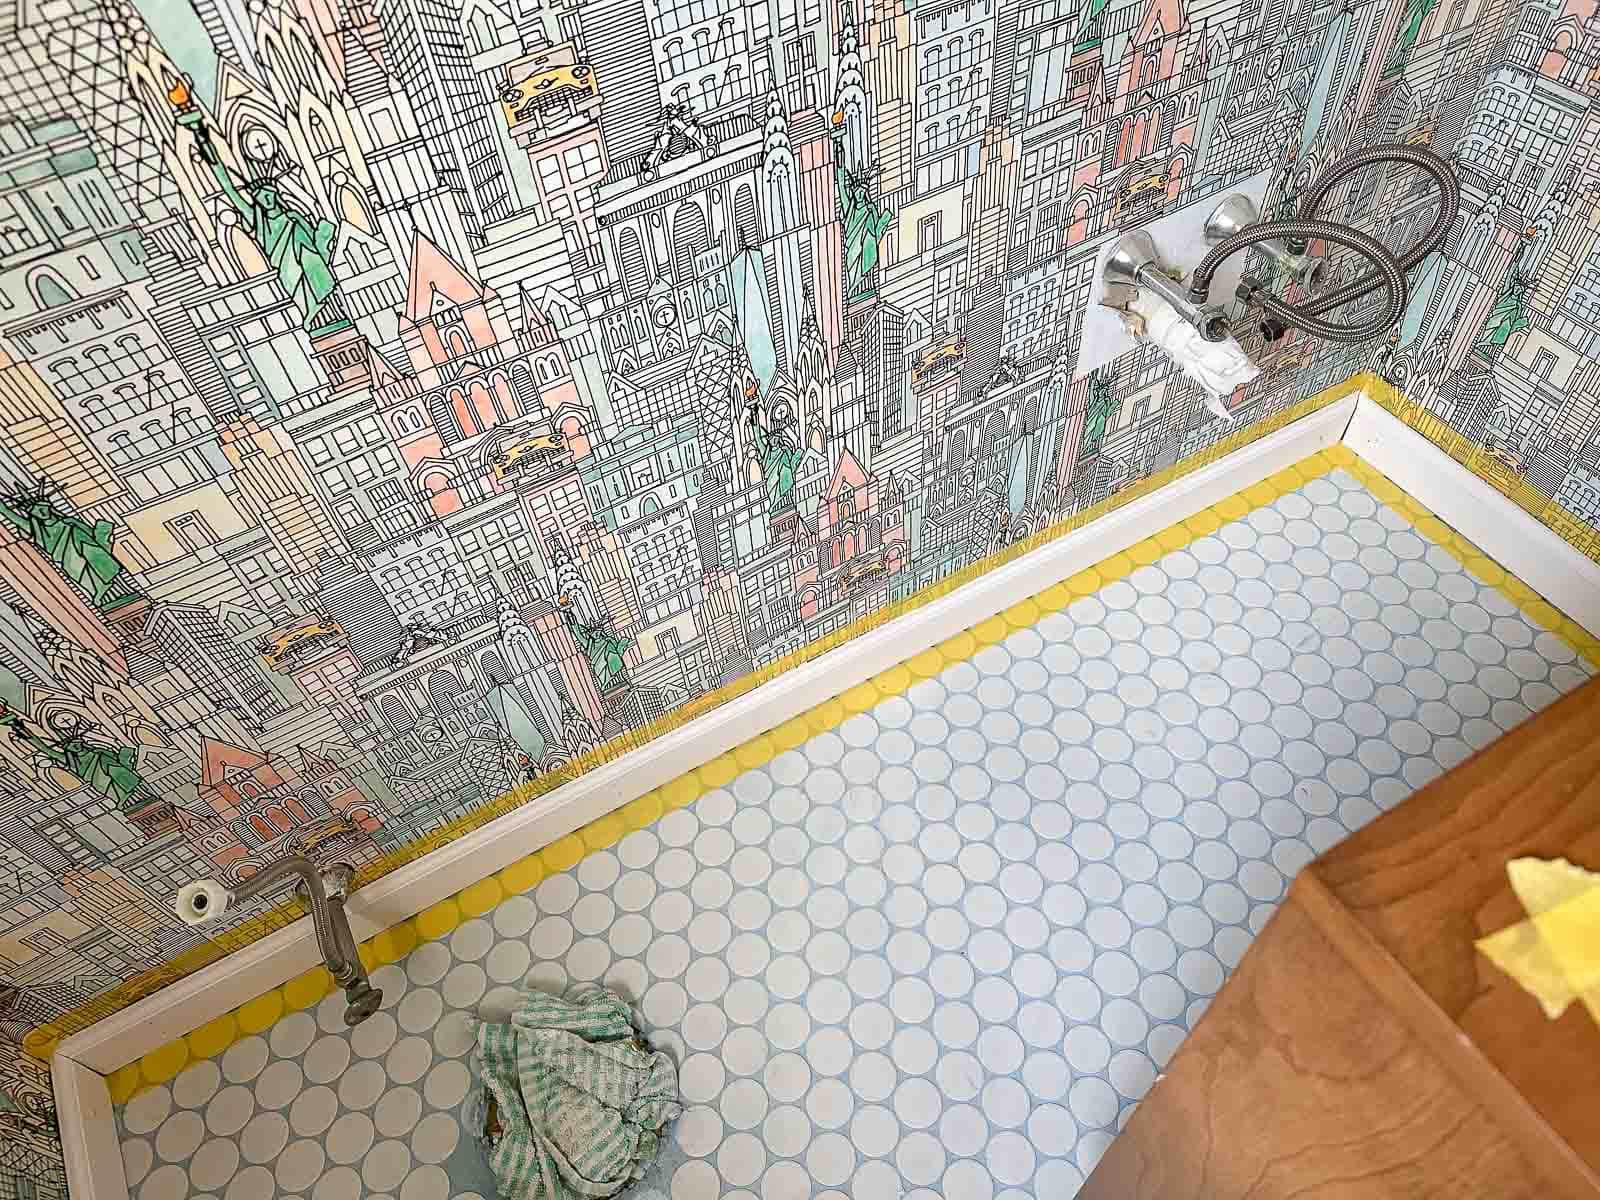
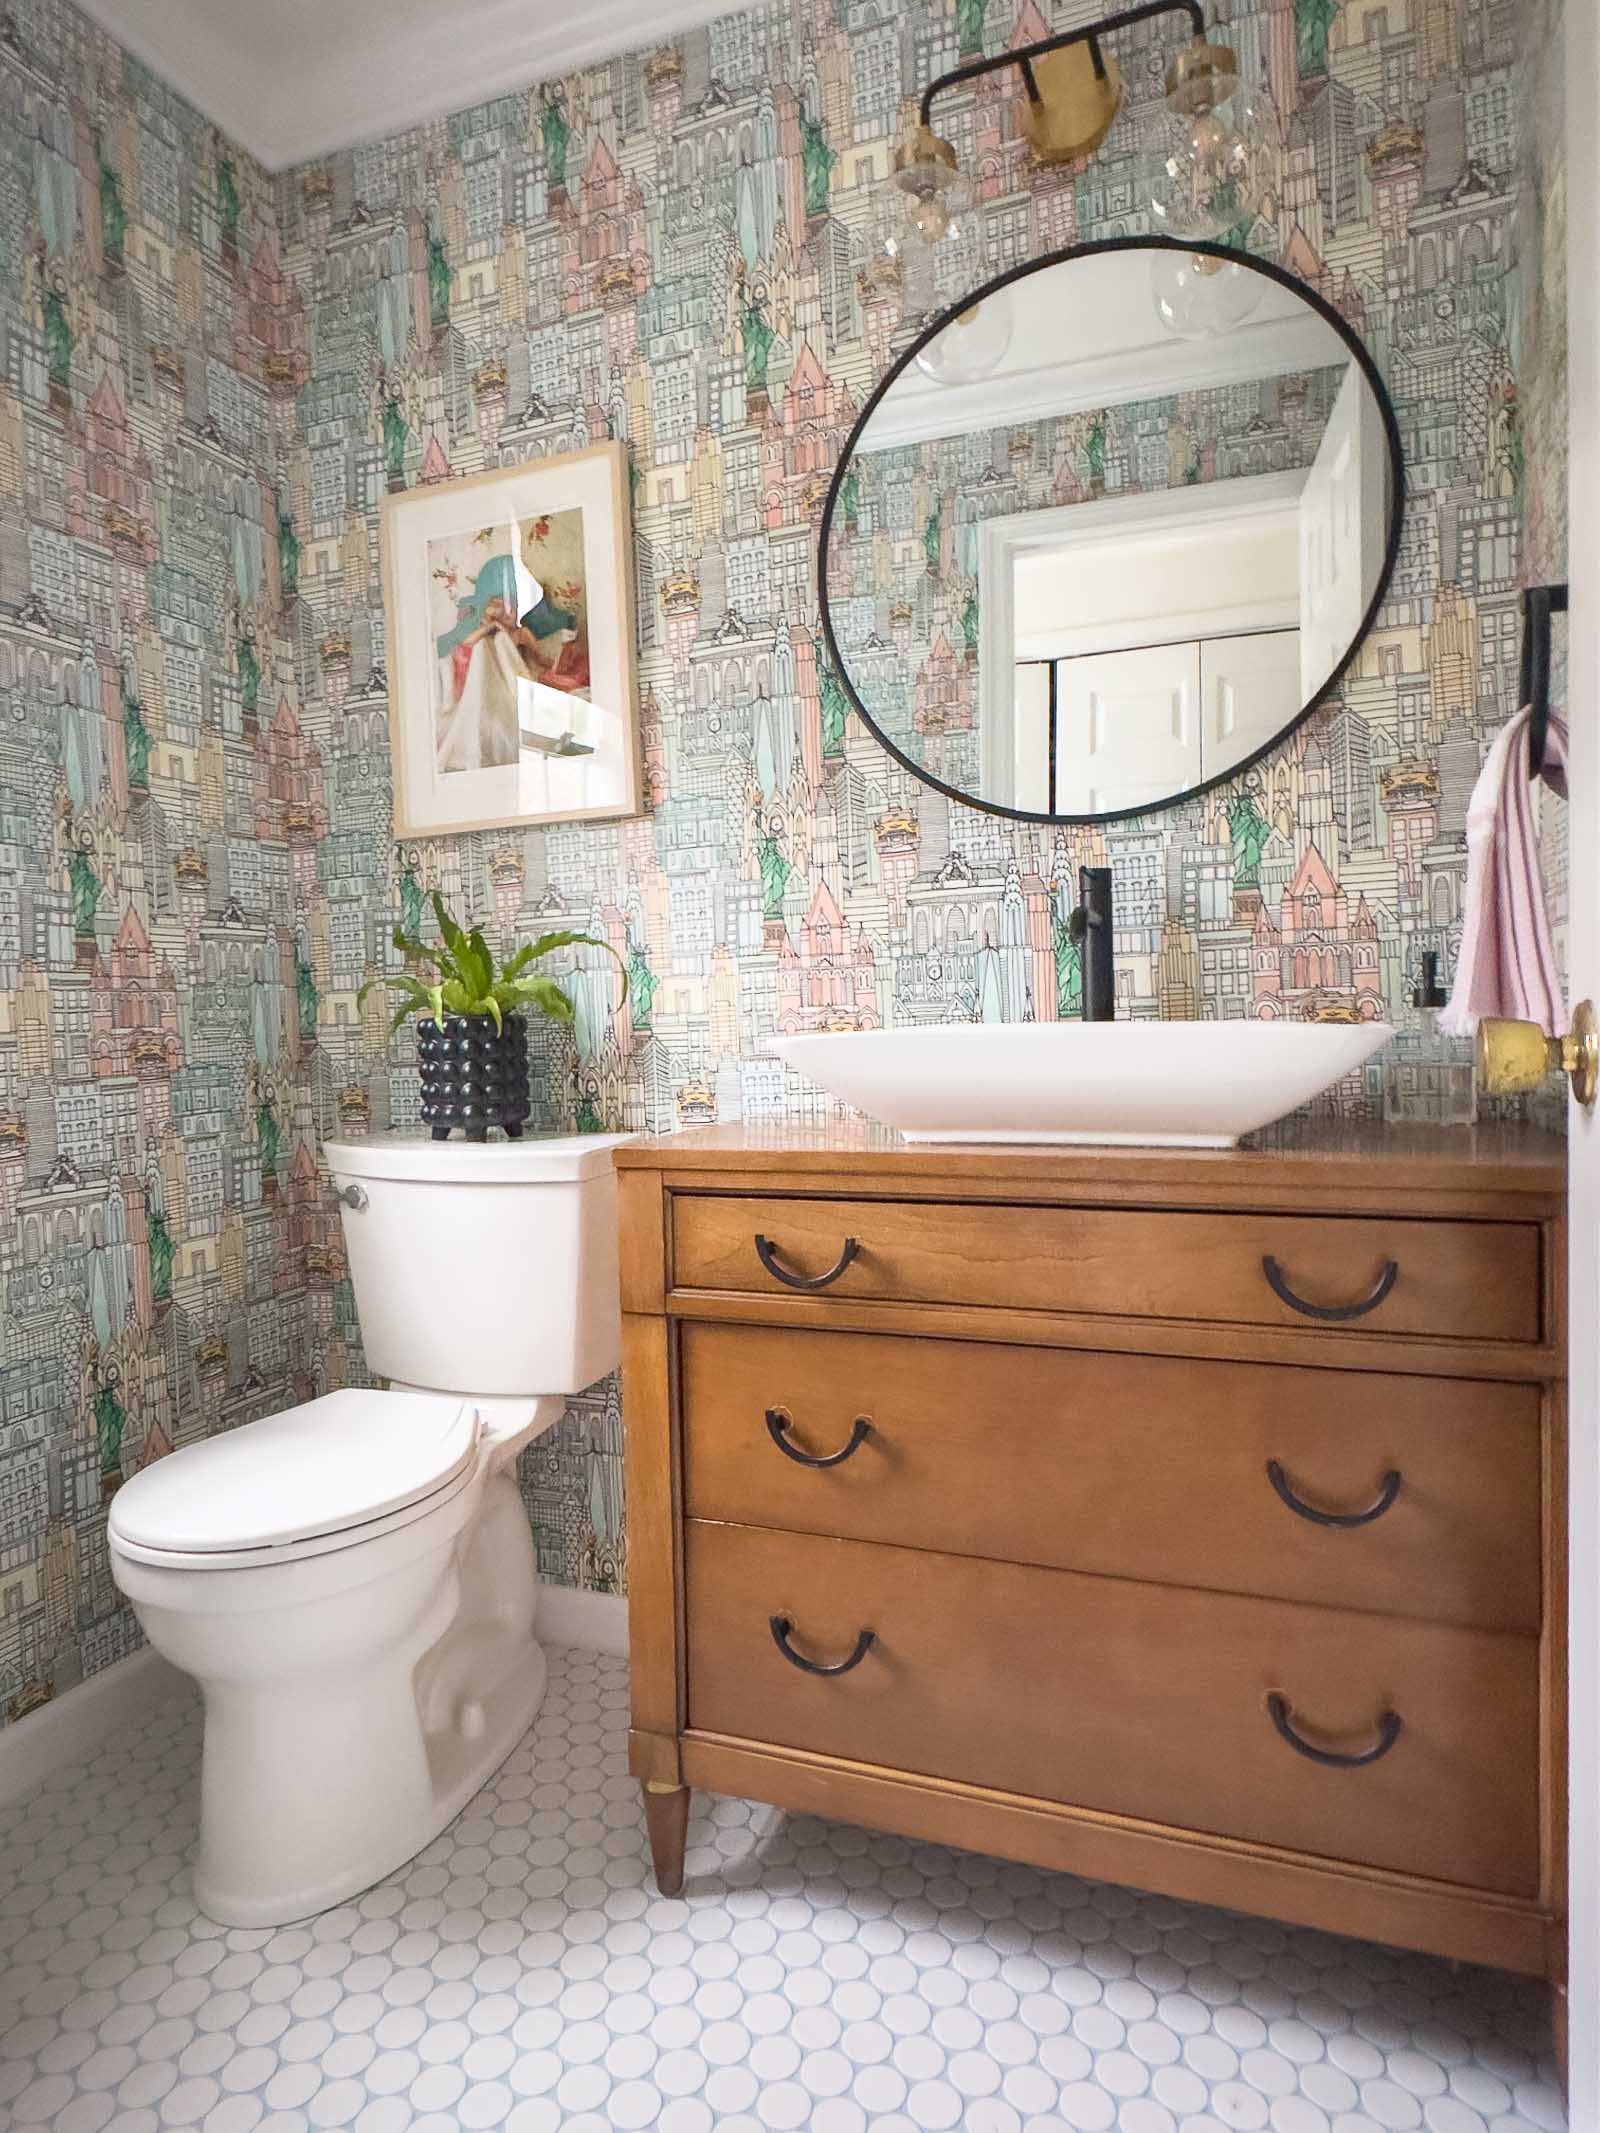
I’m not an expert with tile so I’m always a little messy and a little disorganized but I used the thinset recommended at the store and a 1/4″ trowel so slowly lay this fun 2″ penny tile from Floor and Decor. Penny tile can be tricky because there’s no way to use spacers really and it’s super easy to move the tile on the mesh to create a wobbly tile line. My only tip is to stagger the sheets of tile and to go slow to make sure all lines of tile are straight and even. It’s also essential that you scrape away any thinset that oozes through which happens fairly often and is a little challenging with the round tiles.

Leave the tile to set up for 24-48 hours without walking on it and then add your grout. Grout 360 had instructions included with the grout so I mixed it accordingly and slowly spread it between the tiles. Note that penny tile EATS up group… the joints are deceptively large so don’t be like me and order more grout than you think you need because running out with 2 feet to go is possibly the most frustrating thing ever. You’ll also want to quickly test that your tile doesn’t STAIN when the colorful grout is applied or else you’ll have to seal your tile first. I mixed up a tiny bit of grout and tested it on one of my tiles and thankfully was in the clear.
With a CLEAN sponge (squeeze out as much water has humanly possible) wipe down the excess grout from the tiles. Grout 360 had clear directions for this so Ieft a bit of a haze on the tiles and went back after with a special cleaner to remove.
Step 5. Wallpaper
I actually hung the wallpaper between tiling and grouting but I probably should have waited so I didn’t risk getting grout on it. Oh well… I wrote up a post here about hanging removable wallpaper. Note: At some point I got lost in my audiobook and forgot to check for level… when I wrapped a corner the paper shifted a bit so half the space is ever so slightly askew. It’s a busy pattern and with the mirror/ vanity/ toilet/ artwork, you totally can’t tell but I was frustrated as hell I made such a dumb mistake. So make sure you check for level every time you hang a new strip of paper.
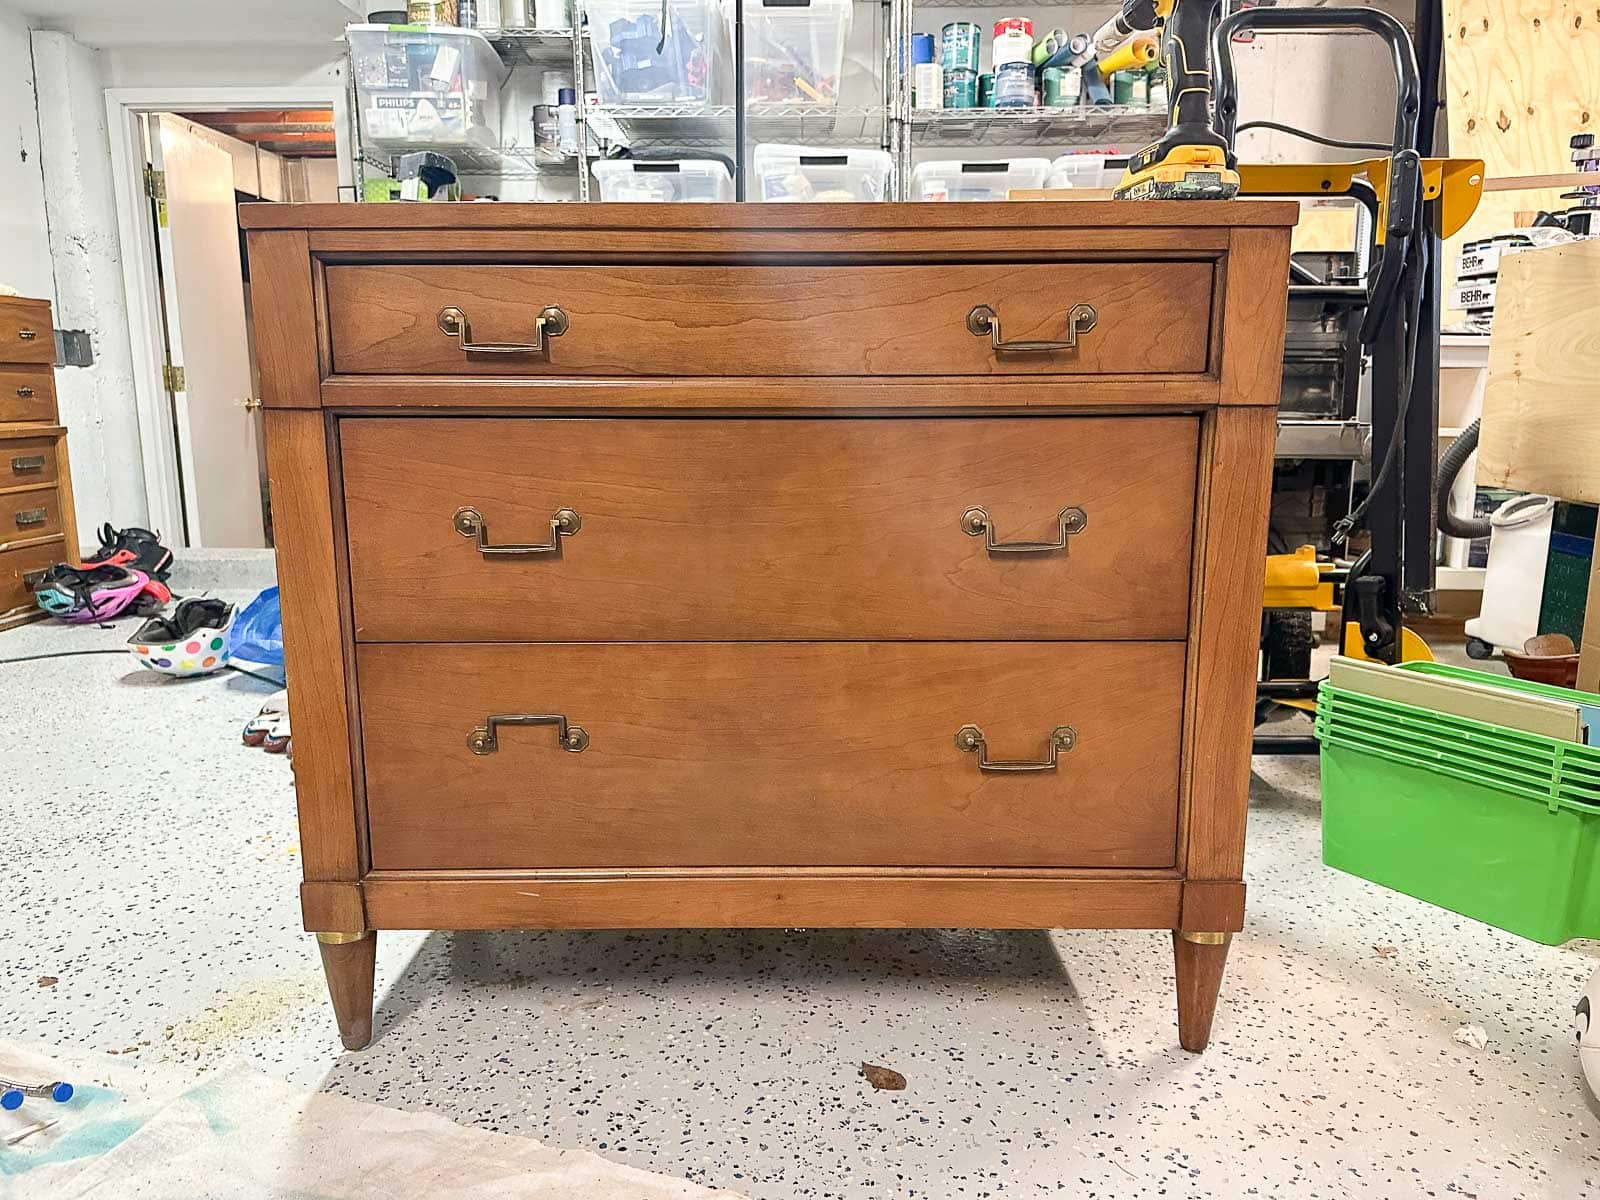
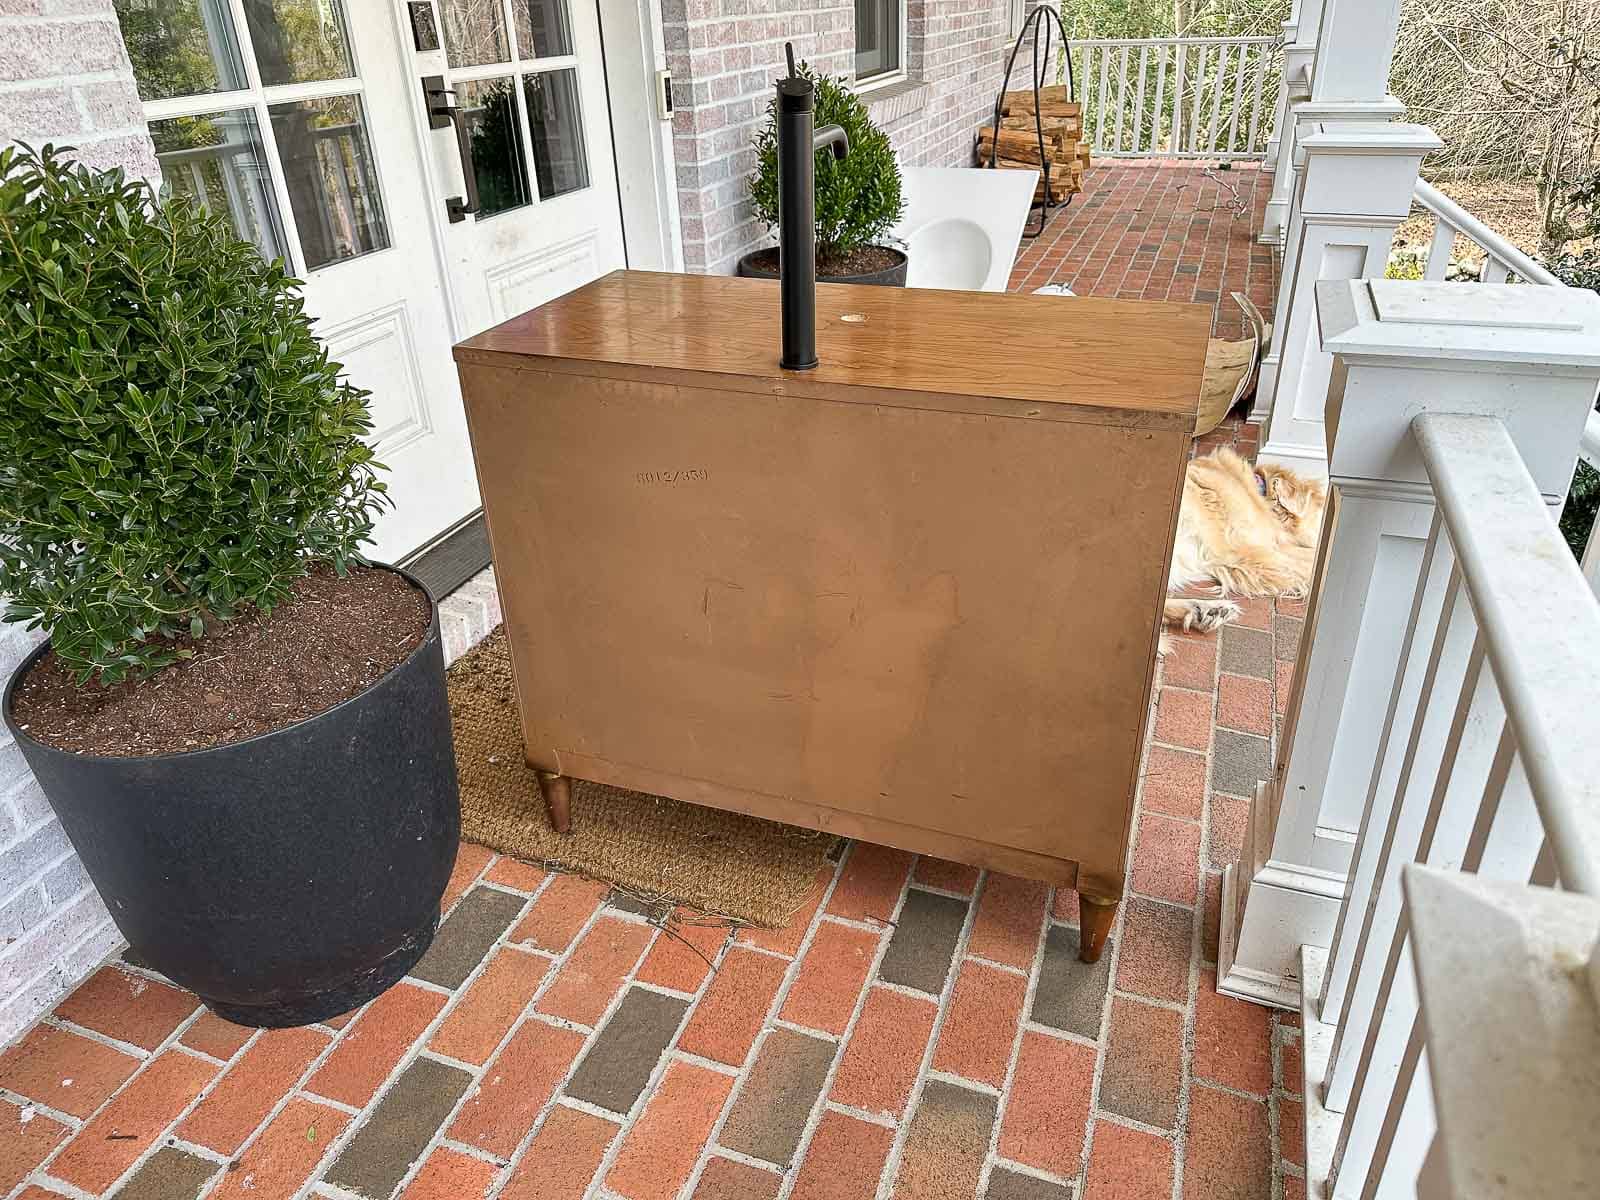
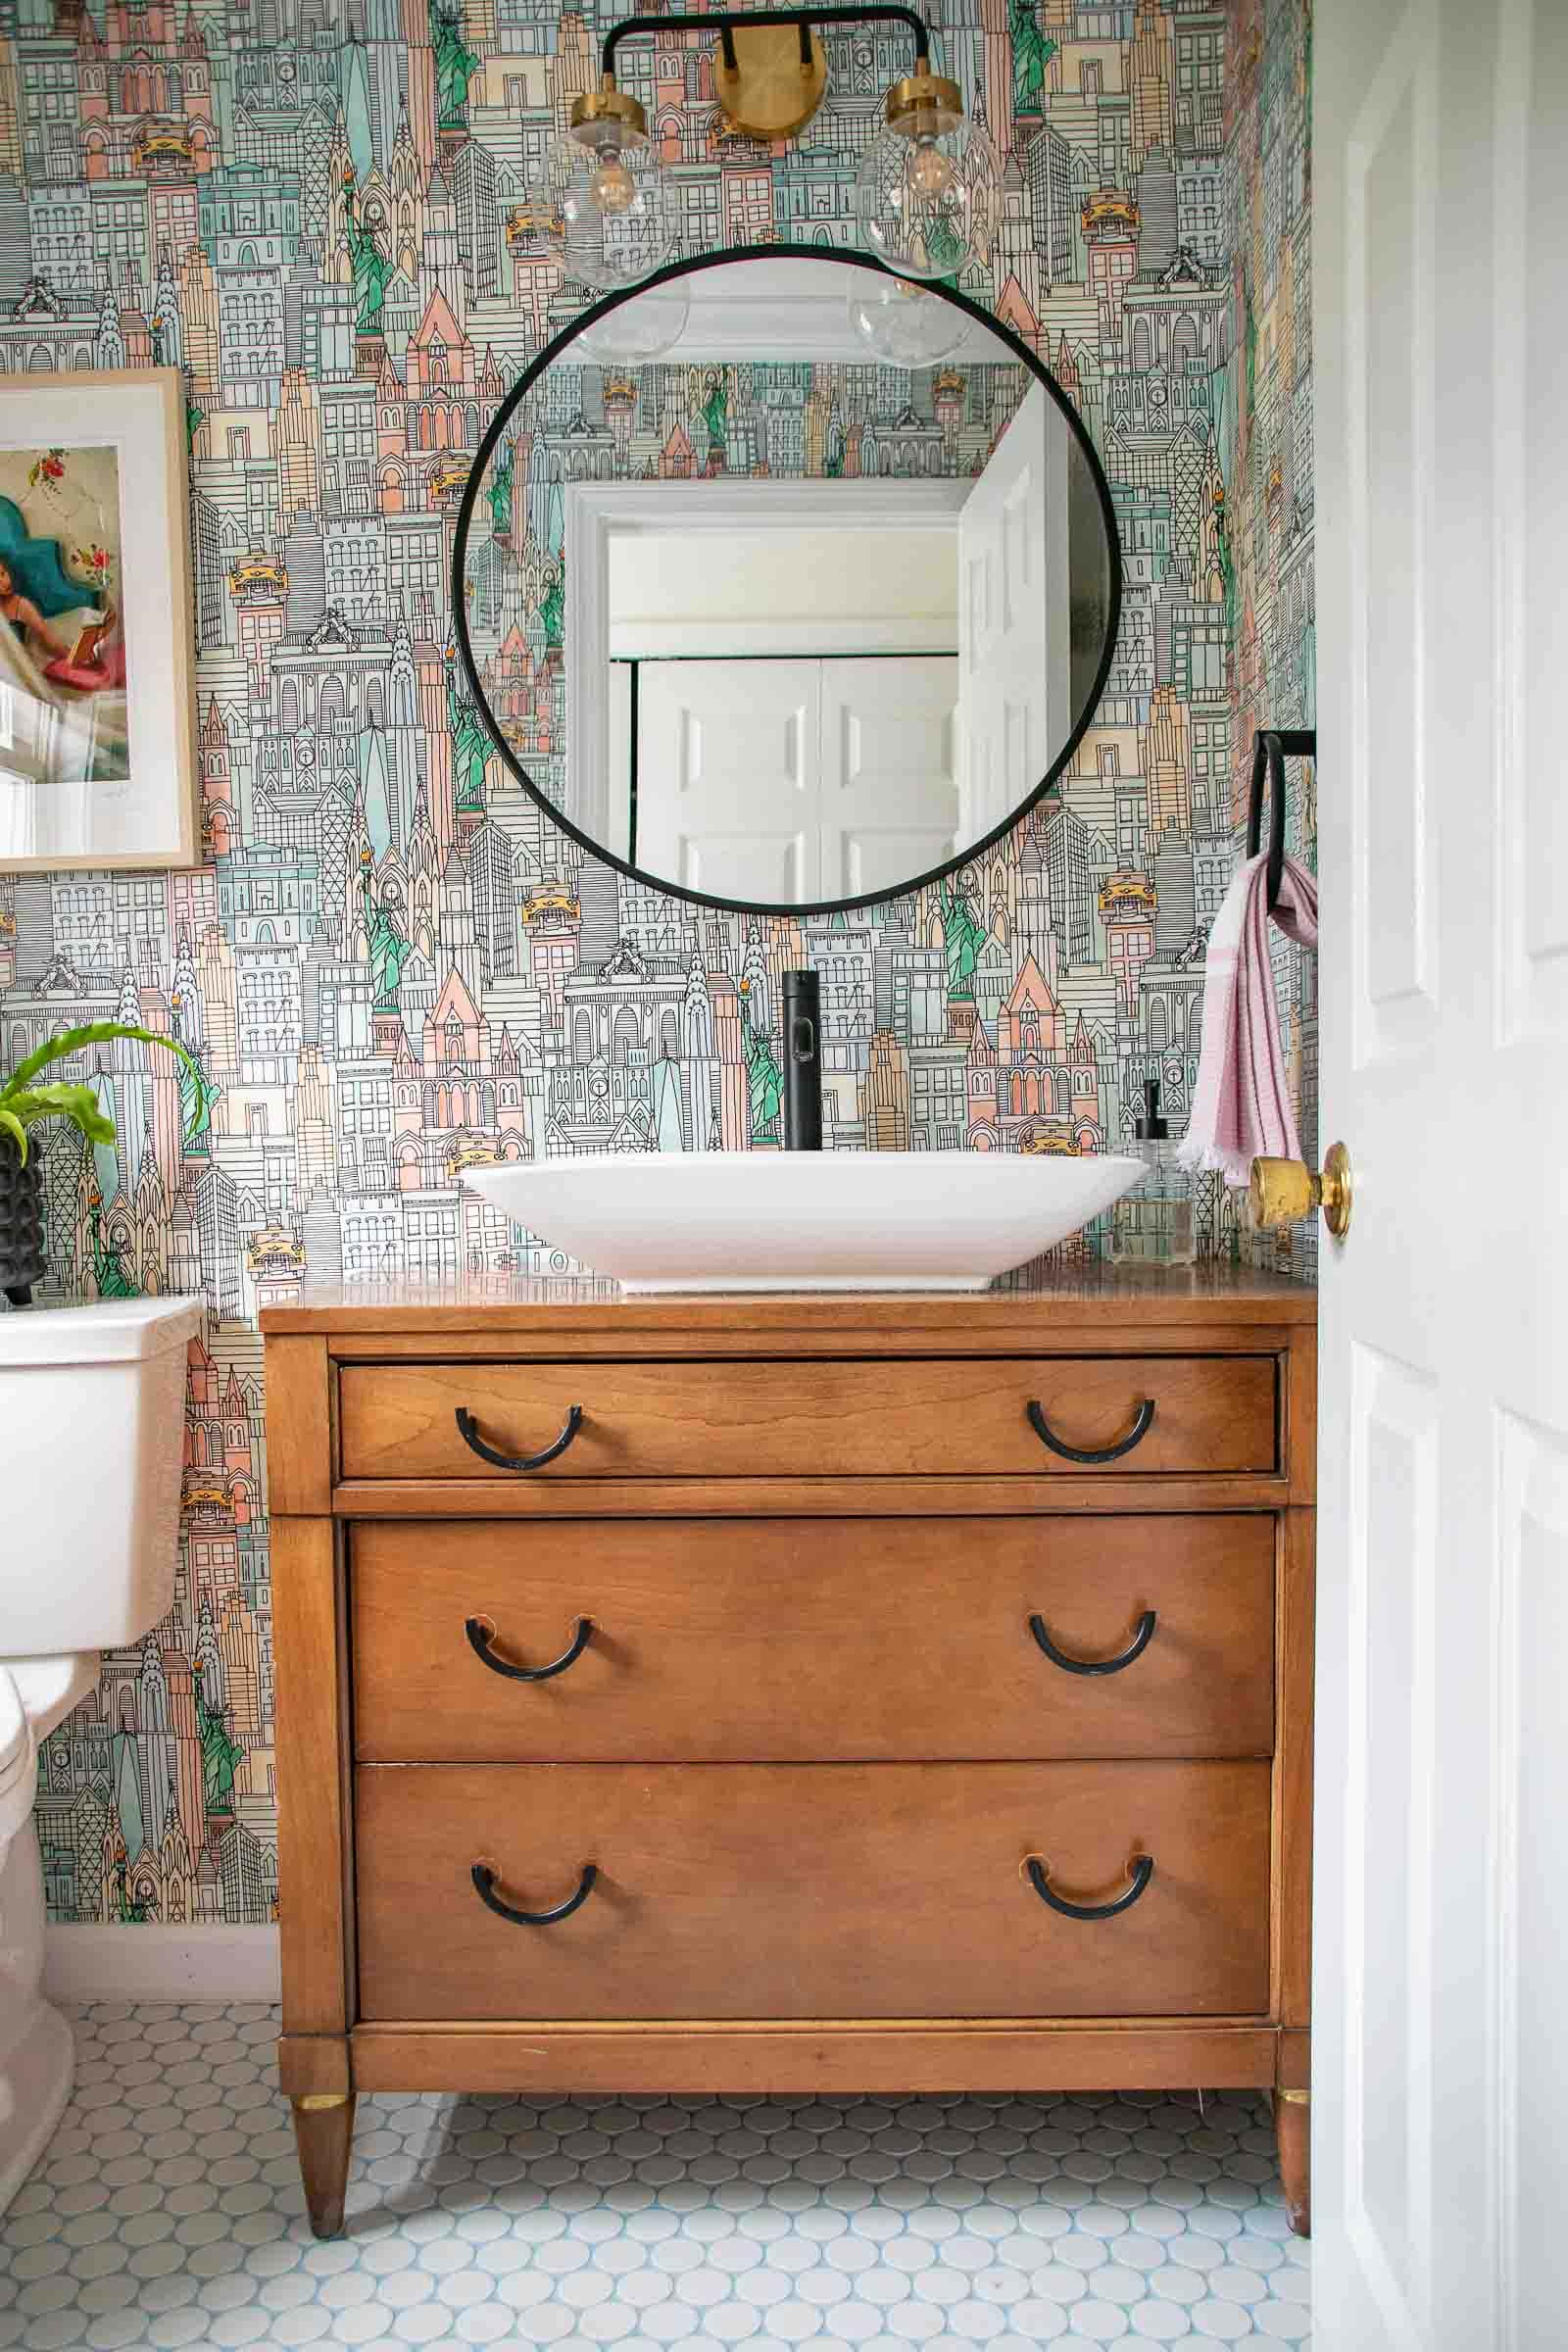
Step 6. DIY Vanity
I did something similar in our primary bathroom so feel free to check out that post here. Essentially, I drilled a hole in the top of this thrifted end table to accommodate the new faucet and another hole to fit the drain for the vessel sink I also thrifted.
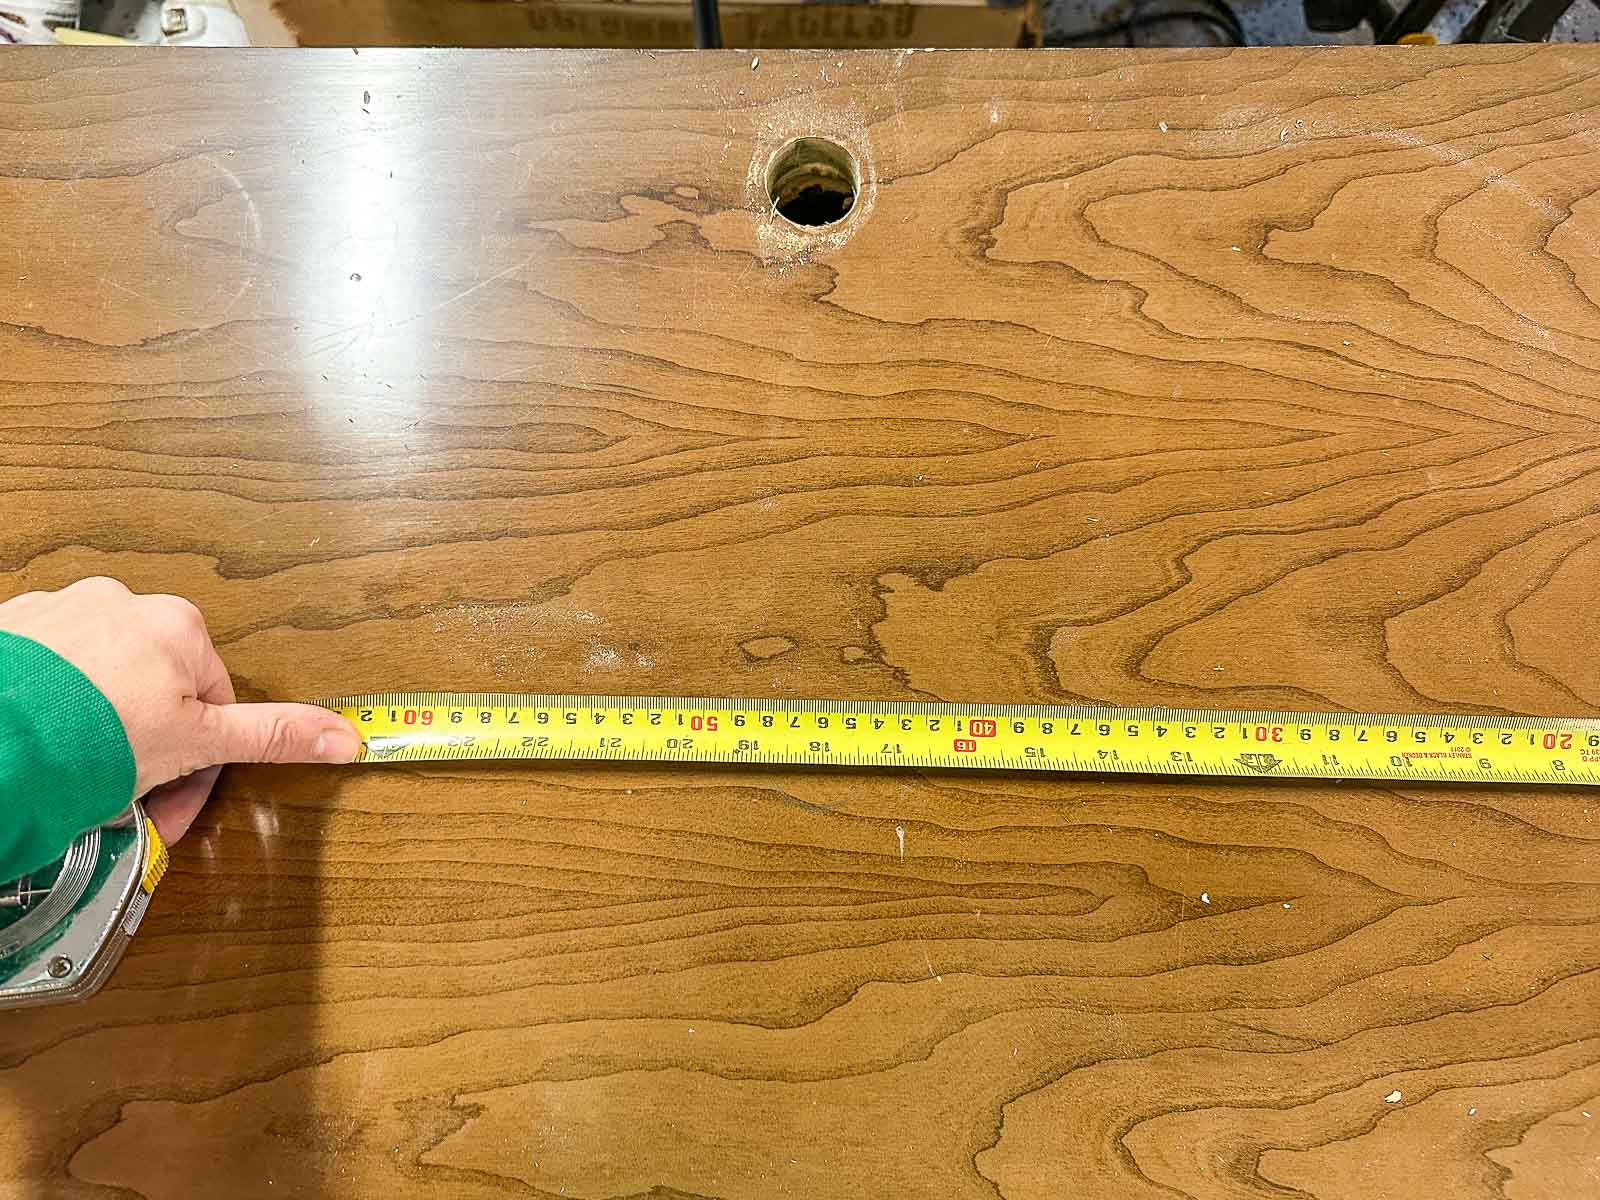
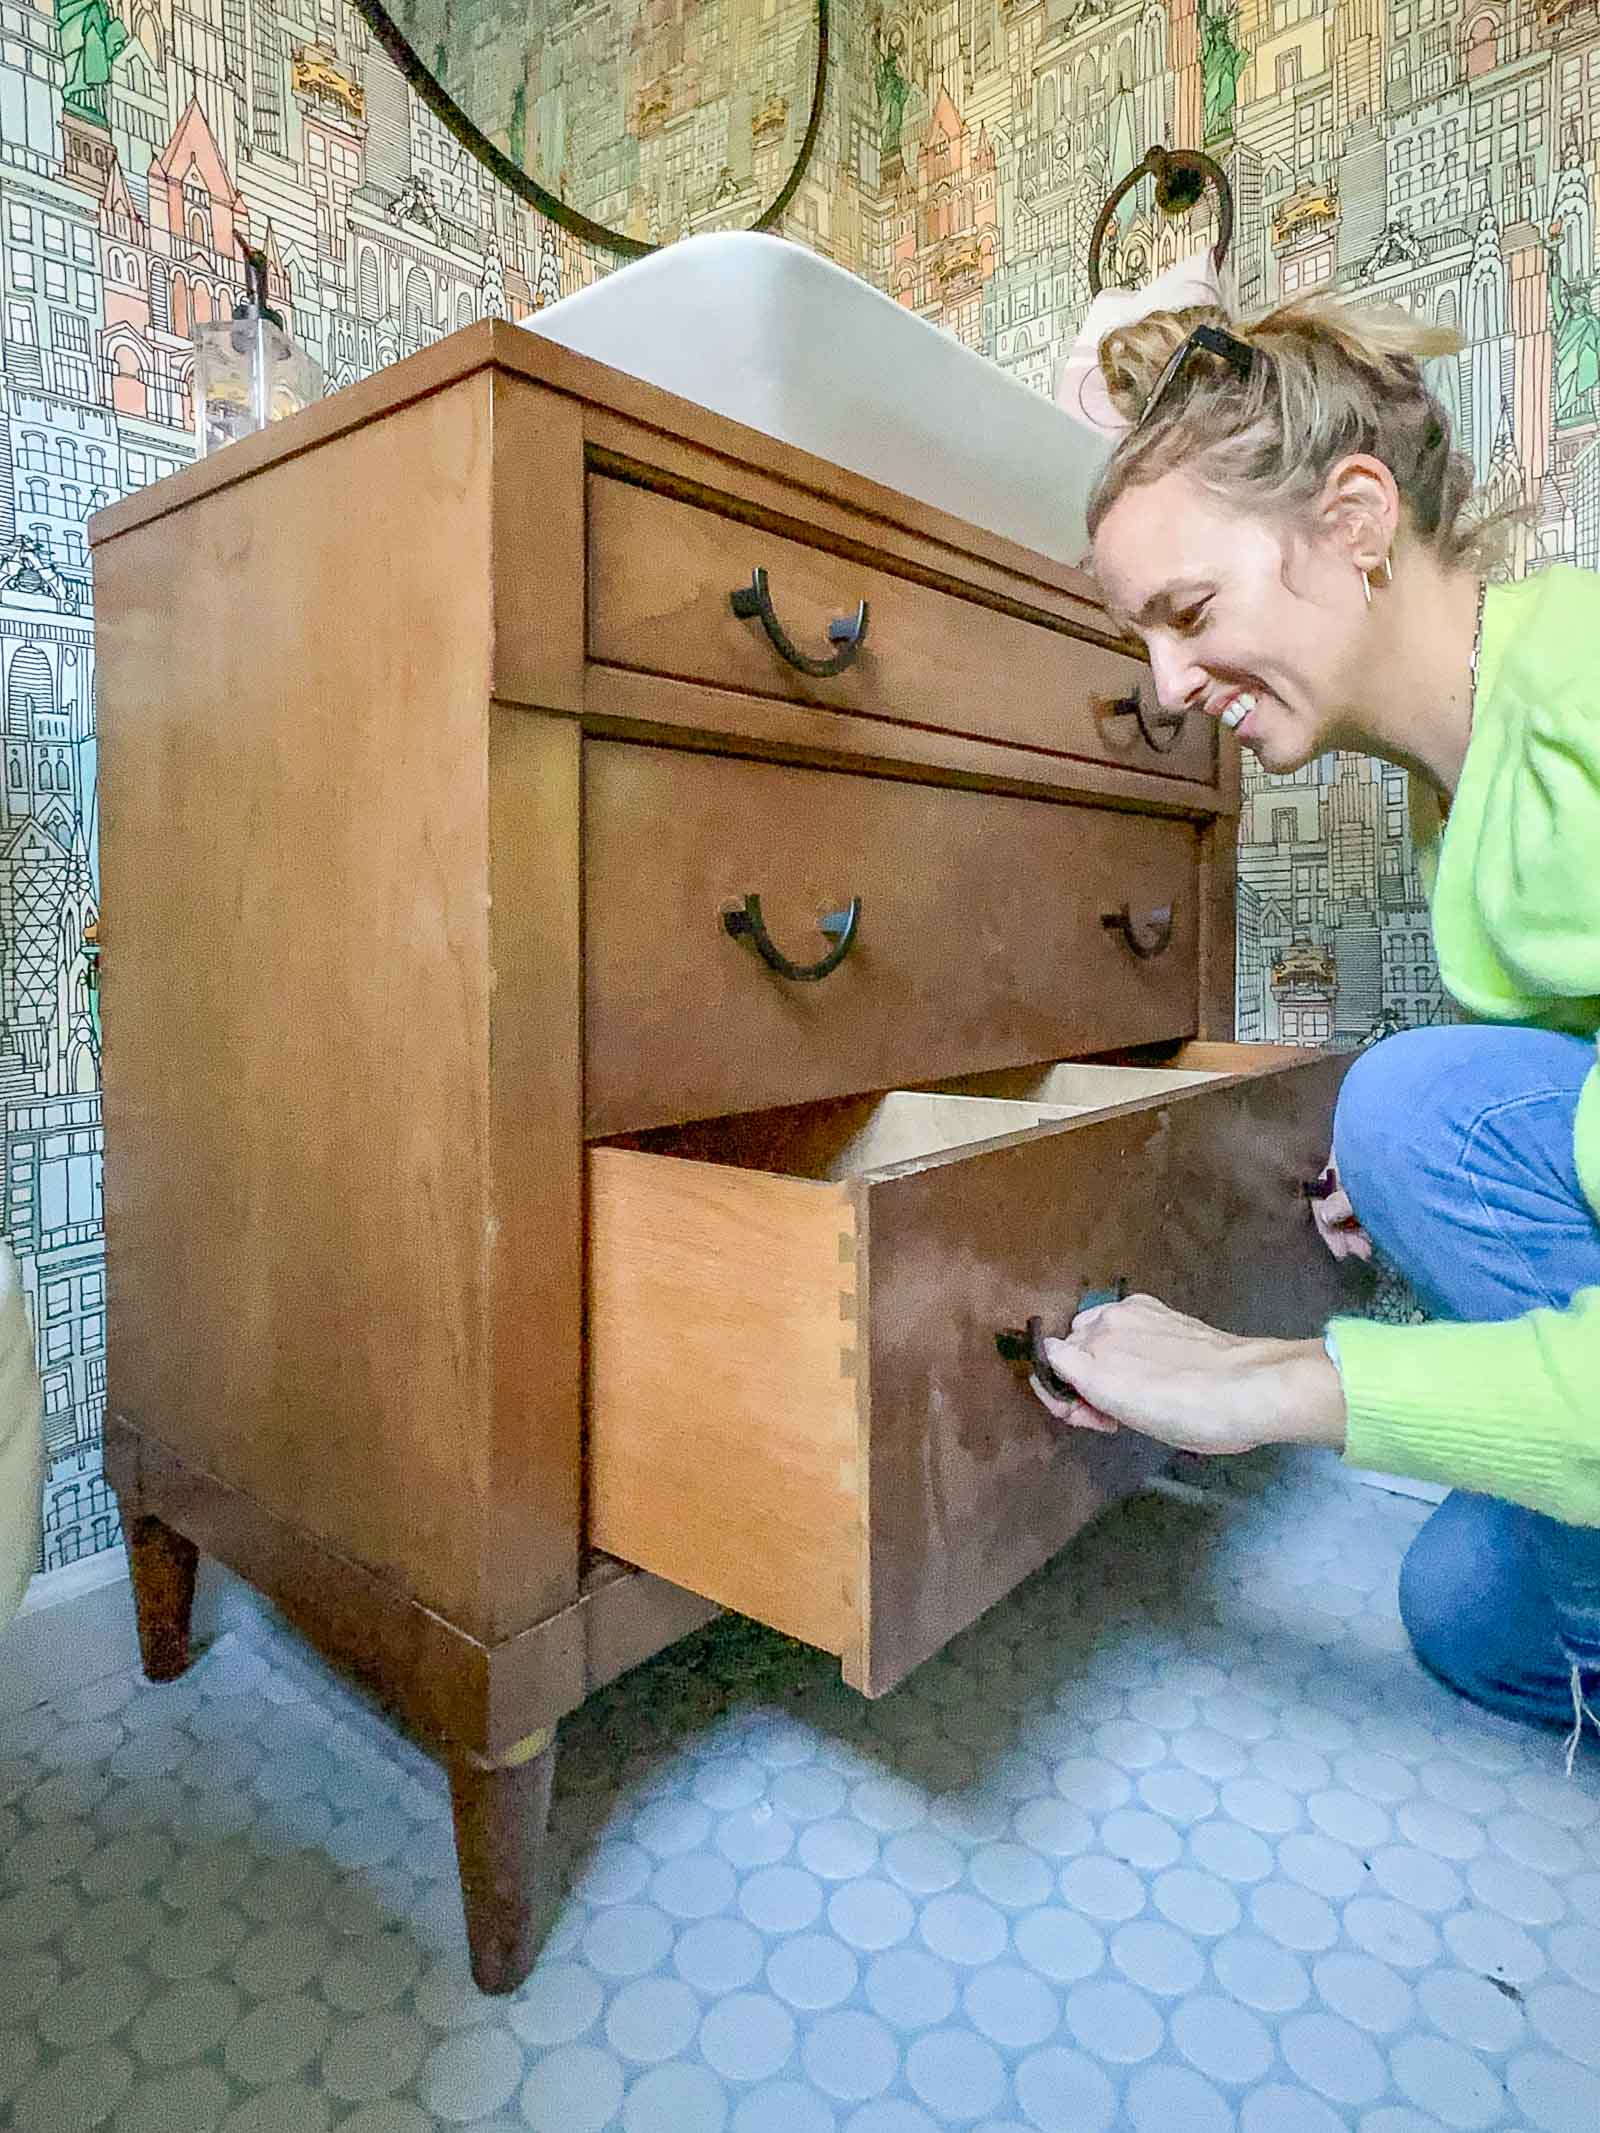
I pulled the piece up into the space and marked where the plumbing was and then cut out the back of the vanity to fit the water lines and the drain pipe.
To retrofit the drawers so they could still be used I basically cut out the middle of each drawer and added new plywood side walls with wood glue, staples and an L bracket. I didn’t bother added drawer slides inside the vanity because these won’t get opened/ closed that often. I used silicon to attach the sink and screwed the vanity into a stud behind it to secure it. I added some back plates inside the vanity and then screwed the top drawer front in place so this will NOT be usable.

Step 7. Finishing Touches
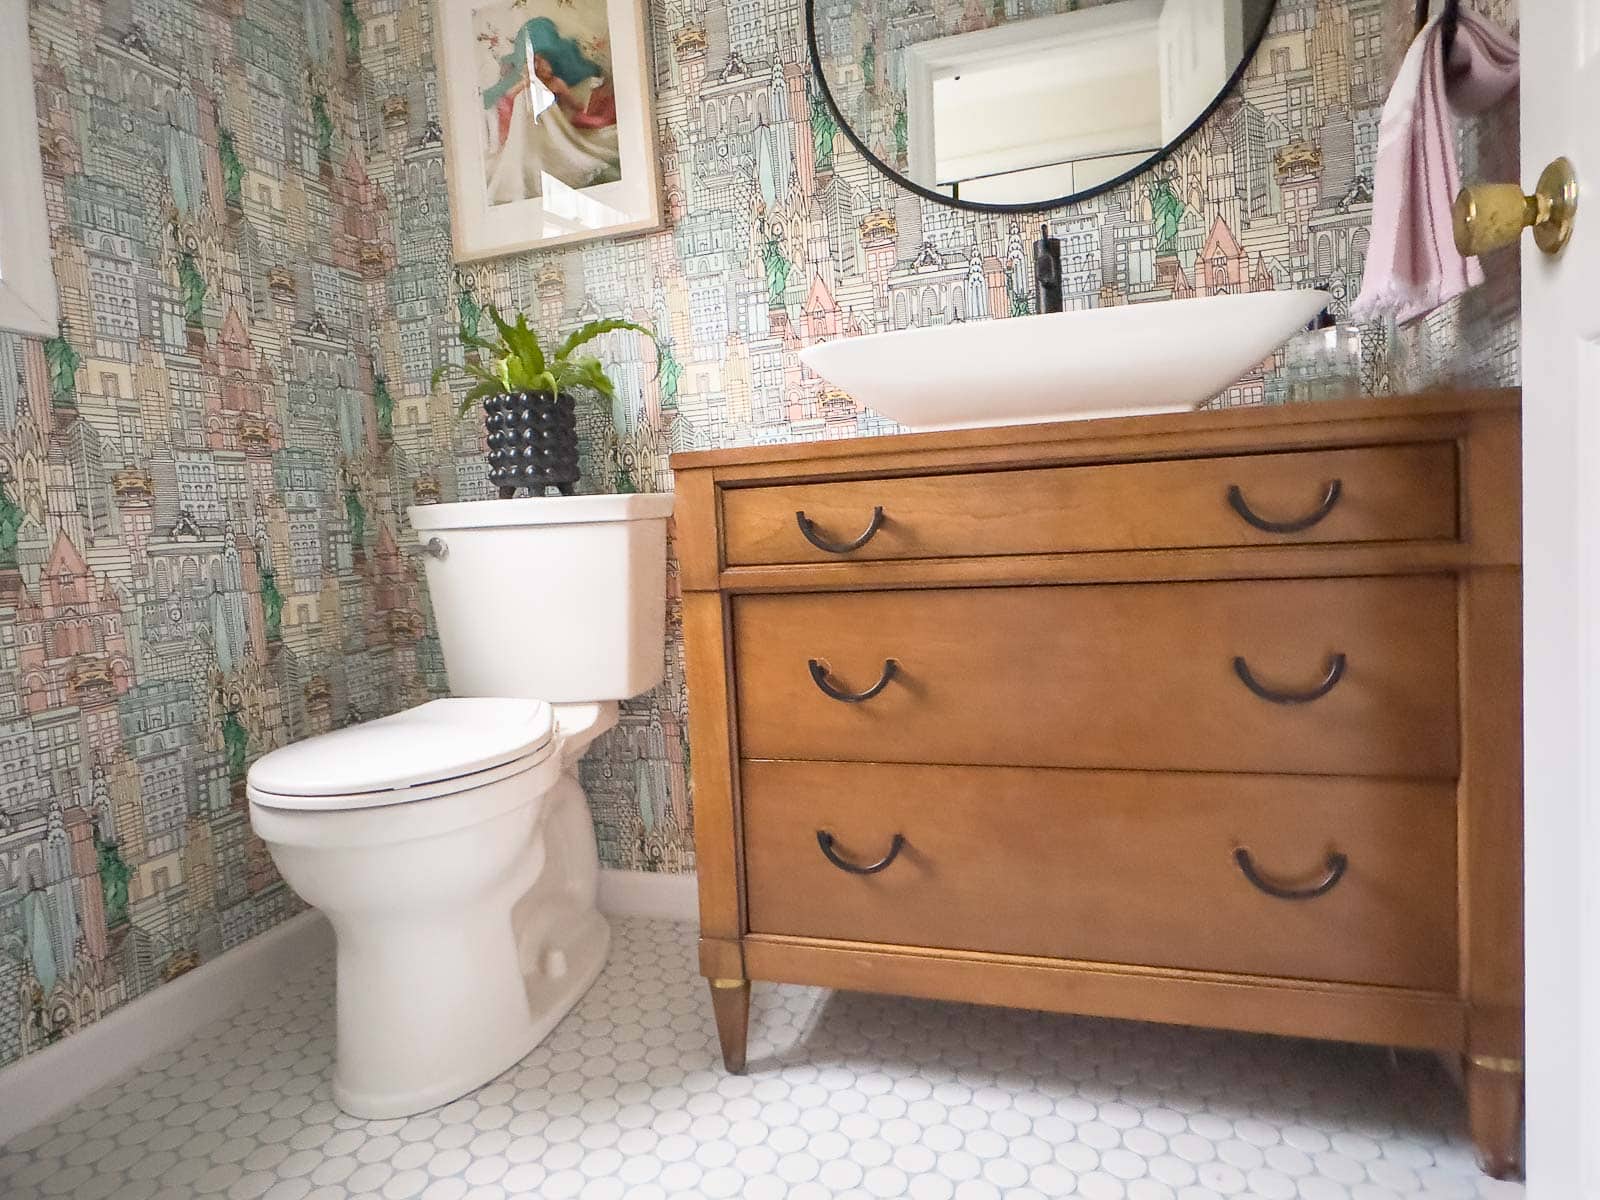
Before bringing the vanity into the space, I nailed the new baseboards into place and cleaned/ sealed the tile. It was much easier to do this with the vanity out of the room obviously. I also caulked around the baseboards and replaced the vent cover (with a new white coat of spray paint). I love the work of Janet Hill so I asked the kids to help me choose a print for the room… they loved this one of the little girl reading which is the perfect balance to the busy hustle and bustle paper behind it. Linking to that round black mirror here but it’s also linked below. The hardware on the vanity got swapped out too for these simple black ones.
All in, this took me a little more than a week. When I tackle a larger project like this, it’s really helpful to break down each piece of the makeover into a manageable step and this room was no different. Demo. Prep. Floor. Paper. More floor. Vanity. Hopefully I’ve outlined each step above for you and given you a sense that something like this is TOTALLY doable if you have a little patience, a little motivation, and a can do spirit! Feel free to leave me a comment below if you have ANY questions!
Materials:
- Wallpaper
- Tile
- Grout
- Toilet
- Faucet
- Vanity (thrifted)
- Sink (thrifted)
- Drawer Pulls
- Artwork
- Mirror
- Vanity light
- Overhead light

Absolutely love it, well done you!!!!!
Thank you!!! xoxo
Love that vanity! We are planning a bathroom remodeling and I wish I could have that one!
We ended up getting the floating version like this https://mykitchenandbath.com/everything-about-bathroom-vanities/