At Charlotte's House

  • About
    • PRESS
    • TELEVISION
    • BLOGGERS HEART HABITAT
    • DISCLOSURE & PRIVACY POLICY
  • HOME TOUR
    • CURRENT HOUSE
    • FIRST HOUSE
    • ROOM REVEALS
    • SEASONAL HOME TOURS
  • GALLERY
    • FLEA MARKET & THRIFT SCORES
    • CRAFTS
    • FURNITURE FIXER UPPERS
    • WALL DECOR
    • OTHER STUFF…
  • PODCAST
    • PODCAST EPISODES
  • SHOP
    • SHOP INSTAGRAM
  • CONTACT
    • SPONSOR/ ADVERTISE
    • SUBSCRIBE

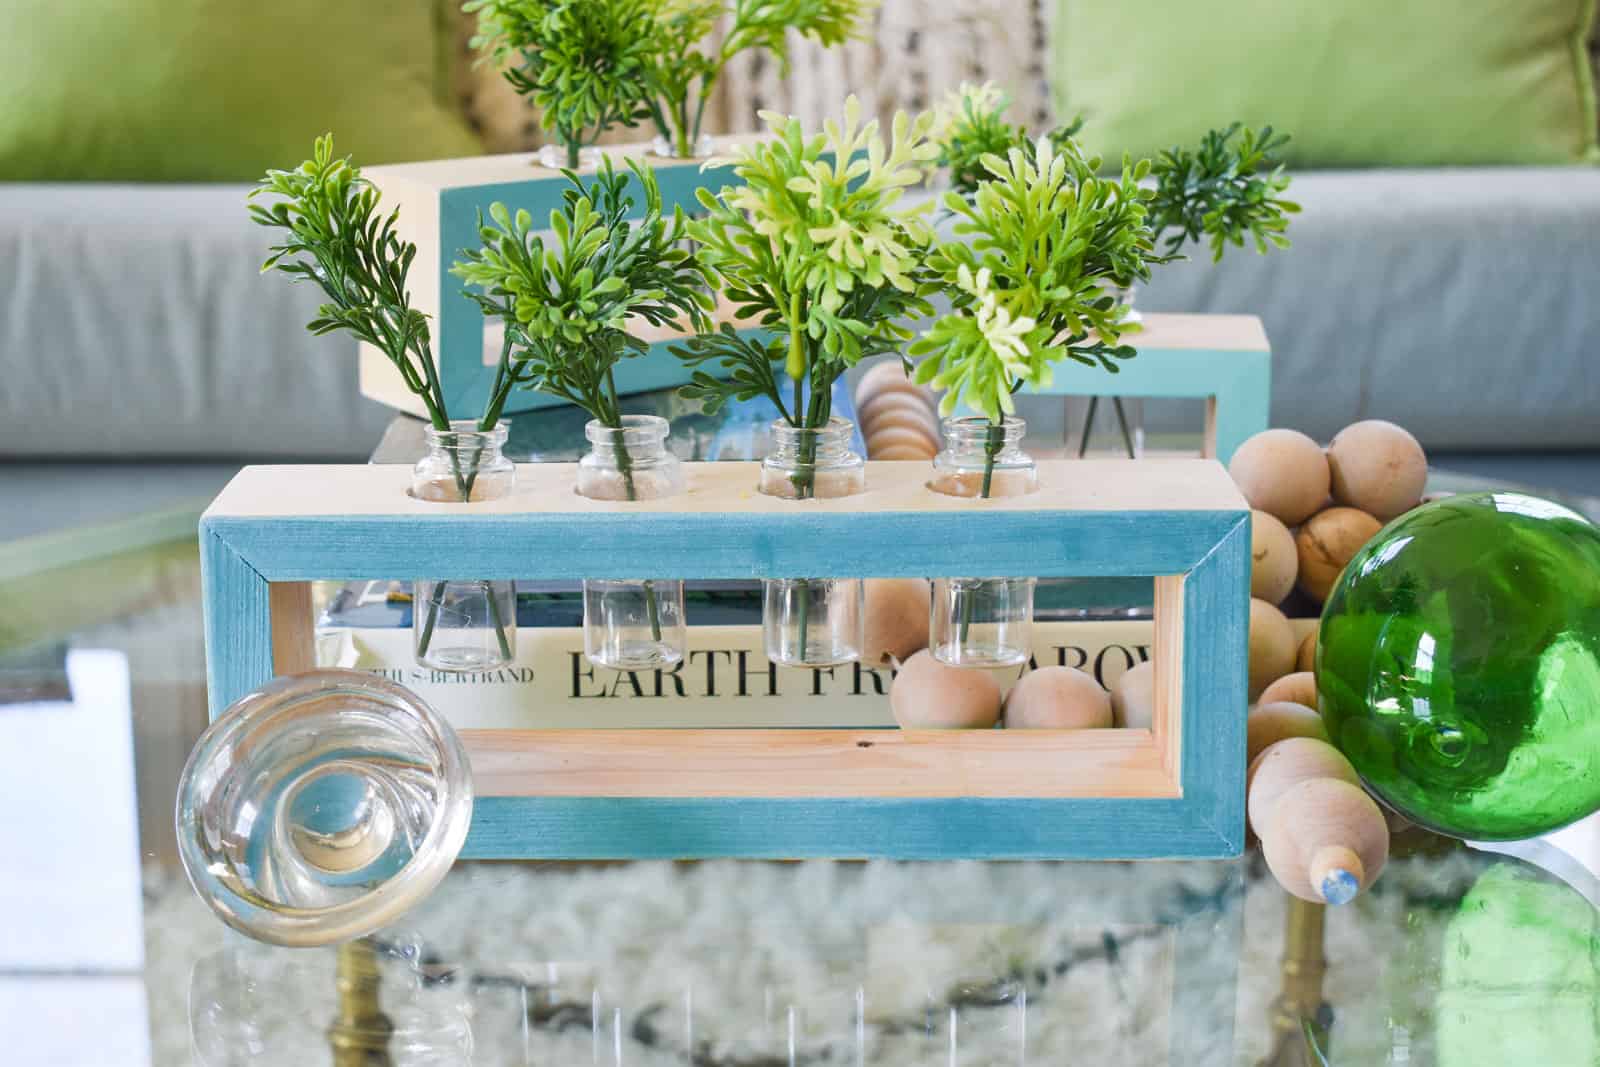
Scrap Wood Modern Bud Vase

Psssst... this post *might* contain affiliate links: see my disclosure here.

March 27, 2018

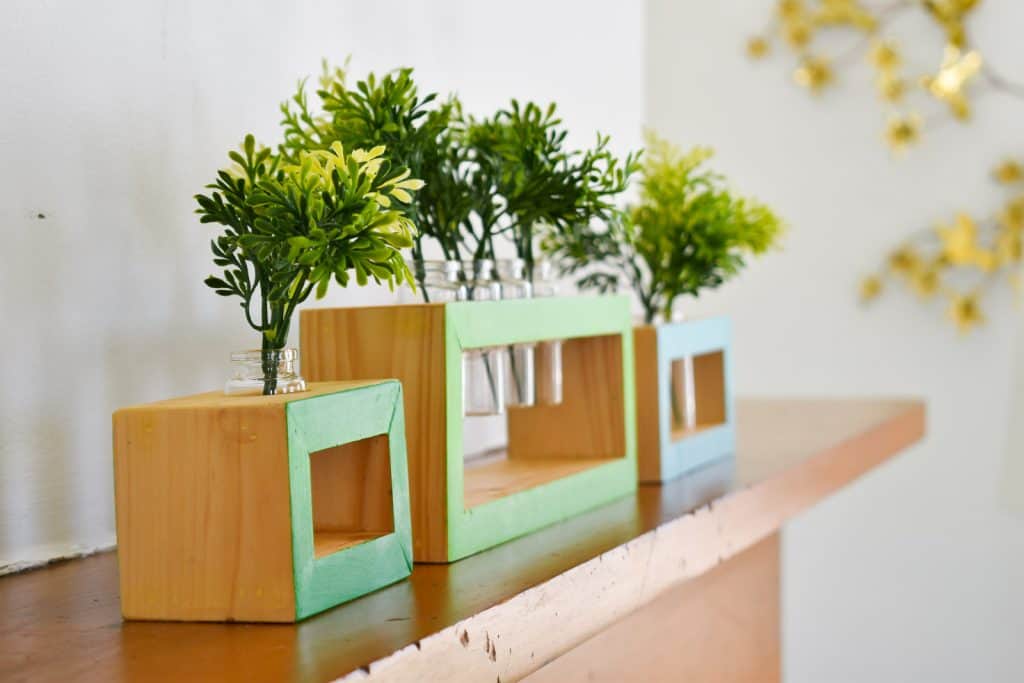
Mitered Wooden Bud Vase

blue and green mitered scrap wood bud case

The more building projects I do, the higher my pile of scrap wood gets. Rather than chuck this extra lumber into the trash, I decided to make this easy, modern spring bud vase!

modern diy bud vase

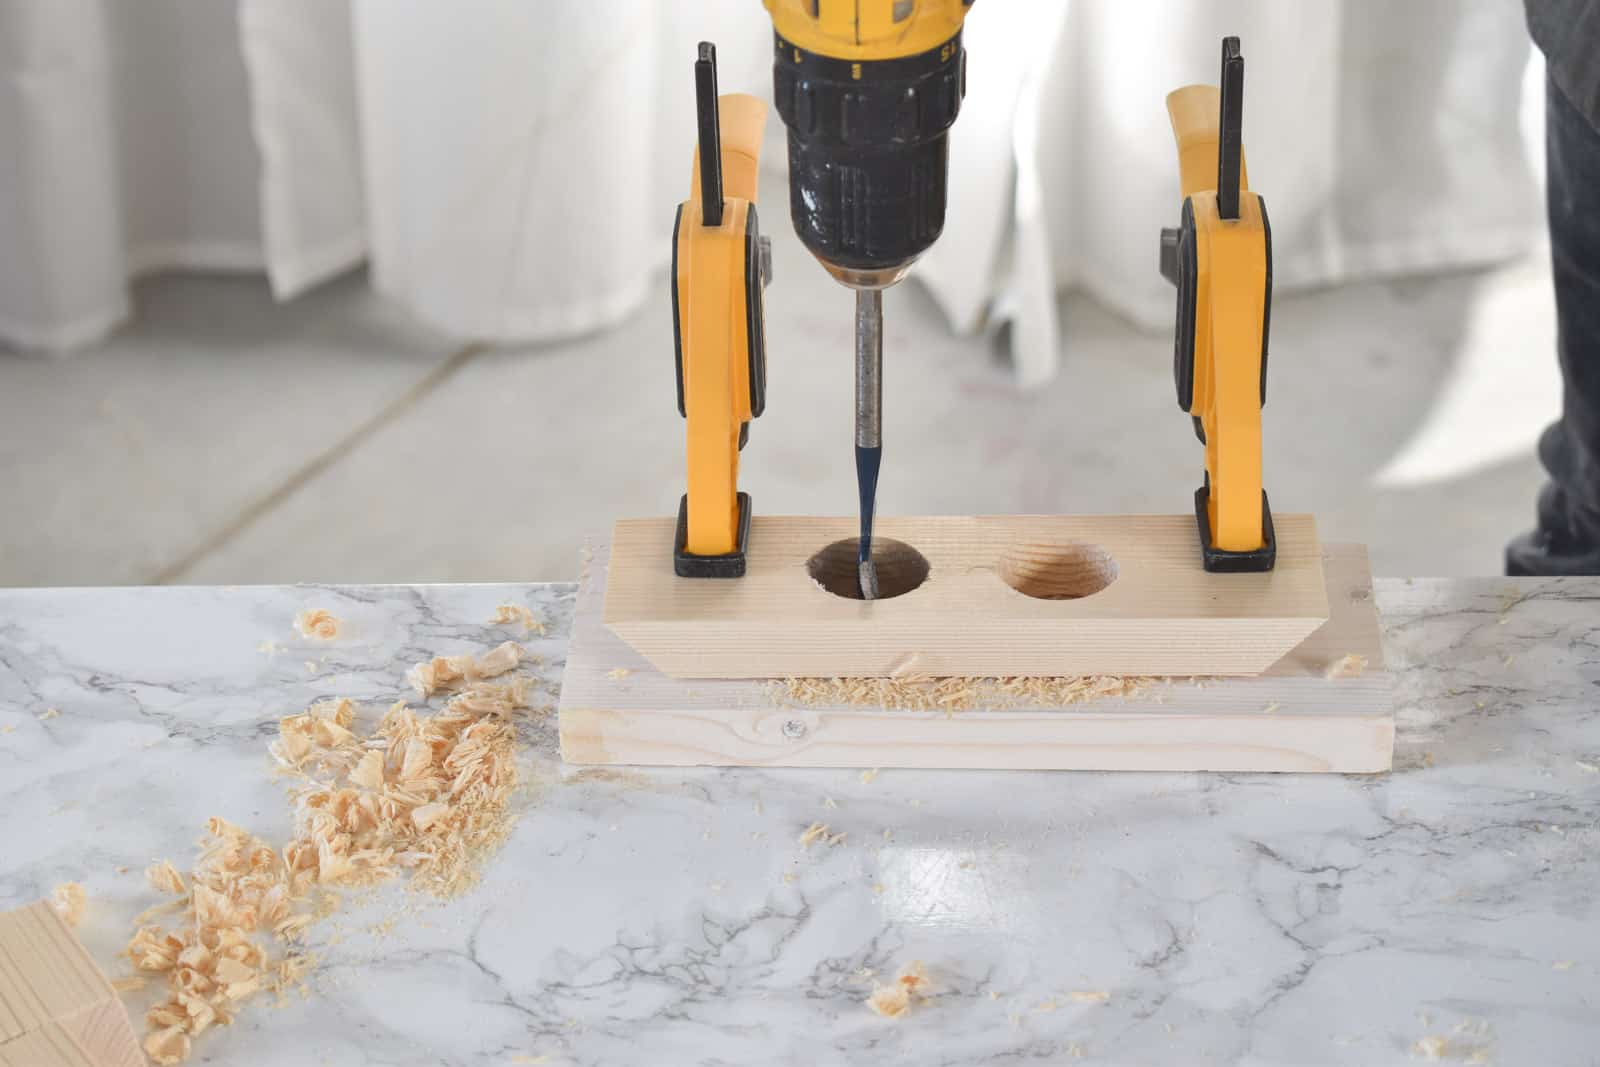
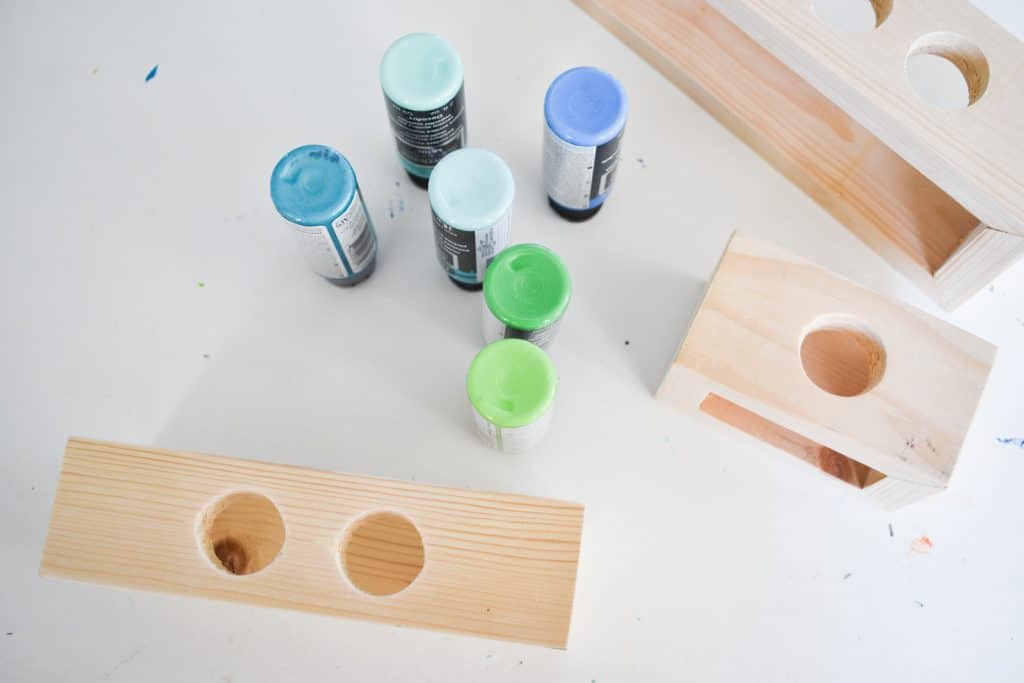
I picked up these inexpensive tiny glass bud vases on Amazon. They’re small enough that I could use the 1.25 spade bit on my drill.

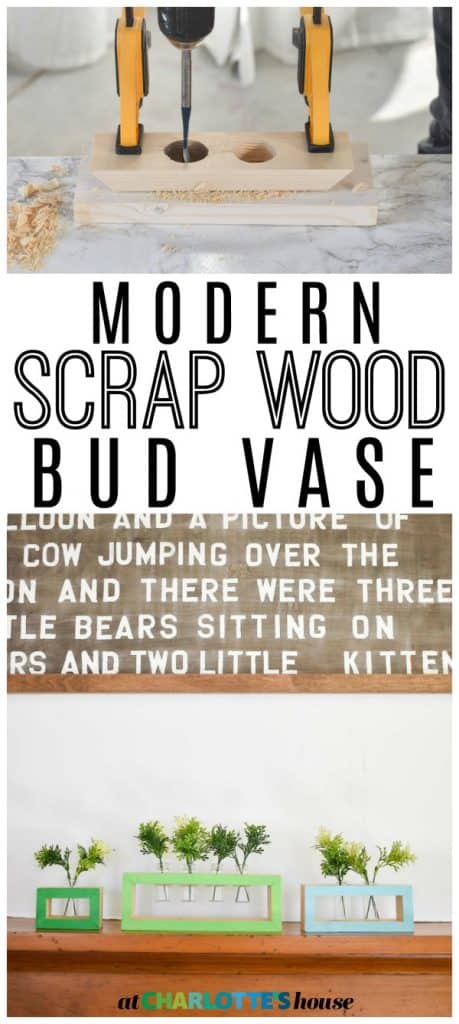
Step 1. Find your scrap wood

I used whatever I had on hand, but most of it was 1×3 common board. I mitered the ends and varied the lengths.

Step 2. Drill holes

The tiny little glasses I bought were just smaller than a 1 1/4 drill bit. I placed one of the longer boards onto a second piece of scrap wood and clamped them both onto the table.  I measured where I wanted to drill and used my paddle bit to make hole (s) in my mitered scrap wood.

drilling into scrap wood for bud vase

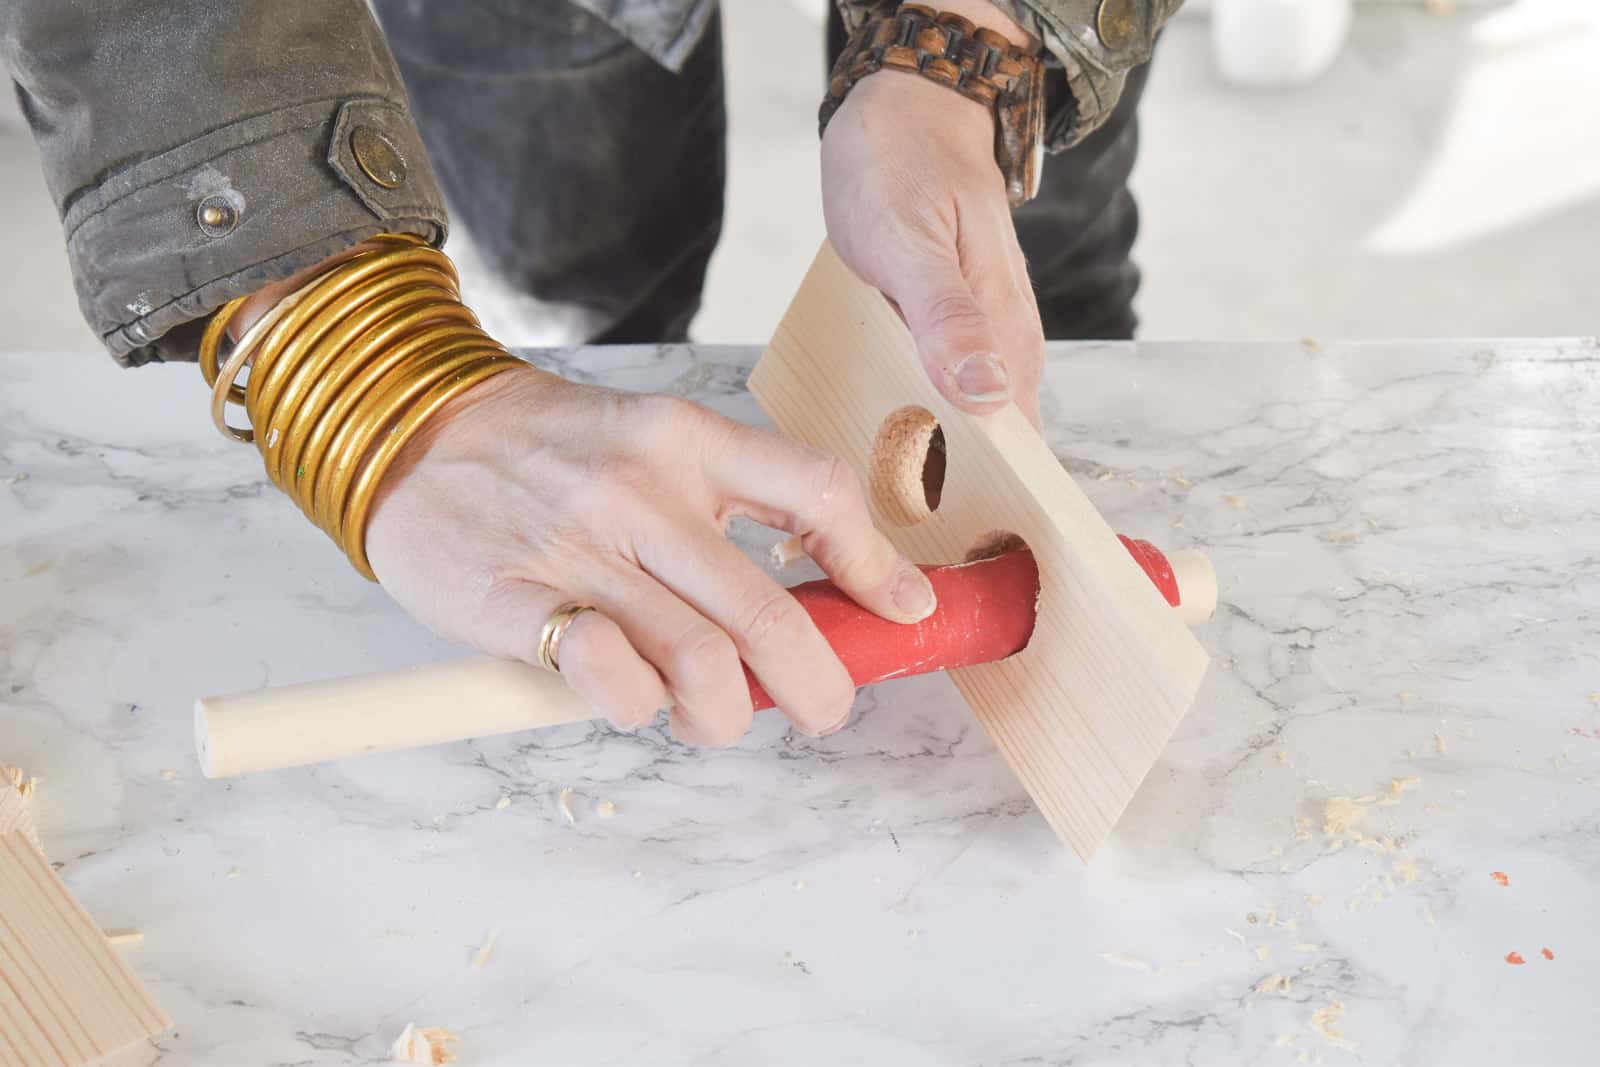
To sand any rough edges from drilling, I wrapped sand paper around a piece of dowel.

sanding the edges from drilled hole

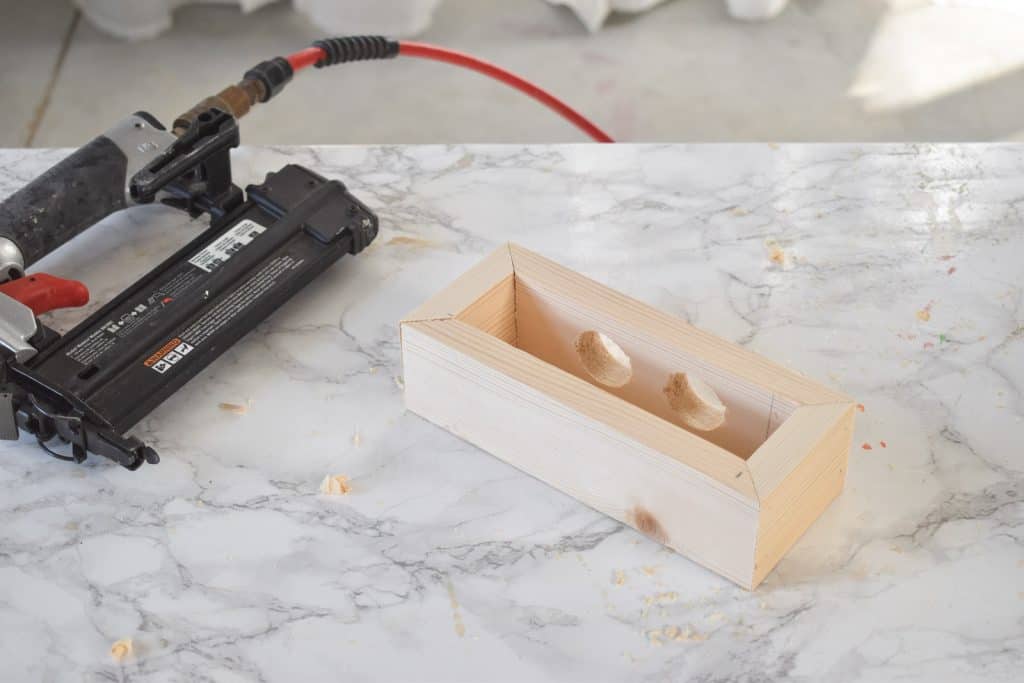
Step 3. Build the Vase

*IF* you’ve made your cuts precisely, the four sides of this mitered vase should come together easily. You maaaaay have to remeasure and recut on occasion. Maybe. I used wood glue and my brad nailer to piece together the vase.

assemble scrap wood into bud vase

Step 4. Wood Filler and Sand

I went around and quickly filled the nail holes and any gaps with wood filler. It dries pretty fast, and then sand it all smooth.
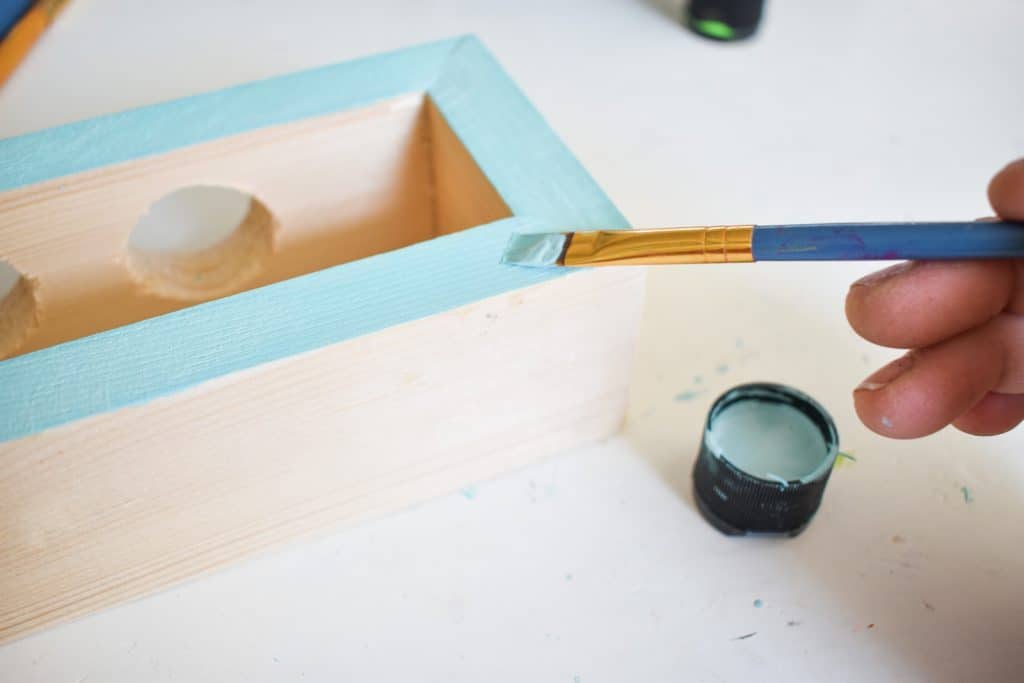
Step 5. Paint

I’m loving raw wood these days, but I couldn’t resist adding a little color. I painted the edges of my planters with various shades of blue and green. Love. To seal the vases and give the wood a little sheen, I gave it them a couple coats of polycrylic.

paint the edges of the bud vase paint the edges of the bud vase

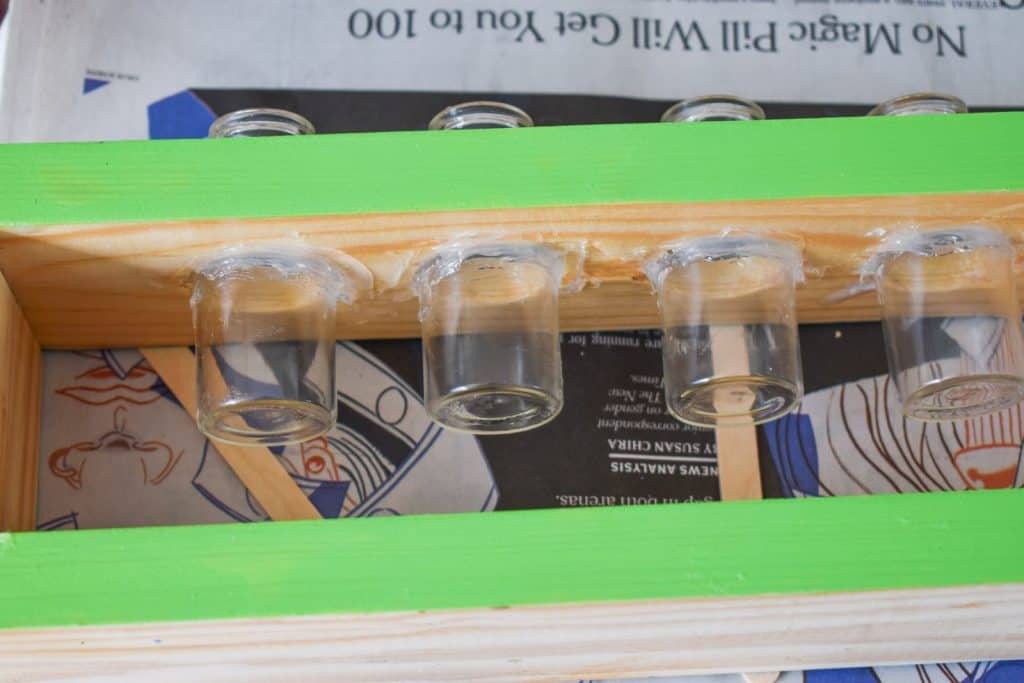
I made three bud vases and each is slightly different. One is taller than the glass jars so I used silicon caulk to adhere the bud vases.

adhering the glasses with silicon

Aside from how much I love the colors of these vases, I am SO excited to have my garden back so I can pop in some fresh zinnias or dahlias!

diy scrap wood bud vases diy scrap wood bud vases

pin this image to pinterest

I used scrap wood to make these super simple bud vases and i love the colorful modern touch they bring to the mantel

XO Charlotte

2 Comments · Builds, Crafts

Comments

  1. Lauriegeorge says

    March 28, 2018 at 8:48 am

    Love! Your carpenter skills never cease to amaze.

    Reply
    • Charlotte Smith says

      March 29, 2018 at 8:58 pm

      Thanks, Laurie! Practice makes… better! 🙂

      Reply

Leave a Reply Cancel reply

Your email address will not be published. Required fields are marked *

*It's not you, it's me... don't mind the CAPS LOCK!
  • Bloglovin
  • Facebook
  • Instagram
  • Pinterest
  • Twitter
  • YouTube

SEARCH

Lover of color, wrangler of chaos, thrifter of all the things.

head-shot-1 Hi, I'm Charlotte! I'm fixing up our 100 year old house and artfully hoarding armchairs in the garage. I love color. I love flea markets. I love a little mess. My days are spent writing, painting, sanding, laughing and negotiating with our 5 kids. You can read more about us here
amazon-shop

SUBSCRIBE

Sign up for my newsletter and get access to my super duper secret and exclusive FB Group... I'll answer questions, share tips, post funny memes. It'll be awesome. (If you're not on FB- hi Dad- I'll still answer any design or thrifting questions... email me!)

Recent Posts

Window Seat Reading Nook

Window Seat Reading Nook

Plans for Our Homework Station

Plans for Our Homework Station

Room Design Dreams

Room Design Dreams

My Renovation Binder

My Renovation Binder

ach-popular-posts
ach-house-tour

WHAT TO WATCH

AS SEEN ON

rr-logo-1 sidebar-as-seen-on-2 sidebar-as-seen-on-1-1 bh-sidebar-1 design-sponge-1 houzz-sidebar-1 mass-appeal fmf-sidebar-1

COPYRIGHT & USE POLICY

All images and text shared on this site are the property of At Charlotte's House unless stated otherwise... and I'm SO thrilled that you're here visiting. I'm delighted for you to Pin or Stumble or Share or Tweet to your hearts delight providing all links are directly to "At Charlotte's House" (not "source" or "photo credit", etc.). If you are a blog or an individual and would like to mention a post of mine please only use a SINGLE image and link back to my original post. I invite brands to contact me directly for image-use terms. Do not alter, crop, edit or add/ remove watermarks from my images. I do not accept guest posts of any kind at this time. If you have any questions, please contact me. For more information, see my full disclosure and privacy policy.

@AtCharlottesHouse

  • If theres something we love in the Smith House its
  • Kids are home for the long weekend Im currently looking
  • I have done zero repeat ZERO for Valentines day this
  • Some days you just have to reach for the bag
  • If you scroll through the list of people you follow

Copyright © 2019 · Simply Pro Theme by Bloom Blog Shop.