
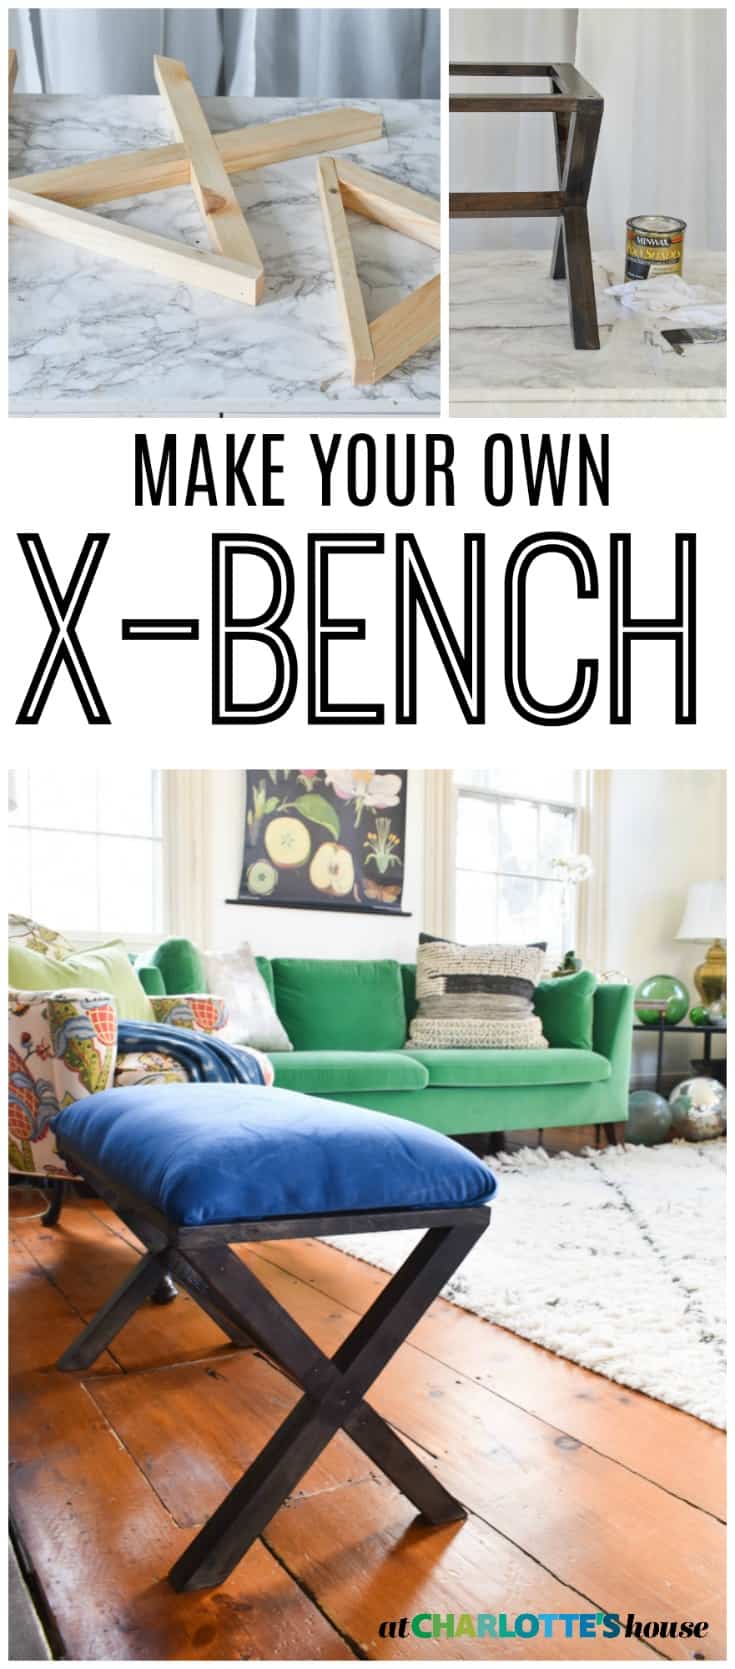
Stained X-Bench Tutorial
Psssst… this post *might* contain affiliate links: see my disclosure here.
DIY Wooden X-Bench
Disclosure: I am thrilled to be partnering with Minwax on this post. I LOVE their products and am really excited to share this tutorial with you!
I love the clean lines of an X bench and have always wanted to make my own… It’s a relatively easy built and fun to customize with fabric and stain choices! Before I go any further, know that I legit copied my friend Jen’s plans for the construction of the Xs. She has all the measurements on her site so rather than copy them verbatim here, just head over there if you want to make your own!
Shop my favorites!
What I DID change was the length of the bench… mine is a little bit longer (24″) but there are only three cuts that will change as a result: the two 1×2 cross pieces with pocket holes, and the 2 x 2 support brace. (Material list at the end of post!)
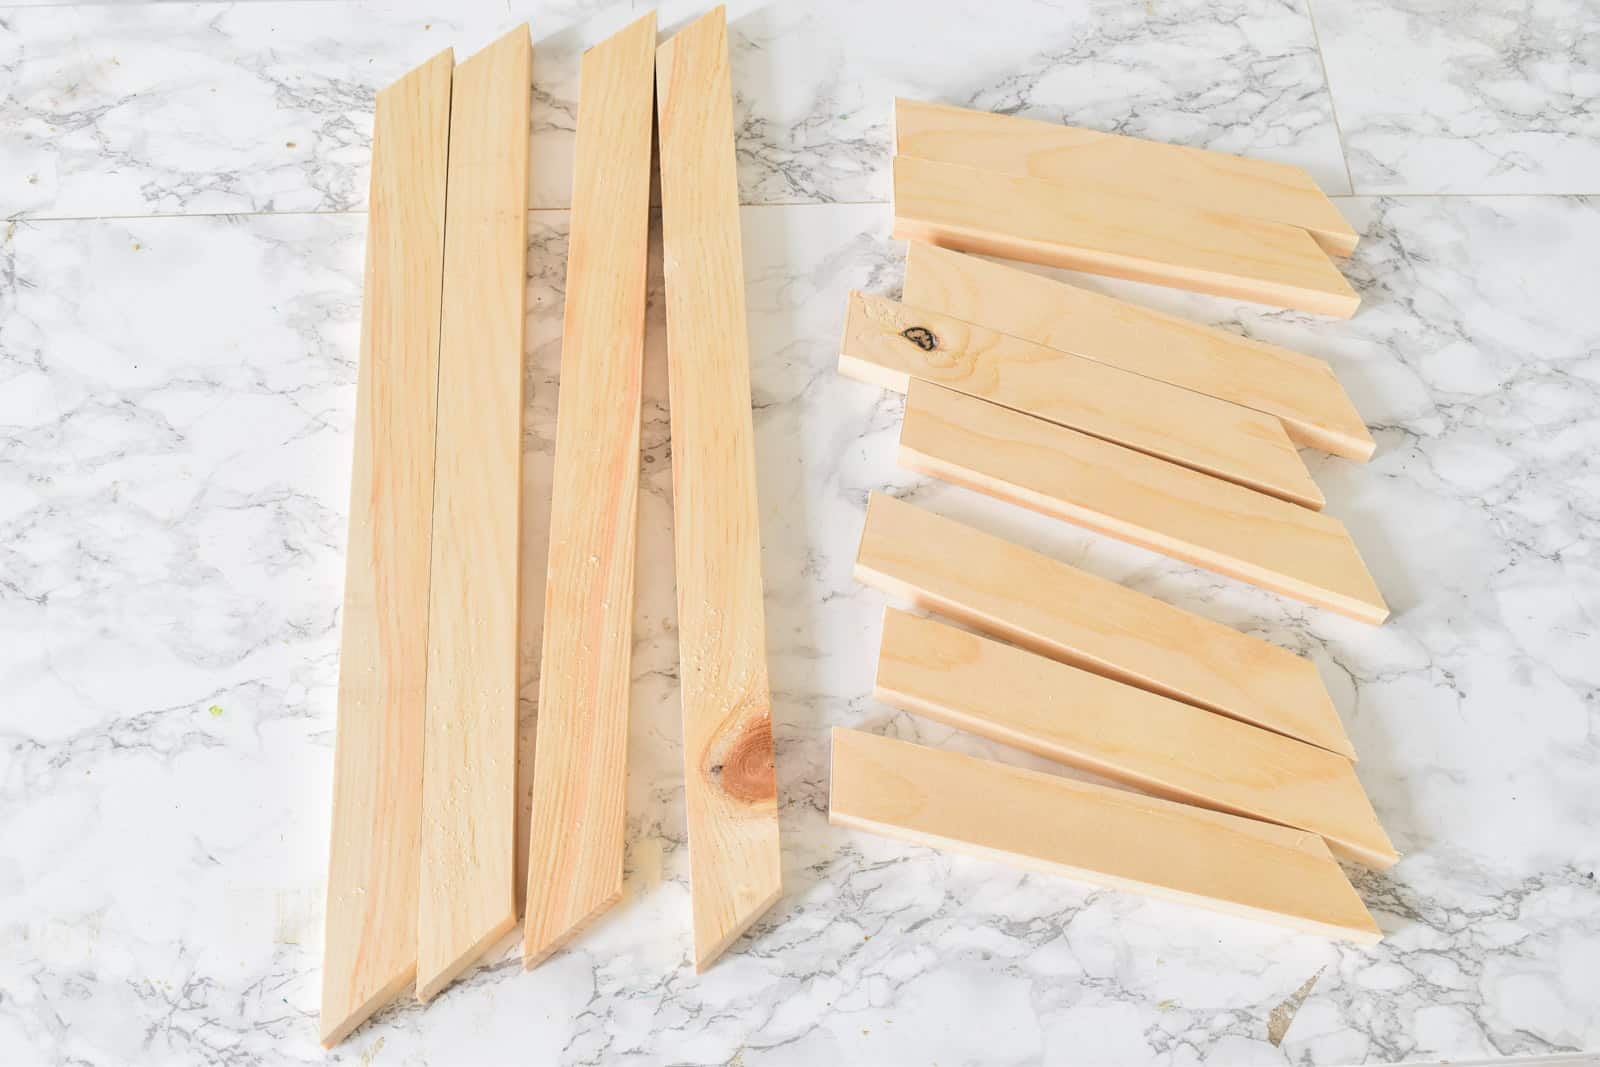
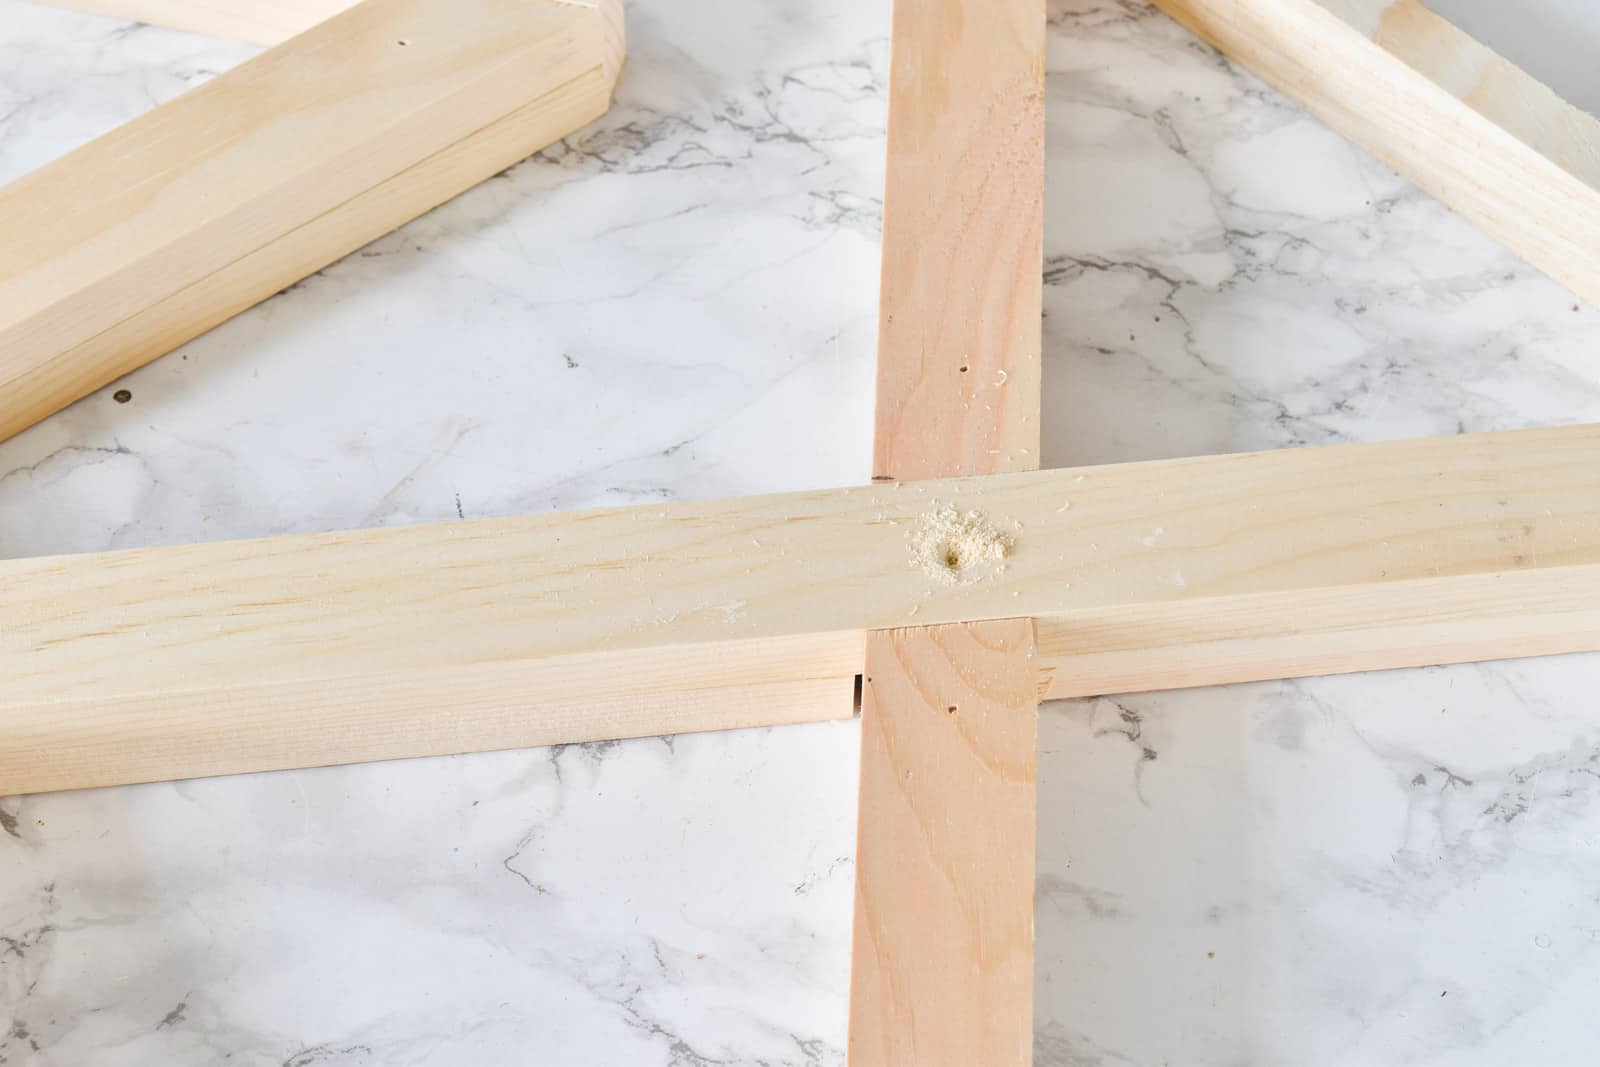
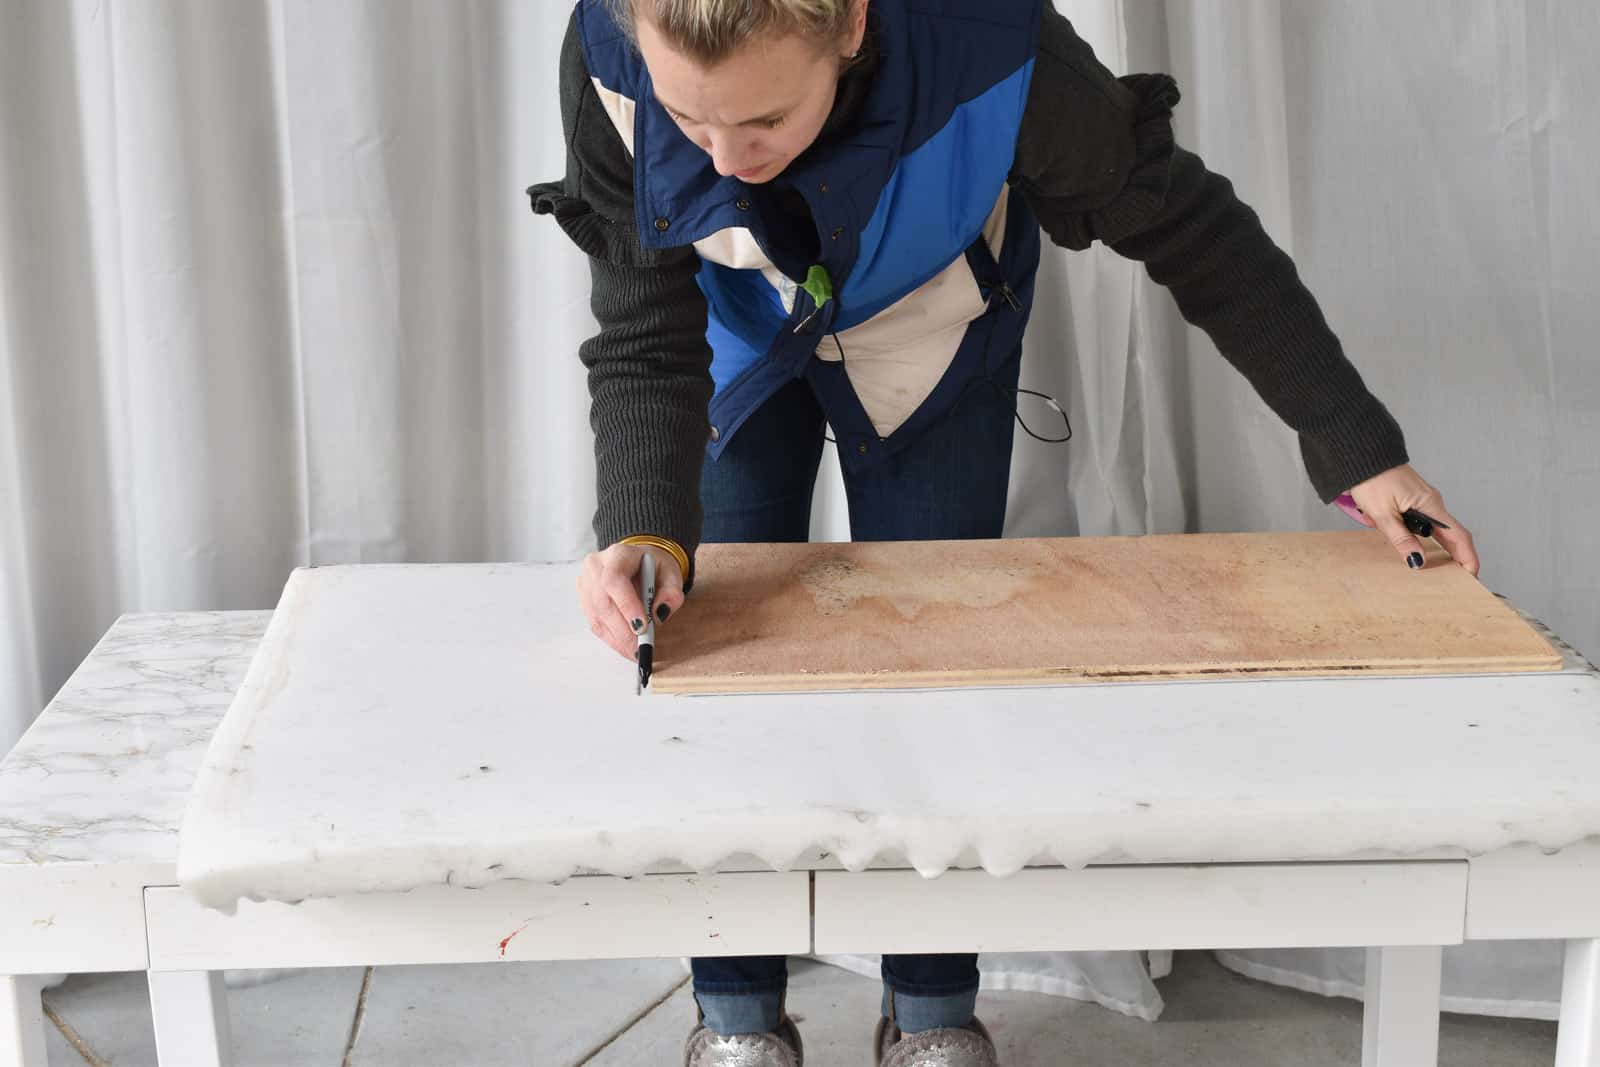
Step 1. Cut the Lumber
Cut your lumber to size and assemble the two “X”s. Per Jen’s plans, I’m using 1×2 basic pine and then a 2×2 cross piece I had in my scrap pile. I used wood glue and a brad nailer to attach.
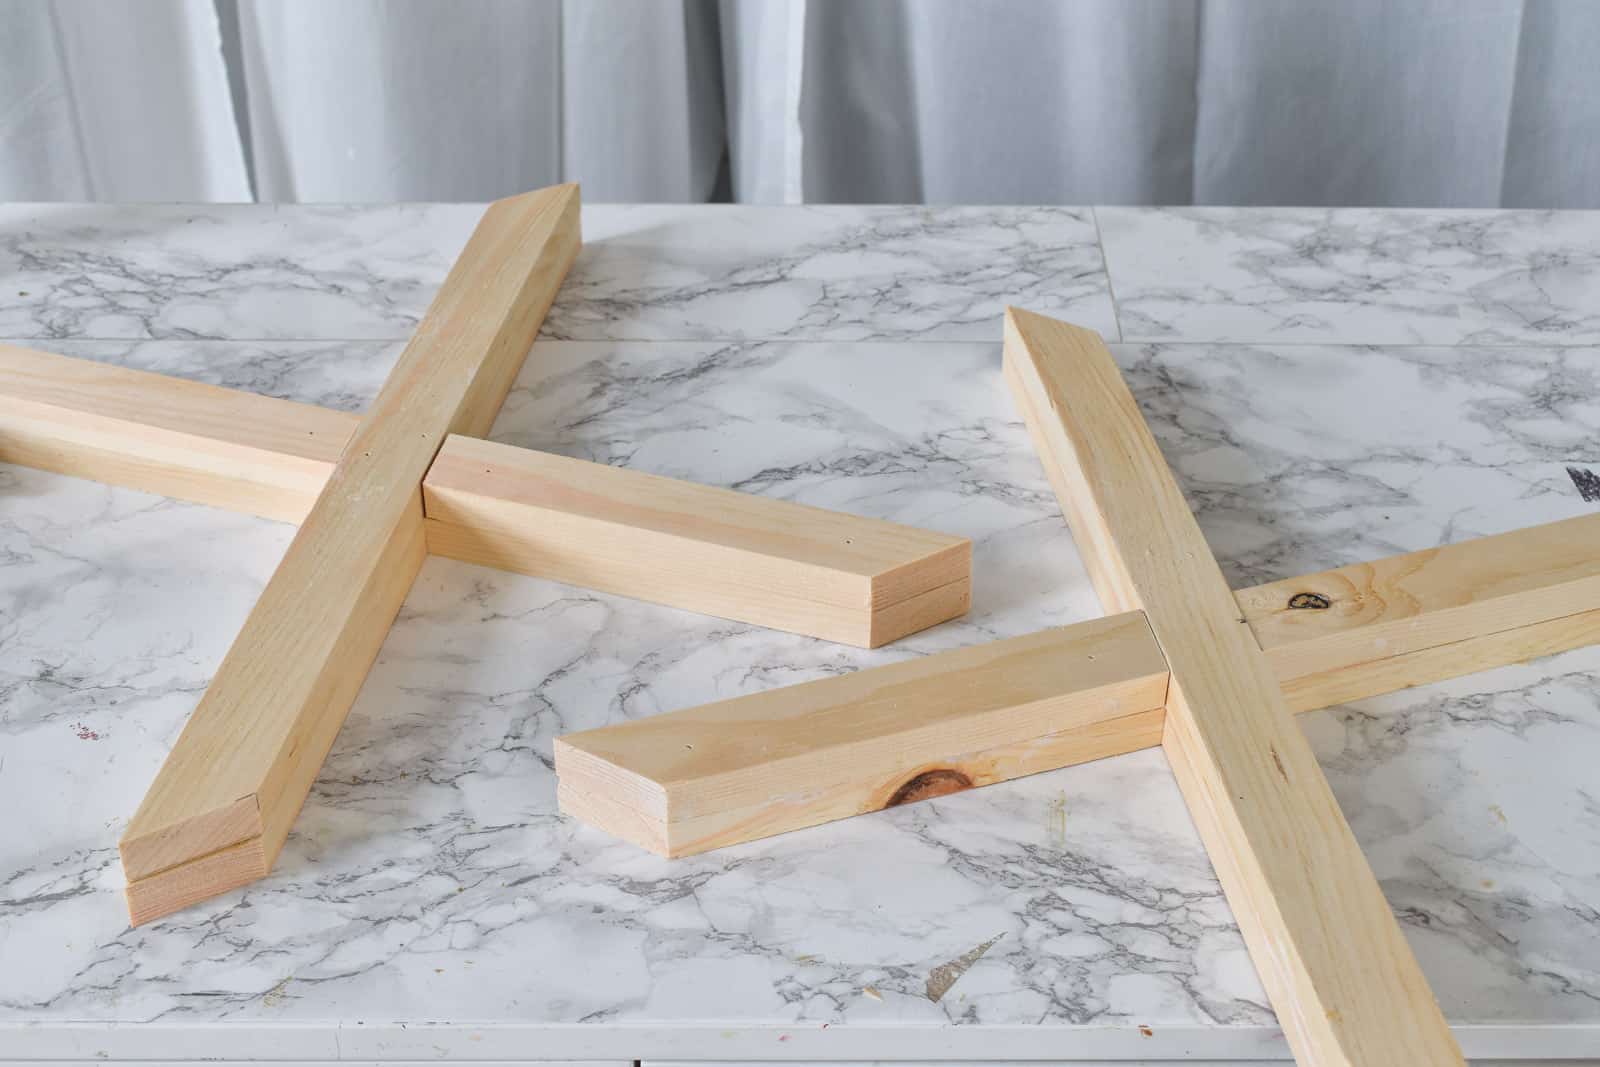
Step 2. Assemble Xs
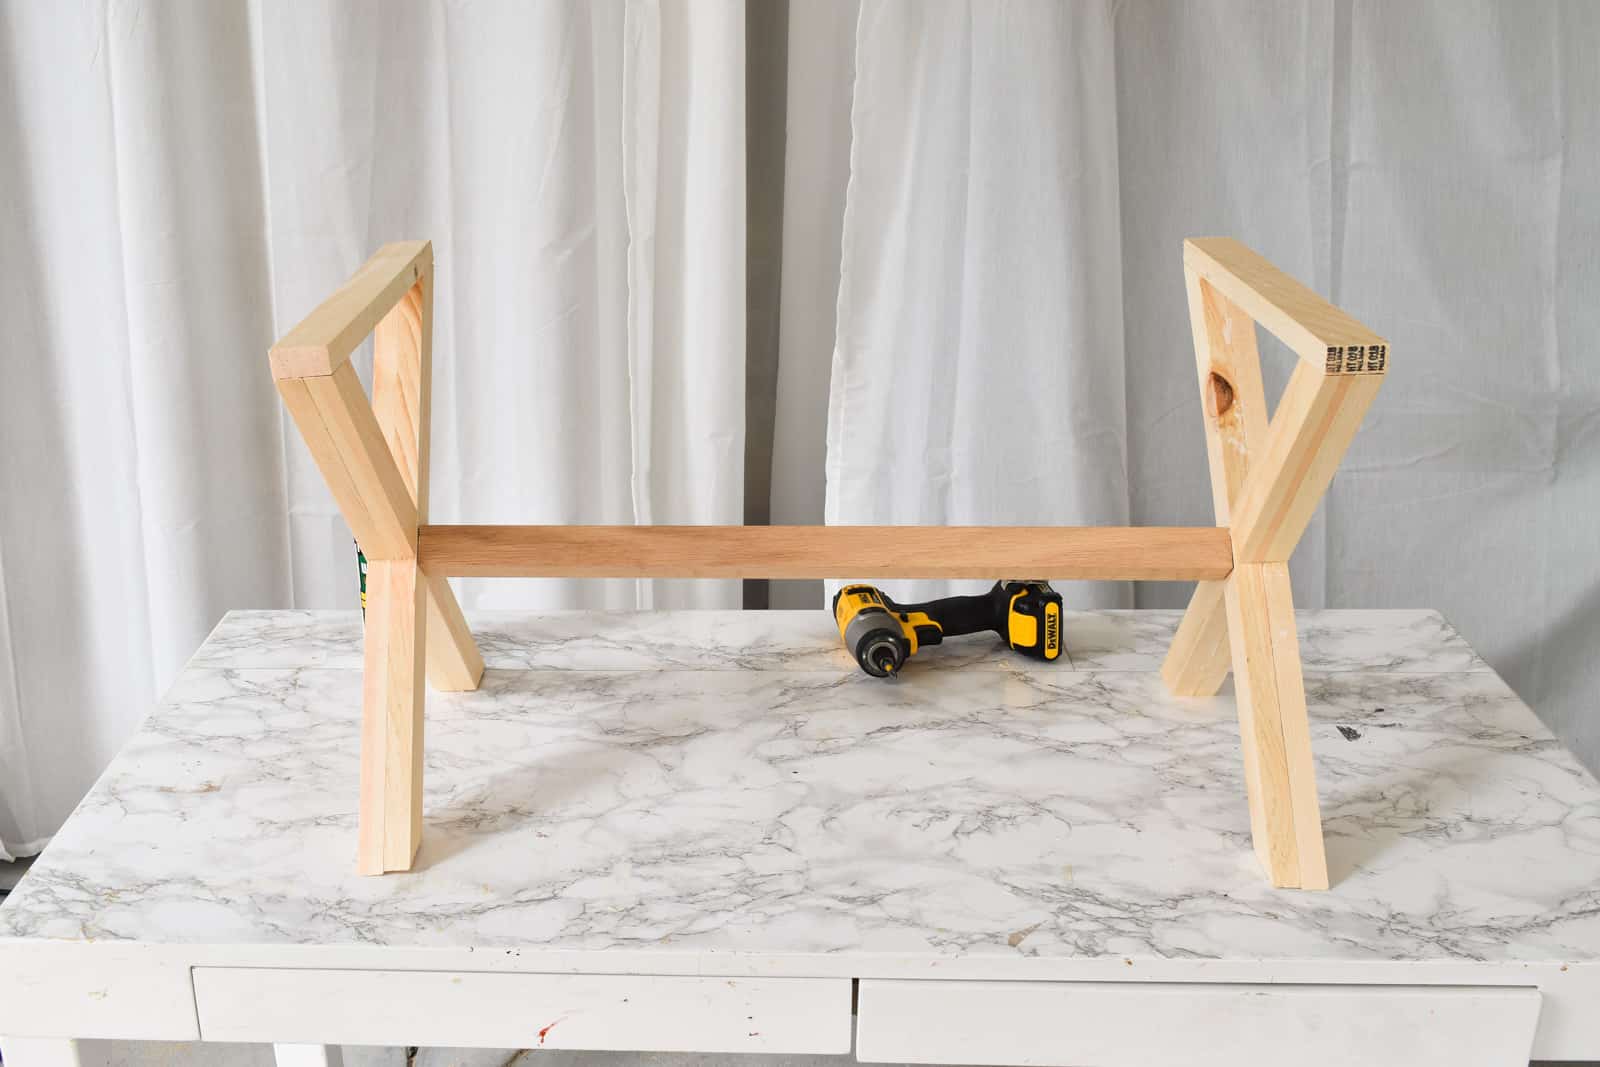
Measure the distance between the top of your “X” and cut a piece of lumber to length. I used wood glue and a brad nailer initially and then went back with countersunk screws to add some security.
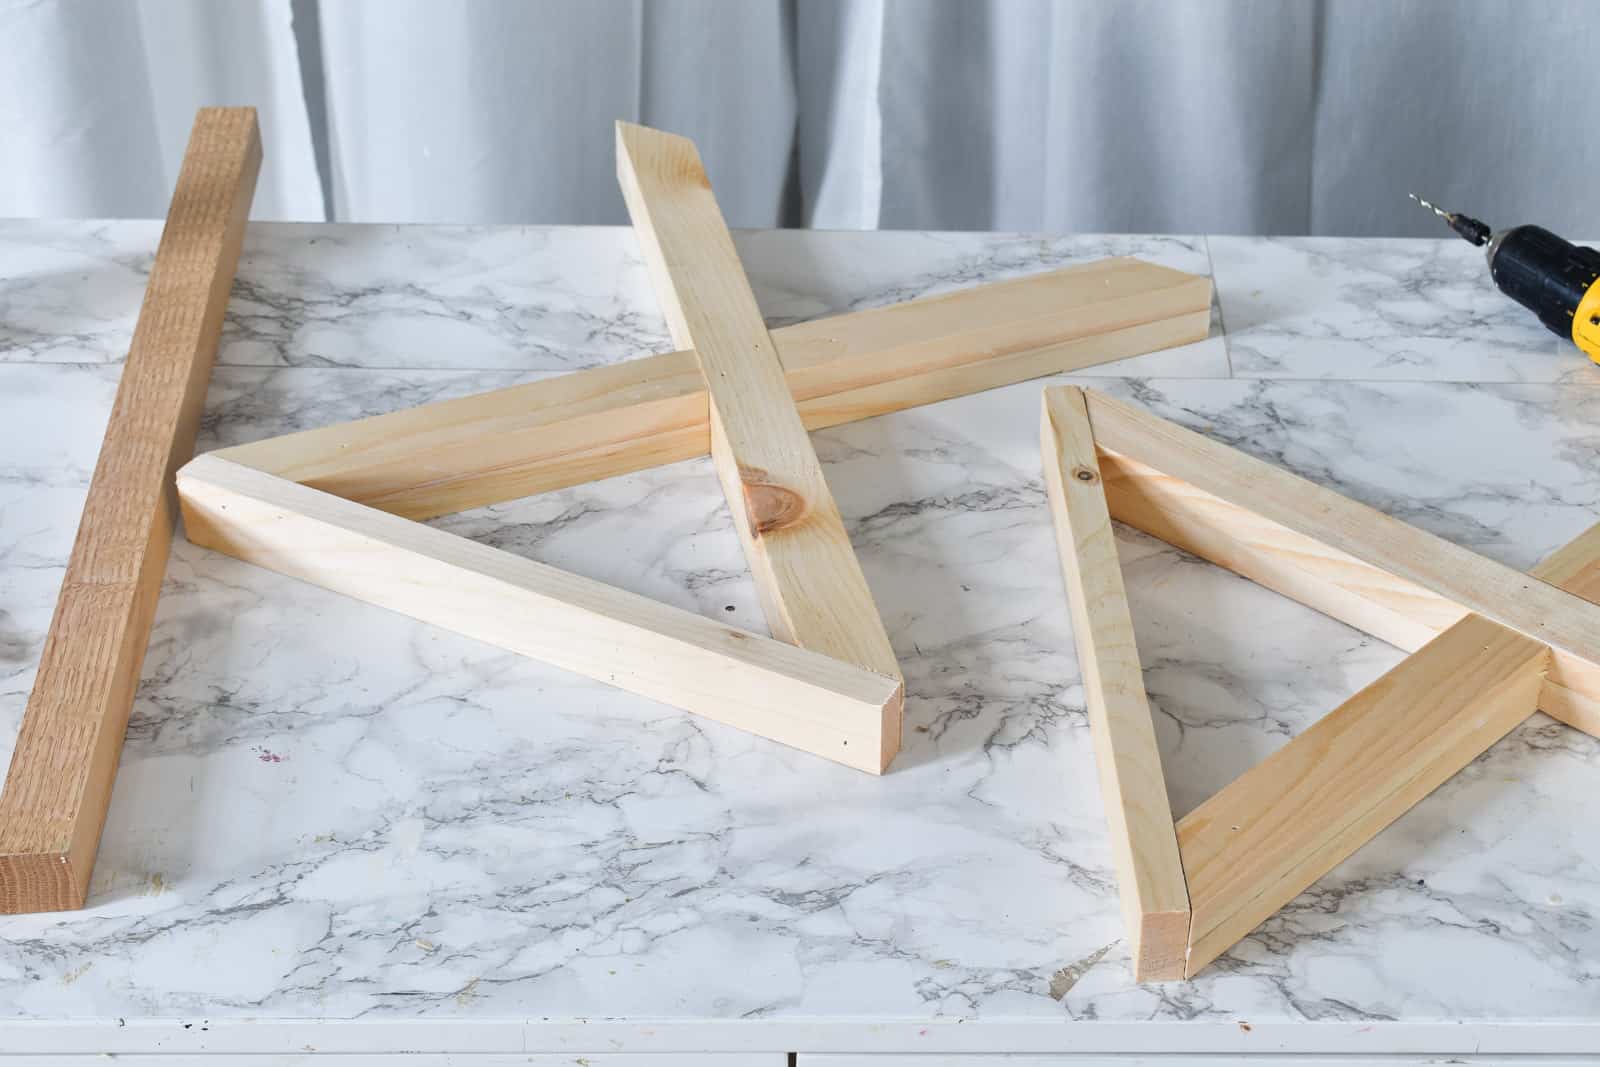
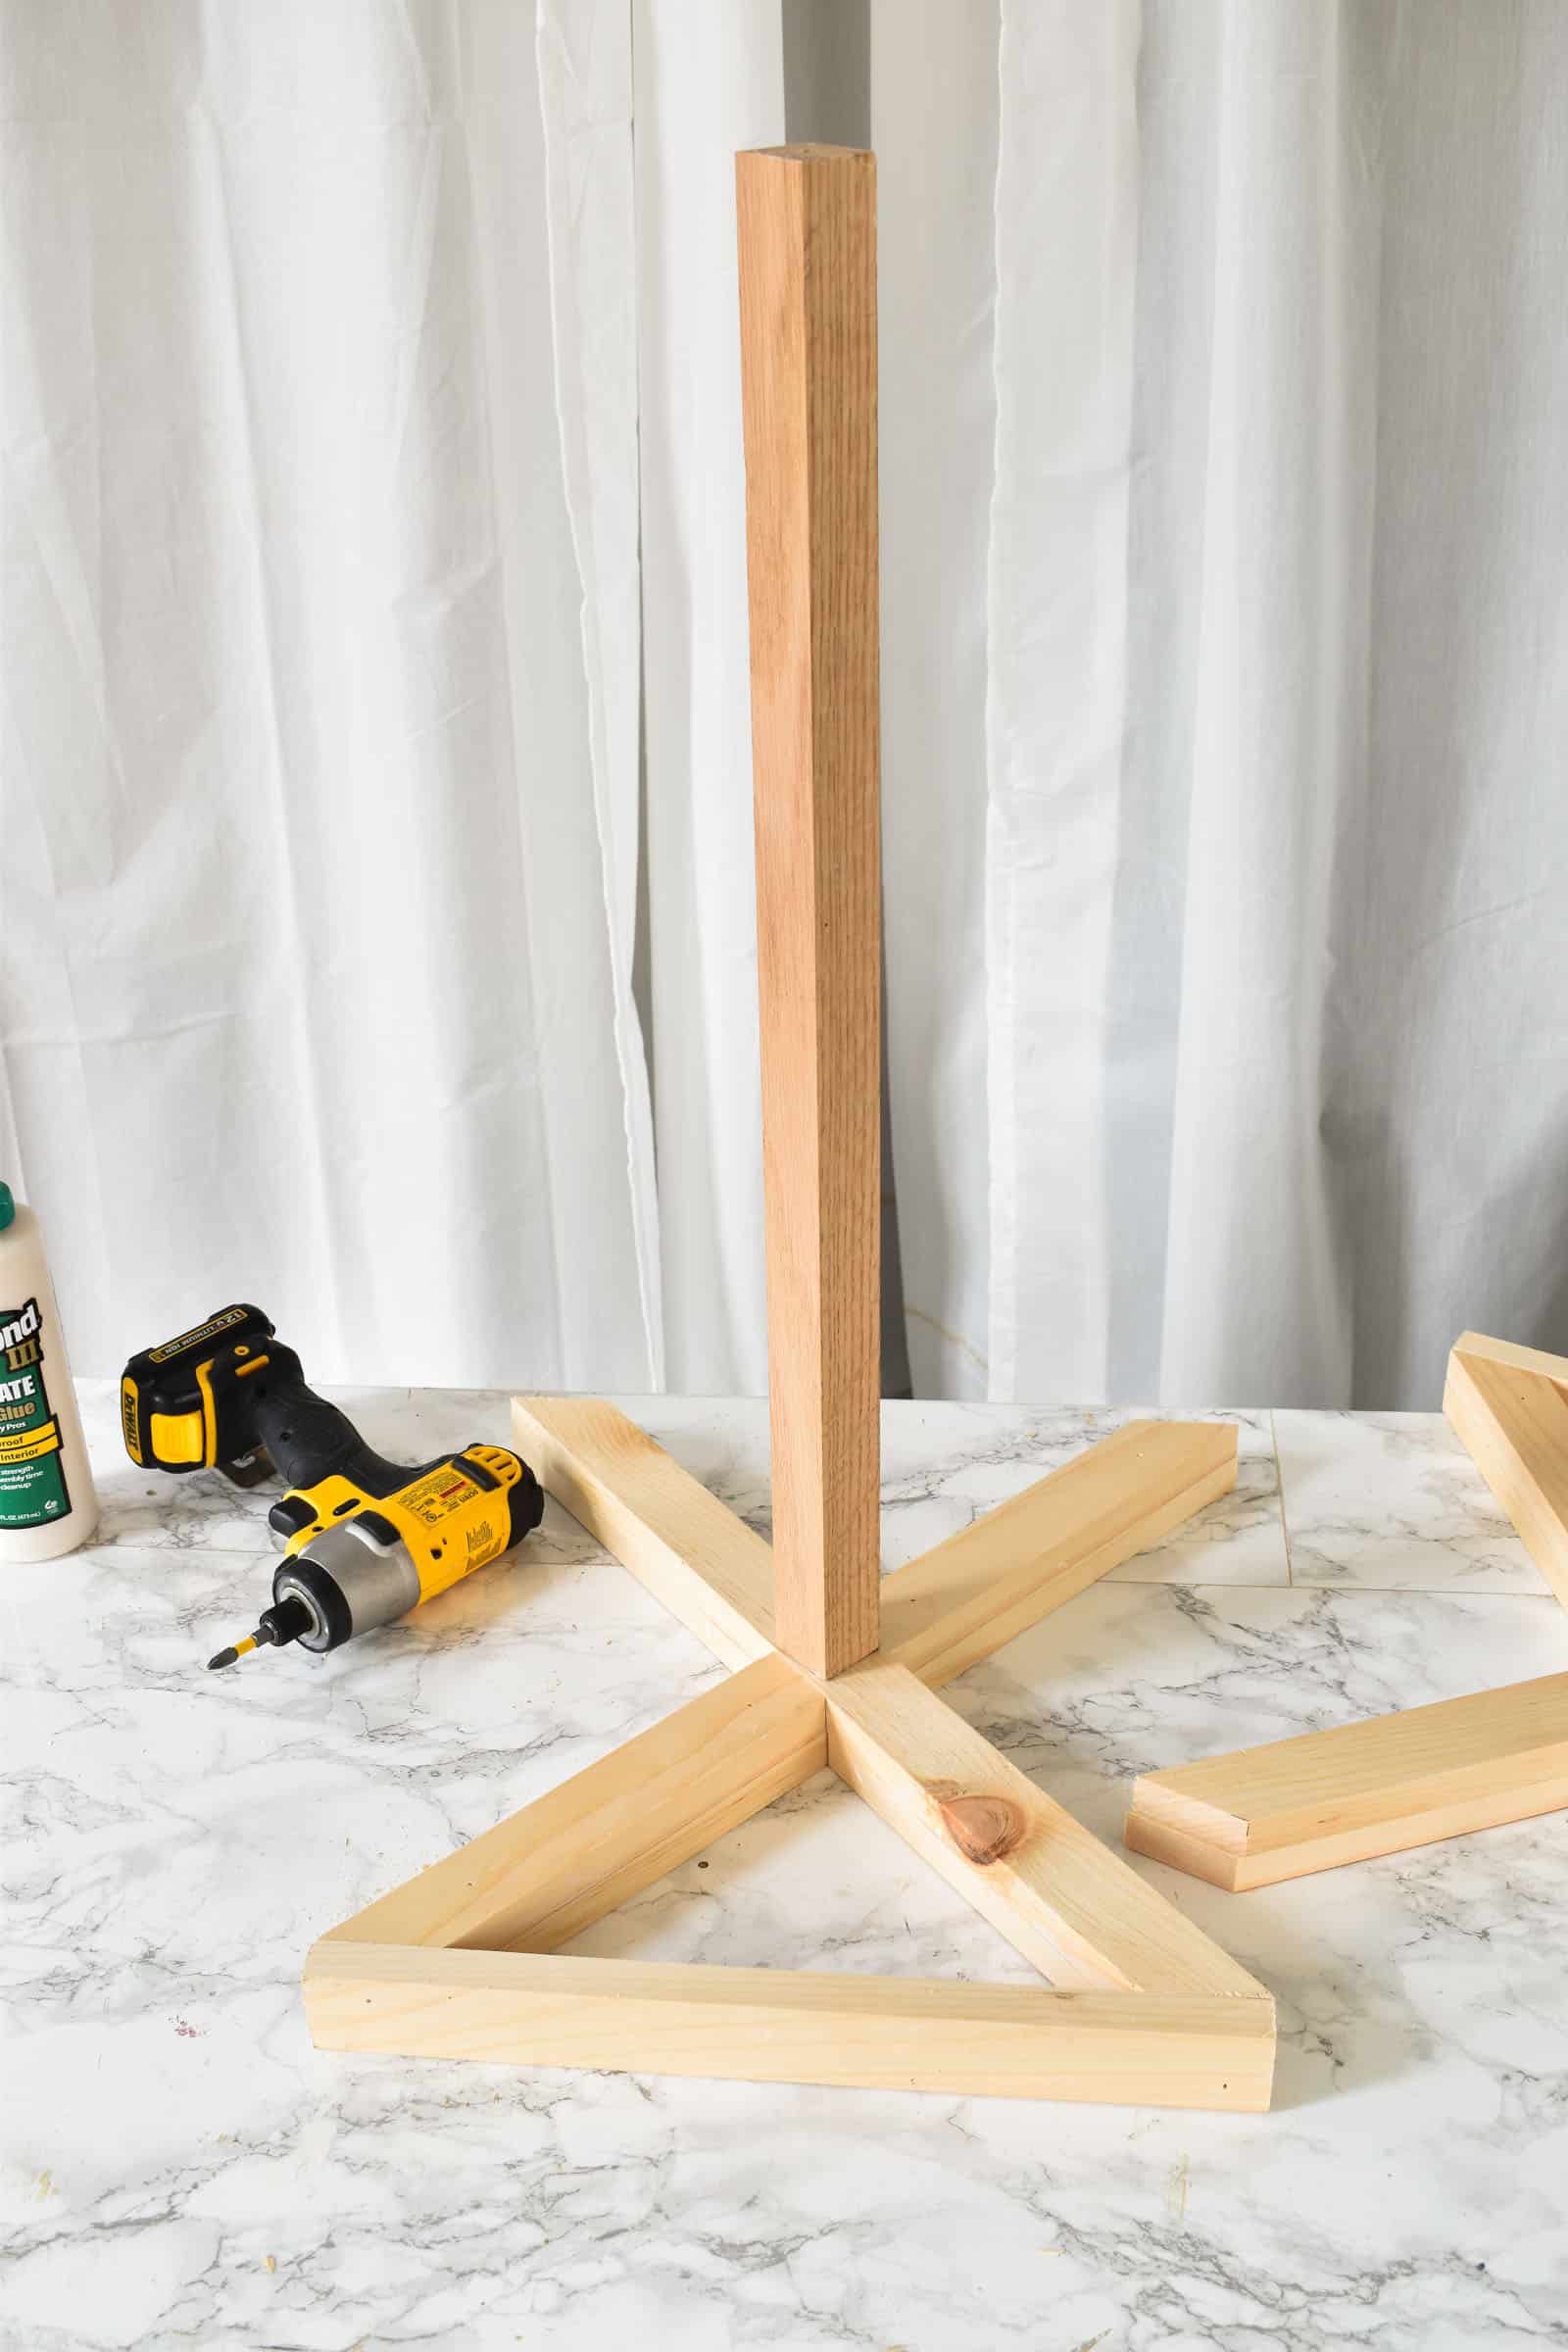
Step 3. Add Center Brace
Cut a 2×2 to the desired length of your bench. Use a countersink drill bit and predrill where the Xs intersect on either end of your bench. Predrill into the center of either end of the 2×2.
Using a 2 1/2″ screw, screw the X end pieces into the 2×2 center support piece. Leave screw slightly loose until you confirm that the bench is level and then tighten the screws.
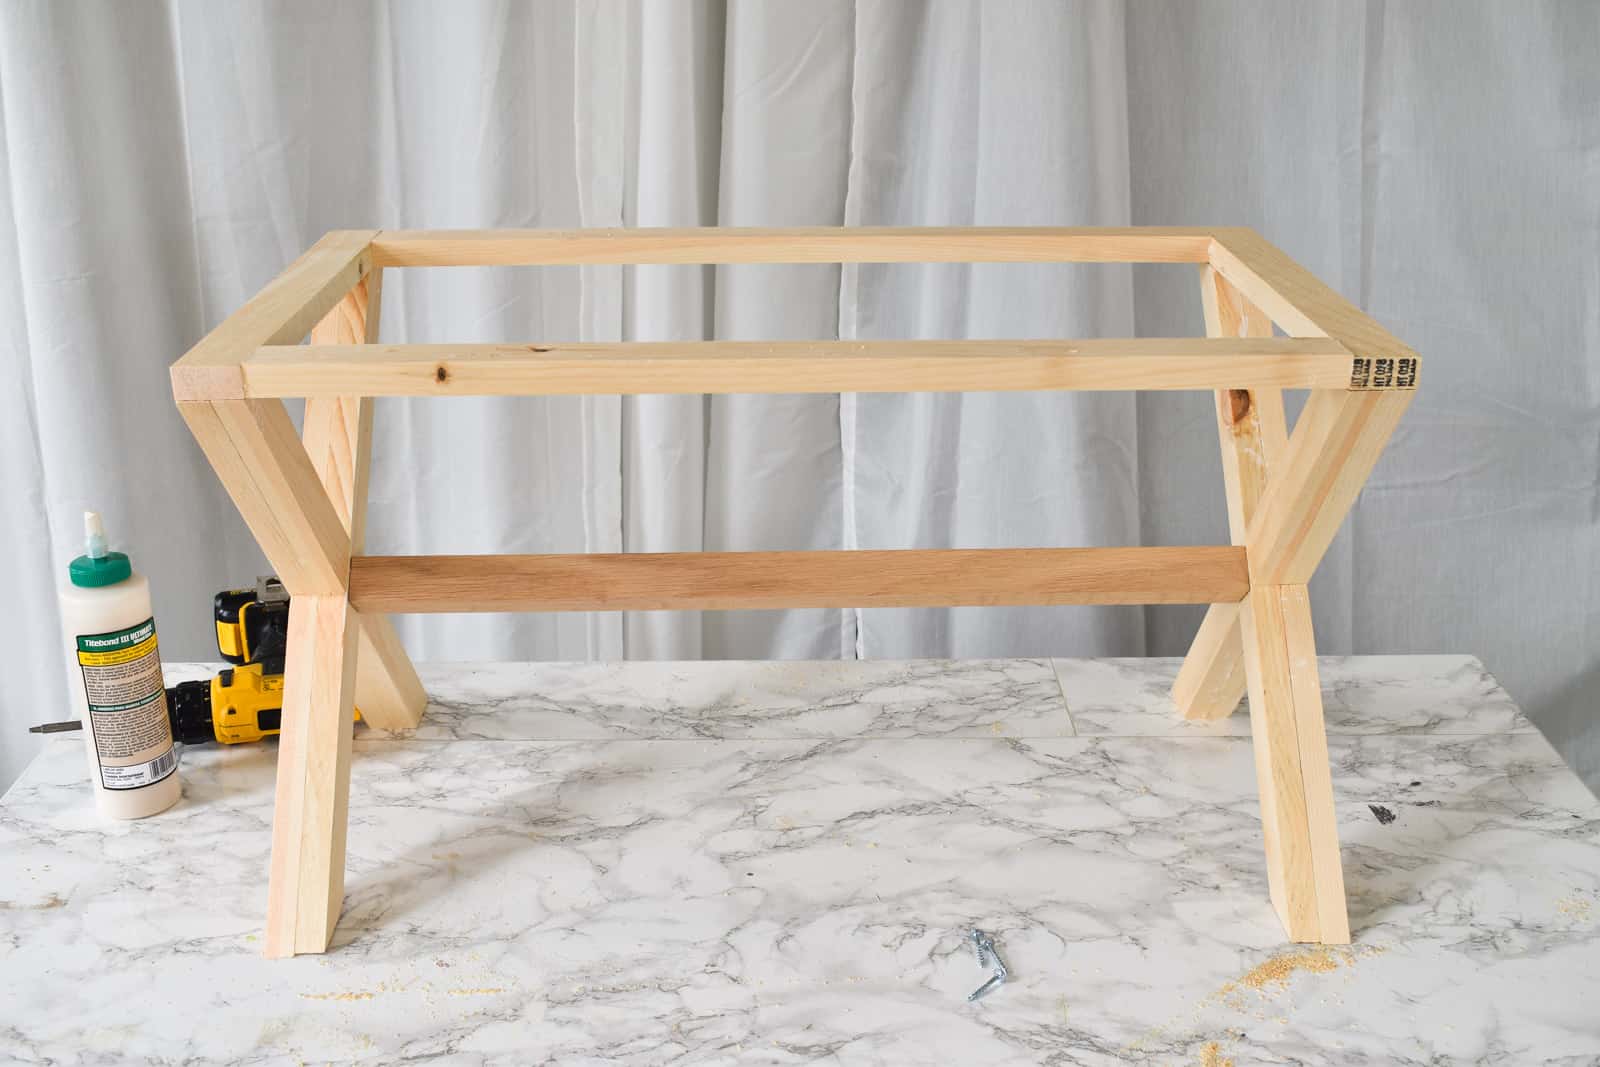
Step 4. Add Top Supports
Cut two 1x2s to the same length as 2×2 in Step 3. Drill pocket holes in either end and attach to top X end pieces that you’ve already assembled.
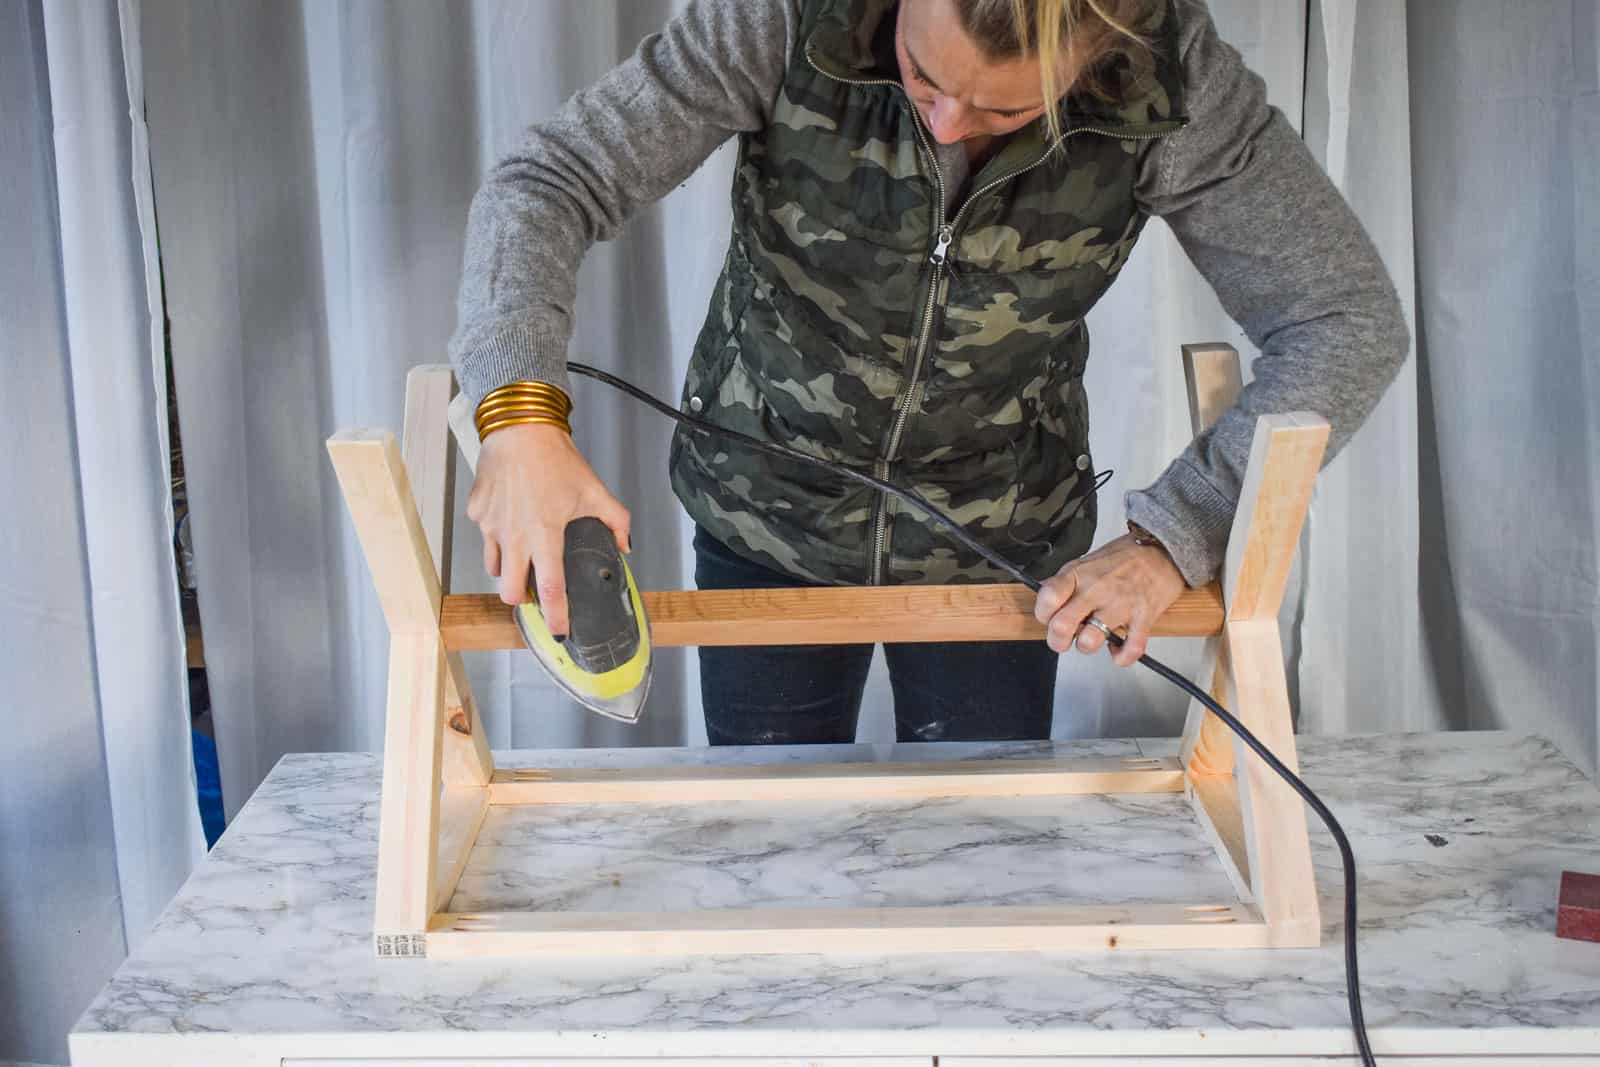
Step 5. Sand
Sand. Make sure you get any residual glue that may have oozed out from the joints. Leftover glue won’t accept stain the same way as the wood and will leave spots. Wipe bench with a rag to remove all dust.
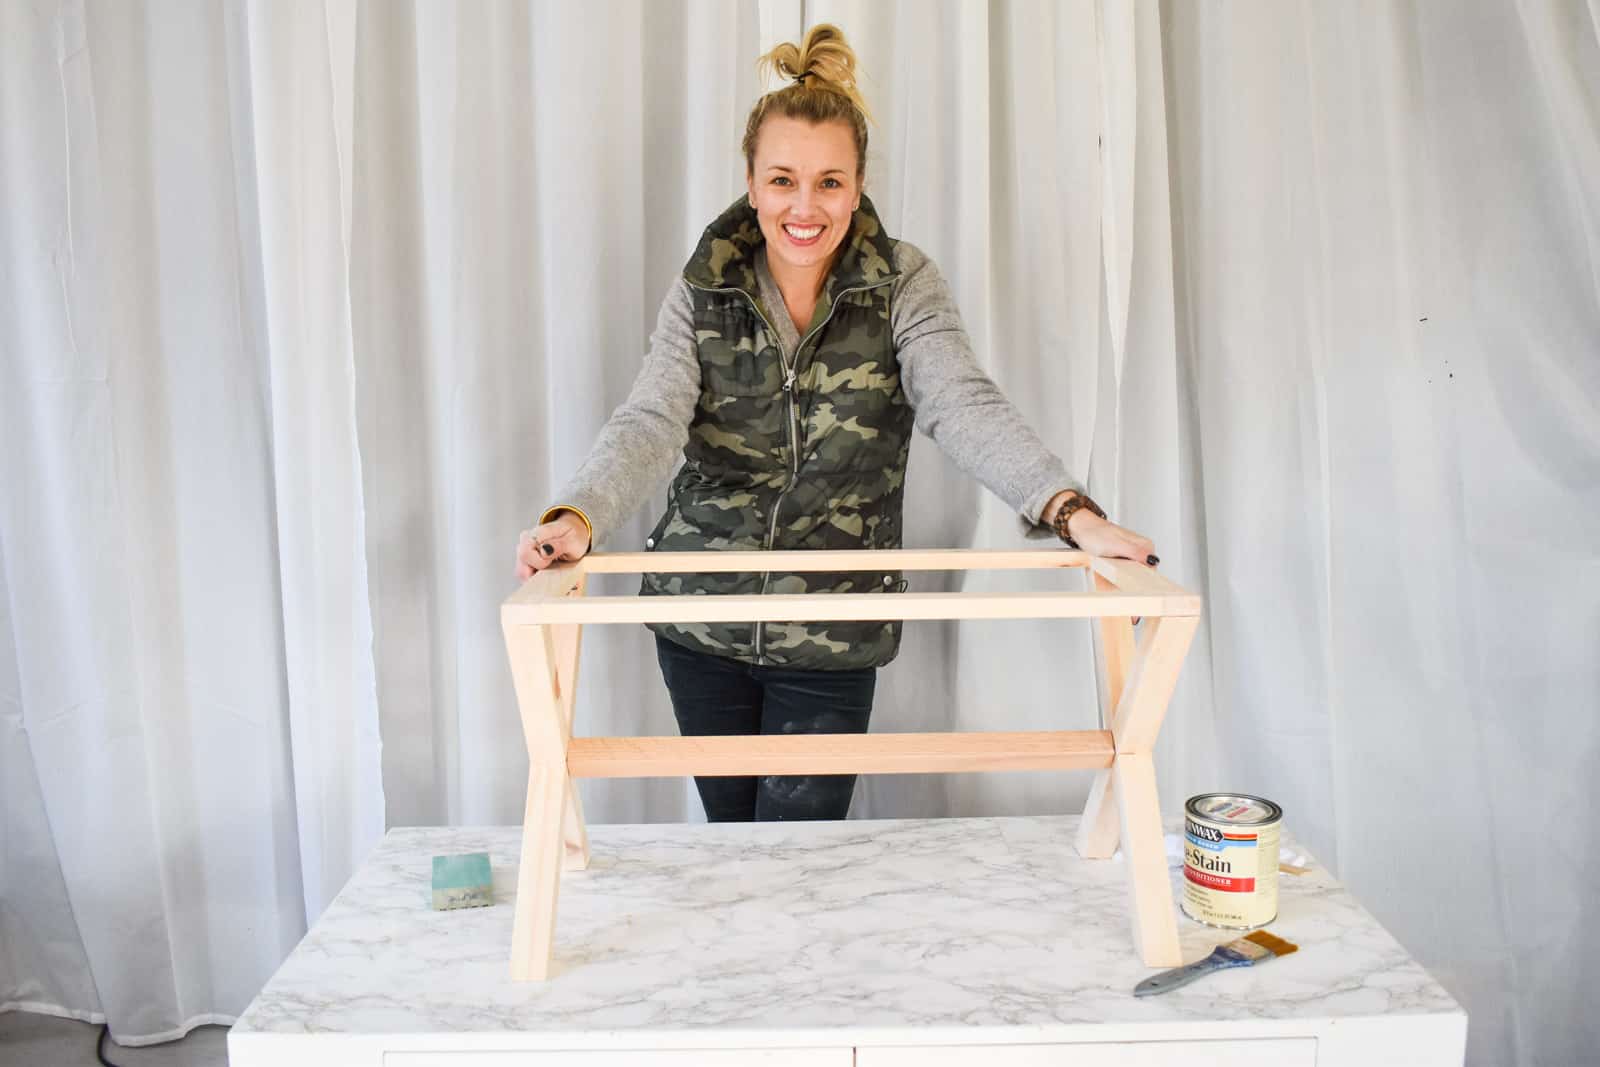
Step 6. Pre-Stain
Brush on pre-stain conditioner. Without pre-stain, you run the risk of having a blotchy appearance. This water based pre-stain is super thin with no odor so you can brush it on, wait 1-5 minutes and then wipe off any excess.
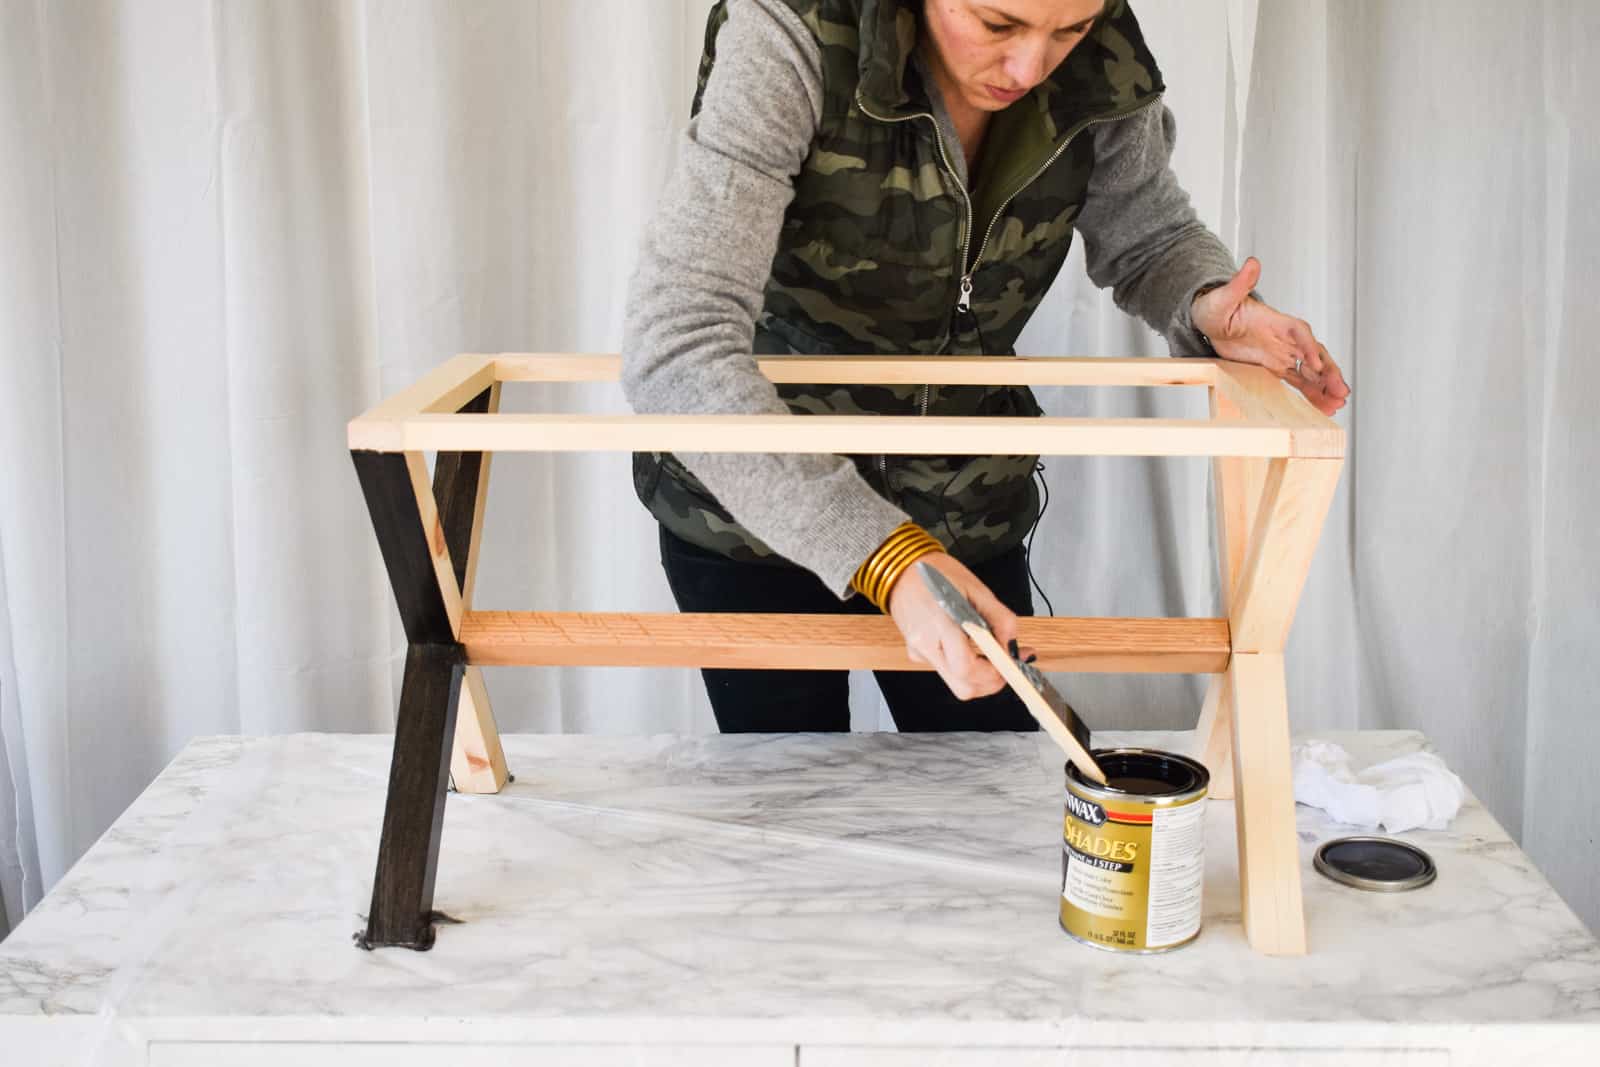
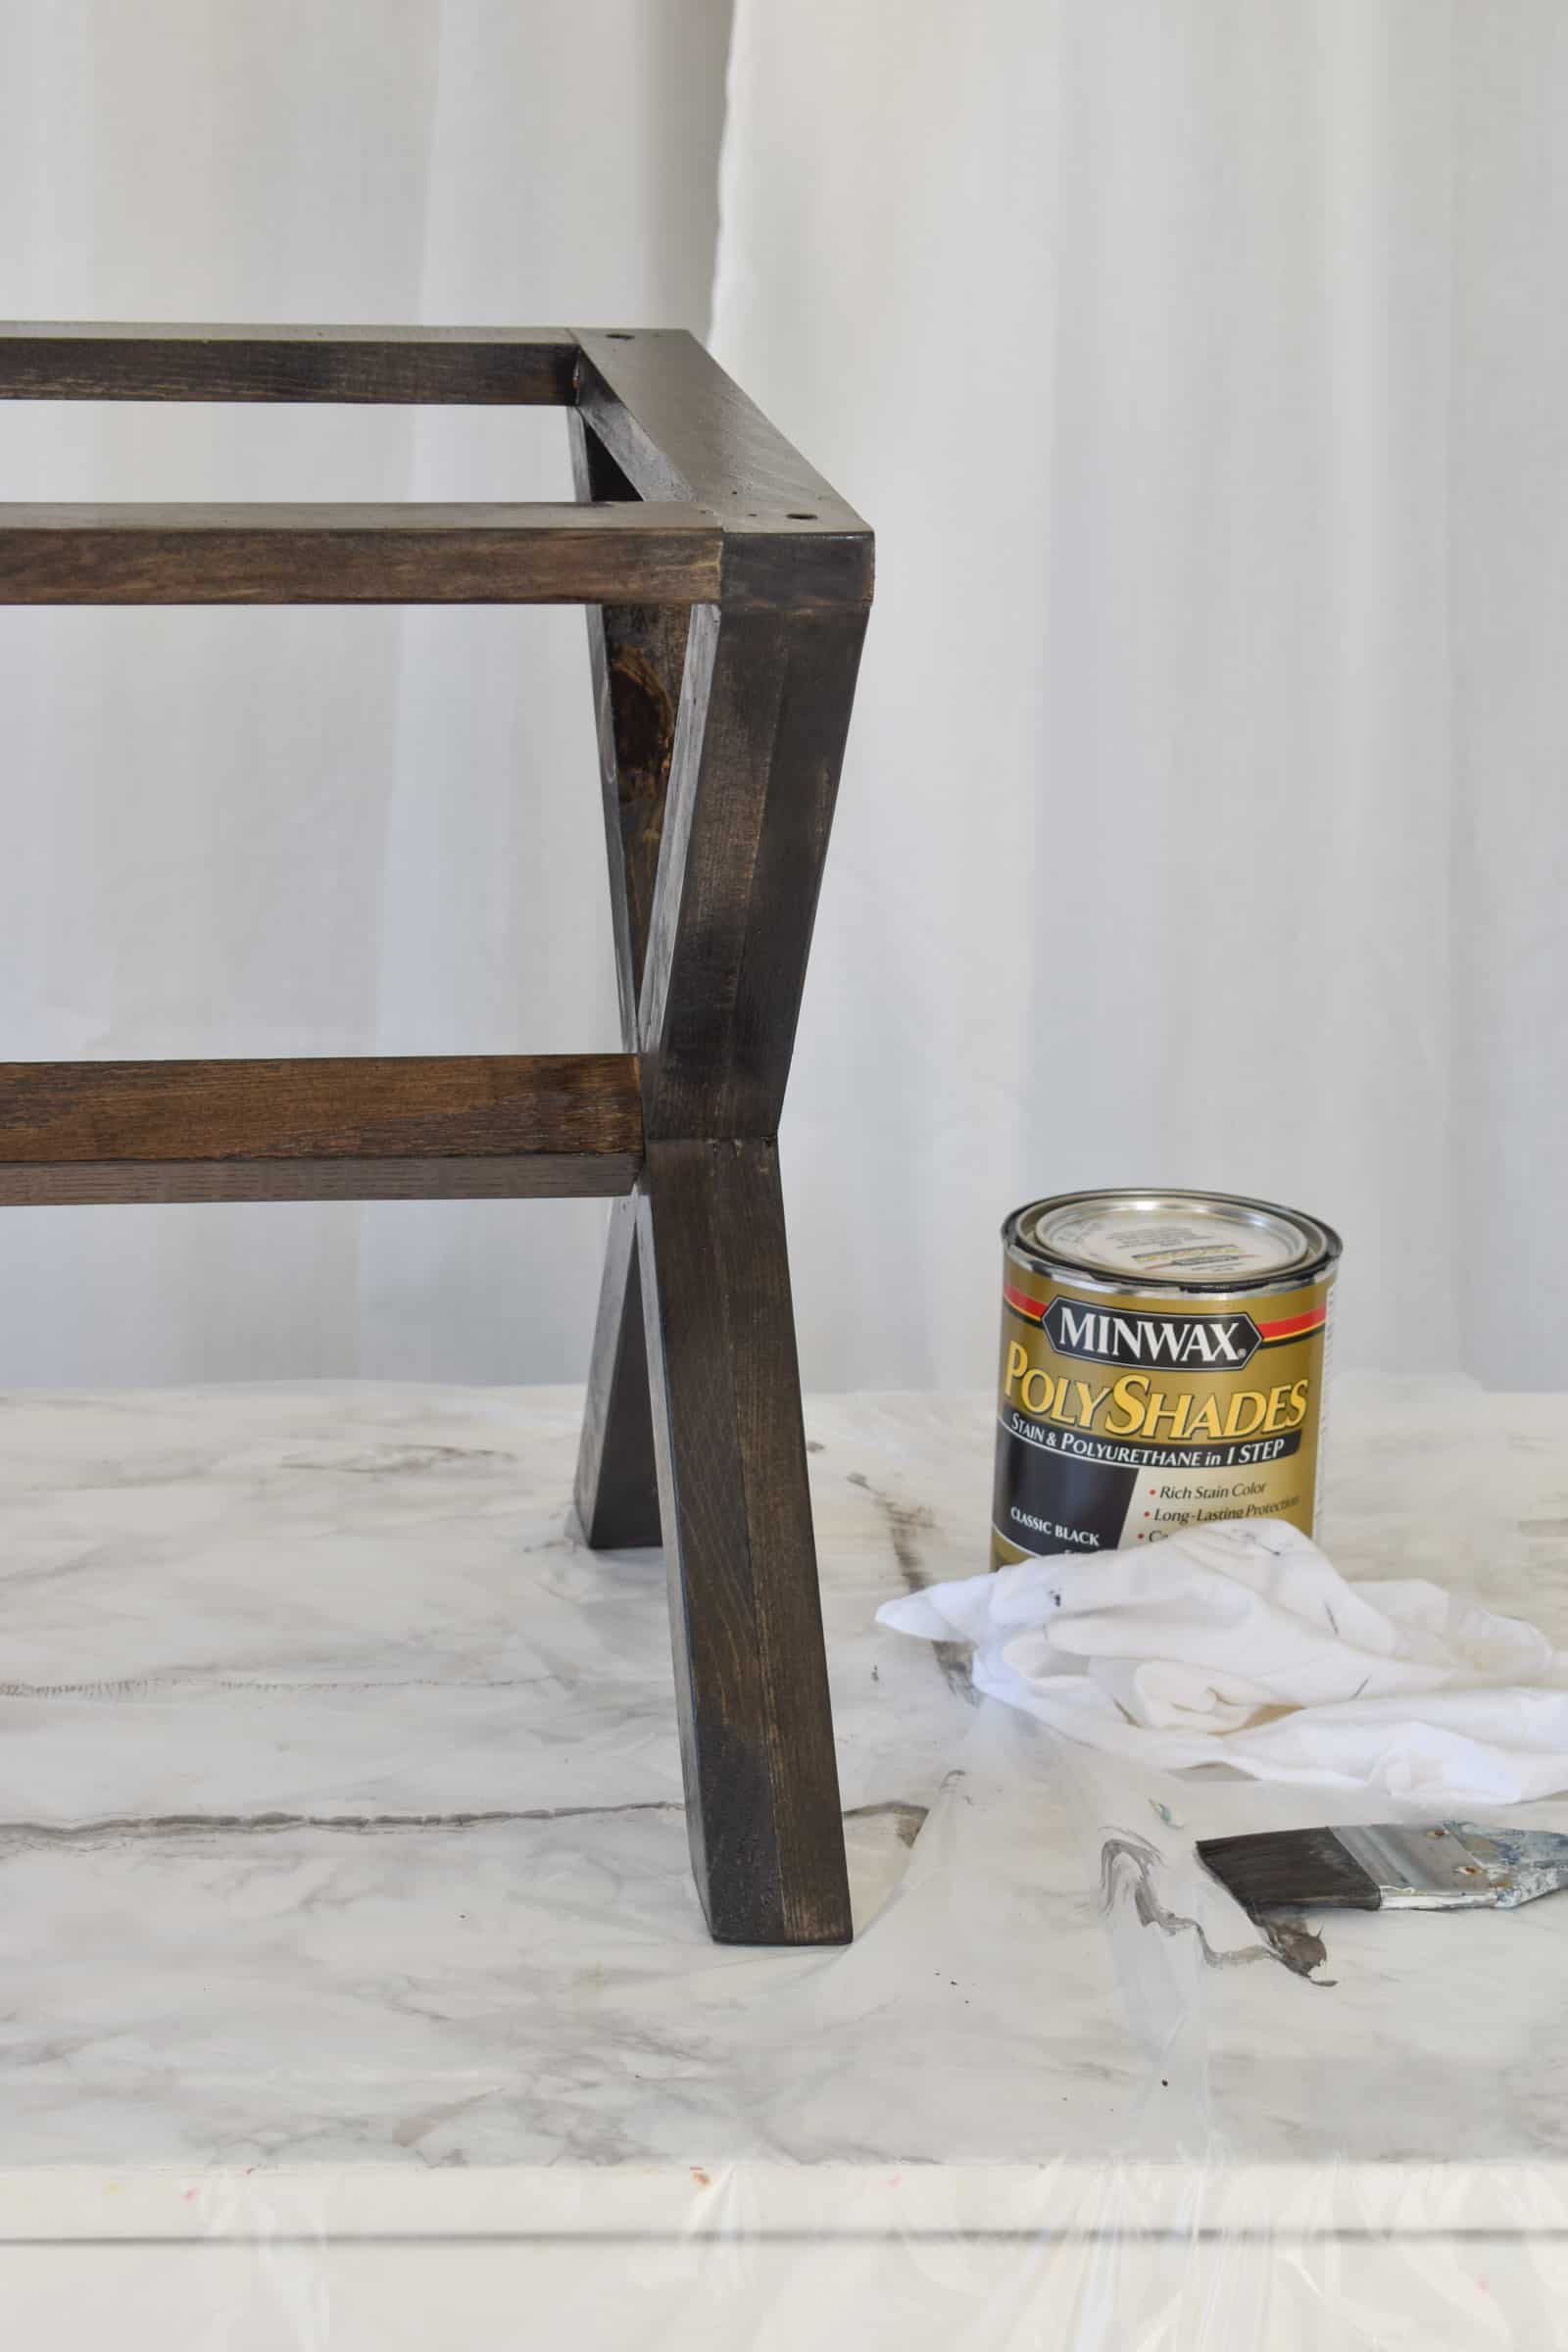
Step 7. Stain
After an hour or so, you’re ready to stain. I used Polyshades in Classic Black for this bench. It’s a stain/ polyurethane in one so the application is a little different. As opposed to traditional stain, you don’t wipe off the excess so it’s imperative to apply the first coat light and even!
Step 8. Upholster
Cut a piece of plywood to fit the top dimensions of the bench, upholster and screw in place from underneath the bench! (For more detailed tutorial on how to upholster a bench seat, check out this post here!)
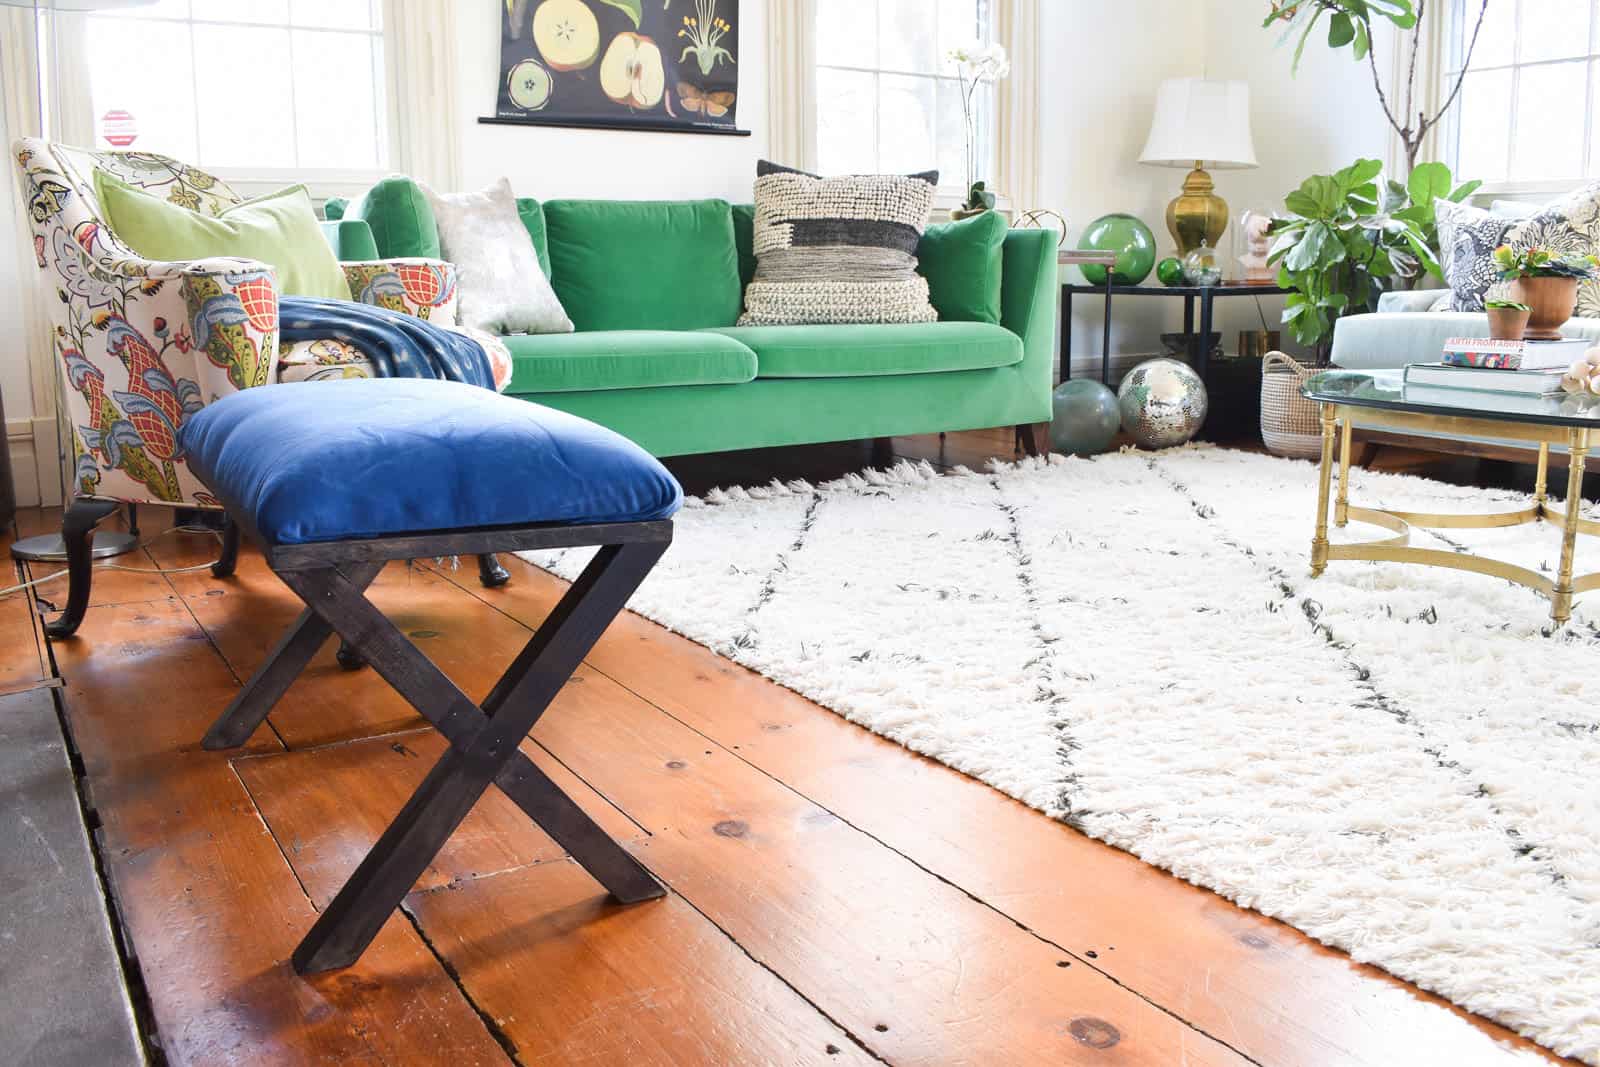
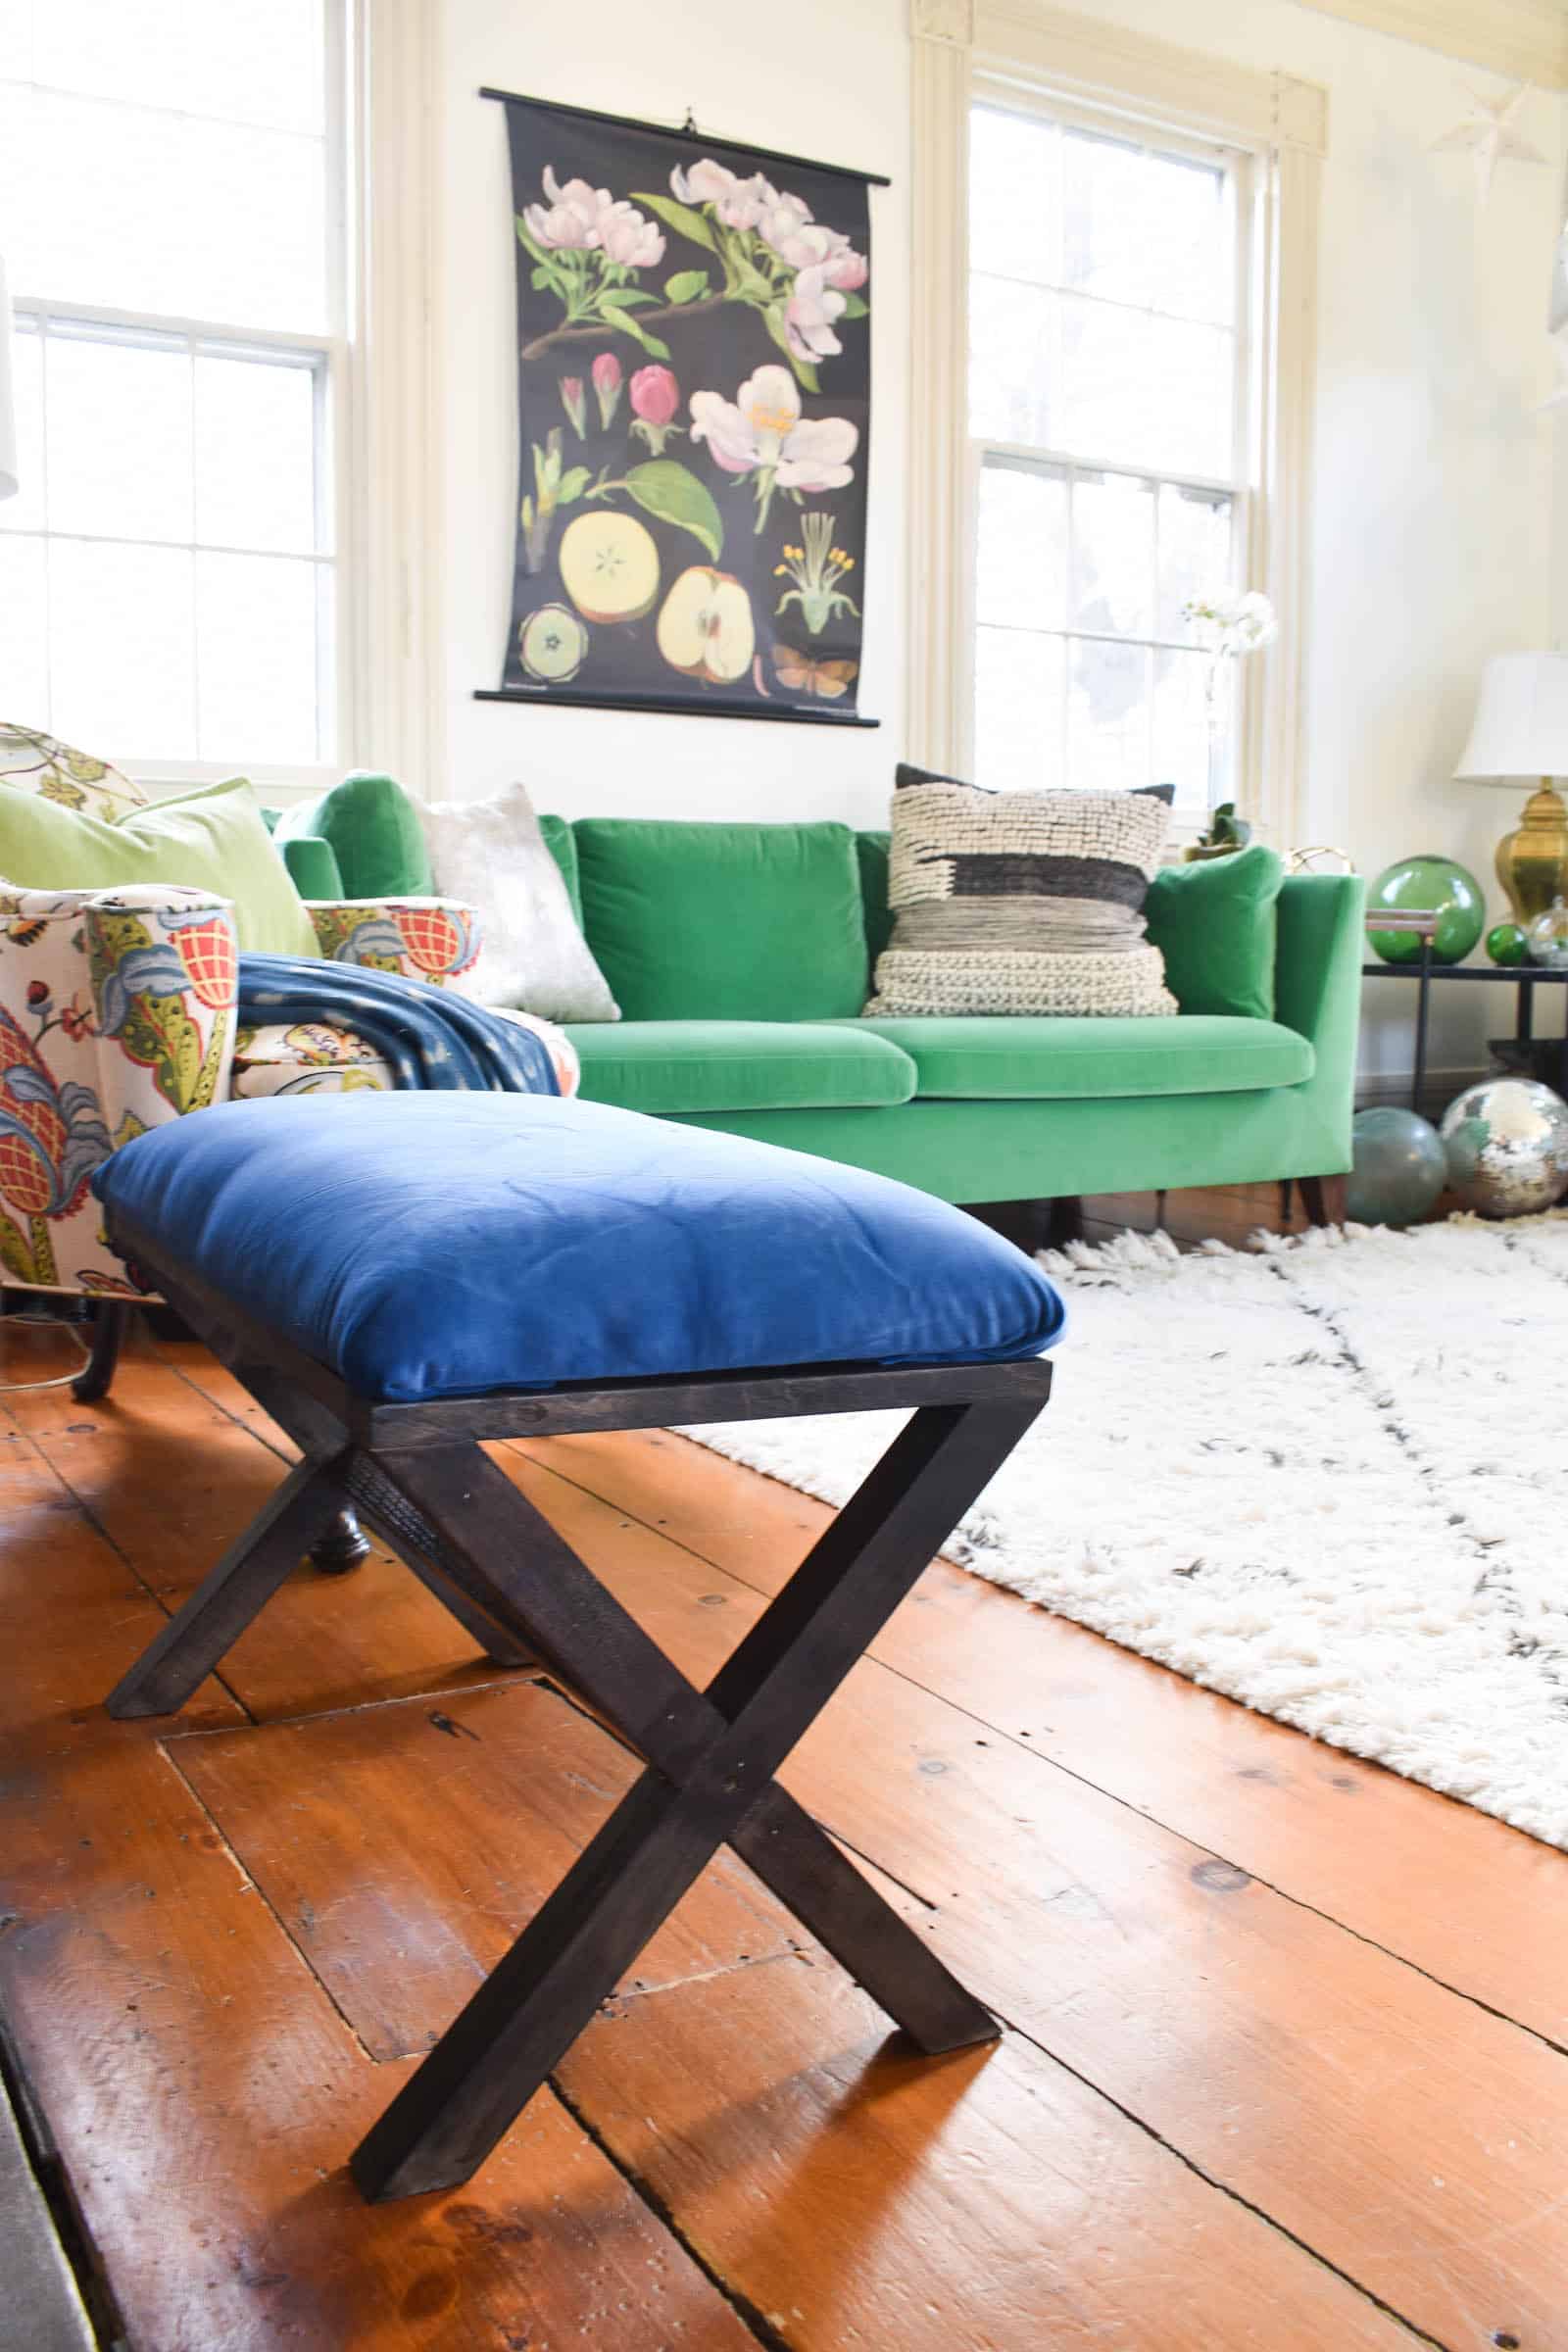
It looks SO good! I love the shape and the addition of that lovely blue makes me happy!


I made a video to go with this tutorial… sometimes the video shows details that the still photos don’t capture so check it out (and why not subscribe to my YouTube channel while you’re over there! Ha!) I’m letting you in on a little secret though… I originally upholstered this with that DIY fabric and I didn’t love how it looked. So… I replaced the dots with the blue velvet and it’s SO much better!
Let me know if you have ANY questions! I am SO thankful to Minwax for providing me with the luxe black stain for this bench… I love the contrast of the black with the blue velvet and it looks amazing in our living room. (I also photographed it here under my new budget high end art… notice any changes?)
Materials
(Affiliate links included for your convenience.)
- 1×2 common board
- 2×2 pine
- Kreg Jig
- Sander
- Woodglue
- Brad Nailer
- Minwax Waterbased Pre-Stain Conditioner
- Minwax Polyshade Classic Black
- Drill
- Pneumatic Stapler
- Foam (I often used egg crate mattress foam… cheaper!)


Don’t Miss Out
Become An Insider!
Signup for exclusive tips, and tricks from Charlotte’s House!
Let’s chat!
I love comments from you, so feel free to leave your thoughts and ideas below! And don’t forget to follow me on Instagram for even more!