
Upholstering My First Chair
Psssst… this post *might* contain affiliate links: see my disclosure here.
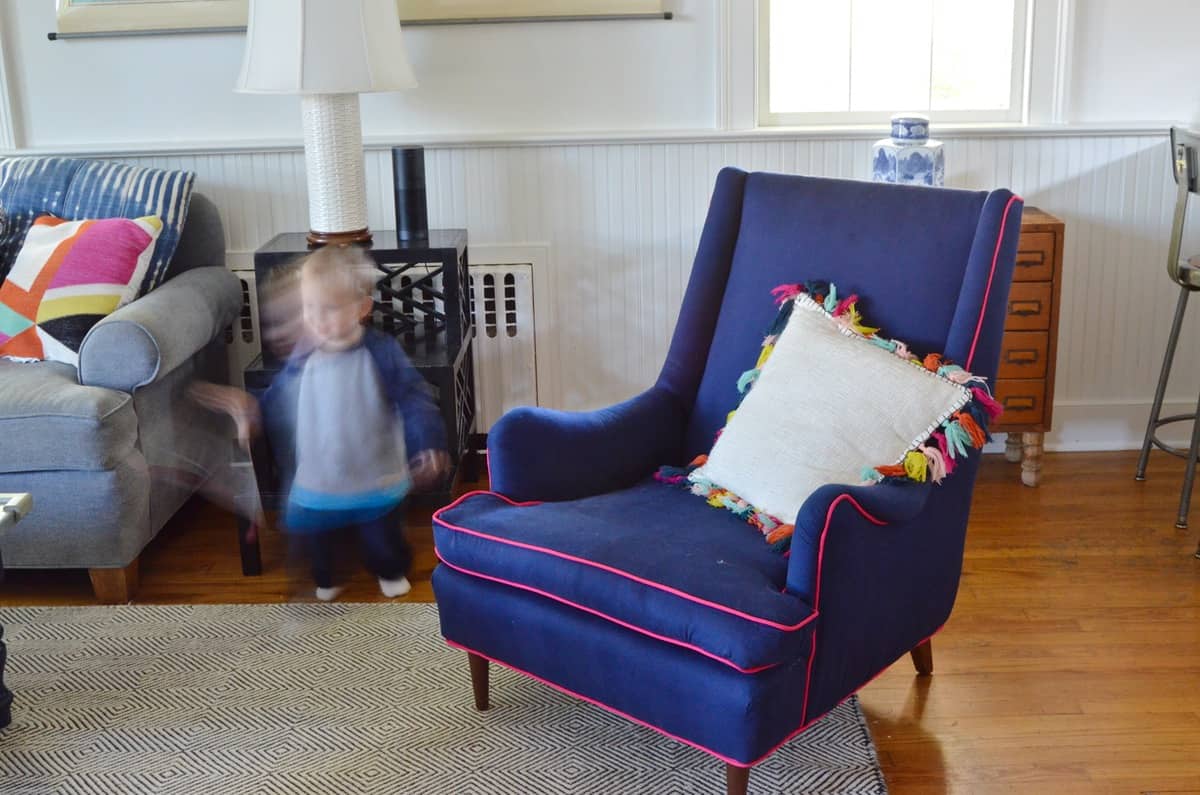
My First Attempt at Upholstering a Chair
For MONTHS (like 12+… aka years), I’ve been threatening to take on a real grown-up upholstery project. And thanks to my new friends at Fairfield World… I got the courage to upholster a chair.
Disclosure: Fairfield world sent me all the foam for this project and their partner in upholstery crime, Dritz, jumped in with some of the smaller items like cording and zippers. Sadly, neither company sent anyone who could show me how to DO this project!
Shop my favorites!
This post will NOT be a comprehensive tutorial, but… it should point you in the right direction. I watched close to a jillion hours of YouTube for this chair and should have watched a few dozen more in hindsight (ahem… cushion videos).
How to upholster a chair… rookie style
Here’s what you’re going to need to do an upholstered chair ‘right’. Can some of these things be skipped? Yep. What I’ve learned about upholstery is that there are lots of ways to skin a cat and if it looks OK… chances are pretty good that you’ve done just fine. (Some affiliate links included.)
What You’ll Need:
• Upholstery Weight fabric
• Cording (subjective what size)
• Foam (thick for cushions and thin for the chair itself)
• Cotton batting/ Cushion wrap
• Upholstery needle/ thread
• Staples
• Staple gun. You need a real deal gun with a compressor to best work your way into the tight spaces.
• Cardboard strip
• Tack strips
• Metal pli-grip
• Dust cloth
• Electric carving knife
• Zipper
• Piping foot
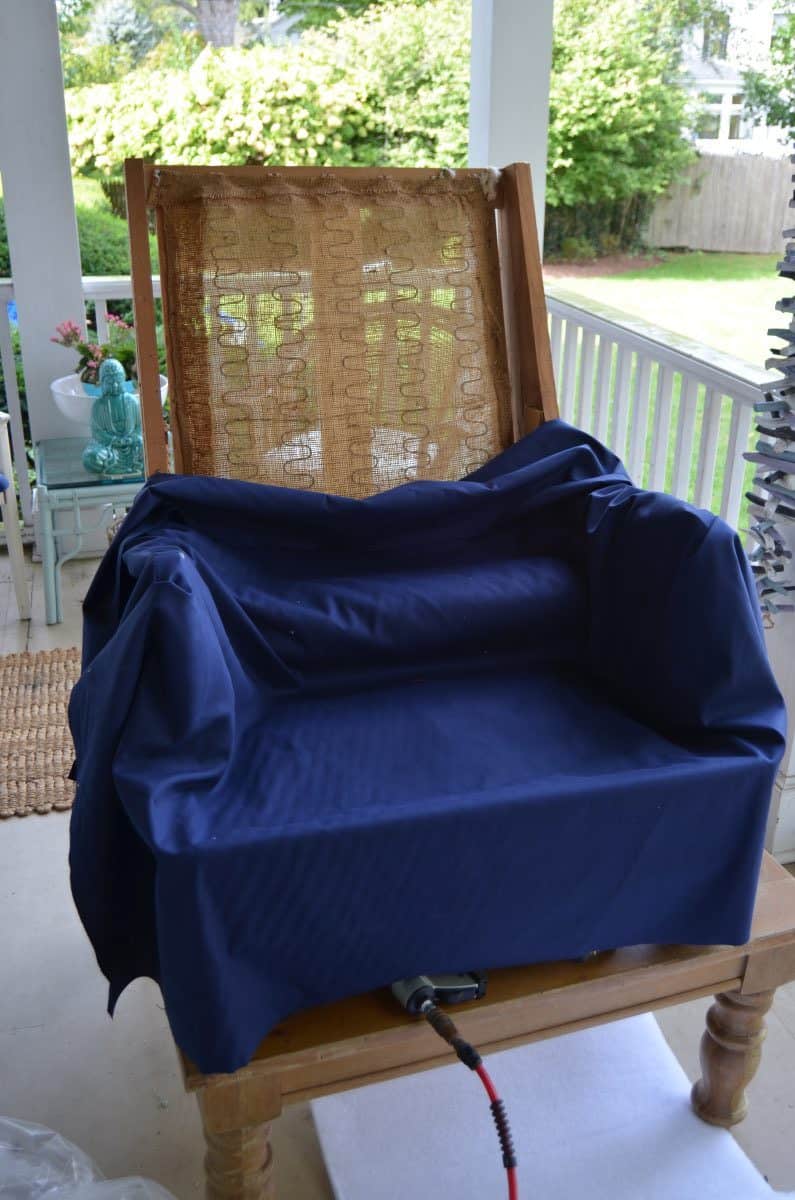
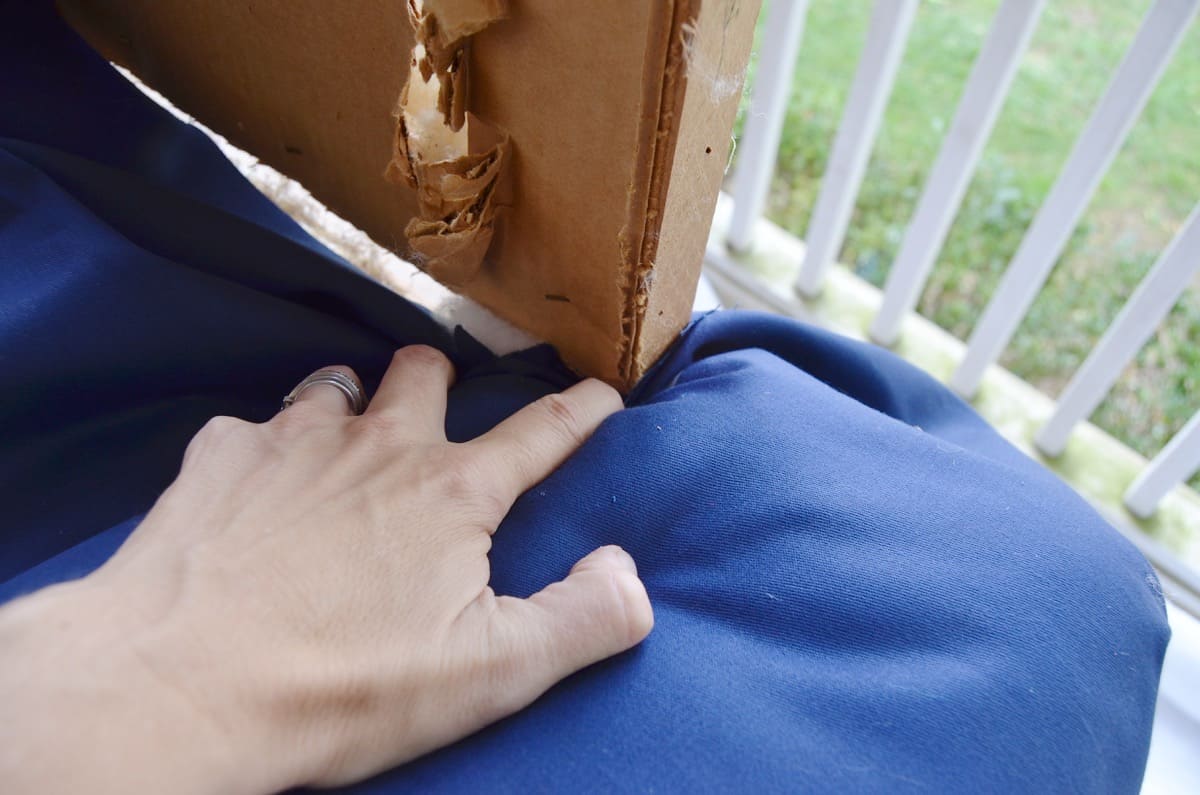
Step 1: Strip off the old upholstery
Strip down your chair to the bare bones. TAKE. PICTURES. Take video. Take more photos than you think is reasonable. Save your fabric if possible to use as a template when cutting the new pieces. (The infrastructure of my chair was in great shape so I didn’t need to get into replacing or repairing the springs or the chair frame. Phew.)

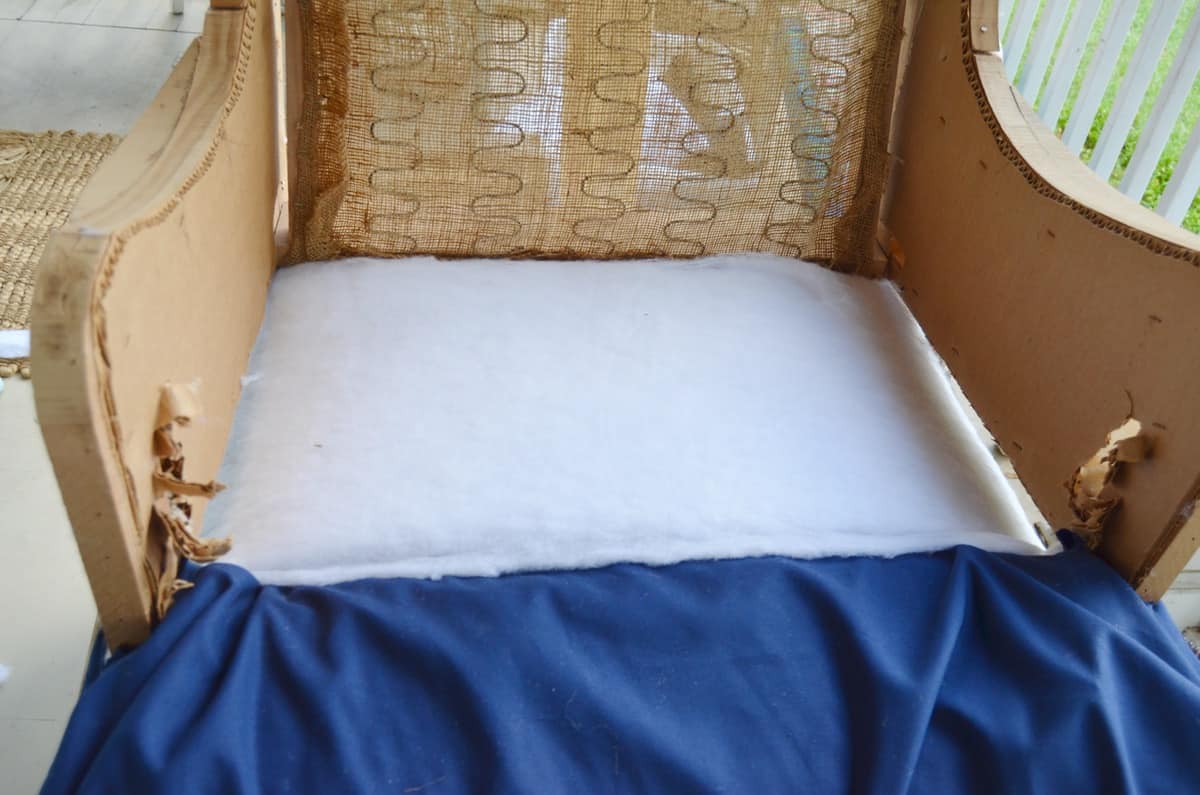
Step 2: Start with the seat of the chair
First thing to tackle is the seat (aka the deck)… the part of the chair under the seat cushion. I was lazy and just used one piece of fabric, but technically you should use a sturdy piece of fabric for the back portion of the deck and then you only need to use your upholstery fabric for the visible portion across the front.
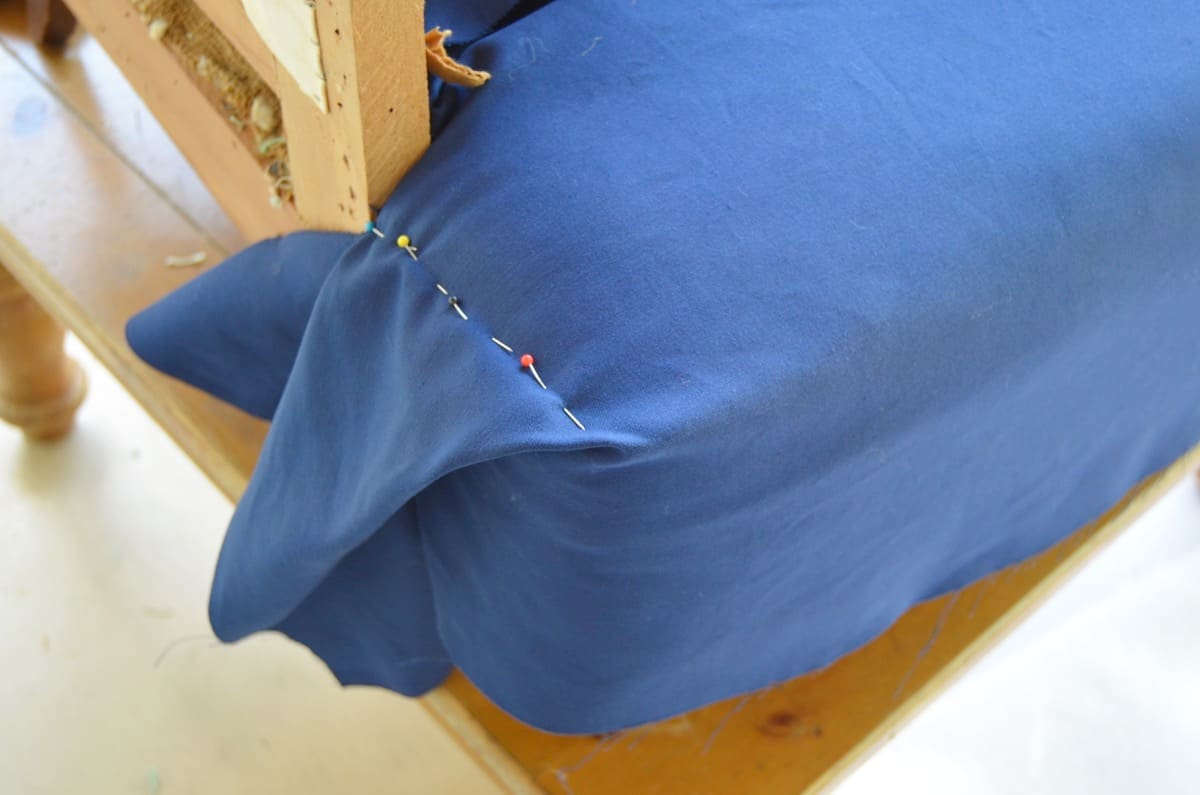
Mark a line between the two arms, and lay the seam of your deck fabric and your upholstery fabric here. Fold the fabric around the front corners of the seat and pin your stitch line. Trim excess fabric and machine sew these corners. Using an upholstery needle and heavy duty thread, use large stitches to attach the fabric to the deck along the guideline you made before between the two arms.
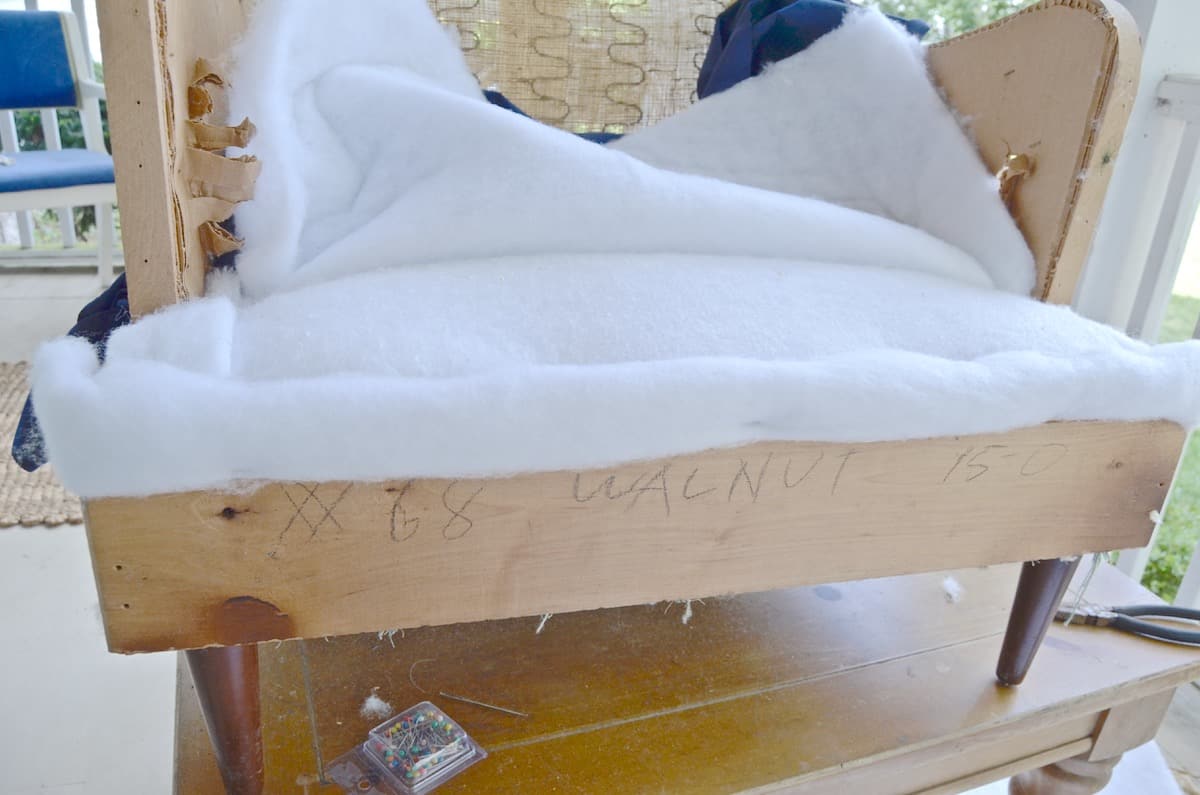
With the fabric tacked in place along that stitch line, fold the fabric out of the way and place a piece of thin foam onto the seat and then cover with batting on either side of your stitch line. For many chairs, it is necessary to ‘pad the deck’ which simply means, adding an additional roll of foam or batting to the front edge of the seat to soften this corner.
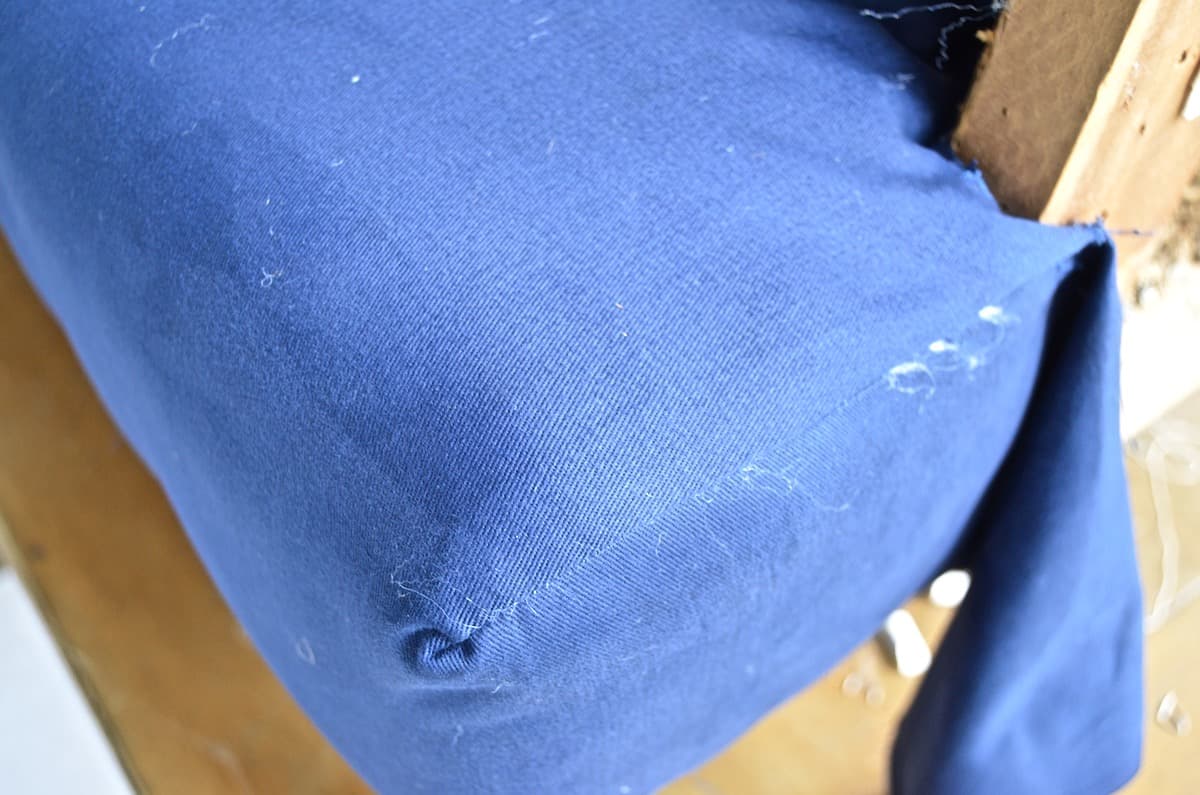
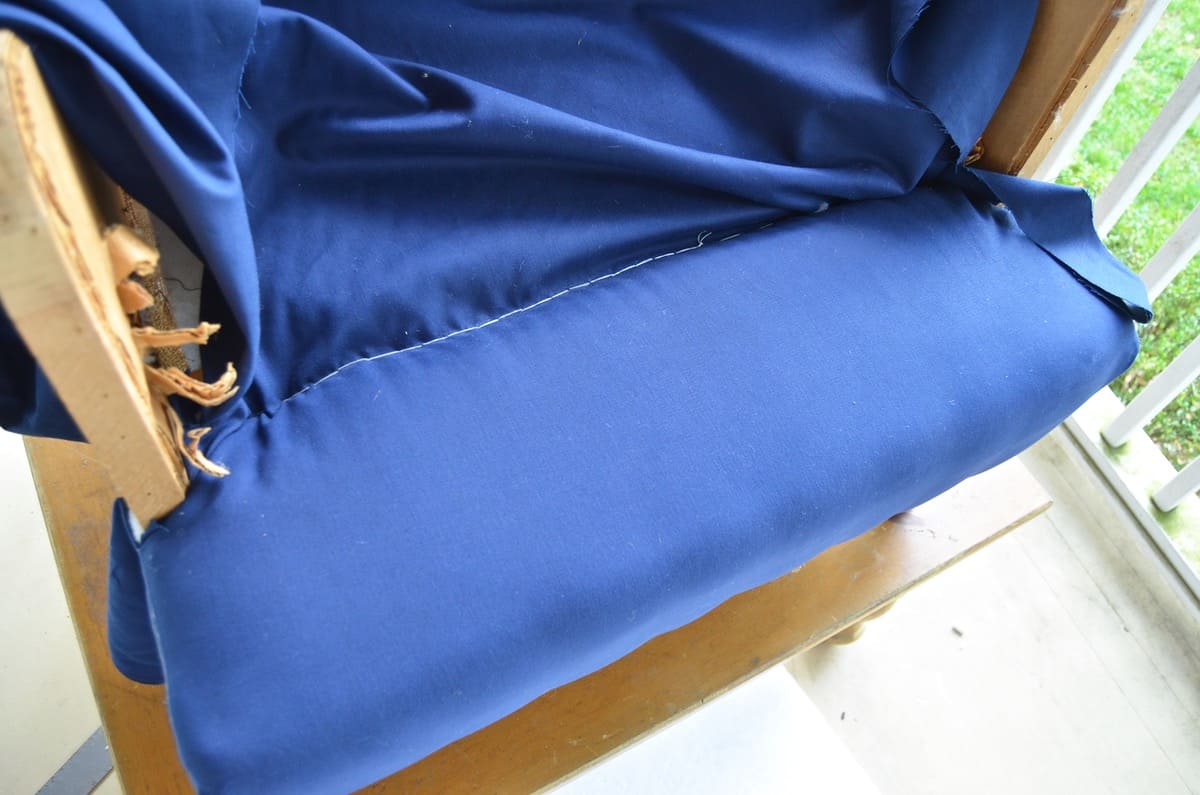
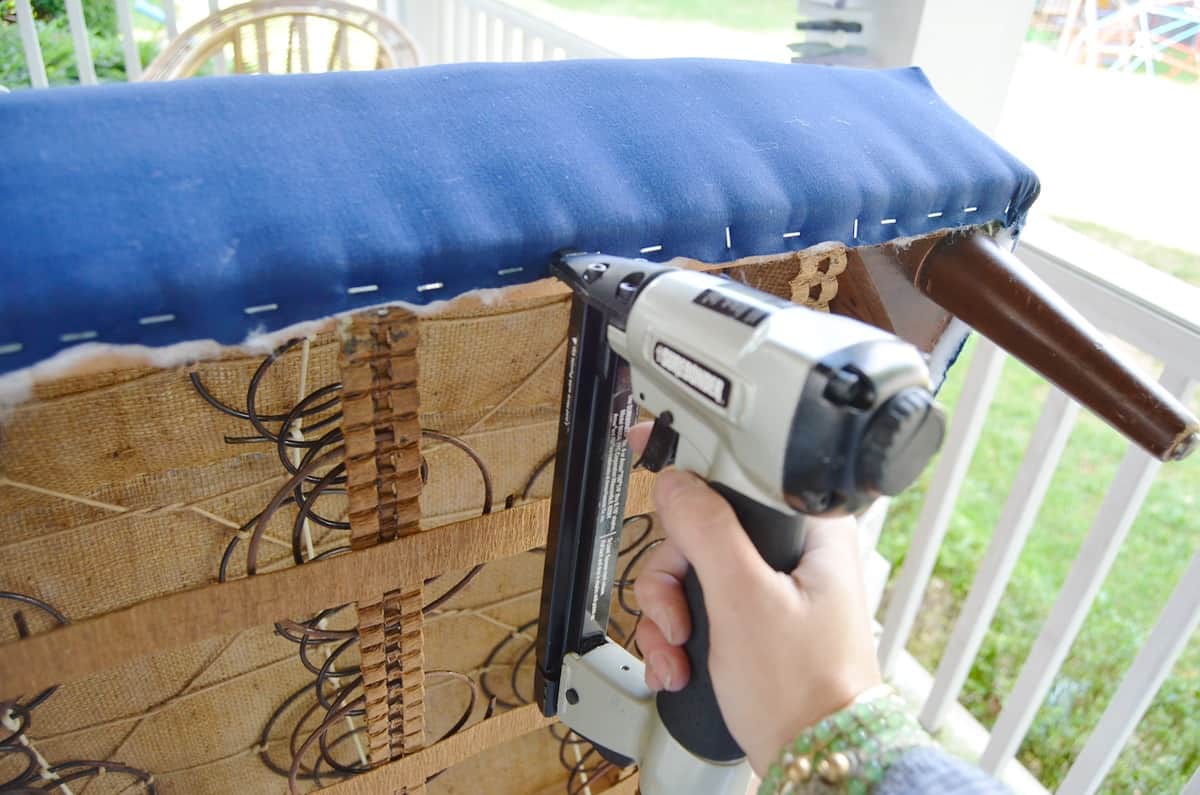
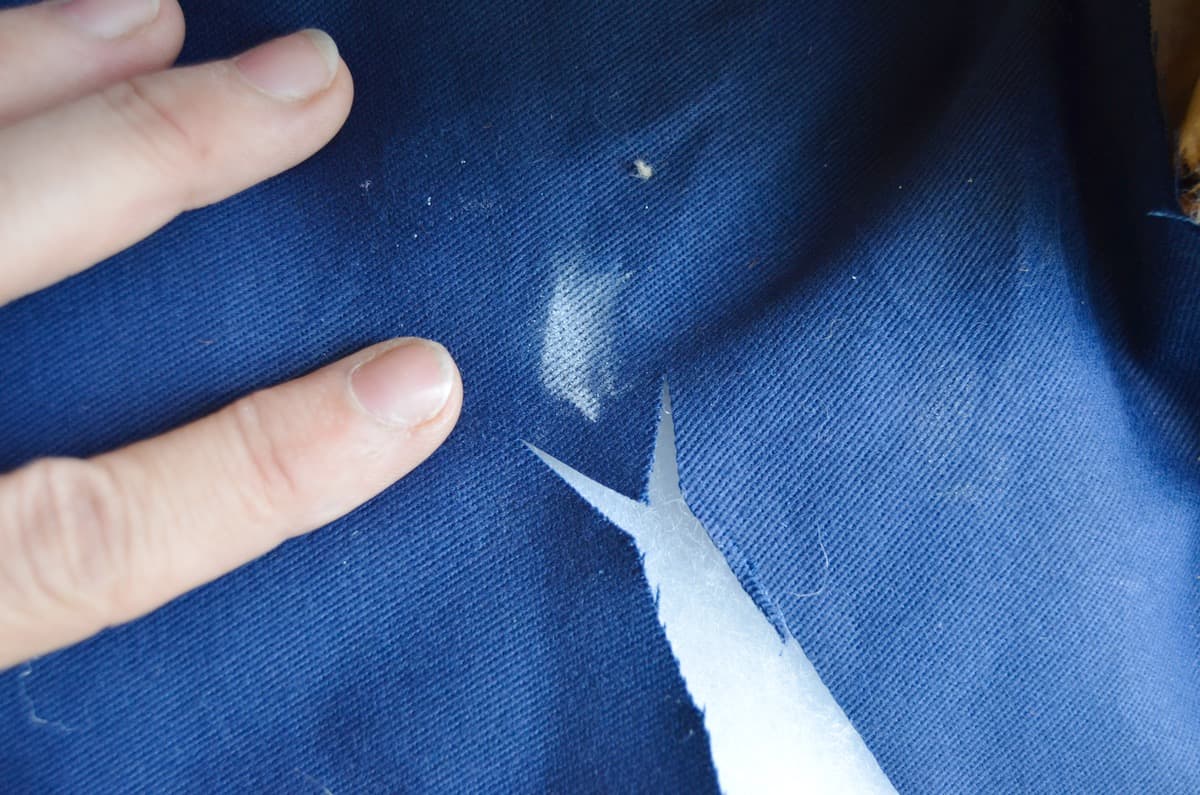
Step 3: Pull Seat fabric tight and staple in place
Pull the fabric tight and staple in place along the bottom edge of the seat. This is where I made some mistakes… It was hard for me to anticipate whether these staple lines would be in the way in a subsequent step… I think each chair is different in this regard, but keep that in mind. Warning: Maneuvering the corners (release cuts) will make you nuts. In the last photo you can see where I made a slight mark with my chalk line where I *thought* the fabric met the corner of the chair. This is a Y cut to help you get the fabric around these corners… I DEFINITELY made a mistake here and there leaving a gap that I couldn’t un-cut. Cut cautiously when making these Y-cuts until you get the hang of it.
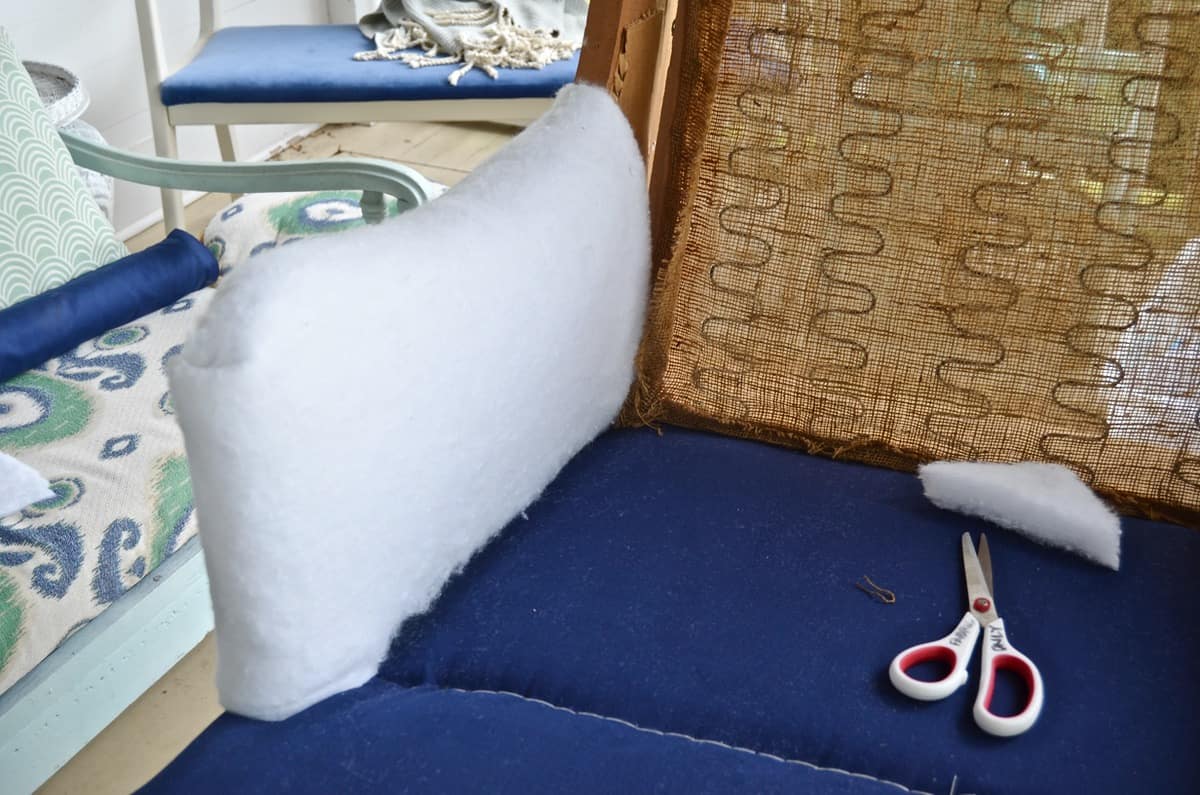
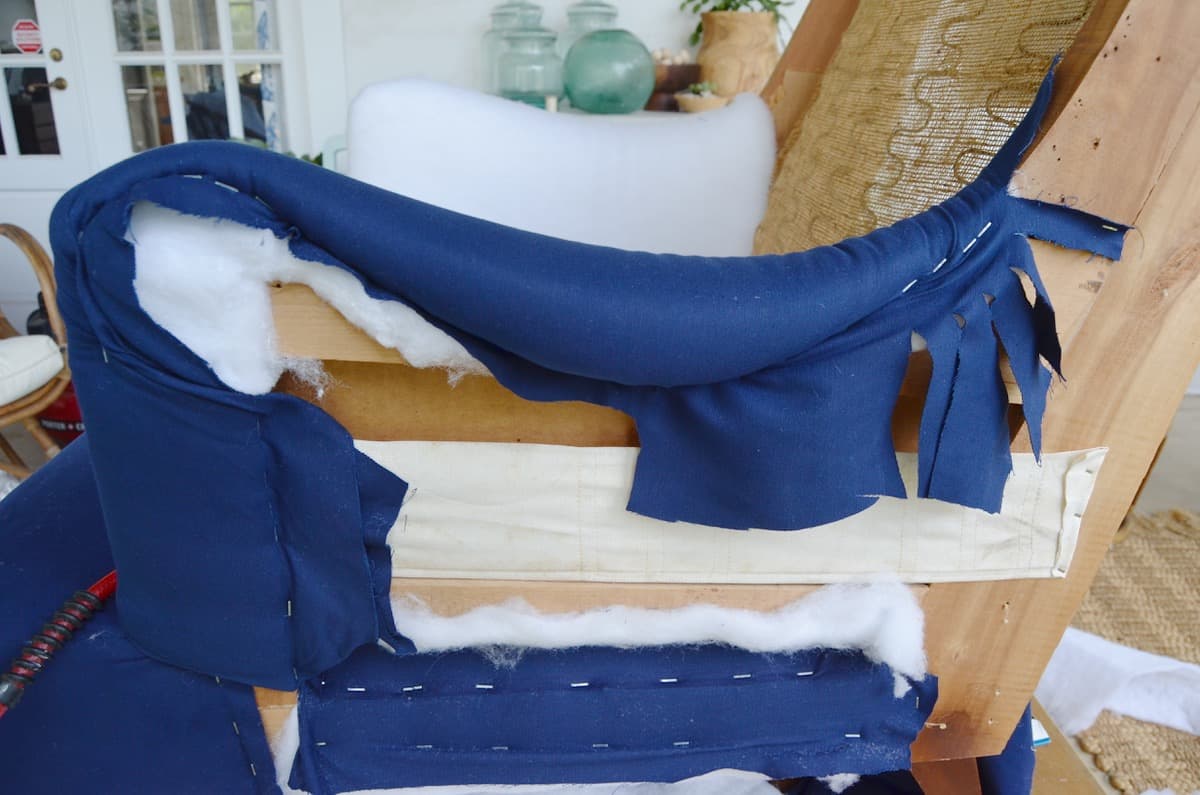
Step 4: Upholster the inside edge of the arms
Pad and upholster the inside edges of the arms. The general pattern for the chair for the next few steps is to lay down foam, cover with batting, and wrap/ staple the fabric around the foam. Wrap the foam up and over the arms and staple in place underneath the outside lip. Trim the fabric along your staple line. My chair was a 70s version of a wingback, so I also had to pad and upholster the inside of the ‘wings’. Where that seam met the seam on the arm was tricky. (See last photo.) I suspect a legit upholsterer would have known how to sew this seam, but I did not. So I used some of my cardboard strip. It wasn’t great so next time, I’ll probably just fold over the fabric and call it a day.
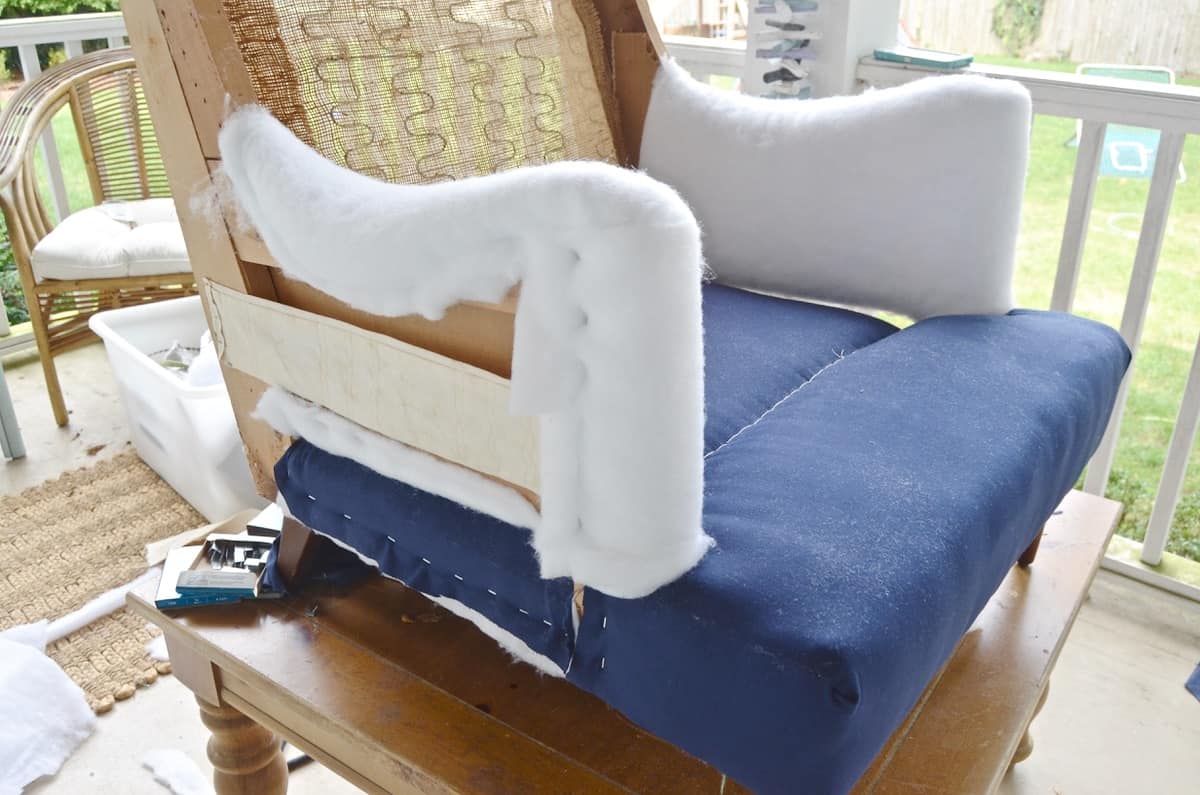
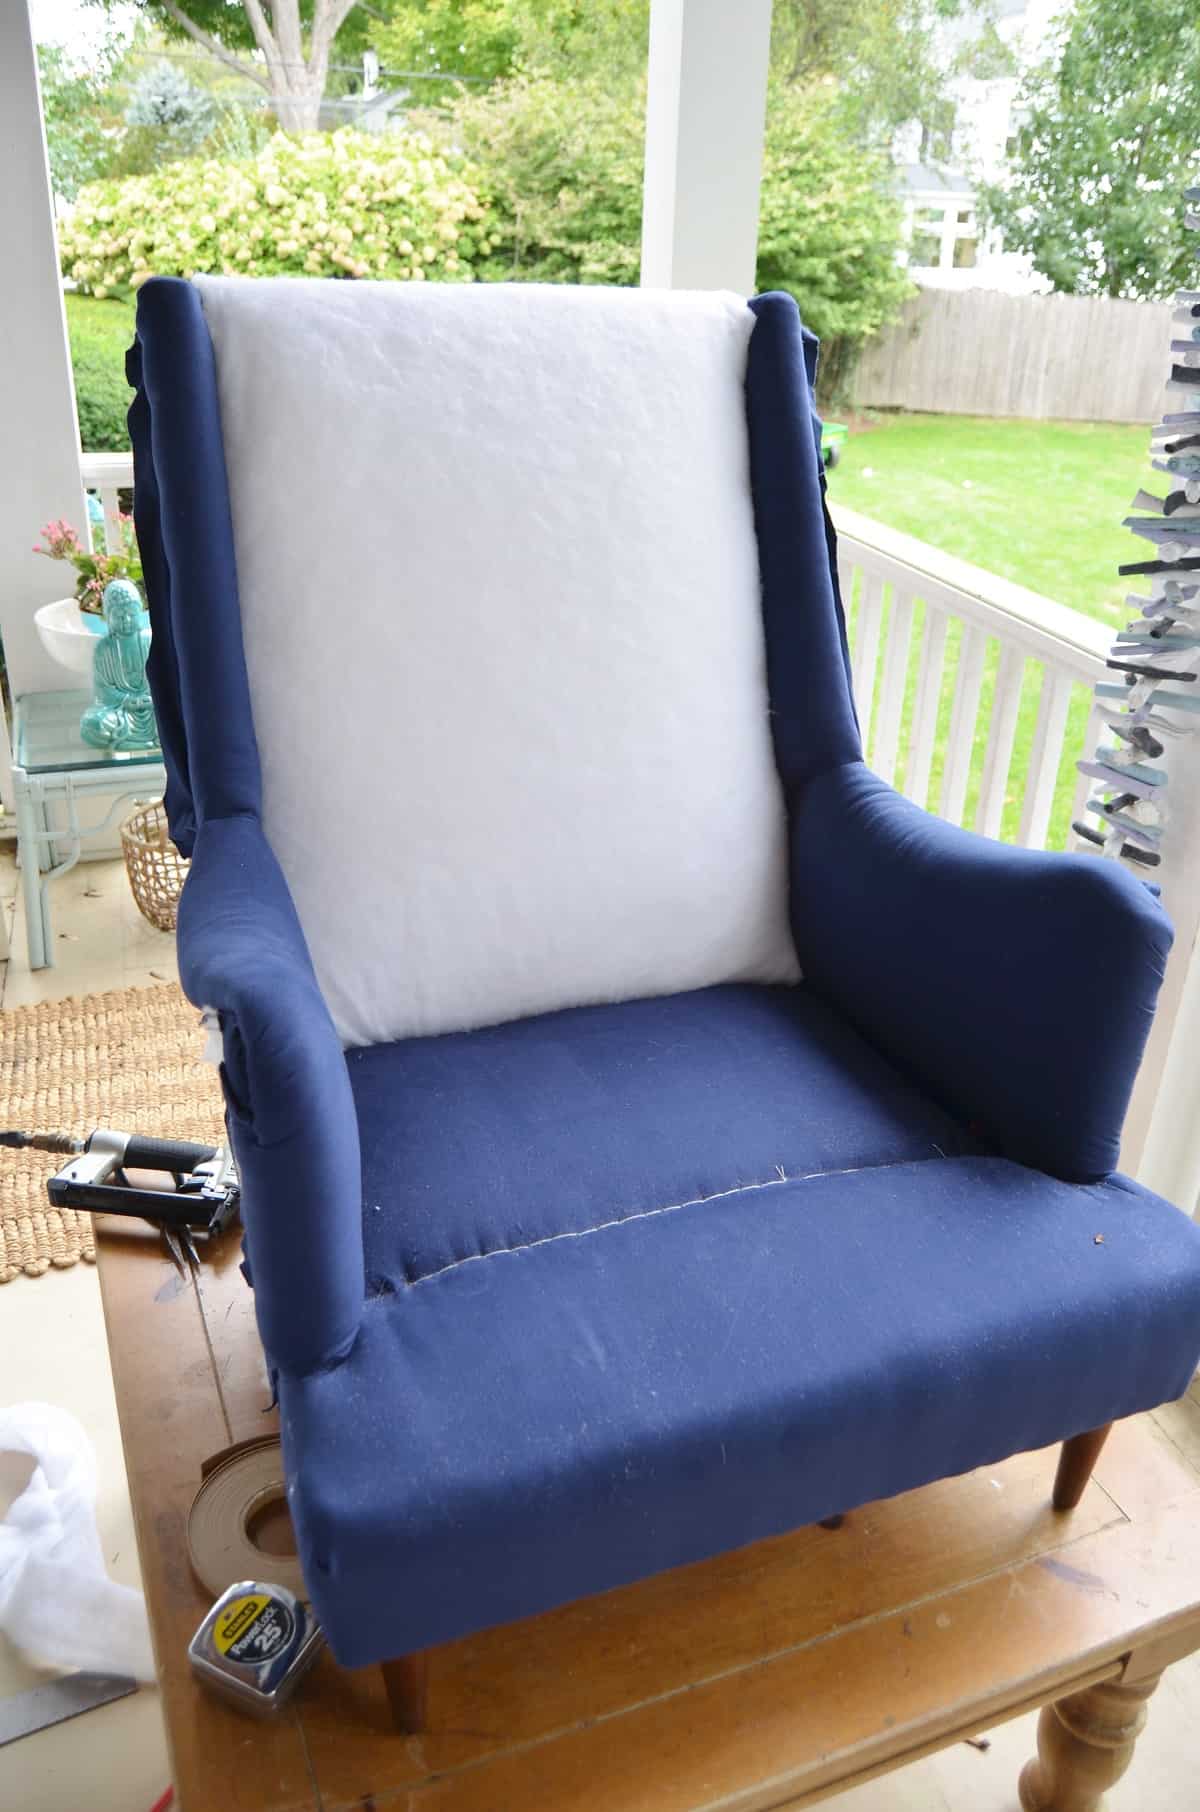
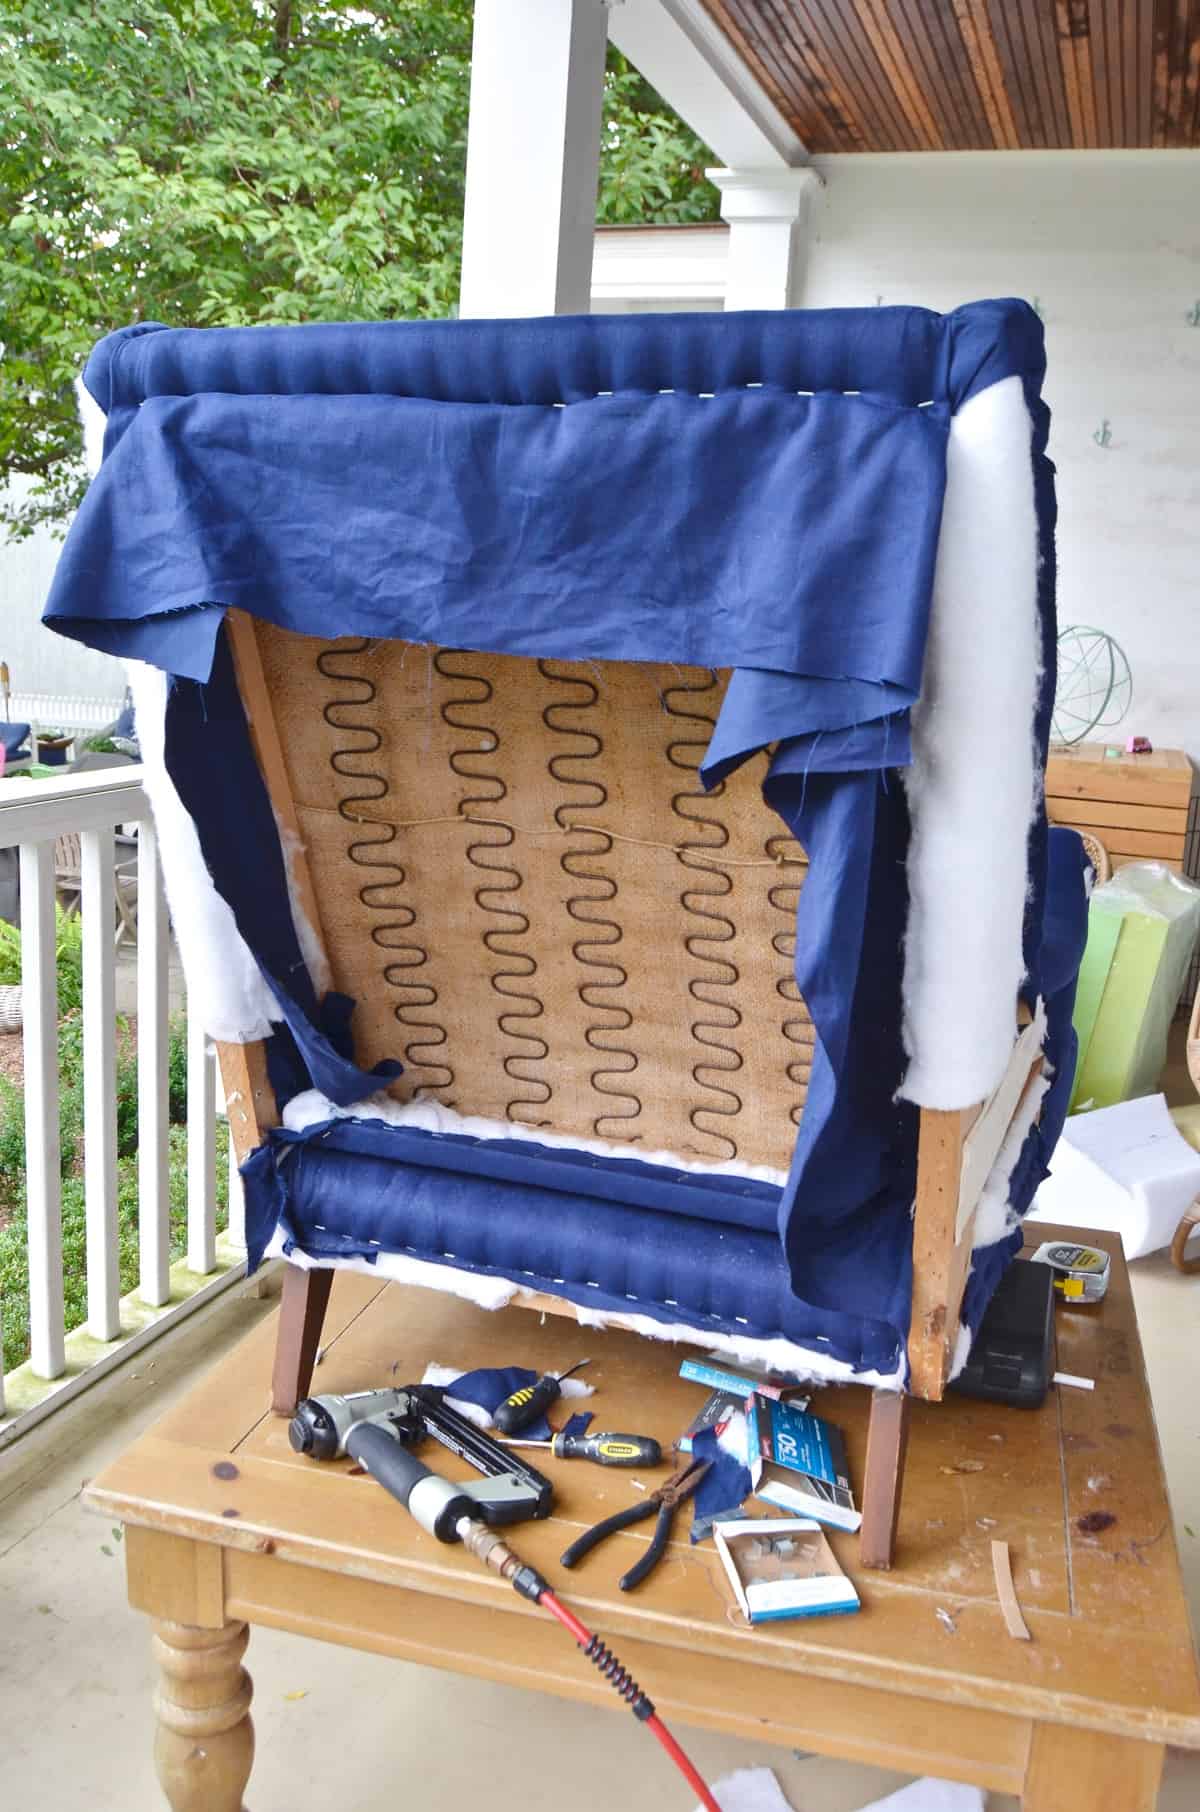
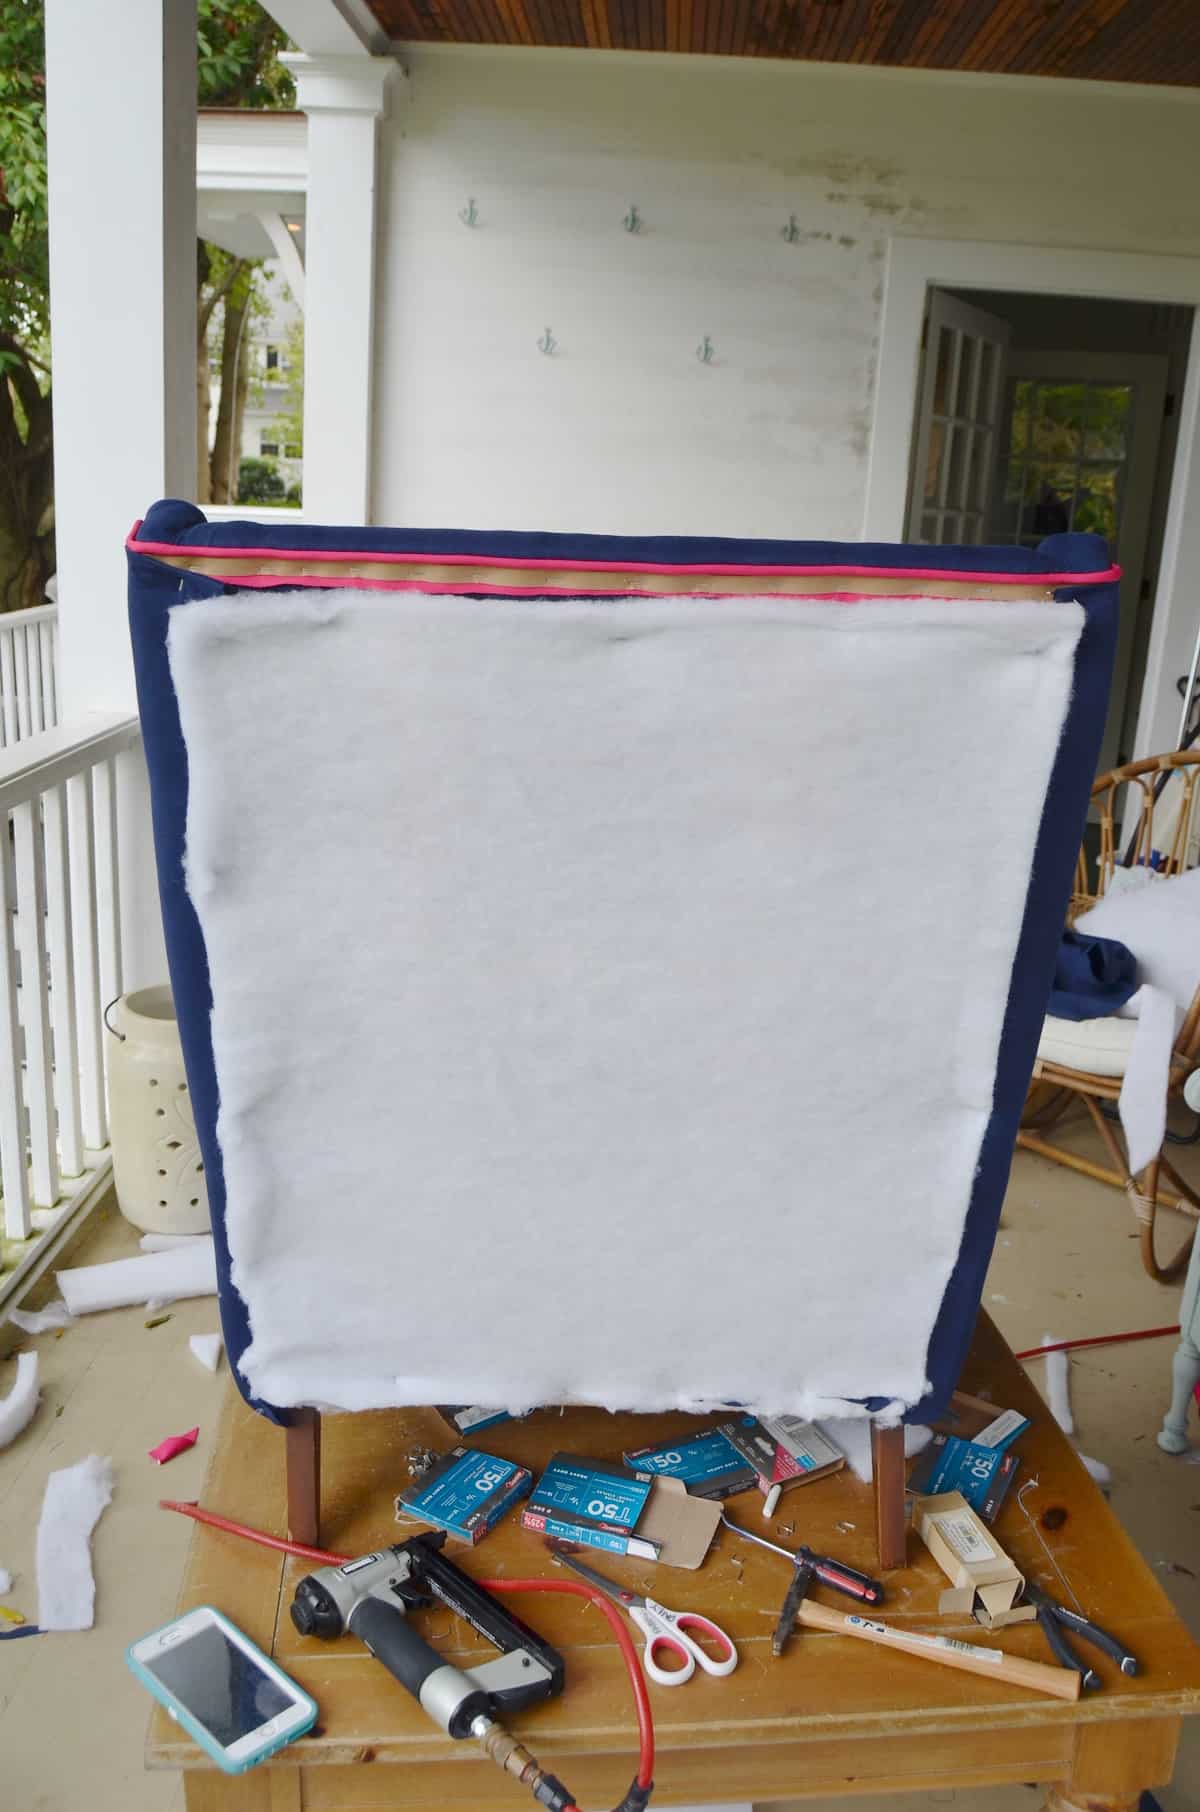
 Step 5: Pad and Upholster the Back of the chair
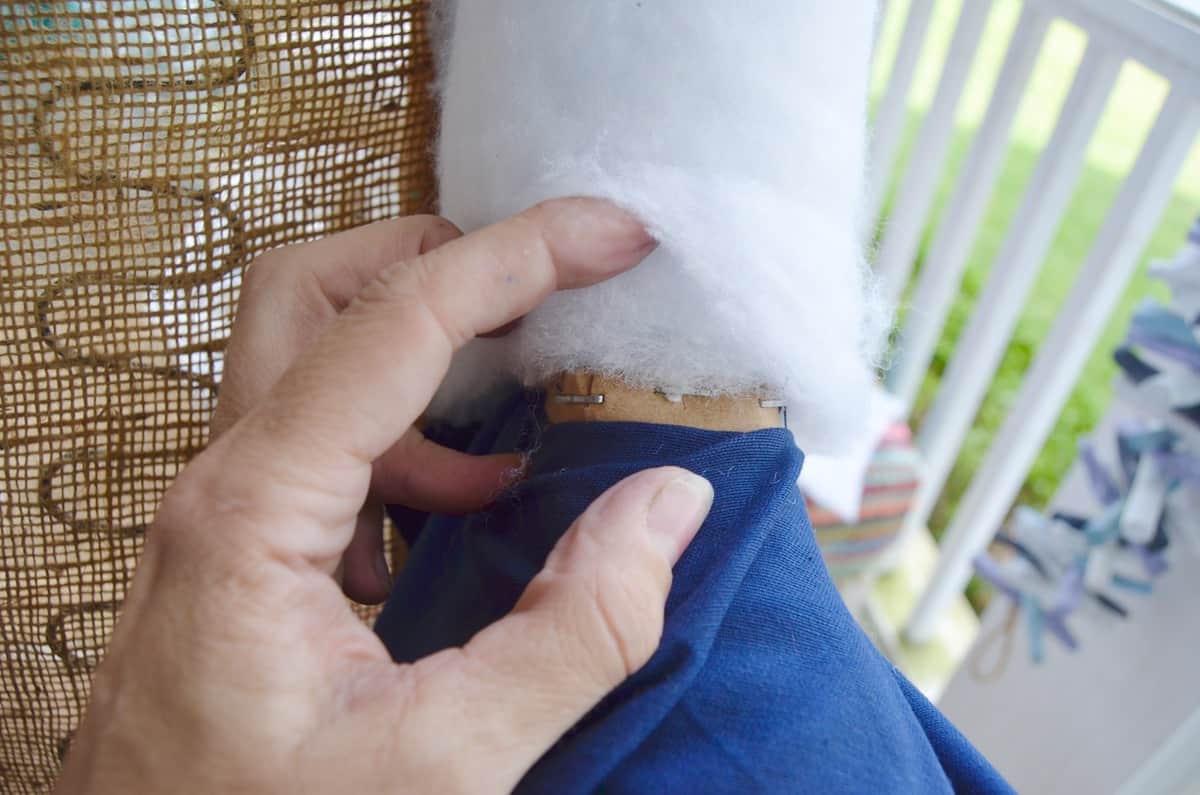 Step 5: Pad and Upholster the Back of the chair
Pad and upholster the front of the back of the chair (NOT the back of the chair itself). This was one step where I wasn’t so sure where to staple the fabric. It tucks between the arms and the back, but I had to look back through photos of how the chair was before to see where it made sense to staple.
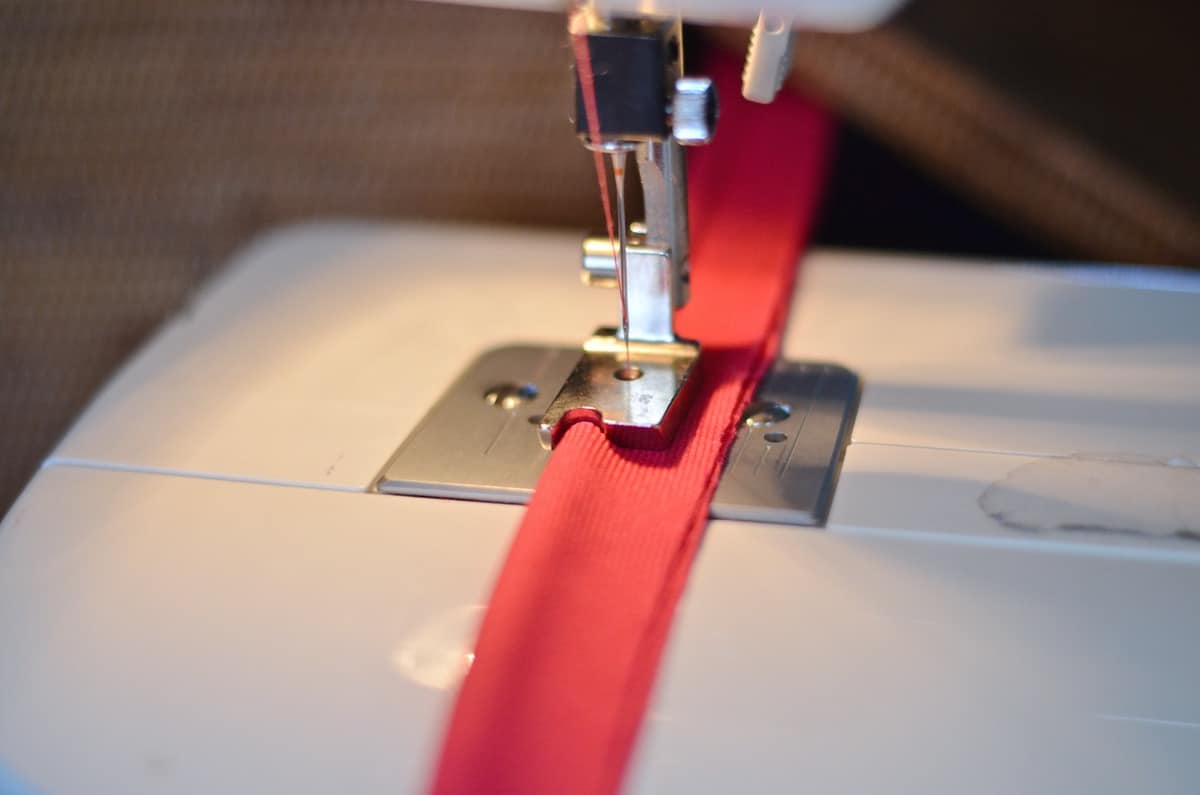
Step 6. Sew Piping
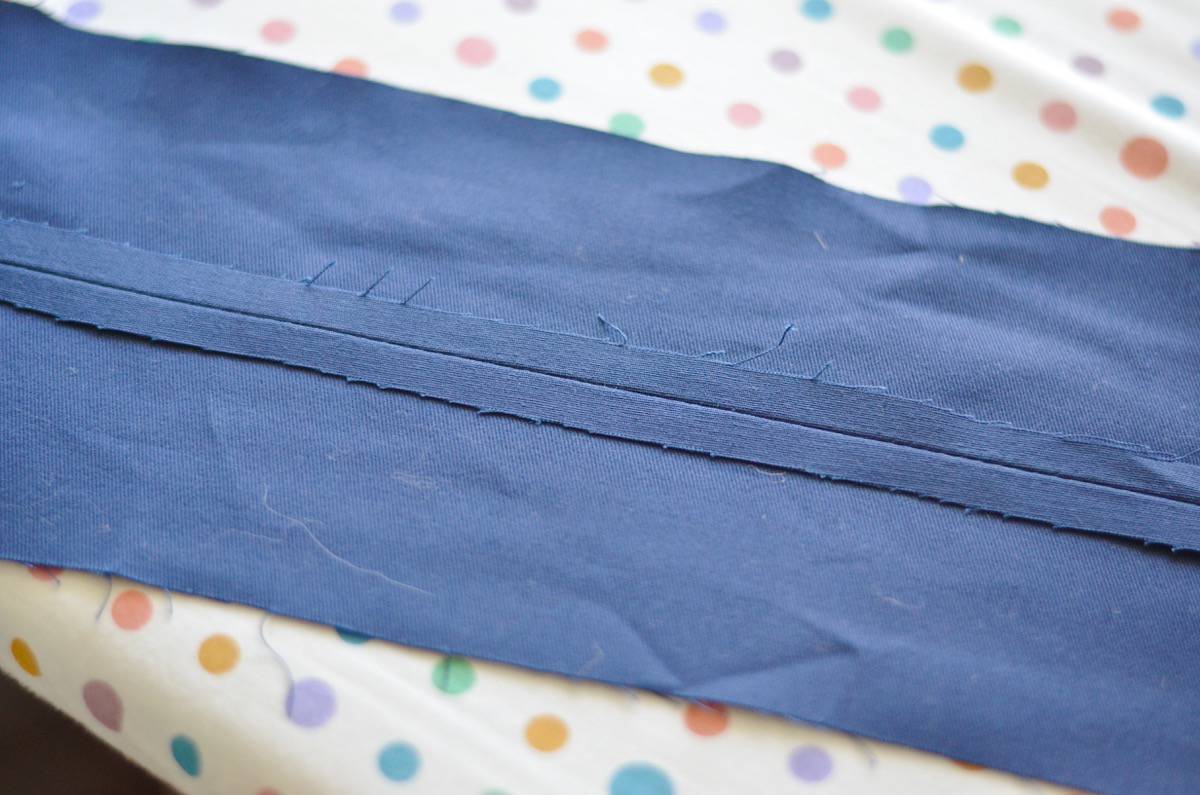
Piping time. If you haven’t sewn cording before, don’t be intimidated. The secret weapon here is a piping foot. It will take jacked up cording and make it pristine. There are tons of YouTube videos on this, but the gist of cording is to cut diagonal strips from your fabric (this is what they call ‘on the bias’) and sew these end to end to make a long strip of fabric. Place your cording in the middle of these strips, and sew the fabric around the cording with your secret weapon. Note: A zipper foot works as well!
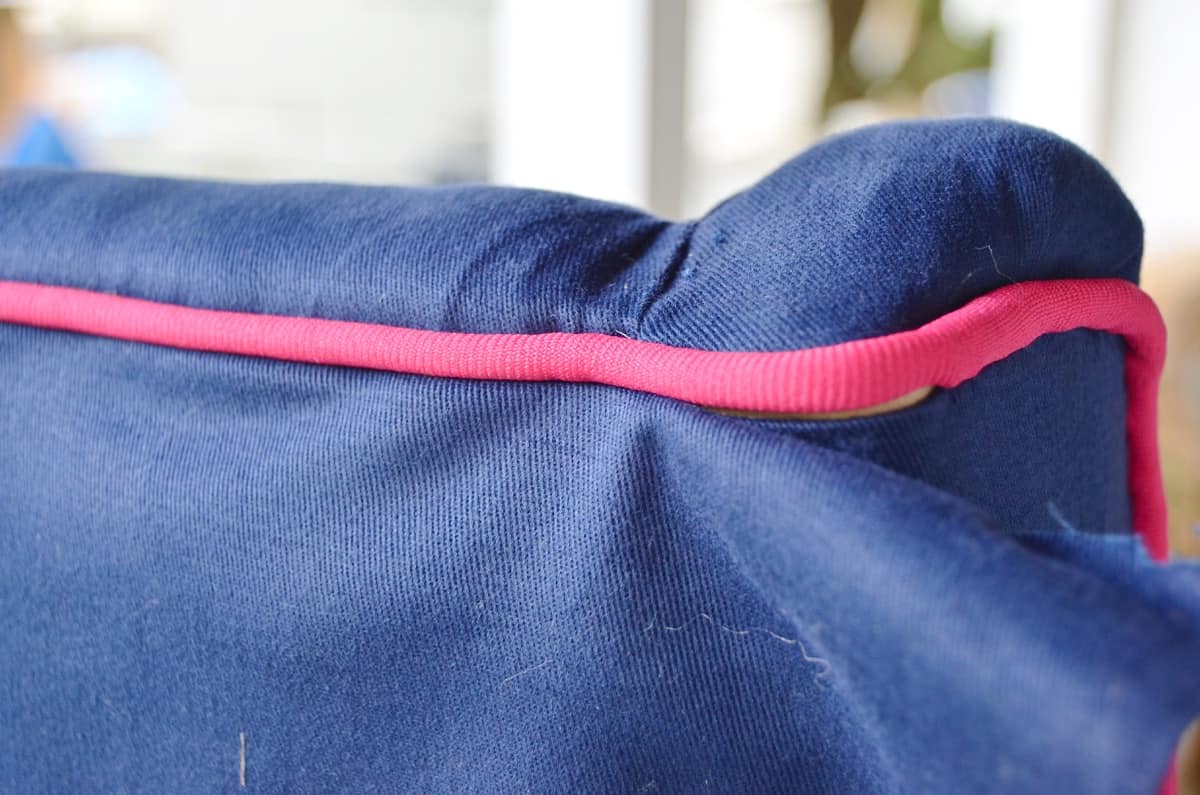
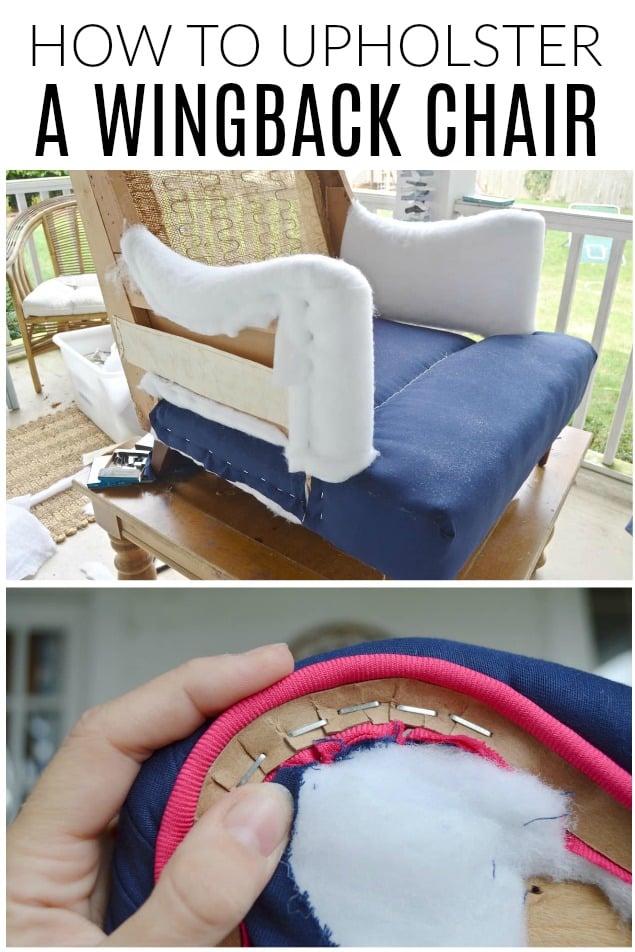
Step 7. Staple the piping along the edges
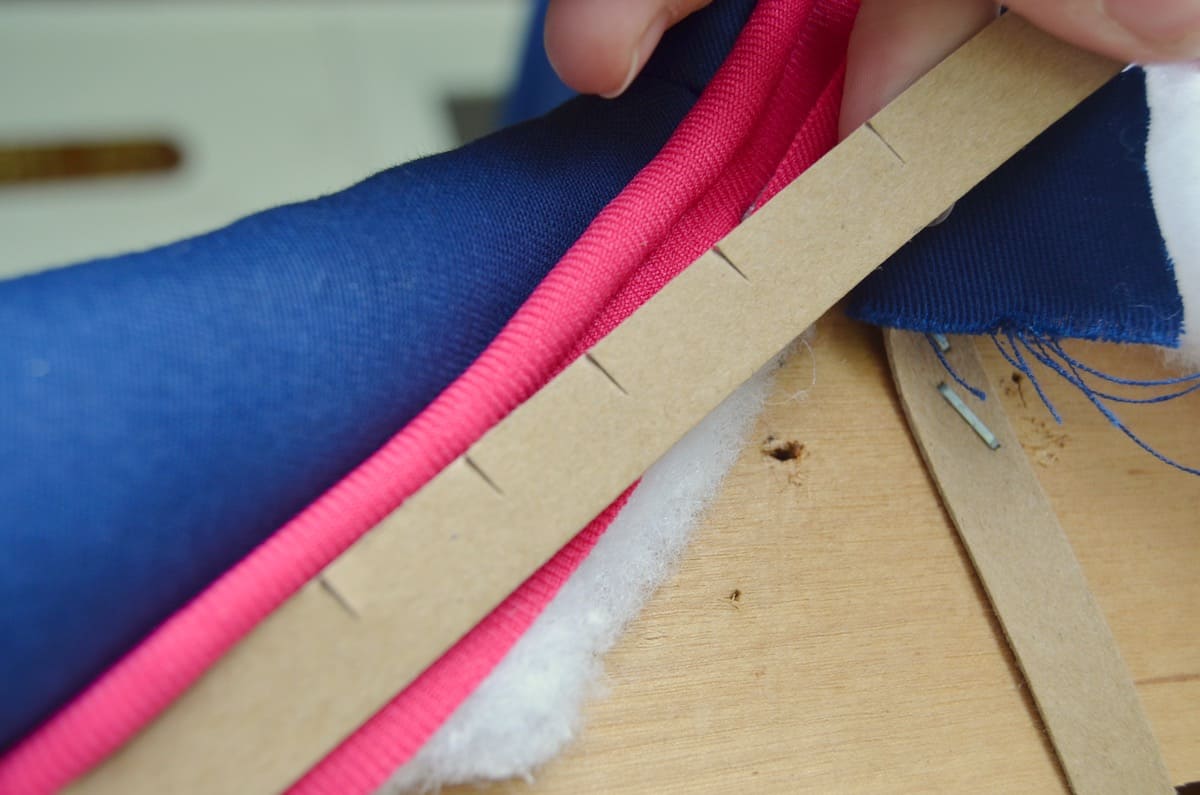
Staple the piping along the edge of your arms and wrap it around the front of the armrests. (Again… refer back to your photos as a reminder of how the piping was originally.) I used the cardboard strip here to make the piping line up nice and crisp. In hindsight, I probably should have used the cardboard in conjunction with the next piece of navy blue fabric here so that I didn’t have to worry about that cardboard being exposed. If the navy fabric was underneath the cardboard strip it would have folded back over the cardboard thus hiding it AND creating a clean line for the piping.
Make release cuts in the cardboard so it will bend around the curves of the chair.
Step 8. Make template for outside of the arms
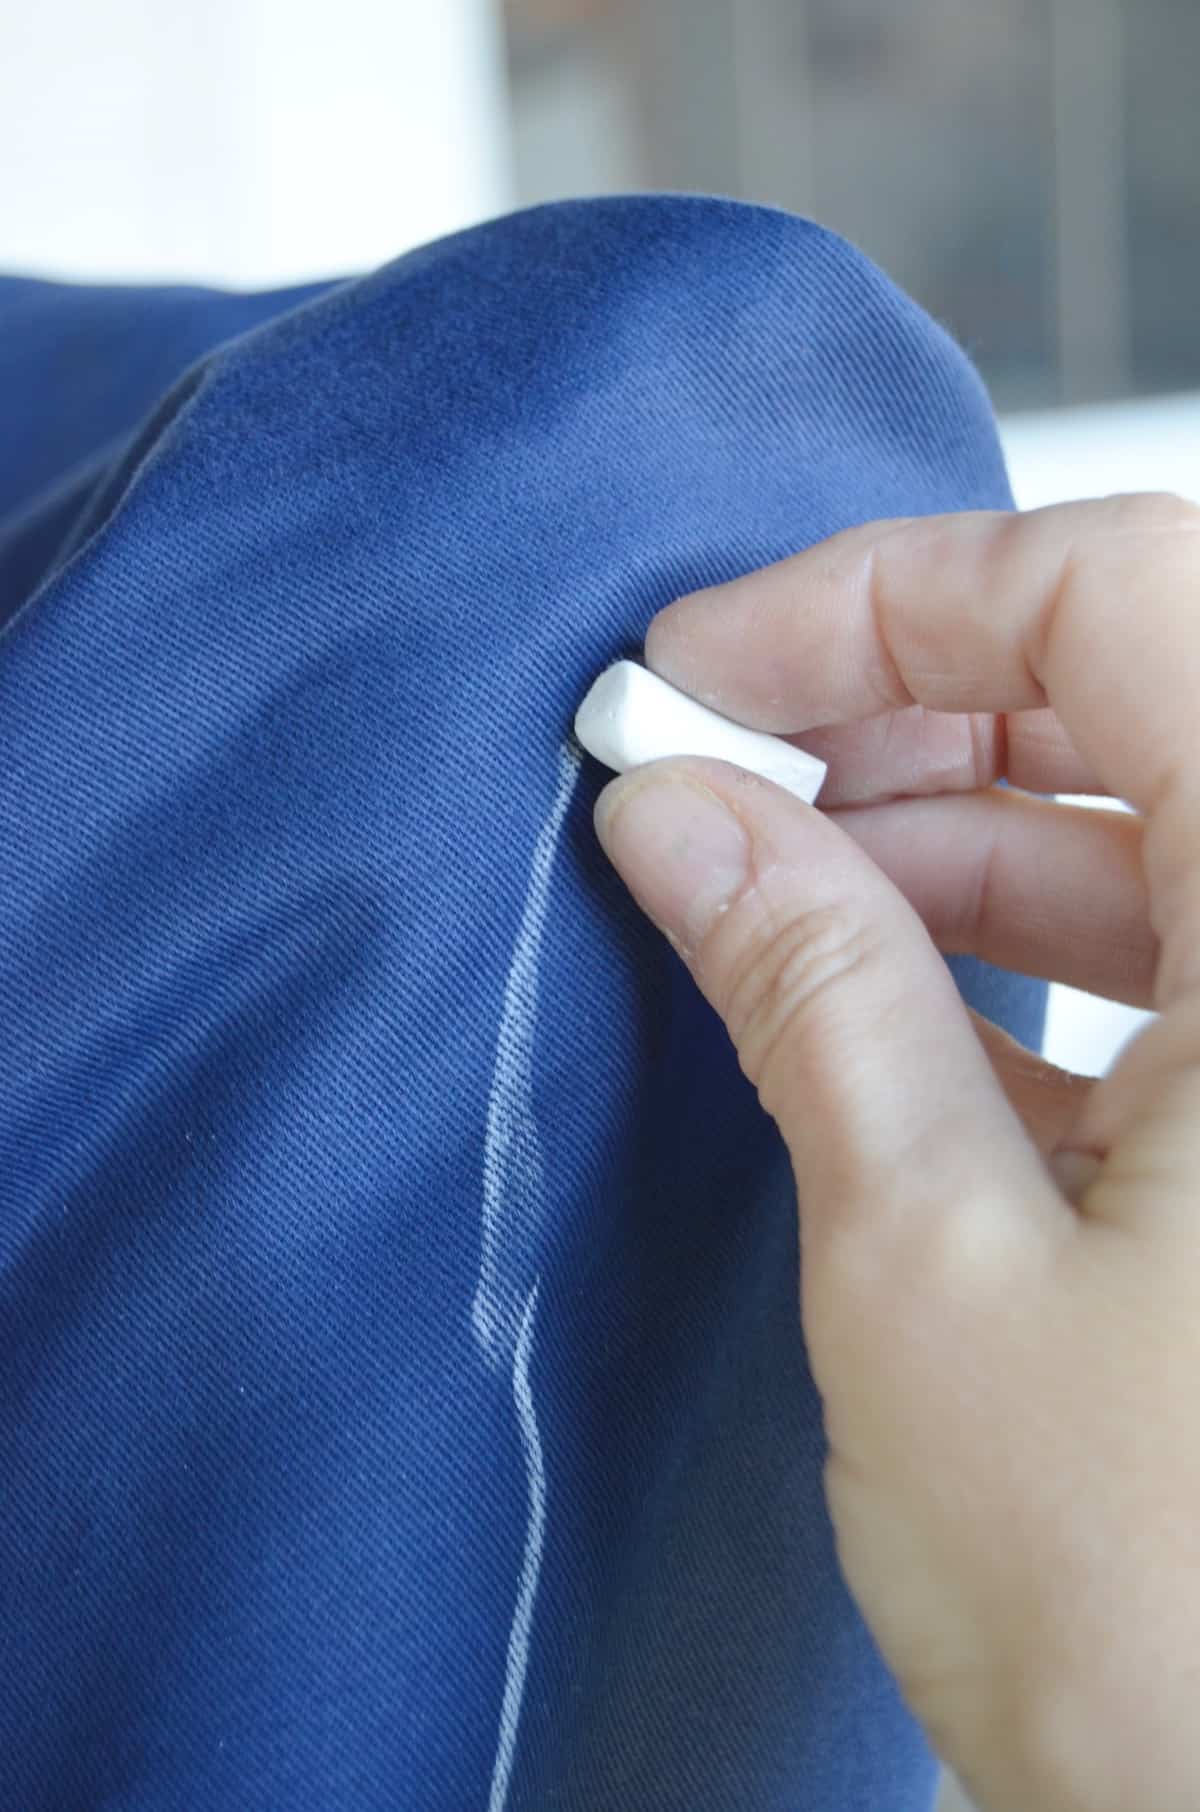
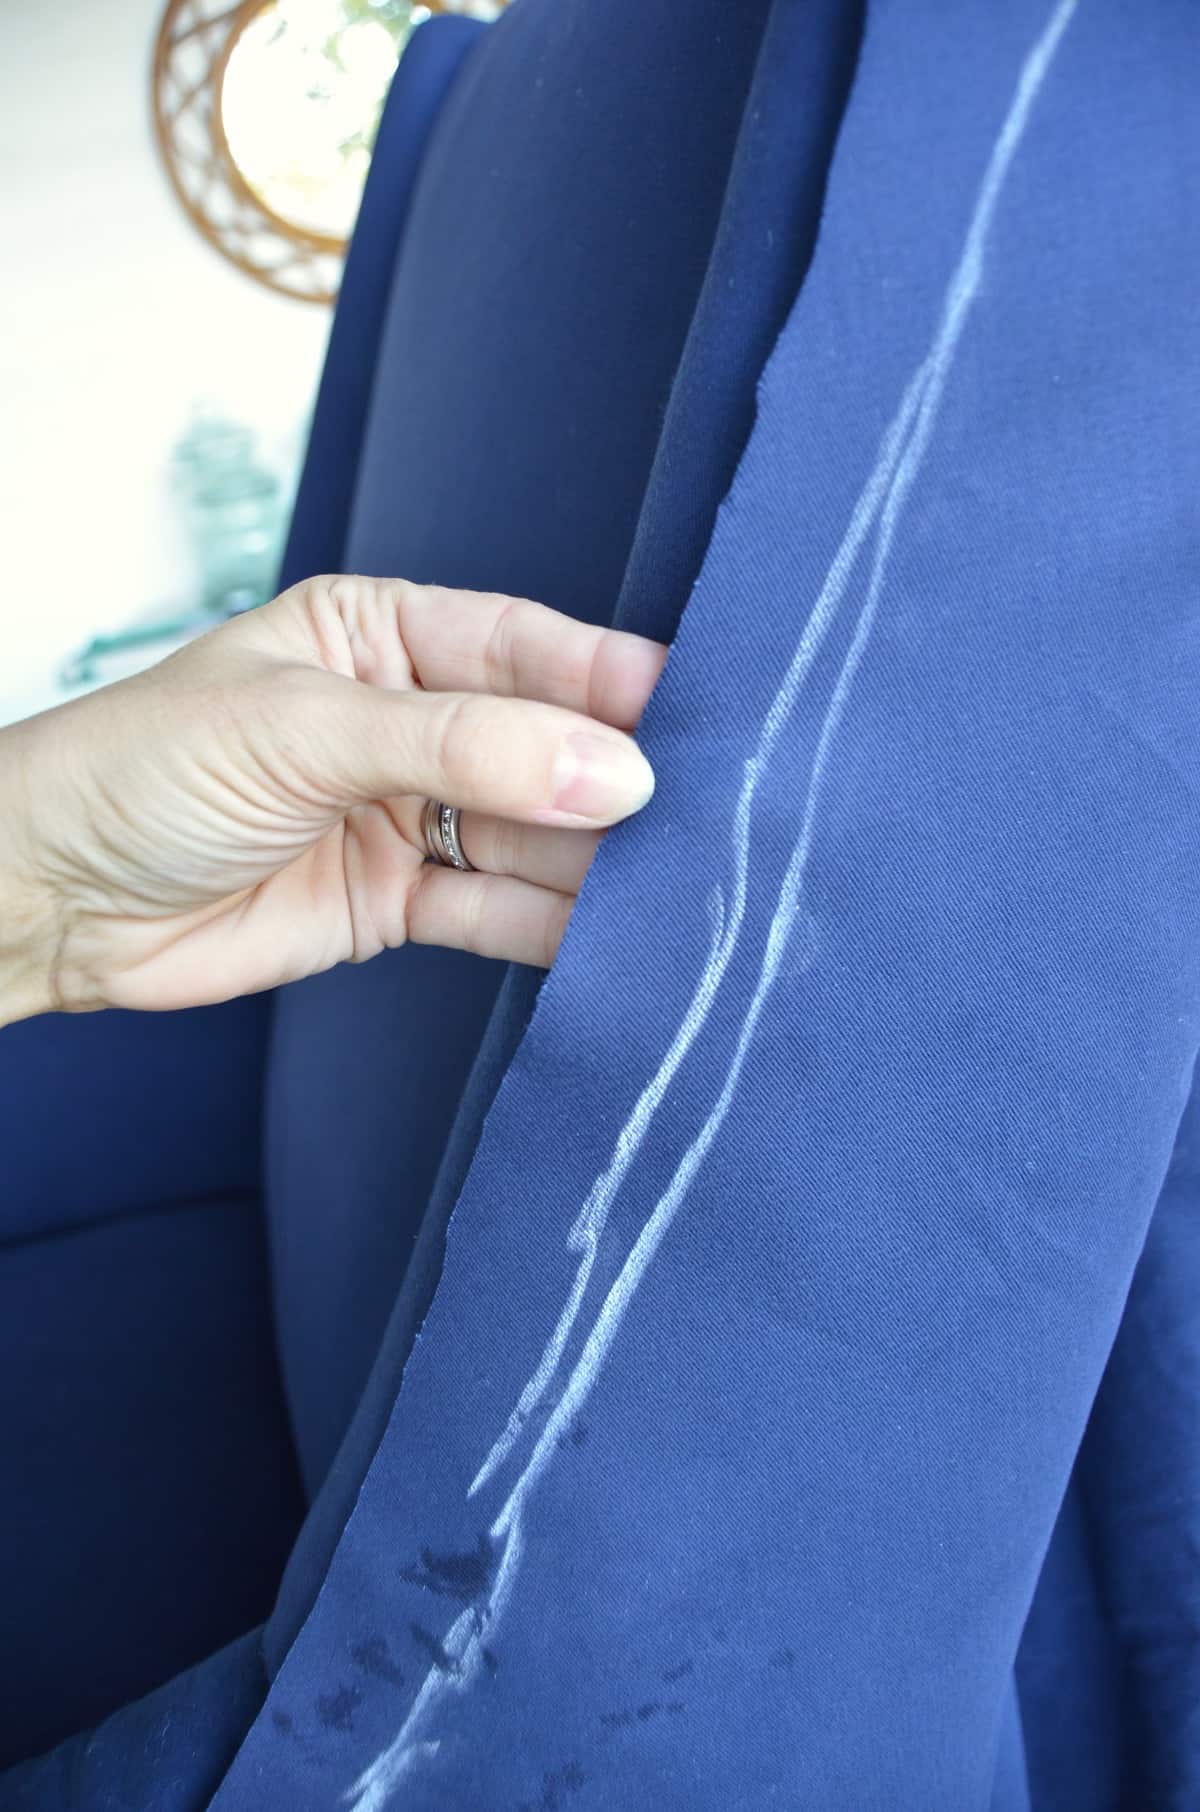
Pad and upholster the outside of each arm. This is where your fabric template will come in handy. If you couldn’t save the old fabric, tilt your staple gun to an angle so only 1/2 the staple goes into the chair to hold your fabric in place with this loose staple. Use chalk to trace along the piping you’ve just stapled, and then down either side. Cut about an inch outside your chalk line; you’re essentially making your own template here.
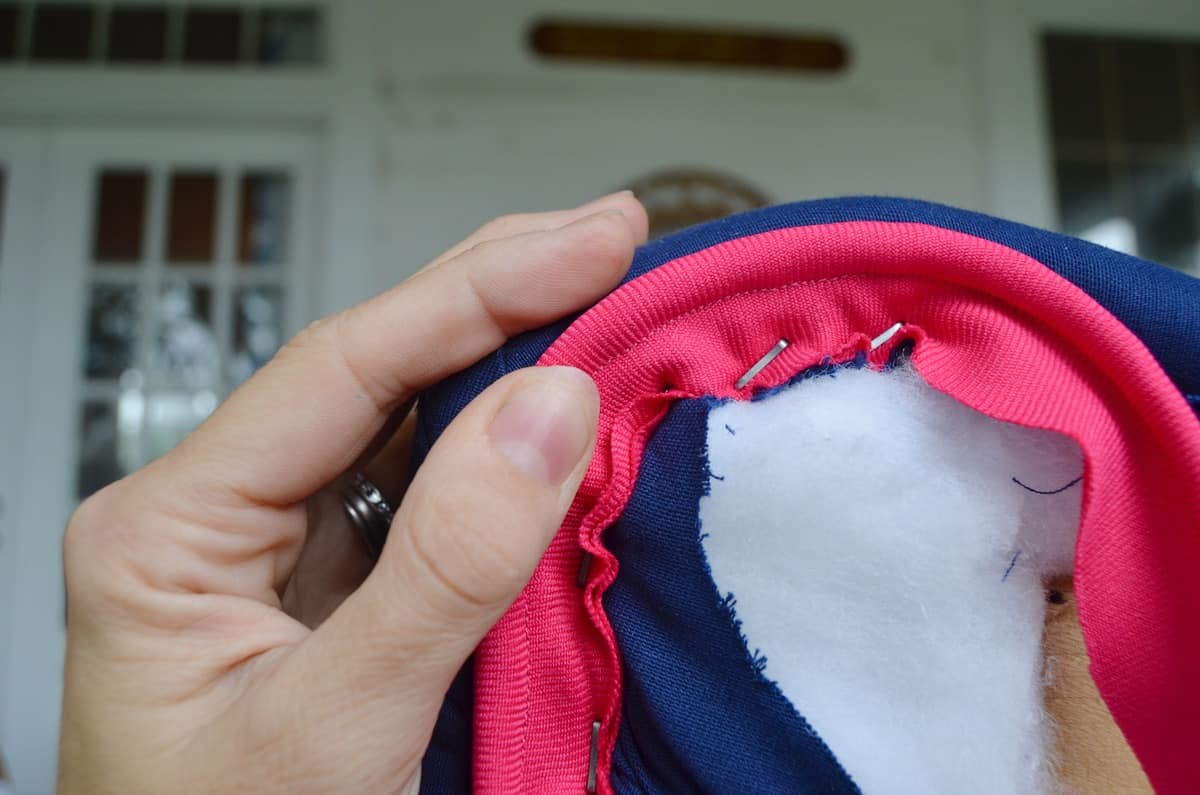
Step 9. Attaching fabric to the outside of the arms
I tried 2 different techniques for the outside of both arms. And honestly I’m not sure which one I preferred. I think the hand sewing might have a slight edge but that might be a chair to chair decision.
Technique 1: Hand sewing. Fold over the fabric along the piped edge and use a hidden stitch to sew the fabric onto the piping. Make sure fabric is taught as you sew. You can correct any small errors when you pull the fabric to staple the back and the underside. This technique took longer, but there weren’t nearly as many things that could go wrong.
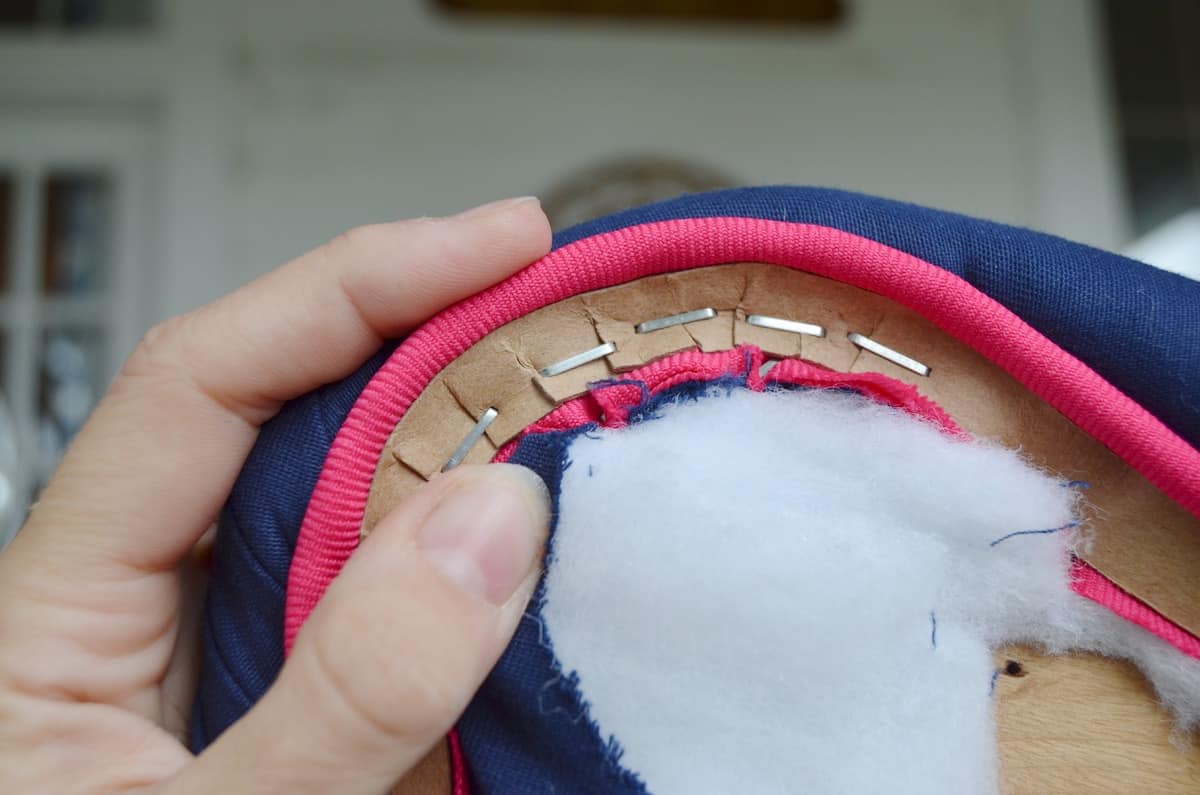
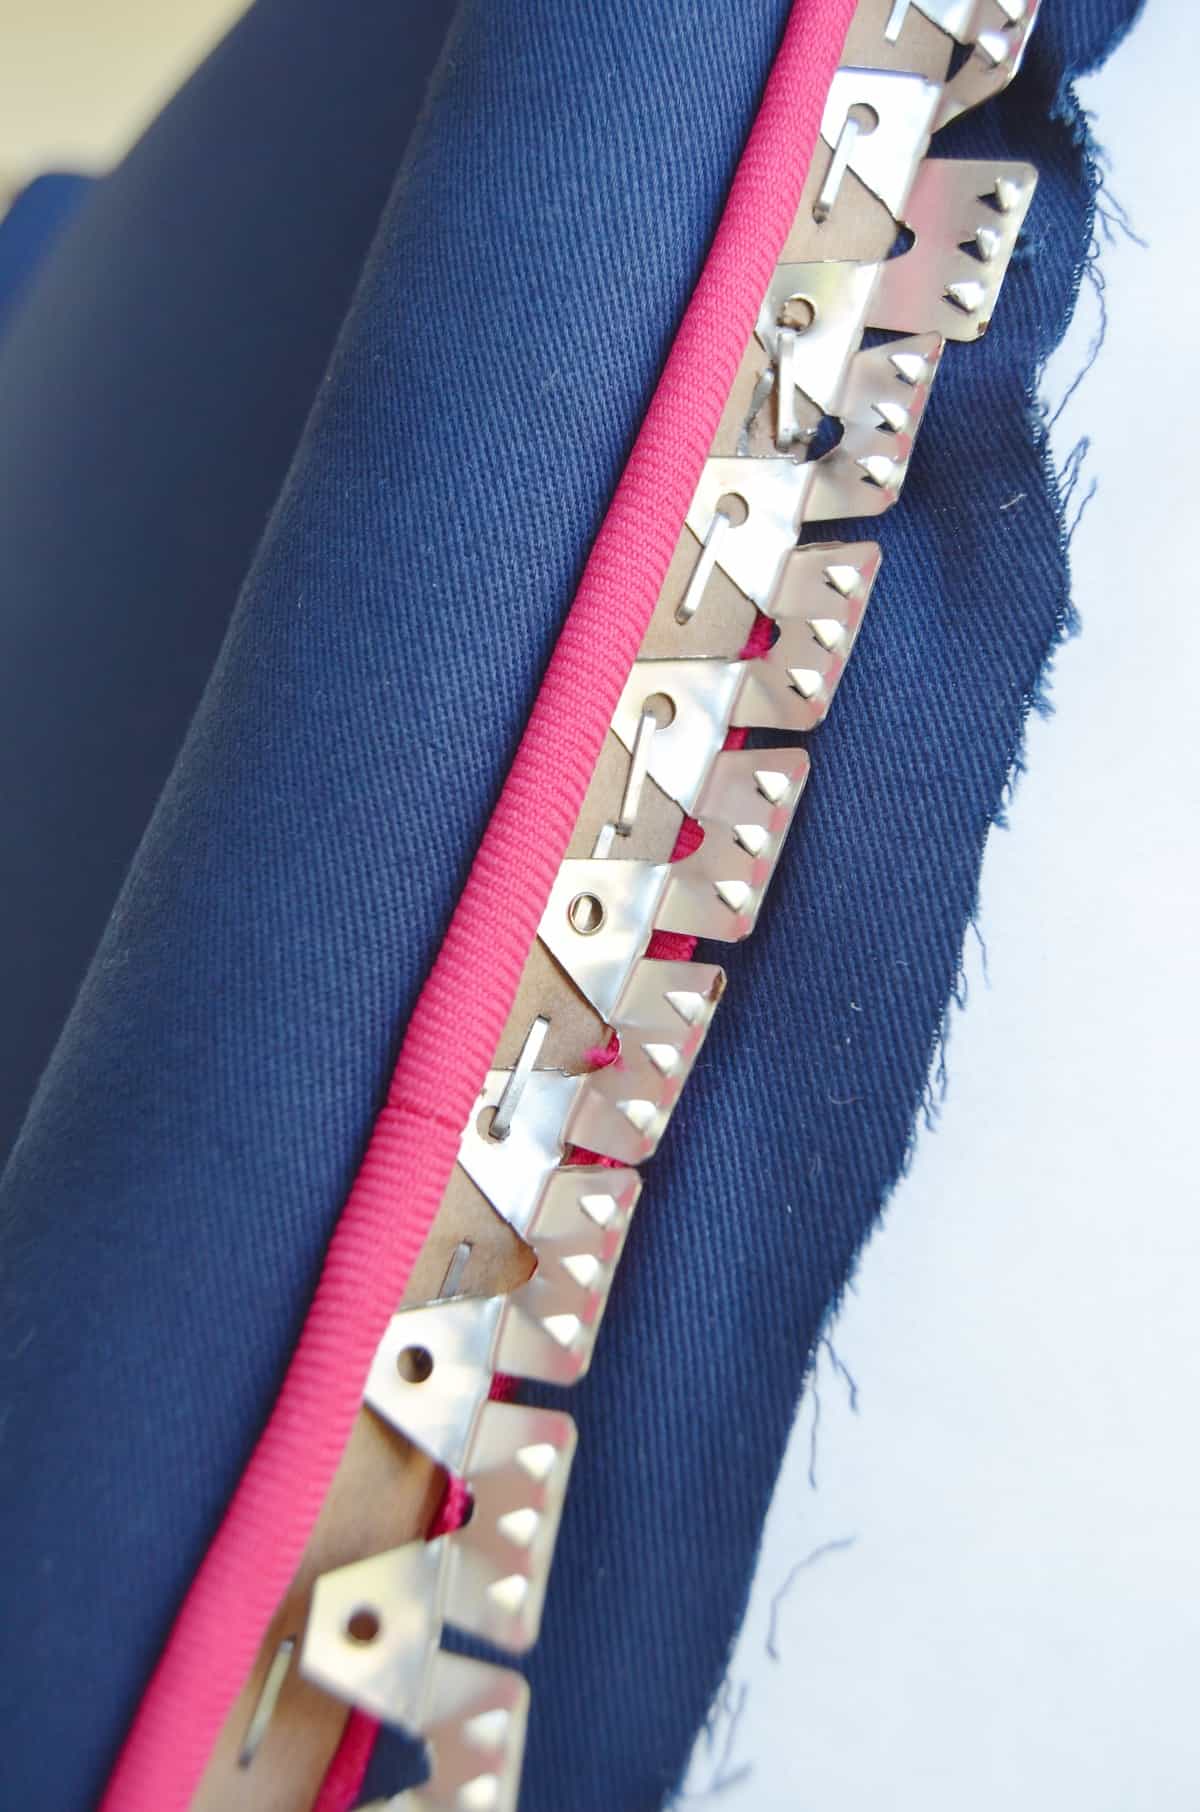
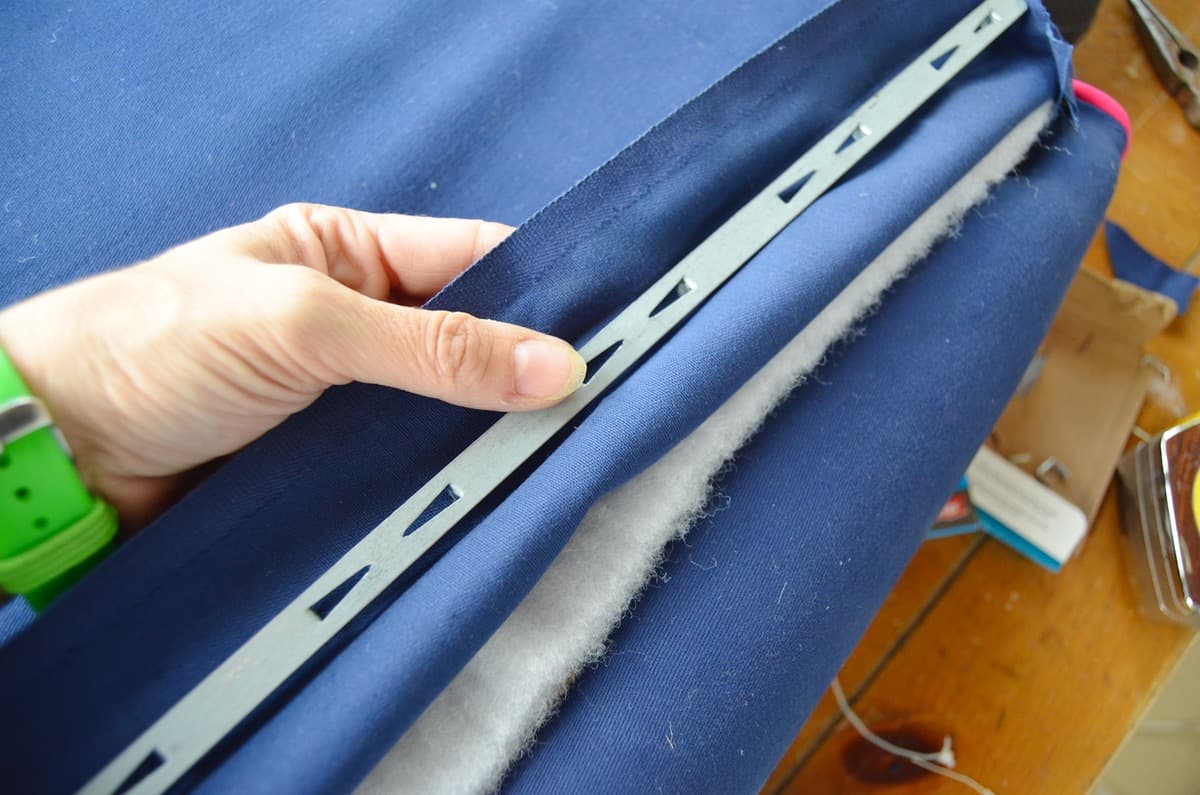
Technique 2: Ply grip. This stuff is sharp so be warned. Line up your staple gun with the holes in the metal and attach it along the edge beneath your piping. Here comes the tricky part. Open the teeth of your ply grip and carefully tuck your fabric between. I used a flat head screw driver to help tuck it in tightly. Using a rubber mallet, hammer the tack strip closed pinching your fabric in the process and creating a taught line below the piping. This technique was easier than I expected but still a little finicky. I shouldn’t have used the cardboard strip to hold the piping in place since this created a little more bulk than I needed when stapling. I was worried about ripping my fabric when I tucked it into the teeth… I didn’t, but it definitely took some getting used to. For the right chair, I think this could be a great solution… the curvy parts of my chair were tricky.

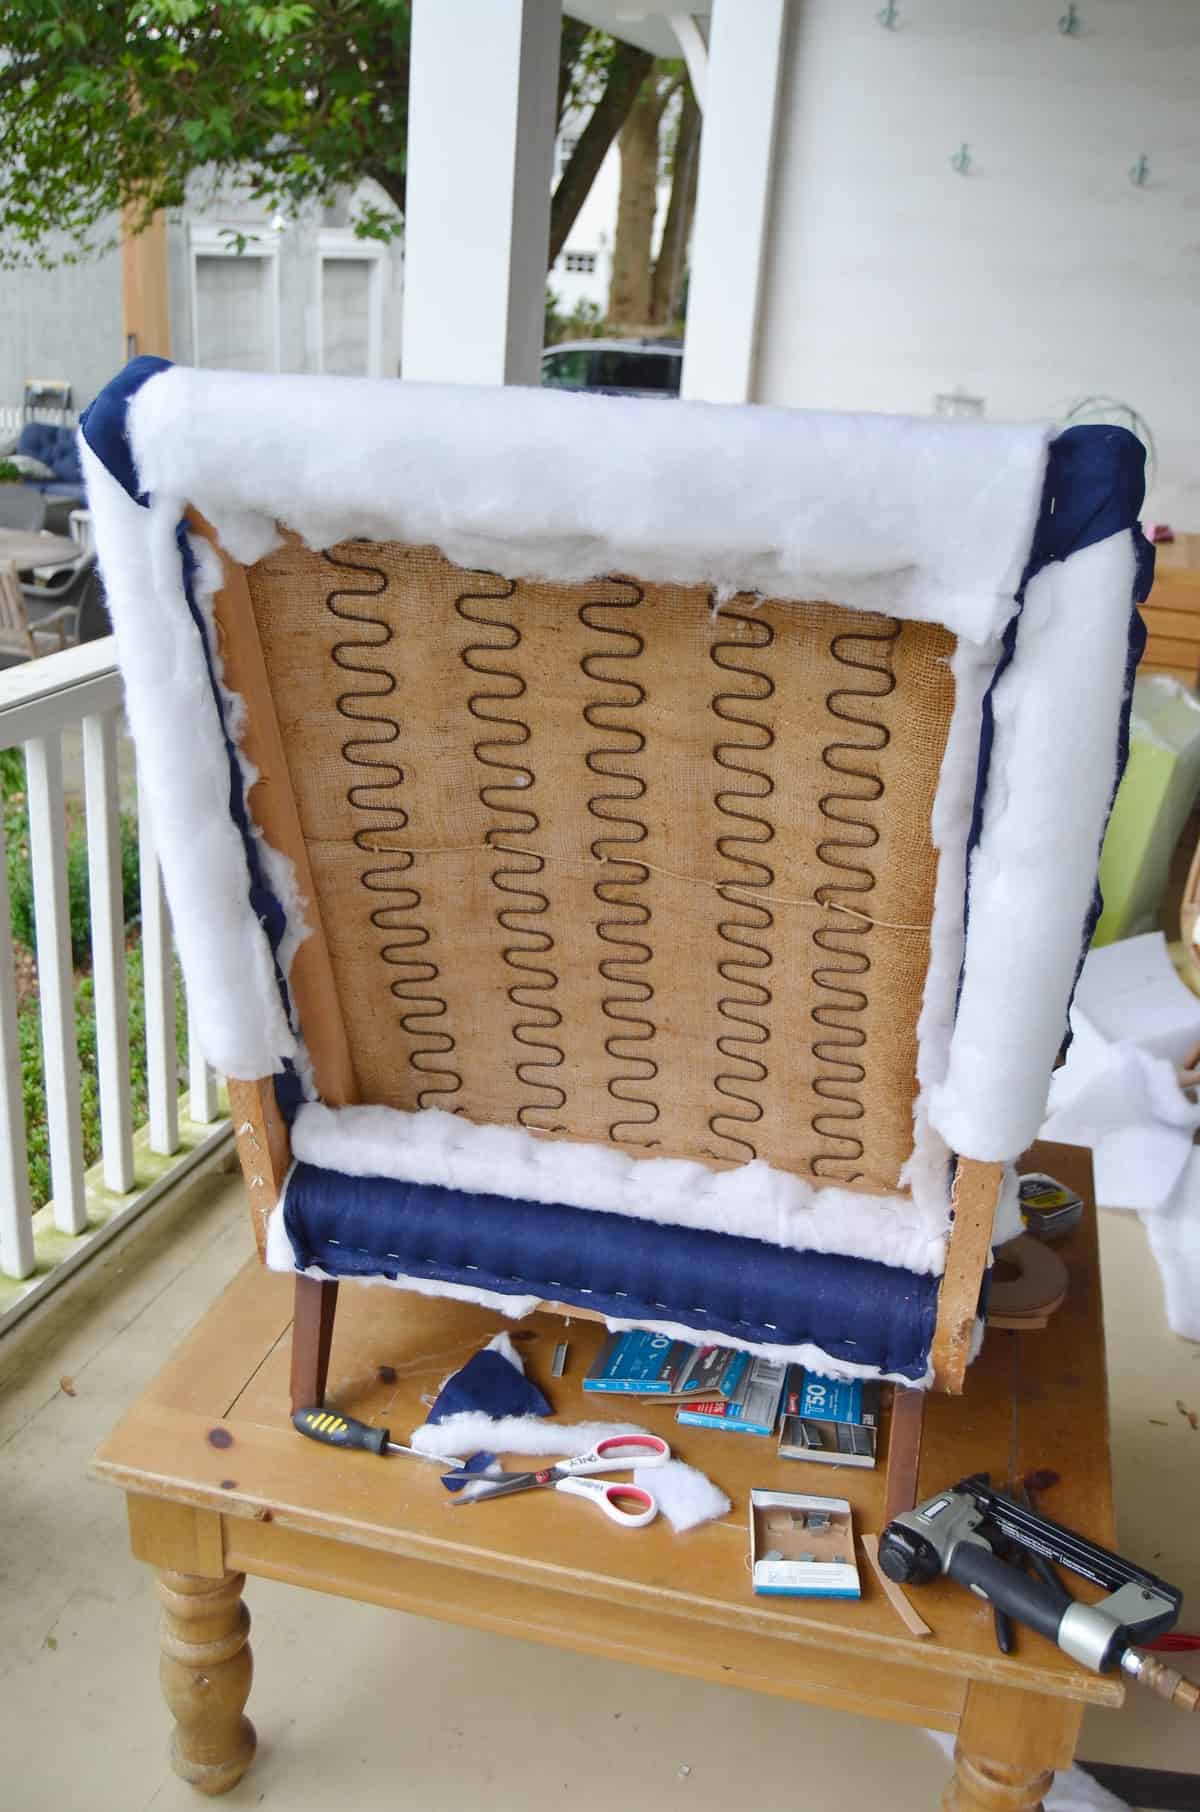
Step 10. Upholster the back of the chair
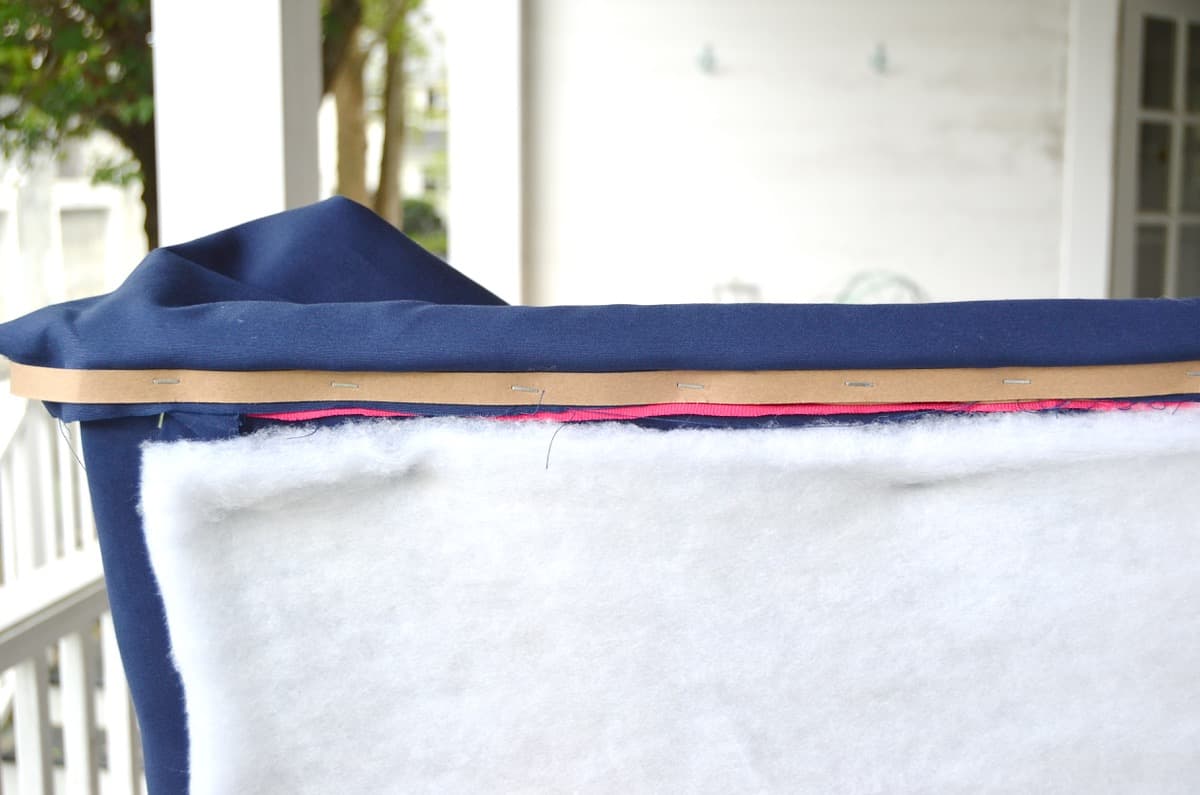
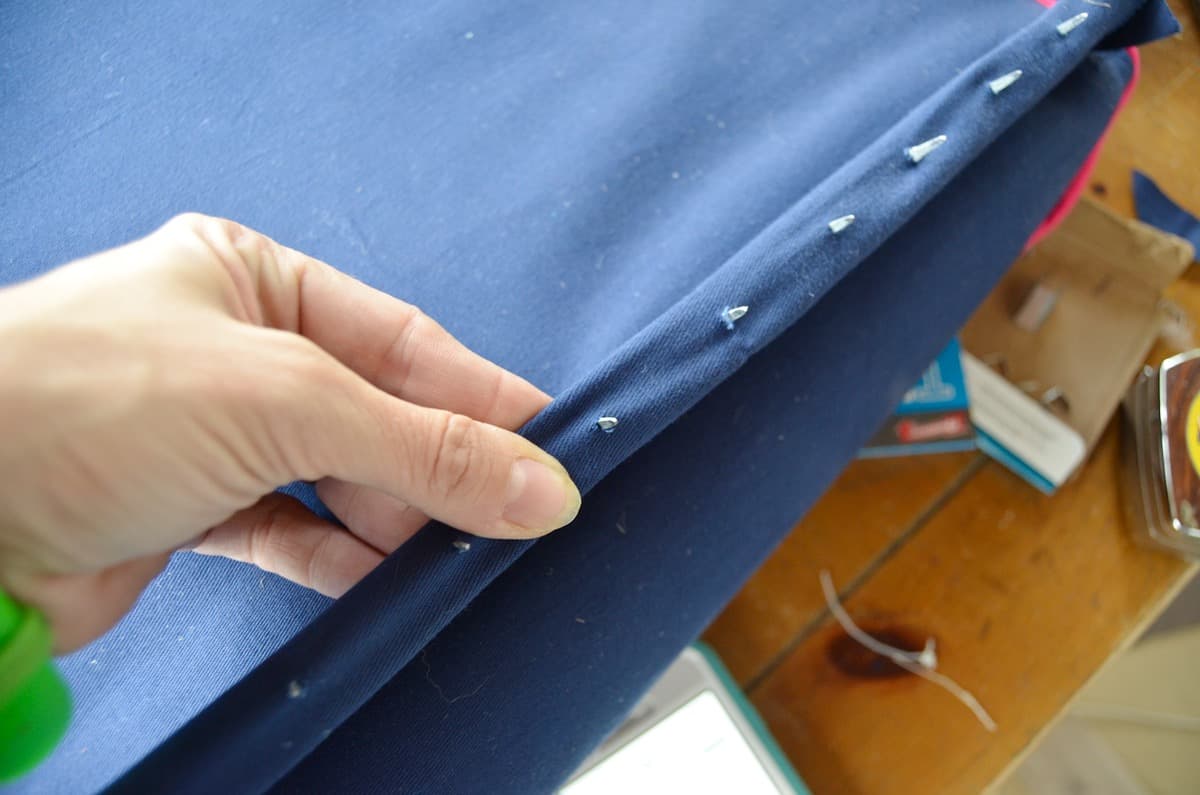
Staple fabric to the back of the chair. You don’t need to go crazy with foam or batting for the back, but it probably makes sense to add a little something just so it looks more upholstered. Flip the top edge of the fabric over and staple in place from the underside with the cardboard strip. When you fold the fabric back over, the cardboard should give it a nice crisp line across the top of the chair.
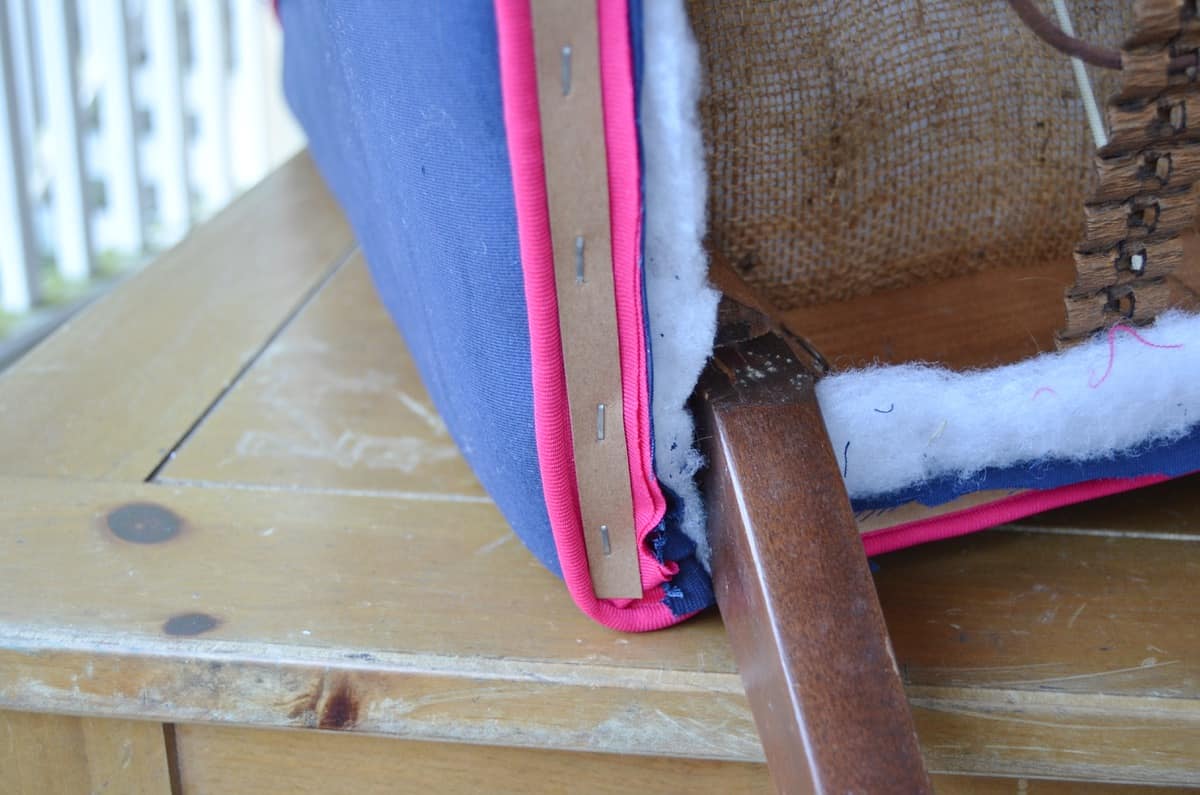
To attach either side of the back, you’ll need to use tack strips. These are straight metal edges with teeth. You align your fabric with the edge of the tack strip and the edge of the chair. With the tacks facing up, press them through the fabric. Flip the tack strip over pulling the fabric taught as a result and use your rubber mallet to hammer the tack strip in place. Again… YouTube the heck out of this one.
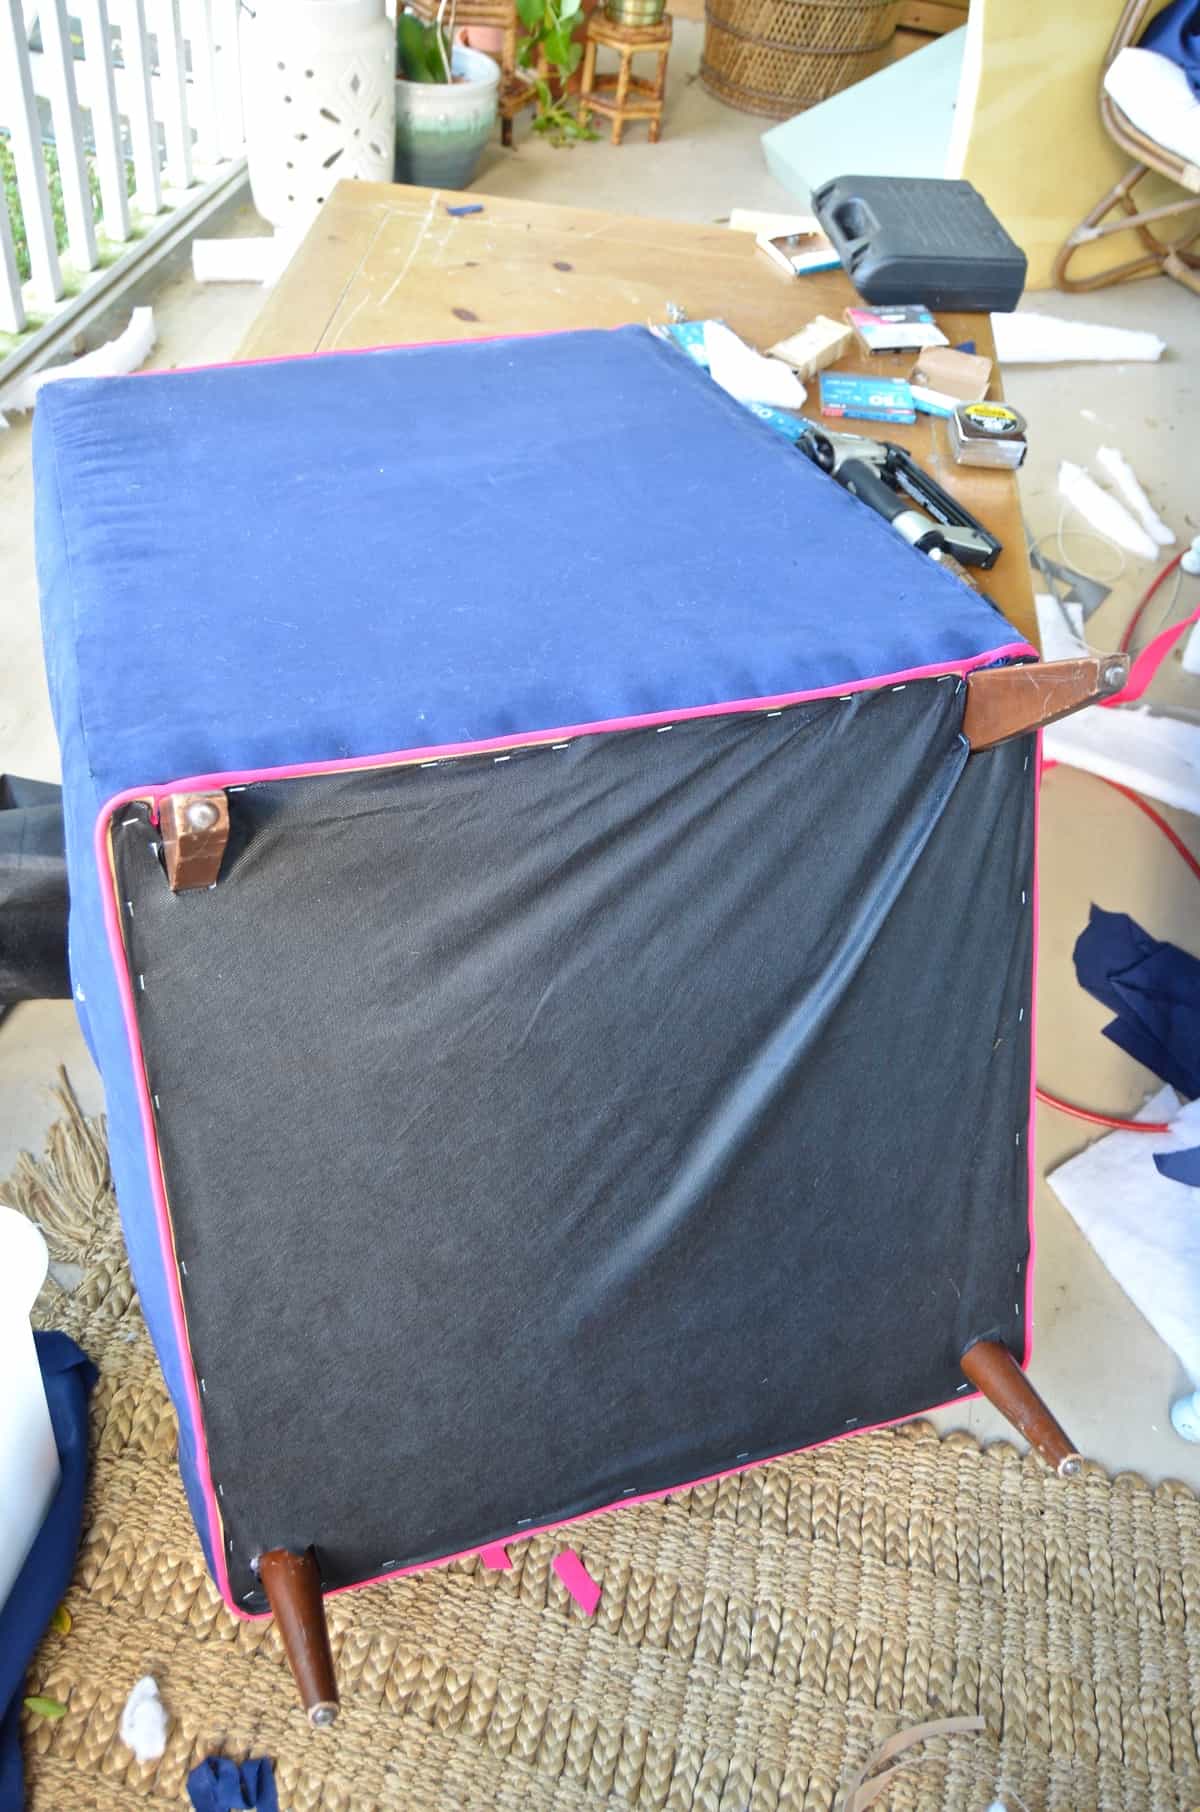
Once you’ve attached either side of the backside of the chair, pull the fabric taught and staple underneath the chair. I wish I had better tips for maneuvering the legs, but I don’t. Fold and make the fabric look as neat as you can. Staple a length of piping along the bottom edge and finish the chair off by stapling the dust cloth across the underside.
Step 11. Sew/ Upholster the cushion cover
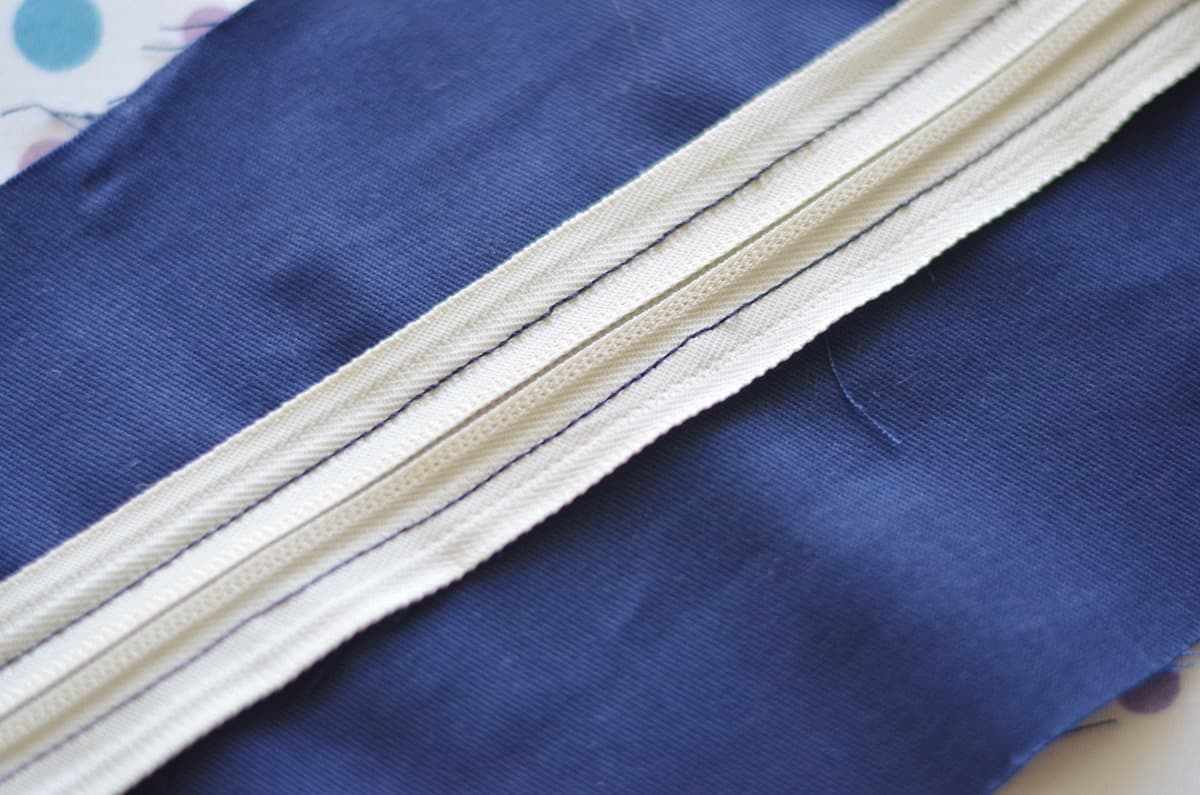
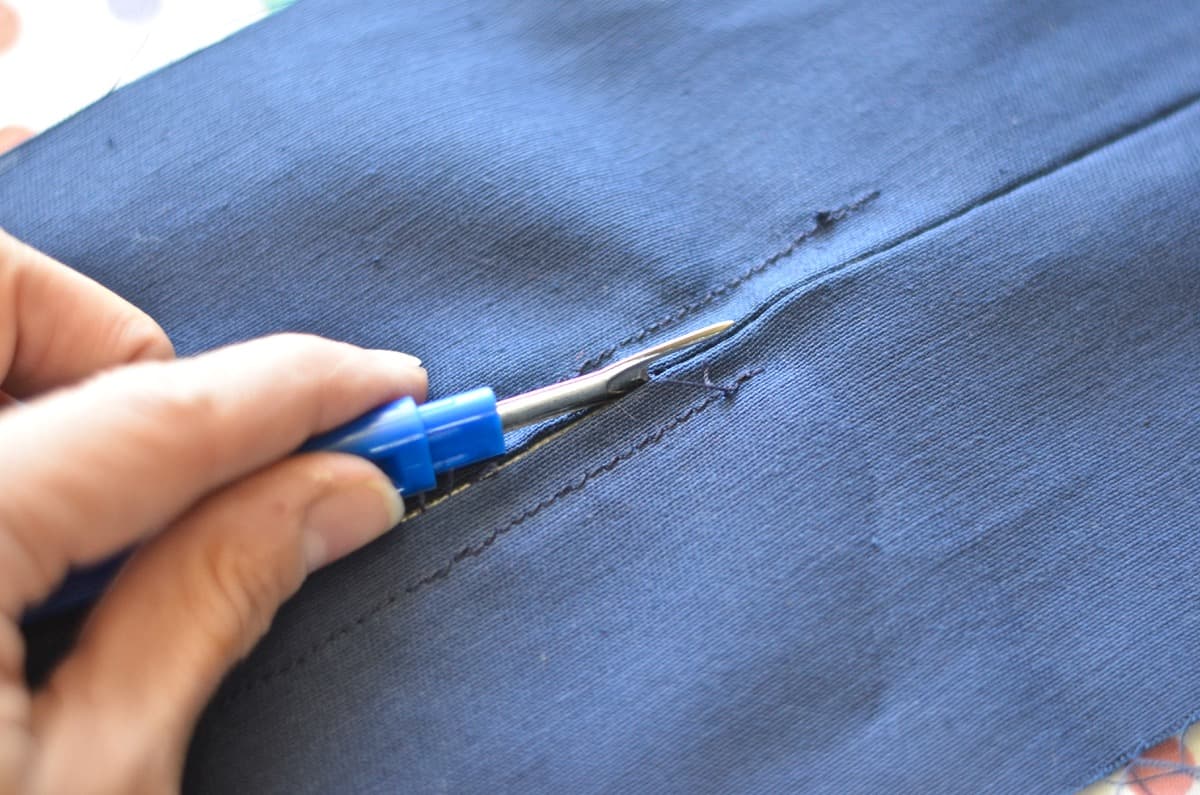
Cushion time. I feel almost irresponsible telling you how to make the cushion because mine is jacked up at best. Do as I say… not as I do, I guess. Determine how deep you want your cushion. Mine is 3”. The gist is that you want a top and a bottom with a stripe around the edge. 396% easier said than done. Start by making the zipper edge. You need a strip of fabric for either side of the zipper… lightly baste these two pieces together and iron the seam open. Pin your zipper in place with the teeth aligned with the seam you just created. Using a zipper foot on your sewing machine, sew along either side of the zipper. Go back with a seam ripper and open up the seam you just created. Boom. Zipper.
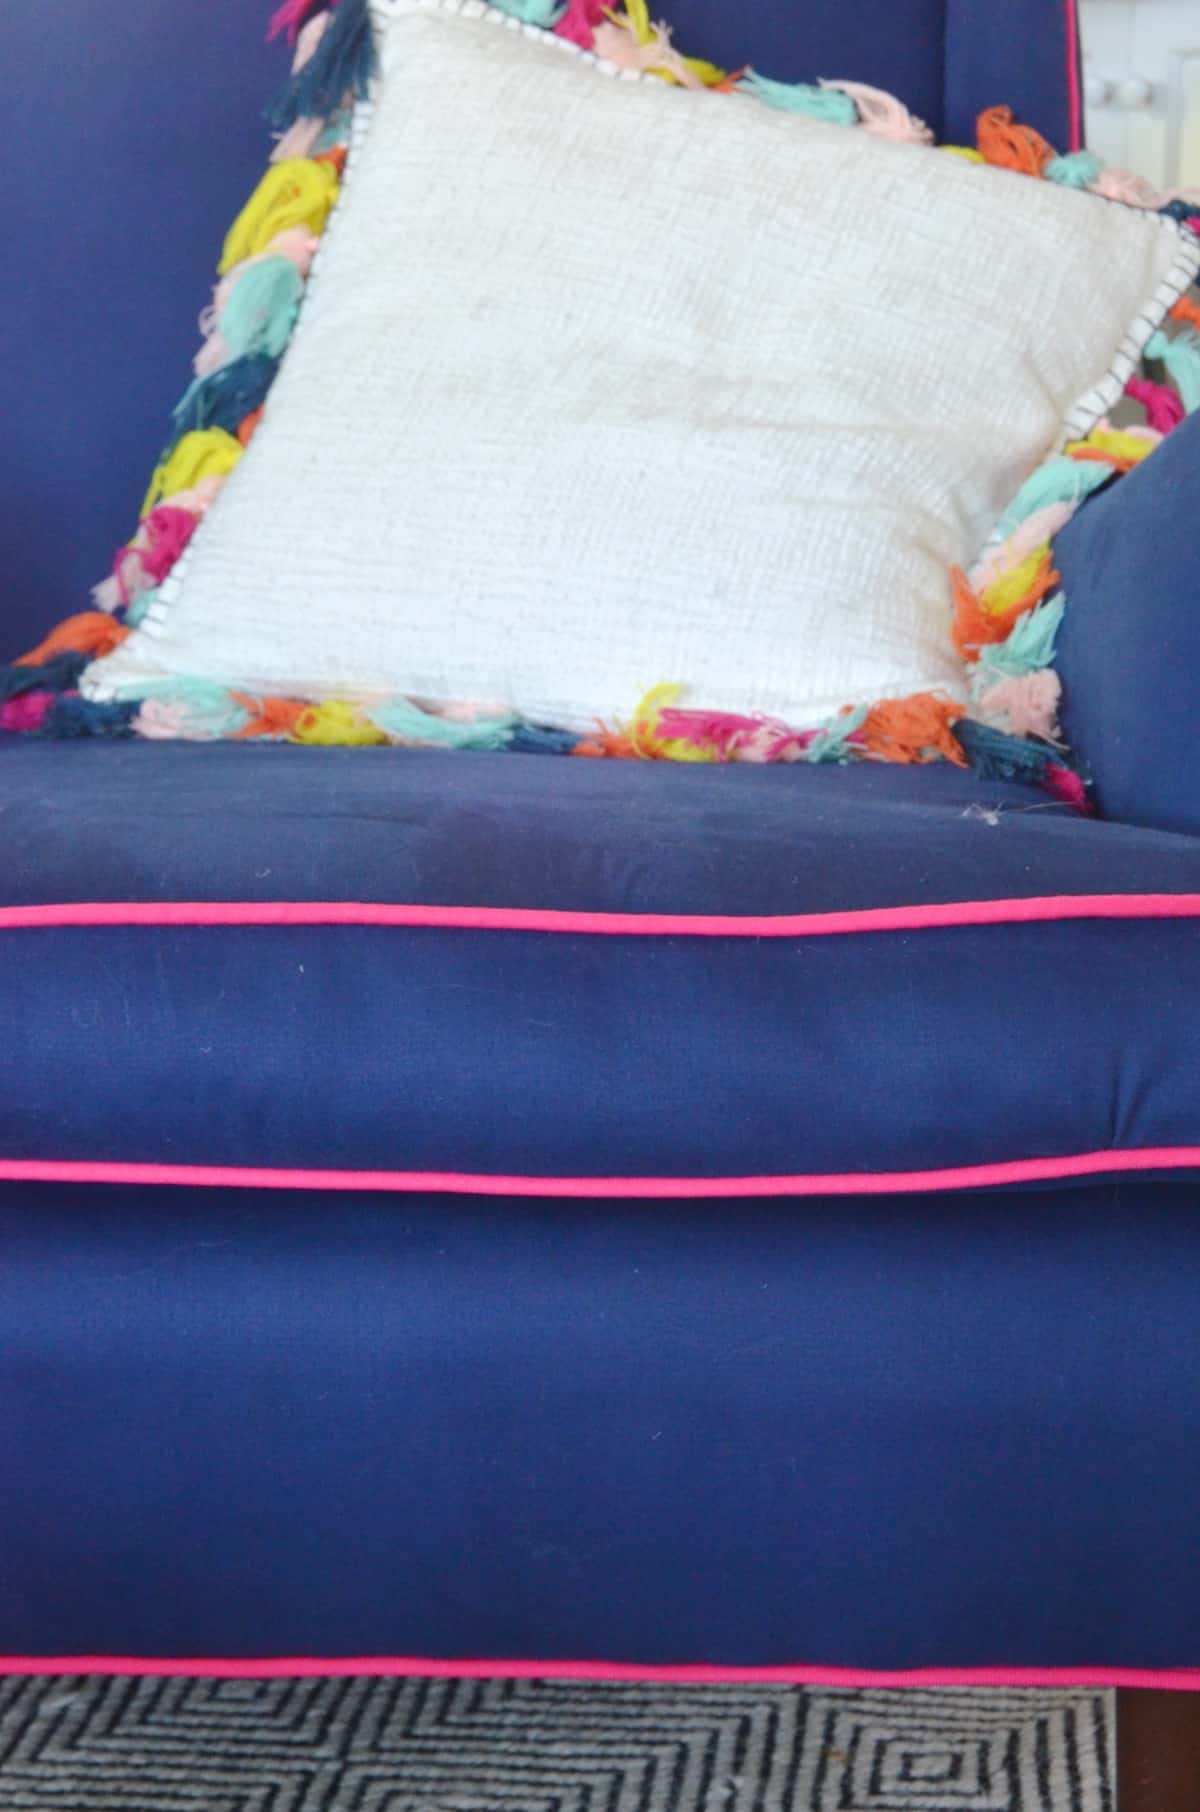
Sandwich the piping between the top piece and the side pieces of your cushion. Slowly work your way around the cushion, stopping at each corner to swivel your fabric. Sew the corner seams in place. You should have an open-faced fabric ‘box’ at this point. Repeat this step with the other cushion panel to put a lid on your box. Cut your cushion foam to shape with the carving knife, and wrap with batting. Stuff the foam into your cushion cover and pour yourself a glass of champagne! You did it!!! You’ll note that there aren’t any great photos of this step… honestly I was cursing a lot and really struggling. Next time I do a chair I honestly my just pay an upholsterer $50 to tackle this part of it because my faulty cushion really makes the rest of the upholster look subpar so the cushion is important!!

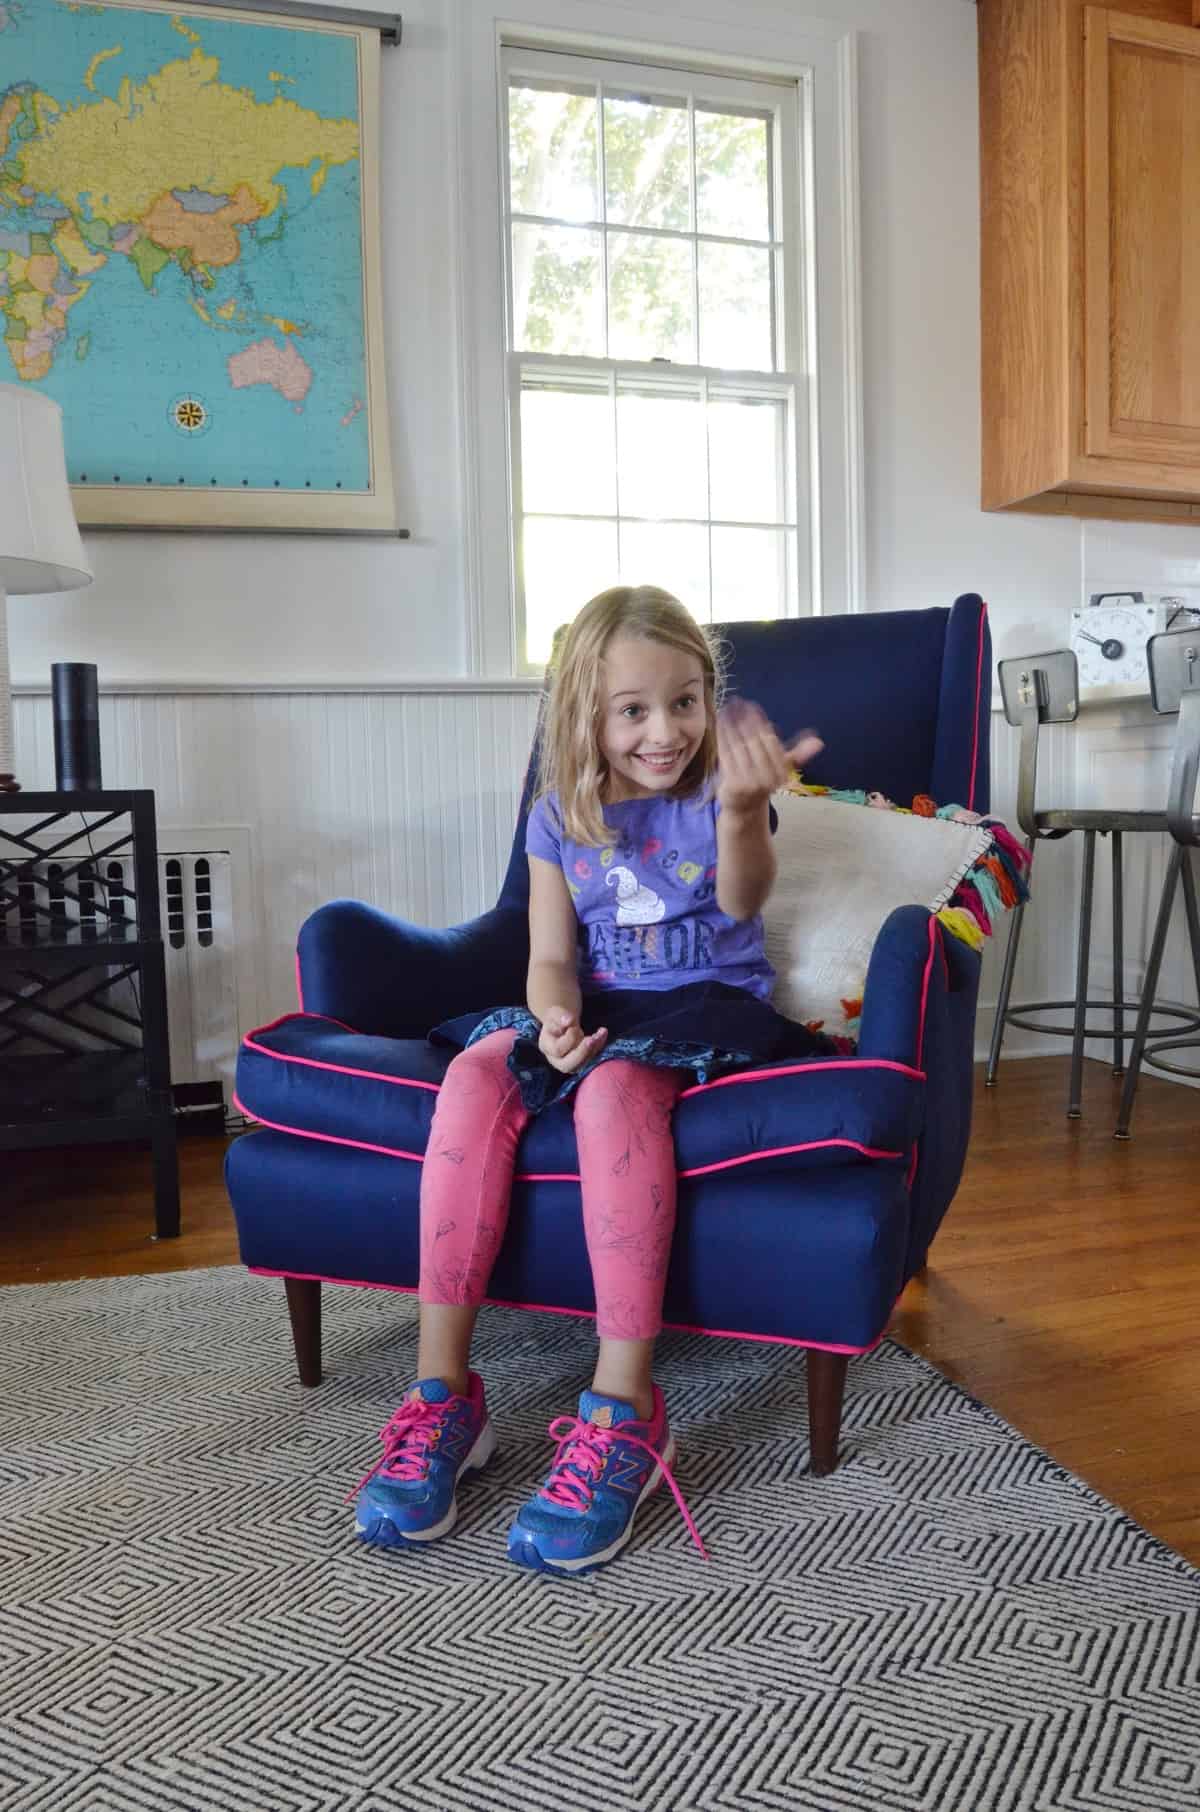
I would NEVER have had the courage to take this on without the collaboration with Fairfield World and Dritz. Upholstery still makes me a little crazed, but I’m getting better!
Check out some of my other upholstery projects HERE!


you did an amazing job! love the contrast piping, too!
Thanks, Cassie!!!! One corner of the cushion is well hidden in photographs, but… I’m motivated to try again. Practice makes perfect! 🙂
Great job Charlotte. Your chair looks awesome and I love the pink piping.
THanks, Shelly! I LOVE the pink. Was a little worried it wouldn’t convey, but it’s super fun in the space!
OMG you did a wonderful job. I think upholstery is hard. Your chair turned out better than mine!
Isn’t it so hard?! The pros make it look so simple! 🙂
Vow Wow Wow, you have really done a great job, I wish I am as talent ! Love the color , your girl must love it so much hua.
Thanks, Alice! Thank goodness for YouTube!
Great job, especially on your own. My first upholstery project, my grandmother (a very accomplished upholsterer) helped me. It is definately harder than it looks. You should be very proud.
I would KILL to have an expert to walk me through it… some things just need to be seen. Thank goodness for YouTube, but you’re right… it’s WAY harder than it looks! THank you!
Hey Charlotte, I kind of wish I could have given you some tips. Overall the steps are correct, and it turned out fairly well, but you gave yourself a LOT of trouble.
I’m a professional upholsterer, so if you want to pick my brain and ask questions, please do. Please don’t take any of the following as harsh criticism. I think you would be a great upholsterer with more practice or a few classes.
You main pitfall (and something that would have made your life infinitely easier) is that the old covers are generally unsewn and used as the patterns. This would have saved a lot of time for the deck and cushion. You basically want to copy anything with sewing on it, making sure to match panels (if using a print/pattern), and making sure the fabric is always in a “waterfall” direction (top to bottom).
Things like the inside back, outside arms, and outside back are just measured and cut rectangular panels.
The other tip I would give you is that it looks like you are not pulling the fabric tightly and evenly enough. This comes with practice, and it’s usually also helpful to have an upholsterer show you how to do it. What I mean by this is like in the first photo of “Step 3”. There should be no vertical puckering in the fabric at each staple (or very very little). The fabric needs to be pulled flat with the whole hand, and you lay your hand across the top edge spanning several inches (leaving the fabric hanging down) and then you staple a few inches at a time. Re-smooth the fabric a few inches farther down, and continue. Avoiding puckers also means pulling more towards the sides (but also without having your fabric grain pulled diagonally). Stripes are a bitch, but they also help you keep everything perfectly aligned and square.
It’s very trick, and it is hard to explain.
There’s also an easier trick to using the plygrip. Staple it down, then fold the flaps 90%. Do not cut the fabric panel to shape. Instead, start to stretch and tuck-in the fabric using a regulator (or whatever you have that’s handy, a skewer, a huge sewing needle, screwdriver, or whatever). This lets you be able to shift it around more easily. When you’ve got a bit tucked in, push a tab down with your fingers and continue along the edge. When the whole panel is in place, and tucked all around, trim the fabric as close as you can (about 1/8″ to 1/4″ sticking out), then go back over the whole line while tucking in the excess fabric (pull and drag with the regulator), and follow that by tapping down each tab with an upholstery hammer, focusing on the edge nearest to the piping. You didn’t need the cardboard with the plygrip (in case it shows in a corner).
JC
Hi JC! Where were you a few weeks ago?! 🙂 These tips are great!!!!! Sadly… the old fabric was SO old and destroyed that it fell apart when I pulled it off the chair. I was so frustrated not to have the templates as you mentioned! I also think I could have used more batting… The trickiest part of upholstery for me is dealing with the edges where all the foam and batting get bulky. One day I’ll ask my upholsterer if I can watch him work because I agree… I just need to see someone do it in person! Thanks for taking the time to leave such an informative and helpful reply! The plygrip tip is great (I was originally thinking I’d hand sew the whole thing so learned the hard way that the cardboard was unnecessary with plygrip)… I may email you in the future if I take on another upholstery job… I think ultimately practice makes perfect! THANKS!!!