
Budget Bathroom Makeover
Psssst… this post *might* contain affiliate links: see my disclosure here.
Giving our Primary Bathroom a Facelift
I made some small changes in our bathroom to give it a more up to date cohesive look.
We’ve lived in three houses and exactly ZERO of them have had an official primary bathroom. In fact, one of my first big room makeovers was when I gave our bathroom in the last home we owned a major facelift. There was also the time I made over the kids bathroom for $60 and shared it with Rachel Ray. I love that kind of challenge! Well fast forward and here we are in our new house. The primary bathroom was more legit than any we’d ever had: soaker tub, steam shower, storage… but aesthetically I didn’t love it. We weren’t interested in any major expense in here so my challenge was to make the space feel a bit more designed and contemporary without… heavy lifting. No biggie. 🥴
Shop my favorites!
Simple Bathroom Update
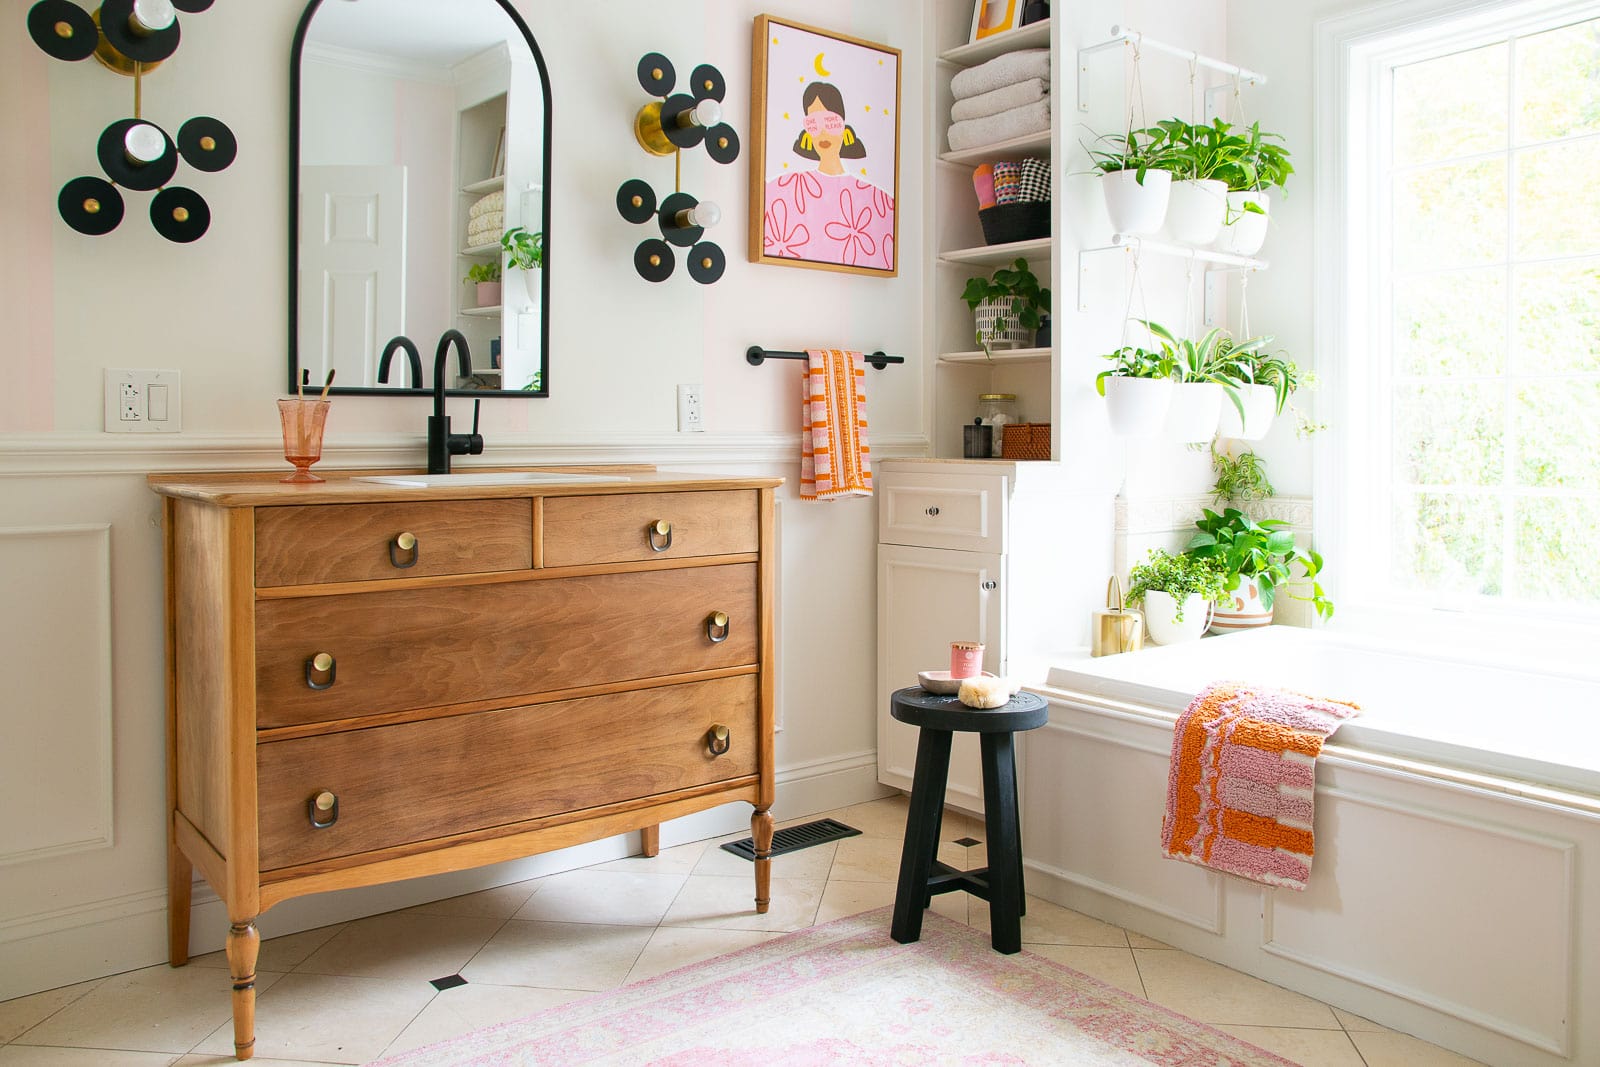
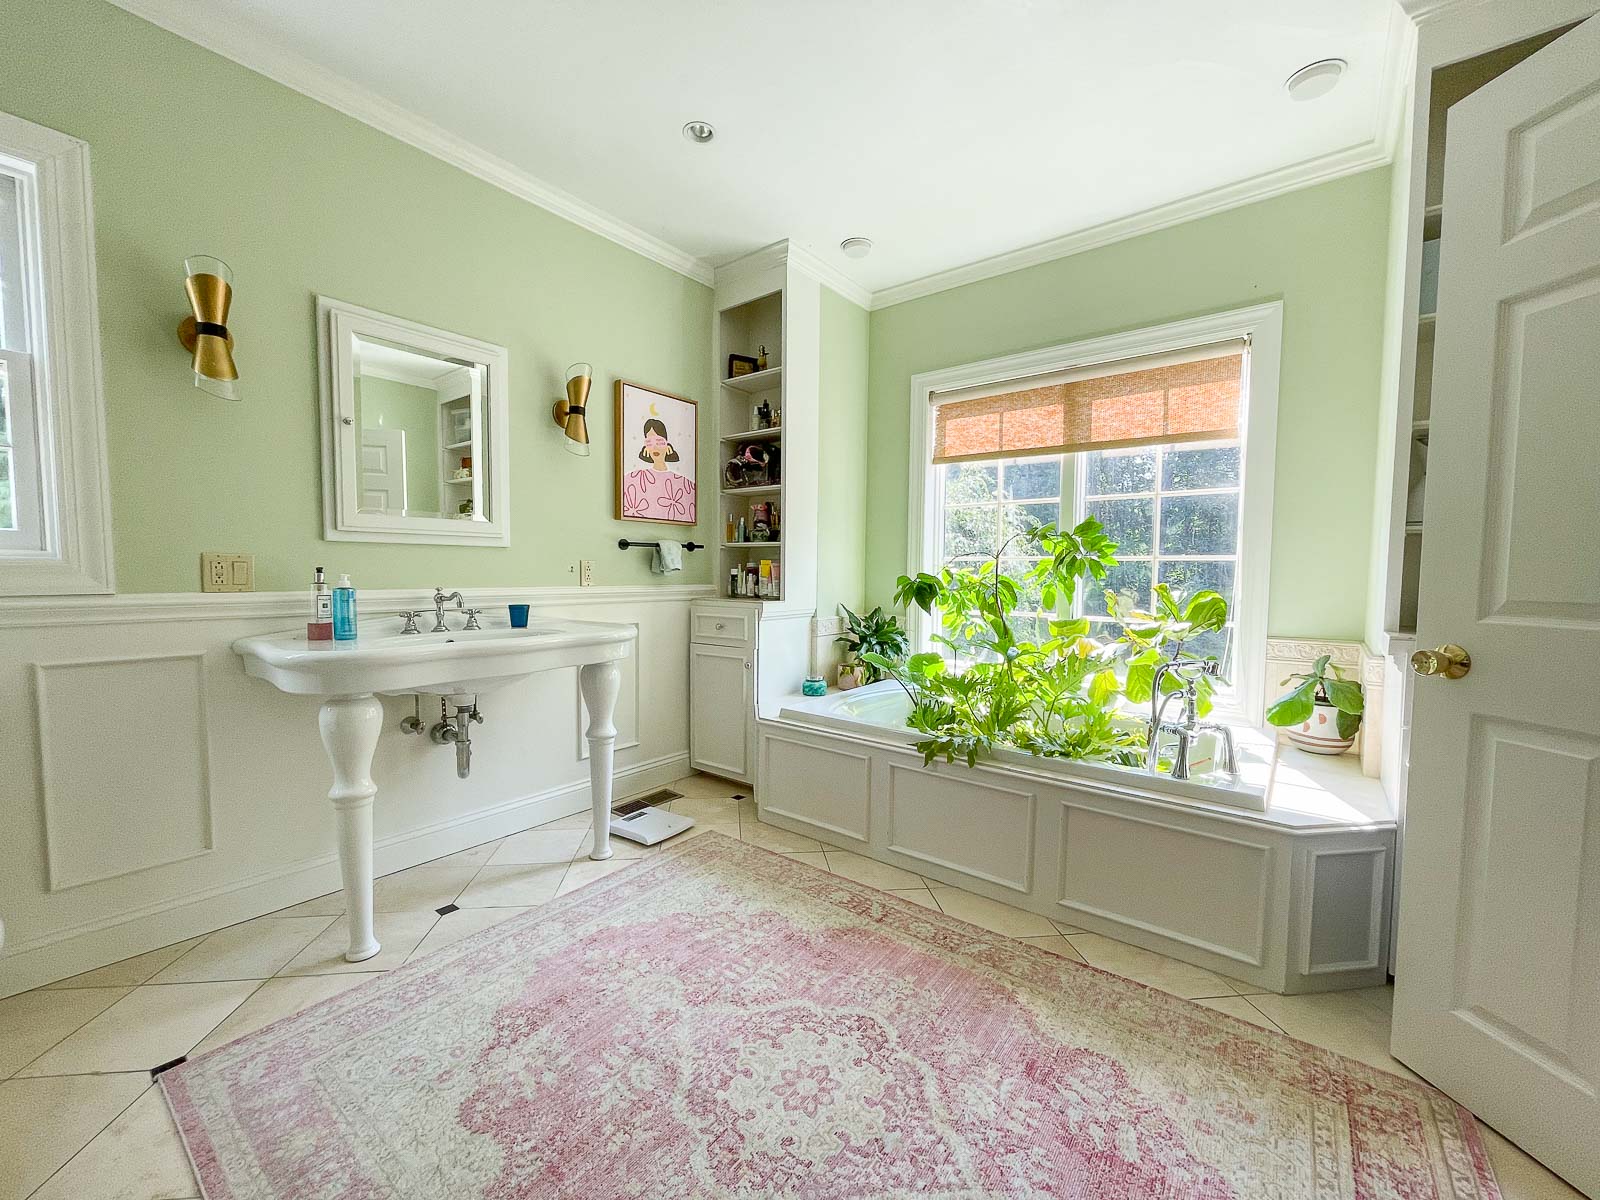
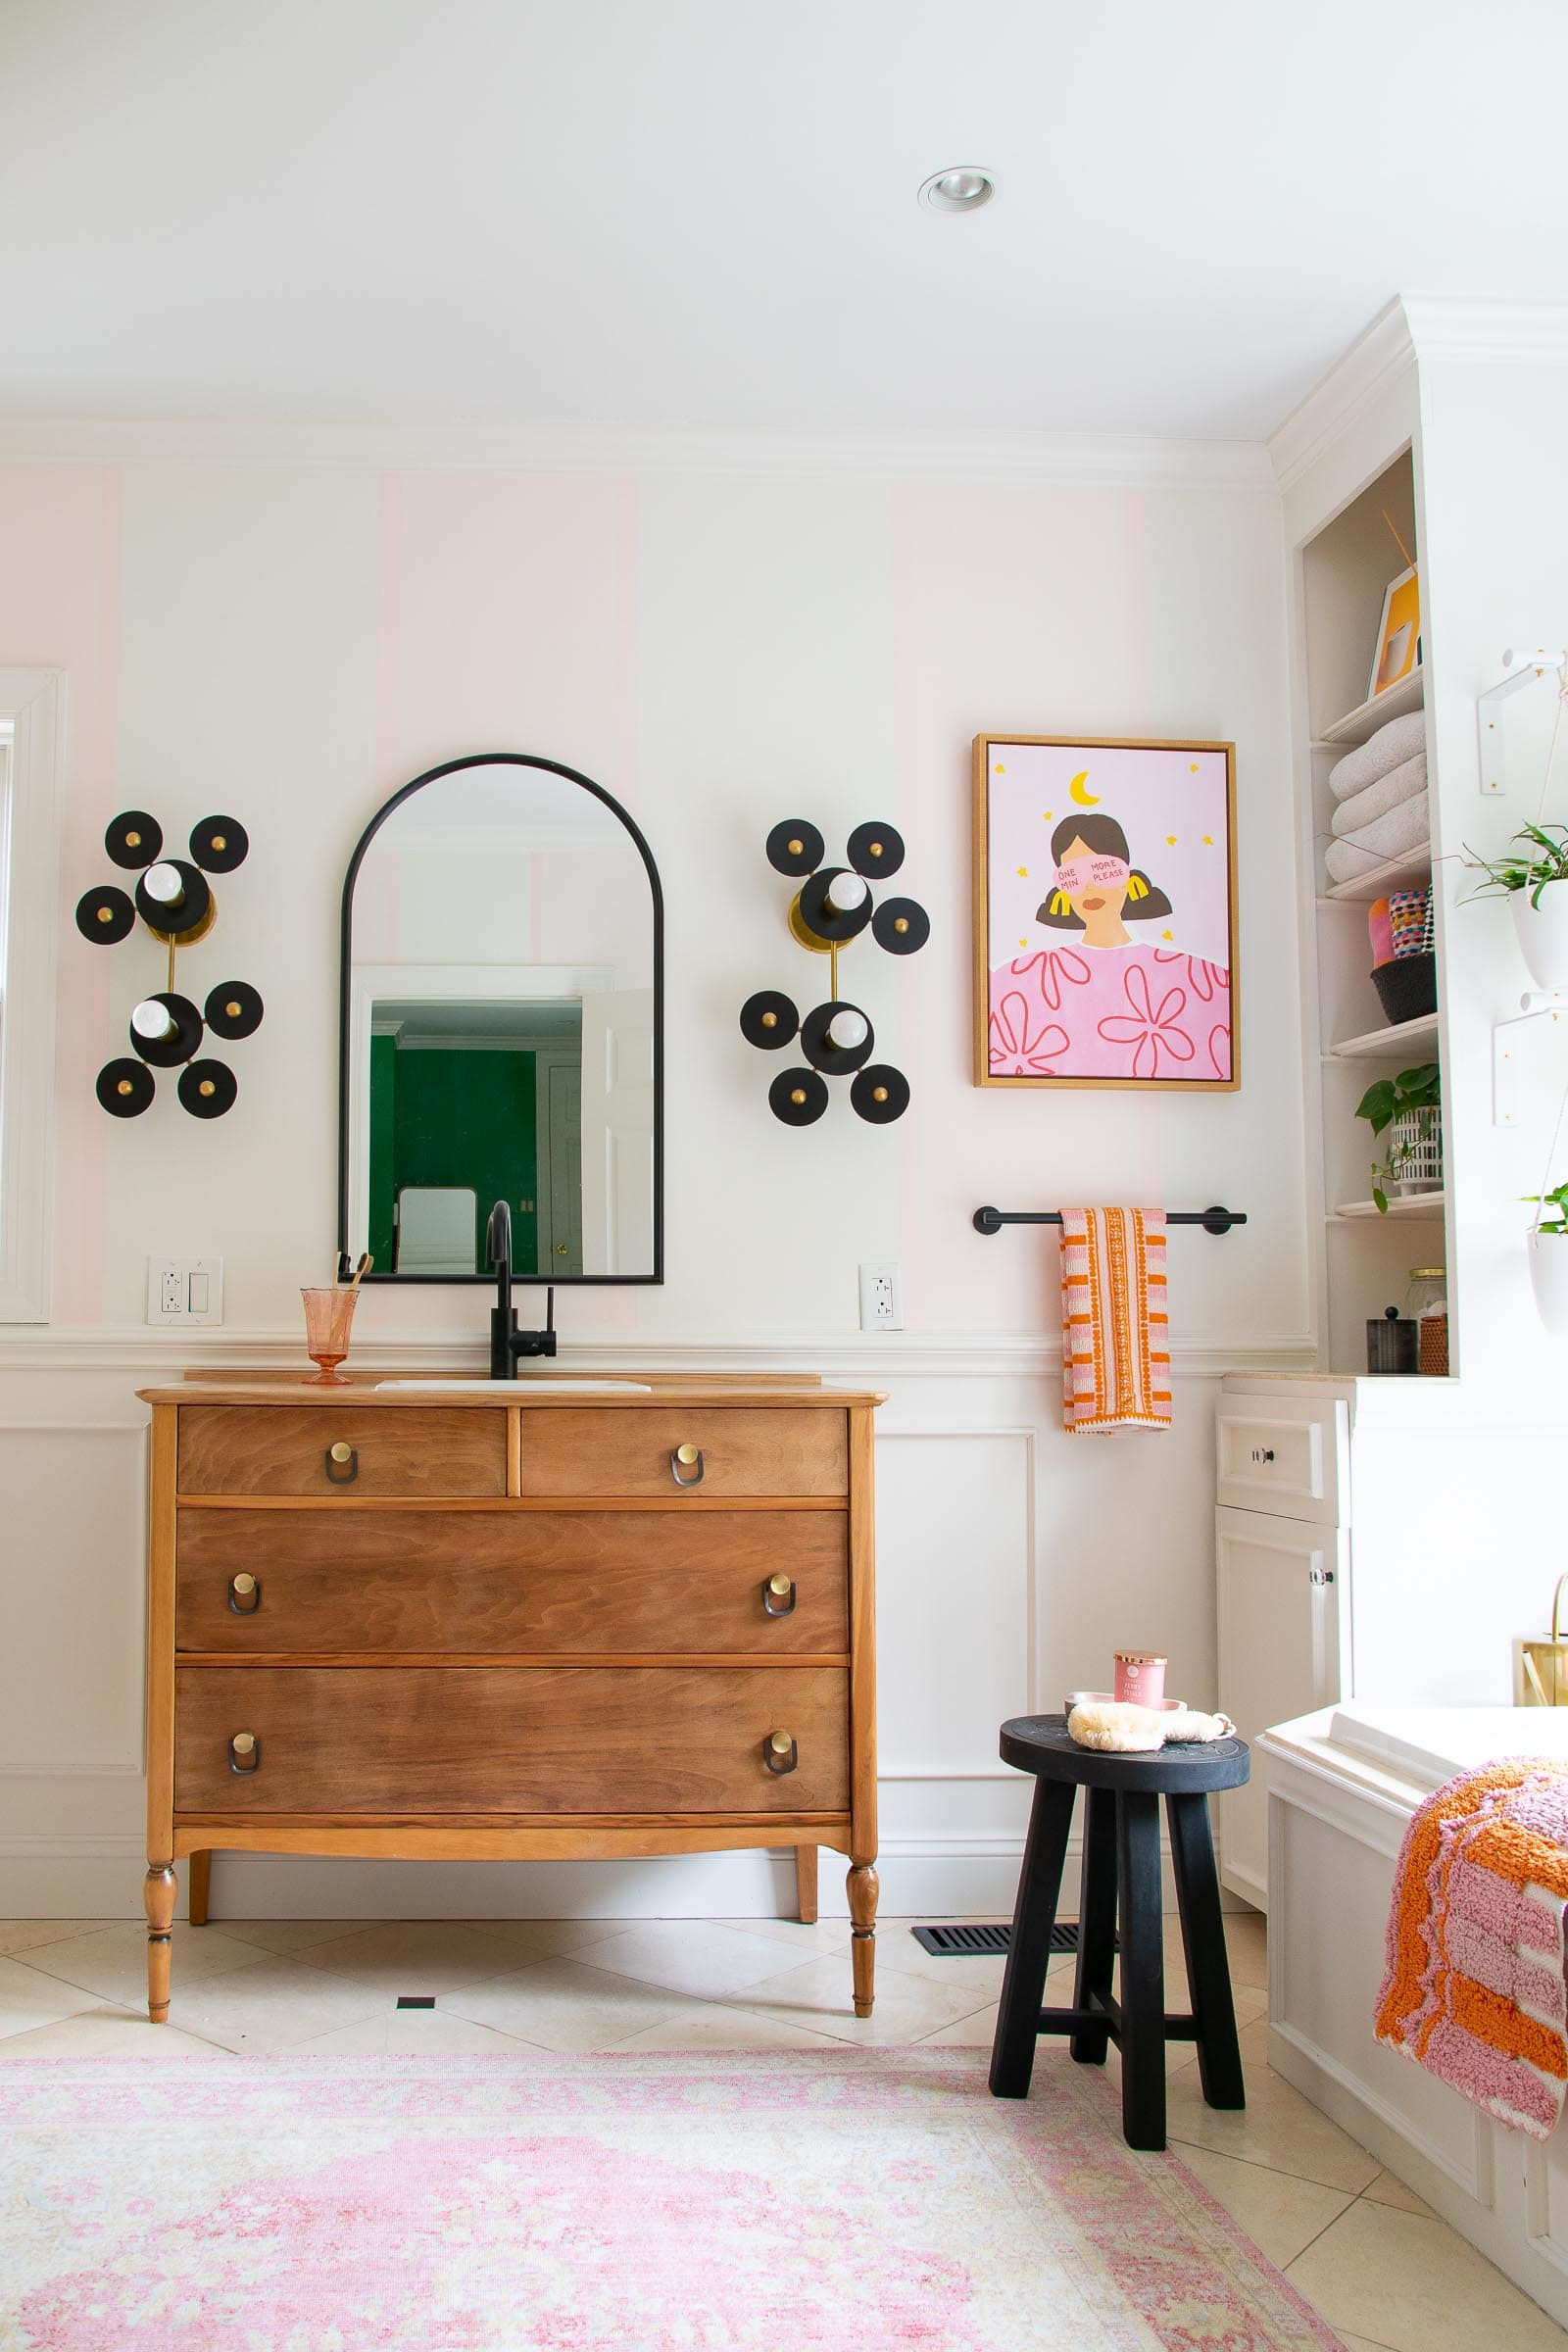
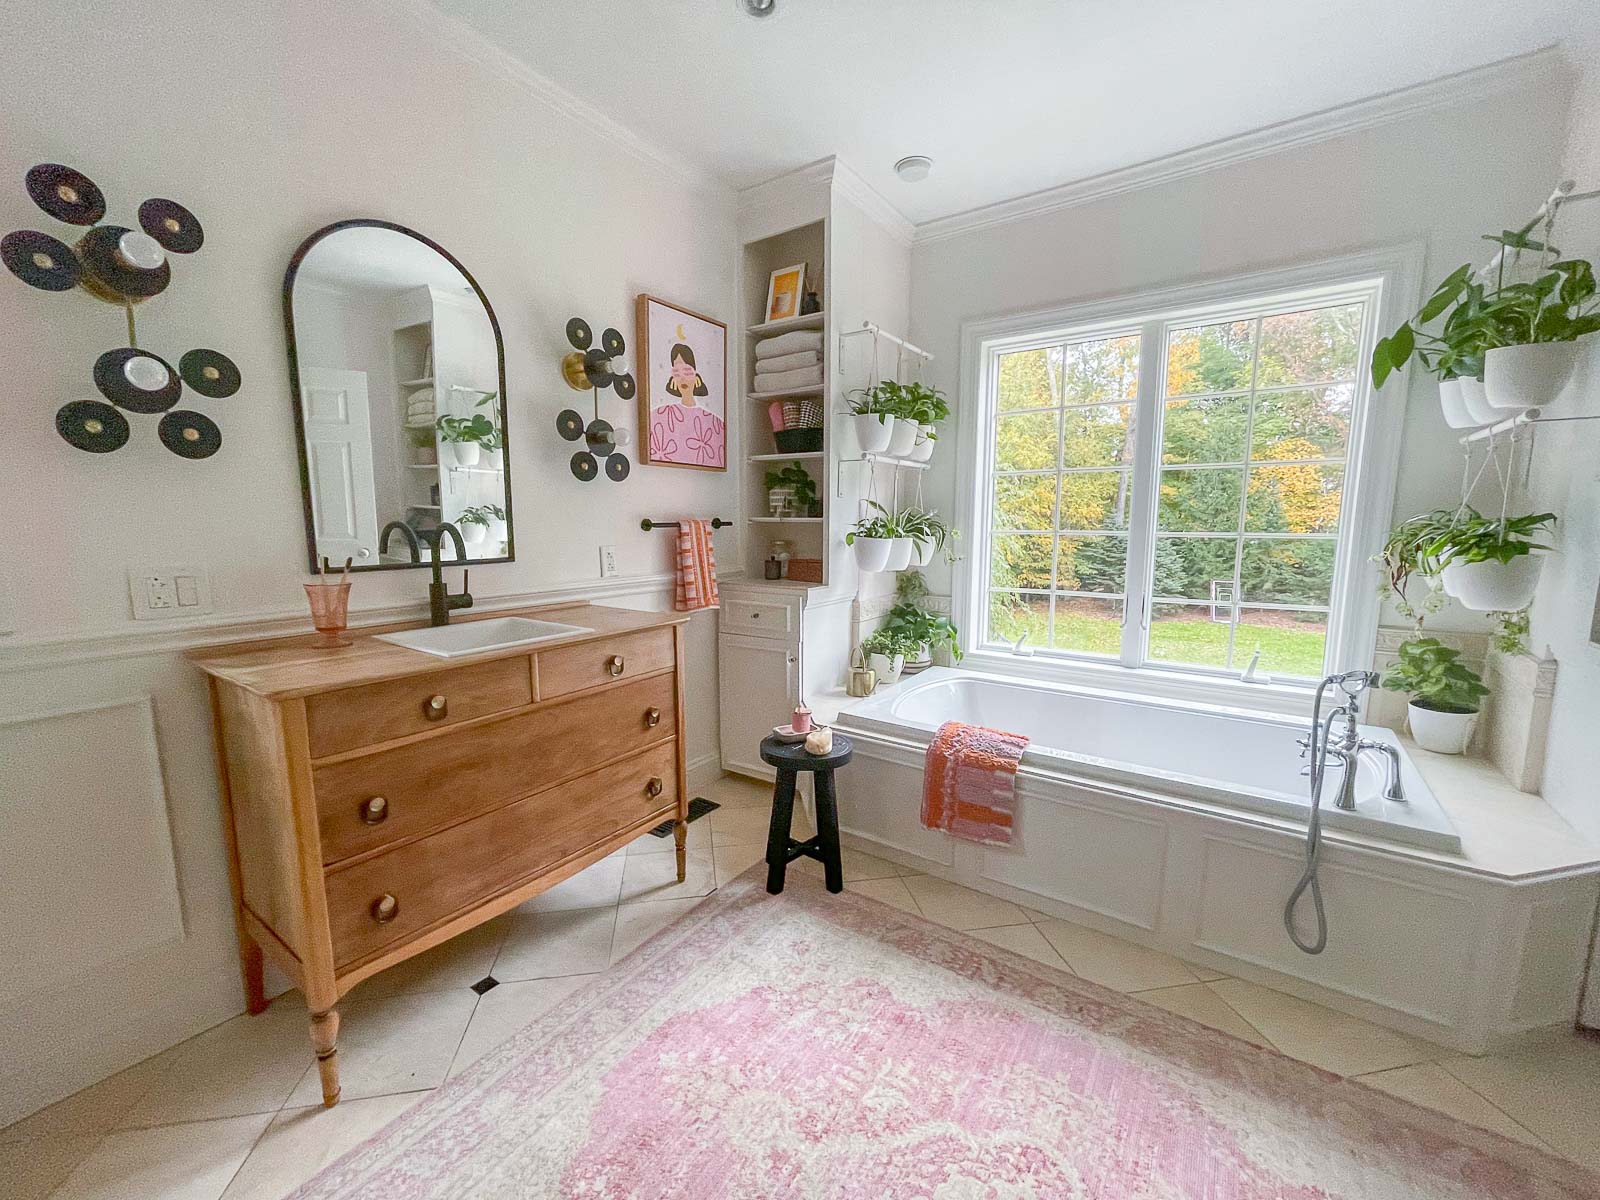
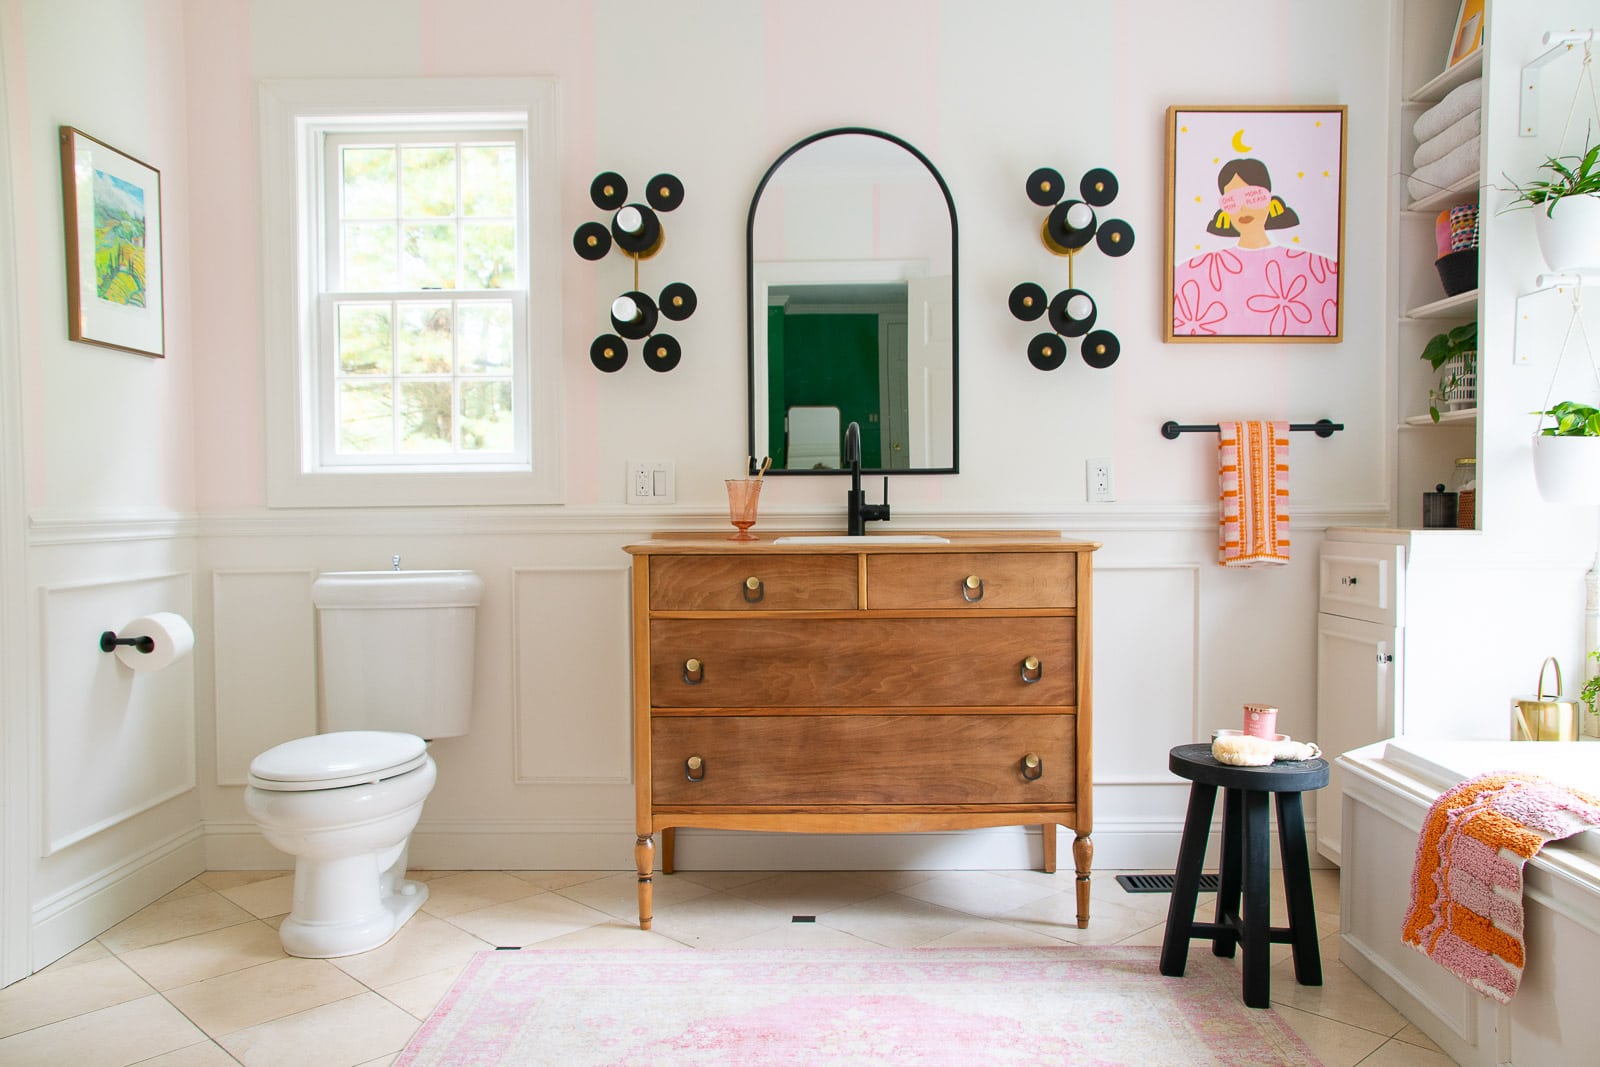
Here’s what I wanted to address: the floor was an aggressively dated travertine/ beige and unfortunately it carries into the shower. This meant that I couldn’t just demo/ replace the floor without having to reset the entire shower which made a hard but manageable project… decidedly out of my league for now. Which meant I had to find a way to work *with* this tile. The vanity. Lots of you guys really like the vanity, but to me… it felt like a heap imitation of a luxe design. Also, the legs looked like drumsticks. Finally… the green walls were NOT working for me. I love green, but this shade in particular just felt a bit dated. To recap, I wanted to downplay the tile somehow, repaint the space and swap out the vanity.
Step 1. Paint
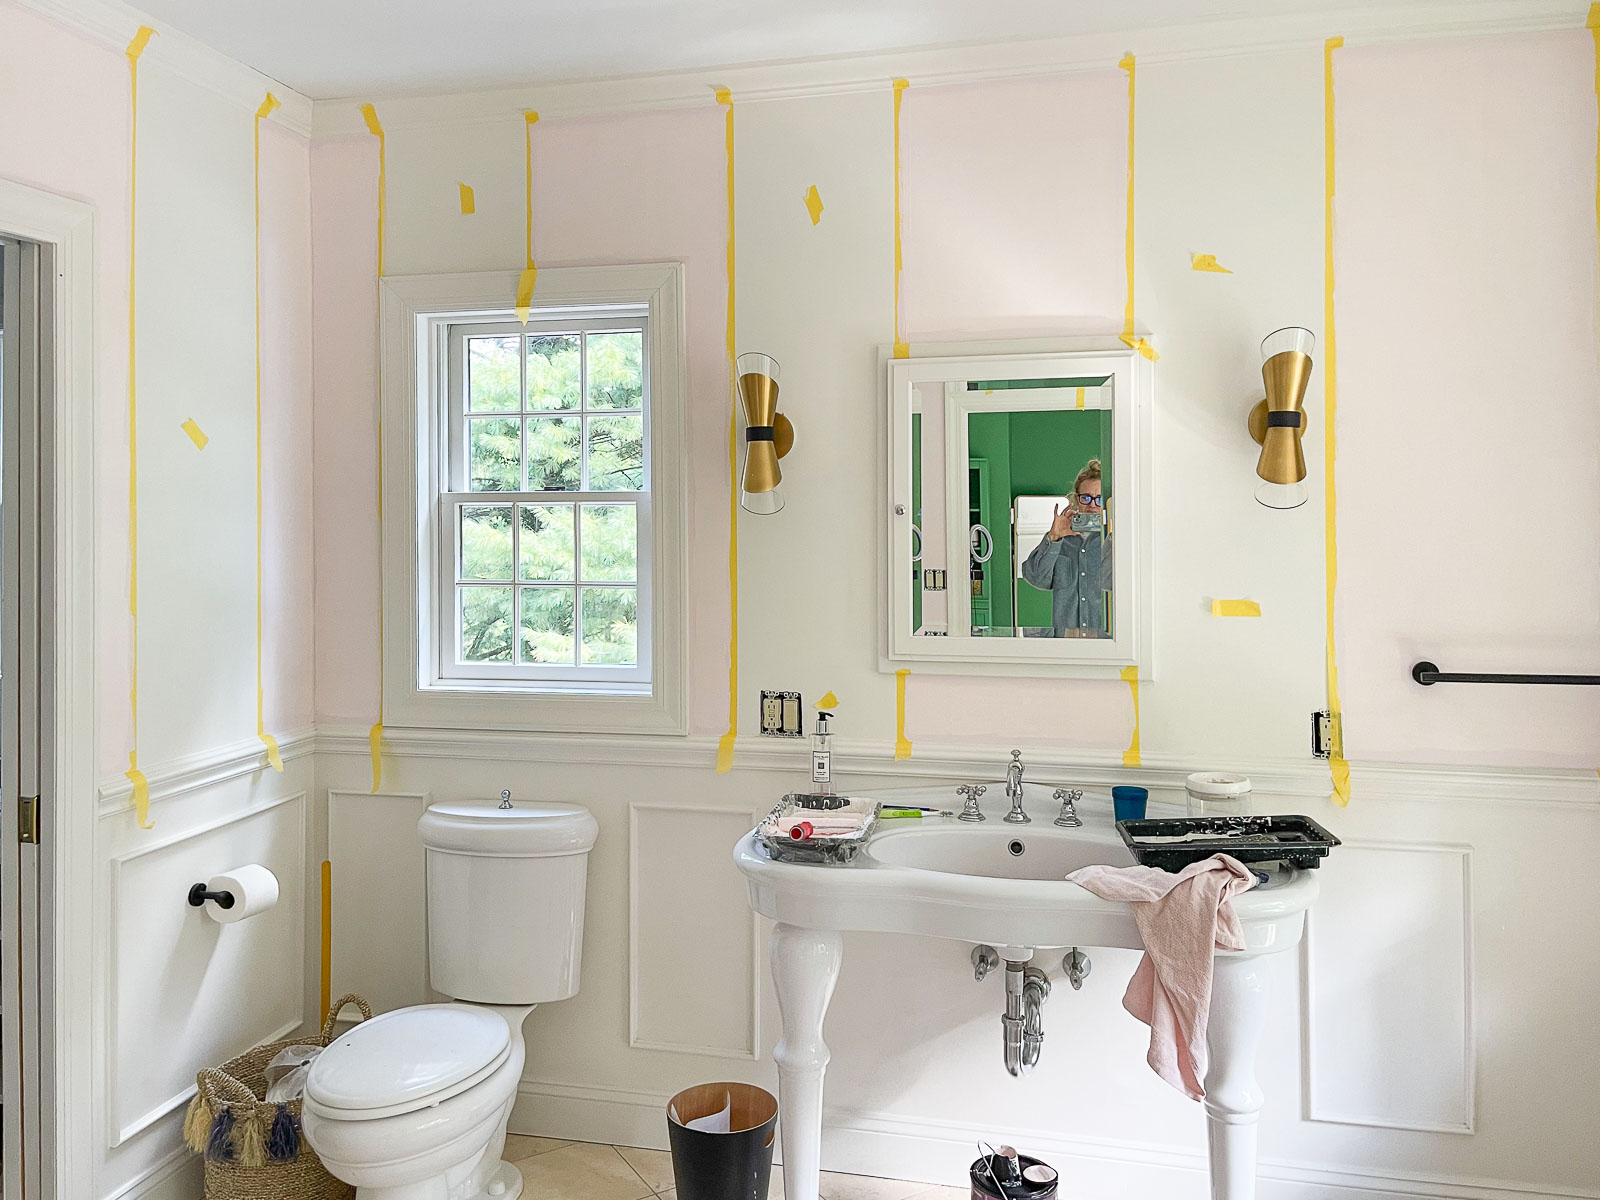
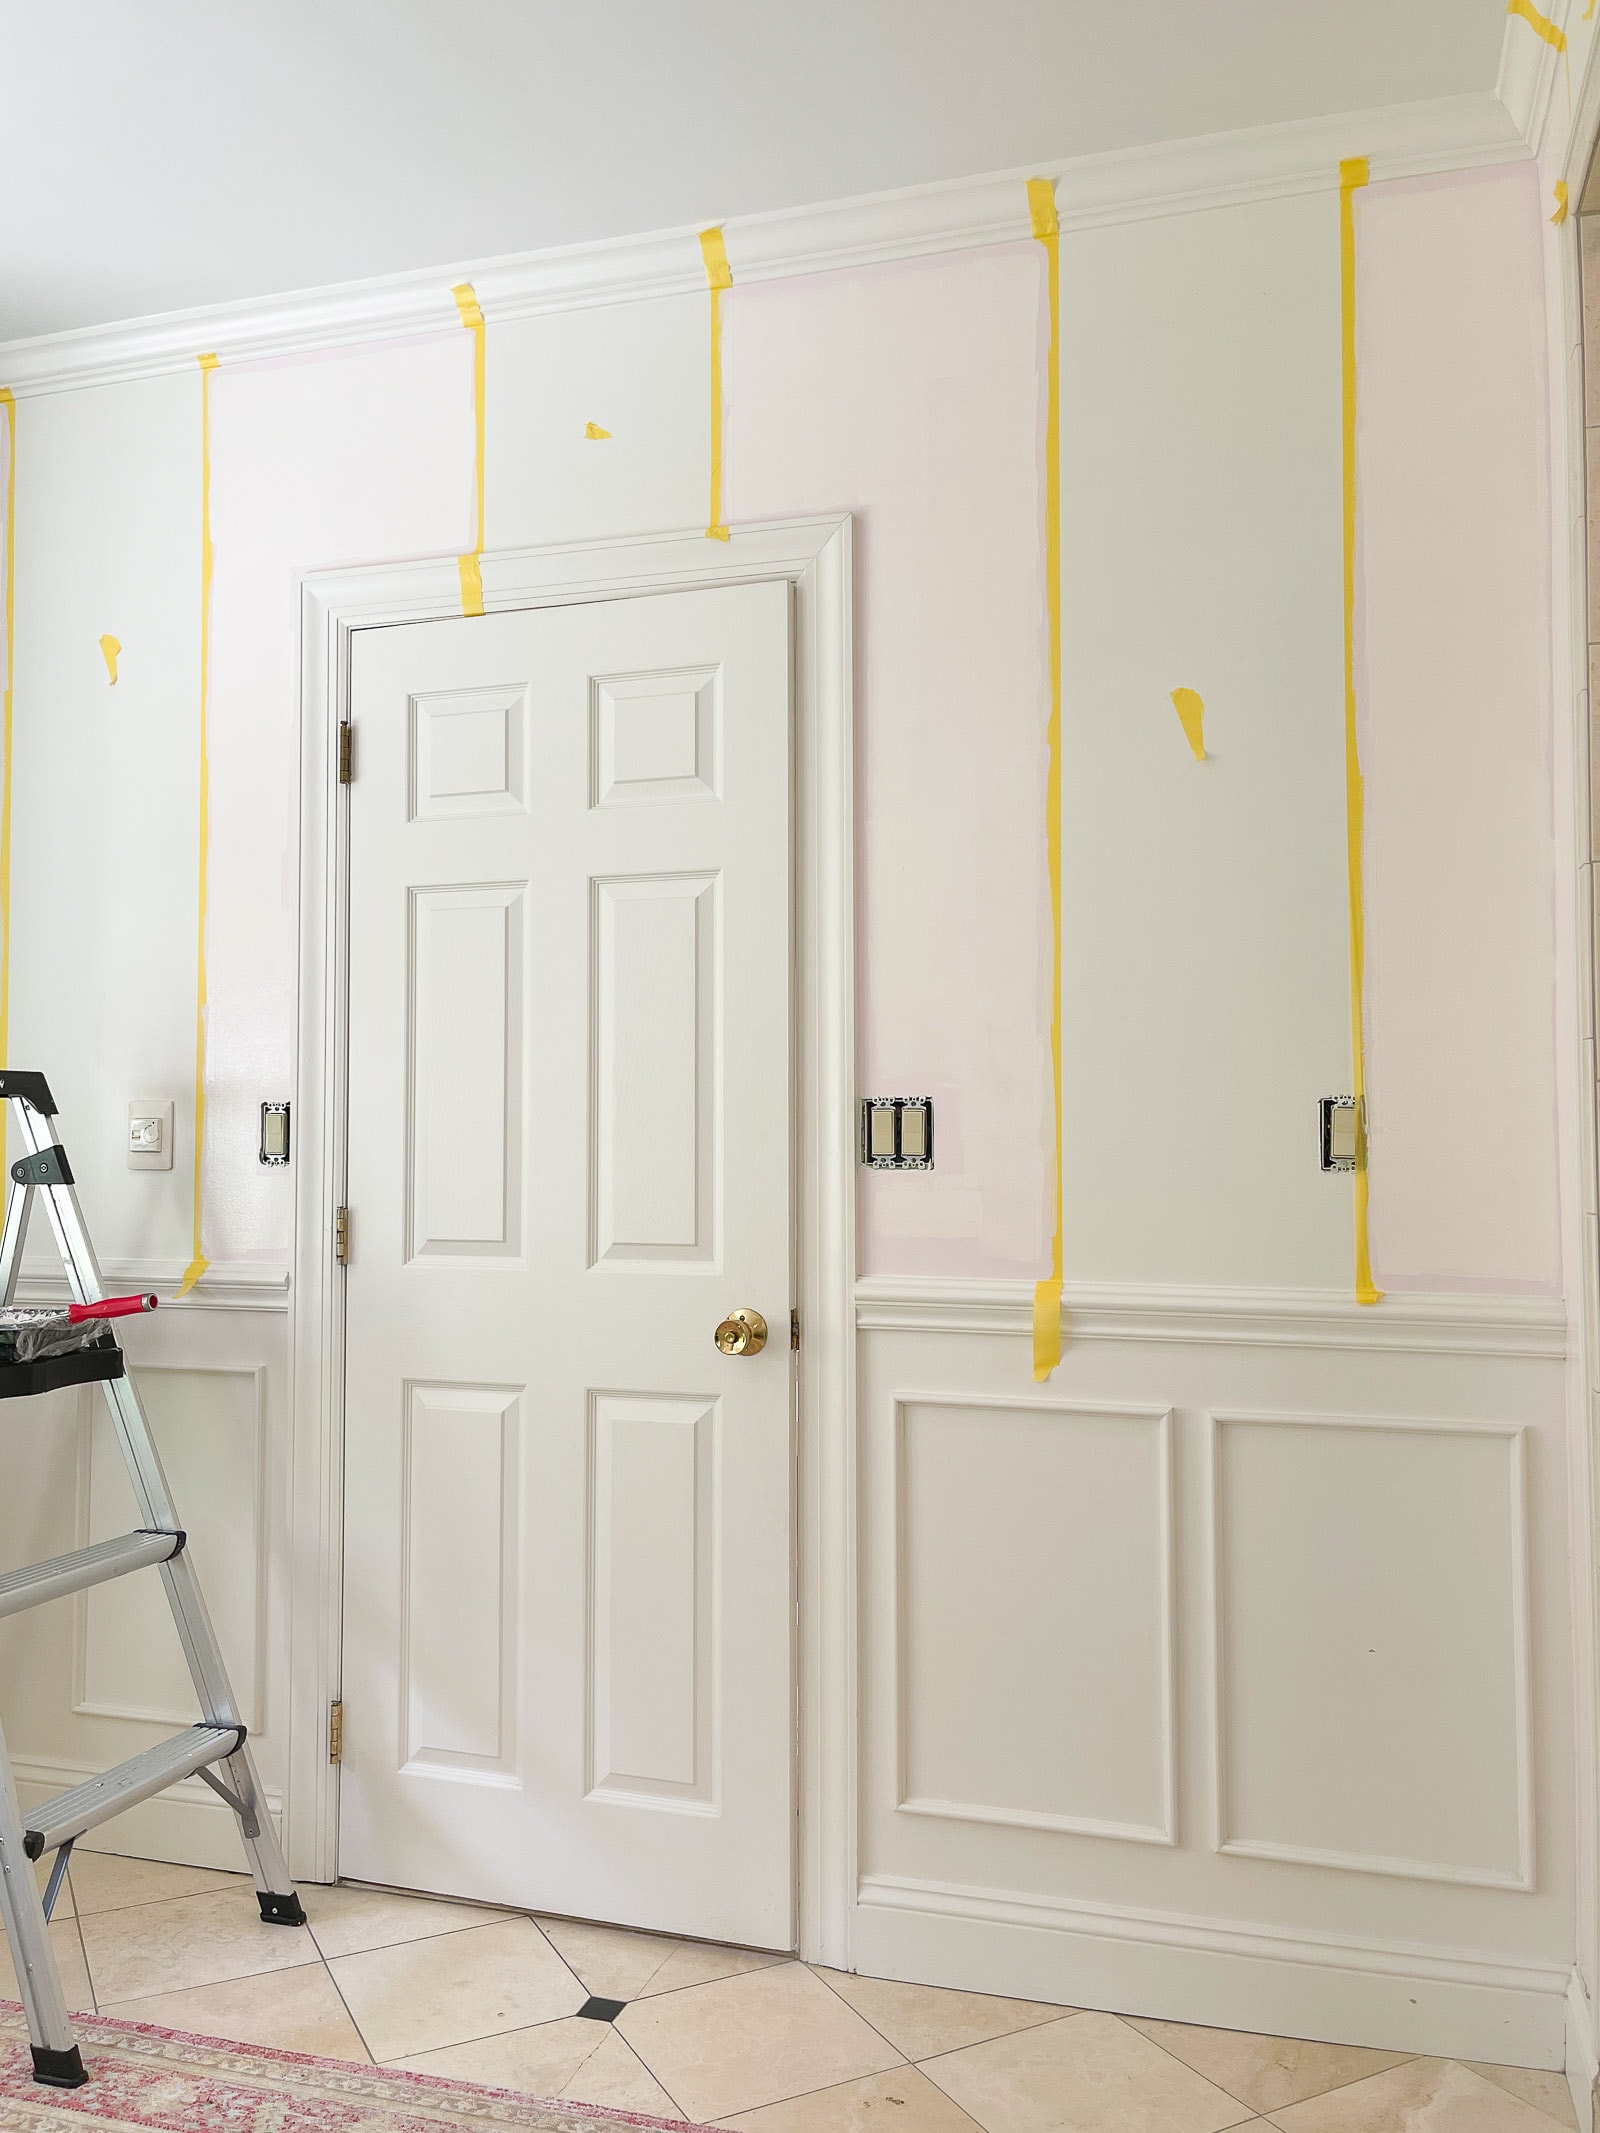
I really liked the way the pink rug in here looked against the tile so I decided to go with a pale pale pink for the walls. Originally I was thinking painted ceiling, but then I thought really subtle stripes could be a good way to break up the solid walls, bring in some interest and also… a bit o’ color! A friend cautioned me to be wary of the Victoria Secret effect… great tip. #Noted I was going with wide stripes and I wanted the pink to be barely noticeable. This was easier said than done and it took quite a few attempts to get a pink that wasn’t too bold, wasn’t too much like a nursery, but it would still show up on camera. Ultimately I settled on the palest pink for the stripe, but I added a slightly darker shade as a border on either side to help delineate the stripe.
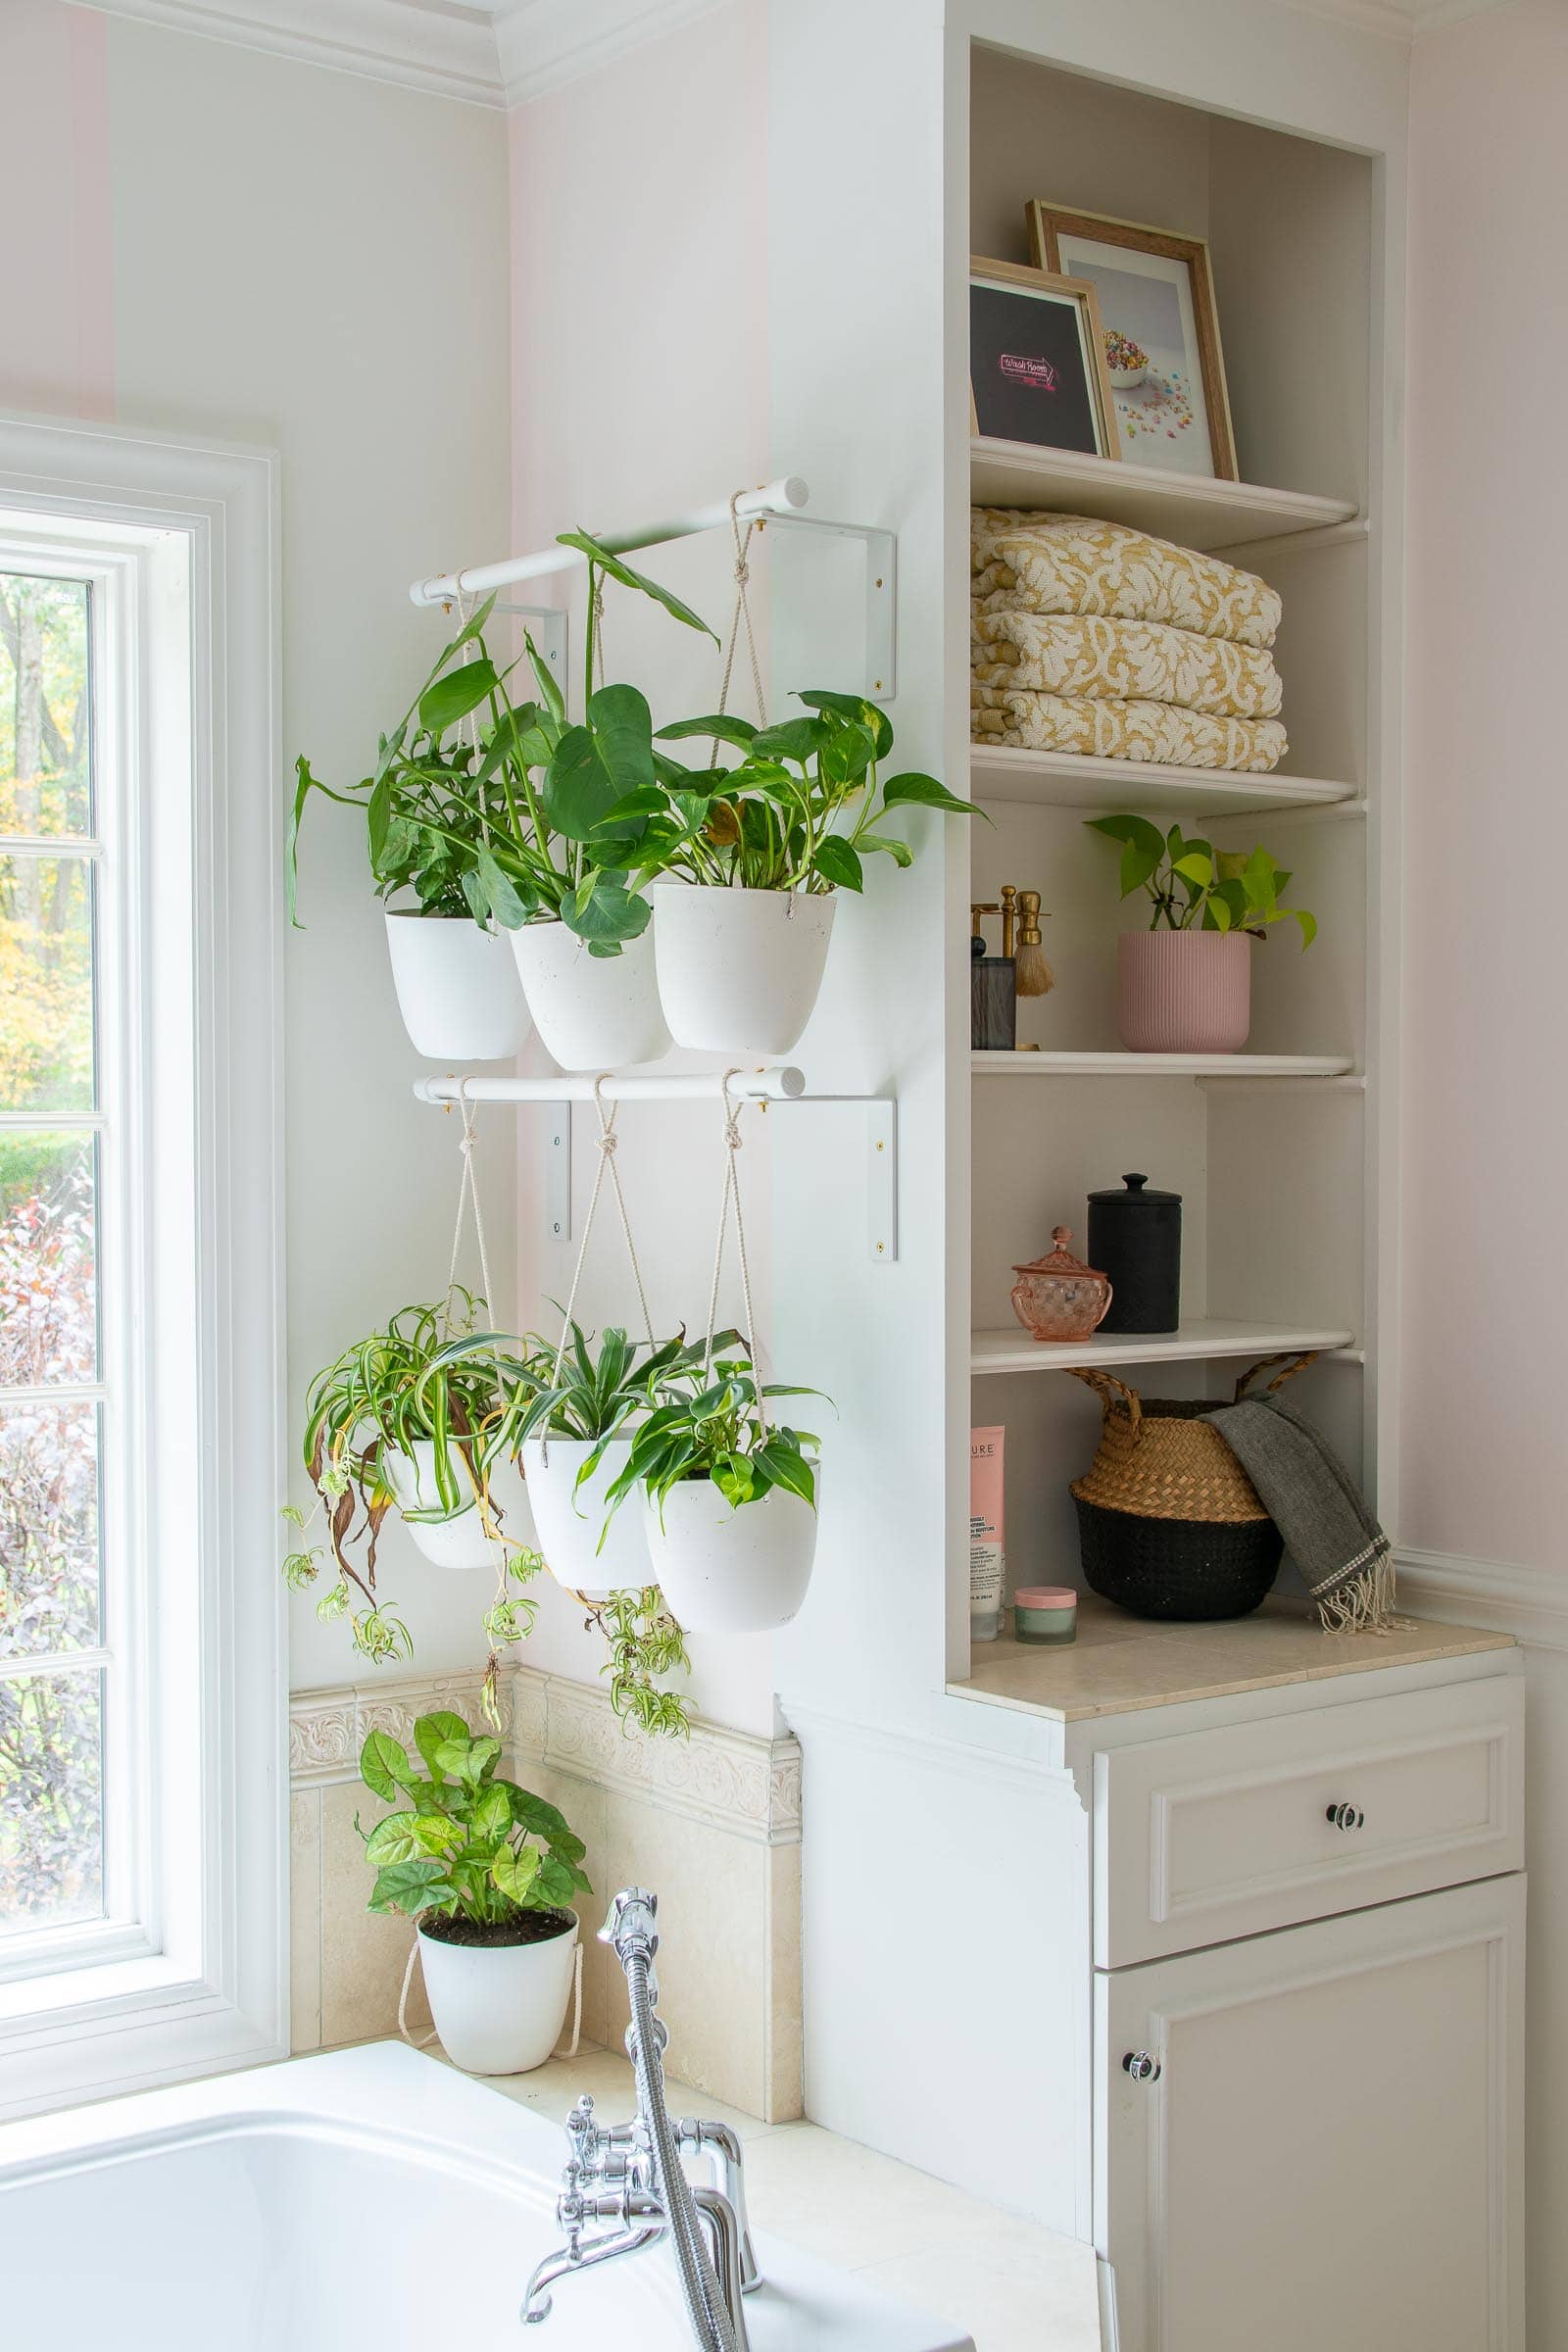
Step 2. Greenery
Another friend suggested lots of flowy lush plants in here given the big sunny window and I loved the idea of using the walls on either end of the bathtub for plants somehow. When I looked online for plant hangers, none of them were quite right or expensive-o, but I figured it would be easy enough to make my own. I wrote up a full tutorial here, but in a nutshell… PVC pipes were involved.
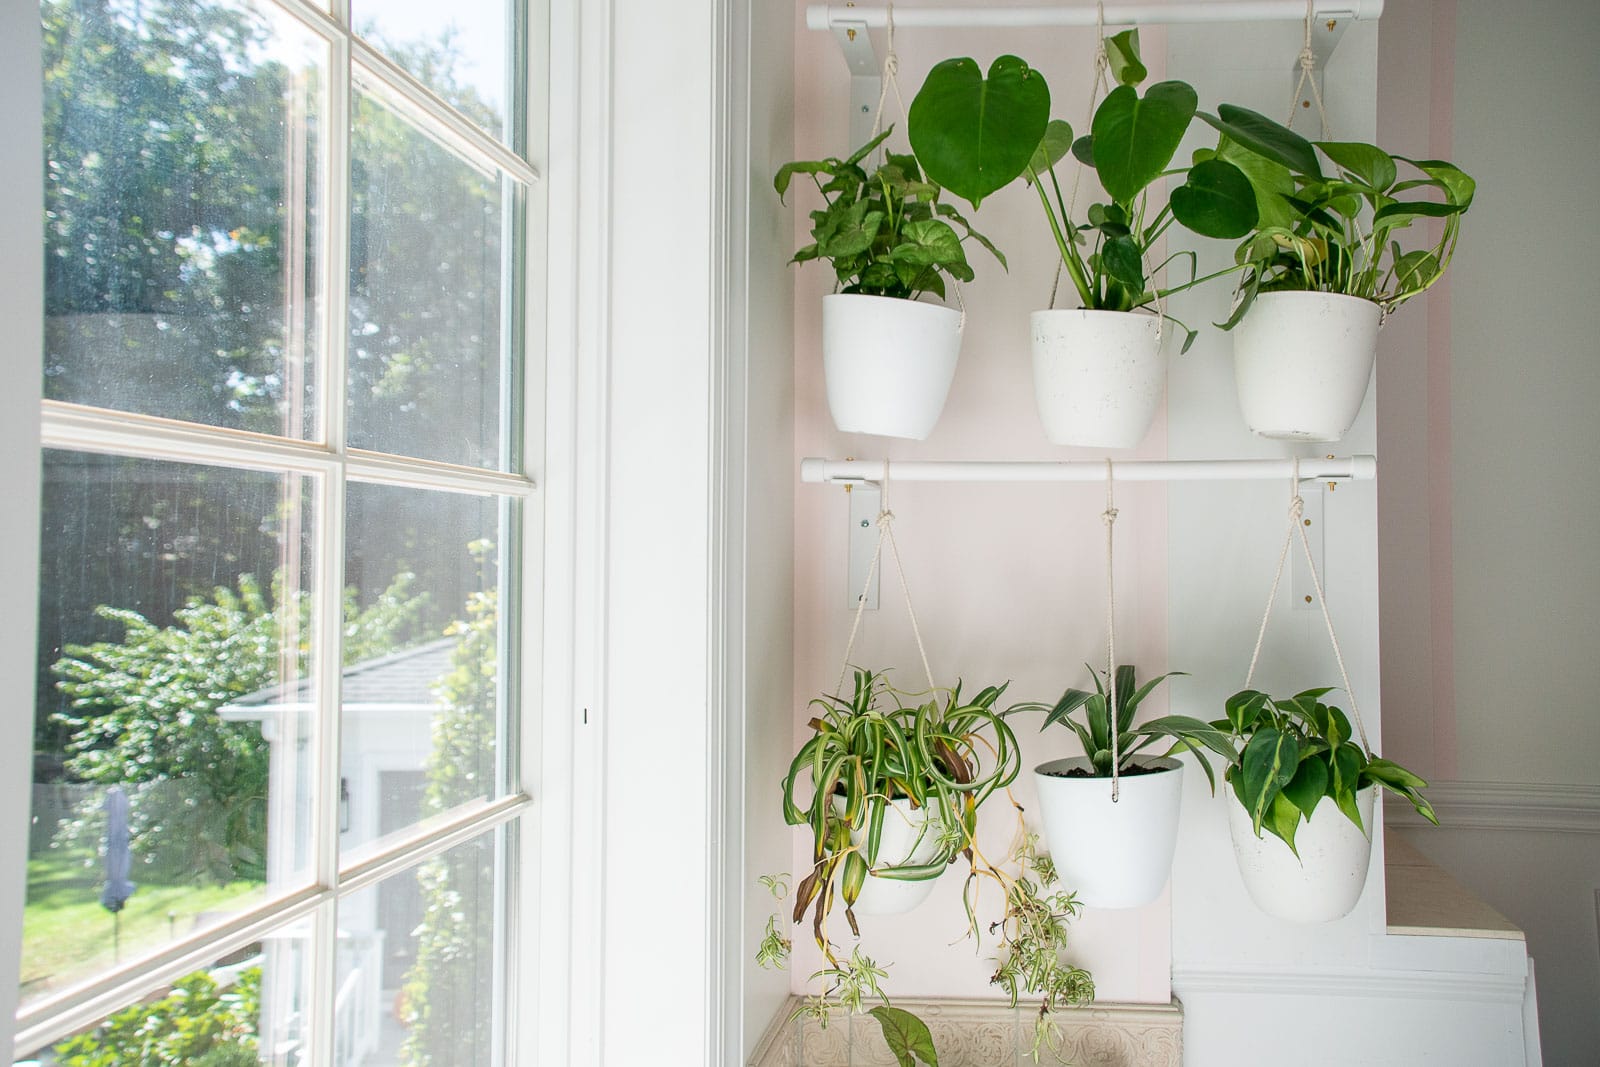
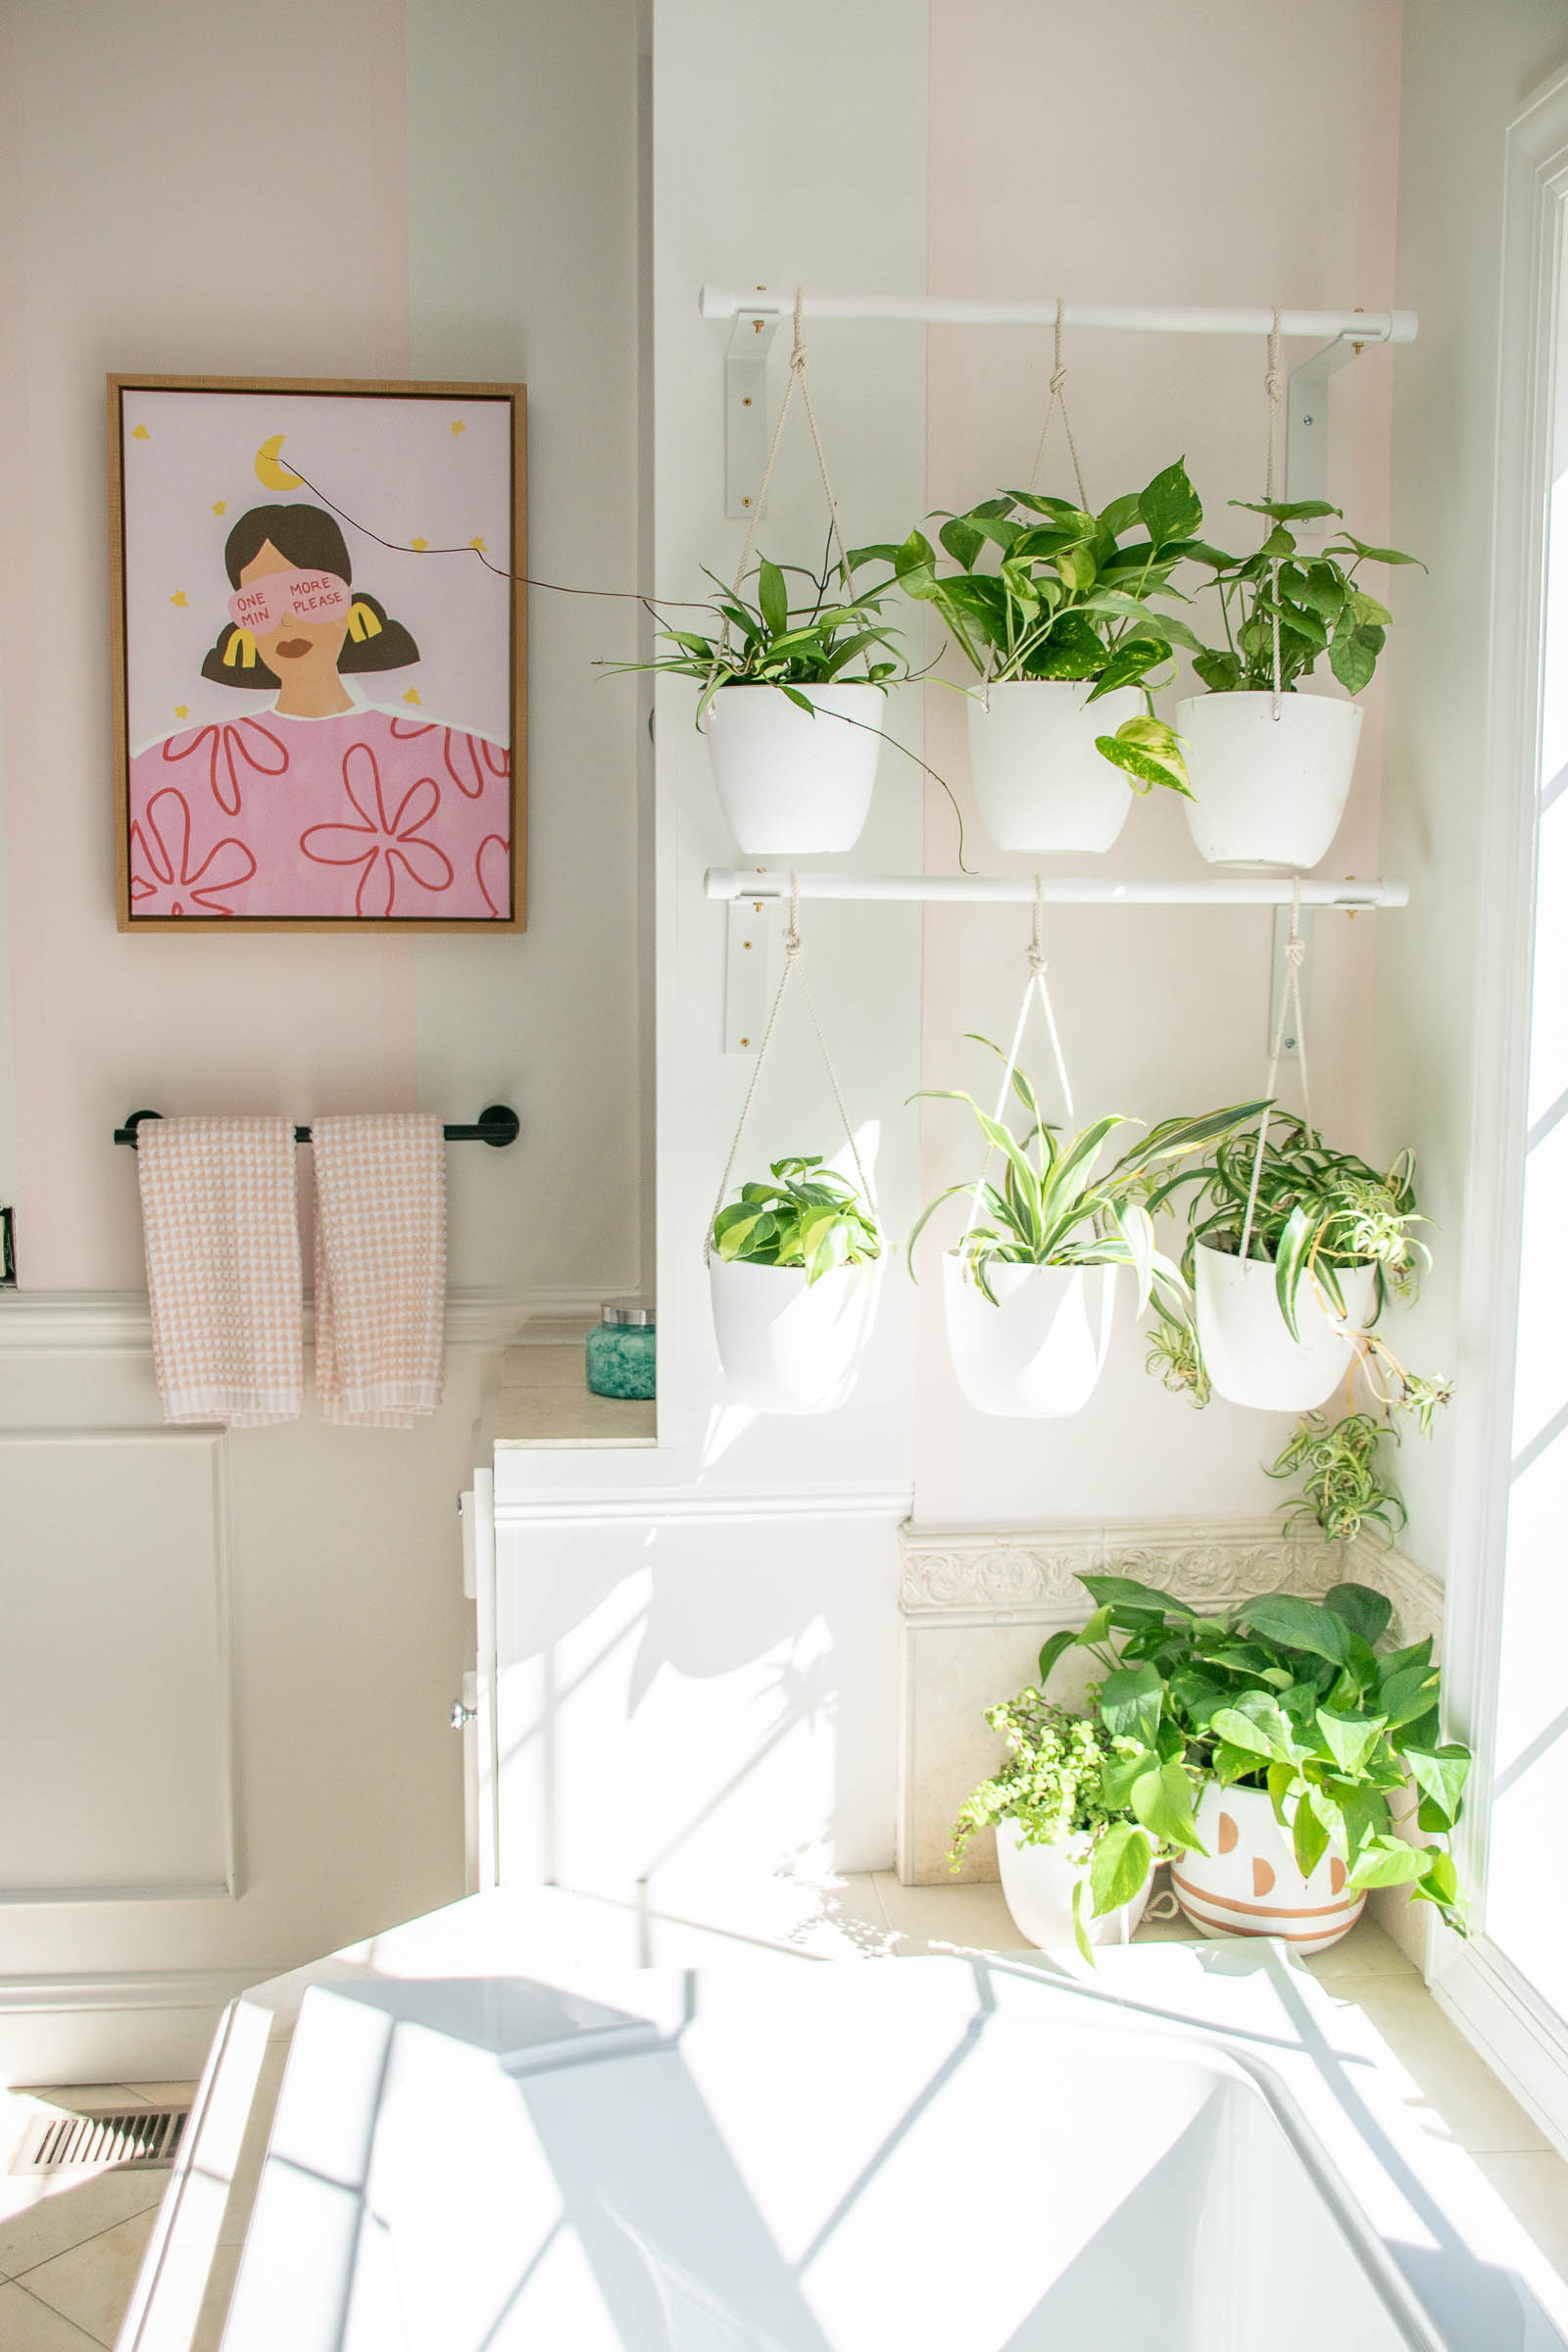
I can’t wait until these plants grow a little bit and begin to spill over their pots. Won’t that look great?
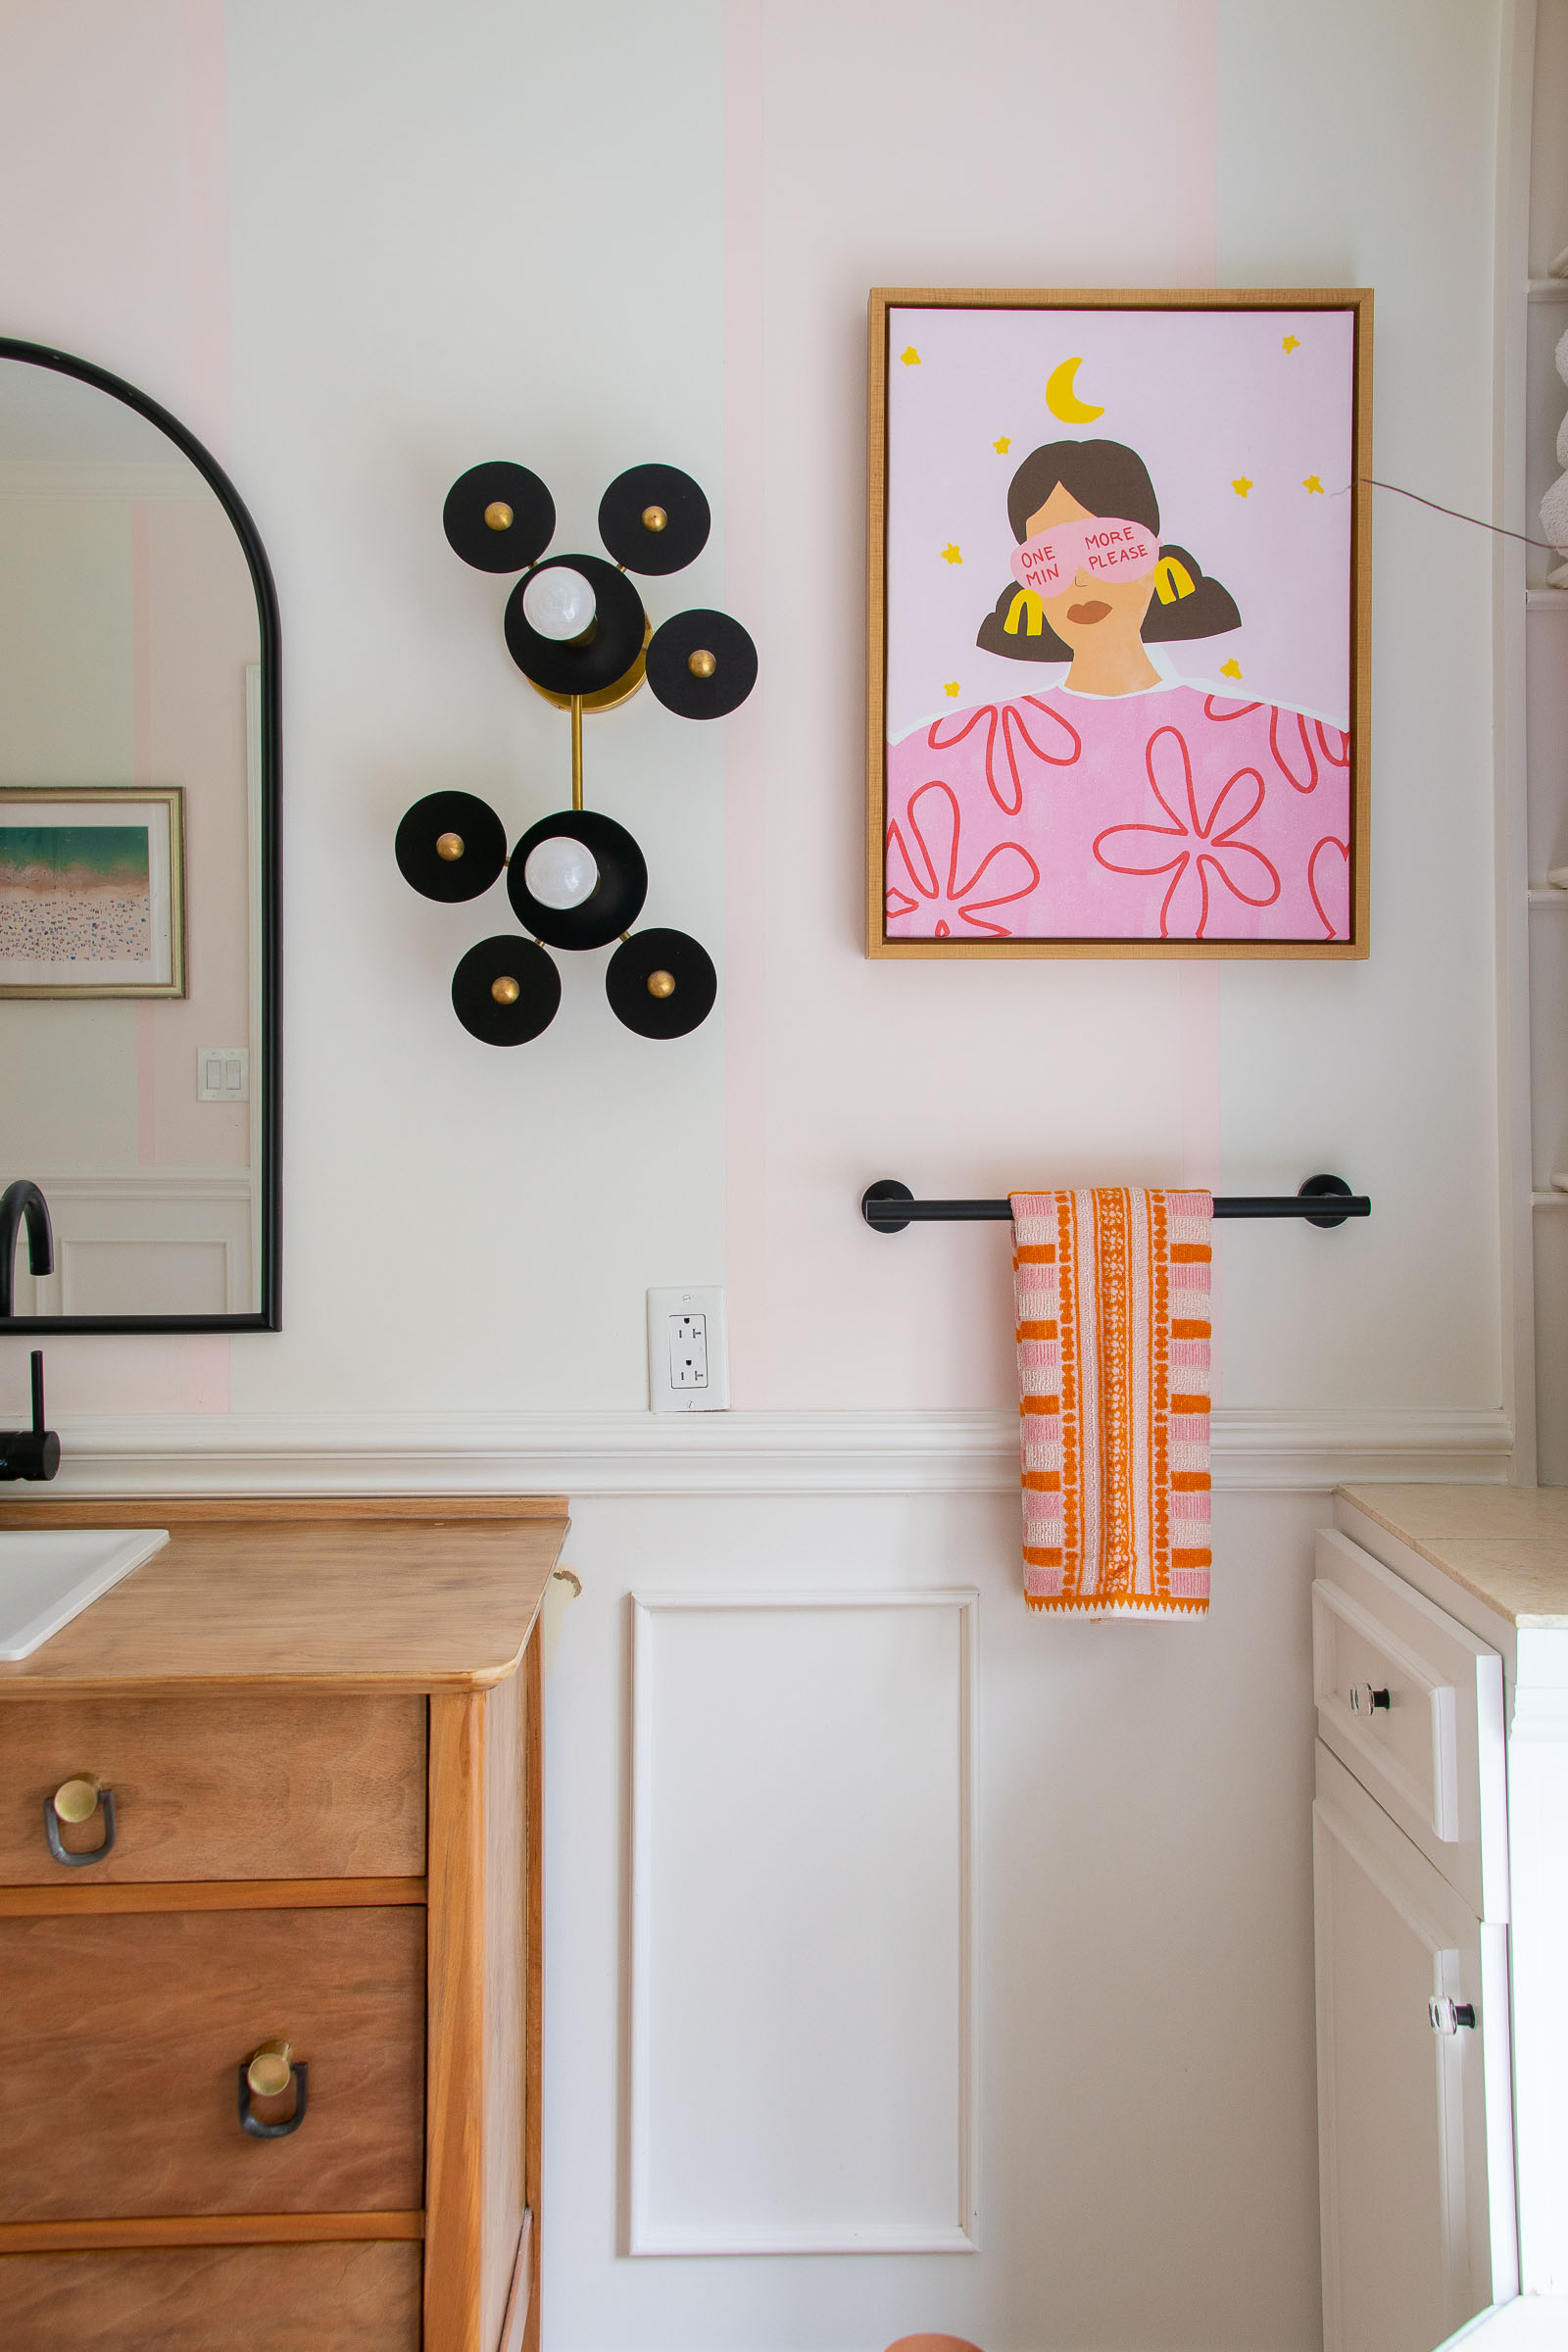
Step 3. Lighting
The sconces I put in when we moved are a favorite of mine, but they were a little small for the space and didn’t give off the best light for a bathroom. New lighting is SUCH an easy way to change a space so I reached out to Sazerac Stitches. Ironically they’re known for making the most fun and colorful lights, but I fell in love with the shape of these sconces. They were interesting and packed a visual punch AND picked up the black in the floor tile.
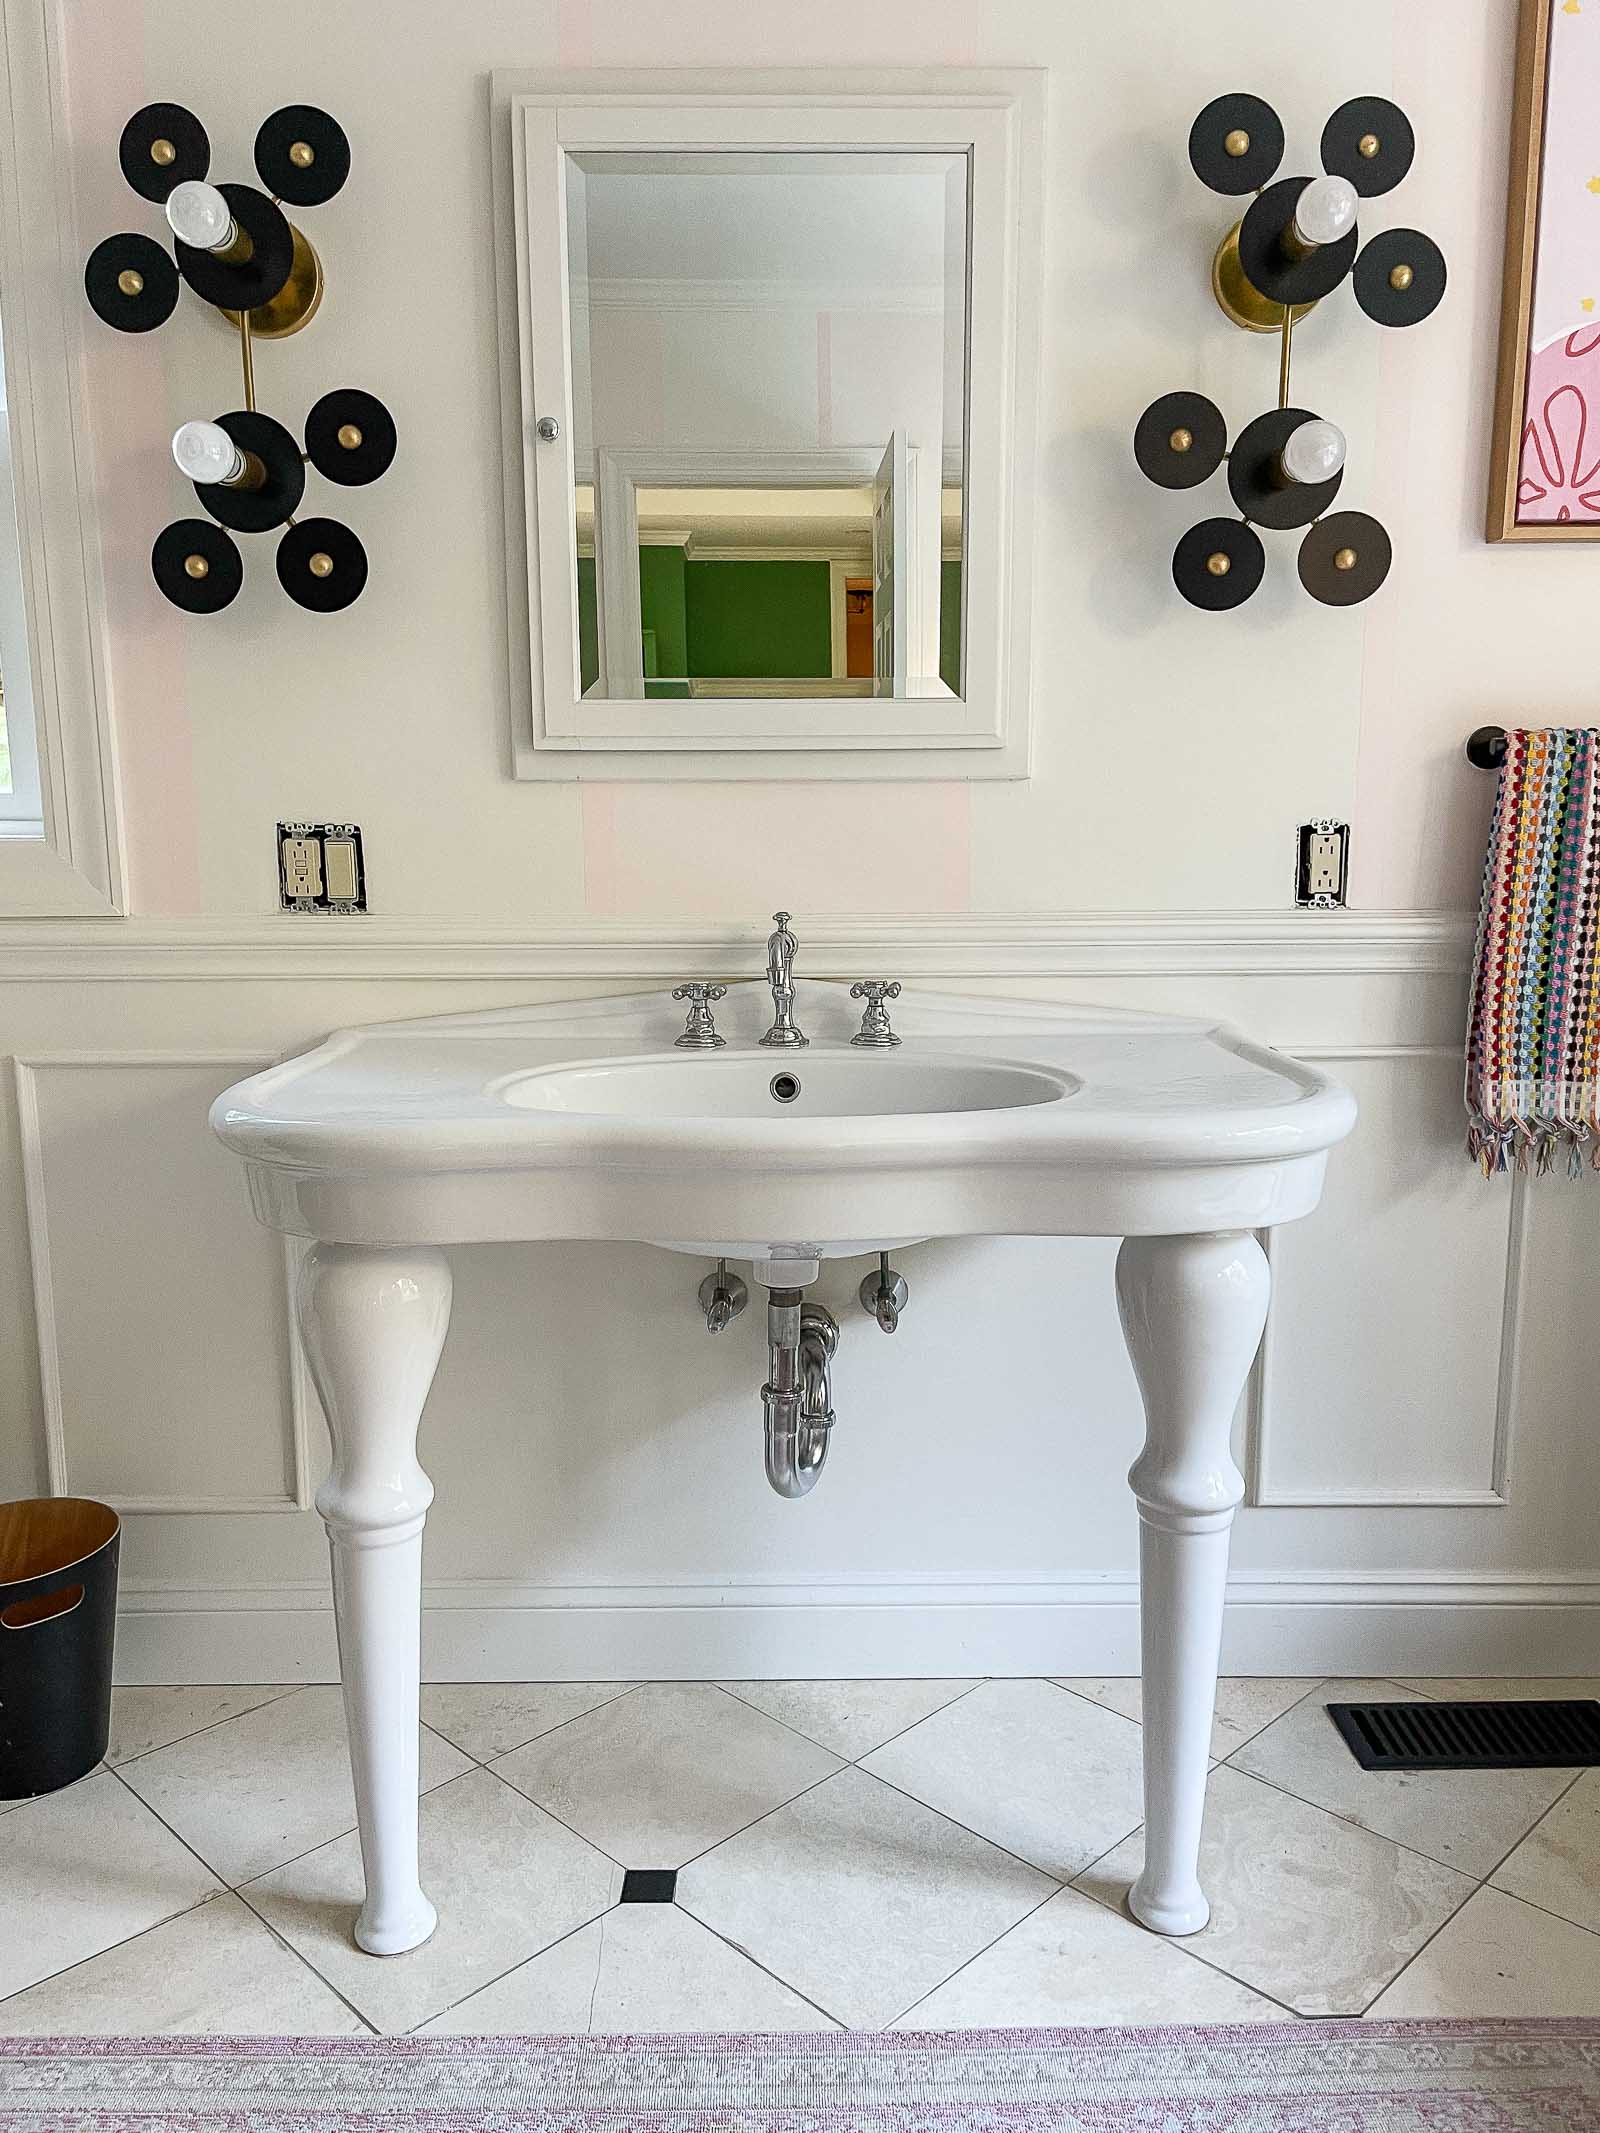
Step 4. The Vanity
This vanity MAKES the space in my opinion. The white ceramic (?) of the older vanity highlighted the beige tone of the floor whereas the warm wood tones of this repurposed dresser compliment and downplay the travertine. I wrote up the whole process of taking an old thrifted dresser and turning it into a working vanity in this post here. If I haven’t said it already, I am beyond proud of this project. I’ve always wanted to turn a dresser into a vanity but I never could have imagined how perfect this would look in the room!

 Step 5. Pivot: Drywall

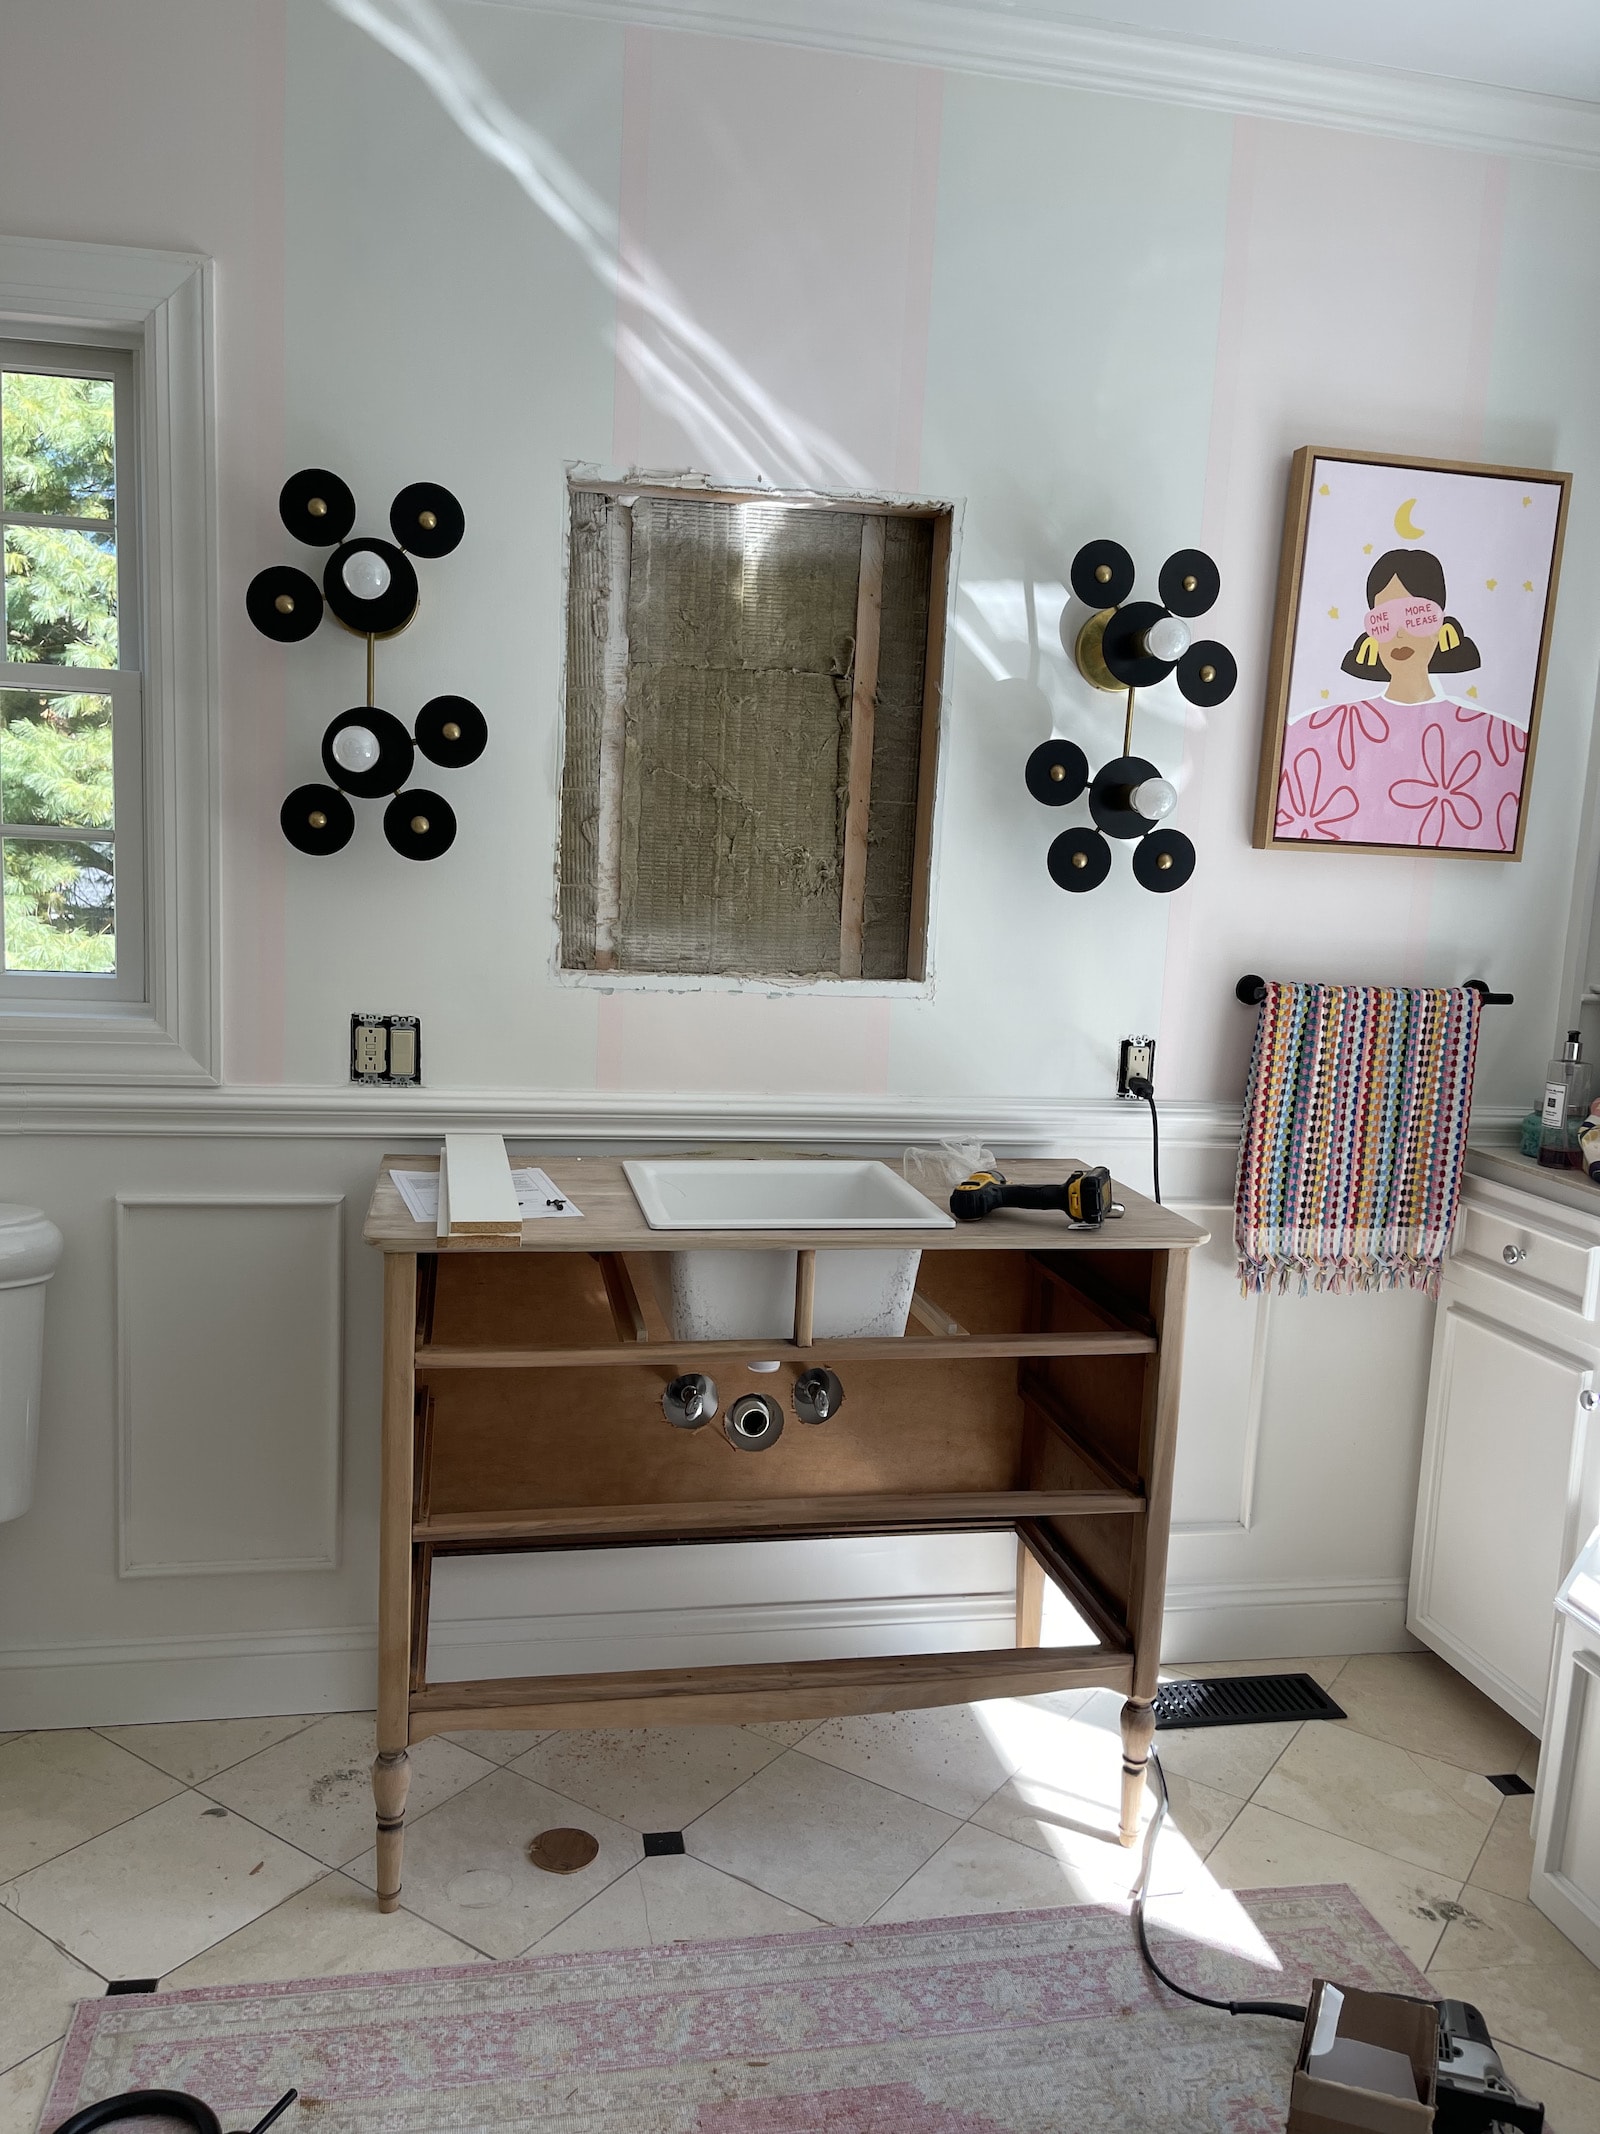 Step 5. Pivot: Drywall
When I installed the vanity, I realized that the medicine cabinet couldn’t open because of the new (taller) Elkay faucet. I made the decision to remove the medicine cabinet entirely and patch that area with drywall. Drywall is NOT my strong suit, but the gist is that you need to install boards on which you can screw in the drywall. I screwed a new frame into the old frame where the medicine cabinet had been and then screwed the drywall in place. WIth tape and thinset, I tried my best to smooth out the seams, sand and repeat. It’s far from perfect, but… I don’t think the imperfections are super obvious either! I primed and repainted the stripe onto the drywall and then hung that contemporary black mirror. Just like that, the room feels like a totally different space!

The dresser cost me $150, I was gifted the sink and faucet, I probably spent $50 on the plant wall and another $50 on paint supplies so that’s… under $250 for a full-ish room makeover! I’m going to call that a W-I-N!

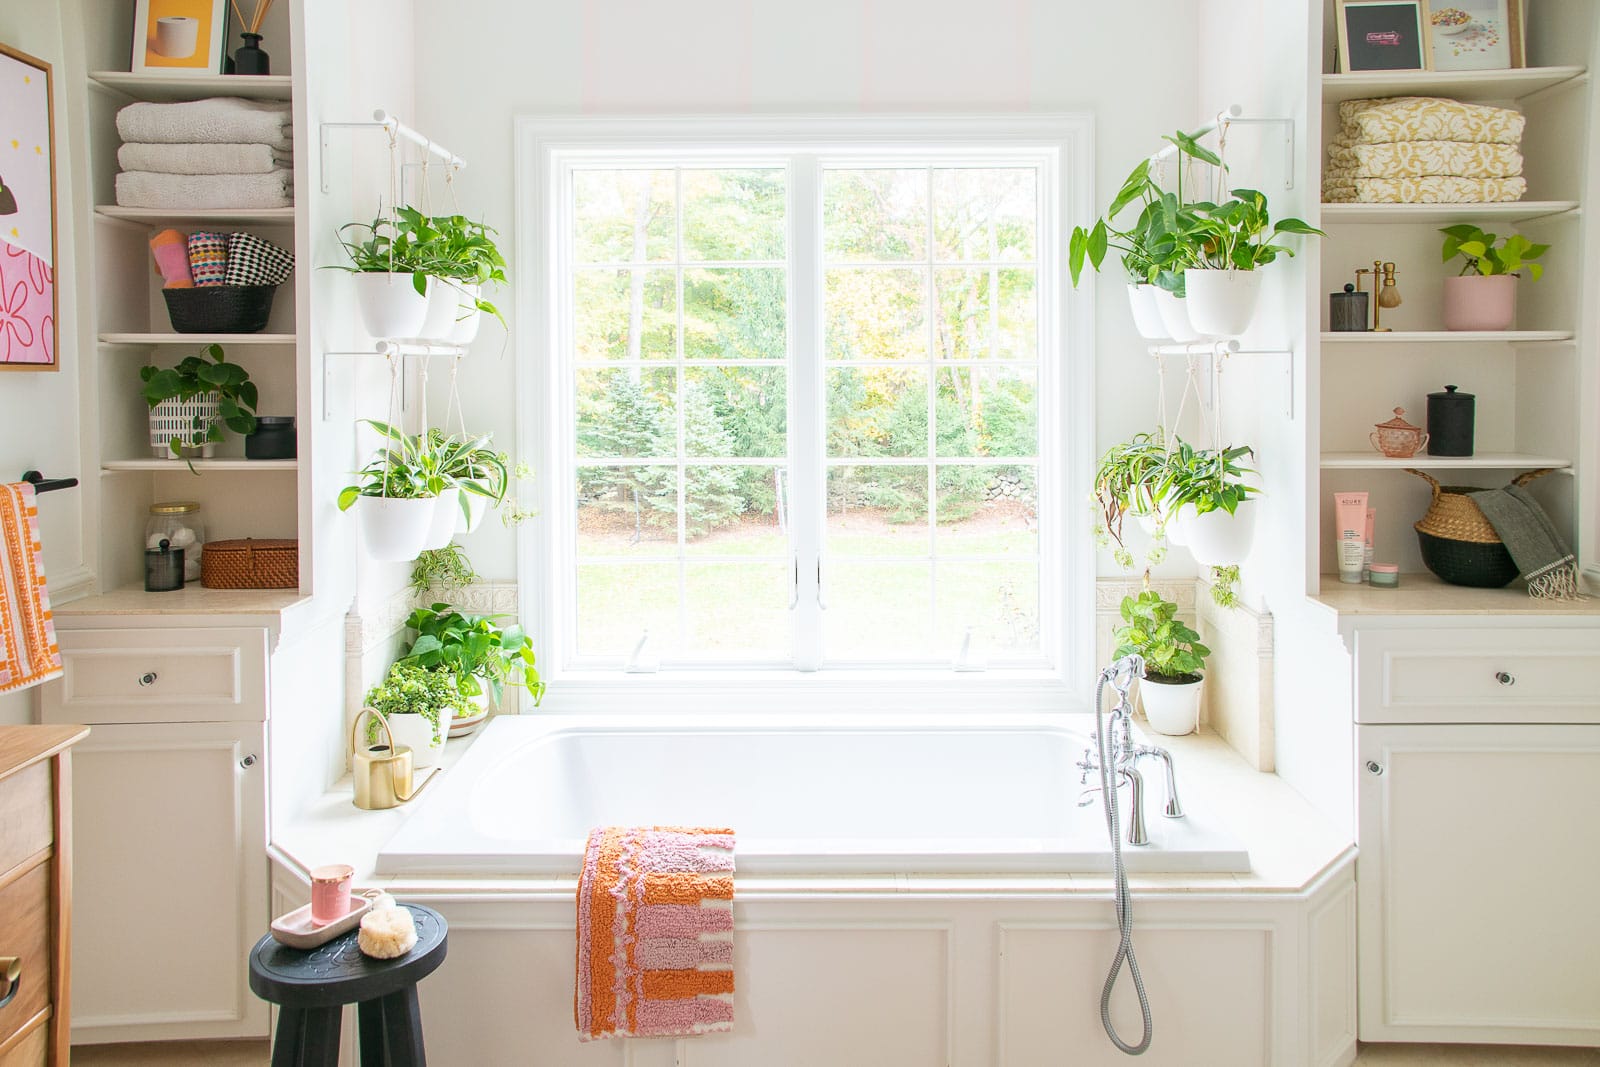
Reminder this was how the space looked when I started.
And this is how it looks now!
Bathroom Sources:
- Dresser: Thrifted
- Sink
- Faucet
- Vanity Knobs
- Mirror (similar to this… mine is from Homegoods)
- Rug
- Sconces
- Hand Towel
- Artwork
Anything else I forgot, just drop me a comment!

Hello Charlotte, I’ve been looking forward to your room makeovers. I really love the transformation of the bathroom, it doesn’t look like a budget makeover at all. You are so talented!
Thank you, Samantha! I really appreciate it! xx
Great post! A budget bathroom makeover proves you don’t need to spend a lot to make a big impact. With smart choices and a bit of creativity, you can refresh the space and add style without breaking the bank. Love the transformation!