
One Room Challenge Week 3: DIY Bubble Chandelier and a Bench
Psssst… this post *might* contain affiliate links: see my disclosure here.
ORC Week 3… Adding a Chandelier and a DIY Bench
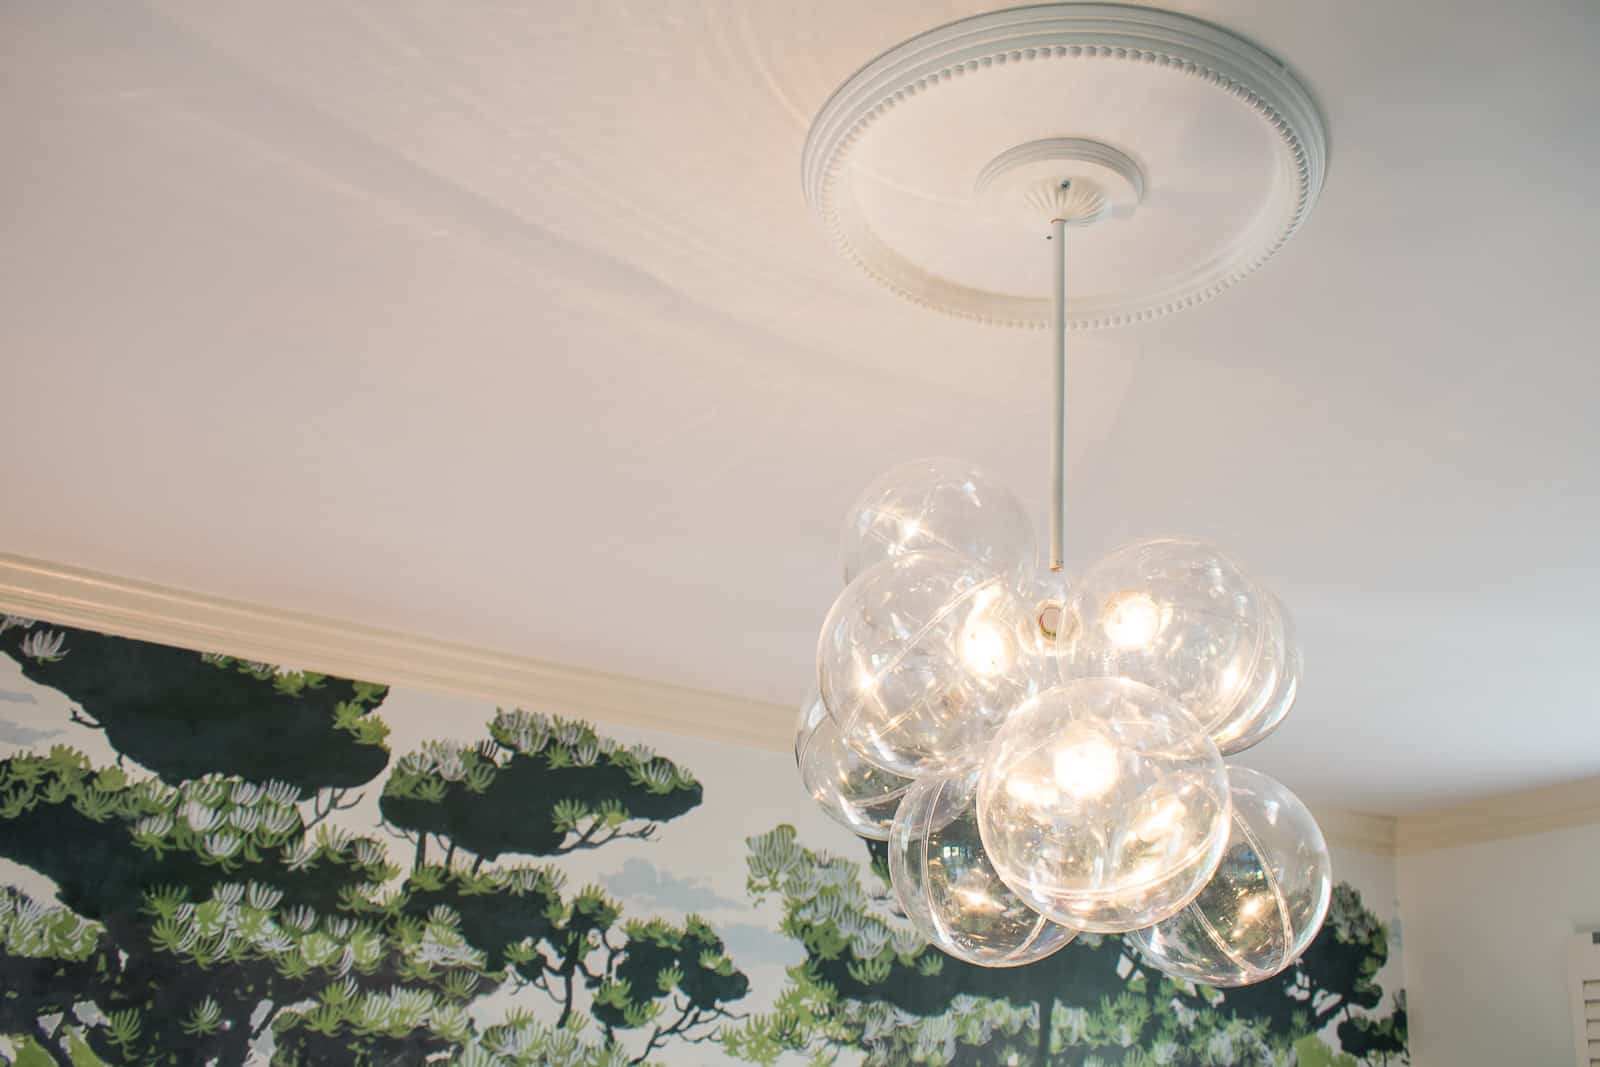
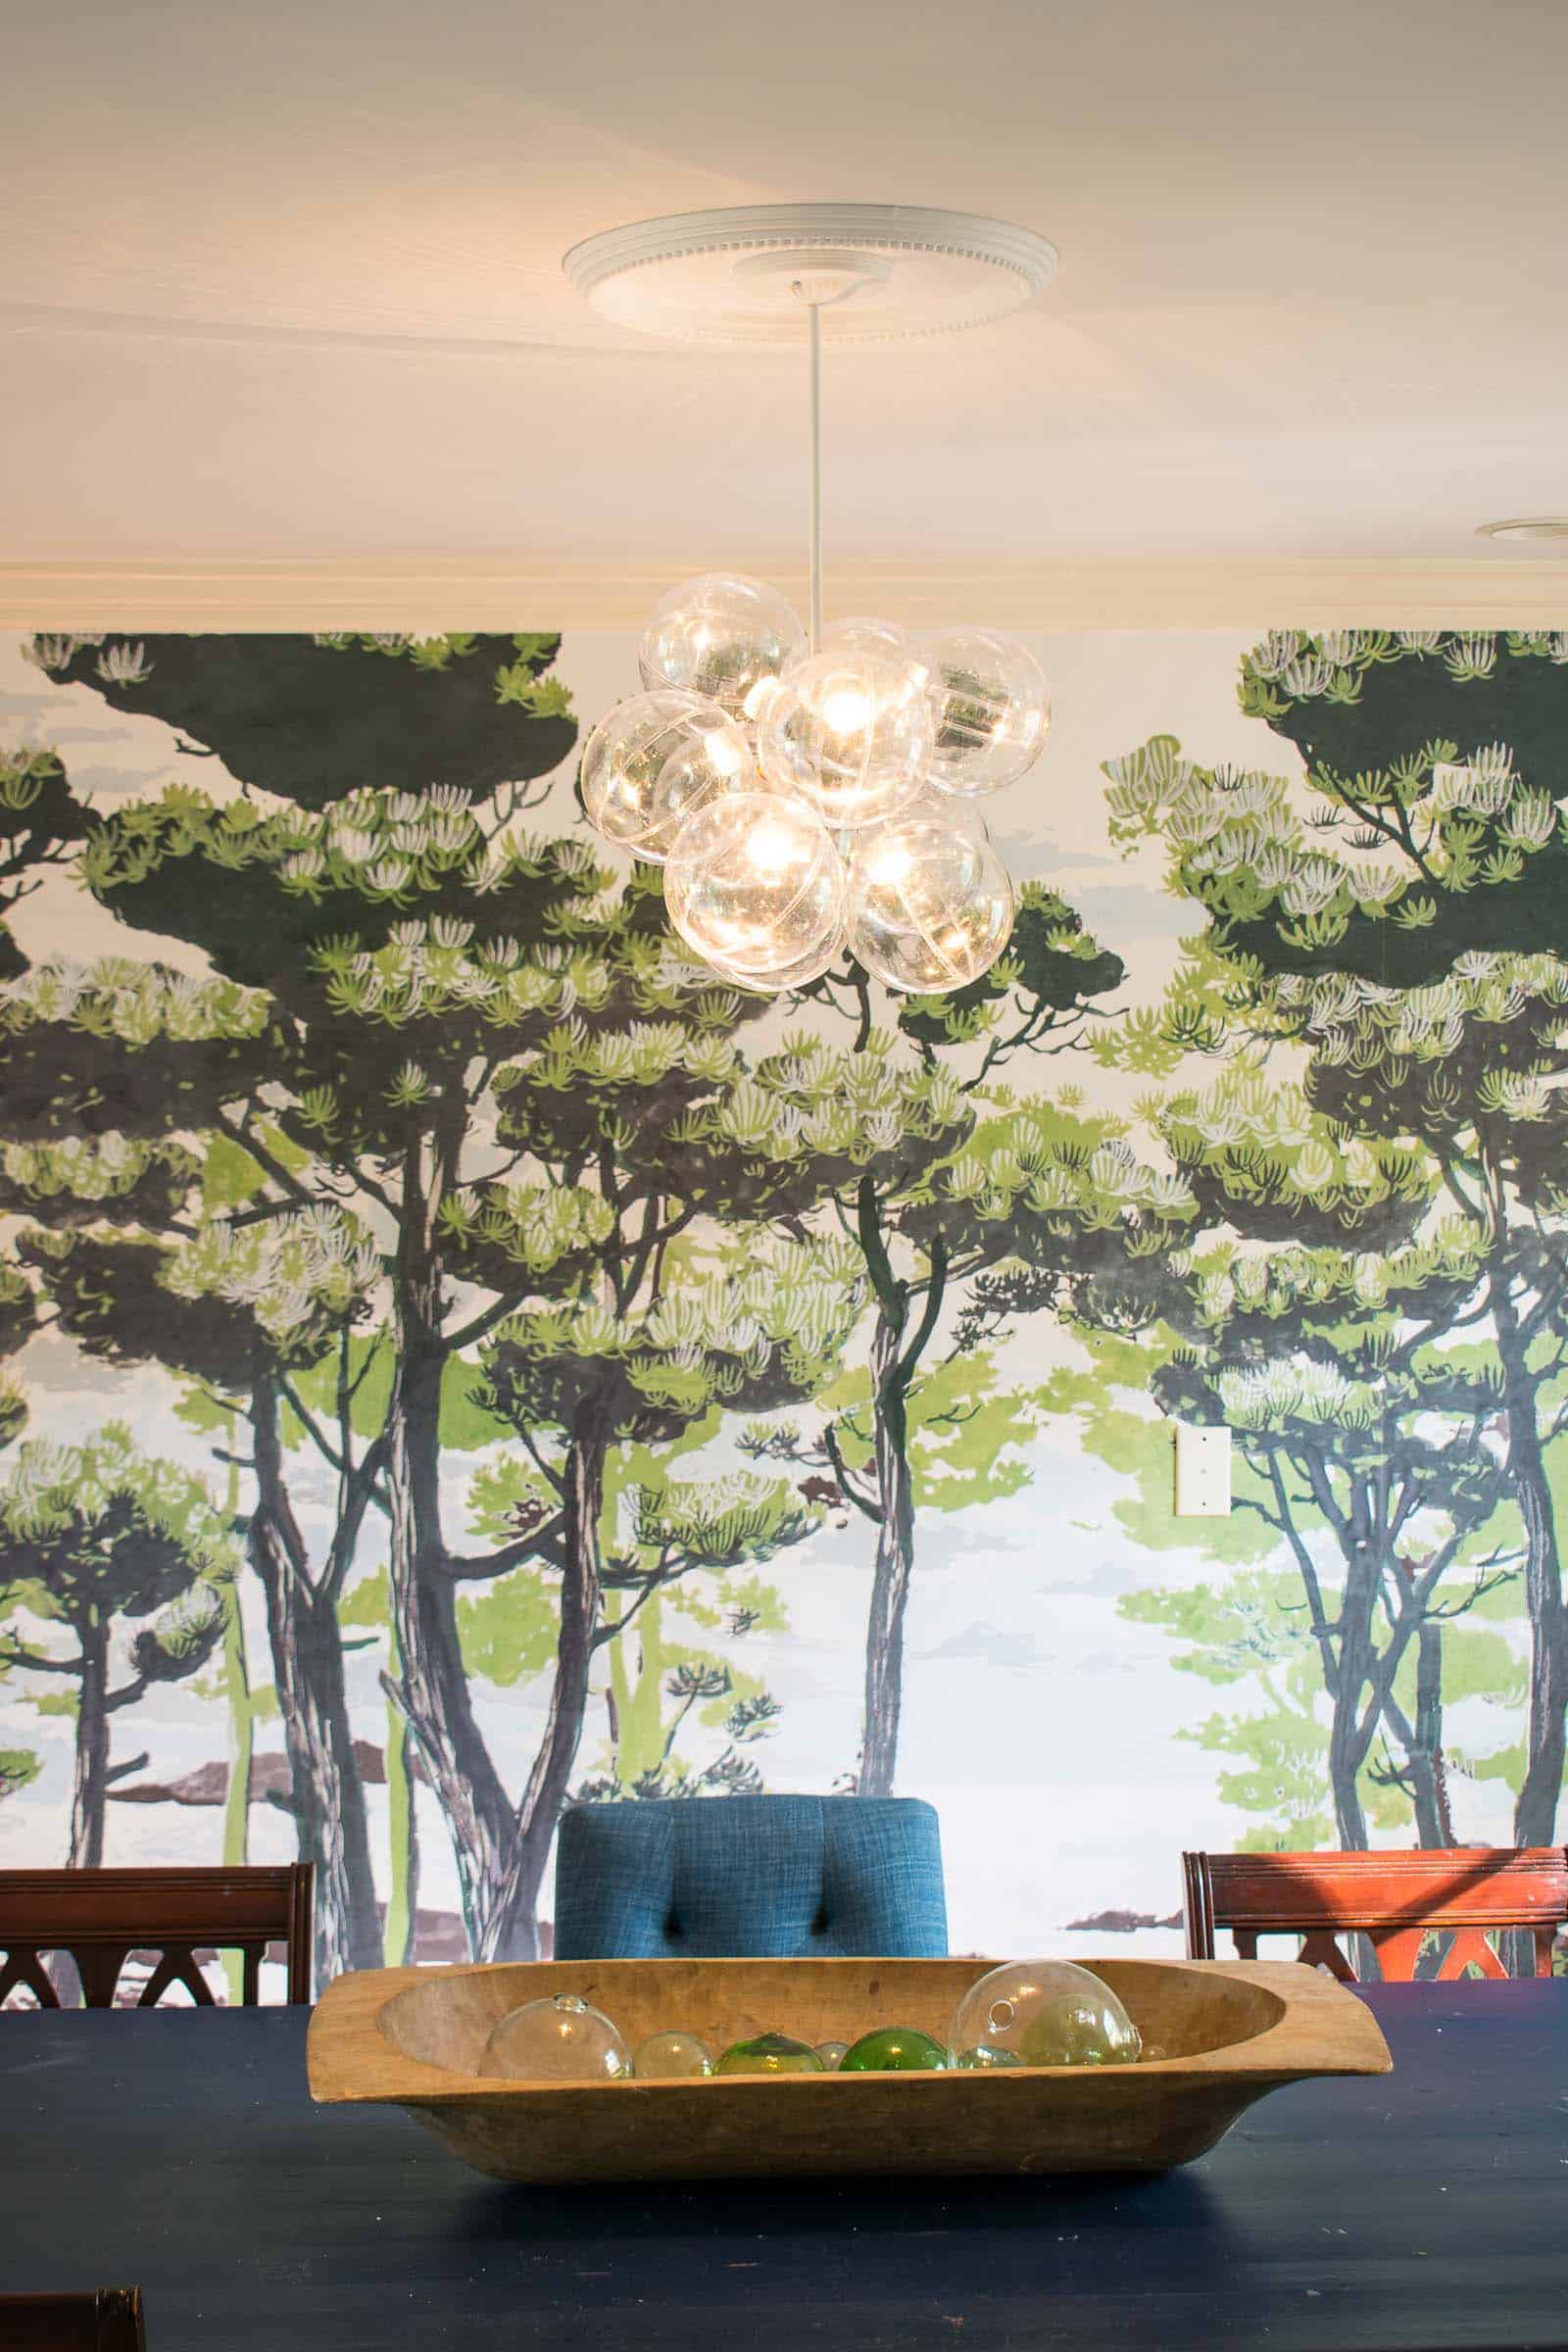
This week I figured out a way to make an imitation bubble glass chandelier that requires… no electricity.
I know I sound like a broken record, but as I watch my fellow designers ripping apart kitchens and rebuilding bathrooms, I feel compelled to say that we’re currently renting so there’s only so much I can tackle over here at chez Smith. I’ve always LOVED a good statement light, but alas… that’s not going to happen for this dining room makeover. And then I had an idea…
Shop my favorites!
DIY (Non-Electric) Bubble Chandelier
First, let’s start with what I love about this style. 1. It’s fun. 2. It doesn’t take up a ton of visual space which is great for our room with very low ceilings. 3. It’s ‘imperfect’… in other words there’s no need for precision. (Precision and I don’t get along very well…) Now let’s get into the challenges: We don’t have an outlet above our dining room table and we don’t have an outlet above our dining room table.
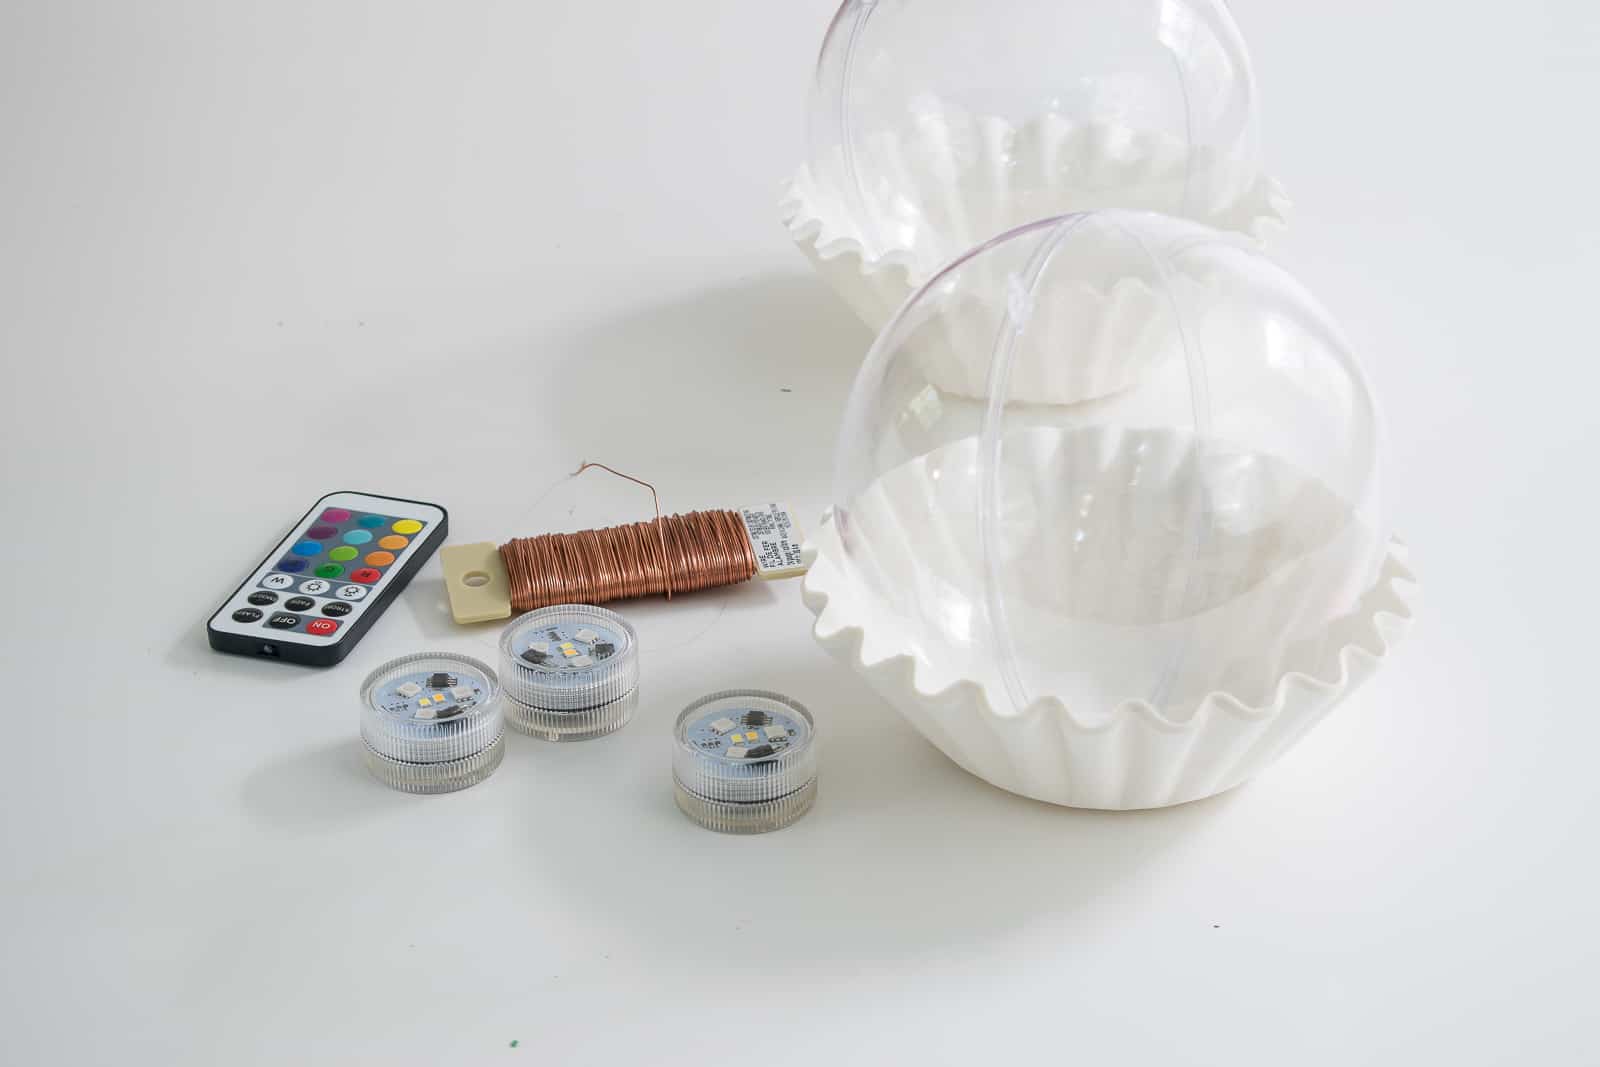
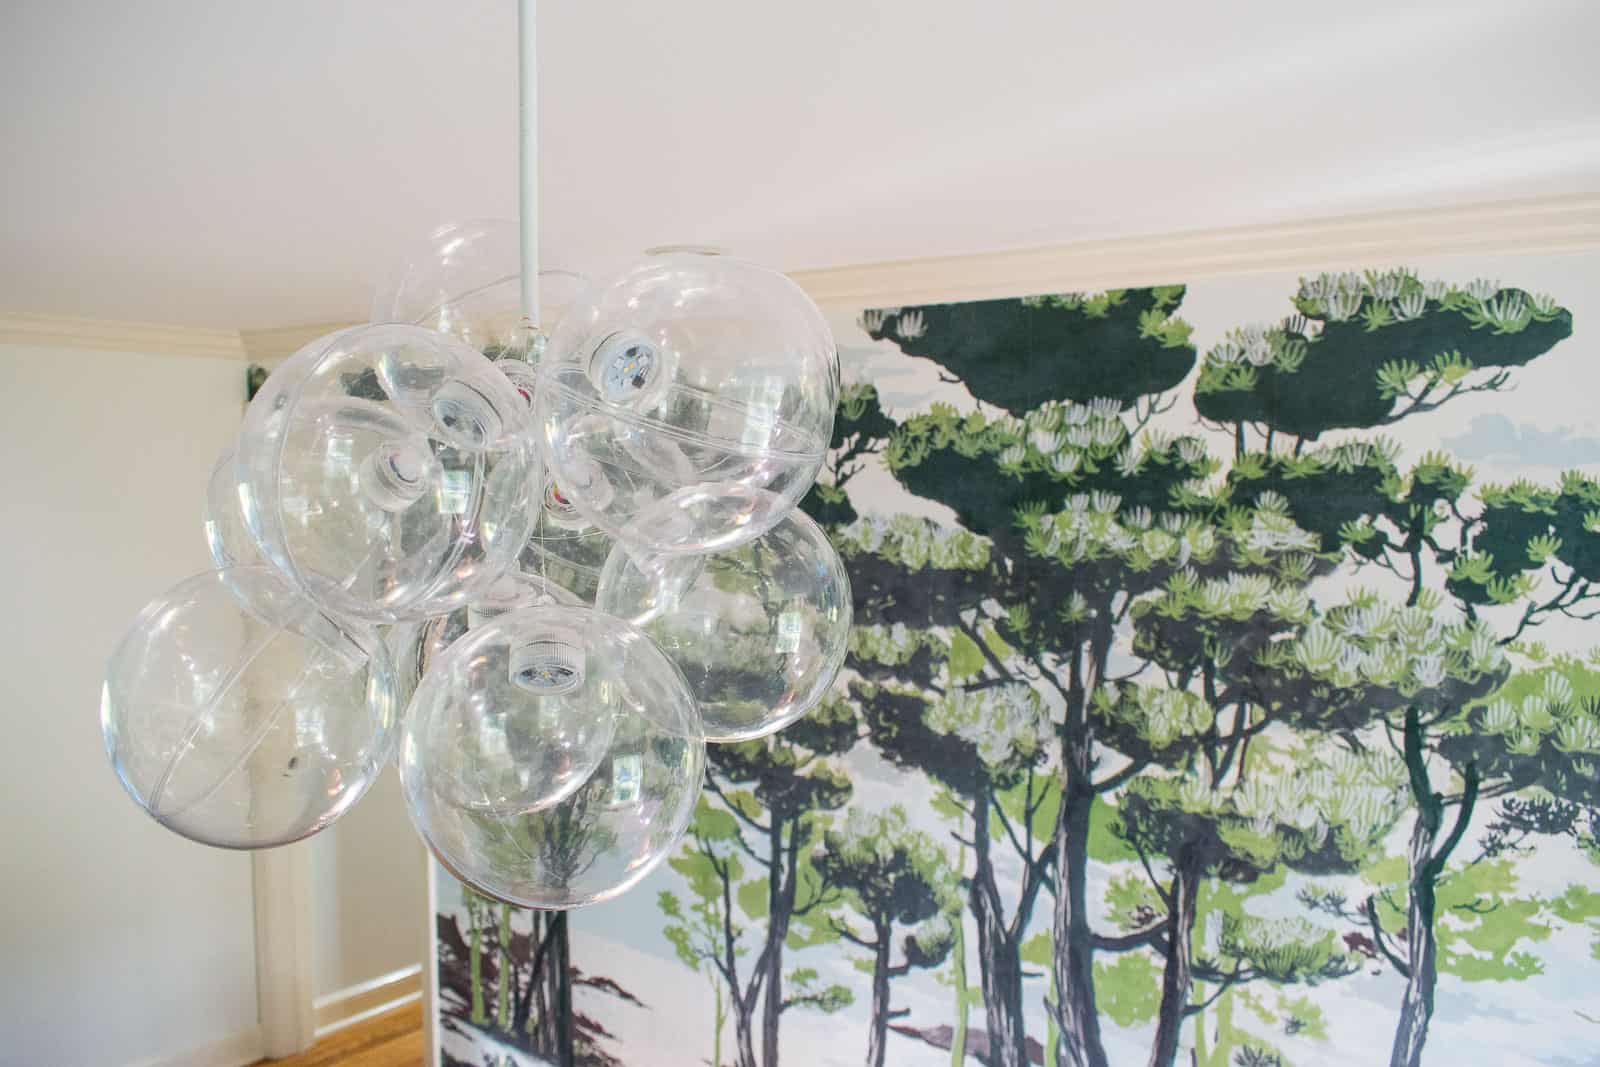
At first I considered a fixture that I could rig with LED puck lights like this, but none of the ones I loved seemed like they would have anywhere to attach the lights. So then I started thinking about fixtures that might be lightweight and it occurred to me that it might look amazing to fill clear Christmas ornaments with LED micro lights. And THEN I saw these large acrylic balls and realized I could just make regular ol’ bubble chandelier!
It took a few different false starts before I figured it out, but I think it looks great so I’m declaring this one a success. Enough of the talk talk talk…. here’s how I did it!
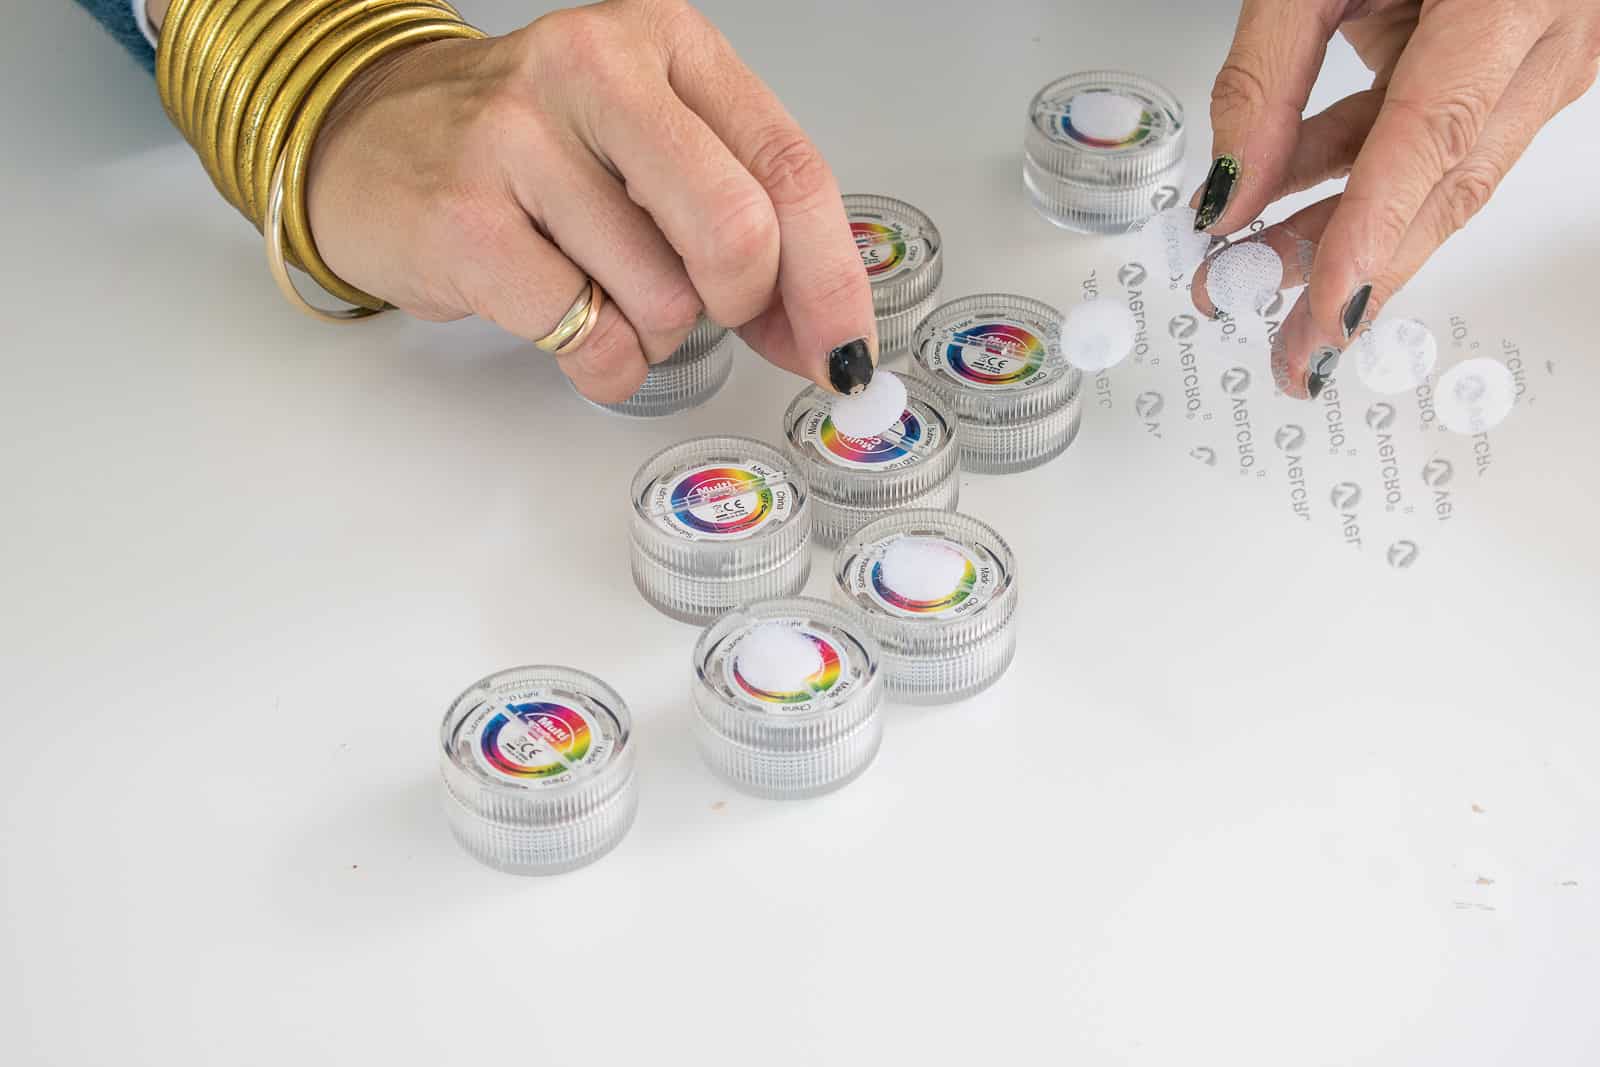
Step 1. Add lights
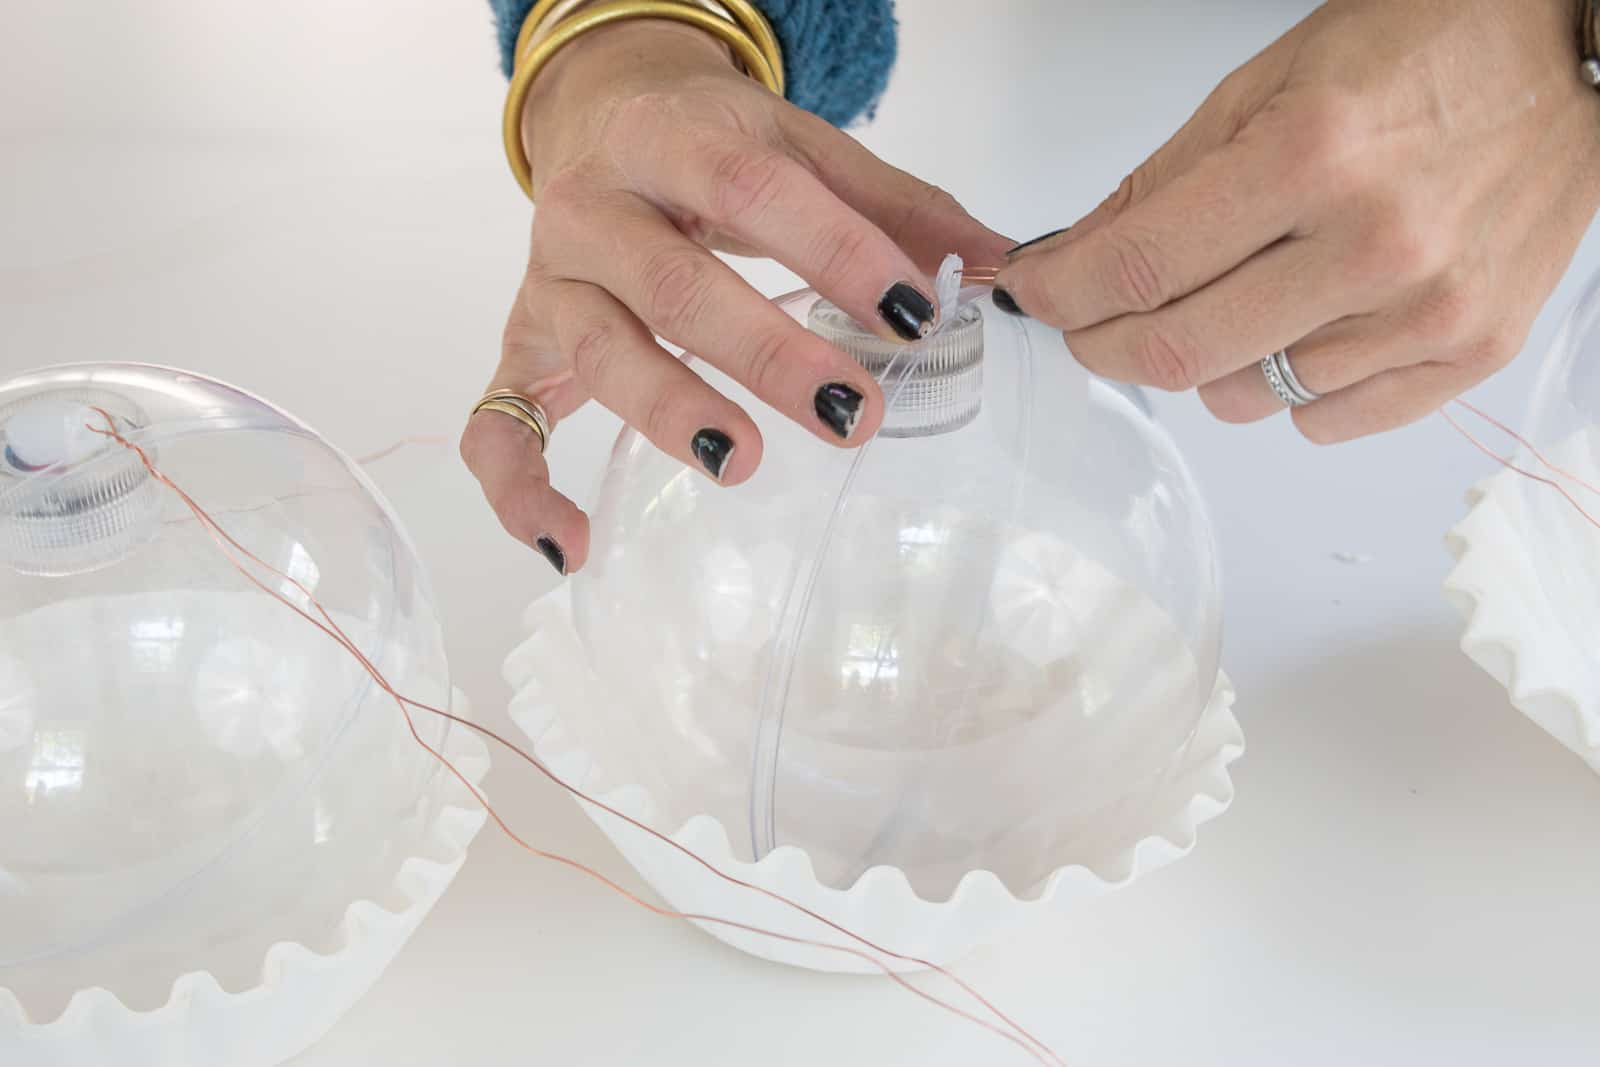
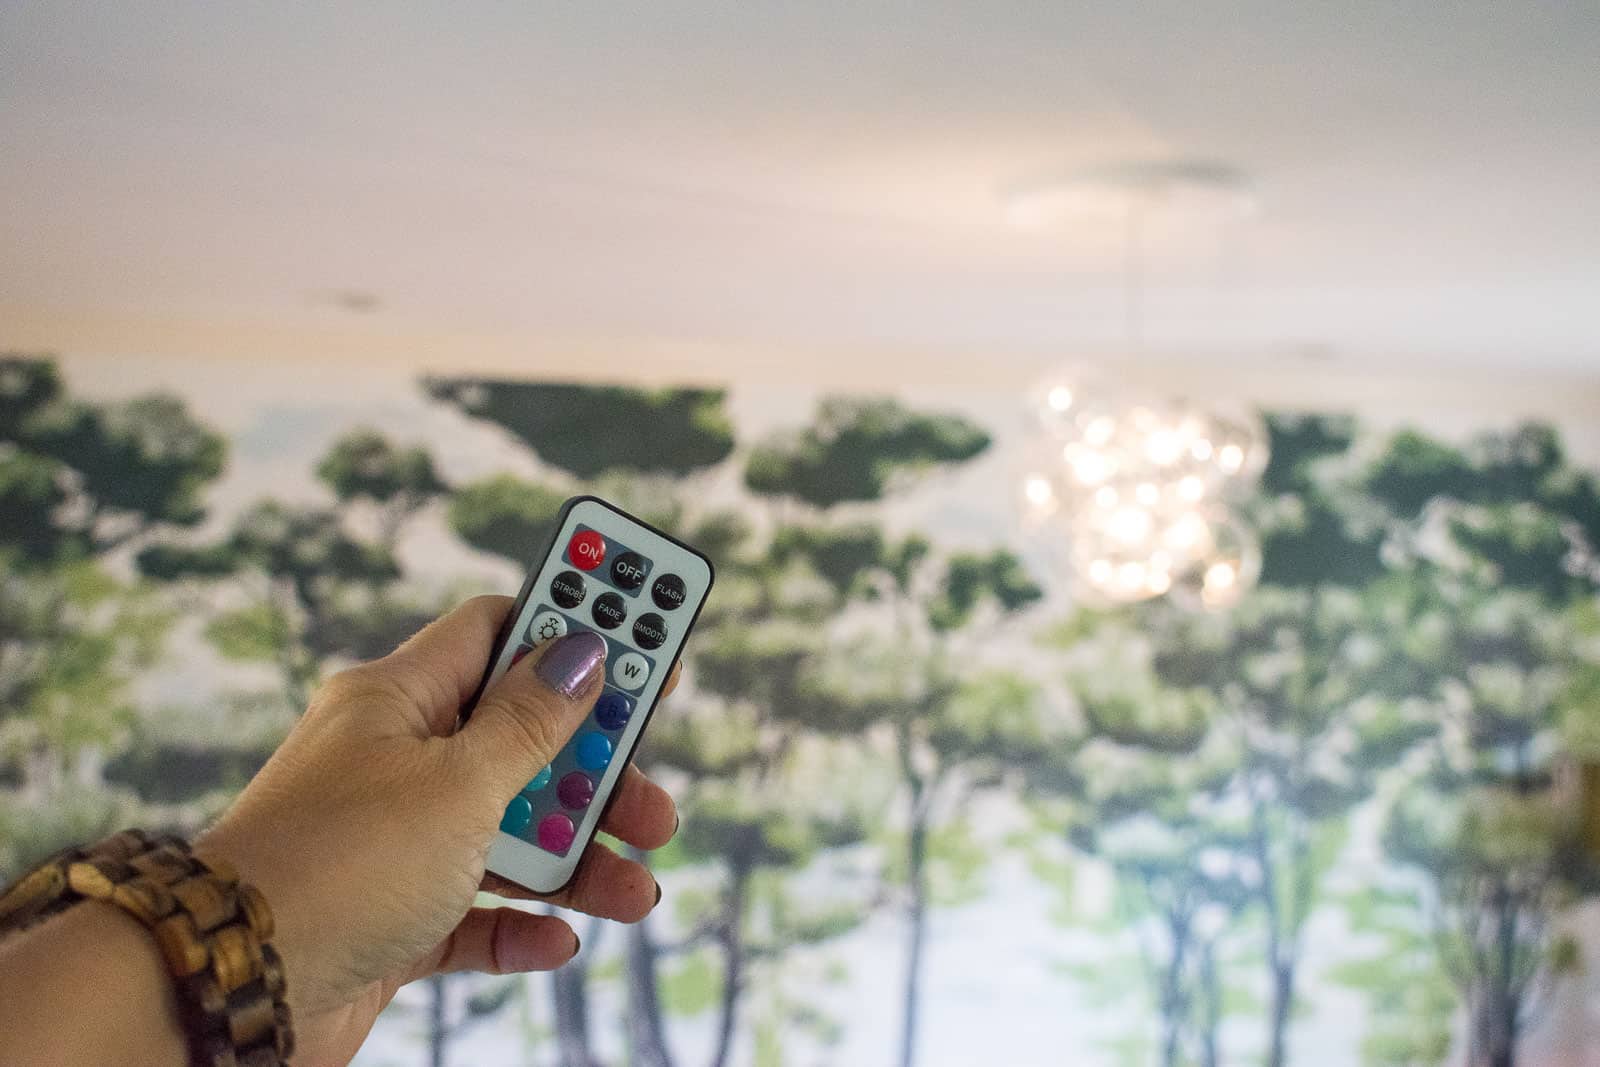
I used these mini LED lights because they were little and controlled by a remote (essential detail). I used round adhesive velcro dots to adhere the LED light to the underside of the plastic ball.
Step 2. String the Plastic Balls
Originally I was planning to have each of the orbs connected to a small copper pipe that I was going to spray paint so I wrapped a thin gauge wire around each one (hence the wire in the photo below). Buuuut… when I looked back at some inspo images, the ones I liked the most were clusters of glass orbs around a single center post. So I ditched the wire and replaced with monofilament. I tied triple knots around each plastic ball and left about a yard of monofilament.
Step 3. Cut and Paint the Copper Pipe
I still used the copper pipe but just on 12″ length for the center. I spray painted it white so it would blend in with the ceiling.
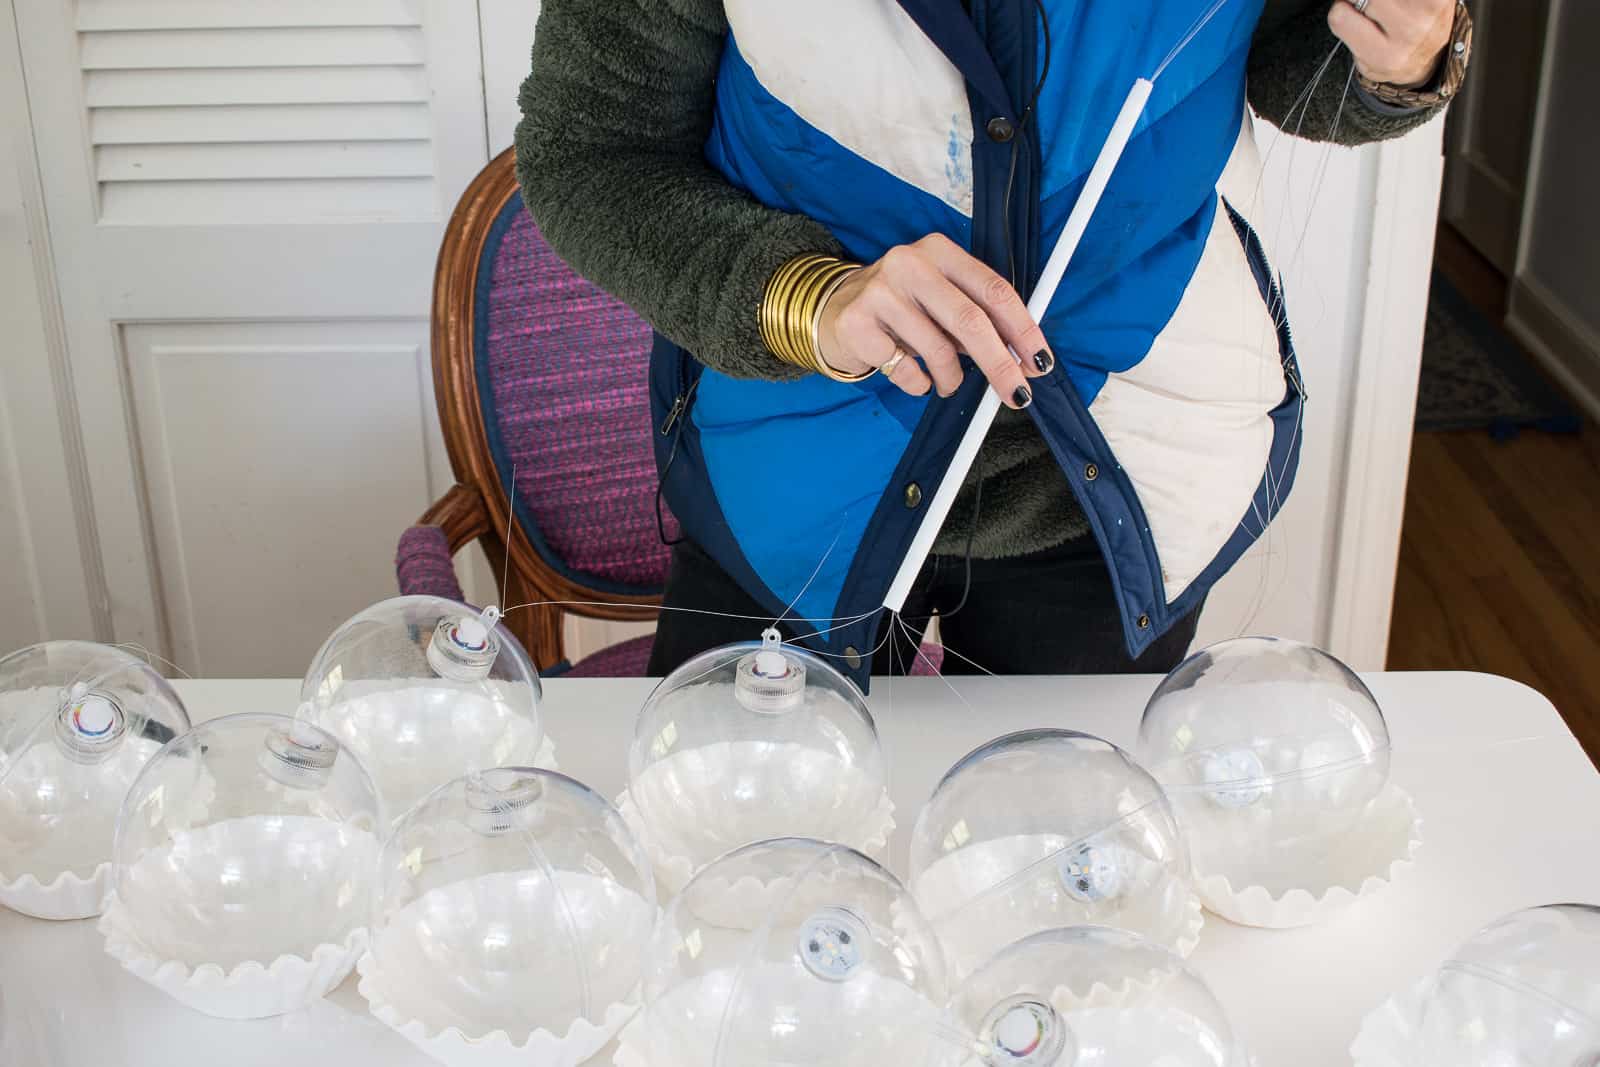
Step 4. String the Fixture
Thread the monofilament through the pipe. You will have a handful of monofilament coming out of the pipe. At this point, you also need to consider how this will hang in your room. I grabbed a basic pendant light kit so made sure to string the monofilament through the canopy and the mounting bar before Step 5.
Step 5. Determine the length of each orb
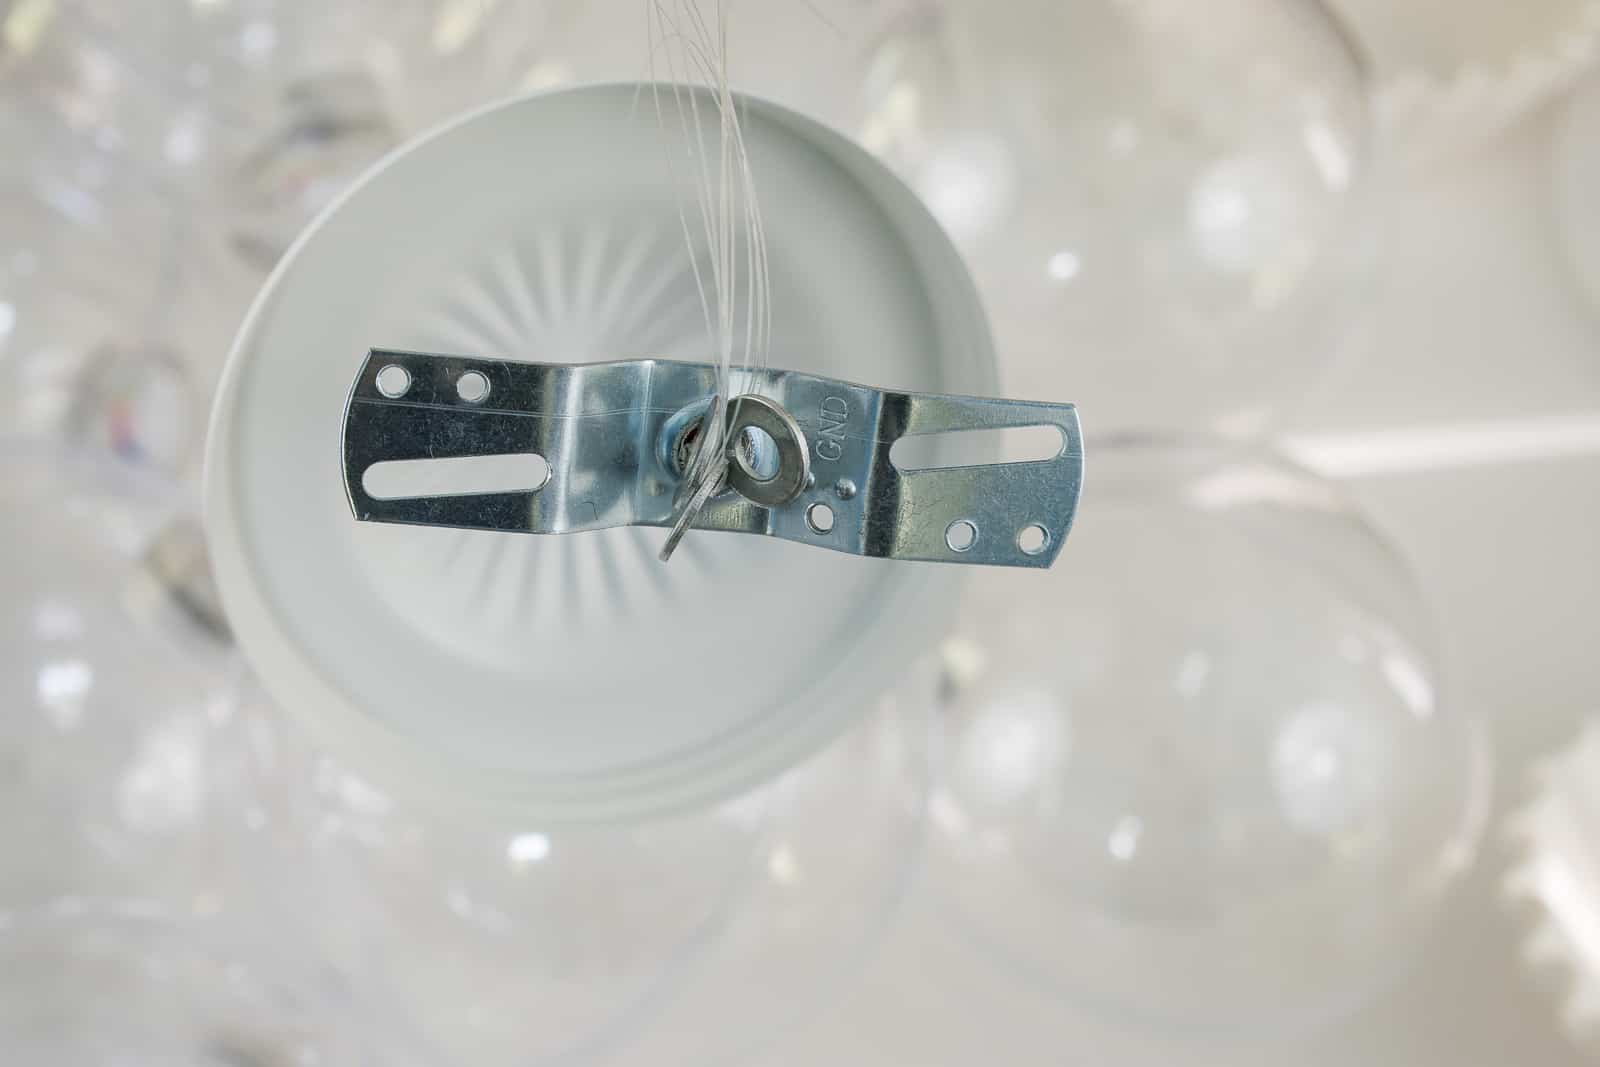
A second set of hands would have made this next step easier by far. I held all the monofilament in one hand and individually adjusted each strand to get a sense of where I wanted each orb to hang. My chandelier has 10 orbs so I divided the orbs into groups of 3, 3 and then 4. Once I found the right length, I tied each group of monofilament onto a metal washer. The washer keeps the monofilament from pulling through the copper tube, but is think enough not to get in the way of the mounting bracket.
Step 6. Mount on the ceiling
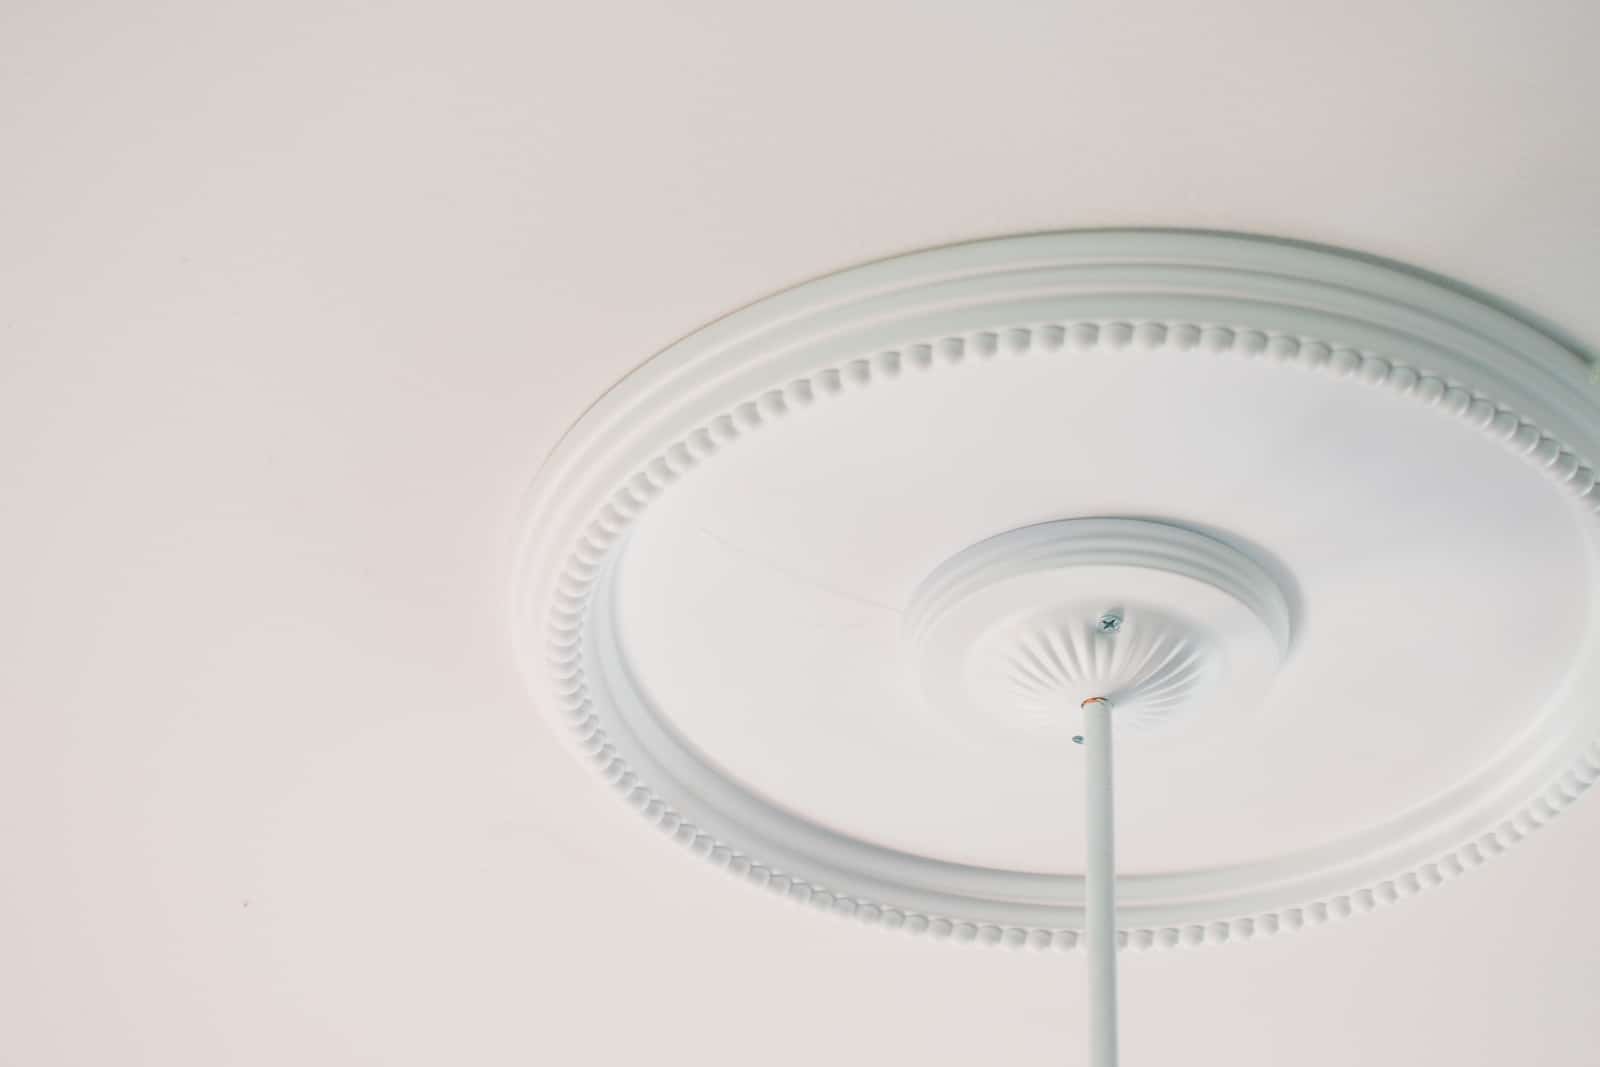
At this stage, I also added a ceiling medallion to make the light fixture feel a bit more formal and legit. First, I use my stud finder to find out where the studs in the ceiling were. I drilled up through the mounting plate into the studs. Then I secure the canopy with two more screws which pinched the ceiling medallion in place!
To use I simply grab the remote and all of my lights can turn on or off! The plastic orbs come apart just enough to reach in and remove the mini puck lights in case you need to replace or simply tighten their connection.
Is this as wonderful as an actual glass bubble light? Obviously not. But from the doorway does it look a lot like a bubble chandelier and help define the dining room space in the new house? YES! I’d say it does!
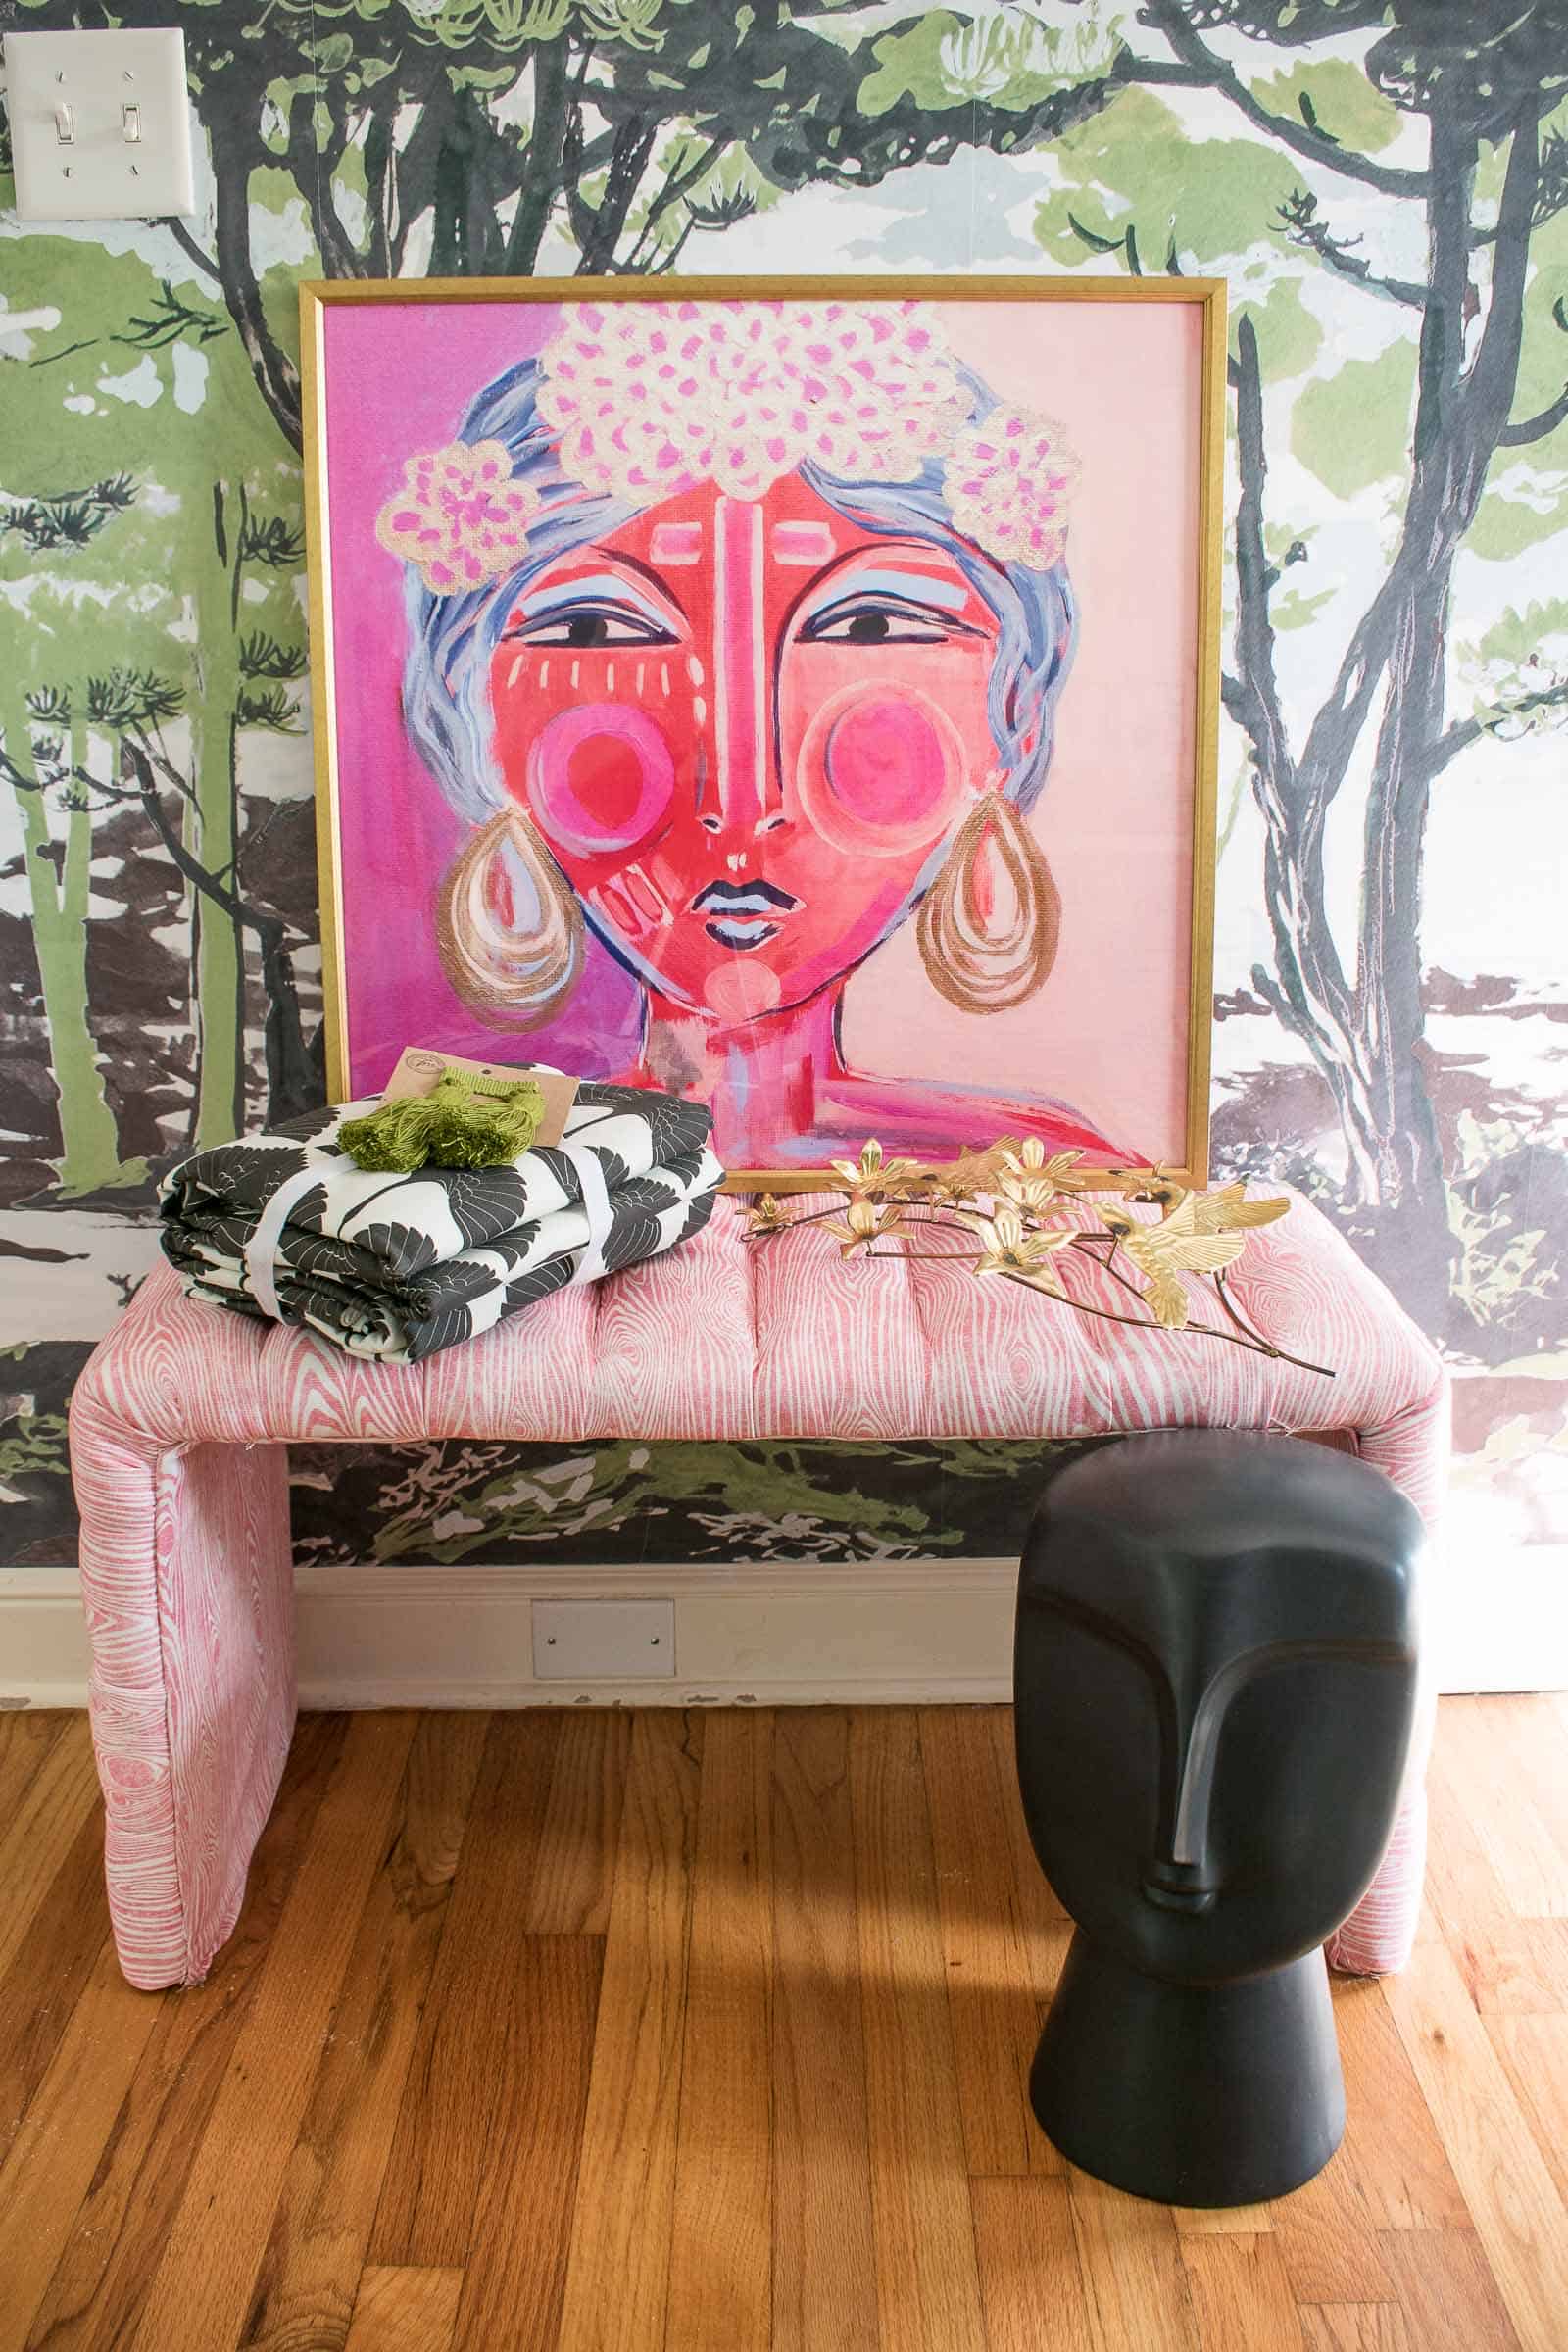
What’s up next? Well… I also upholstered this fun tufted bench. I’m still kind of amazed that it worked and I have a tutorial coming soon! I love that fabric and next week I’ll chat a bit more about the various patterns coming into the space and hopefully have a curtain update for you!
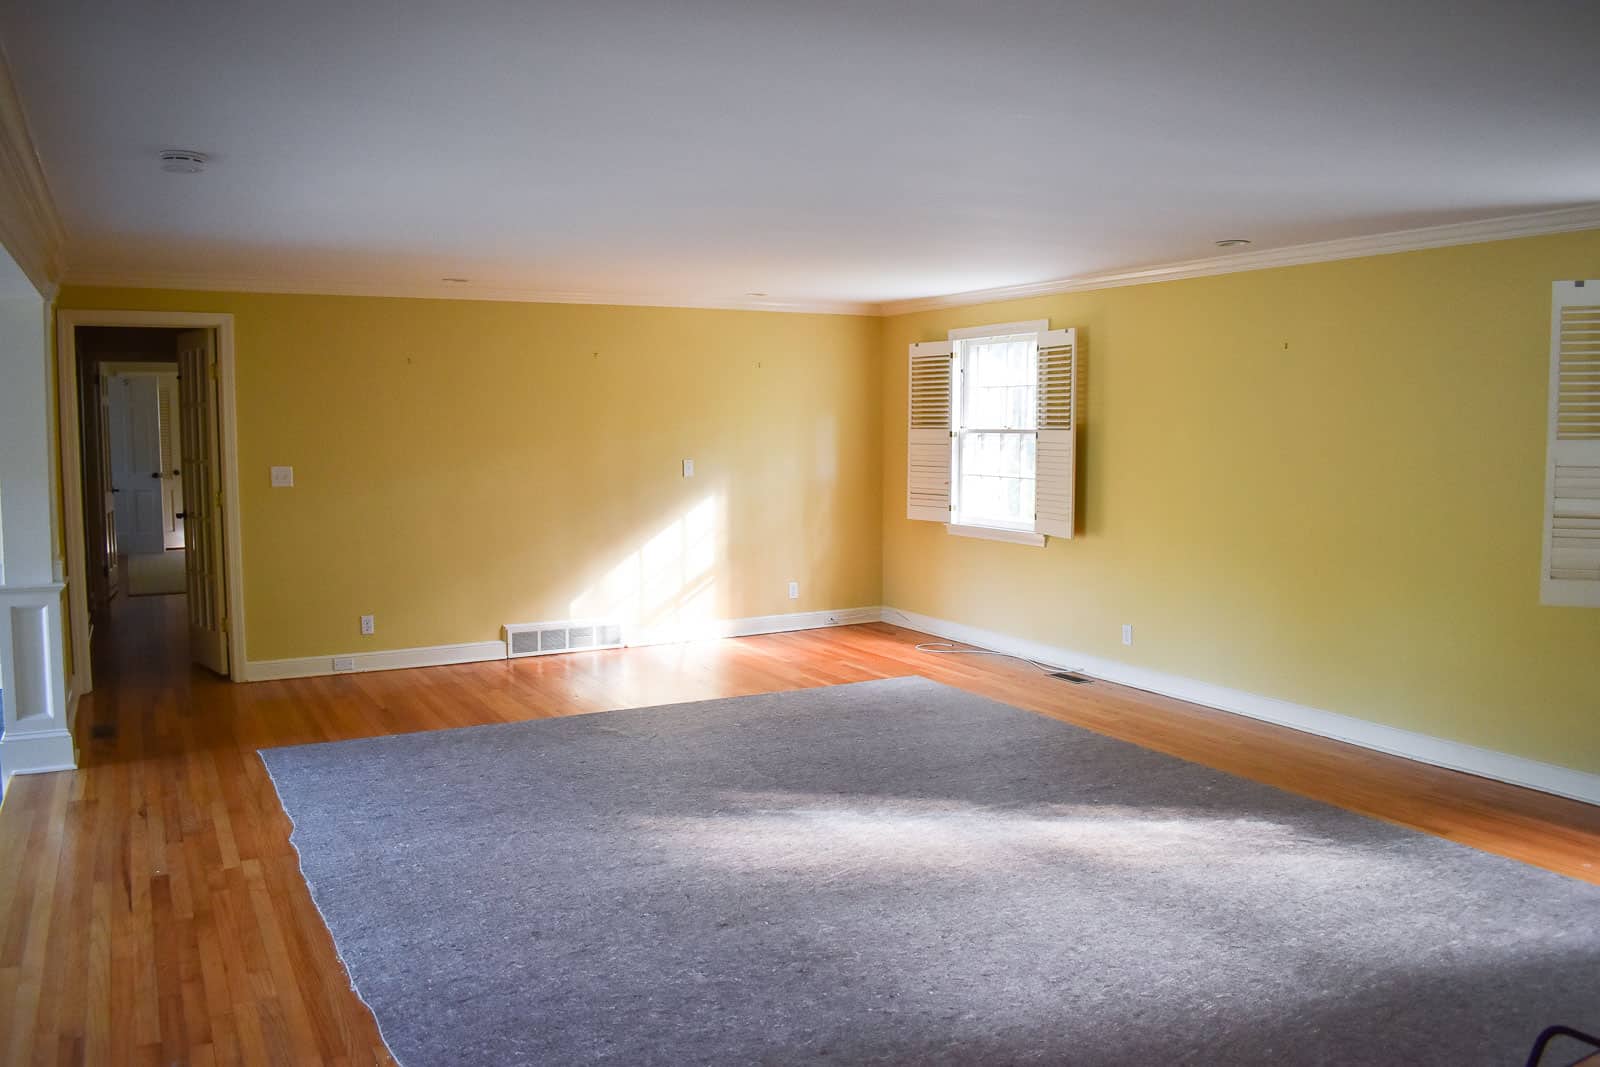
This room is all about incremental change… without losing our security deposit I can’t pull down any walls or lay down new floor, but I can continue to chip away at the space. Each week I’m tackling a handful of manageable projects and… in 6 weeks, I’m hoping you won’t recognize it! And lest you think the rest of the space is pulled together, fear not. Here’s how it looks at the moment. LOTS more to do:


As always, take some time to go visit all the featured designers below. They ARE pulling down walls and rewiring bathrooms. Get ready to be VERY impressed!
Design Addict Mom | Erika Ward Interiors | Erin Kestenbaum | Girl & Grey
Gray Malin | Hommeboys | I Spy DIY | Jewel Marlowe | The Learner Observer | Making it Lovely
Nicole White Designs | Old Brand New | Oscar Bravo Home | Place of My Taste | The Rath Project
Room for Tuesday | SG Style | Undecorated Home | Veronica Solomon | Media BH&G | TM by ORC


They say necessity is the mother of invention and man alive, i am so impressed with how creative you are getting here!! (My three year old started saying man alive, and I’ve decided to adopt the phrase and use it as much as i can, ha). I truly find it more impressive than the folks doing major renovations (don’t get me wrong, i still love following those stories too) but there is just something about finding a simple way to solve a problem that I really admire! Love this light and where this whole room is going. 🙂
That’s hilarious! Arthur will answer questions to the affirmative by saying ‘yah yah yah’ which makes me smile too!
Are you kidding?? This project is SO creative. It looks amazing! I’m feeling very inspired and VERY impressed.
THANK YOU! It was a fun problem to solve!!
I did a very similar thing in our dining room, but i used a long branch and Fairy lights. Your SOLUTION is lovely, and very now. Bravo!!
I LOVE that idea! I think I mention on Instagram but a local garden store did something very similar last CHristmas and I loved it!
I really appreciate your creativity and the fact that you are killing it with these affordable and doable diy’s!
Thanks so much!! I love finding simple solutions to more complicated problems!!
Slow. Clap. The chandelier looks so good! The best DIYs are the ones you figure out yourself and I think a lot of people will want to copy this. I love it!!!
Hahaha! Love the slow clap. 🙂 Appreciate it friend! That’s my favorite part of any project… simple solutions that look more complicated!
This is totally the bom diggity…and It looks great in the space. I’m definitely planning to make one…just cuz…LOL… I’ll tag you during my office makeover. XO
Haha! Yay! DEFinitely tag me… would love to see!! Thank you!
I thoroughly appreciate this space and your DIY light is amazing. I cannot wait to see the final reveal. I’m tackling a bedroom and it may kill me! LOL
Haha! Thank you and good luck!!! This is usually the point of the ORC when things are looking pretty bleak!! Hang in there!
Ha!! Will do!
I love the bubble lights but they are so expensive and I am all about the DIY! I am def pinning this to try later!
So beautiful and creative! Would you please share about how much this cost in total?
Hi there! I linked to materials in this blog post but I would guess it costs around $50?
Thank you for this nice sharing. Great post.
Thank you!