
Painted Striped Coffee Table
Psssst… this post *might* contain affiliate links: see my disclosure here.
DIY Faux Inlay Coffee Table
I built this coffee table and then painted it using Frogtape to make these bold graphic black and white stripes.
Disclosure: this is a sponsored post with Frogtape… my go-to painters tape always and forever!
Shop my favorites!
I’ve had a black and white inlay coffee table on my inspo board for aaages…. The one I have has rounded waterfall edges and a bold black and white stripe accented but a white inlay border. It’s such a fun twist on a coffee table bringing a bit of graphic detail to a space (coffee table) that doesn’t necessarily add much style to the room. $1200+ is not in my budget so I decided to try my hand at DIY! Wish me luck!
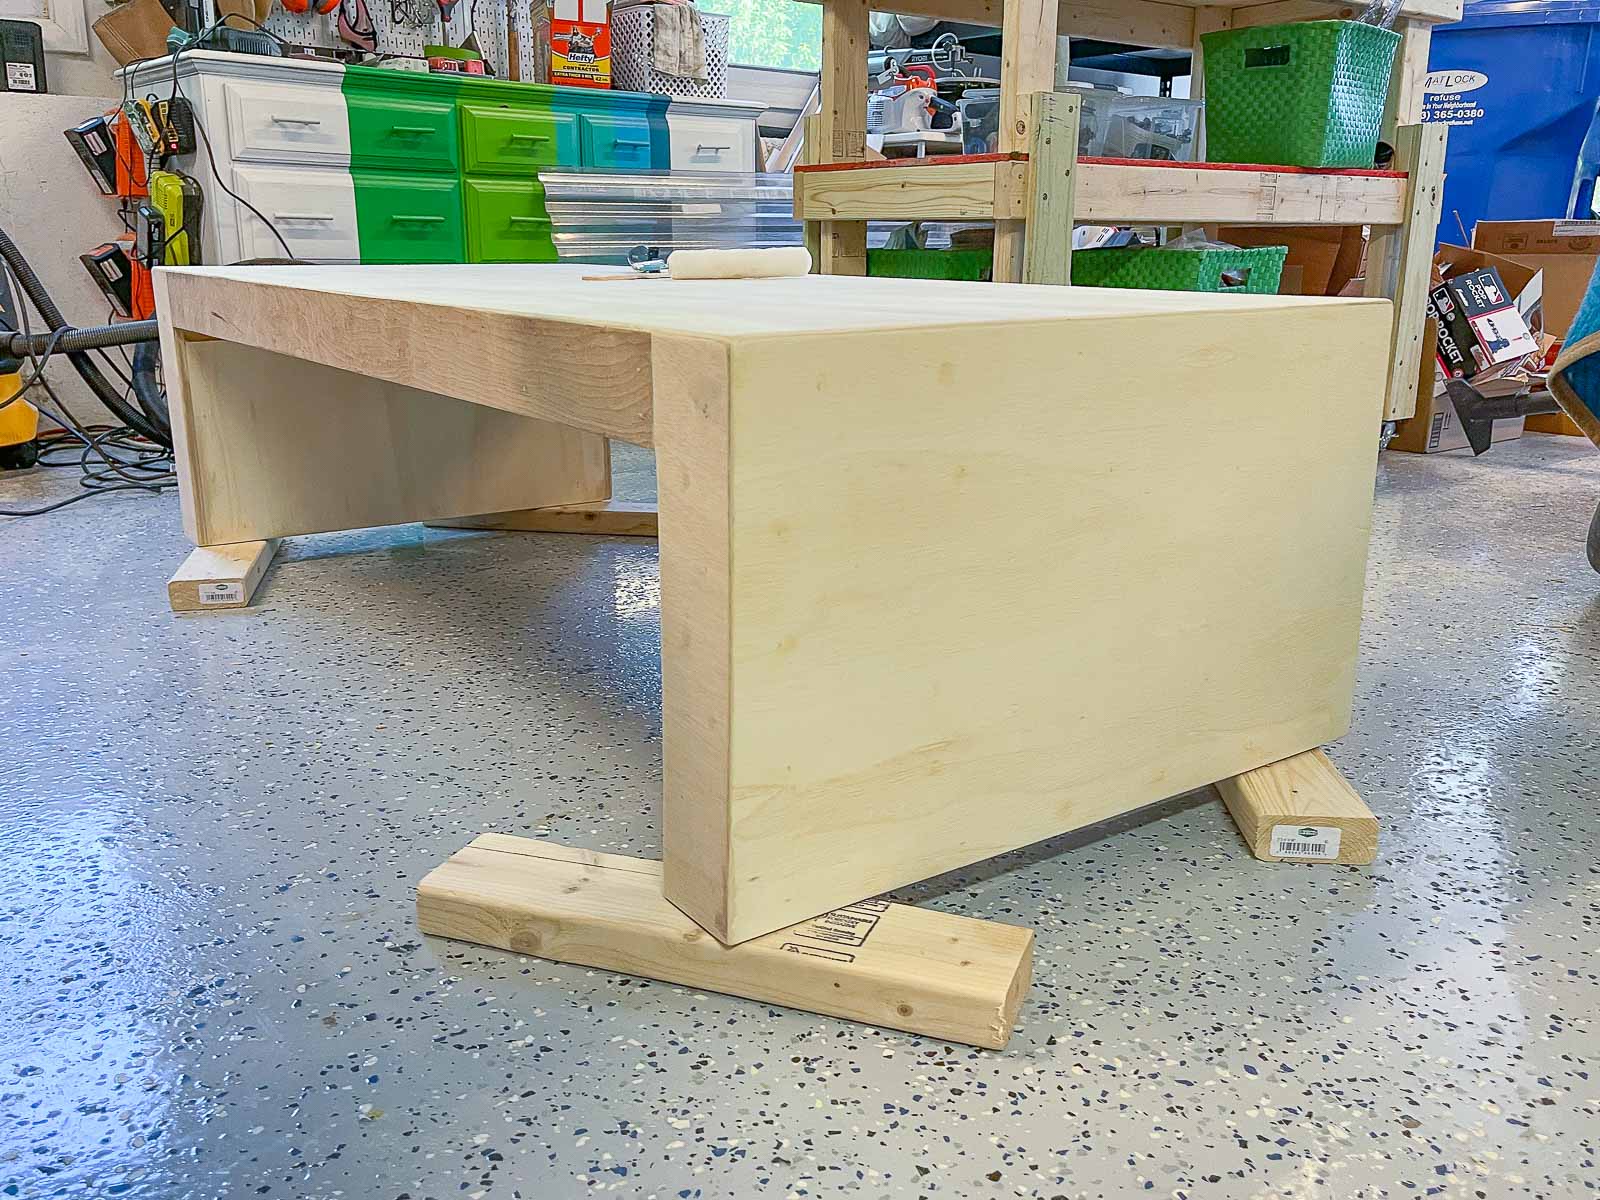
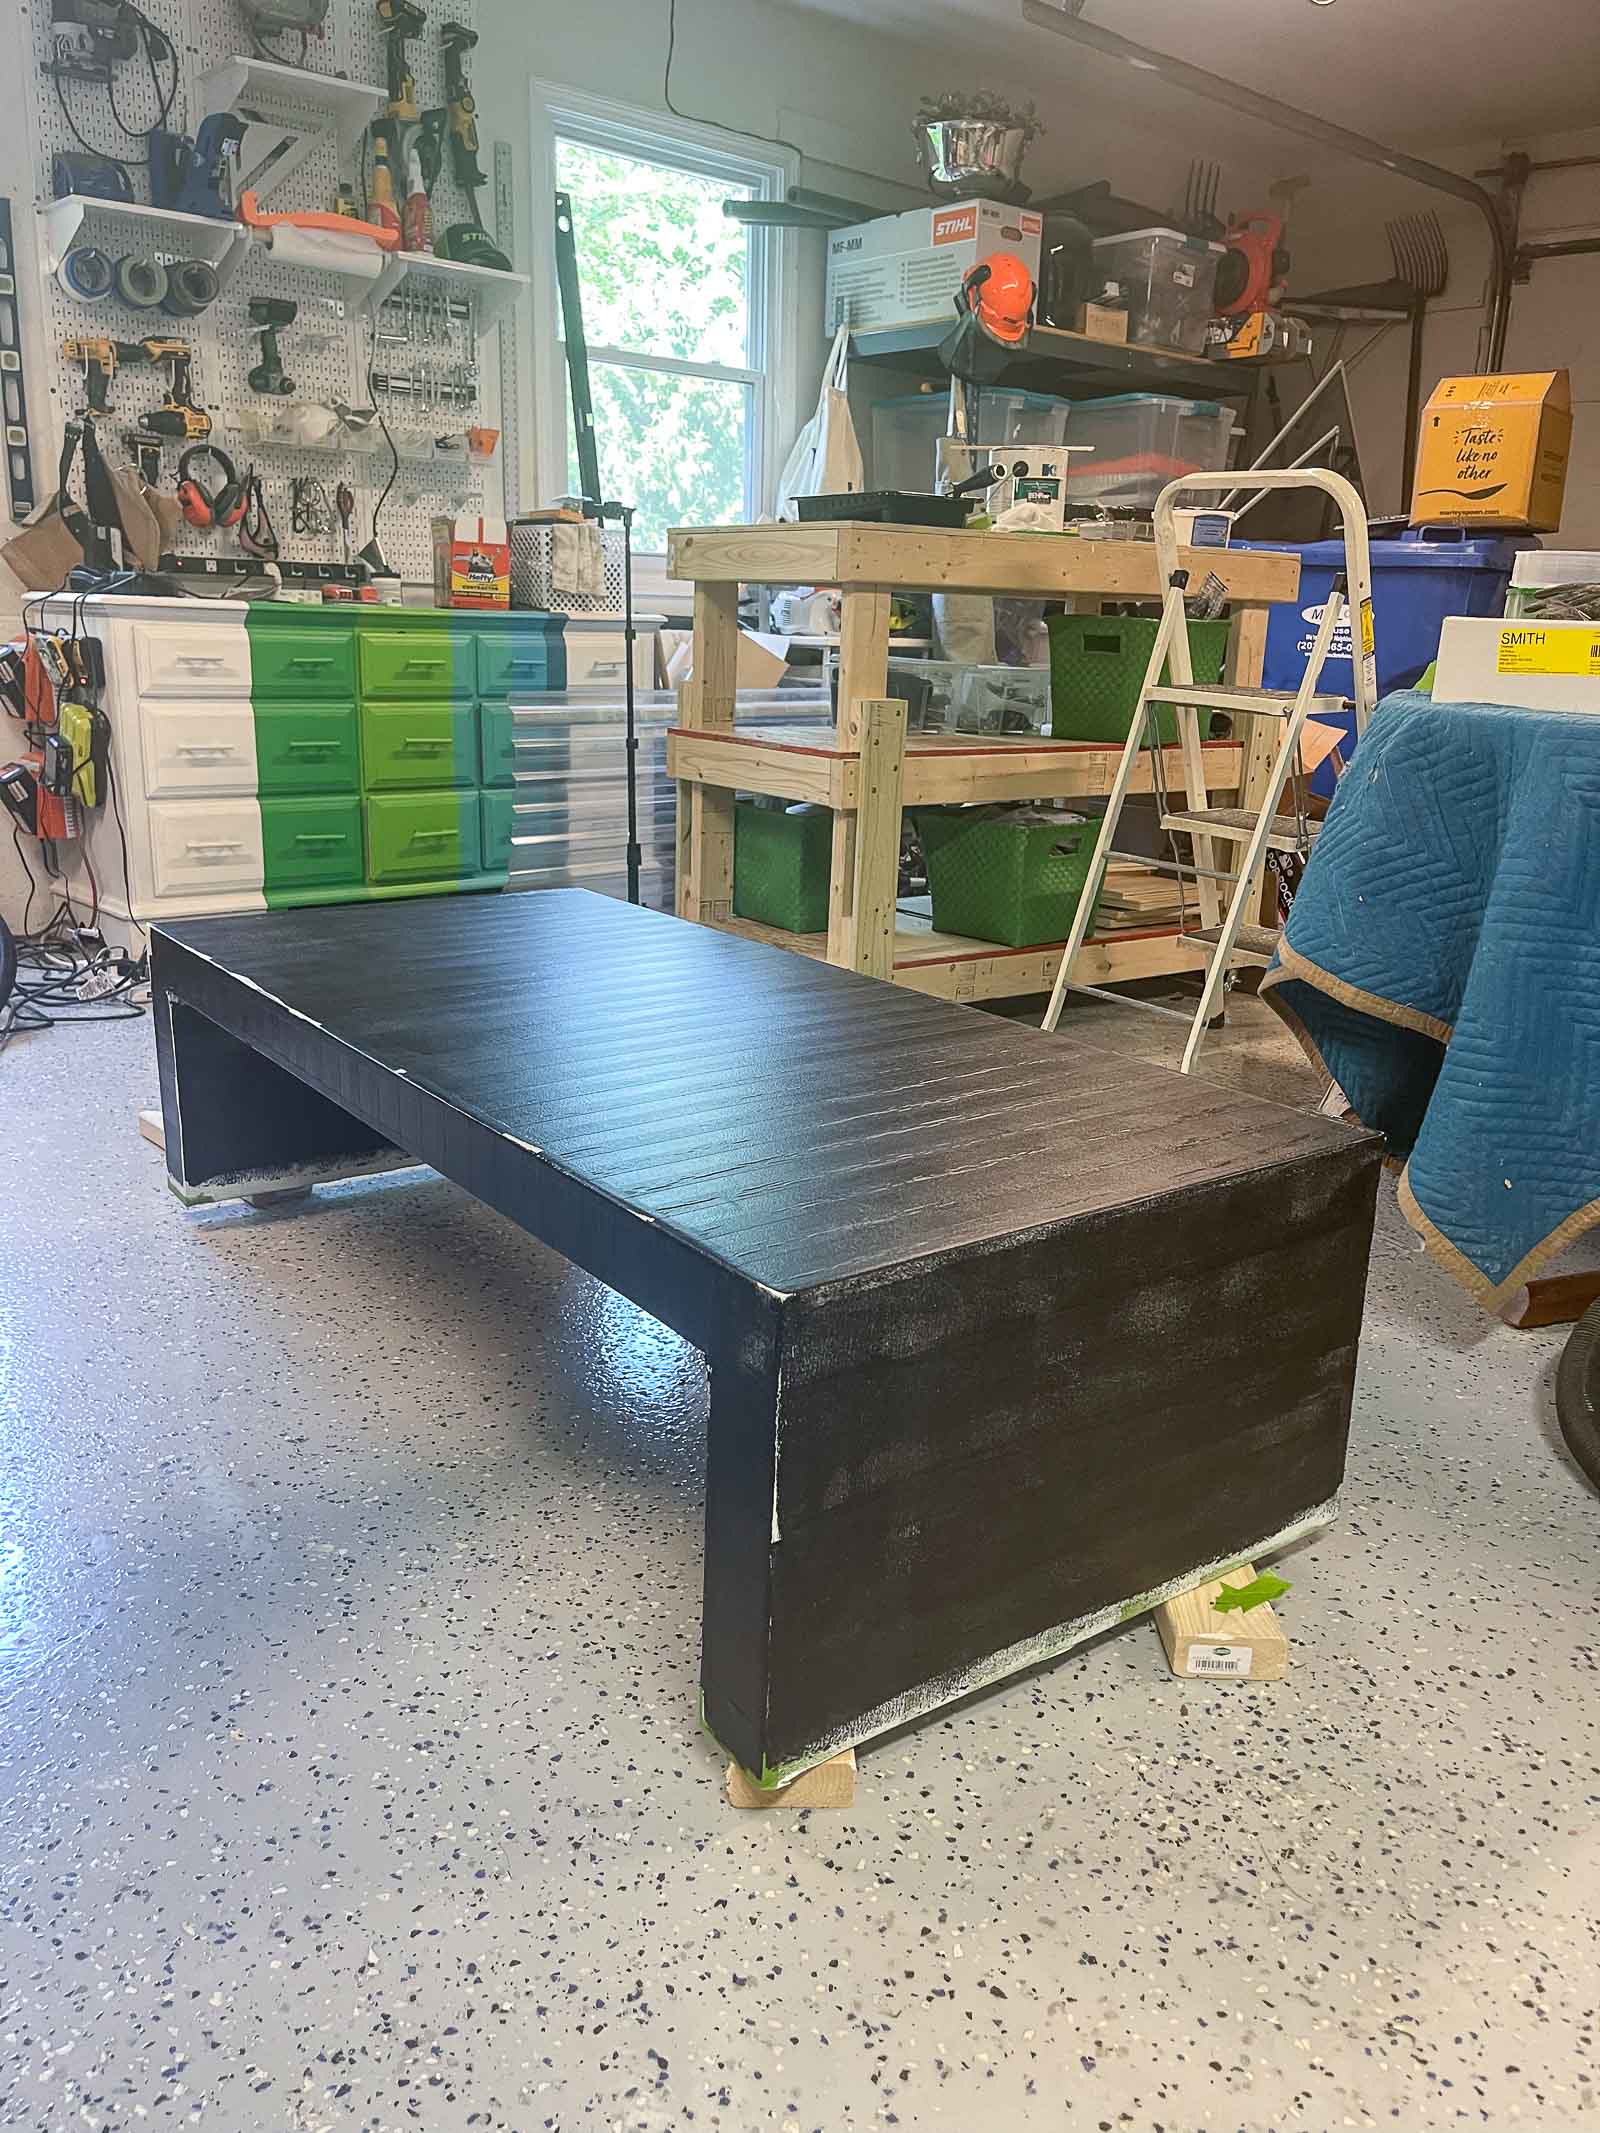
Step 1. Build the table
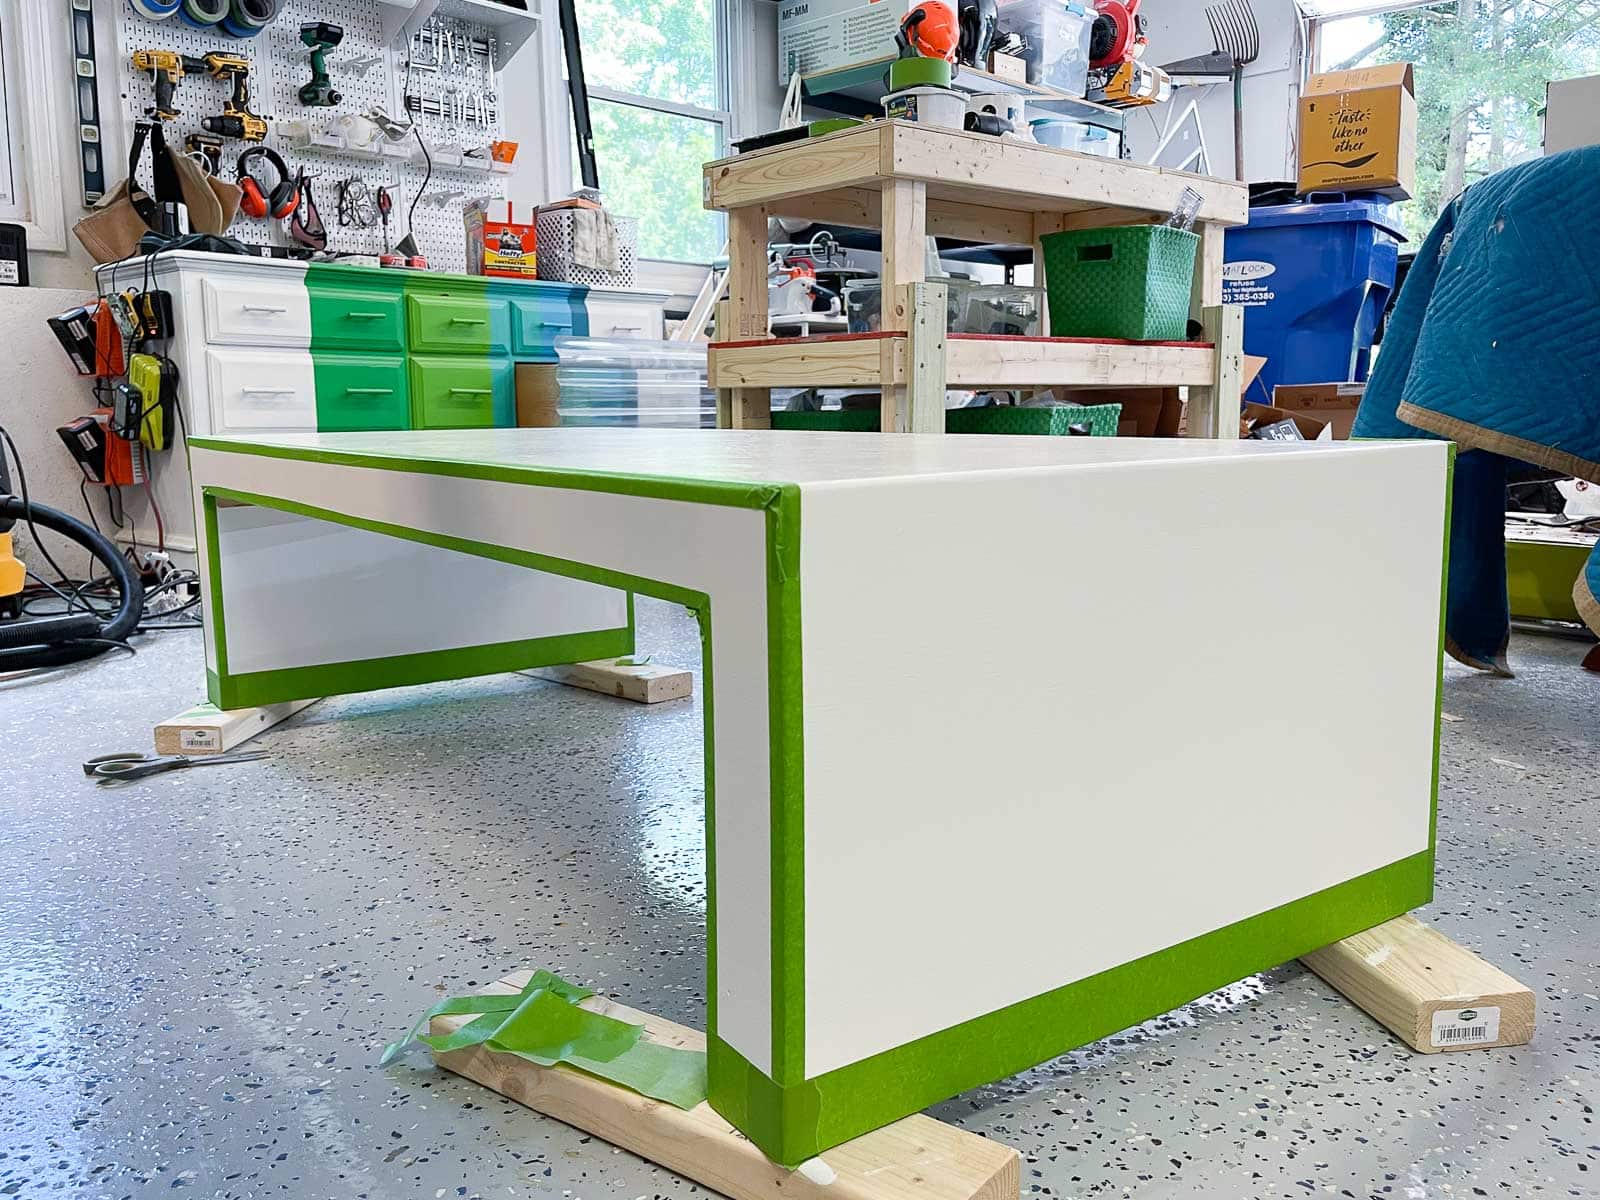
My inspo table has rounded edges… I don’t have any bendable plywood and didn’t feel brave enough to make curves with my table saw. So in lieu of curves I’m building a waterfall table with clean lines and simple design using a sheet if plywood and a 2×4 framework. The only annoying mistake I made was building the framework just big enough that a hobby board wouldn’t fit. I had to buy a full sheet of plywood and cut it down to size.
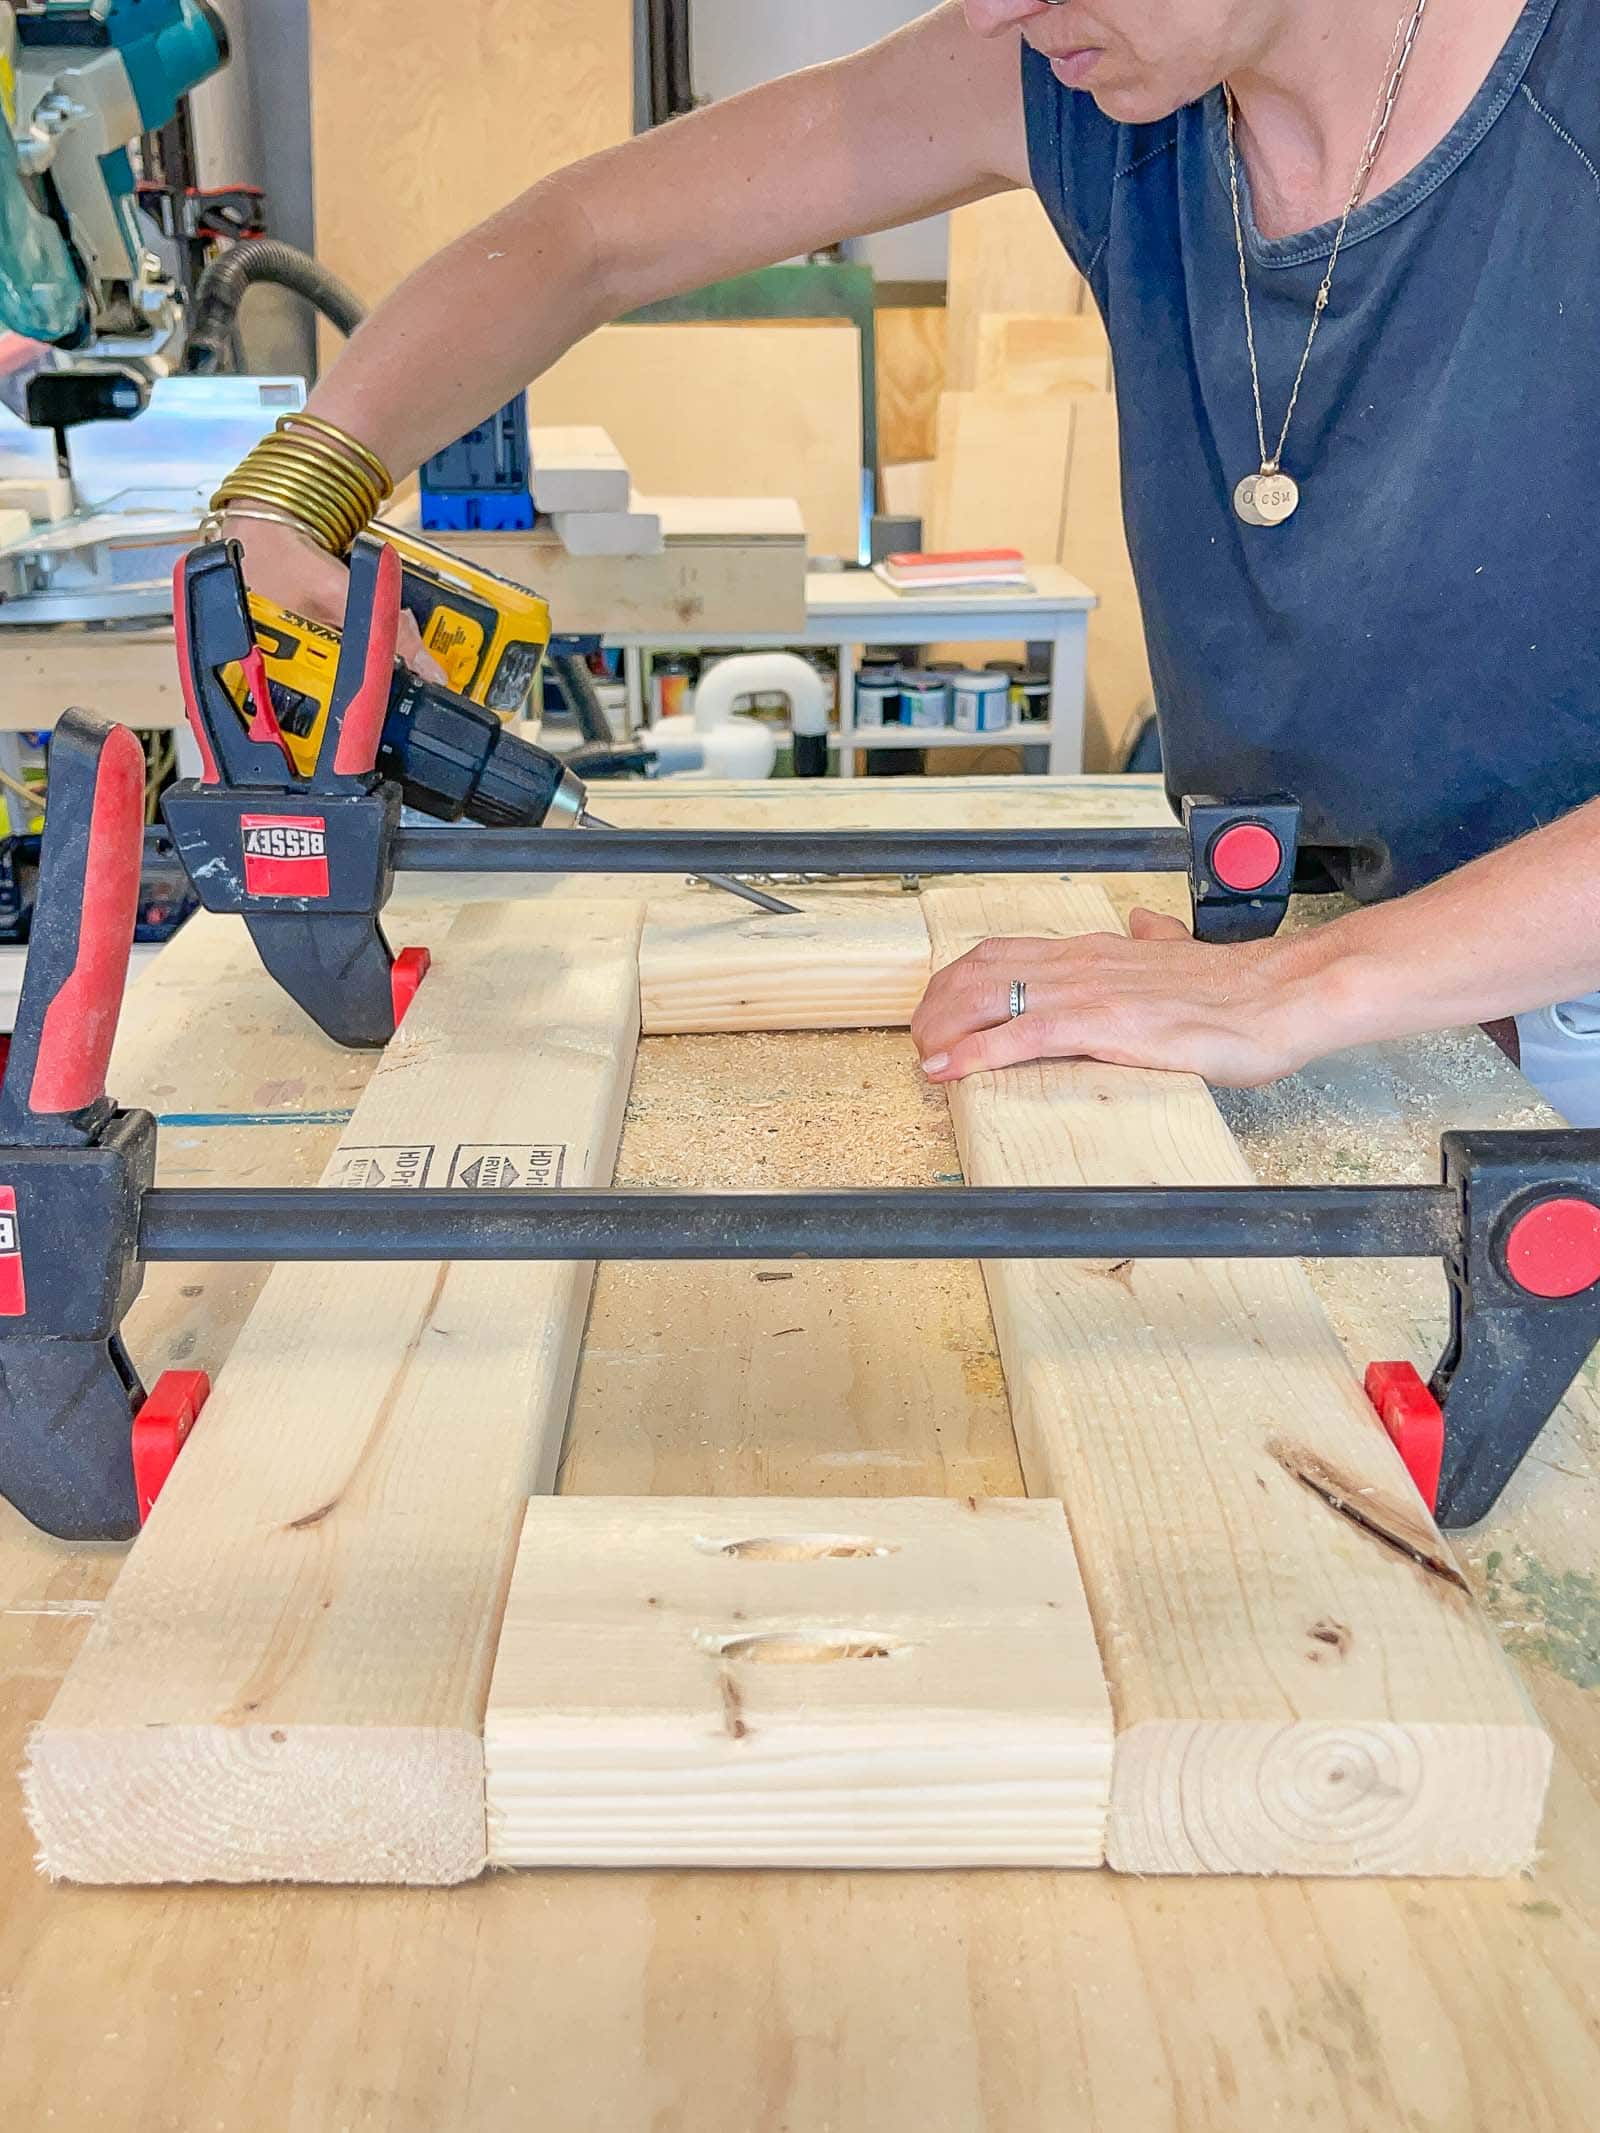
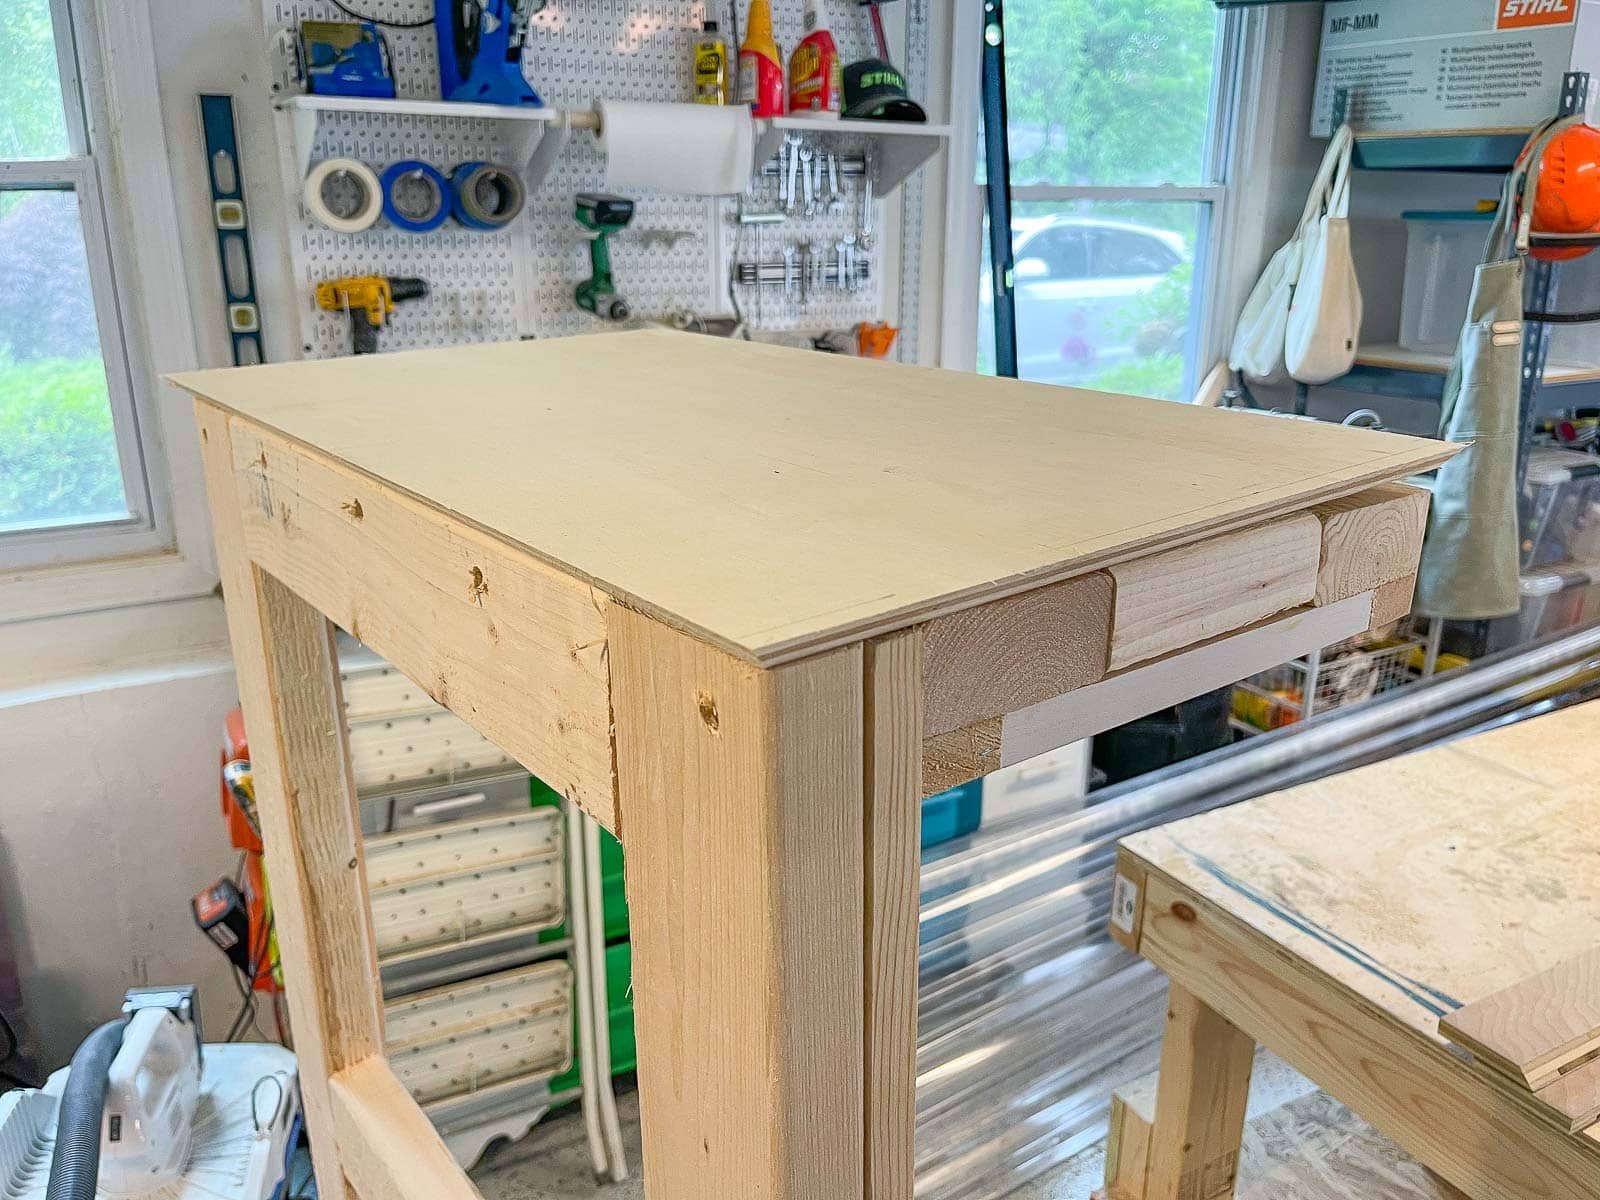
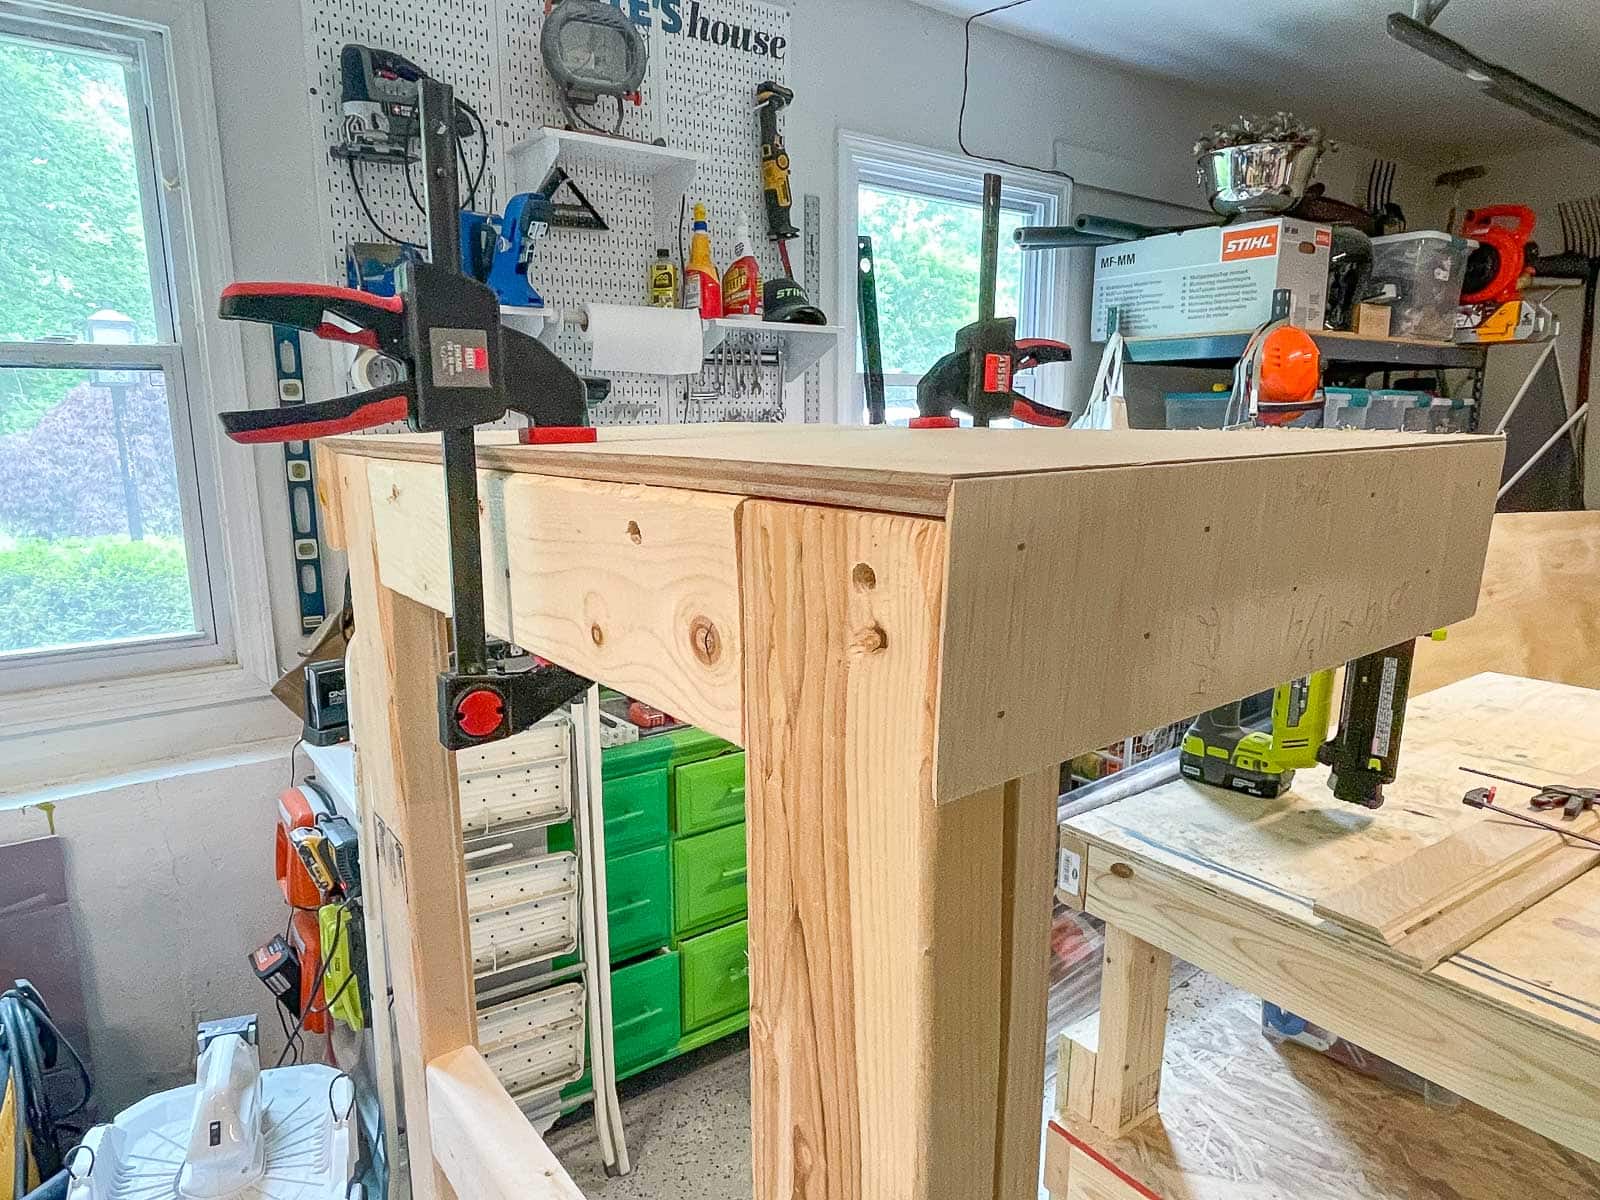
In concept this table is three skinny boxes (one long one for the top of the coffee table and two shorter ones for the legs). The boxes consist of 2x4s as the bones and then 1/2″ sanded plywood with mitered corners to wrap around the outside. I used heavy duty screws that I countersunk into the table top so they could reach down and into the coffee table legs. The strips of plywood were given 45 degree mitered corners on my table saw so that I could glue and brad nail them in place around the table to make clean straight corners without any exposed end grain.
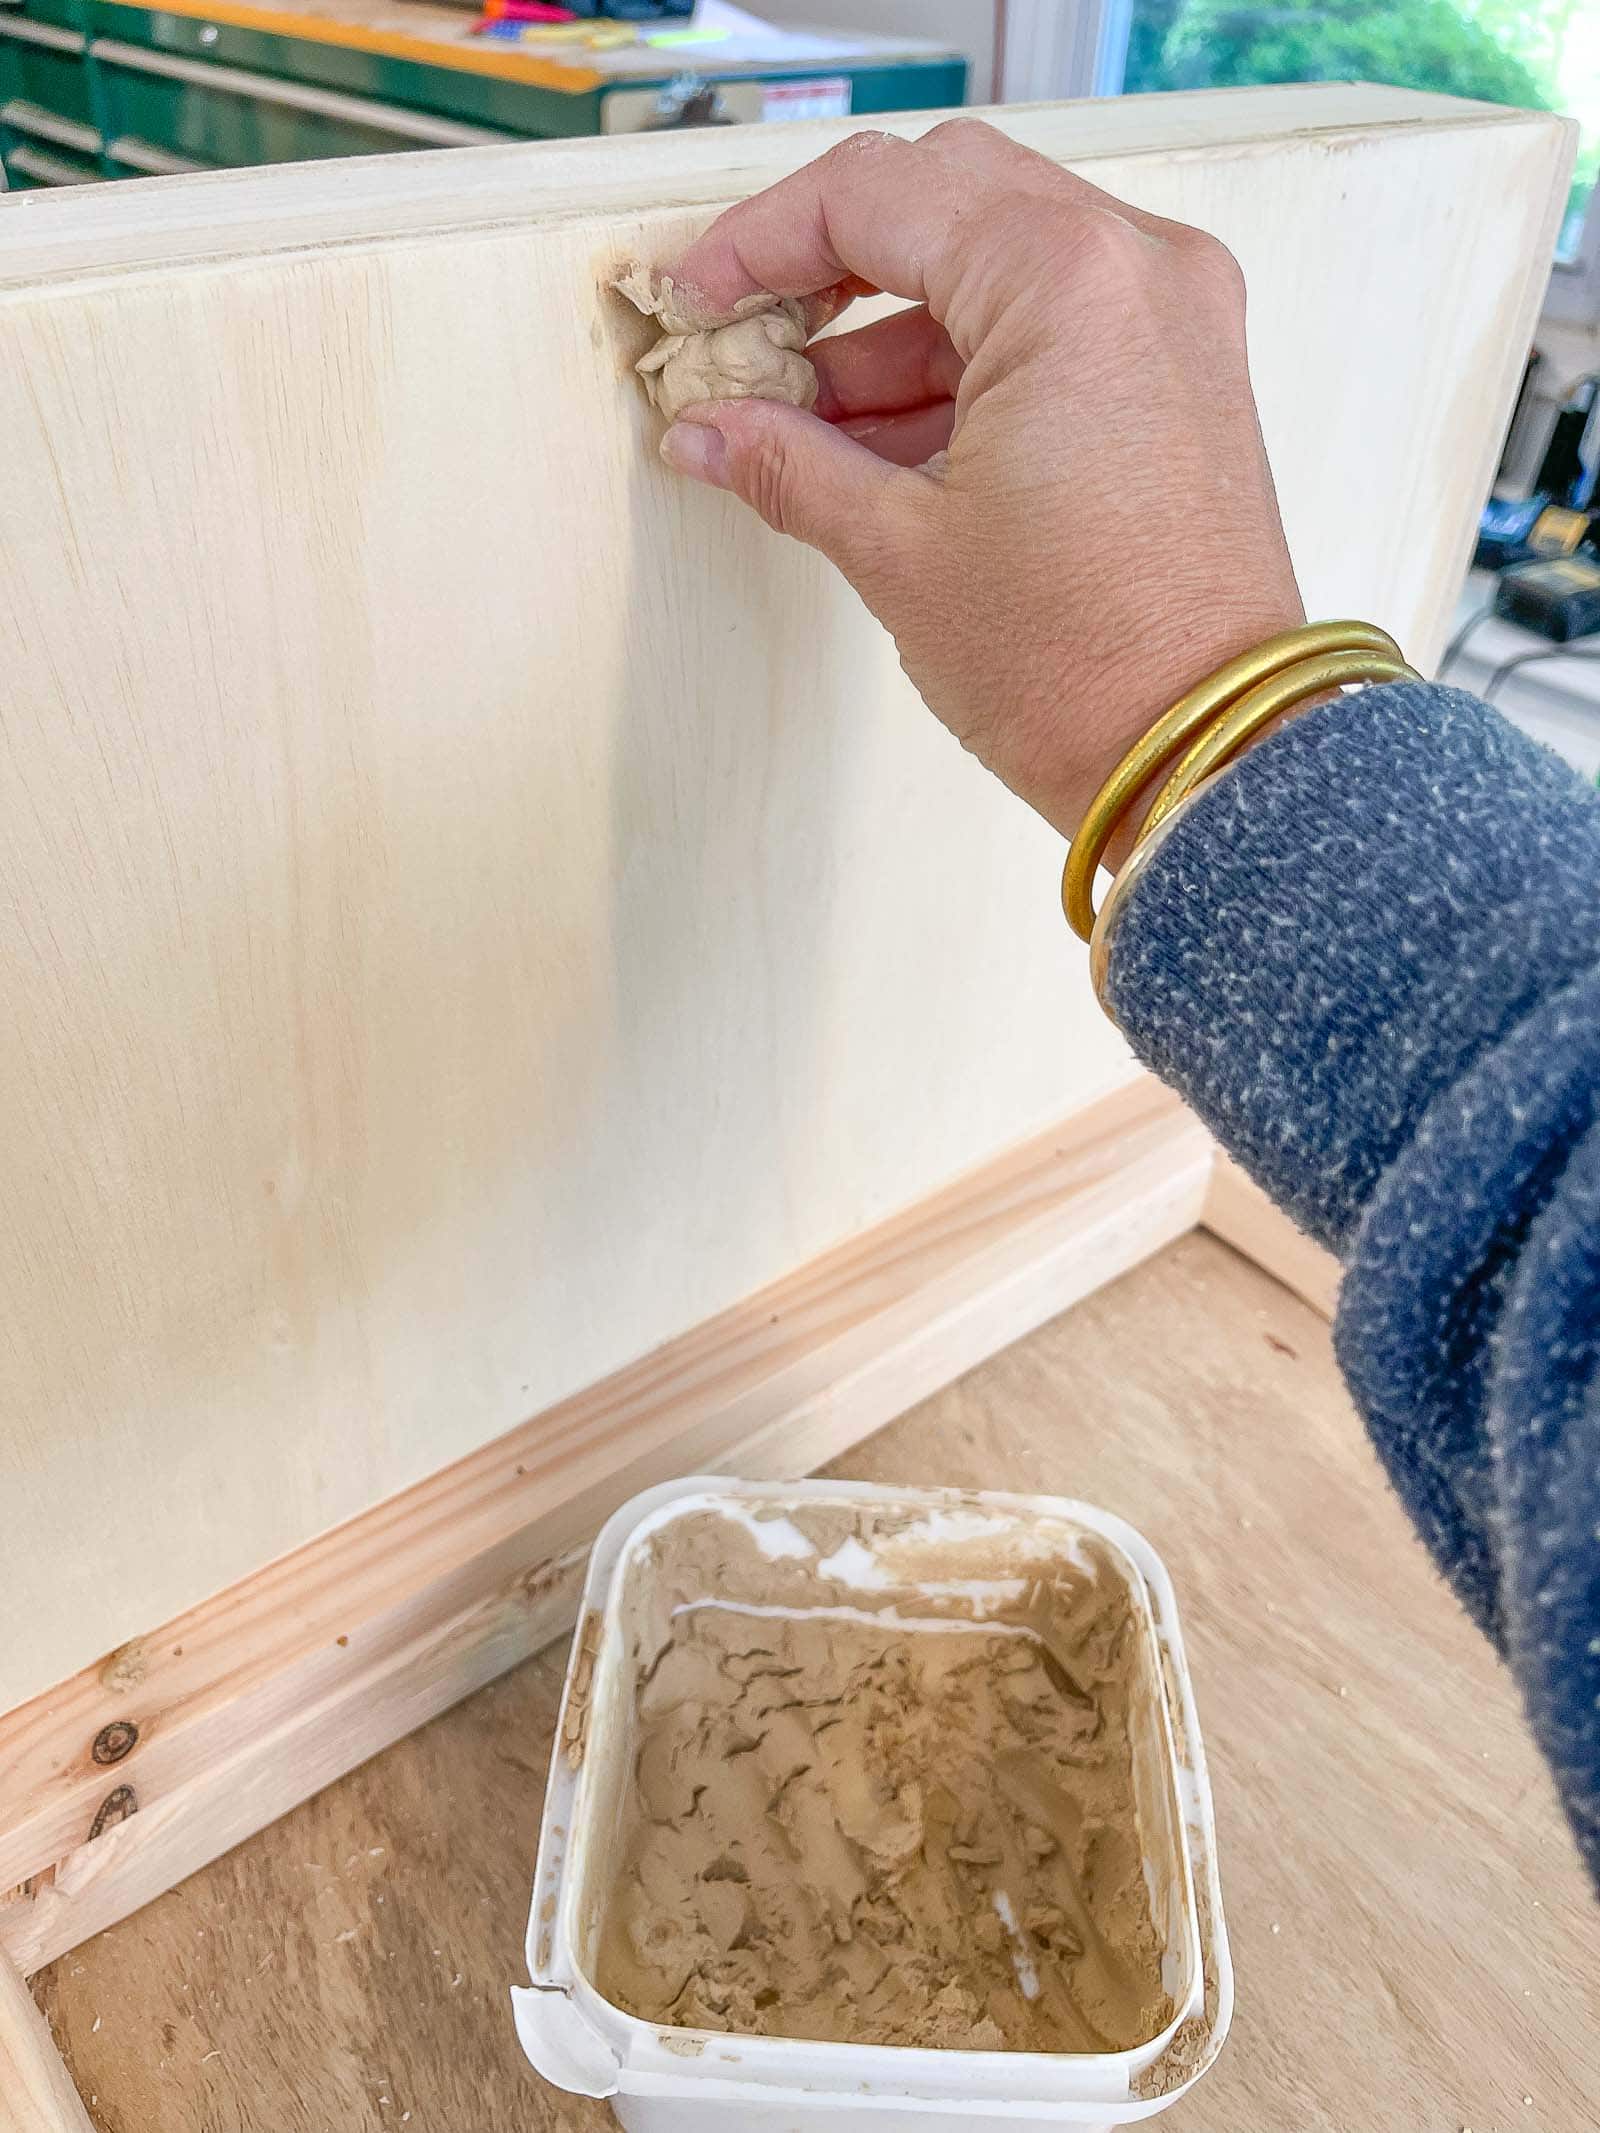
Step 2: Sand and Fill the table
This is my first time making long mitered cuts like this on my table saw and I did a pretty good job but definitely had to go back and fill in along the corners with wood putty. (I do *not* recommend this project if you’re planning to stain the wood as those wood fill patches will show up and look sloppy.)
Once the surface and the corners were cleaned up, it was time for the fun part: paint!
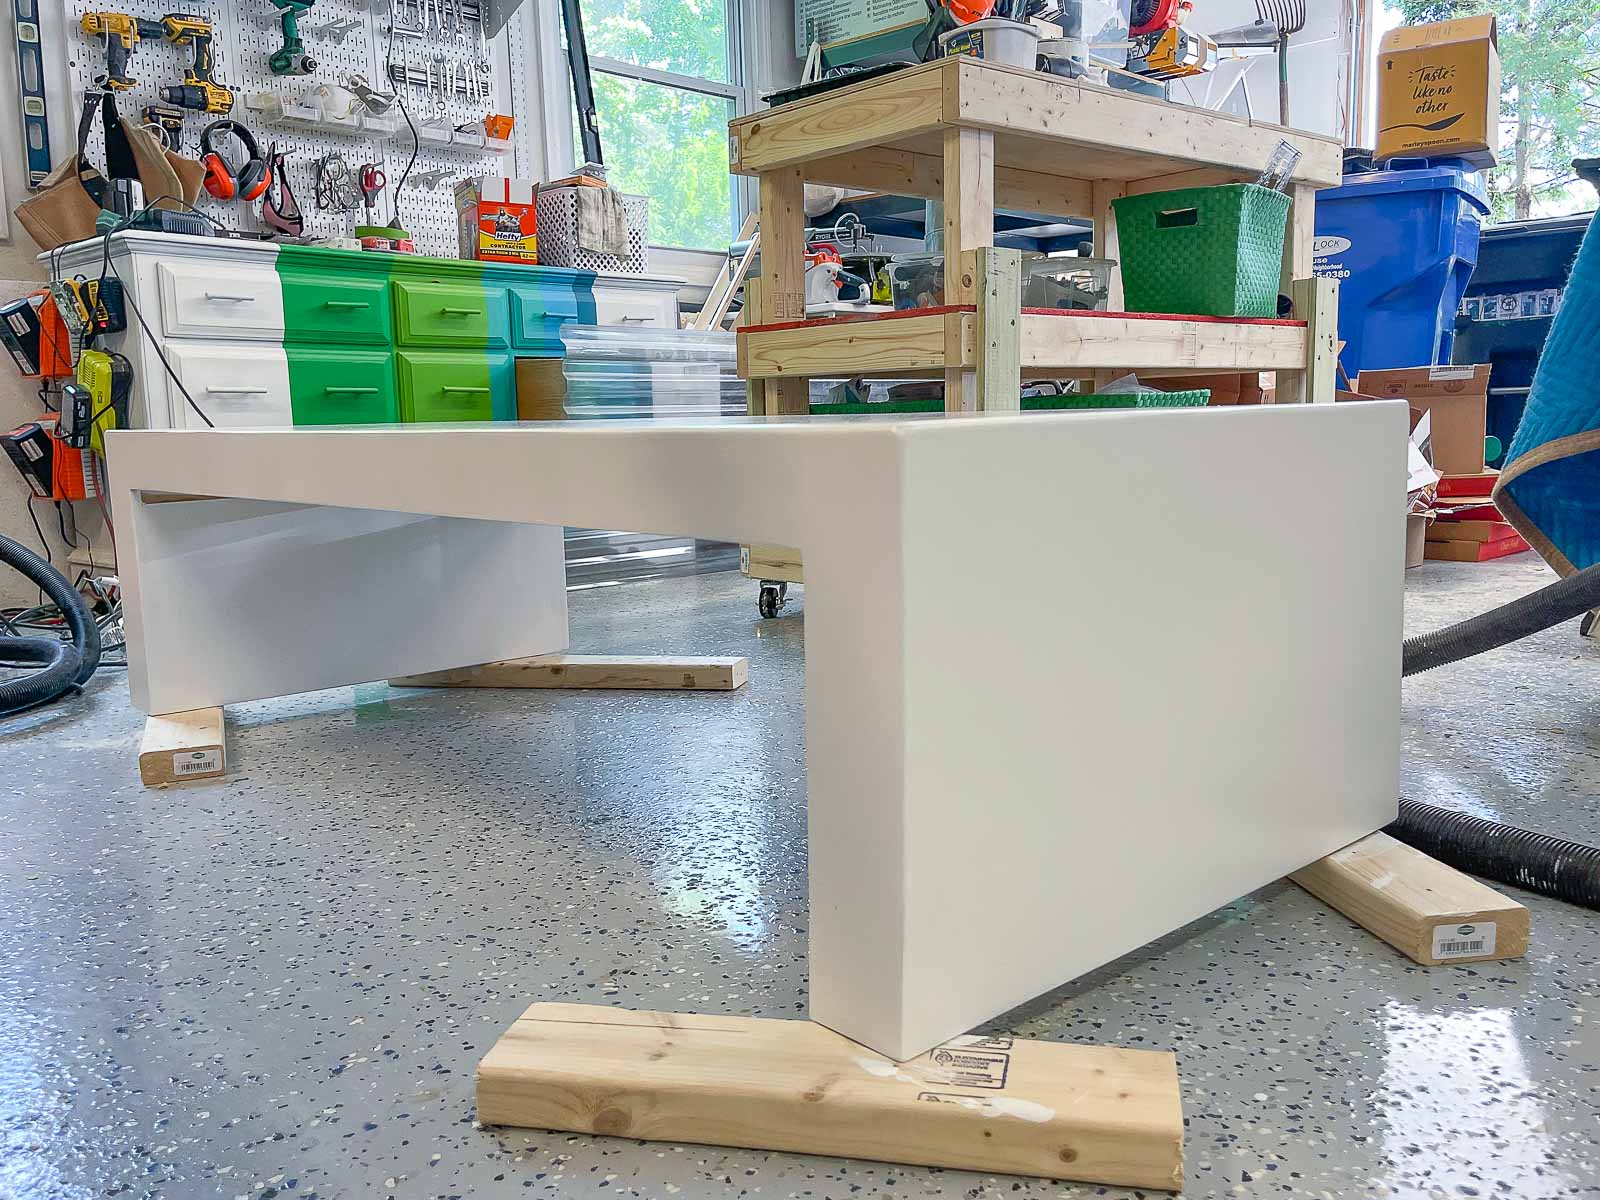
Step 3: Paint the Base color
I started by priming the table with a low nap roller, letting the paint dry and then lightly sanded. Wipe down the surface of the table and paint with the base color. I’m using Behr Whisper White and Behr Limousine Leather for the two colors on this table.
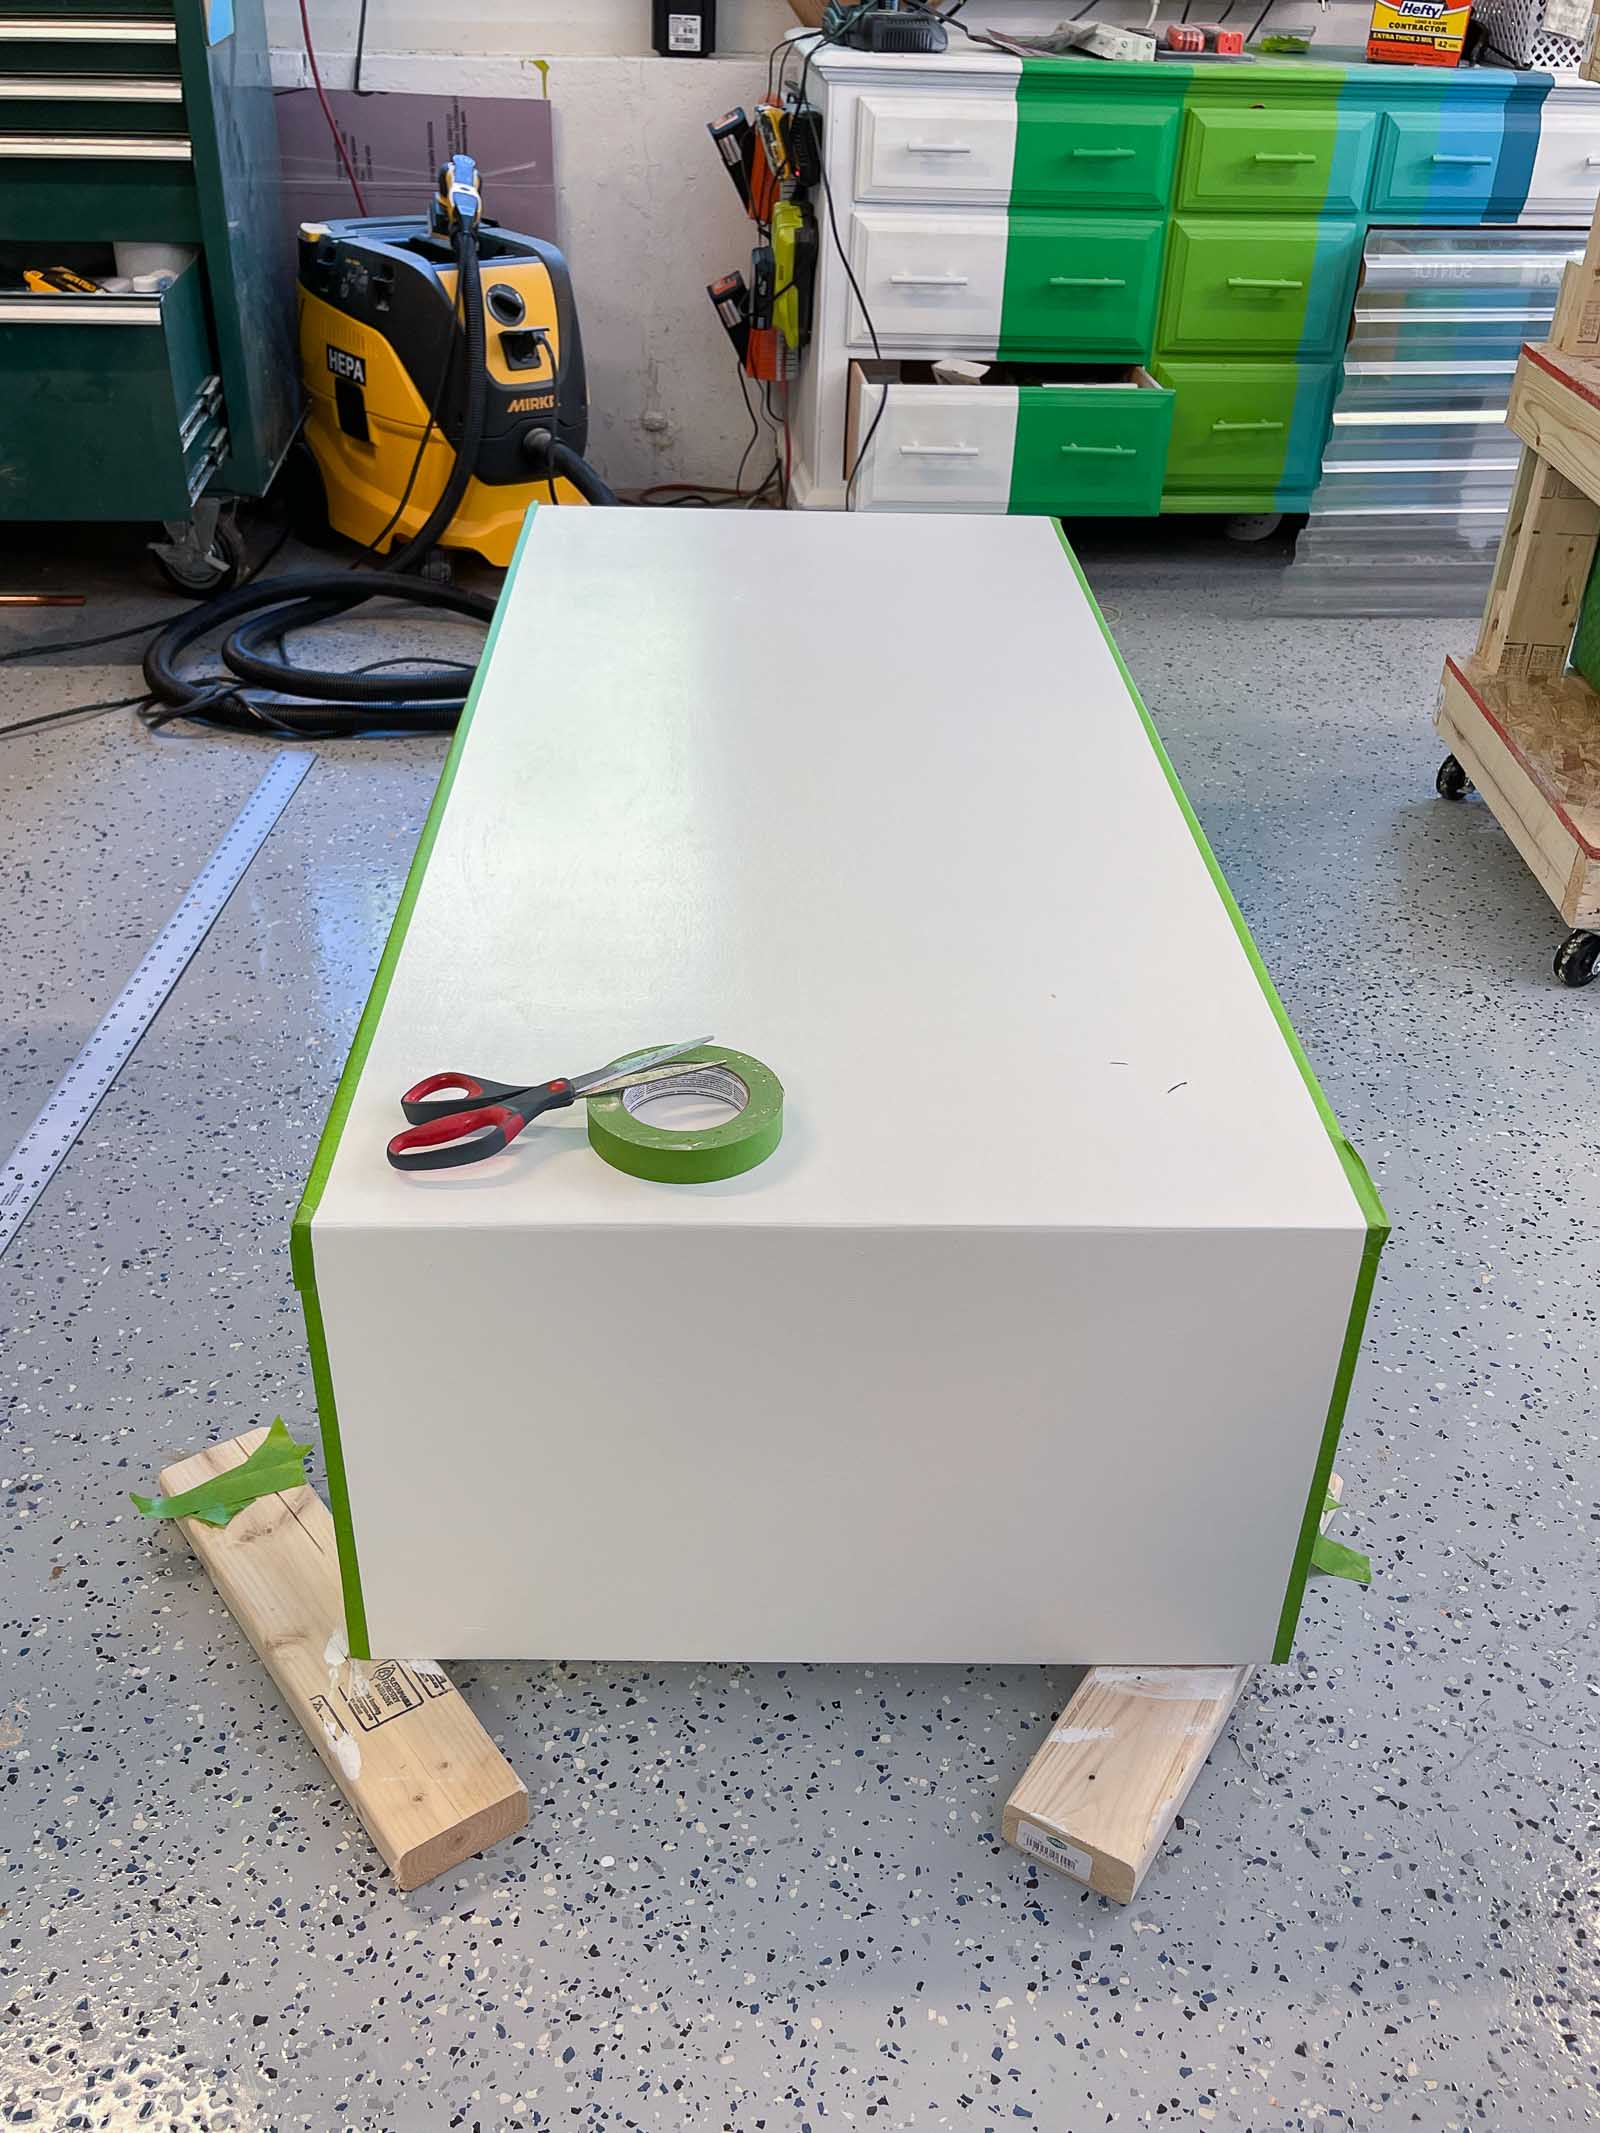
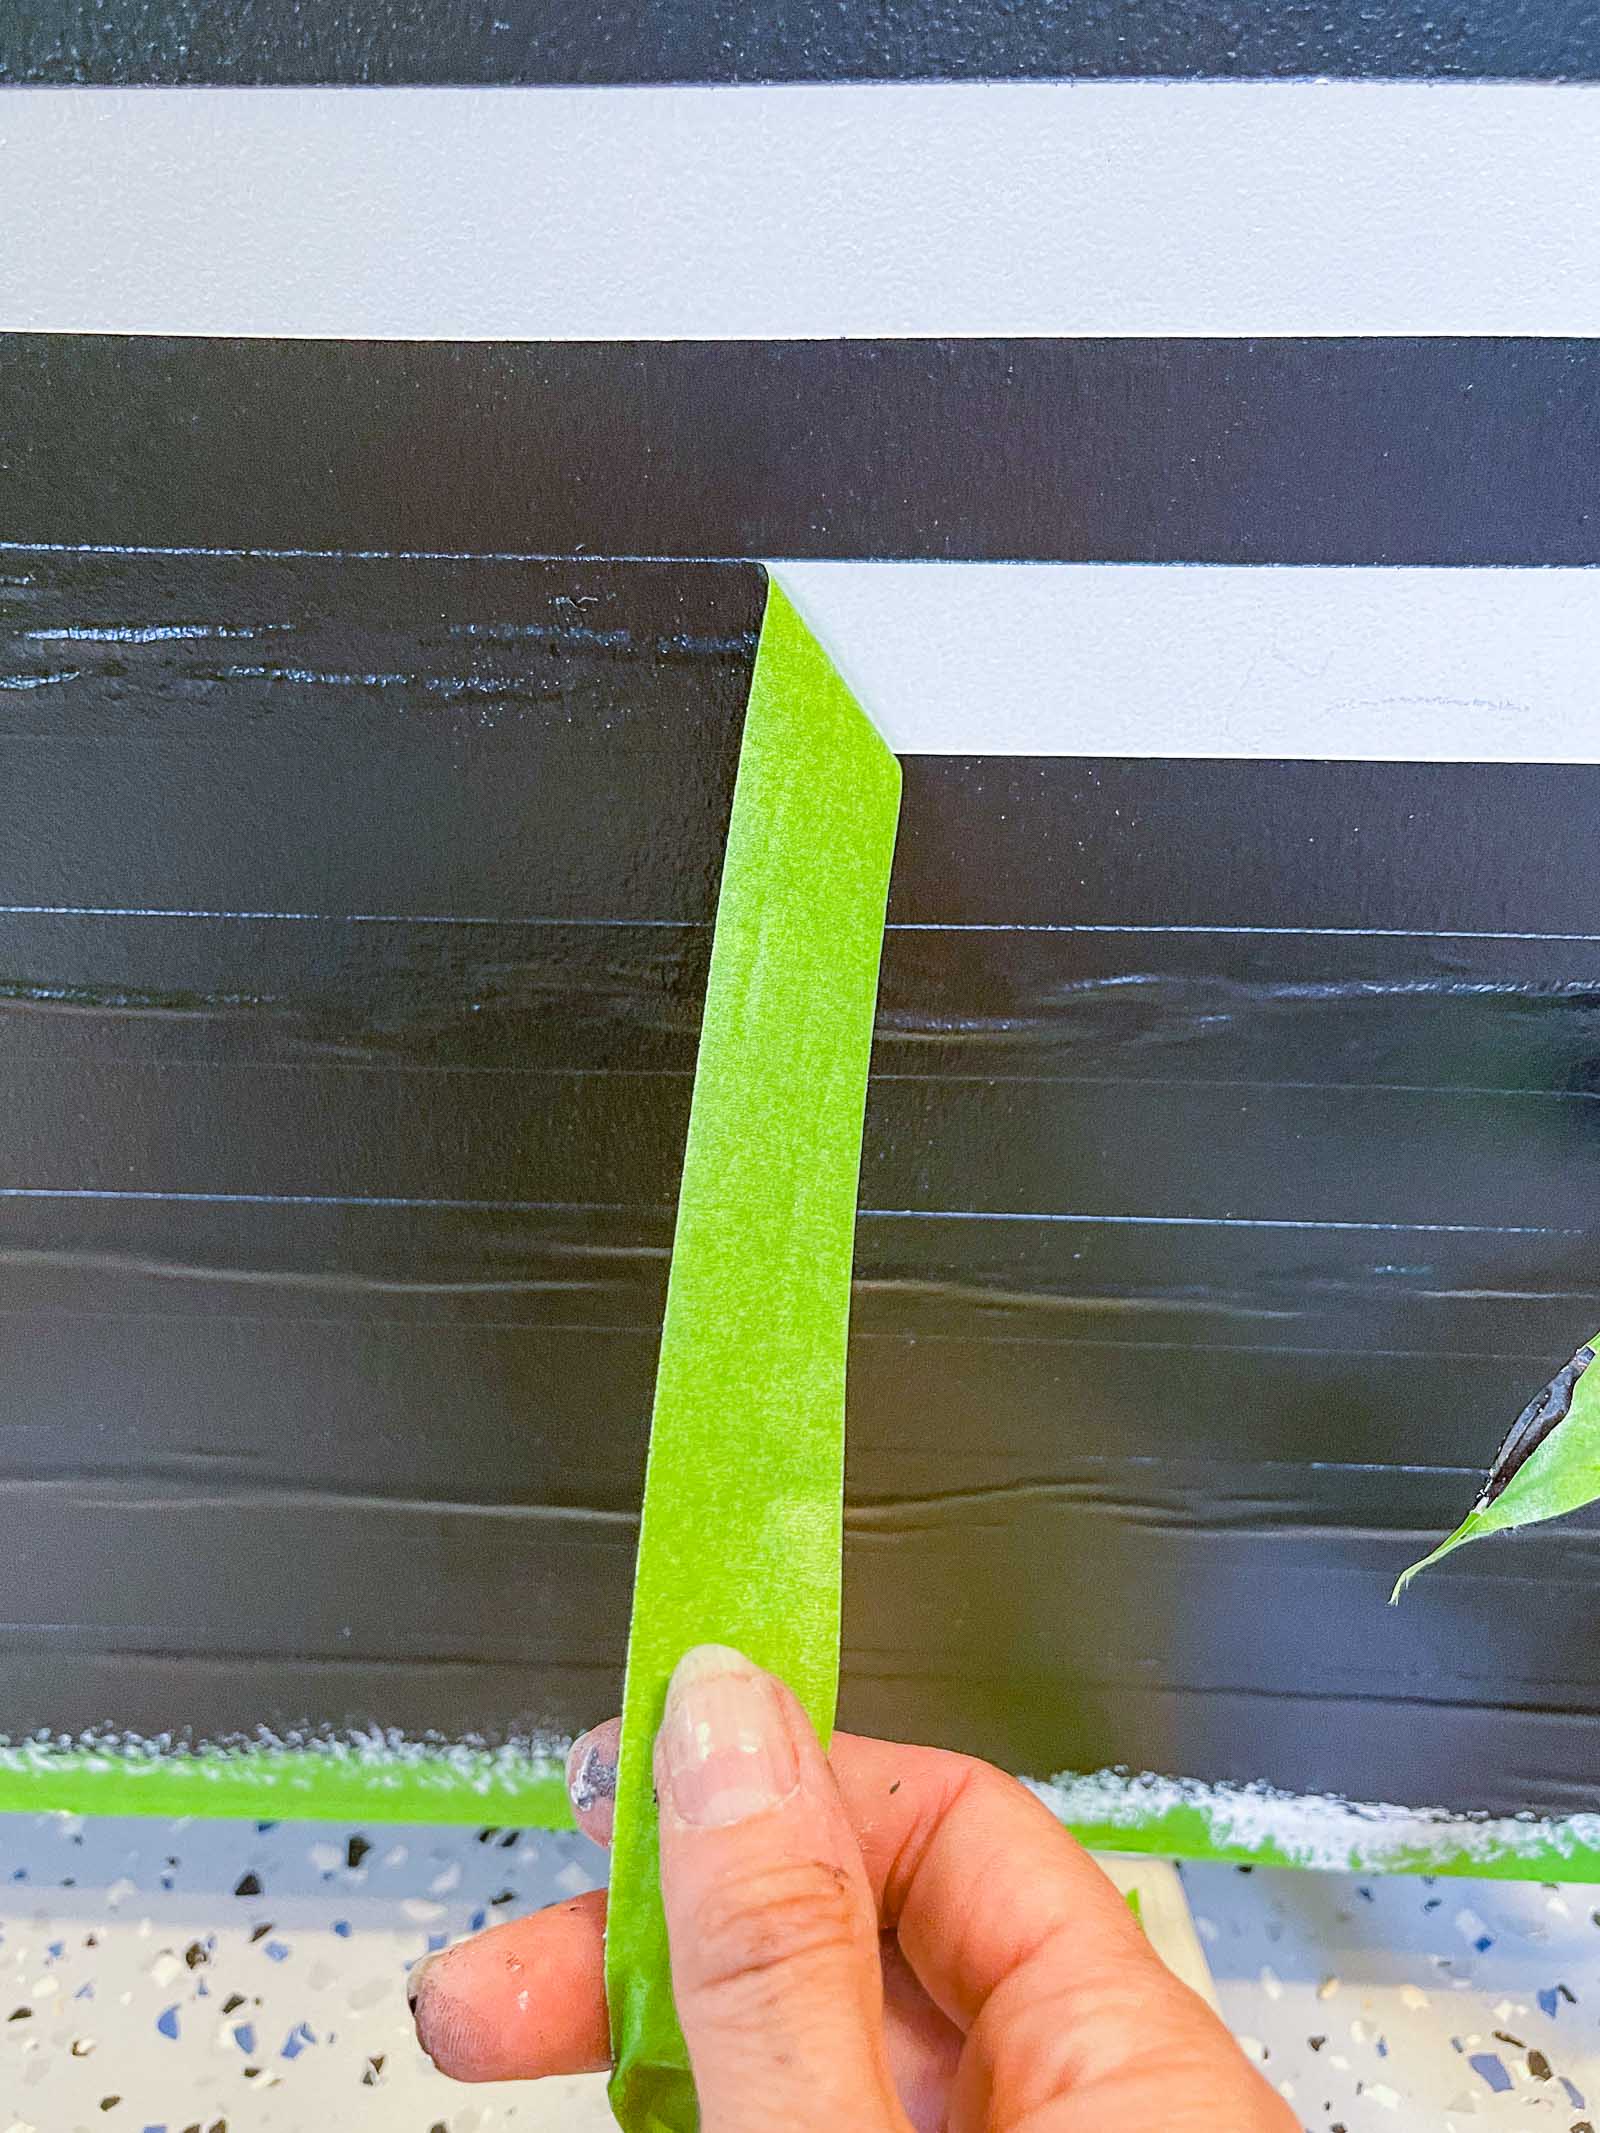
Step 4. Paint the Stripes
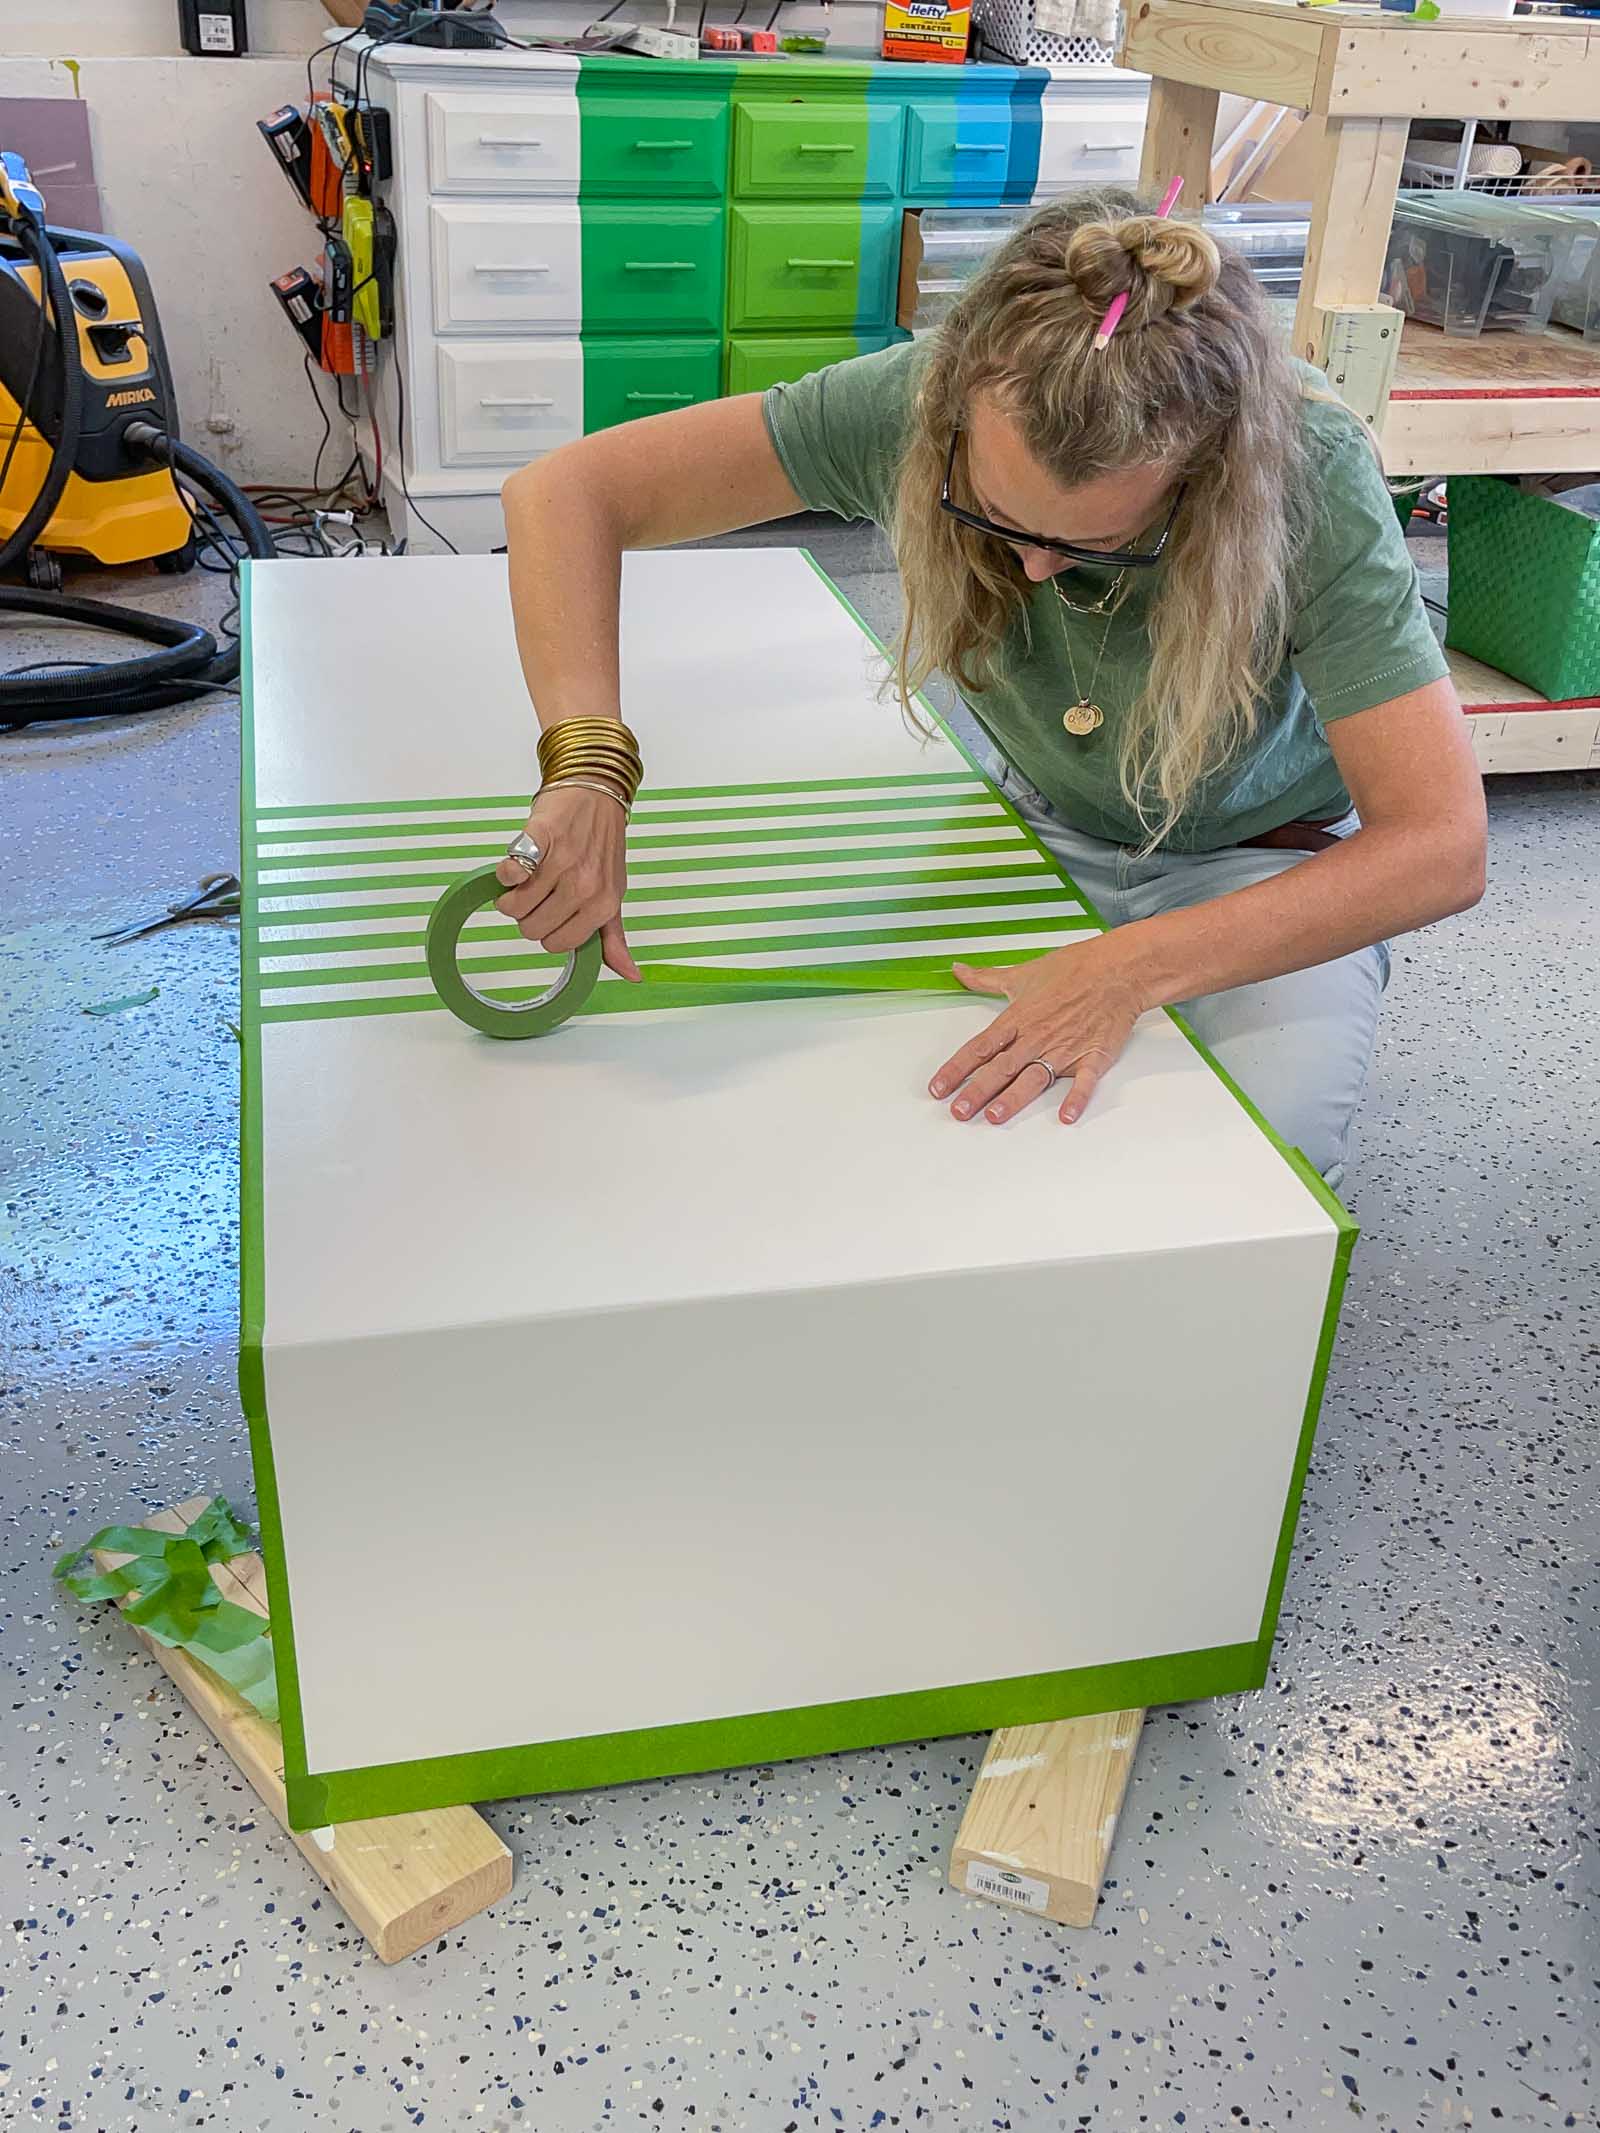
Frogtape has a paint block technology baked right into it that helps create those clean crisp lines essential to any painted stripe project. If possible, I always like to “seal” my paint edges by painting over them with the underlying color which is how I plan to tackle this table. For stripes like this, I used the .94″ Frogtape which is a bit skinnier and used the tape as a spacer. I loved the way the inspo table had an inlay frame and then the black and white were set inside… I taped off the corners of the table first and then put down my first strip of paint along the center line of the table top. Moving from the center towards either end of the table, I used a piece of Frogtape as my spacer and carefully put down the piece to seal in place for painting.
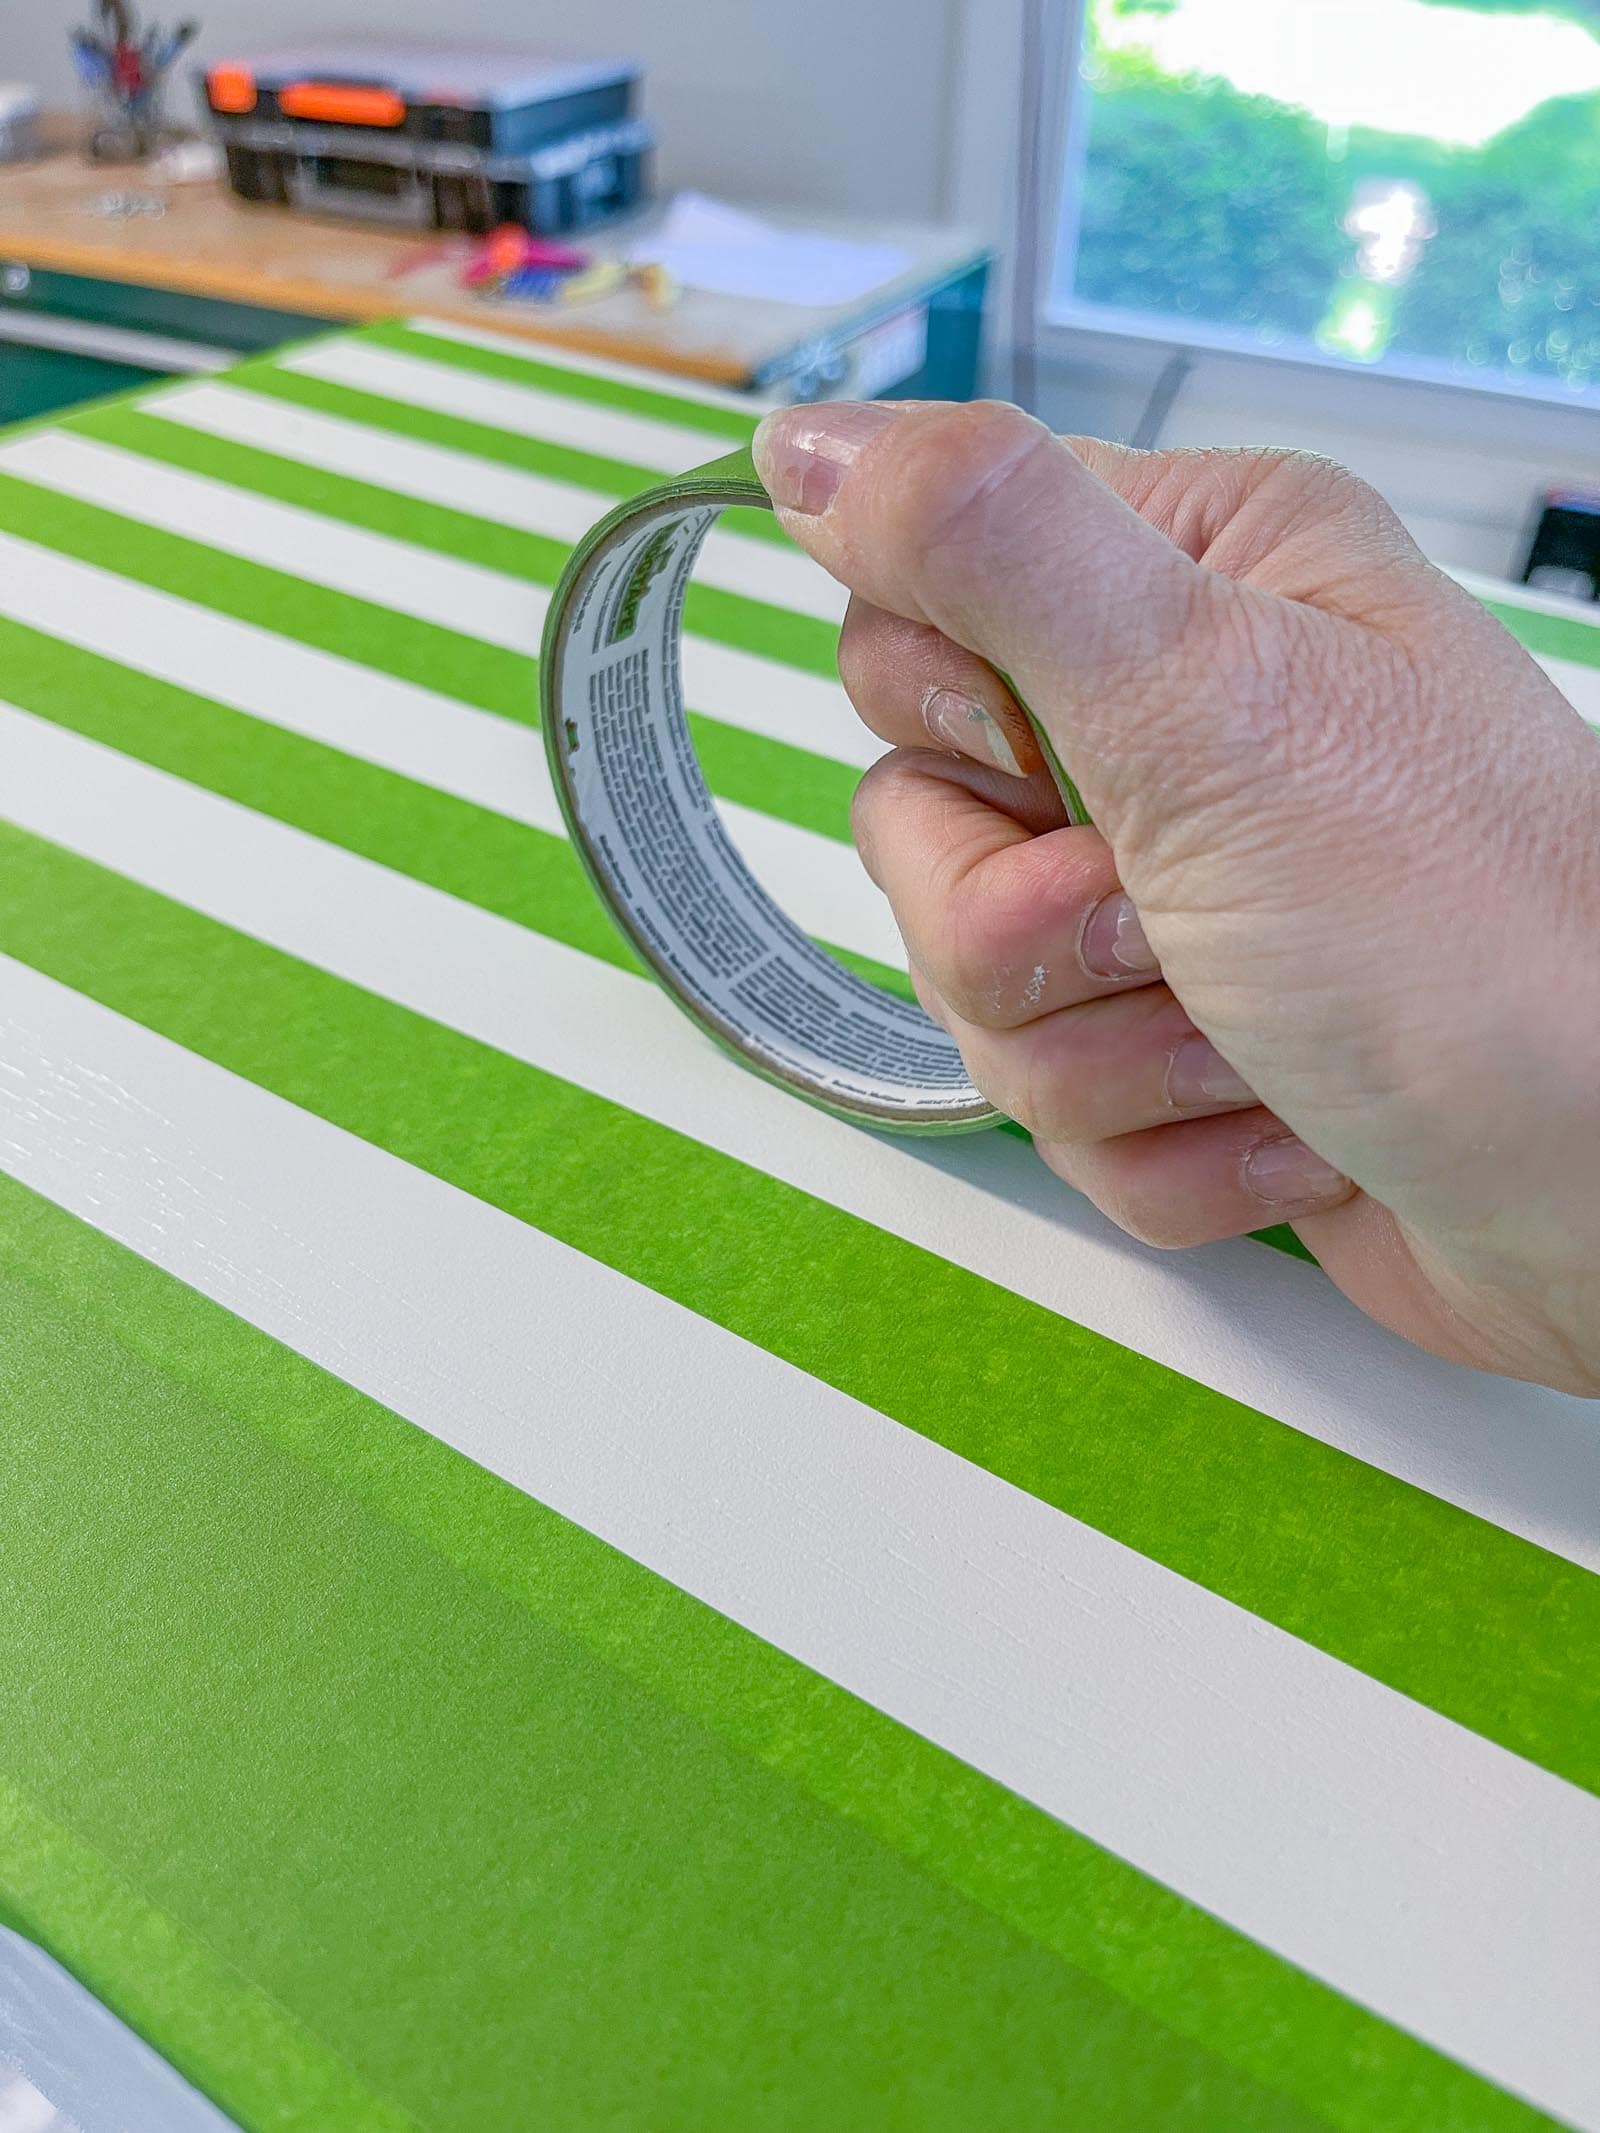
I always make sure my tape edges are adhered by running the roll of tape along the edges. And then to seal, I simple paint over the tape with the White base color. This way, on the offhand chances there are any tiny gaps beneath the tape that white paint will fill them in and you won’t notice.
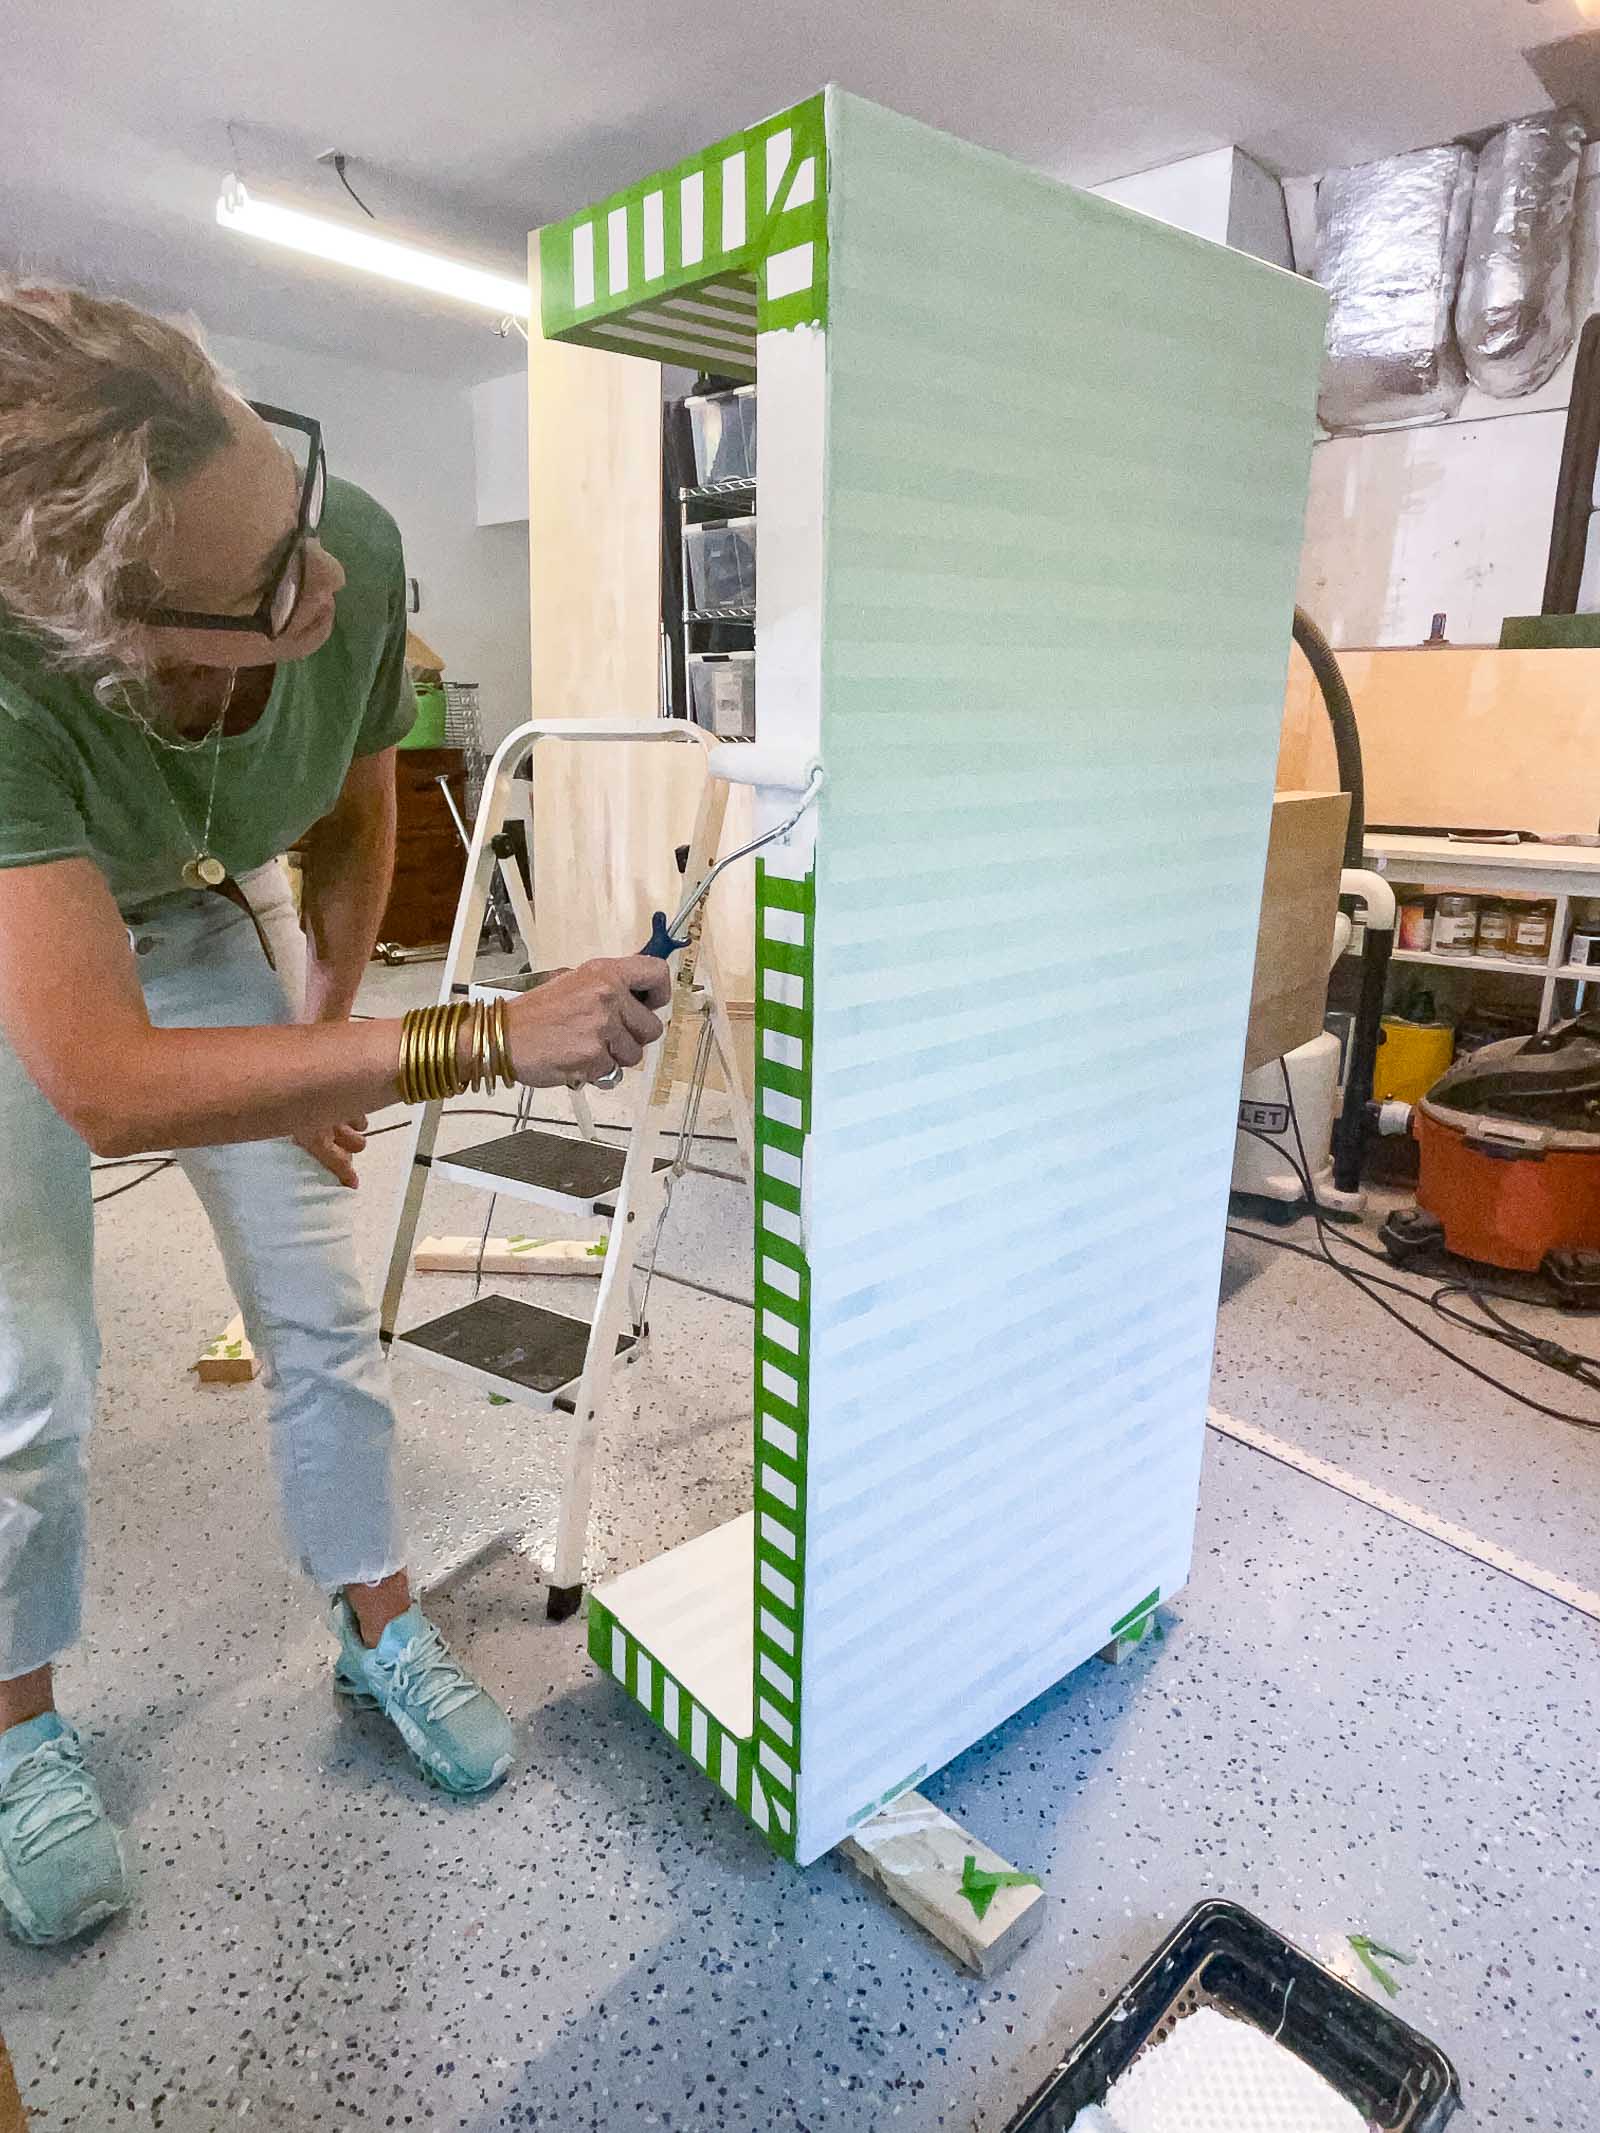
After the white paint had dried, it was showtime! I rolled a couple of coats the black paint over the tape and waited. I’ve been working with Frogtape for years (see my paintover challenge room HERE, this backgammon board HERE and this furniture flip HERE… I’m sure there are more!) and without exception the best part is the tape pull. Frogtape has never let me down and that first glimpse of the clean crisp lines NEVER gets old. So satisfying.

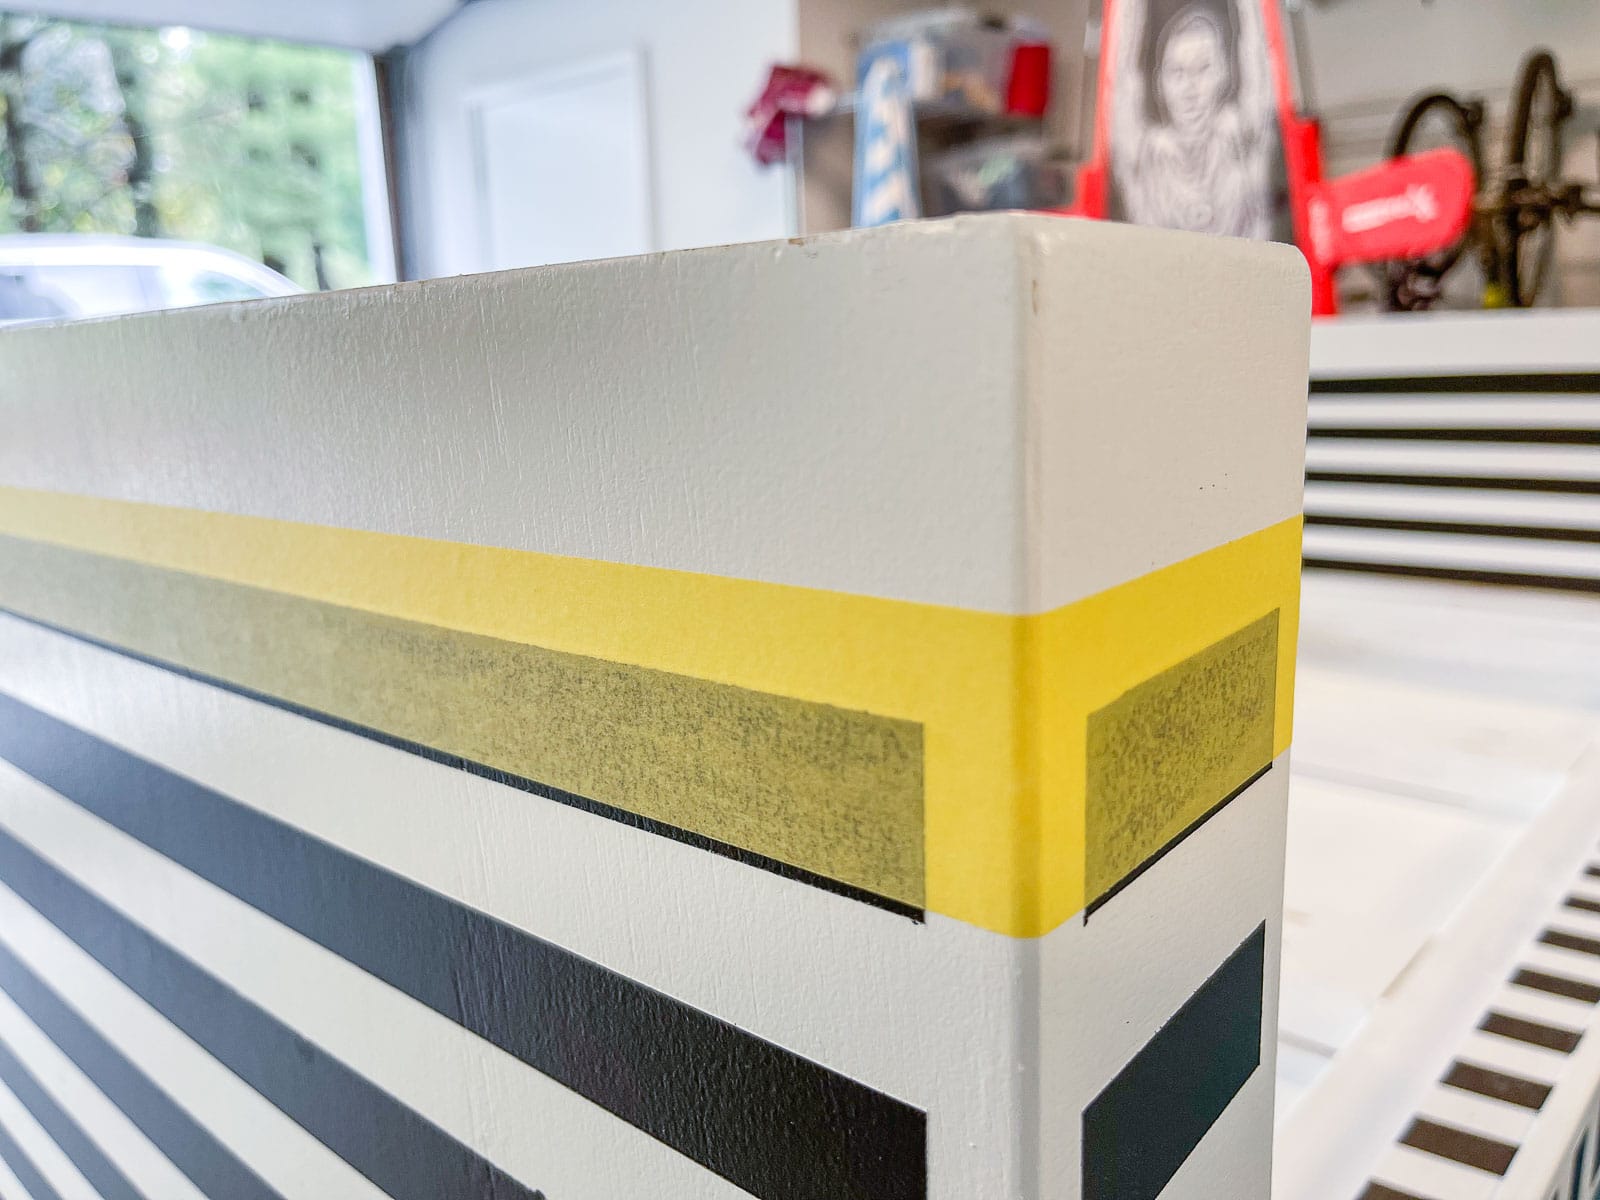
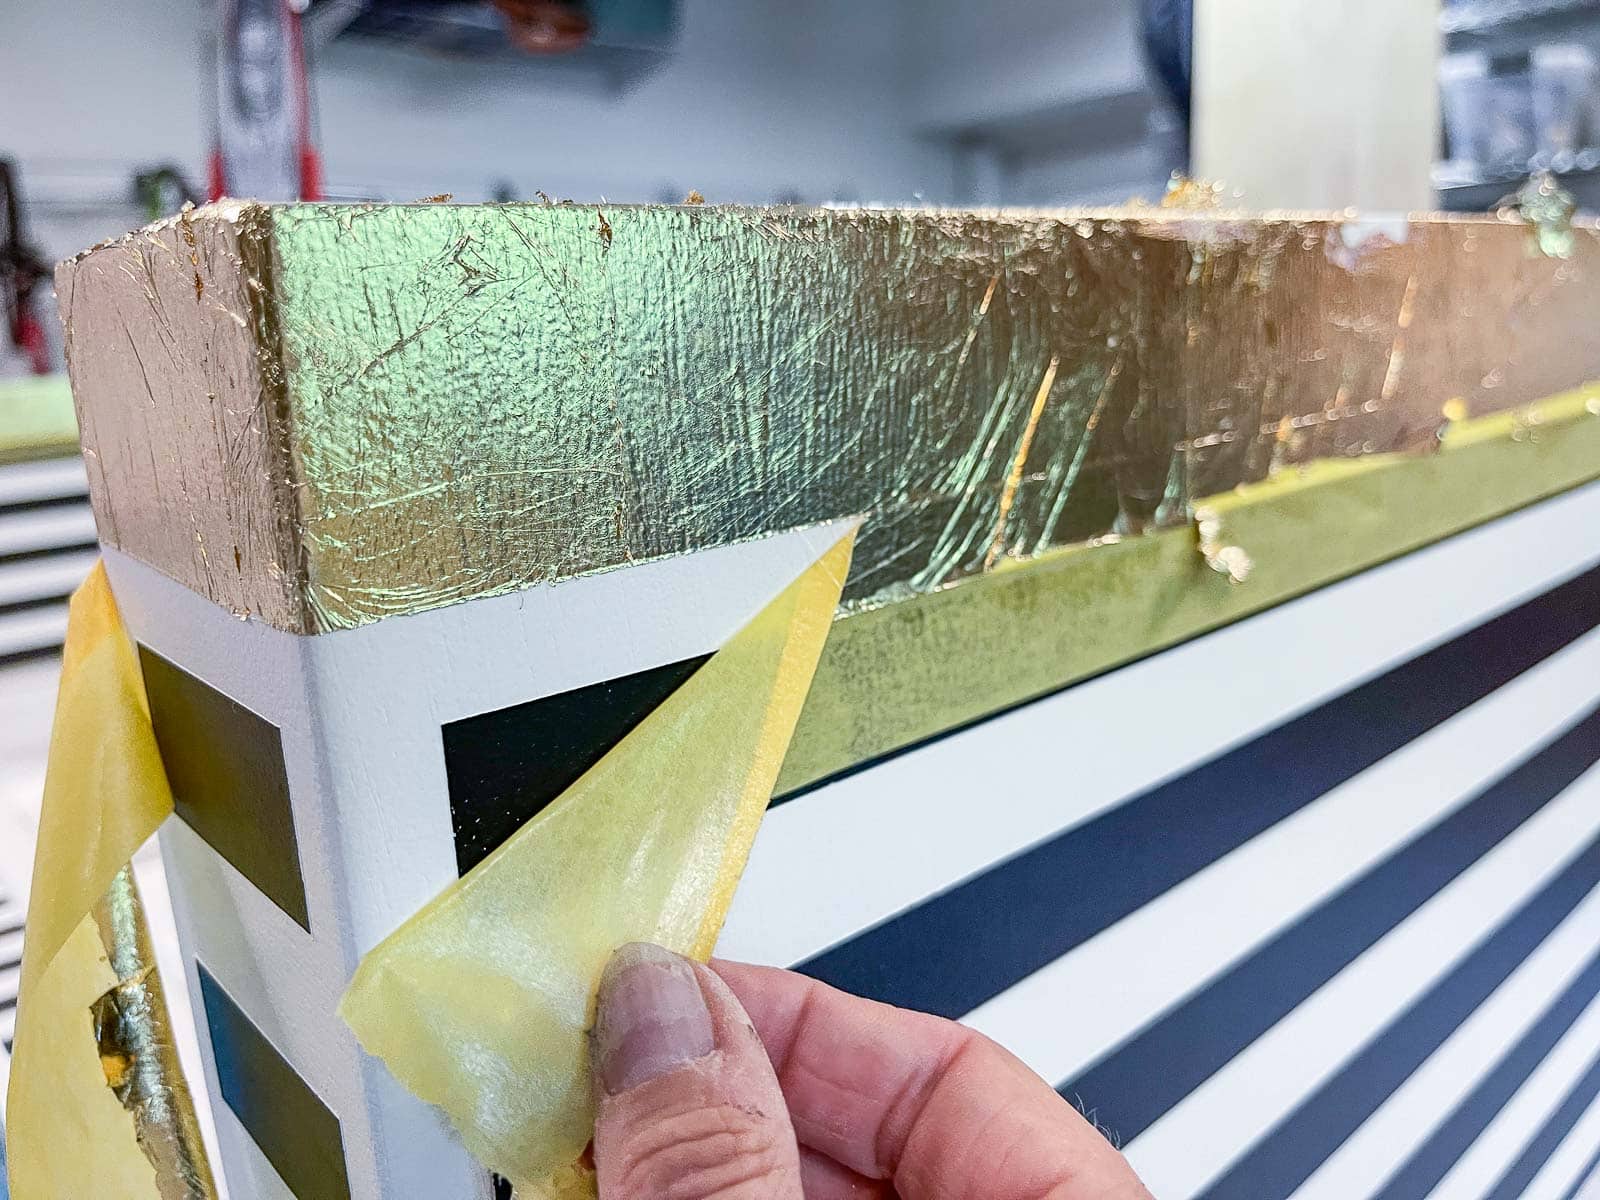
Step 5. Add “gold” feet
I loved that my inspo table had that brass detail on the bottom of the legs. I don’t know how to make brass feet, but I *do* know how to gold leaf. Do you? It’s super easy and such a good bang for your buck. I taped off the table leg and painted the adhesive onto the surface where I wanted the gold leaf to be. This adhesive needed to dry for 15-30 minutes but check the label on the one you’re using. Once the glue was tacky, it was time to gold leaf. This is simply placing the thin gold leaf onto the adhesive and smoothing in place with a special gilding brush. Overlap the next piece of gold leaf and repeat. With the brush, you can brush away the excess leaf leaving behind one smooth gold surface. Peep the crisp line even with gold leaf!!
Step 6. Seal the table
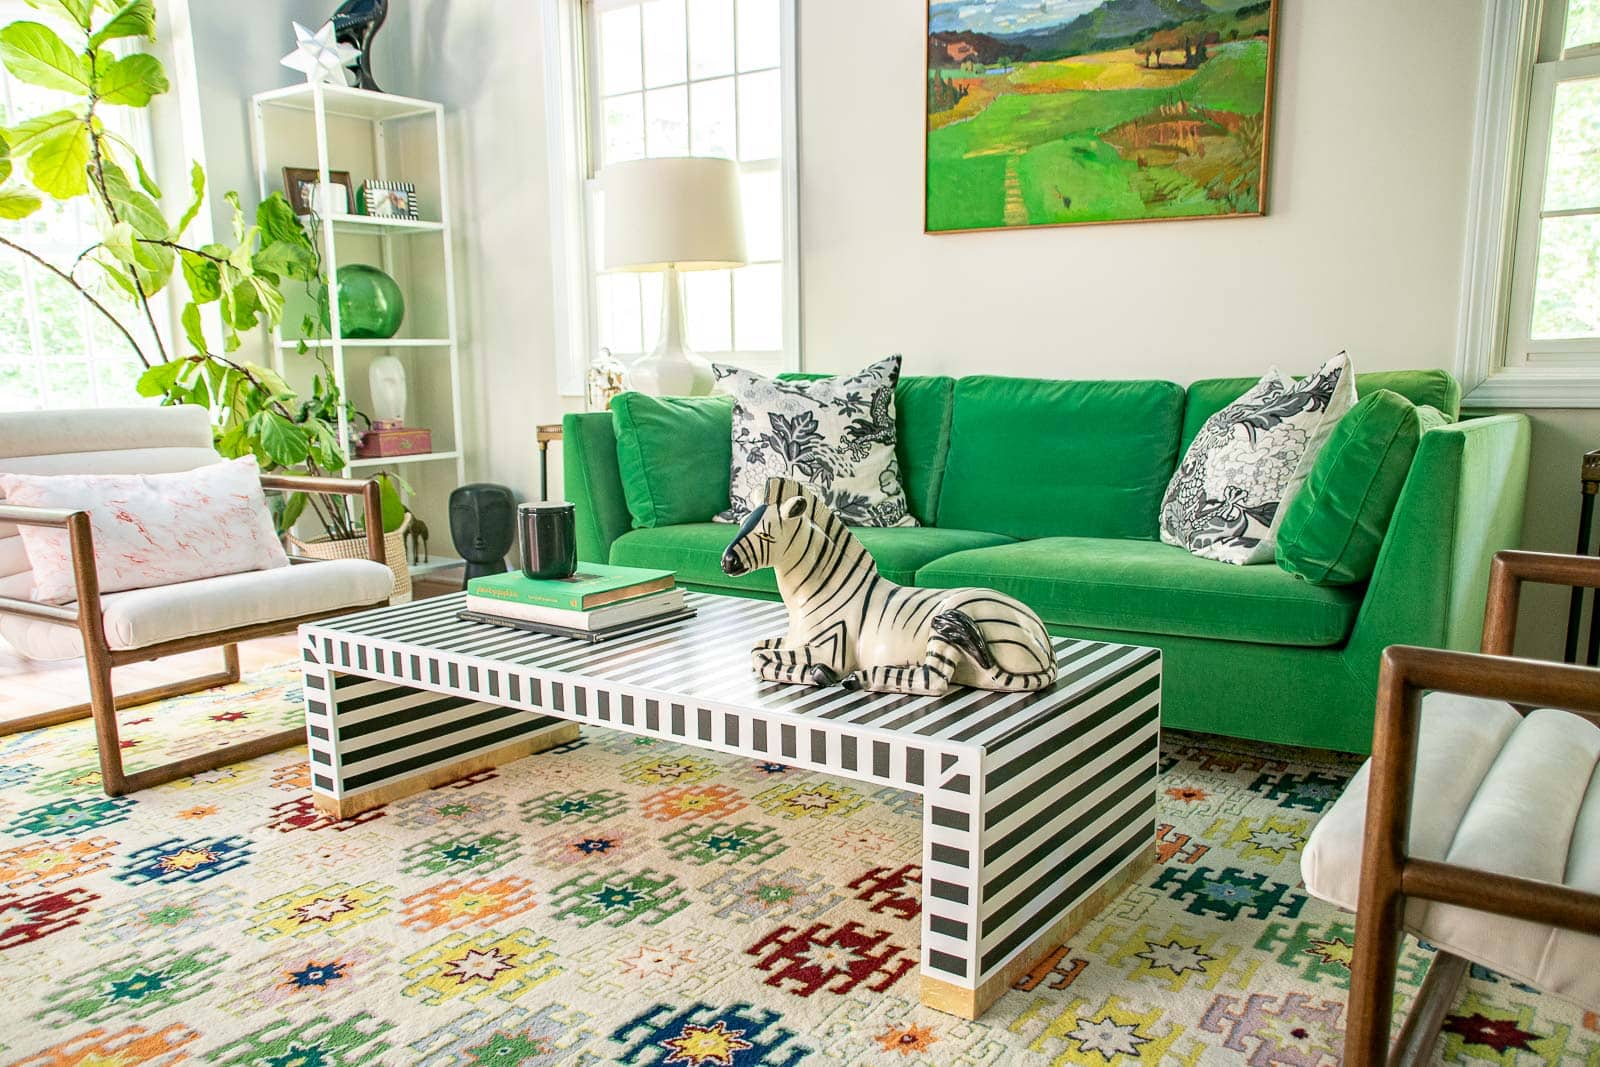
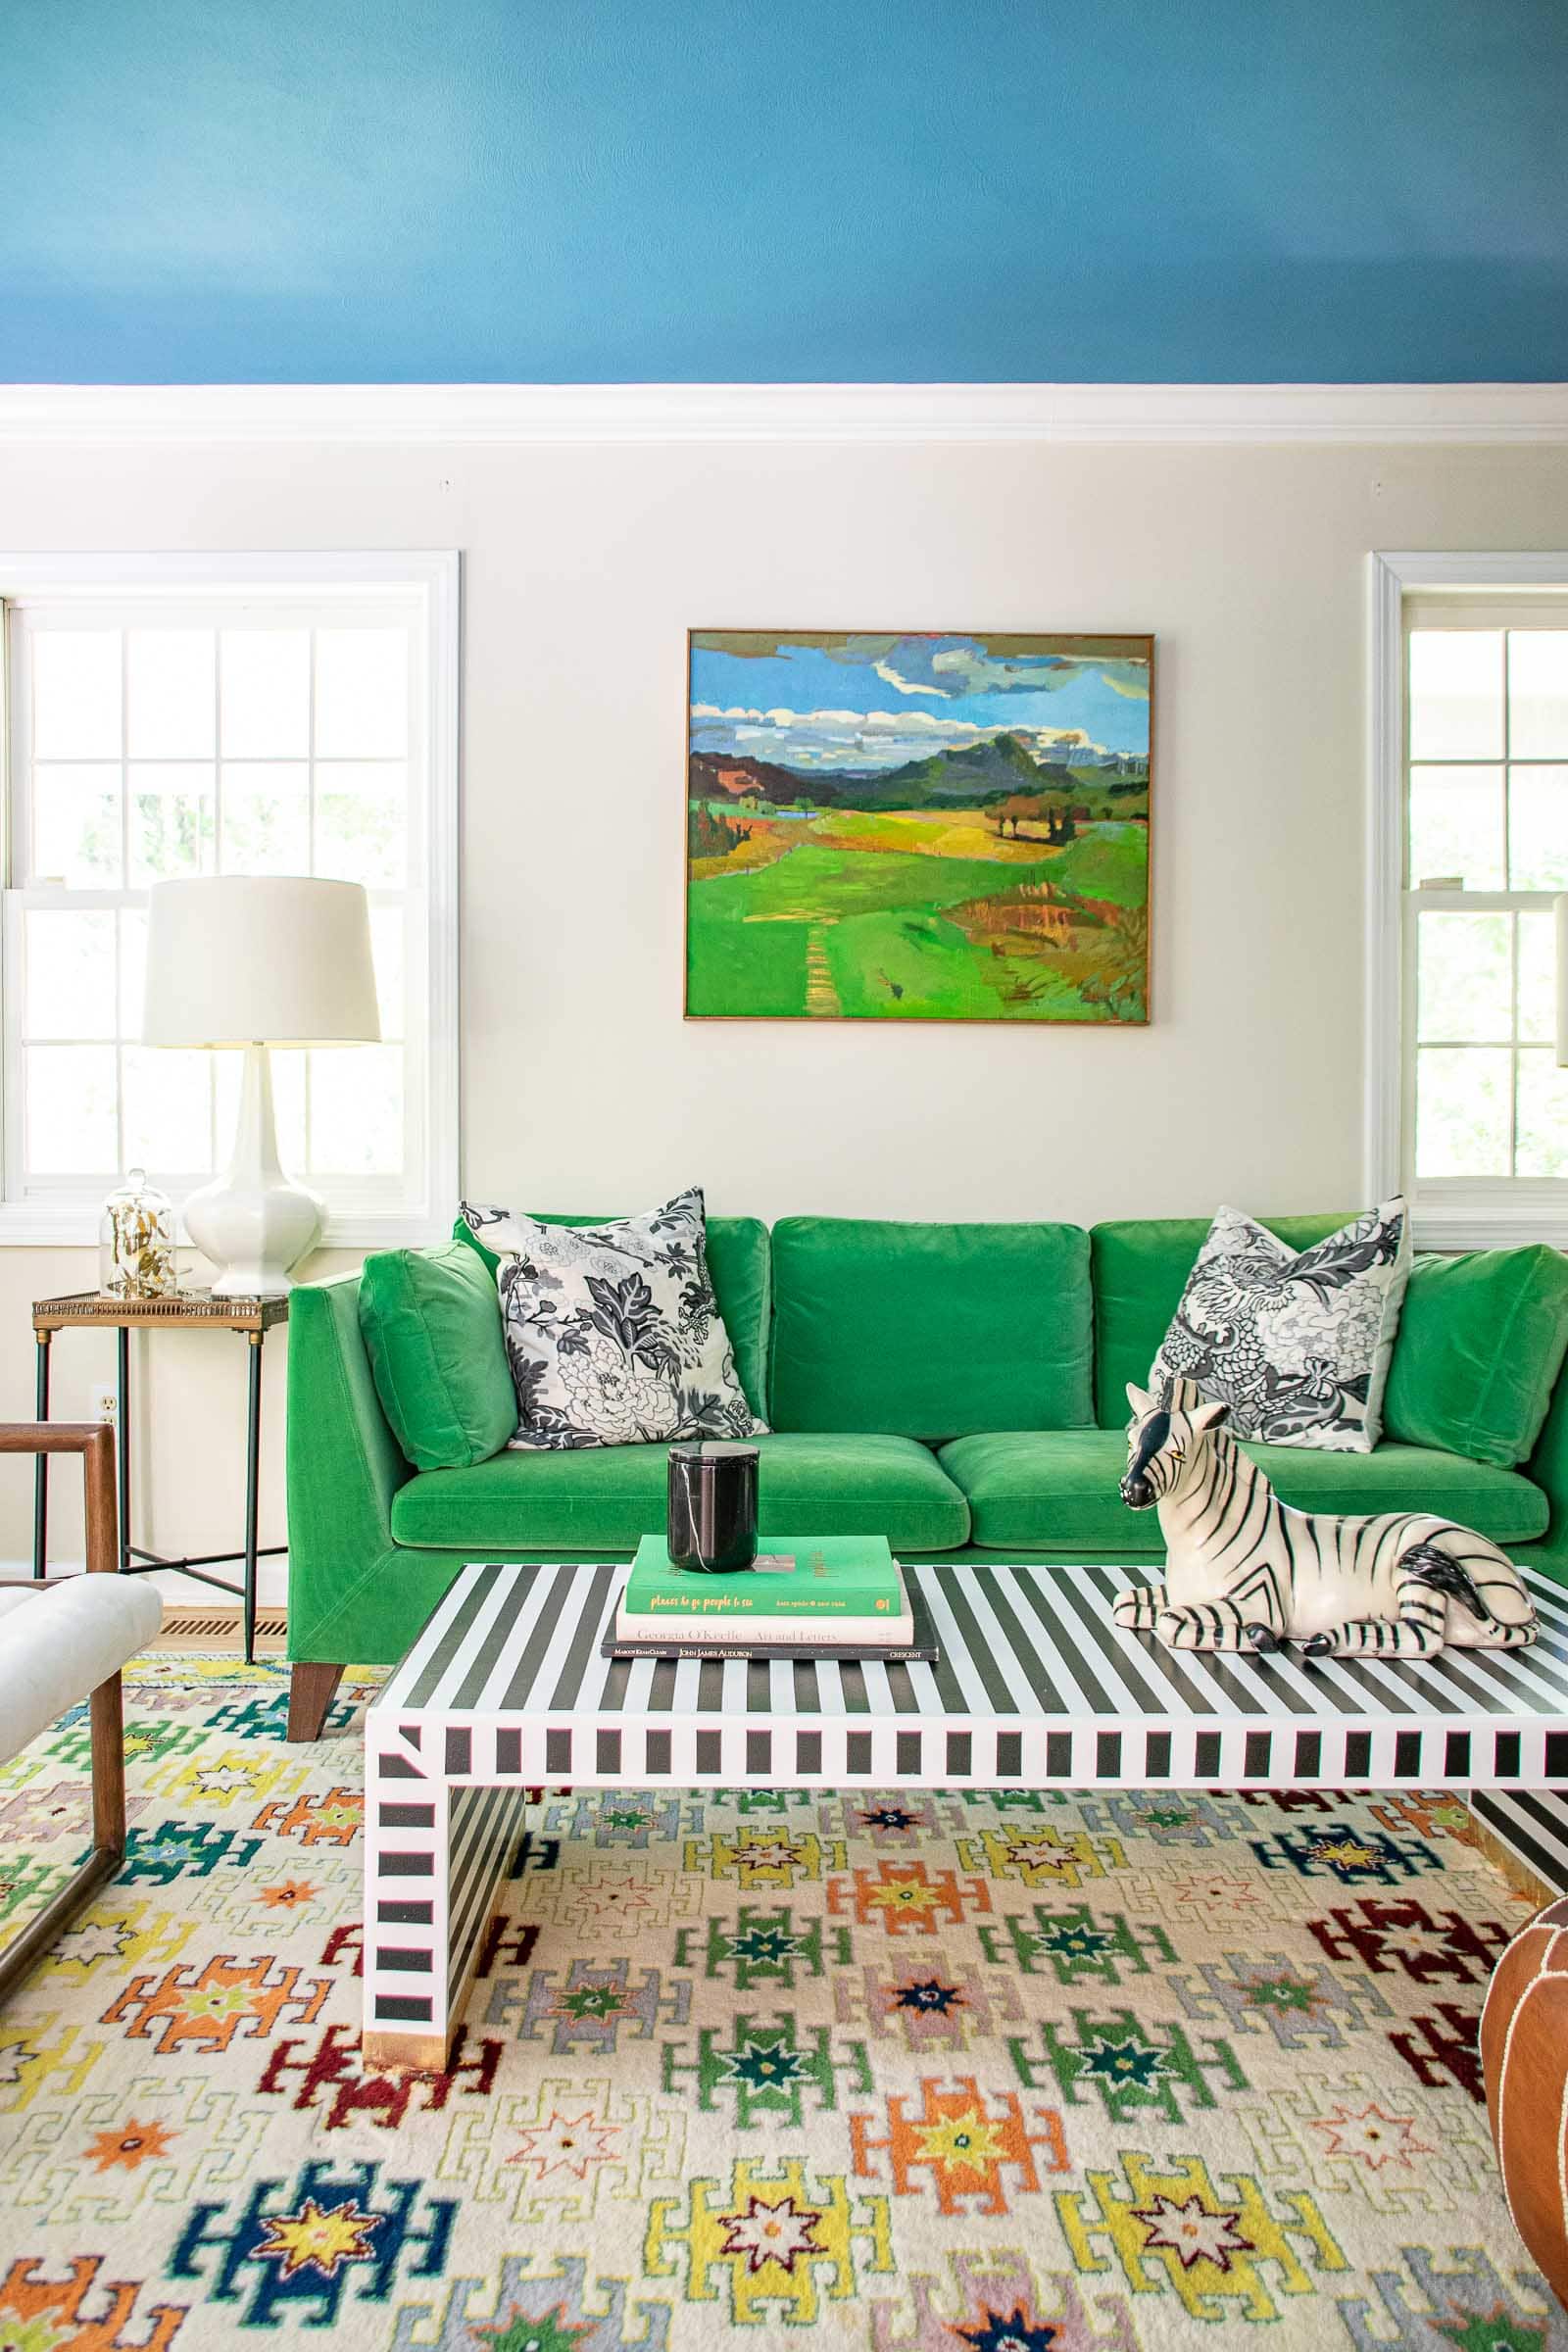
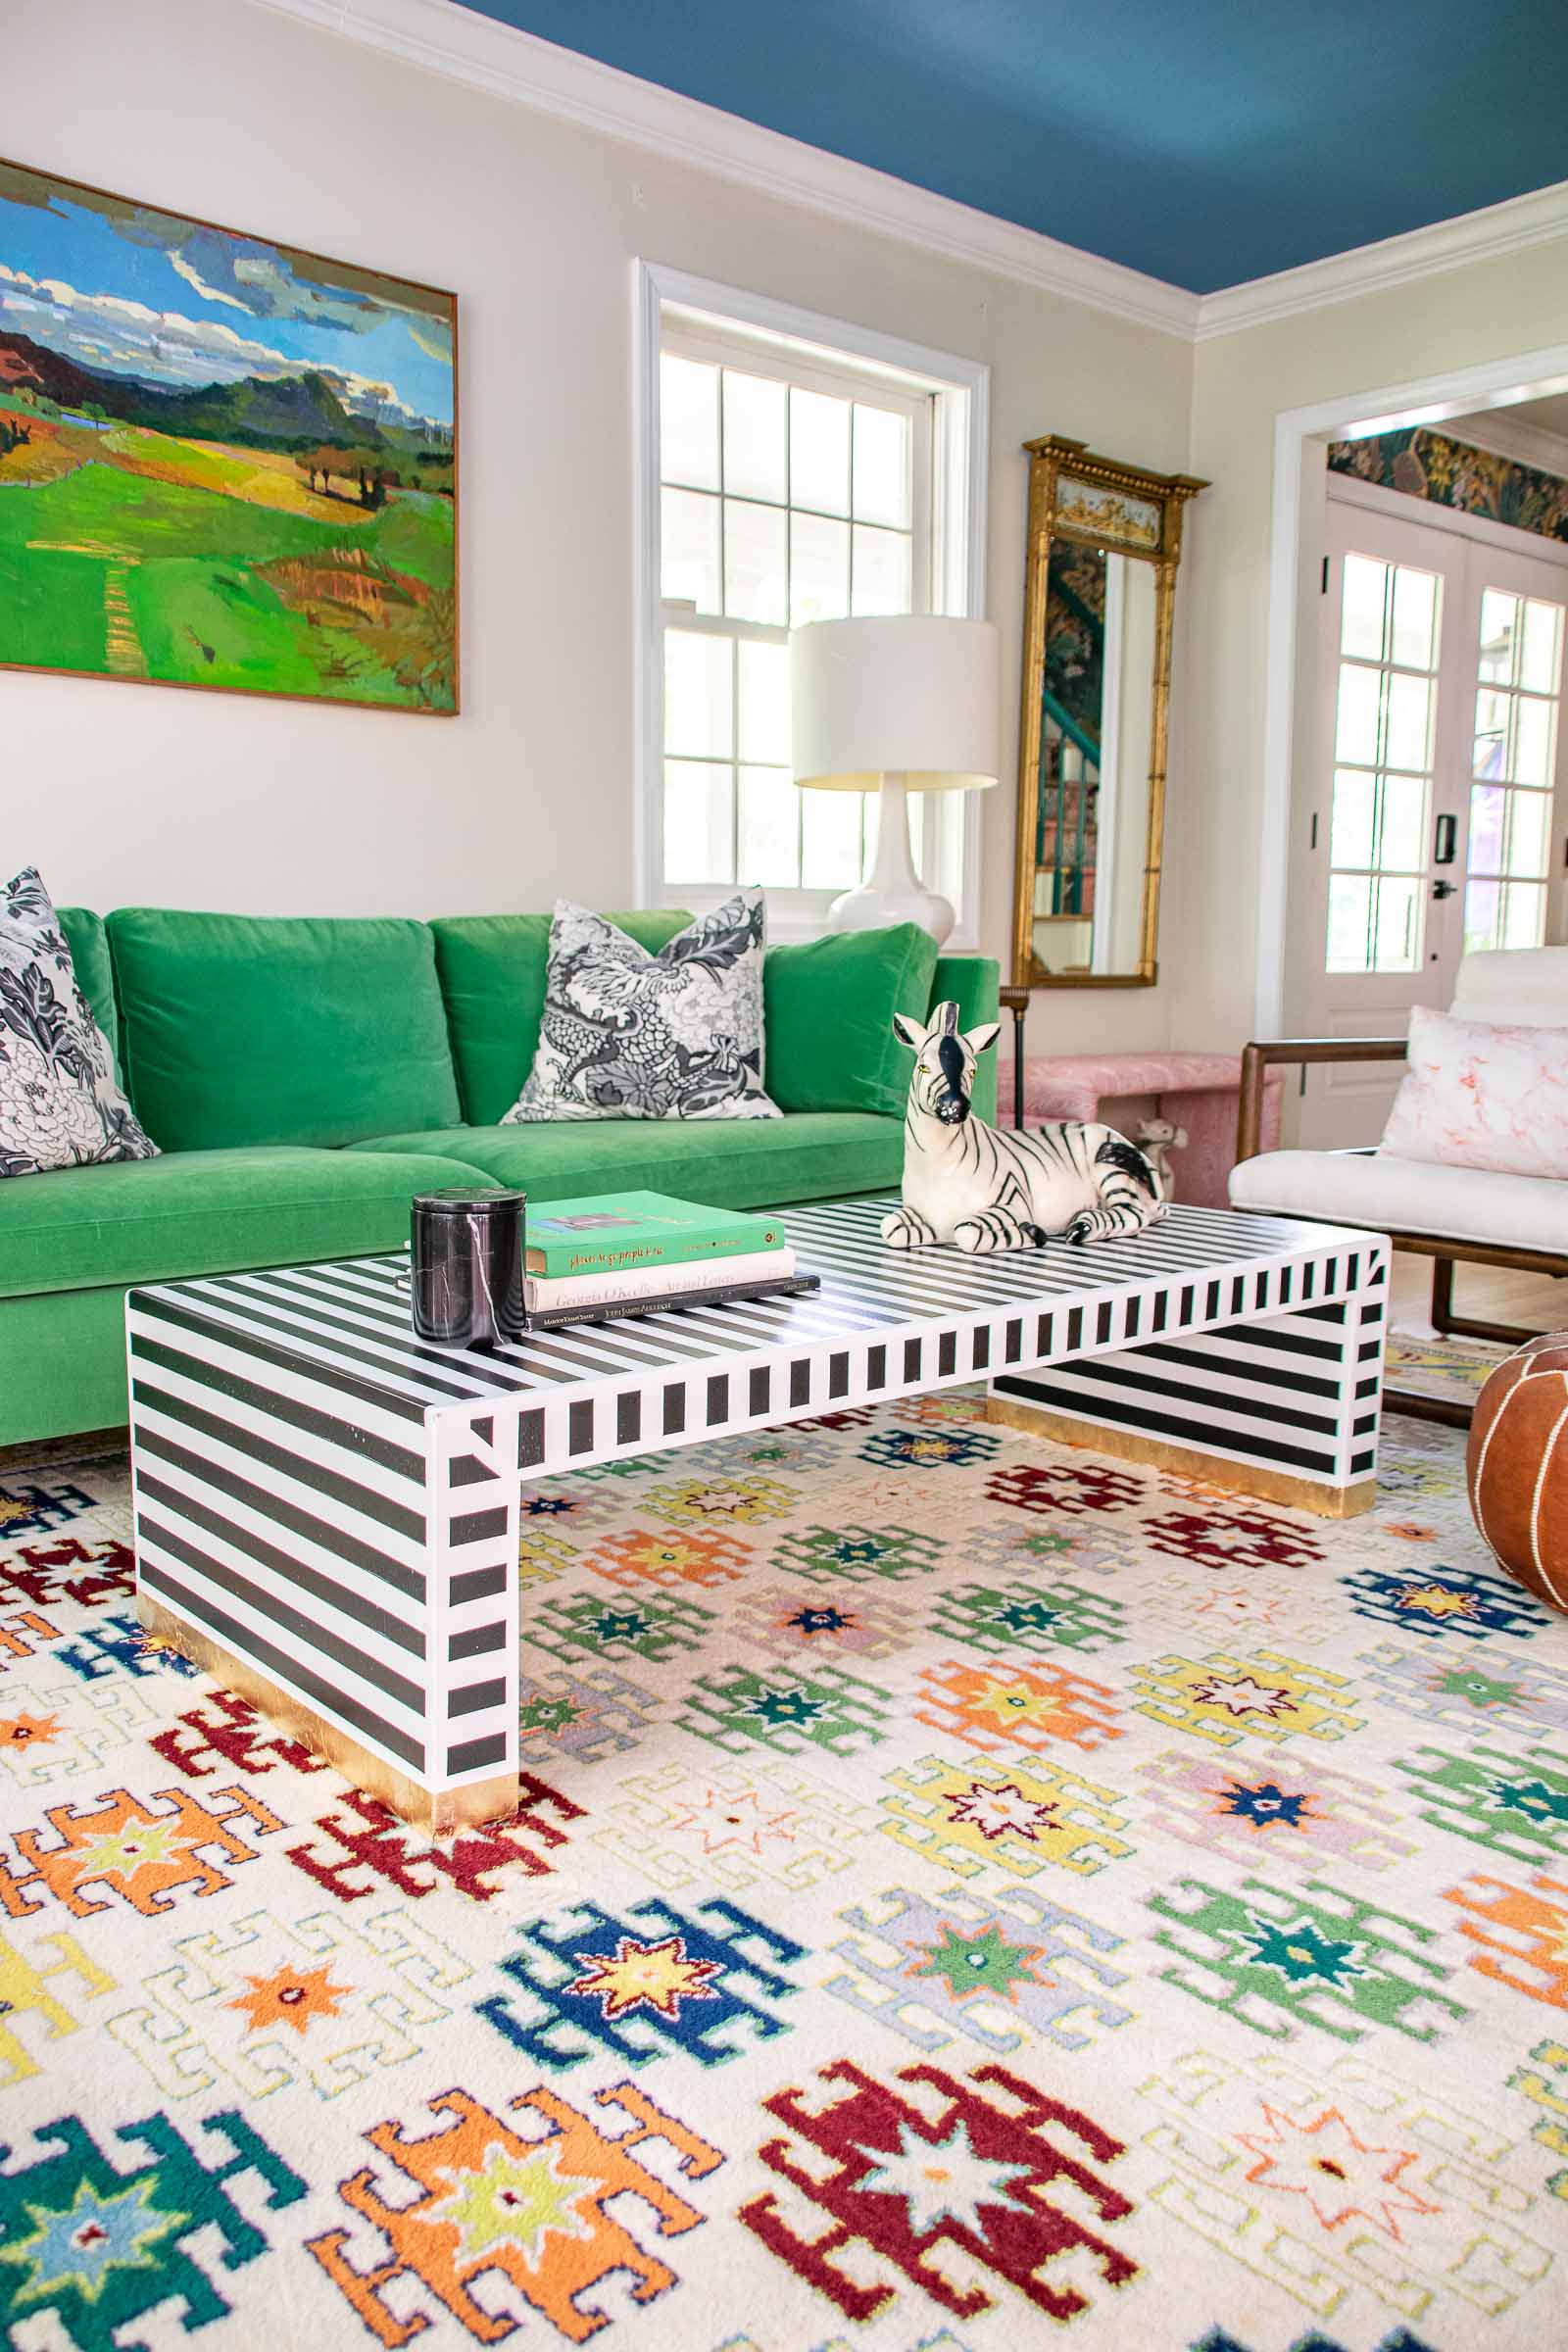
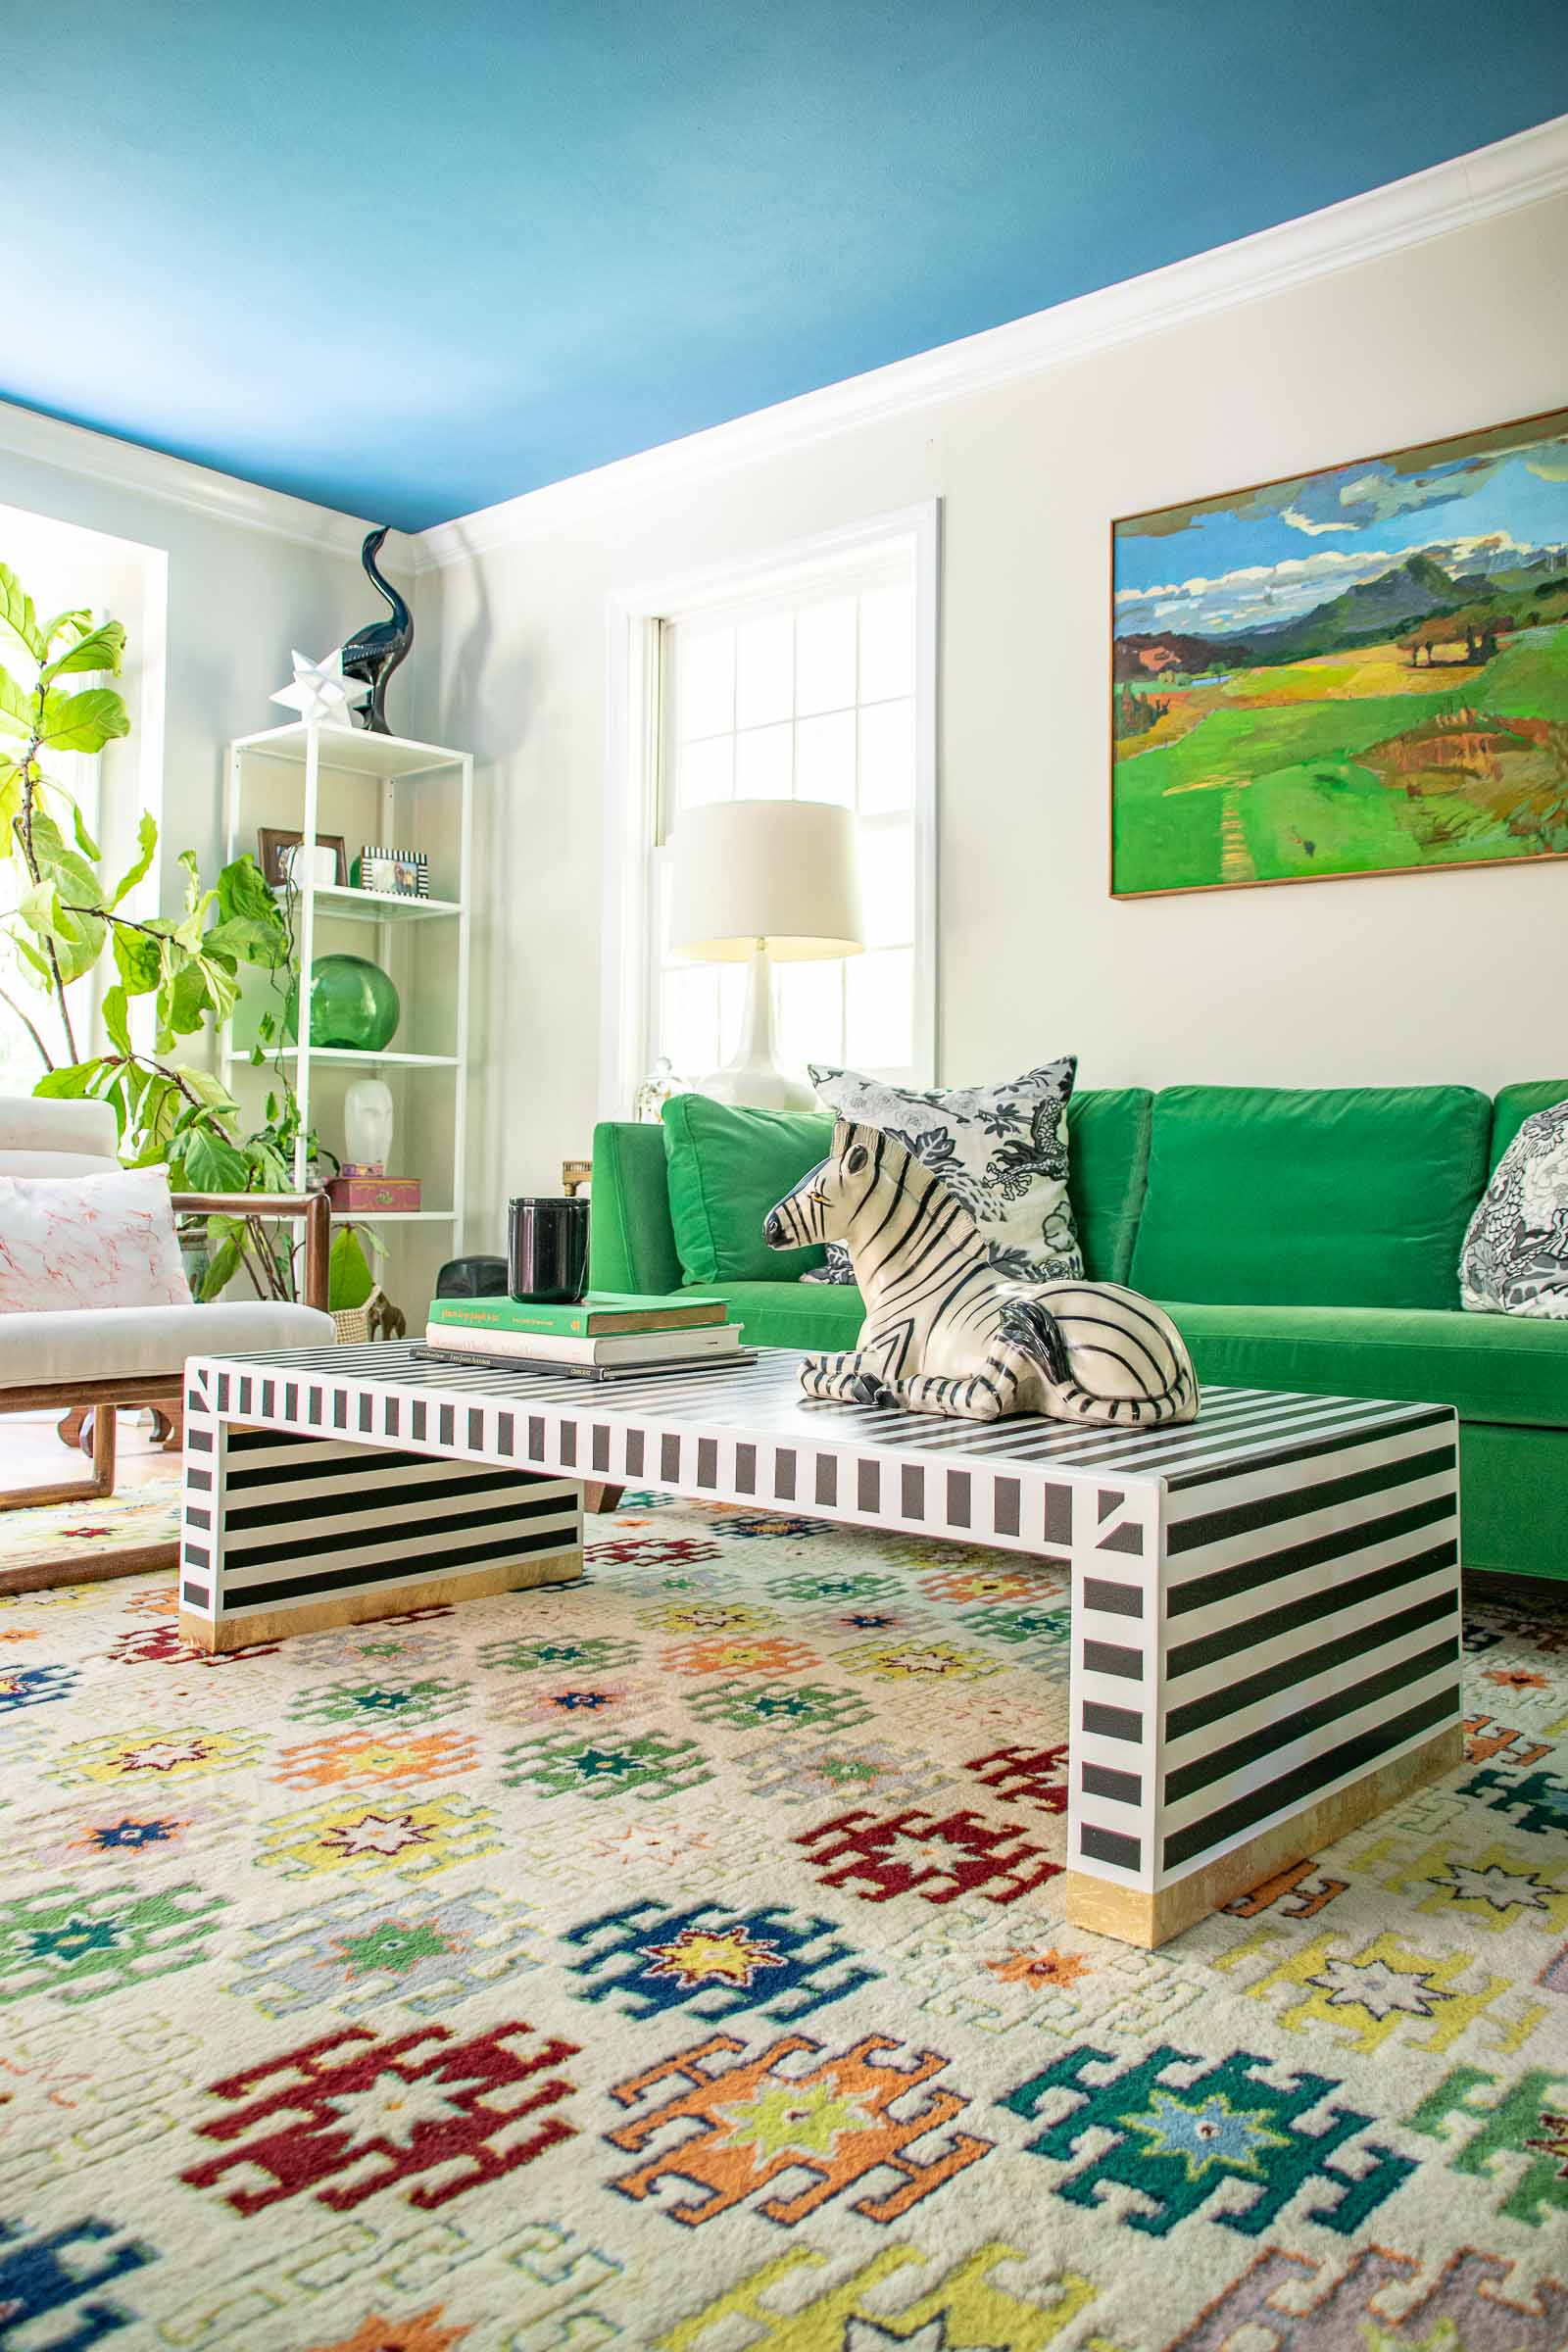
If I’m just painting, I don’t typically bother with a clear coat, but because this table had both the gold leaf and all those carefully painted stripes… I went back over with a couple coats of polycrylic to protect the surface before bringing it up to our living room. No question this is a big bold statement in the space, but it cost me some scrap lumber and a little bit of time and I got to practice some building techniques. I love mixing pattern and this bold table is a fun DIY addition to our living room.

Love it!
Thank you Nicole!! xoxo
That is one fabulous table!! Very bold with the stripes and gold leaf!! Outstandind job!!
I really appreciate it! Thank you!! xx
Did you use 2×2’s to reinforce your 2×4 frame? It looks like you created a 2×2 box on the legs of the 2×4 frame base (picture under you with power tool near top). Your tiktok also shows what looks like a 2×2 box on the inner legs of the table? Were the legs reinforced? Table looks great – hoping to duplicate!!!
Hi! Yes and no. 🙂 I added scrap material but NOT to reinforce the table; I wanted the legs and the top to be chunky so I added scrap wood only to add some dimension to the piece.
WhAT ARE THE EXACT DIMENSIONS OF THE TABLE? HOW WIDE ARE THE LEGS?
The table top is 25″ x 56″. The legs are about 3.25″ thick… basically a 2×4 wrapped with thin plywood.
excellent. thank you very much! let’s see if I can duplicate that success. 🙂
Love The area rug, could you share where it is from?
Sadly that’s from a local store that’s since gone out of business!