
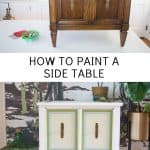
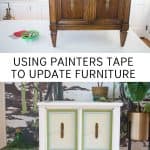
Painting a Wooden Table With the Help of Painters Tape
Psssst… this post *might* contain affiliate links: see my disclosure here.
Using Painter’s Tape to Paint a Dated Wooden Table
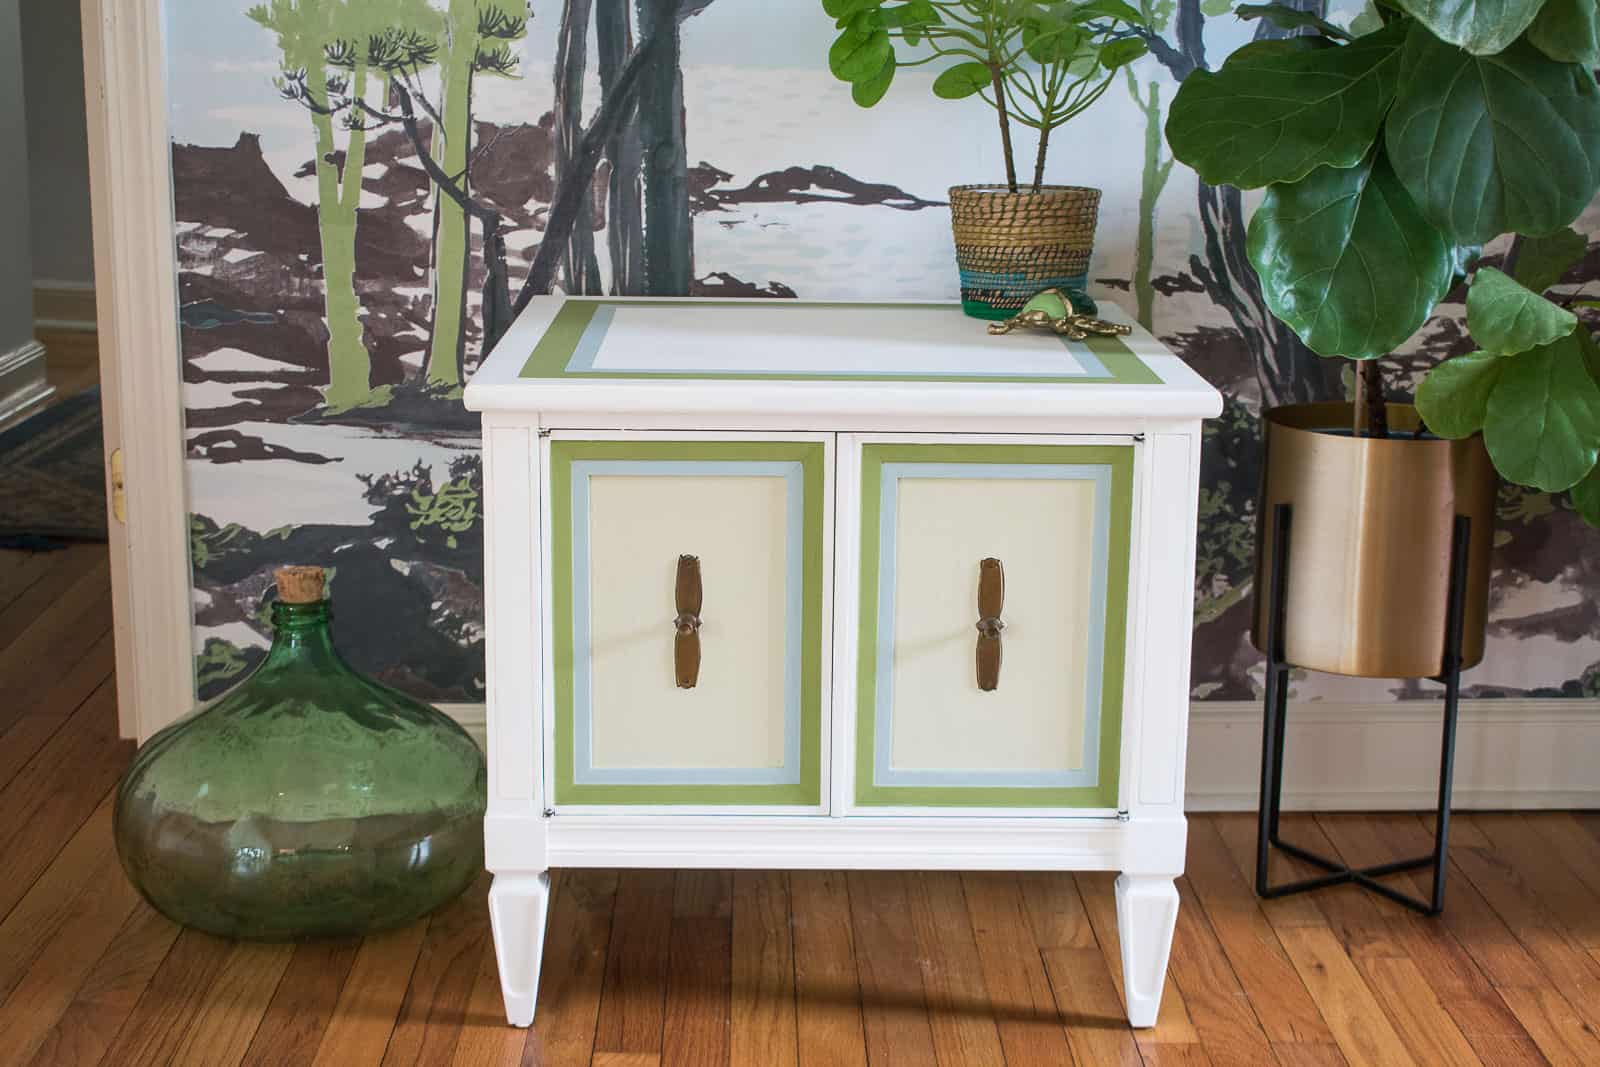
Painting a wooden table is an easy way to bring Taniya Nayak’s 2020 trend, Natural Beauty, into your decor.
Disclosure: I’m partnering with my friends at Frogtape to bring you this makeover.
Shop my favorites!
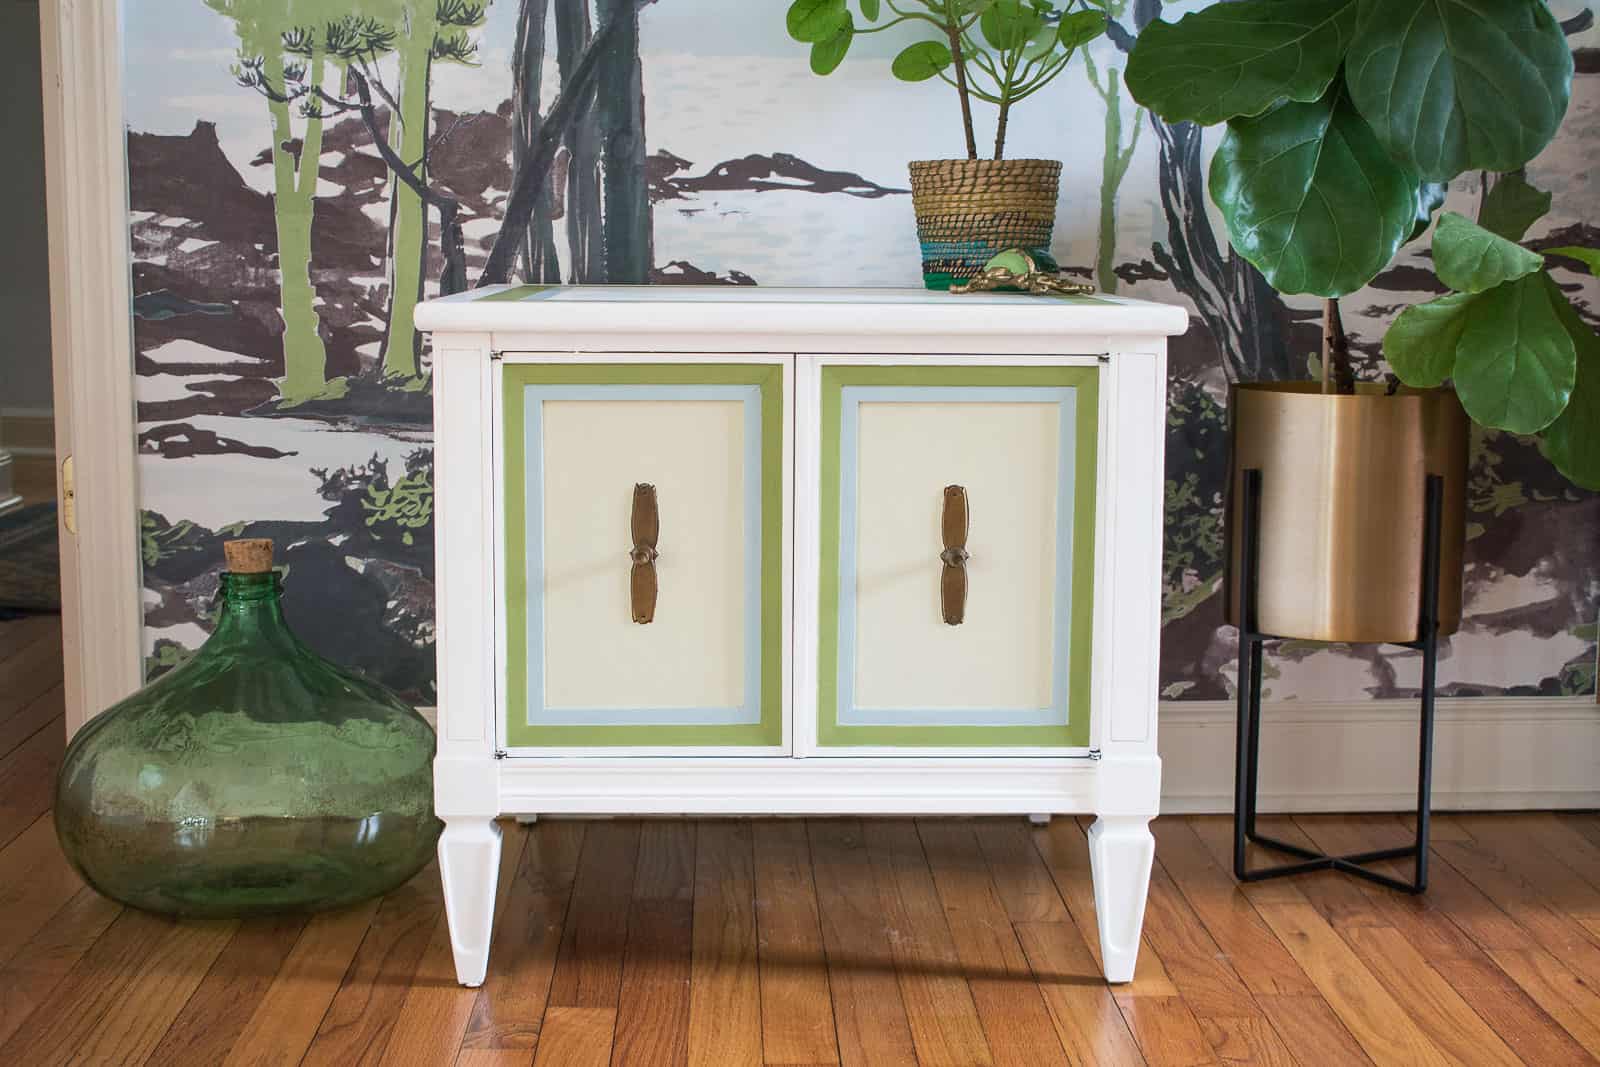
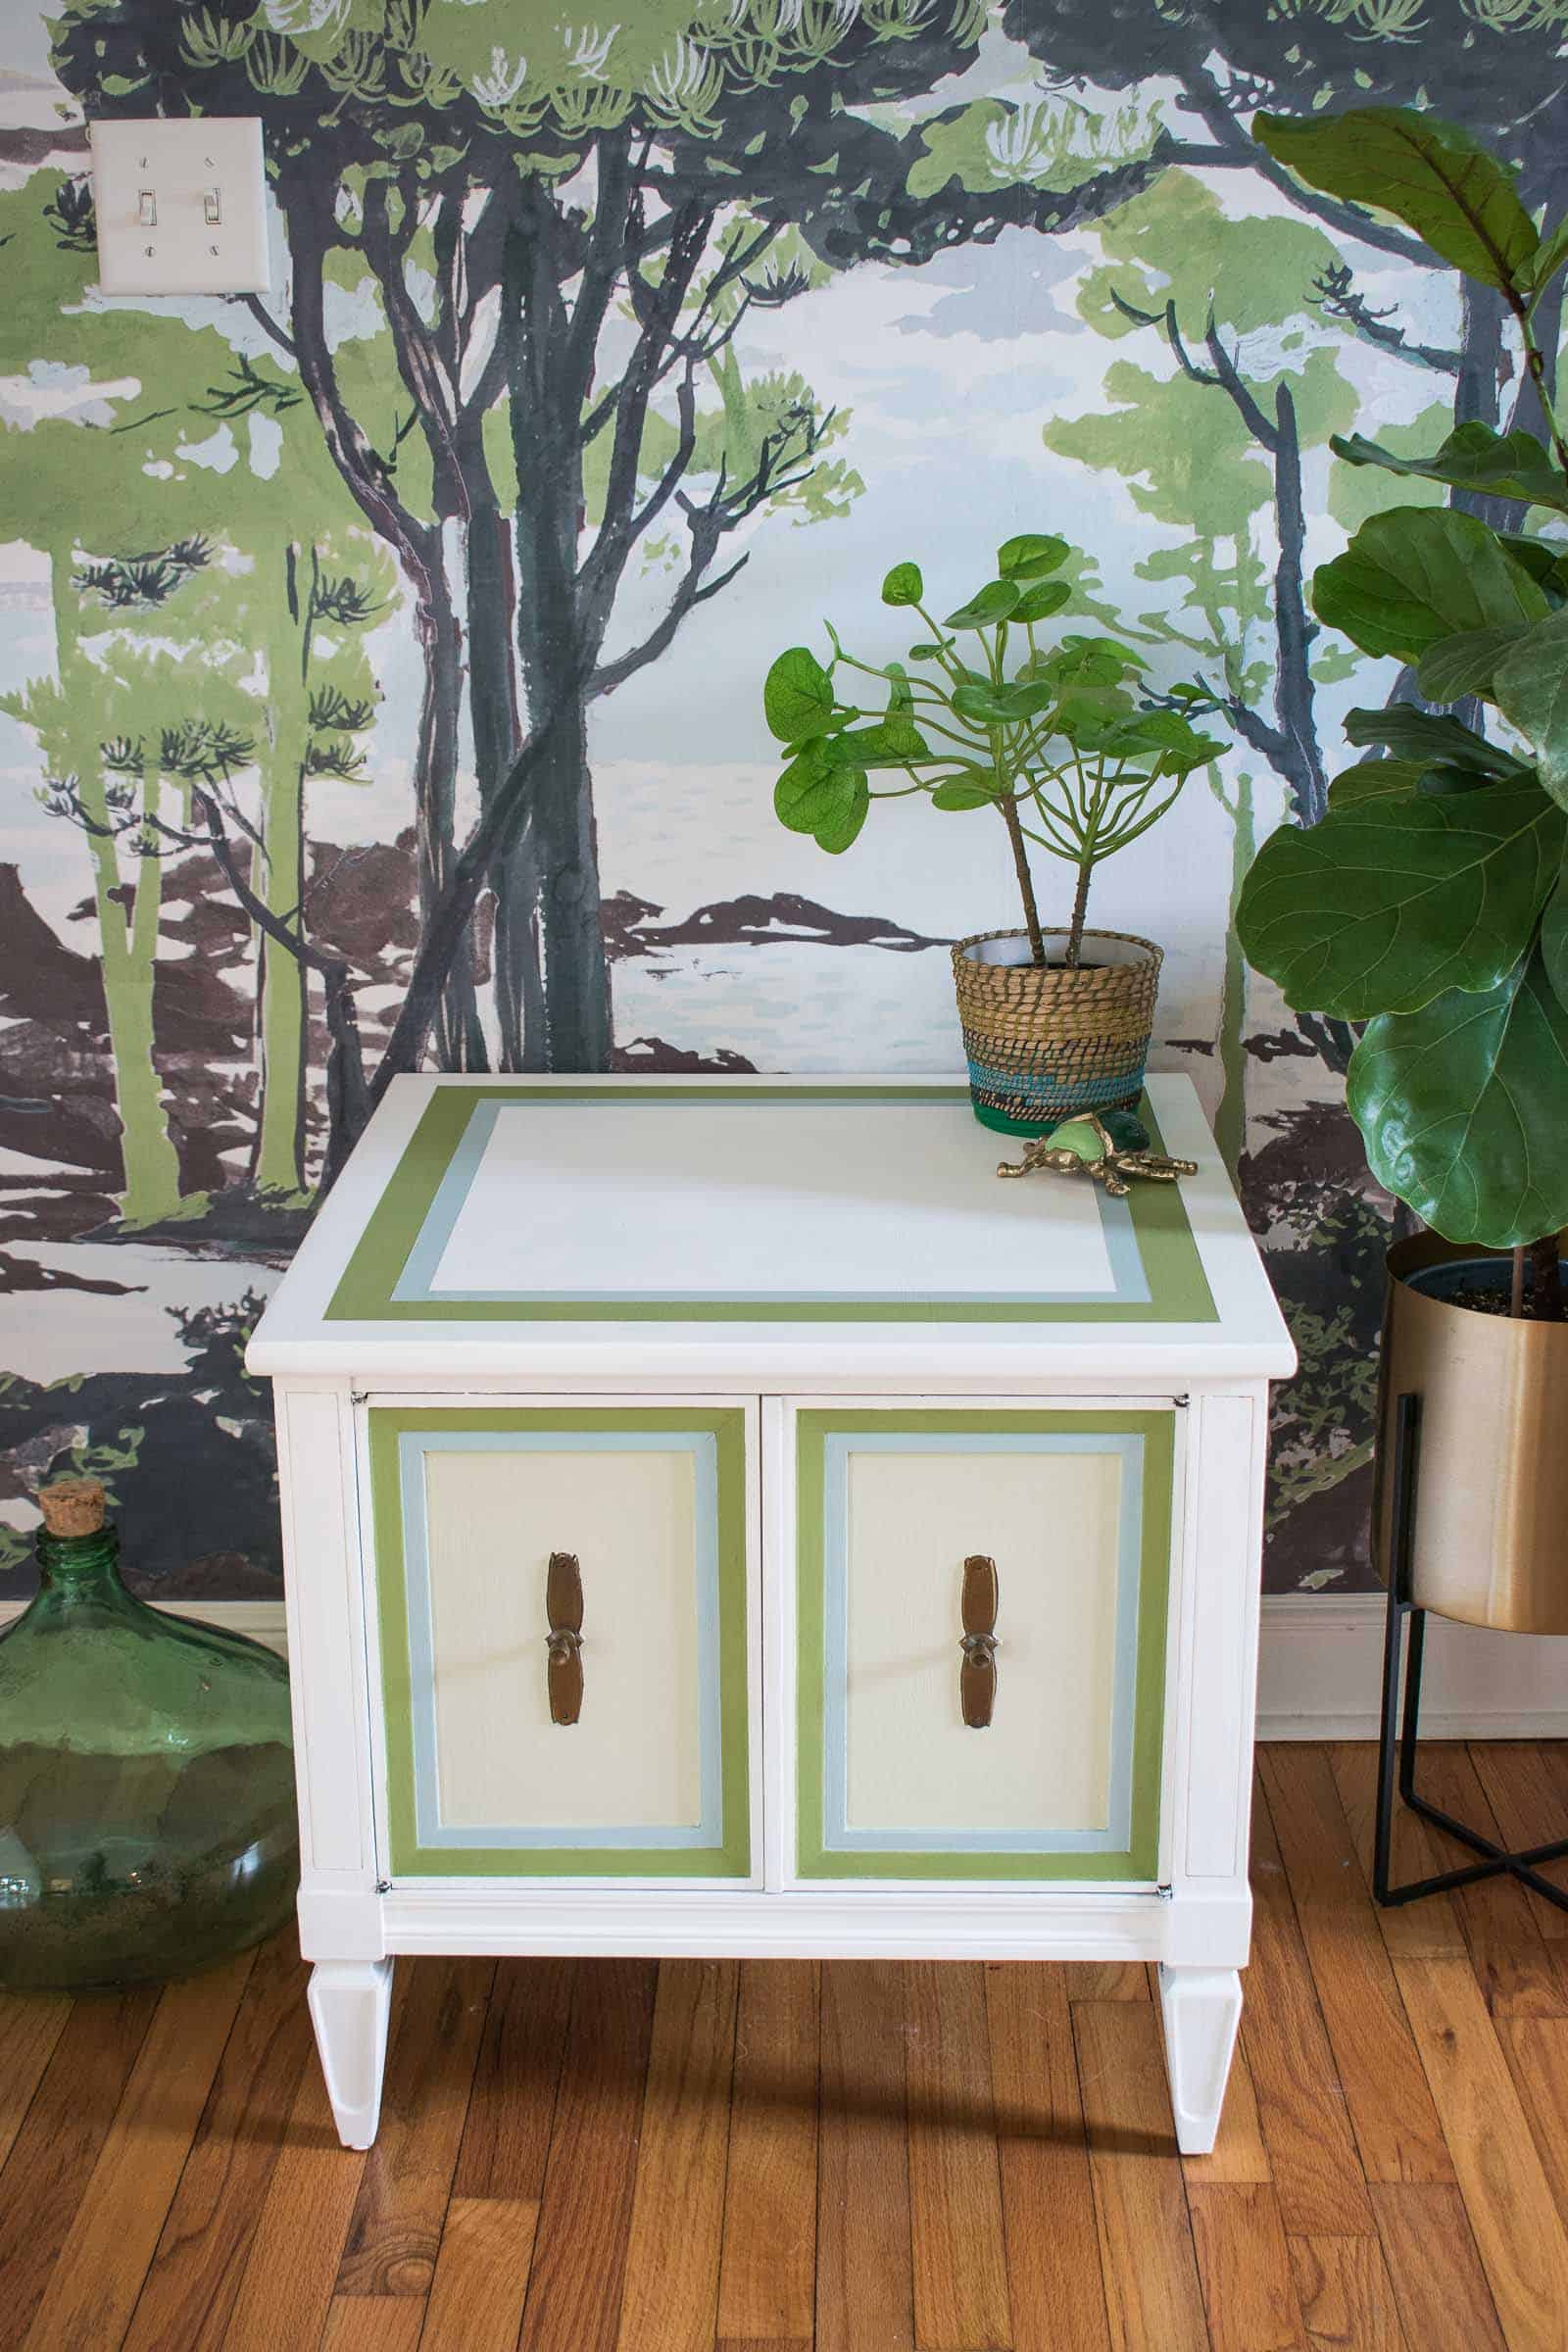
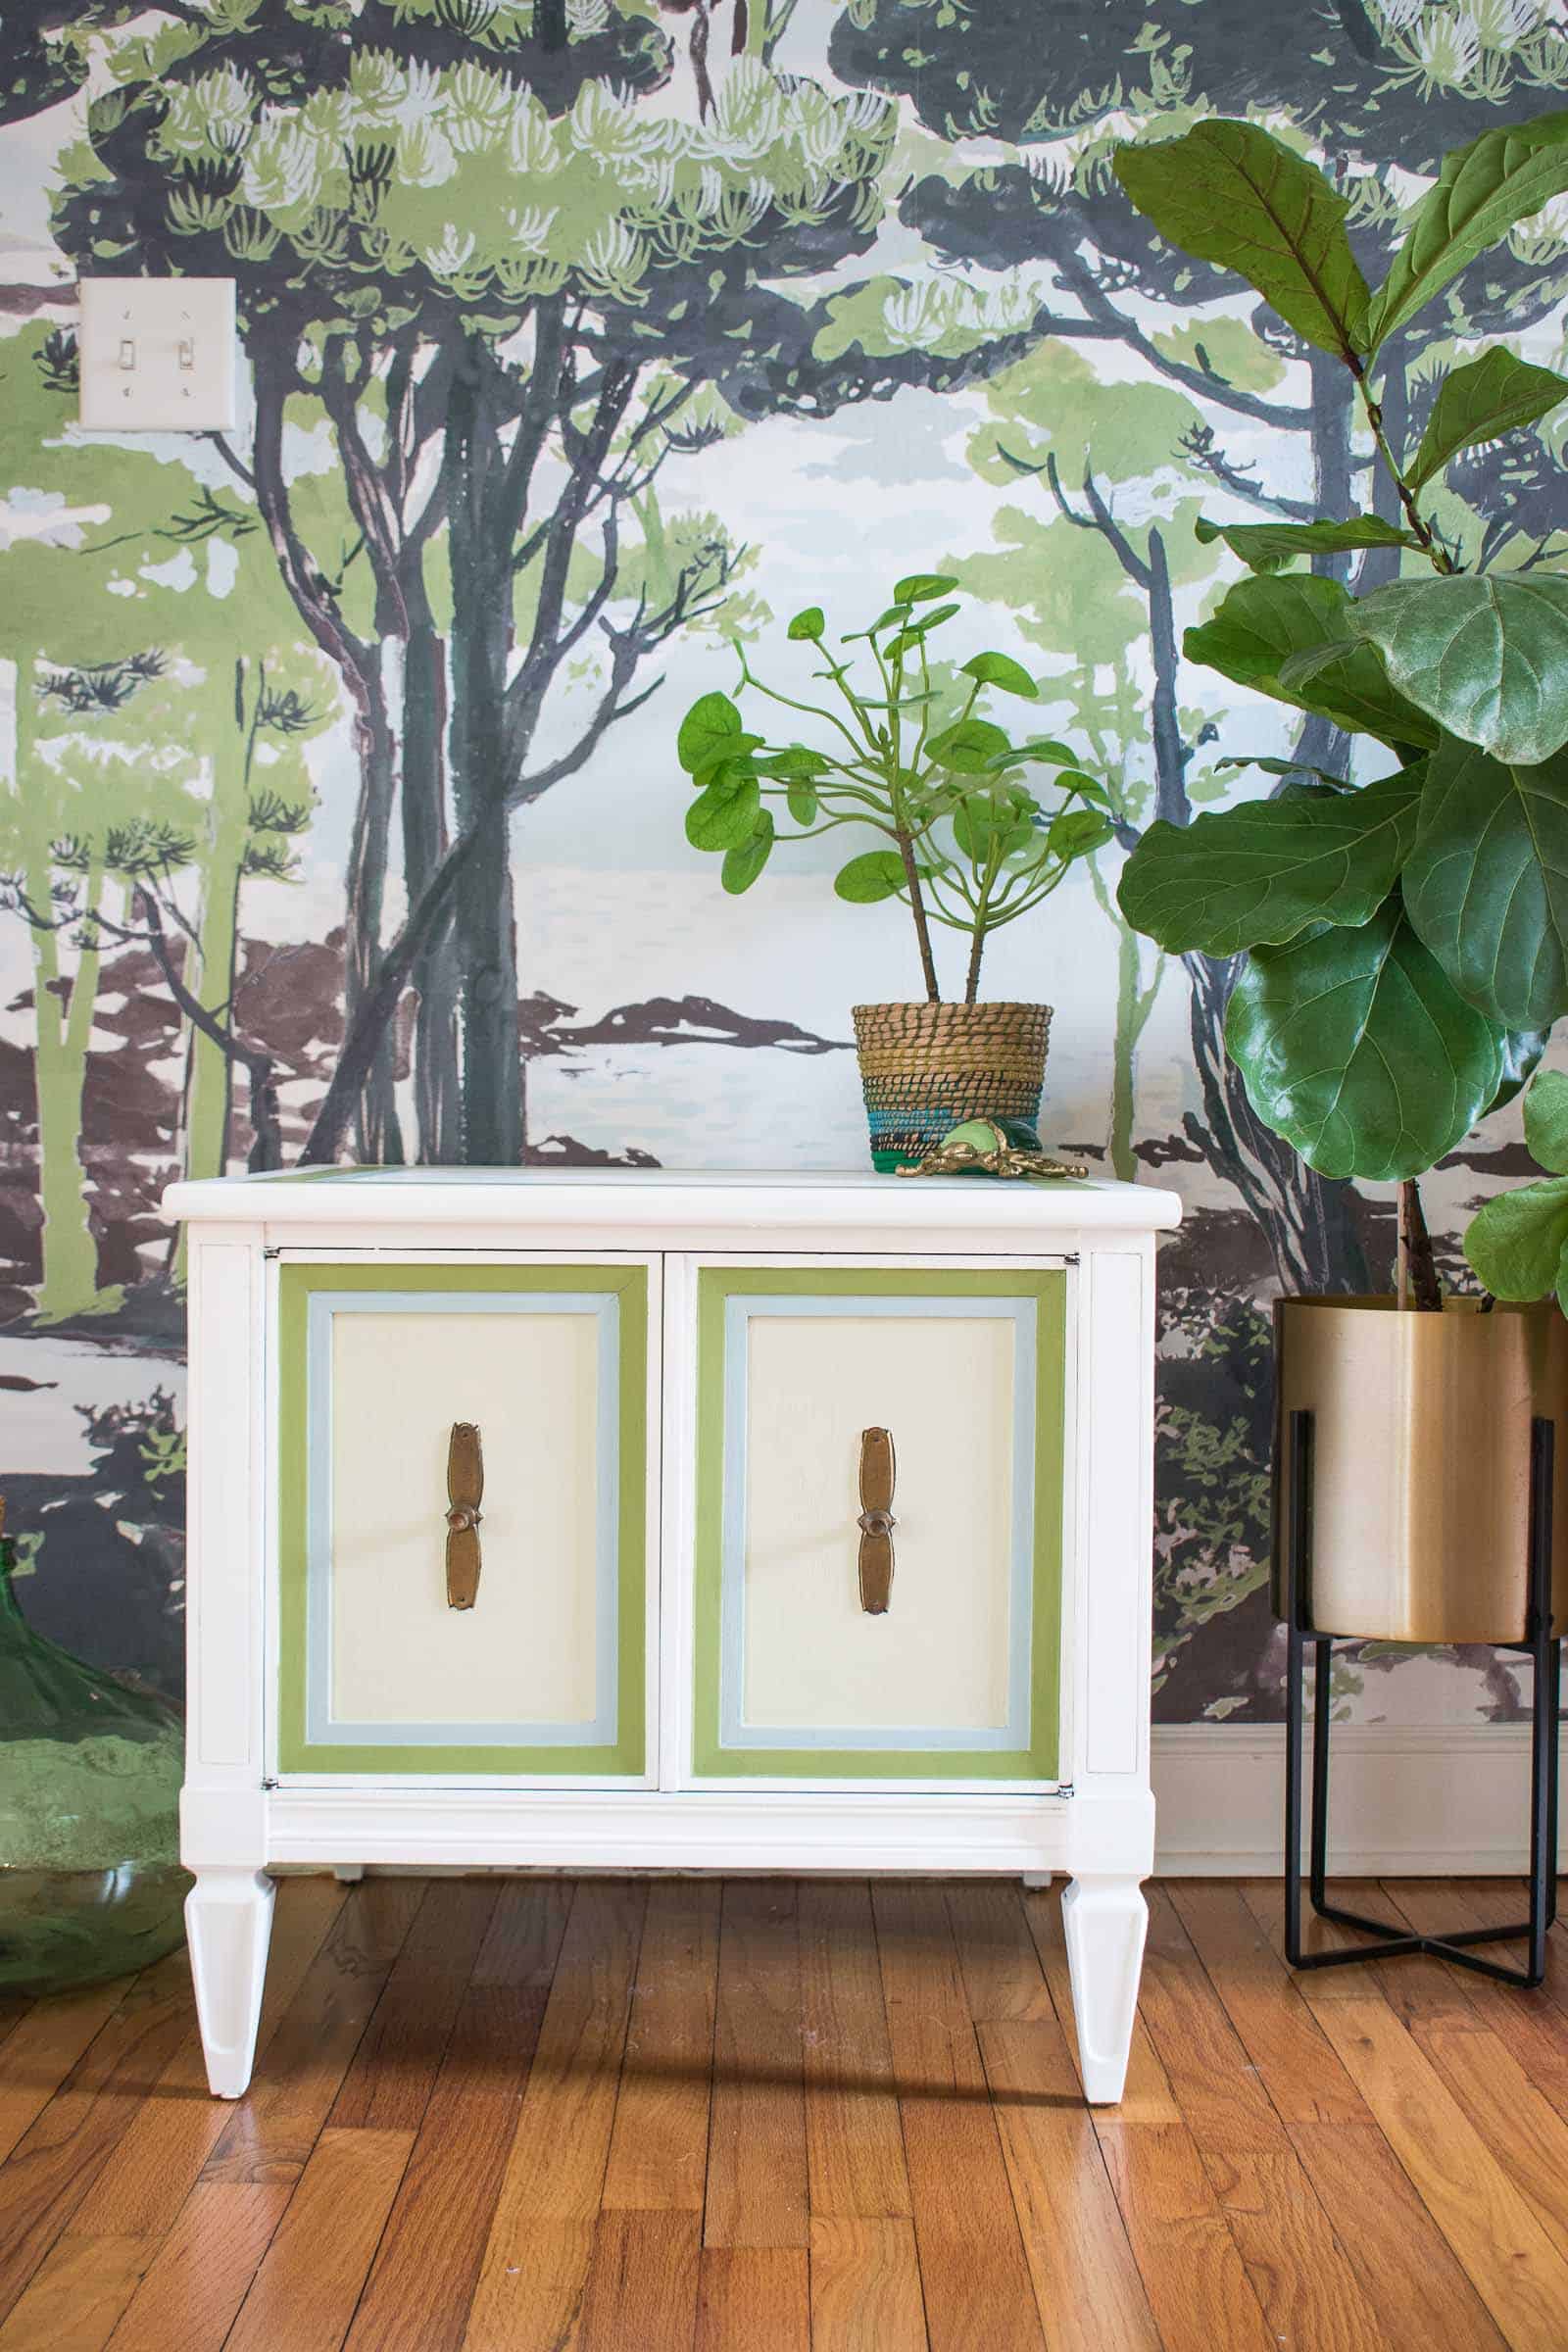
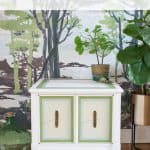
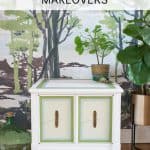
A year ago this month, I was knee deep in the Paintover Challenge with my friends at Frogtape. I tackled my office and still get little happy flutters when I walk in there to work. I am thrilled to be partnering with Frogtape again to help showcase one of Taniya Nayak’s themes for this year’s challenge: Natural Beauty. This isn’t my typical color pallet, but I actually loved how these muted serene tones look on this side table and they look perfect when paired with my fun dining room mural!
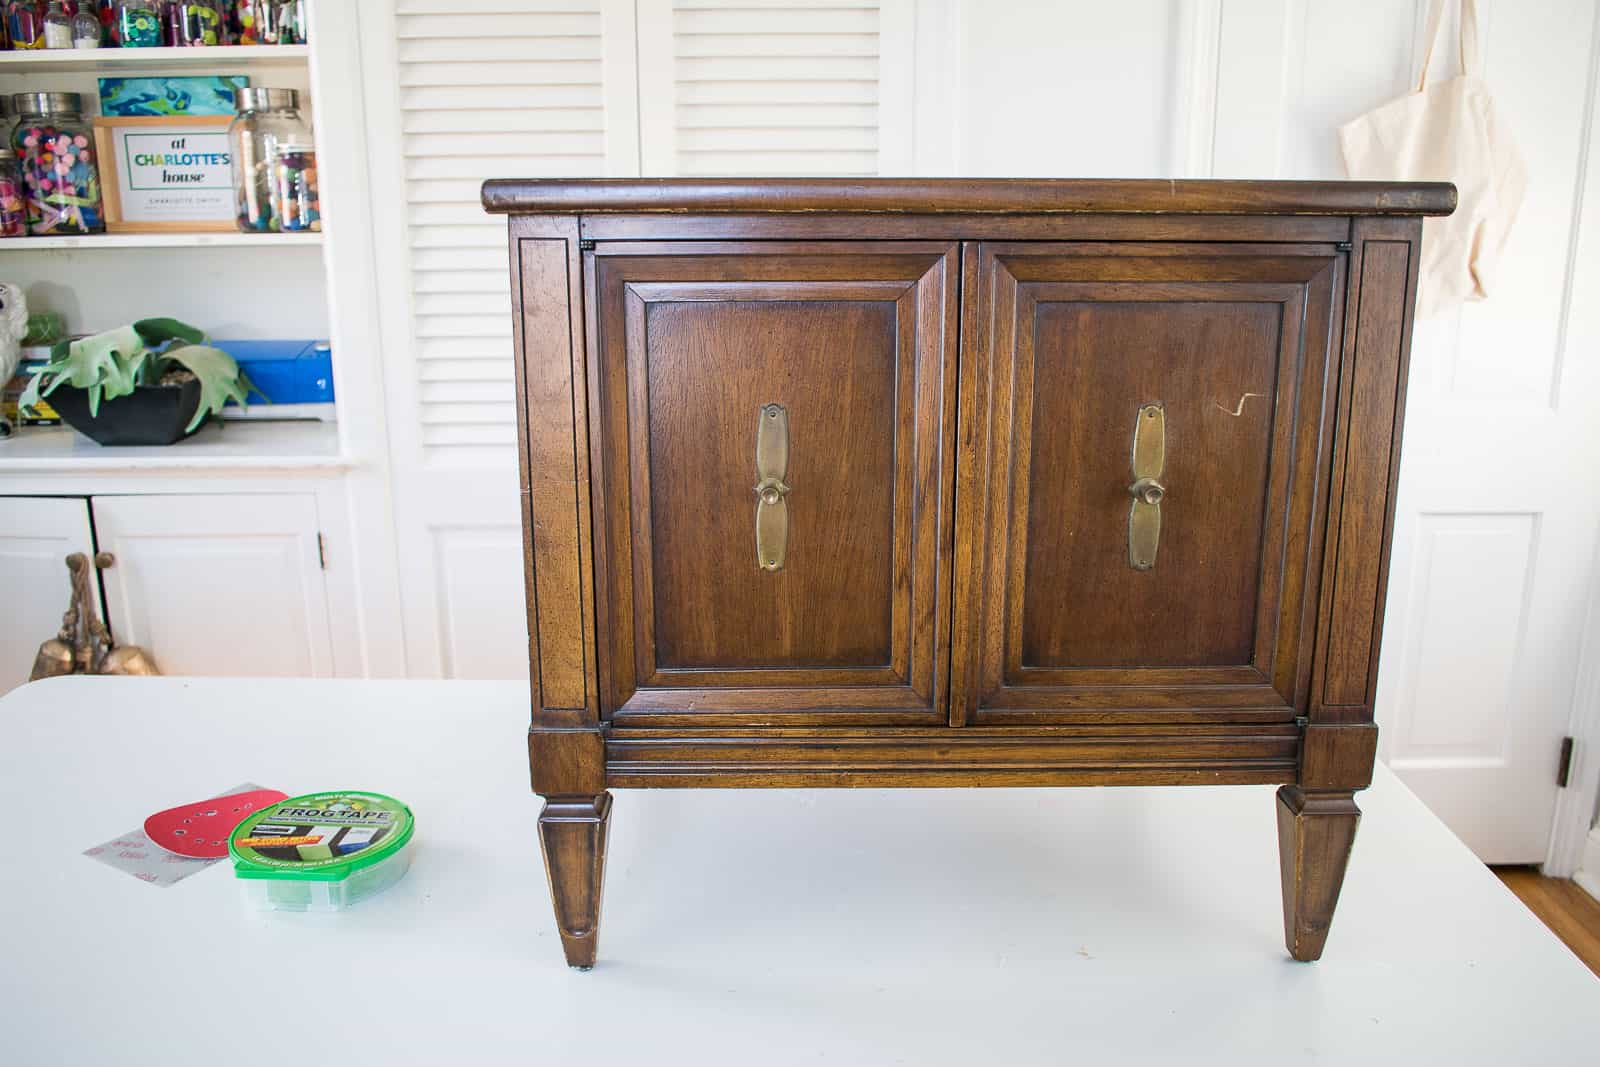
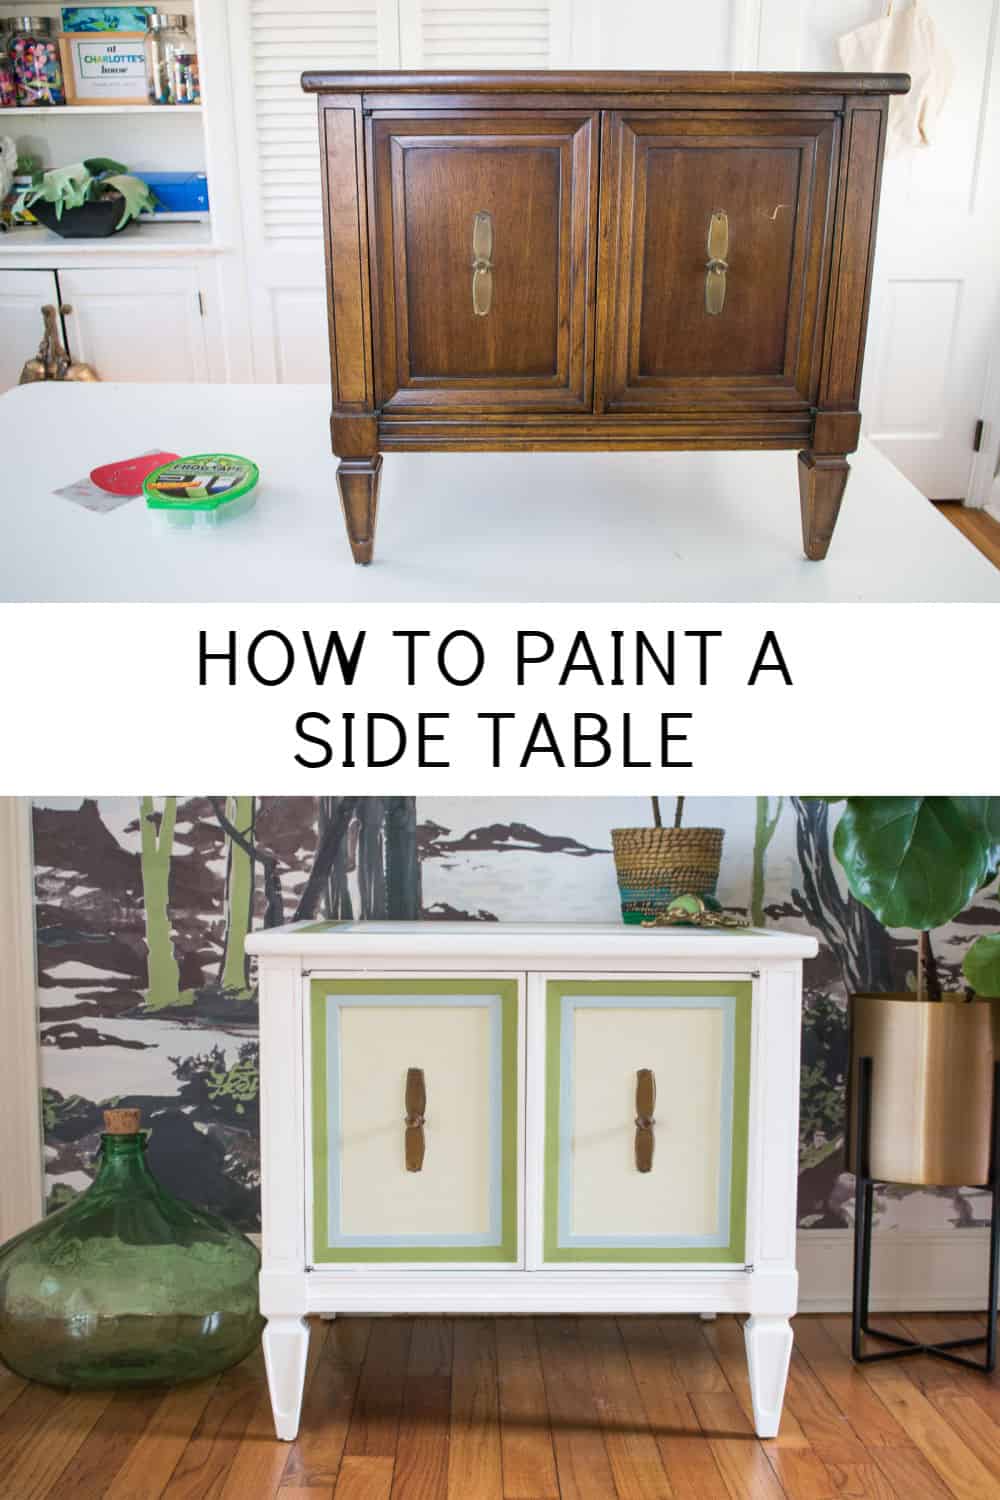
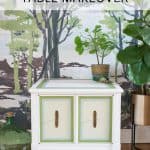
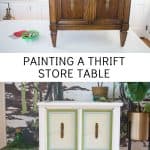
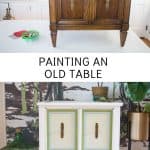
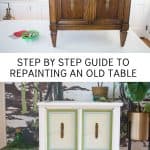
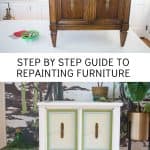
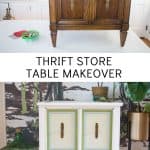
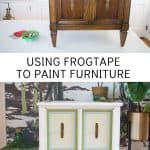
I picked up this side table at the Restore for $10. I know I just finished stripping another restore purchase to bring it back to its wooden glory, so I appreciate that this might seem a little hypocritical, but… painting an old dated piece of furniture can also be an amazing way to give it new life and bring it into your individual decor. Before I paint anything, I look for a maker’s mark and take into account how it was made and whether there’s anything extraordinary about it. In this case… it seemed like an old wooden table, so I went ahead with the paint.
Prepping the Wooden Table
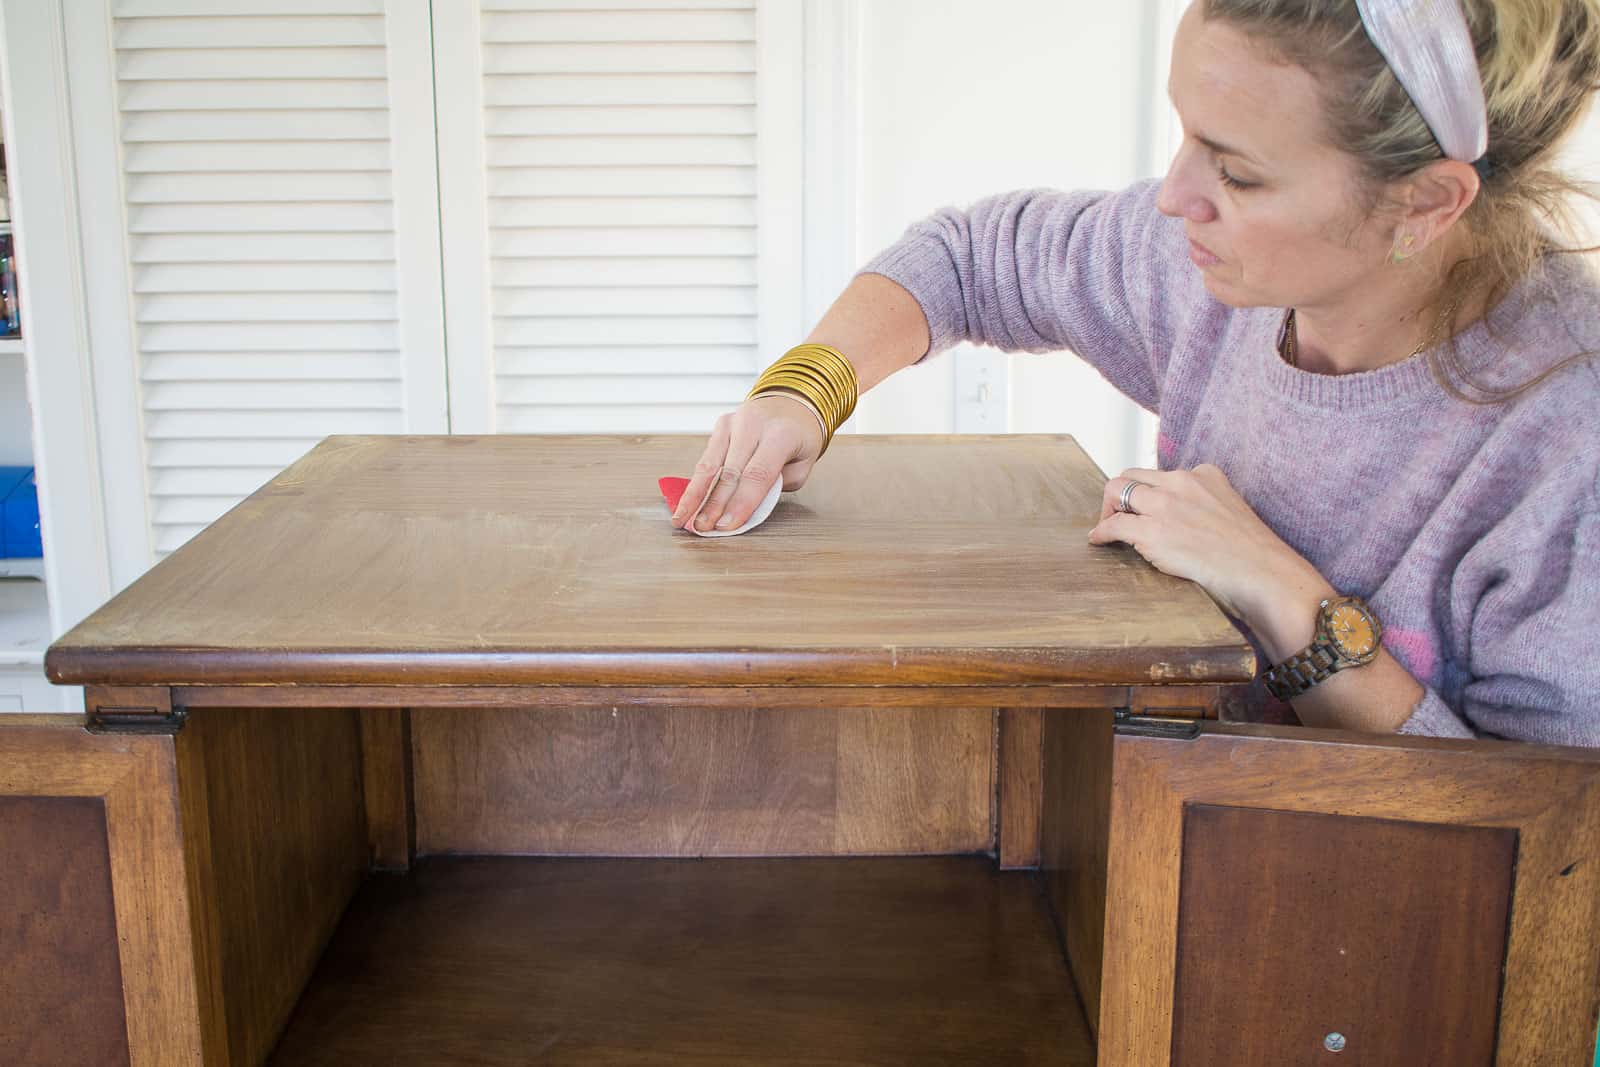
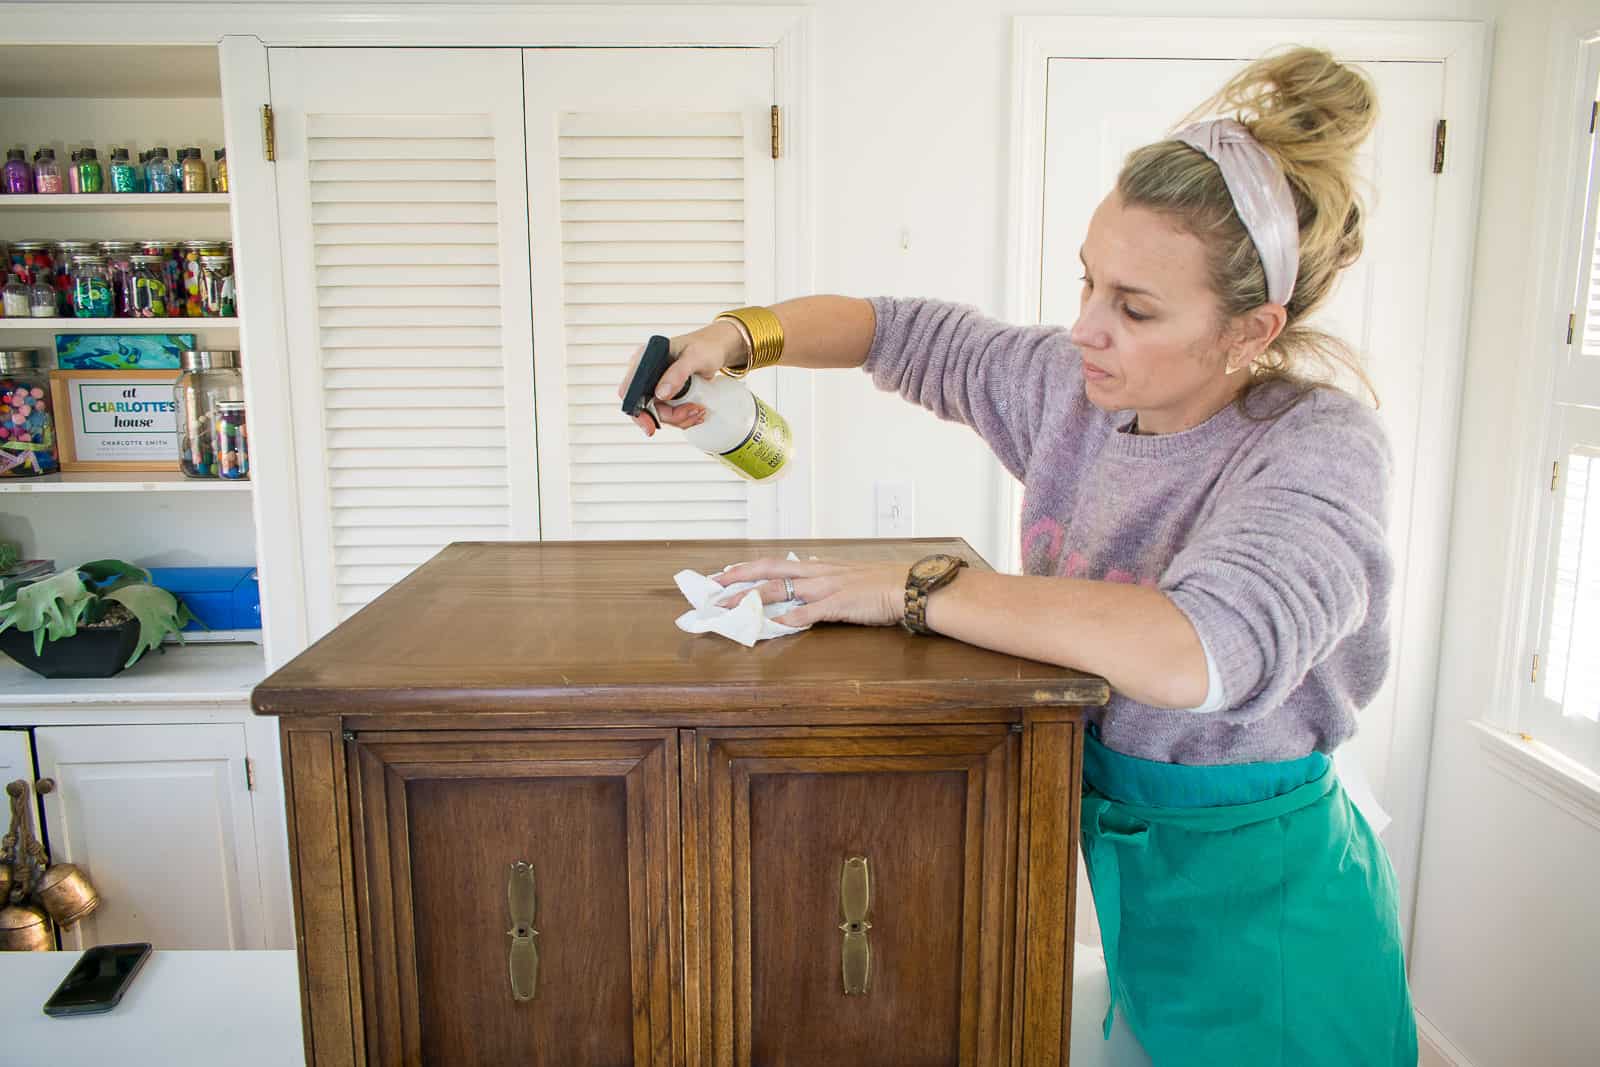
Regardless of what type of paint I’m using, I always give the furniture a light sanding with a medium to high grit sandpaper. (The lower the number grit, the rougher the sand paper… for this I’m using a 120 grit.) Your goal is to remove any ‘sheen’ that might be on the wood surface to give the paint something to grab onto.
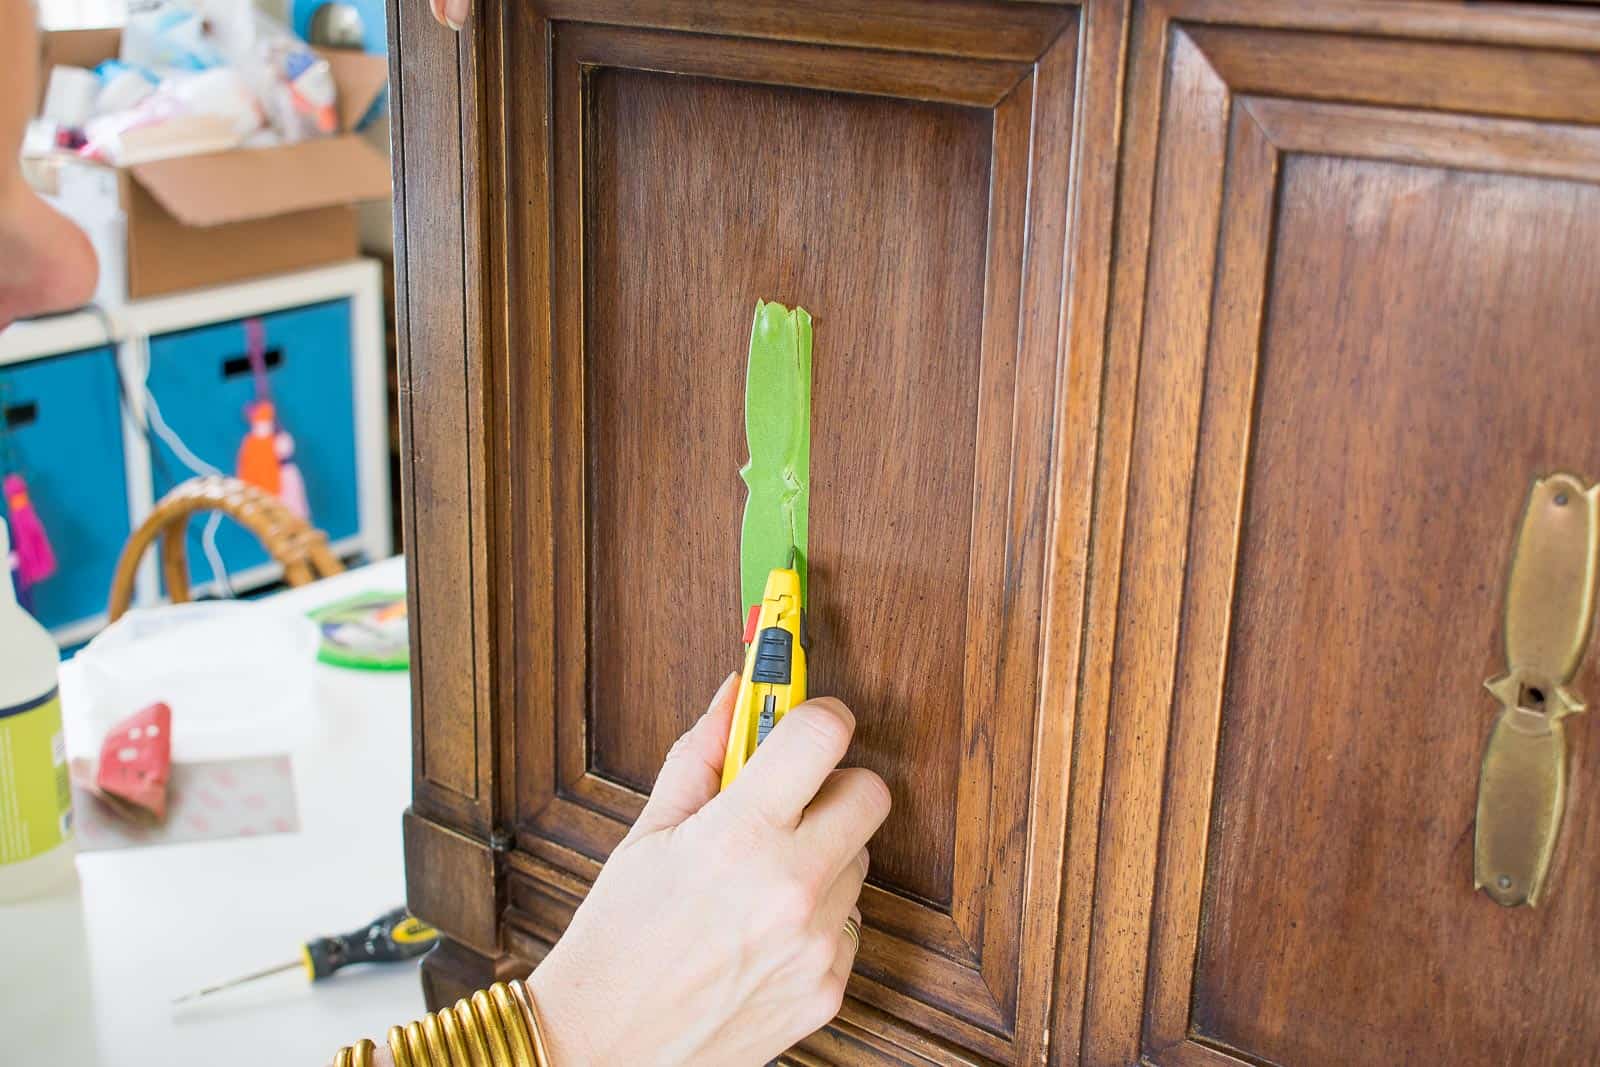
I also removed the knobs to make it a little easier to paint. The brass plates under the knobs were nailed in place so I didn’t want to risk removing them. I used my Frogtape to tape these off as best as possible, using a sharp blade to trim around the brass.
Once you’re done sanding, clean the surface really well. You can use a sticky tack cloth, murphy’s oil soap, a liquid deglosser or any other gentle cleaner.
Choosing your Paint
I’m using chalk paint on this piece. Chalk paint has some advantages aaaaand some disadvantages. The biggest advantage is that it doesn’t require any primer and you can paint inside (no fumes). The disadvantages are more to do with the application: the paint can be a bit thick so that takes some getting used to and typically you need a top coat- either a wax or a polycrylic which just adds an extra step.
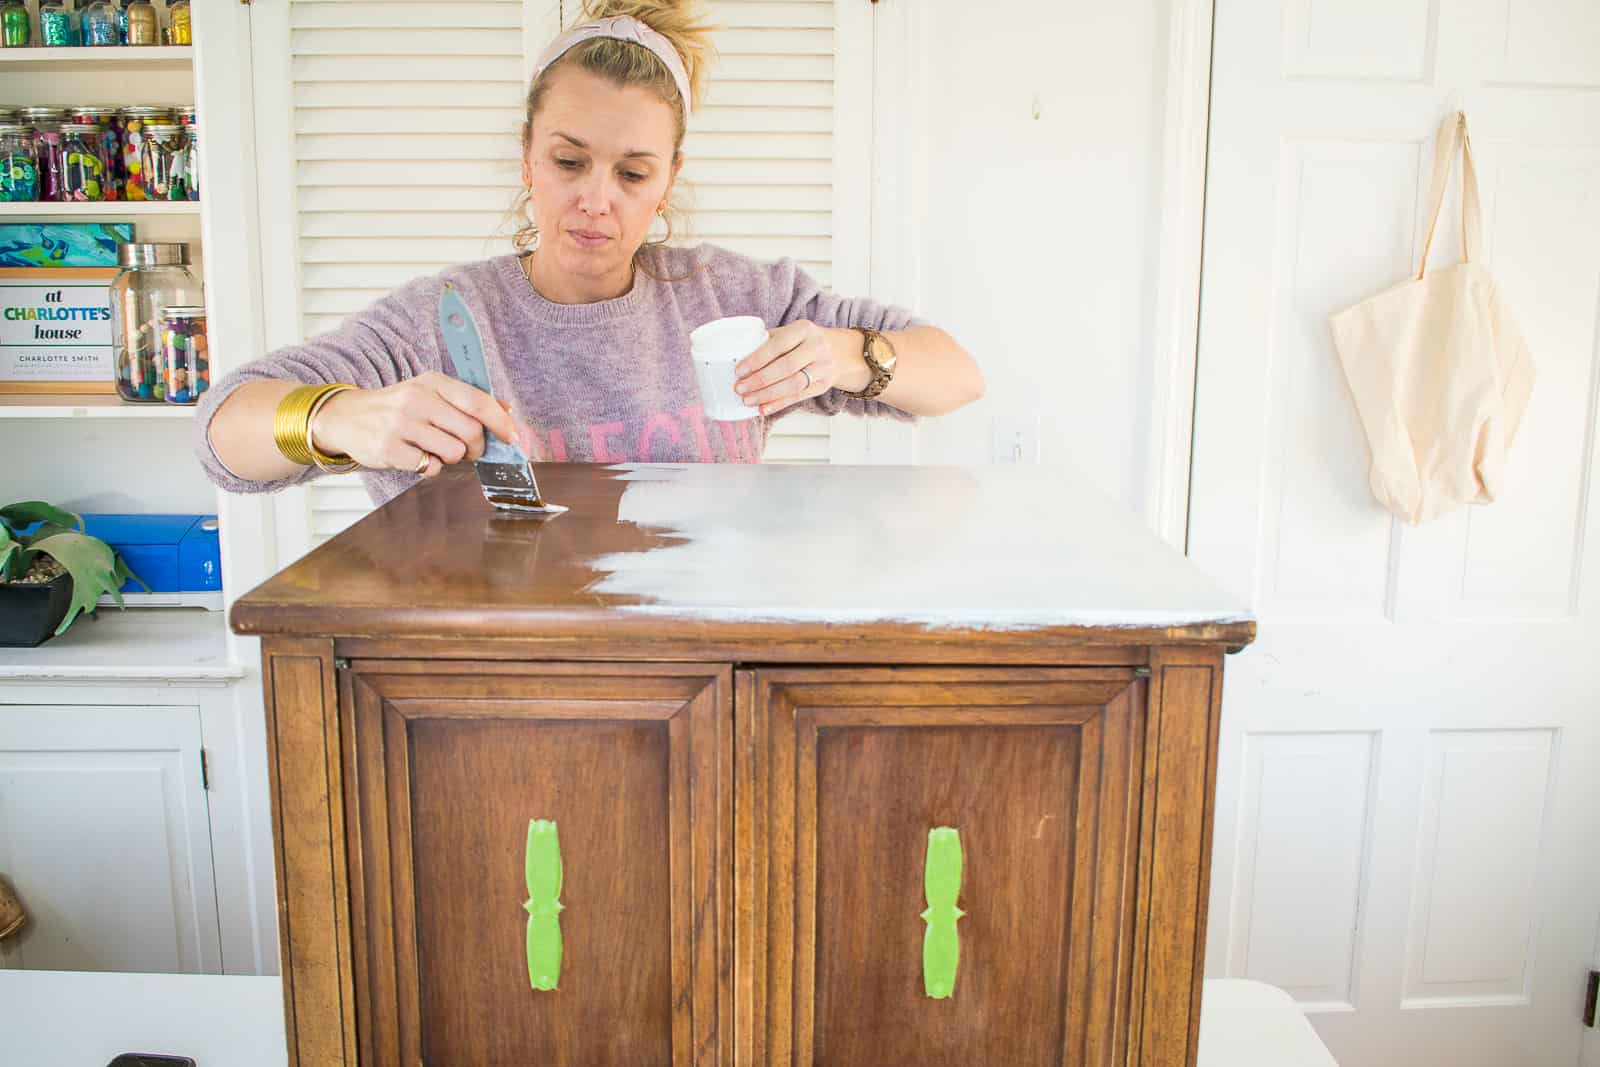
Painting the base coat (s)
My table had a fairly dark stain so it took 3 coats of chalk paint. There was definitely some bleed-through in the first coat so multiple coats were necessary. (To prevent bleed through on the first coat… start with a high quality prime in lieu of the chalk paint.) For this project I’m using DecoArt Chalky Finish paint in Everlasting (white), Enchanted (darker green), Vintage (blue) and Revive (greeny taupe in the middle).
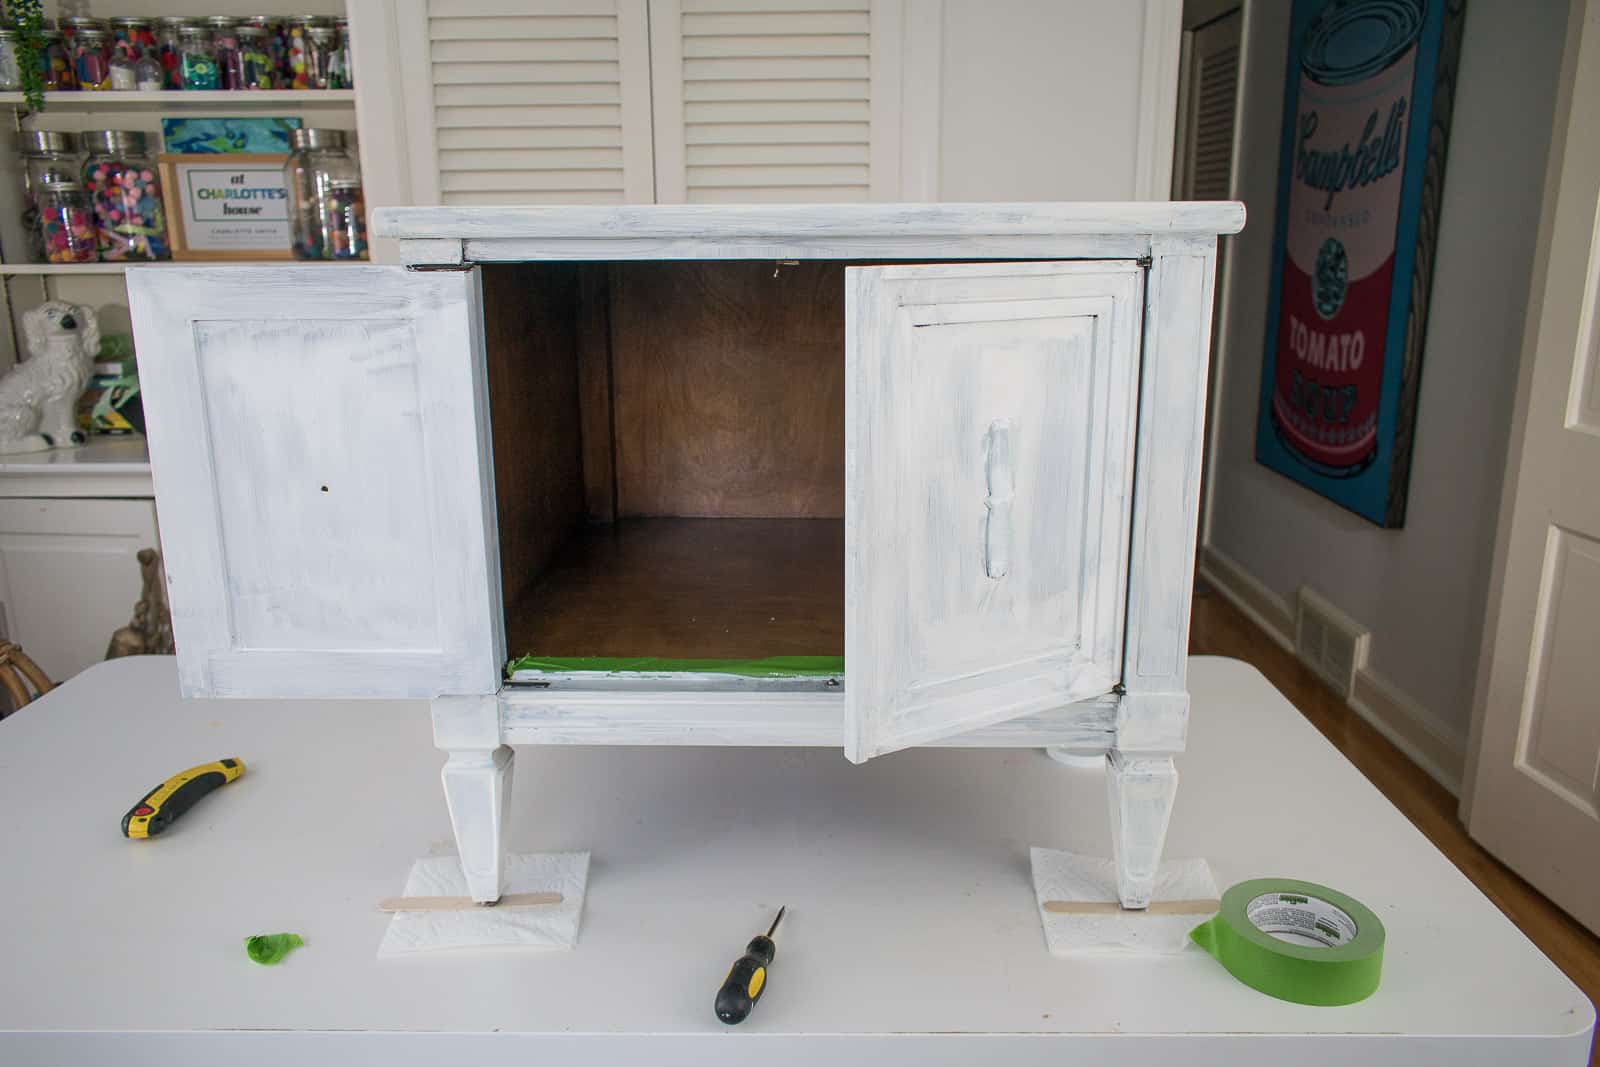
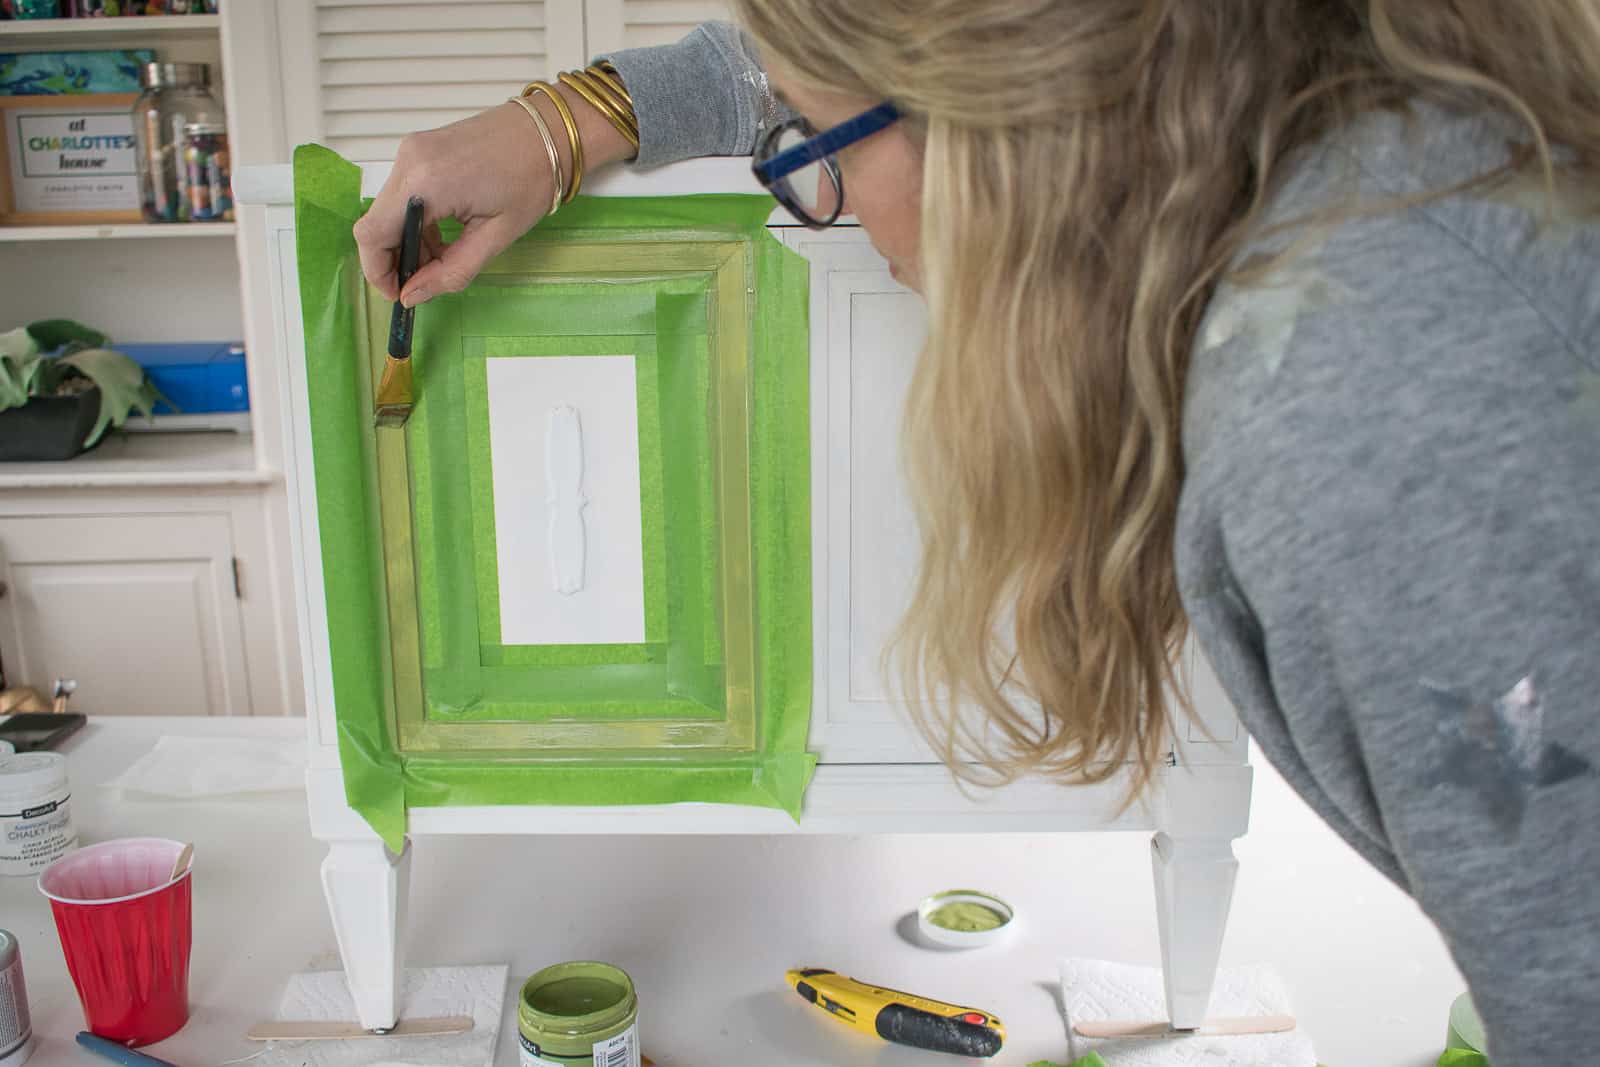
Taping off the Pattern on the cabinet doors
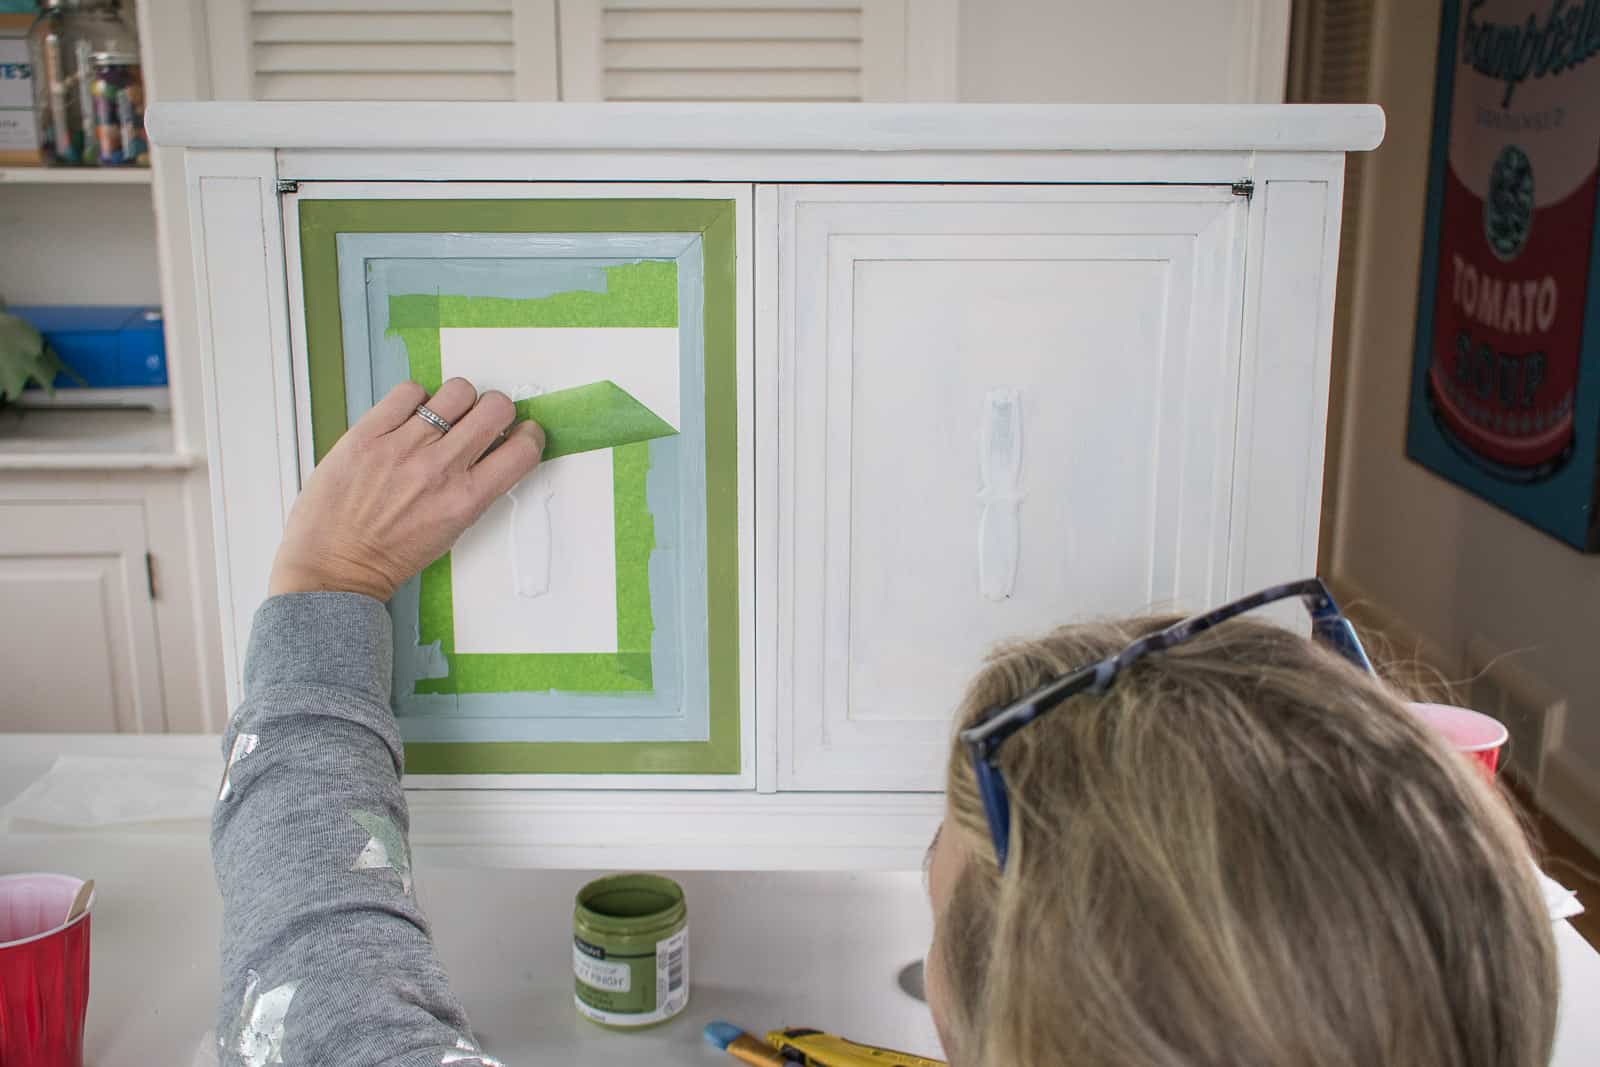
I chose this table because of the pattern on the front. I loved the lines of the construction, so it made sense to accentuate these lines with my Frogtape. I taped off the cabinet fronts 24 hours after I’d painted; technically I should have used the yellow delicate surfaces tape… but the green multi-surface tape worked like a charm. Frogtape has a special paintblock technology that is activated when you paint over it and, in my experience, if used correctly it always produces wonderful crisp lines.

I was impatient so for the inside corners of my pattern, I used a small detail brush and hand painted this part. Obviously waiting until the next day so my paint had dried and I could use tape would have been ideal, but I think it looks OK.
Removing the Frogtape
In my opinion there isn’t a right or wrong way to do this as it will all depend on the surface you’ve taped and the type of paint you’re using. For this piece, I was a little nervous that leaving the paint on too long would pull up the chalk paint underneath, so I didn’t wait long at all… maybe 30 minutes… to remove the tape. If the paint is still wet when you remove the tape, you need to be extra careful that you pull the tape directly up and away from the piece. I often remove it at a slight angle to ensure the crispest line possible. (See below.)
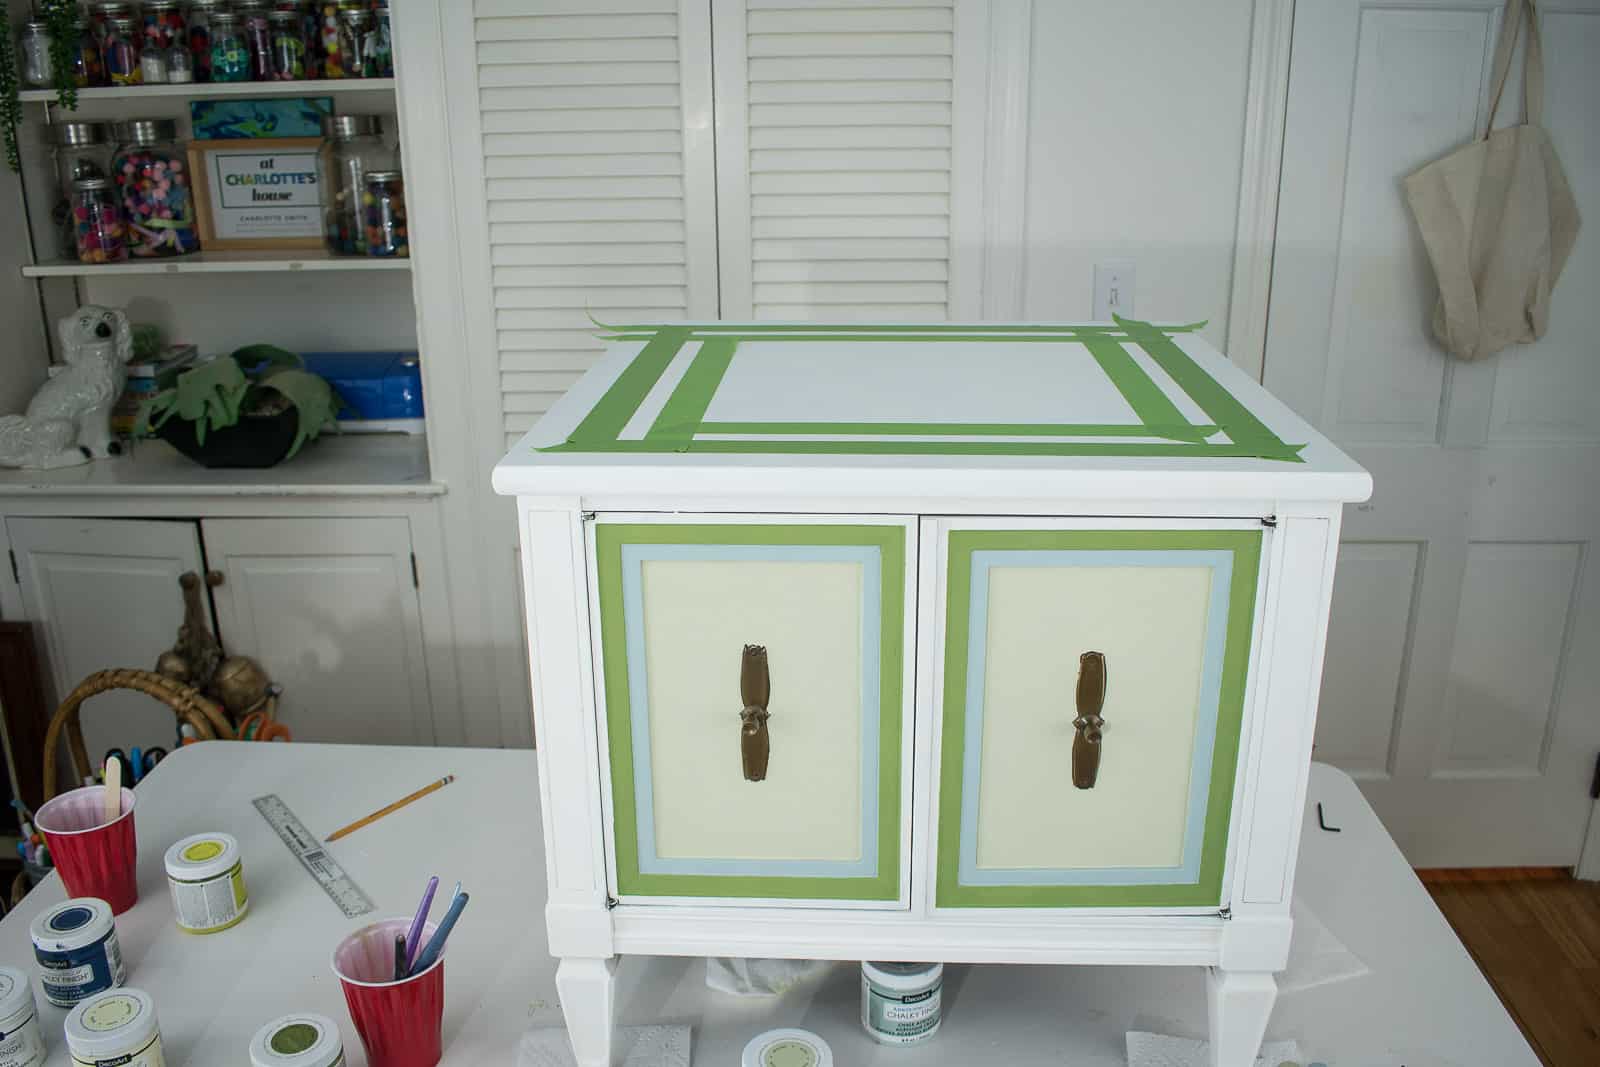
Taping off the pattern on the table top
When I’m taping of designs with Frogtape, I will often use the width of the tape to help give me clean parallel lines- much easier than measuring the entire length of each line. (See how I taped off faux molding in my office here.) For the top of this table, I used one piece of tape to mark the distance from the edge of the table. Then a second width of tape for the stripe. I wanted the blue stripe to bit a bit narrower so I did measure for this one, but measuring one line is much easier than measuring all four!
Finishing touches
I replaced the knobs and… that’s it. I don’t mind the patina on the brass knobs, but those could certainly be polished. And I don’t mind the flat finish of the chalk paint so I left it alone. To protect the surface, you can use a chalk paint wax or a polycrylic… I’ve used both and they give the chalk paint a slight sheen so I recommend this step if you want your piece to be a bit easier to clean.
Make sure you check out this year’s Paintover Challenge and see what space was created with this Natural Beauty trend in mind!


Awesome
Thank you!!! This was a fun project!
Cool, I’m goinG to try this TECHNIQUE on my white French proviNcial dresser& converting it to a bath vanity🤓👍
Good luck!! Sounds like a fun project!