
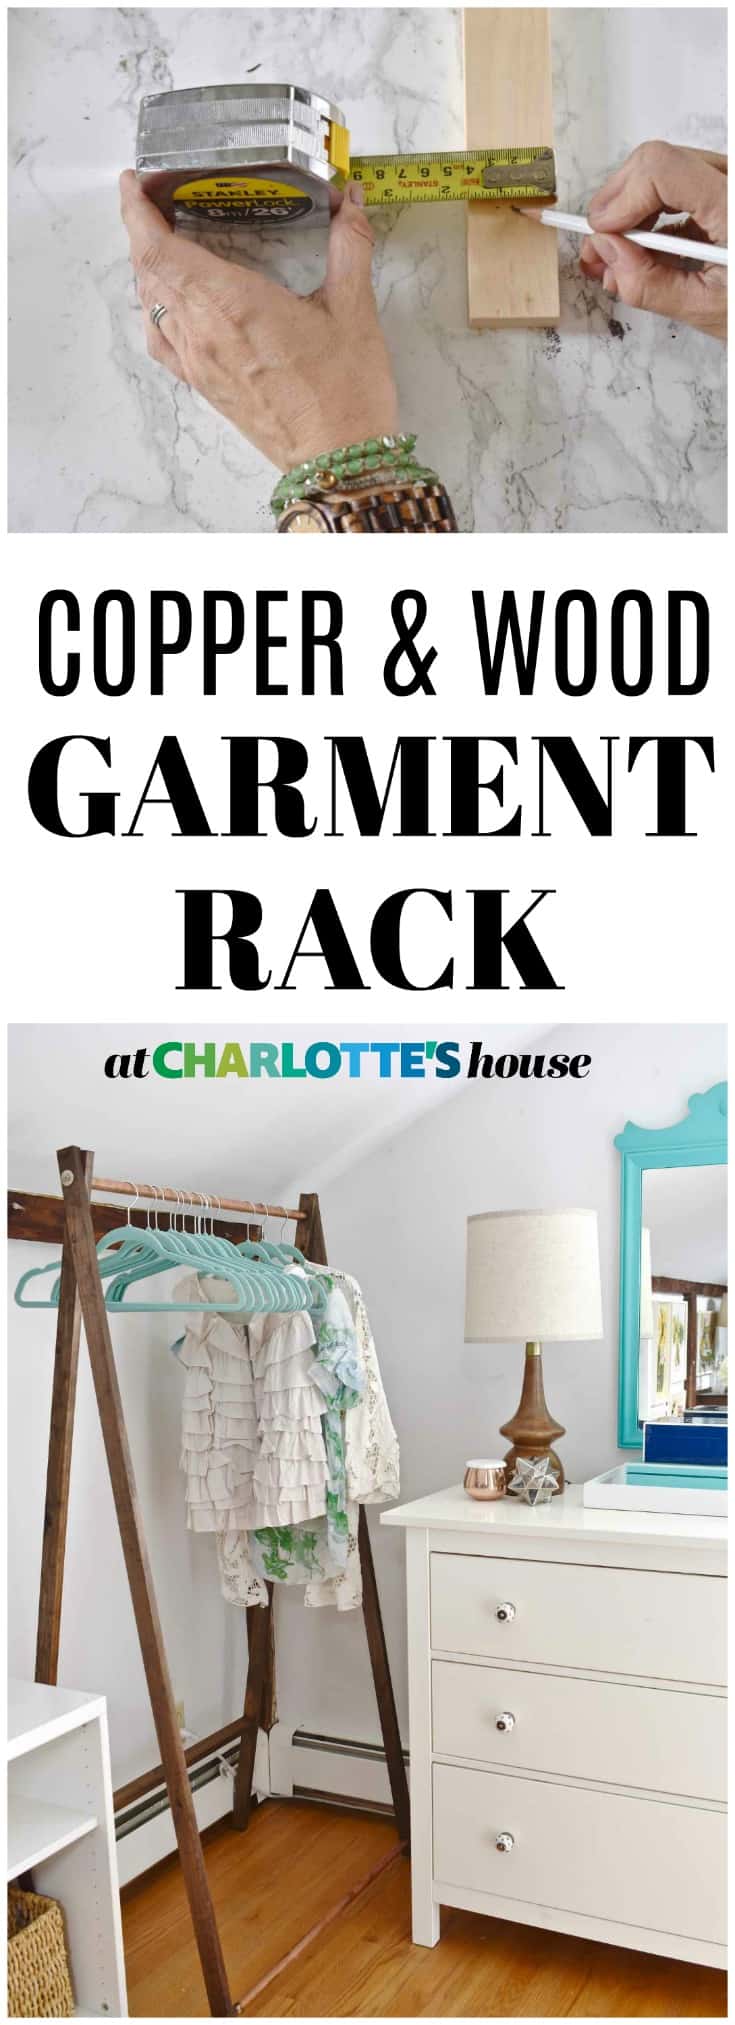
Wood and Copper Garment Rack
Psssst… this post *might* contain affiliate links: see my disclosure here.
ORC Week 4: Garment Rack and Dresser Styling
Weeeeeek 4! I’ve never been brave enough to take on a TRULY major project for the One Room Challenge, so Week 4 over here is typically awash in projects and styling and clutter! This year is no exception!
Let’s look at the bright side: we have wallpaper. Glorious and colorful wallpaper. It appears to be still adhered to the walls so I’m declaring it a big ol’ VICTORY! We also have a super chic, super clean-lined table that I’m excited to bring into the space and style with all sorts of bathroom-like goodies.
Shop my favorites!
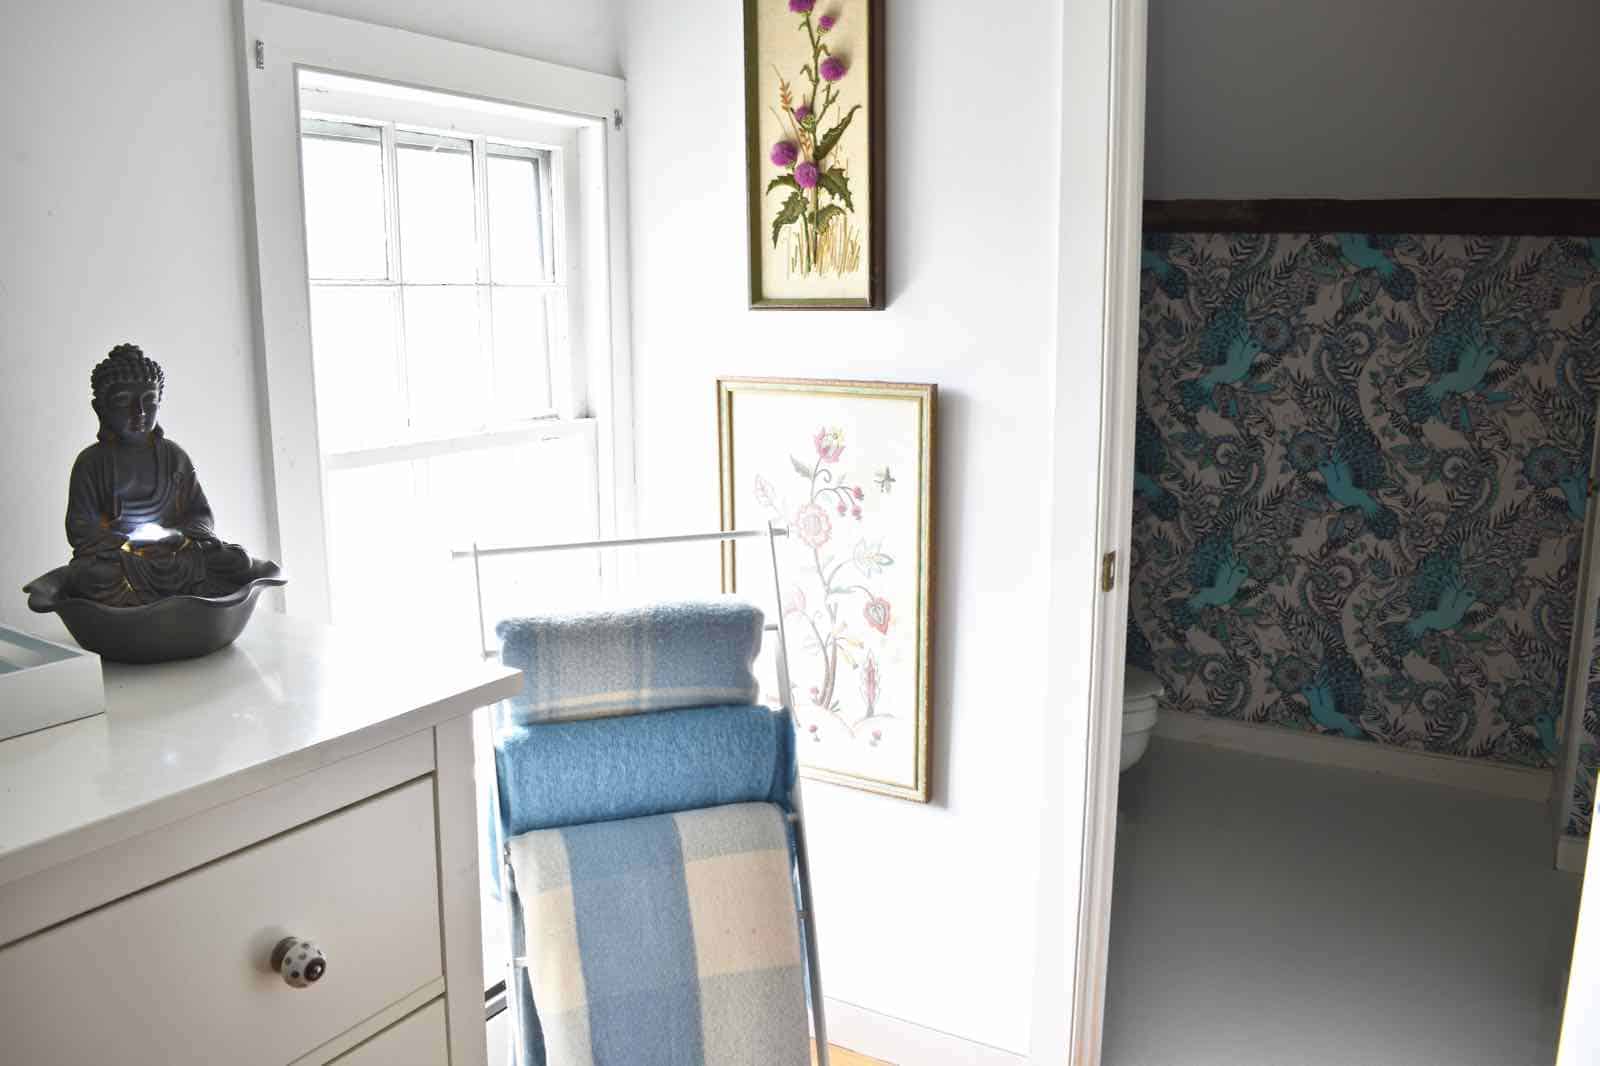
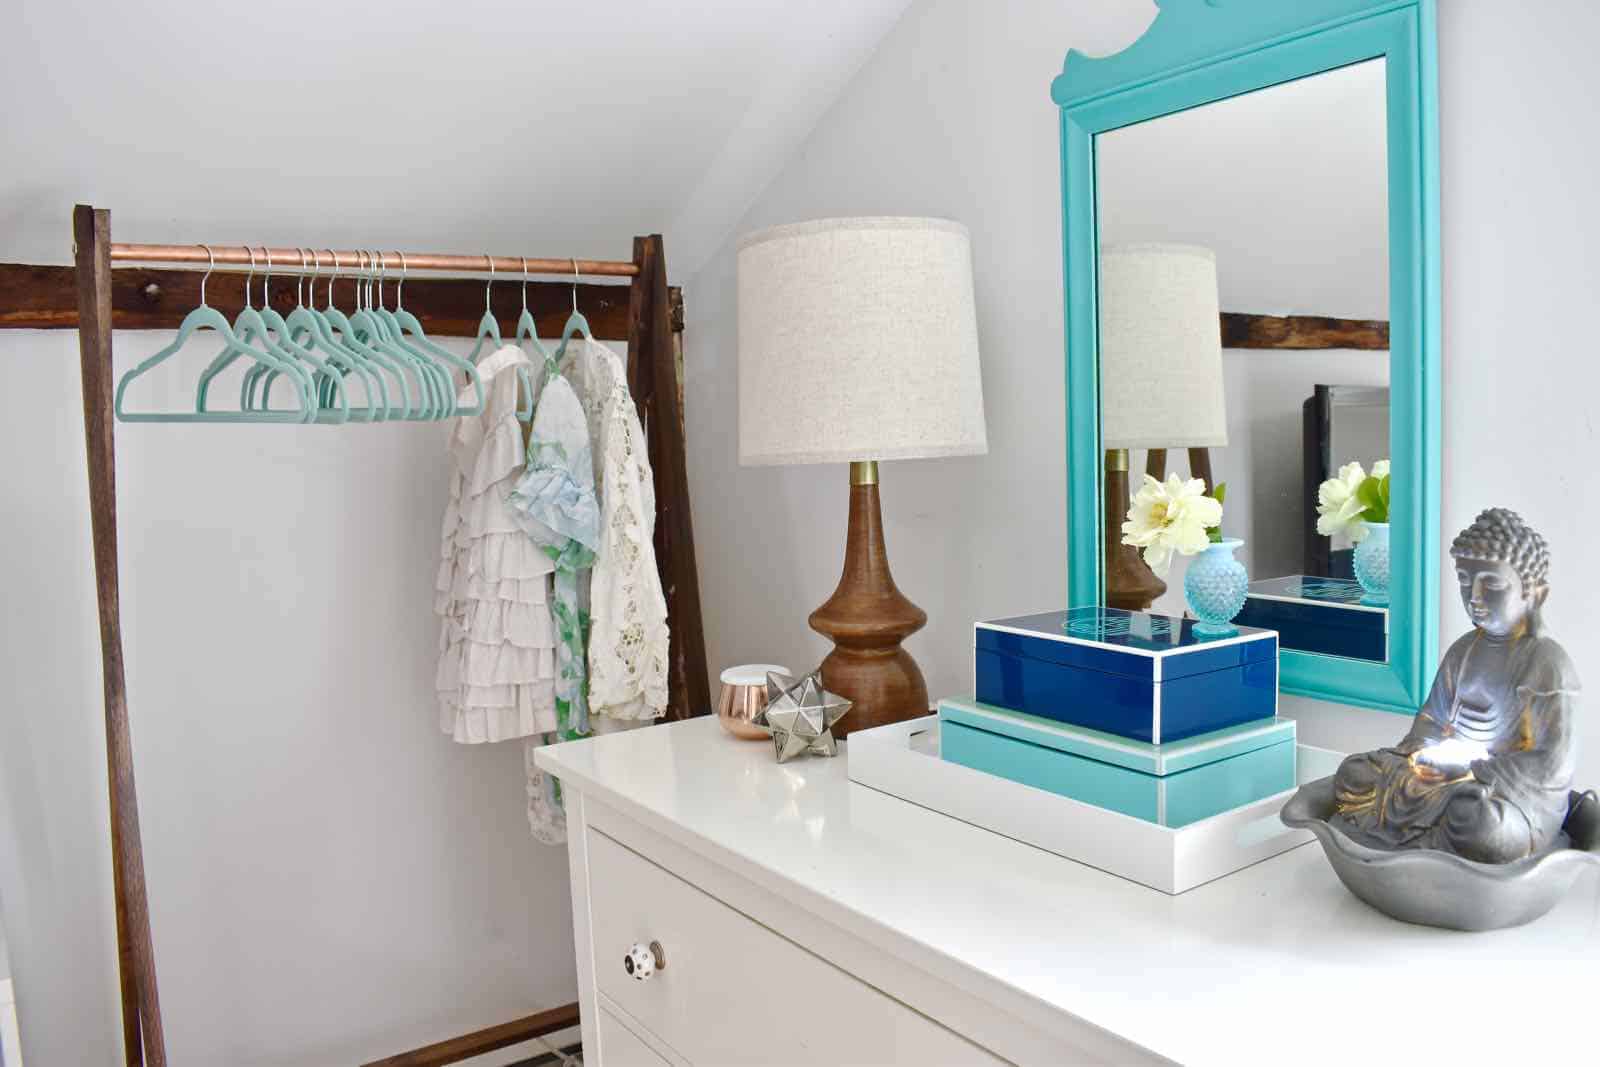
What we don’t have is the final floor treatment. I’m saving that for next week. So for today… I thought I’d focus my attention on the little area outside this bathroom. Our guest room doesn’t have a closet, so this area is a dressing area/ closet all wrapped into one. I had a rolling rack there, but it wasn’t anything special… I wanted to possibly hanging something to free up the floor space, but the corner wasn’t quite right for hanging. After poking around Pinterest for some other DIY garment racks, I pulled little details from lots of the ones I saw, and came up with my own design!
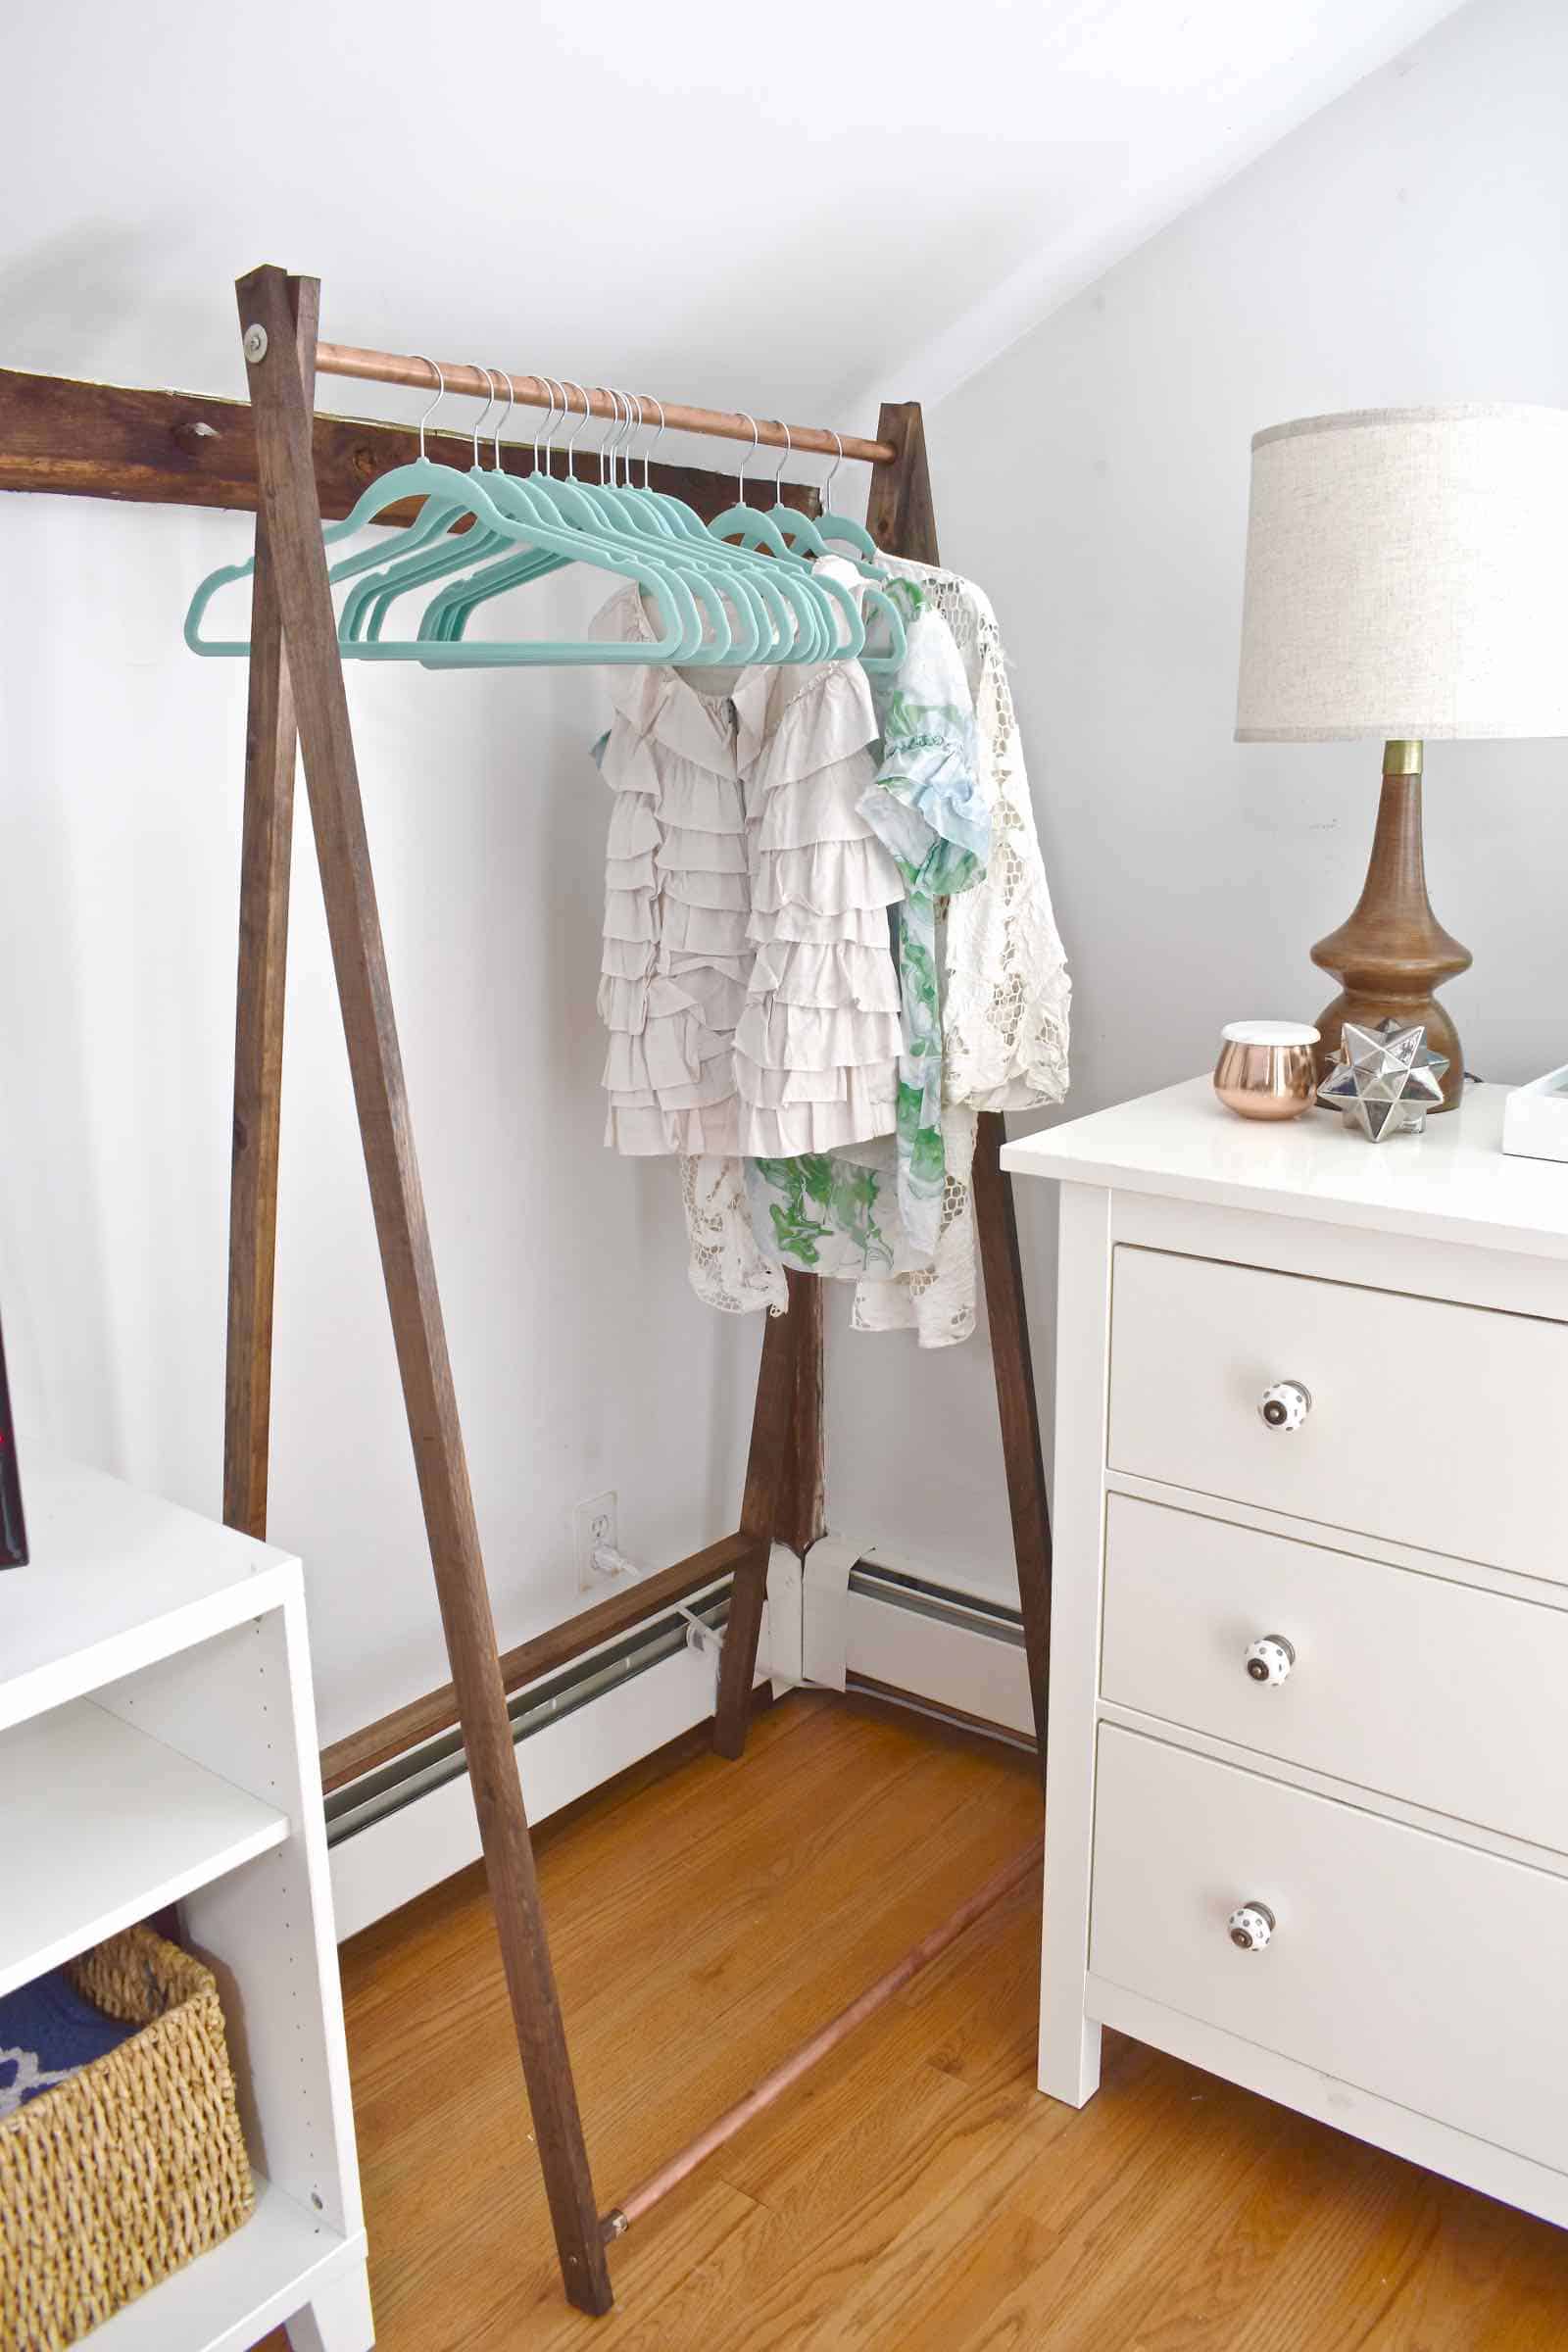
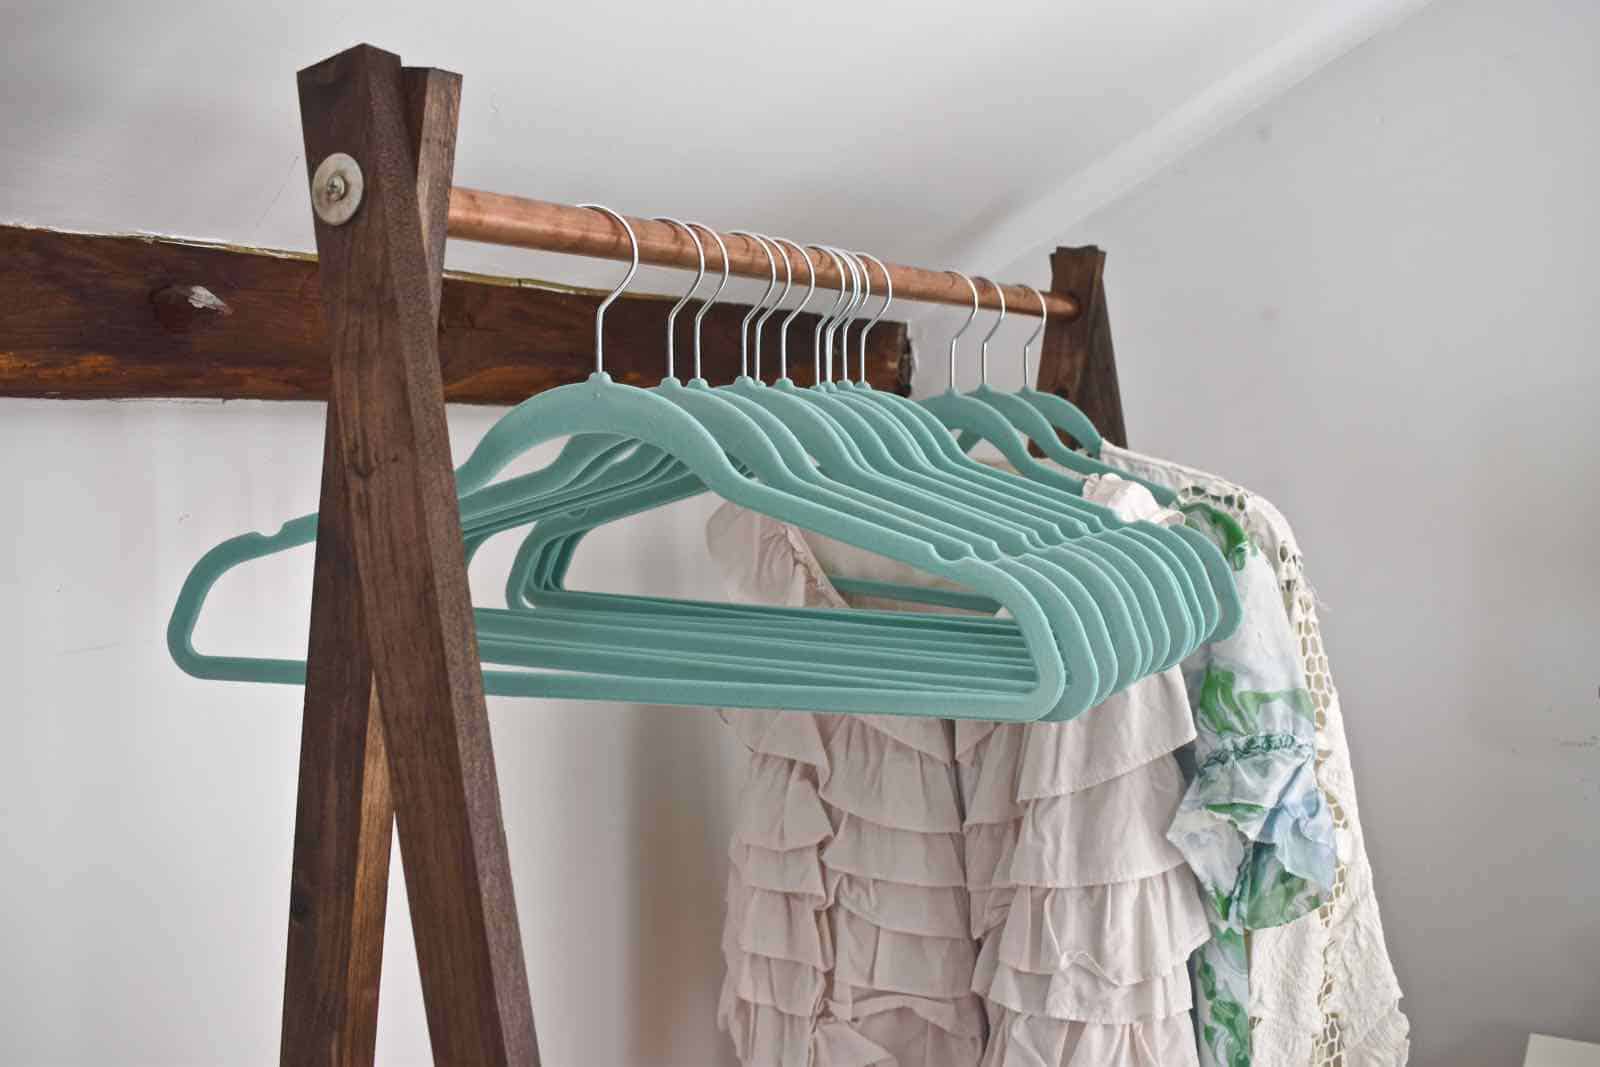
It’s not going to hold piles of hanging clothes, but it will easily hold the hanging clothes that come with my parents or other guests here for a long weekend.
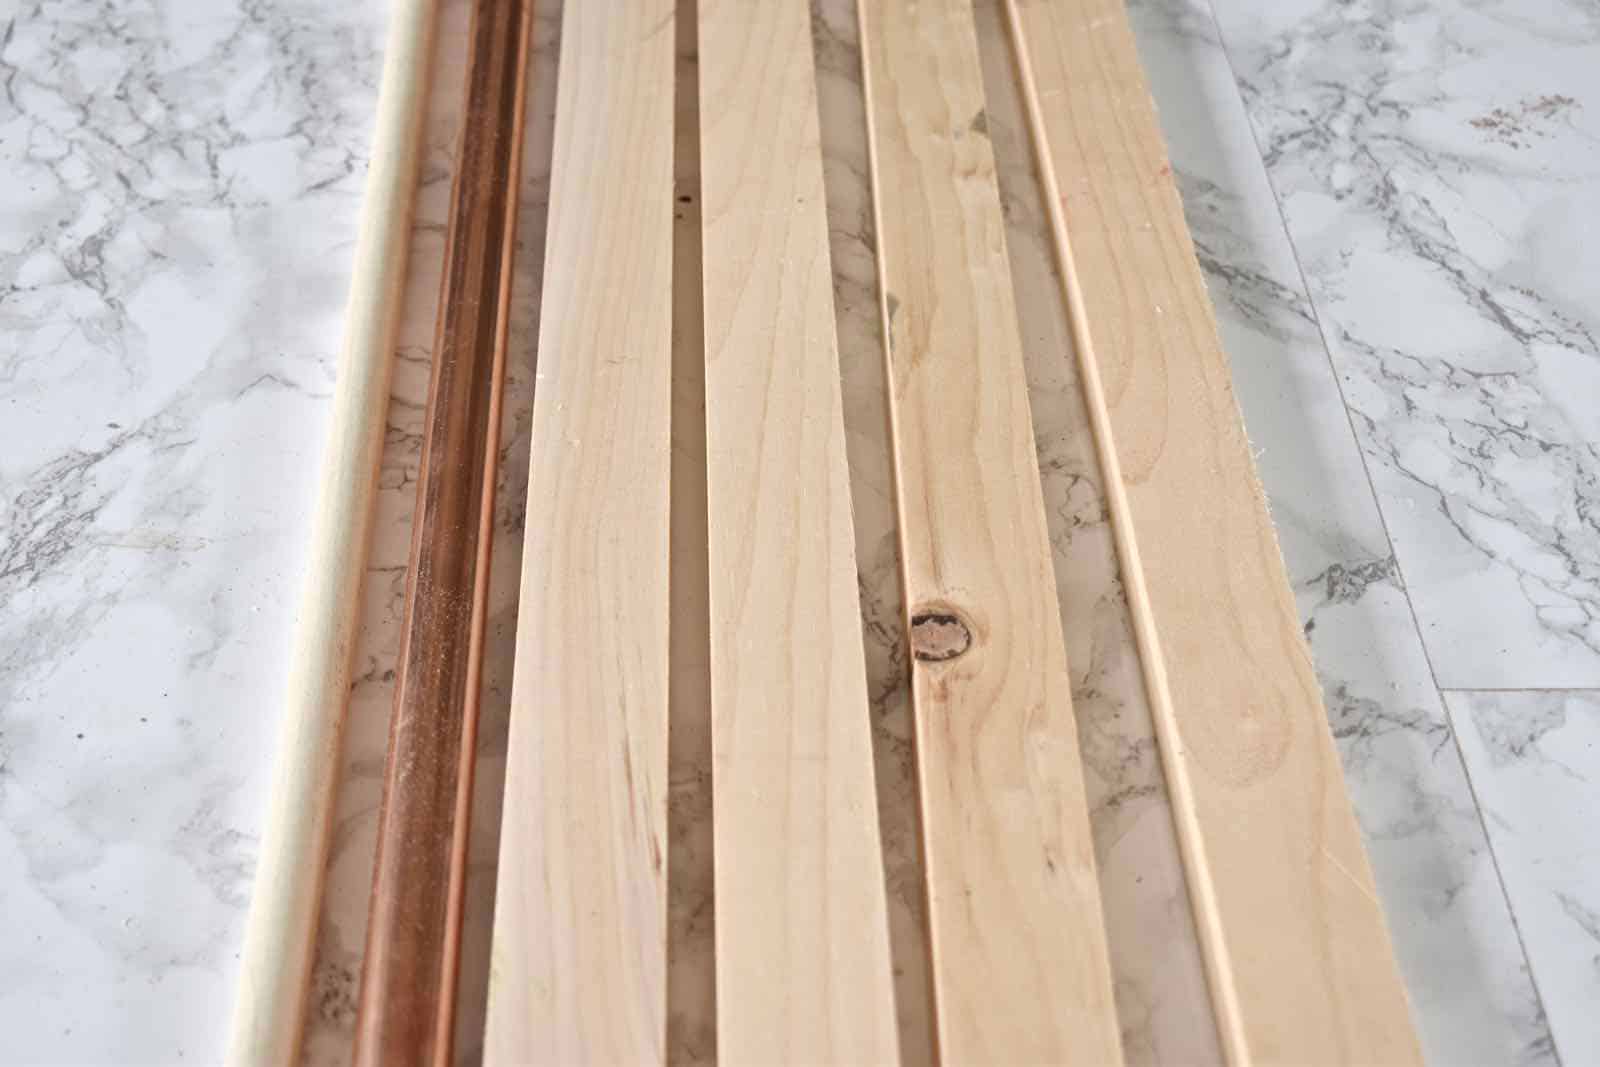
Materials needed:
– five 6-foot 1x2s
– 5/8″ dowel
– 3/4″ copper pipe
– washer/ screw
– kreg jig
– router
– 5/8″ paddle bit
– wood stain
I’m never great at explaining my builds so PLEASE leave a comment with any questions.
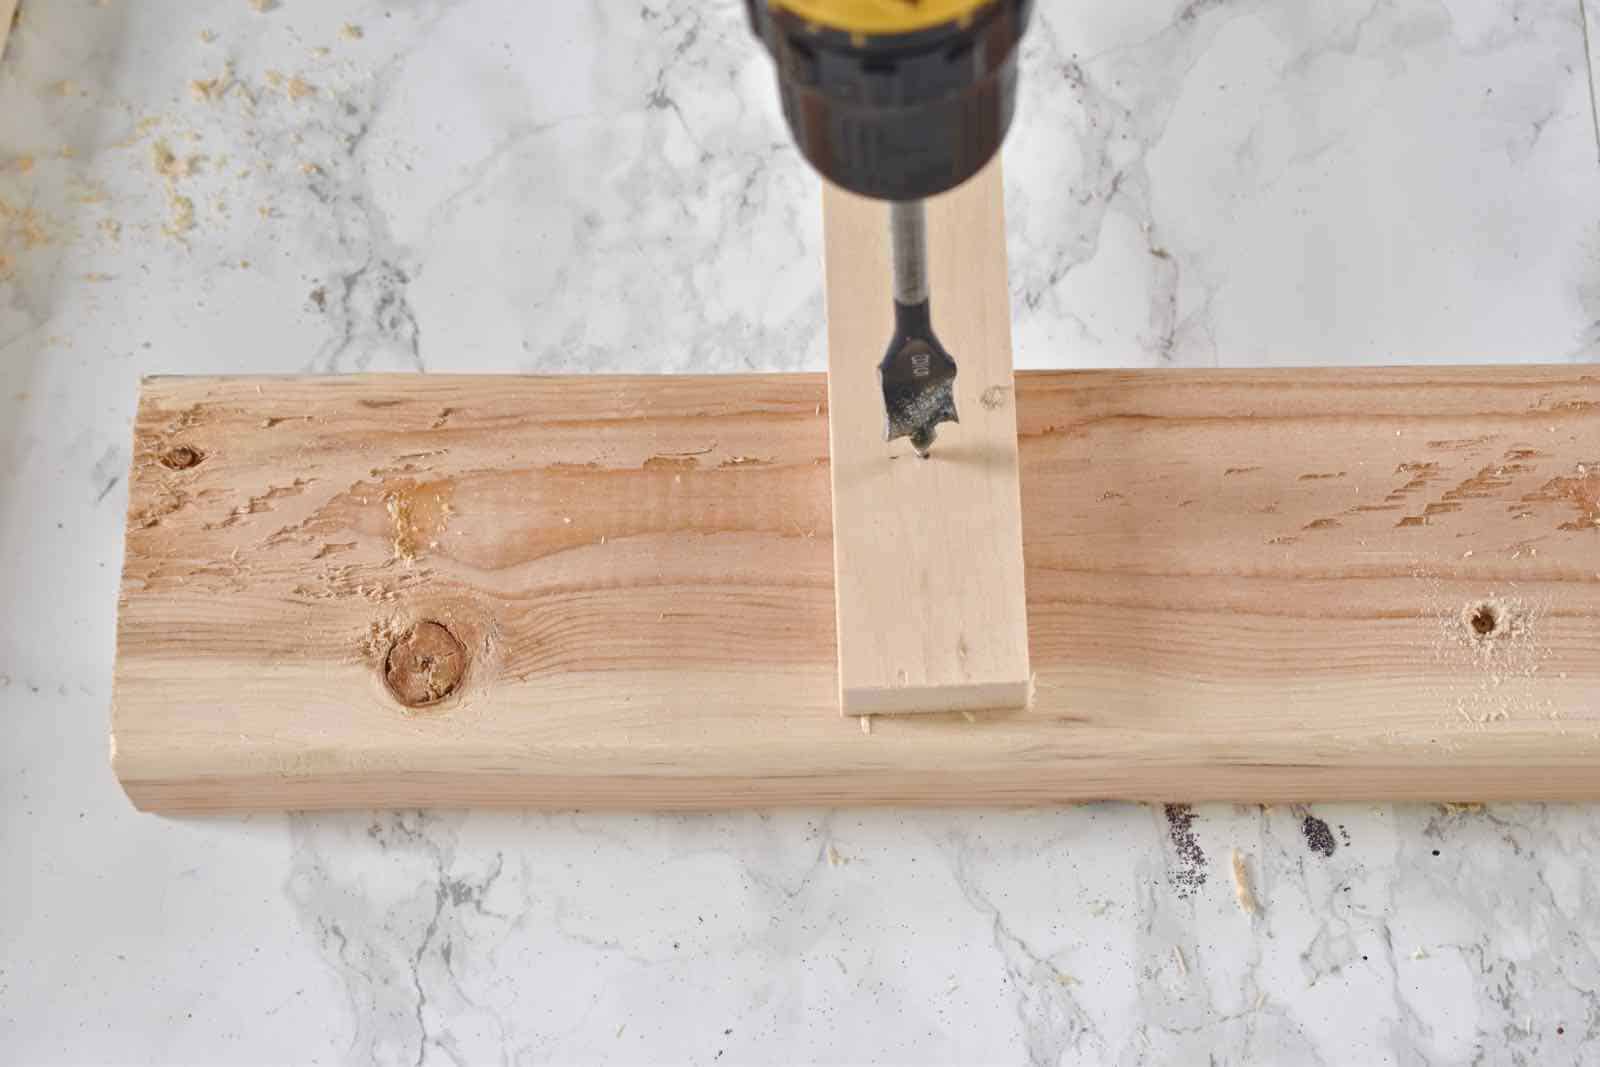
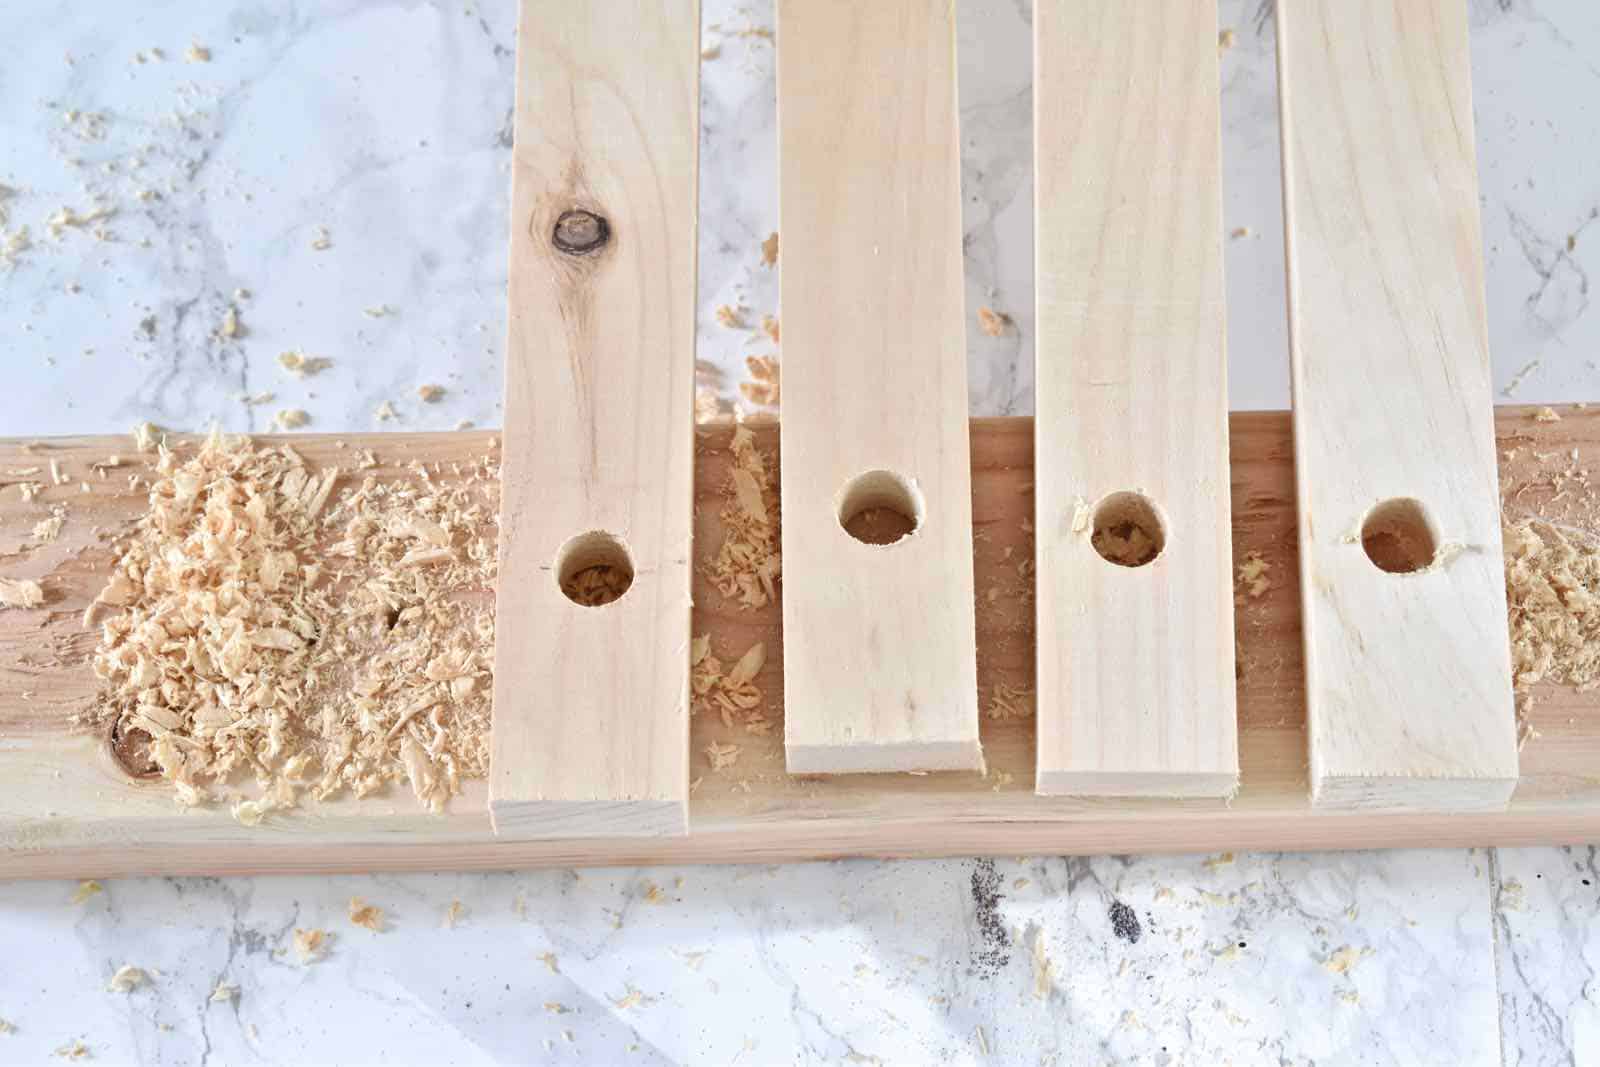
Step 1:
Use the paddle bit to drill a hole through the ends of four 1x2s.
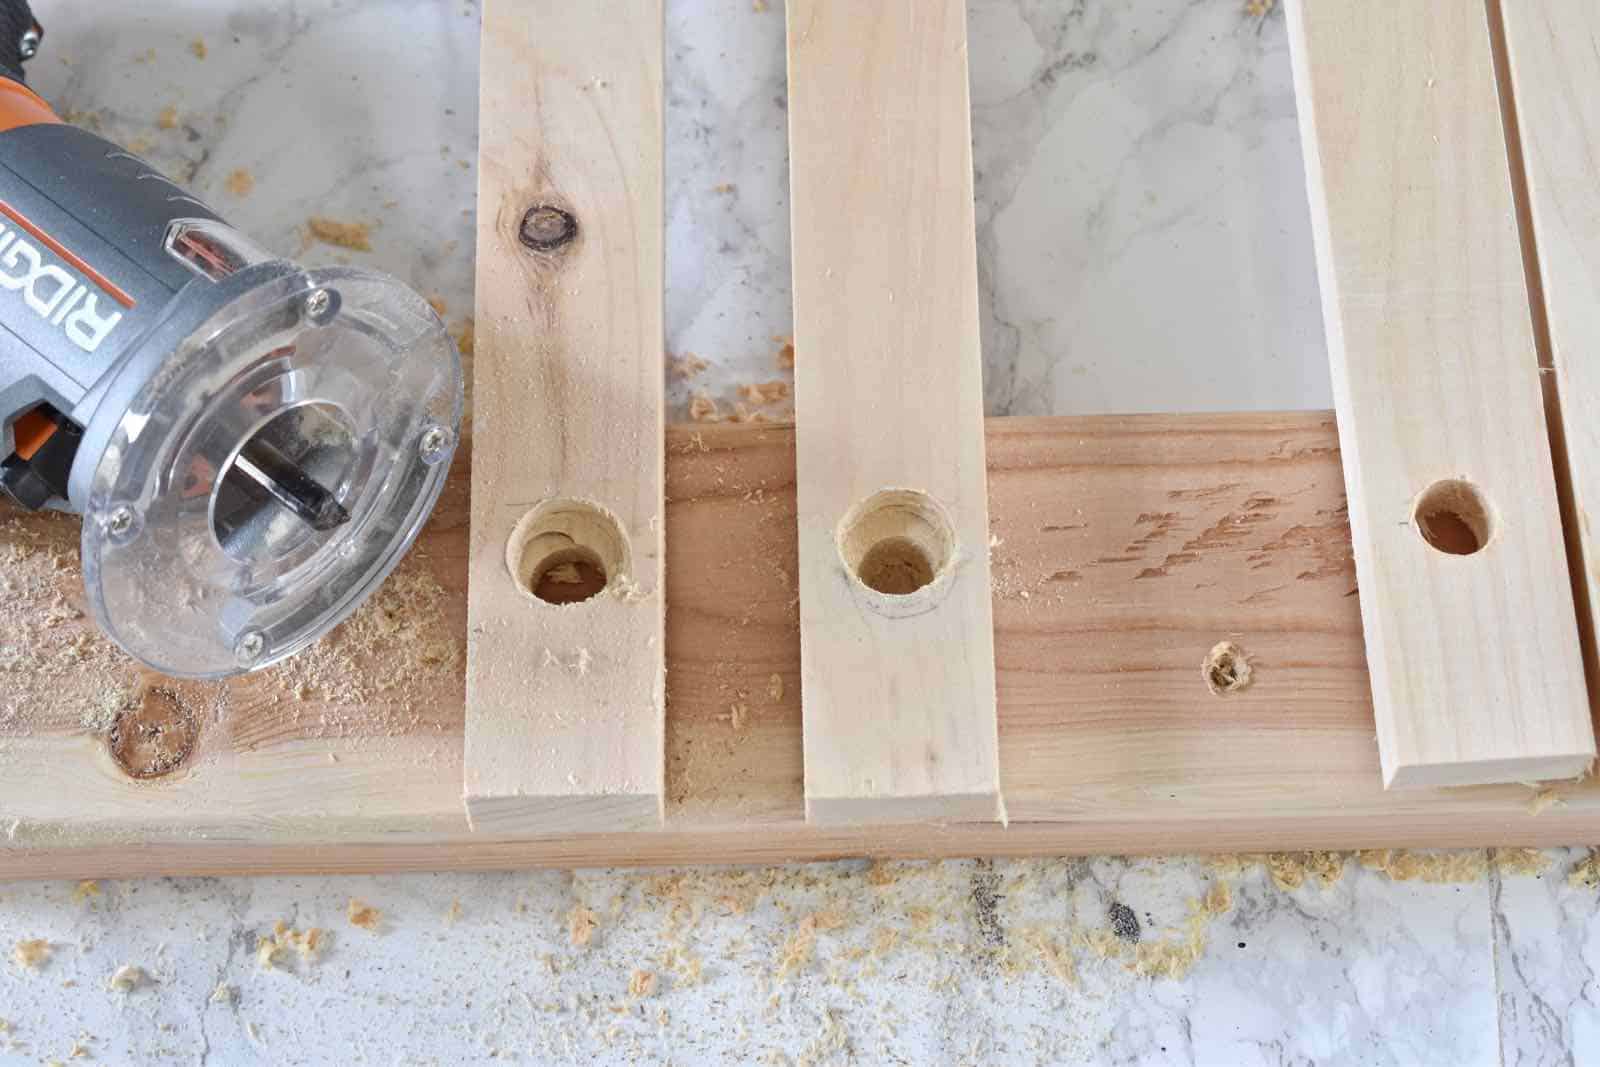
Step 2:
Use the router to make a slightly larger hole around two of the drilled holes approximately half way through each 1×2
Step 3:
Cut the dowel long enough to fit through two 1x2s on either end and still allow enough room in the middle for hanging items.
Step 4:
Cut the copper long enough to fit in the middle of the 1x2s.
Step 5:
Pre drill a hole in either end of the dowel.
Step 6:
Thread the dowel through the first two 1x2s making sure the routed hole is facing the middle of the garment rack. Put the copper pipe around the dowel and make sure it’s resting inside the routed hole. Place the remaining two 1x2s onto the dowel, making sure the routed hole is facing the copper pipe.
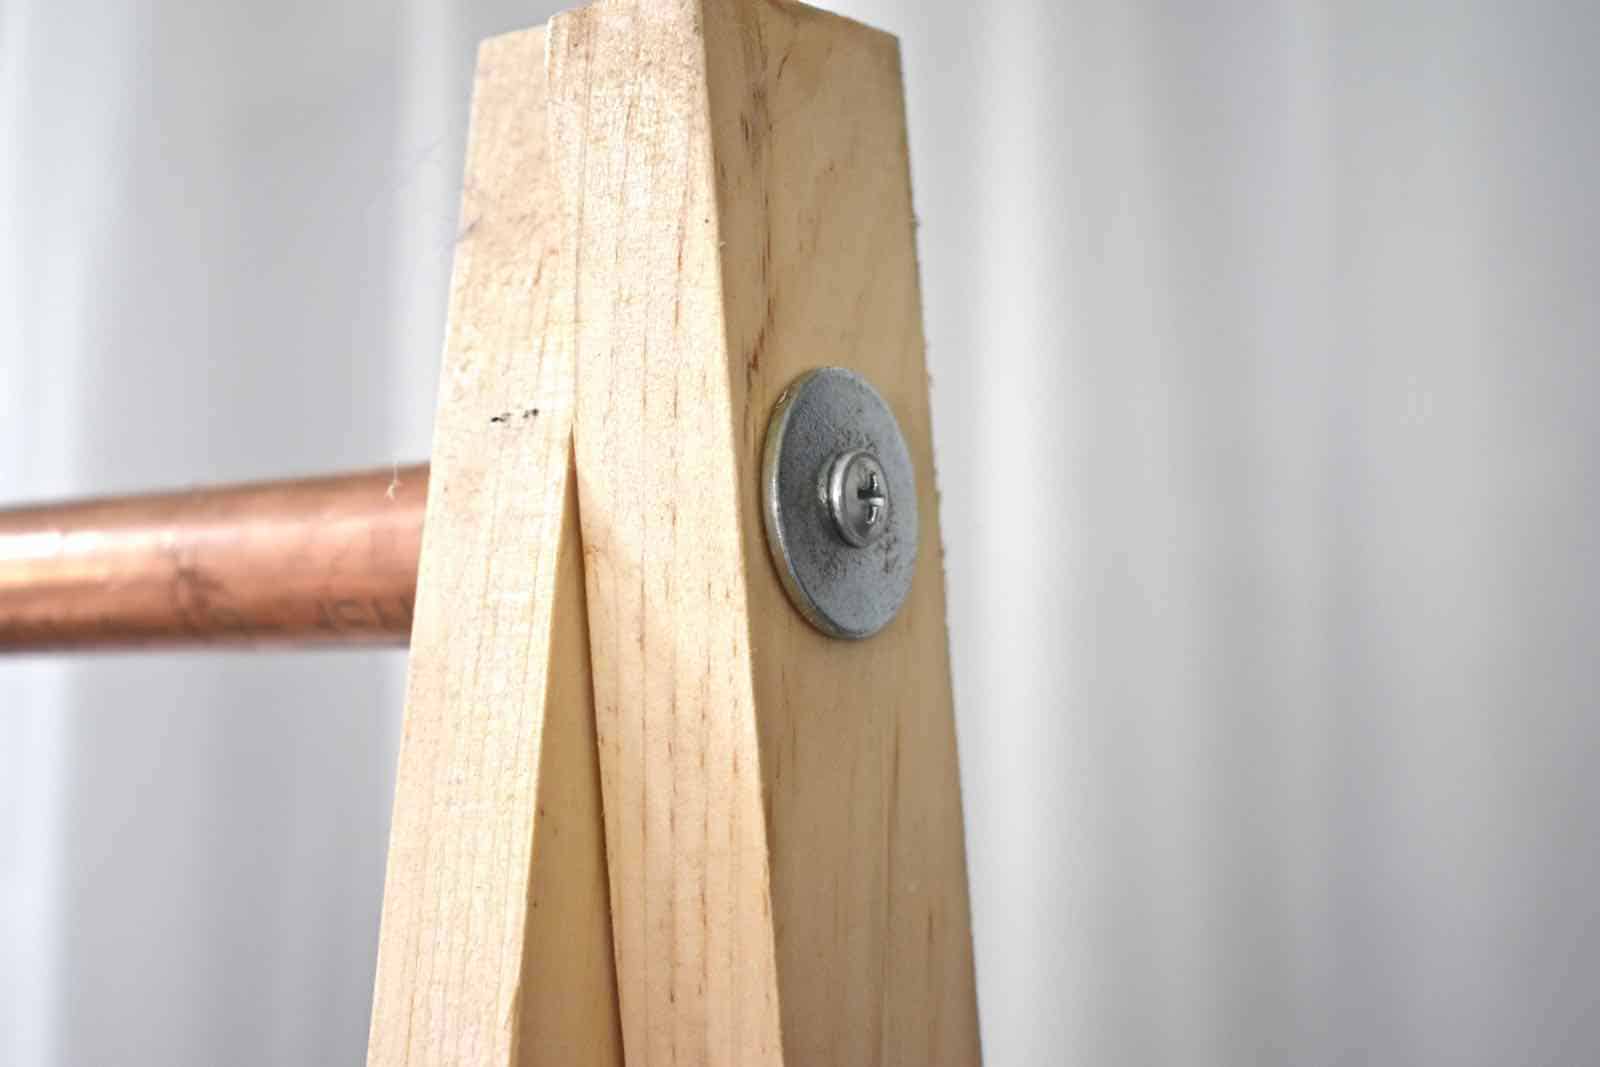
Step 7:
Secure the dowel by placing a washer on the end of each dowel and then drilling through it into the dowel. Repeat on the far side.
 Step 8:
 Step 8:
At this point, you should have the beginning of your garment rack: two legs on either side of the hanging bar. In order to secure it a bit, measure and cut a 1×2 and attach between the two back legs of the garment rack with pocket holes
Step 9:
I had an extra dowel and remaining copper pipe, so I drilled them in place on the bottom of the front legs of the garment rack, but another 1×2 brace would suffice. Stain and set up!
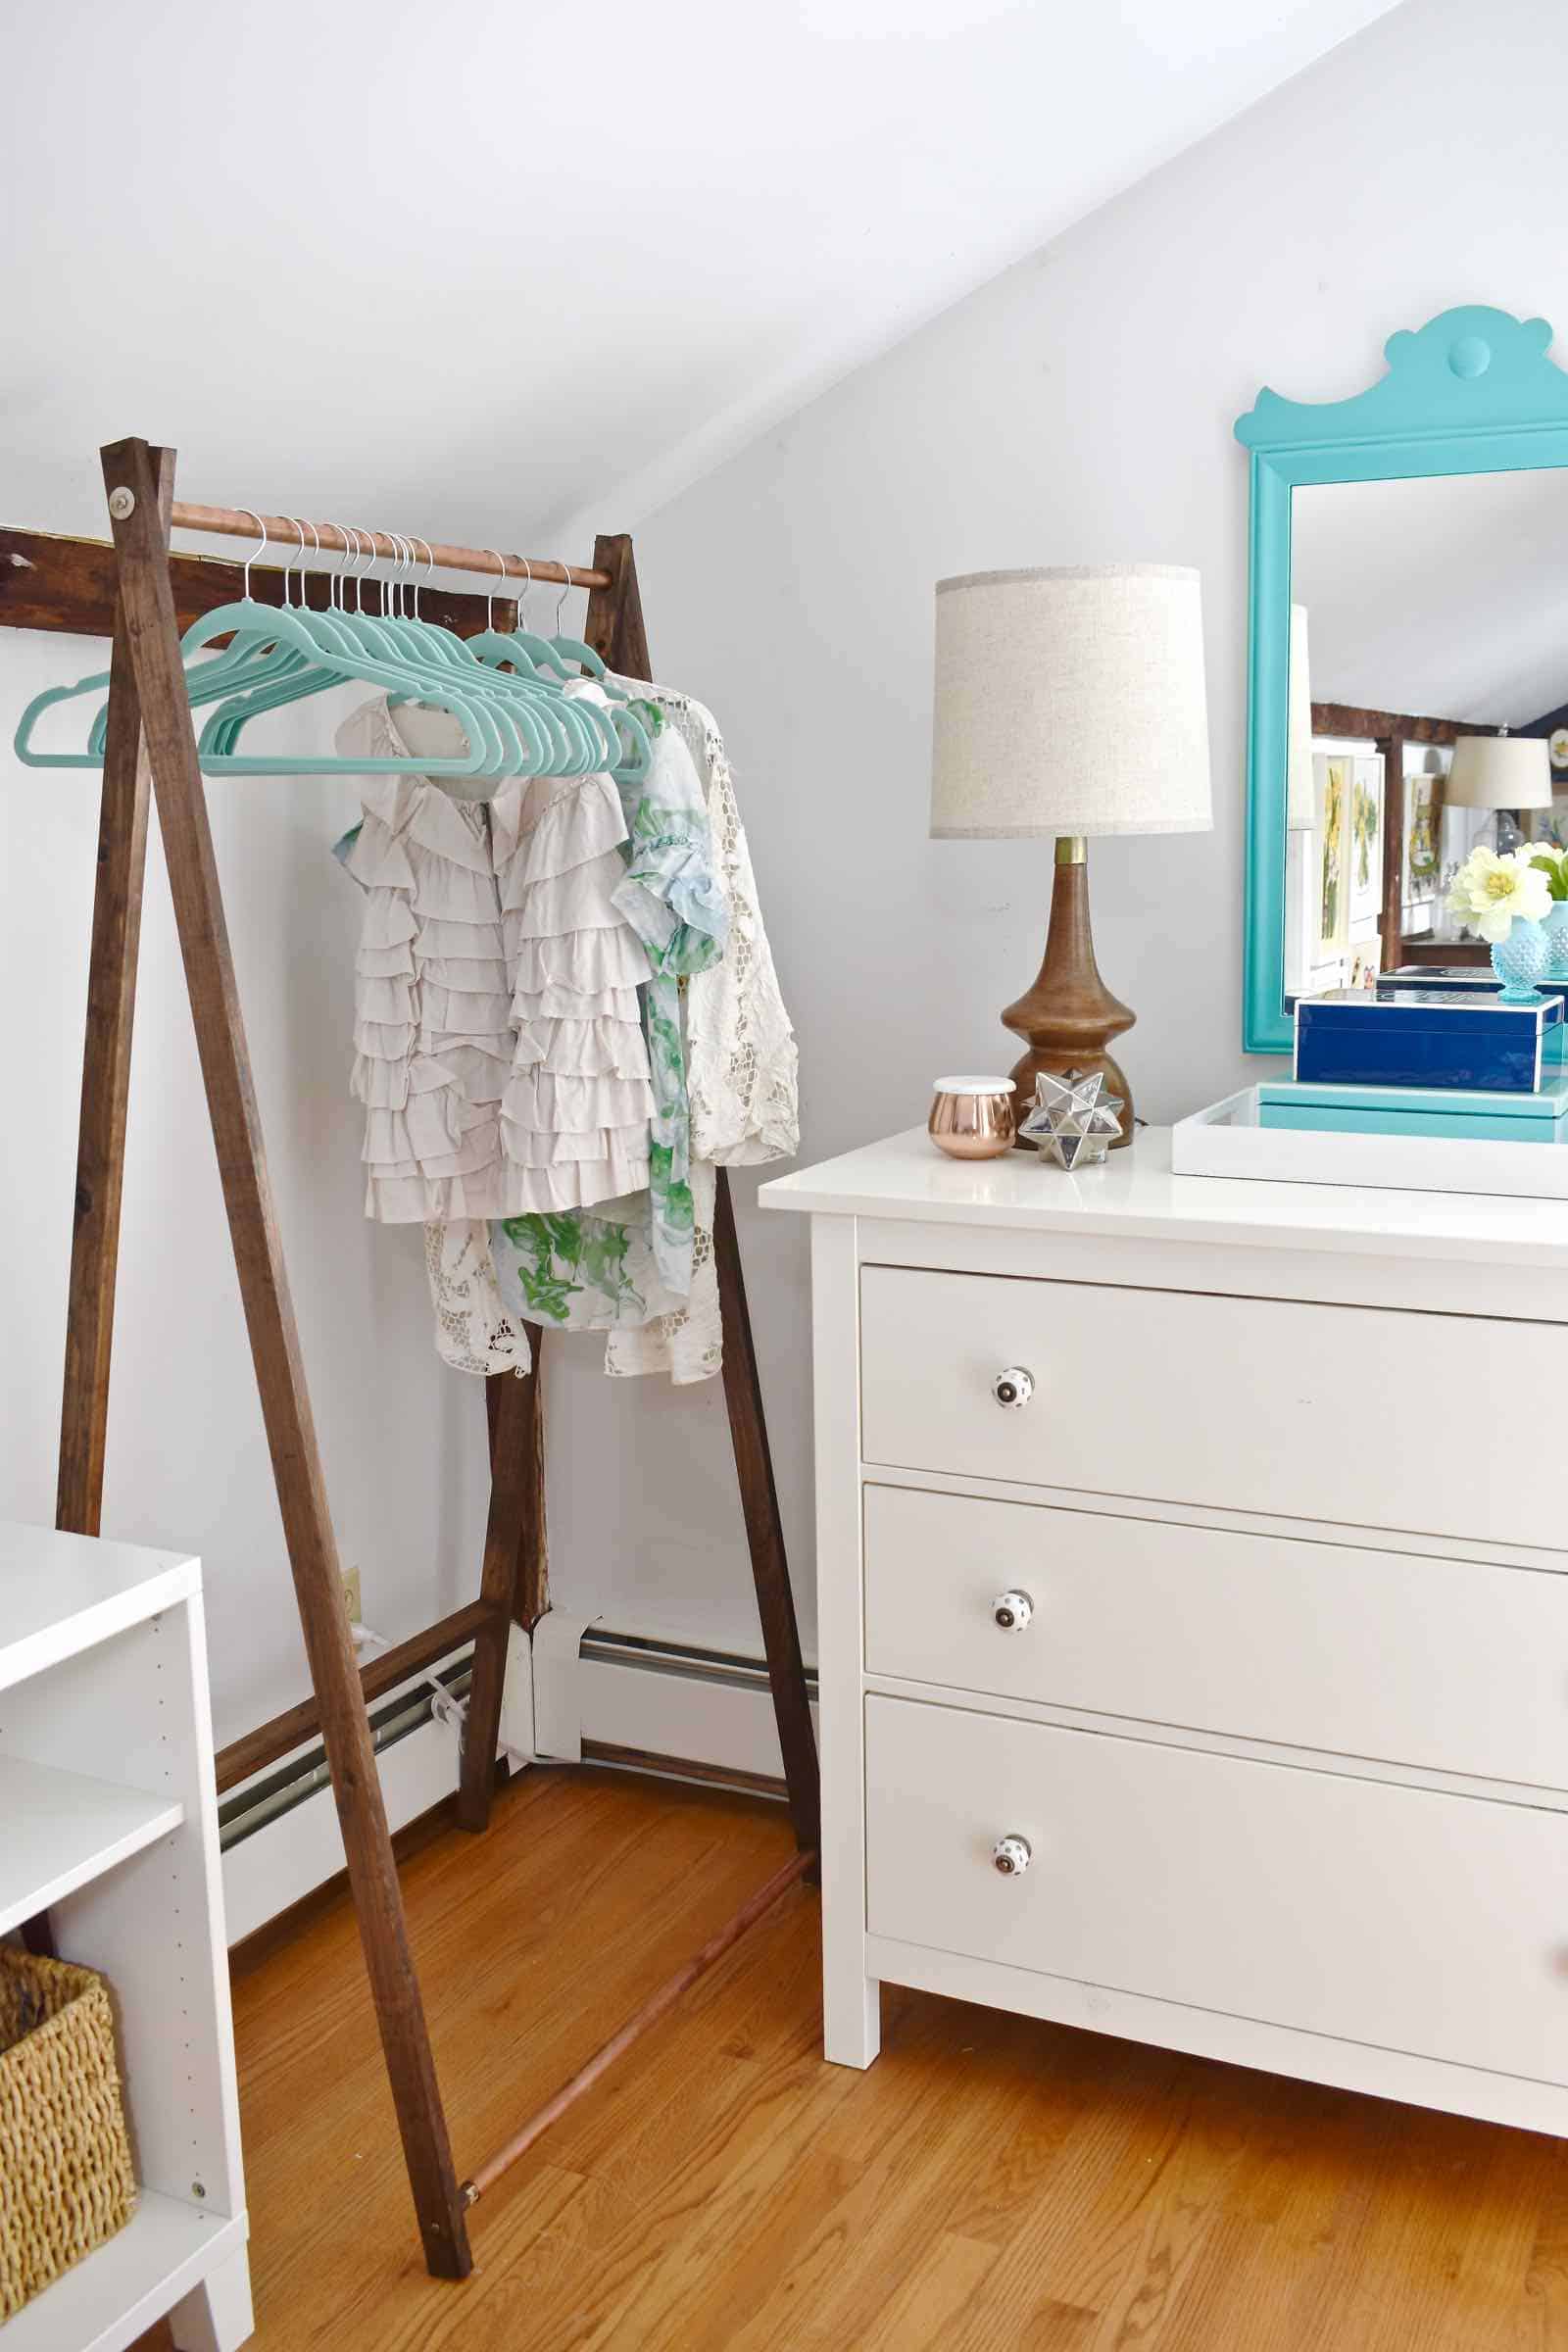
This garment rack can open and close accordingly. Again… it’s not intended for day-to-day wear and tear, but it’s a perfect clean and modern solution to our guest room hanging storage needs!
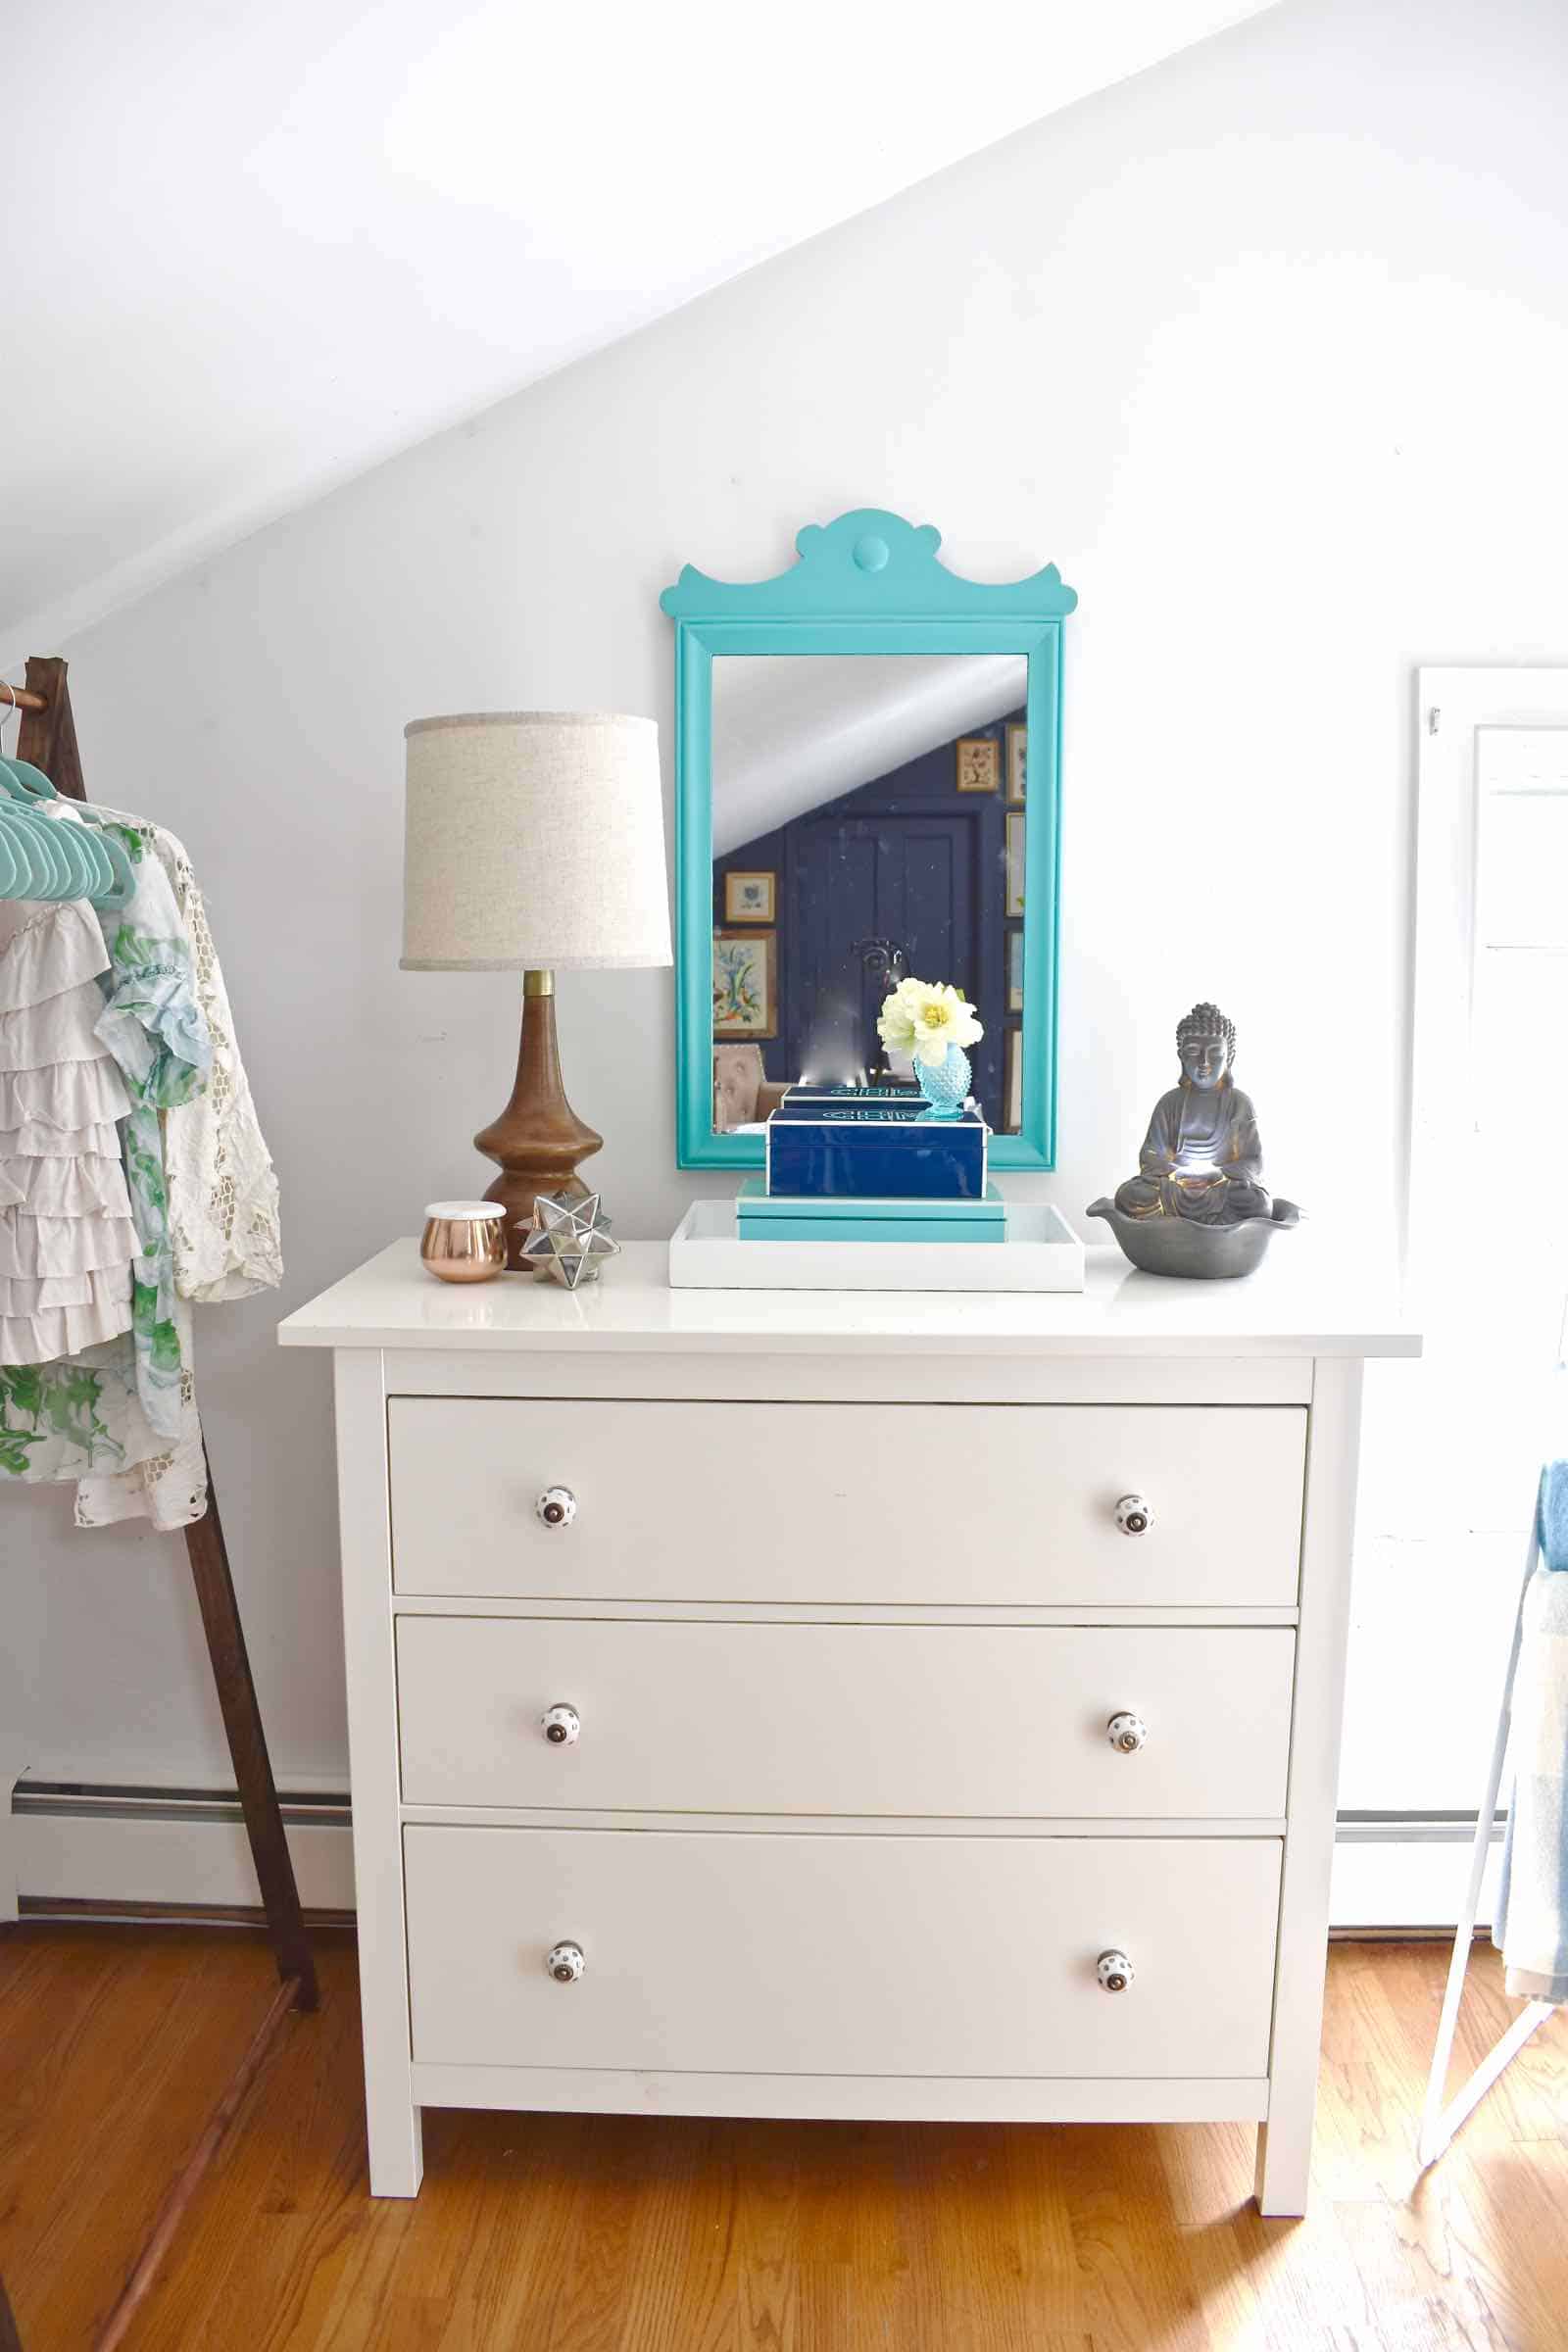
Thanks to Lamps Plus, I have a new table lamp and that trickling Buddha fountain on the dresser. I thought the Buddha could be a nice night light, but I also look for ANY excuse to bring another Buddha into my life.
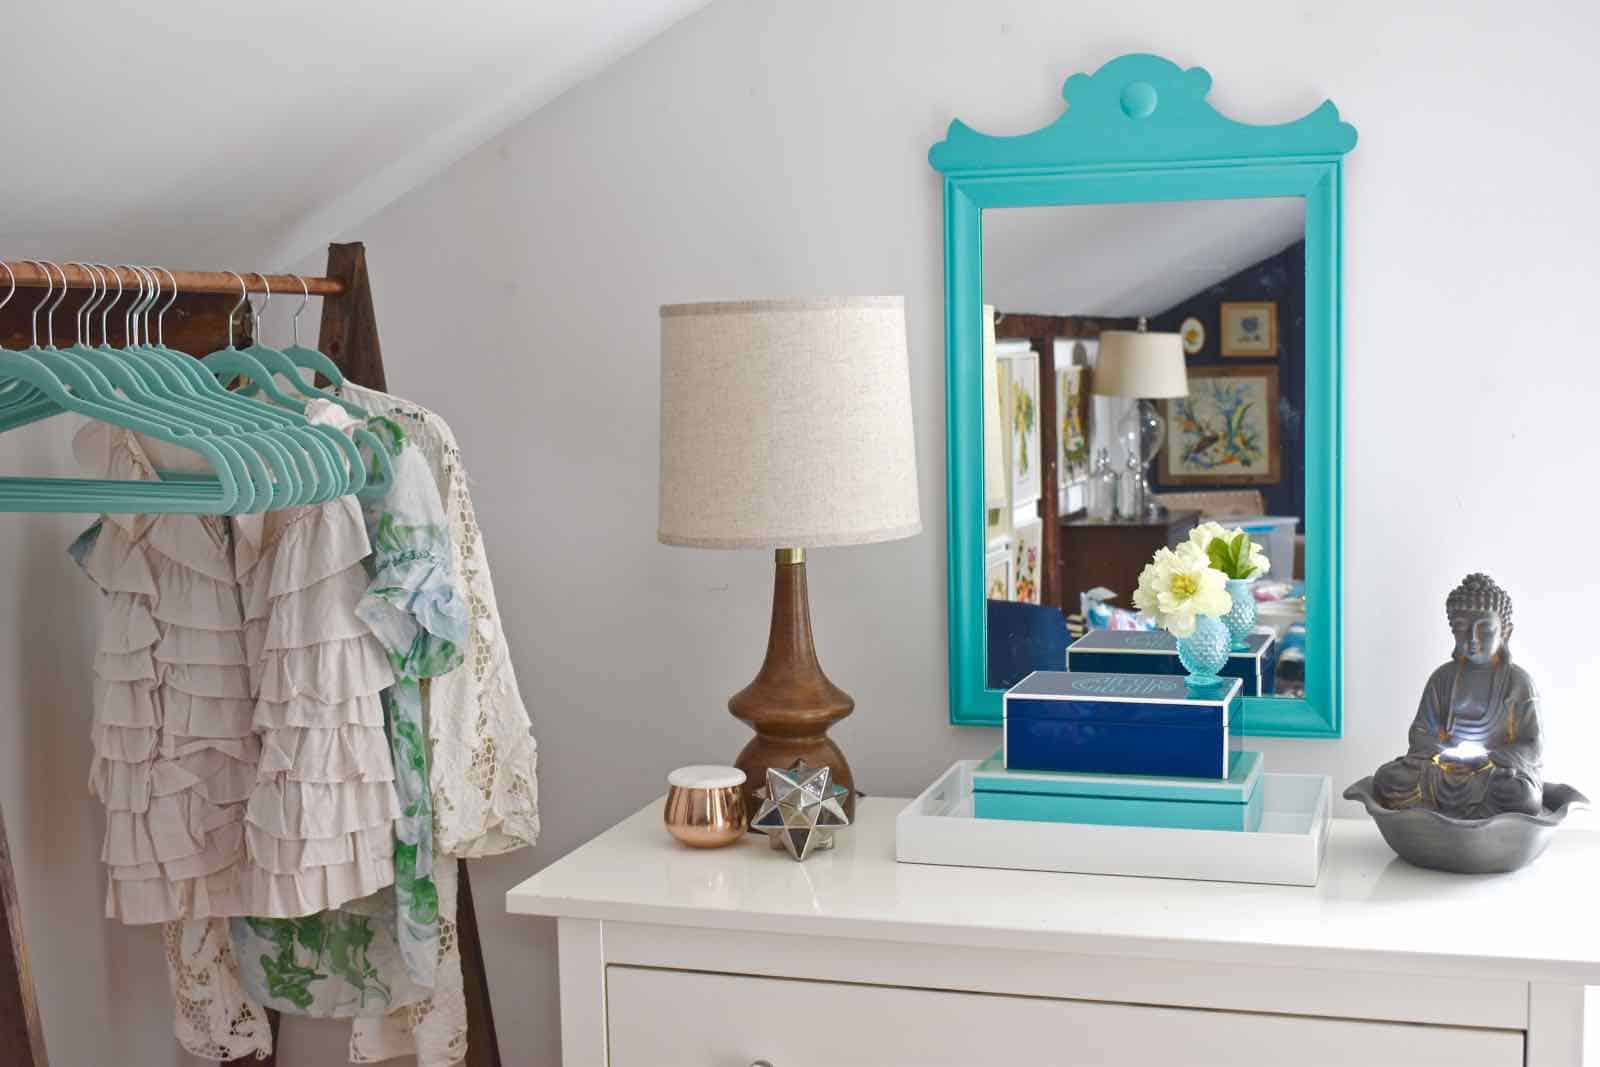
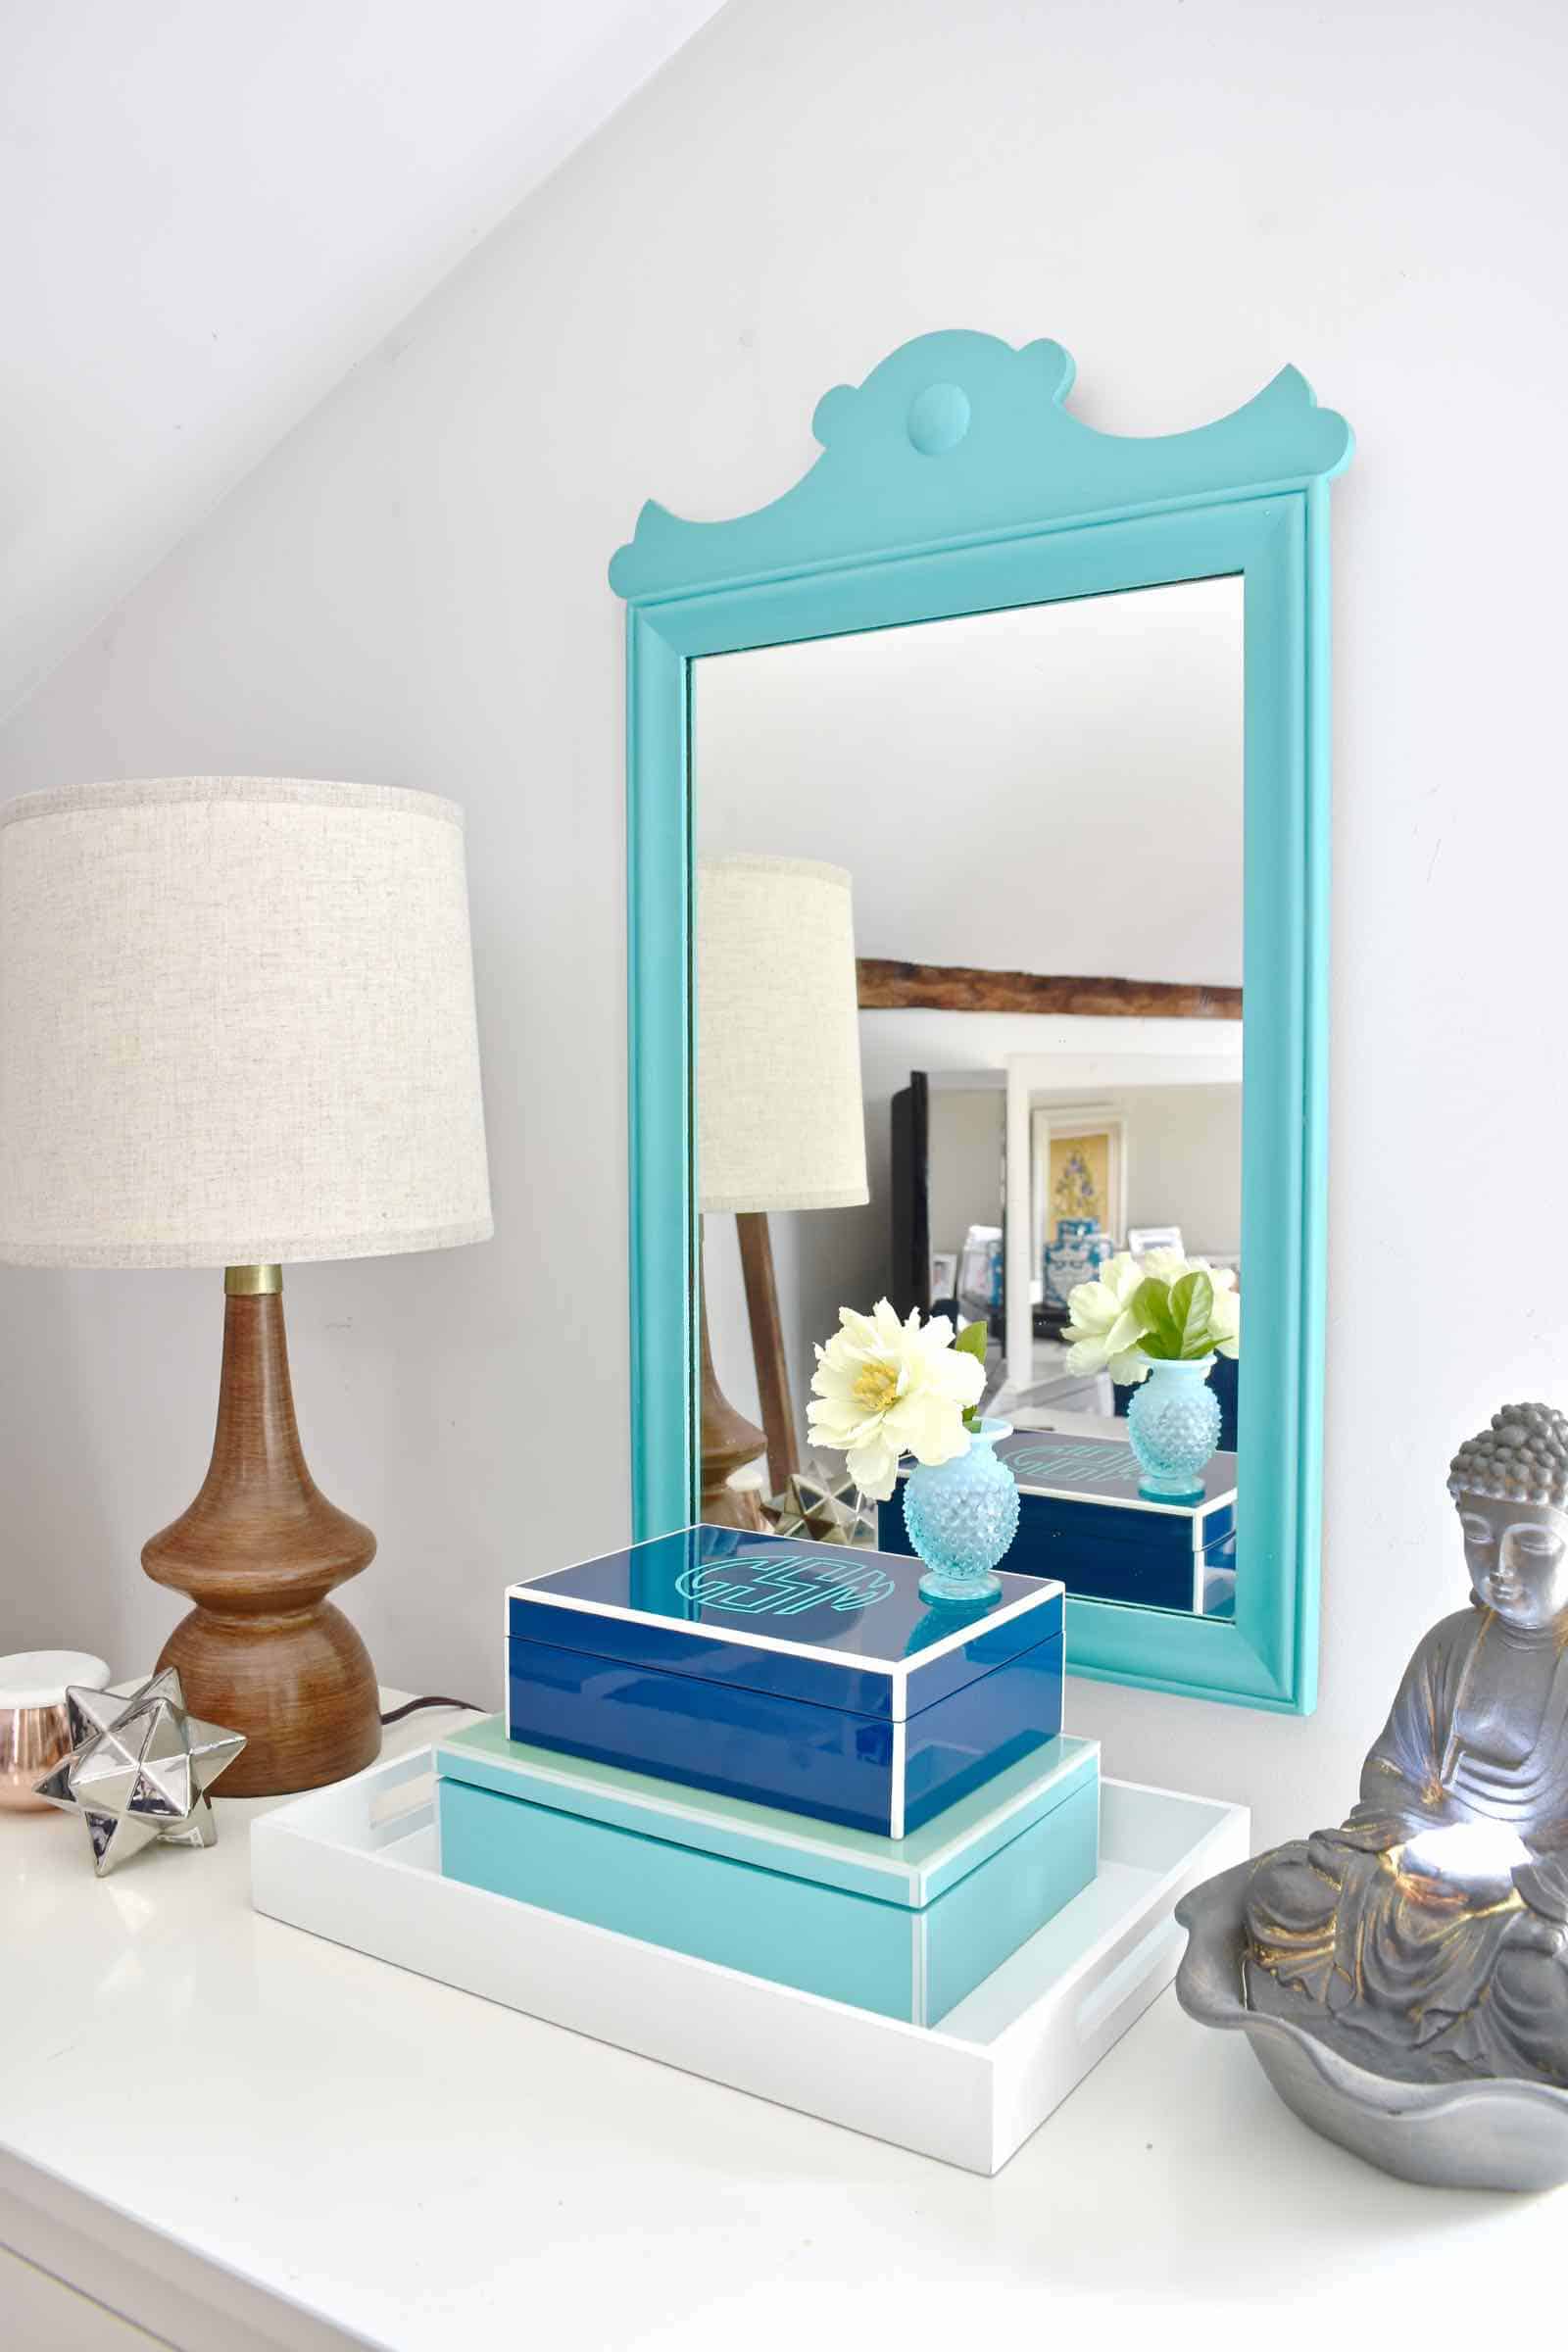
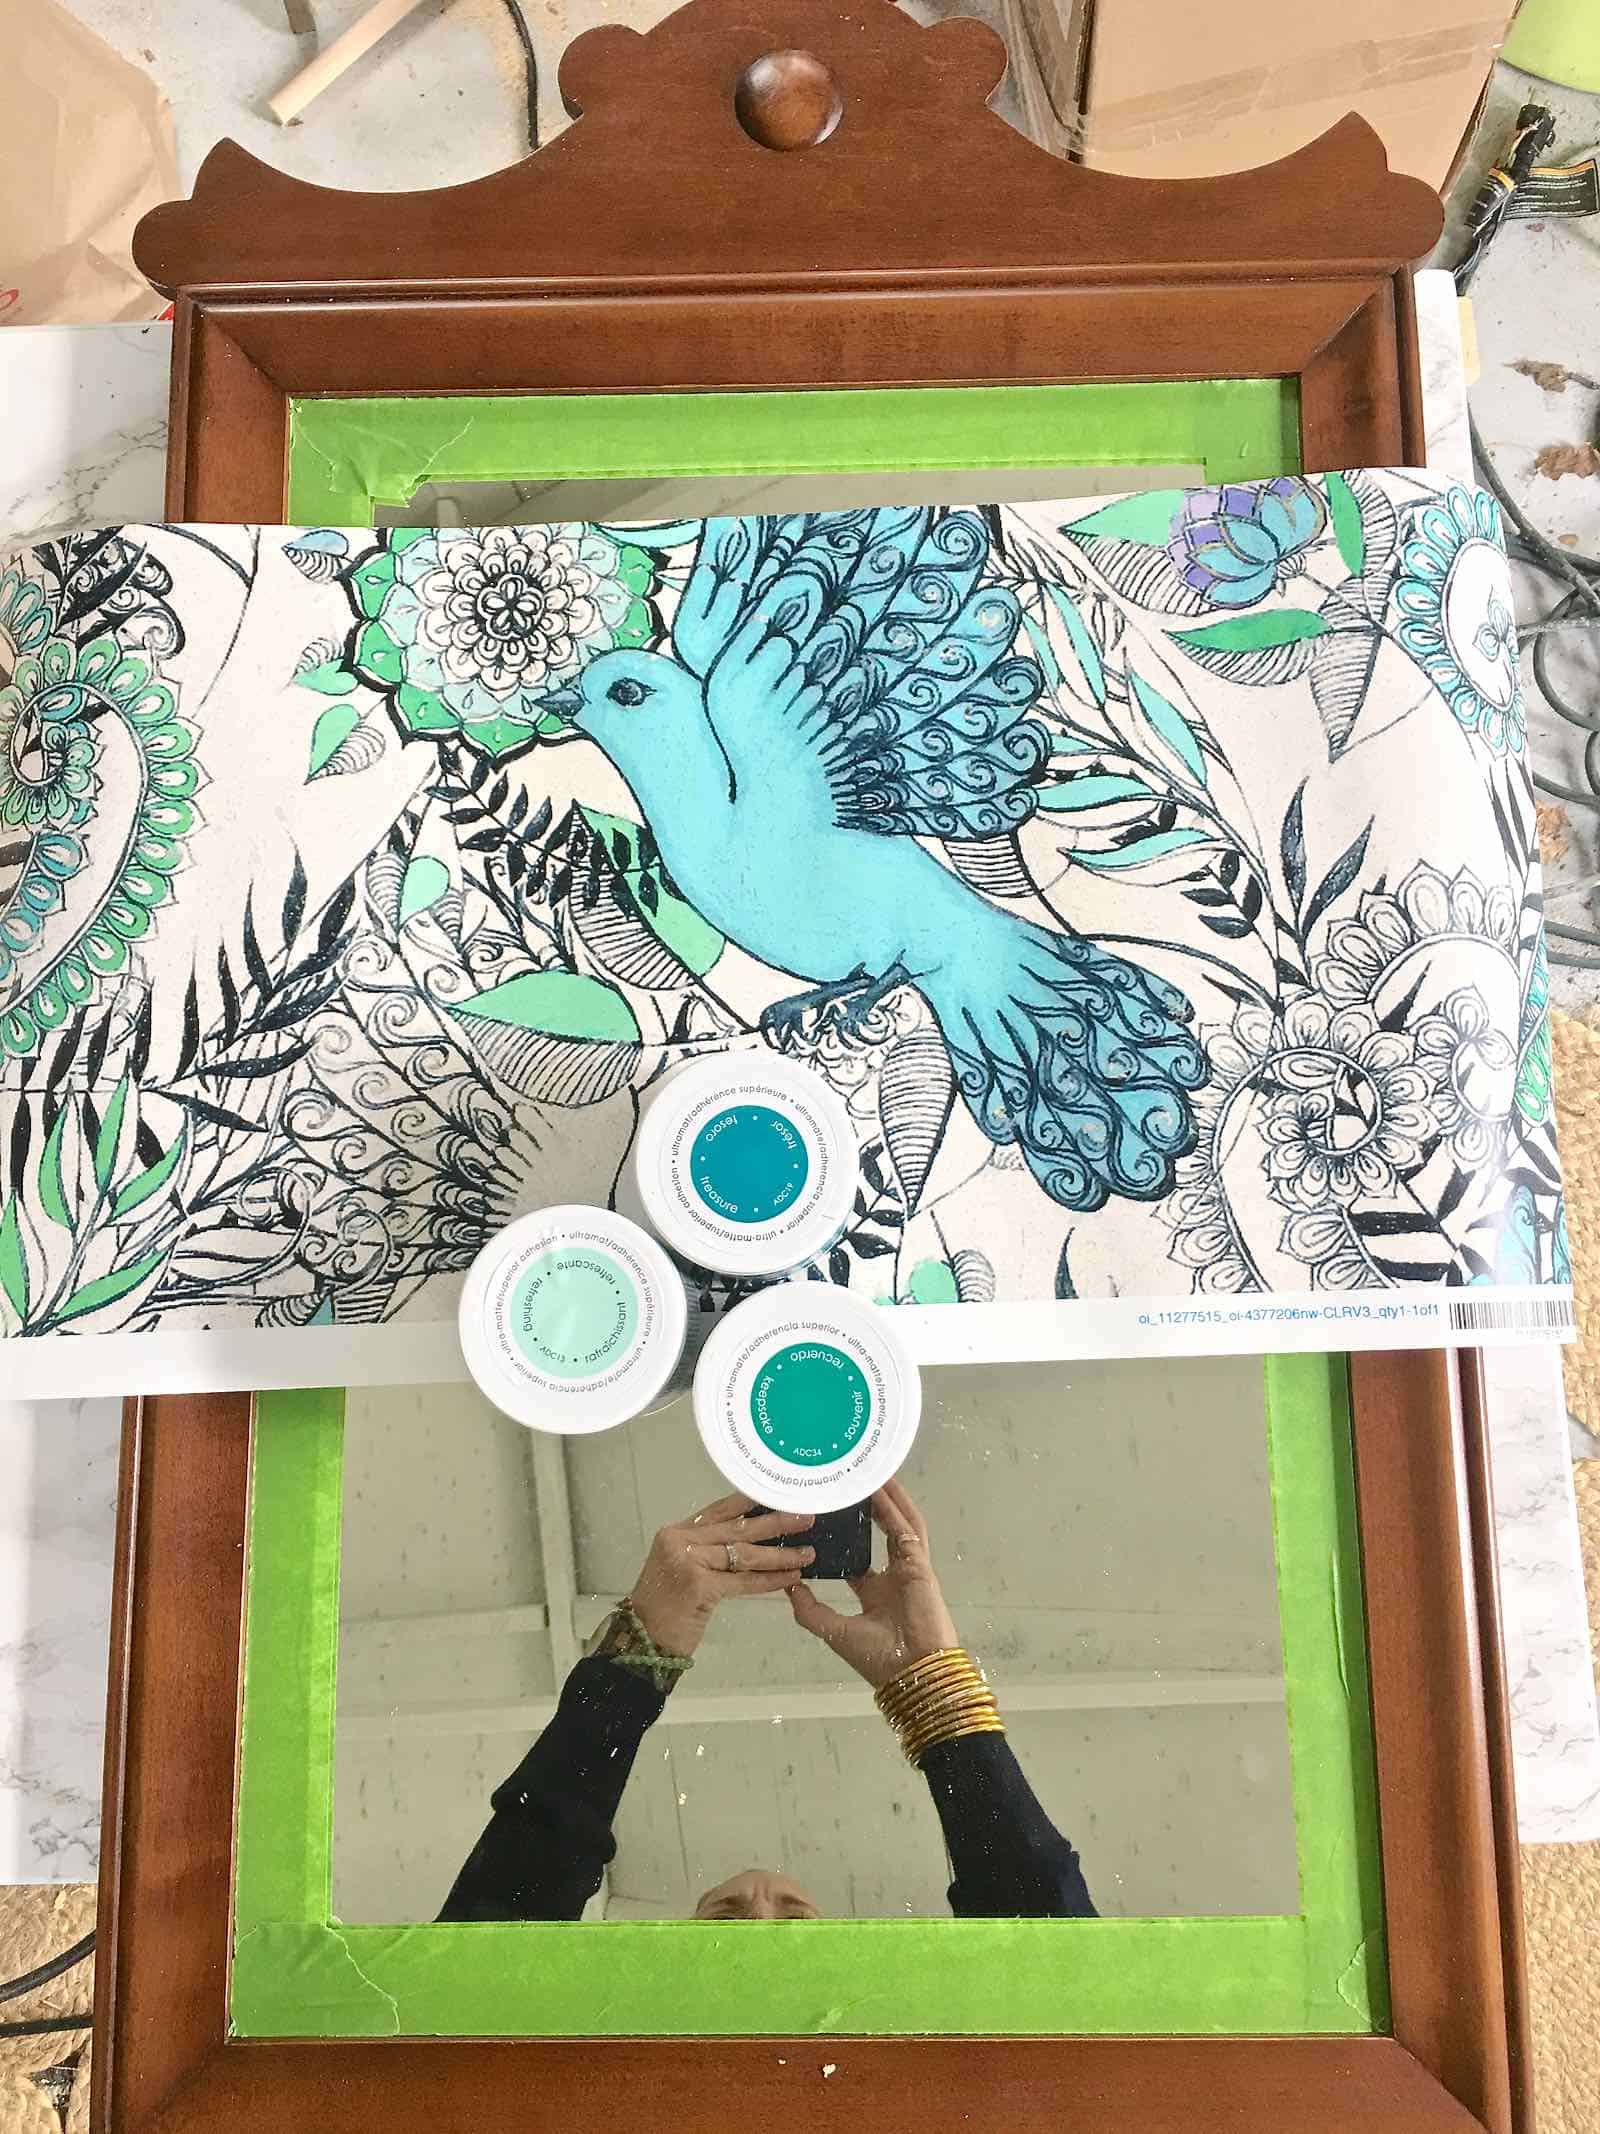
I found that mirror at Goodwill for $4 and grabbed it thinking I’d use it for my Halloween decor, but… I ended up mixing up a custom blue with some of my Americana Decor chalky finish and it’s the perfect addition to this dressing area.
I’m away with two of the girls this weekend and then back to the bathroom floor next week so stay tuned! I’ll have another Halloween post for you this weekend just in time for Tuesday! Don’t forget to click over to Calling It Home to see all of the other fun rooms being worked on this go around for the One Room Challenge!


oh that mirror is so adorable!! loving that pop of bright blue and you total rocked that diy project!
Thanks, Tim! It’s not for everyone, but I love a pop of color! 🙂 Your room is looking great!
Wow, a diy garment rack! love it and a nice touch for guests. the color palette is gorgeous too. buddah is my fav. I think i have 5 scattered around my home 🙂
I LOVE Buddha! I have him in lots of places too! xx
Where was this post when I was messing up about two months ago?? Charlotte I gave up and just bought one! Yours looks awesome!
Ha! This probably won’t hold dozens of hangers, but it’s definitely a little more stylish than the rolling rack I pulled out of there! xx
I love the turquoise mirror! It goes great with your wallpaper! I can’t wait to see the final reveal!
Thanks!! I can’t wait to get back up there this week and get some work done! Took a quick break to deal with other stuff and I miss it! 🙂
Whoa! You really showed us that timber-based garment racks are actually an ideal choice for indoor areas as they offer more elegance. I’ve been searching for the right rack for my daughter’s apartment to no avail so far, unfortunately. Well, after going through this article I think I know where to find the perfect product.